By Design Bundles
Scan N Cut Tutorials2 min
Faux stitching in brother scan and cut canvas workspace
1- Open canvas workspace. Click on the shape tool.
2- Select the shape or design you need the stitching on. You can upload an SVG file to place the stitching on as well as any shape in the toolbox.
3- With your design selected, click on the offset icon. A new window will appear.
4- In the new window, change the offset direction from outward to inward. Next change the corner type from round to bevel. Click OK.
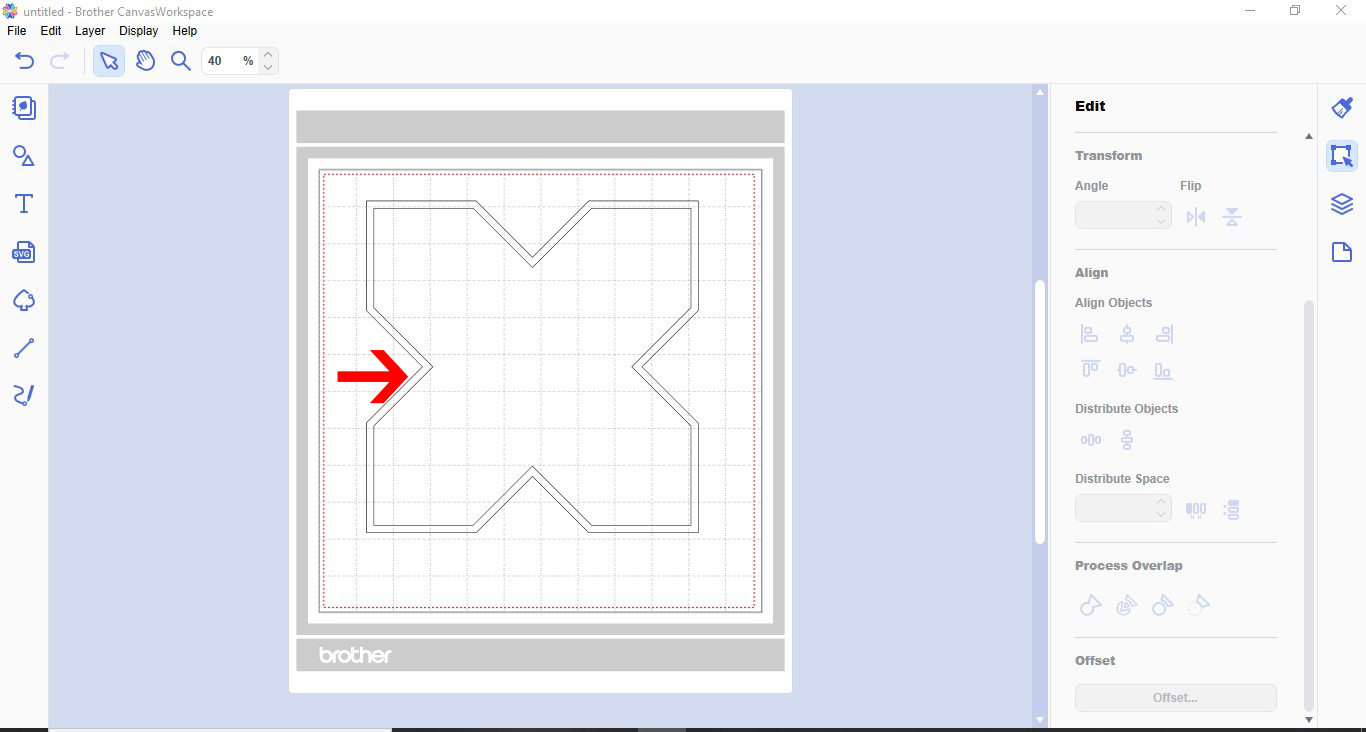
5- A inside line will appear.
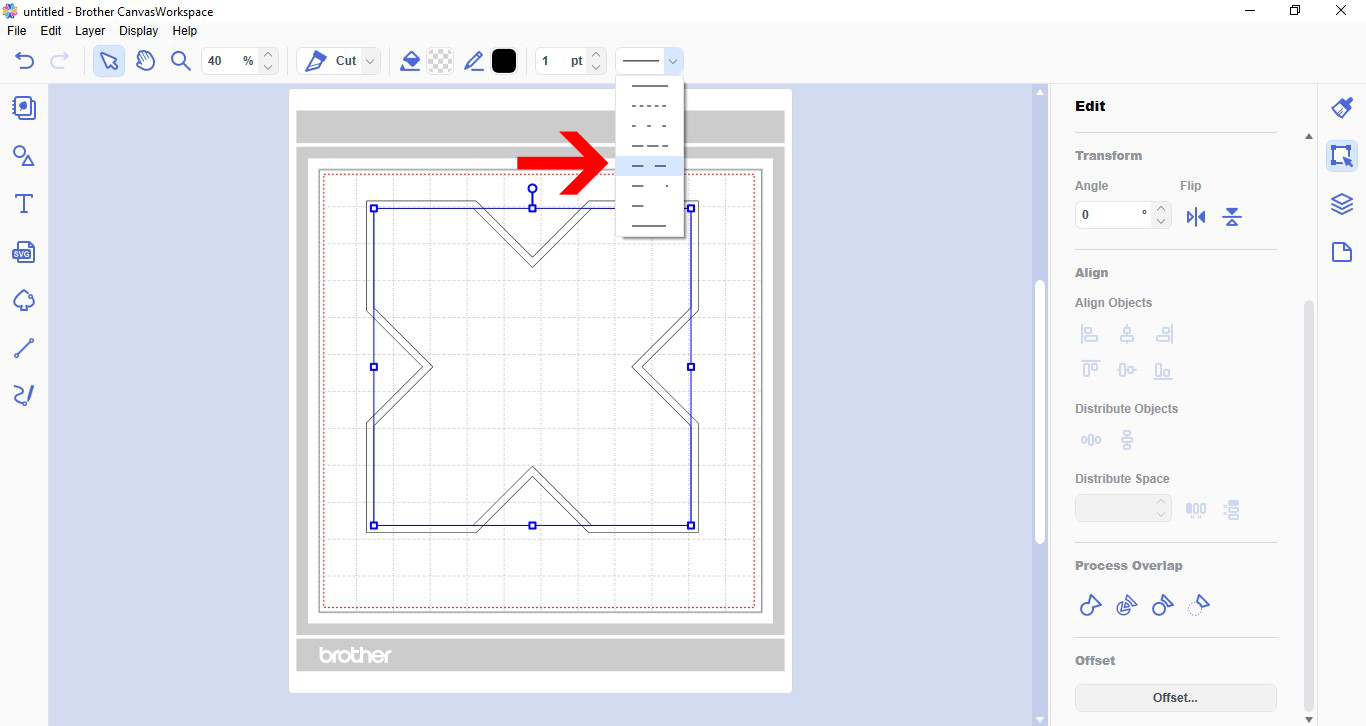
6- With the line selected, click on the line type drop down box and select the dash line.
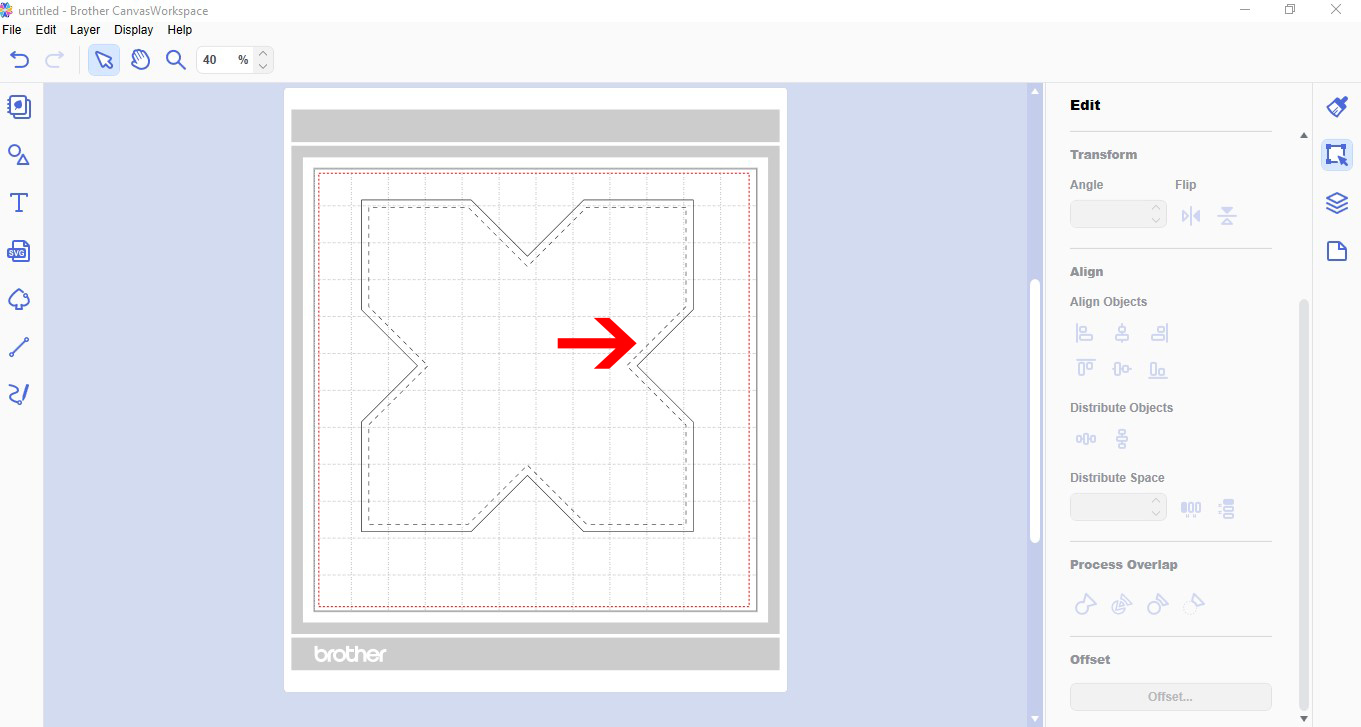
7- Your stitched line is now on your design.
Save
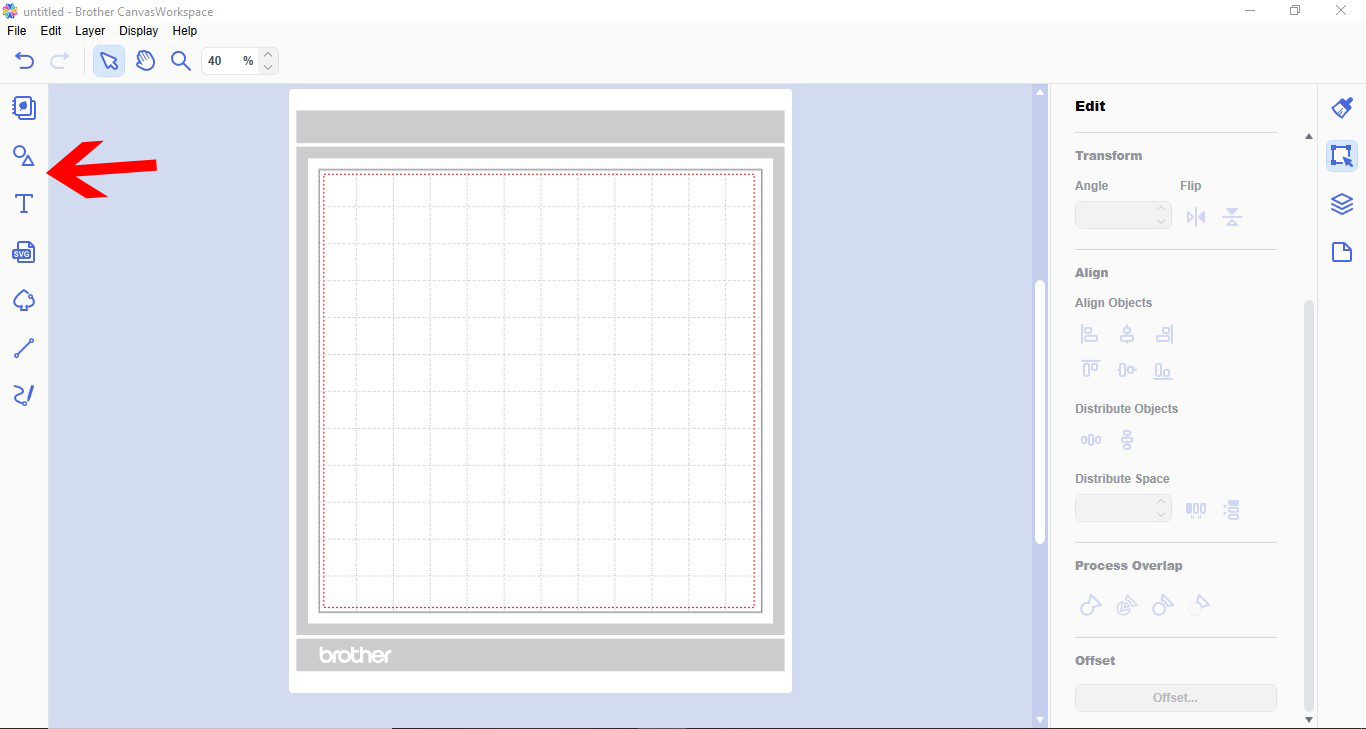
2- Select the shape or design you need the stitching on. You can upload an SVG file to place the stitching on as well as any shape in the toolbox.
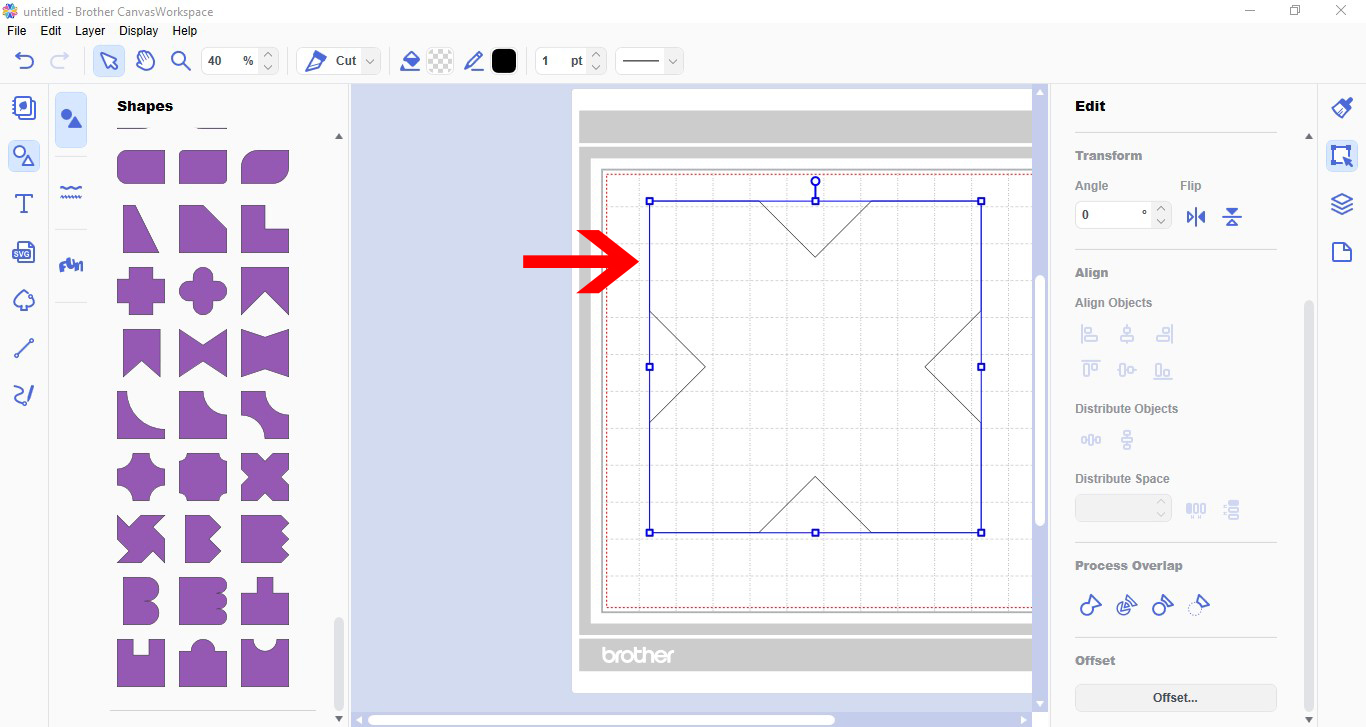
3- With your design selected, click on the offset icon. A new window will appear.
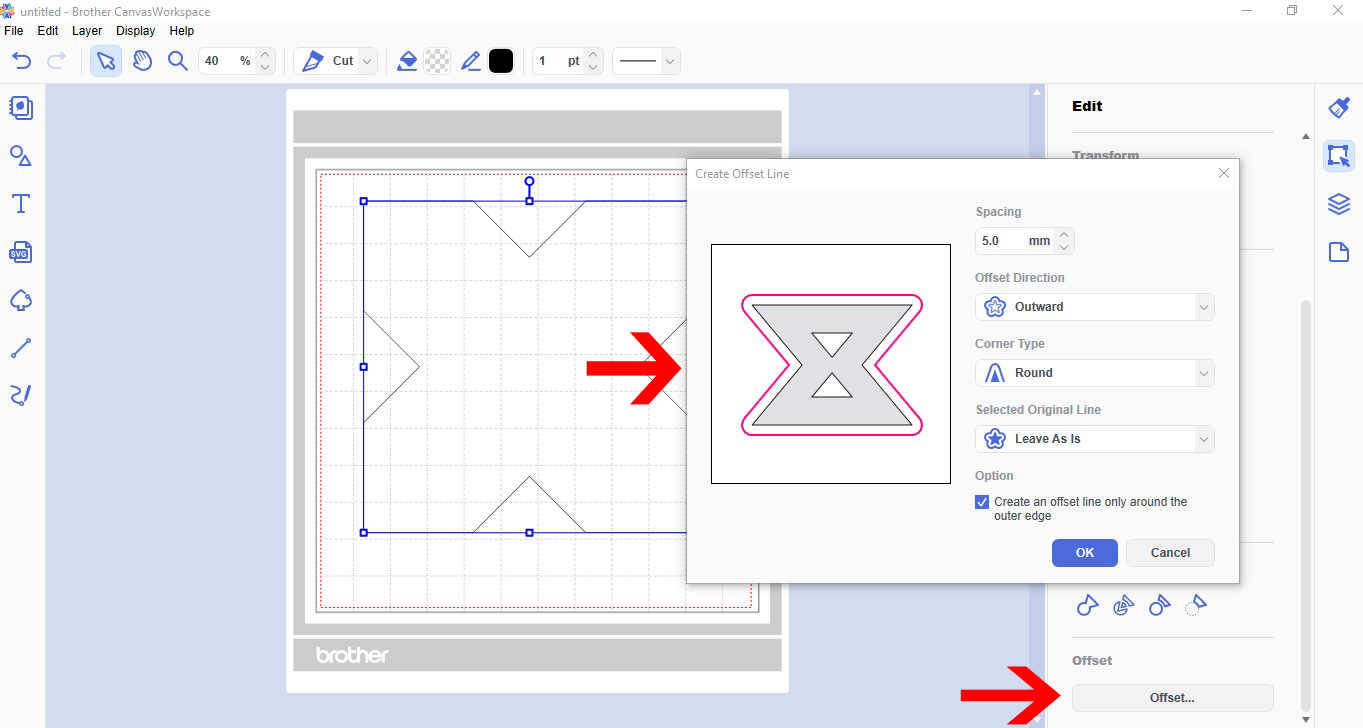
4- In the new window, change the offset direction from outward to inward. Next change the corner type from round to bevel. Click OK.
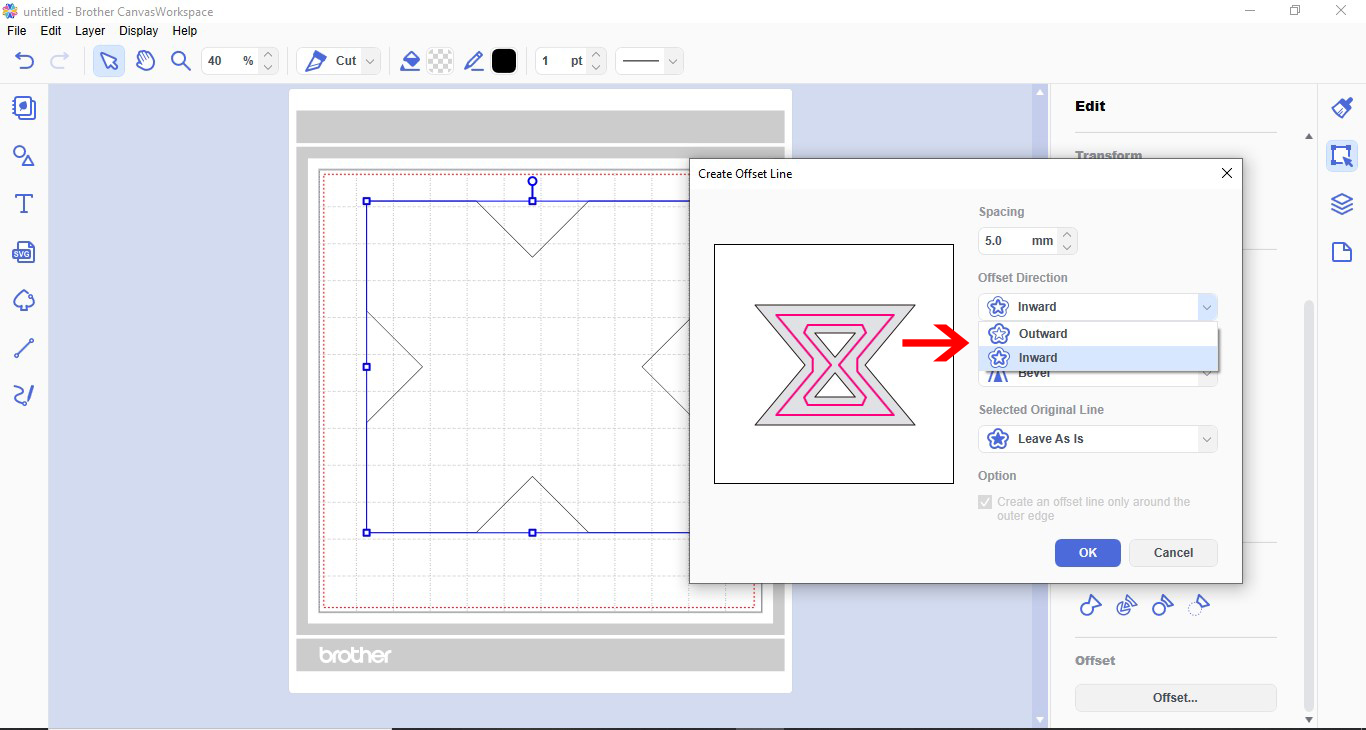
5- A inside line will appear.
6- With the line selected, click on the line type drop down box and select the dash line.
7- Your stitched line is now on your design.
Save
Related Tutorials
Scan N Cut Tutorials
How to create curved text in brother scan and cut canvas workspace
Learn how to curve text in Brother Scan N Cut
Scan N Cut Tutorials
How to make a image larger than your cutting mat in Brother Scan N Cut canvas workspace
Learn how to cut designs larger than your cutting mat in Brother Scan N Cut canvas.
Scan N Cut Tutorials
Converting SVG to FCM cutting fine in Brother scan and cut canvas workspace
Scan N Cut Tutorials
Remove cut lines from shapes in brother scan and cut canvas workspace
Scan N Cut Tutorials