By Design Bundles
Illustrator Tutorials11 min
How to Make a Paper Cut Effect in Illustrator
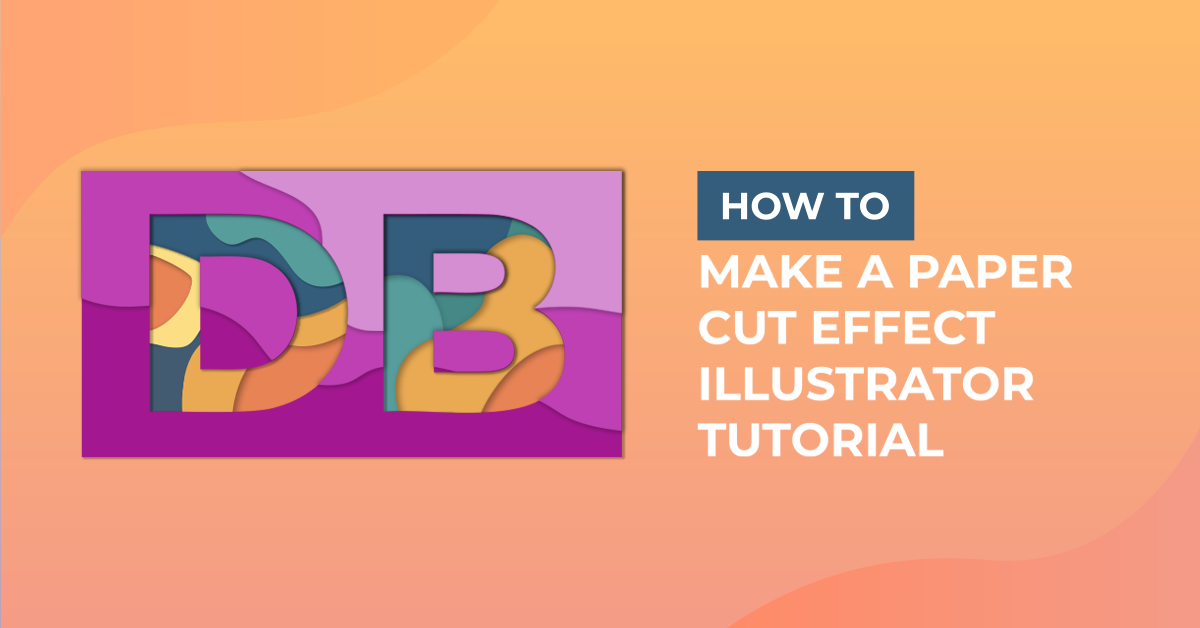
In this tutorial we will learn how to make a 3D Paper Cut Effect .
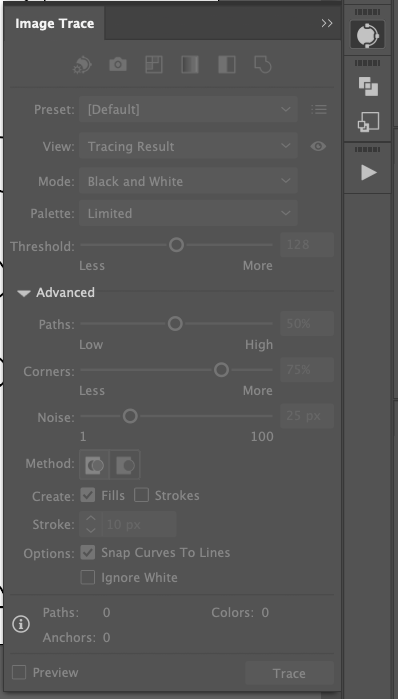
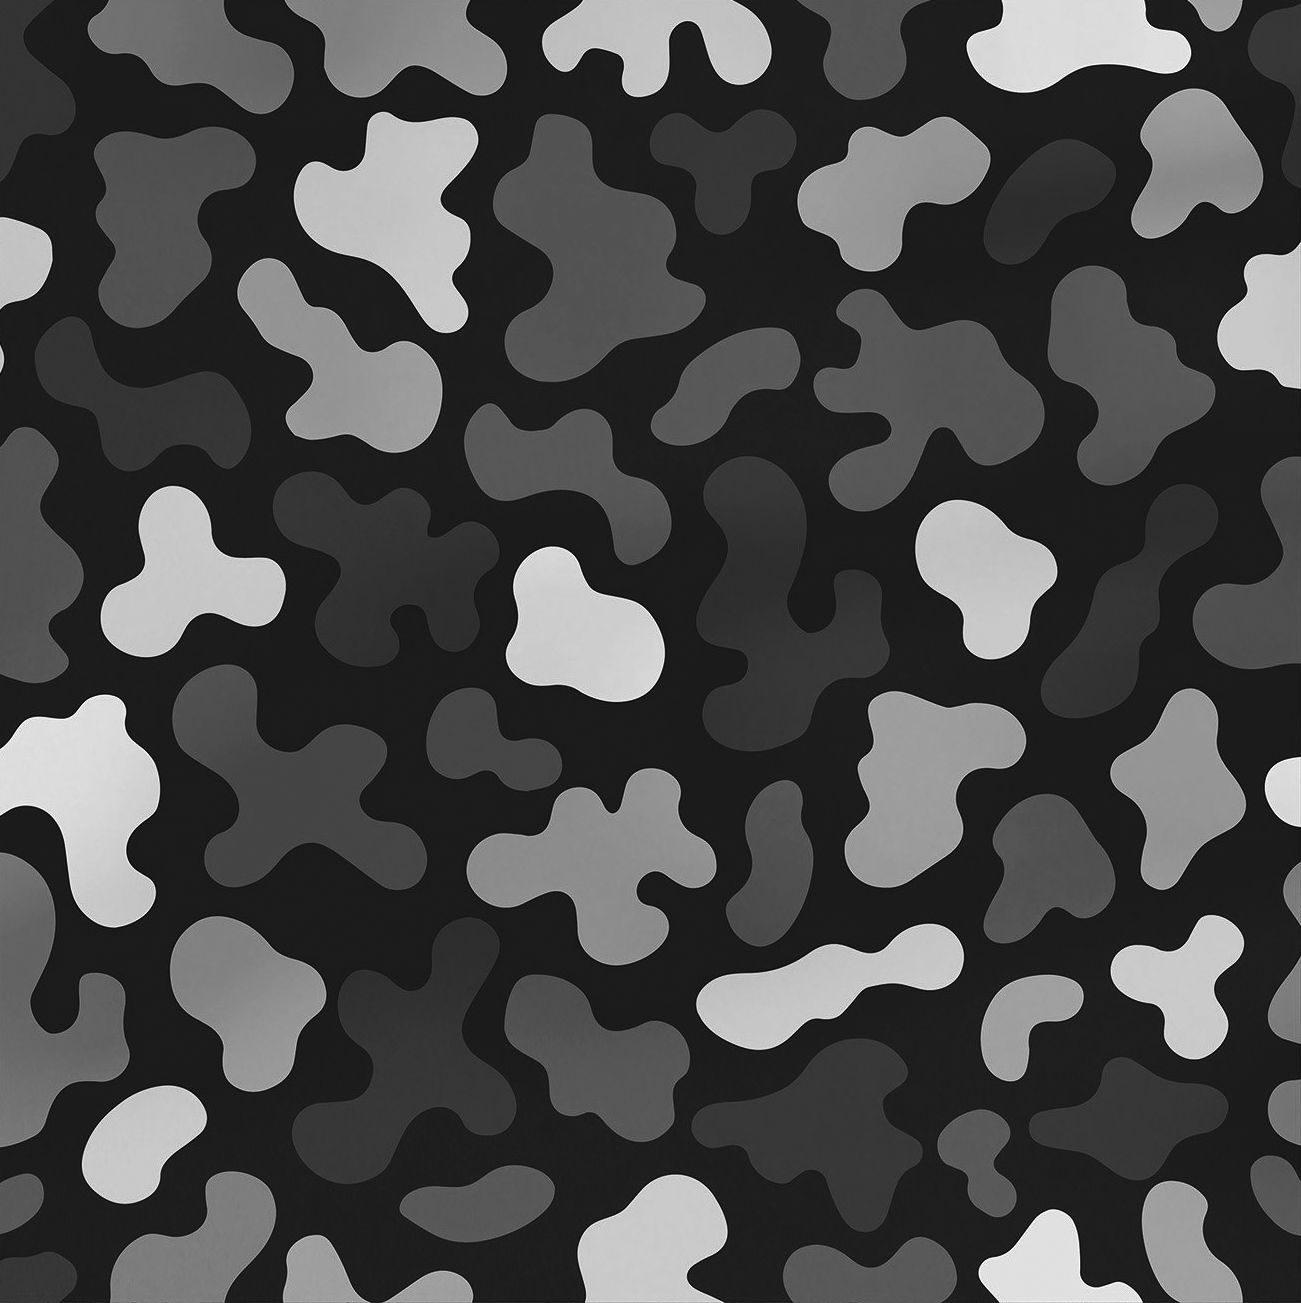
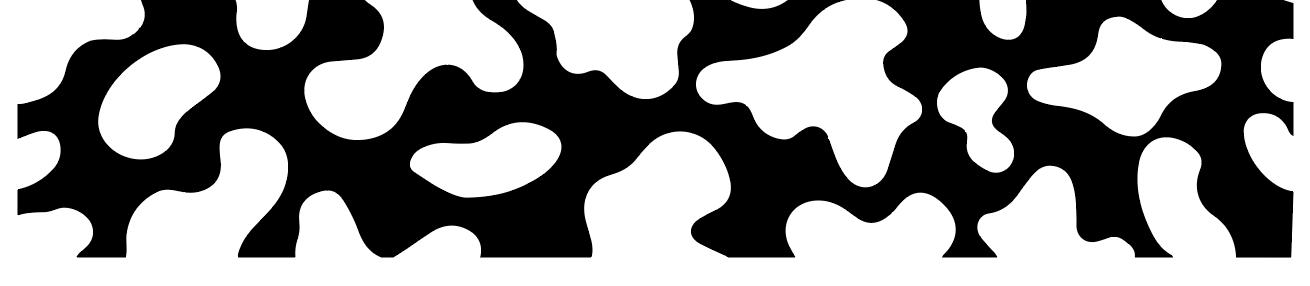
First, we will need a contour shape. You can use any appropriate vector or image for this purpose. If you decide to go with an image, transform it into a vector using Image Trace or create the shapes from scratch or to trace them yourself.
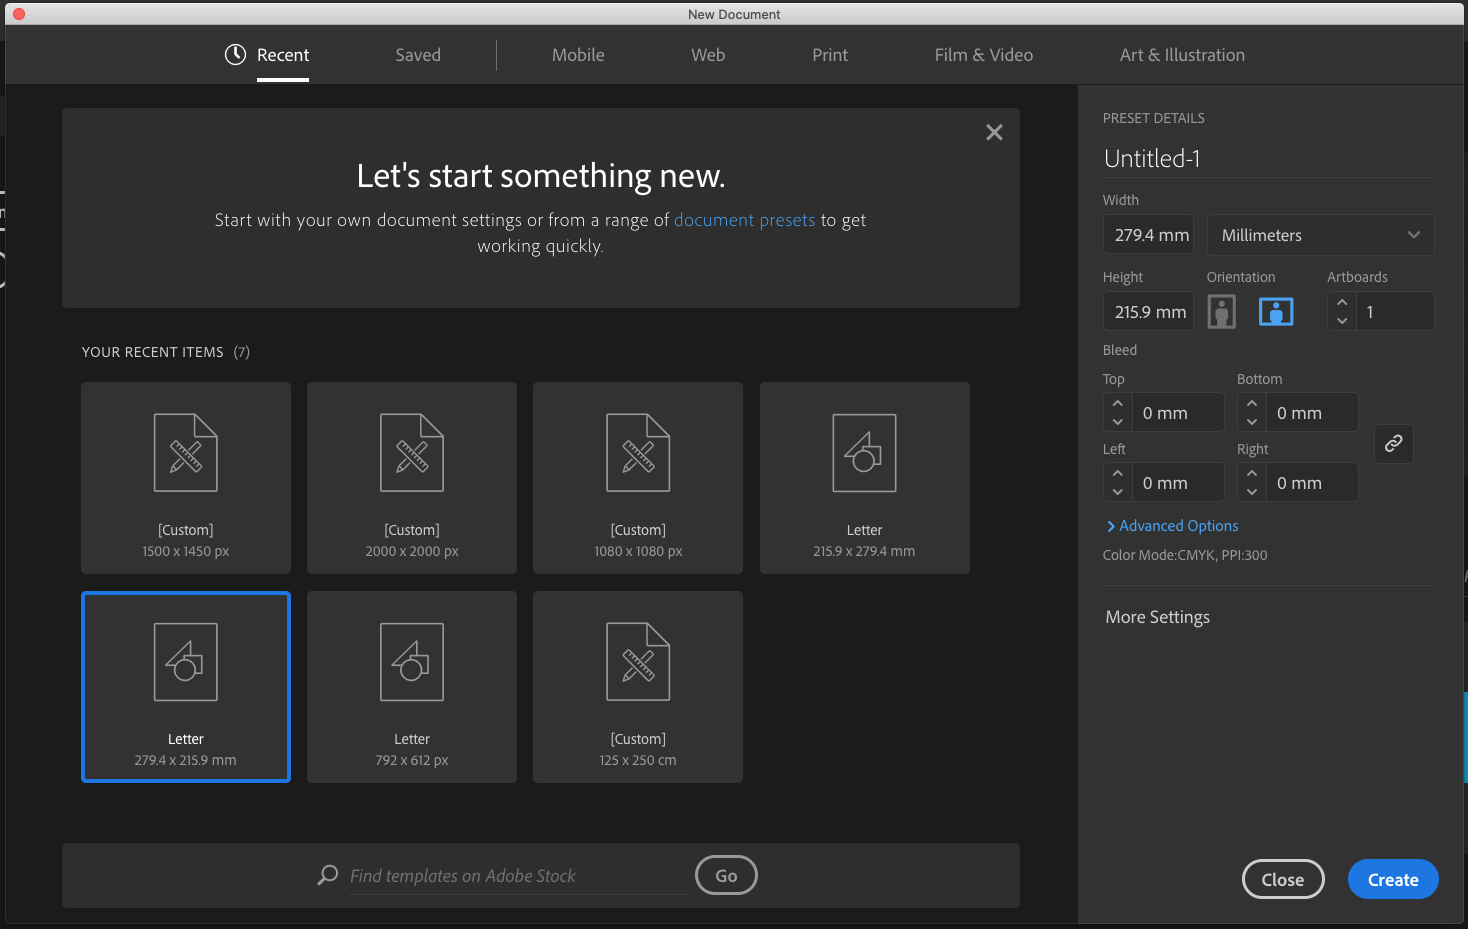
Create a New Document and bring in the vector contour shape you want to use.
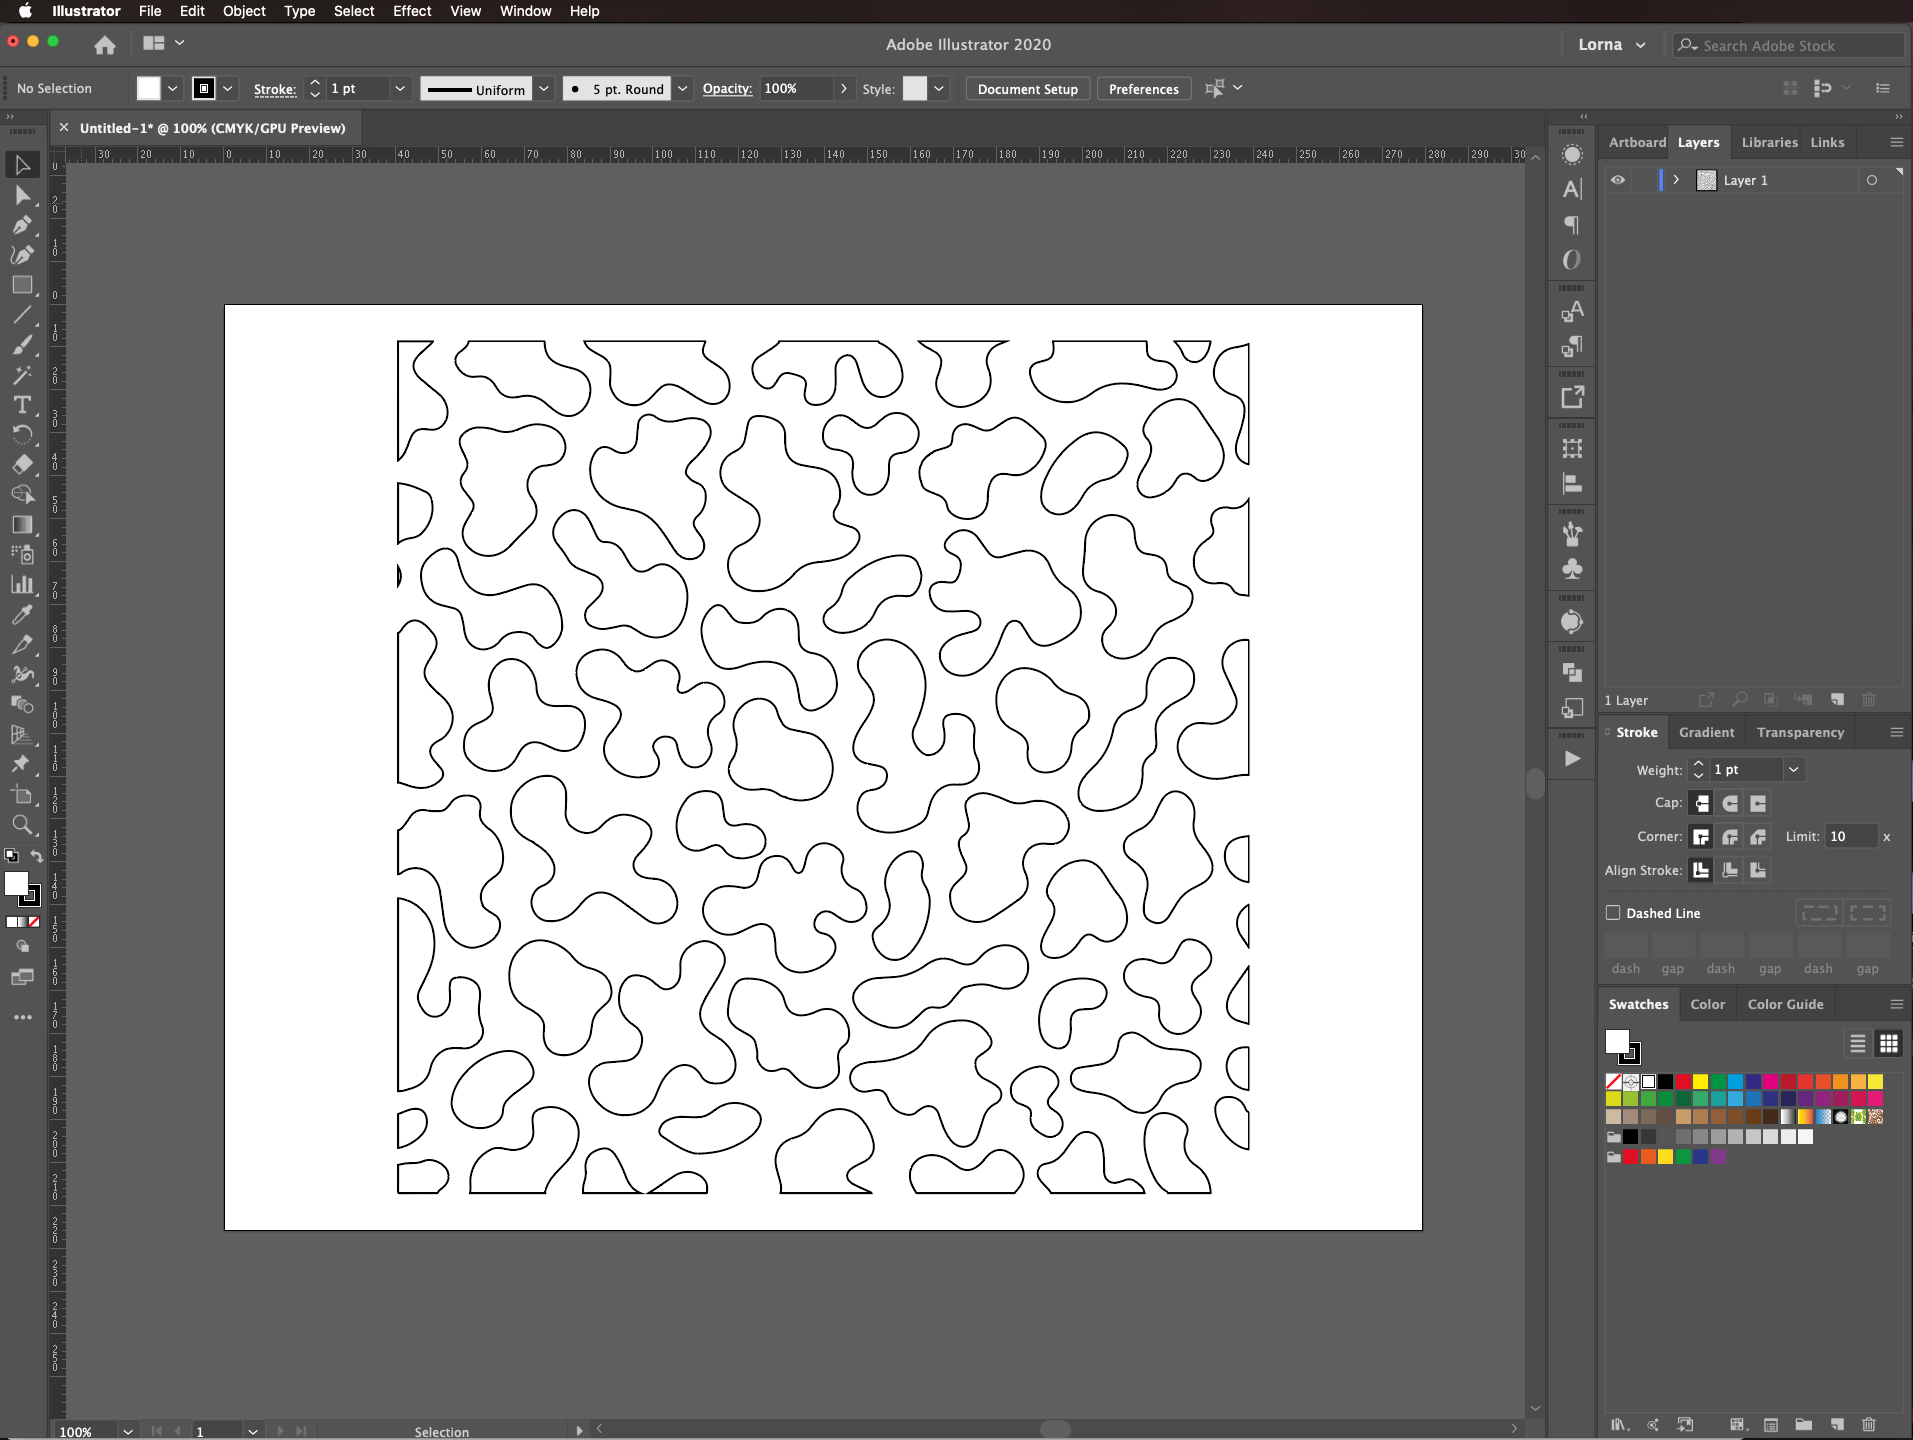
Fill it with a light color (we used white) and if your image doesn't have a background, use the Rectangle Tool (M) to create one in a contrasting color (we used black).
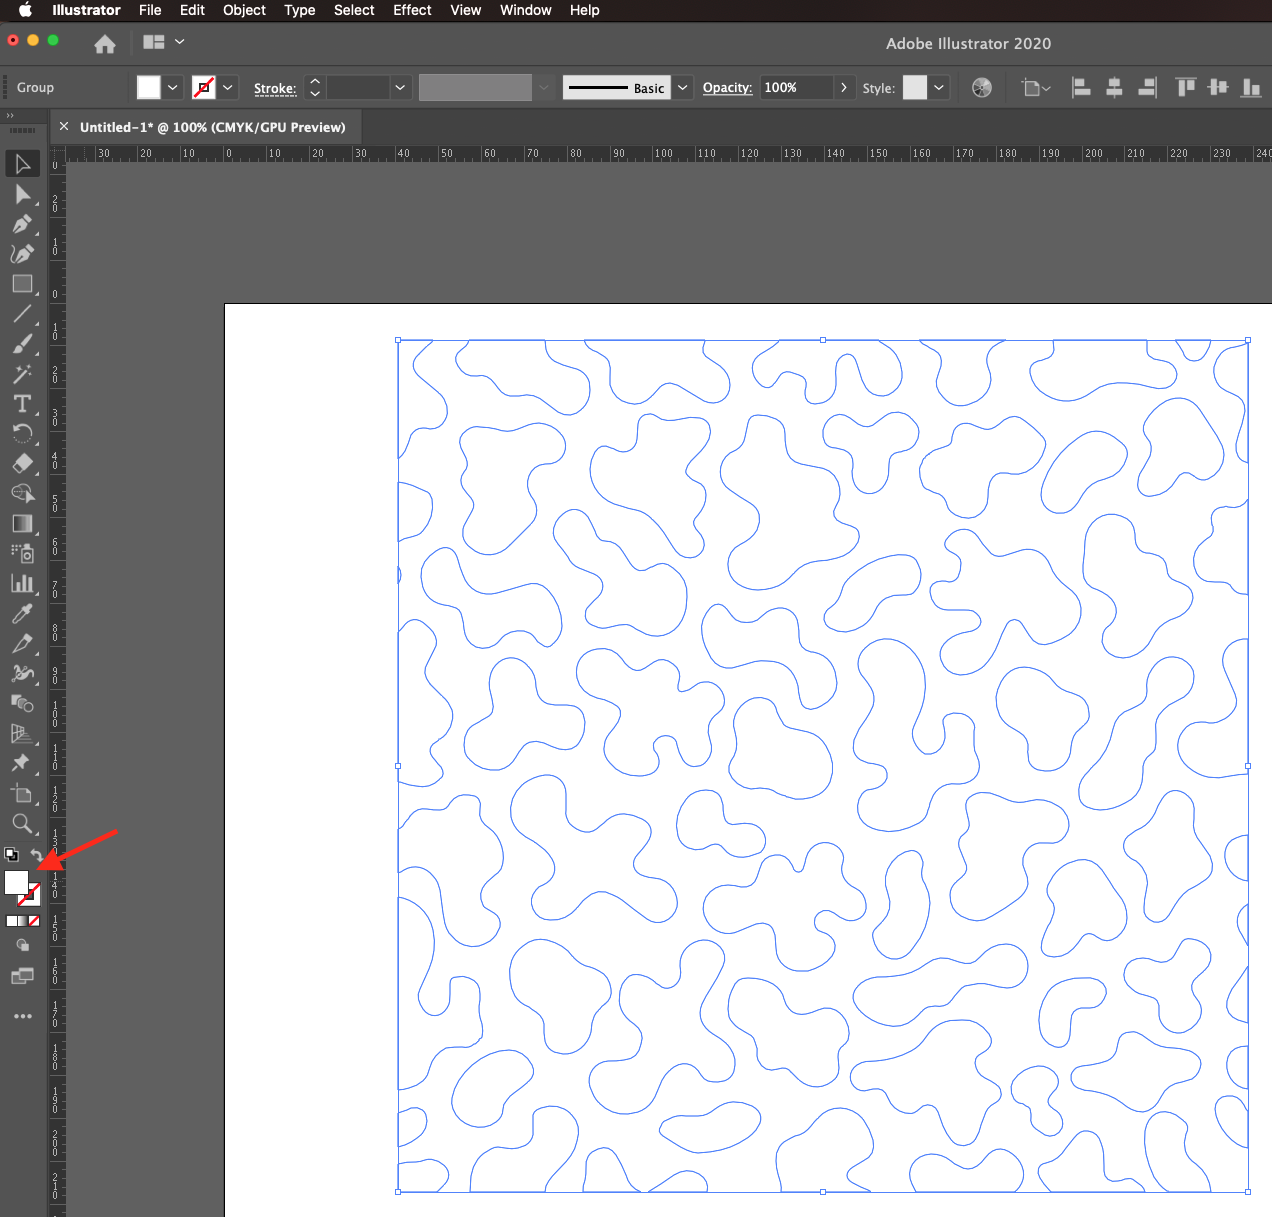
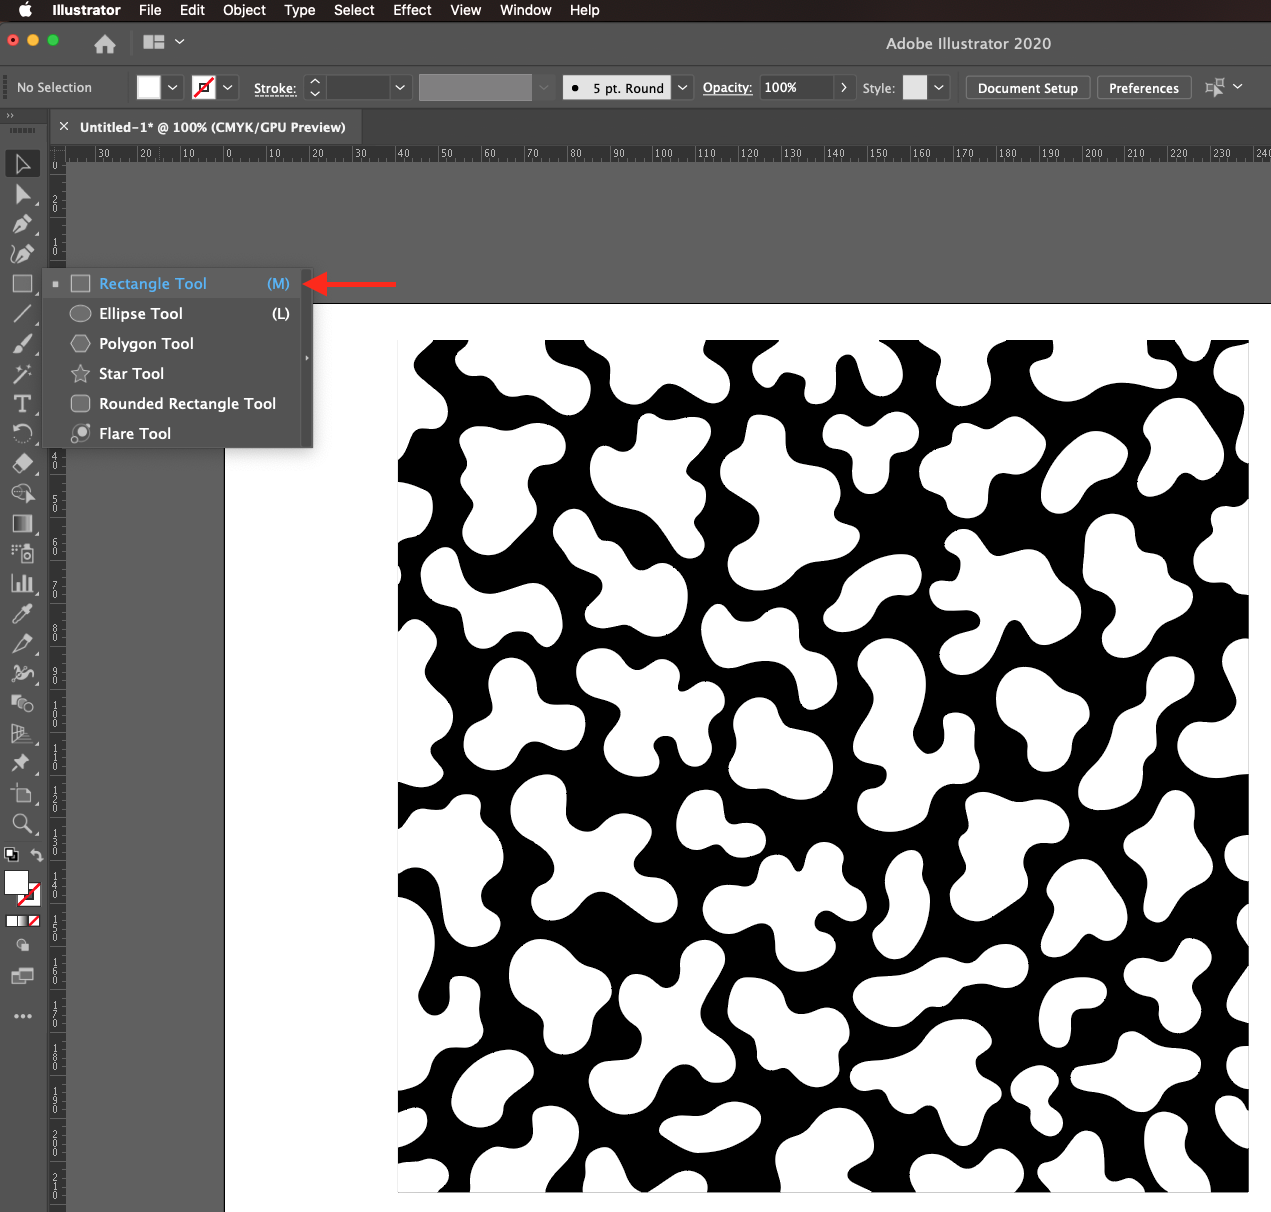
Select both (shapes and background) and use the Shape Builder Tool (Shift + M) while holding the Option/Alt key to punch the Shapes through the Background.
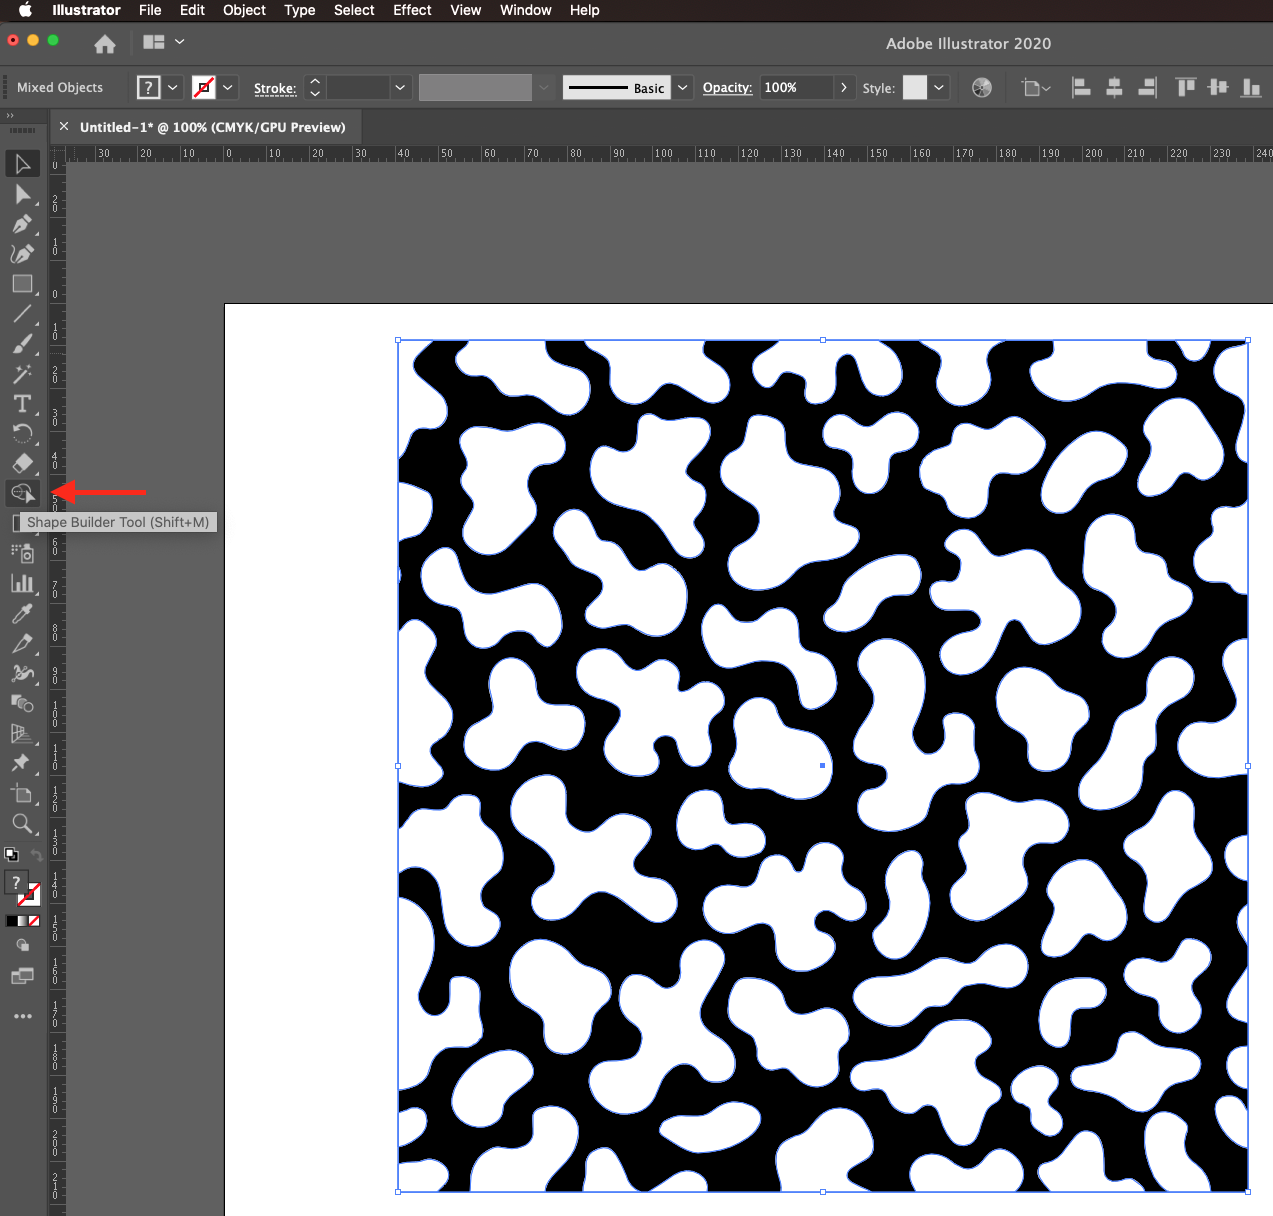
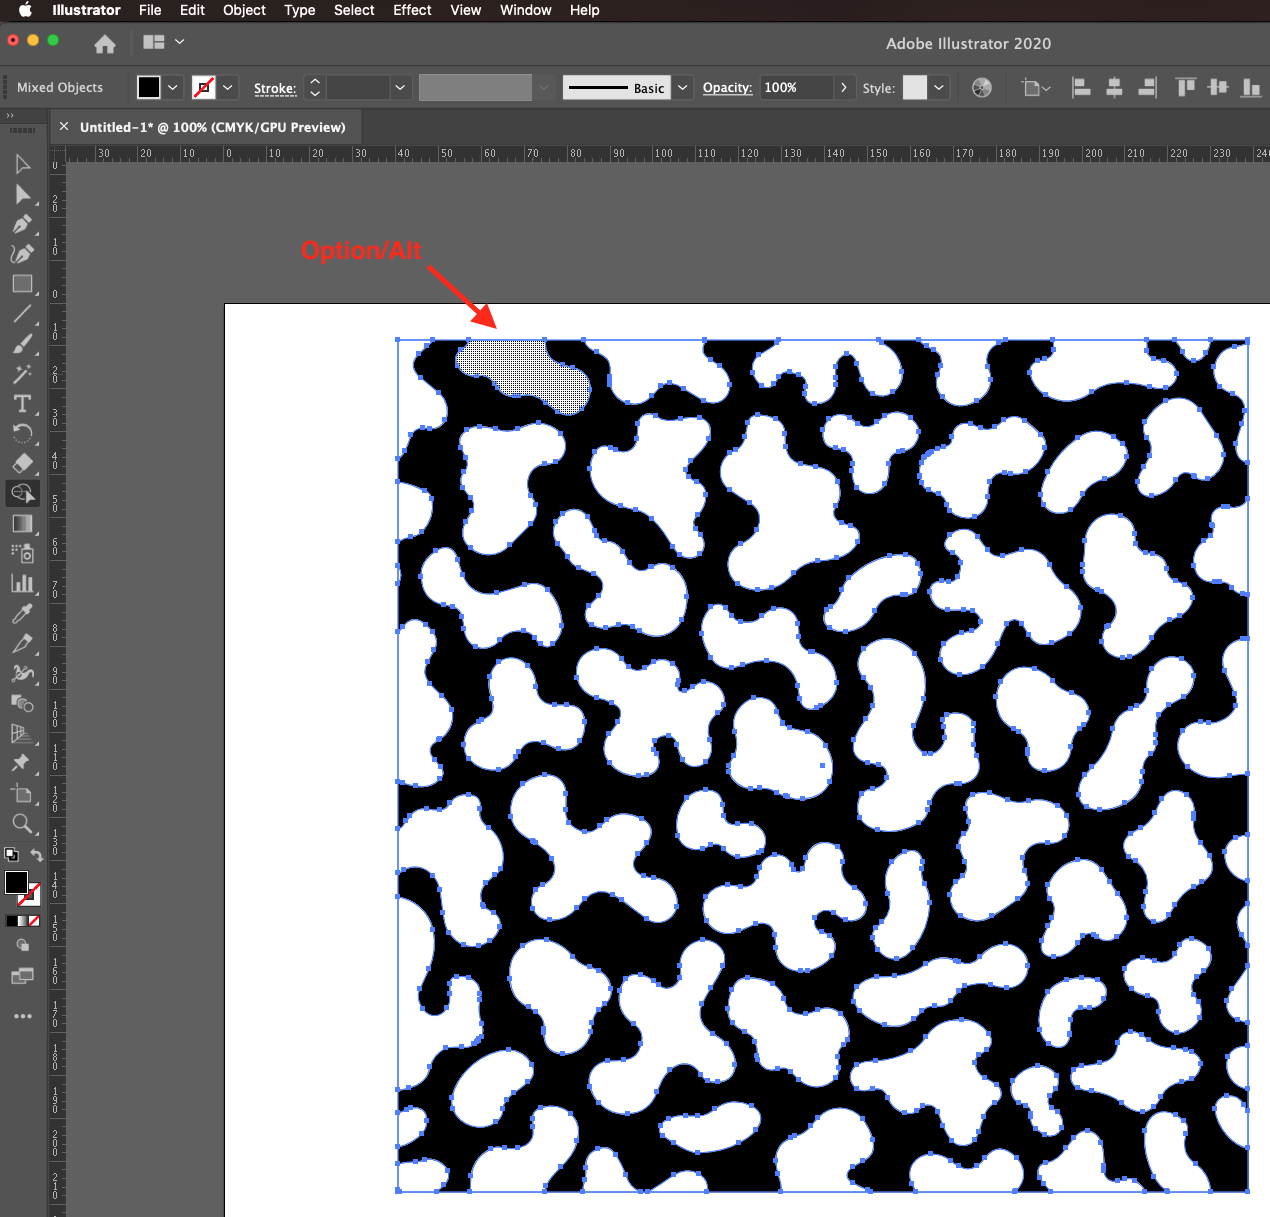
If there’s multiple shapes, just keep going until you finish them all.
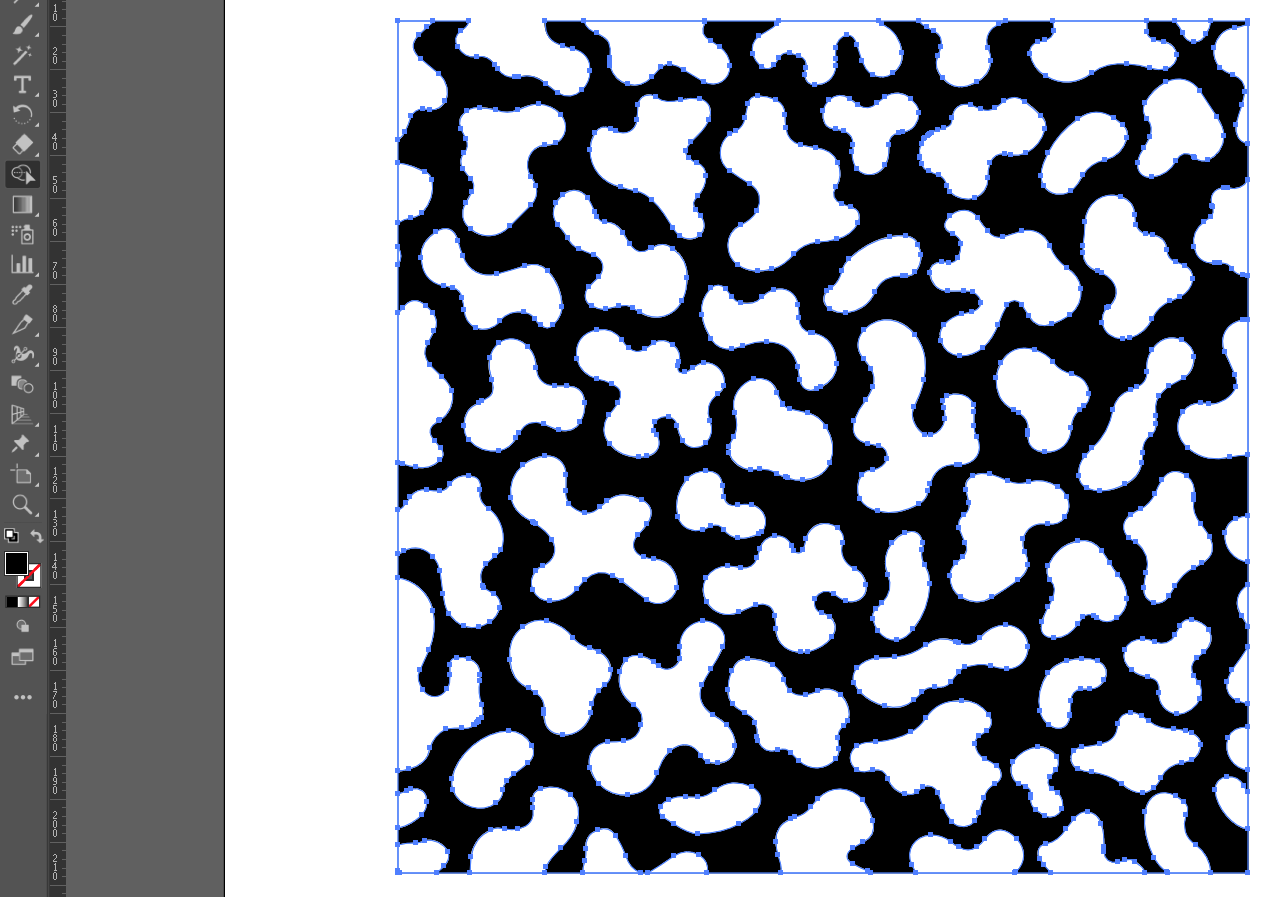
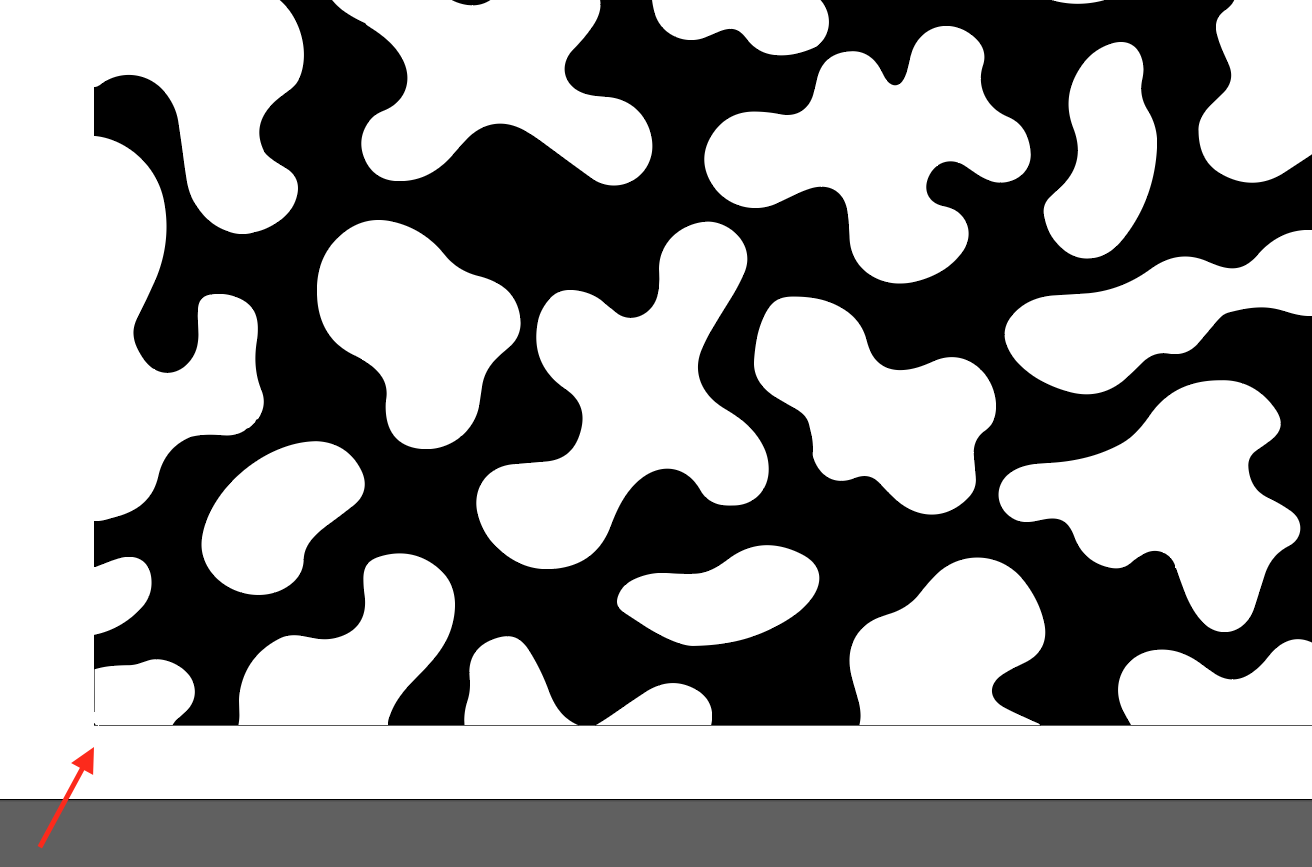
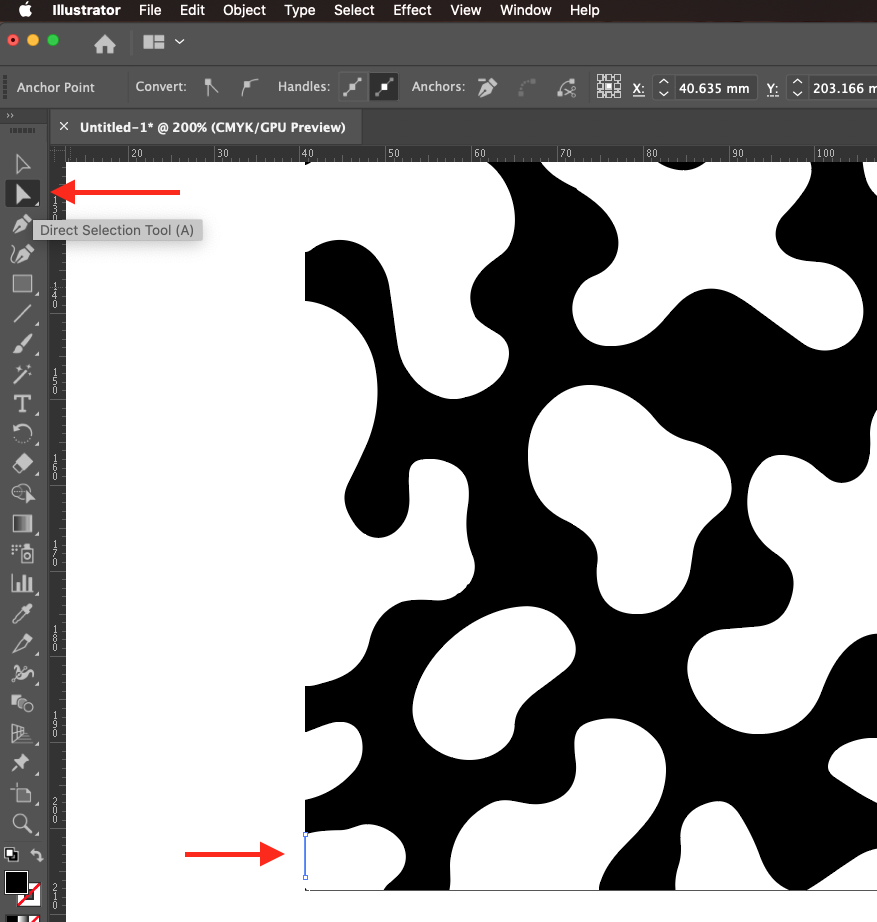
Check if there are some vectors that need to be cleaned up and use the Direct Selection Tool (A) to pick them up and Delete them.
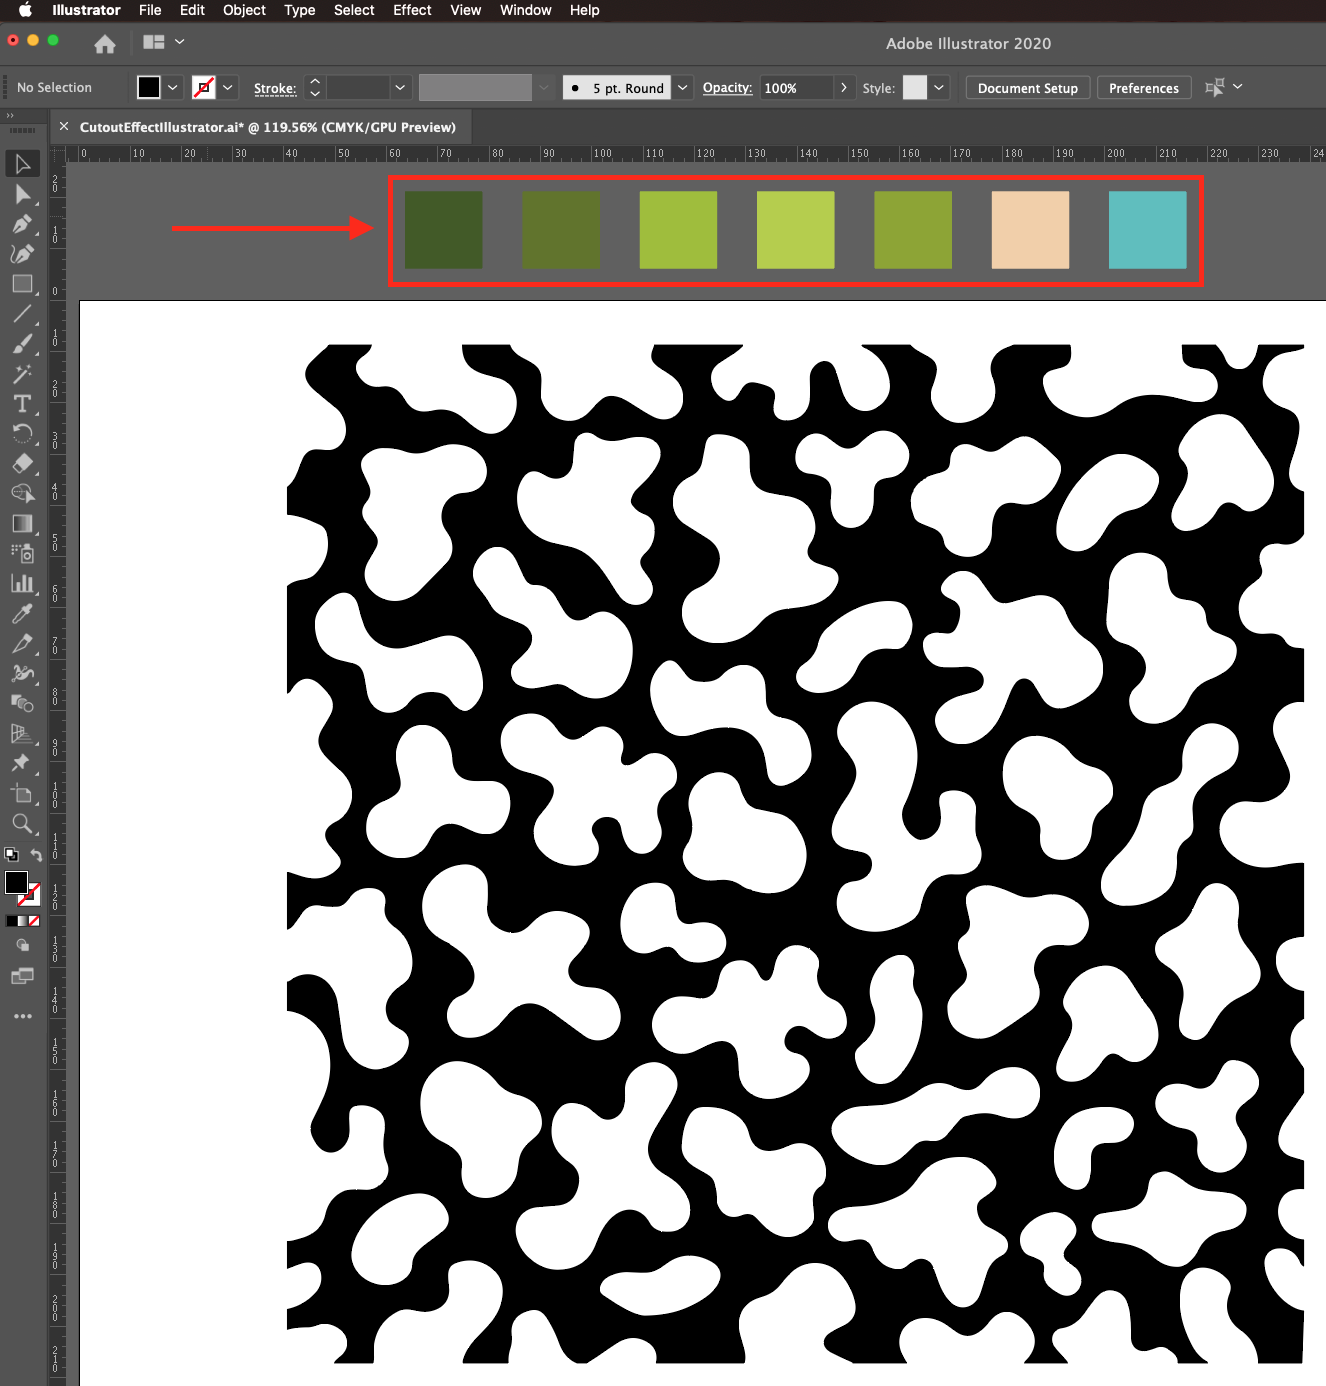
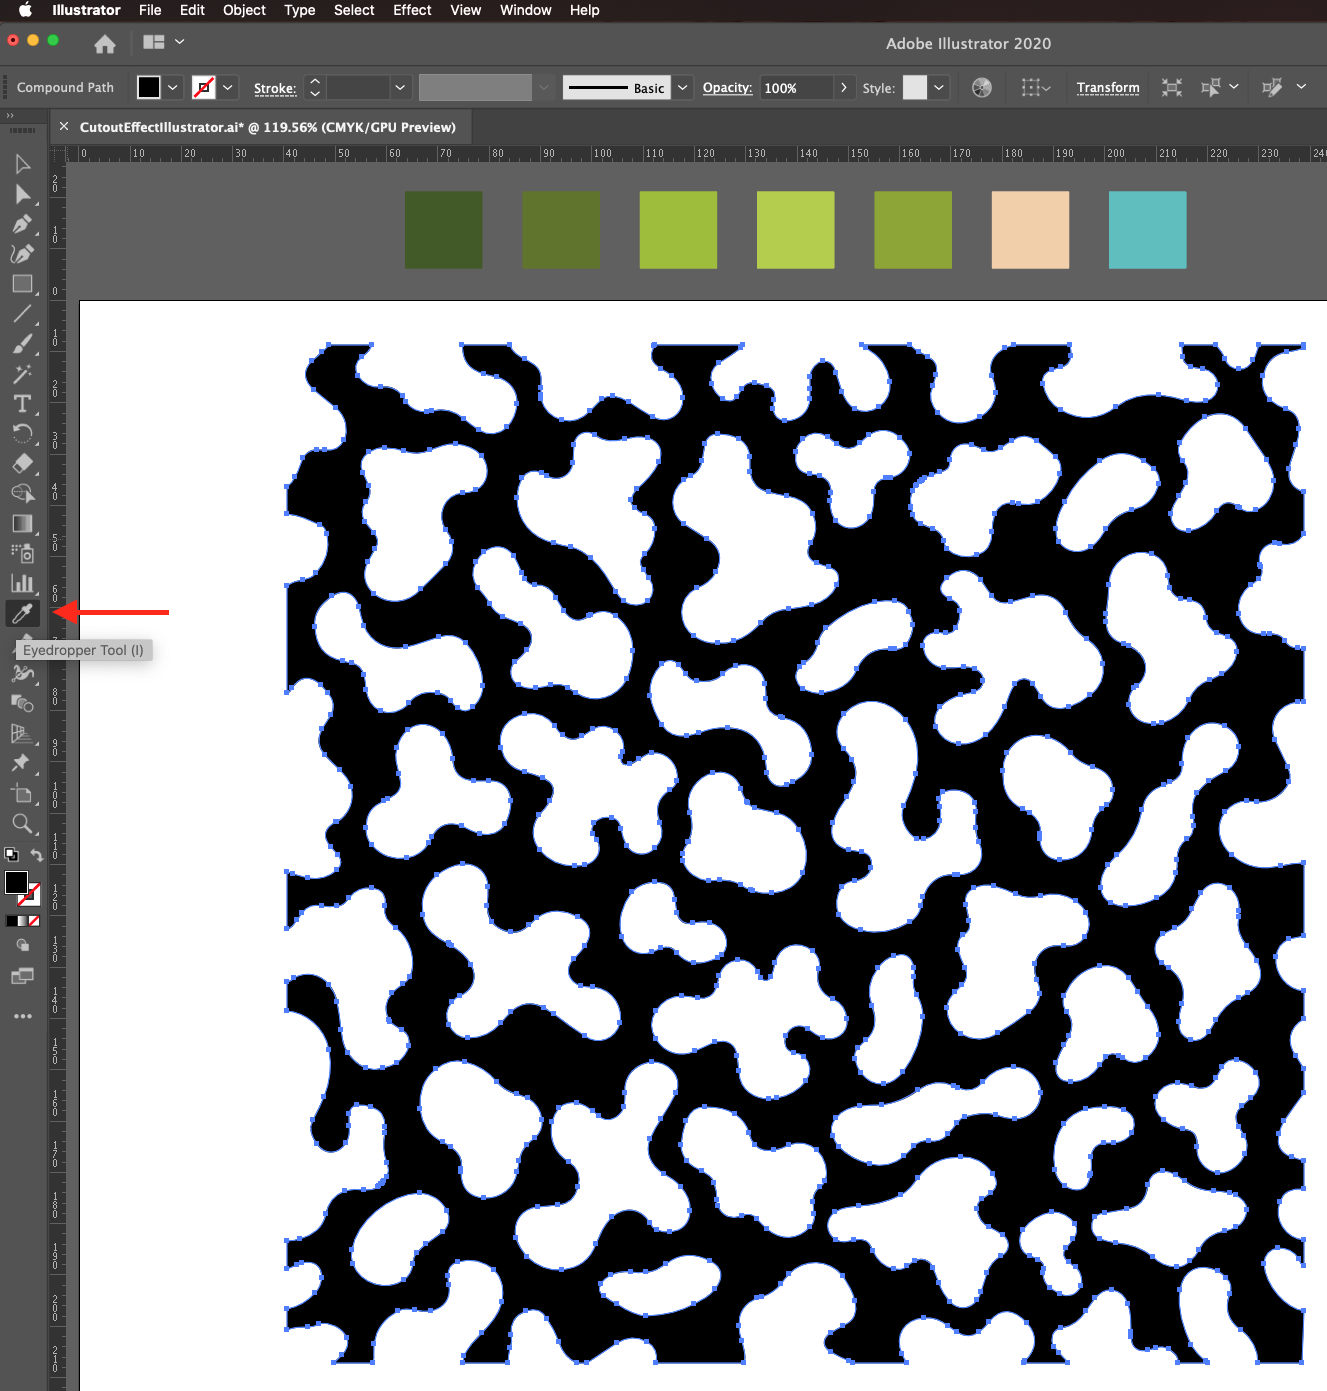
Is a good idea to set up your color palette just outside your document so you can then color your artwork using the Eyedropper Tool (I).
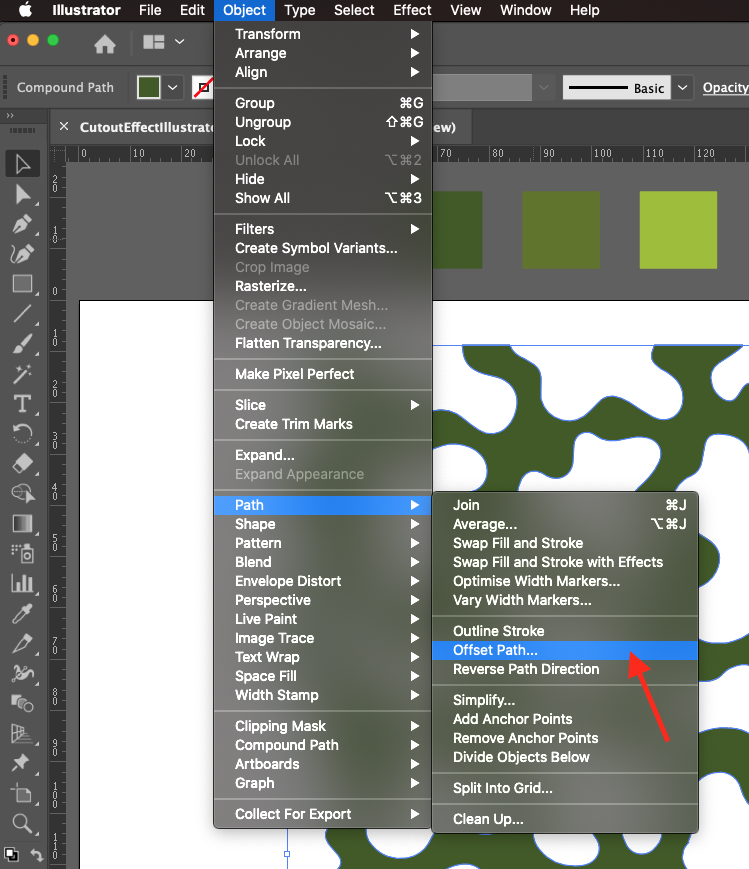
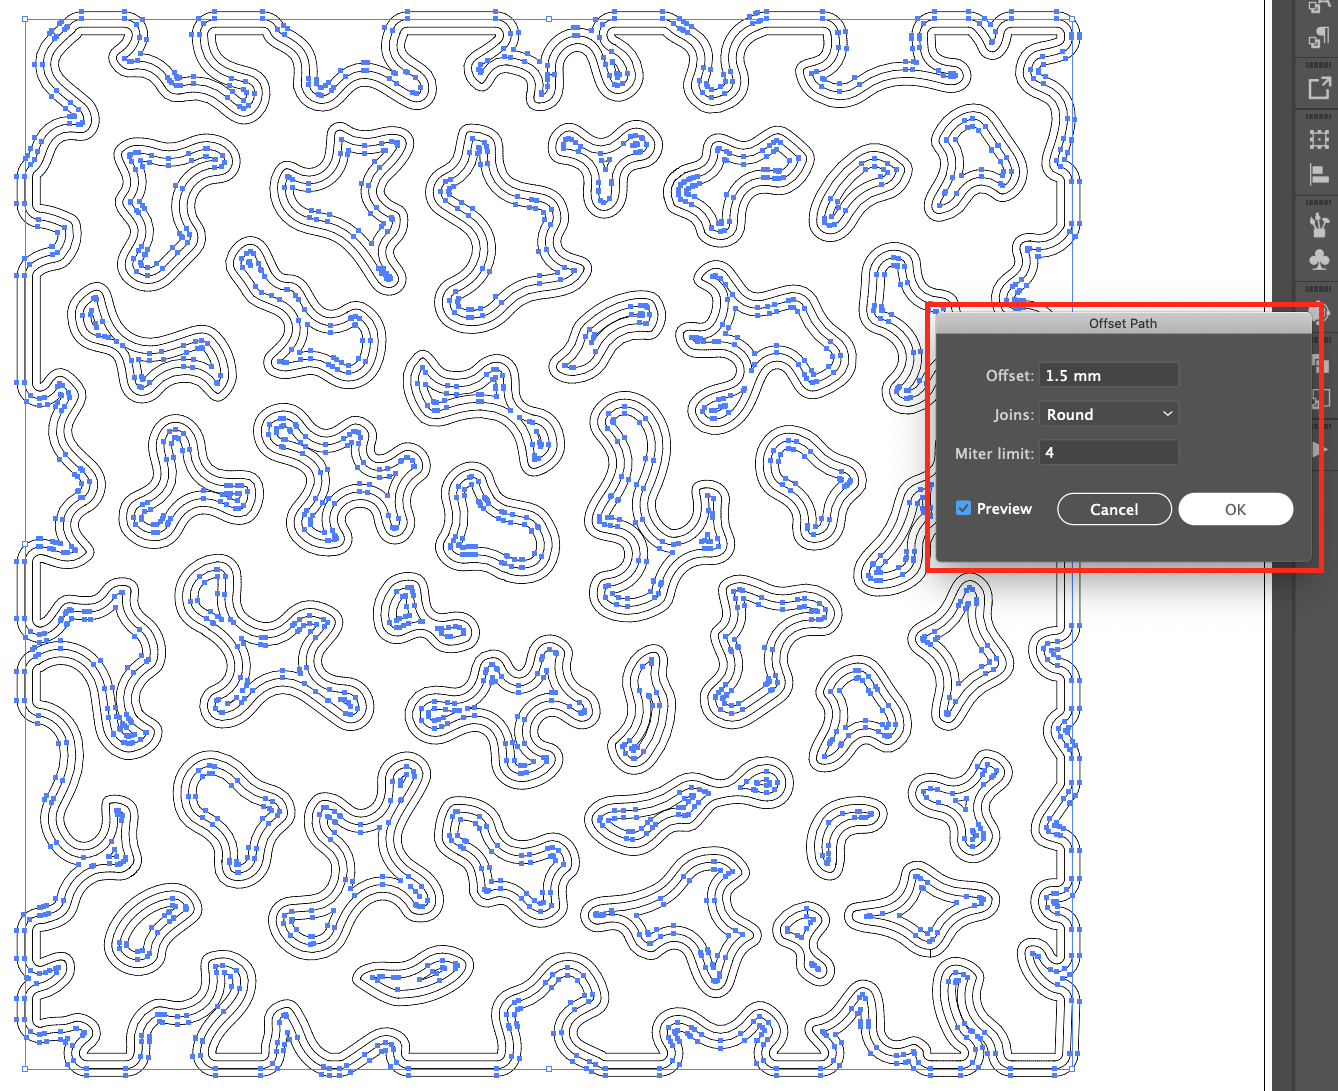
Select your contour shape and go to Object > Path > Offset Path. Adjust the settings depending on your shape, in this case we used a 1.5 mm Offset, Round Joins and a Miter Limit of 4. Click on the Preview box so you can check how the settings apply to your shape.
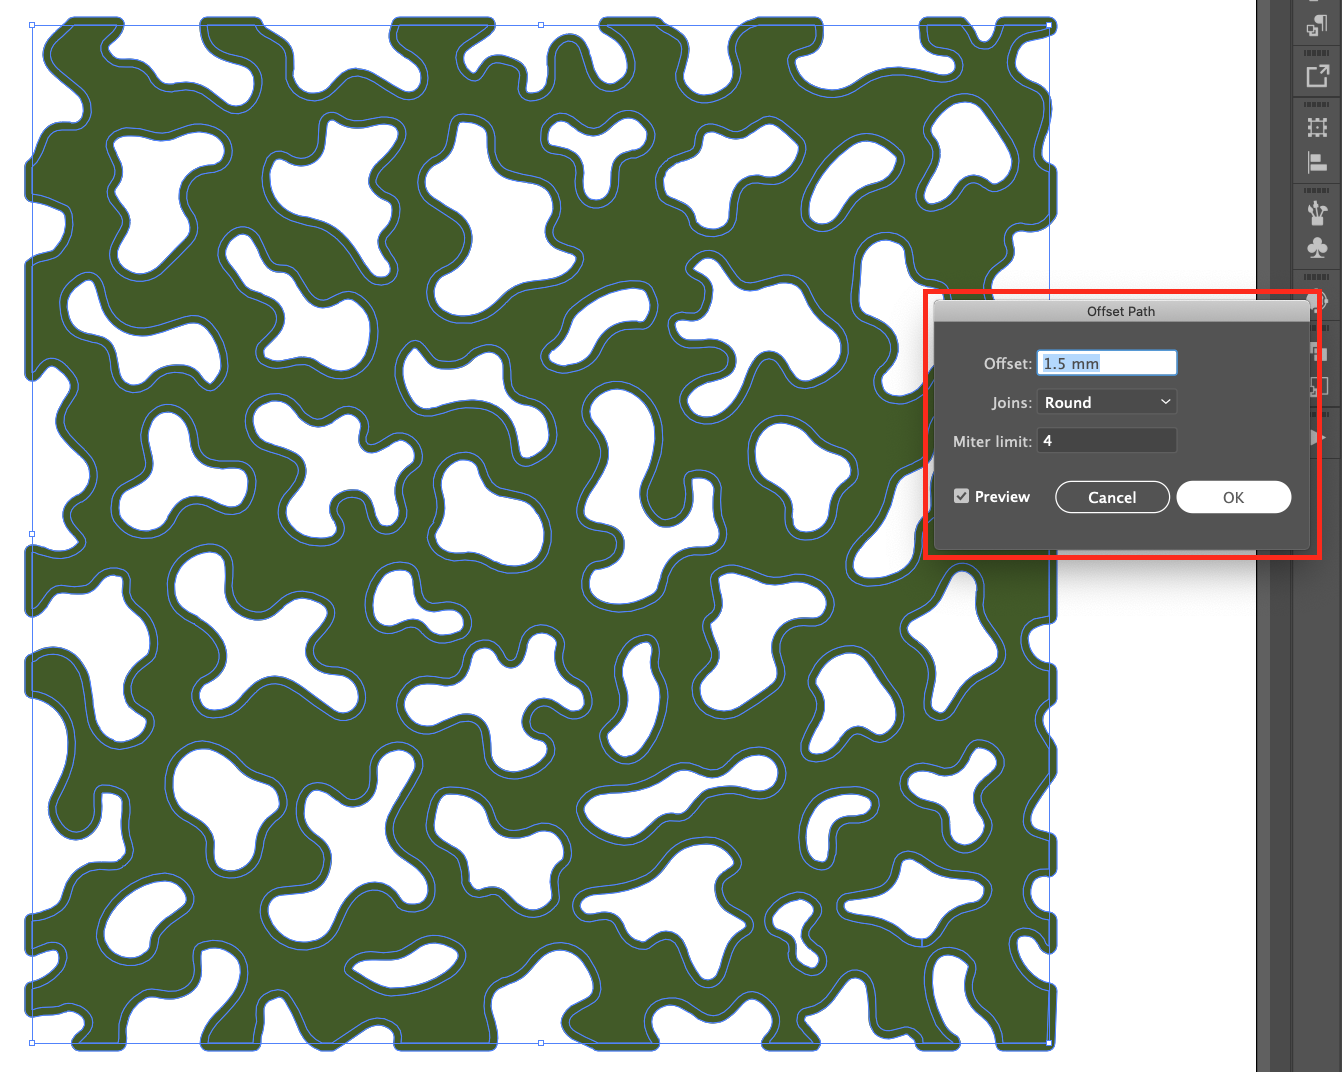
You should now have two contour shapes, one larger than the other.
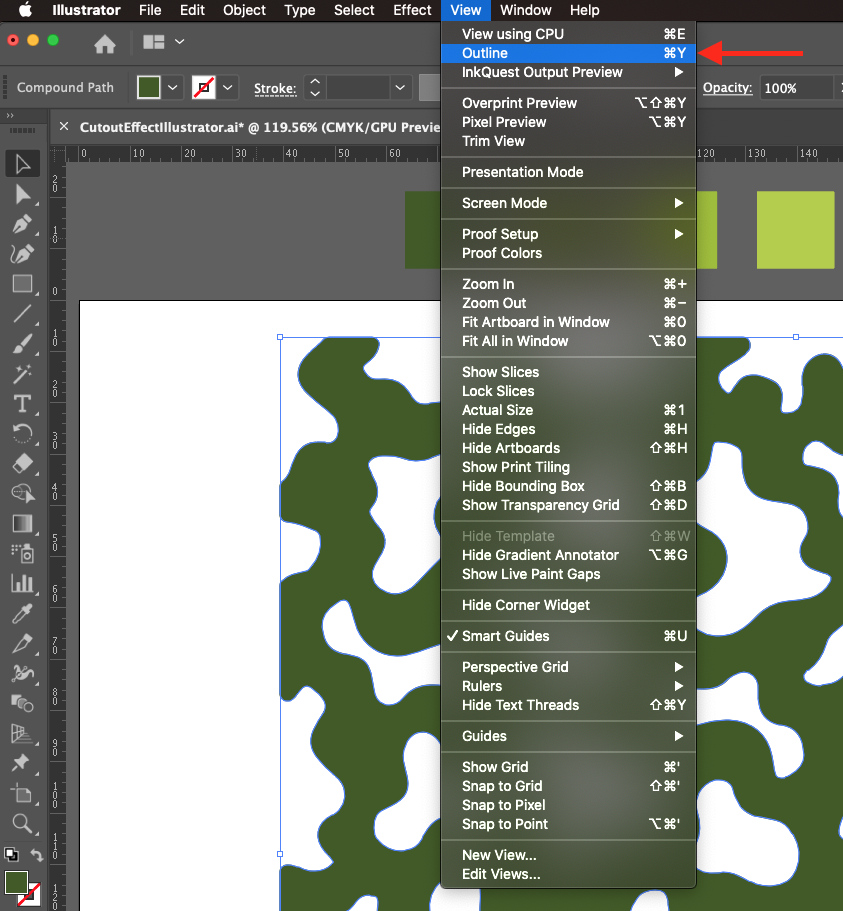
To get a better view, enter Outline View (Command/Control + Y) and select the larger contour shape.
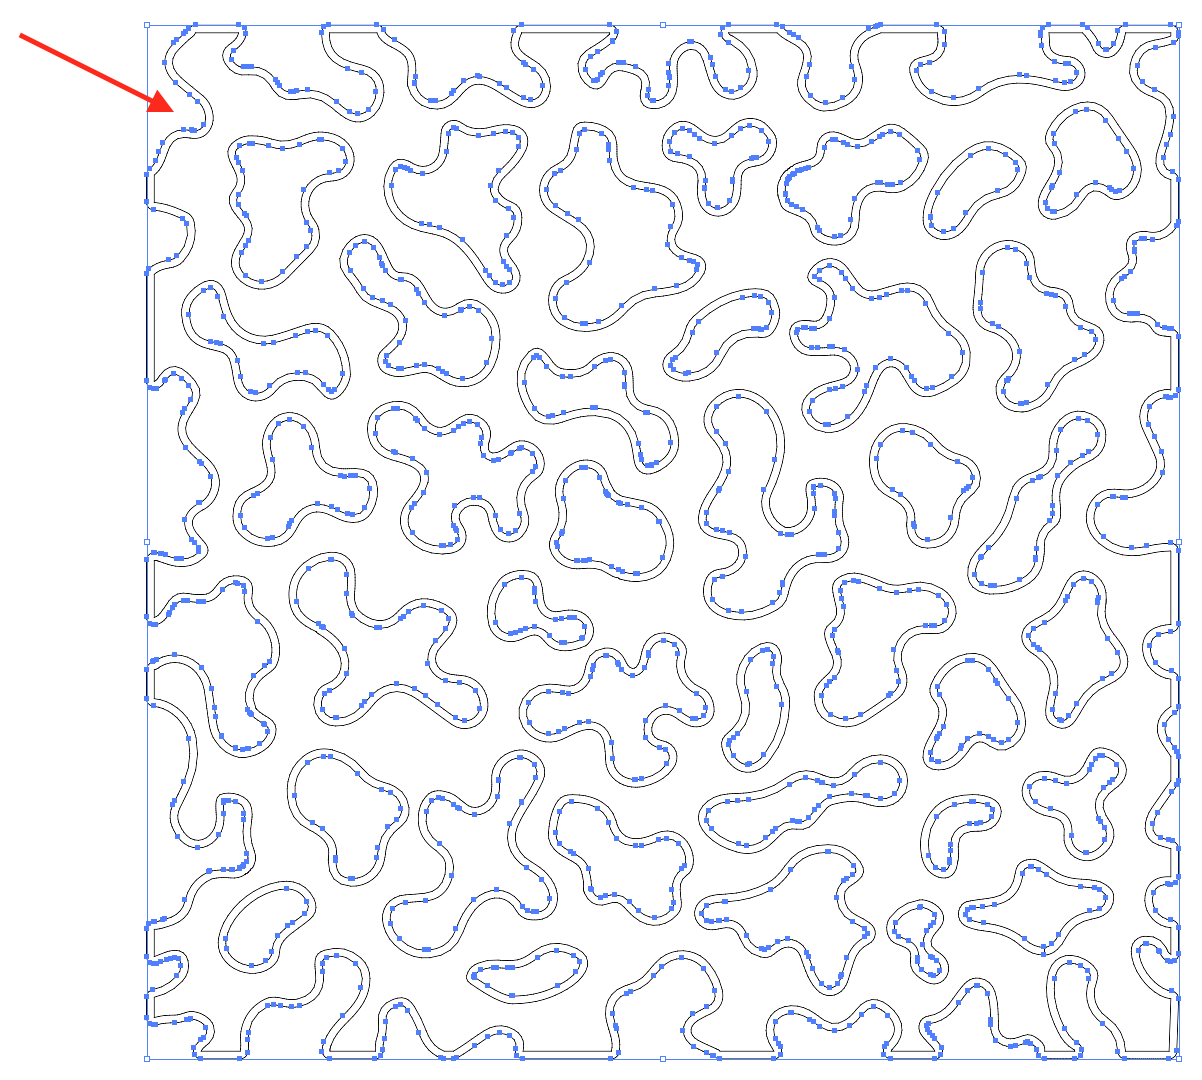
Create another Offset Path with the same settings.
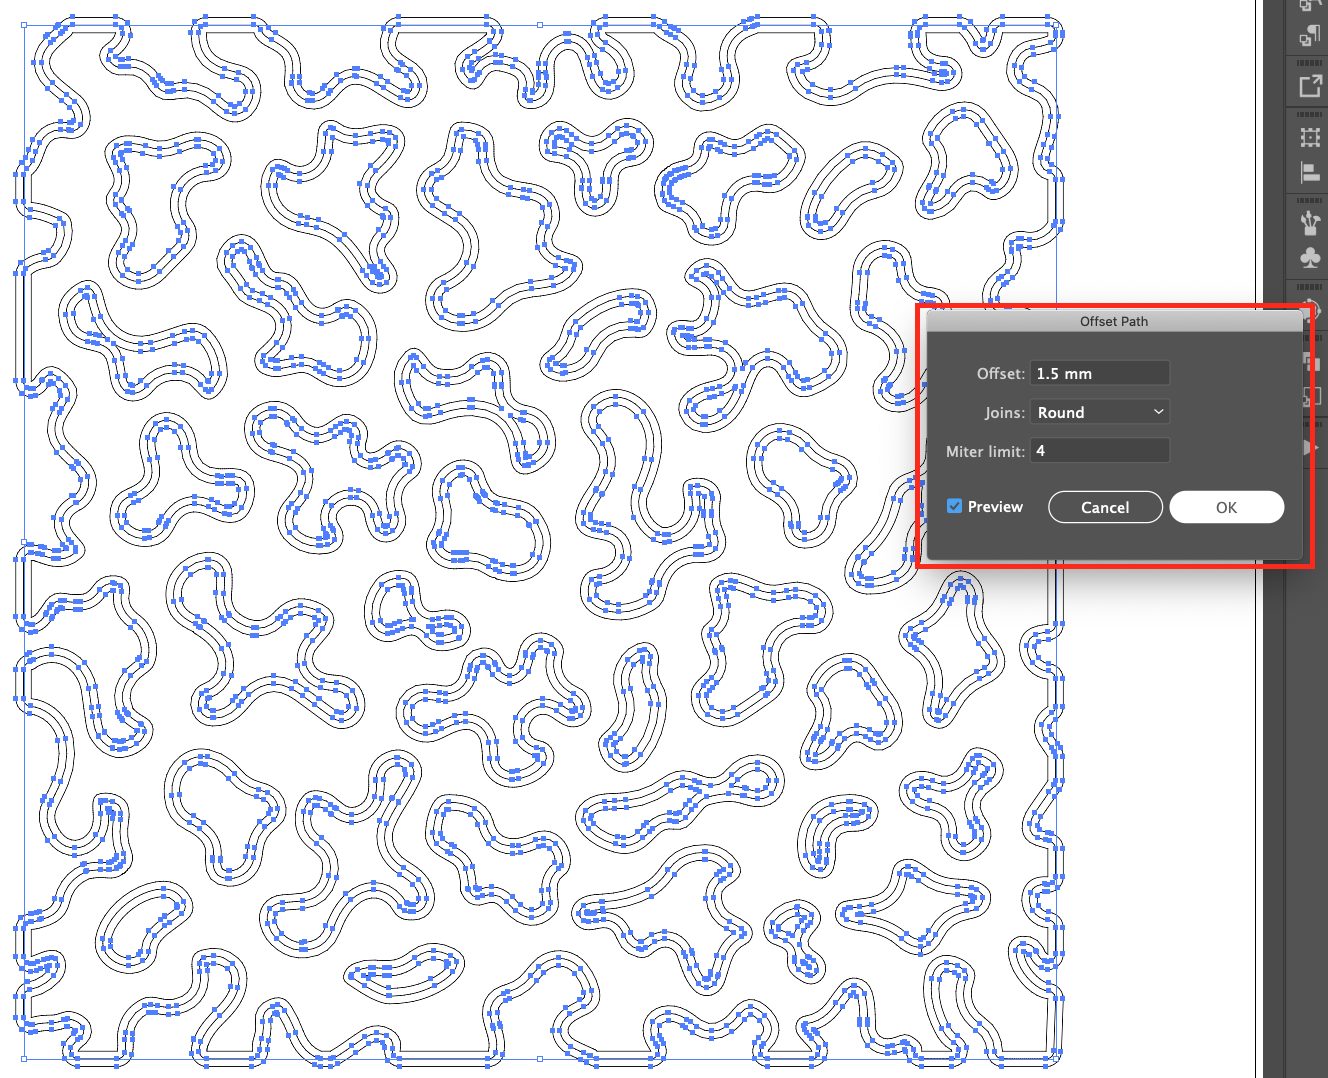
Keep going until you think you have enough layers.
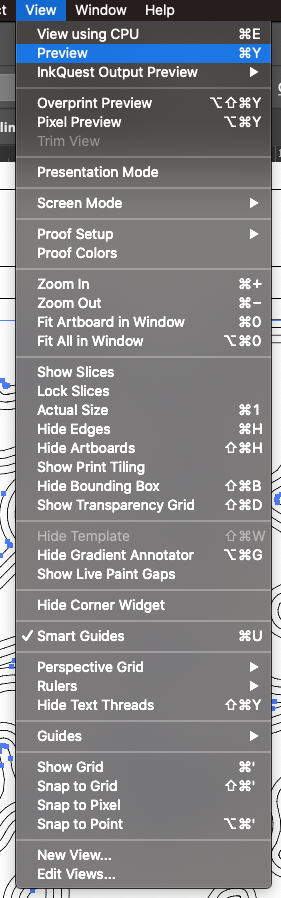
Once you are done, head back to Preview Mode (Command/Control + Y).
 ]
]
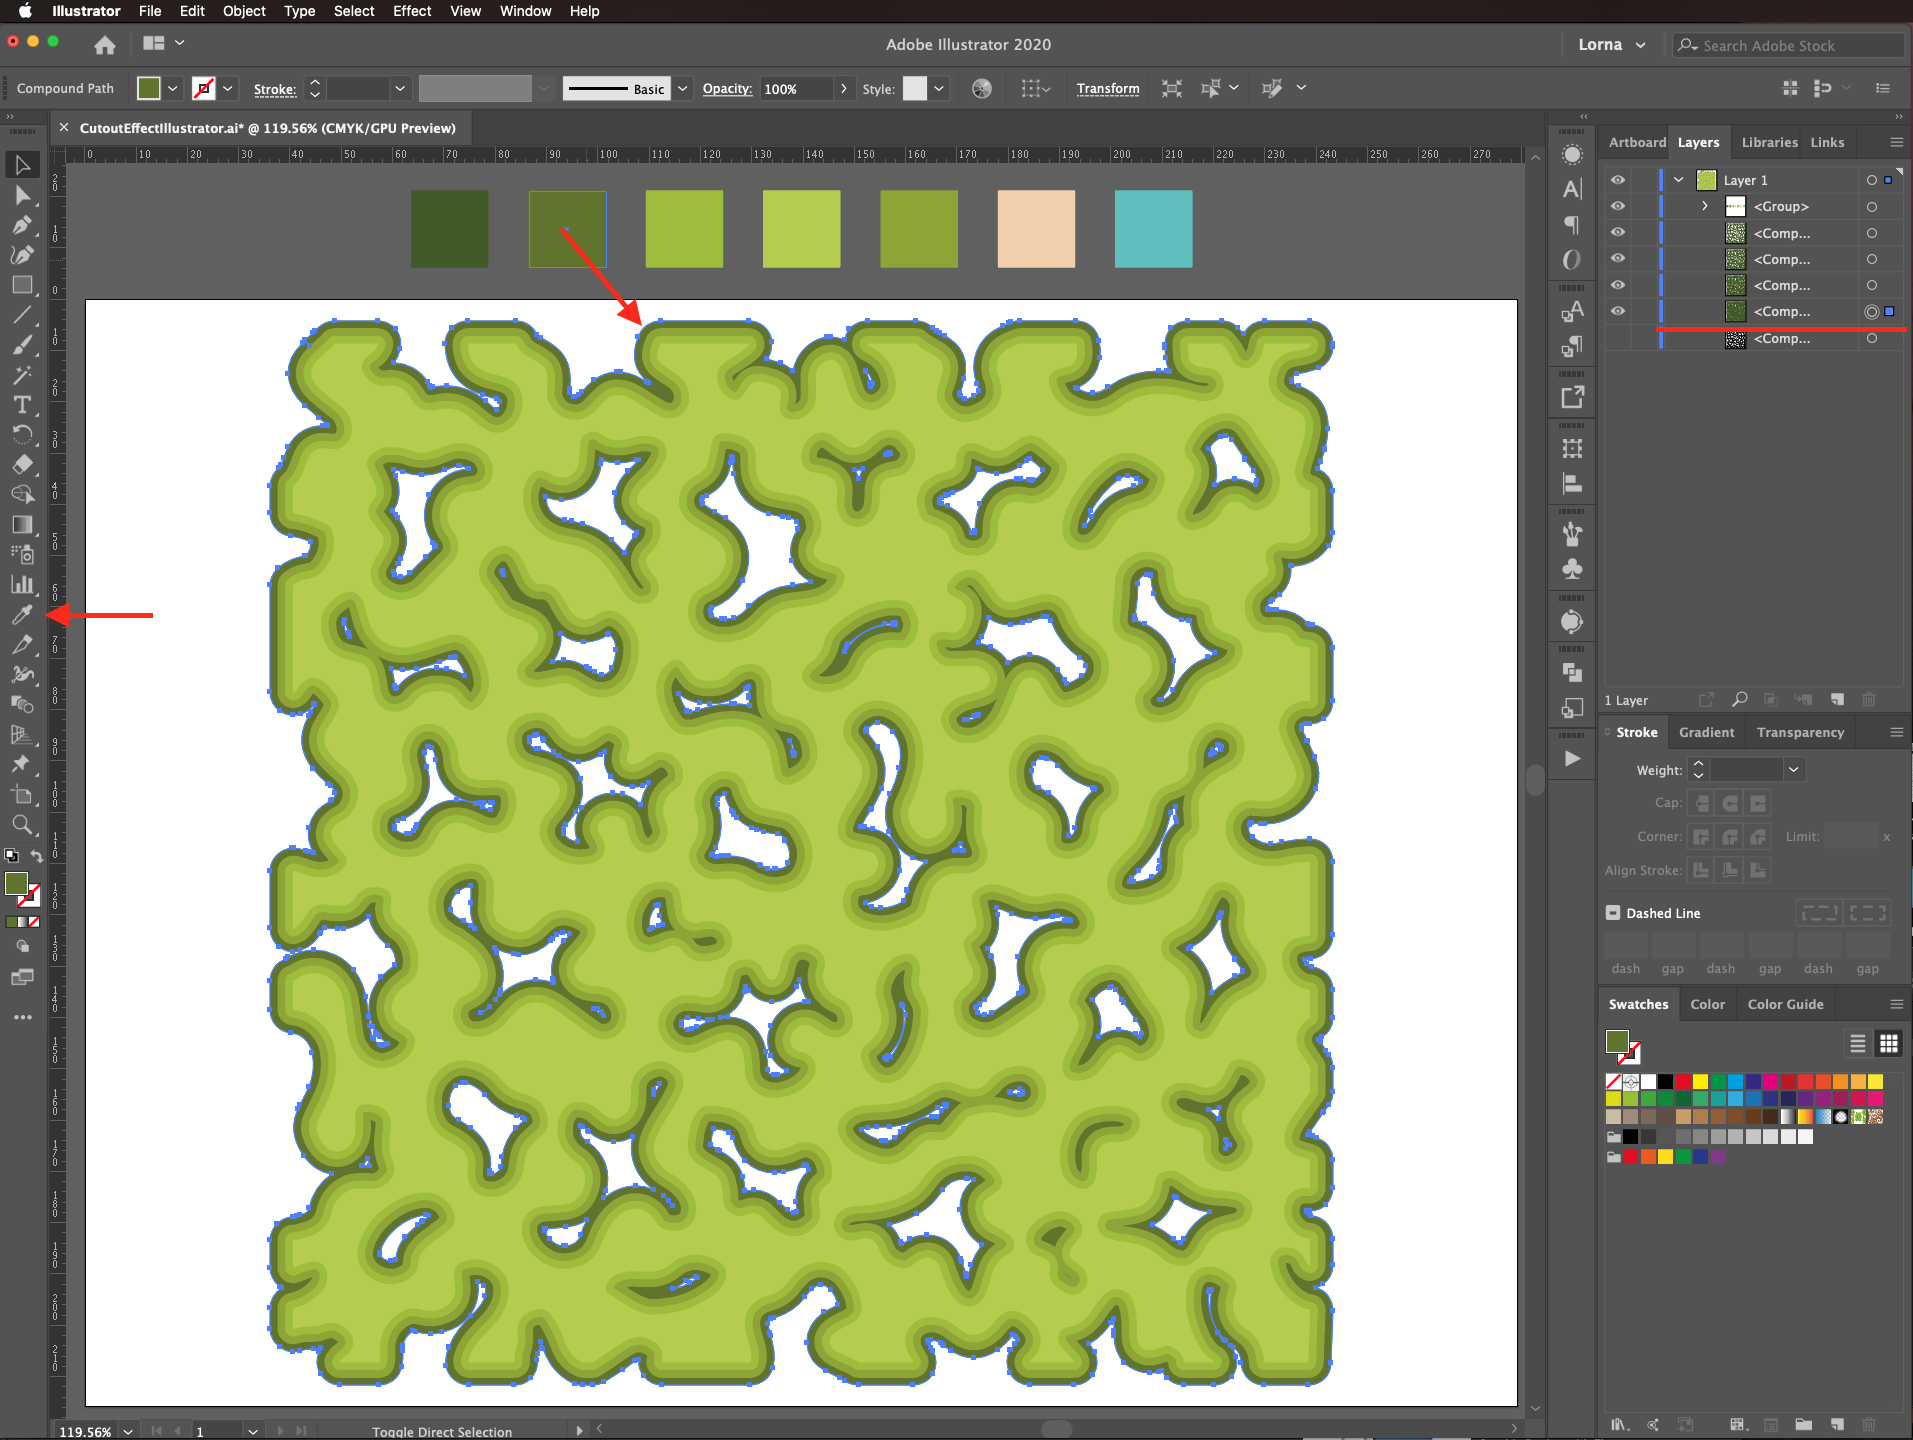
Select one of your contour shapes, and using the Eyedropper Tool (I) fill it with one of the colors from your palette. Fill each contour shape with a different color.
For the Background, use the Rectangle Tool (M) to create one that covers all your contour shape and fill it with a contrasting color.
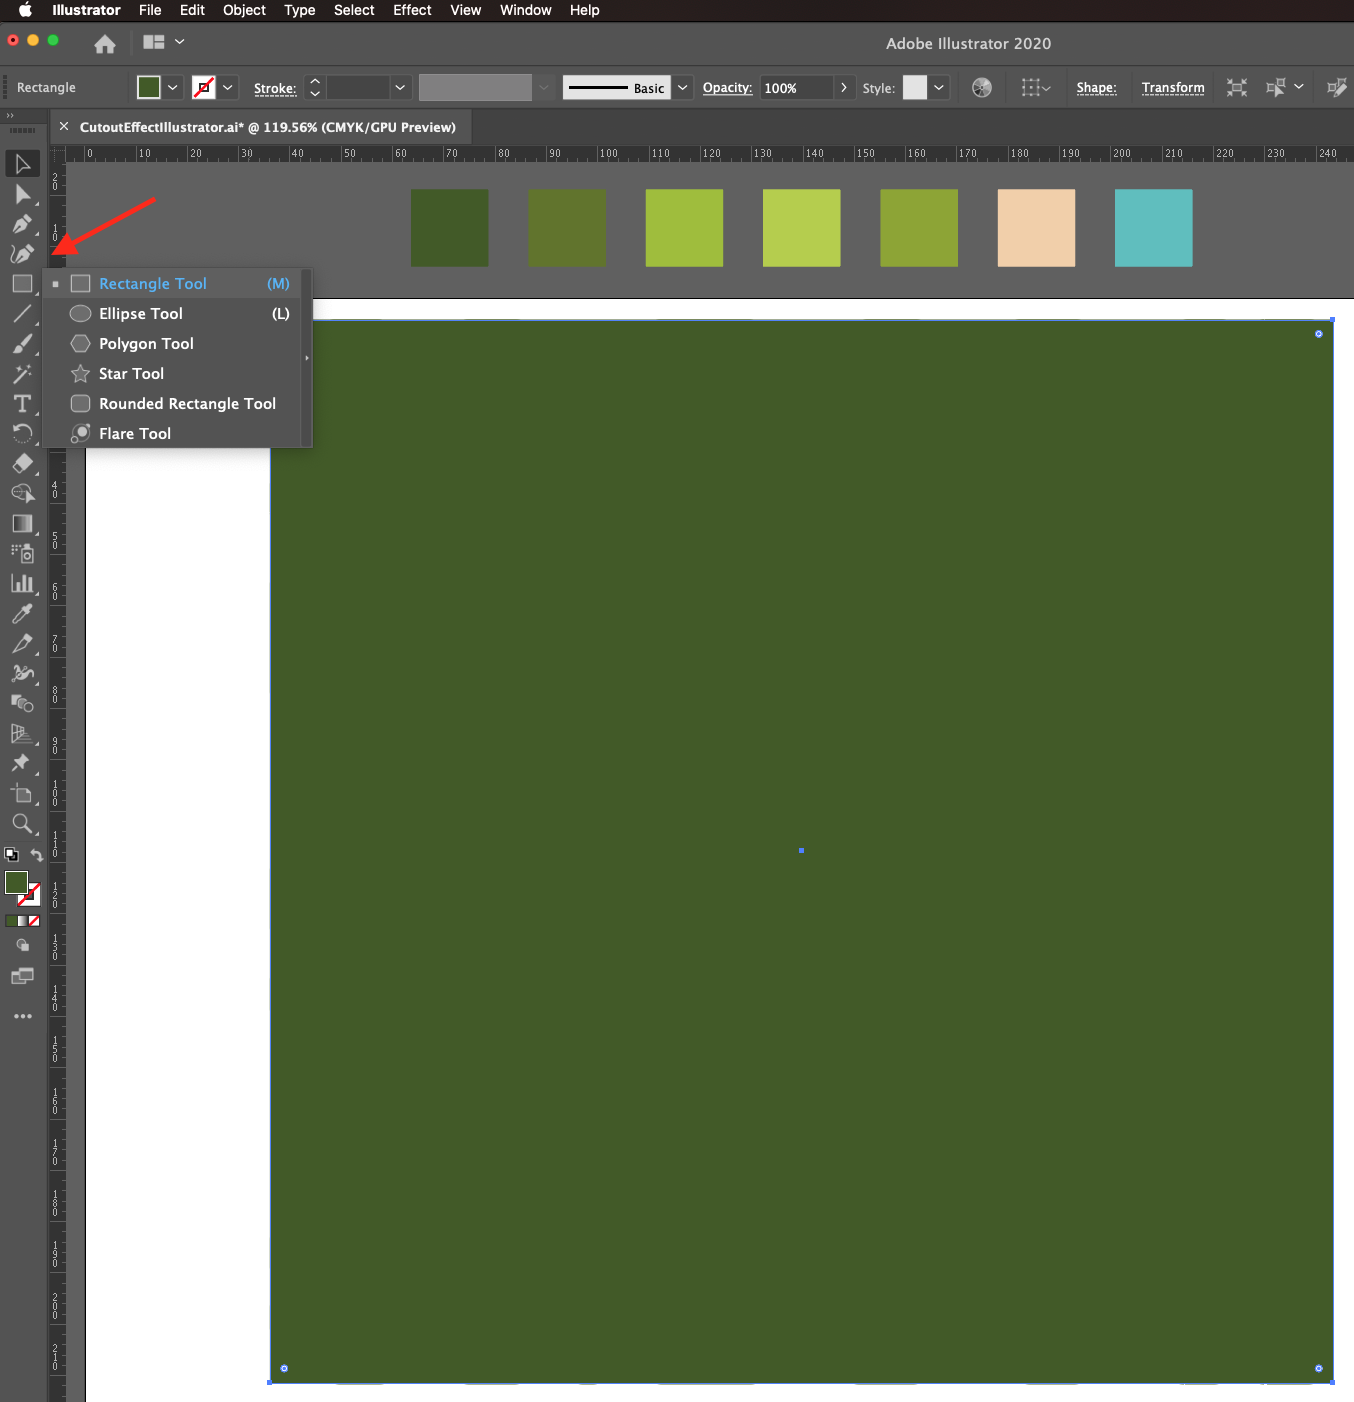
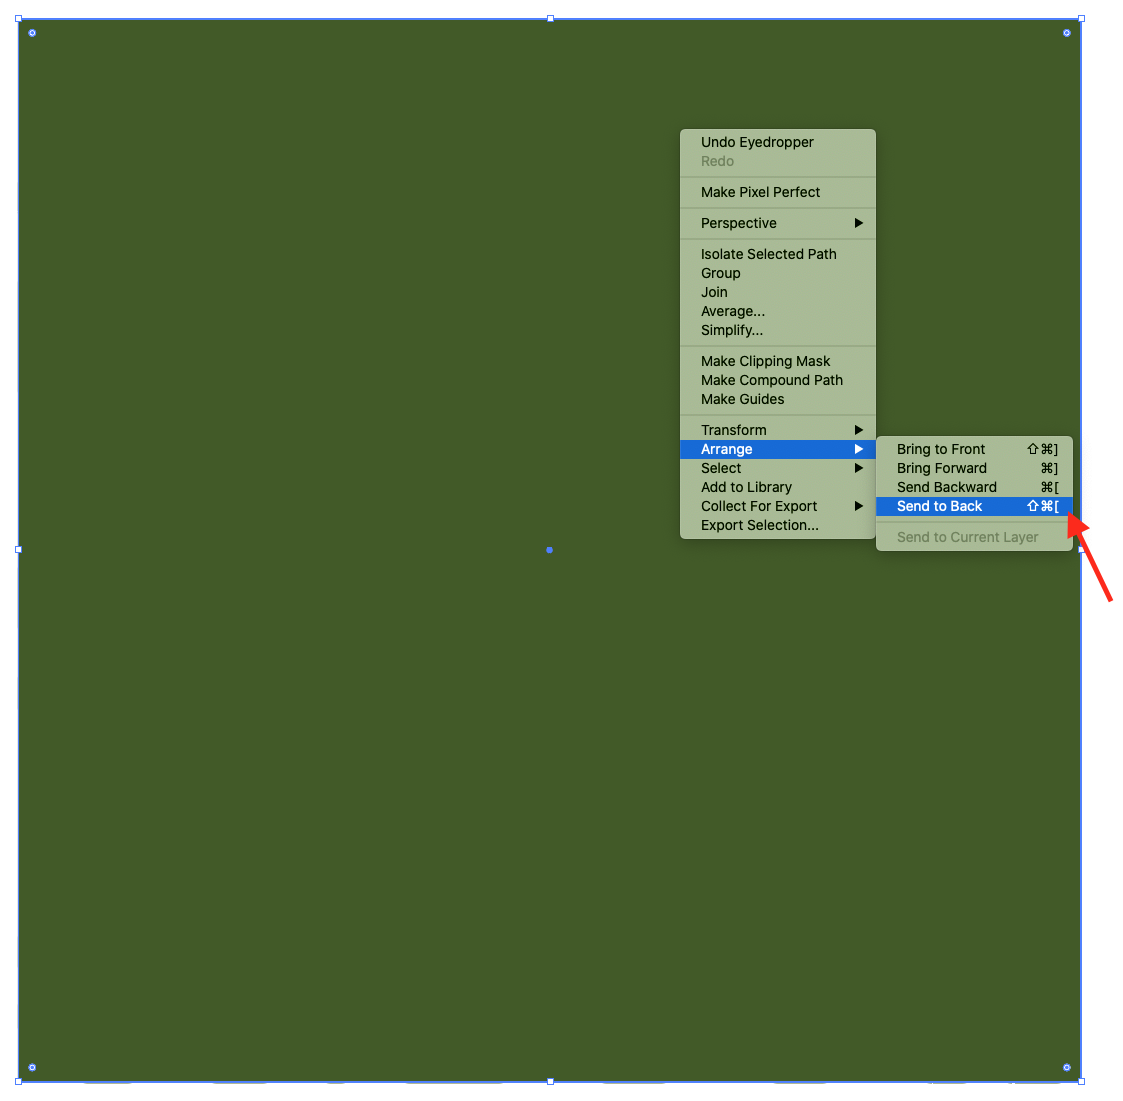
Right-click on top of it and select Arrange > Send to Back.
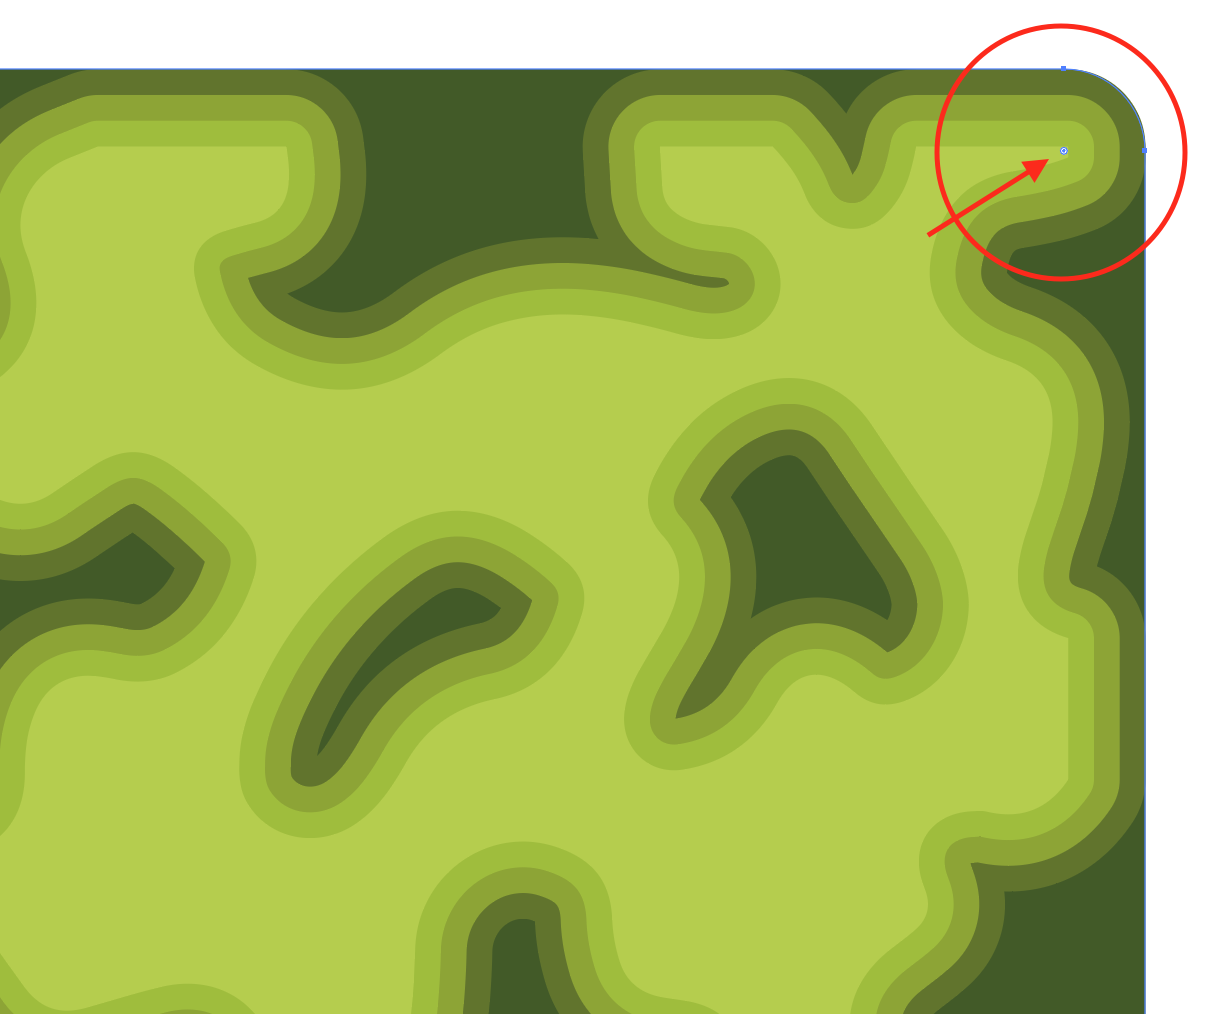
You can round the corners of your background shape by clicking on the small circles near each one and pulling down until you get the desired curvature.
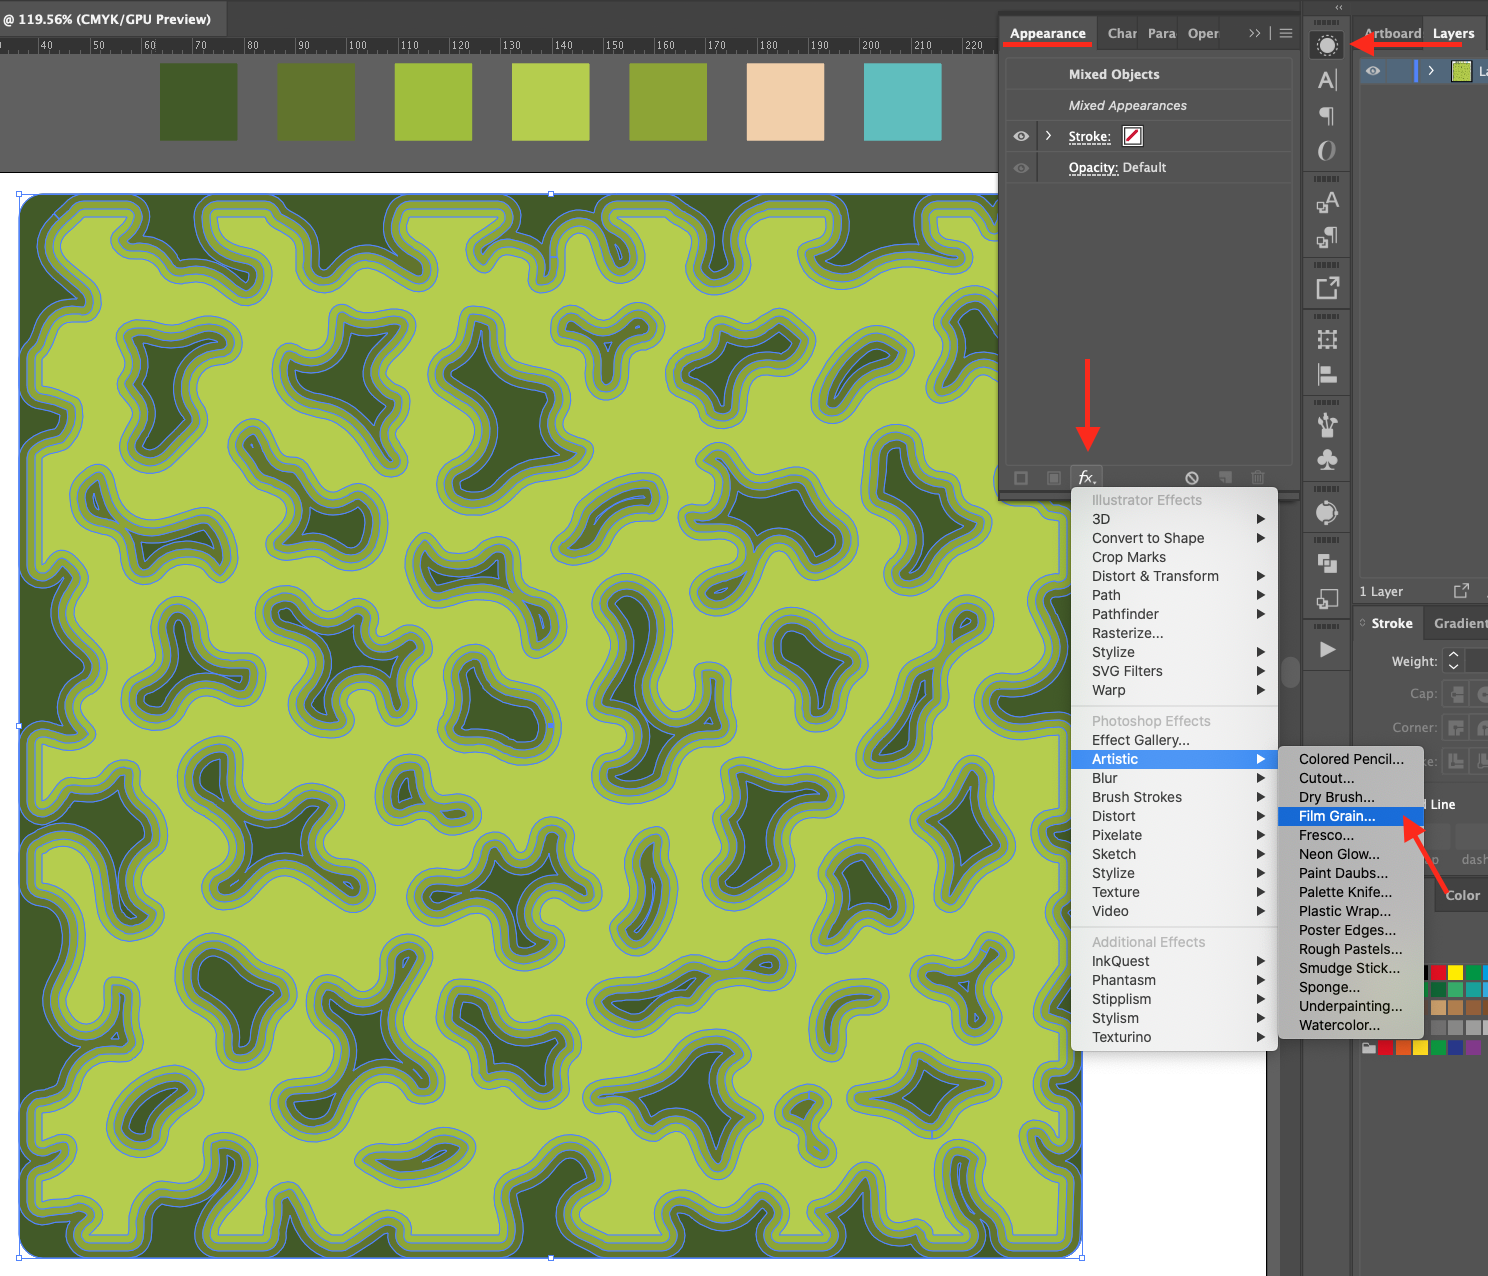
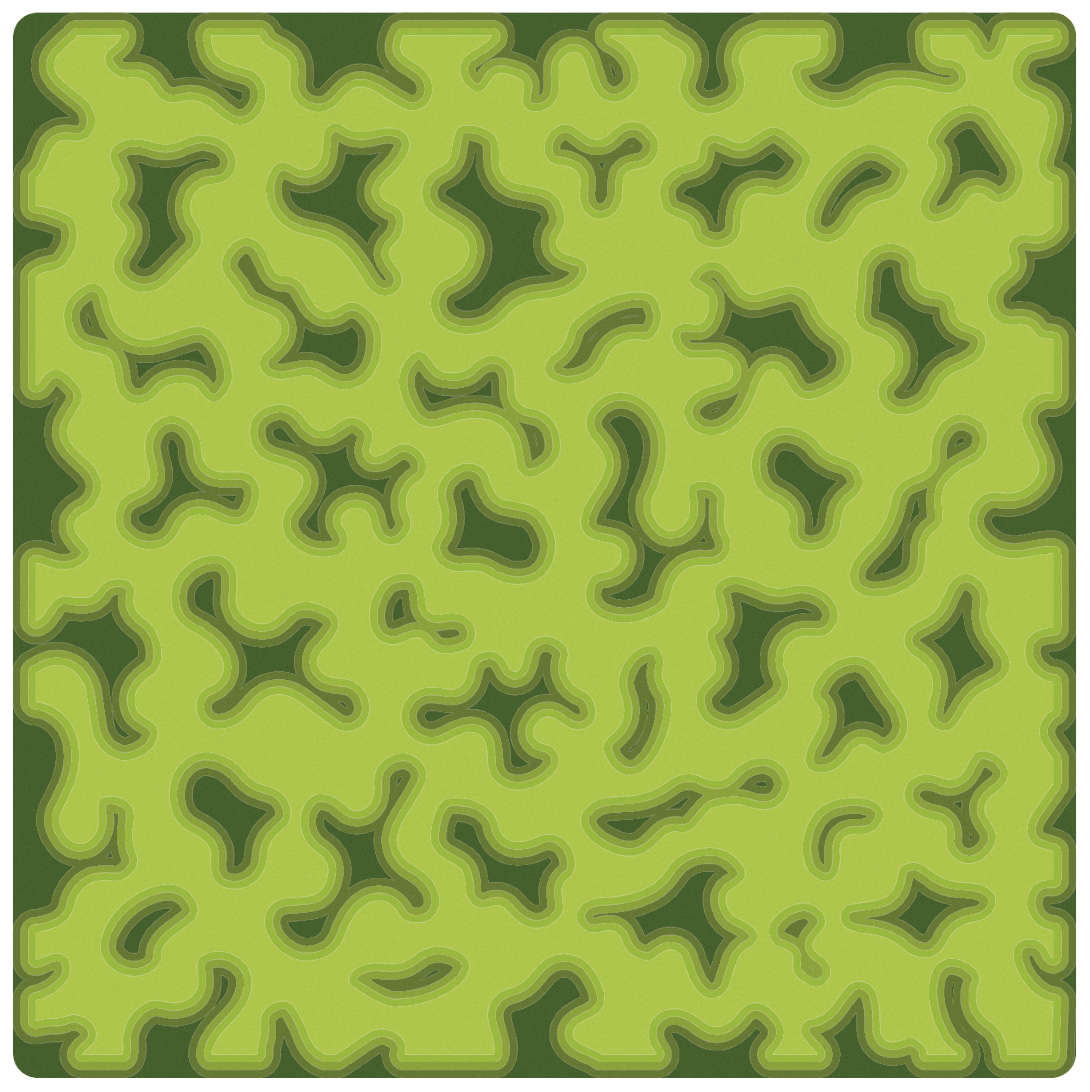
Select everything and head to the Appearance Panel (Window > Appearance). Click on the Illustrator Effects button at the bottom-left side of the panel and go to Artistic > Film Grain.
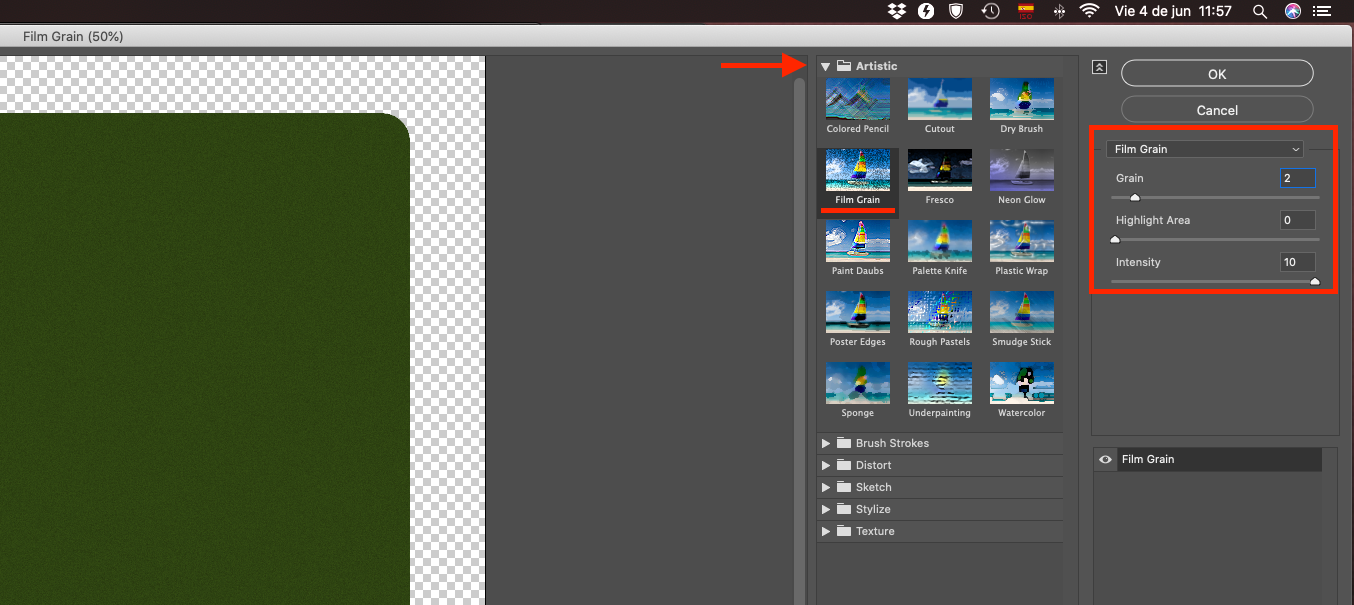
This will open the Effects Gallery. There, use the following values: Grain 2, Highlight Area 0 and Intensity 10.
You will get a grainy paper-like look on your shapes.
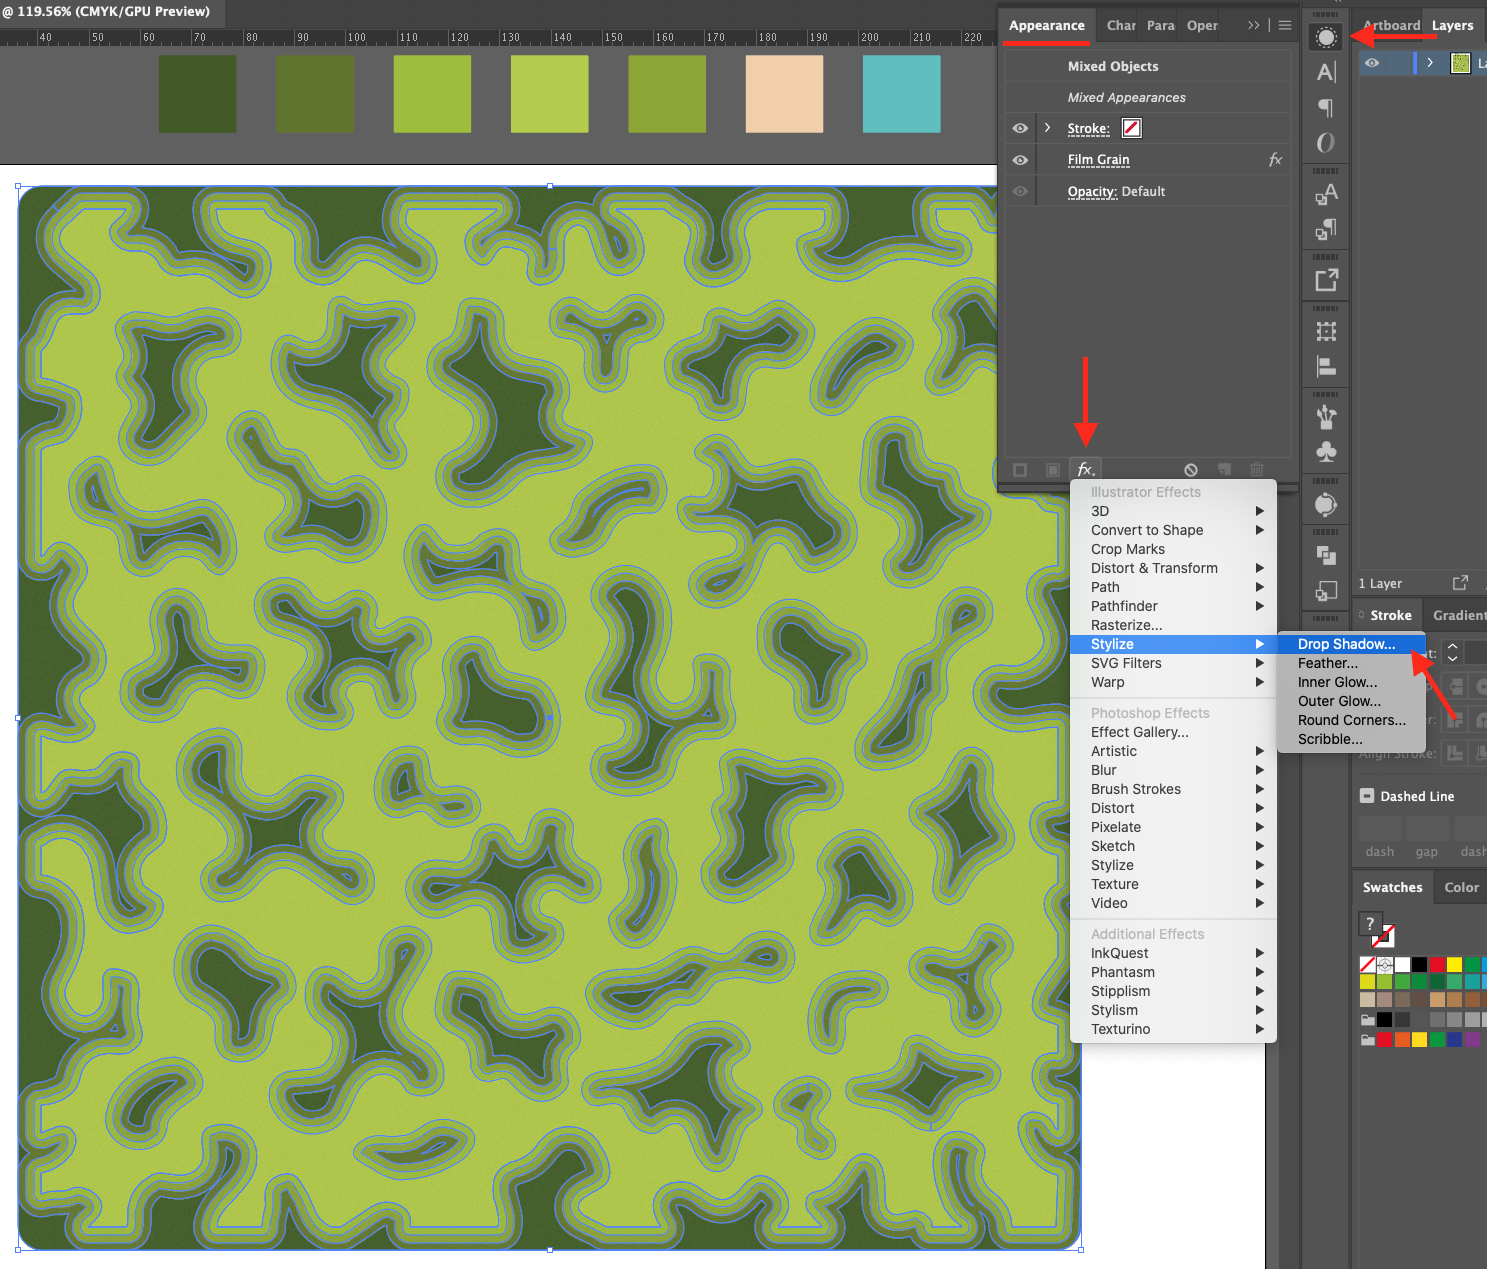
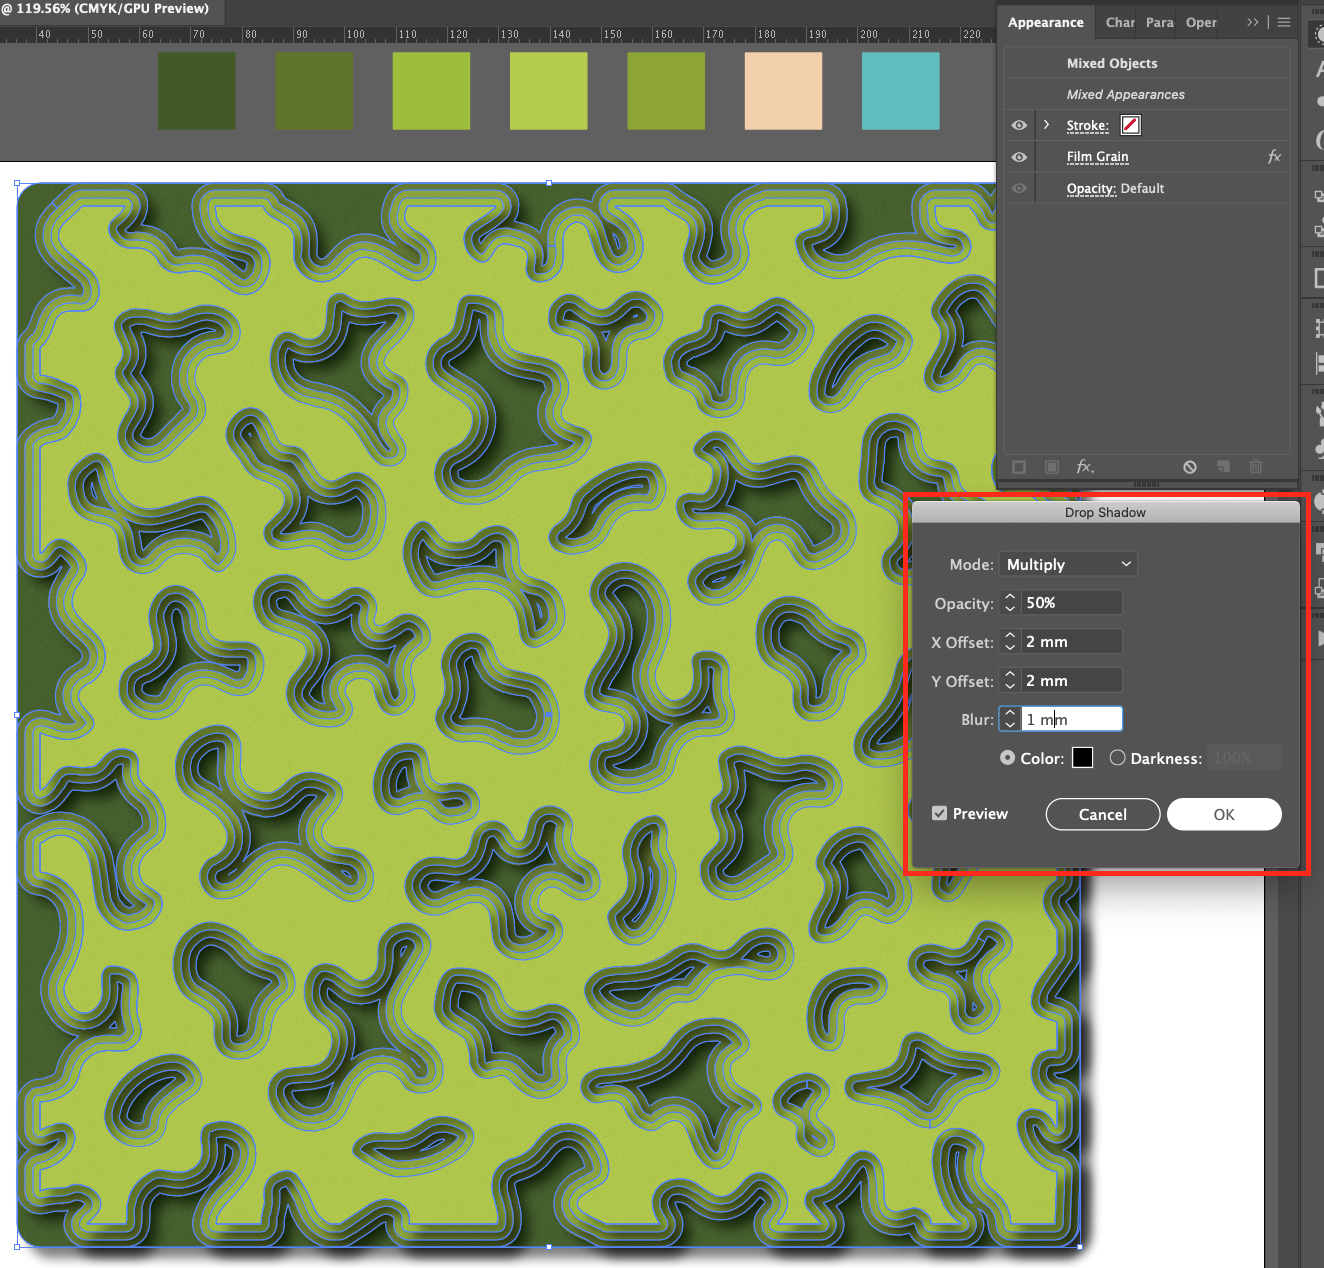
Now, select everything again, head to the Appearance Panel (Window > Appearance). Click on the Illustrator Effects button at the bottom-left side of the panel and go to Stylize > Drop Shadow. Use the following values: Mode Multiply, Opacity 50% and X and Y Offset 2 mm, Blur 1 mm.
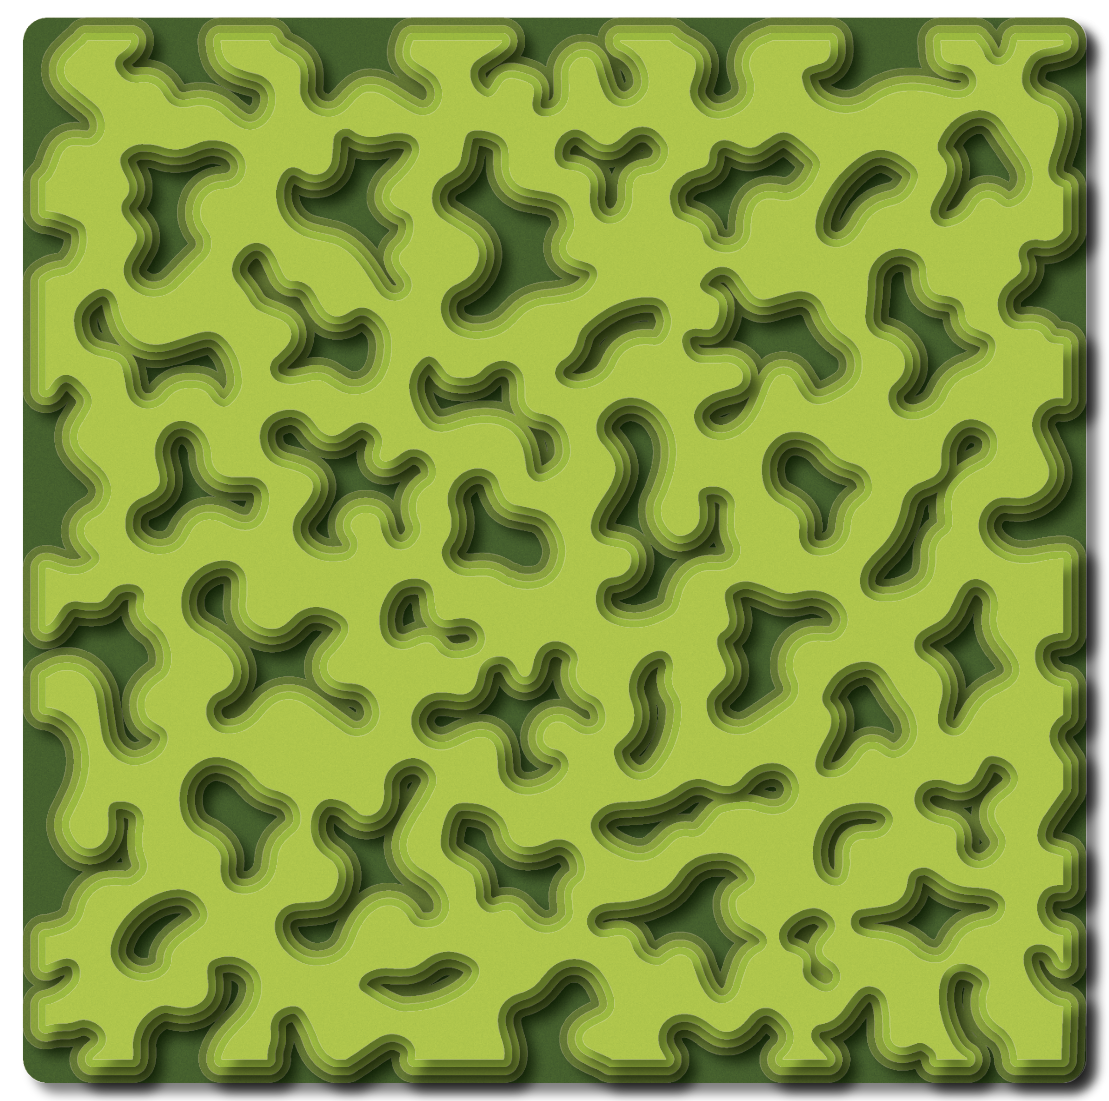
To get rid of the portions of the contour shape layers coming out from the edges, look at the measures of the top-most contour shape.
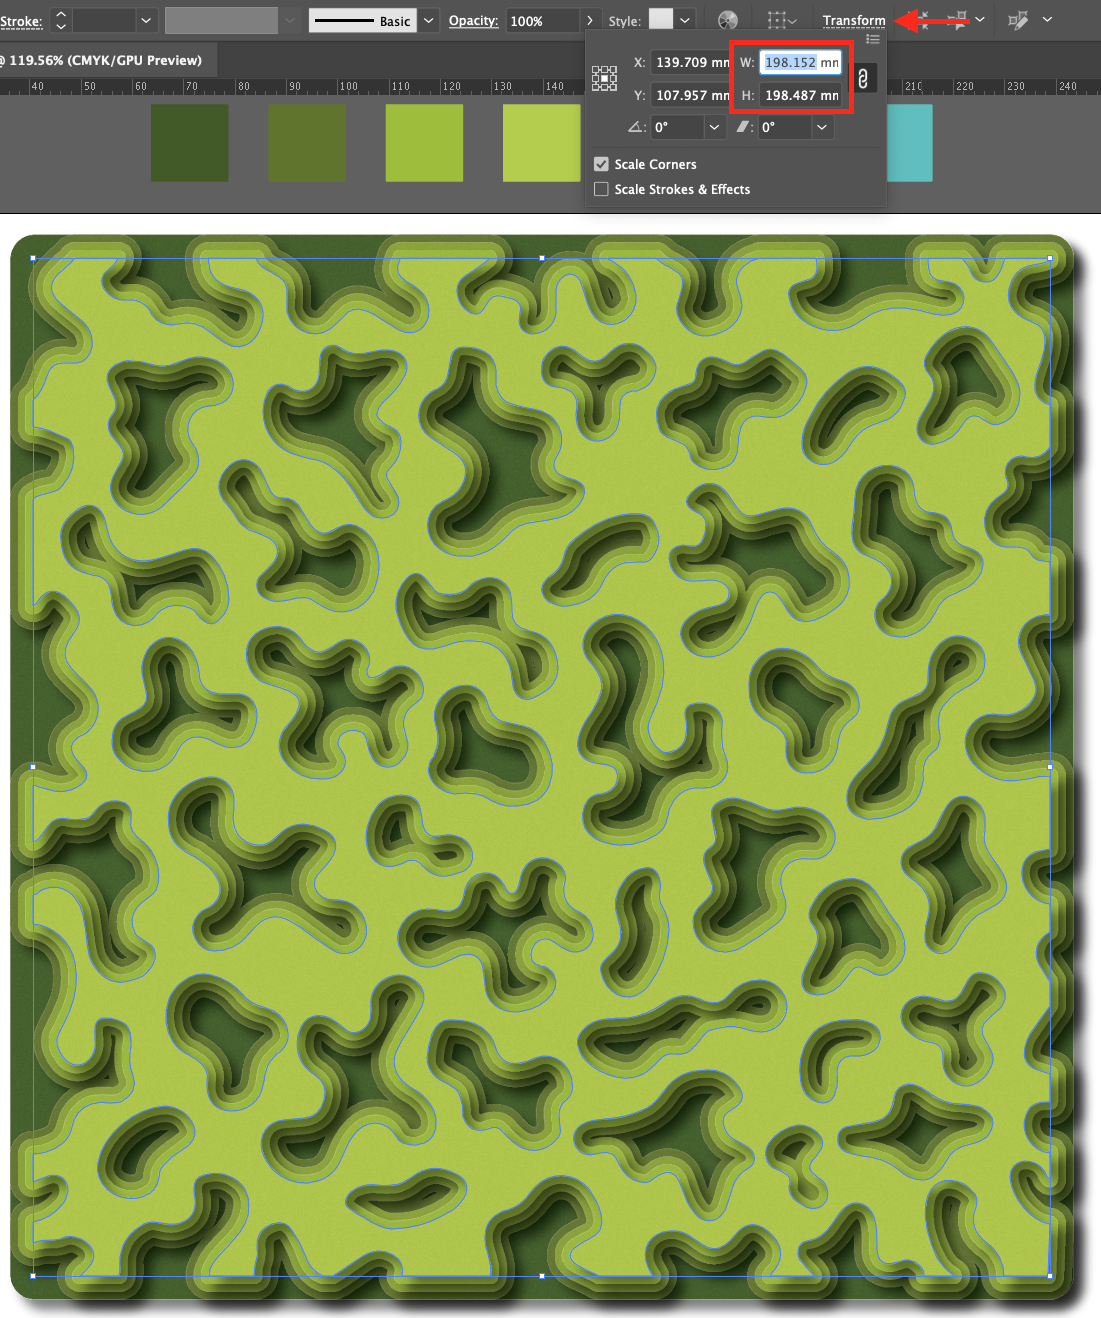
Create another square on top of everything (make it transparent - No Fill and Stroke).
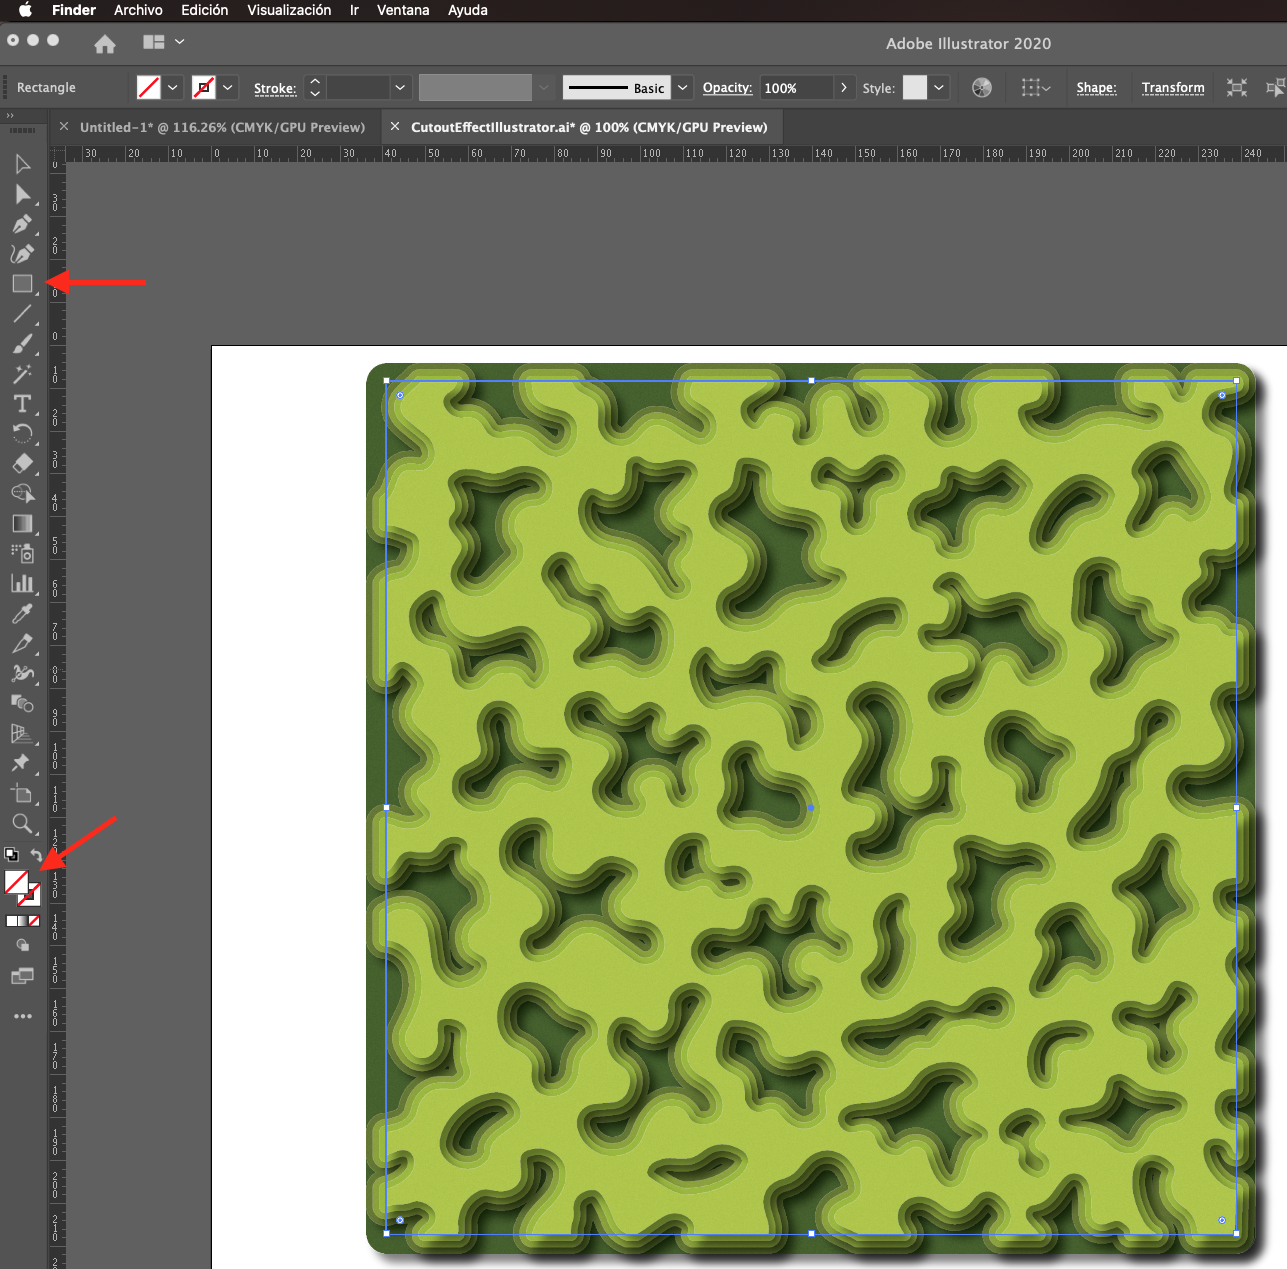
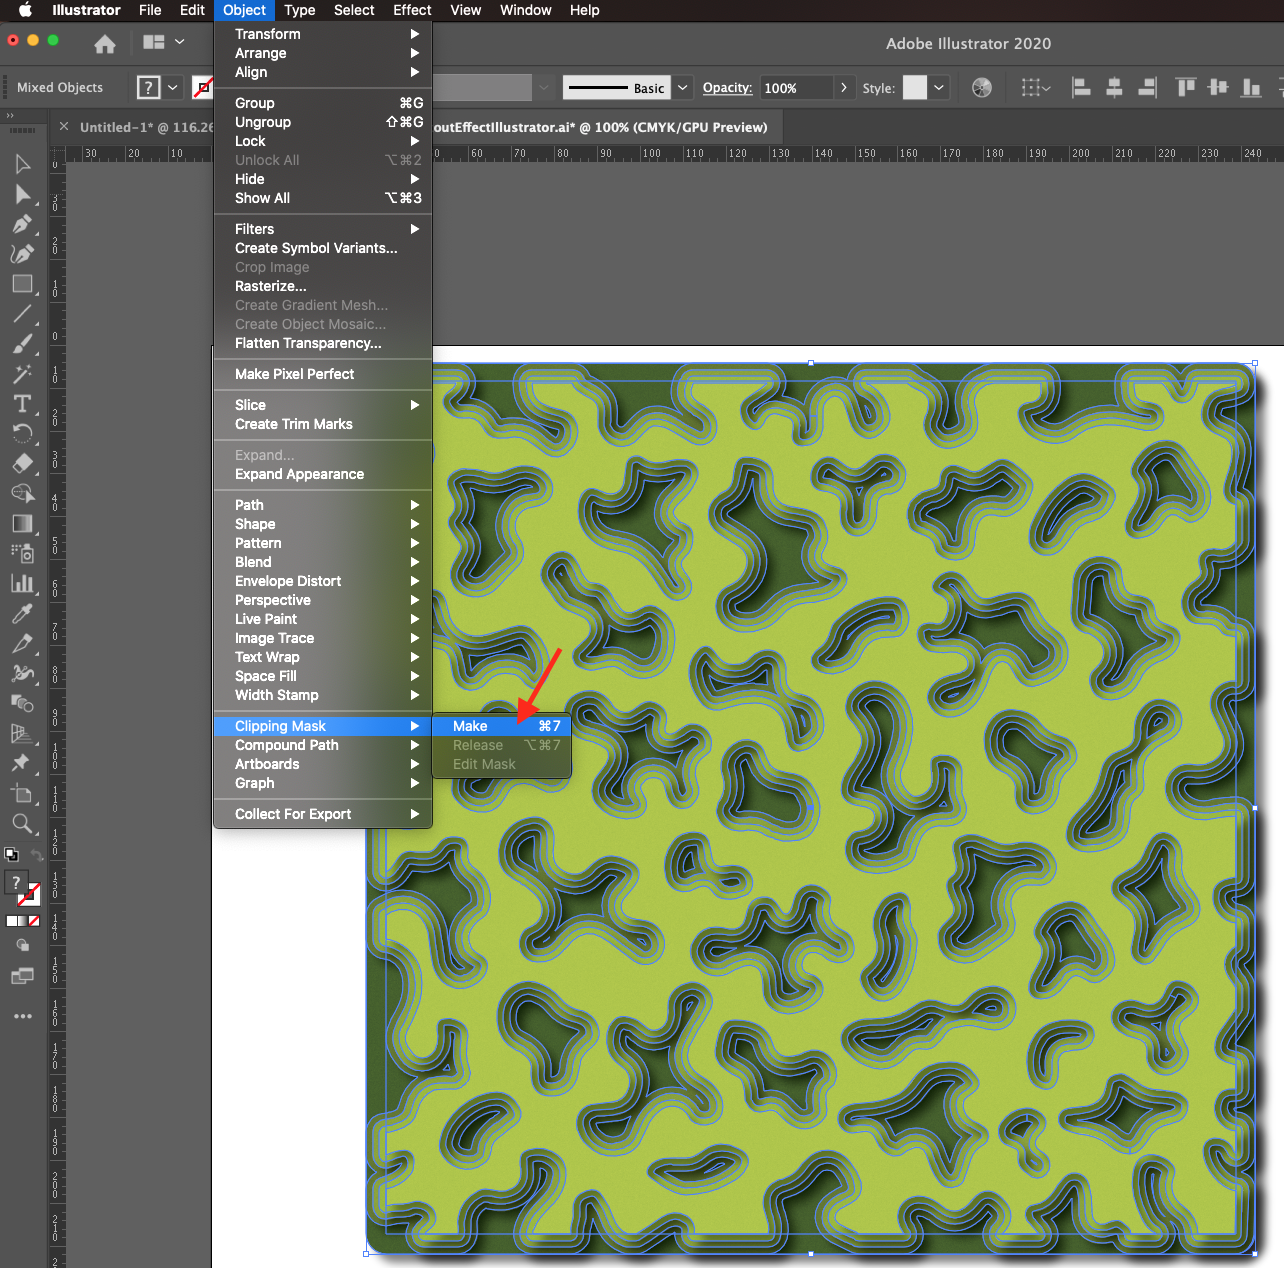
Select it together with all the contour shape layers but leave the text and text border layers out and head to Object > Clipping Mask > Make (Command/Control + 7).
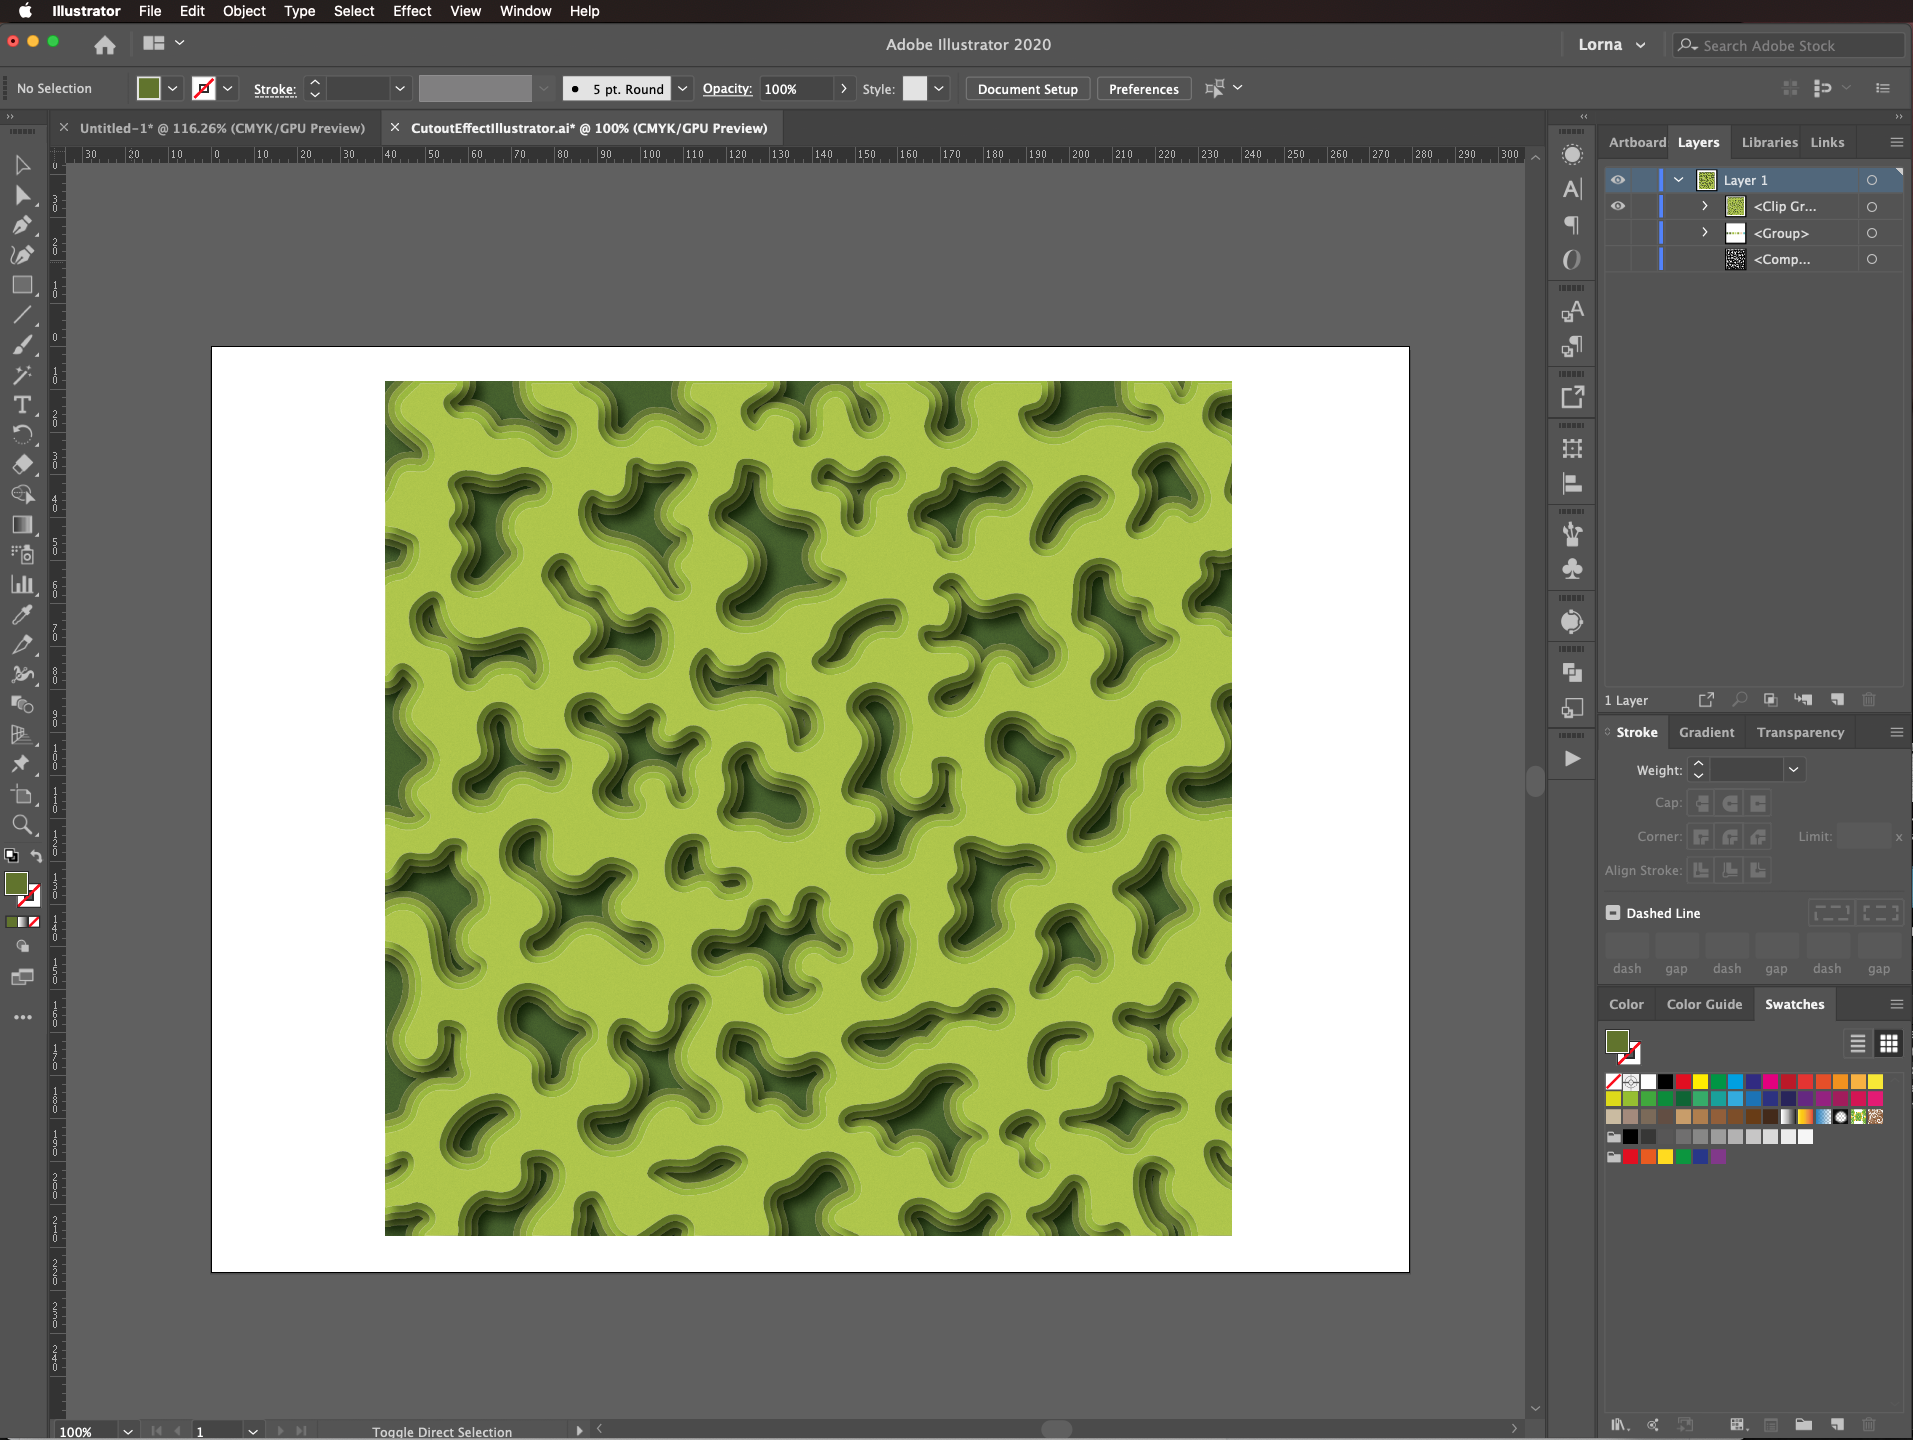
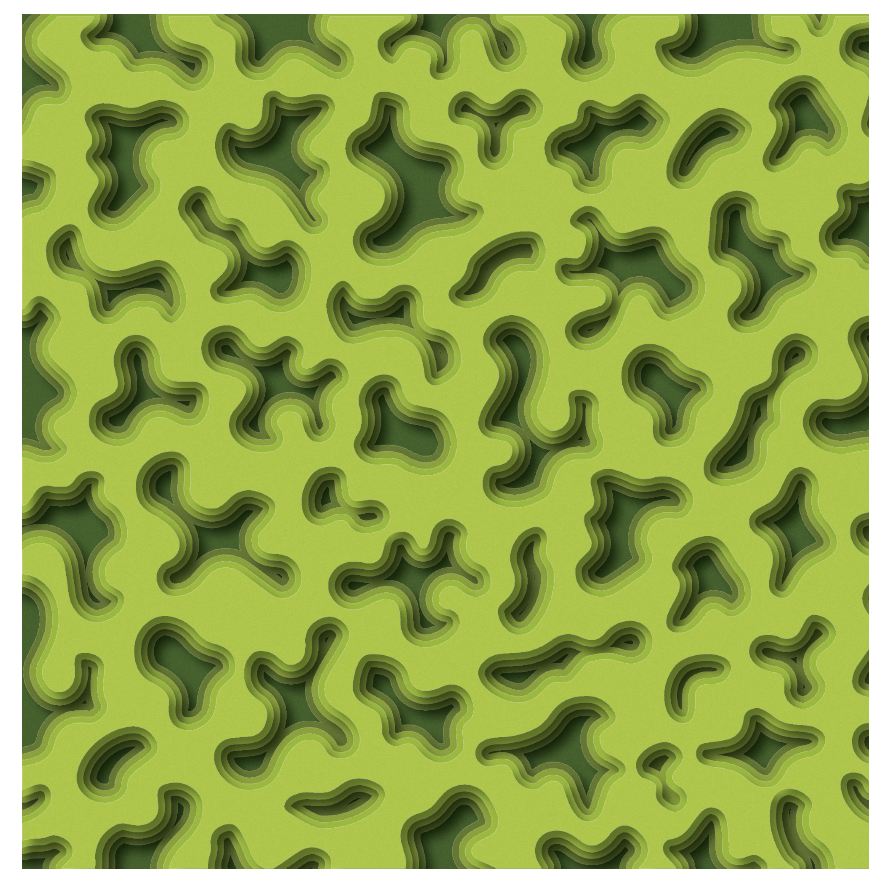
You can use other colors, reverse the order of the shapes, etc. to achieve different results.
You can check out our great variety of Illustrator Tutorials, or learn another way of achieving similar results with our other Paper Cut tutorials for Photoshop and Procreate.
First, we will need a contour shape. You can use any appropriate vector or image for this purpose. If you decide to go with an image, transform it into a vector using Image Trace or create the shapes from scratch or to trace them yourself.
Step 1: Set up your contour shape
Create a New Document and bring in the vector contour shape you want to use.
Fill it with a light color (we used white) and if your image doesn't have a background, use the Rectangle Tool (M) to create one in a contrasting color (we used black).
Select both (shapes and background) and use the Shape Builder Tool (Shift + M) while holding the Option/Alt key to punch the Shapes through the Background.
If there’s multiple shapes, just keep going until you finish them all.
Check if there are some vectors that need to be cleaned up and use the Direct Selection Tool (A) to pick them up and Delete them.
Step 2: Add your color palette
Is a good idea to set up your color palette just outside your document so you can then color your artwork using the Eyedropper Tool (I).
Step 3: Create the layers
Select your contour shape and go to Object > Path > Offset Path. Adjust the settings depending on your shape, in this case we used a 1.5 mm Offset, Round Joins and a Miter Limit of 4. Click on the Preview box so you can check how the settings apply to your shape.
You should now have two contour shapes, one larger than the other.
To get a better view, enter Outline View (Command/Control + Y) and select the larger contour shape.
Create another Offset Path with the same settings.
Keep going until you think you have enough layers.
Once you are done, head back to Preview Mode (Command/Control + Y).
]Step 4: Color the layers
Select one of your contour shapes, and using the Eyedropper Tool (I) fill it with one of the colors from your palette. Fill each contour shape with a different color.
For the Background, use the Rectangle Tool (M) to create one that covers all your contour shape and fill it with a contrasting color.
Right-click on top of it and select Arrange > Send to Back.
You can round the corners of your background shape by clicking on the small circles near each one and pulling down until you get the desired curvature.
Step 5: Apply a paper-like texture
Select everything and head to the Appearance Panel (Window > Appearance). Click on the Illustrator Effects button at the bottom-left side of the panel and go to Artistic > Film Grain.
This will open the Effects Gallery. There, use the following values: Grain 2, Highlight Area 0 and Intensity 10.
You will get a grainy paper-like look on your shapes.
Step 6: Add the shadows
Now, select everything again, head to the Appearance Panel (Window > Appearance). Click on the Illustrator Effects button at the bottom-left side of the panel and go to Stylize > Drop Shadow. Use the following values: Mode Multiply, Opacity 50% and X and Y Offset 2 mm, Blur 1 mm.
Step 7: Remove unwanted portions
To get rid of the portions of the contour shape layers coming out from the edges, look at the measures of the top-most contour shape.
Create another square on top of everything (make it transparent - No Fill and Stroke).
Select it together with all the contour shape layers but leave the text and text border layers out and head to Object > Clipping Mask > Make (Command/Control + 7).
You can use other colors, reverse the order of the shapes, etc. to achieve different results.
You can check out our great variety of Illustrator Tutorials, or learn another way of achieving similar results with our other Paper Cut tutorials for Photoshop and Procreate.
Related Tutorials
Affinity Tutorials
How to Make a Paper Cut Effect in Affinity Designer
Procreate Tutorials
How to Make a Paper Cutout Effect in Procreate
In this tutorial you will discover how to create a Paper Cut Out Effect using Procreate.
Illustrator Tutorials
Torn Paper Effect in Illustrator
In this tutorial we show you how to create a torn paper effect in Illustrator.
Illustrator Tutorials
How to Make Die Cut Stickers in Illustrator
In 3 steps, learn how to make die cut stickers with the white border in Adobe Illustrator.
Photoshop Tutorials
Paper Cut Out Effect in Photoshop
Illustrator Tutorials
How to Make a Snowflake Laser Cut Ornament in Adobe Illustrator
Create a Decorative Laser Cut Ornament!