
Paper Cut Out Effect in Photoshop
For this tutorial, we are using the font “Reybro” from Font Bundles and some mandala vectors.
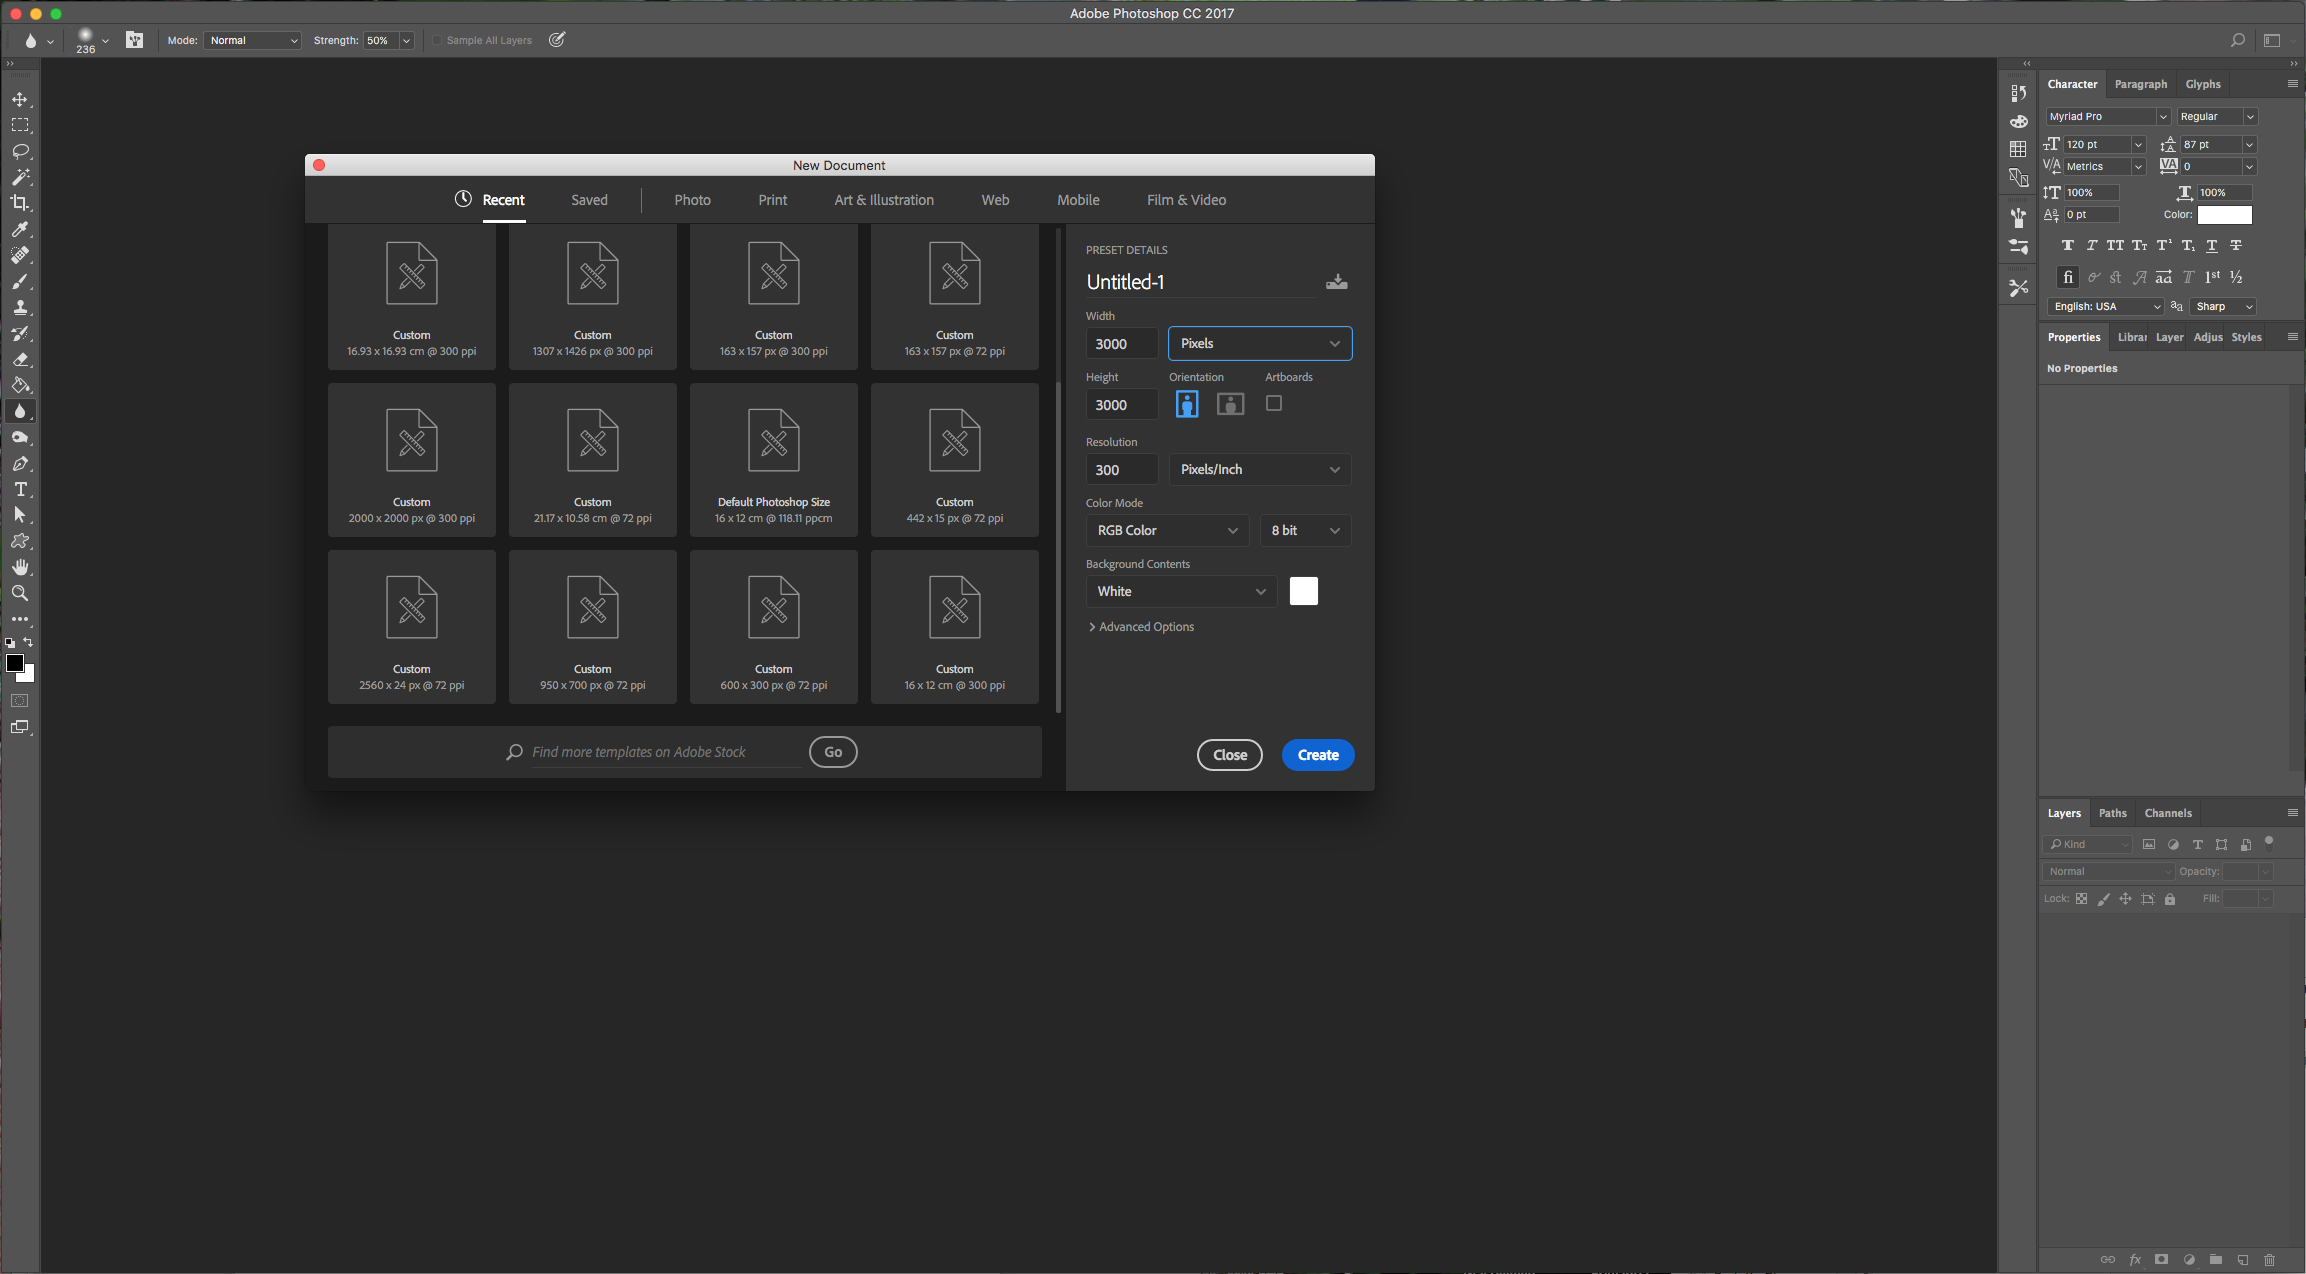
1 – In Photoshop create a “New Document” and make it 3000 x 3000 pixels, 300 dpi, RGB Mode and use White as “Background” Color.
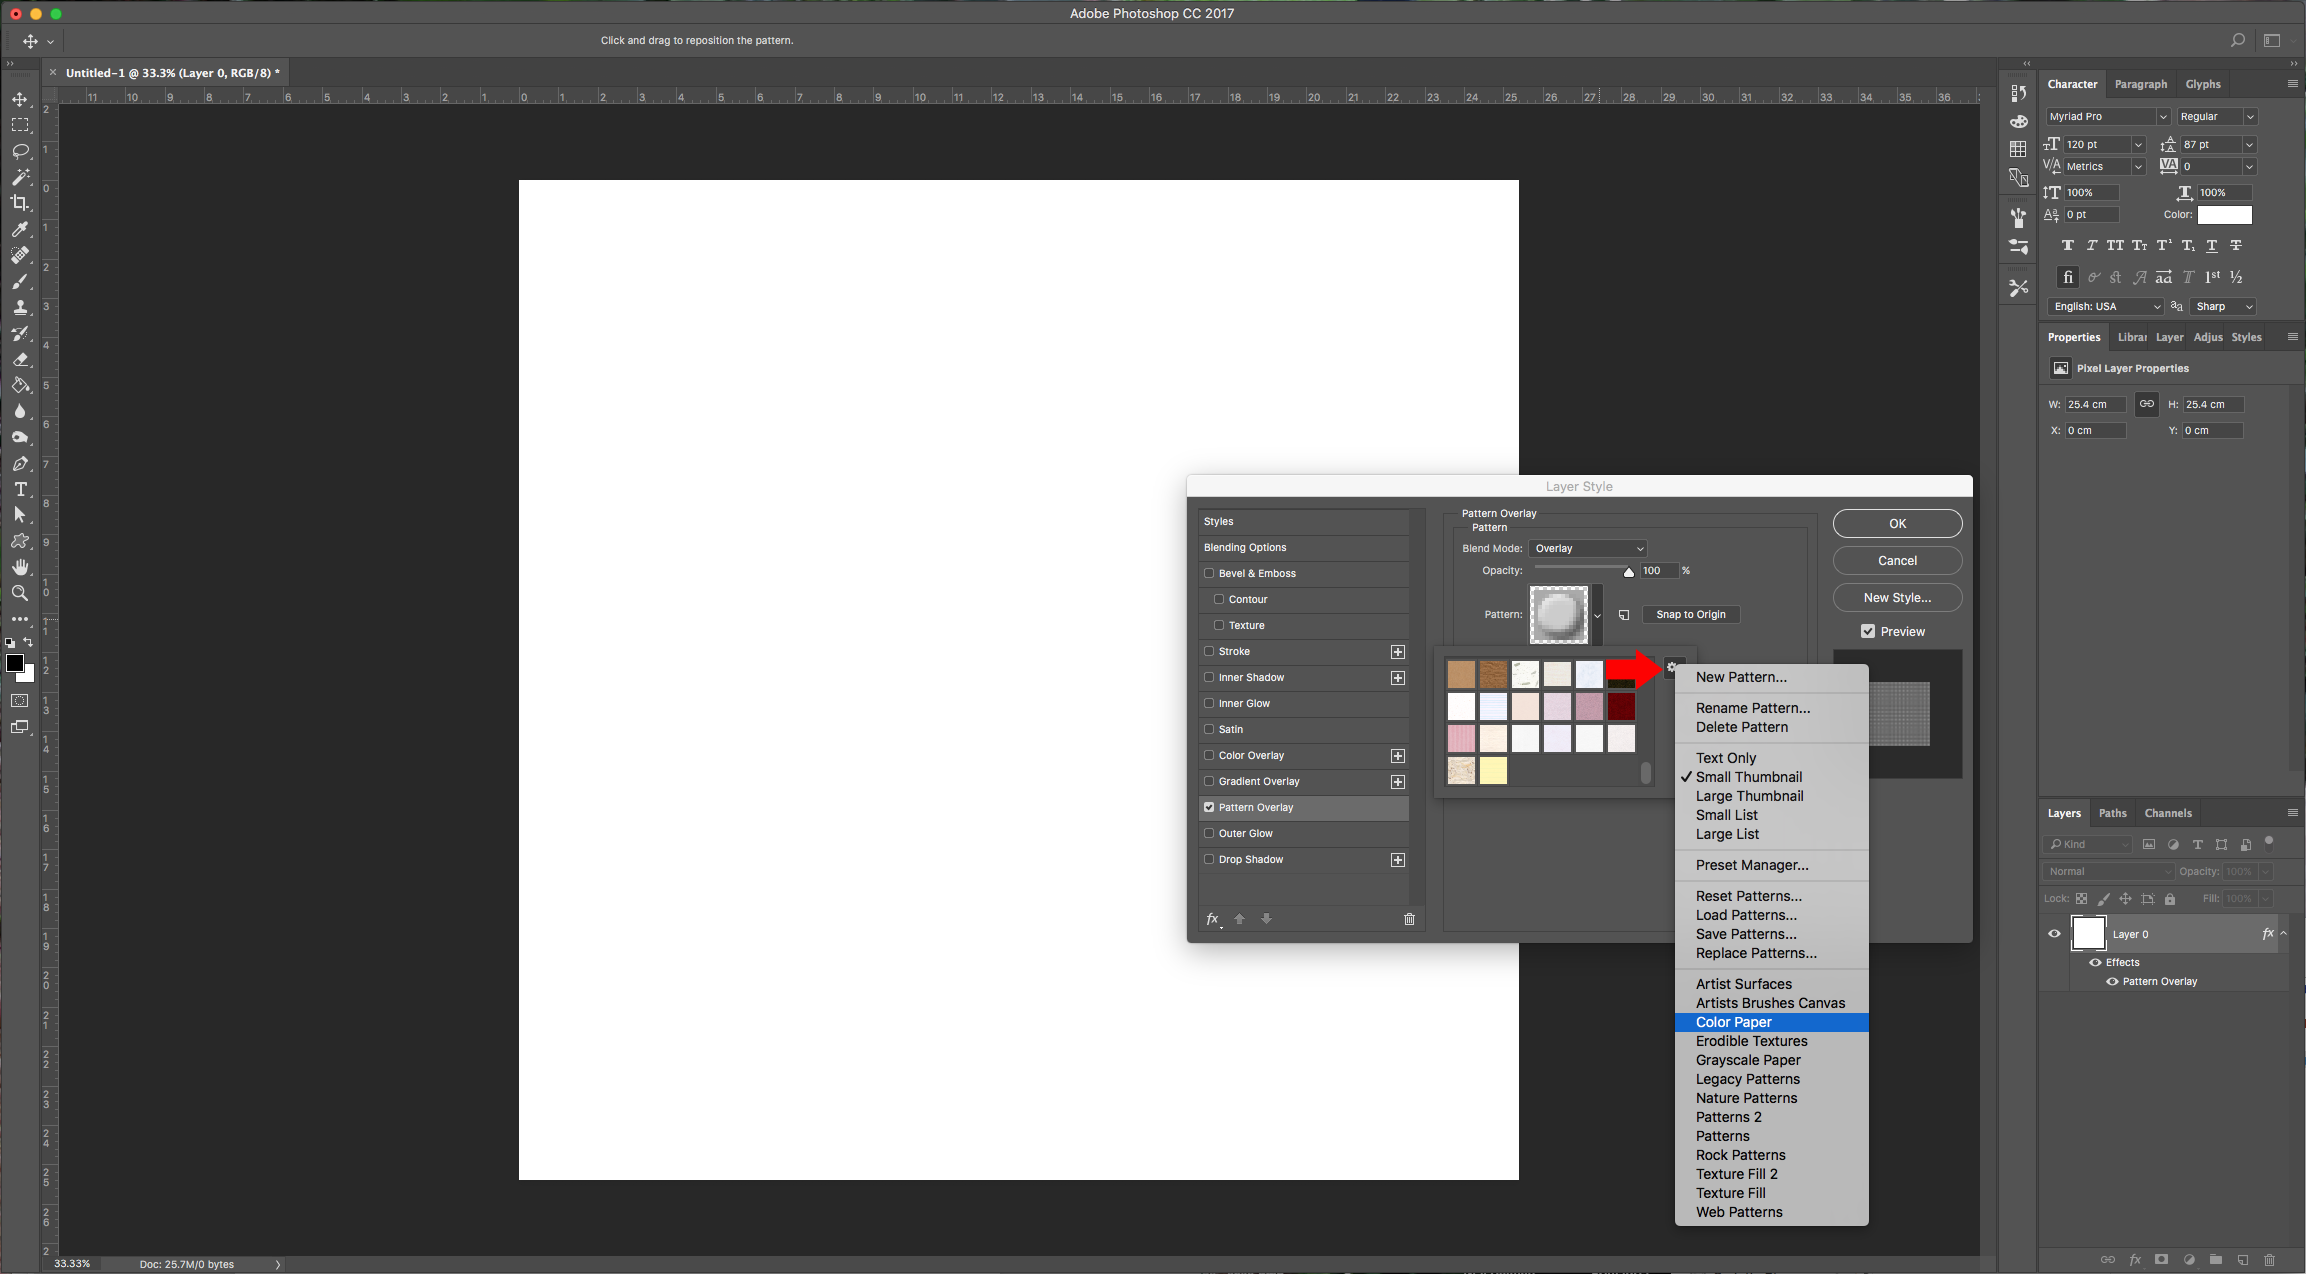
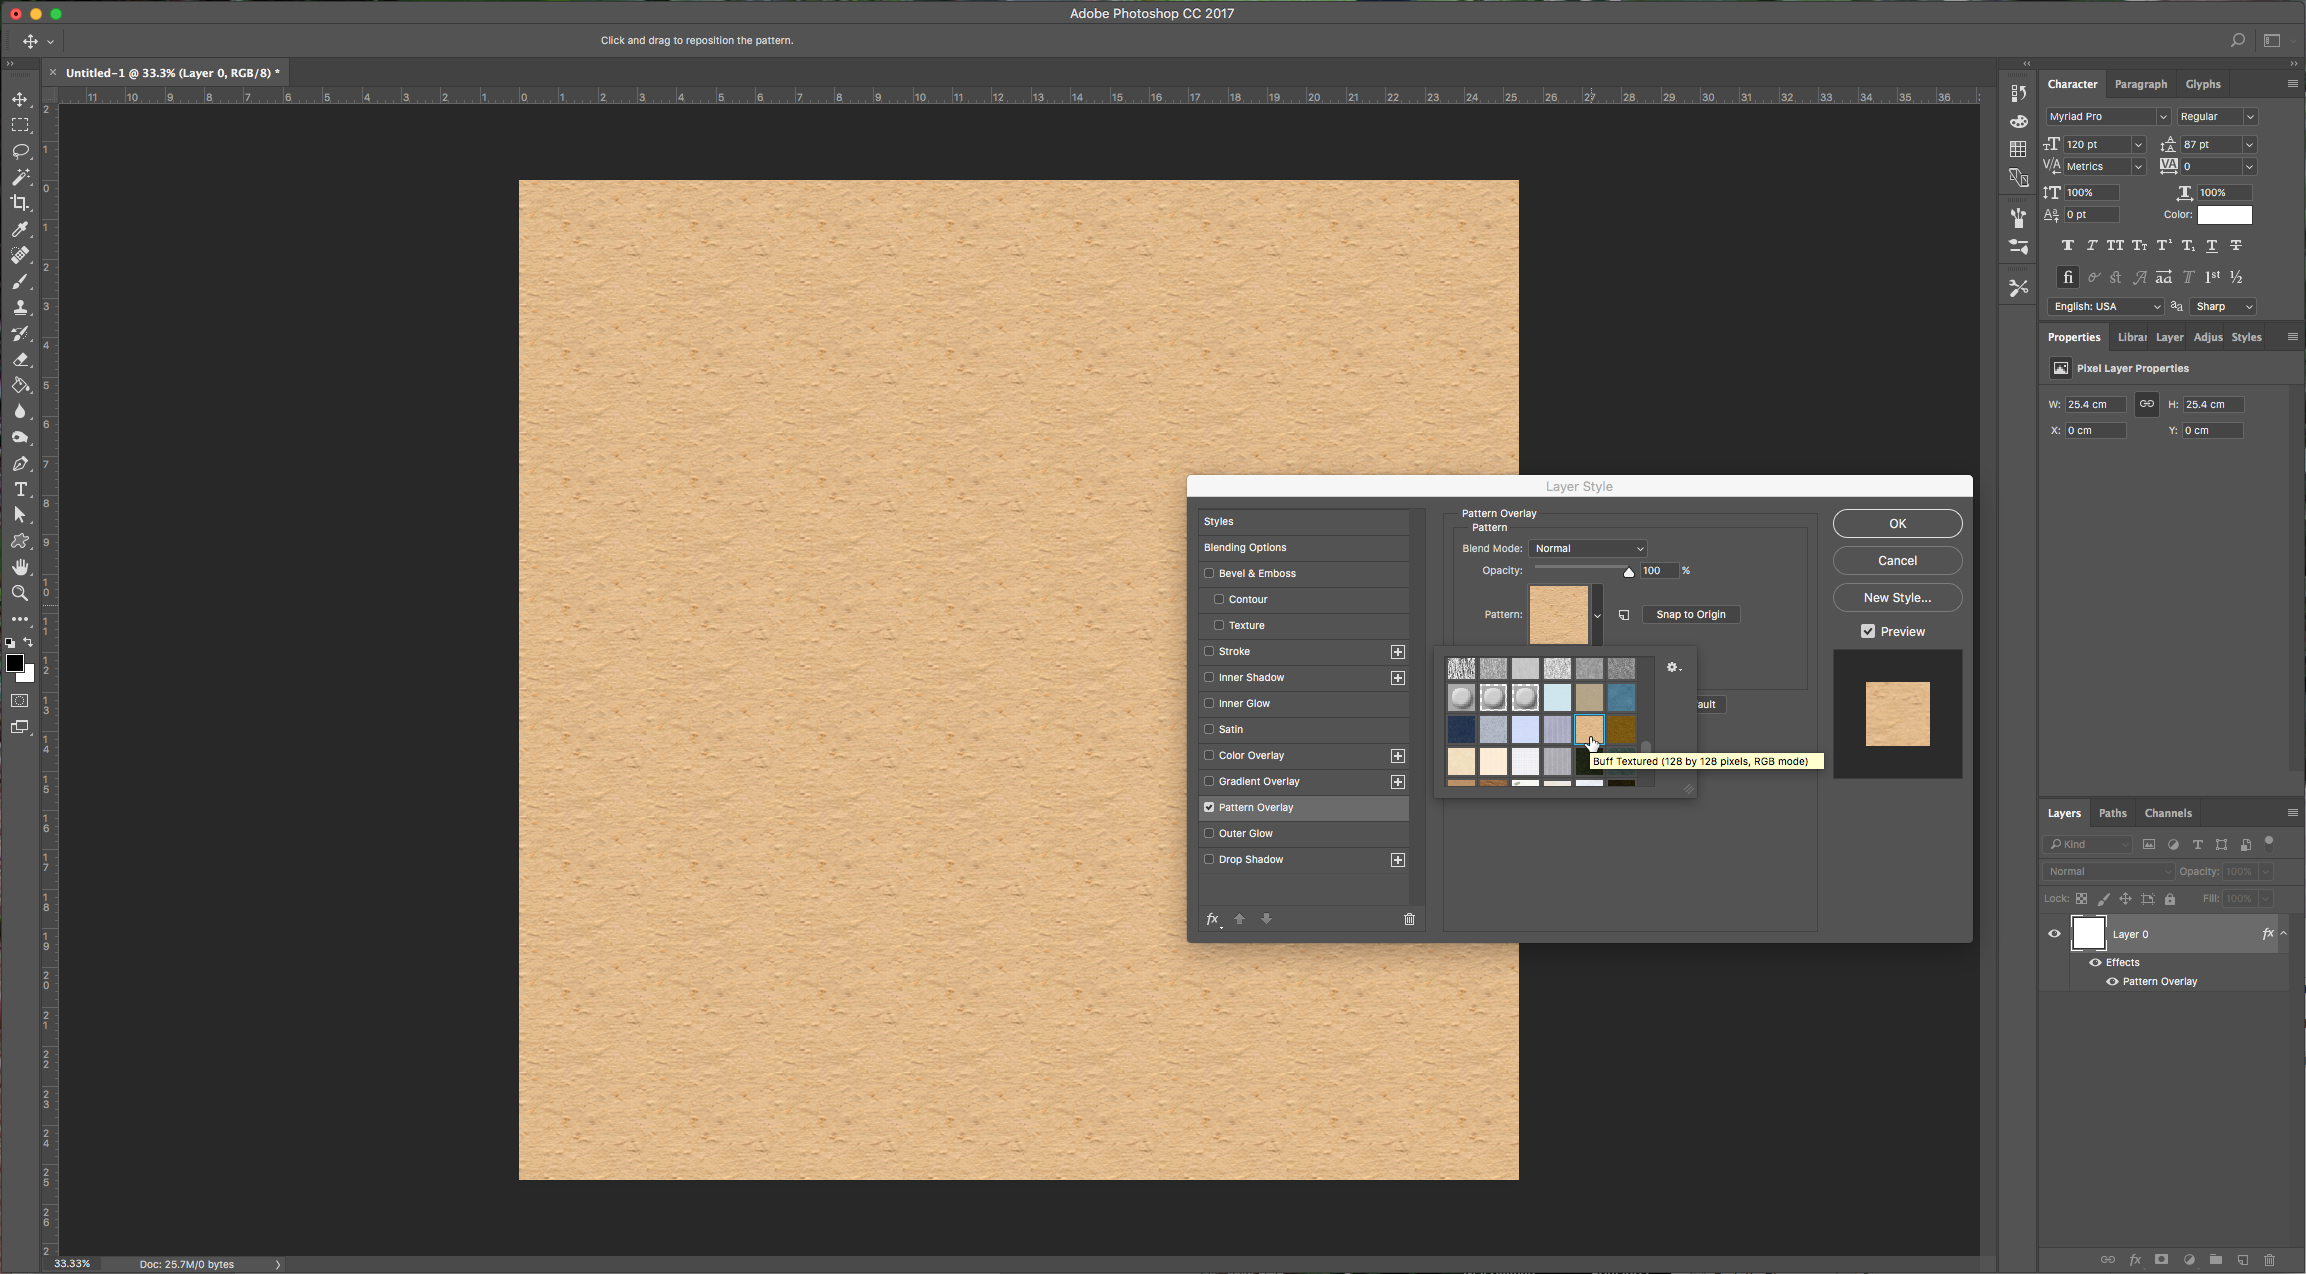
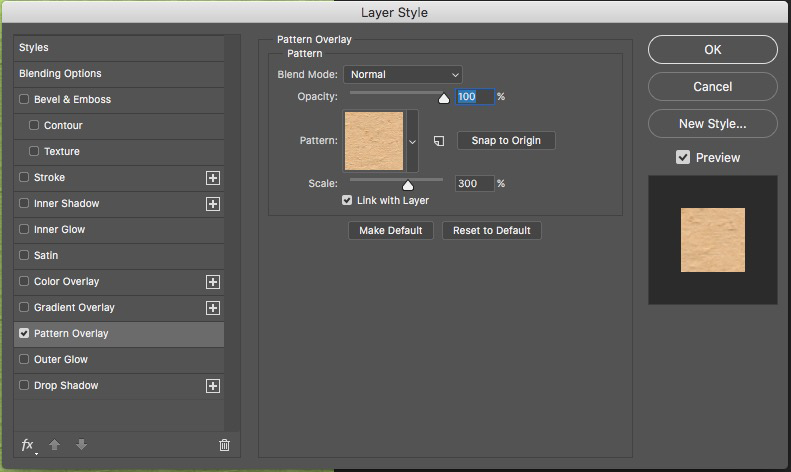
2 – Double-click on the “Background” to make it editable and then double-click on the layer again to invoke “Blending Options”. Apply a “Pattern Overlay” with the following values.
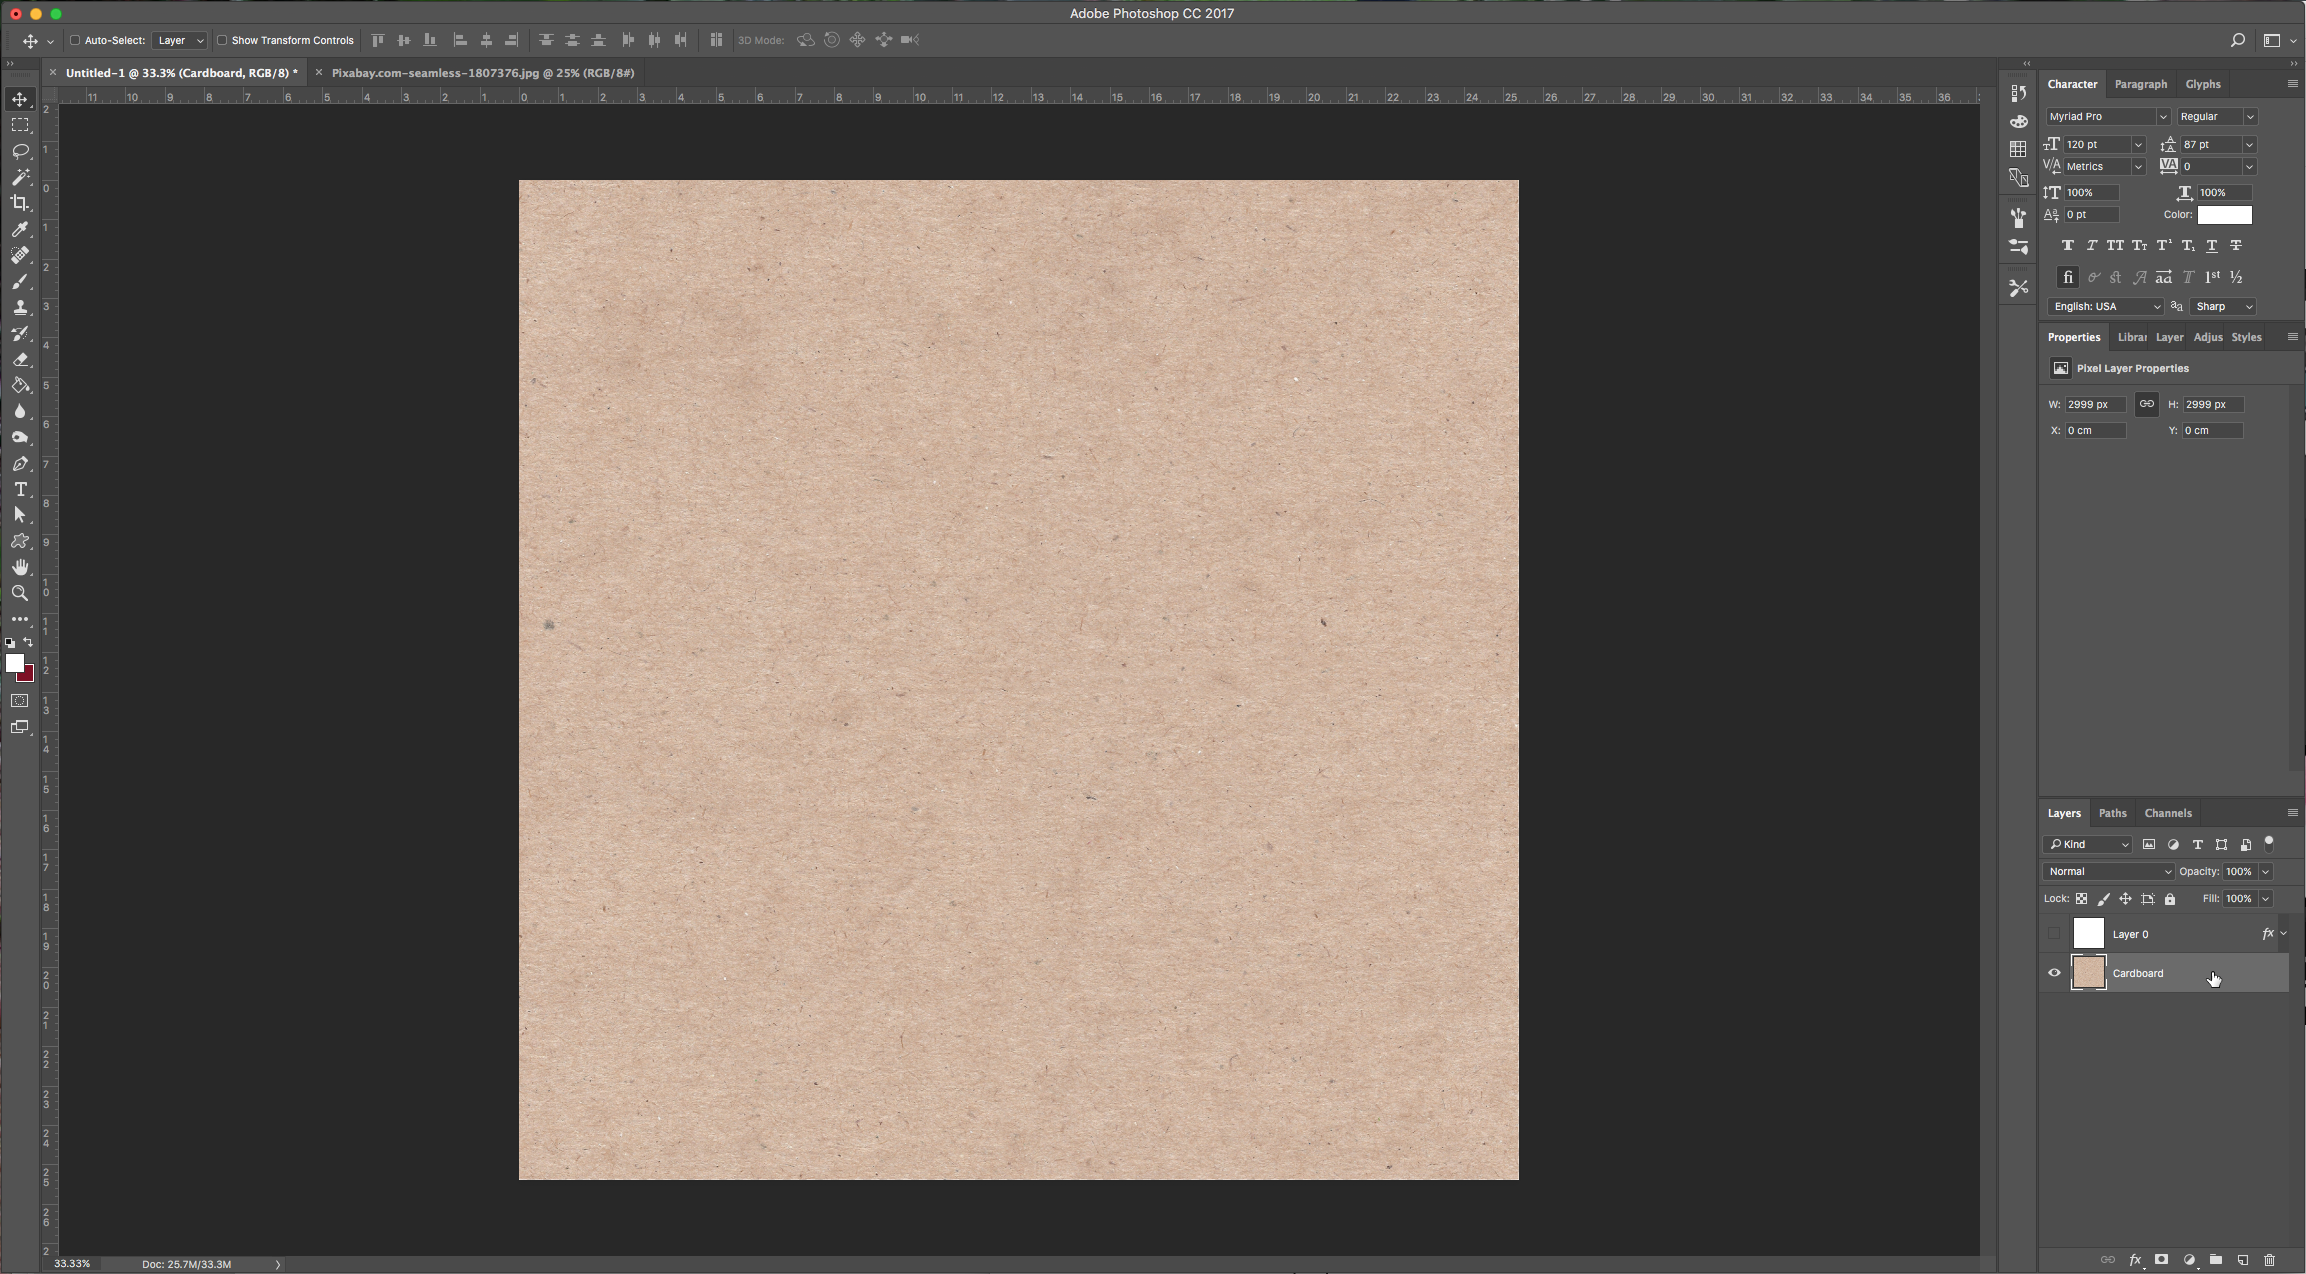
3 – Bring your cardboard background into your document, size it properly and send it to the bottom of the layers.
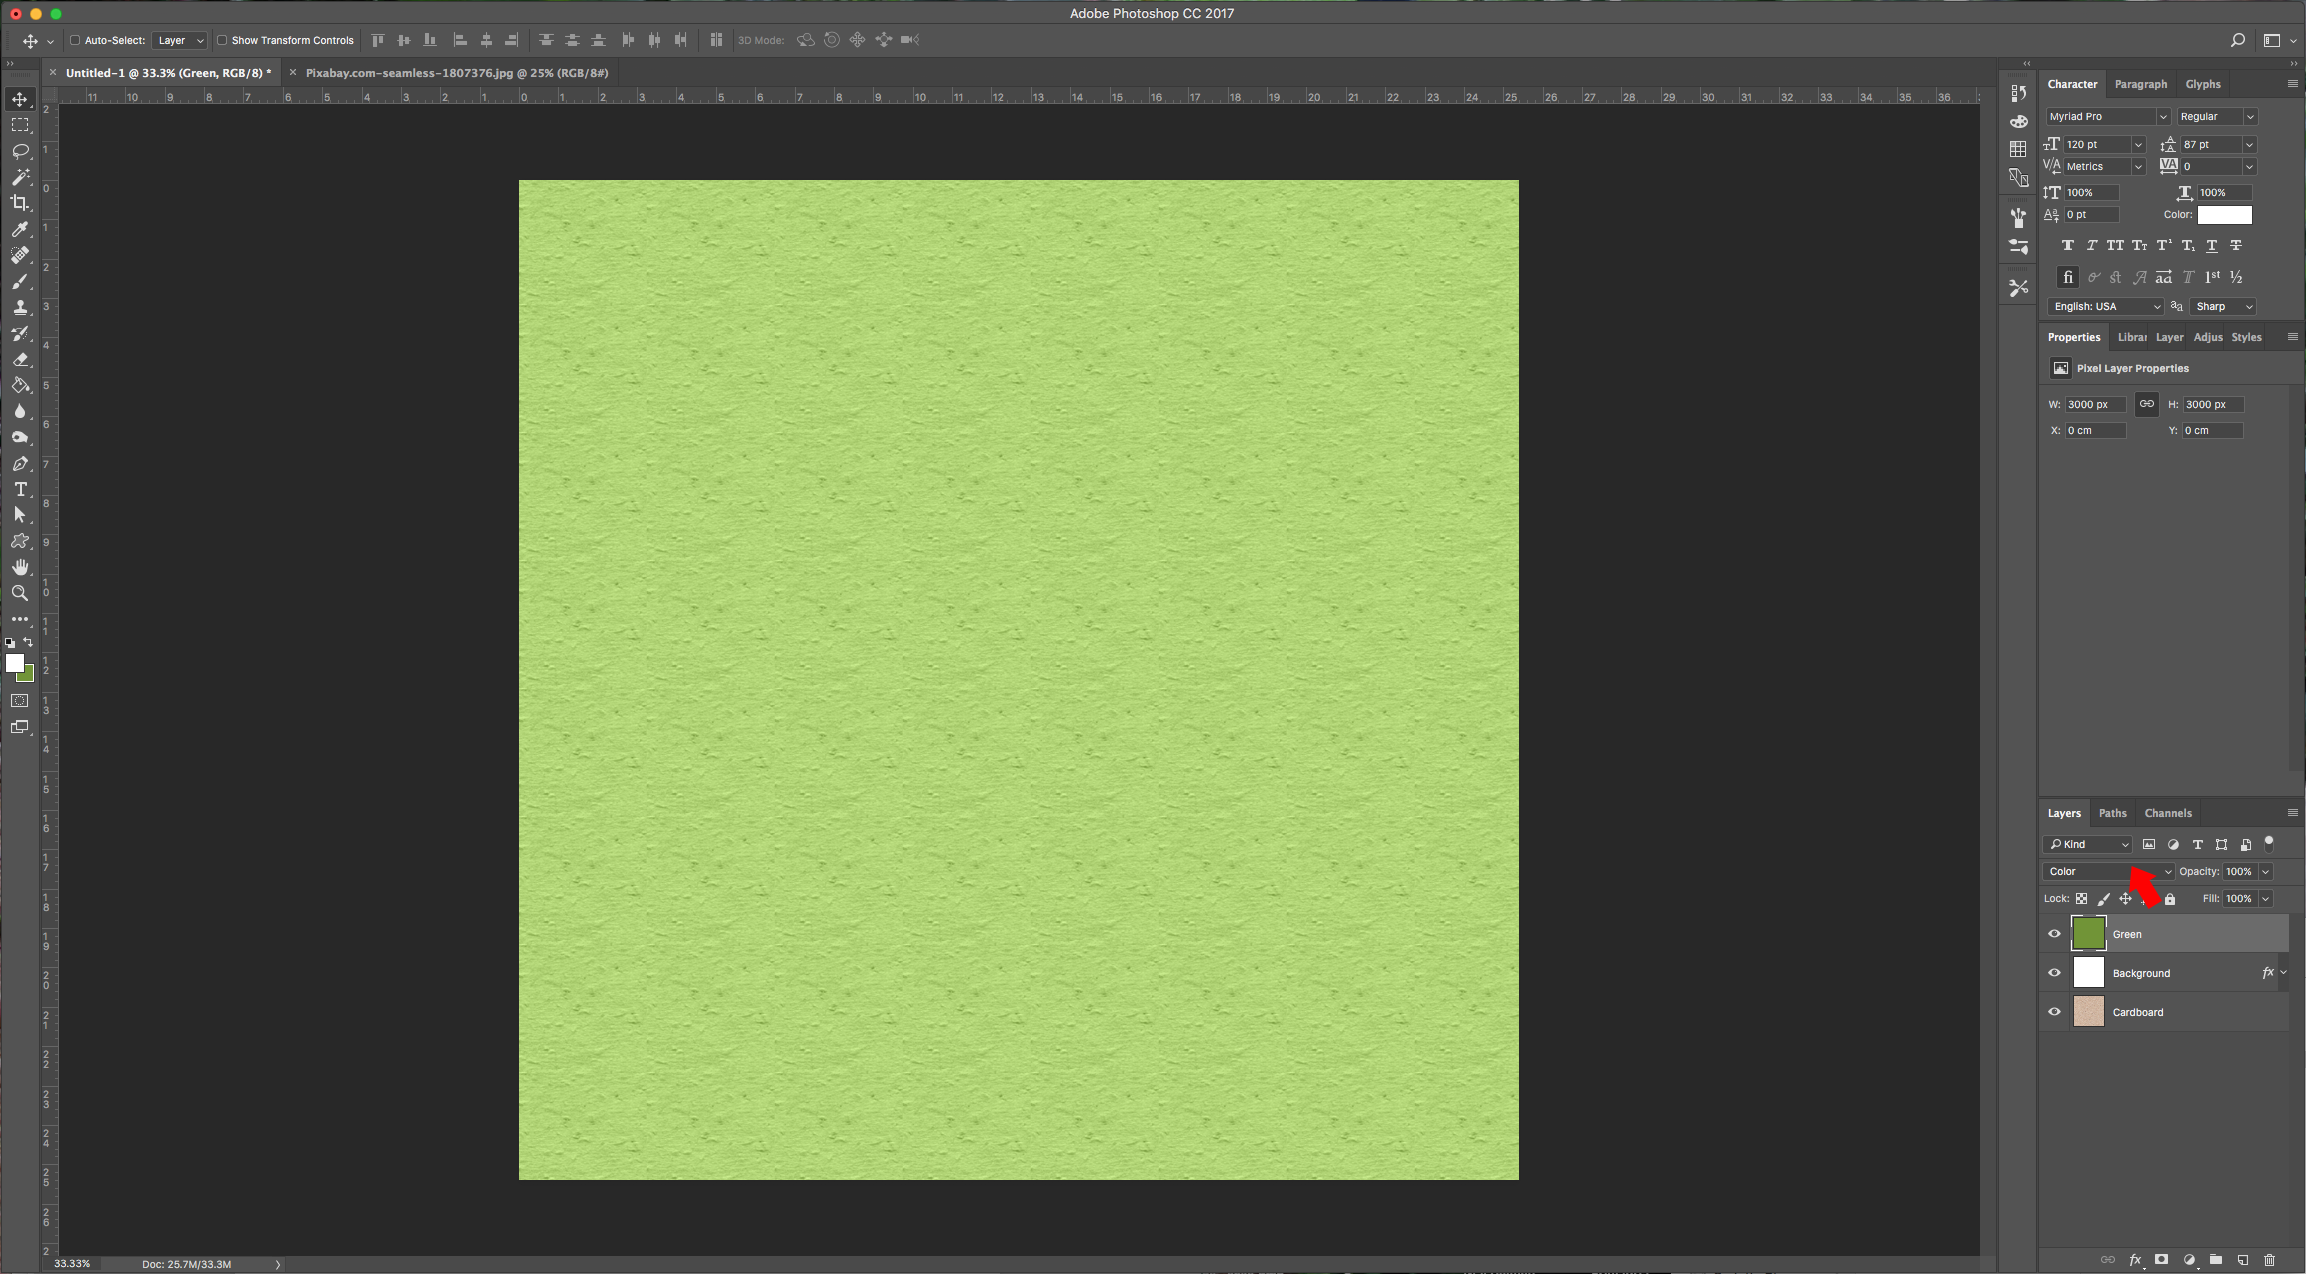
4 – Create a “New Layer” (Shift + Command/Control + N) and fill it with the color of your choice (we used #709530) and change the “Blending Mode” to “Color”. Consider that this will result in a lighter shade so take it to account.
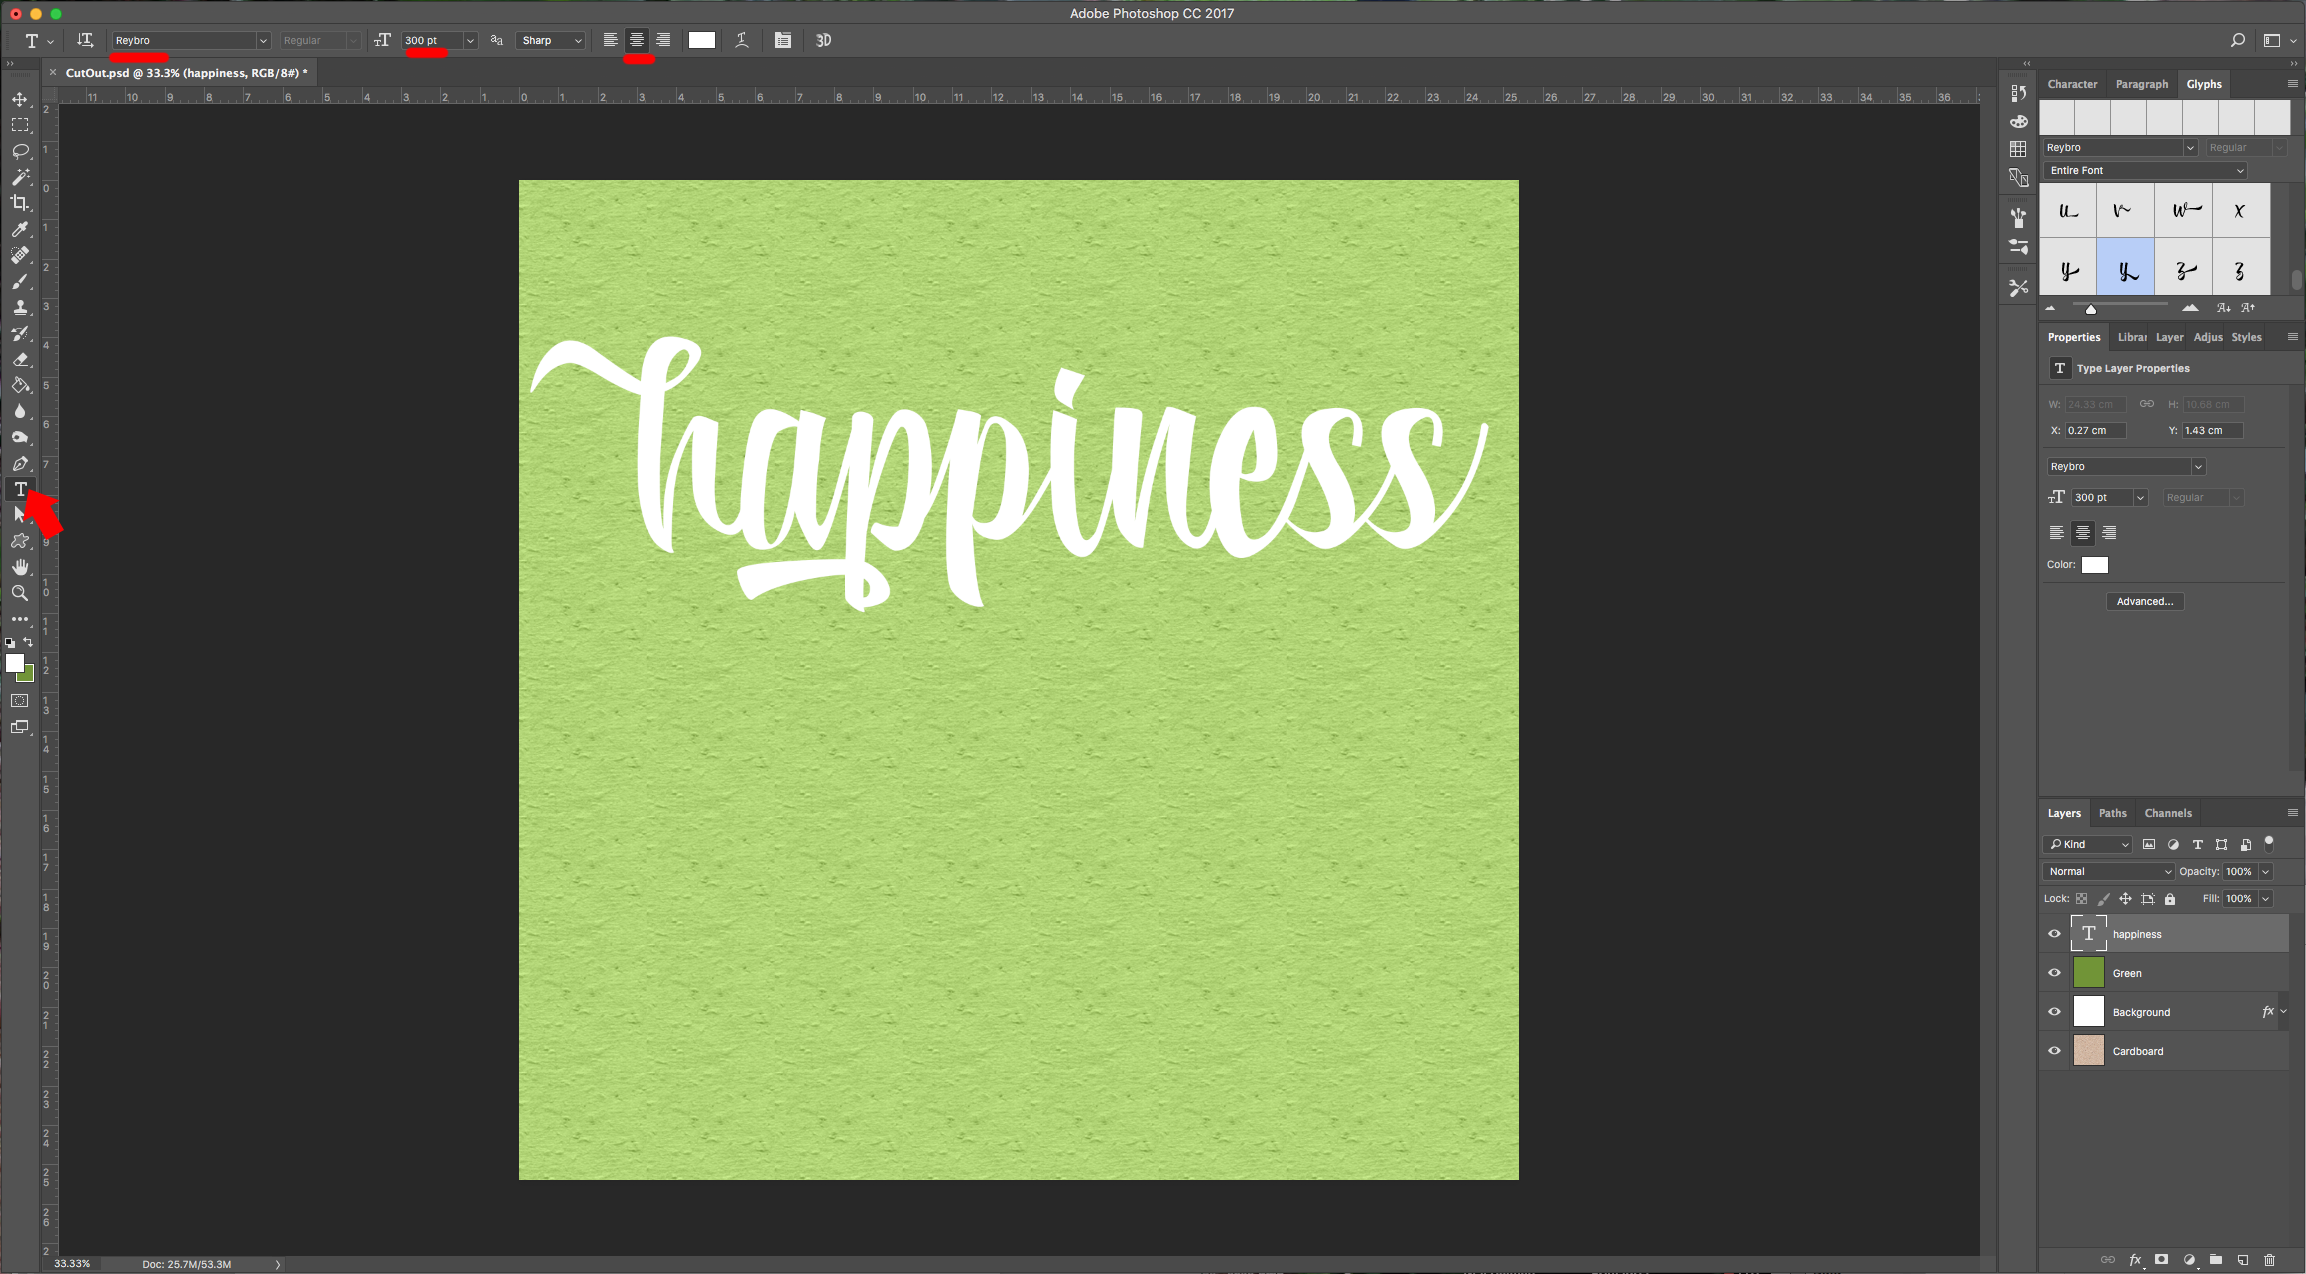
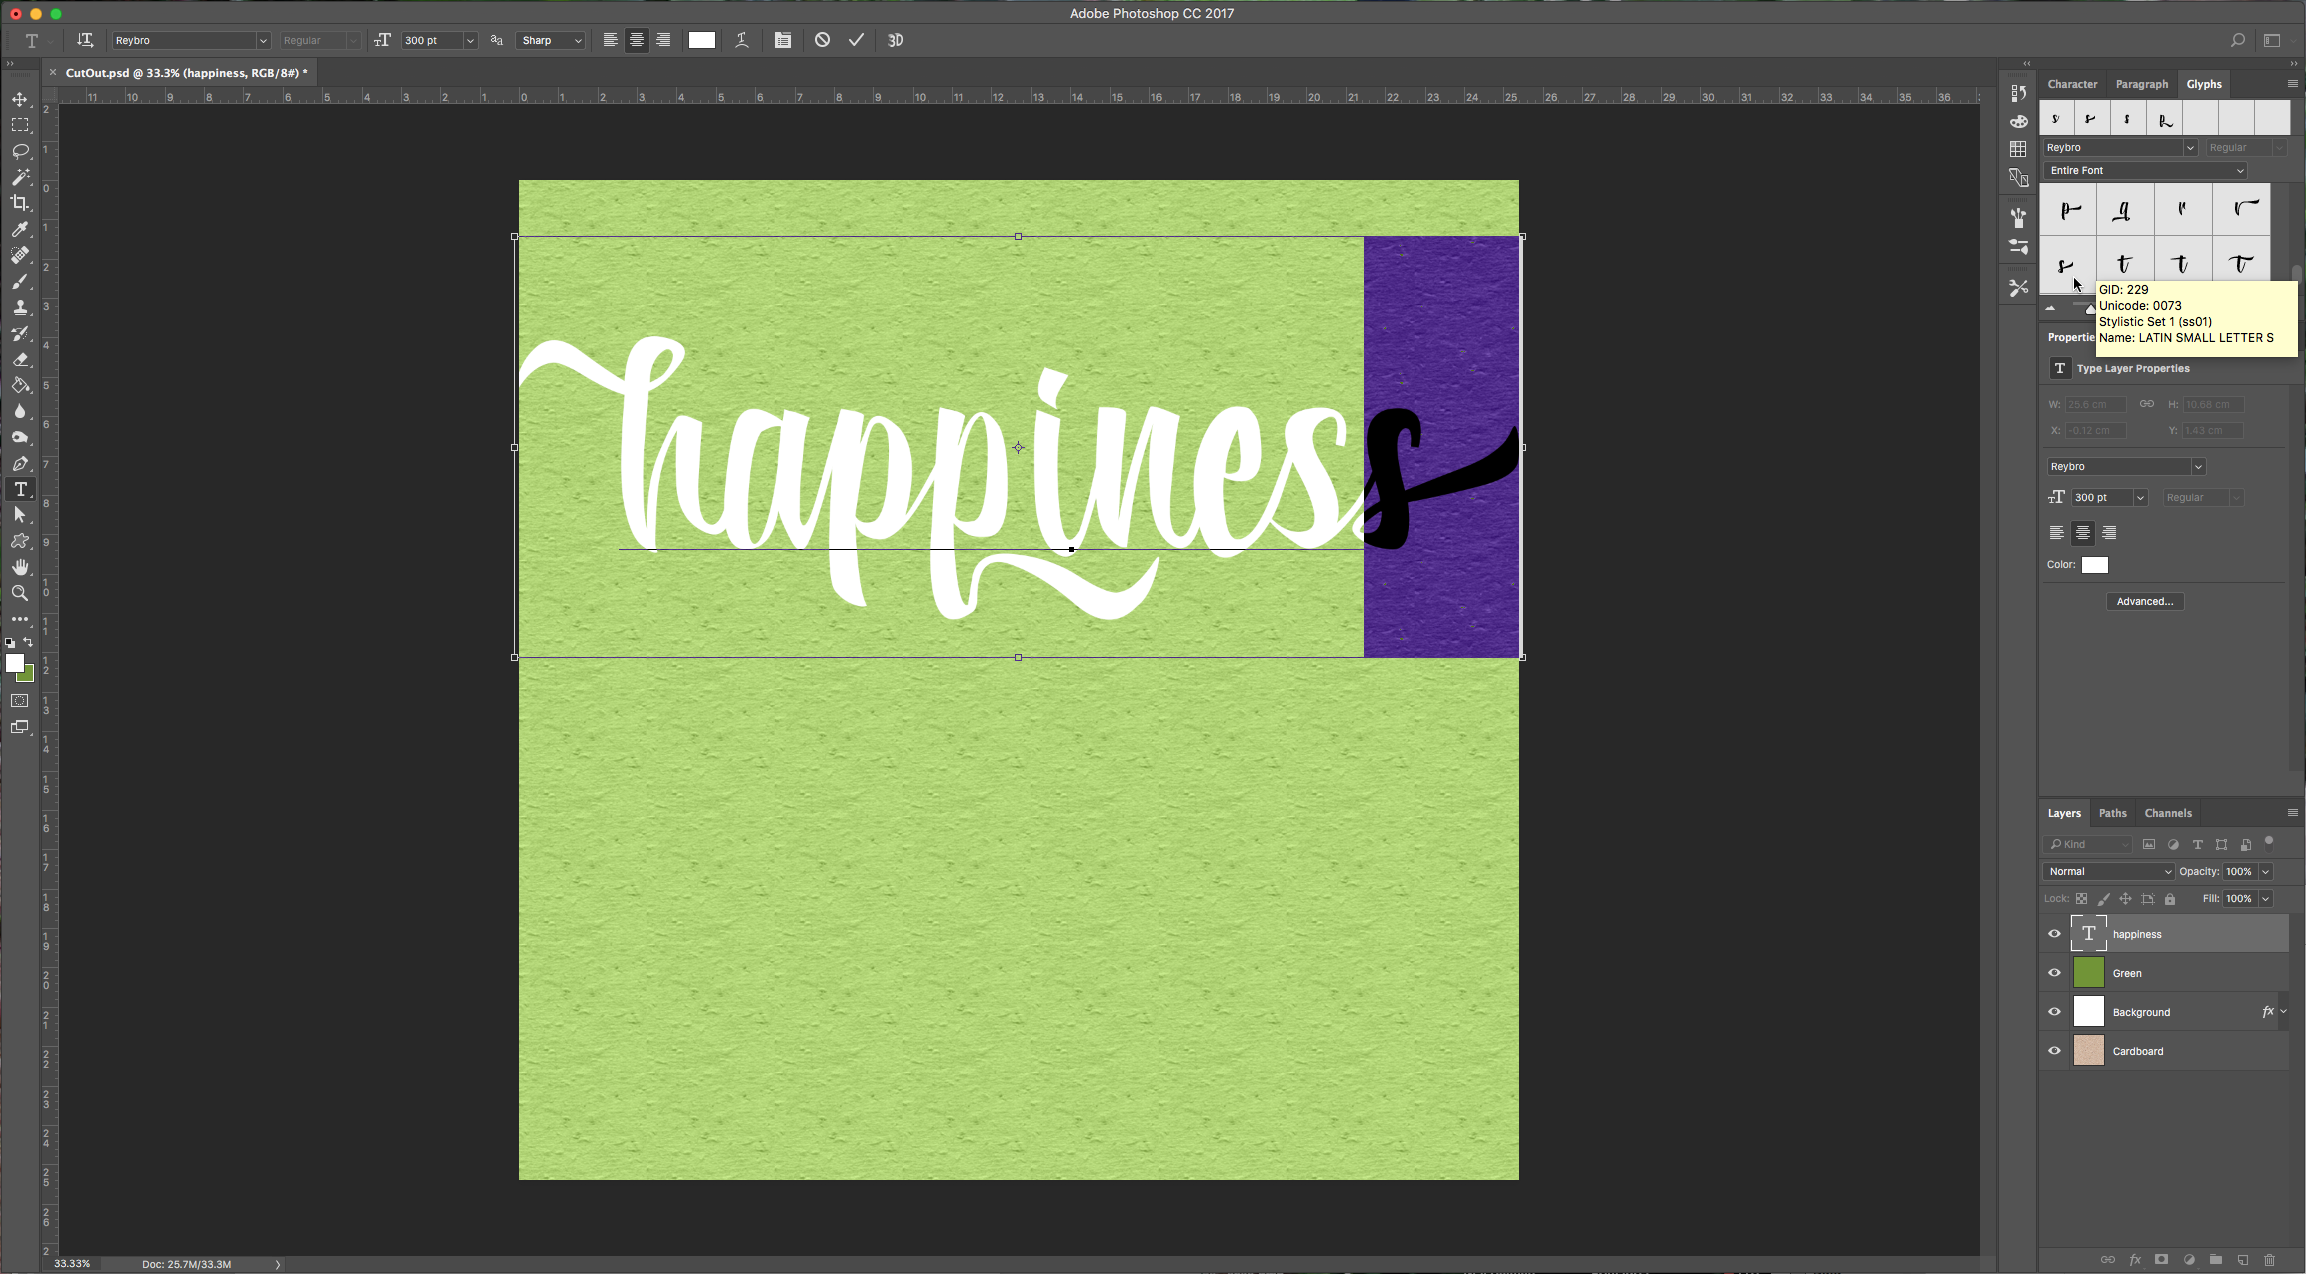
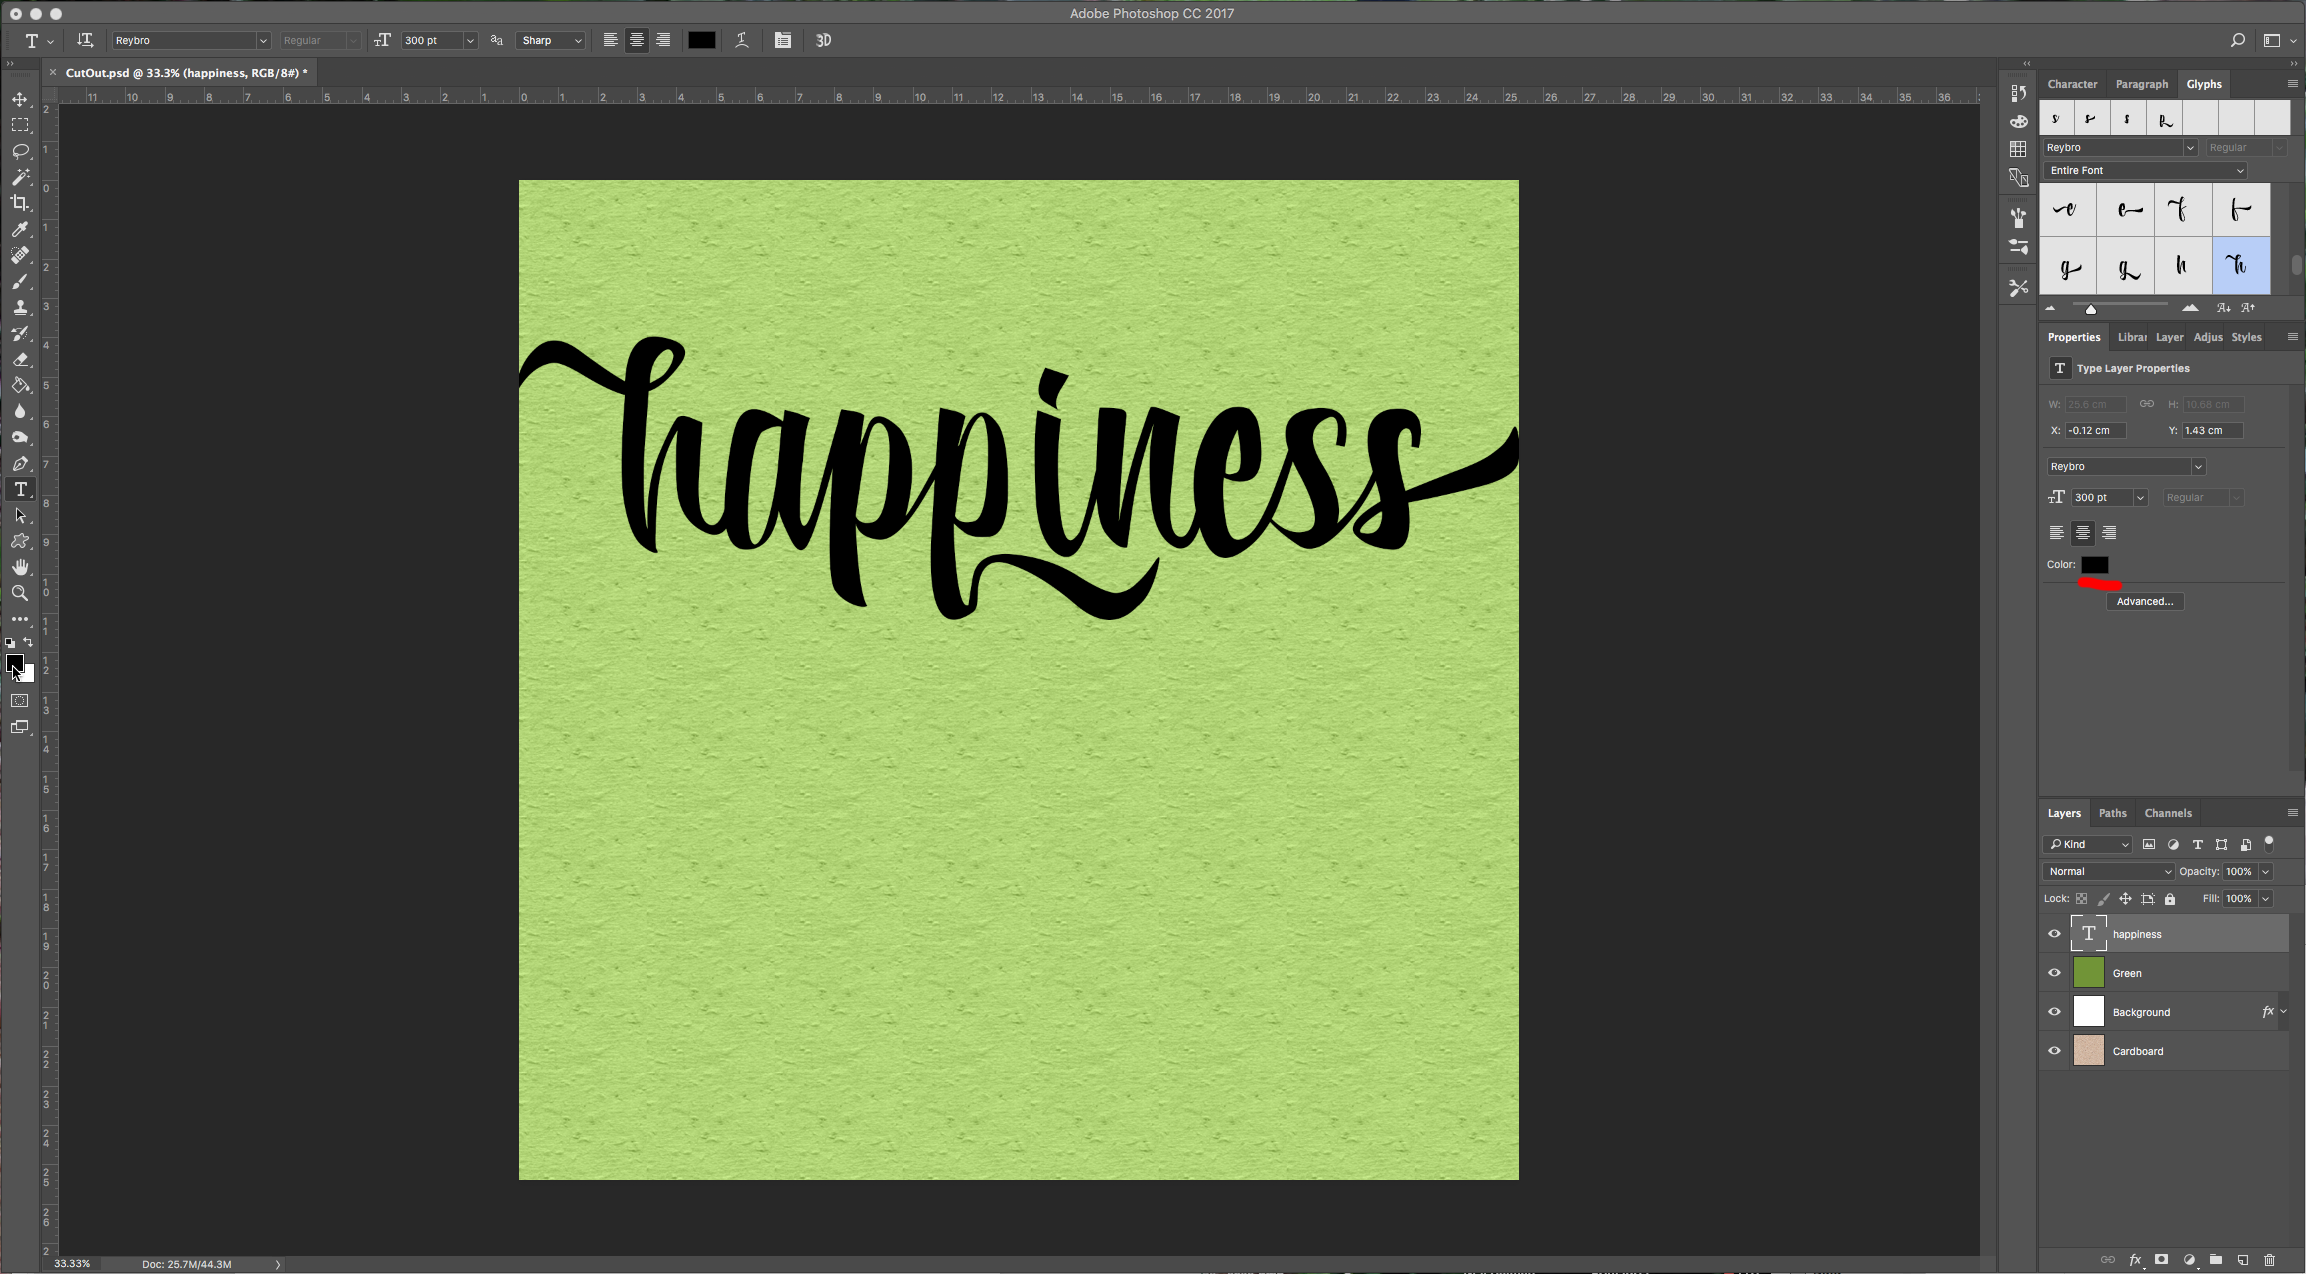
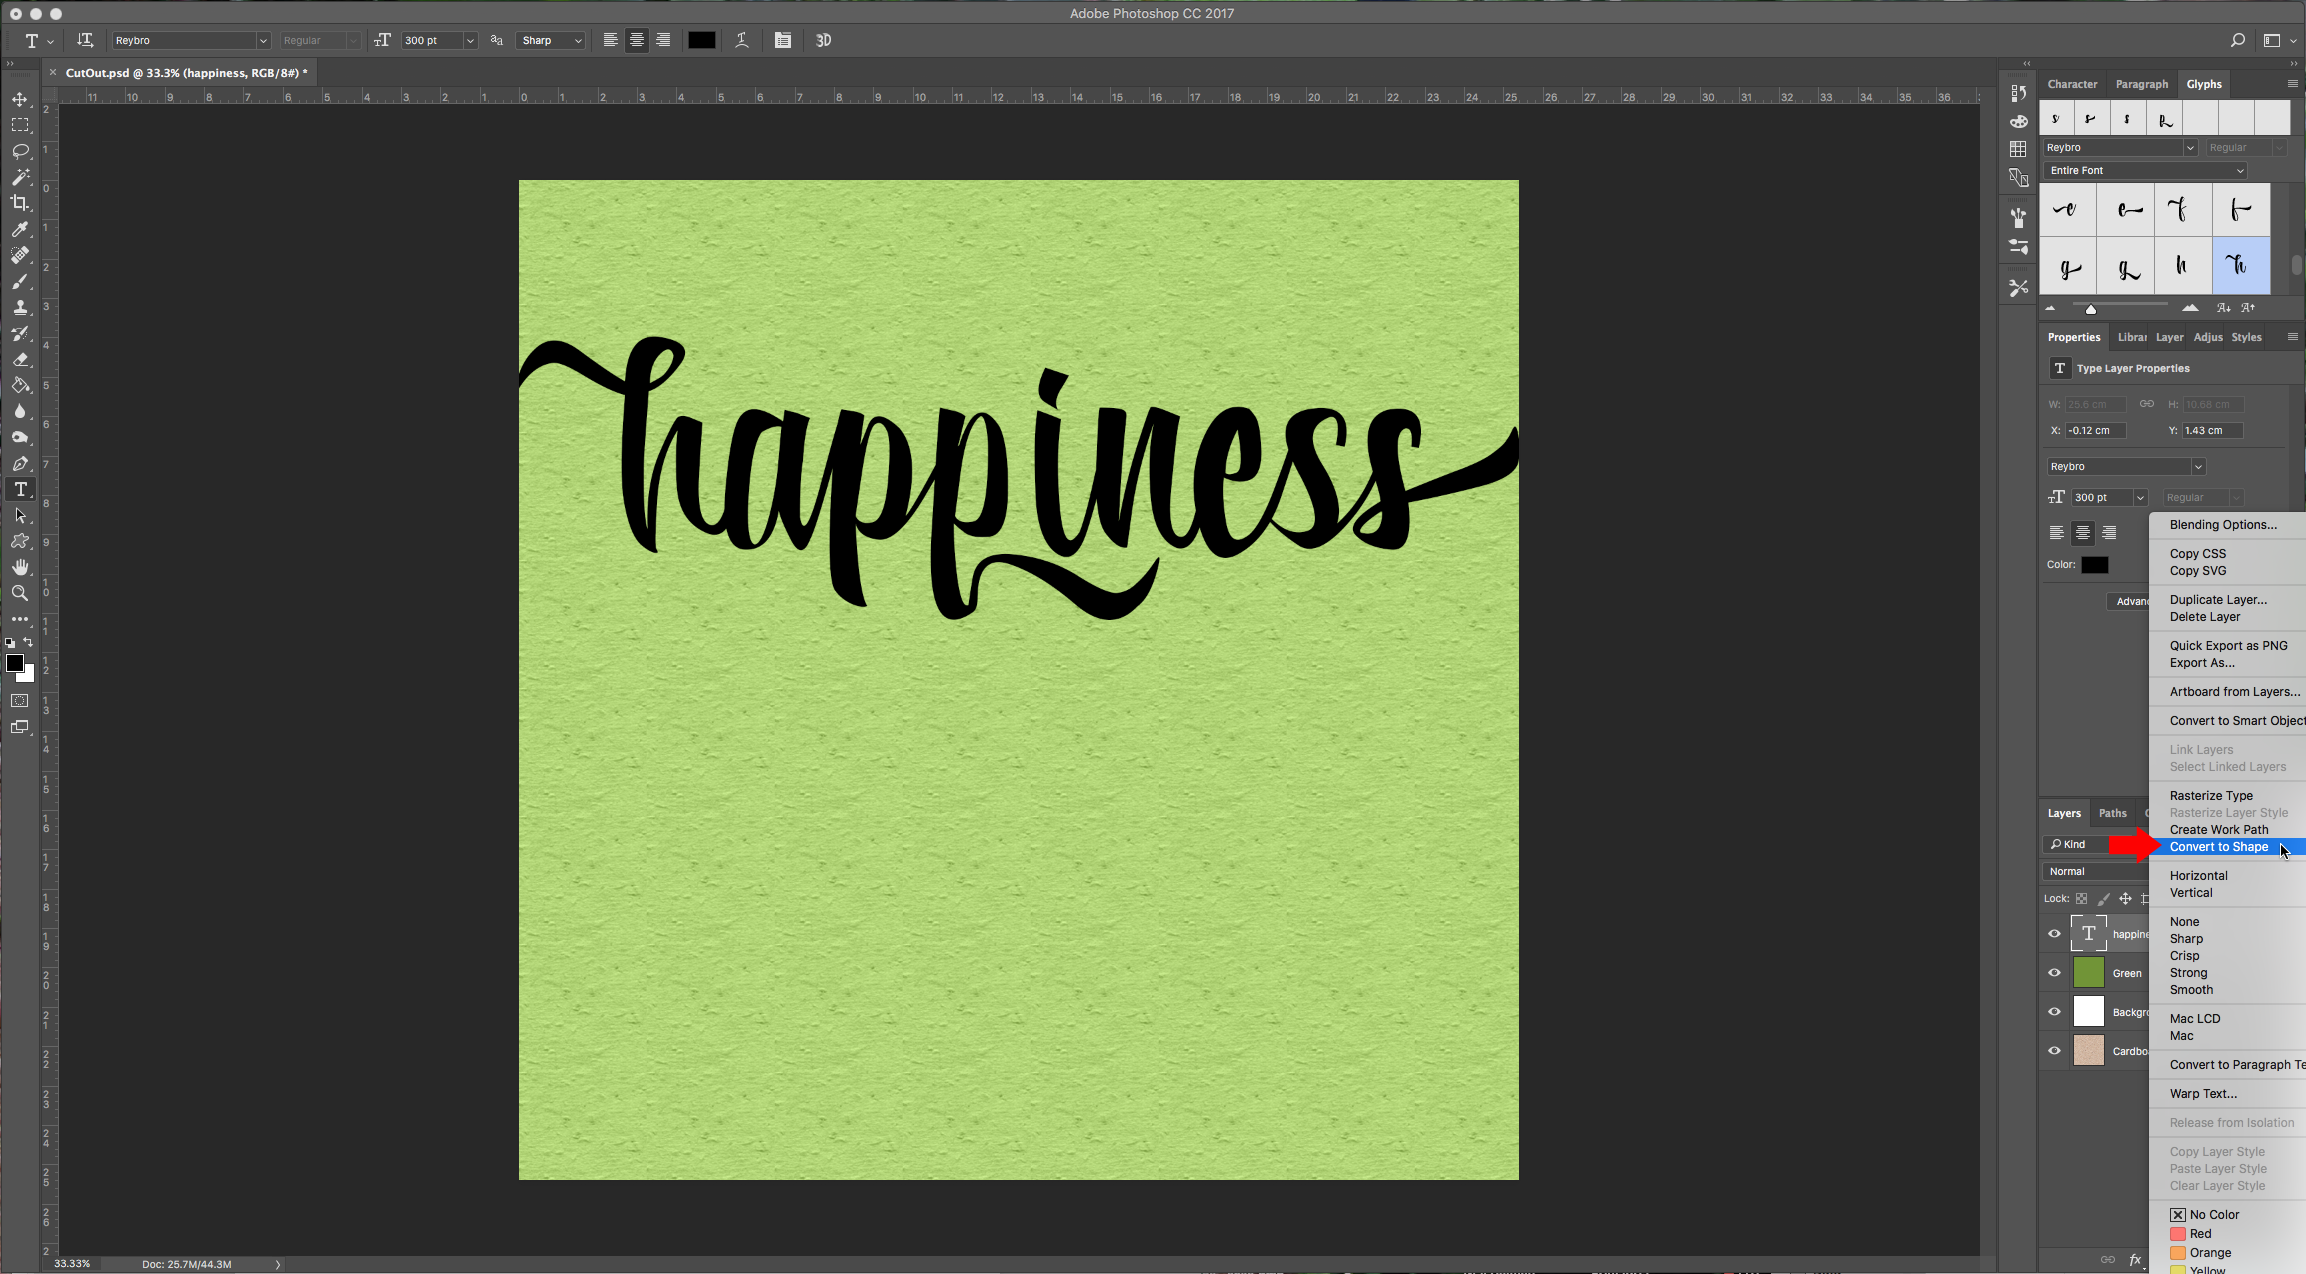
5 – Select the “Type Tool” (T) and write your text, choose the font you like. We used “Reybro” and chose some of the alternates to get a nicer look. We want the sides of the text to be a bit outside the paper. Once you are happy with your text, change your text color to black, and right-click on the layer and choose “Convert to Shape”.
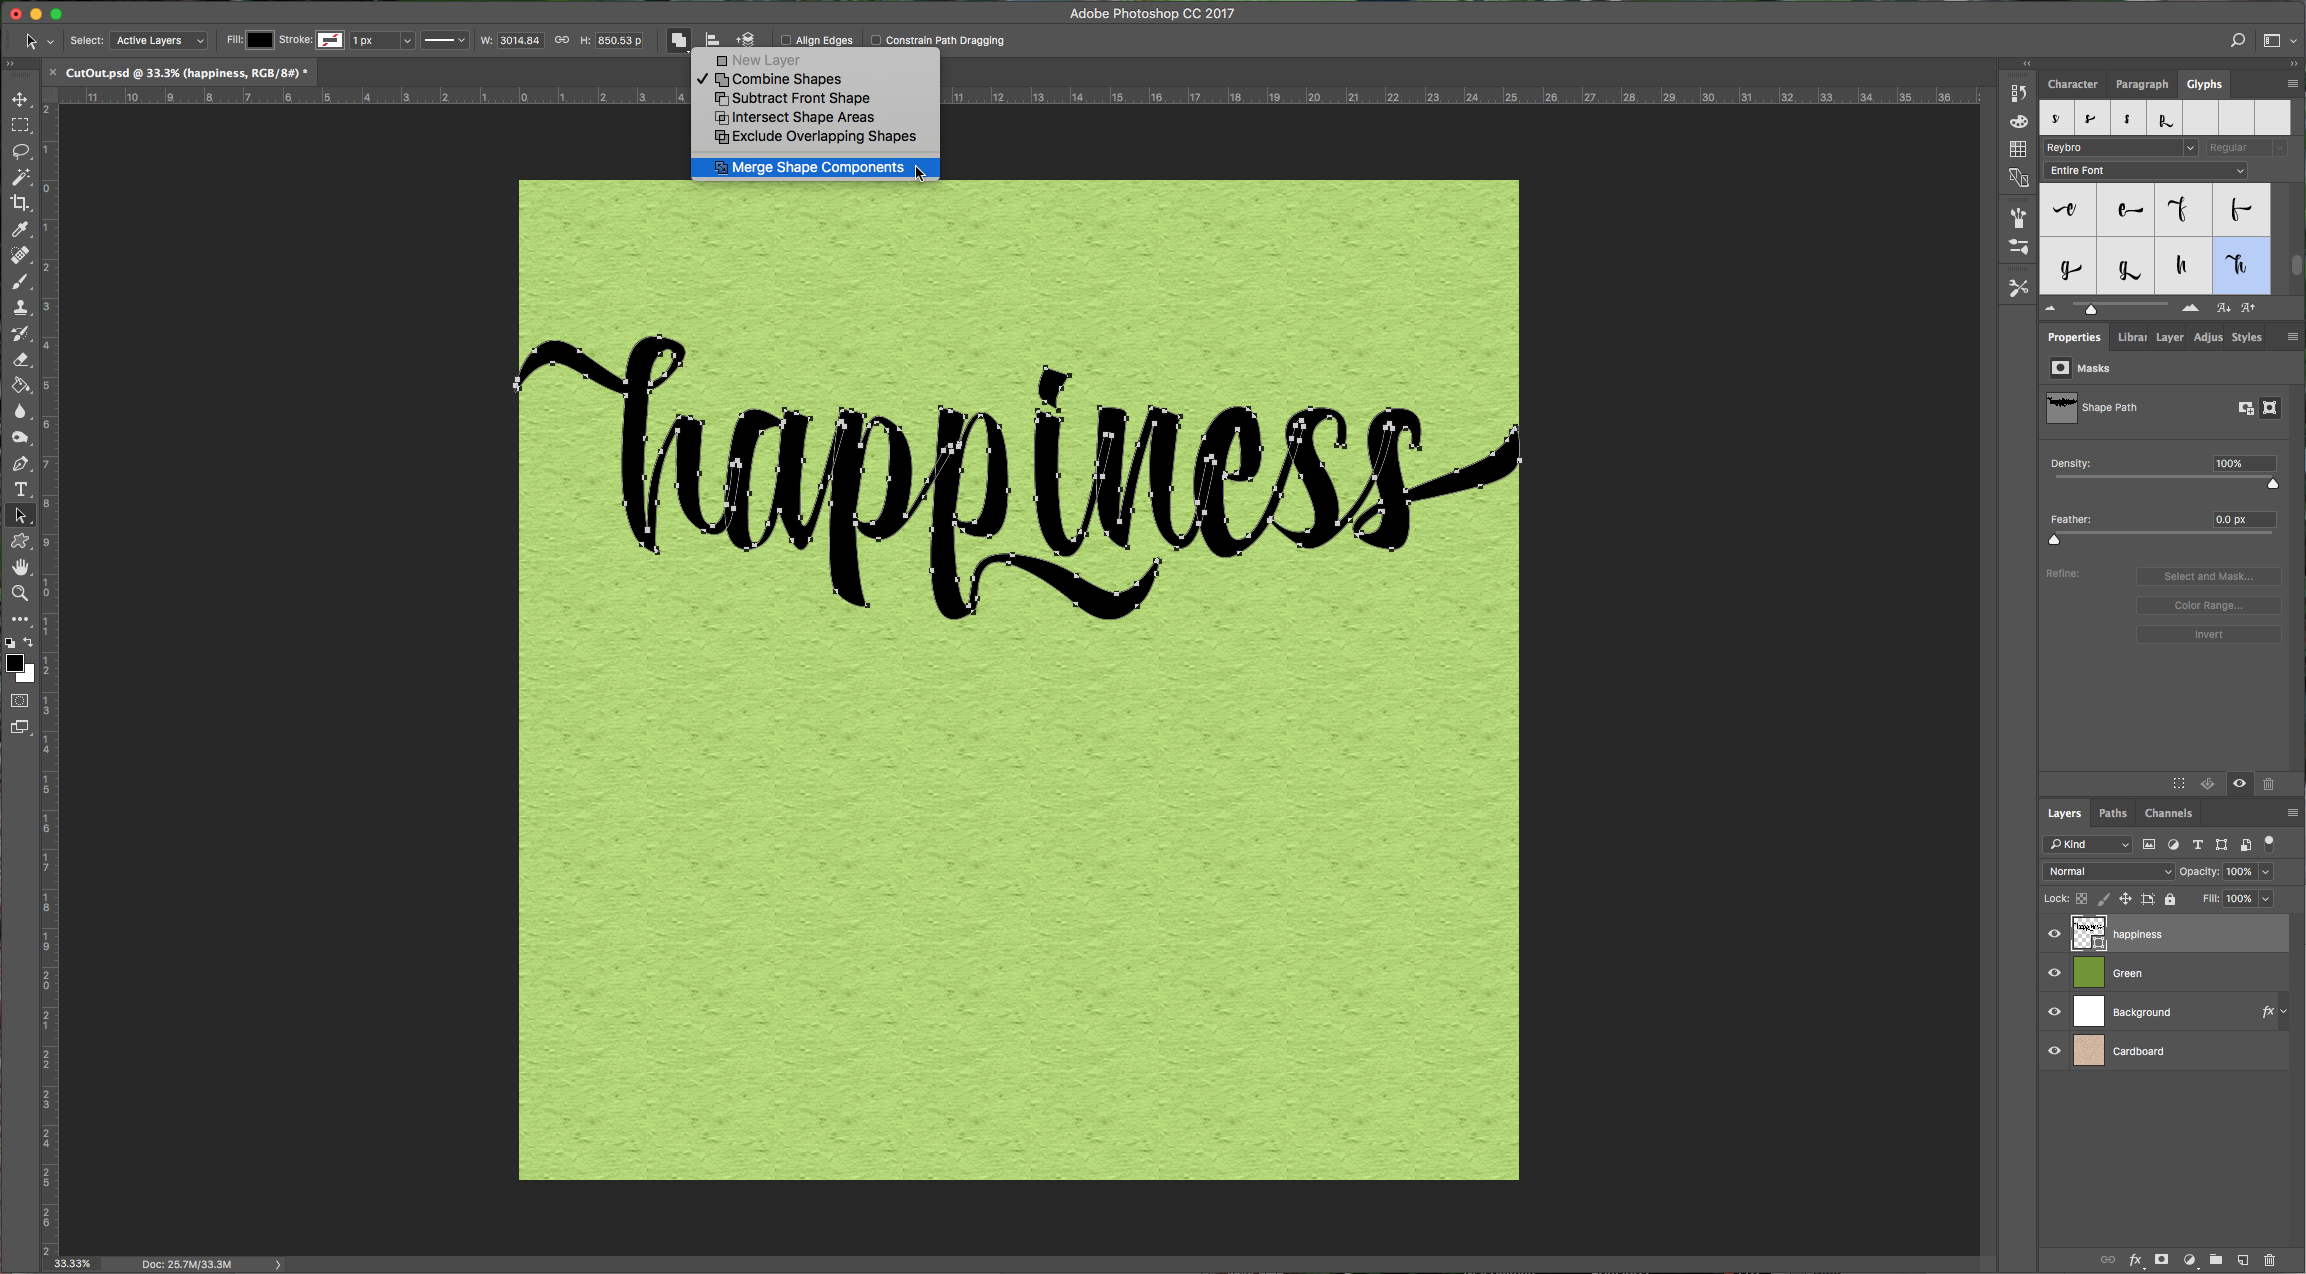
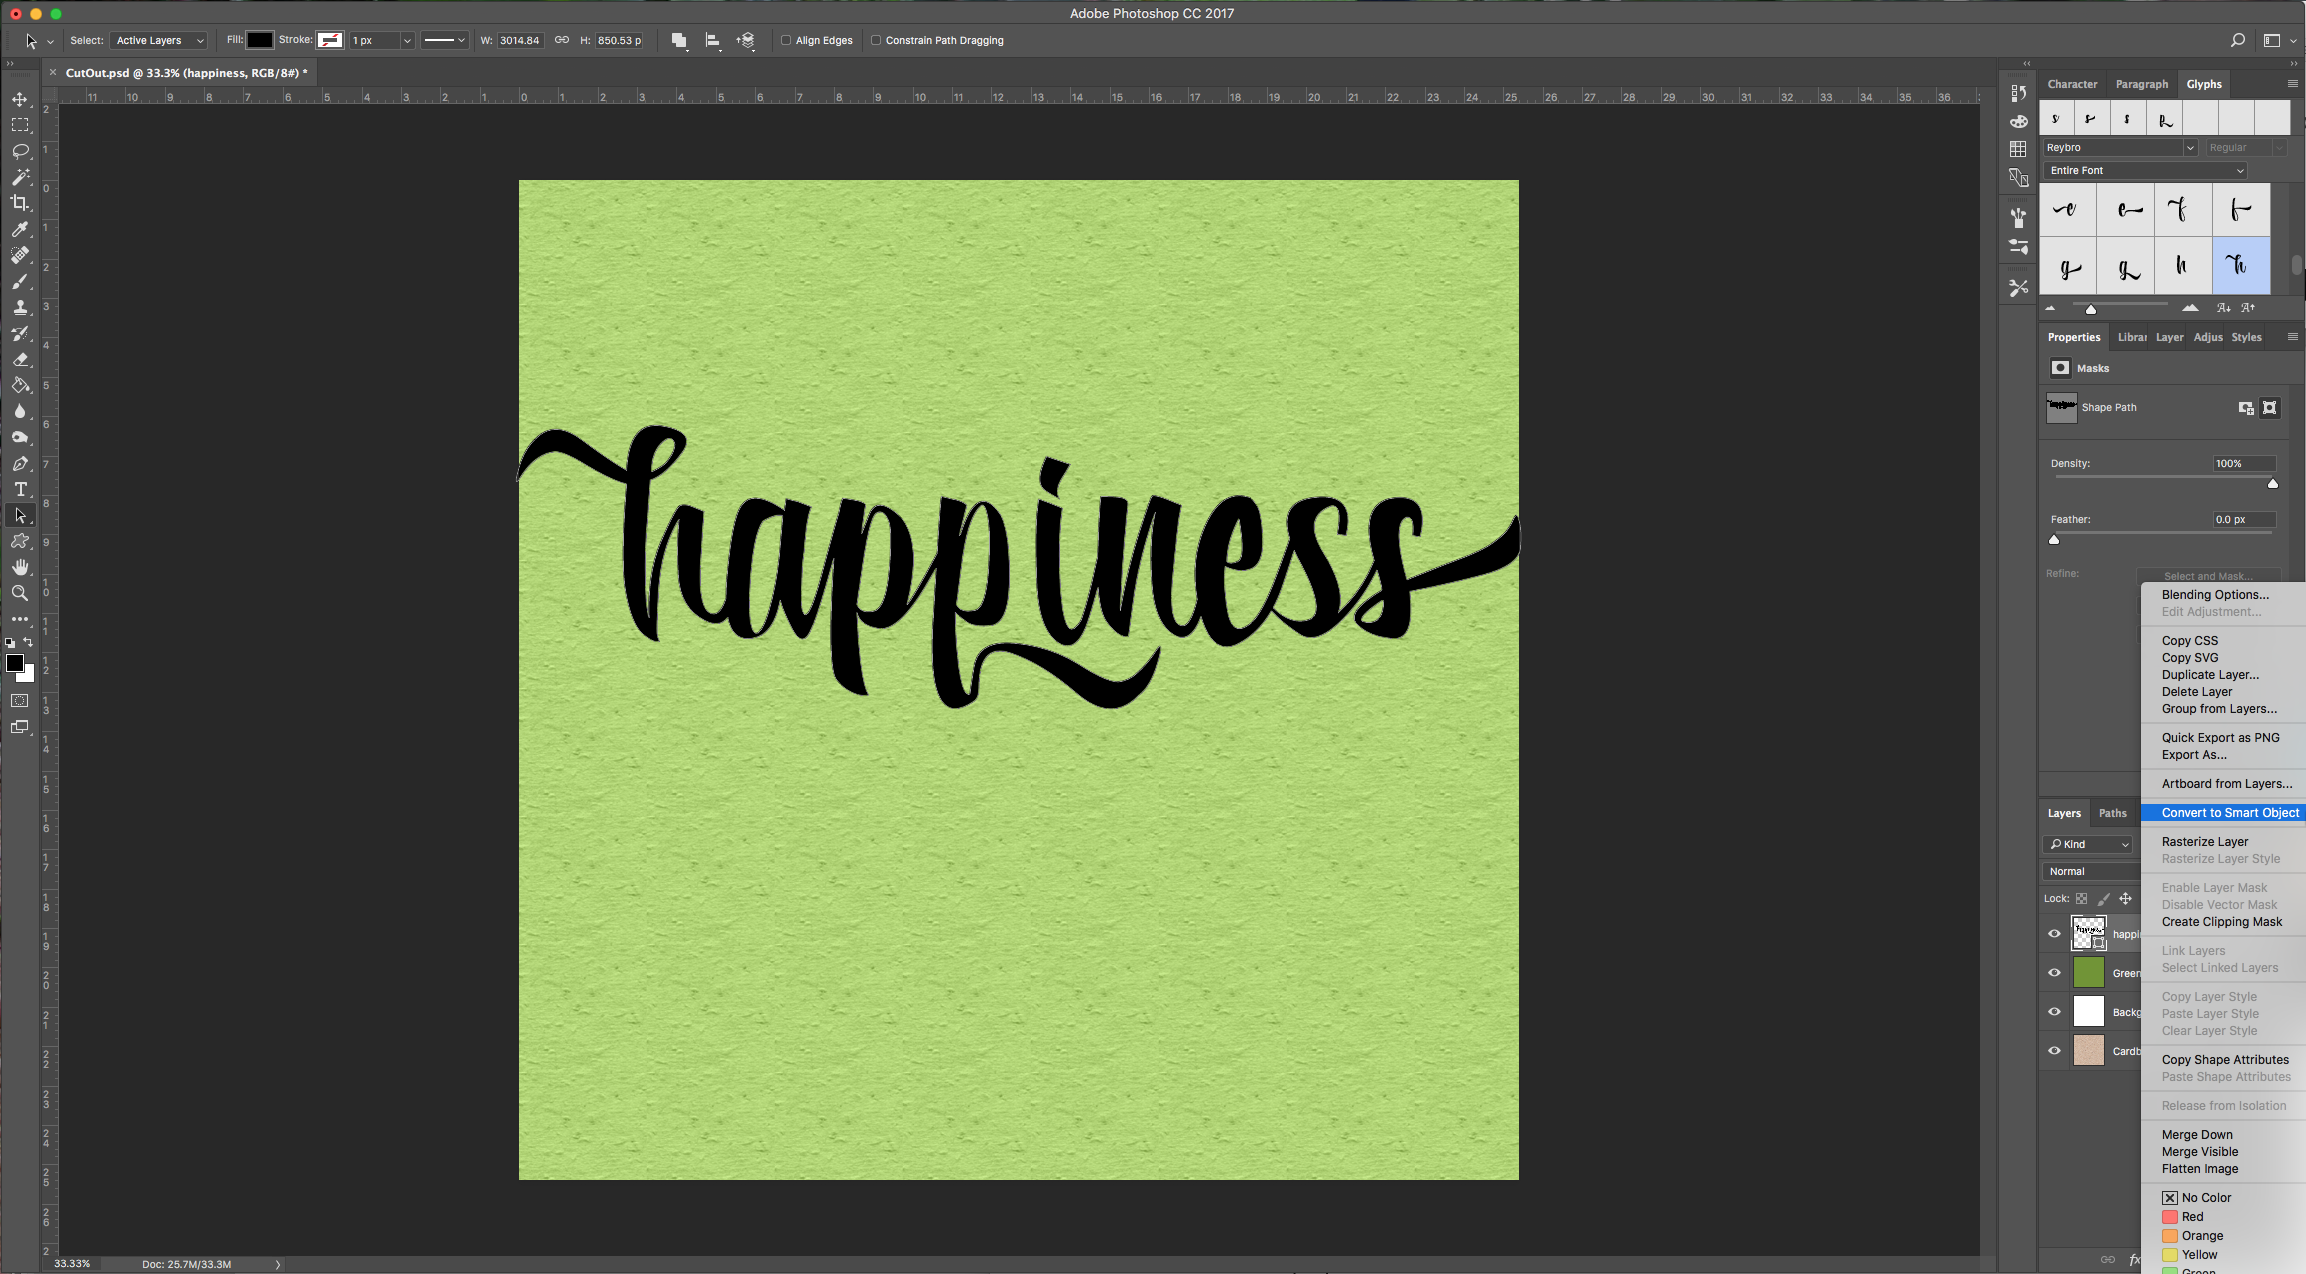
6 – Choose the “Path Selection Tool” (A) and making sure your text is selected choose “Merge Shape Components” from the “Path Operations” menu on the top left. Right-click on the text layer and select “Convert to Smart Object”.

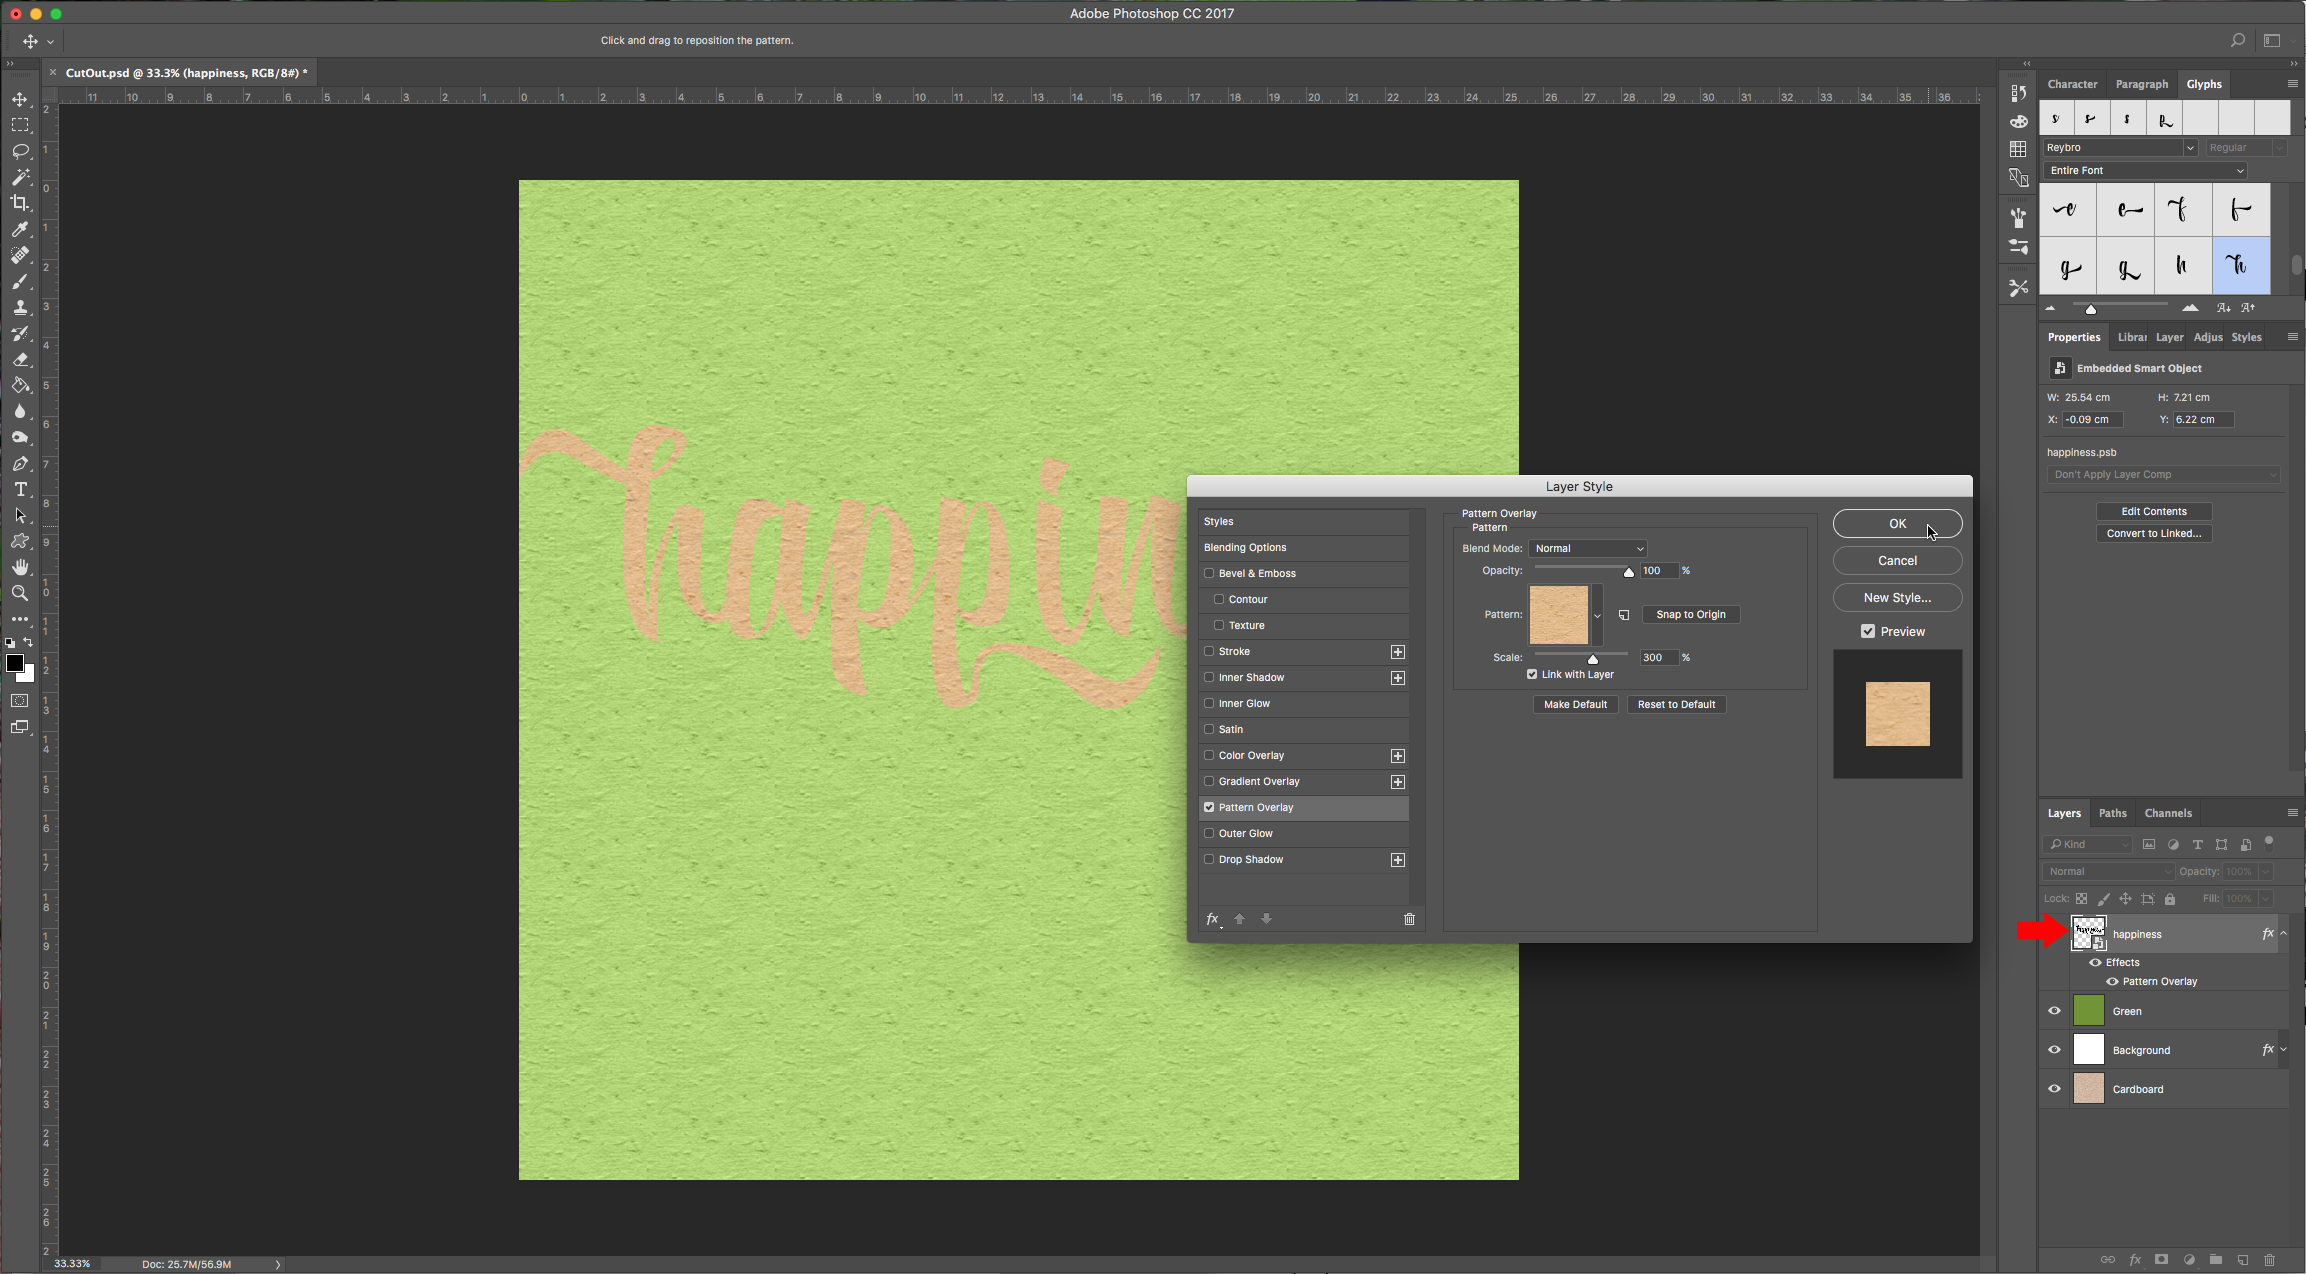
7 – Double-click on your layer again to invoke the “Blending Options” and apply the same “Pattern Overlay” you used before.
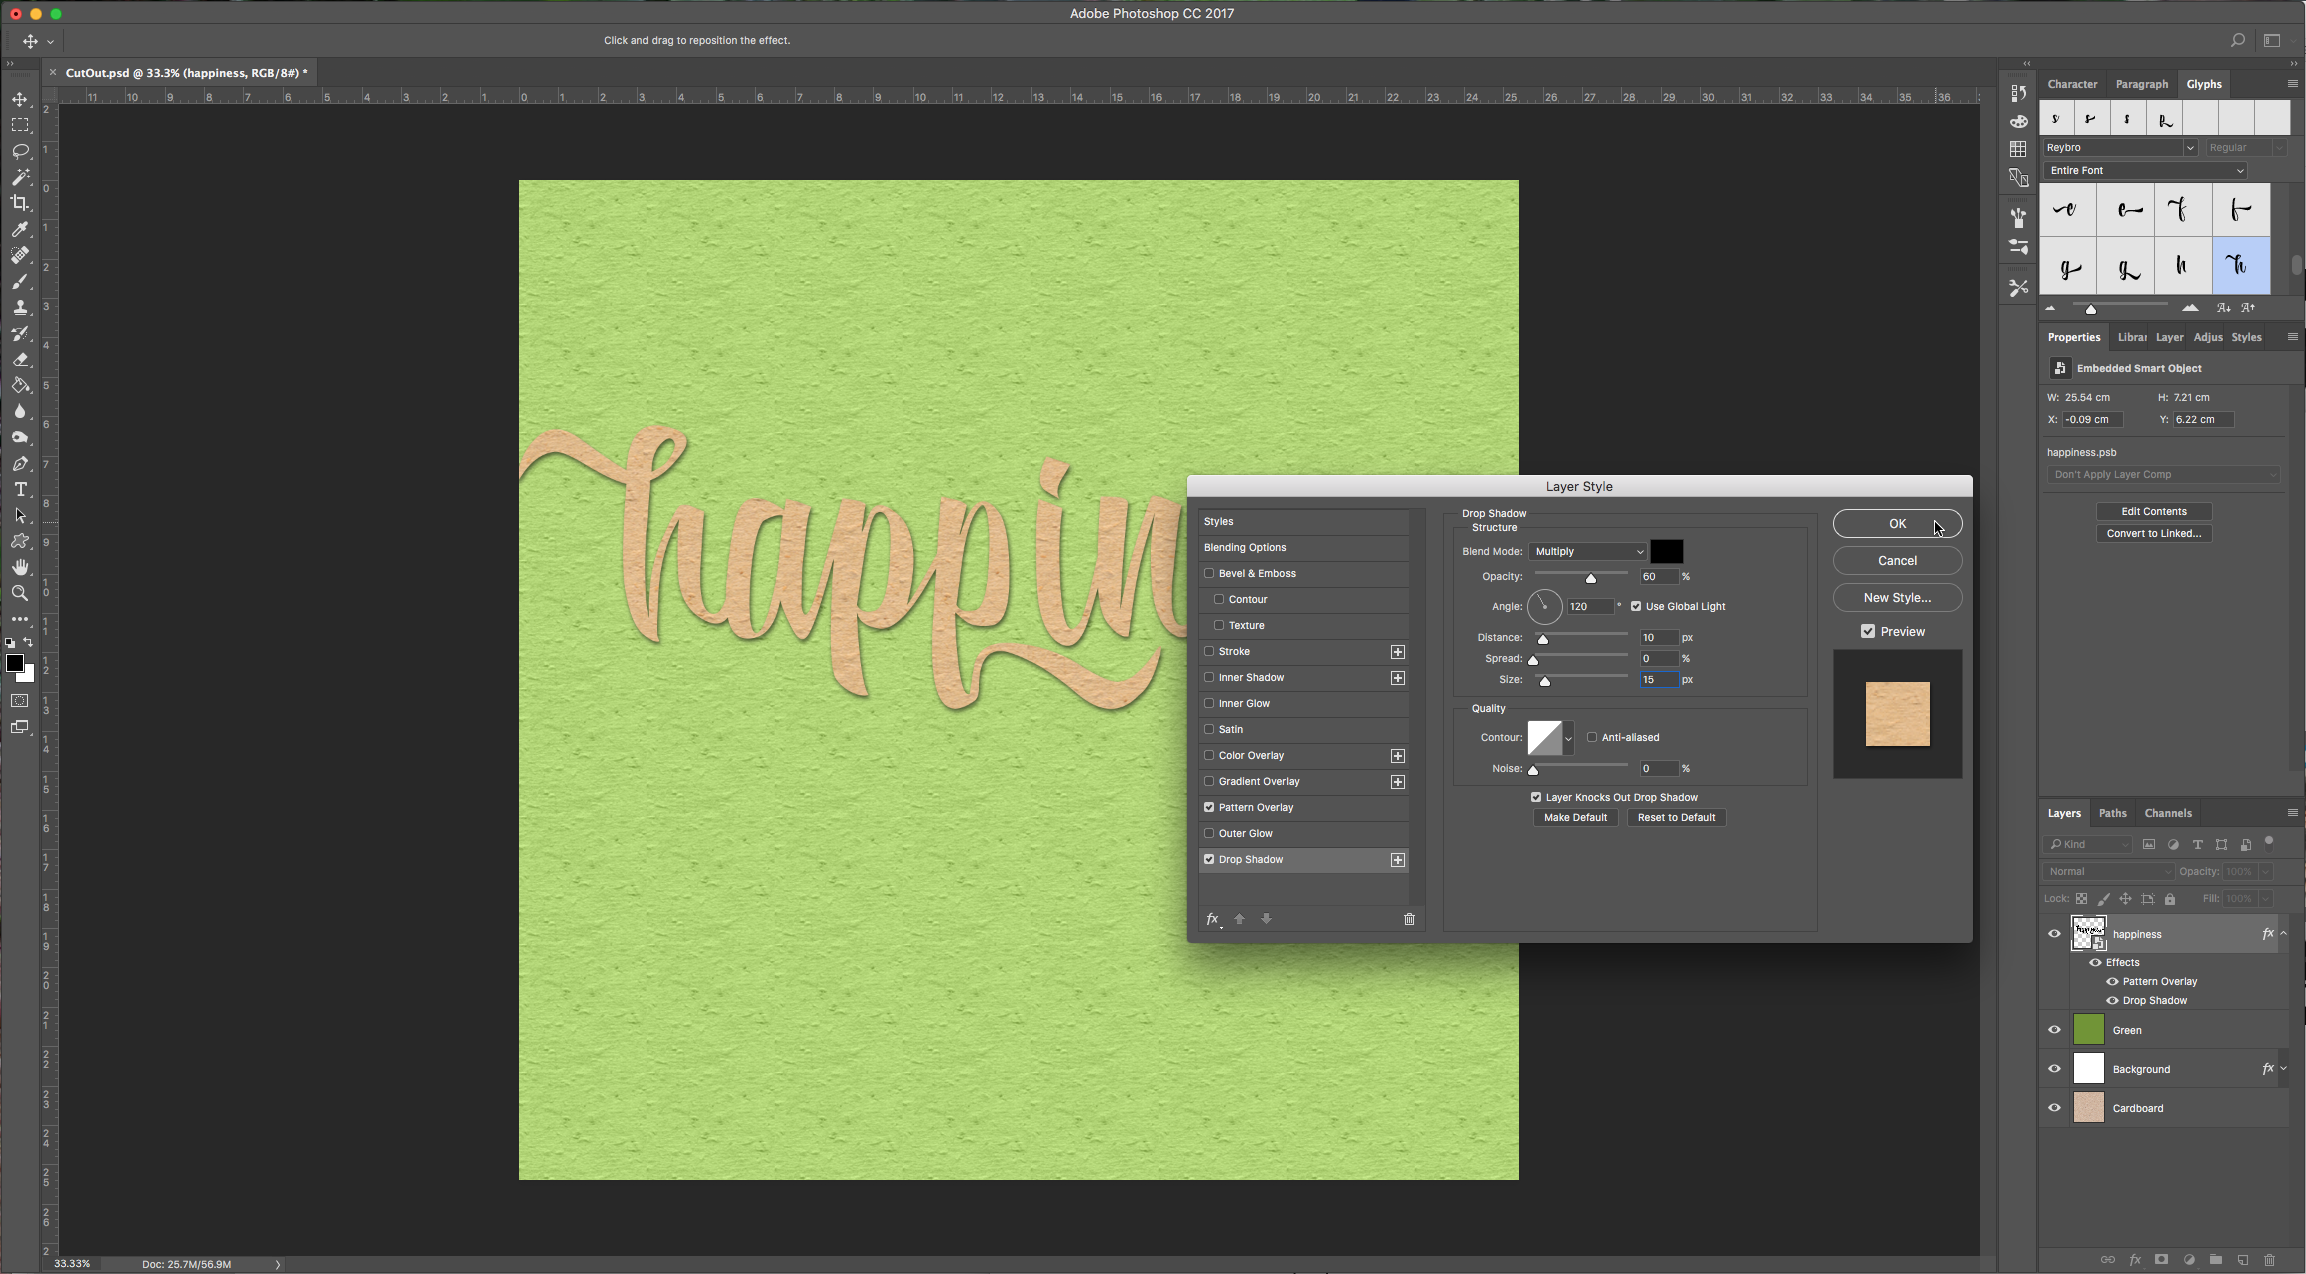
And add a “Drop Shadow” with the following values:
Blend Mode color: We used a dark green (#1a2d12)
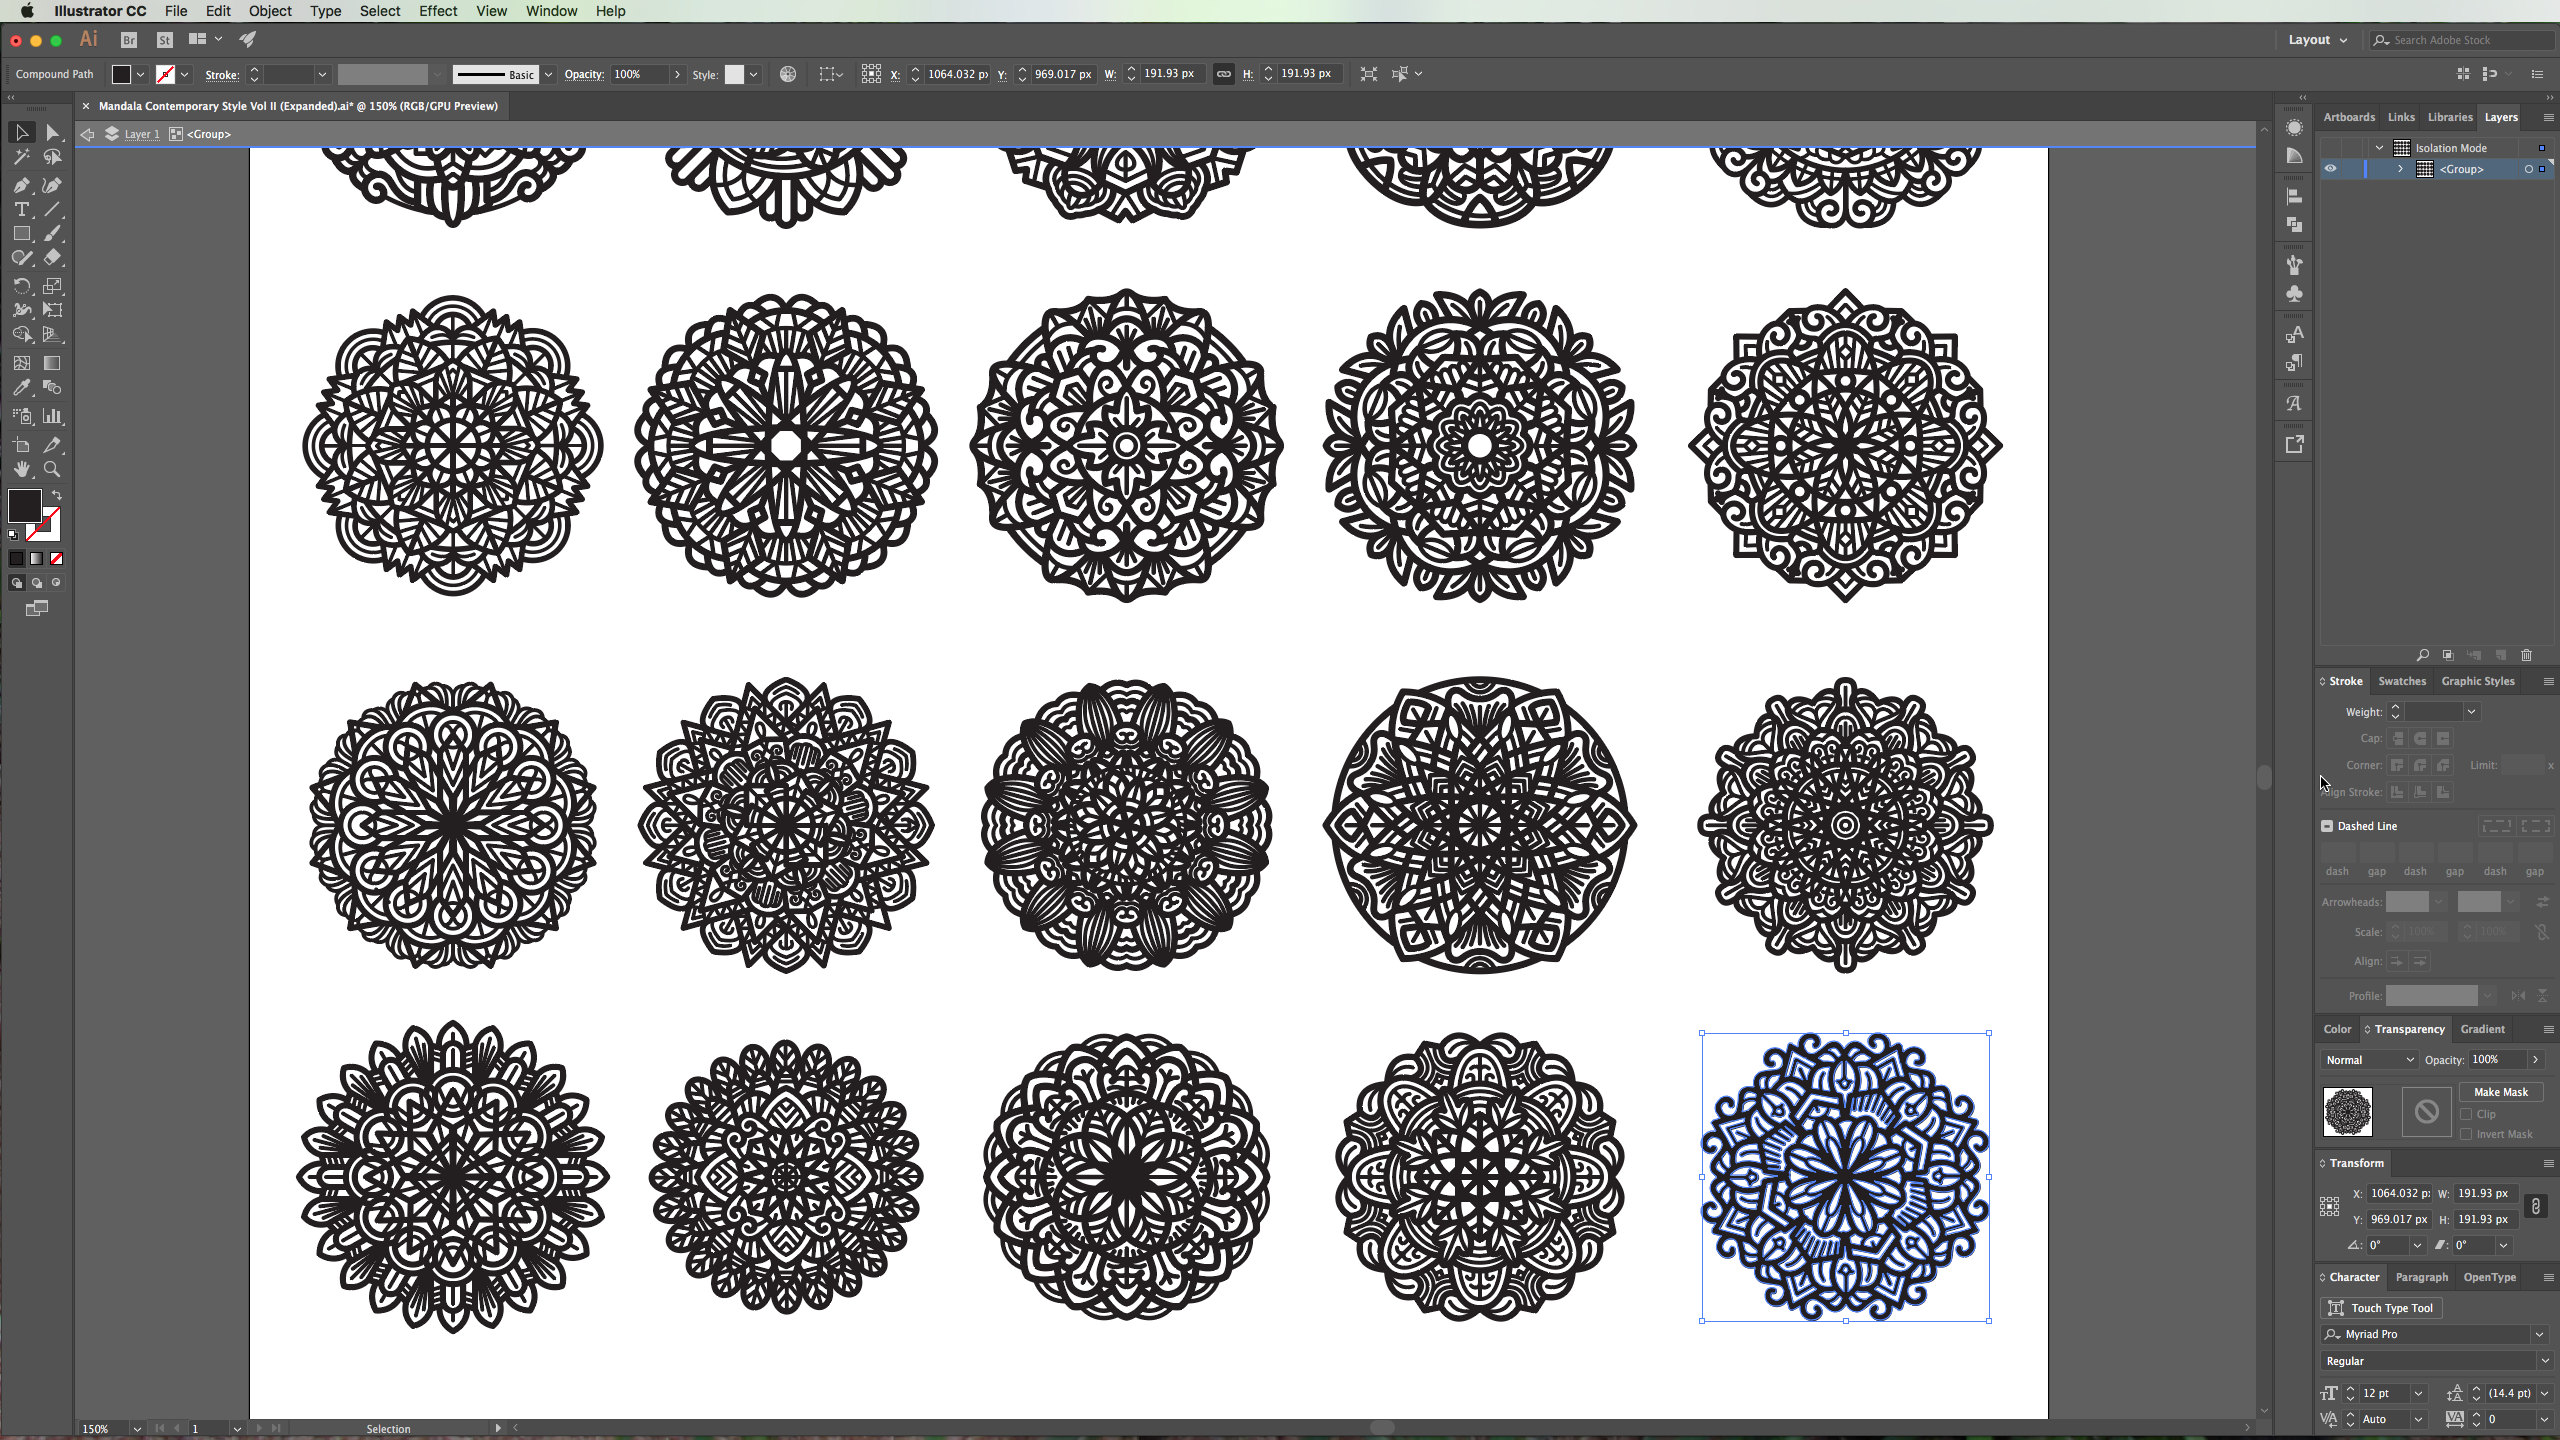
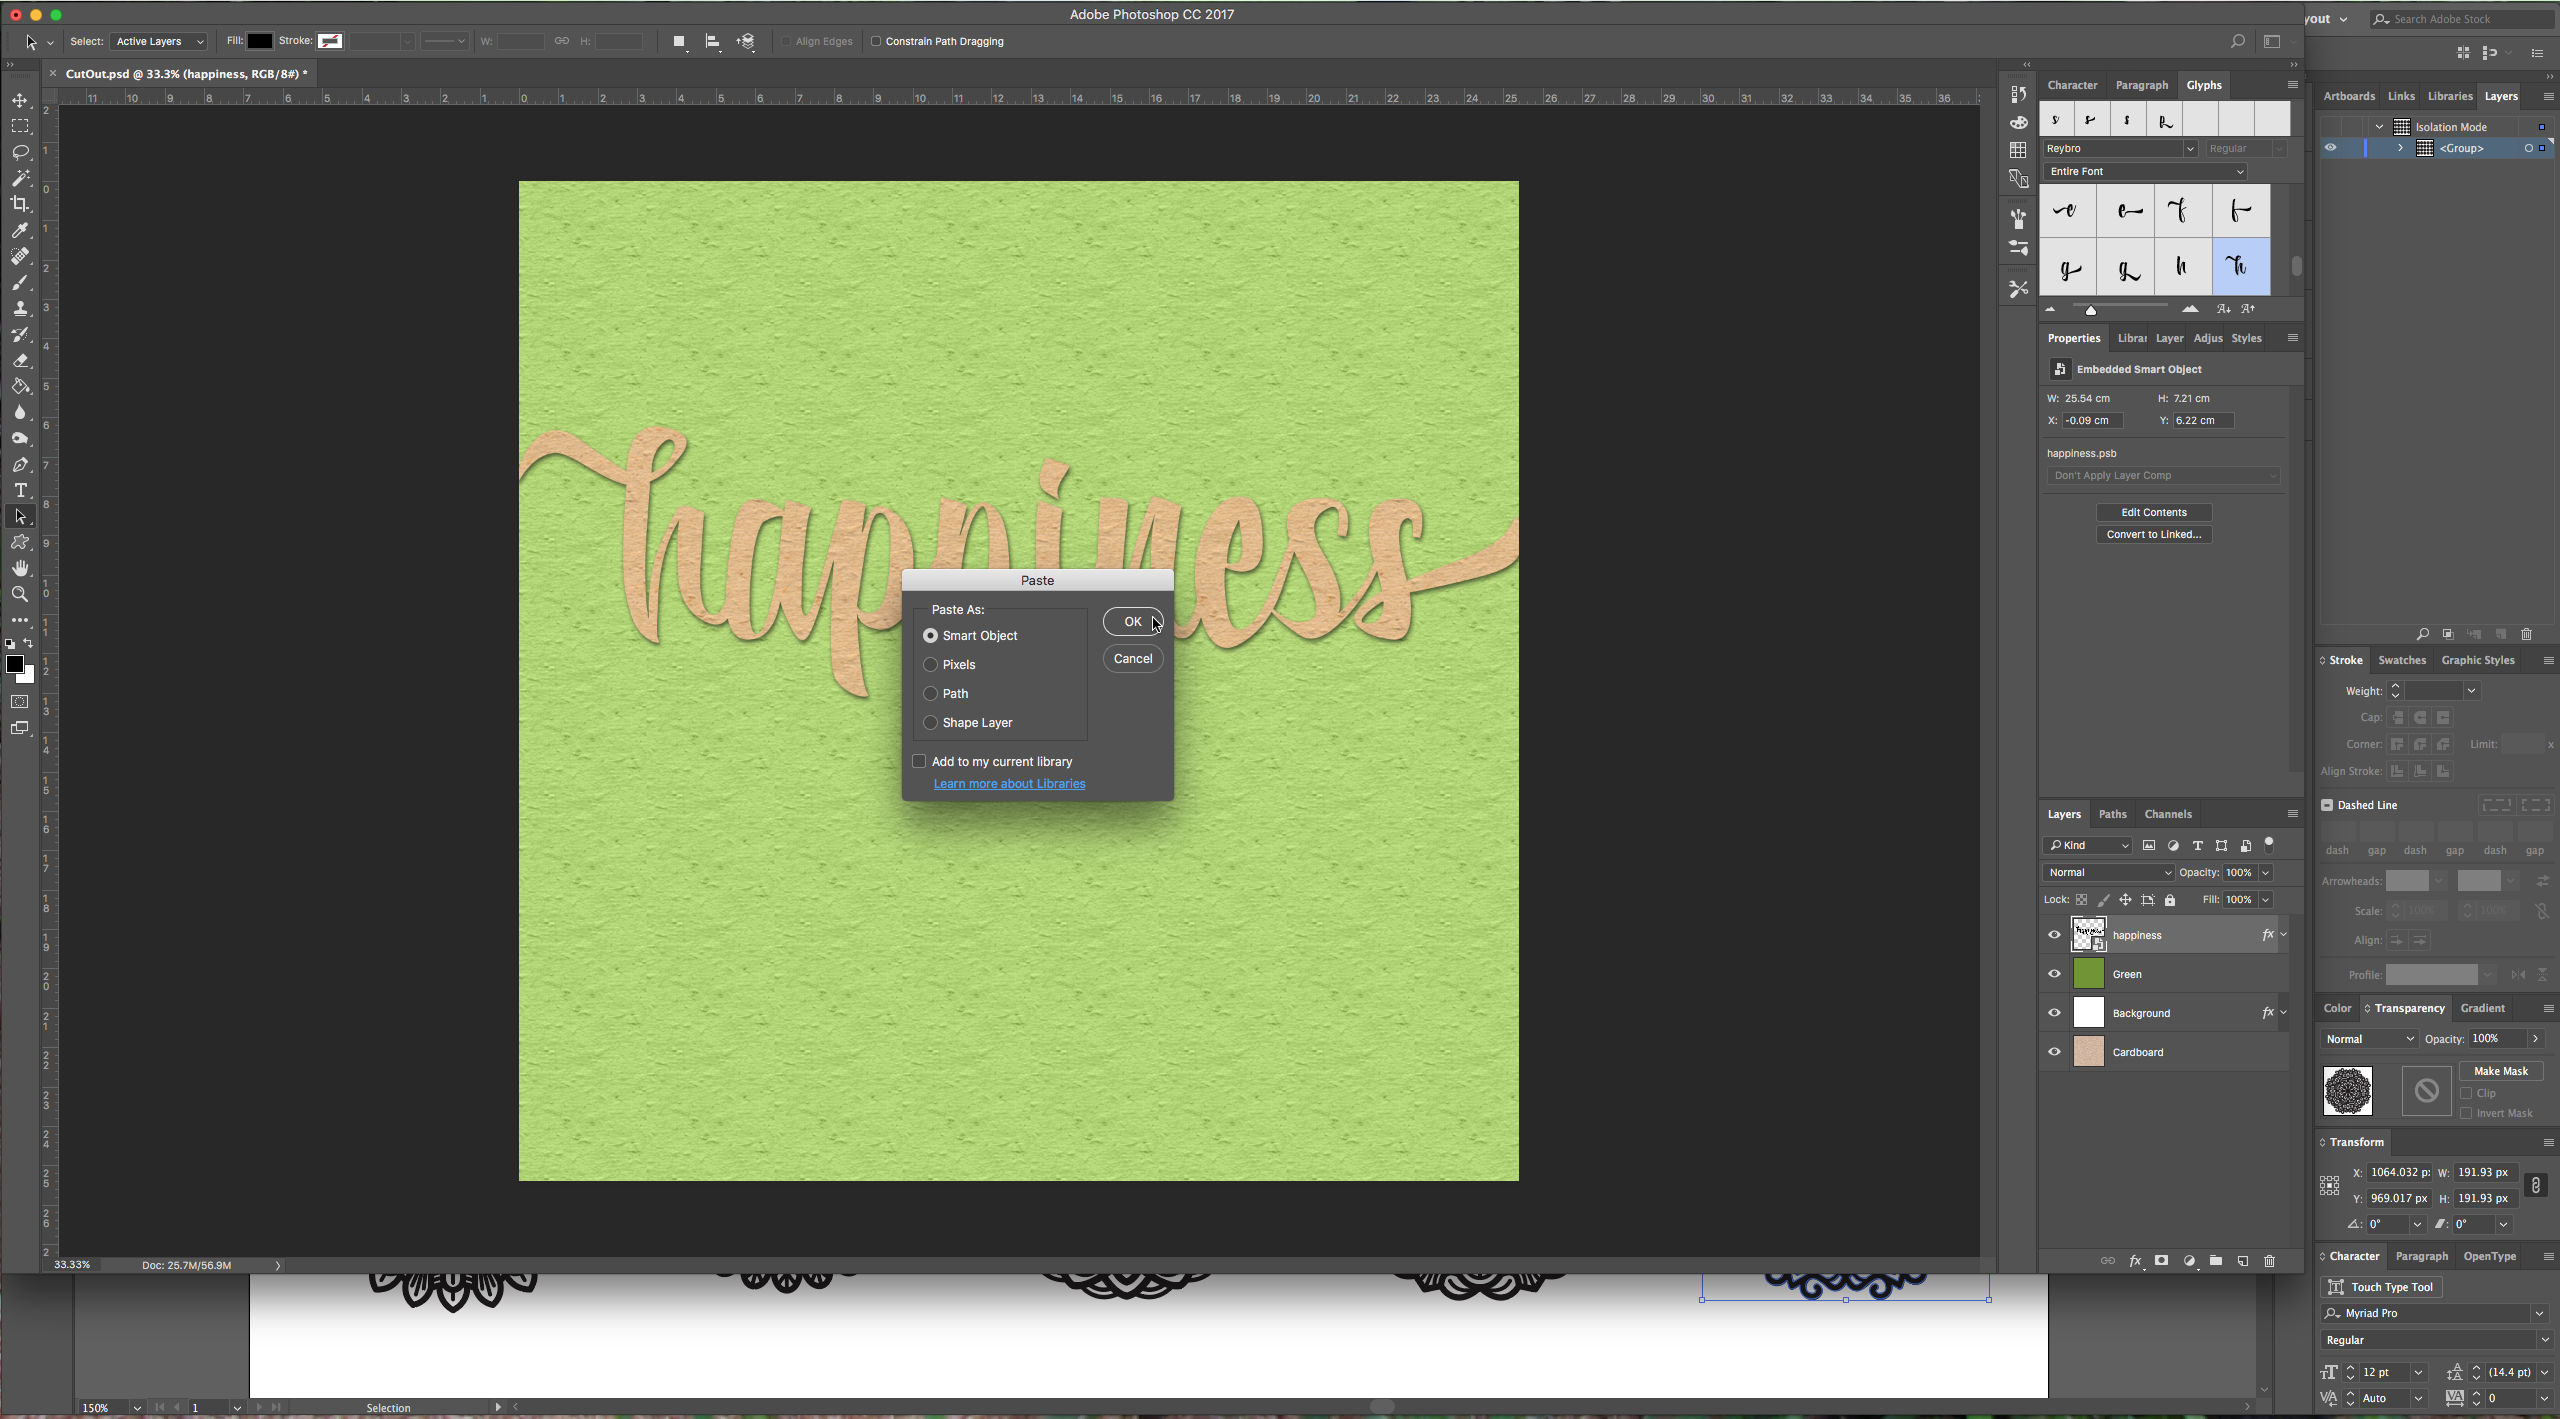
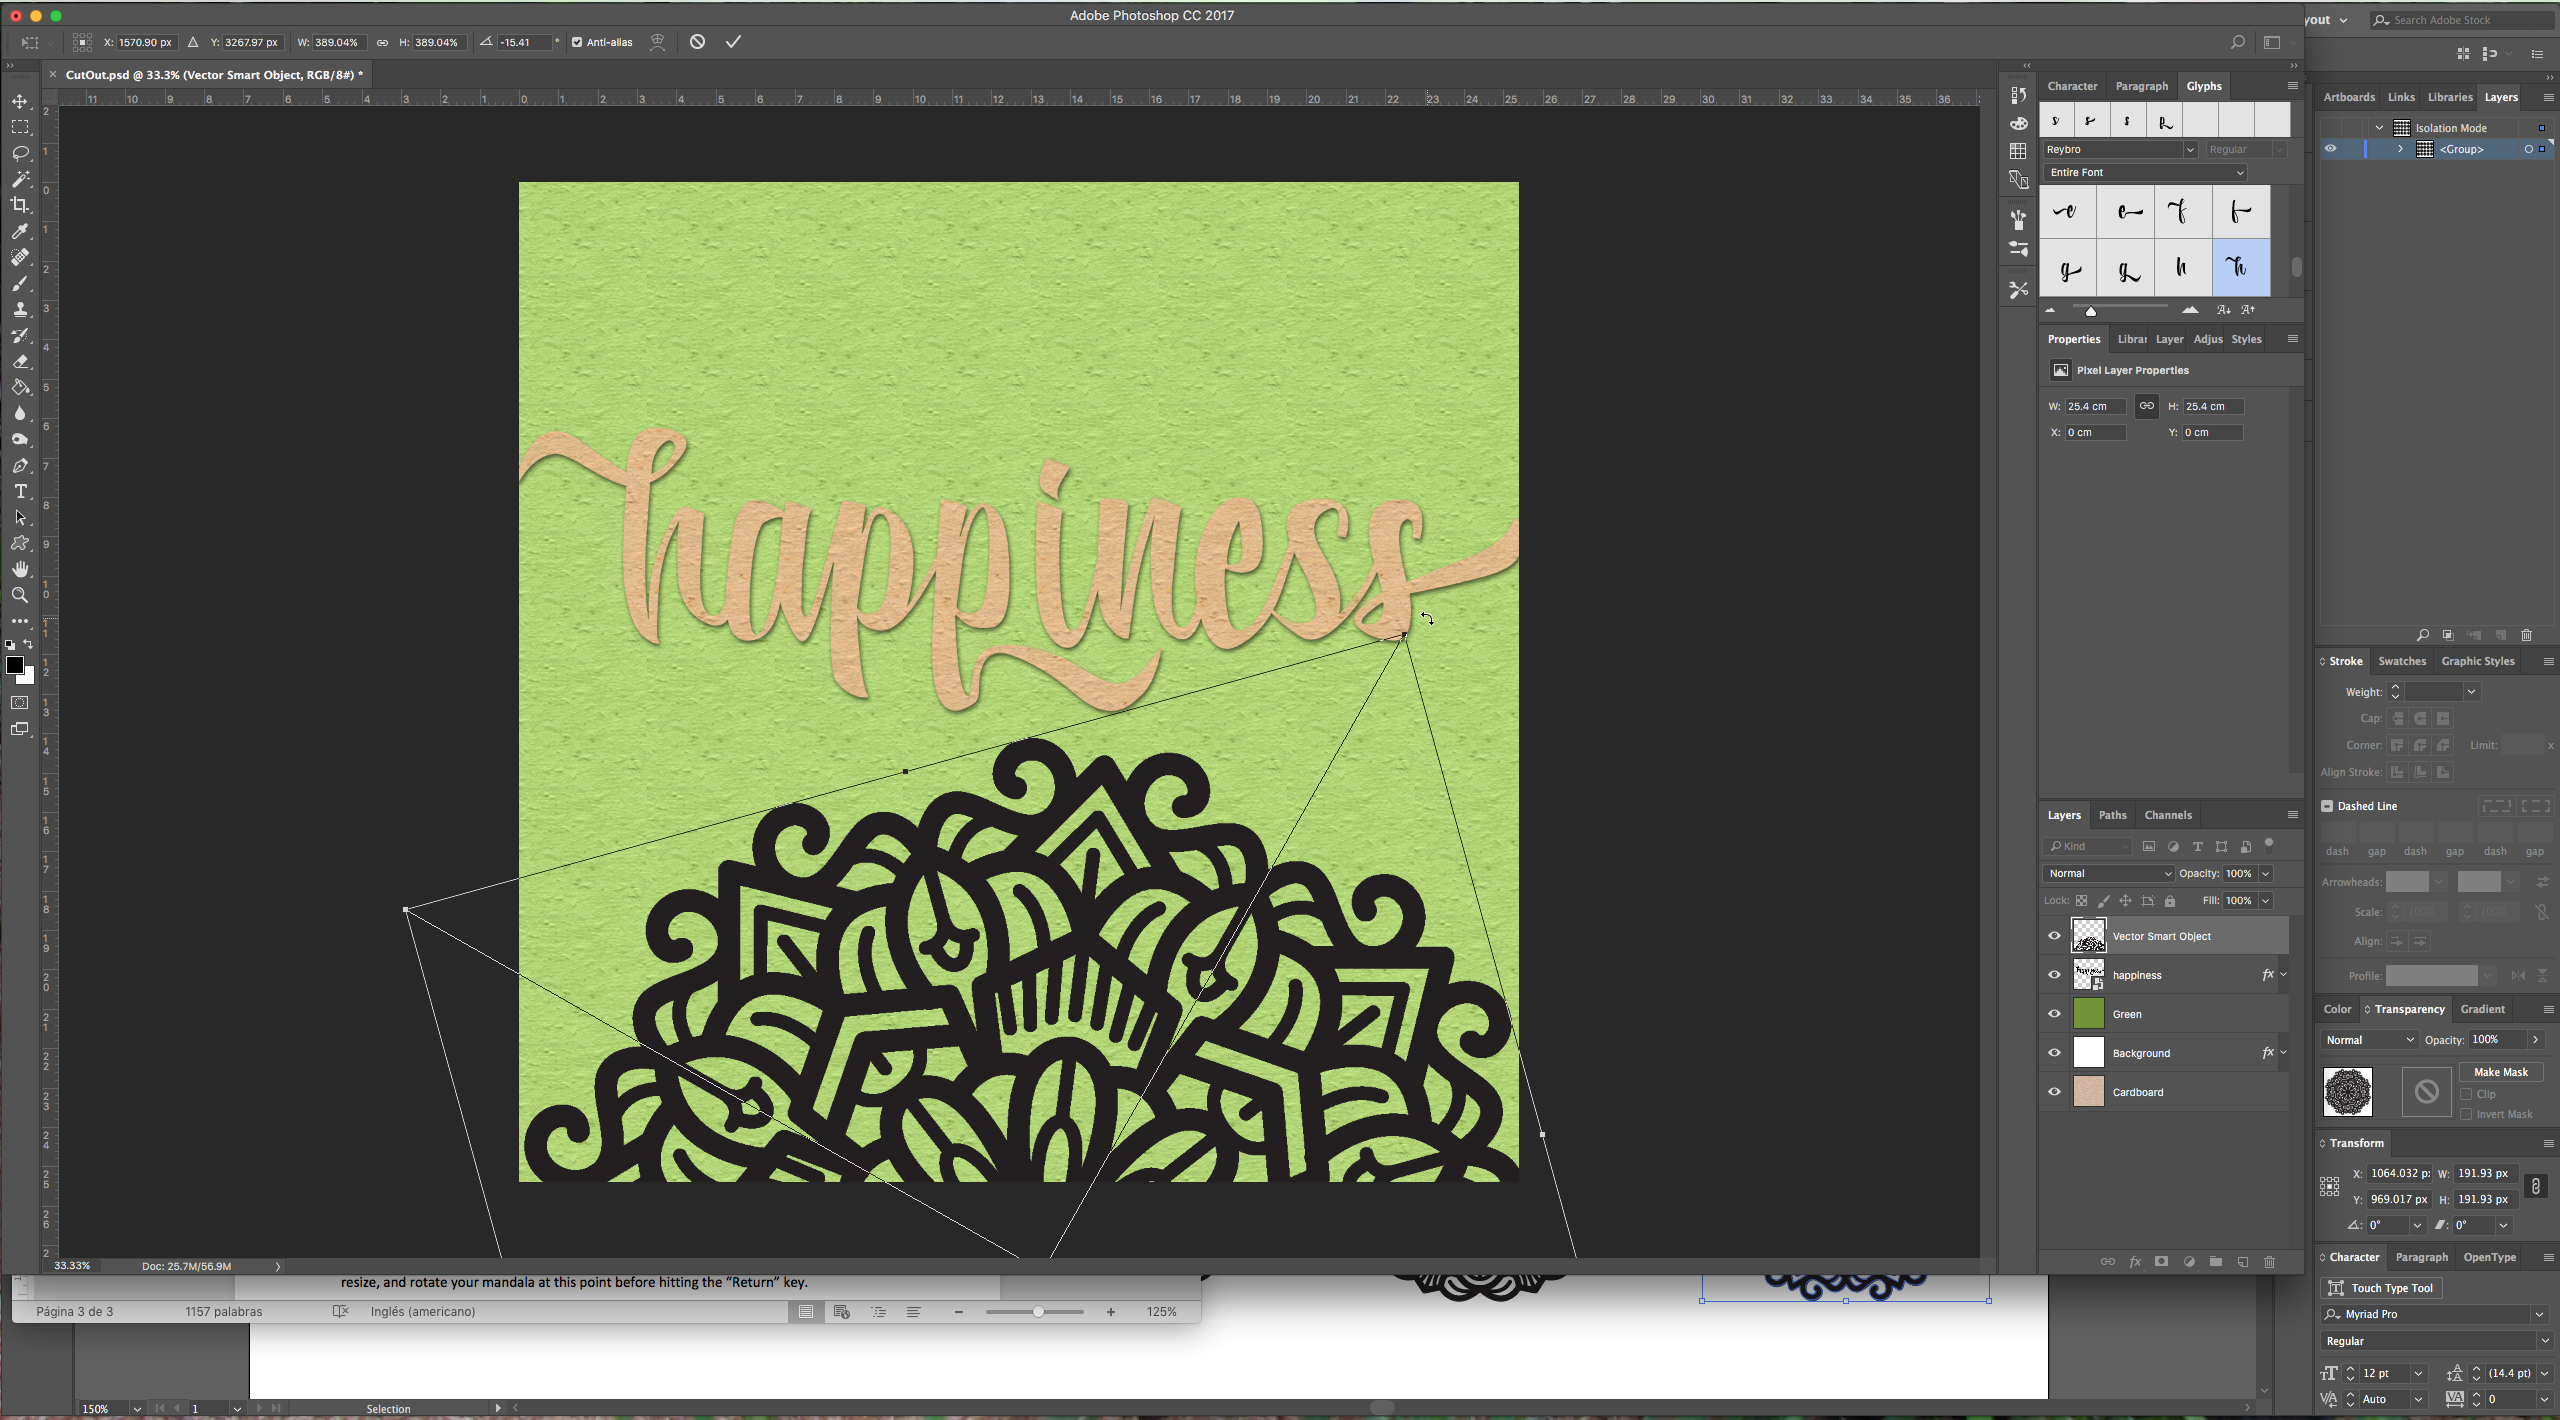
8 – Now you can open your Mandala vectors in Illustrator and choose the one you would like to incorporate to your artwork. You can use just a piece if it seems too complicated. Click Command/Control + C to copy and then head to Photoshop and click Command/Control + V to copy, choose “Paste as Smart Object” when prompted. You can resize, and rotate your mandala at this point before hitting the “Return” key.
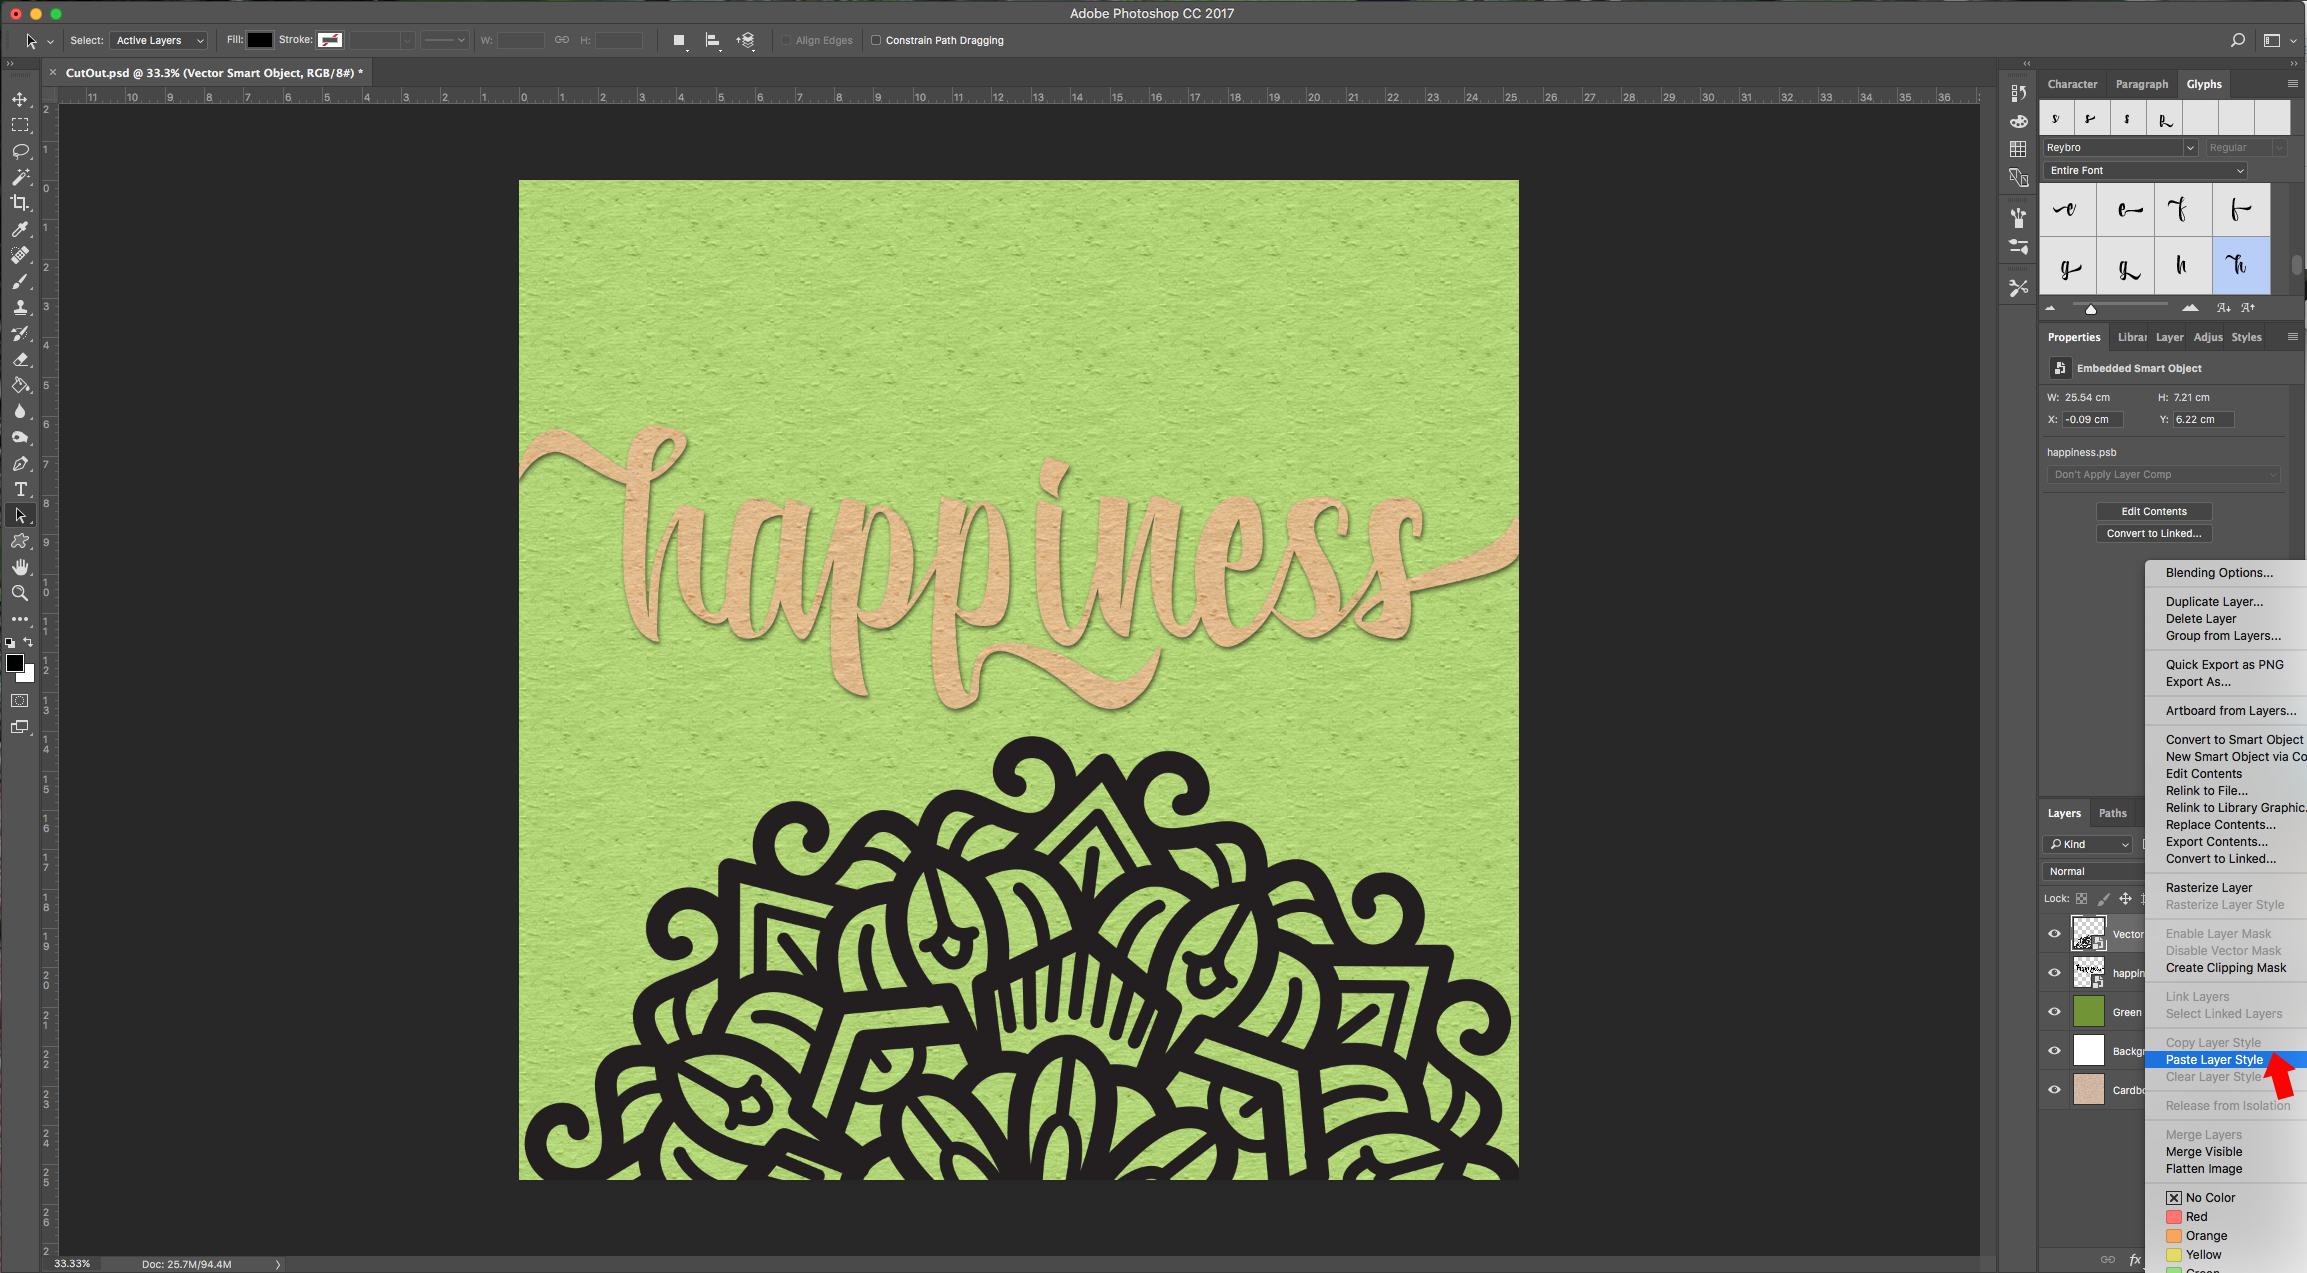
9 – Right-click on your text layer and “Copy Layer Style” then go to your Mandala and “Paste Layer Style”.

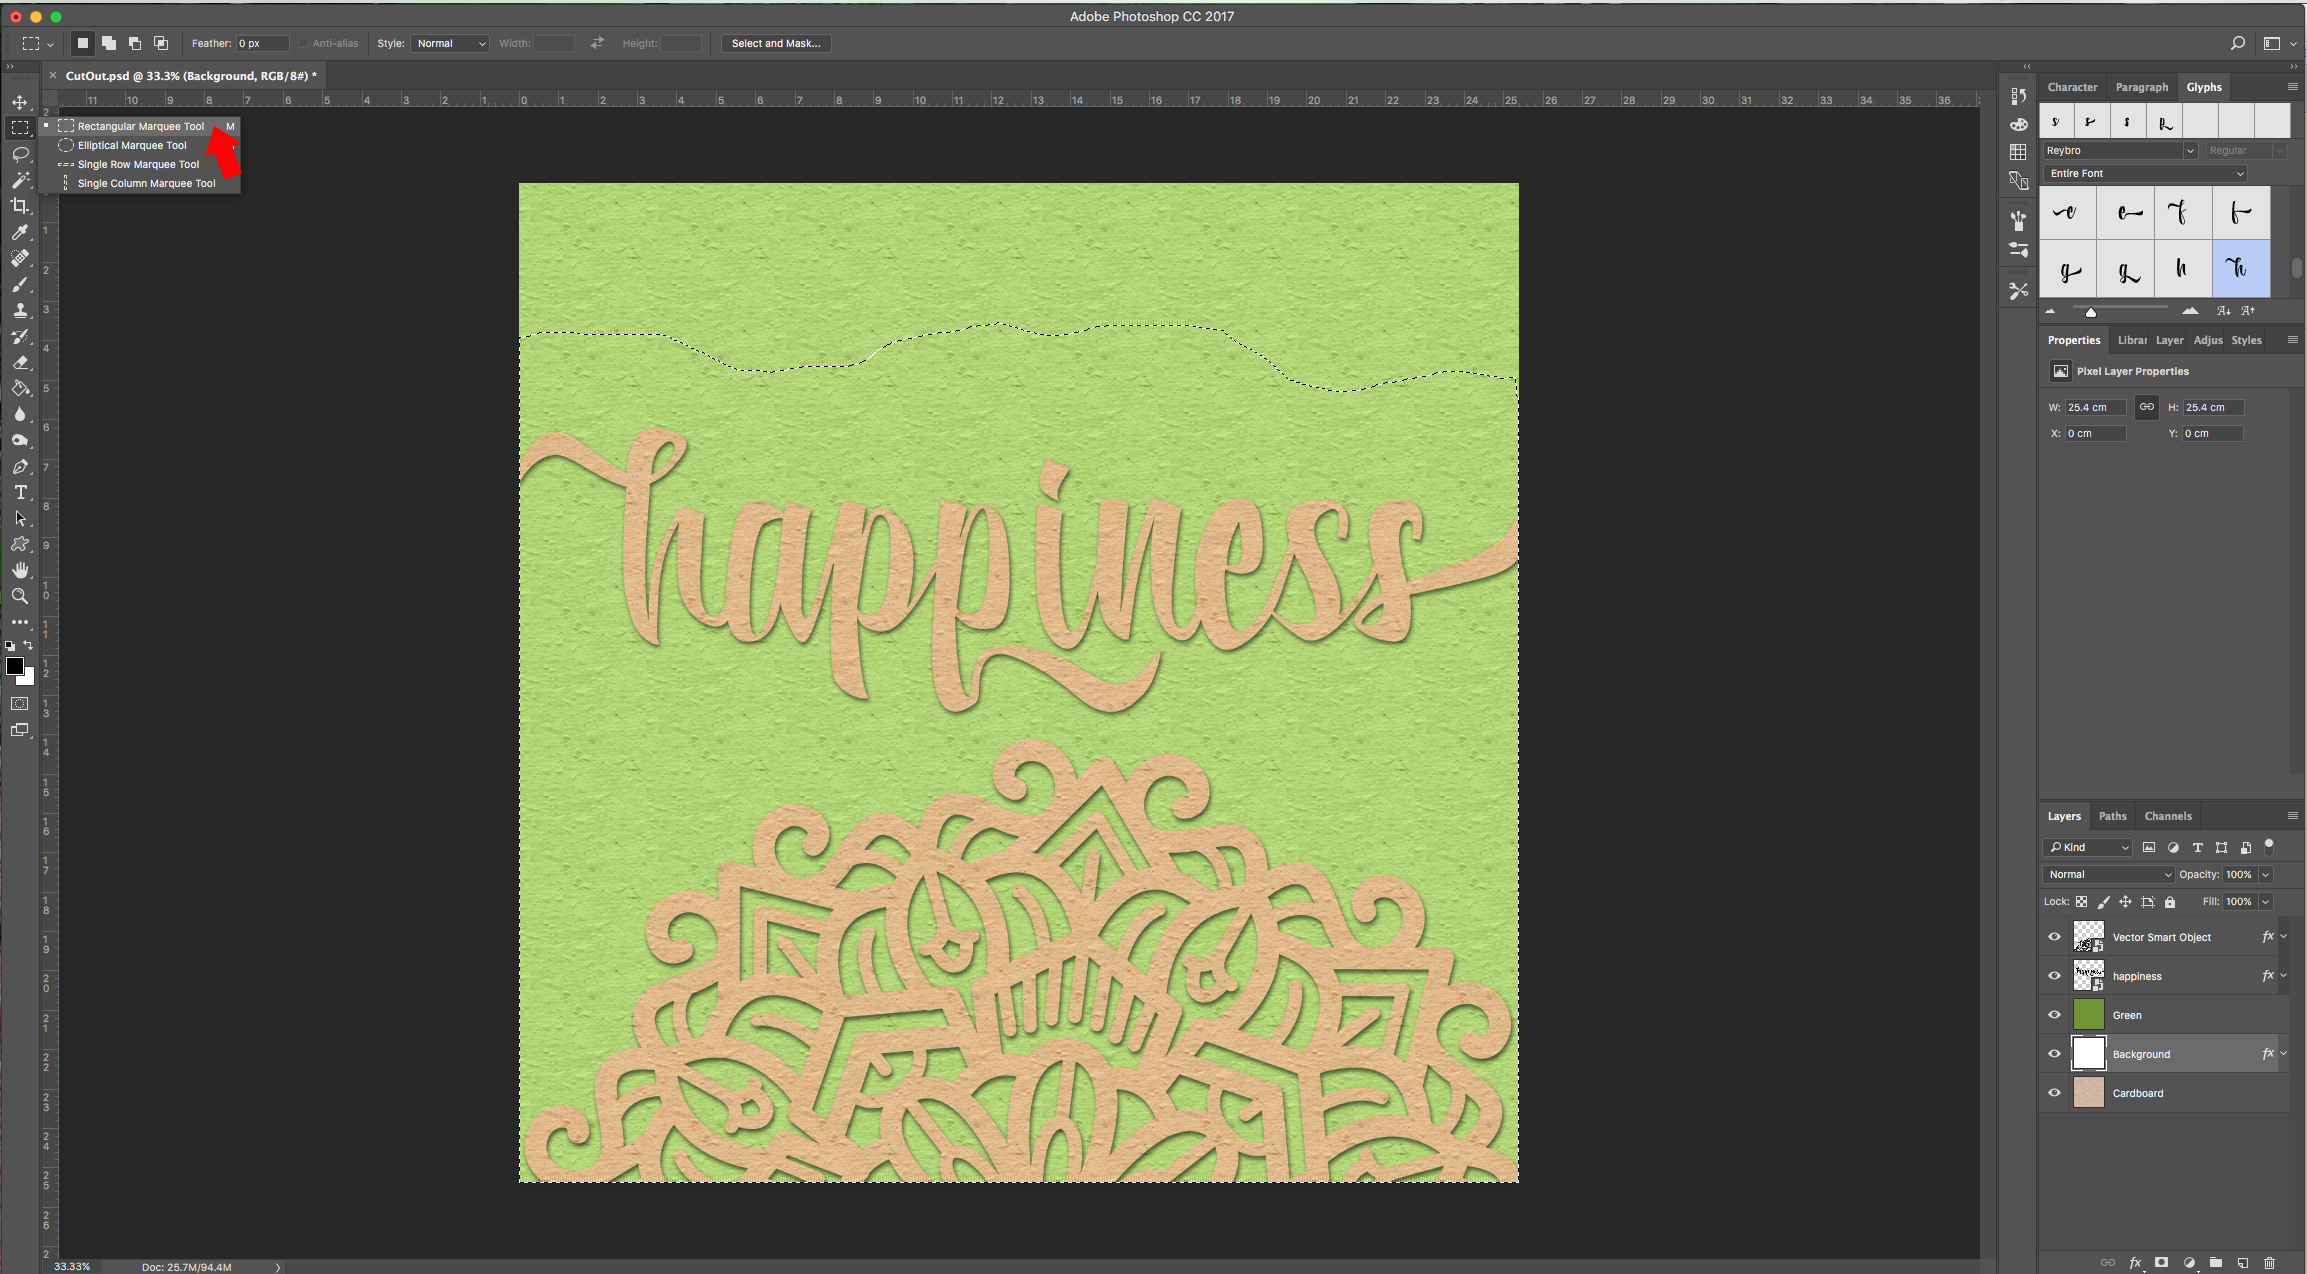
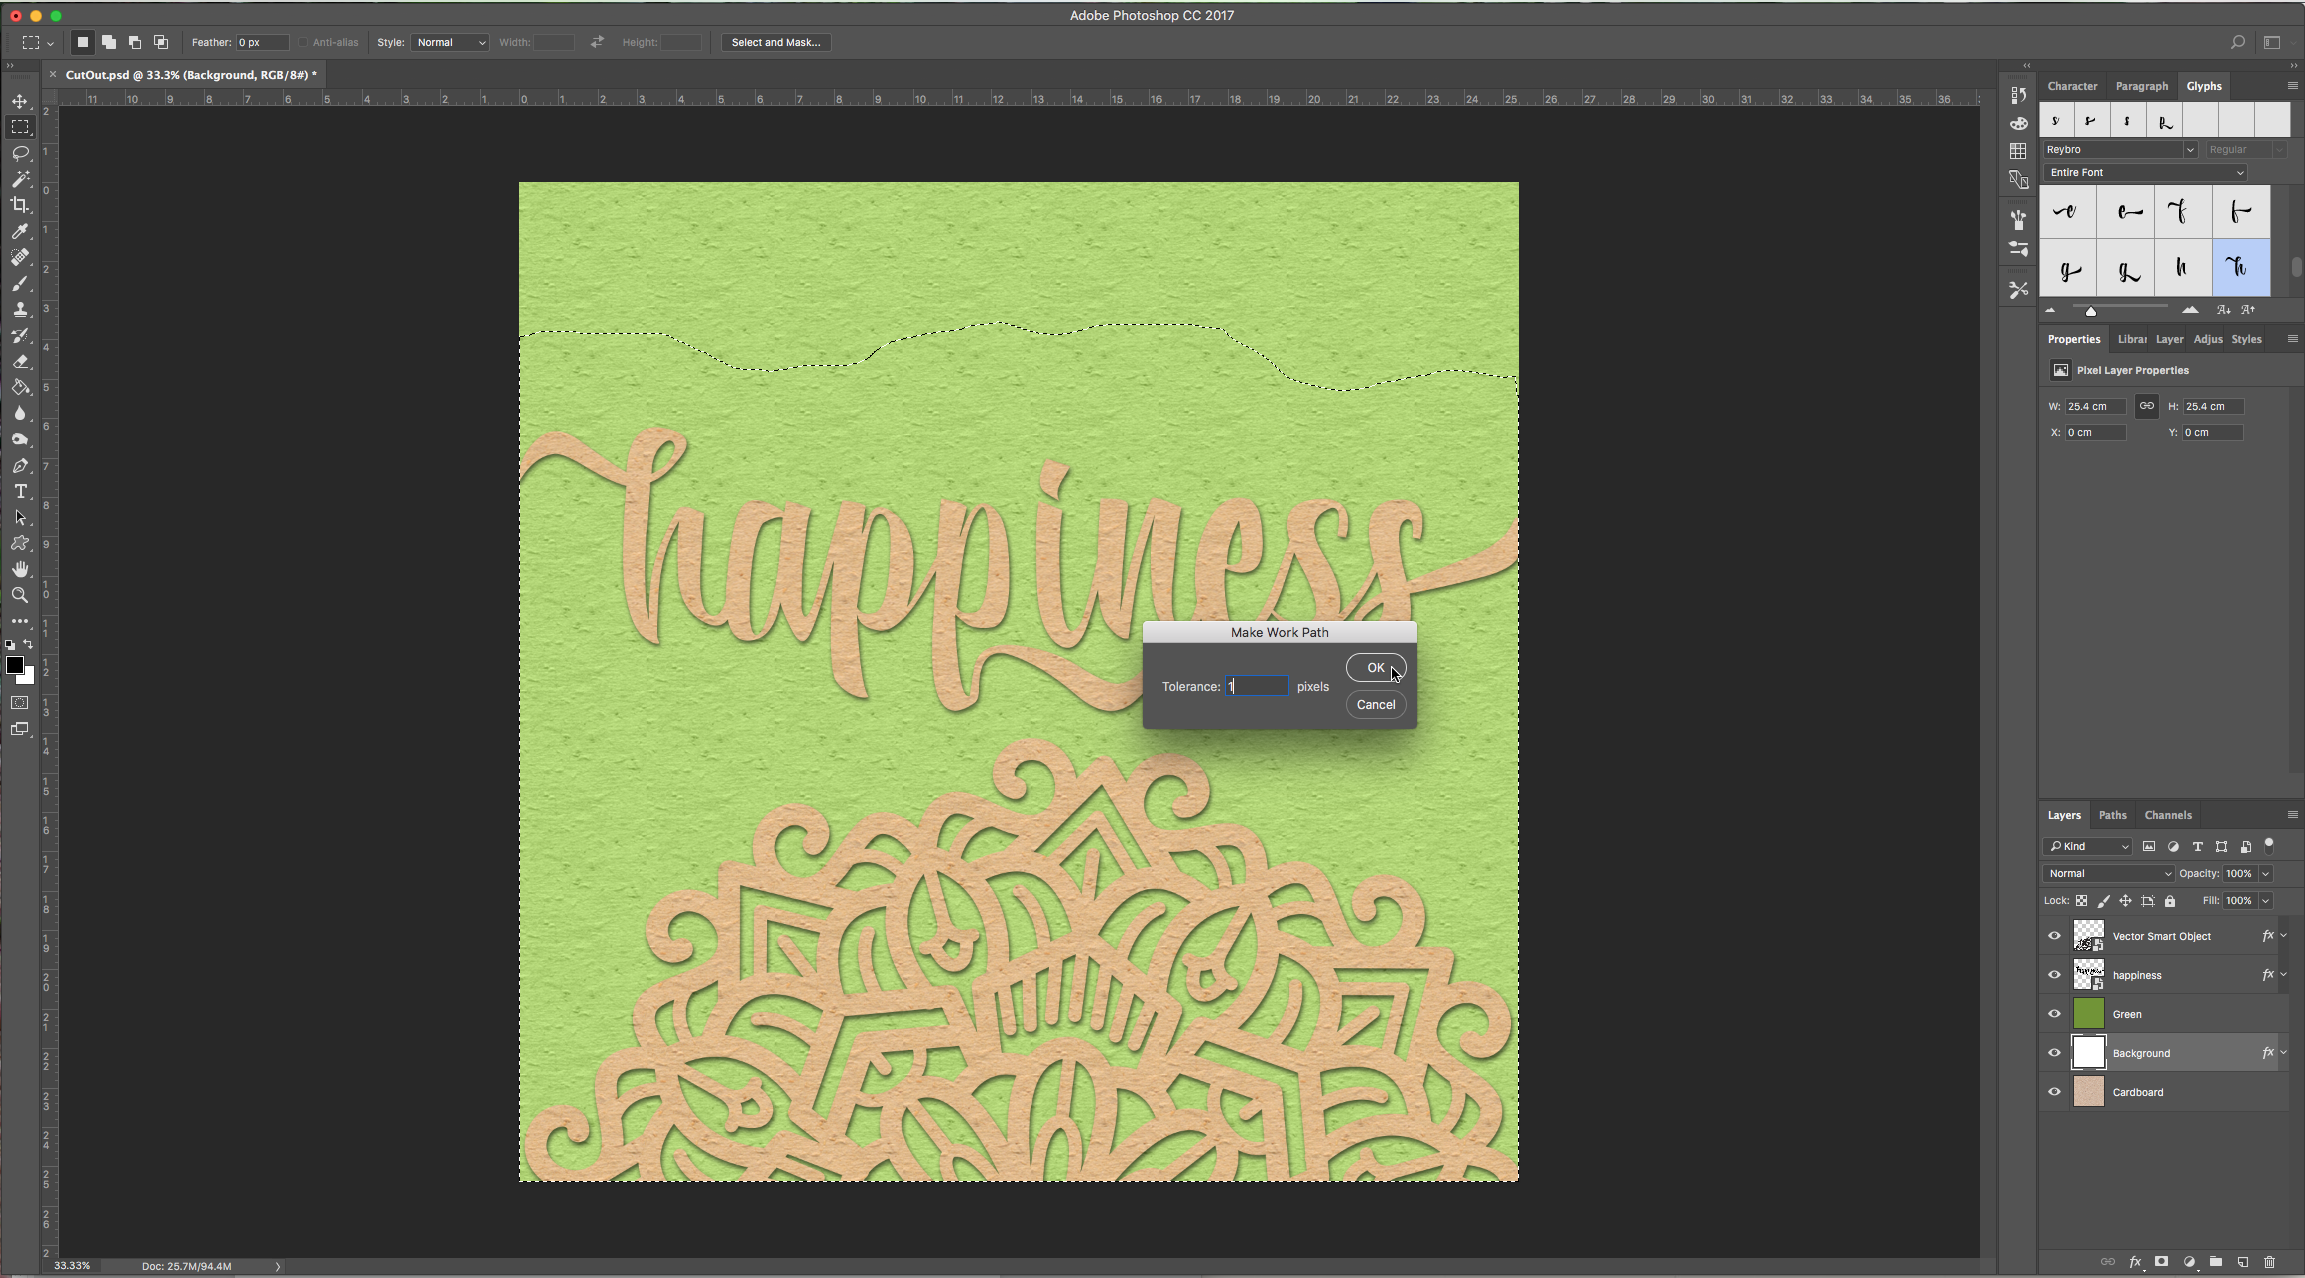
10 – Go to your “Background” layer and with the “Lasso Tool” (L) draw a “tear” in your artwork and continue your selection across the lower half of the file. To make it easier you can use the “Rectangular Selection Tool” while pressing “Shift” to add to your selection.

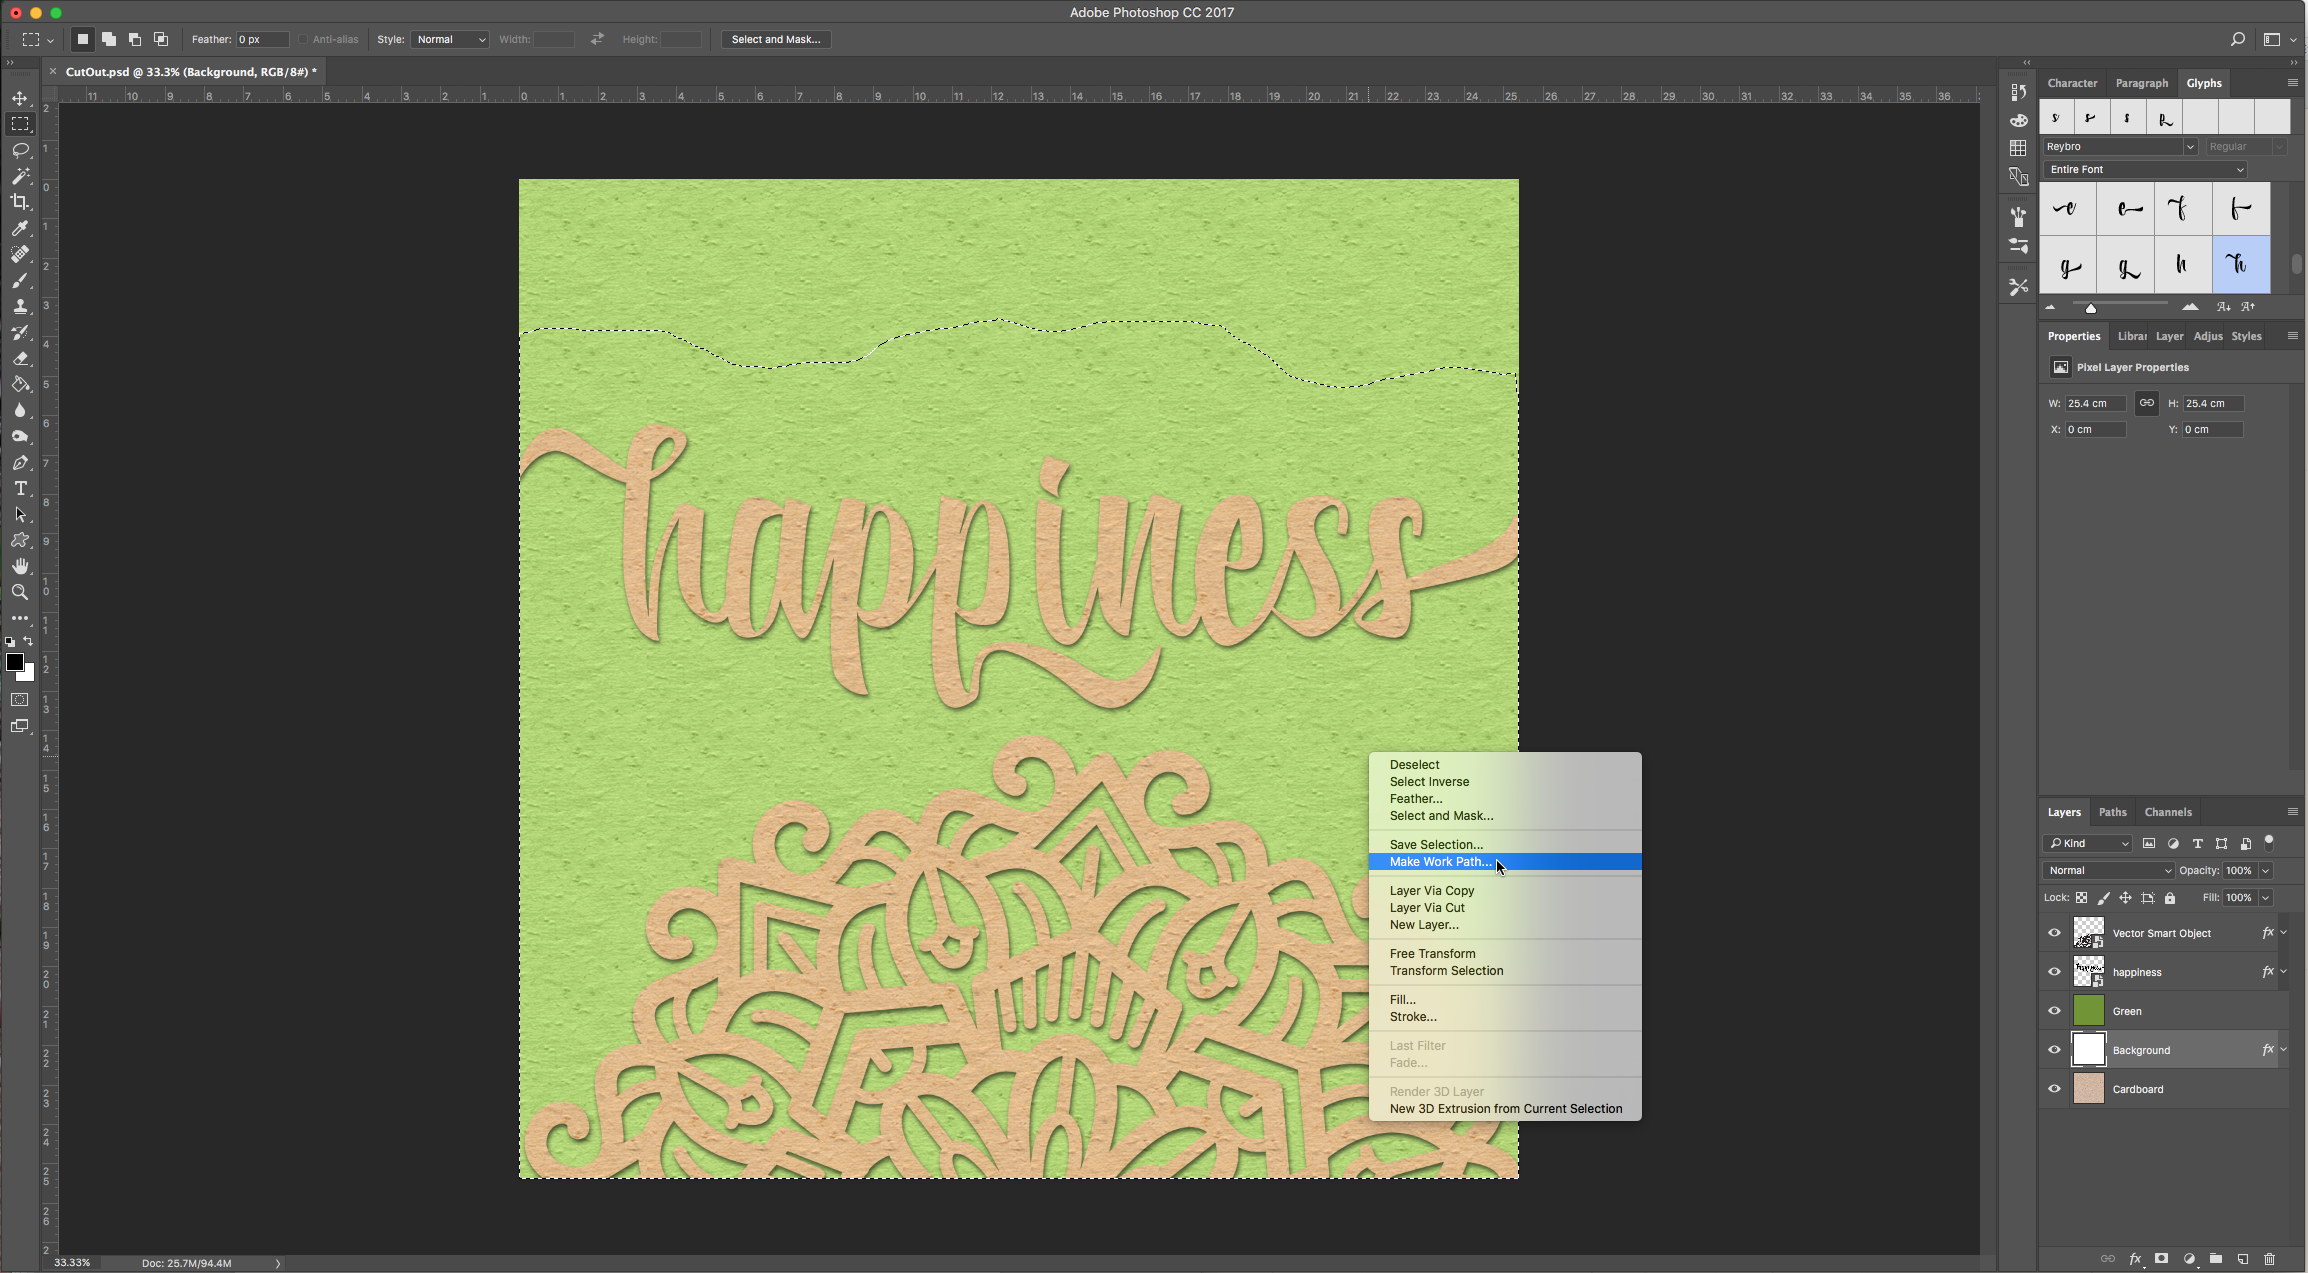
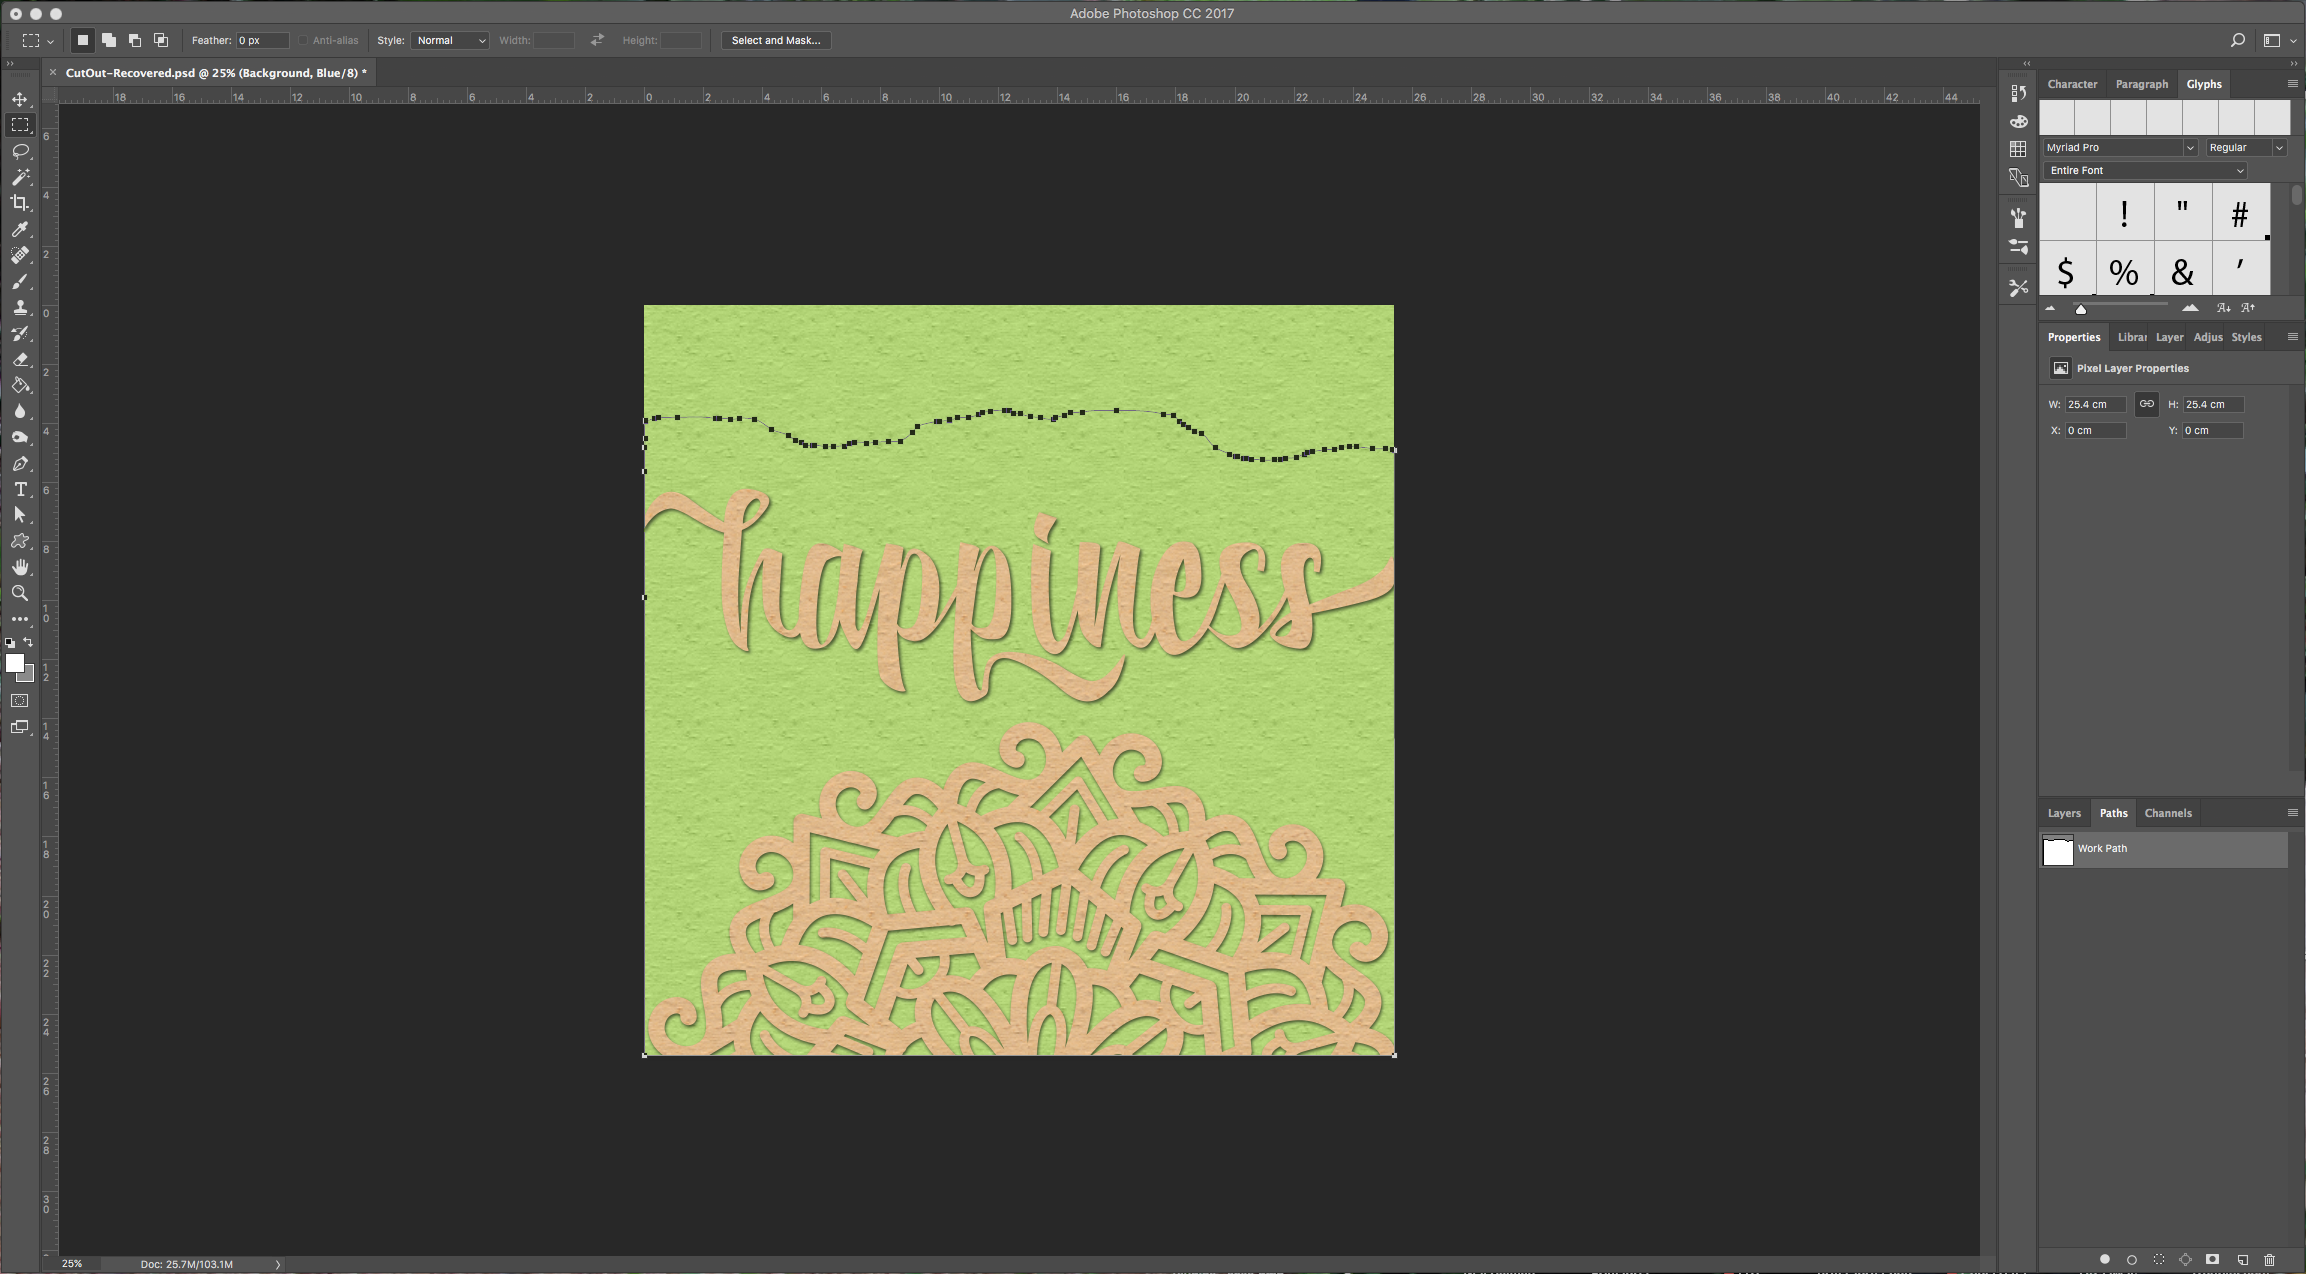
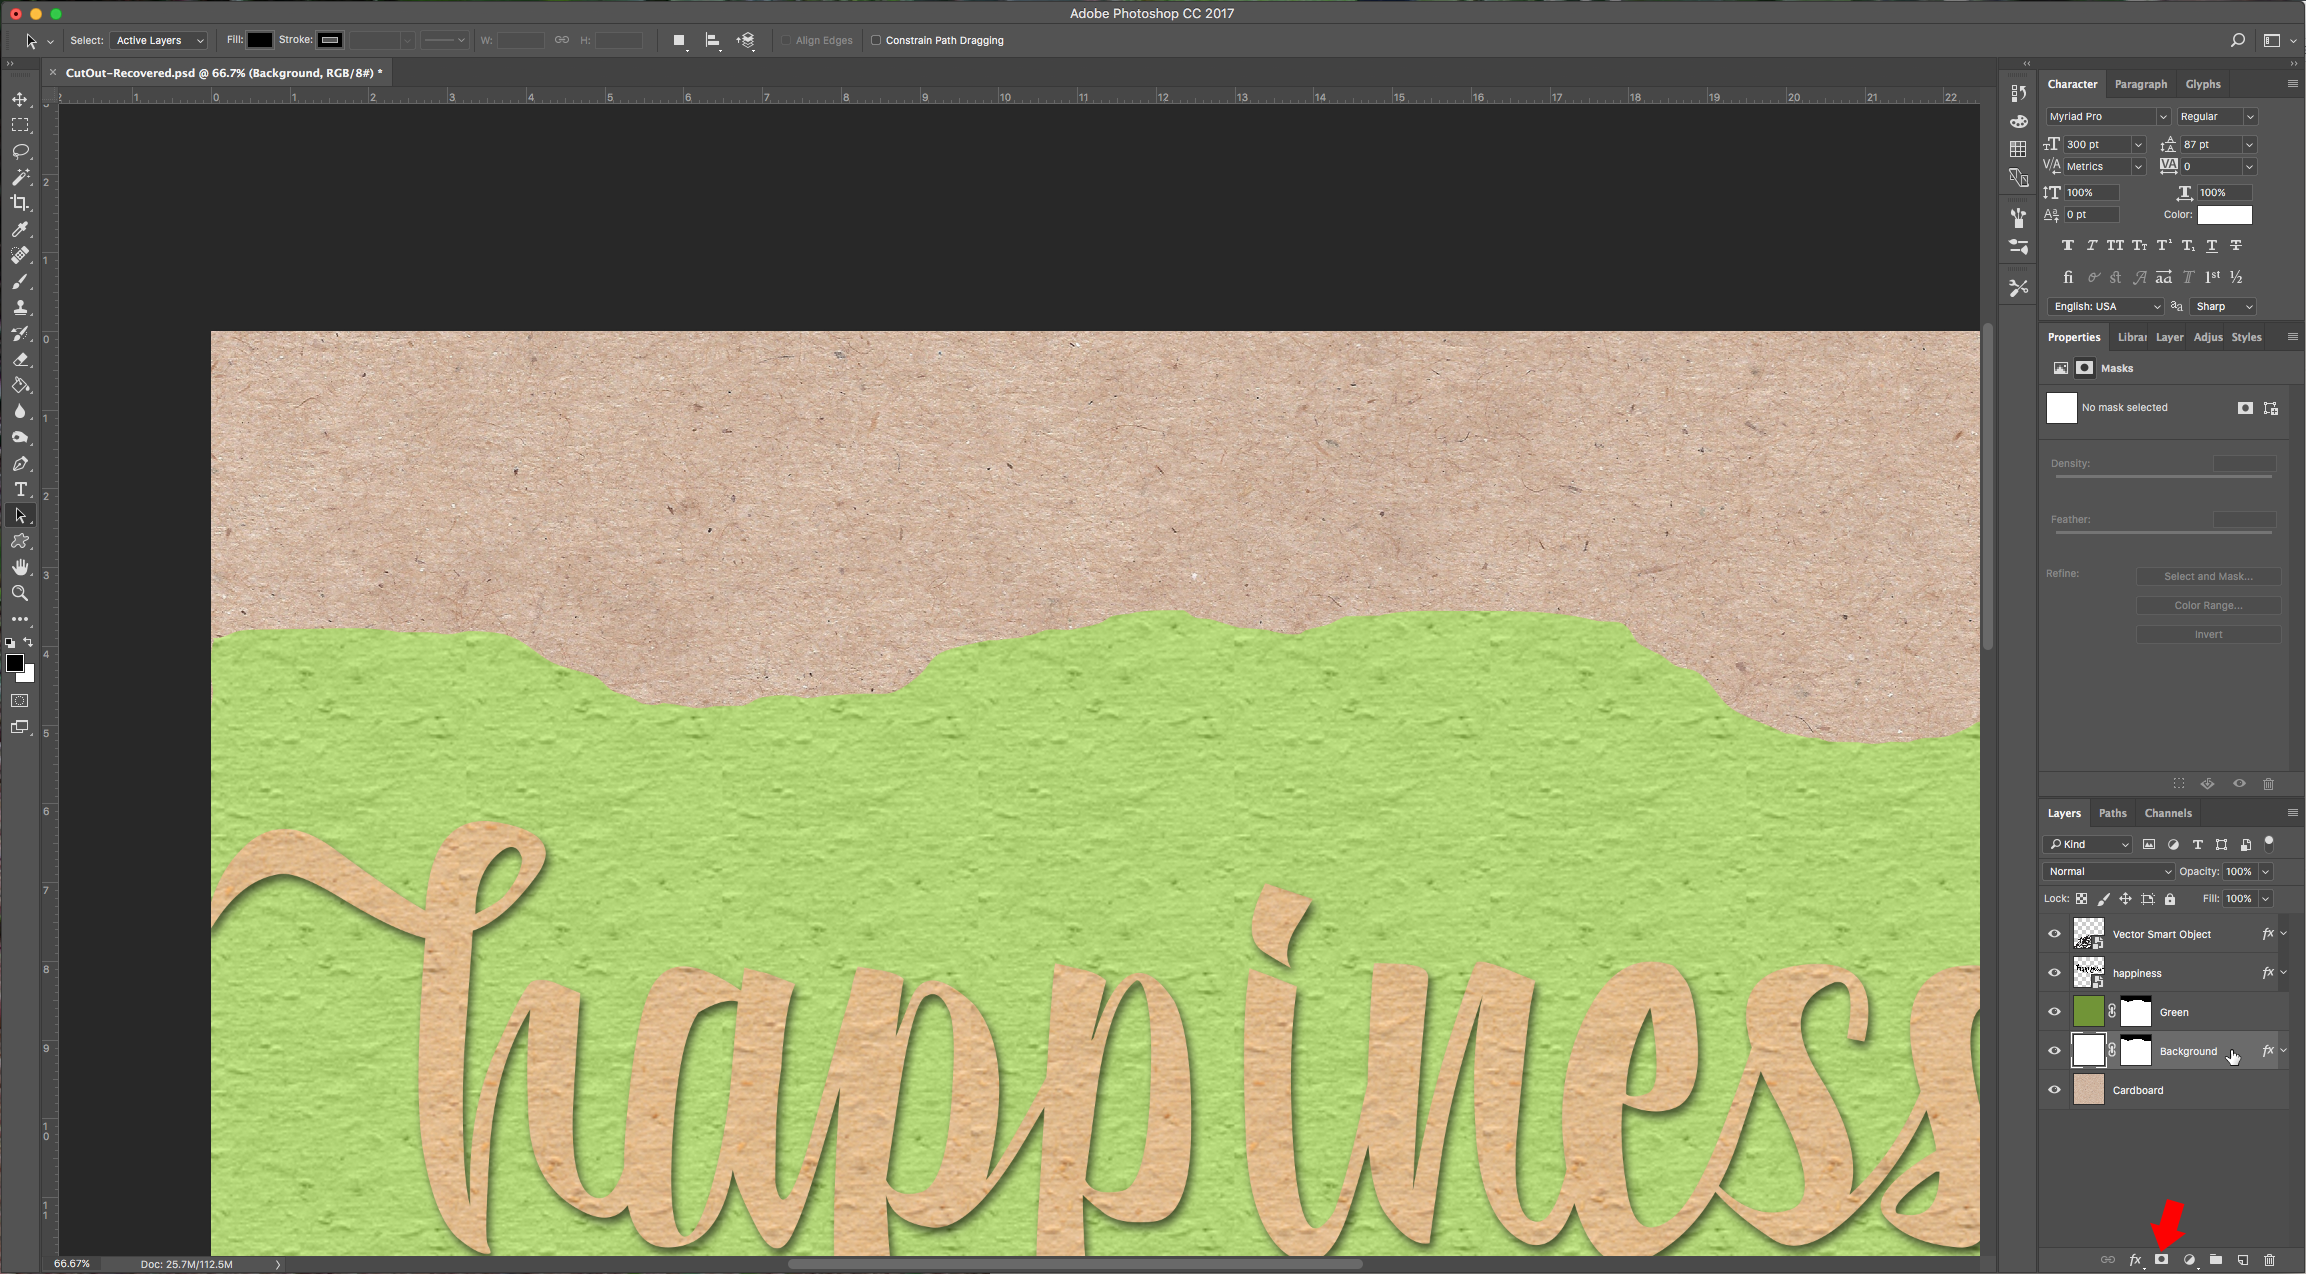
11 – Right-click on your selection and choose “Make Work Path”, use a “Tolerance” of 1 pixel. With that selection make a “Layer Mask” of your “Background” layer and do it for your “Green” layer too. (Click on the “Add Vector Mask” button at the bottom of the “Layers” menu).
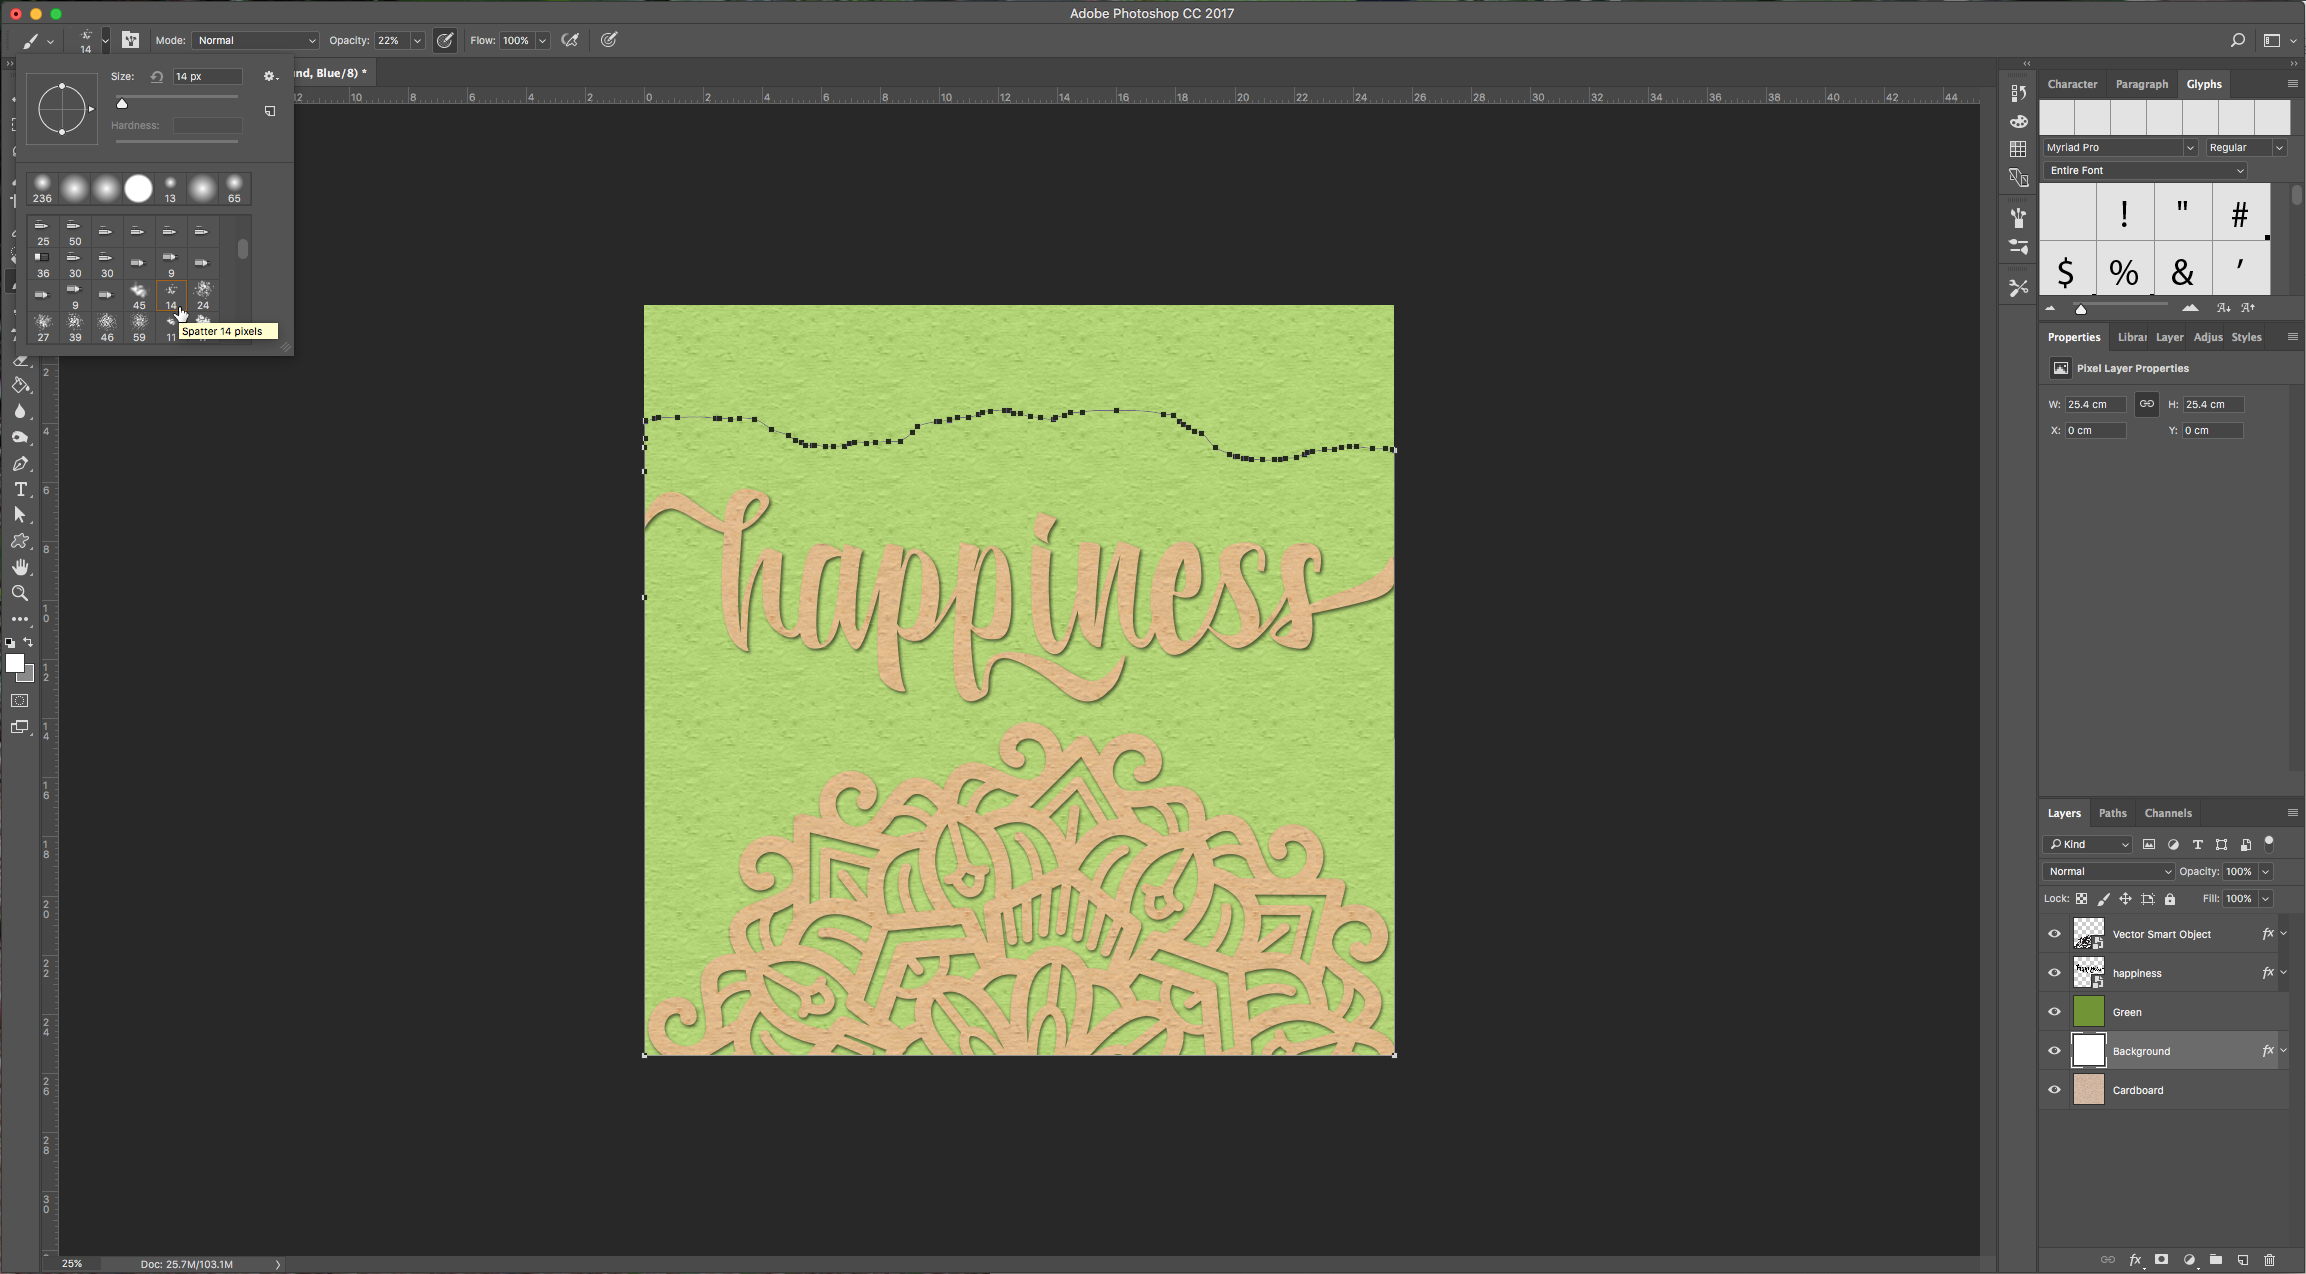
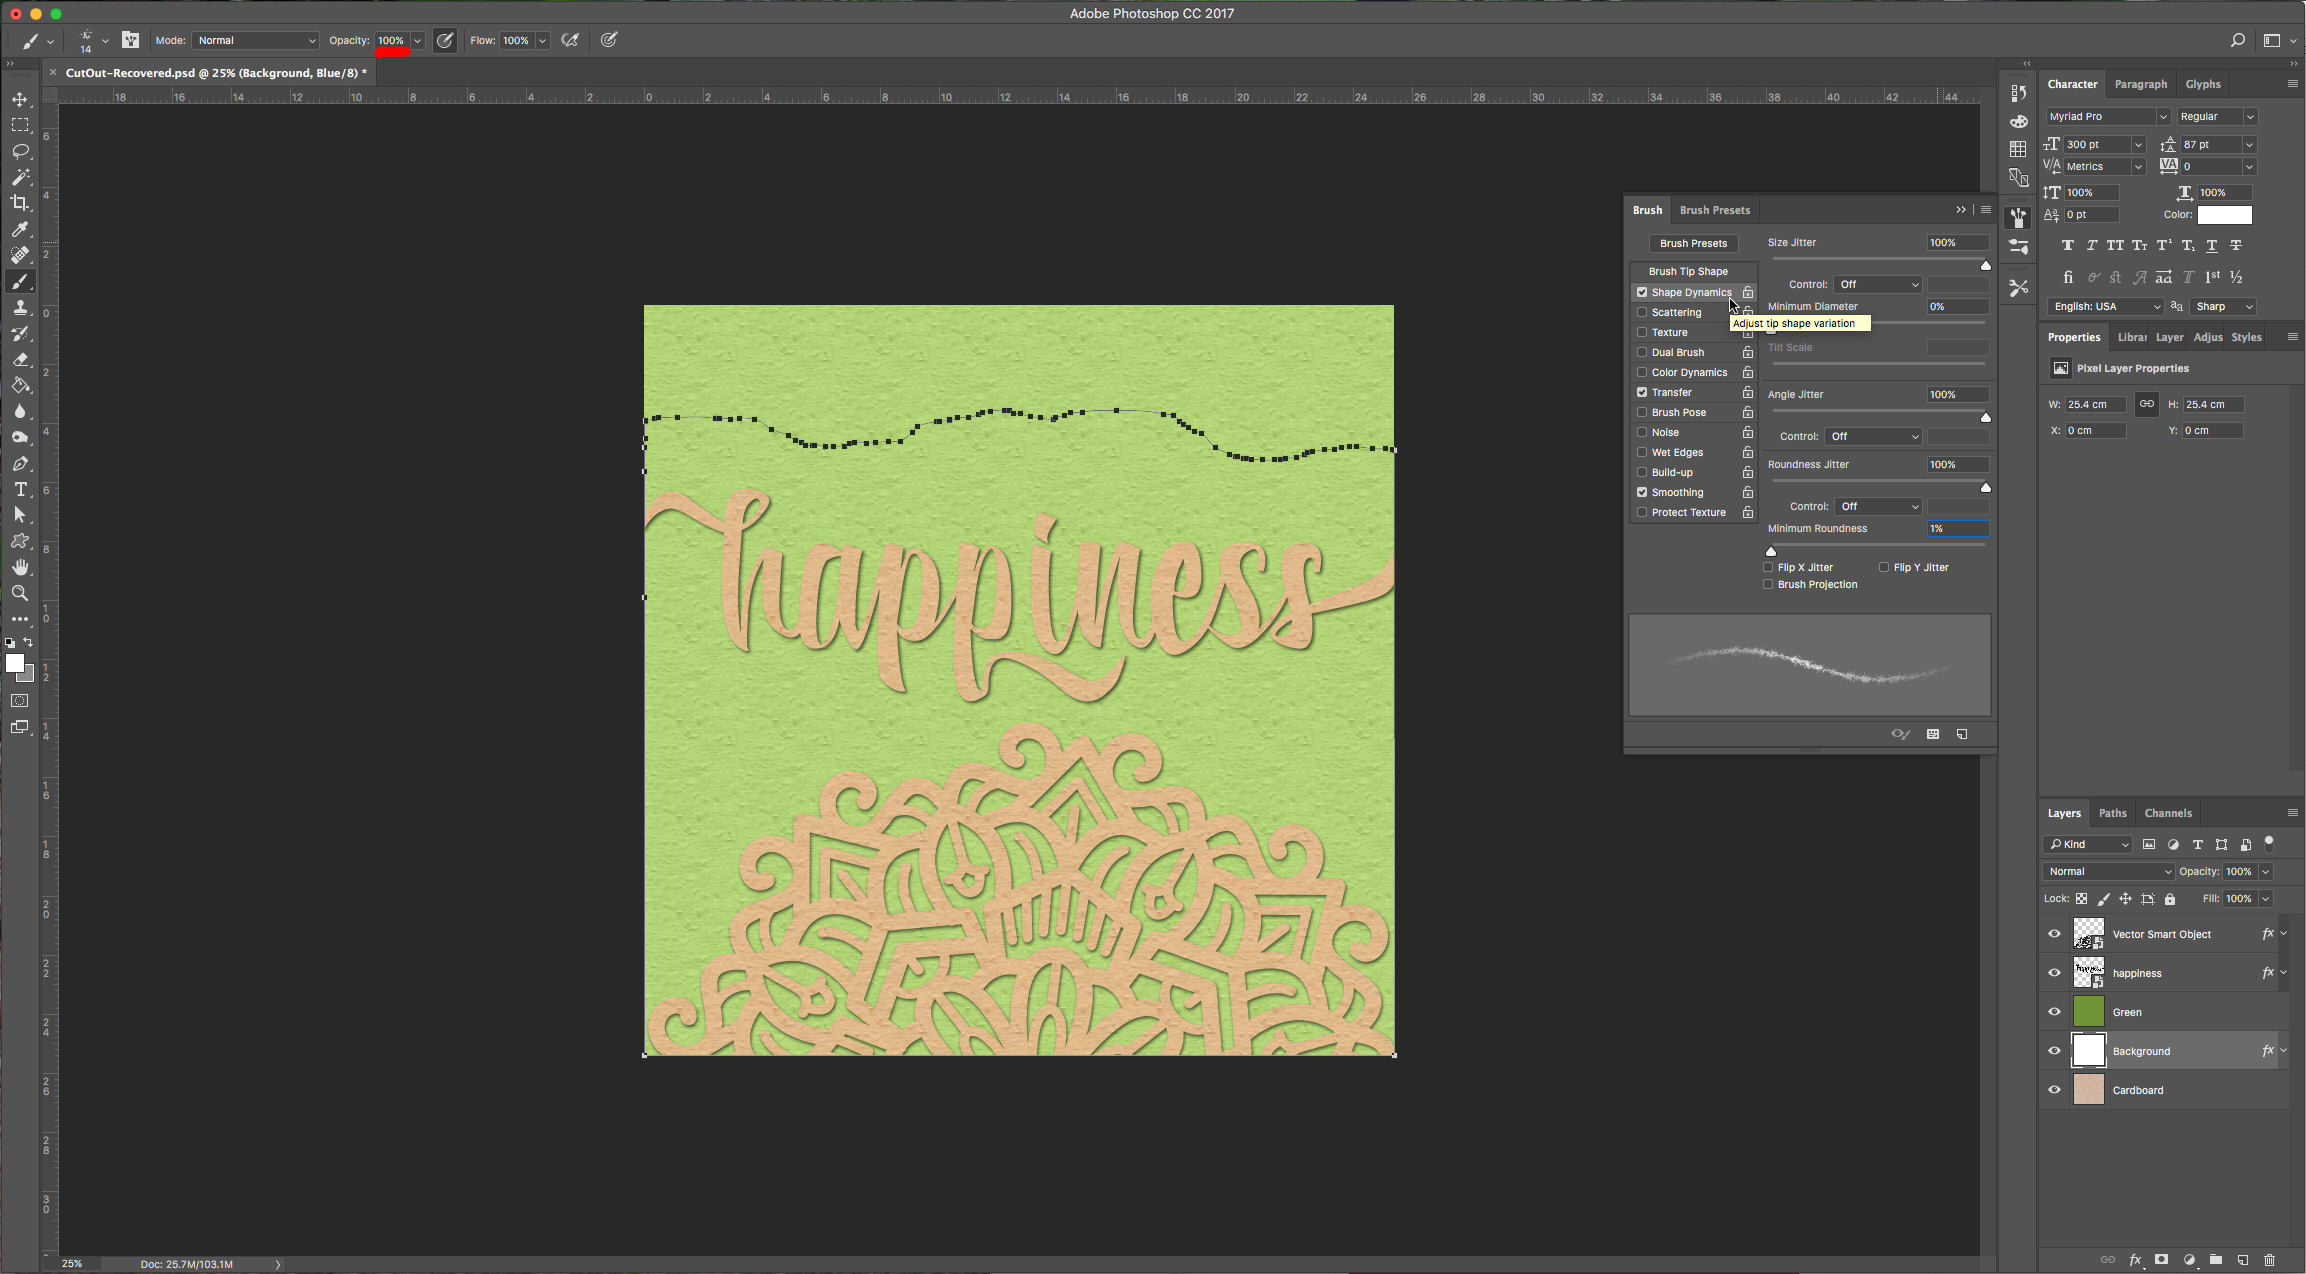
12 – Select the “Brush Tool” (B) and choose the brush “Spatter 14 pixels” (depending on the size of your file you may need to resize the brush). Make sure your “Opacity” is 100% and then go to the “Brush Options” and apply the following values in “Shape Dynamics”:
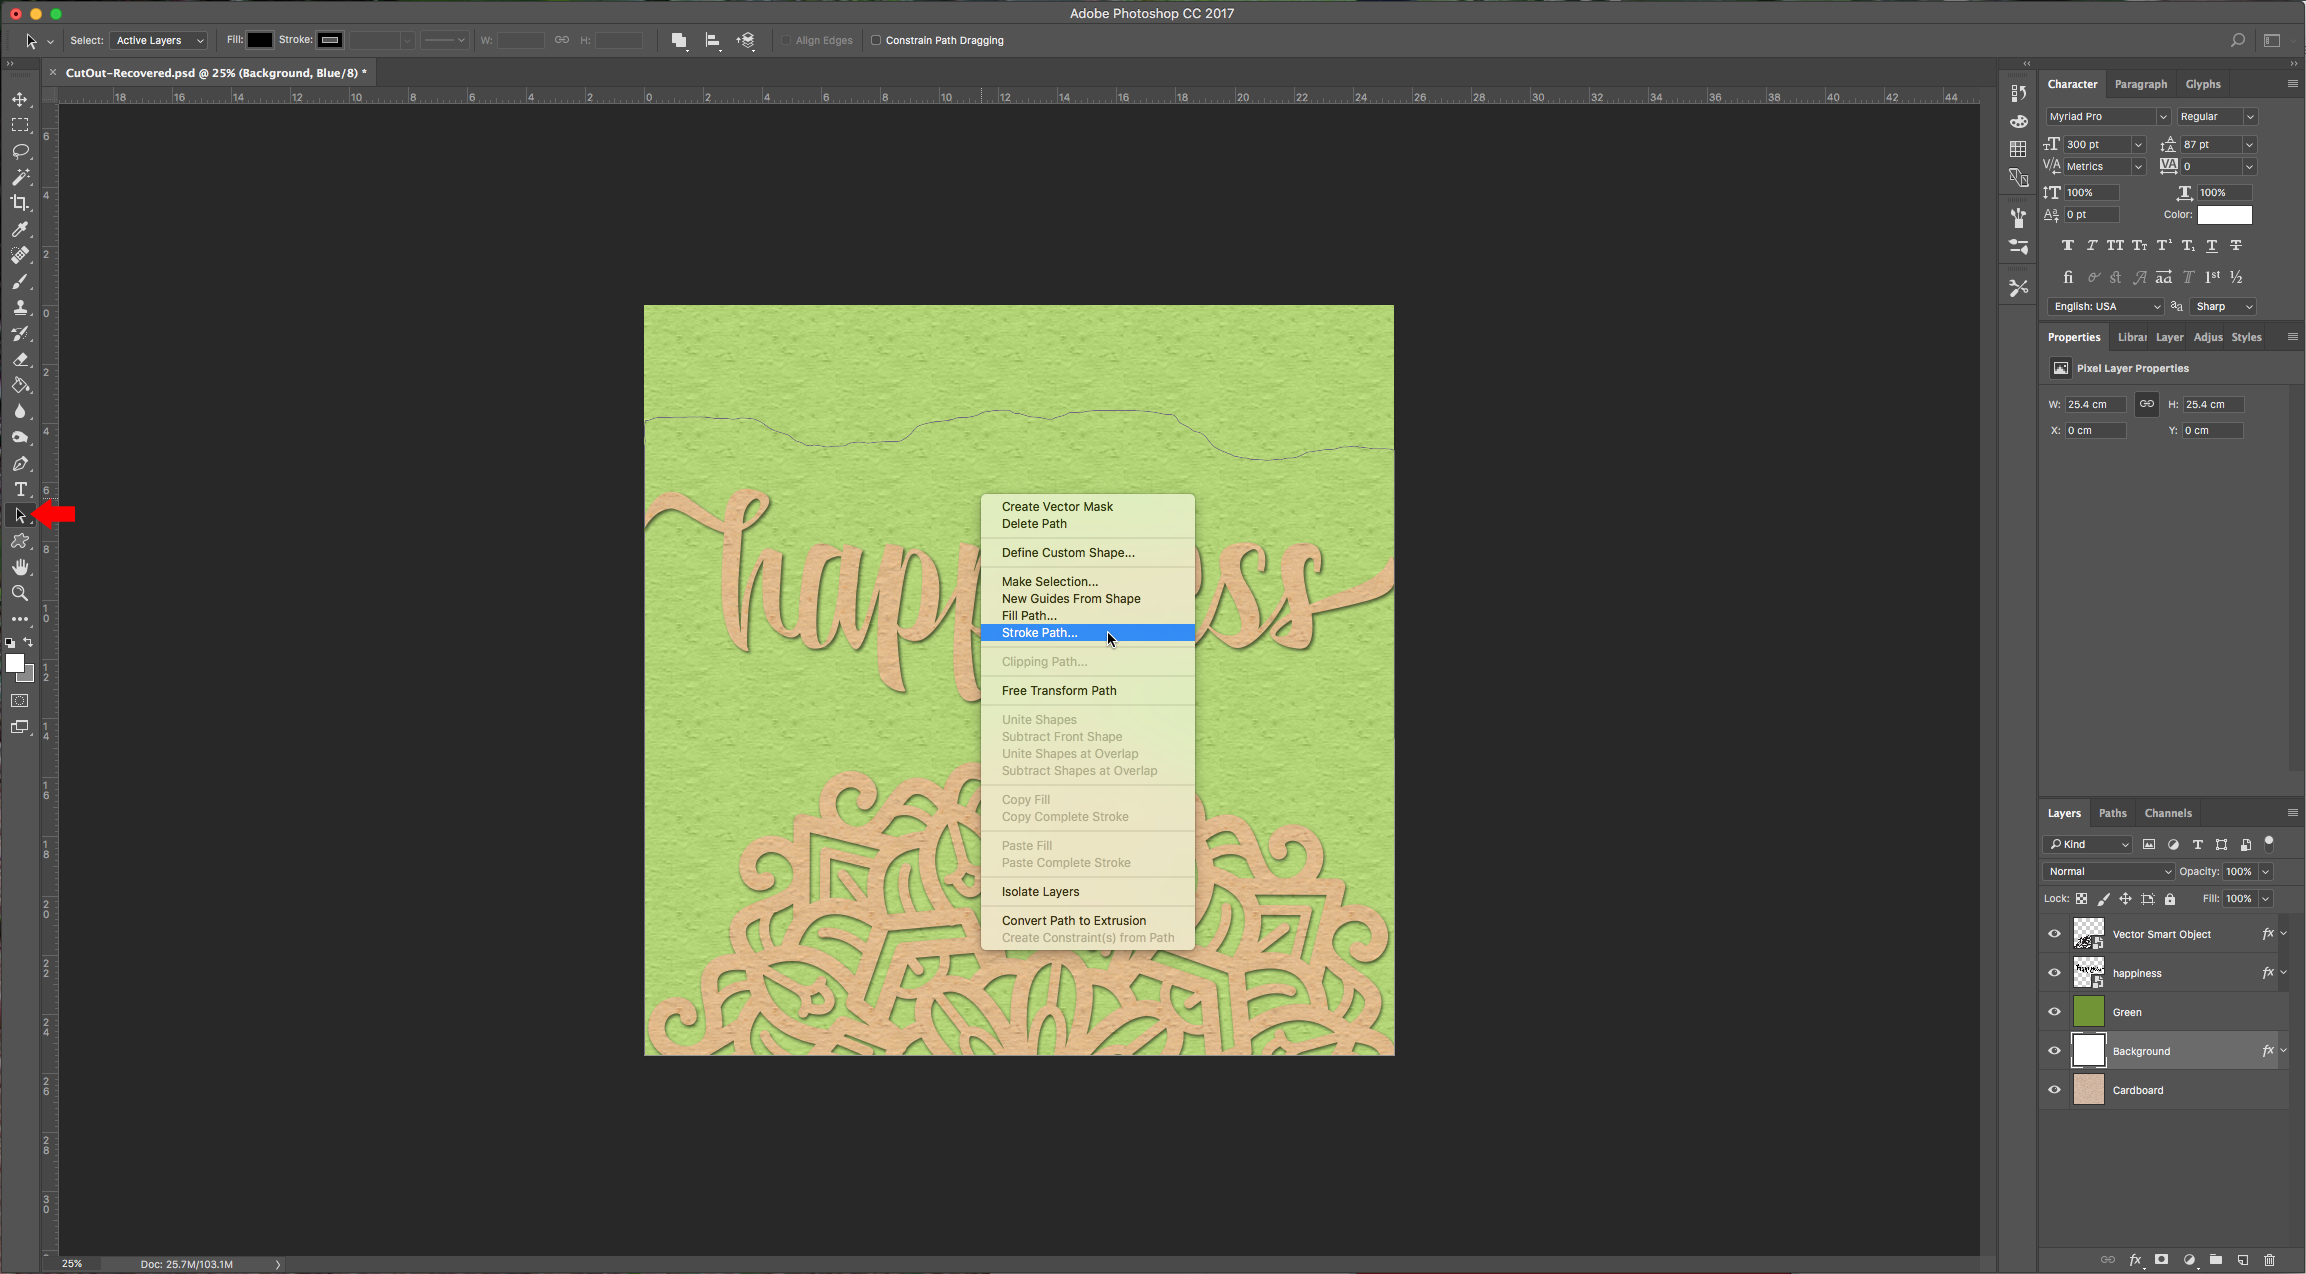
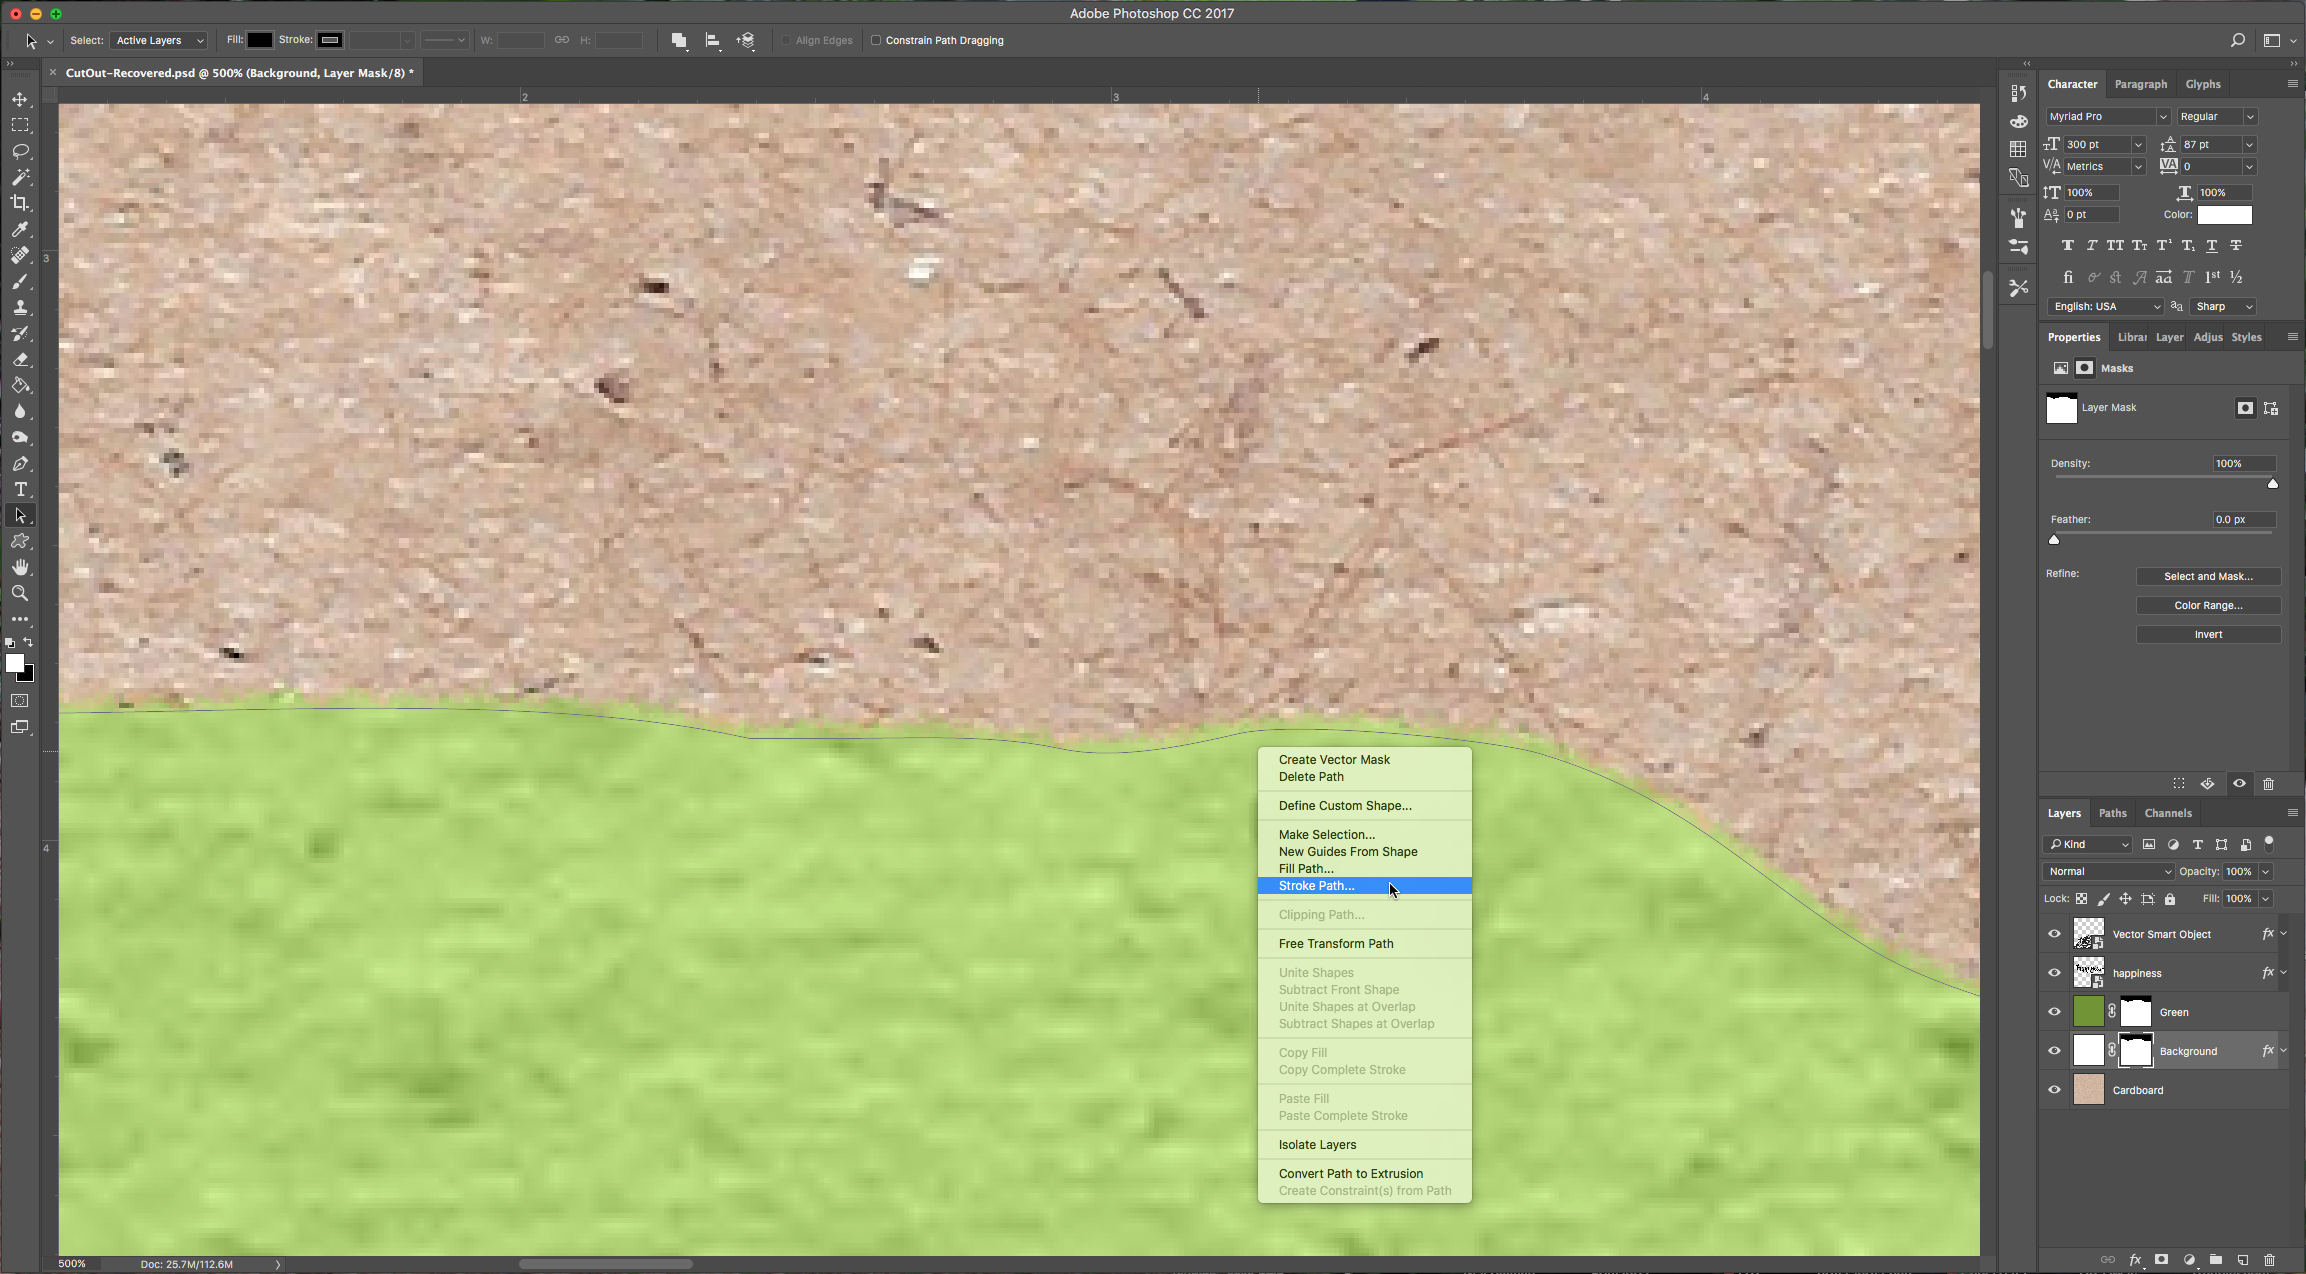
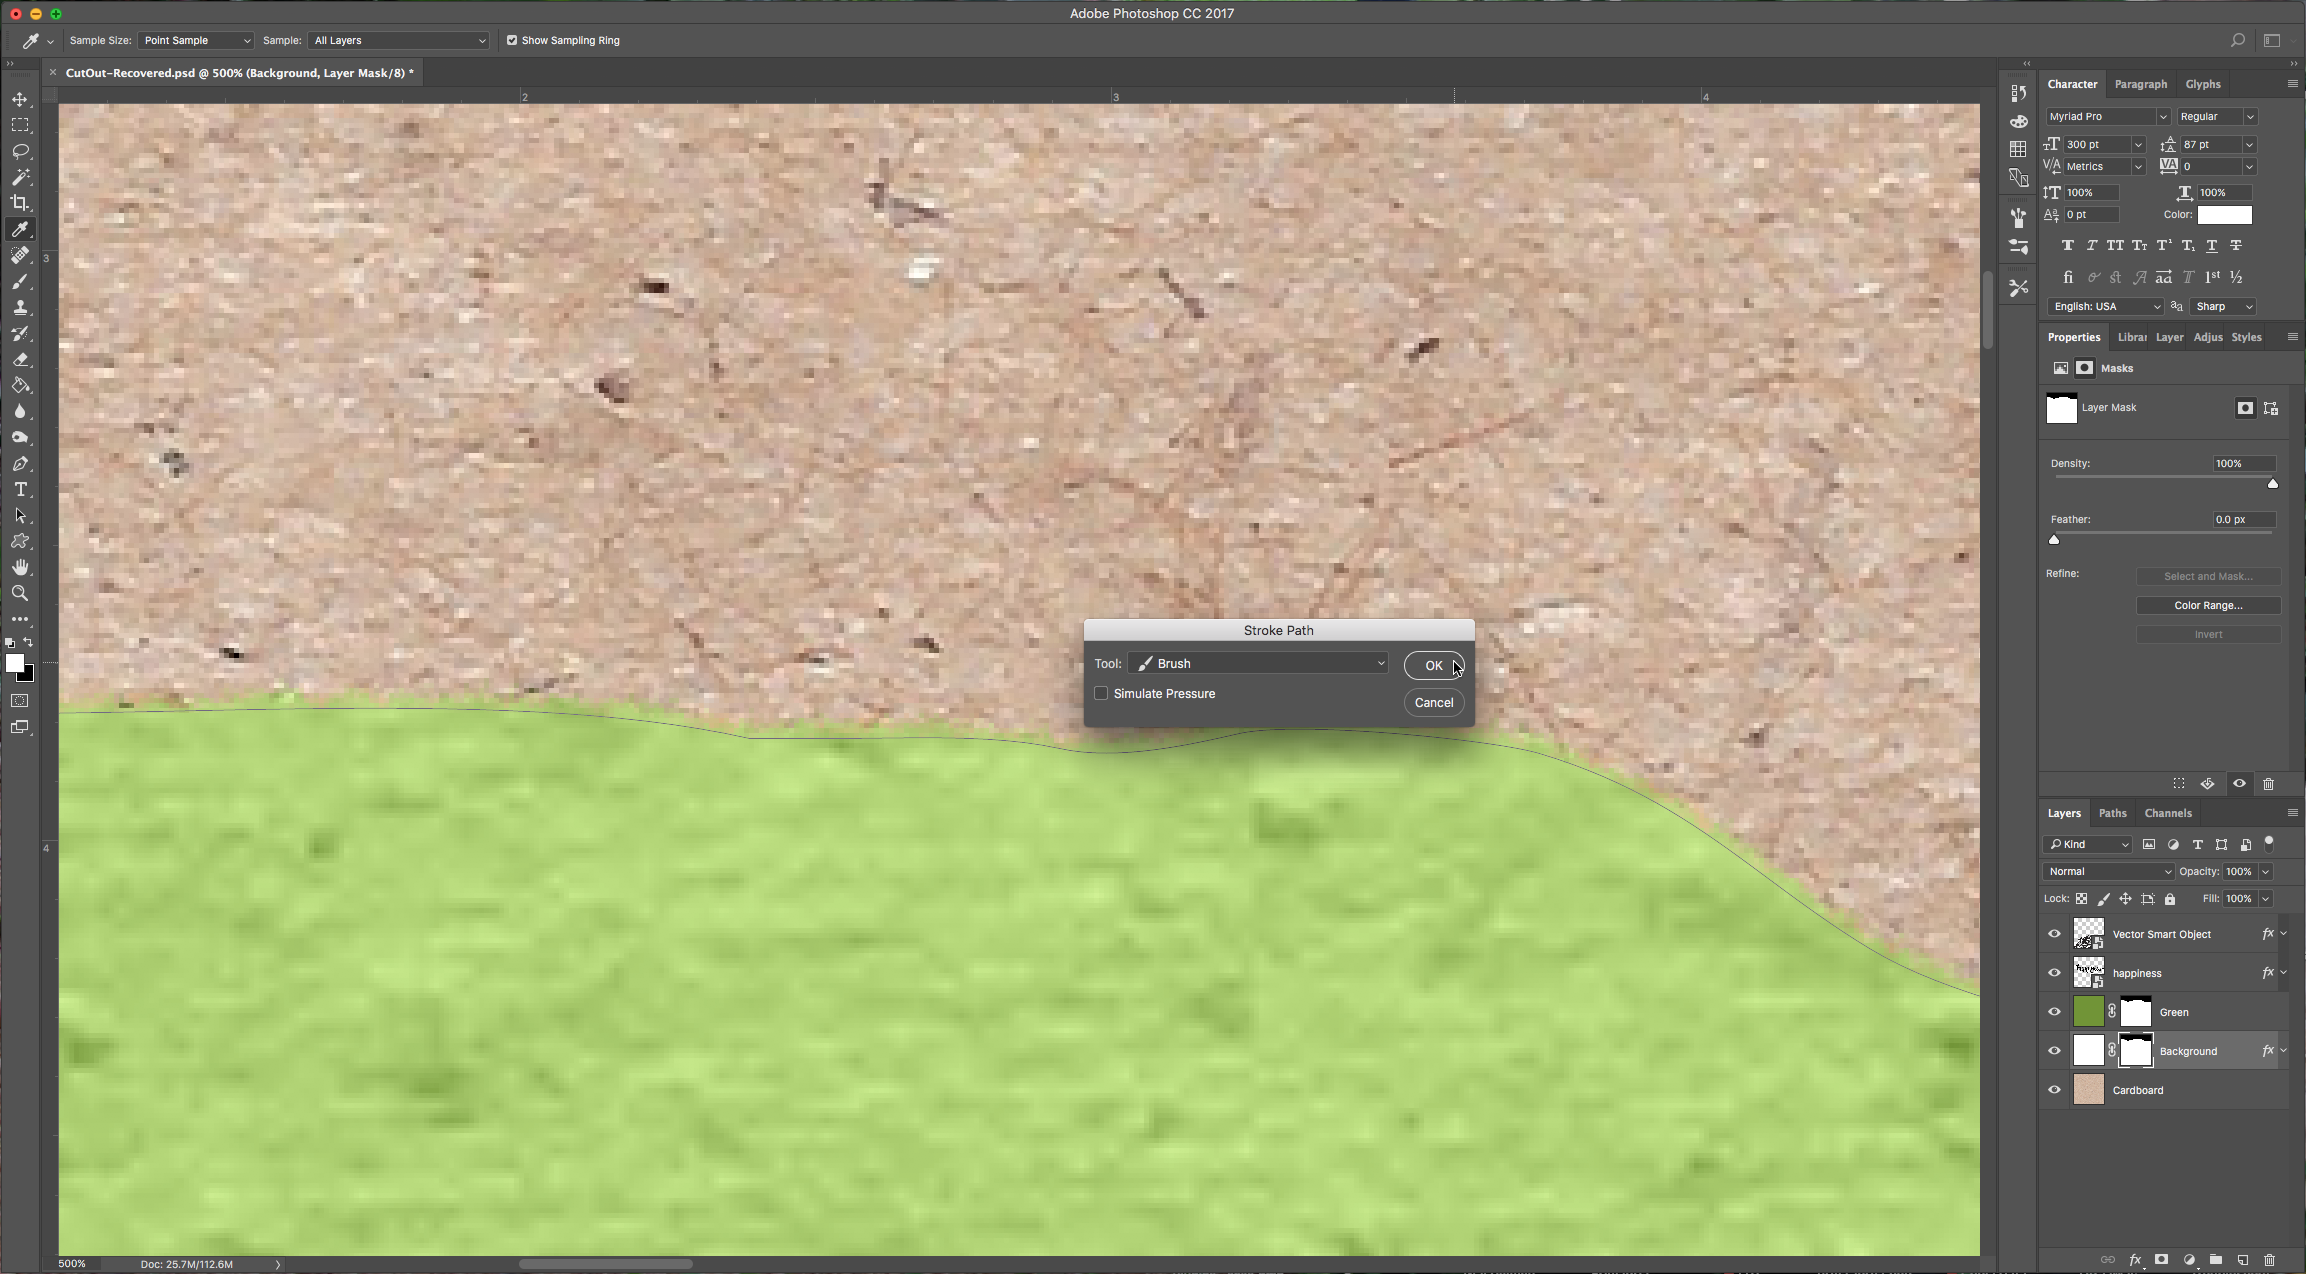
13 – Choose the “Path Selection Tool” (A) and right-click on your selection. Choose “Make Stroke Path” and use “Brush” from the following dialog (make sure “Simulate Pressure” is unchecked). You may need to repeat this a couple of times in both “Background” and “Green” layers.
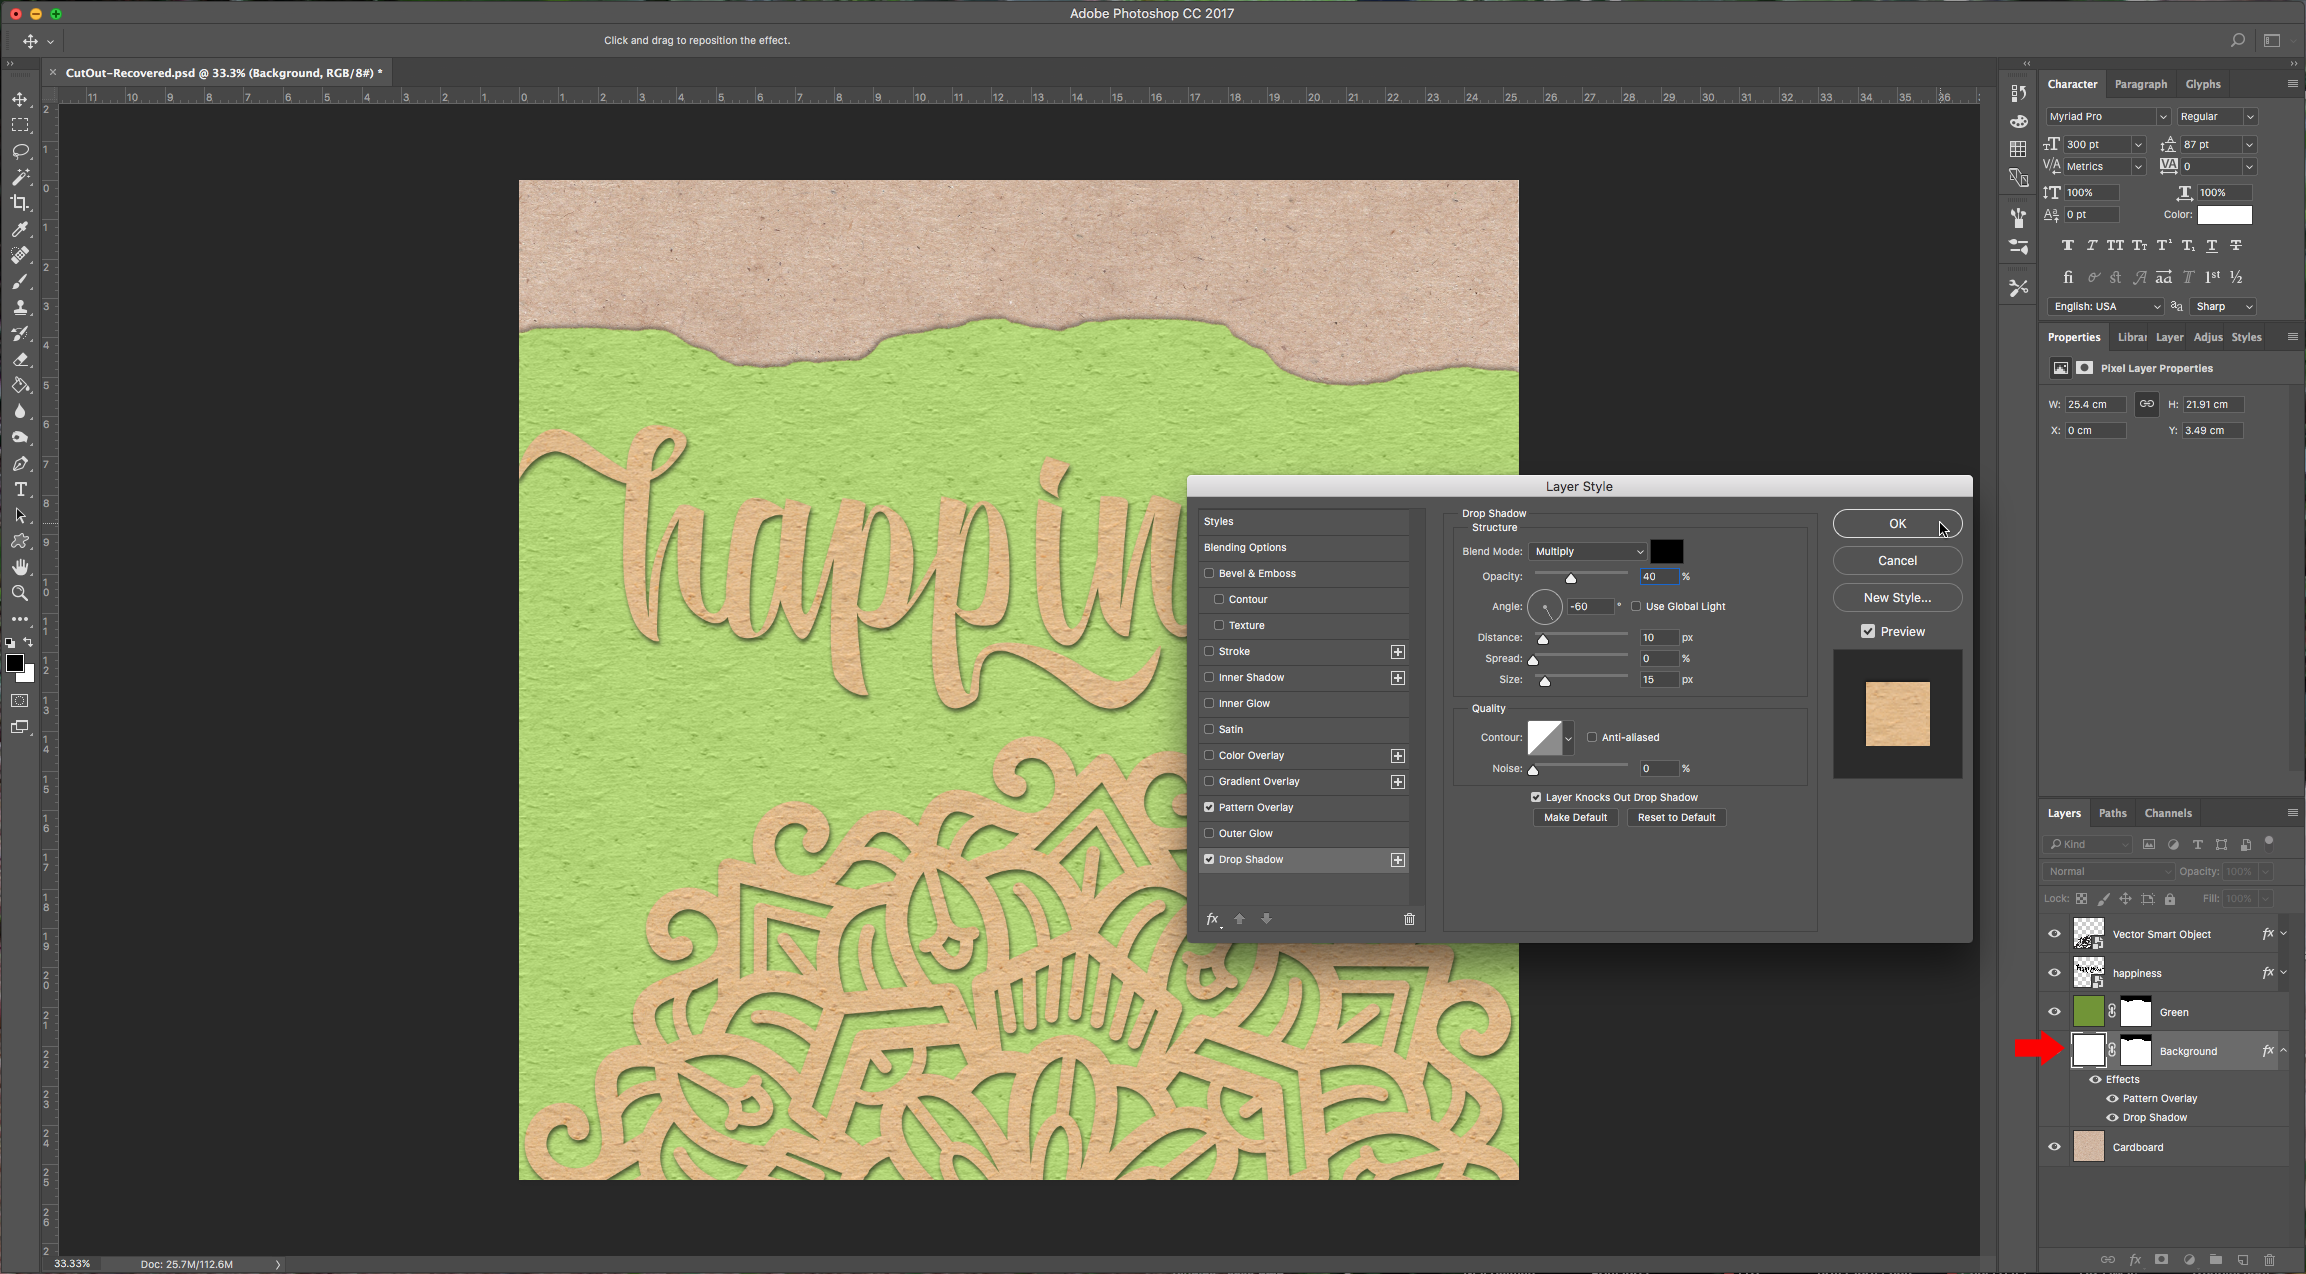
14 – Double-click on your “Background” layer and add “Drop Shadow” to it with similar values used for your Text and Mandala layers but uncheck the “Use Global Light” button and change the angle to - 60 degrees and lower the “Opacity” to 40 %.
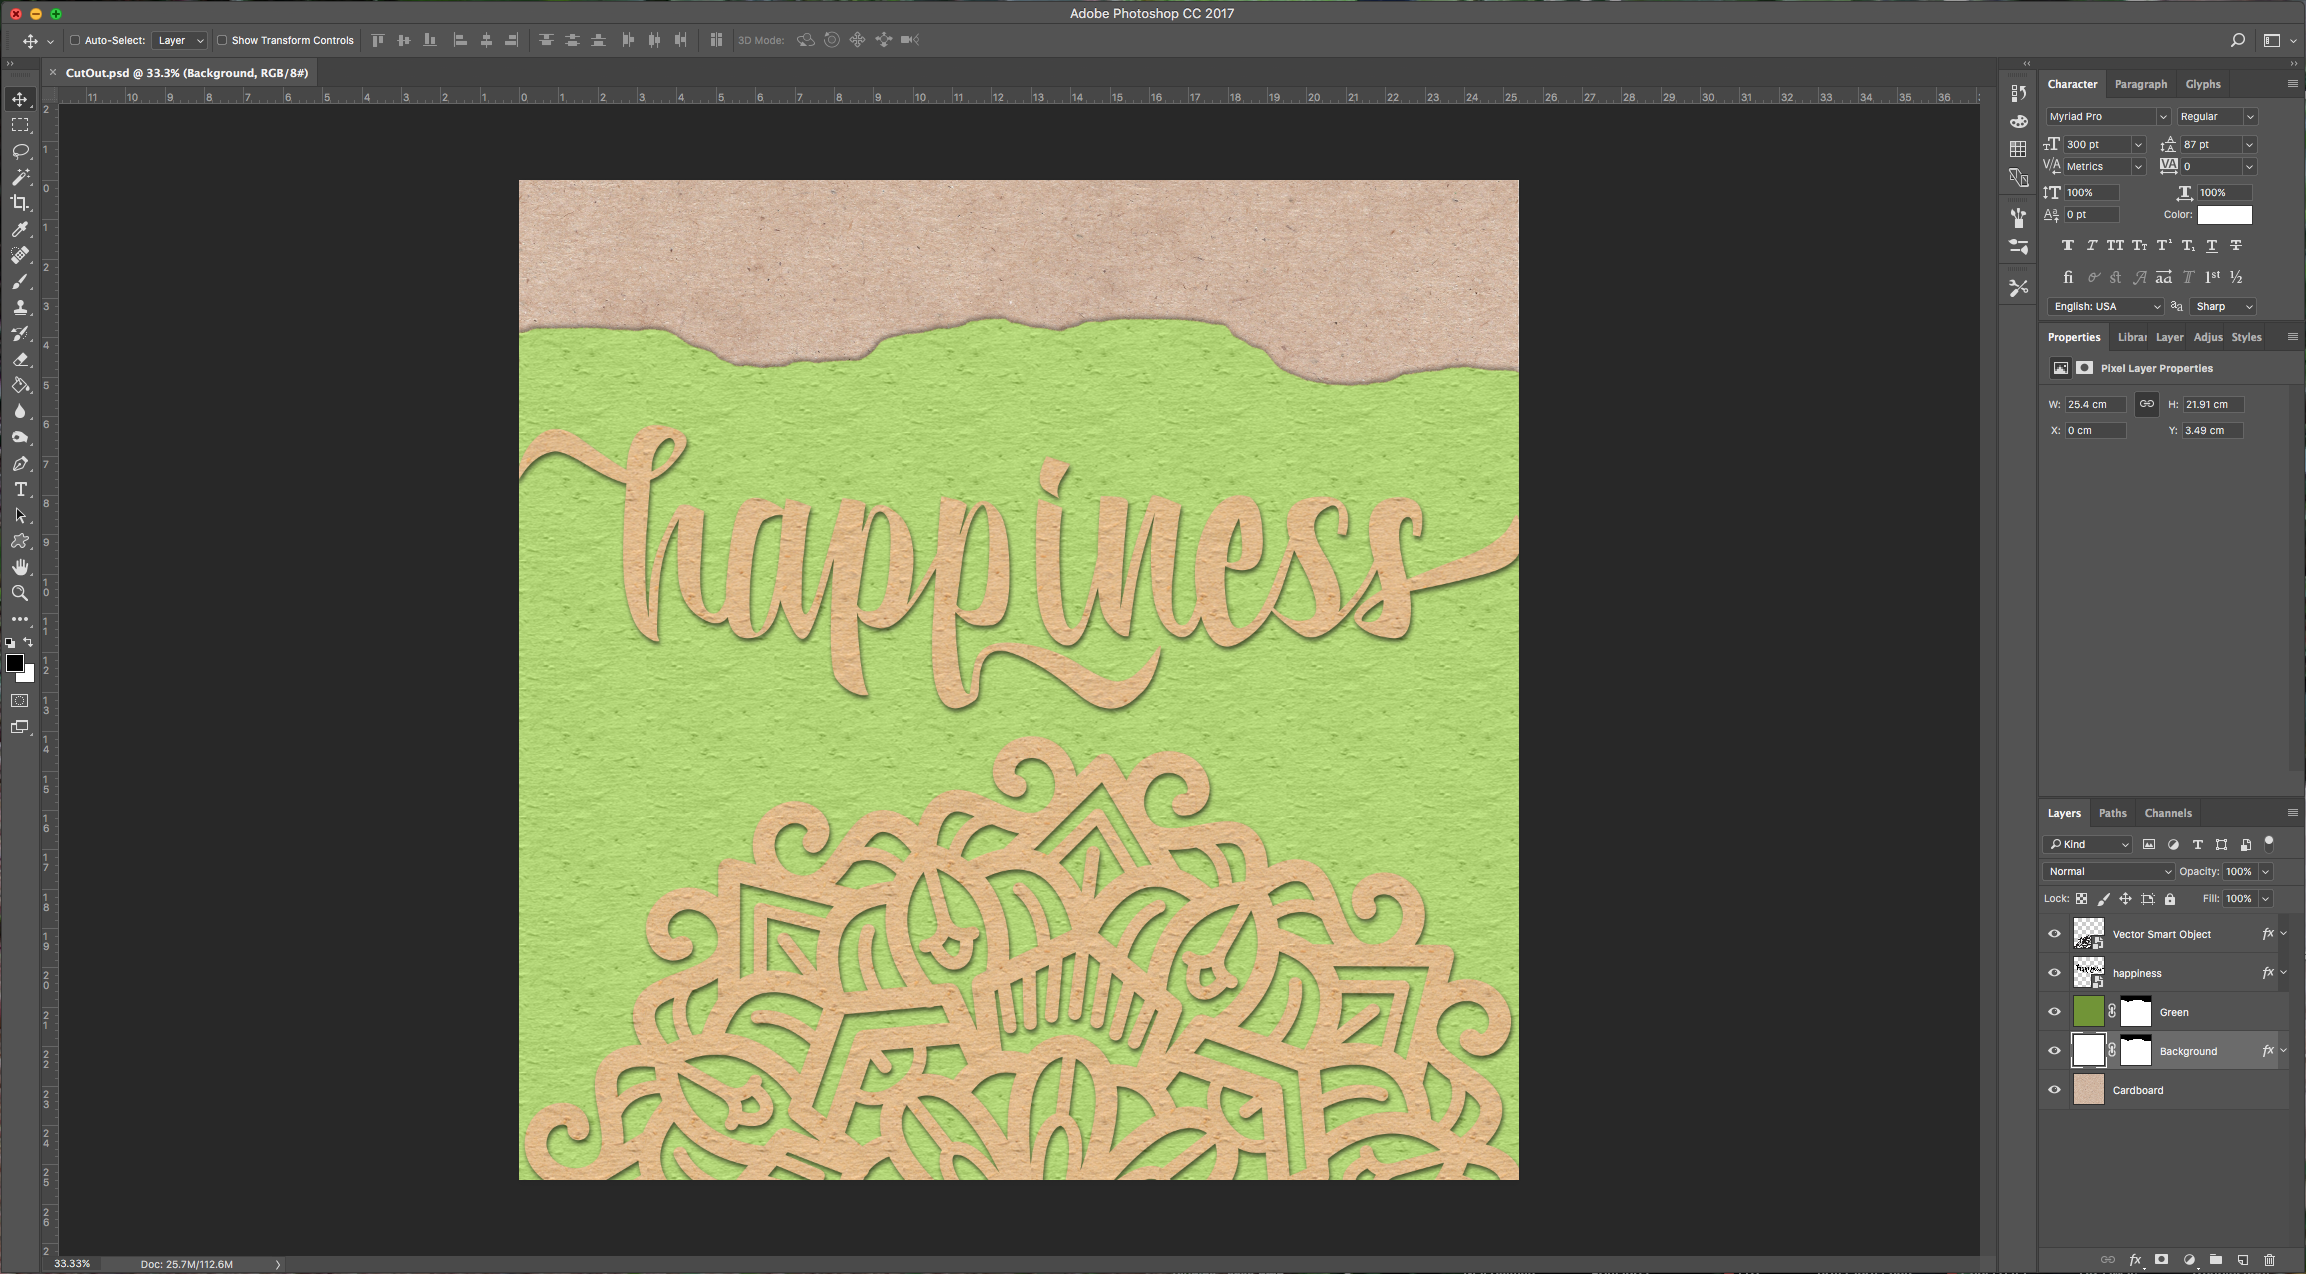
15 – Check out your artwork.
1 – In Photoshop create a “New Document” and make it 3000 x 3000 pixels, 300 dpi, RGB Mode and use White as “Background” Color.
2 – Double-click on the “Background” to make it editable and then double-click on the layer again to invoke “Blending Options”. Apply a “Pattern Overlay” with the following values.
3 – Bring your cardboard background into your document, size it properly and send it to the bottom of the layers.
4 – Create a “New Layer” (Shift + Command/Control + N) and fill it with the color of your choice (we used #709530) and change the “Blending Mode” to “Color”. Consider that this will result in a lighter shade so take it to account.
5 – Select the “Type Tool” (T) and write your text, choose the font you like. We used “Reybro” and chose some of the alternates to get a nicer look. We want the sides of the text to be a bit outside the paper. Once you are happy with your text, change your text color to black, and right-click on the layer and choose “Convert to Shape”.
6 – Choose the “Path Selection Tool” (A) and making sure your text is selected choose “Merge Shape Components” from the “Path Operations” menu on the top left. Right-click on the text layer and select “Convert to Smart Object”.
7 – Double-click on your layer again to invoke the “Blending Options” and apply the same “Pattern Overlay” you used before.
And add a “Drop Shadow” with the following values:
Blend Mode color: We used a dark green (#1a2d12)
8 – Now you can open your Mandala vectors in Illustrator and choose the one you would like to incorporate to your artwork. You can use just a piece if it seems too complicated. Click Command/Control + C to copy and then head to Photoshop and click Command/Control + V to copy, choose “Paste as Smart Object” when prompted. You can resize, and rotate your mandala at this point before hitting the “Return” key.
9 – Right-click on your text layer and “Copy Layer Style” then go to your Mandala and “Paste Layer Style”.
10 – Go to your “Background” layer and with the “Lasso Tool” (L) draw a “tear” in your artwork and continue your selection across the lower half of the file. To make it easier you can use the “Rectangular Selection Tool” while pressing “Shift” to add to your selection.
11 – Right-click on your selection and choose “Make Work Path”, use a “Tolerance” of 1 pixel. With that selection make a “Layer Mask” of your “Background” layer and do it for your “Green” layer too. (Click on the “Add Vector Mask” button at the bottom of the “Layers” menu).
12 – Select the “Brush Tool” (B) and choose the brush “Spatter 14 pixels” (depending on the size of your file you may need to resize the brush). Make sure your “Opacity” is 100% and then go to the “Brush Options” and apply the following values in “Shape Dynamics”:
13 – Choose the “Path Selection Tool” (A) and right-click on your selection. Choose “Make Stroke Path” and use “Brush” from the following dialog (make sure “Simulate Pressure” is unchecked). You may need to repeat this a couple of times in both “Background” and “Green” layers.
14 – Double-click on your “Background” layer and add “Drop Shadow” to it with similar values used for your Text and Mandala layers but uncheck the “Use Global Light” button and change the angle to - 60 degrees and lower the “Opacity” to 40 %.
15 – Check out your artwork.
by @lornacane


