Paper Cutout Text Effect Photoshop
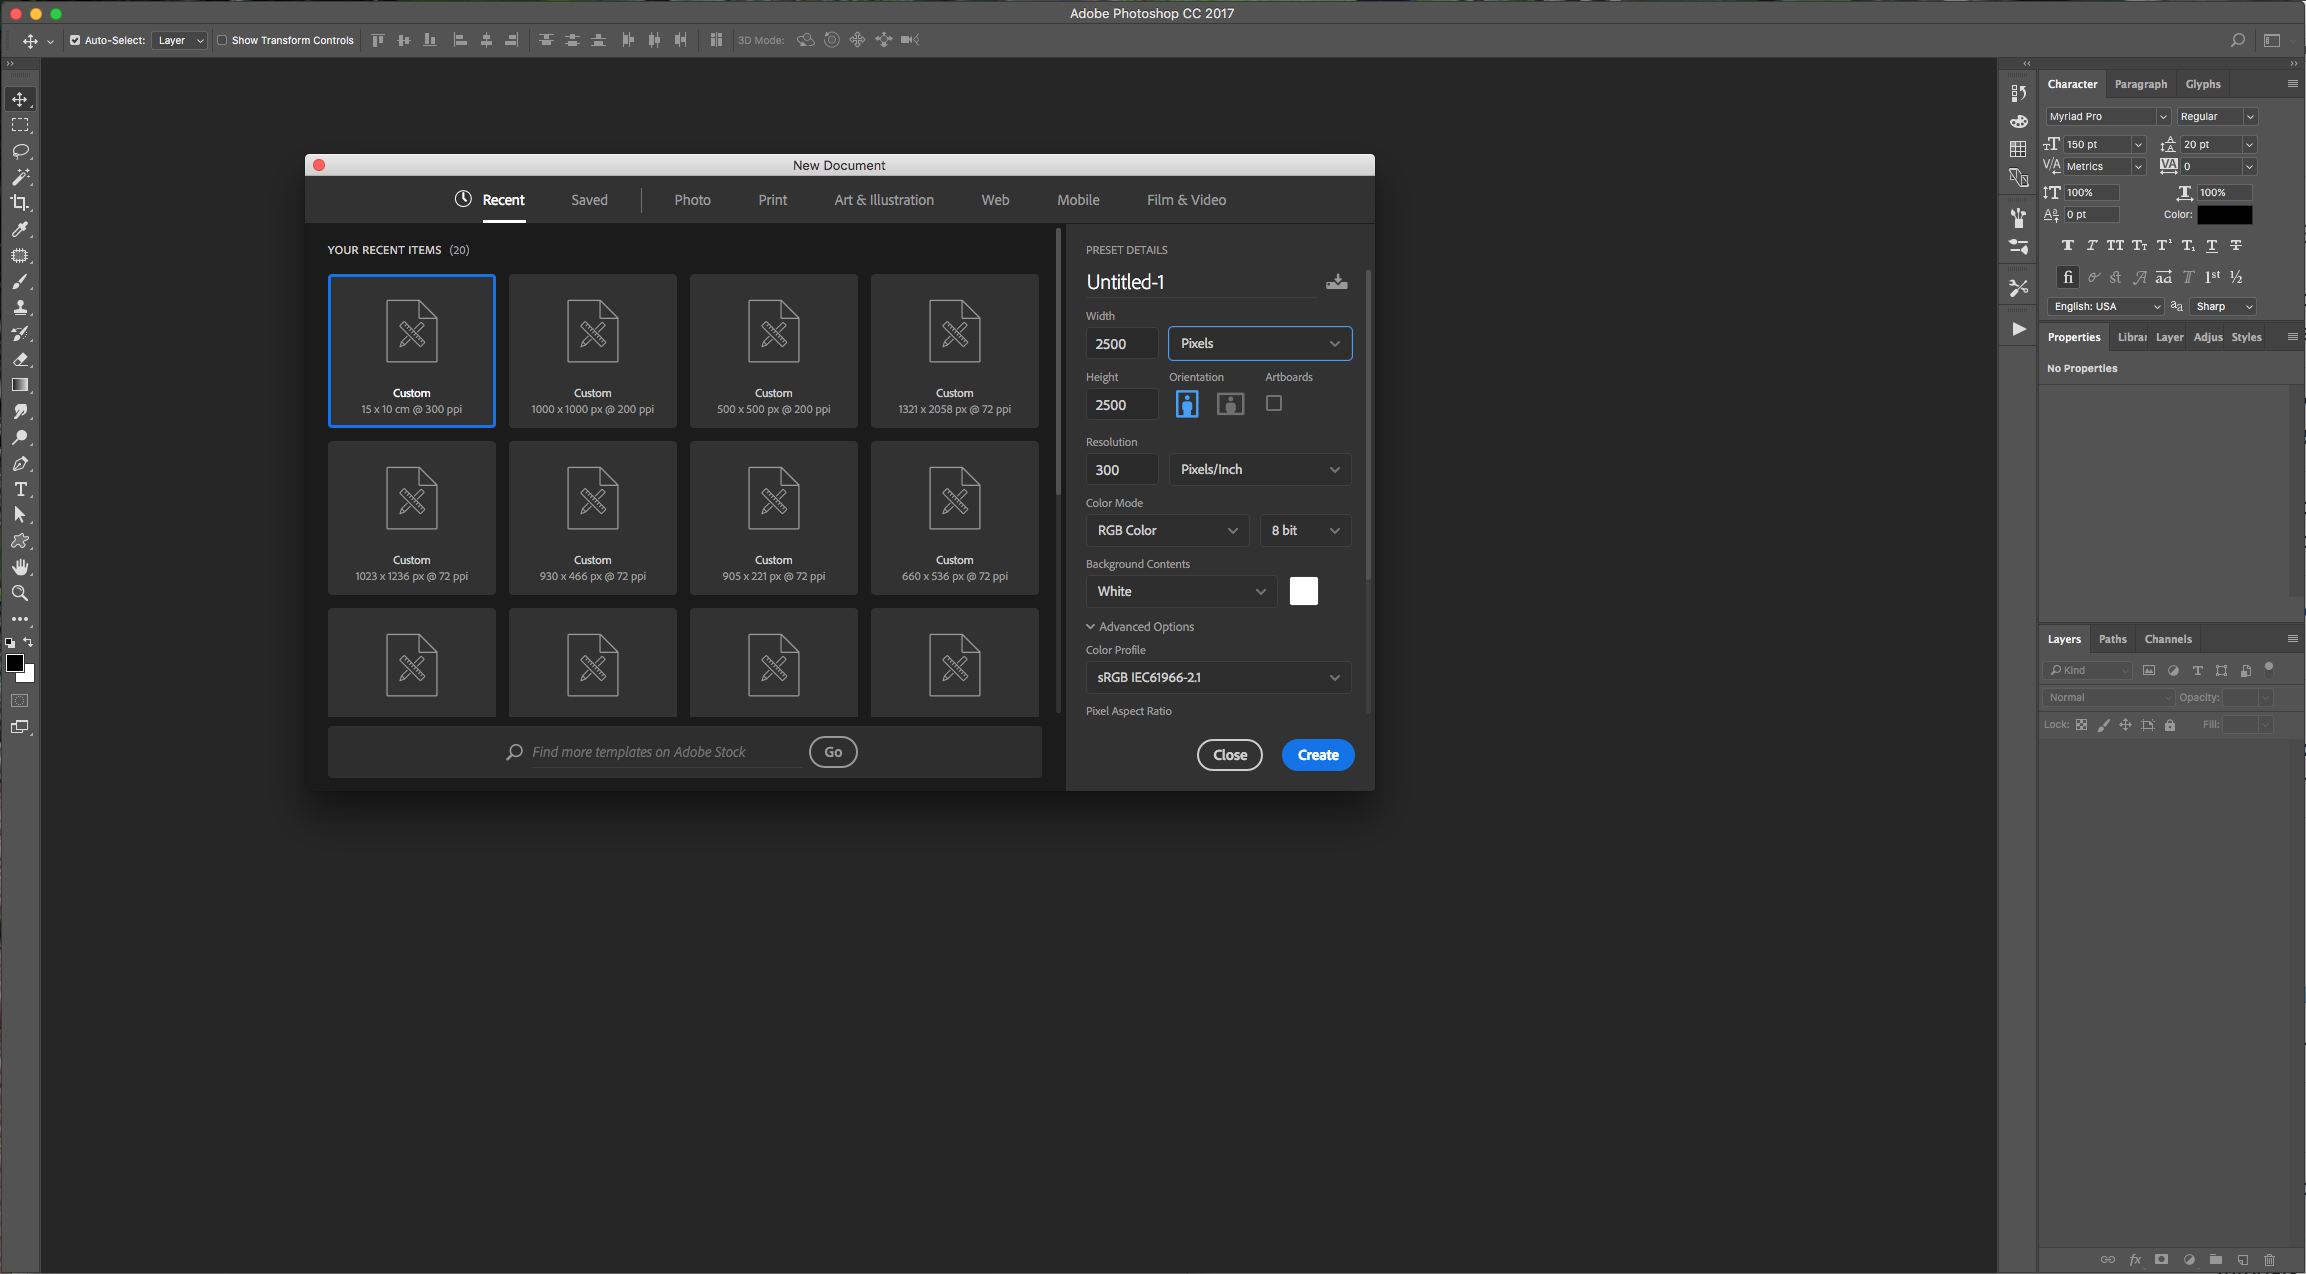
1 – In Photoshop, create a New Document. Make it around 2500 pixels per side, and depending on the use you want to give to your artwork choose the “Resolution” and the “Color Mode”. (If you are only going to use it for screen viewing use 72 dpi and RGB as “Color Mode”, but if you want to print it or scale it up in any way then use 300 dpi. CMYK “Color Mode” is mainly for printing). It’s better to work in RGB since some filters and Effects won’t work in CMYK and the go to Image > Mode > CMYK, just remember that certain colors would be duller.
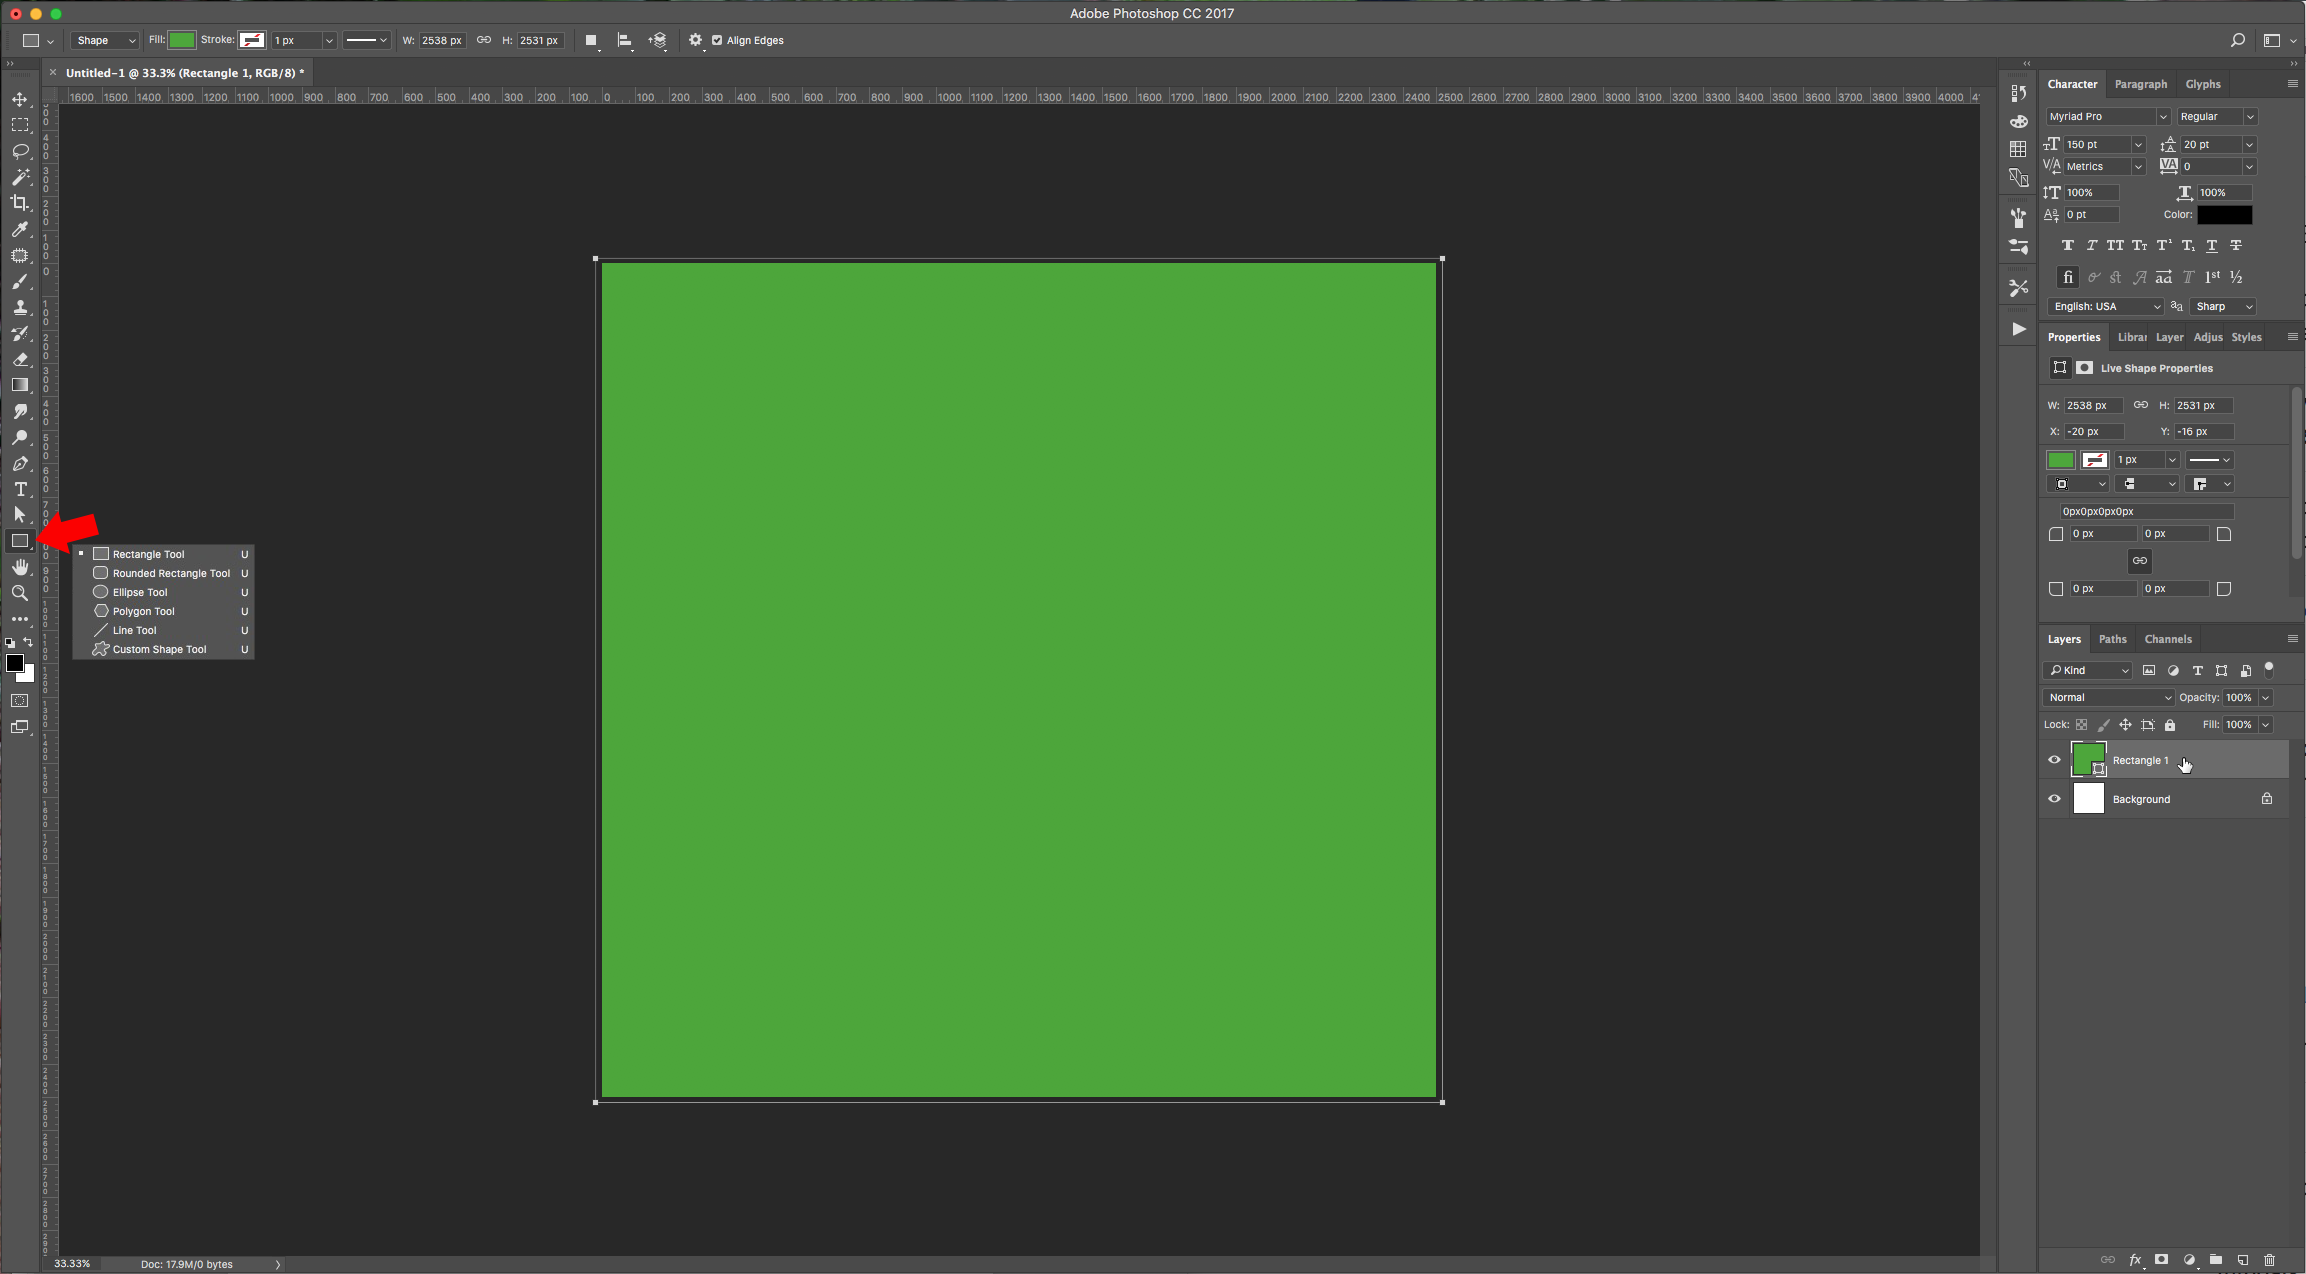
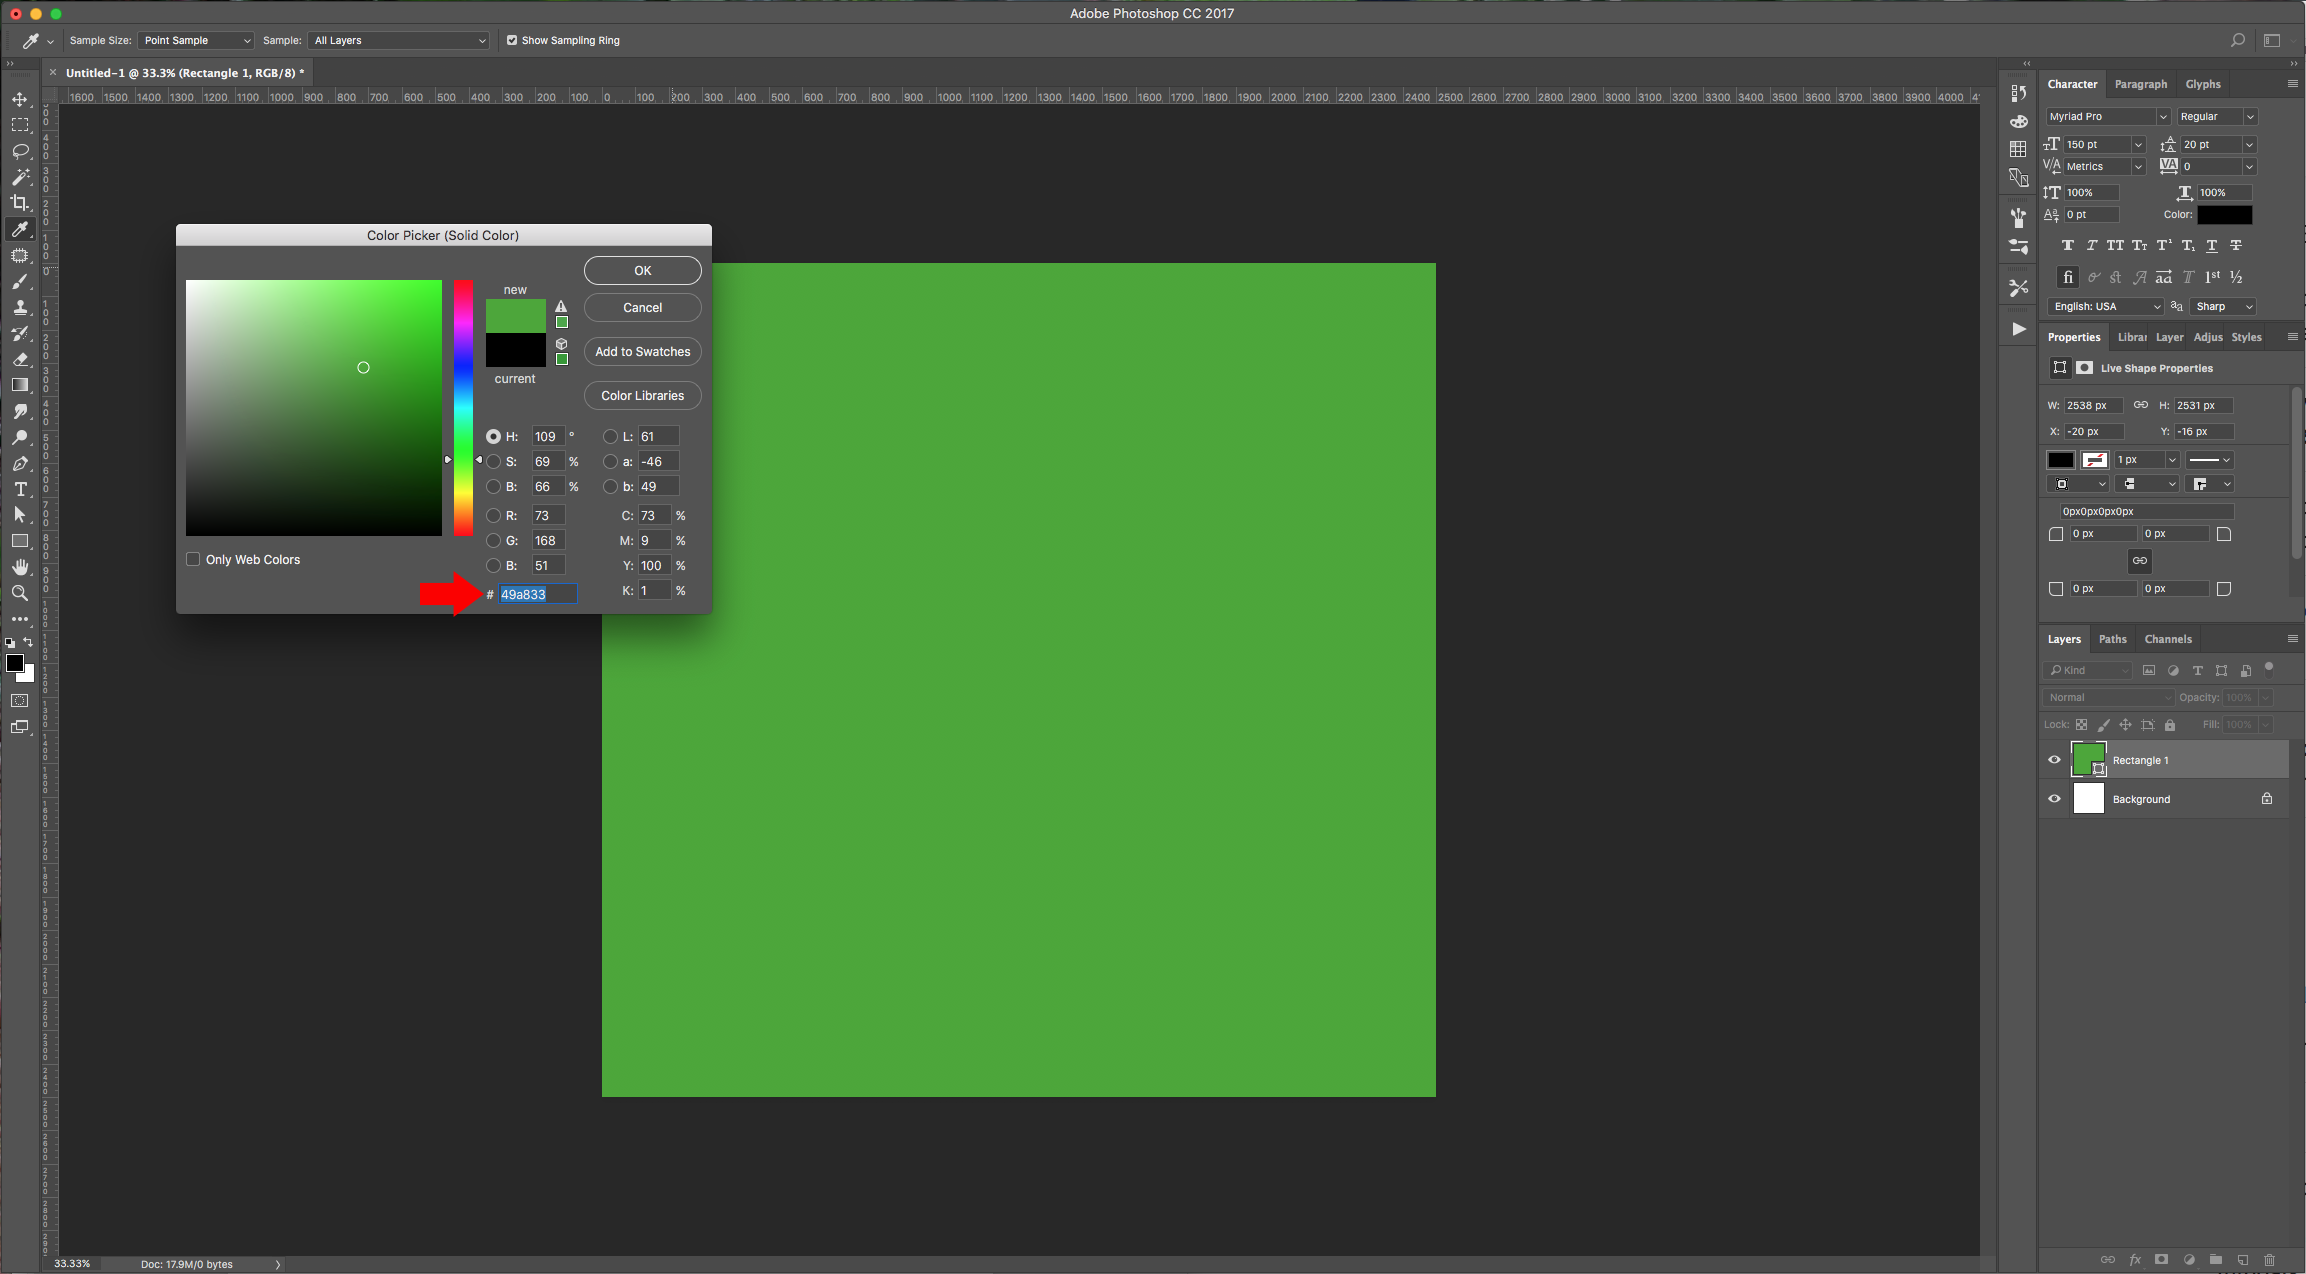
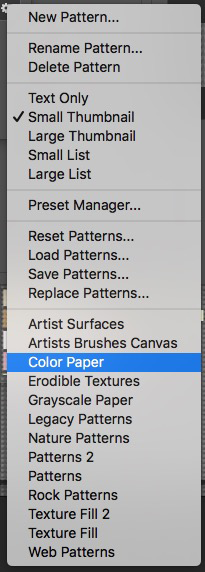
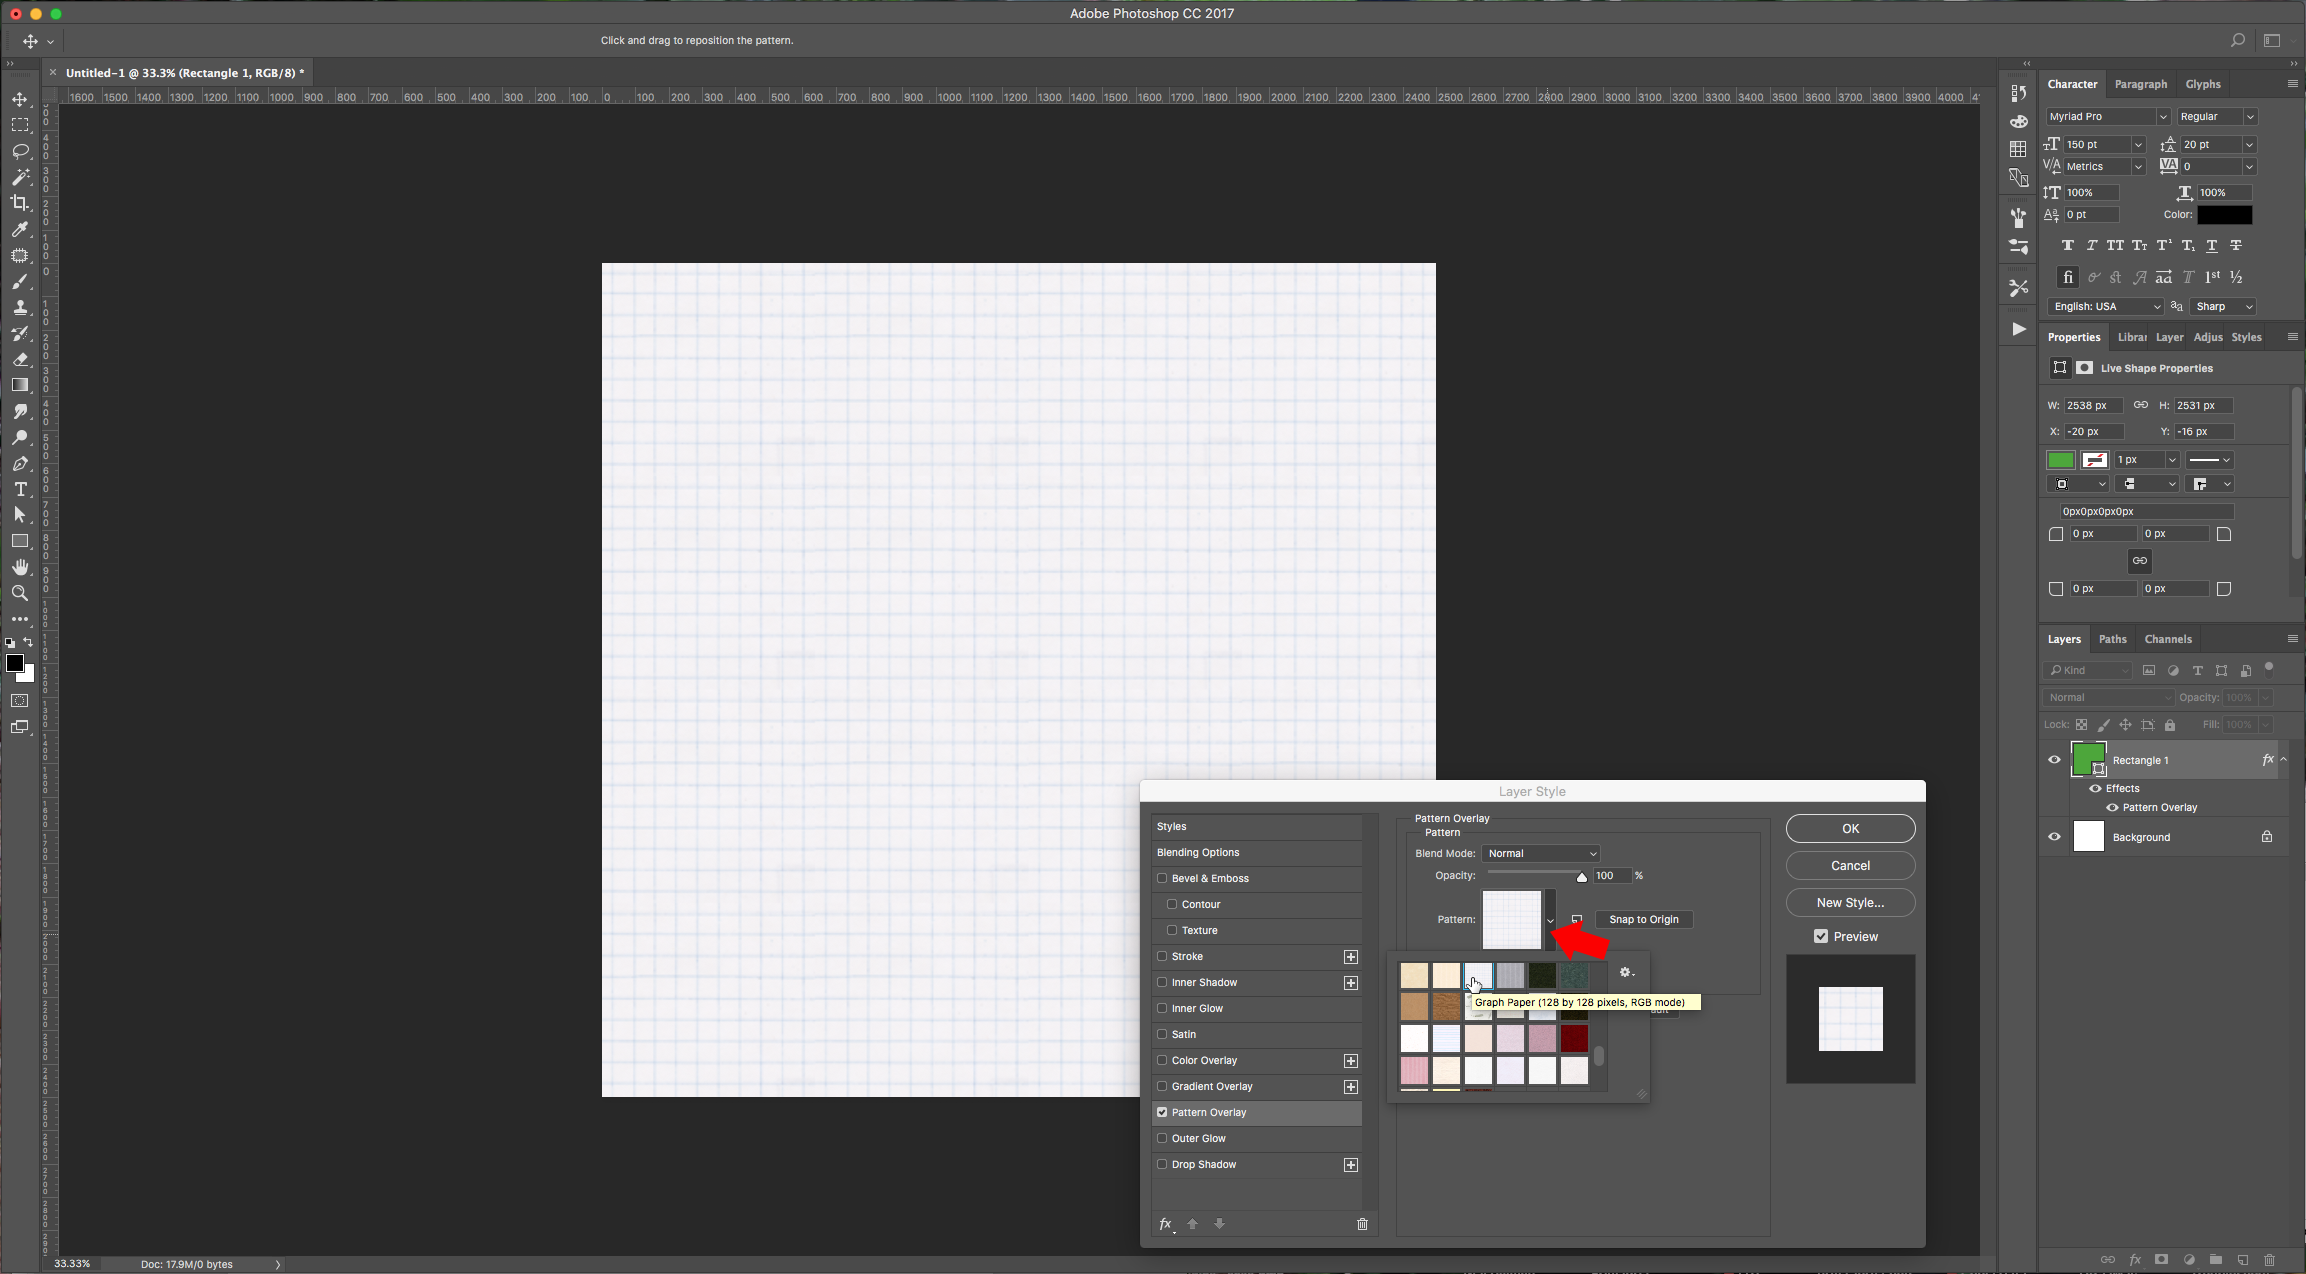
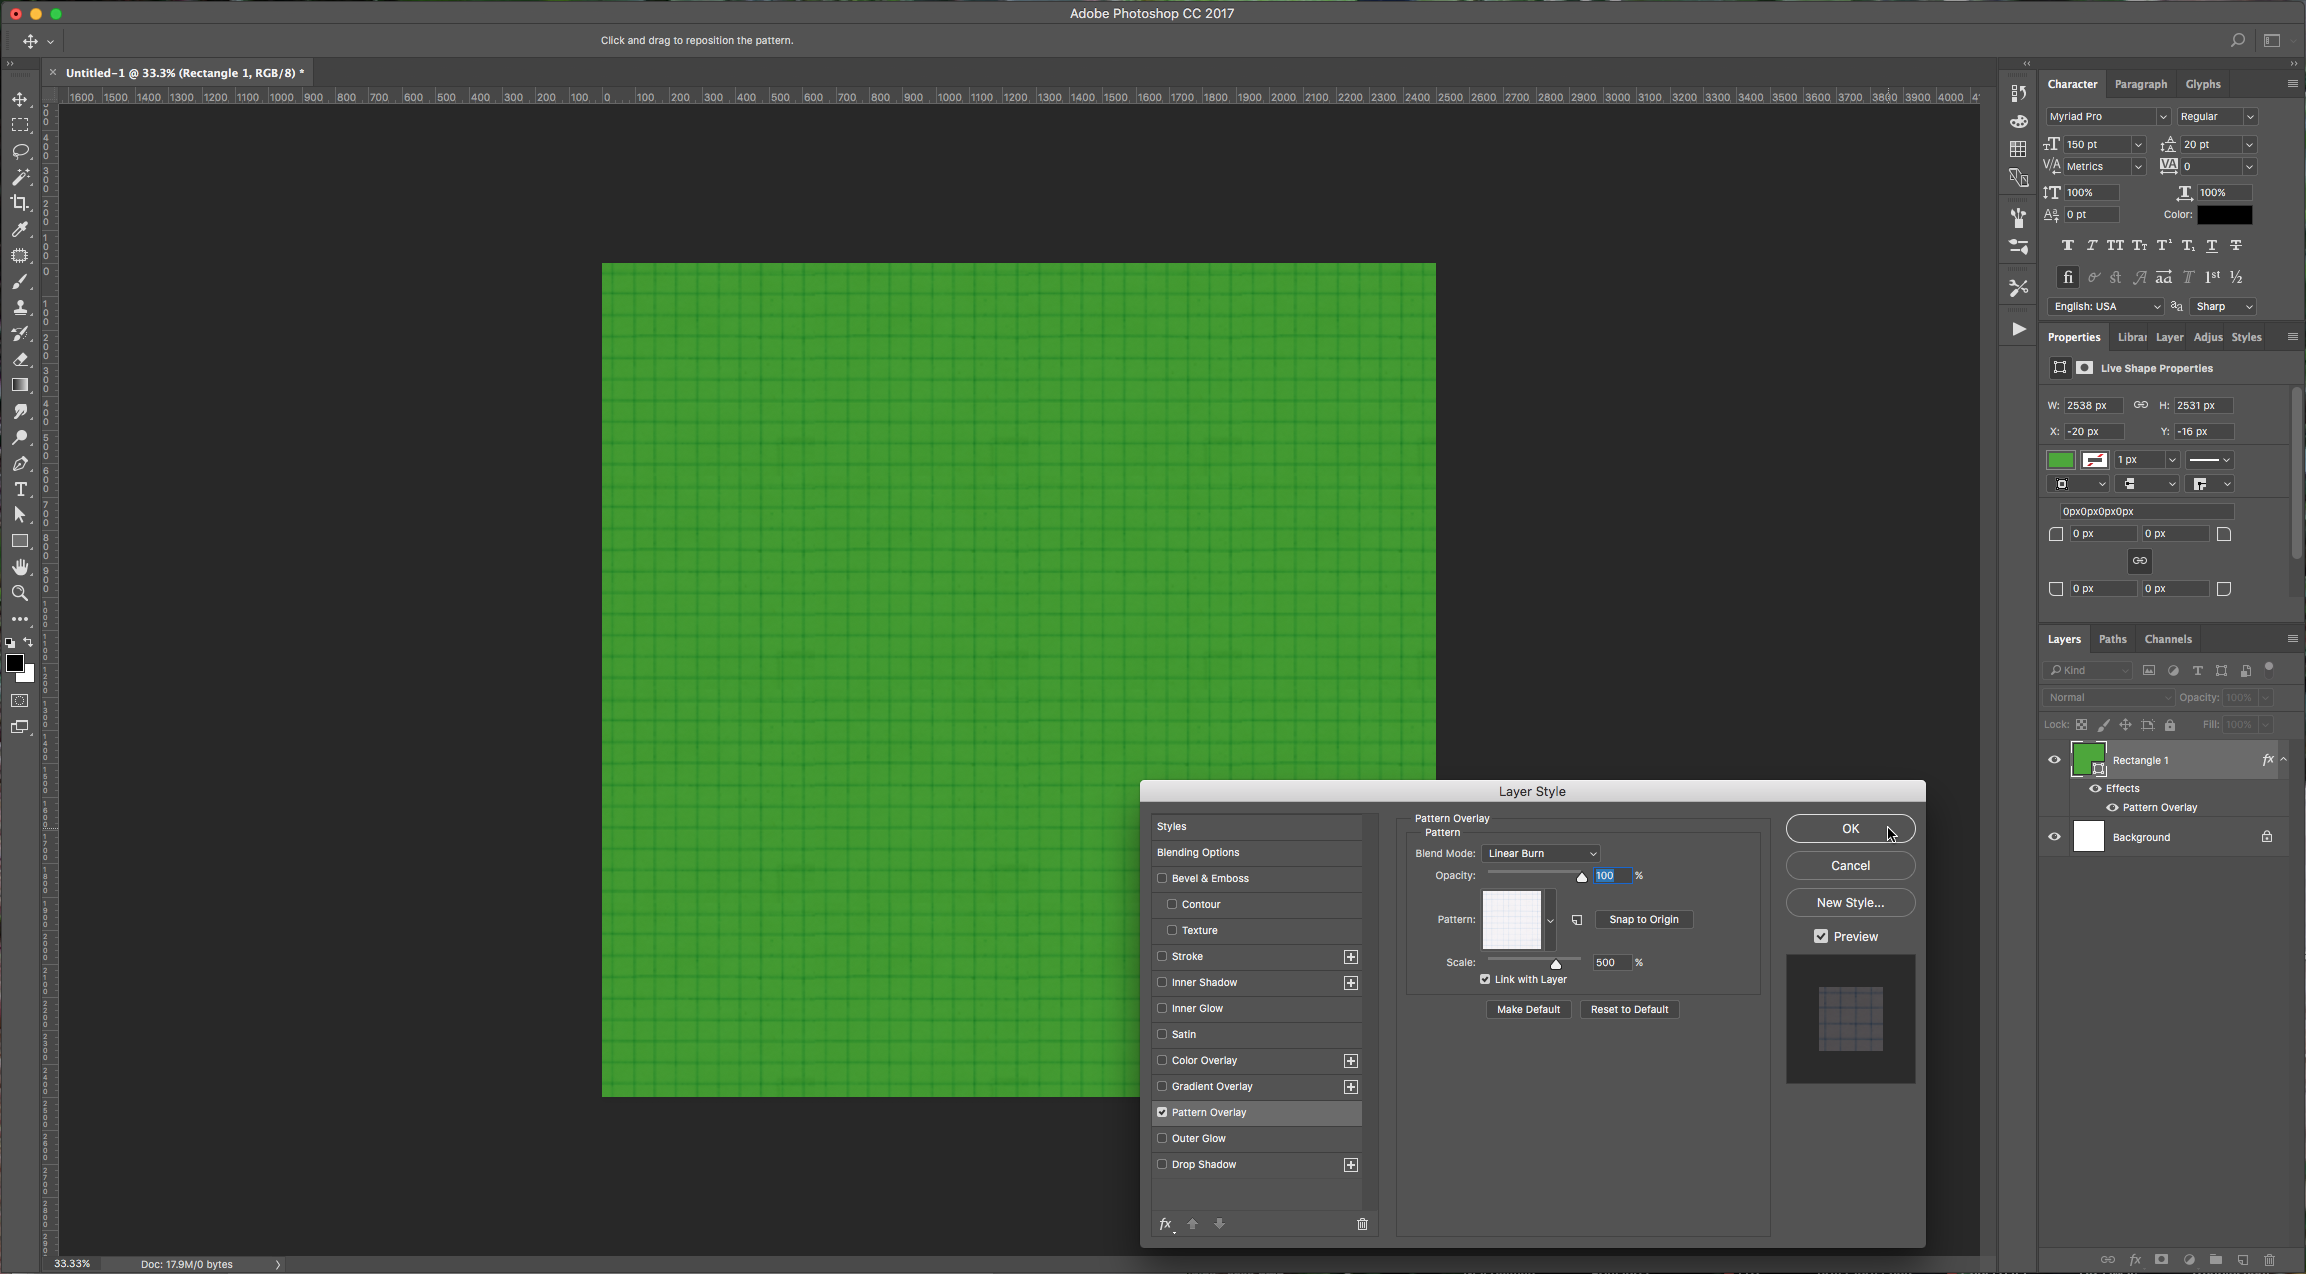
2 – For the “Background” you can apply the color of your choice at “Step 1” (Choose the color in “Background Contents” when you create the document). Also, you can add the color to your “Background” Layer with the “Paint Bucket Tool” (G) or the “Gradient Tool” (G) or you can use the “Rectangle Tool” (U) and draw a rectangle on top of your “Background” and give it the color you want. You can change the color by double-clicking on the thumbnail. You can then apply some patterns or effects to further enhance the layer. We used #49a833 or… Double-click on the Layer and apply the following “Layer Style” – Pattern Overlay (New Pattern > Color Paper)
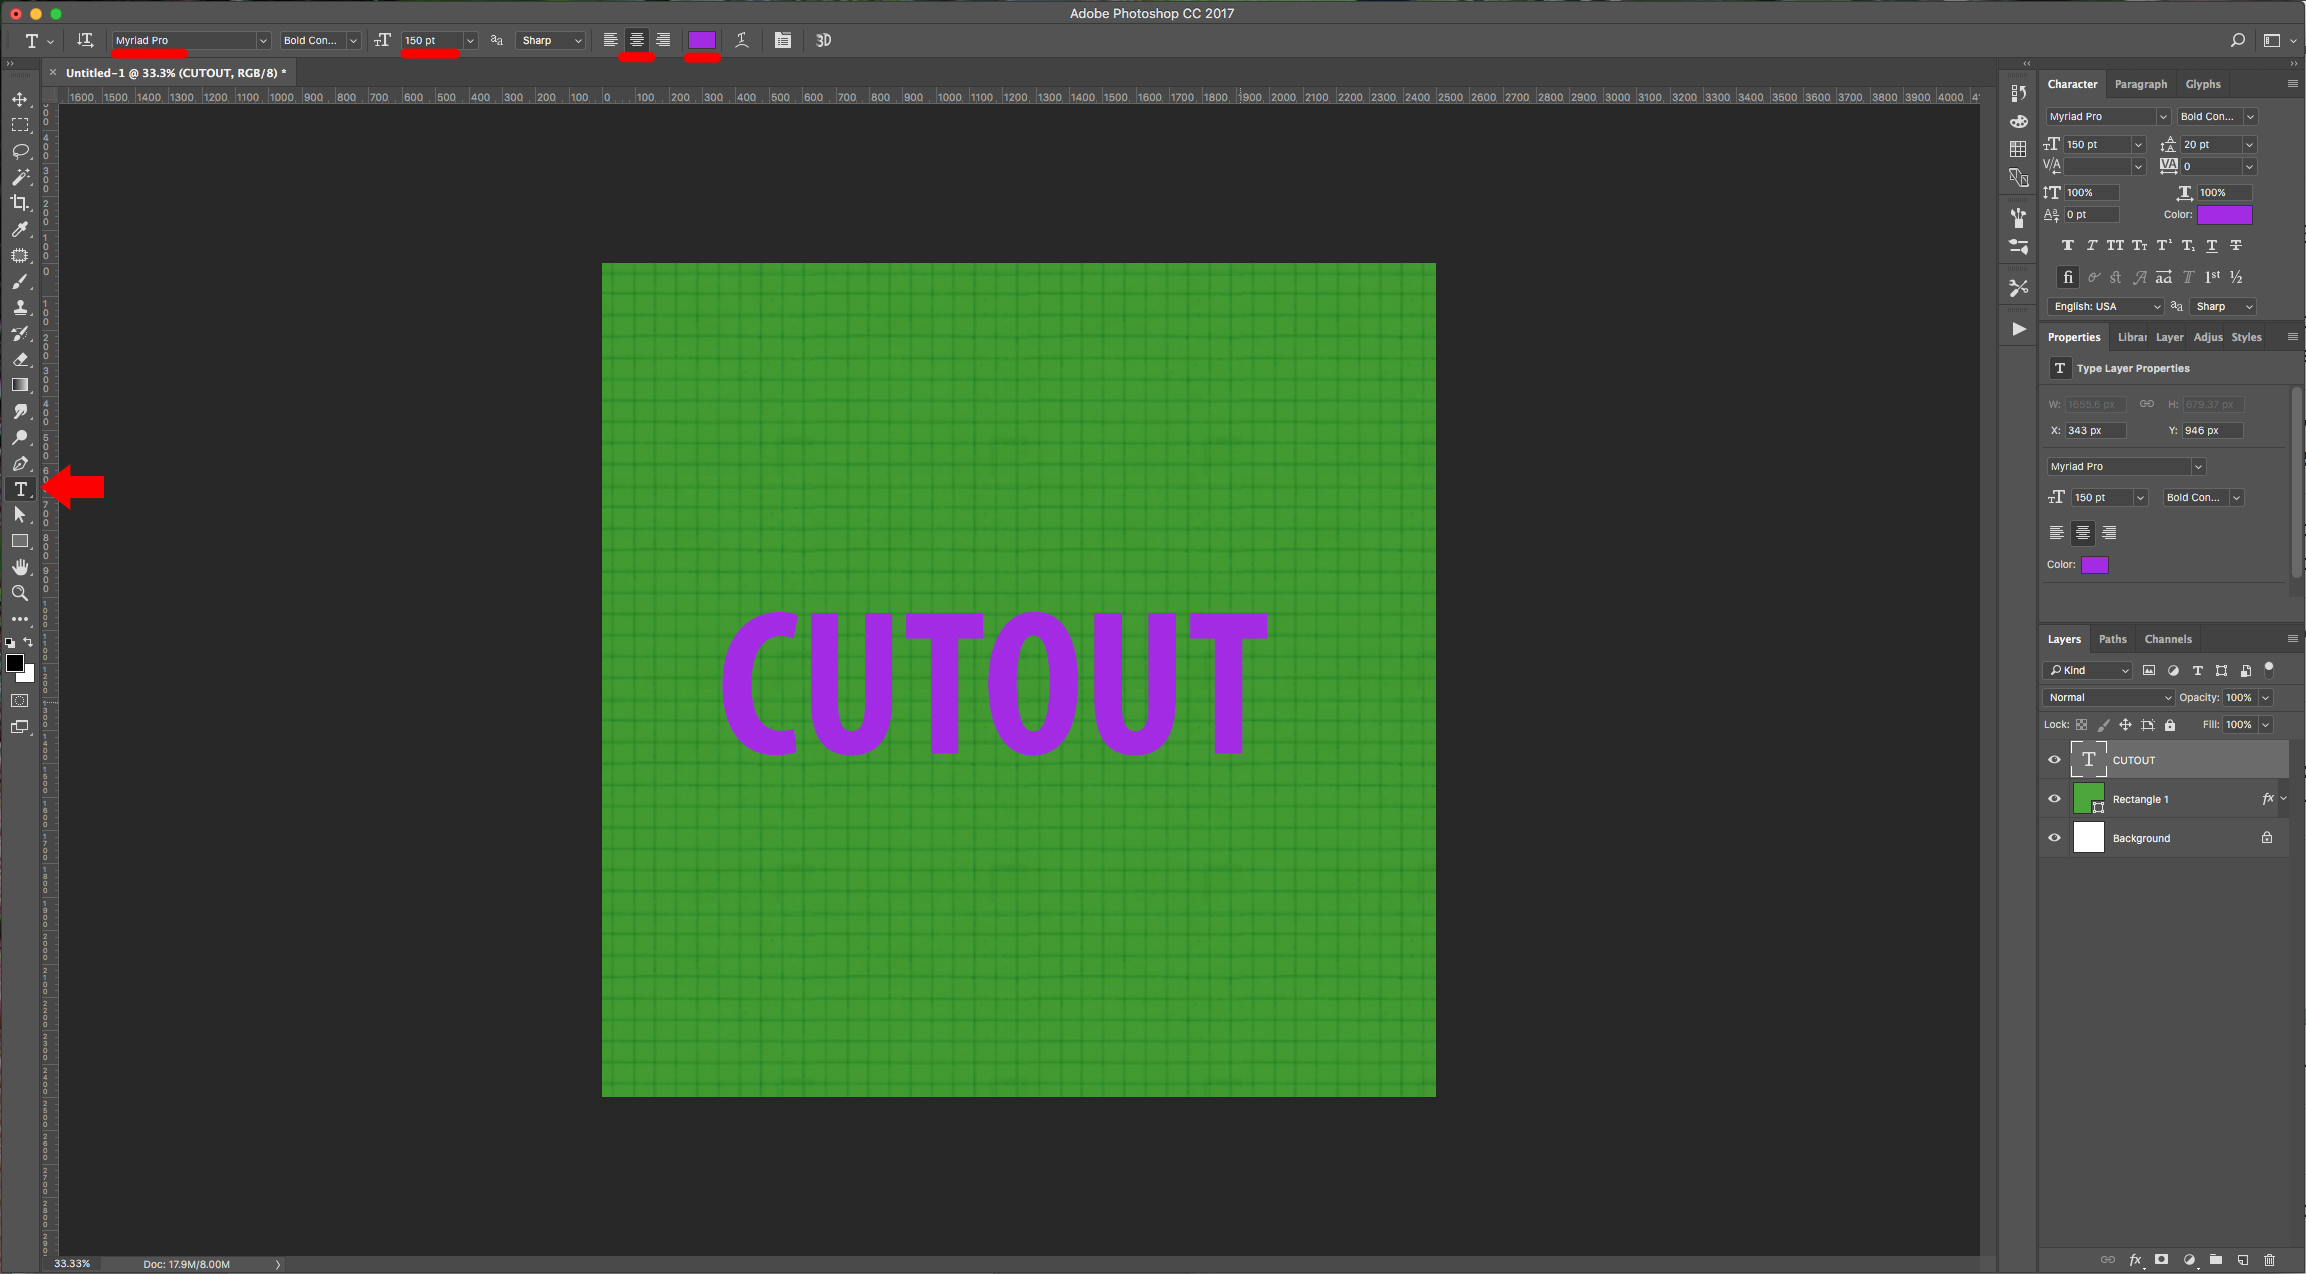
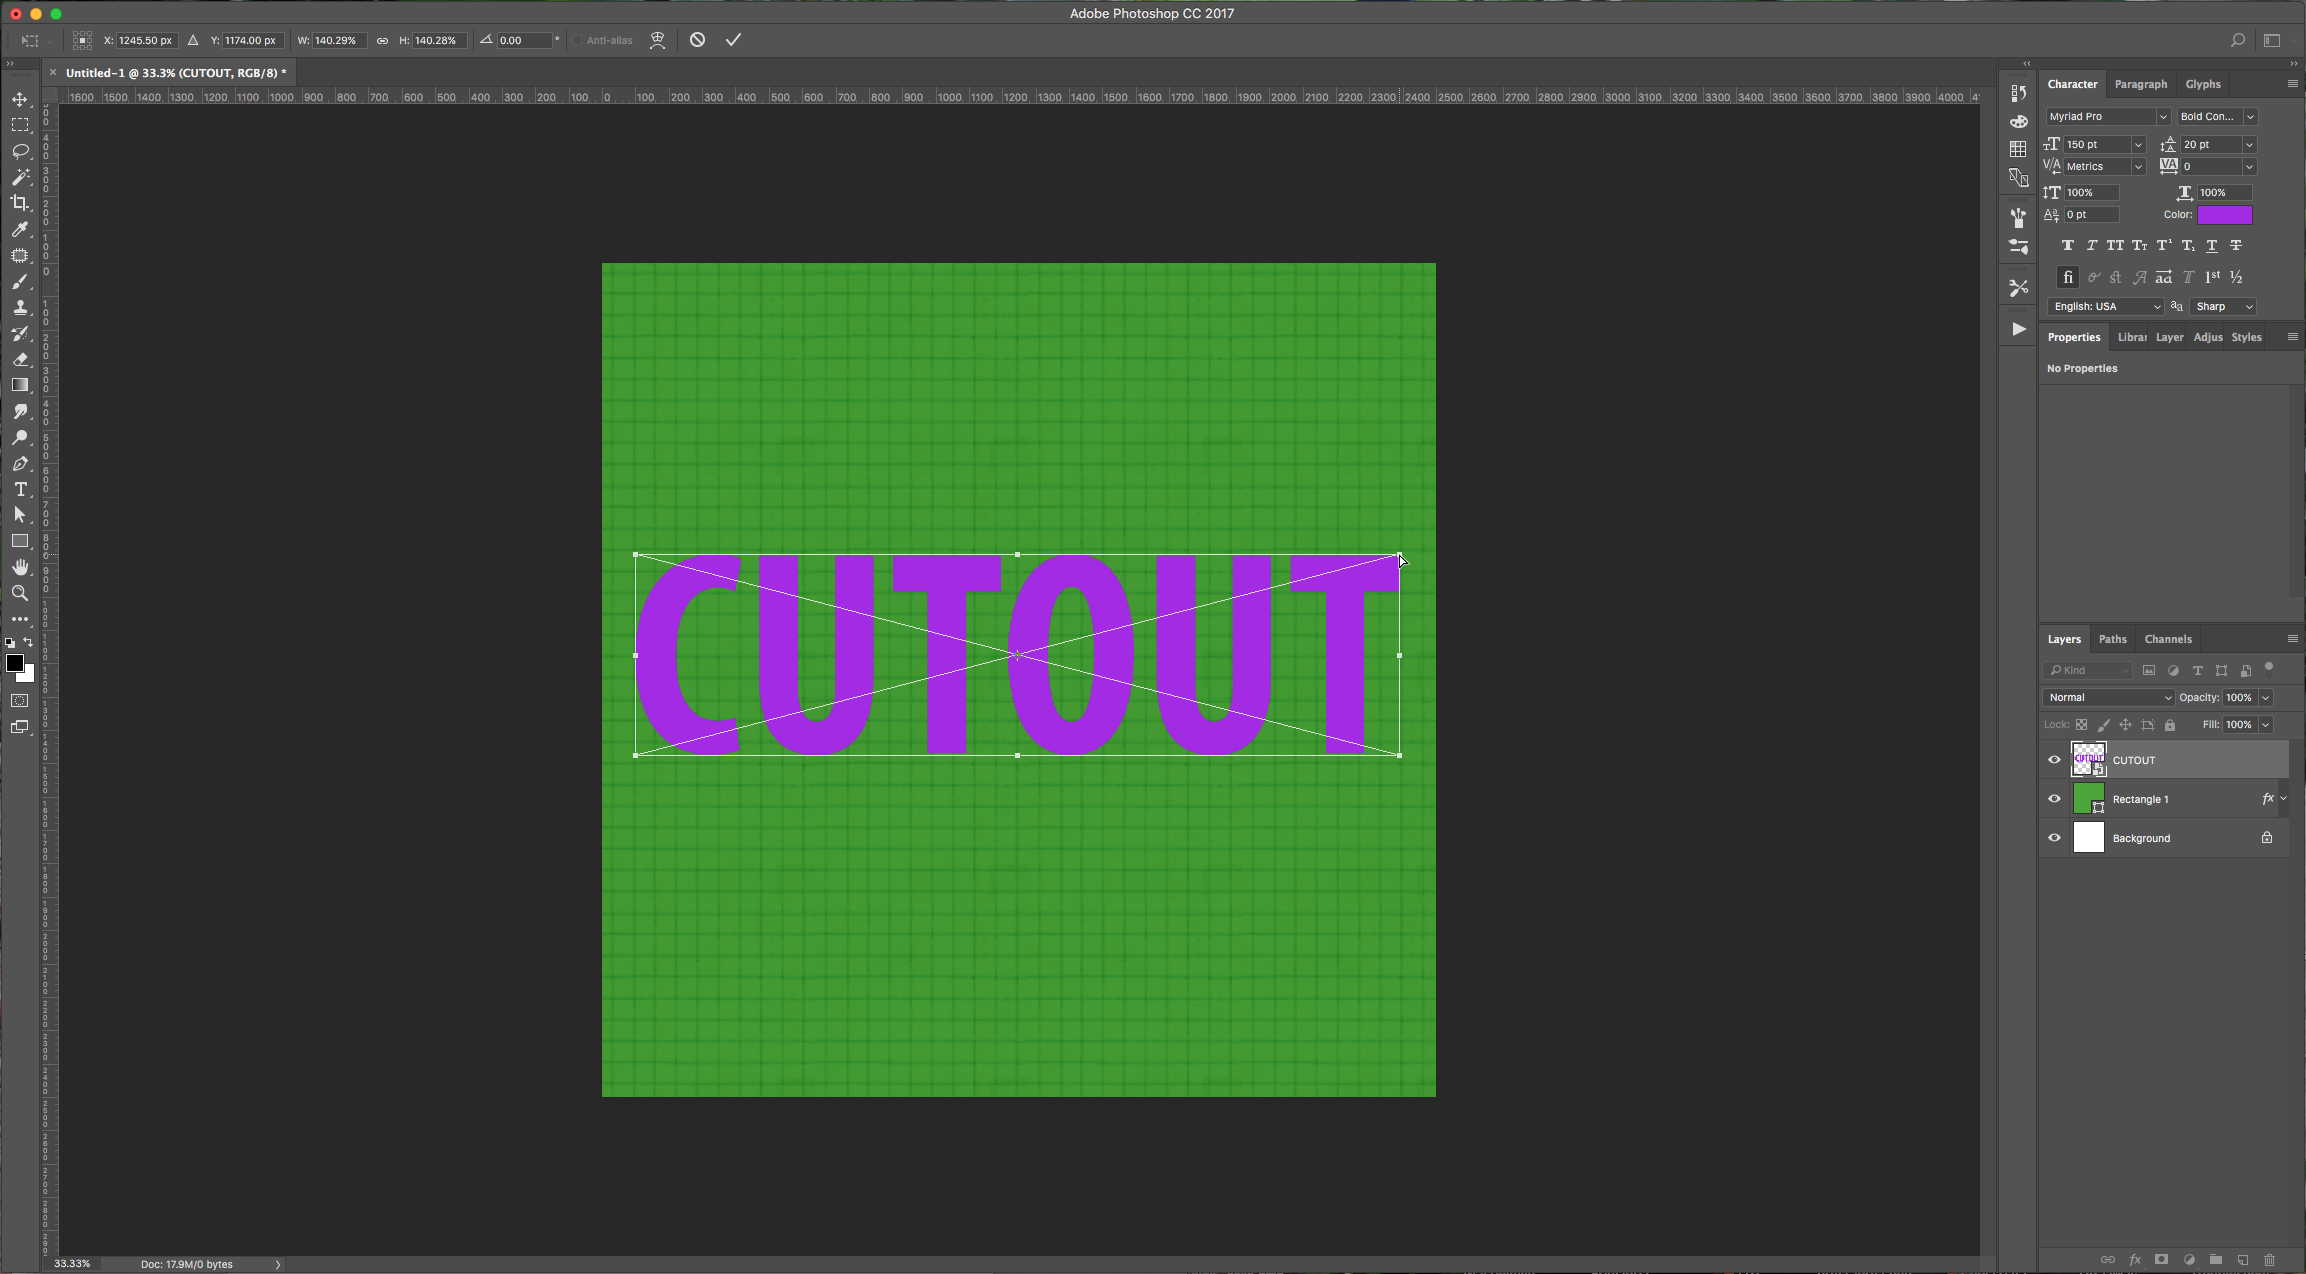
3 – Select the “Type Tool” (T) and write your text. (If you are using a shape as background you will need to hold the “Shift” key when you first click on your artboard so your shape is not considered the “Text Box”). We used “Myriad Pro Condensed Bold” as our font of choice and used a contrasting color as “Fill” (#a518e7).
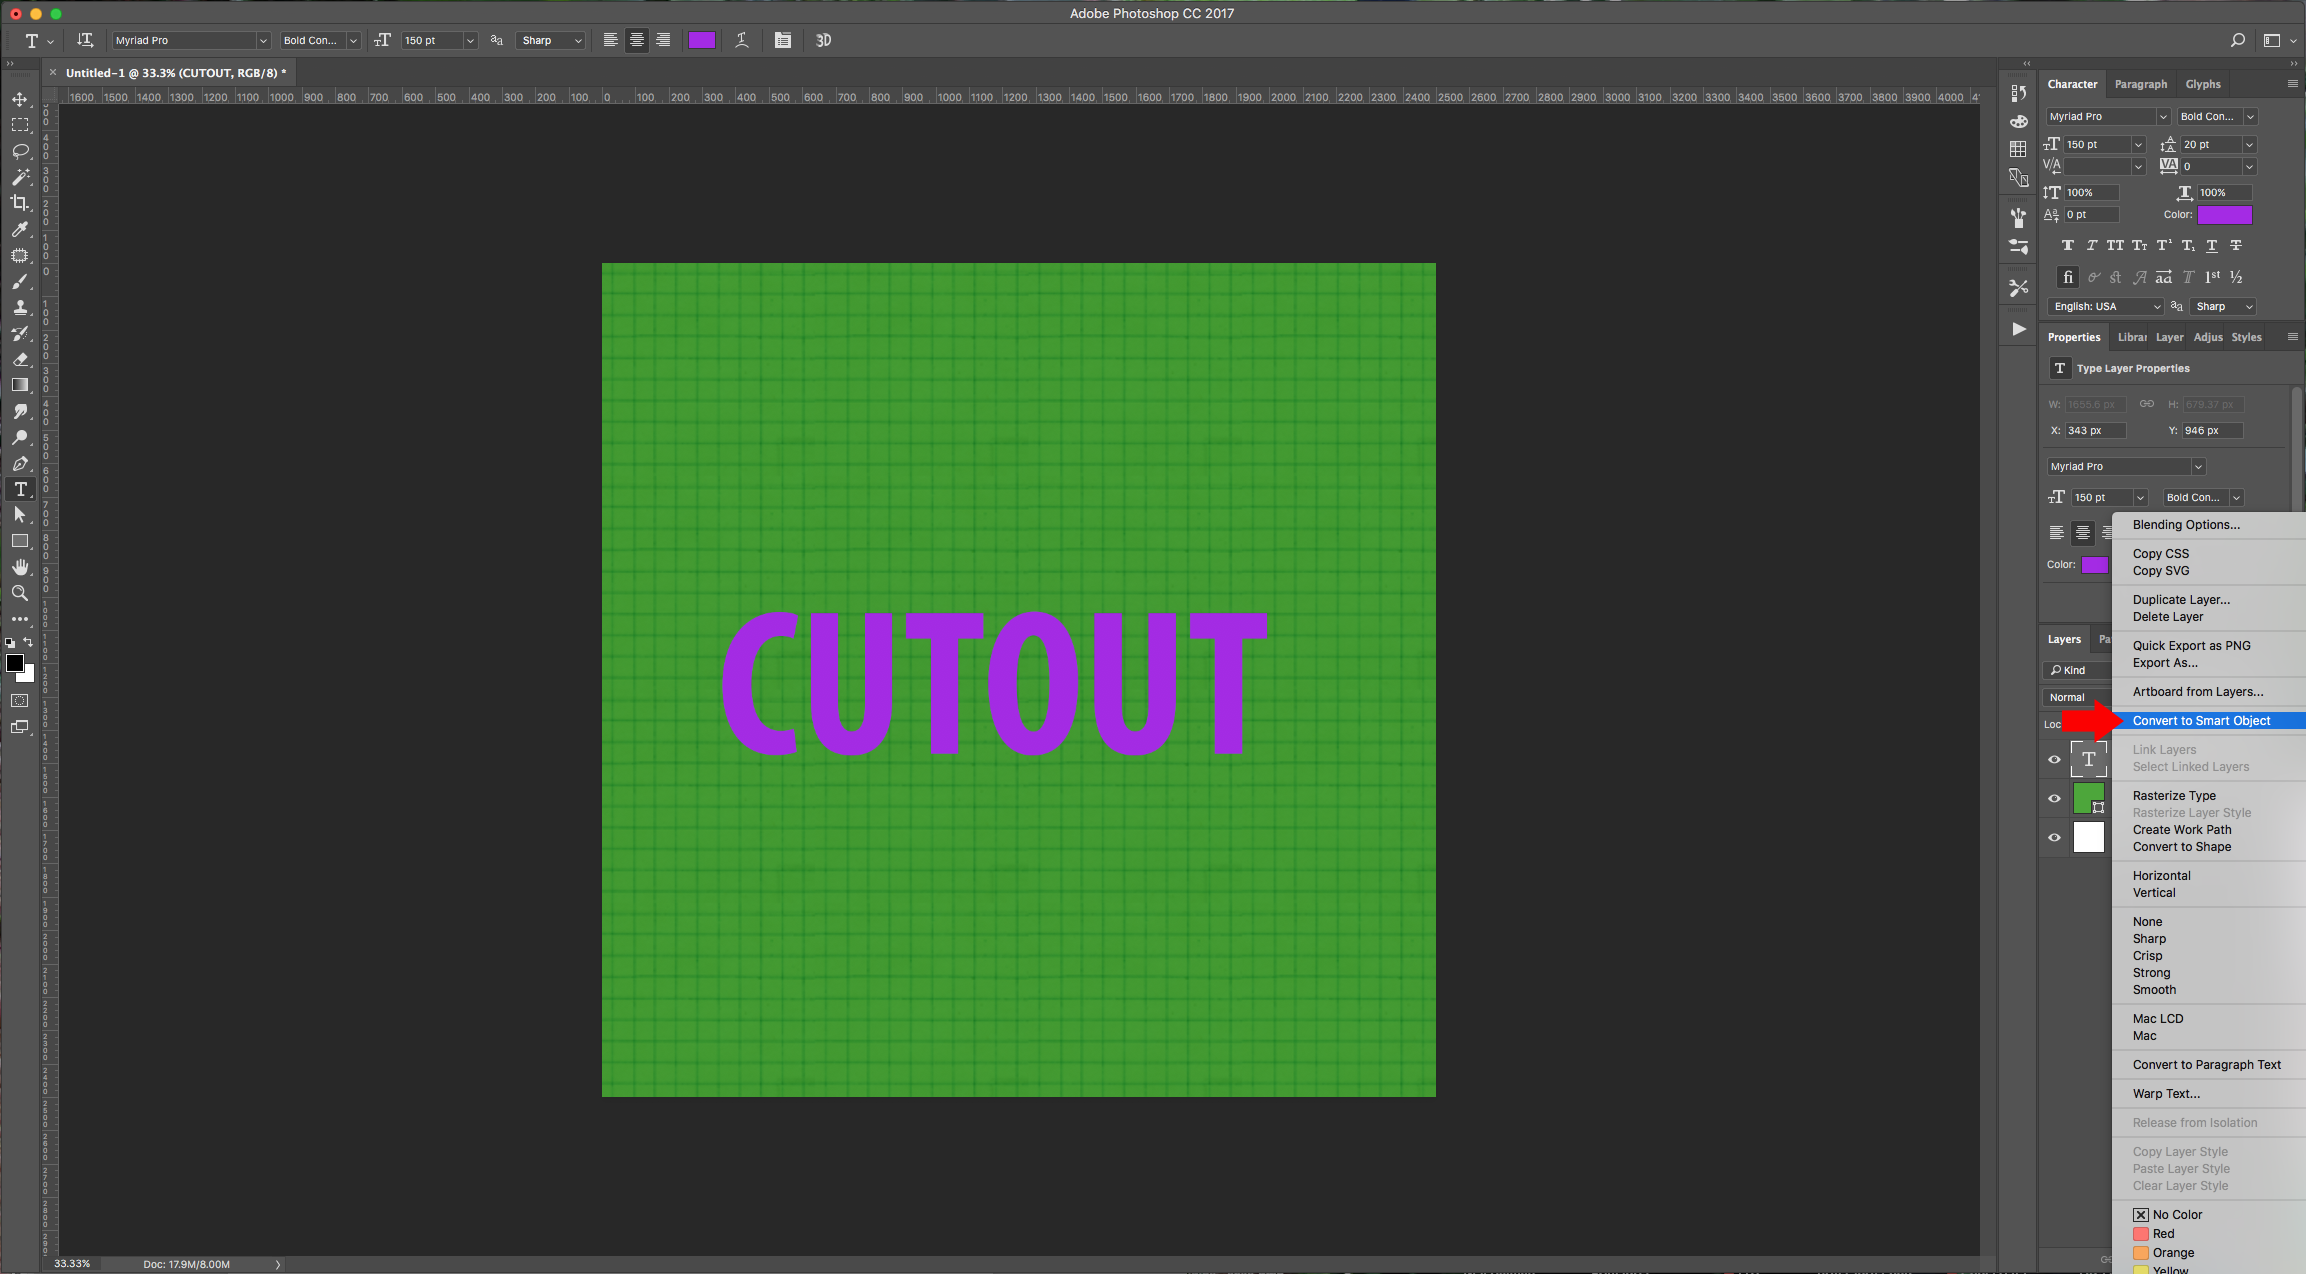
4 - Once you are happy with your text right-click on its thumbnail and choose “Create Smart Object” from the menu. Now we can modify the text.
5 - Double-click on your text thumbnail and apply the following “Layer Style”:
Bevel & Emboss (Shadow Mode color # 307221)
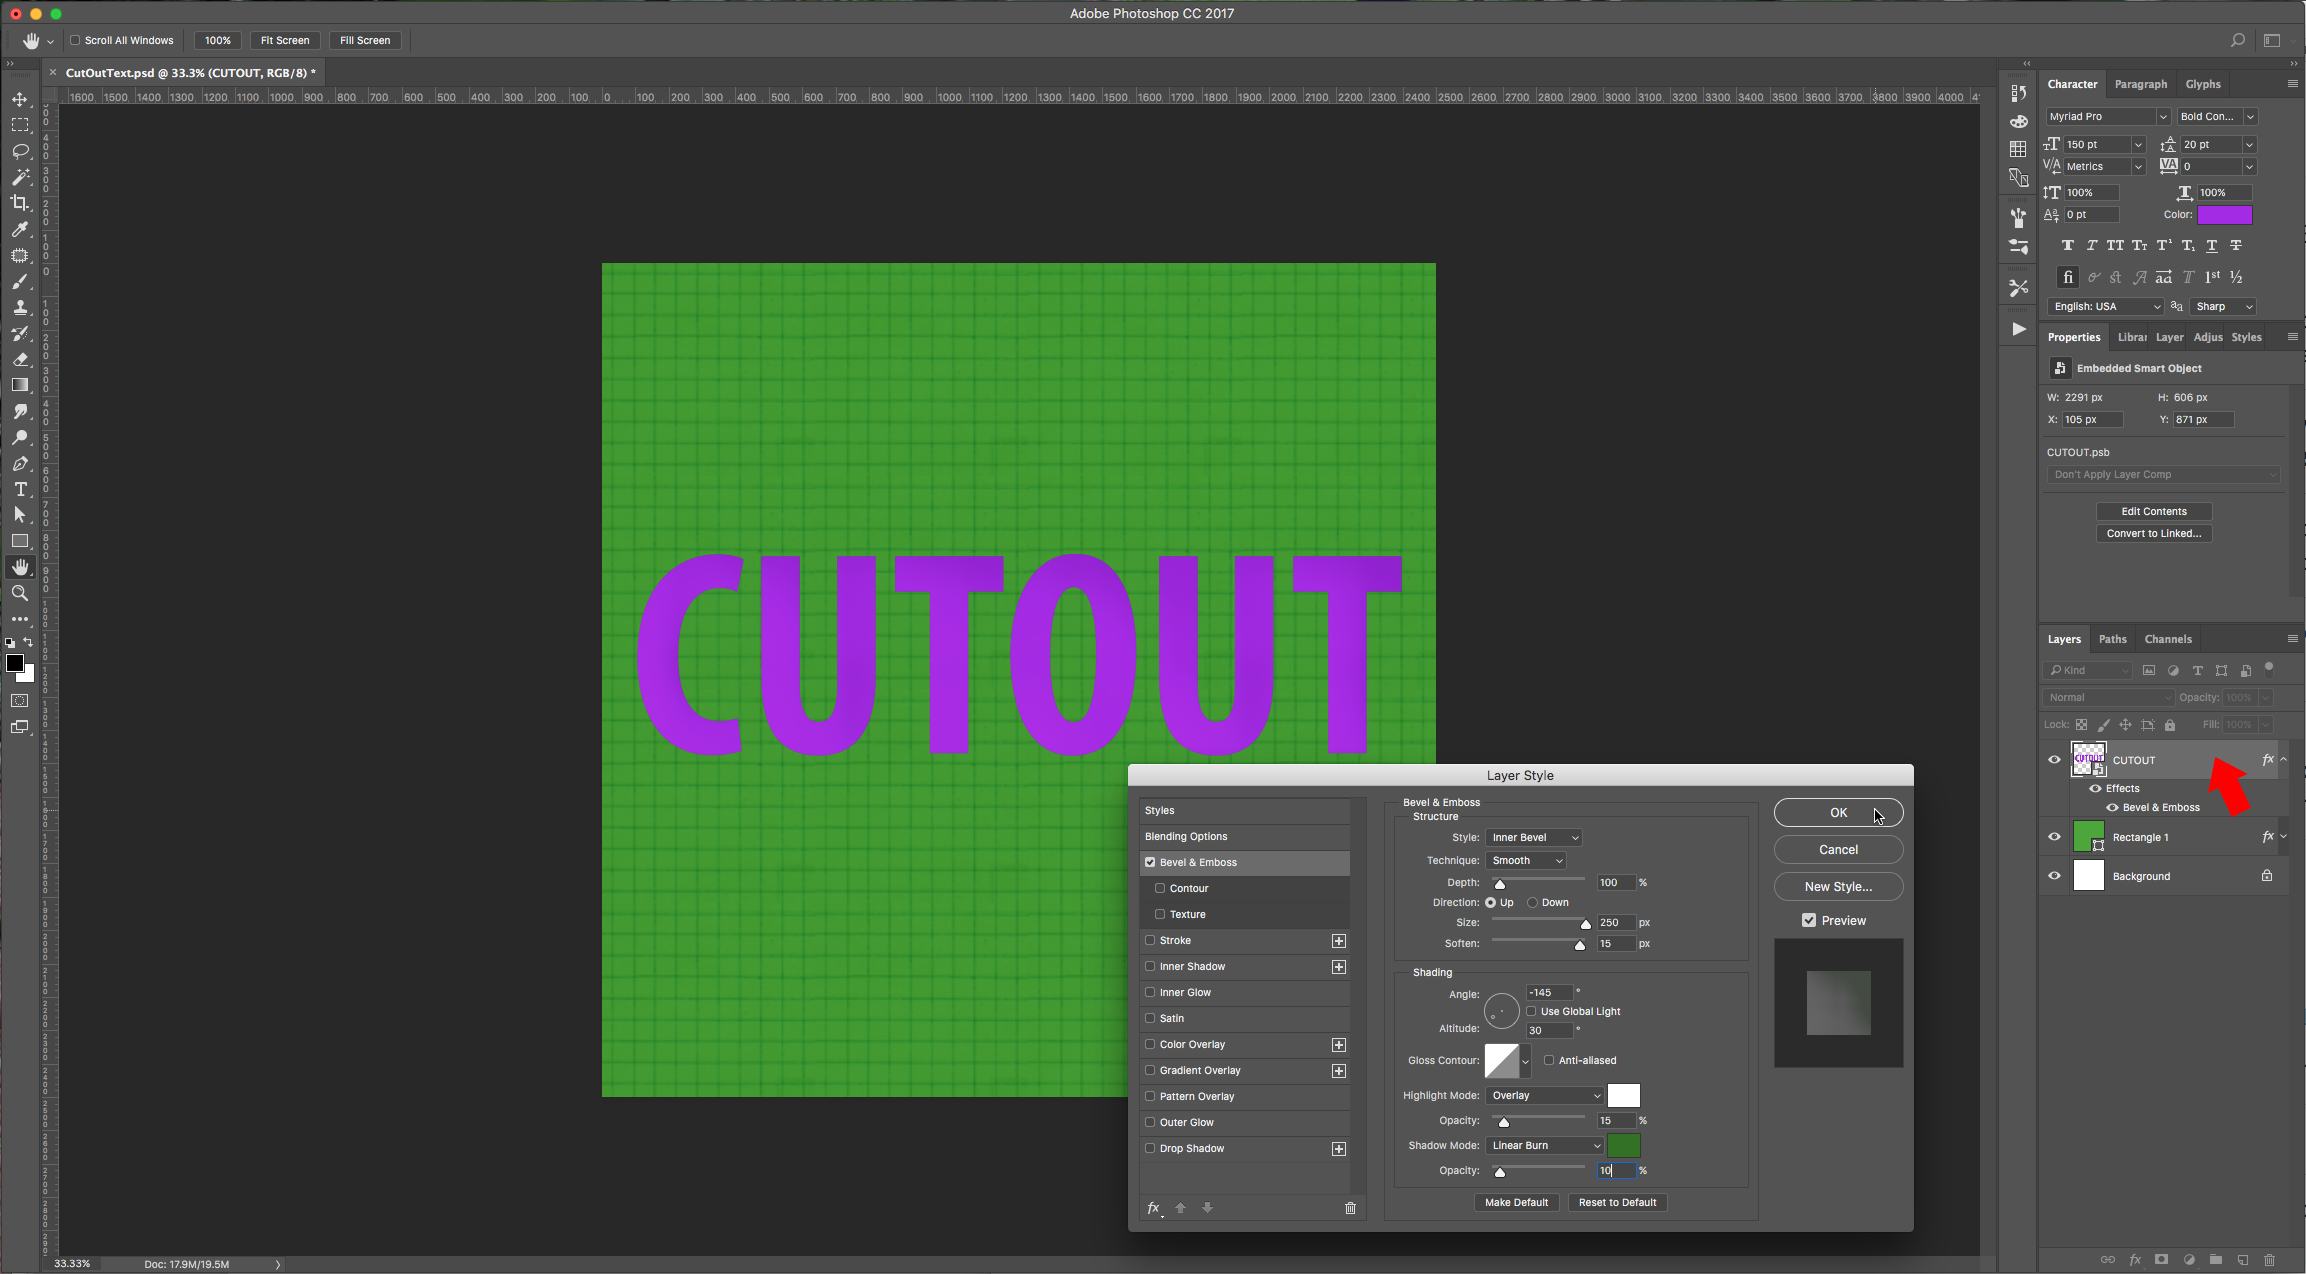
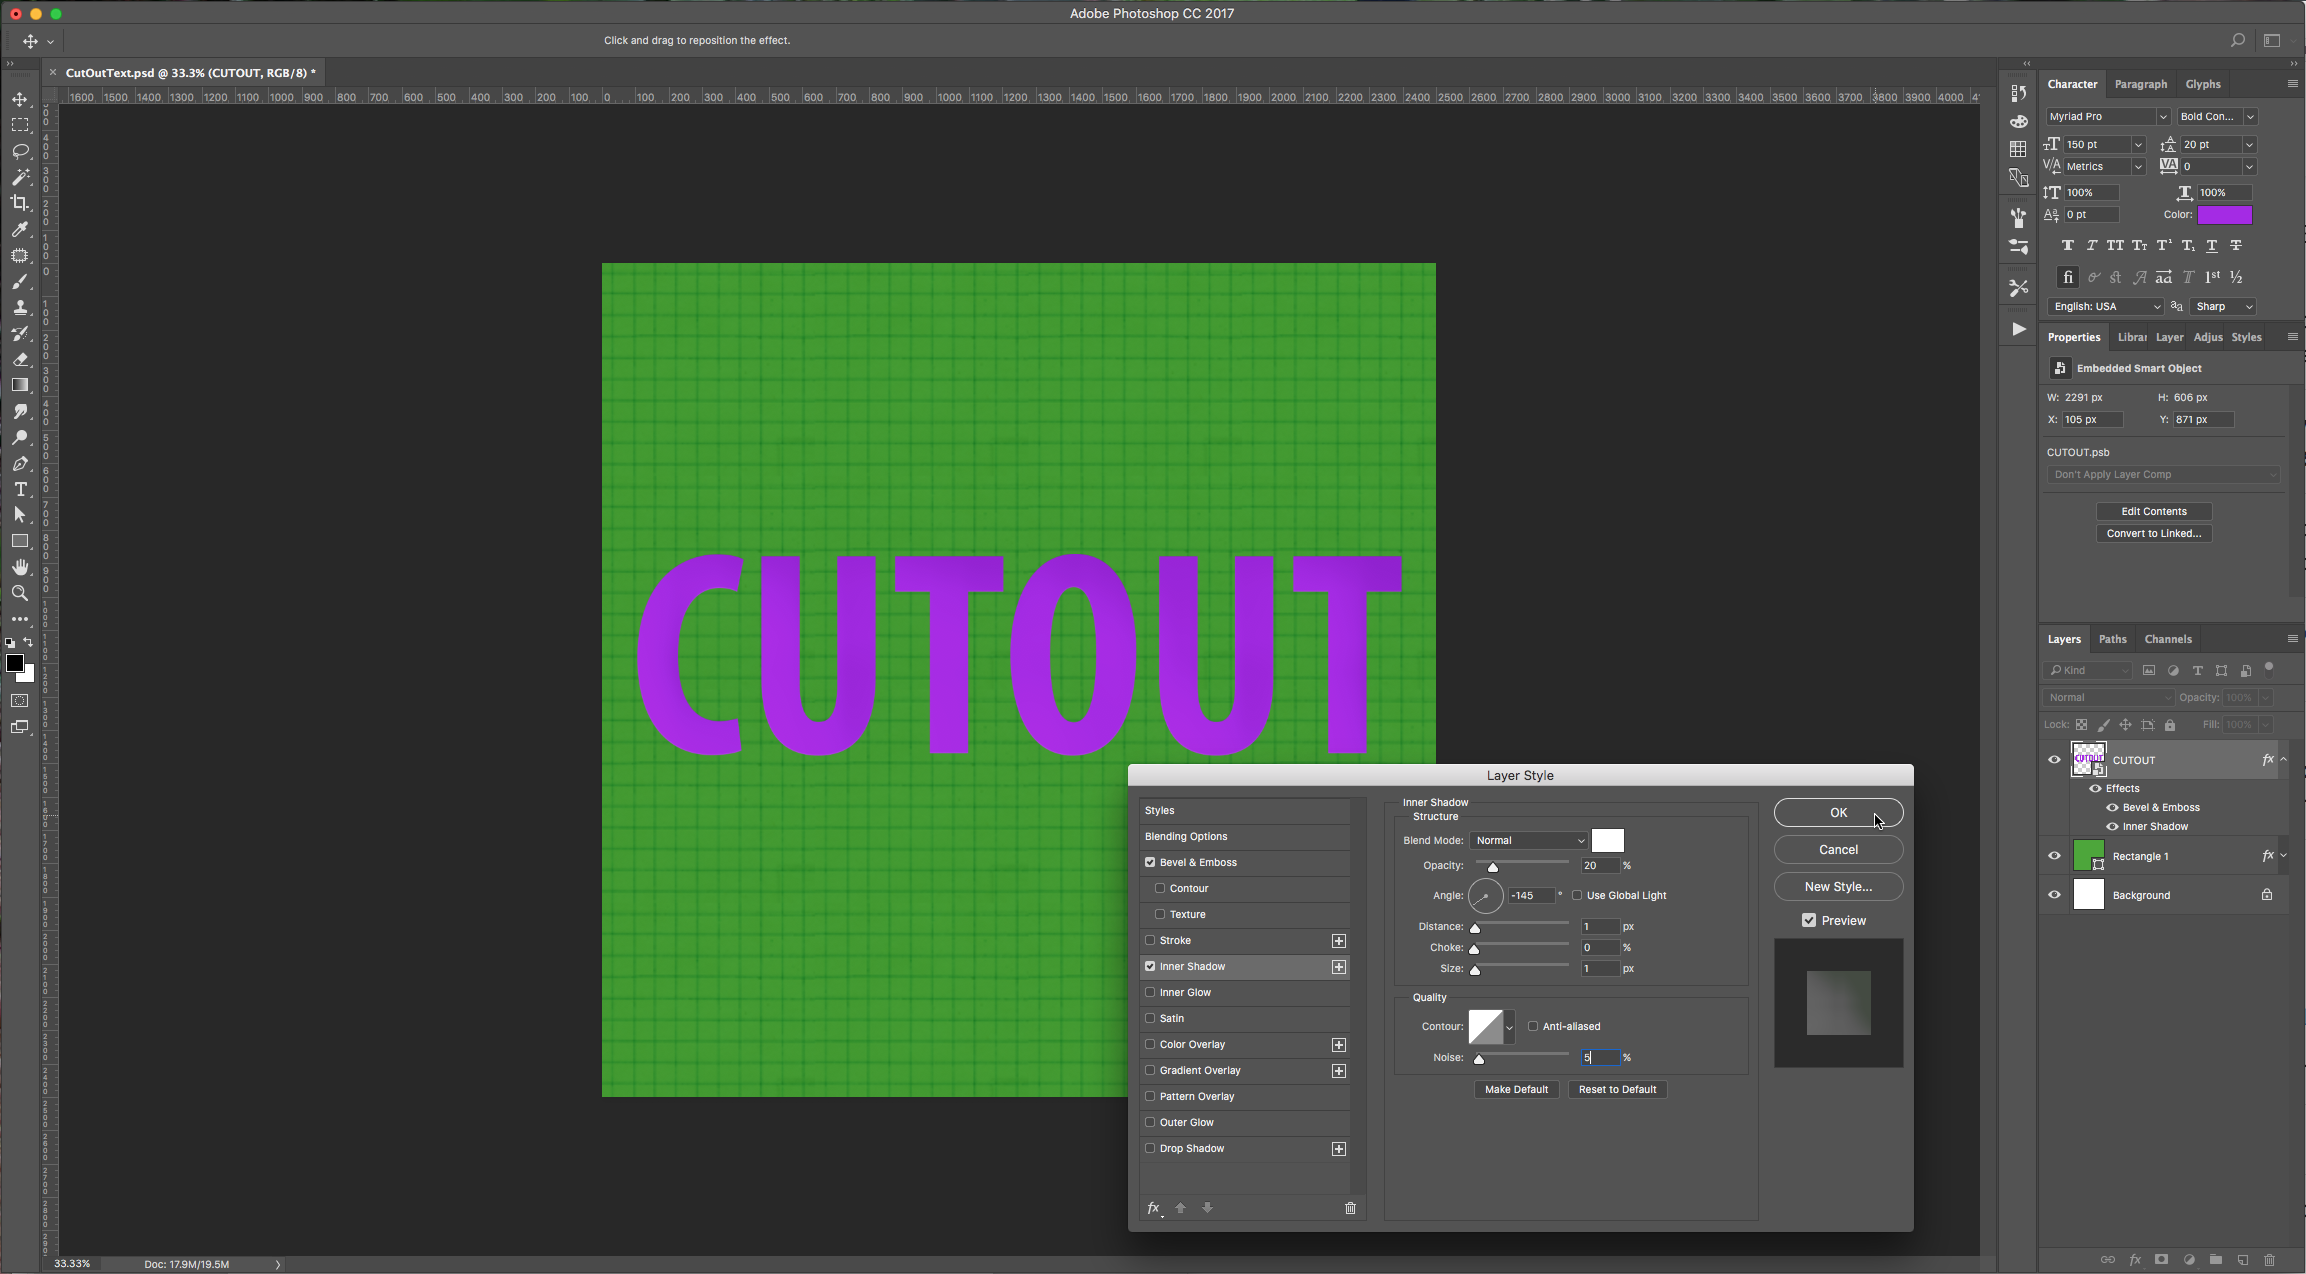
Inner Shadow (Blend Mode color # ffffff)
Pattern Overlay

Drop Shadow (Blend Mode color #ffffff)

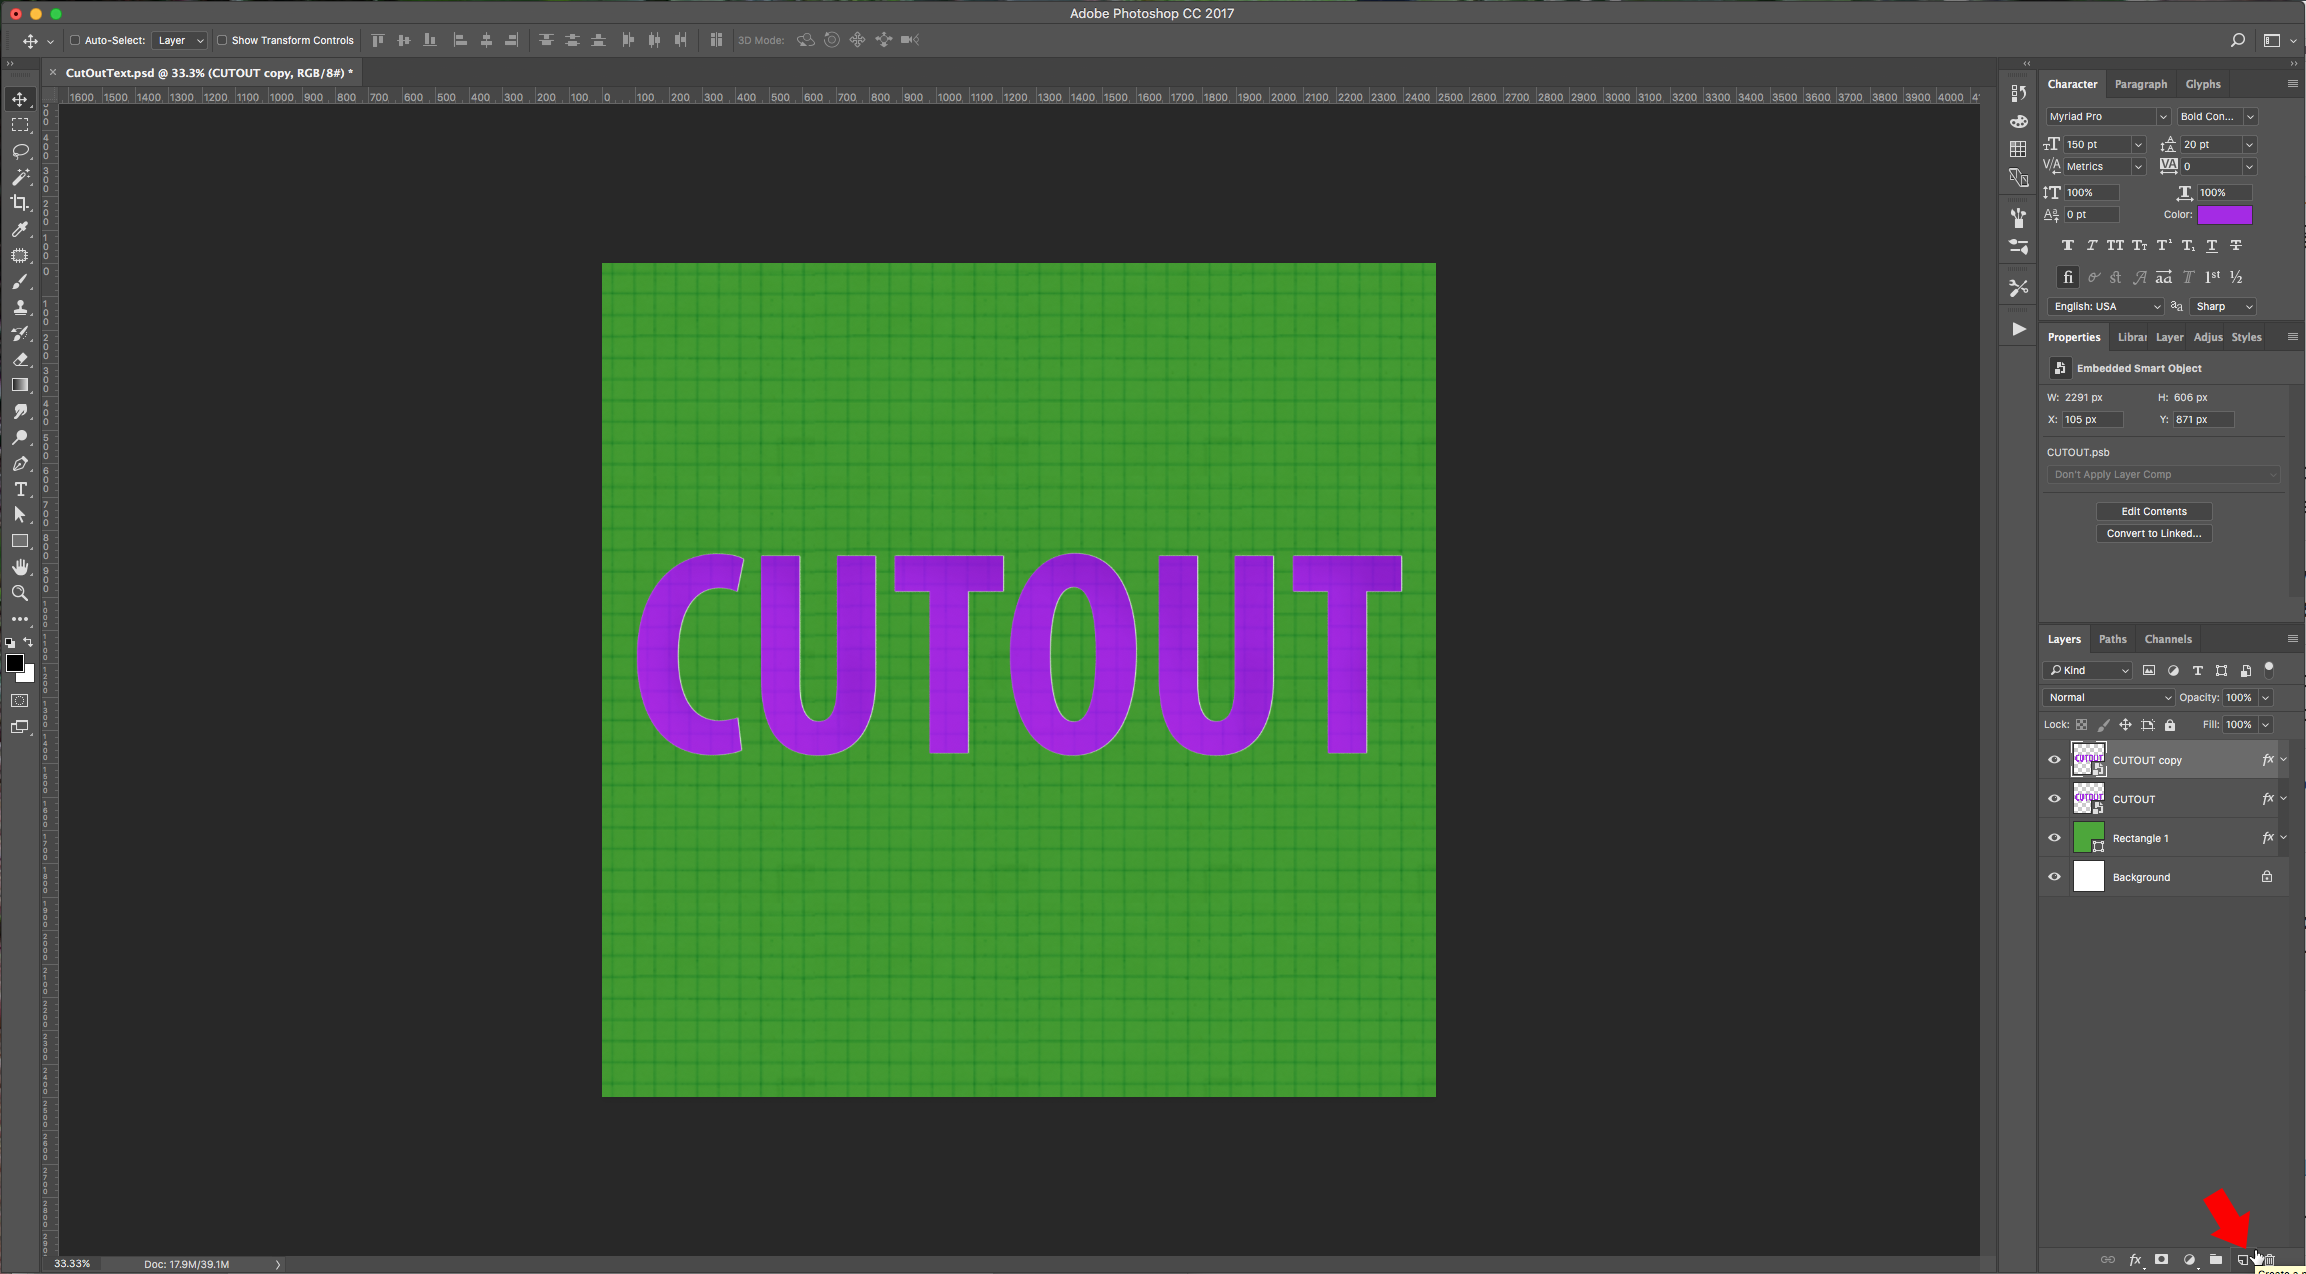
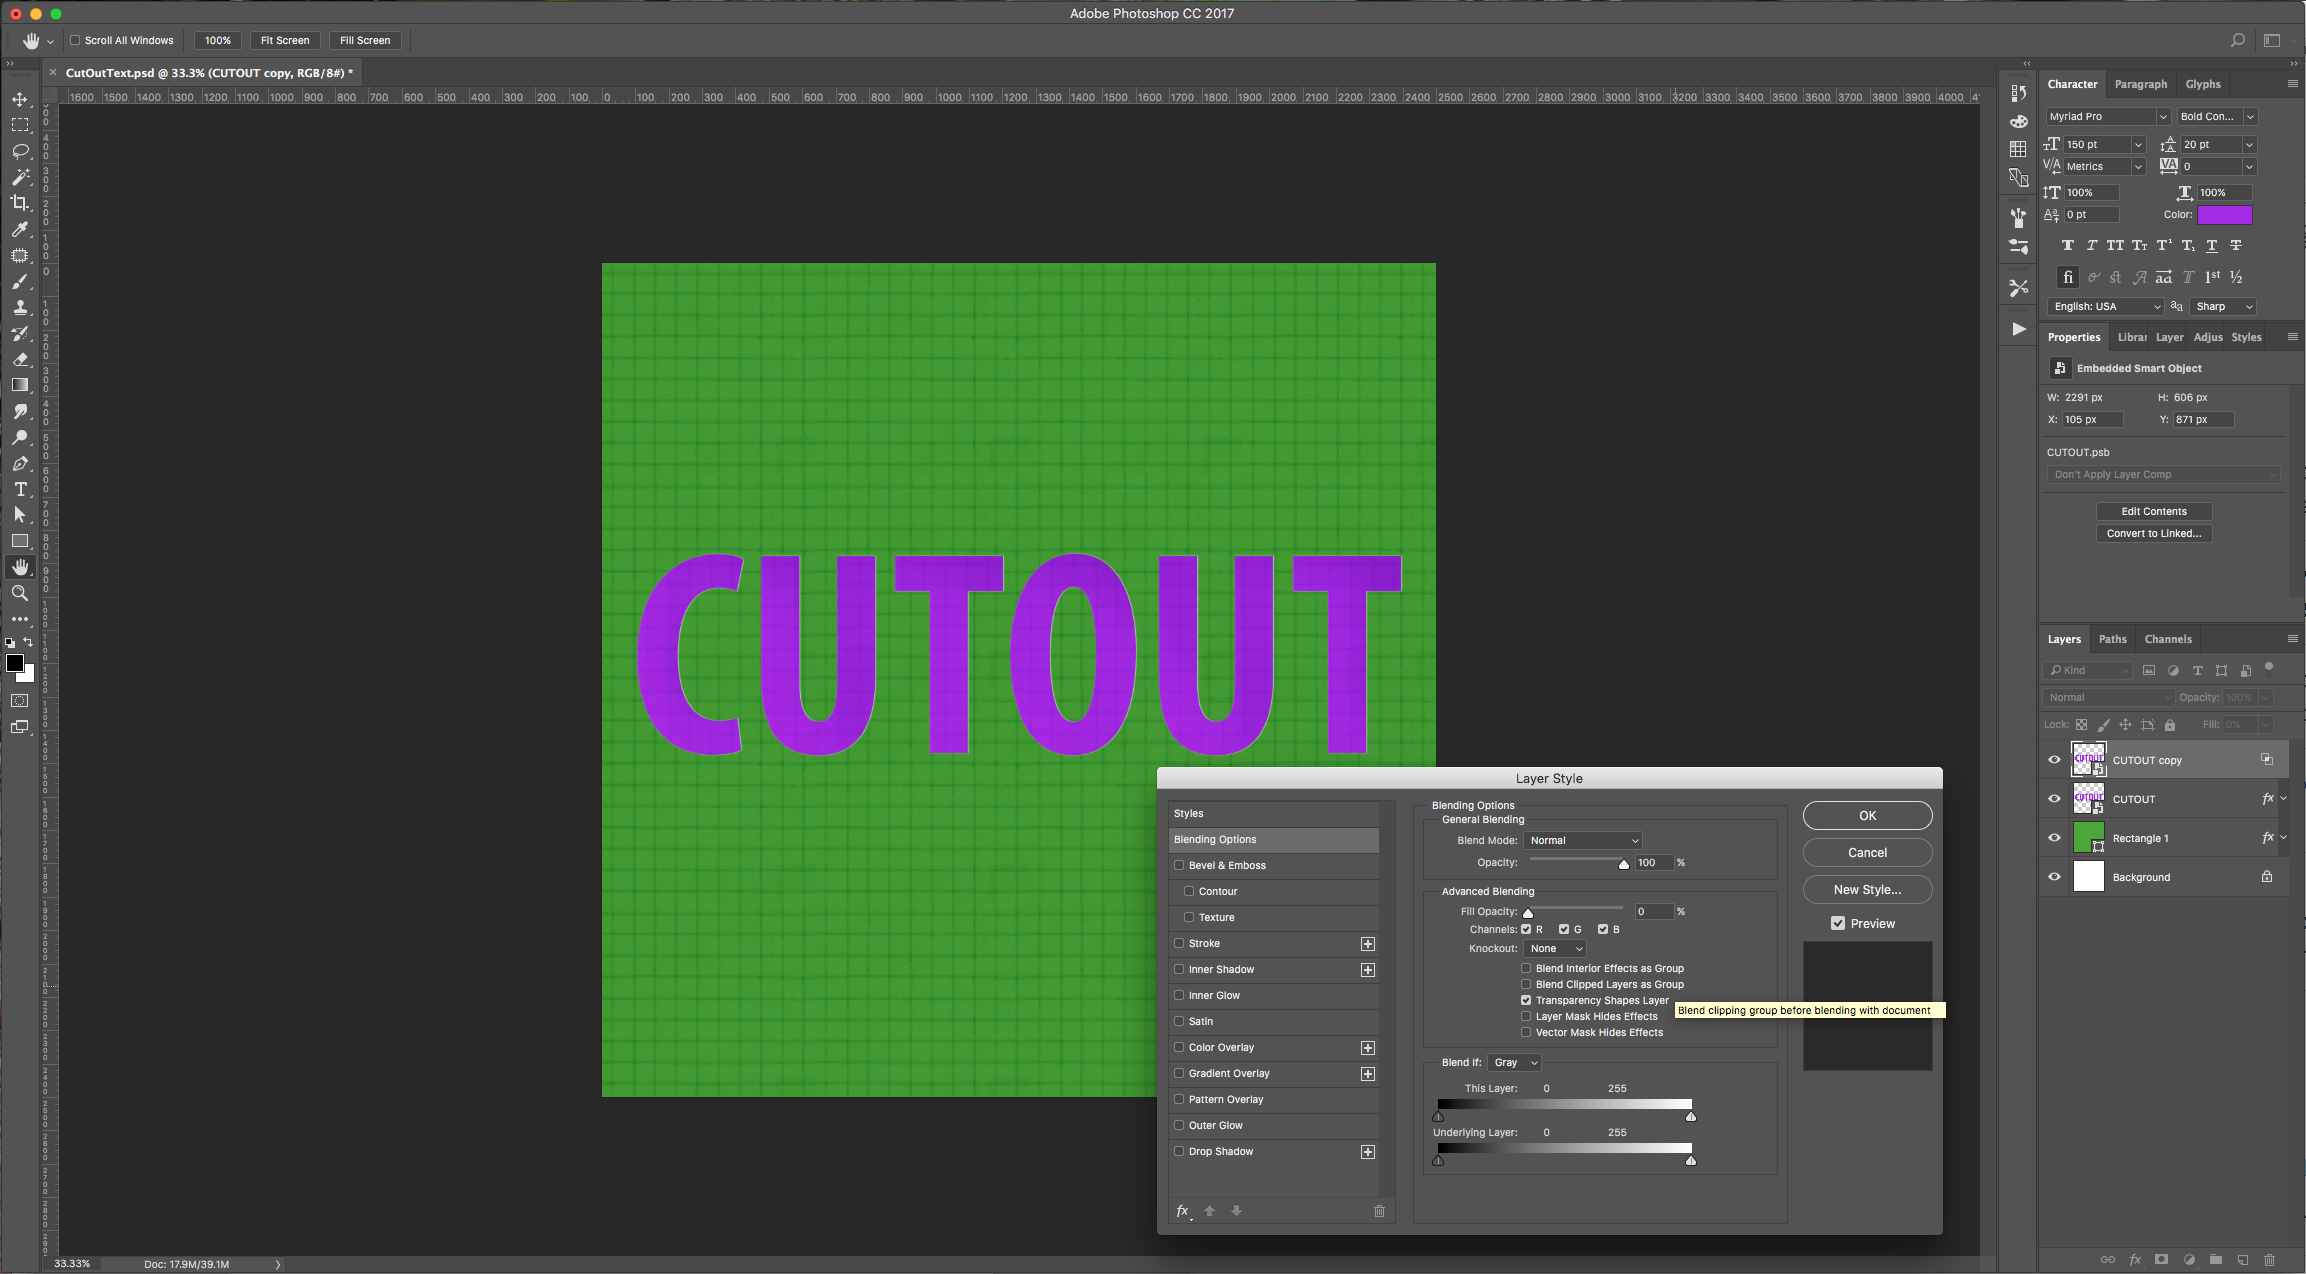
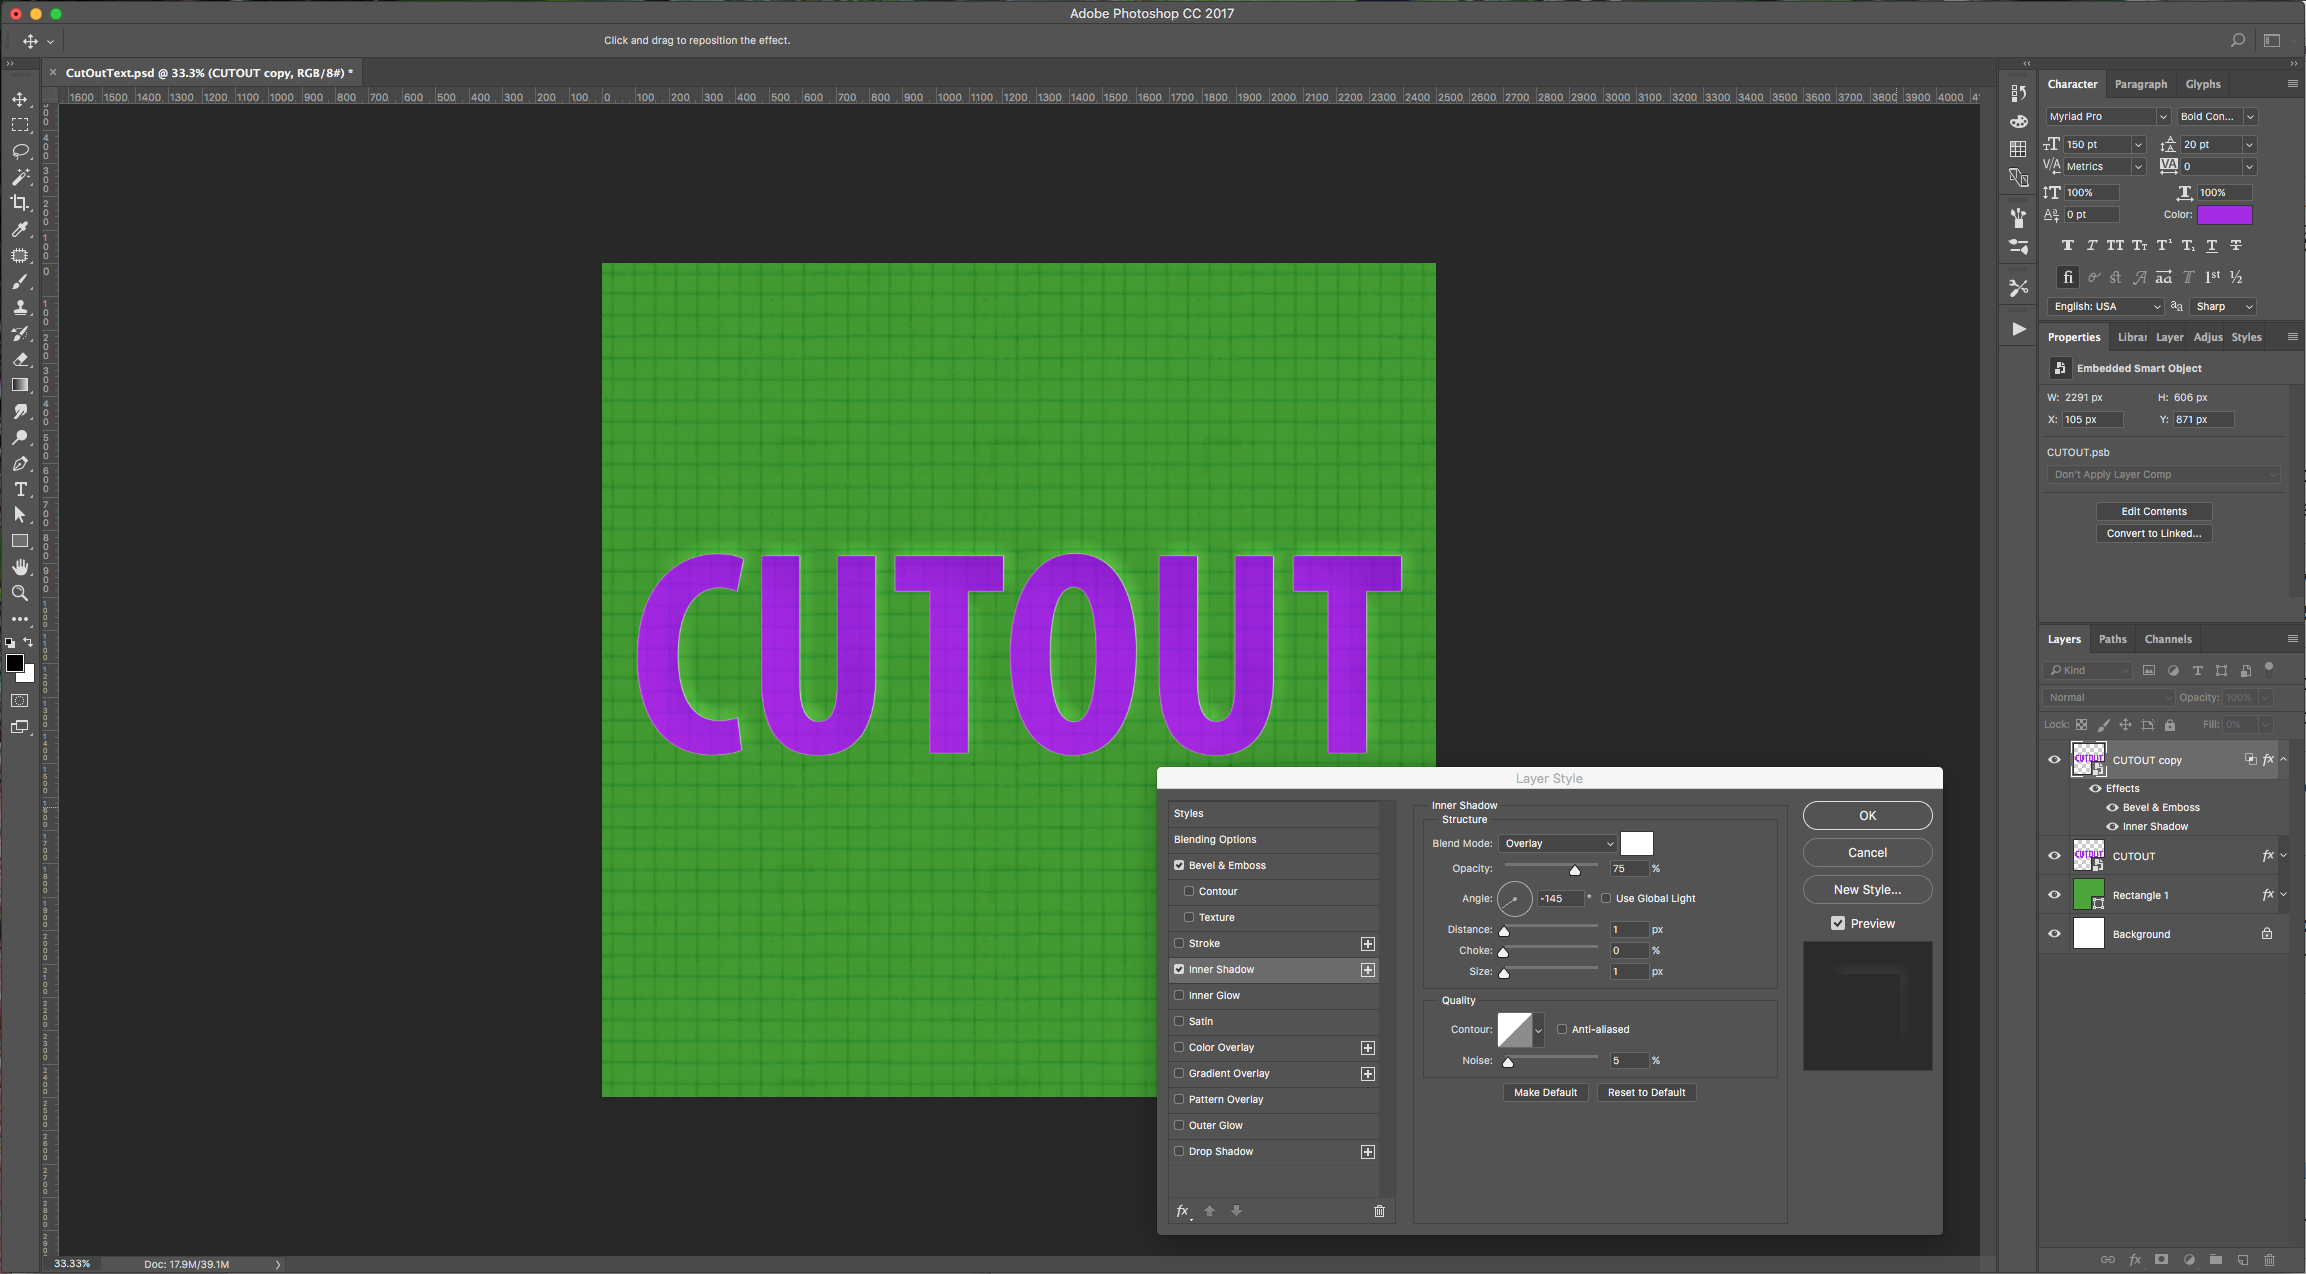
6 - Duplicate the text layer by dragging its thumbnail to the “Create New Layer” button at the bottom of the “Layers” menu. Right-click on top of “Effects” icon located in the right part or your layer’s thumbnail and select “Clear Layer Styles” or select and drag the effect thumbnails to the “Trashcan”. Set the layer’s “Fill” to 0%, then double-click on the layer to apply new ones:
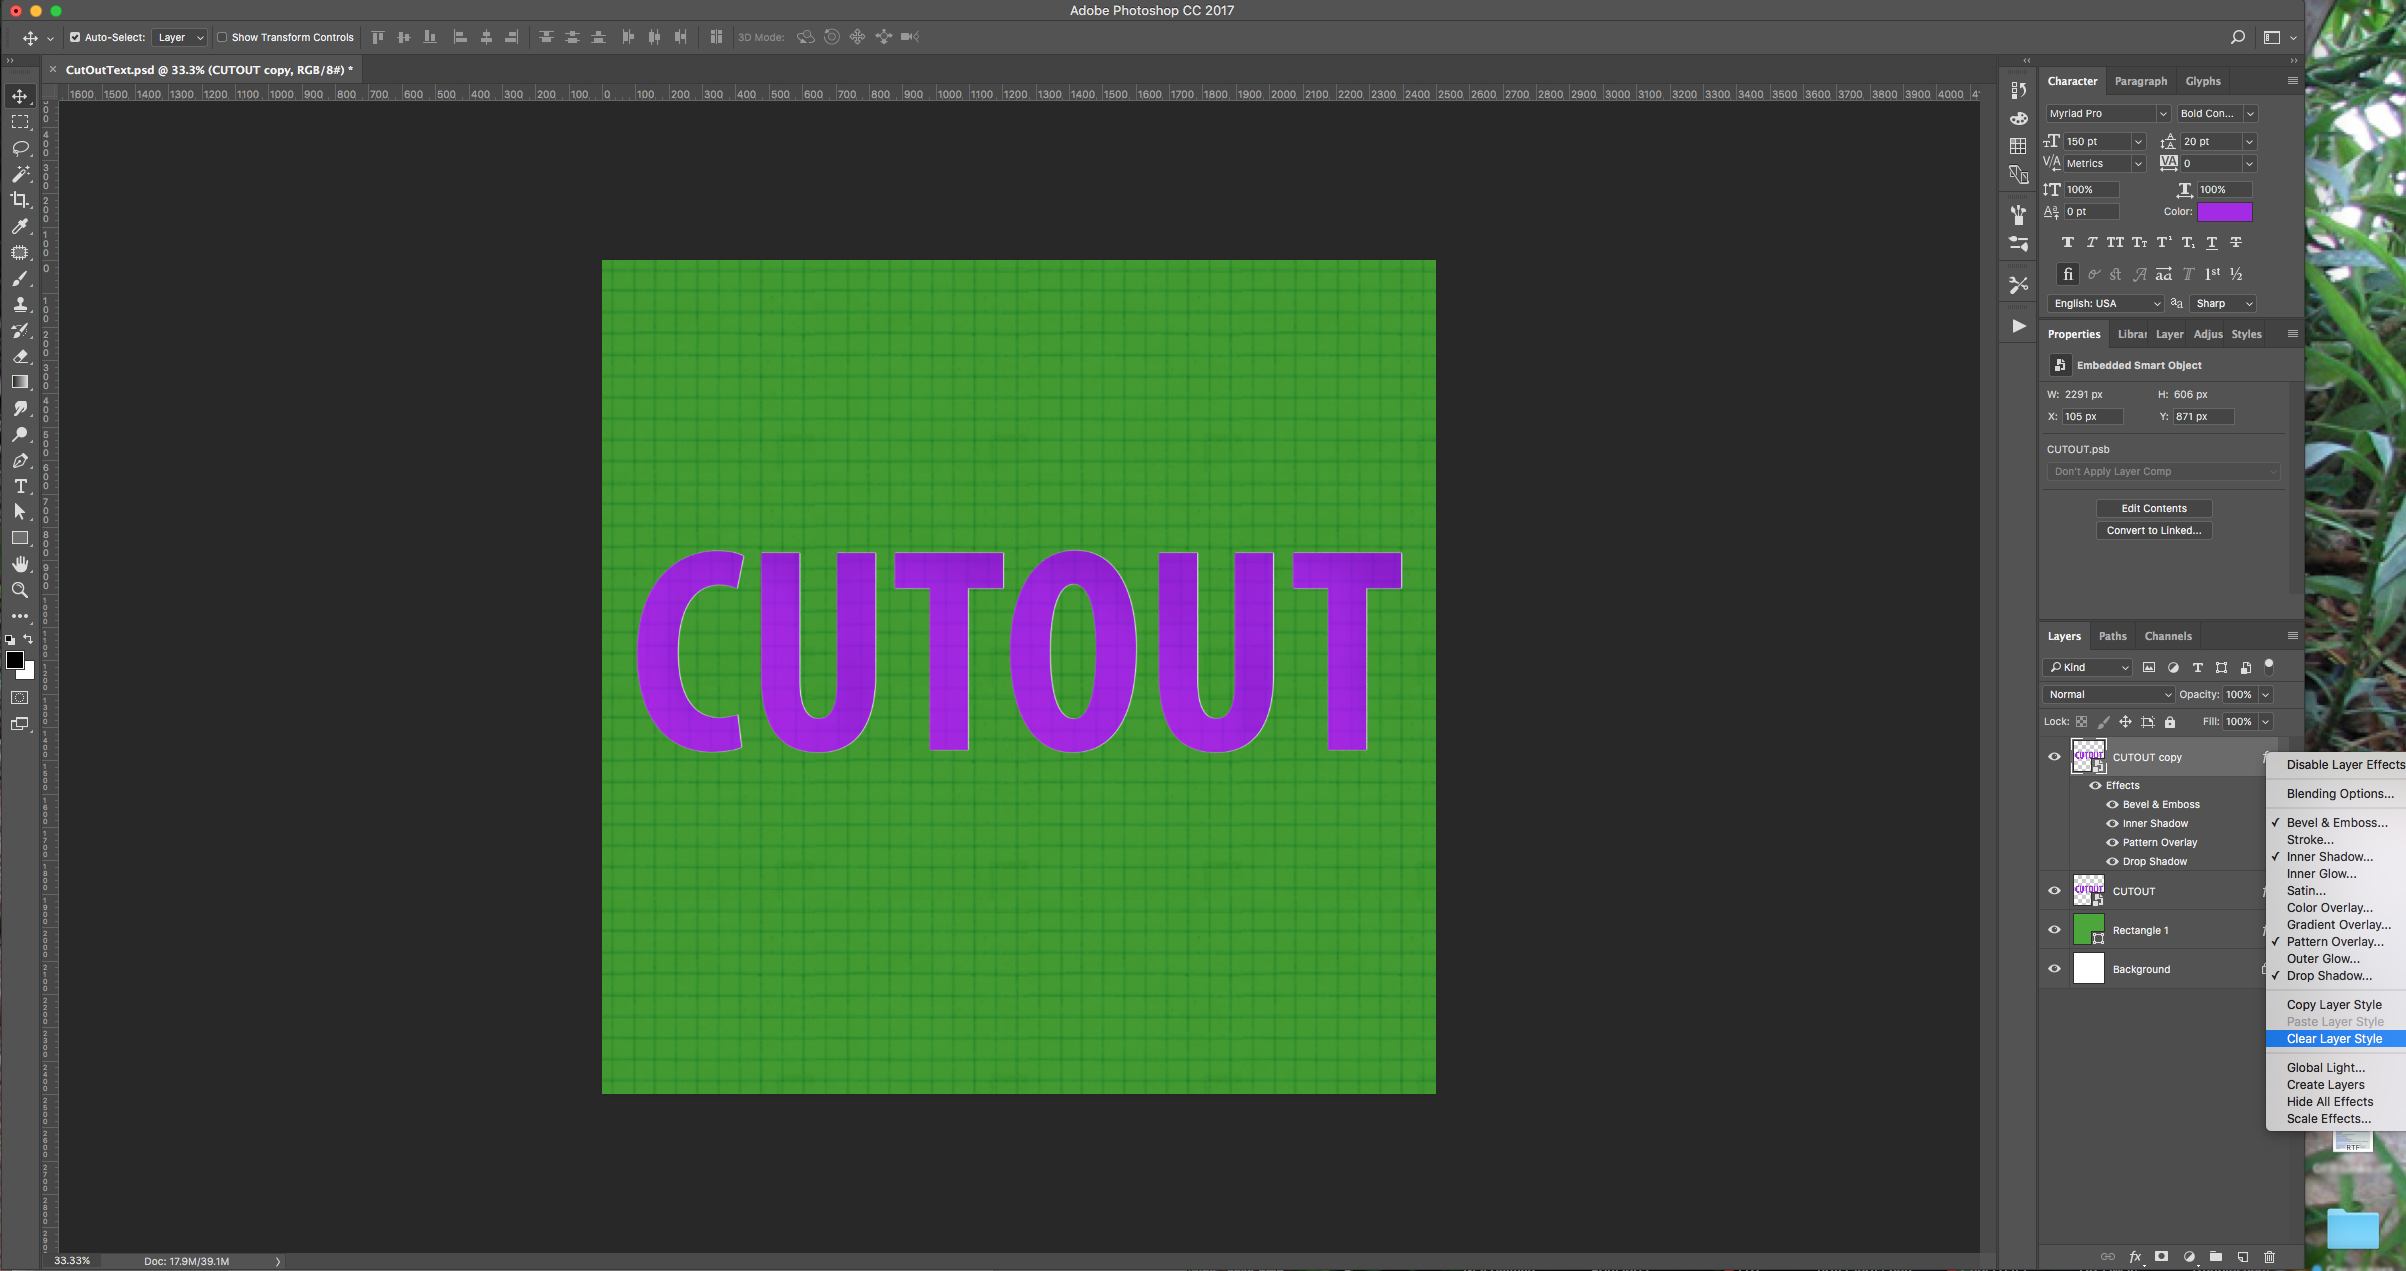

In the “Blending Options” uncheck the “Blend Clipped Layers as Group”.
Bevel & Emboss:

Inner Shadow: (Blend Mode color #ffffff)
Drop Shadow: (Blend Mode color #ffffff)

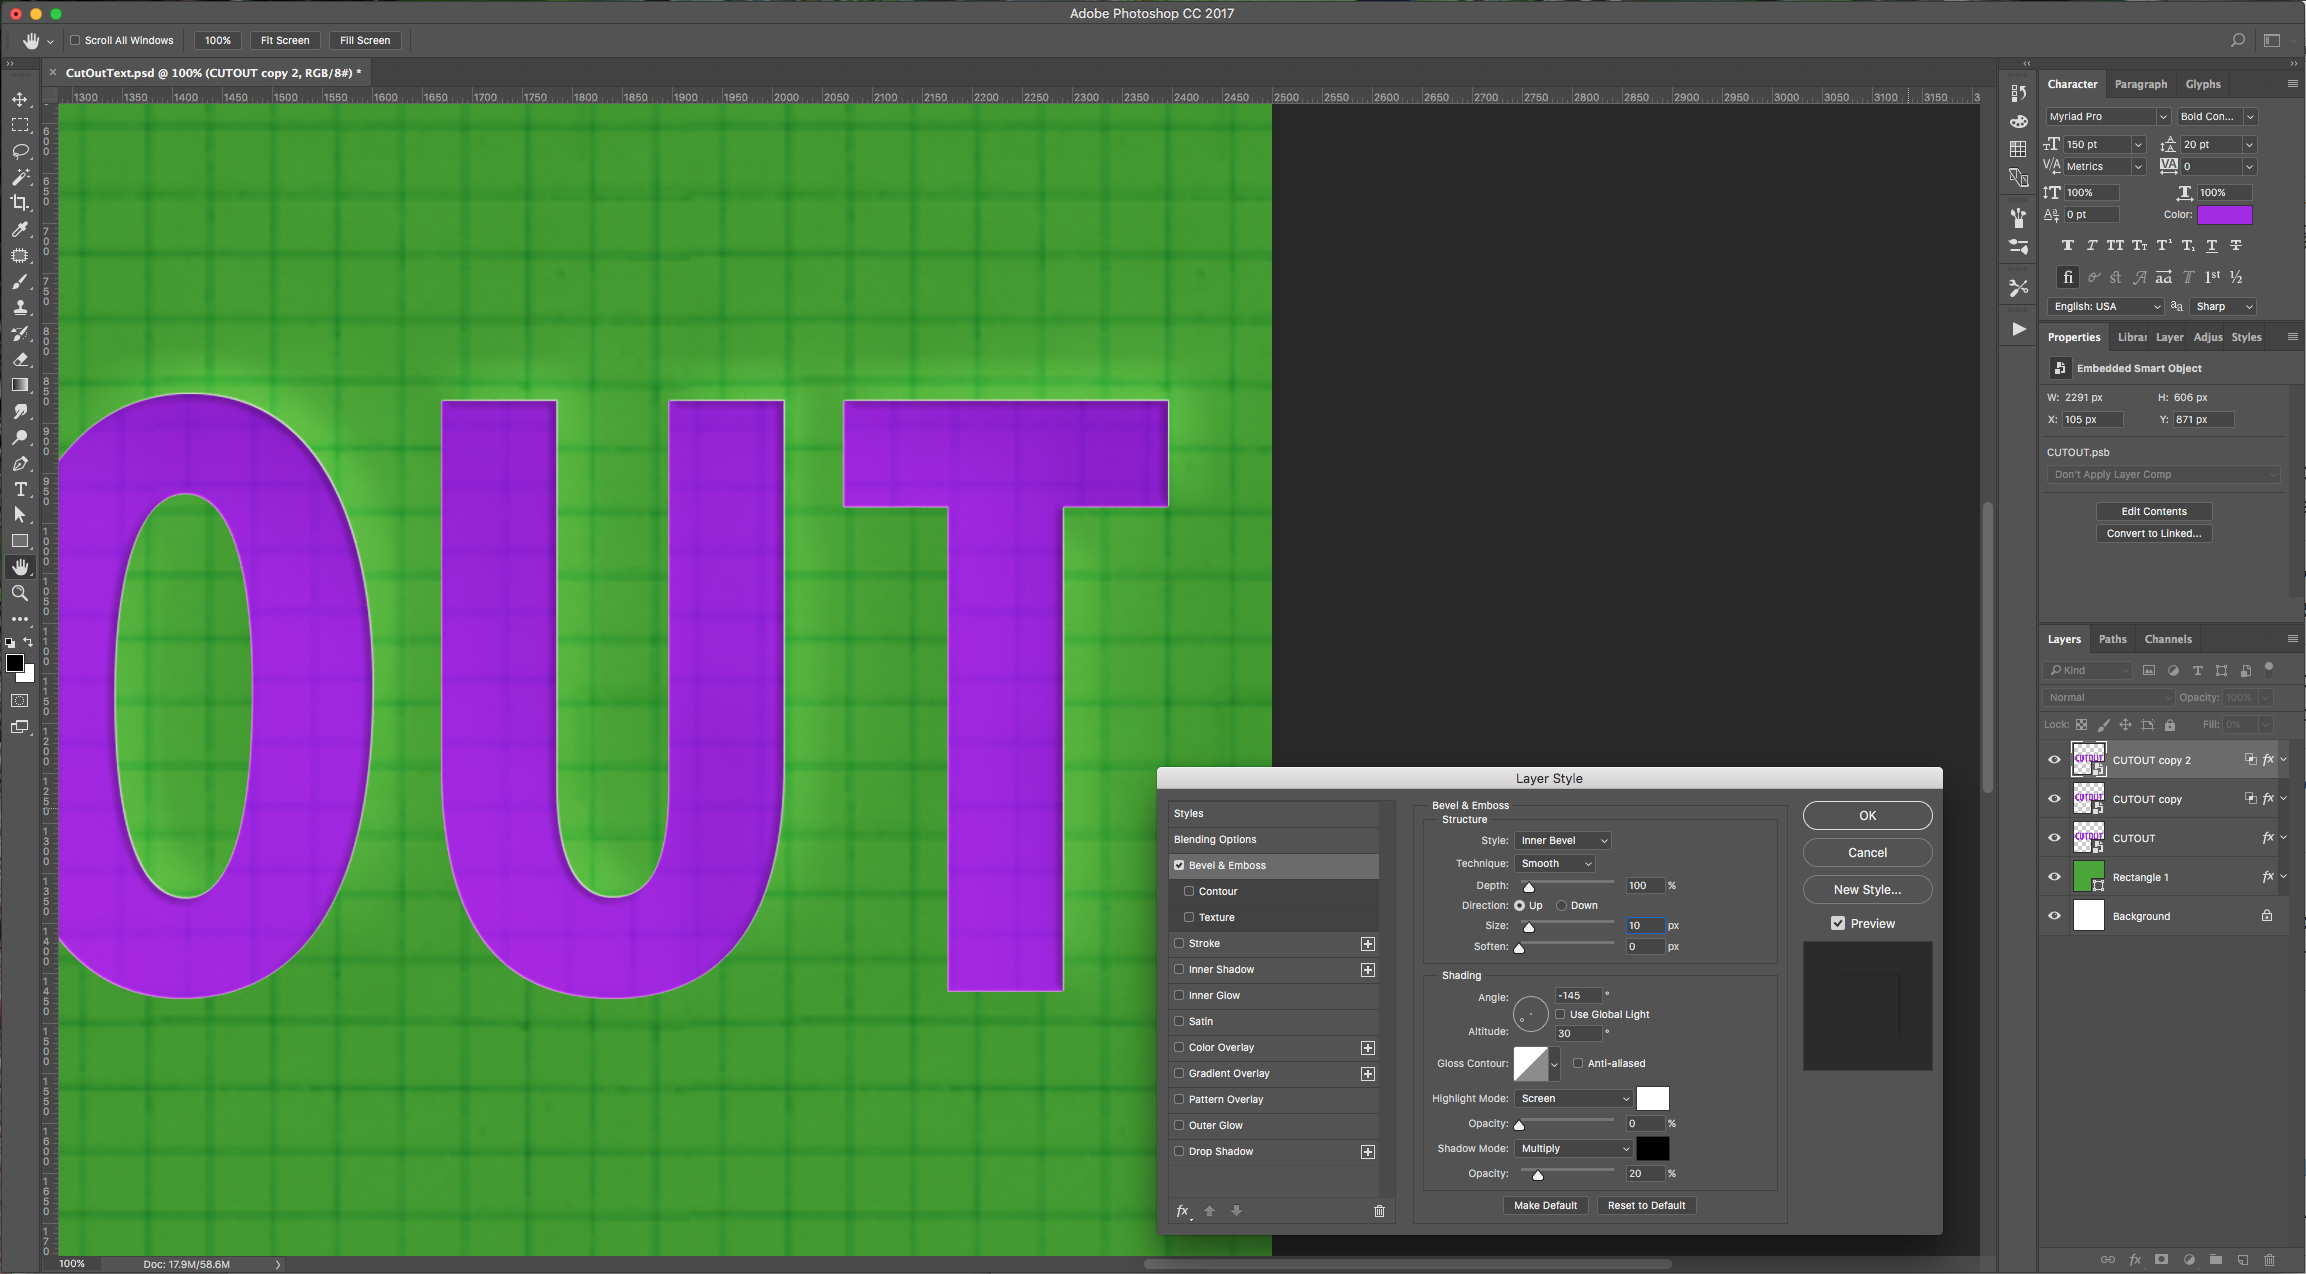
7 - Duplicate this text layer and Clear the Layer Styles again. Apply the following Styles to this layer:
Bevel & Emboss: (Shadow Mode color #000000)
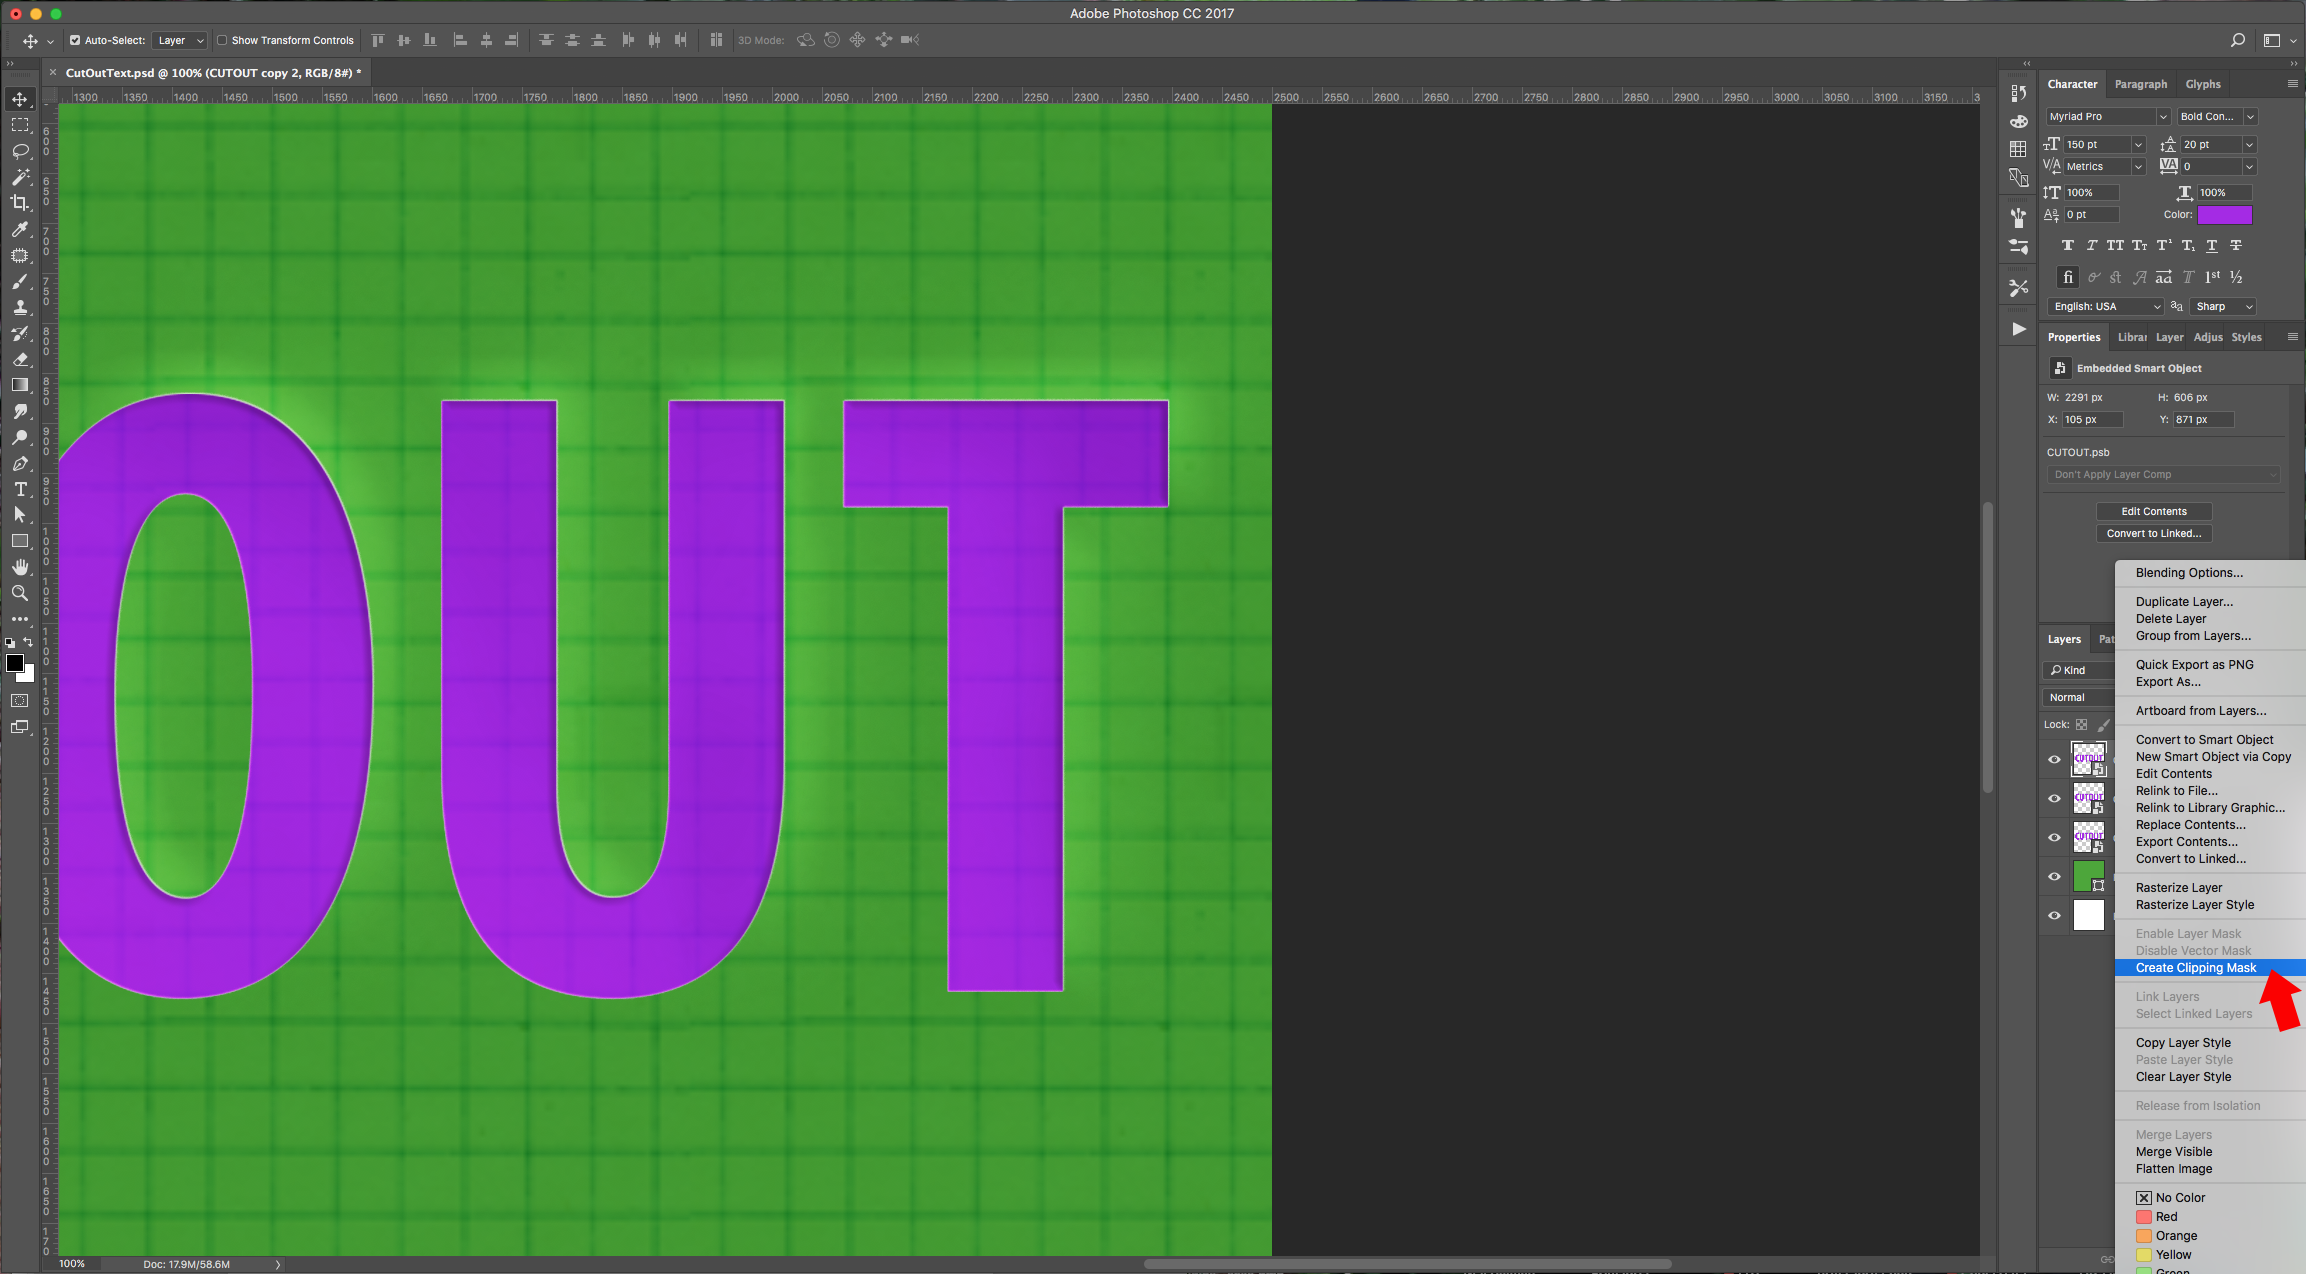
8 - Clip your topmost layers by right-clicking on the first one and selecting “Create Clipping Mask” from the menu.
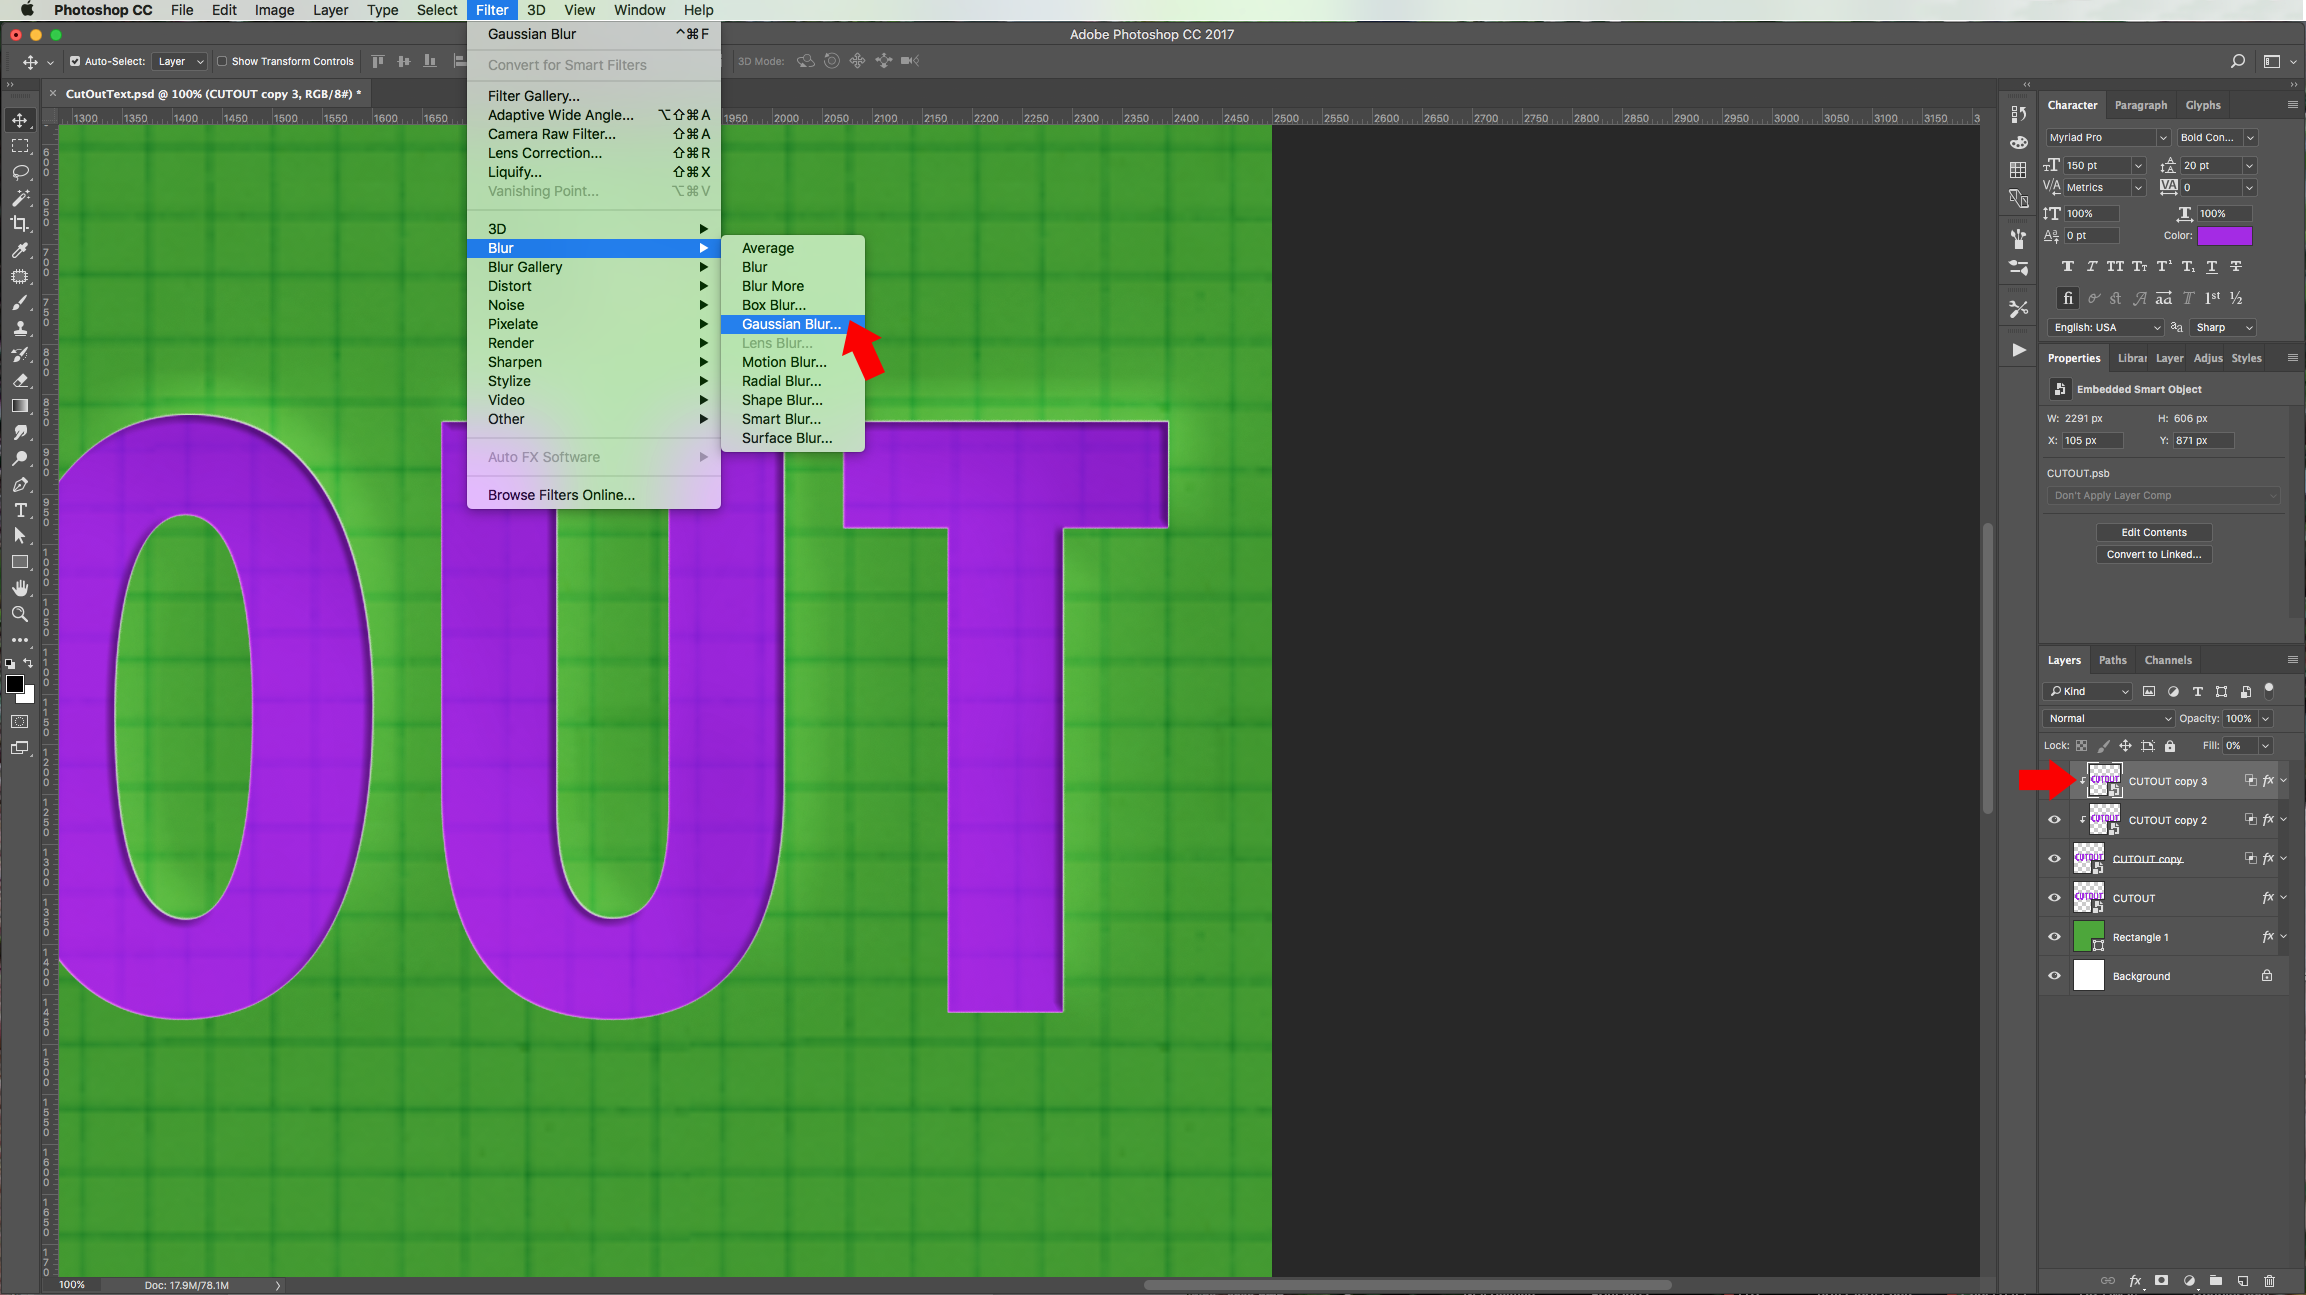
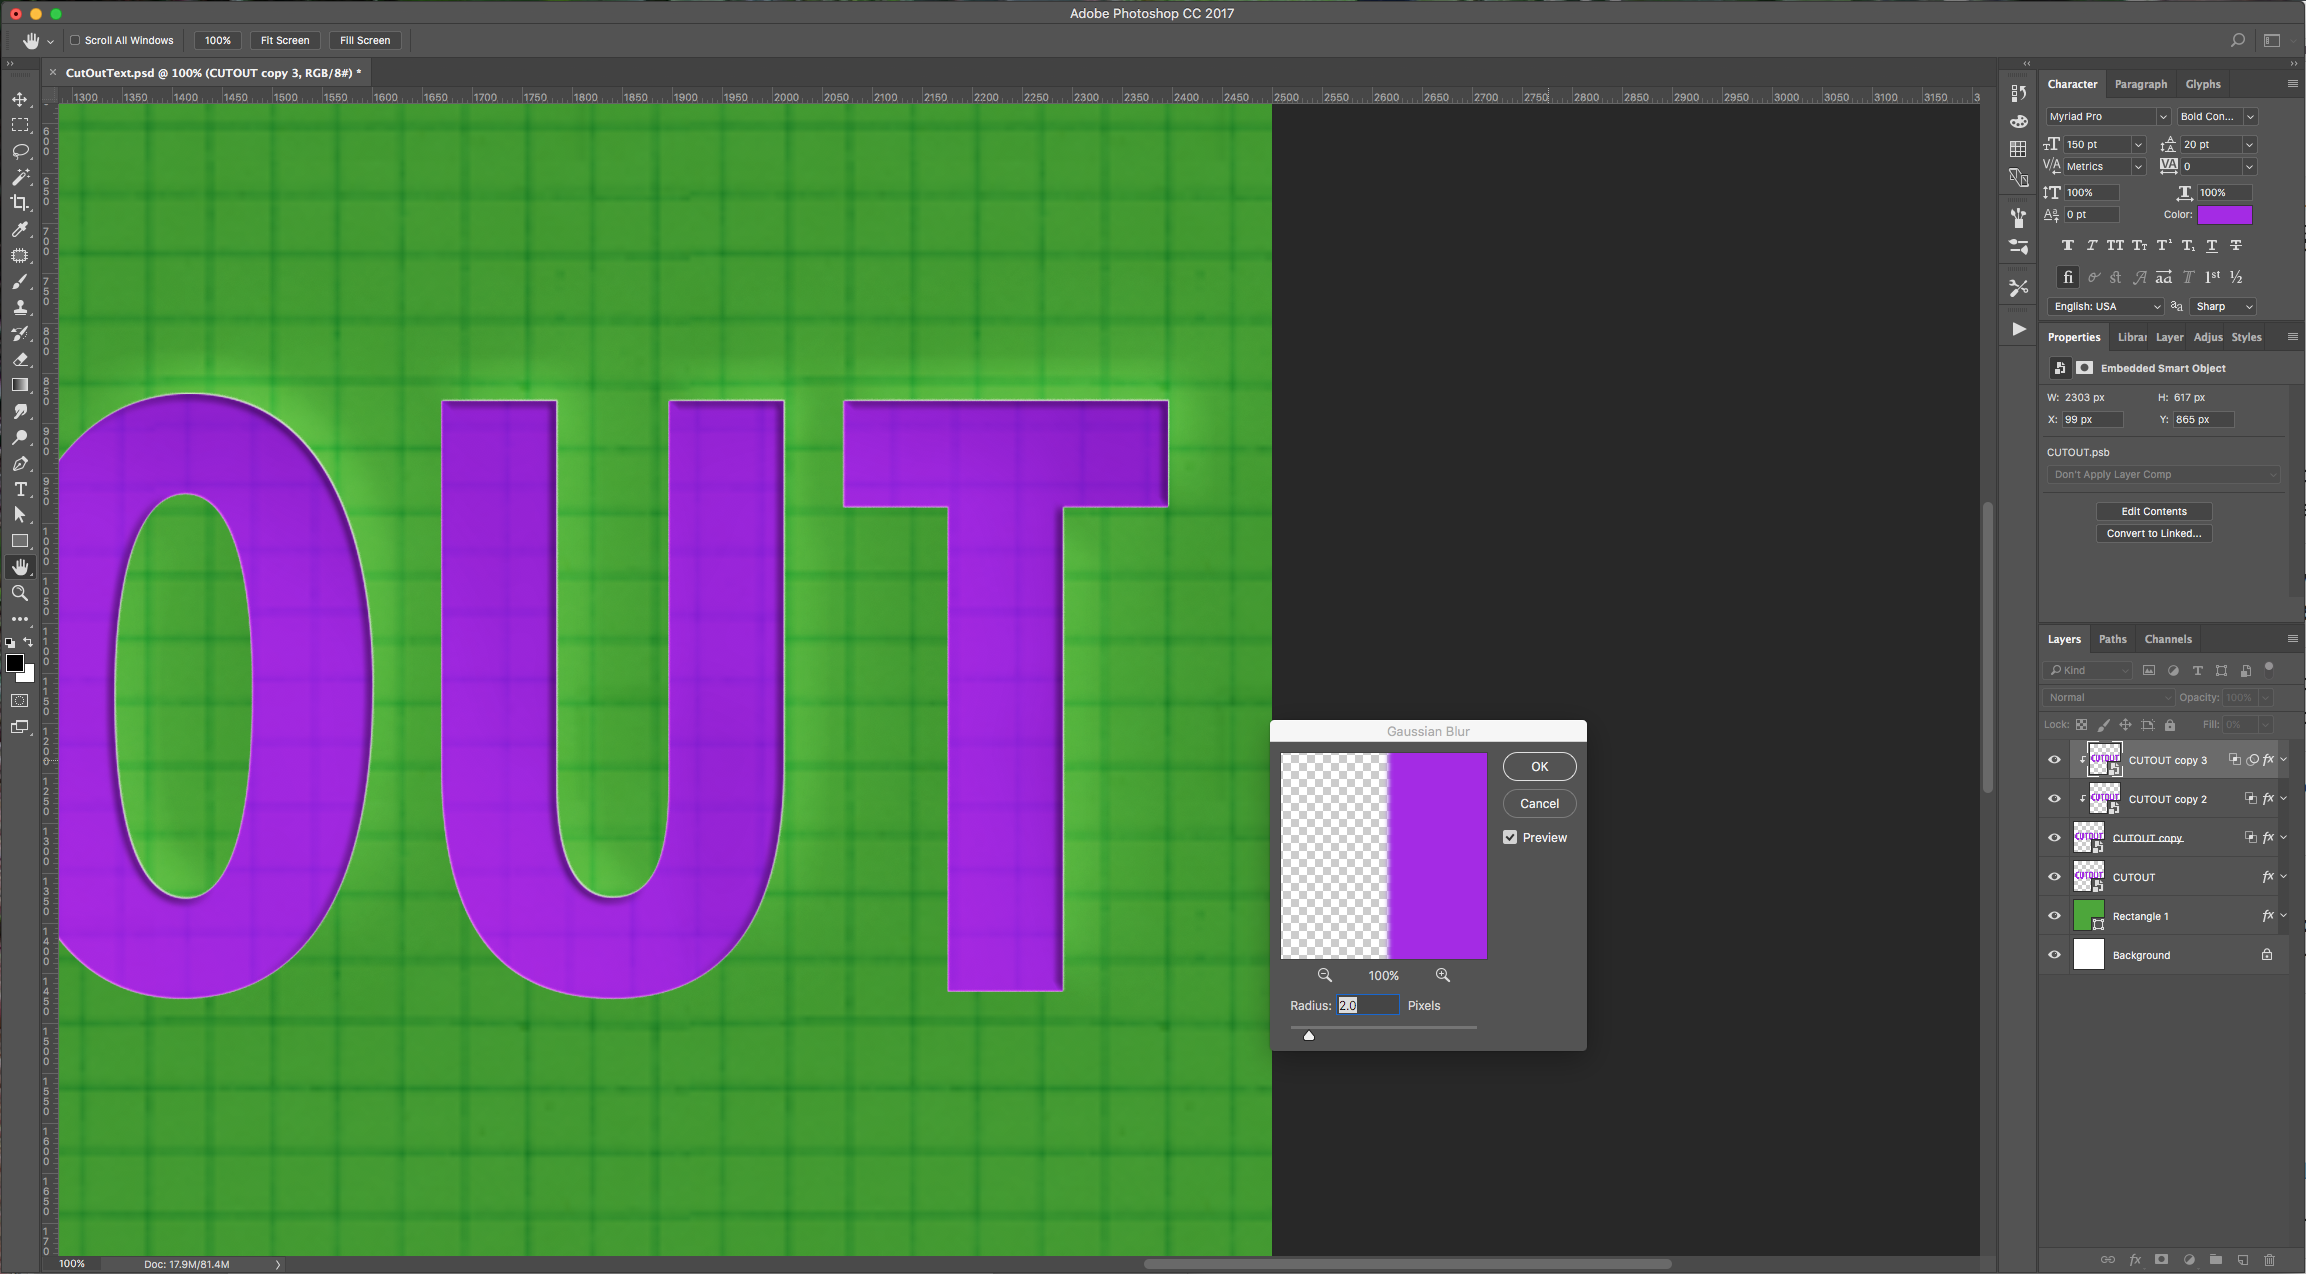
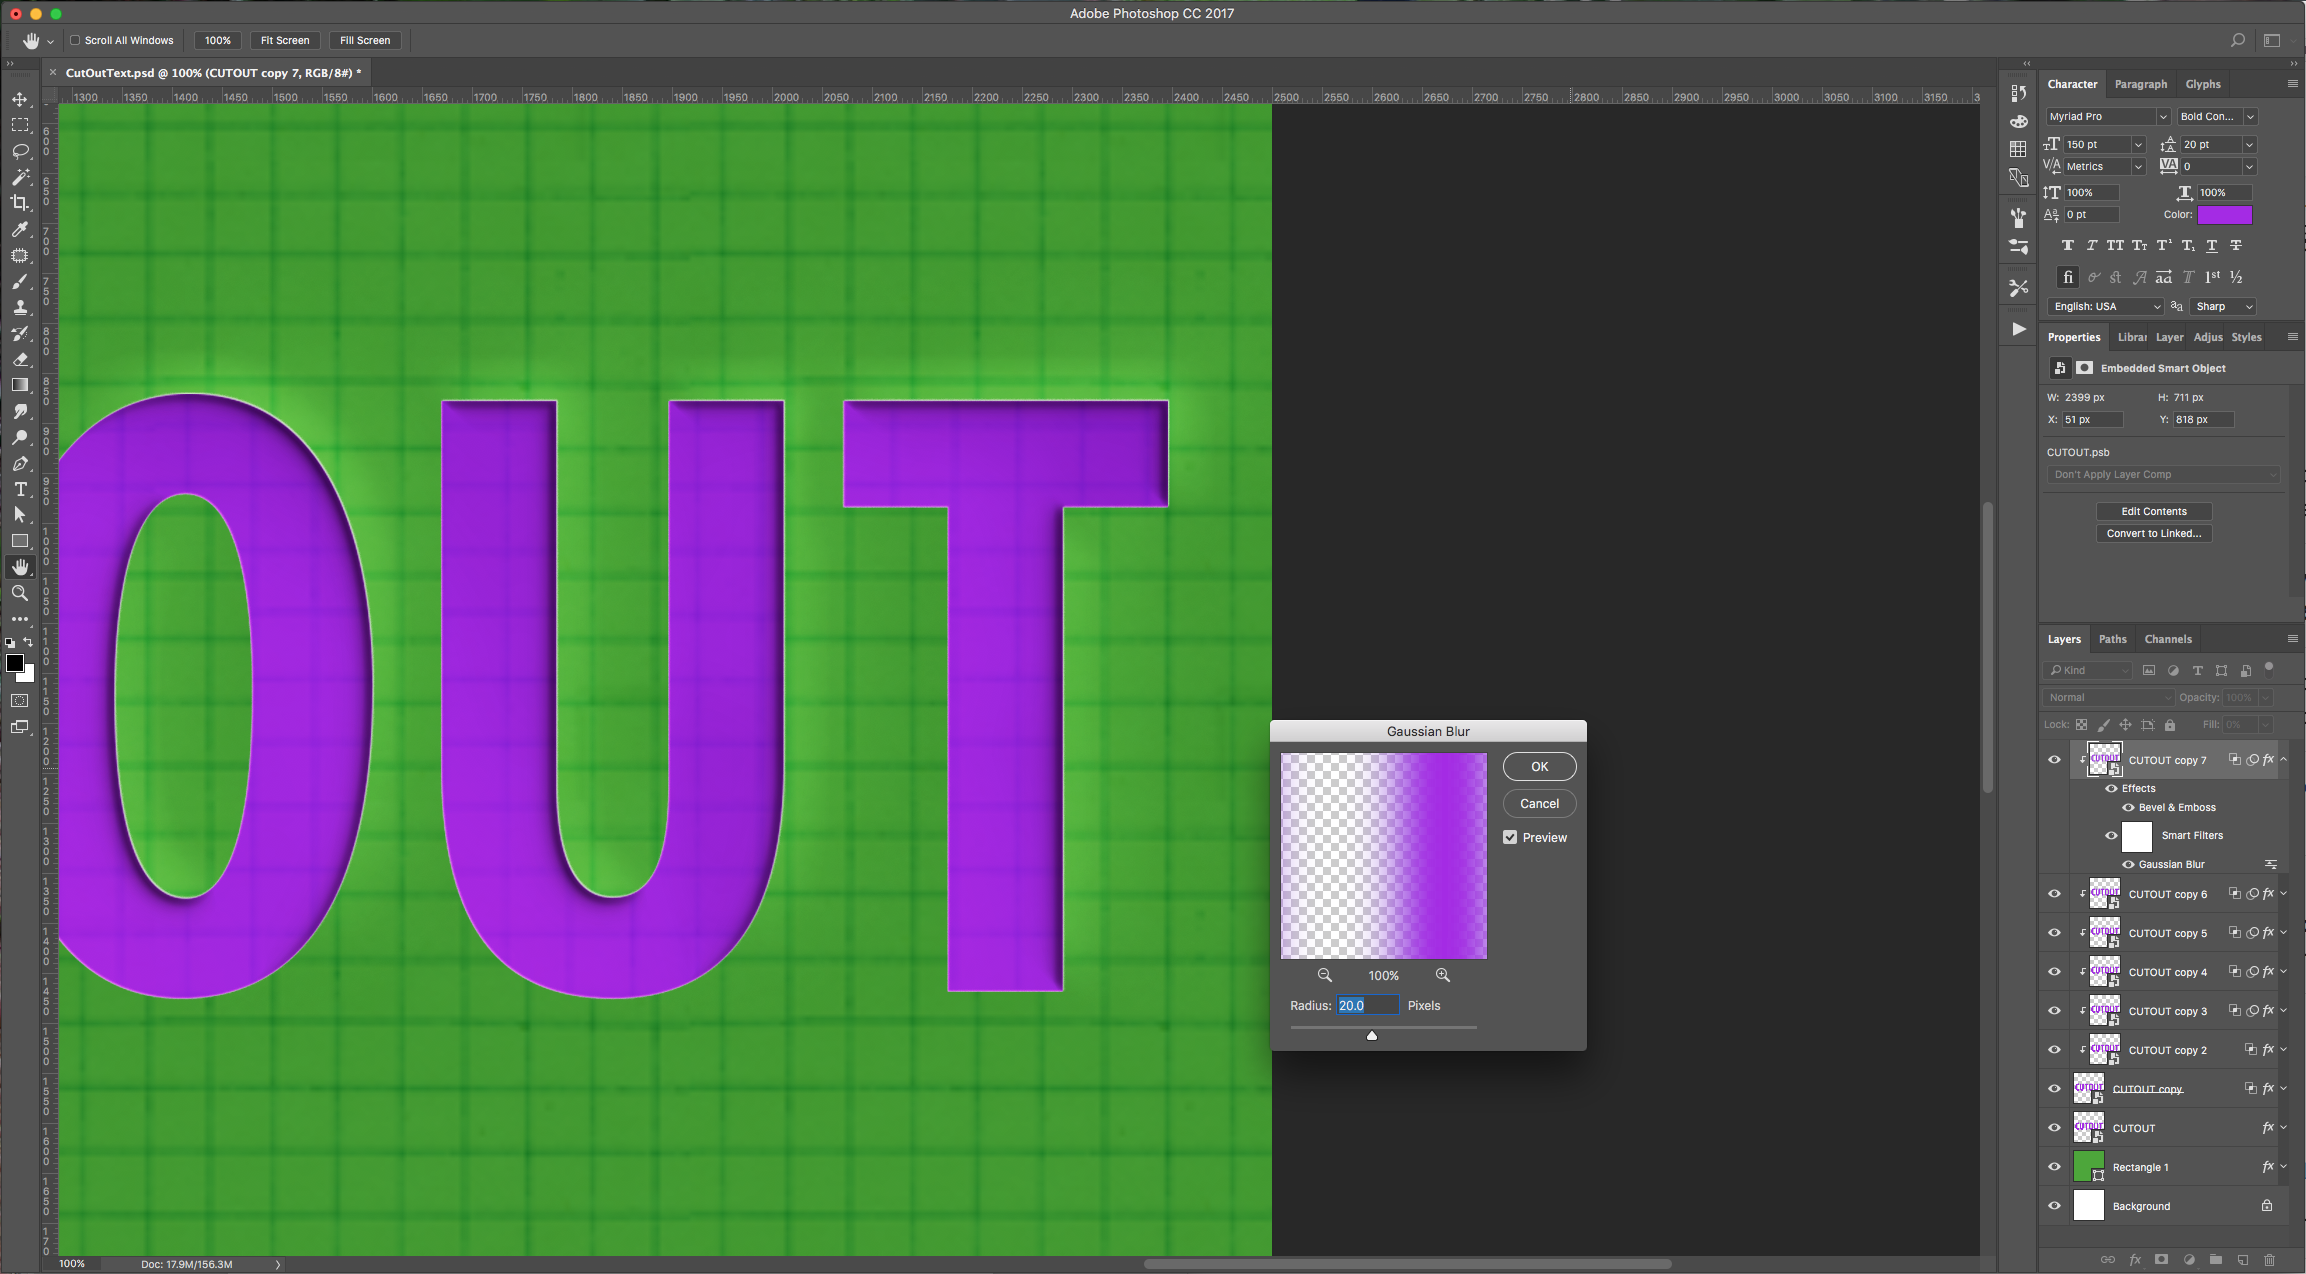
9 - Duplicate your top layer again and make sure that this copy is “Clipped” too. Then go to Filter > Blur > Gaussian Blur and use a “Radius” of 2.0 pixels.
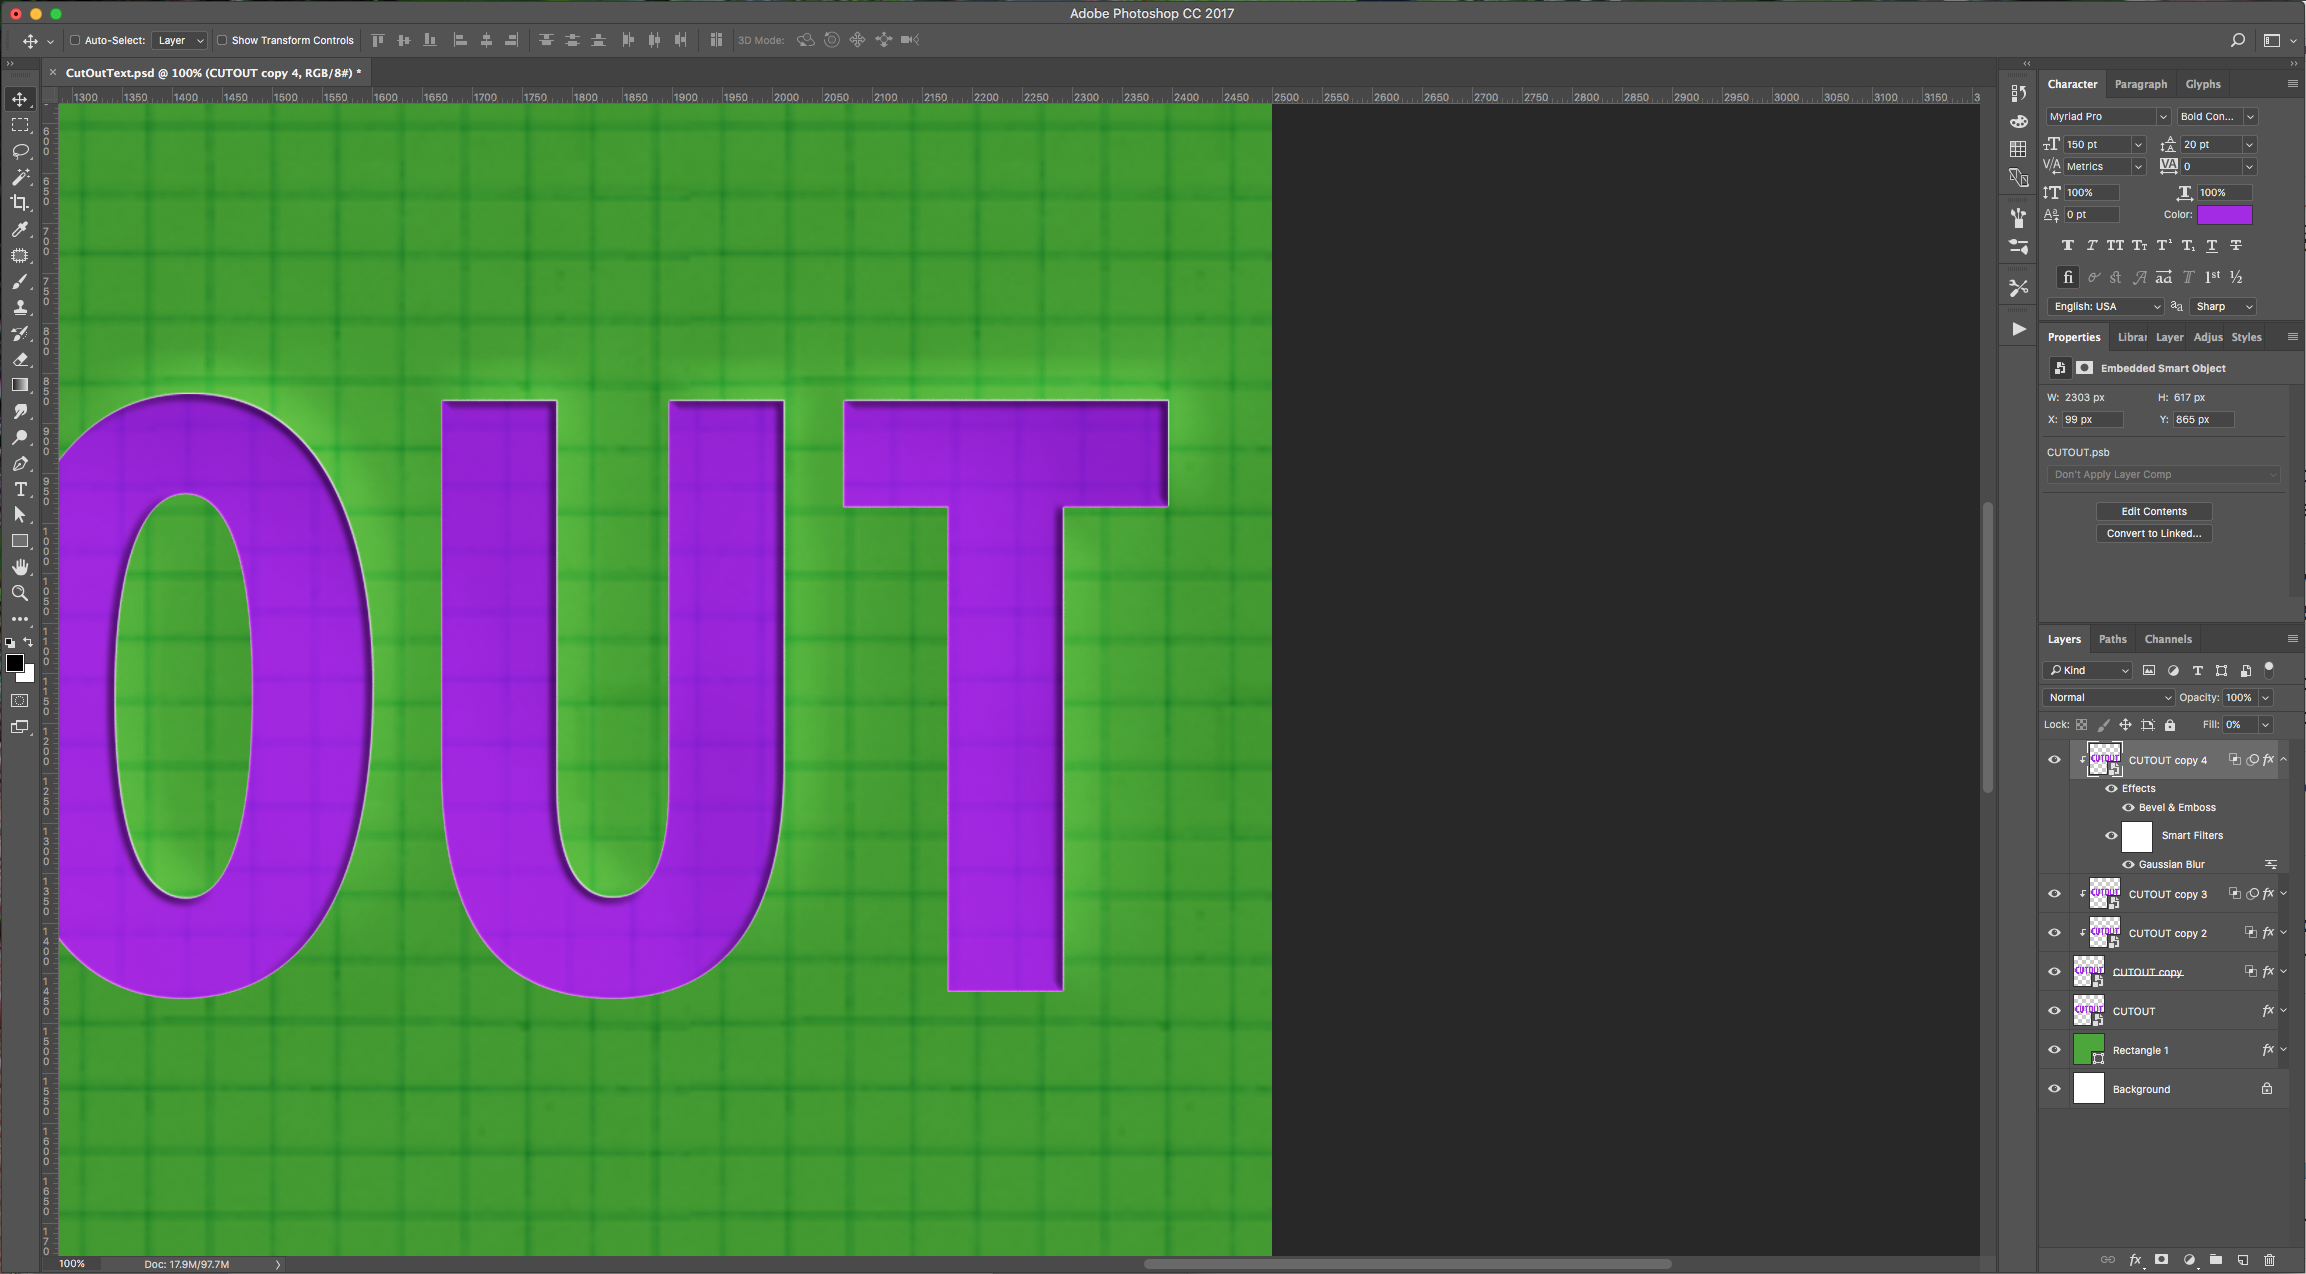
10 - Repeat Step 9 four more times, then double-click on the Filter to change the “Gaussian Blur Radius” to 6.0, 8.0 and 10.0 and 20.0 pixels on each new layer duplicate.
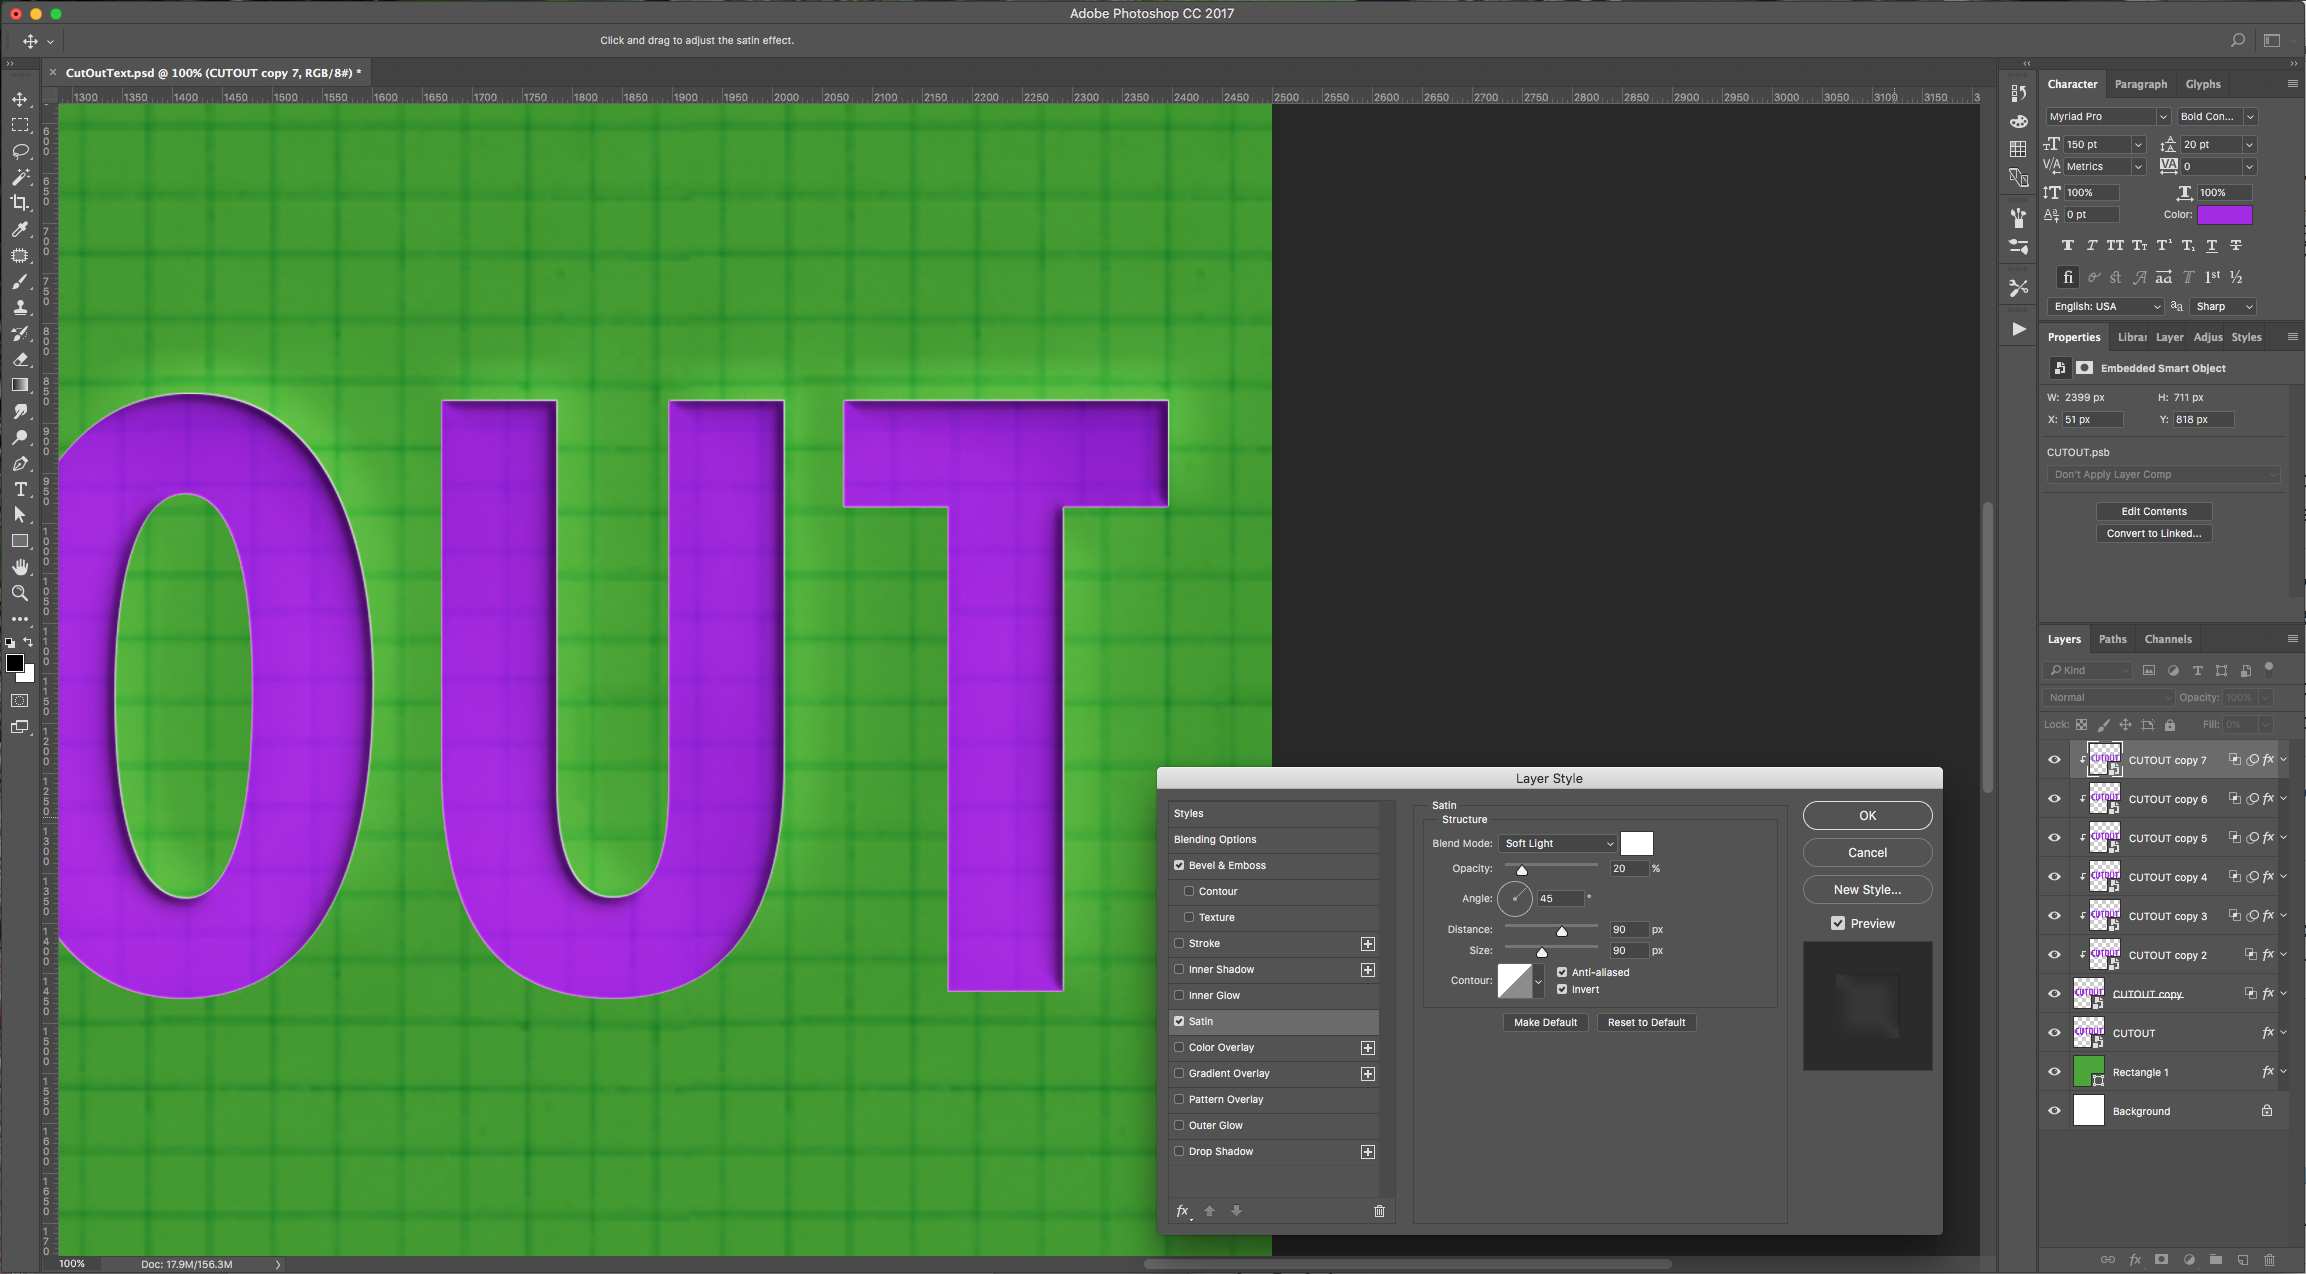
11 - Double-click on the top layer to add the following “Layer Style”:
Satin (Blend Mode color #ffffff)
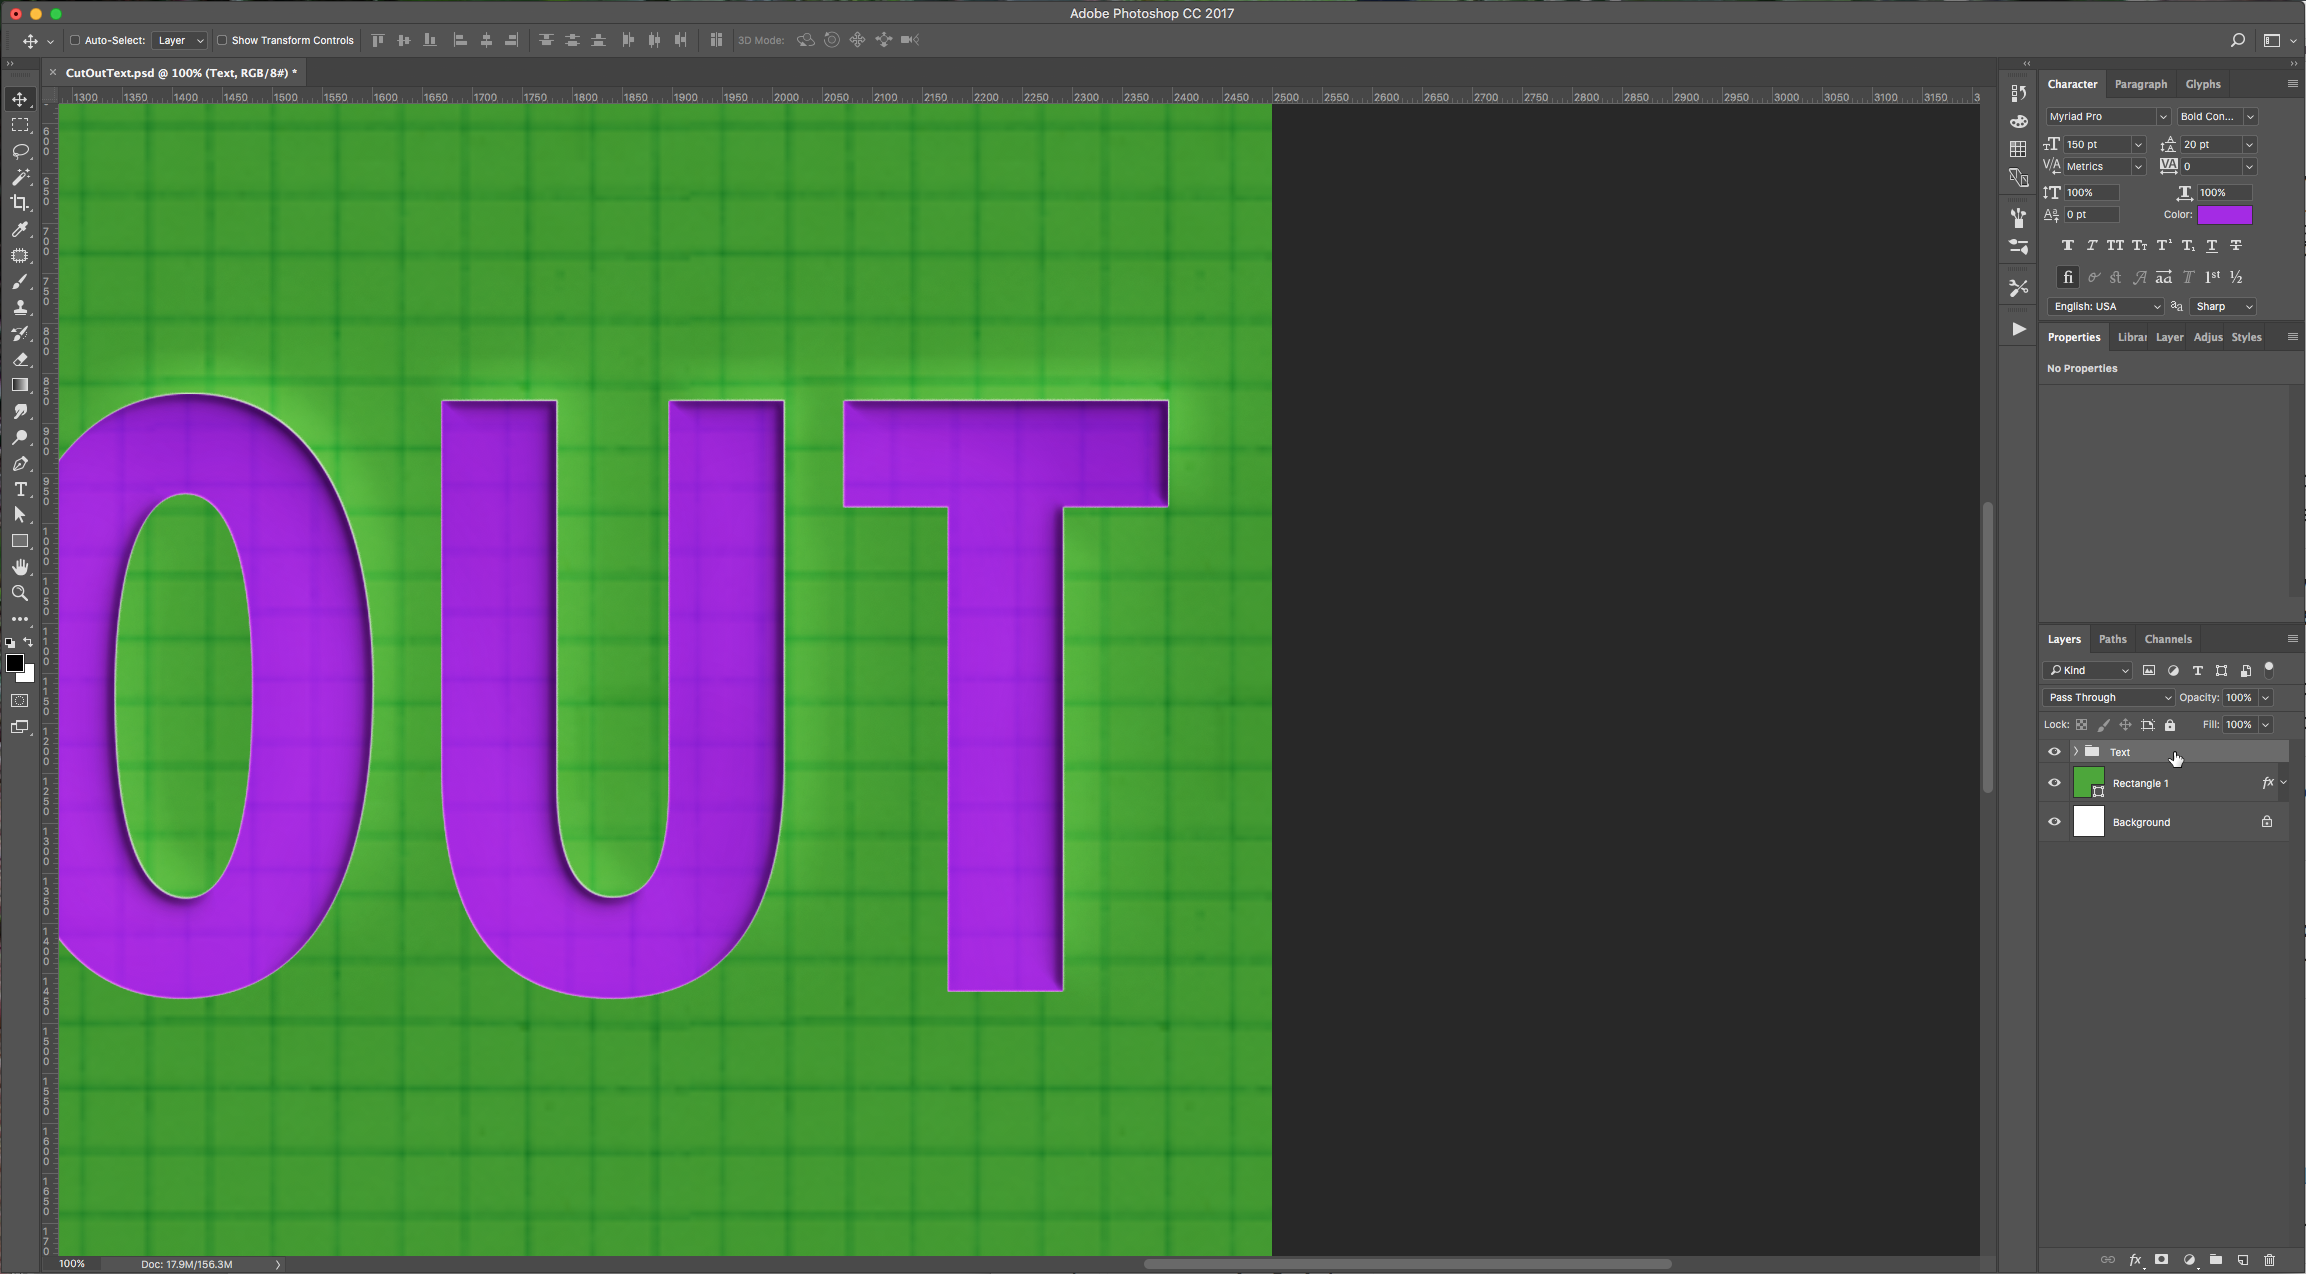
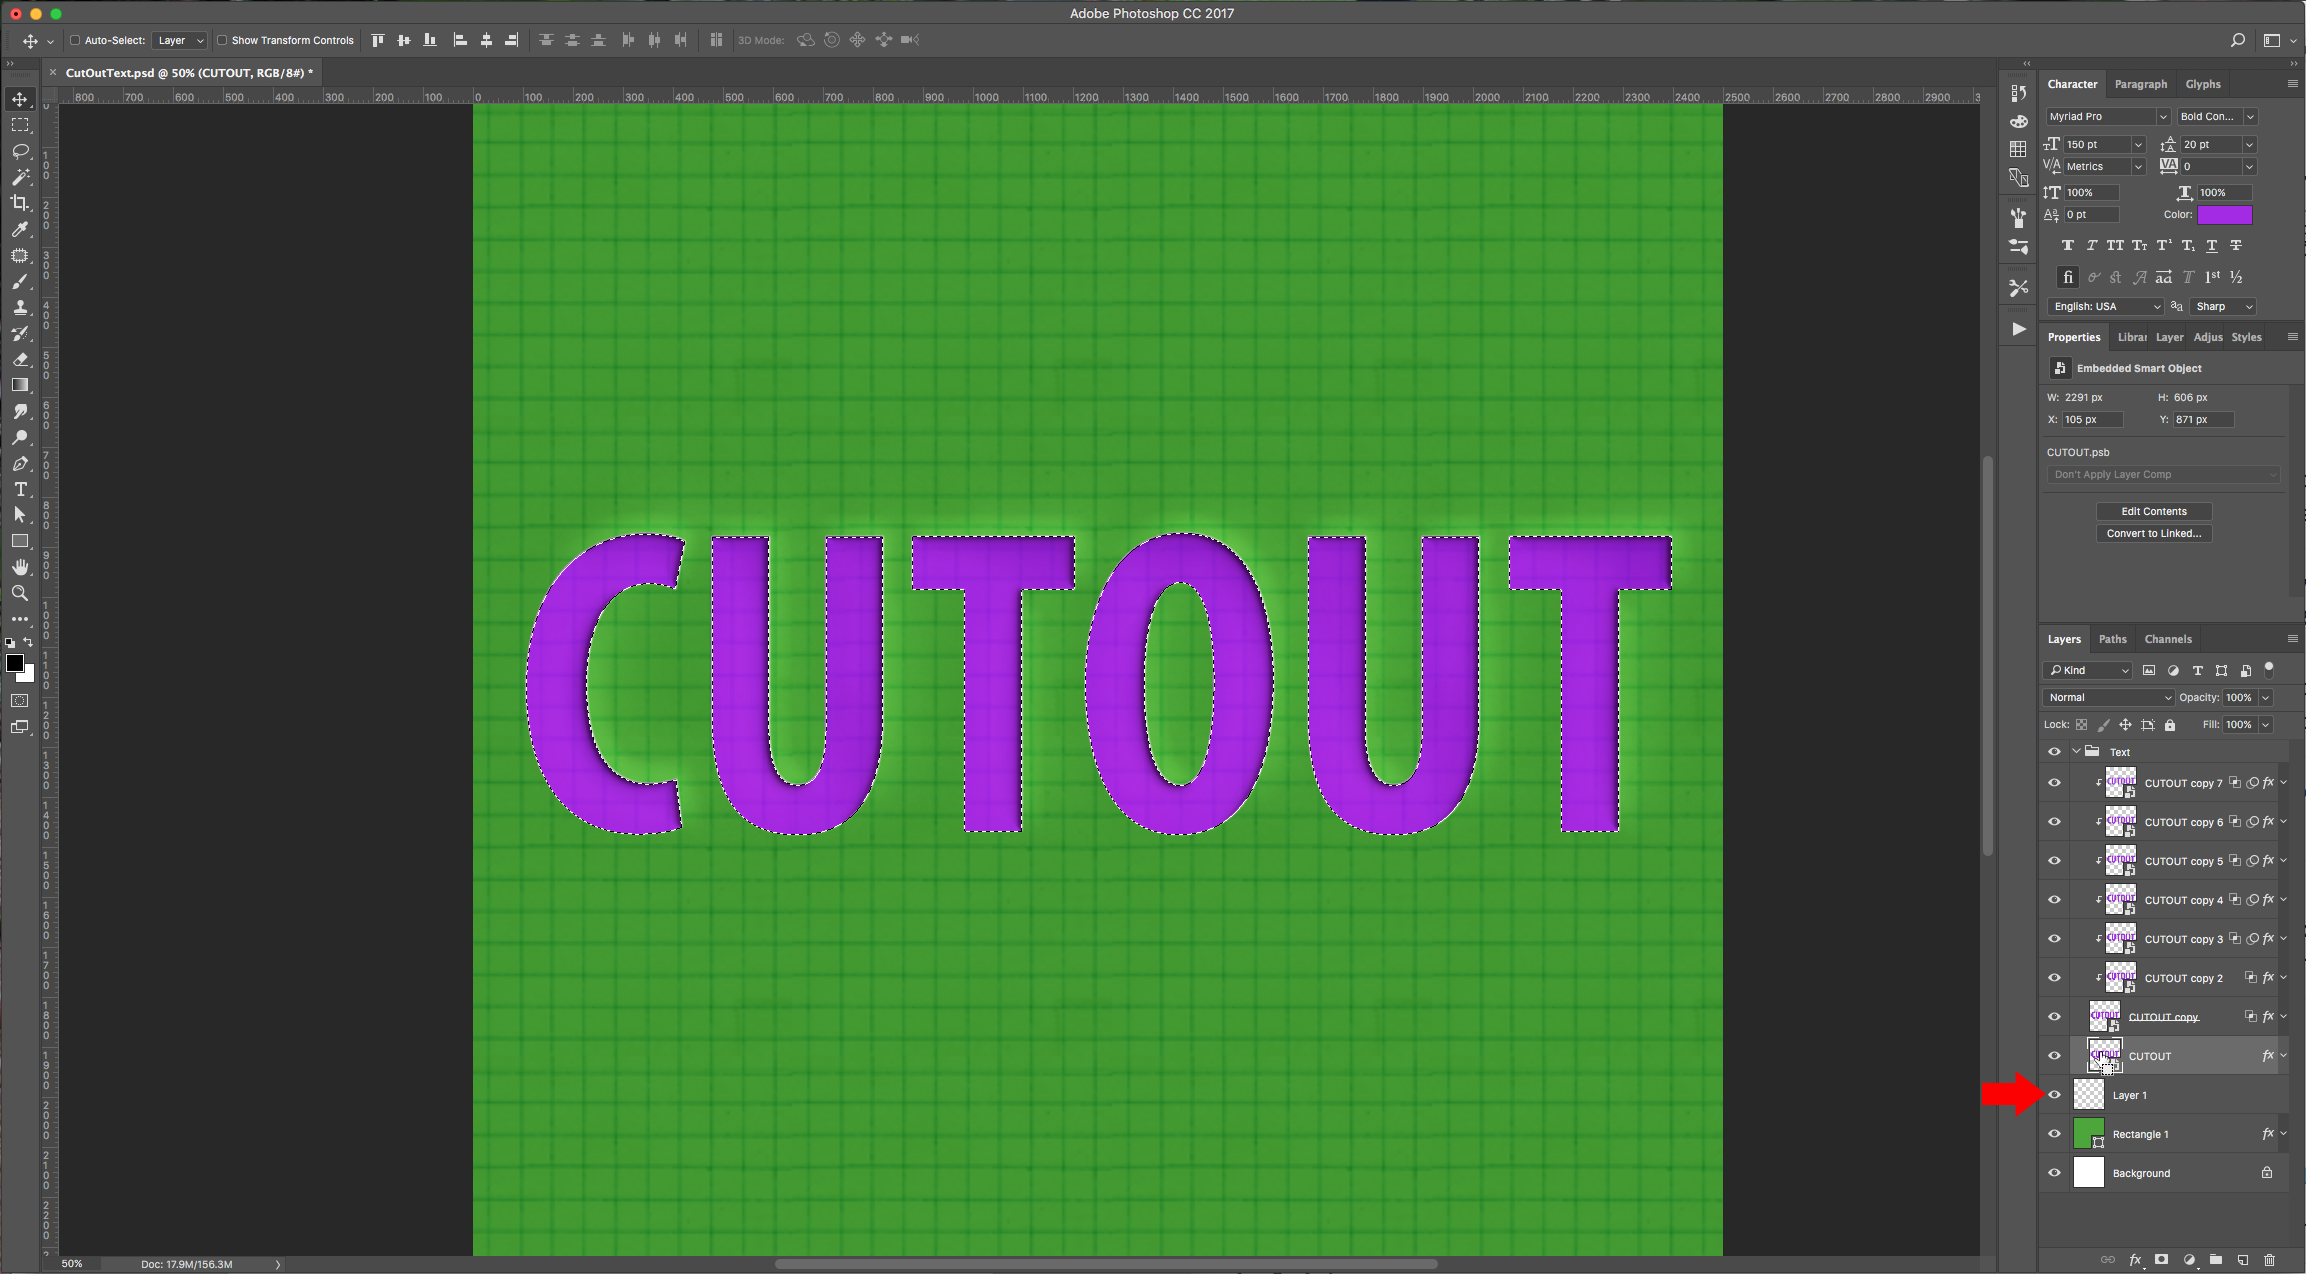
12 - Select all your text layers and click on the little folder icon at the bottom of your “Layers” menu to group them together. Name your group.

13 - Create a “New Layer” by clicking on the “Create New Layer” button at the bottom of the “Layers” Menu and place it on top of your shape/background layer and under the “Text” group.
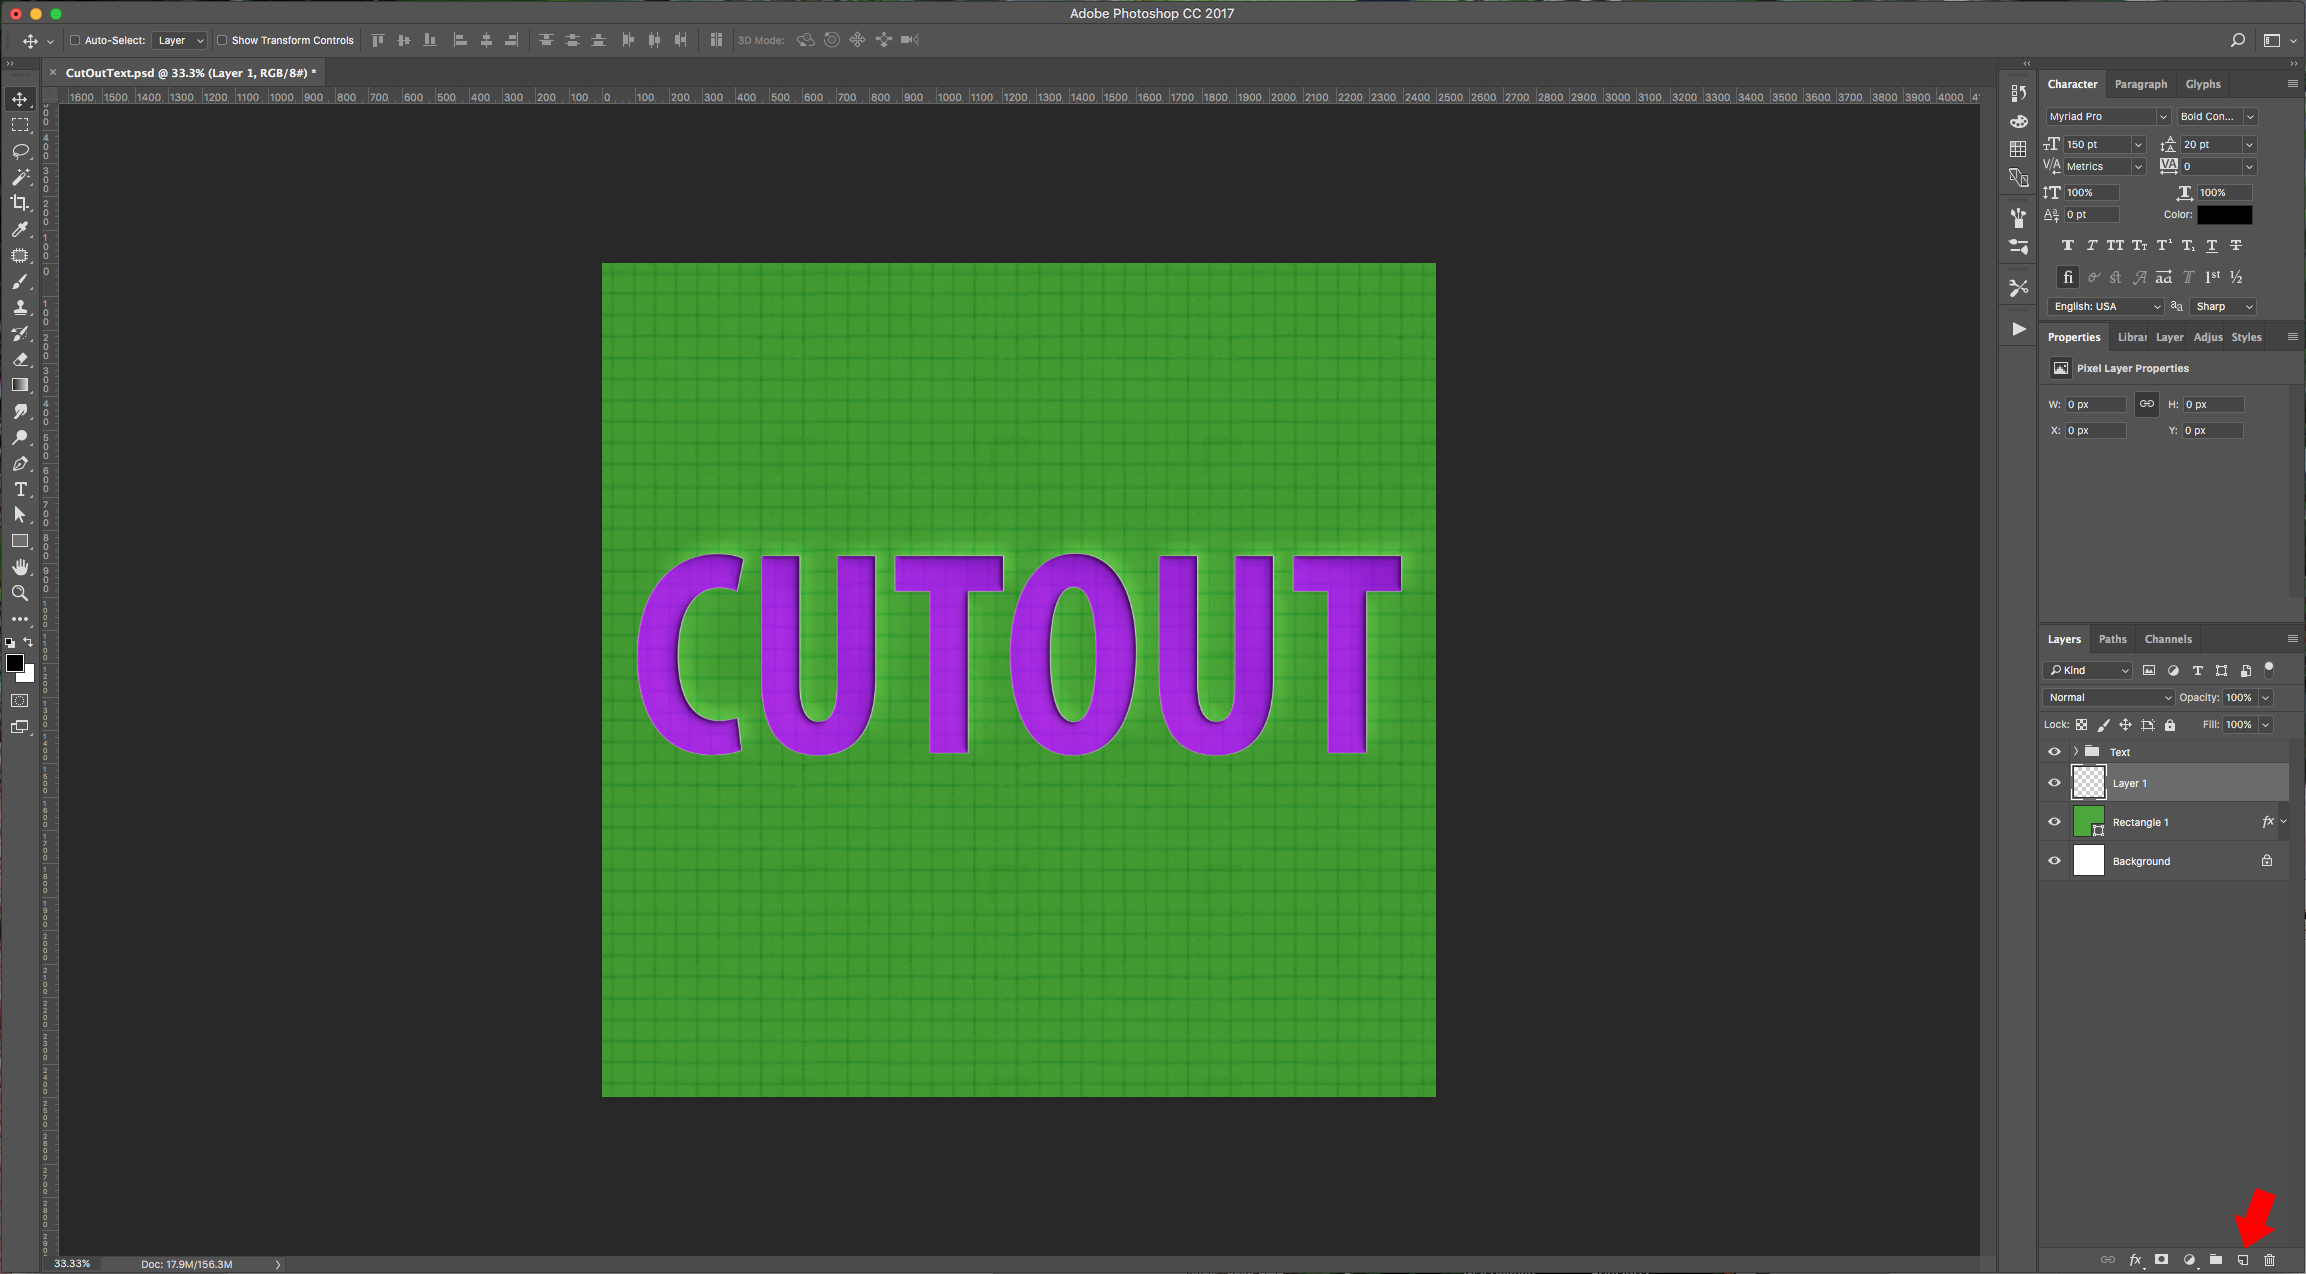
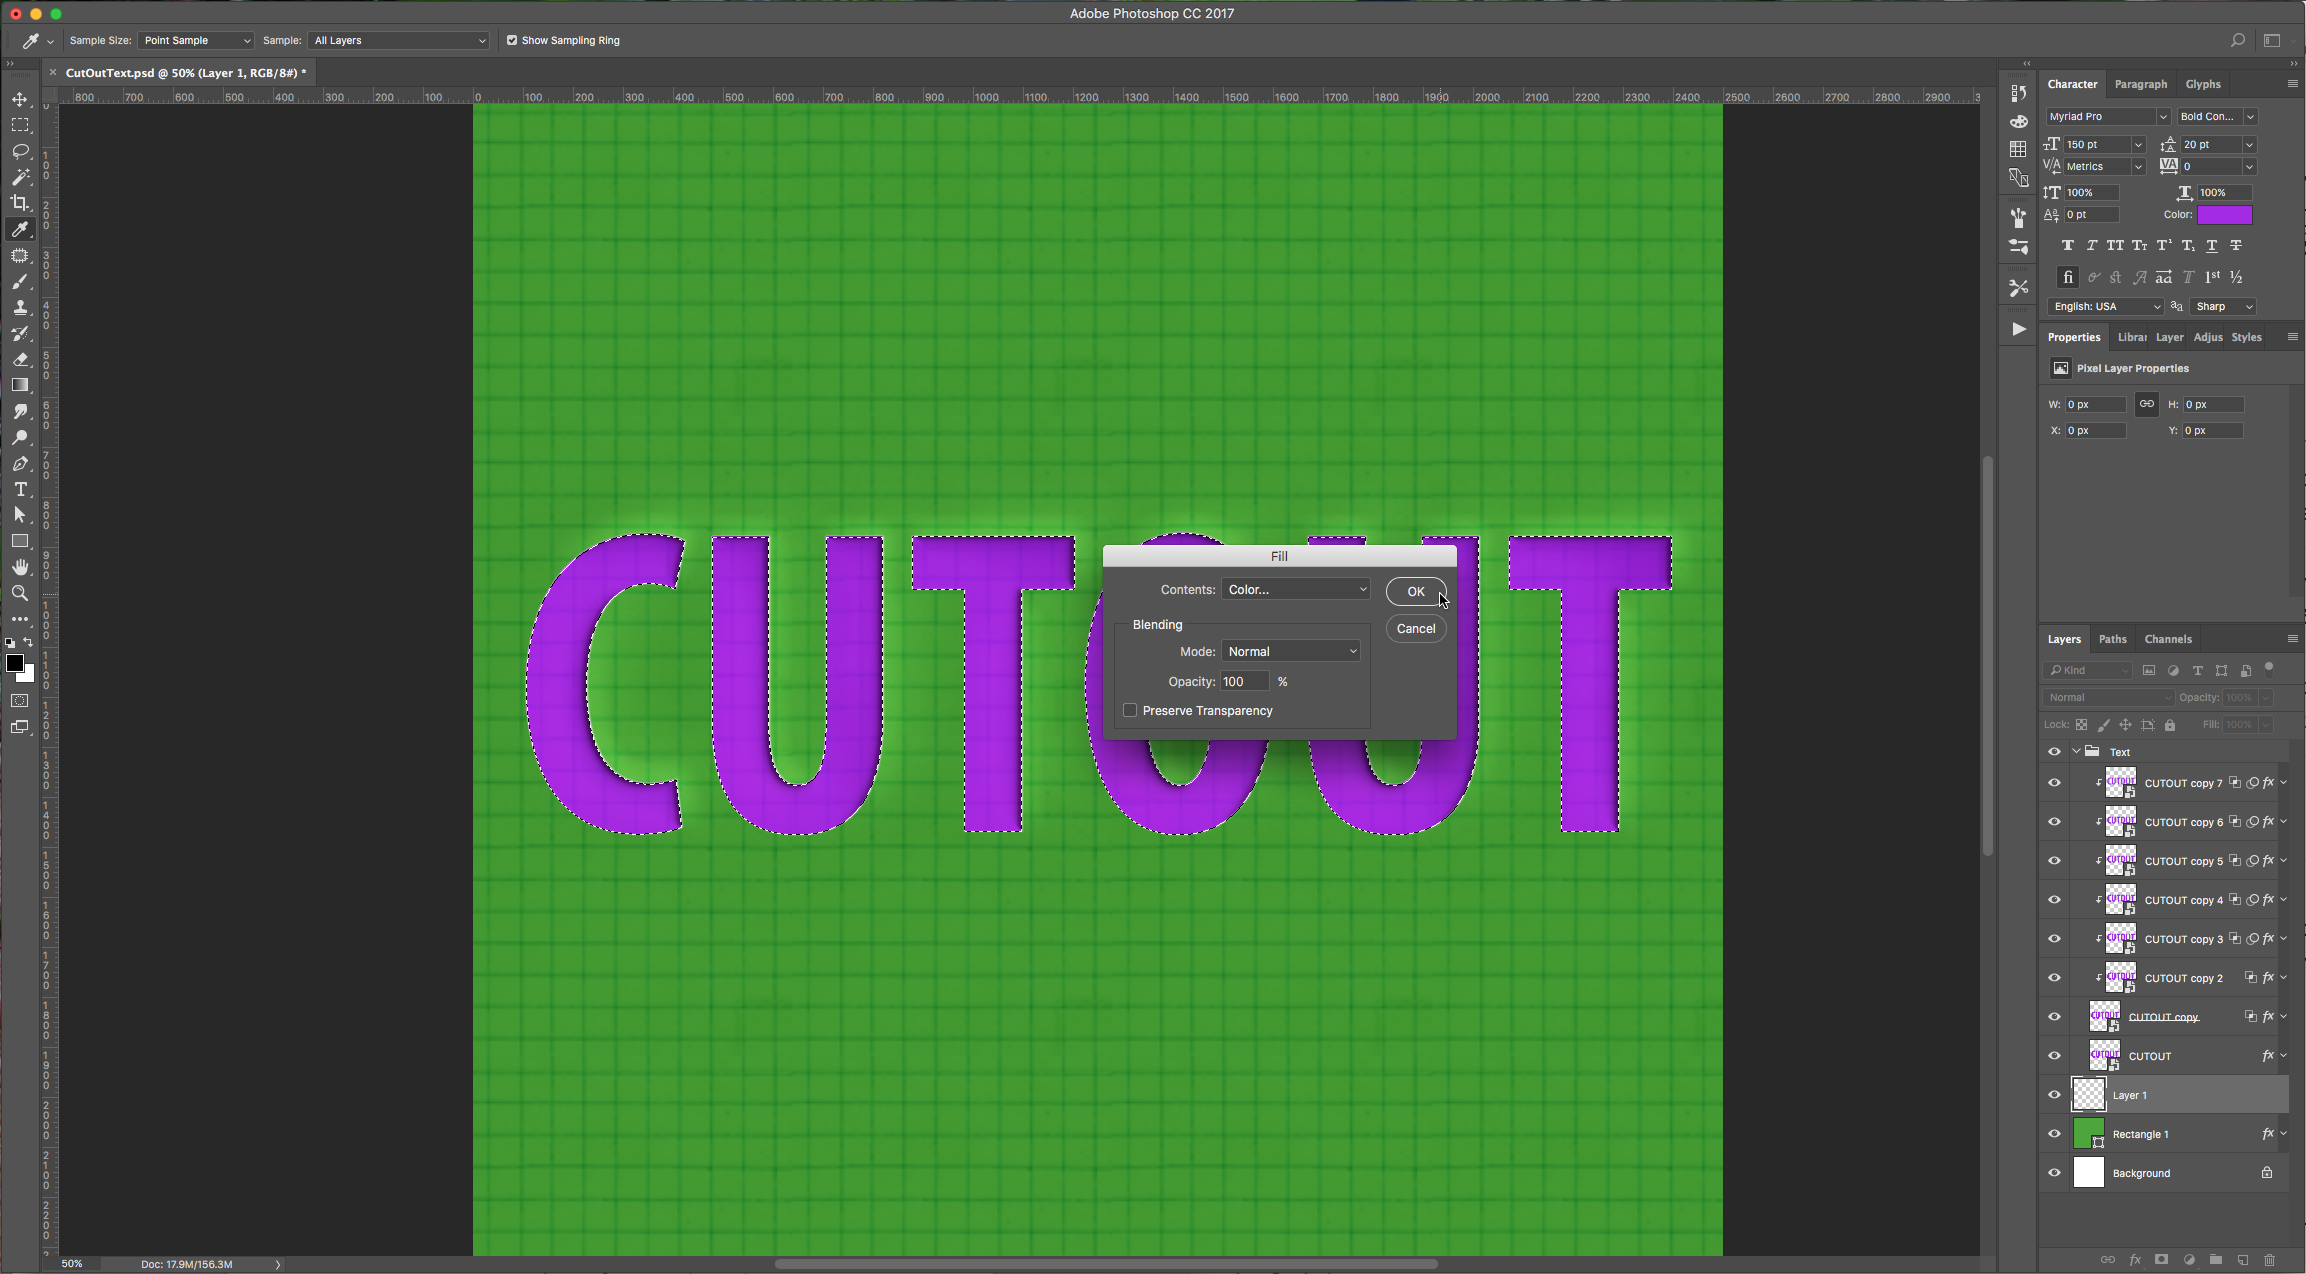
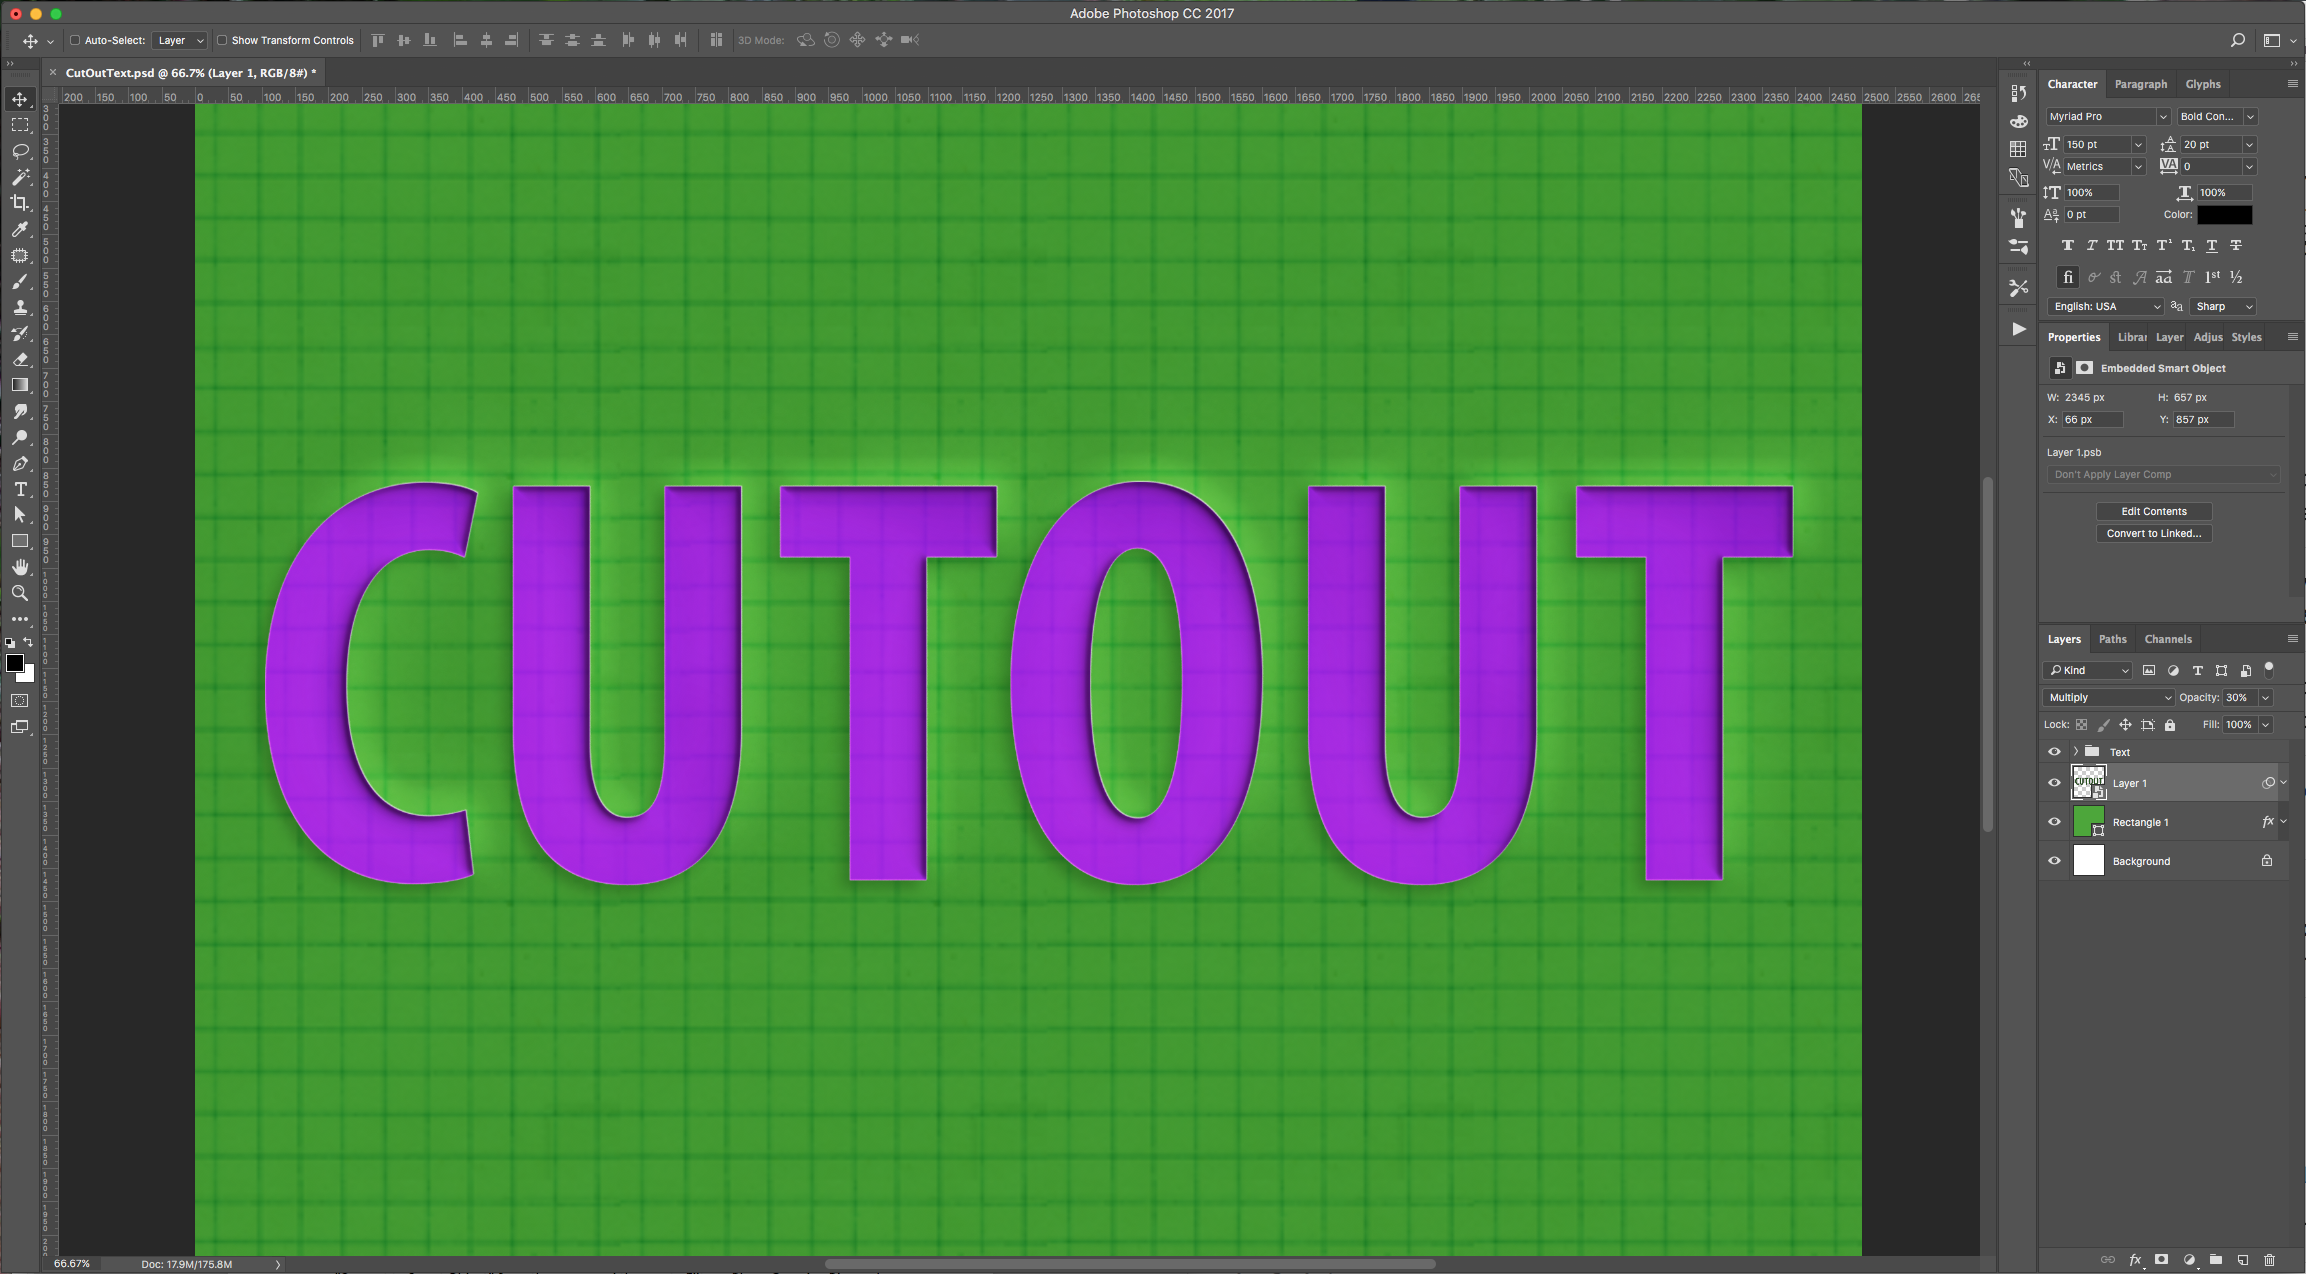
14 - While holding Command/Control click on a text layer to make a selection of your text and the remember to re-select your new layer. Press Shift + Delete/Backspace to invoke the “Fill” menu and choose a color to apply to your selection. For “Contents” choose “Color” and use a darker shade of your background color (#38712a). Deselect with Command/Control + D and then click the “Down” and “Left” arrow keys for about 5 or 6 times to create a shadow.
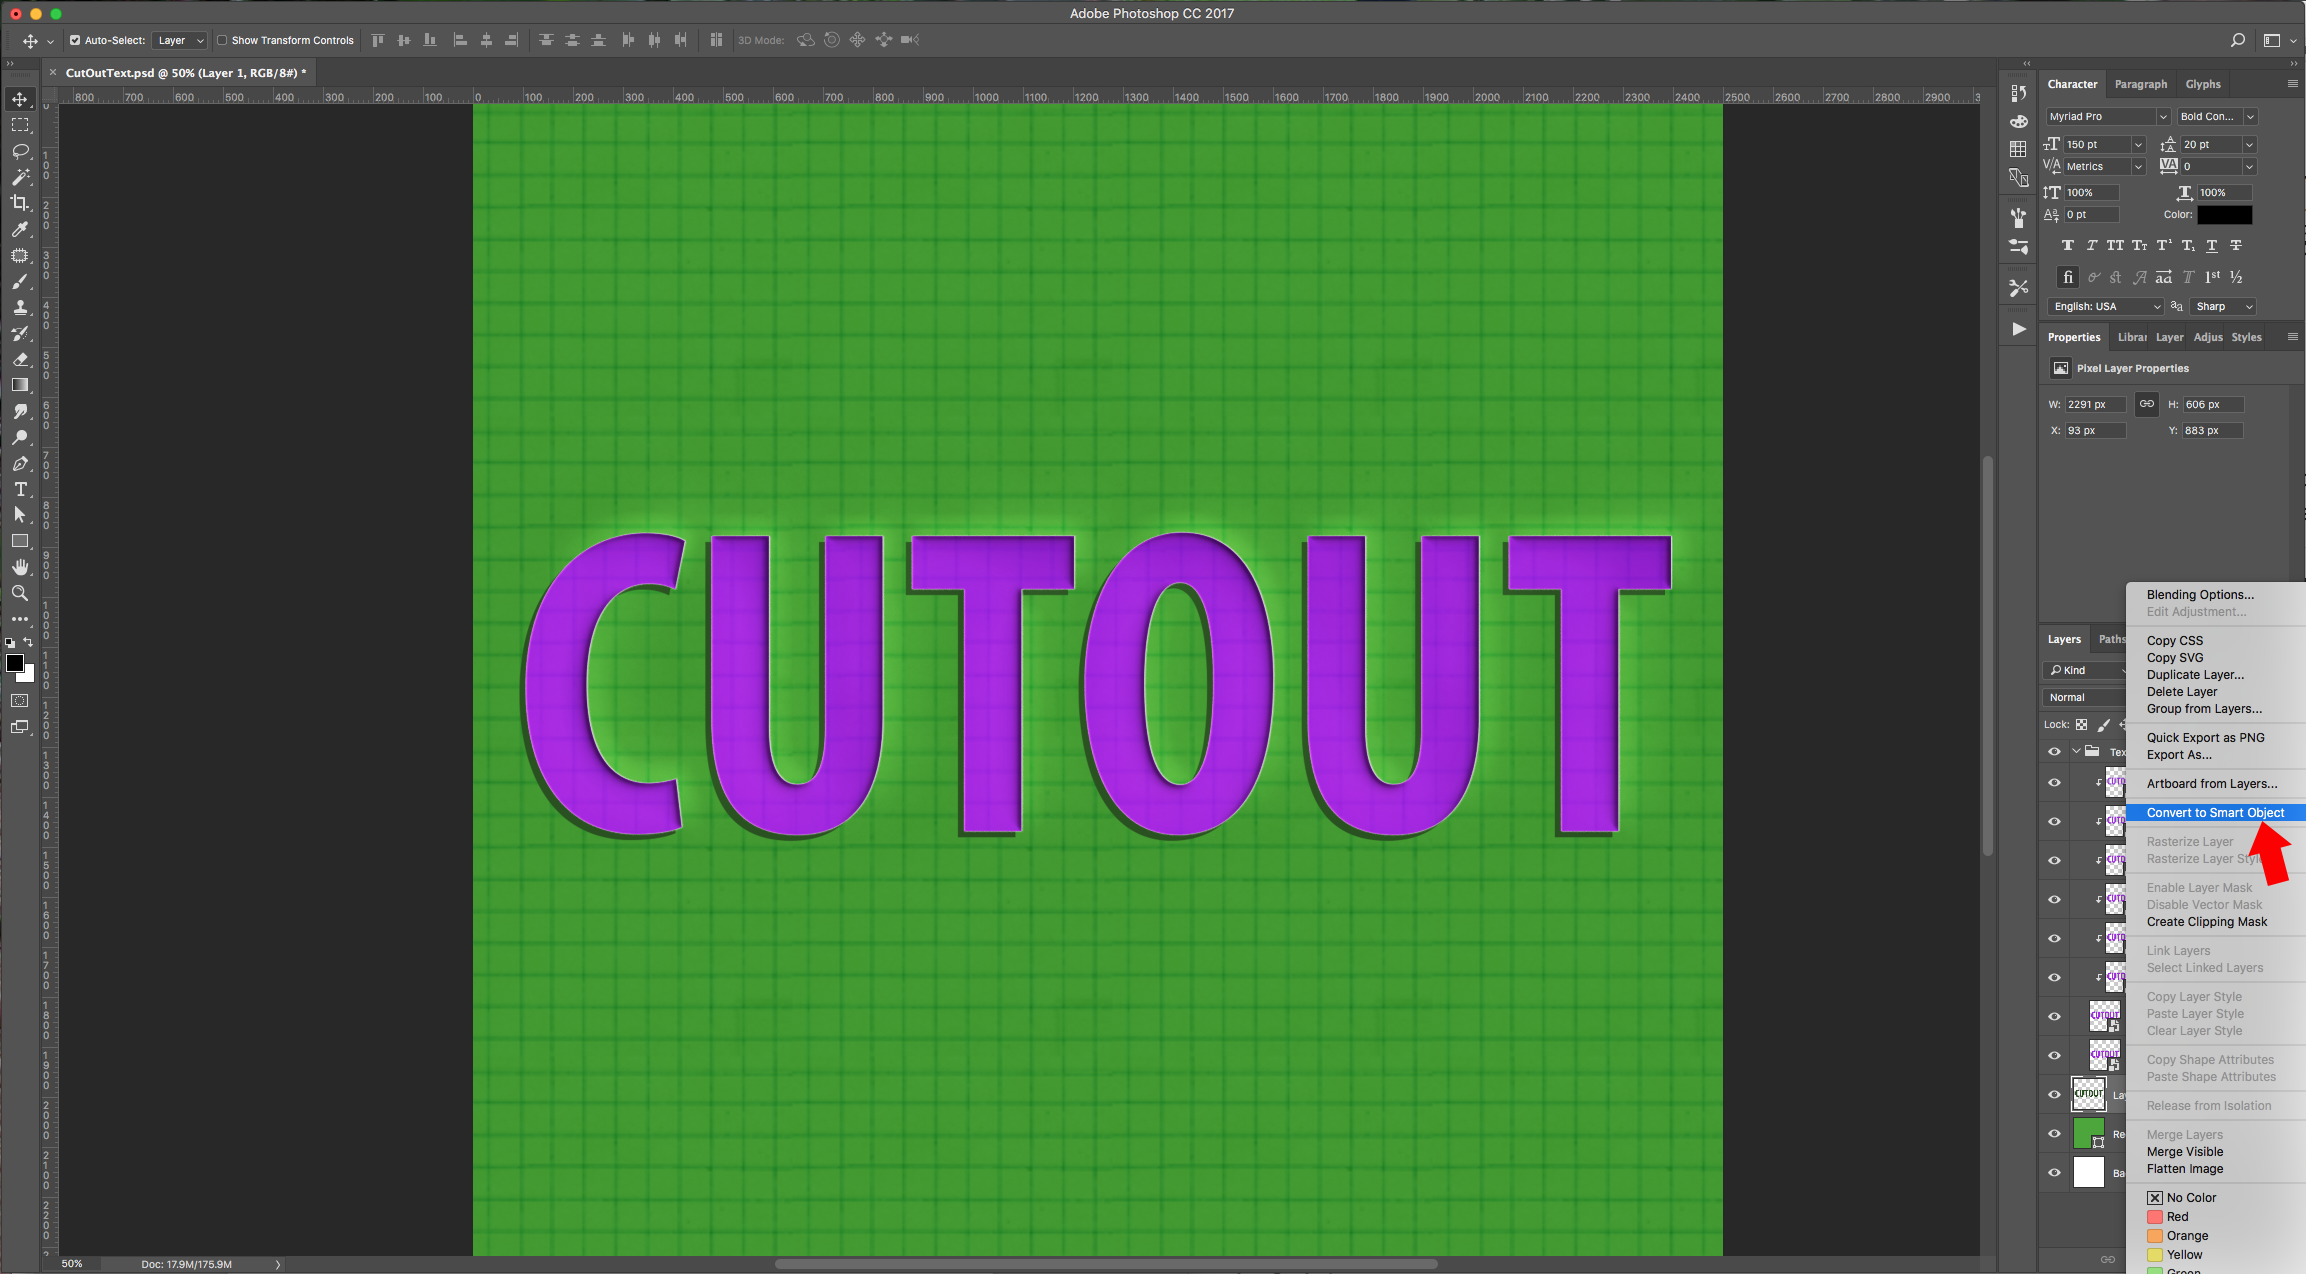
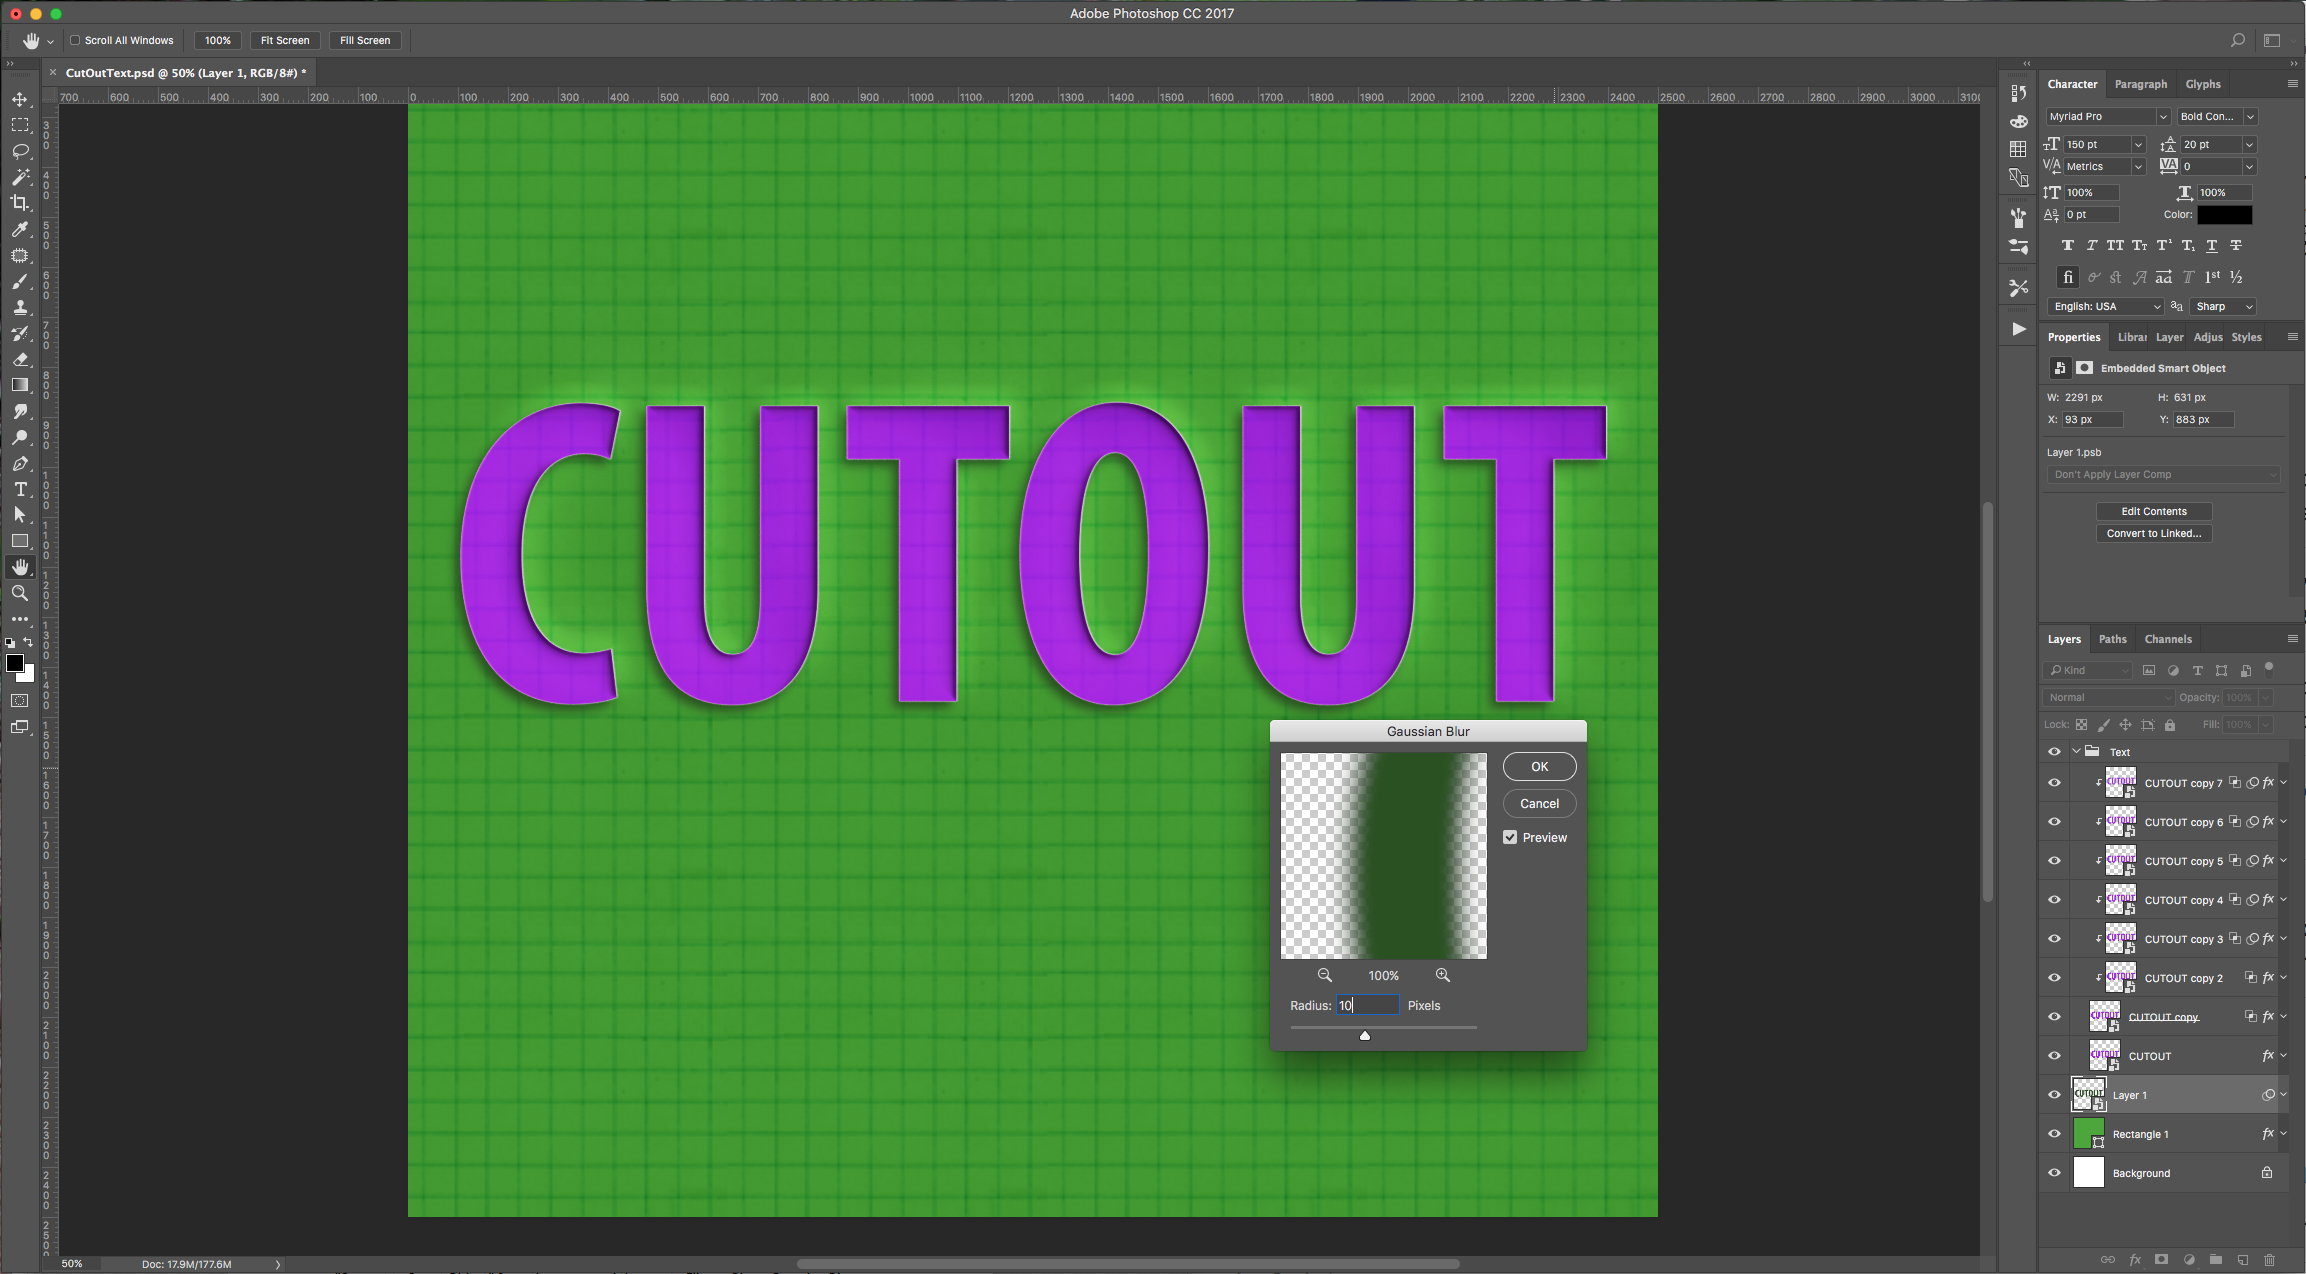
15 - Convert the layer to a “Smart Object” (right-click on the layer thumbnail and select “Convert to Smart Object” from the menu and then go to Filter > Blur > Gaussian Blur and give it a “Radius” of about 10.0 pixels. Change the “Blending Mode” to “Multiply” and the “Opacity” to 30%.
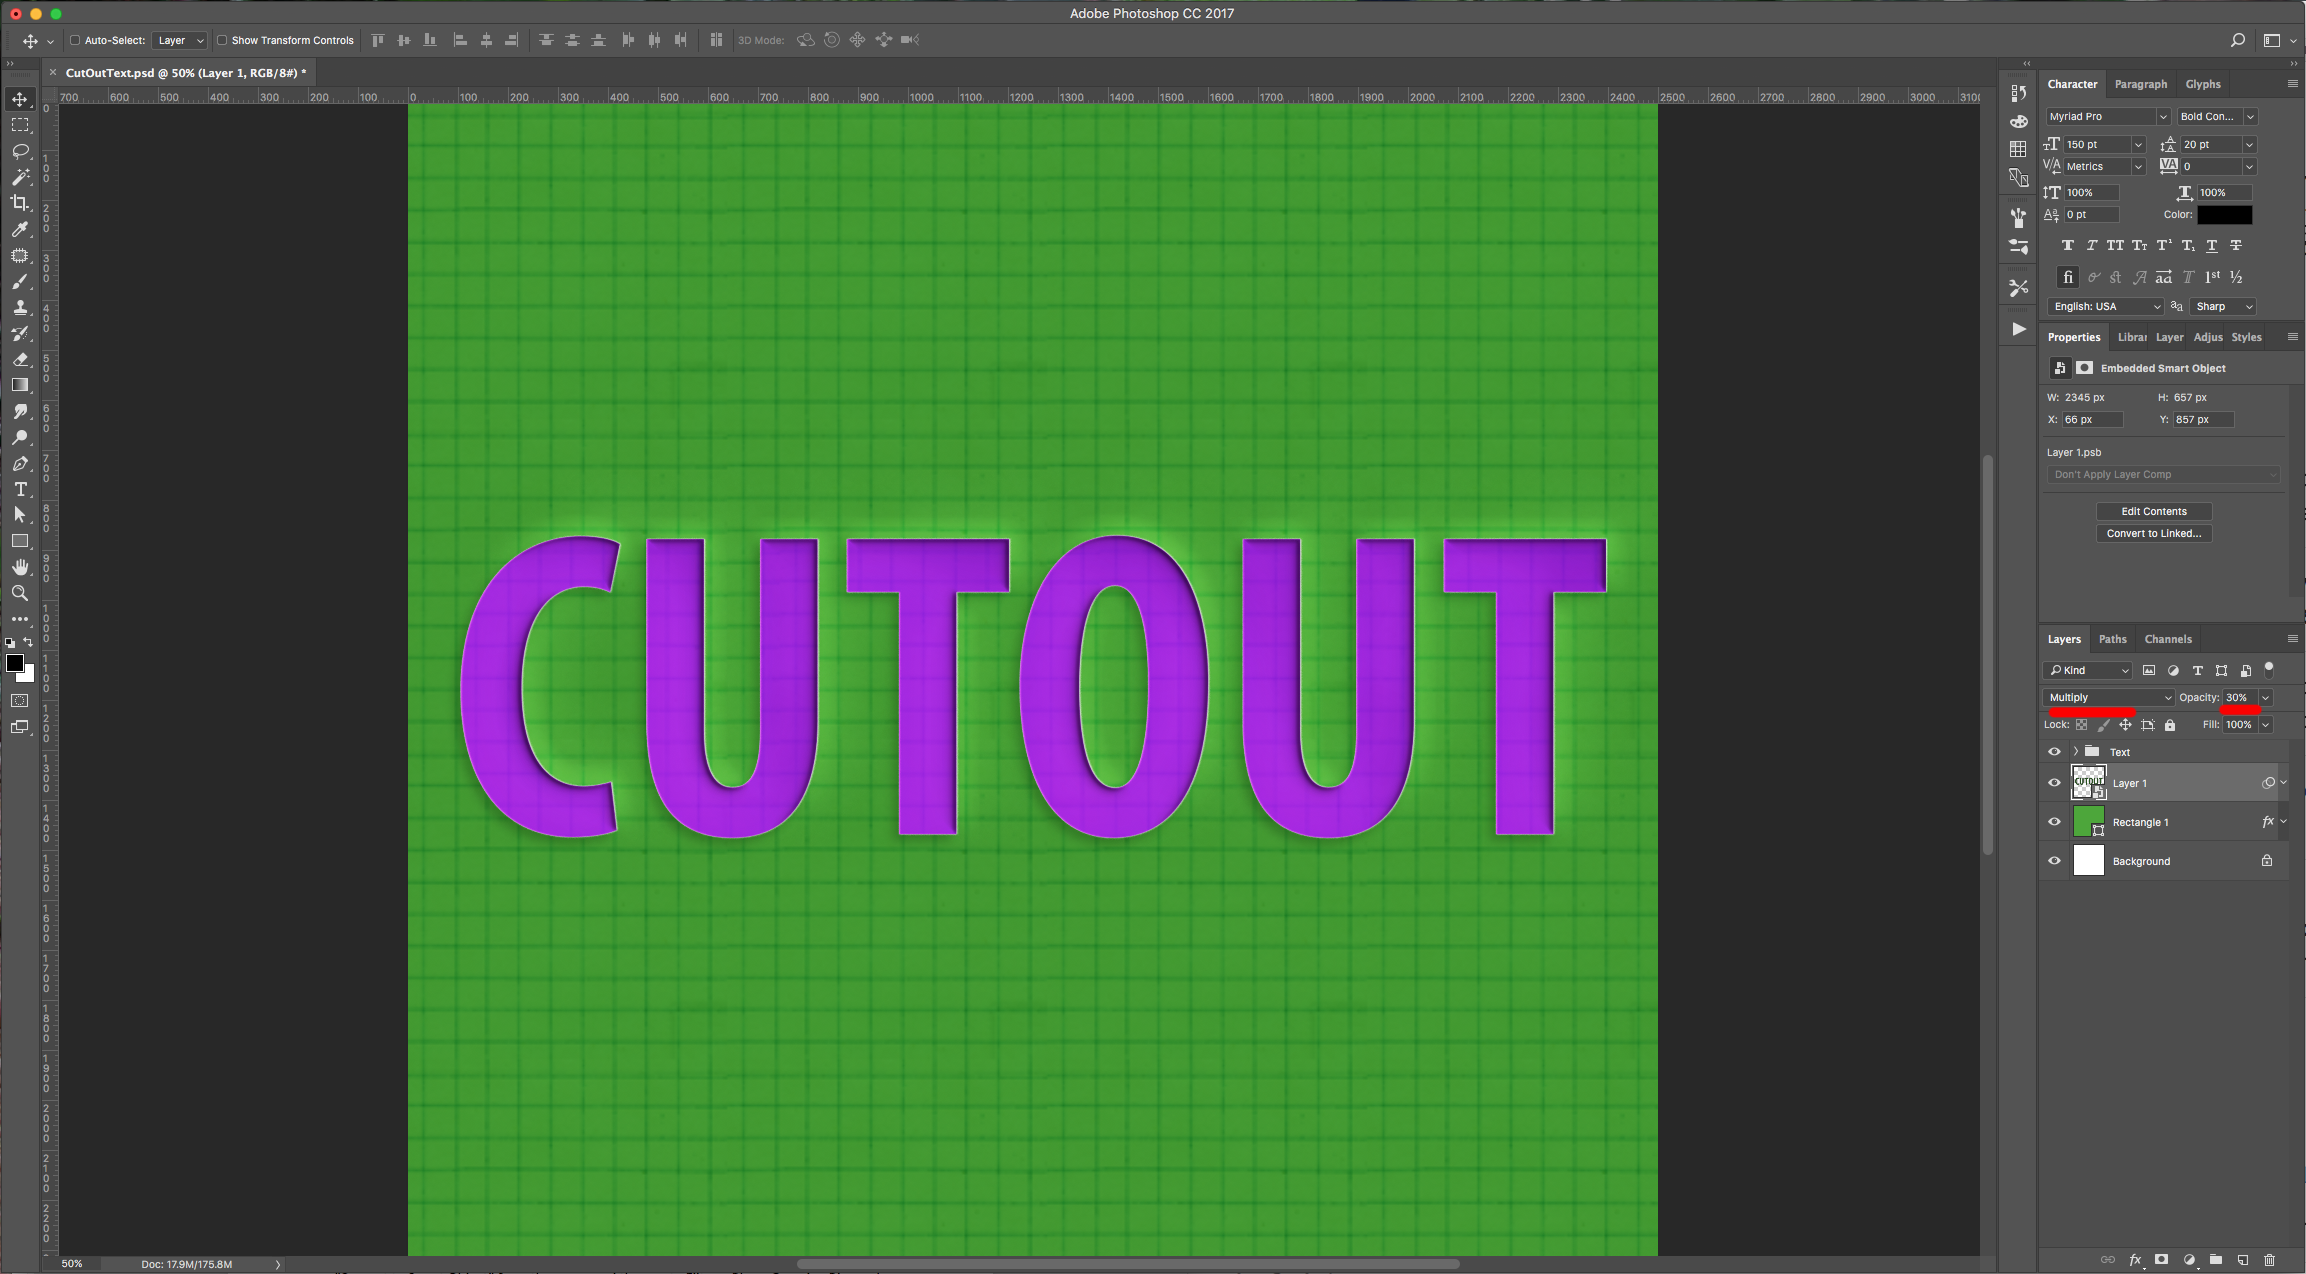
16 - Check it out.
2 – For the “Background” you can apply the color of your choice at “Step 1” (Choose the color in “Background Contents” when you create the document). Also, you can add the color to your “Background” Layer with the “Paint Bucket Tool” (G) or the “Gradient Tool” (G) or you can use the “Rectangle Tool” (U) and draw a rectangle on top of your “Background” and give it the color you want. You can change the color by double-clicking on the thumbnail. You can then apply some patterns or effects to further enhance the layer. We used #49a833 or… Double-click on the Layer and apply the following “Layer Style” – Pattern Overlay (New Pattern > Color Paper)
3 – Select the “Type Tool” (T) and write your text. (If you are using a shape as background you will need to hold the “Shift” key when you first click on your artboard so your shape is not considered the “Text Box”). We used “Myriad Pro Condensed Bold” as our font of choice and used a contrasting color as “Fill” (#a518e7).
4 - Once you are happy with your text right-click on its thumbnail and choose “Create Smart Object” from the menu. Now we can modify the text.
5 - Double-click on your text thumbnail and apply the following “Layer Style”:
Bevel & Emboss (Shadow Mode color # 307221)
Inner Shadow (Blend Mode color # ffffff)
Pattern Overlay
Drop Shadow (Blend Mode color #ffffff)
6 - Duplicate the text layer by dragging its thumbnail to the “Create New Layer” button at the bottom of the “Layers” menu. Right-click on top of “Effects” icon located in the right part or your layer’s thumbnail and select “Clear Layer Styles” or select and drag the effect thumbnails to the “Trashcan”. Set the layer’s “Fill” to 0%, then double-click on the layer to apply new ones:
In the “Blending Options” uncheck the “Blend Clipped Layers as Group”.
Bevel & Emboss:
Inner Shadow: (Blend Mode color #ffffff)
Drop Shadow: (Blend Mode color #ffffff)
7 - Duplicate this text layer and Clear the Layer Styles again. Apply the following Styles to this layer:
Bevel & Emboss: (Shadow Mode color #000000)
8 - Clip your topmost layers by right-clicking on the first one and selecting “Create Clipping Mask” from the menu.
9 - Duplicate your top layer again and make sure that this copy is “Clipped” too. Then go to Filter > Blur > Gaussian Blur and use a “Radius” of 2.0 pixels.
10 - Repeat Step 9 four more times, then double-click on the Filter to change the “Gaussian Blur Radius” to 6.0, 8.0 and 10.0 and 20.0 pixels on each new layer duplicate.
11 - Double-click on the top layer to add the following “Layer Style”:
Satin (Blend Mode color #ffffff)
12 - Select all your text layers and click on the little folder icon at the bottom of your “Layers” menu to group them together. Name your group.
13 - Create a “New Layer” by clicking on the “Create New Layer” button at the bottom of the “Layers” Menu and place it on top of your shape/background layer and under the “Text” group.
14 - While holding Command/Control click on a text layer to make a selection of your text and the remember to re-select your new layer. Press Shift + Delete/Backspace to invoke the “Fill” menu and choose a color to apply to your selection. For “Contents” choose “Color” and use a darker shade of your background color (#38712a). Deselect with Command/Control + D and then click the “Down” and “Left” arrow keys for about 5 or 6 times to create a shadow.
15 - Convert the layer to a “Smart Object” (right-click on the layer thumbnail and select “Convert to Smart Object” from the menu and then go to Filter > Blur > Gaussian Blur and give it a “Radius” of about 10.0 pixels. Change the “Blending Mode” to “Multiply” and the “Opacity” to 30%.
16 - Check it out.
by @lornacane


