Watercolor Text Effect in Photoshop (Part 2)
For this tutorial we are using a canvas or paper background and Titin Script from Font Bundles.
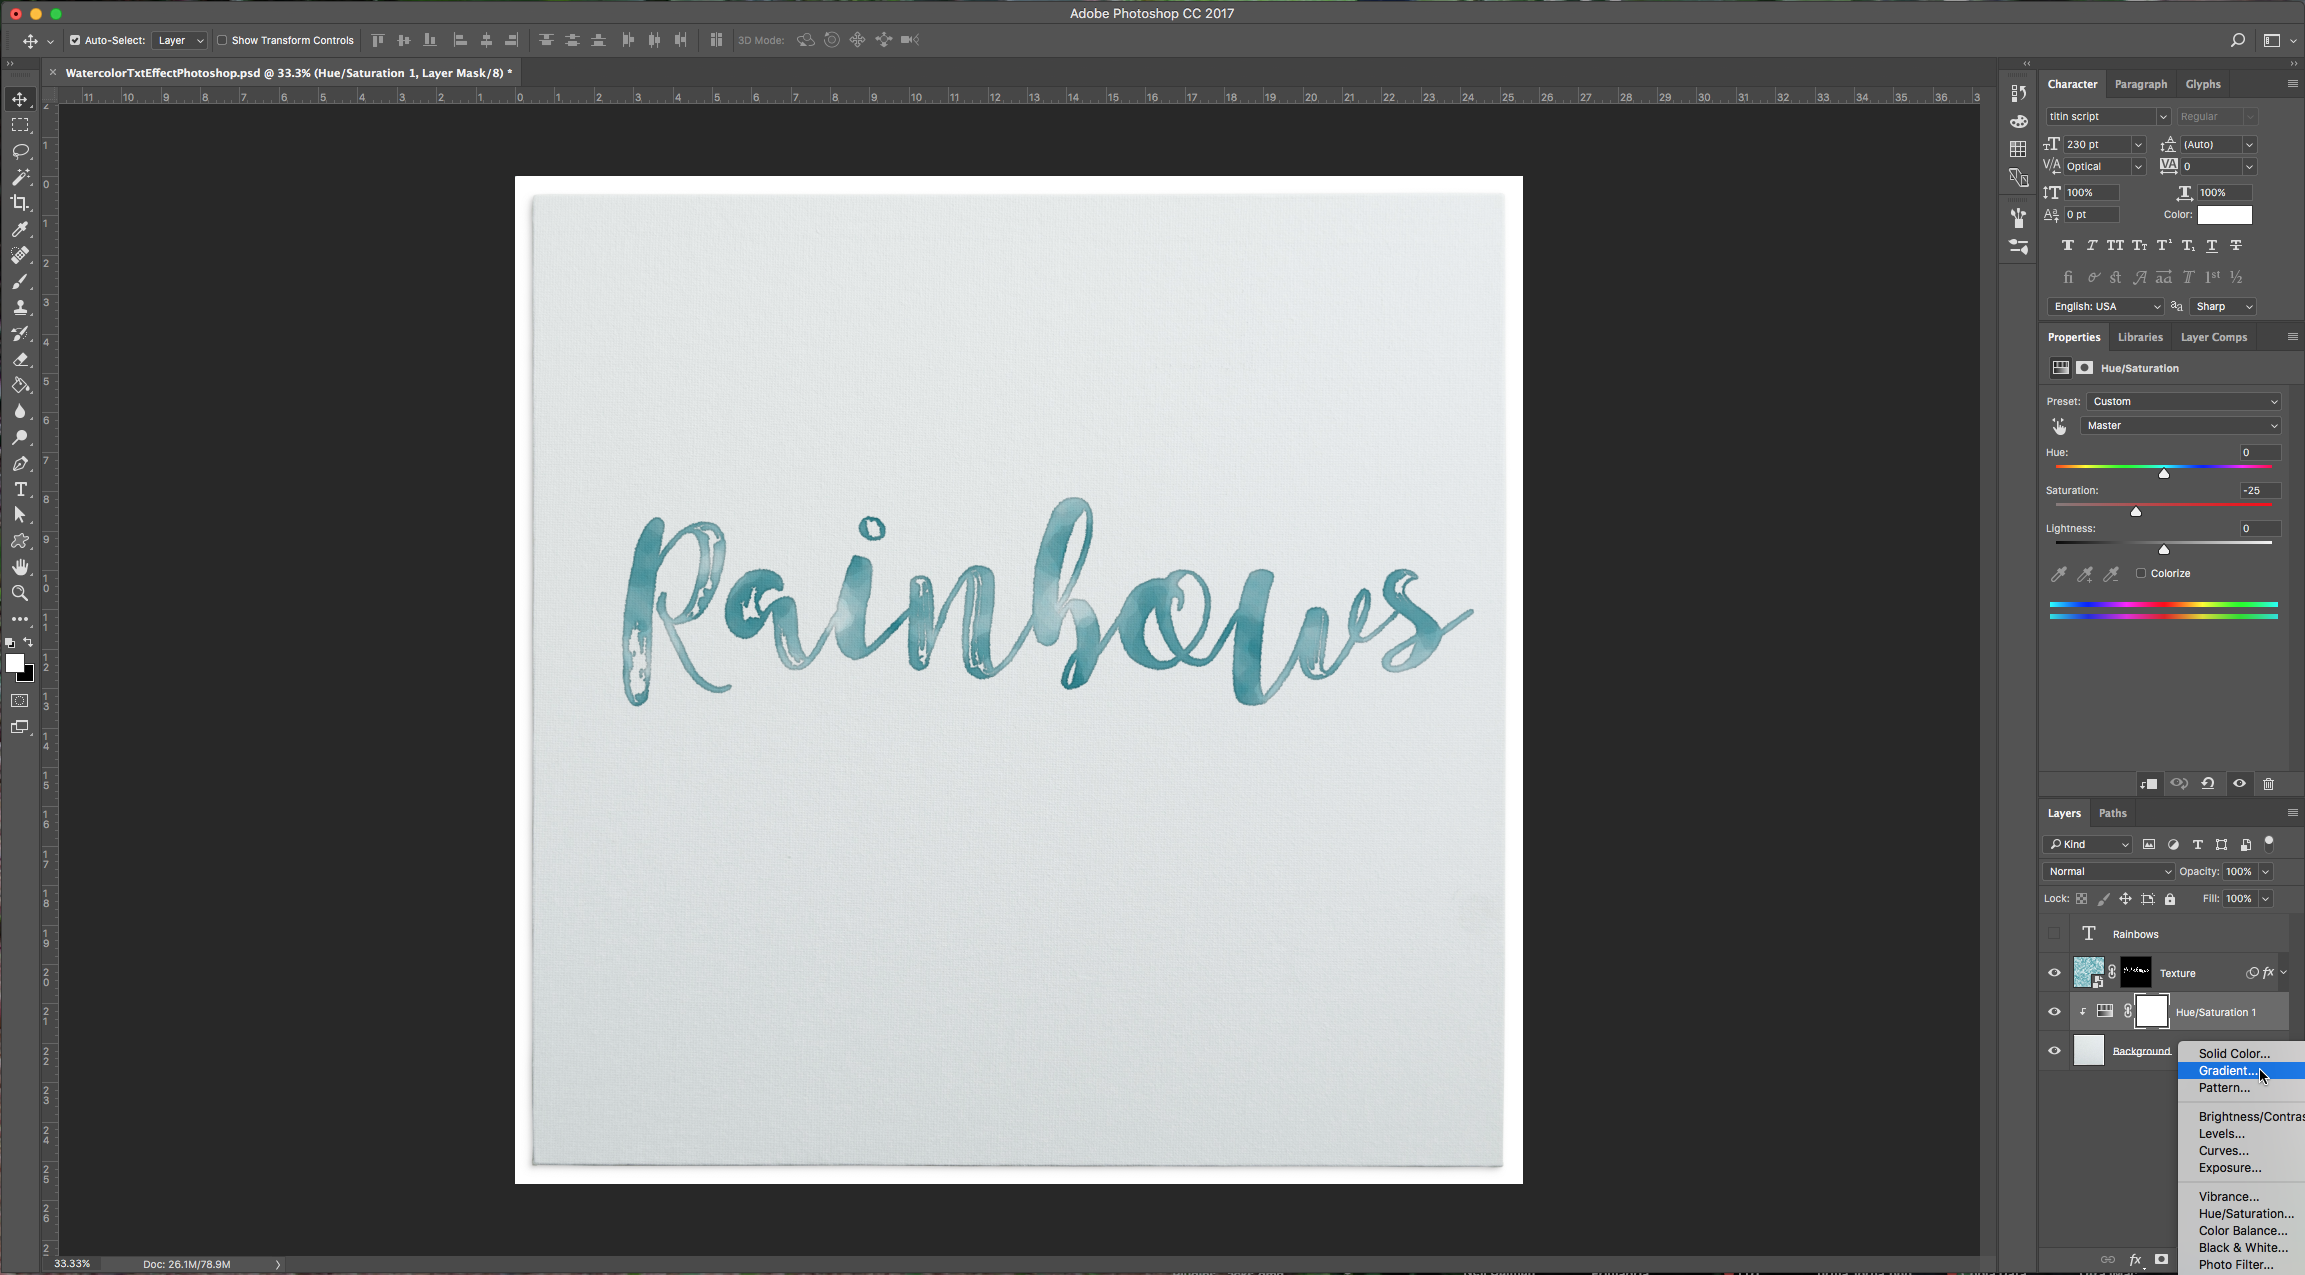
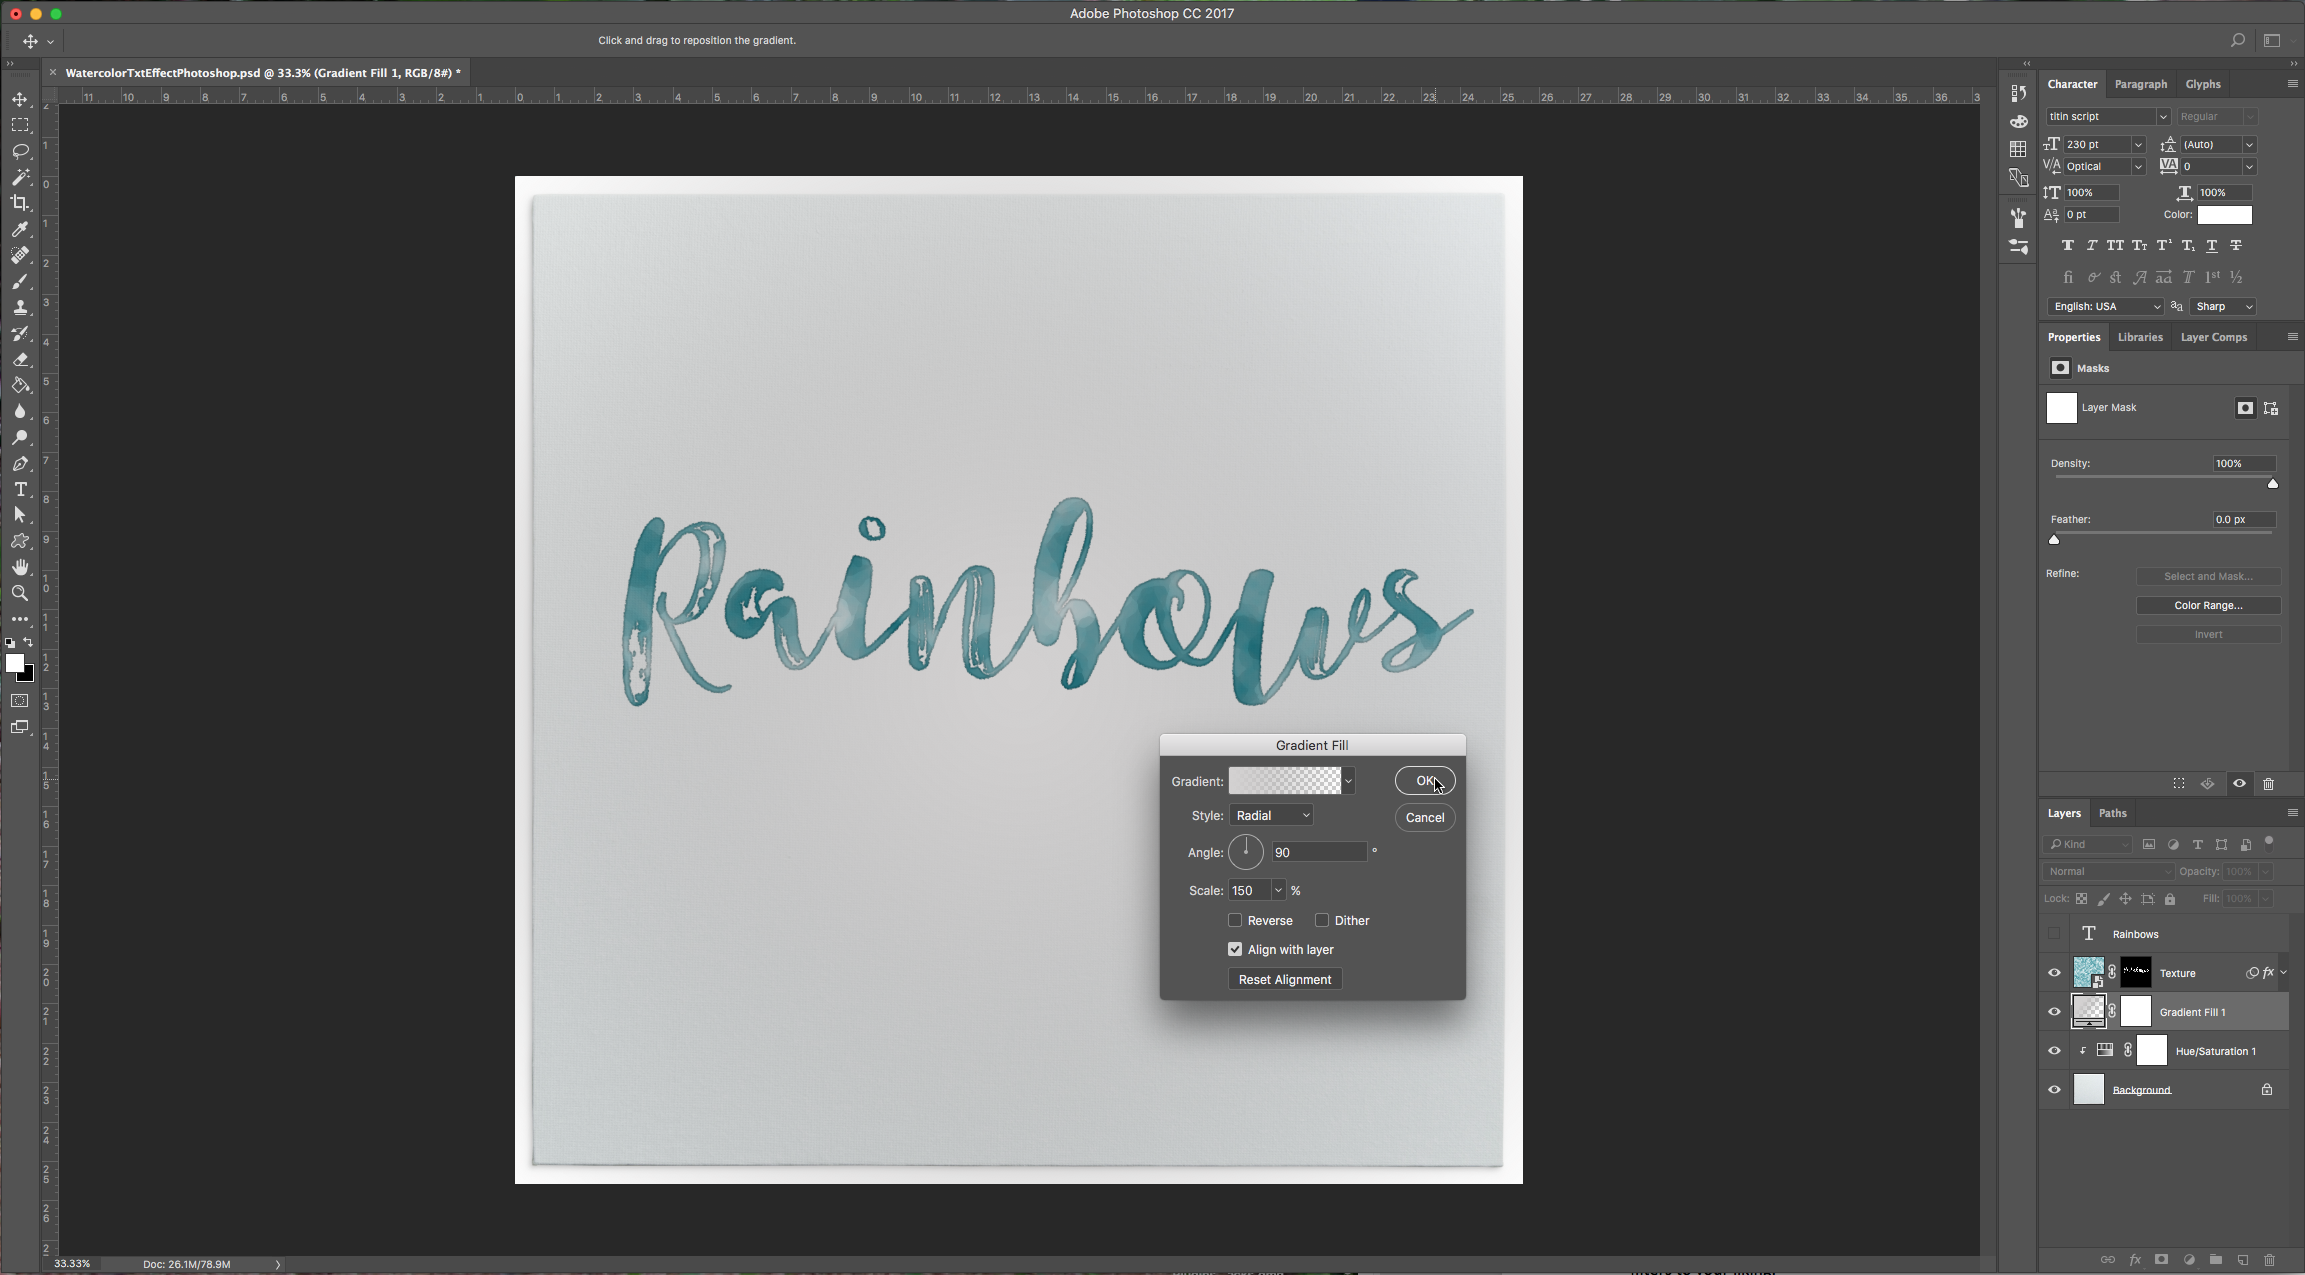
1 – Create a new “Gradient Layer” under your “Texture” layer. Use a “Transparent to Fill Color” gradient with #d3d1d1 and #918f8f as colors, the Style as Radial and a 250% Scale. Hit Ok.
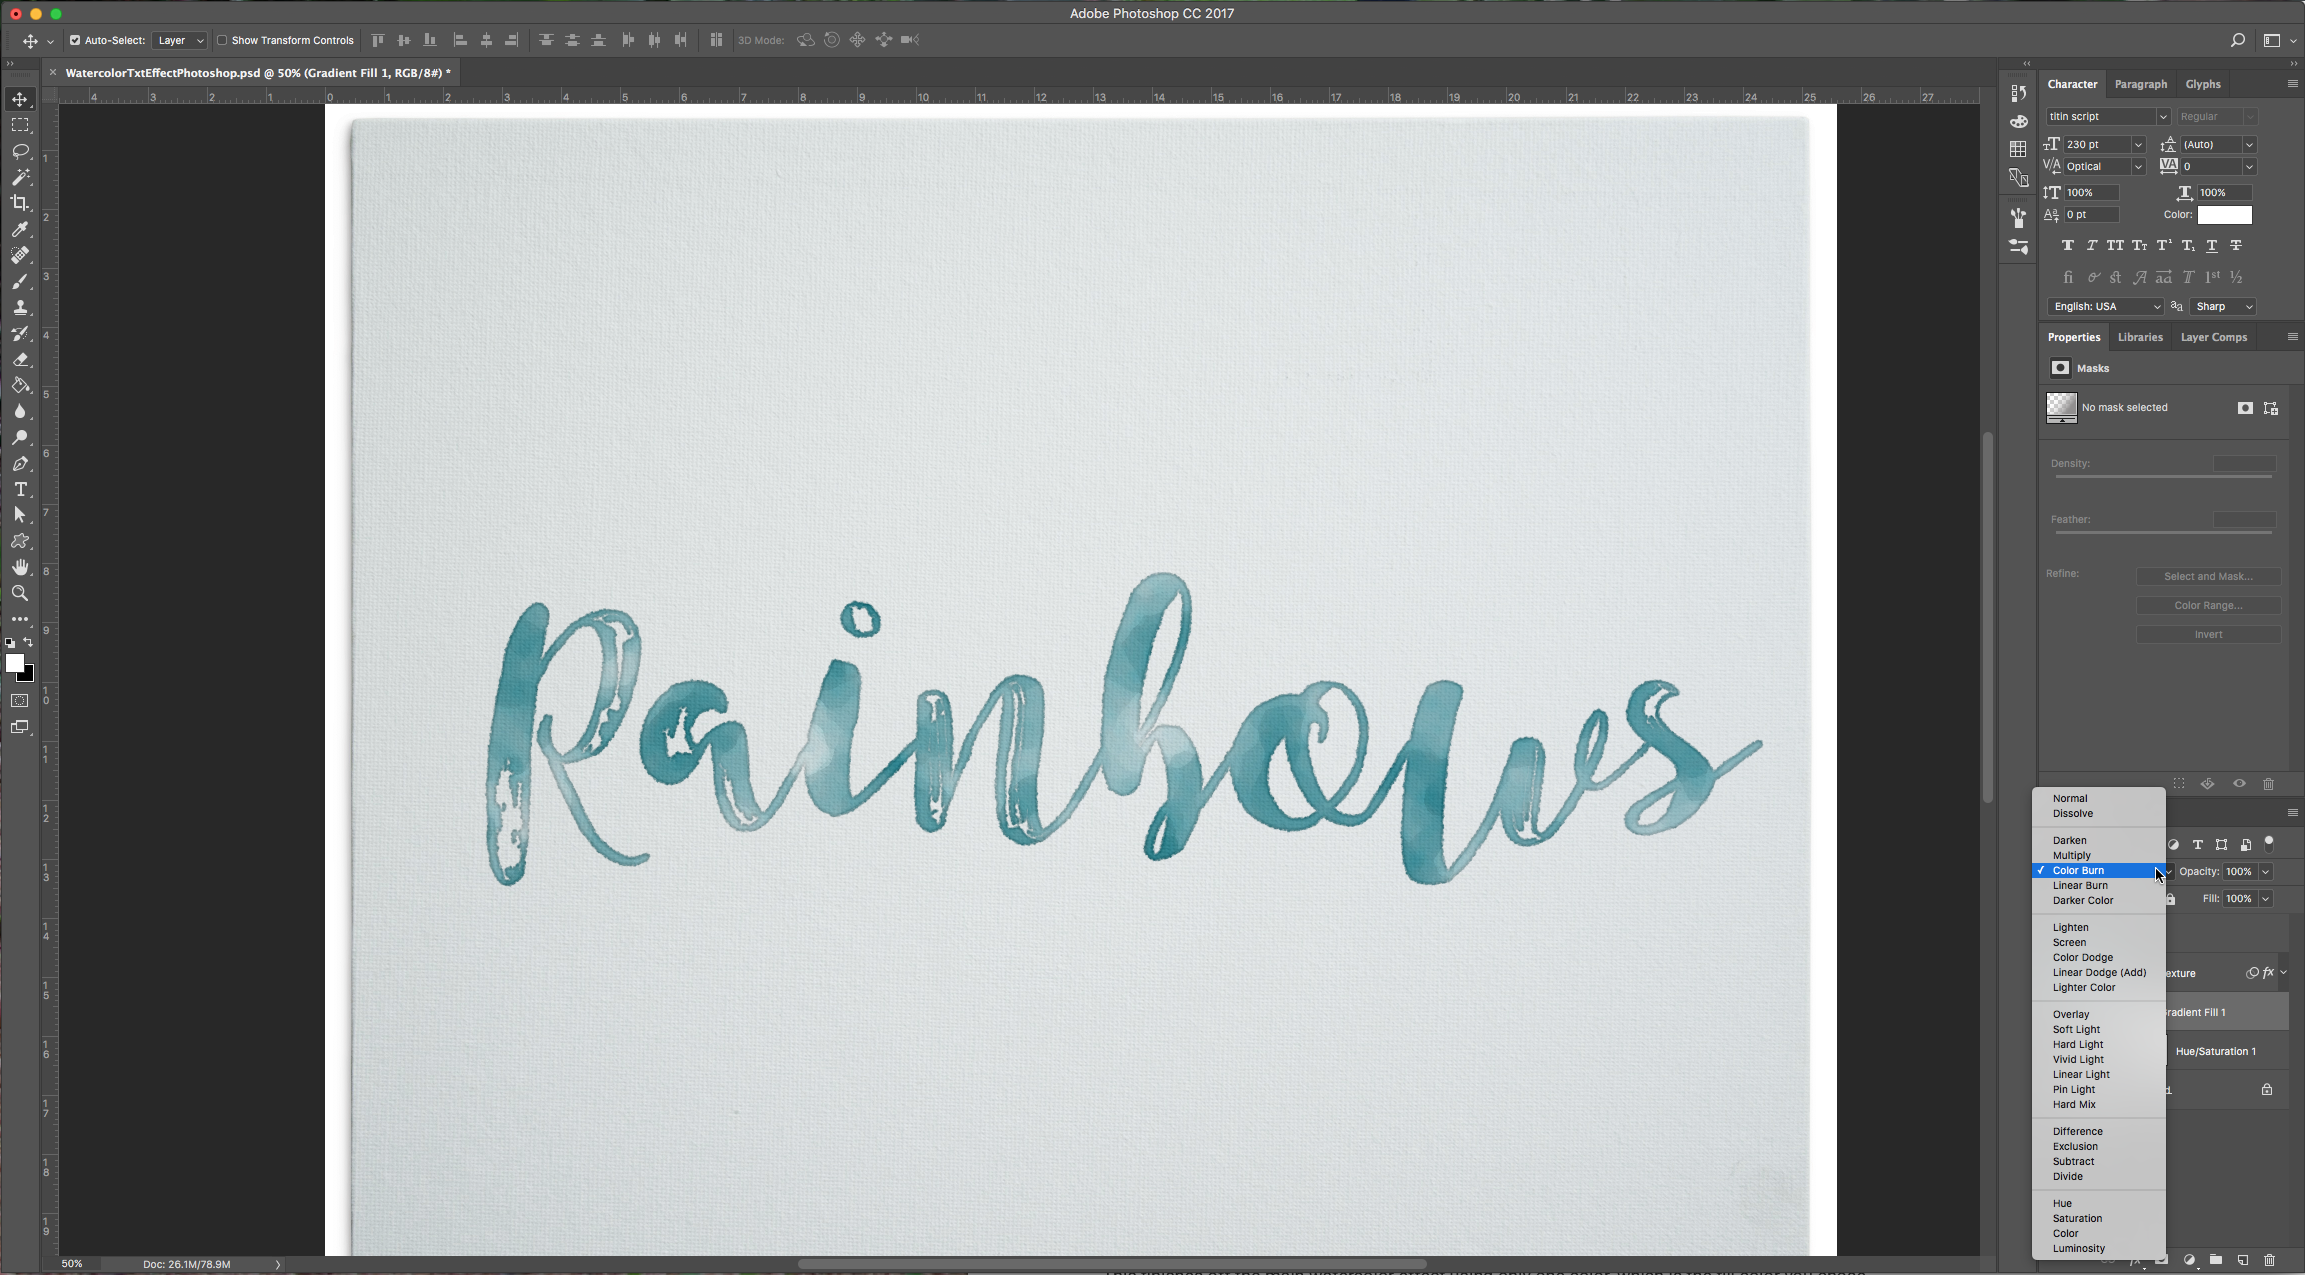
2 – Change the “Gradient Layer” Blending Mode to “Color Burn”.
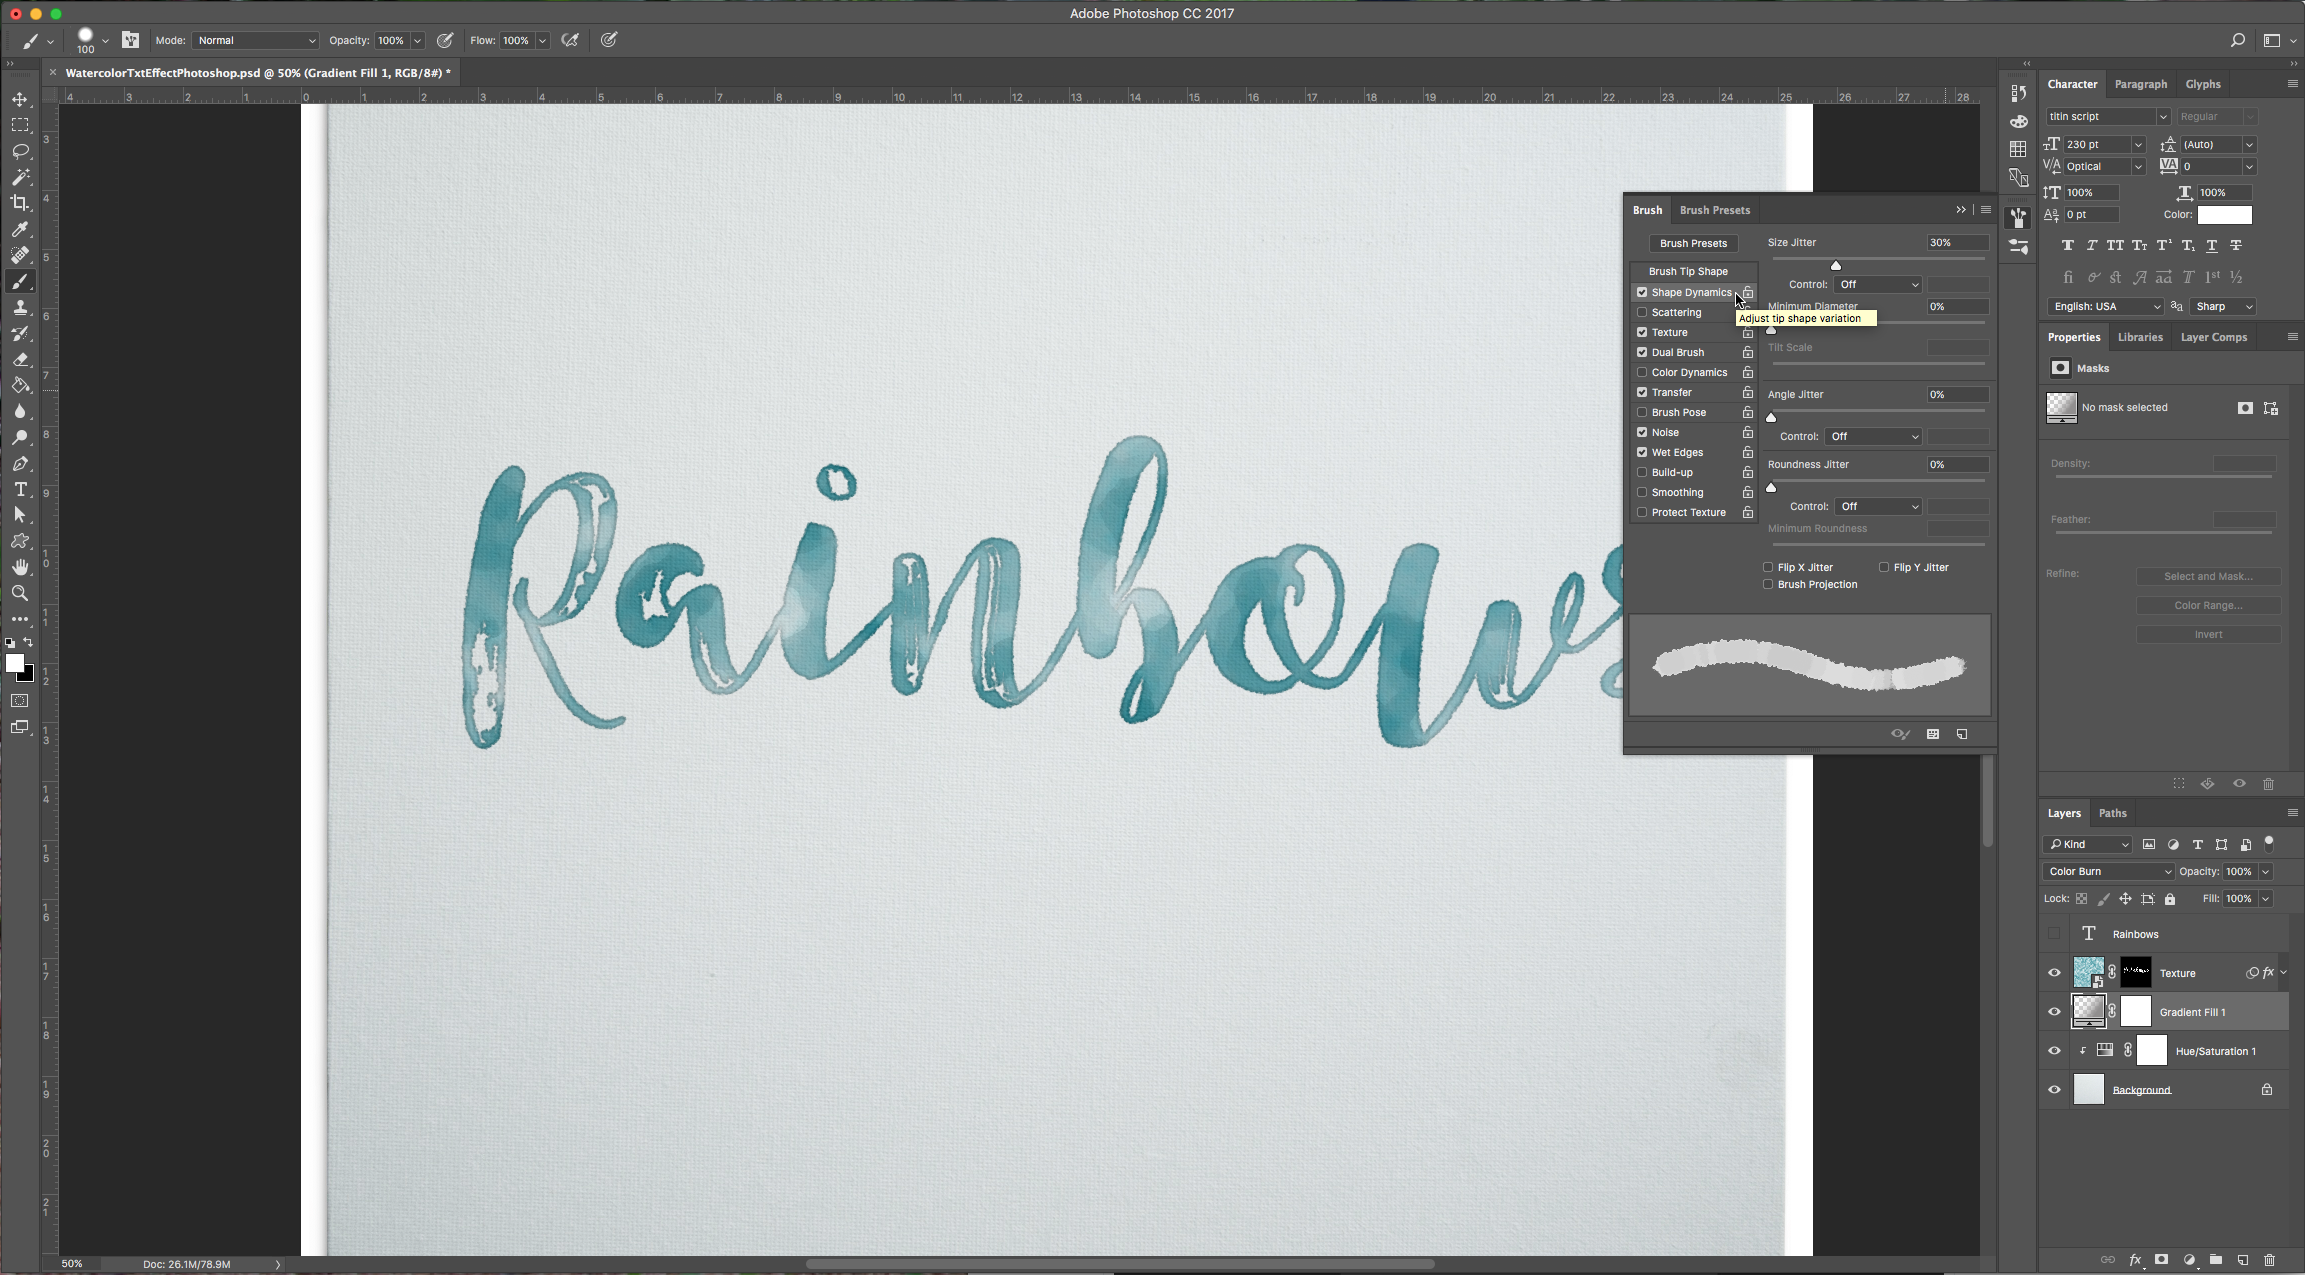
3 – Let’s create a new watercolor brush to add some detail. Select the “Brush Tool” (B). Select a hard round tip and Use the following values in the “Brush Panel”:
Brush Tip Size:
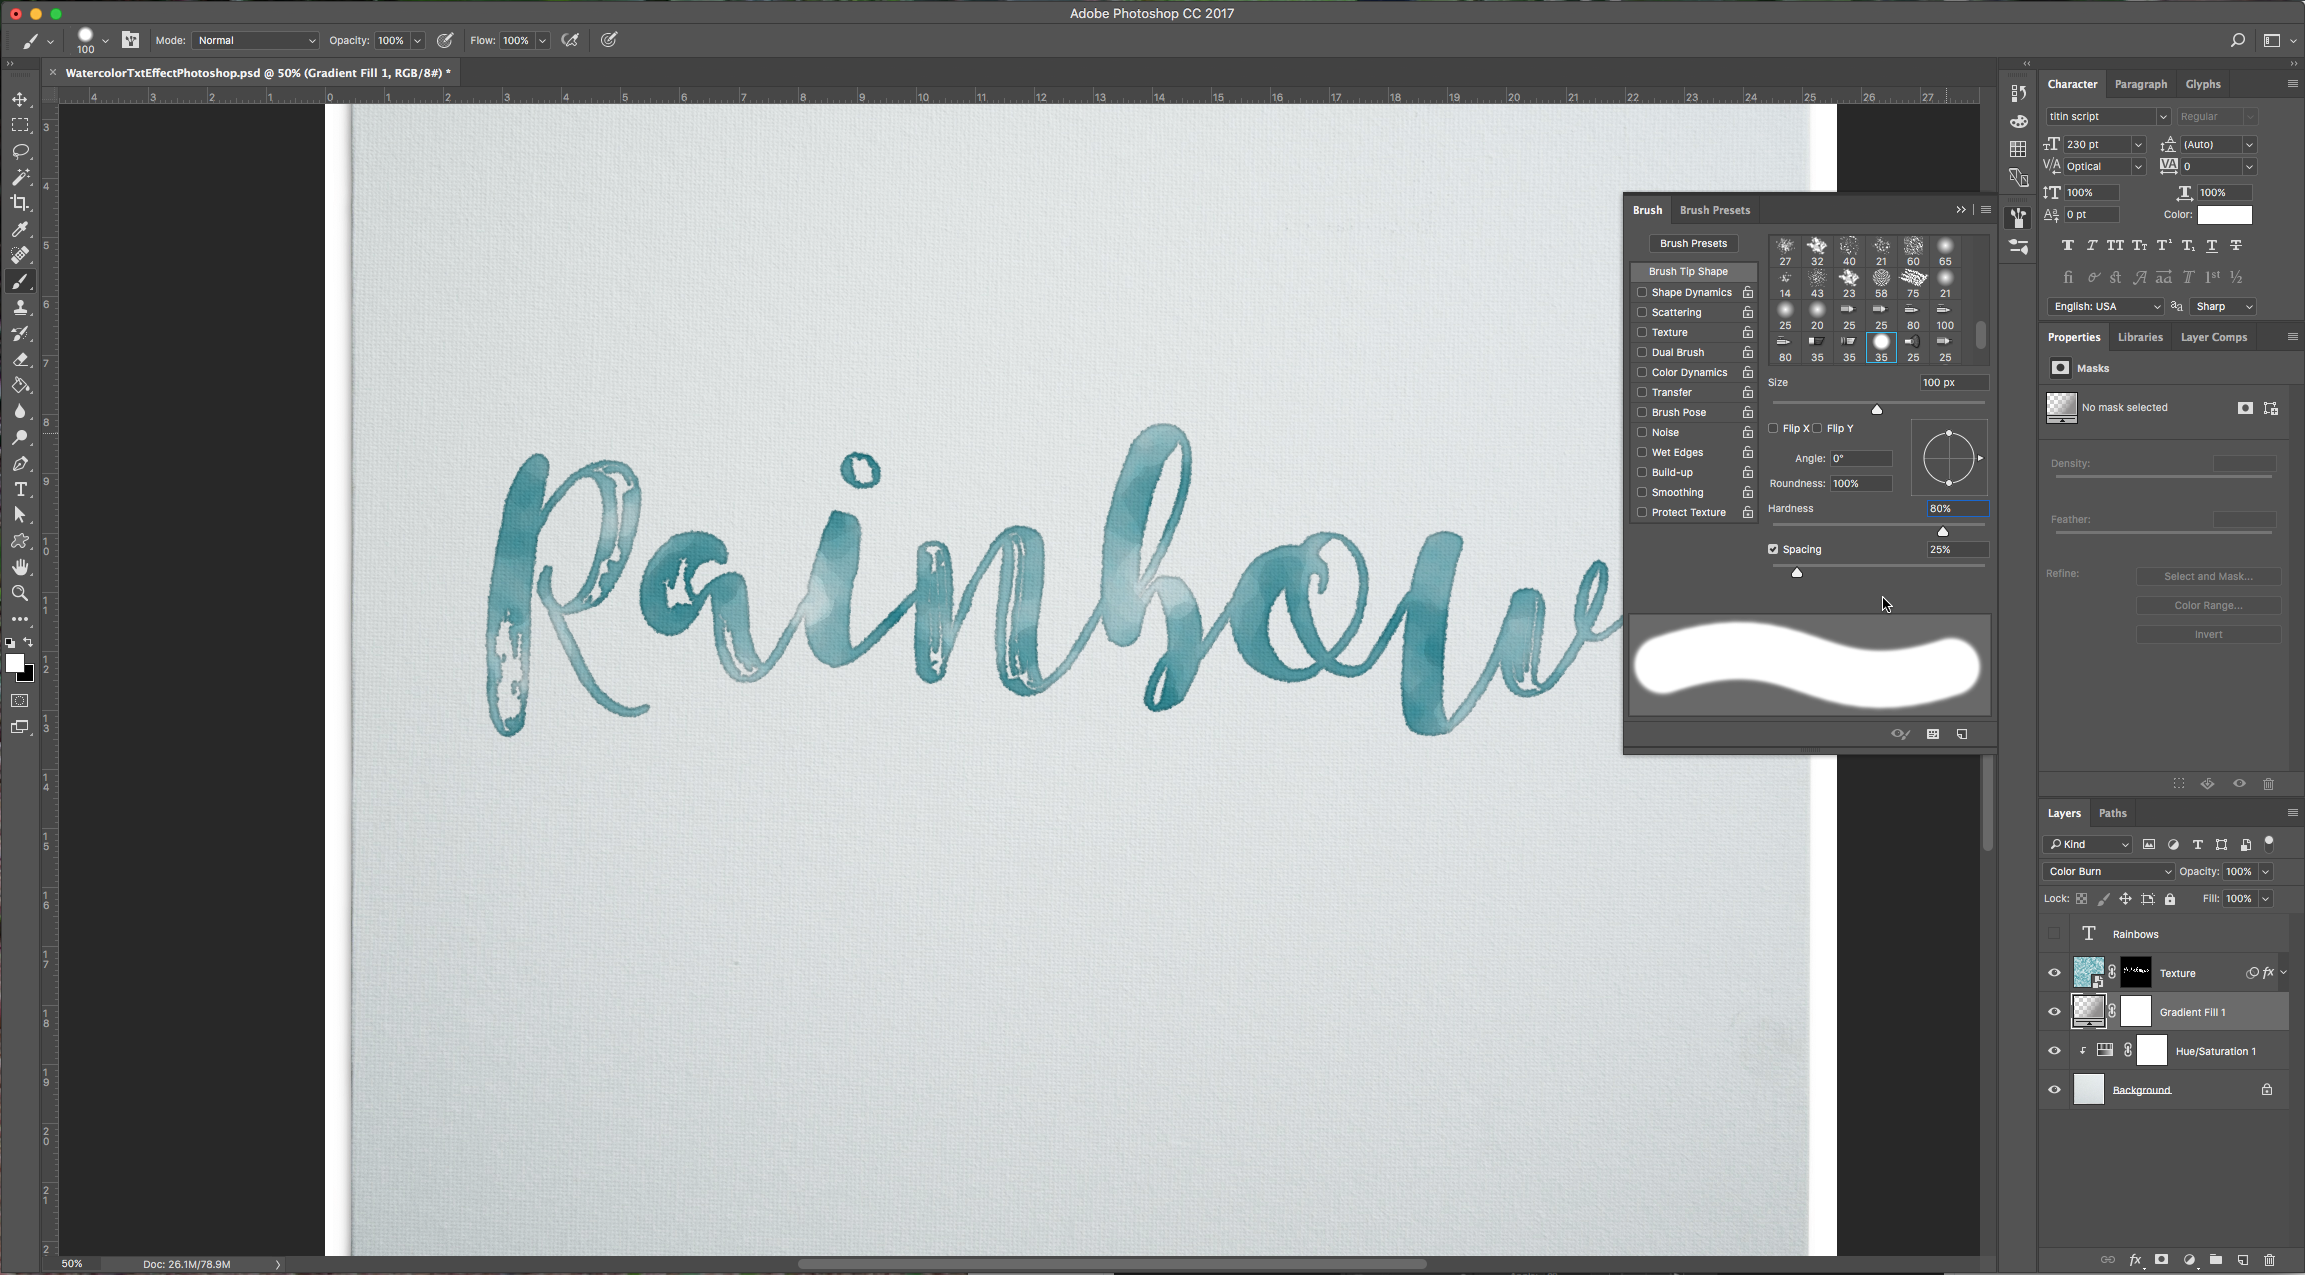
Shape Dynamics:
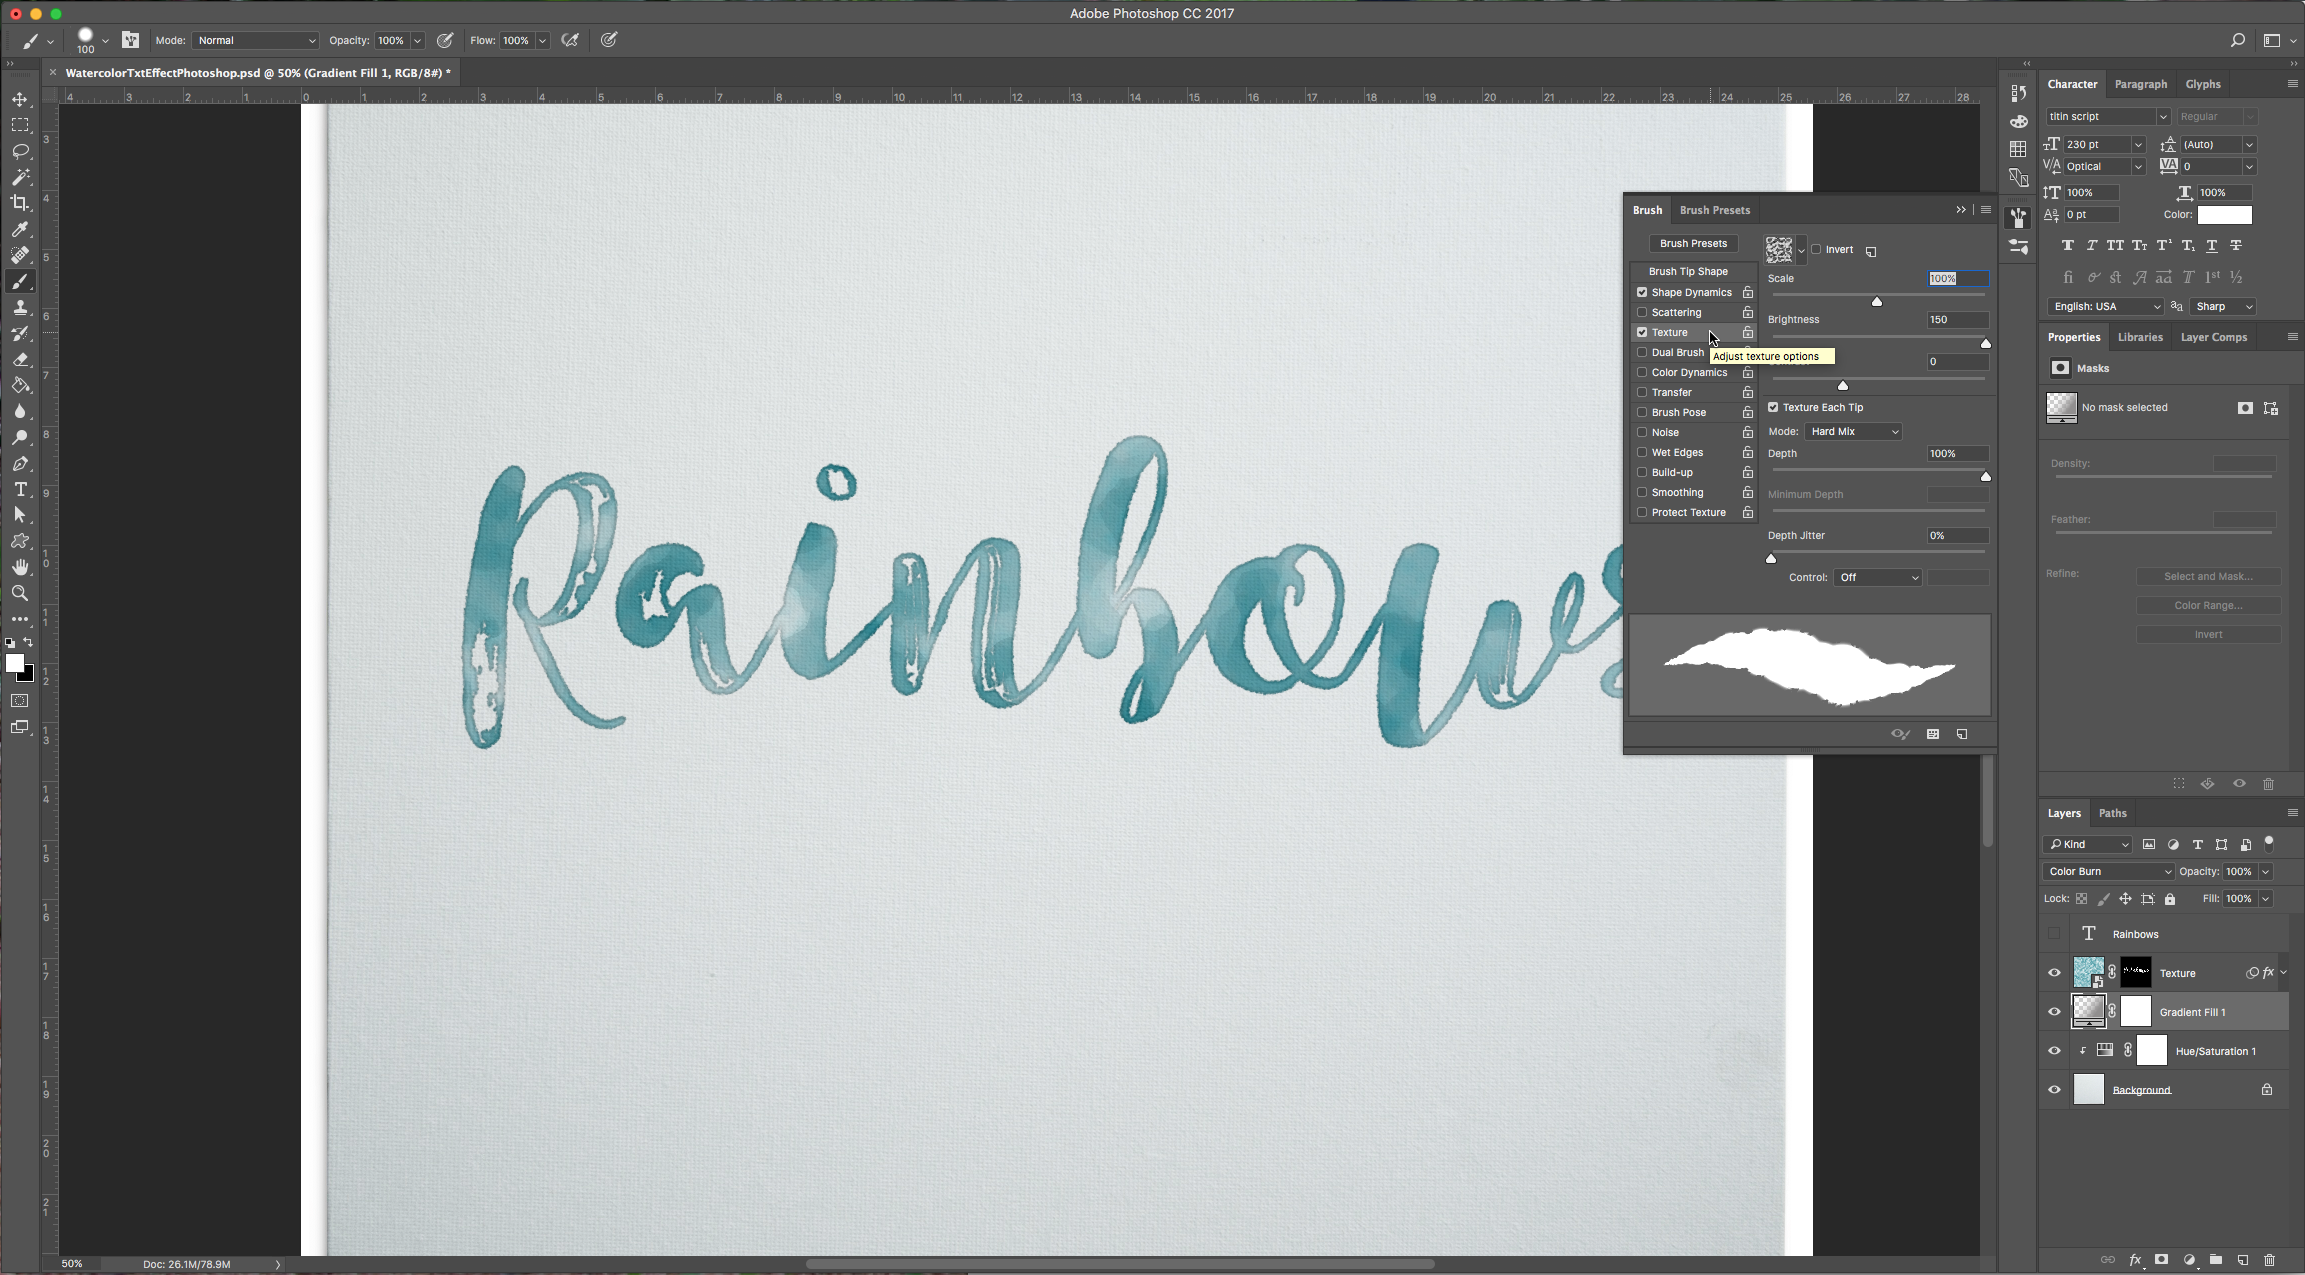
Texture:
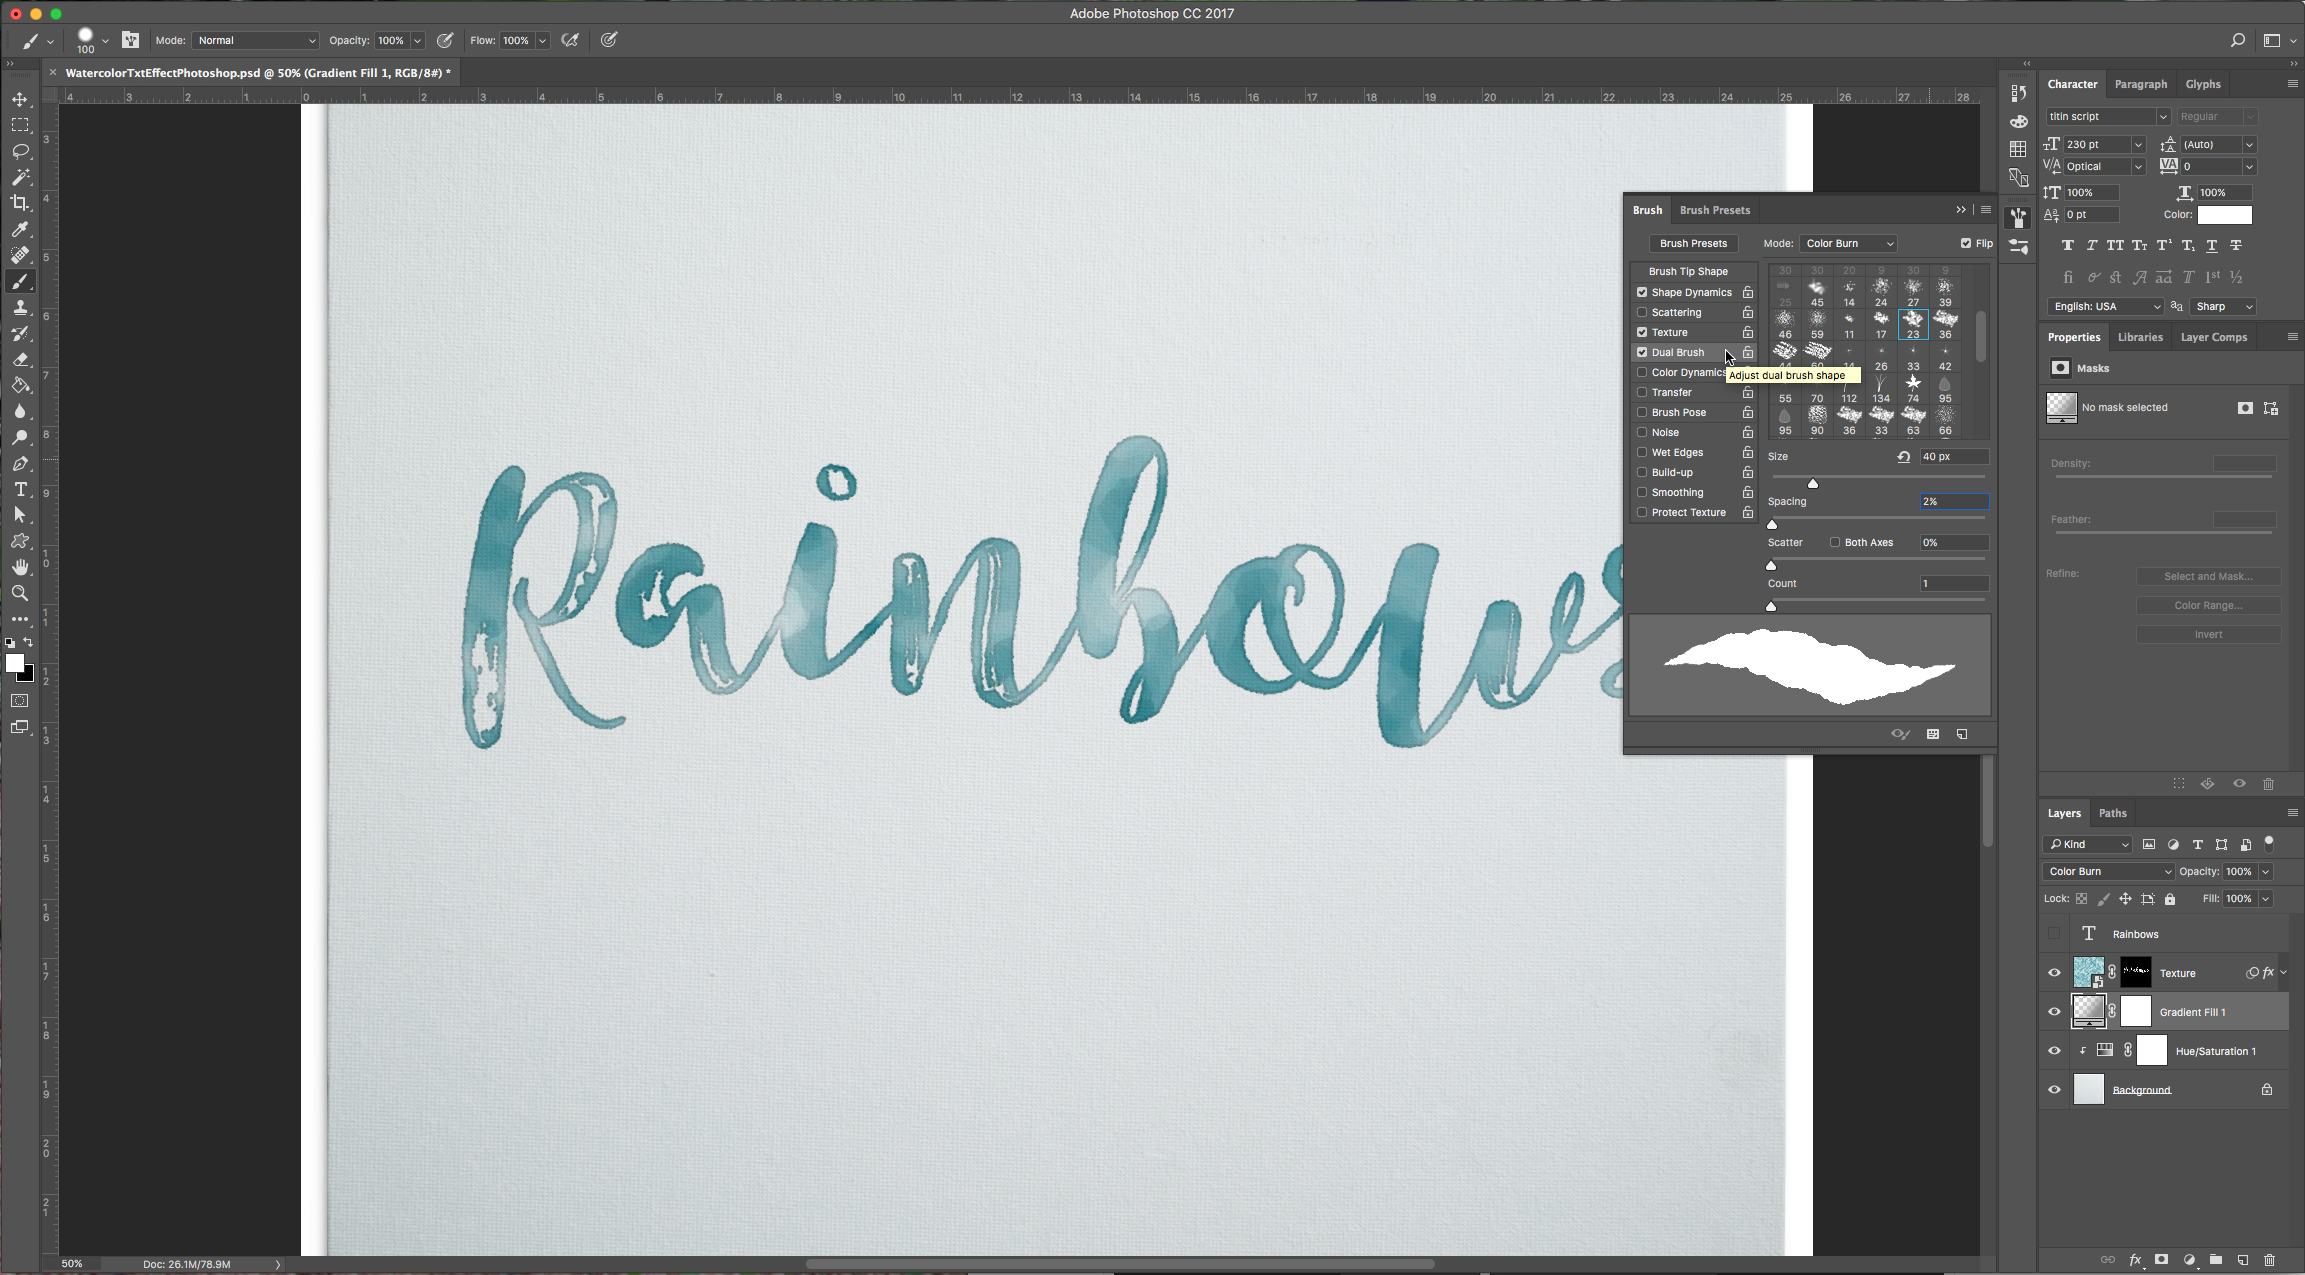
Dual Brush: Chalk 23 pixels tip.
Transfer:
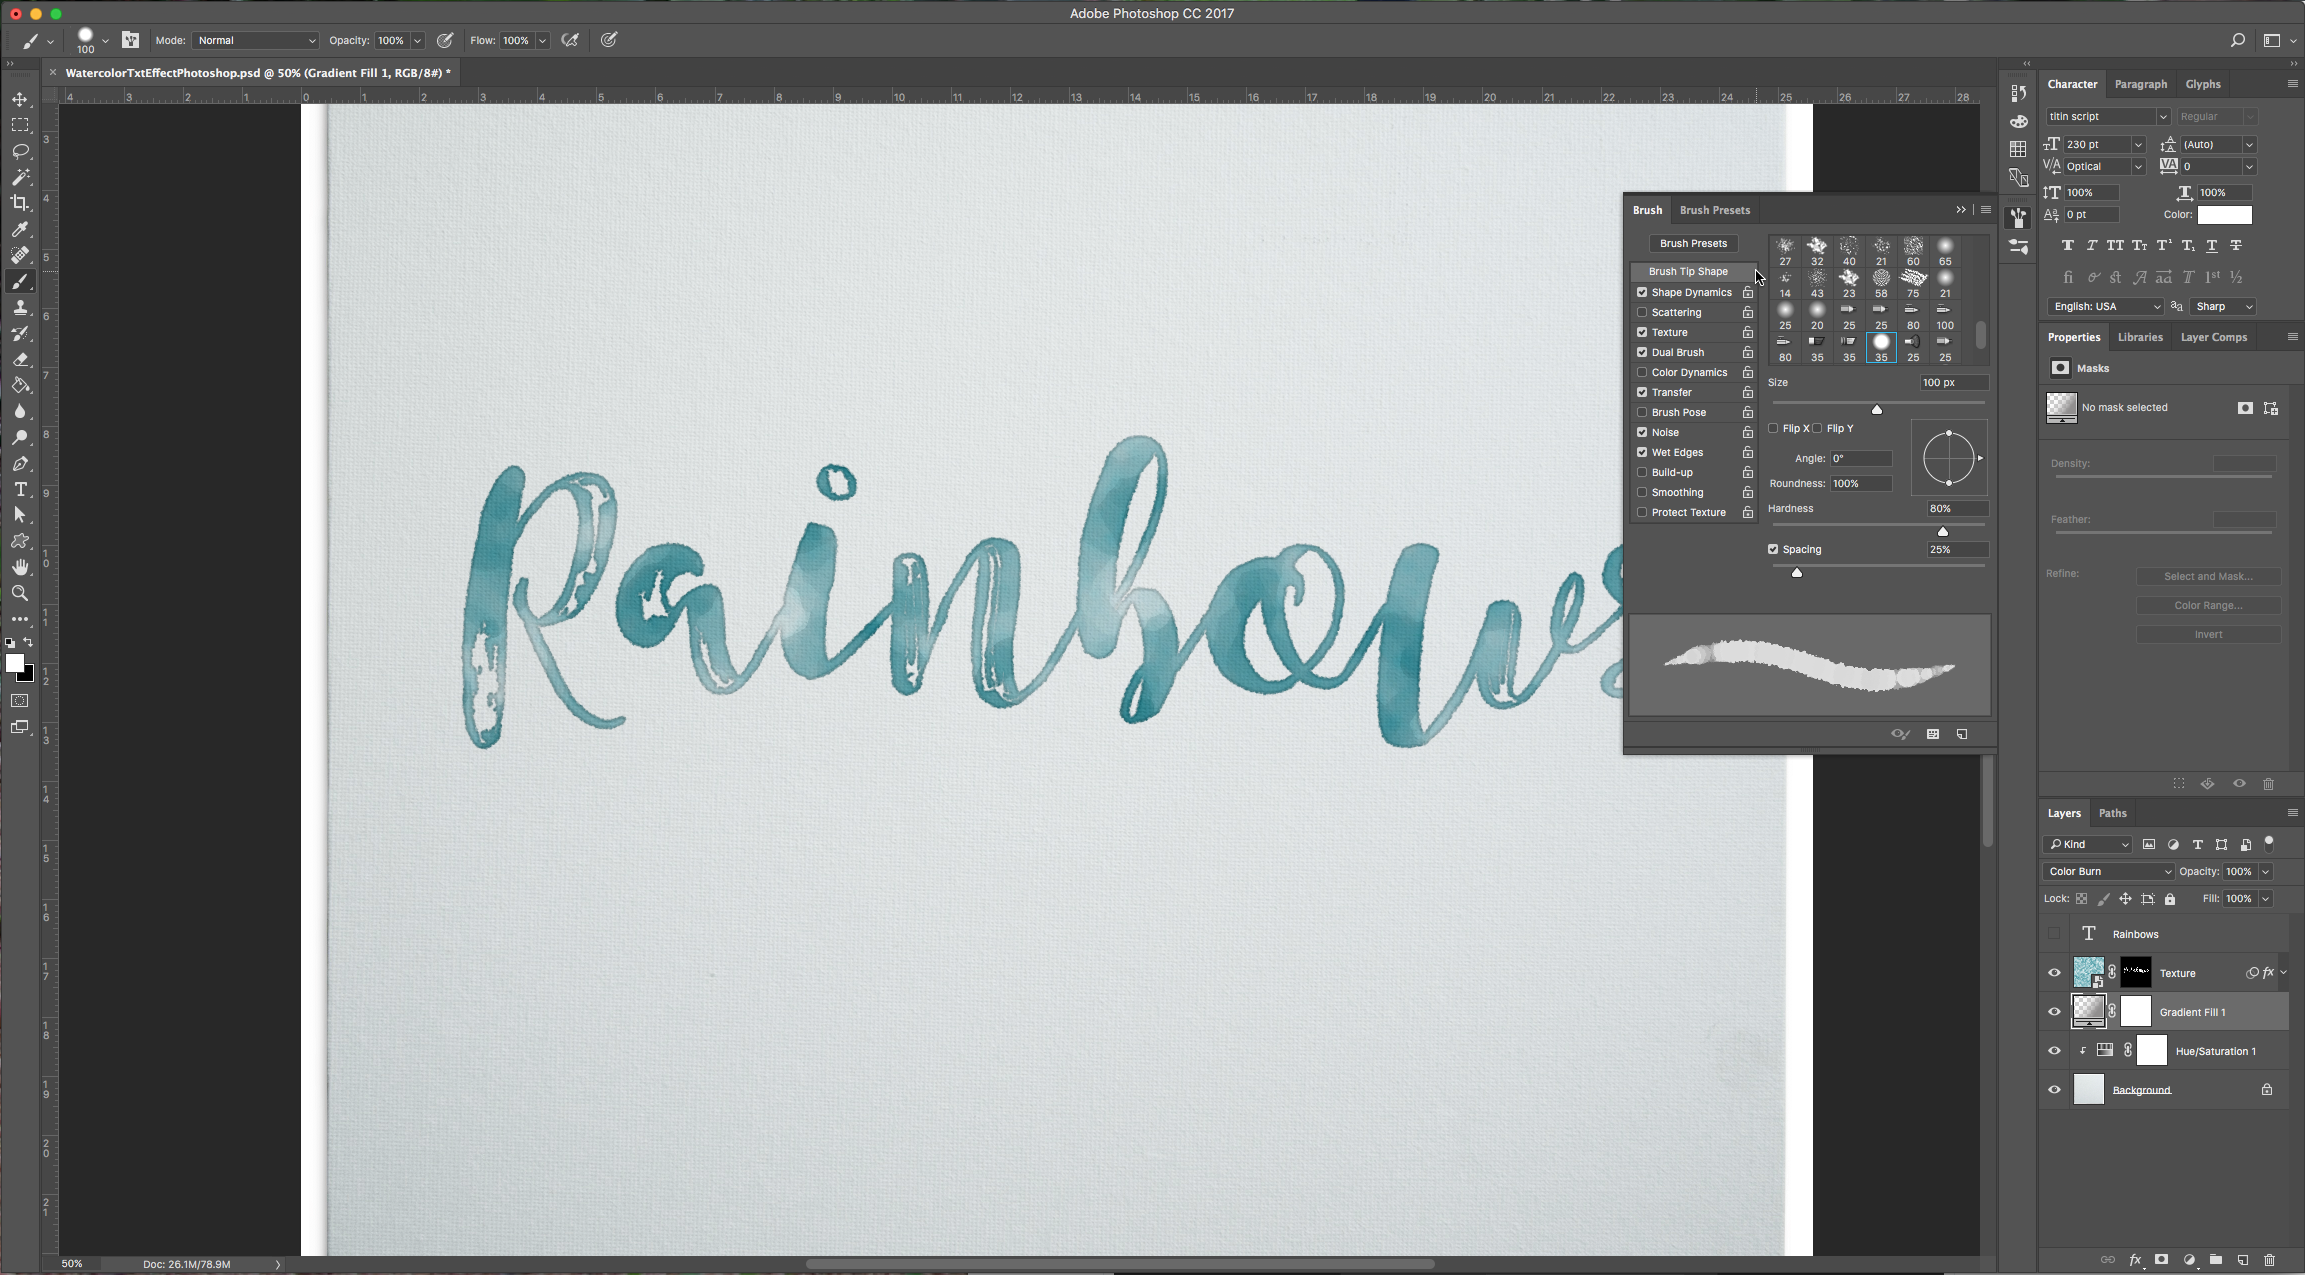
And check “Noise” and “Wet Edges”.
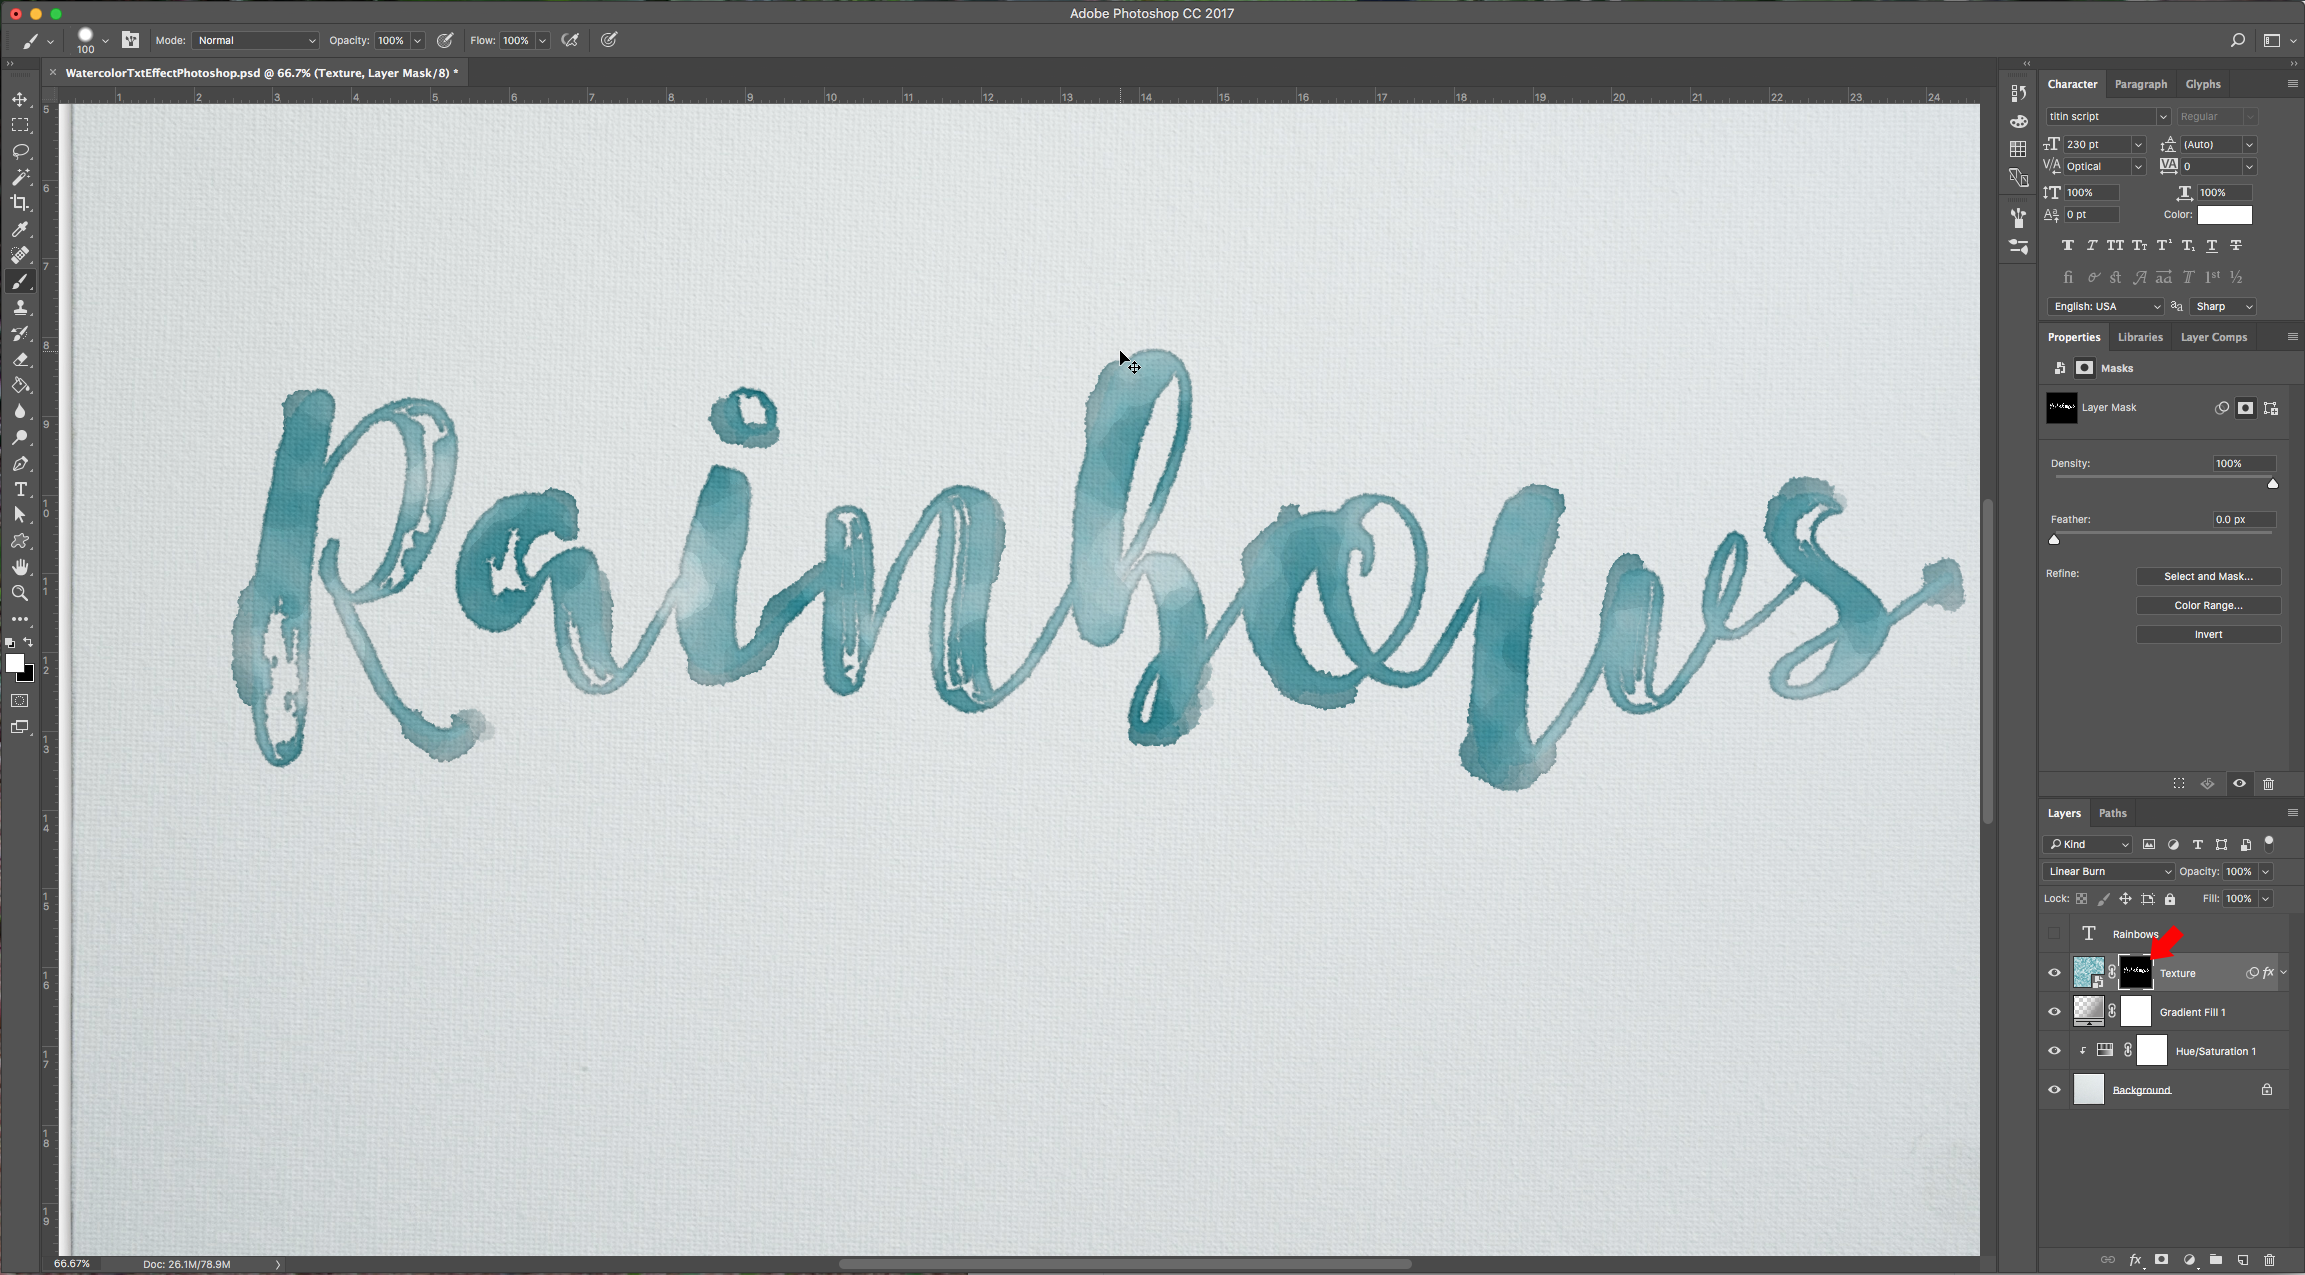
4 – With your “Texture” layer mask selected draw some smudges and stains.
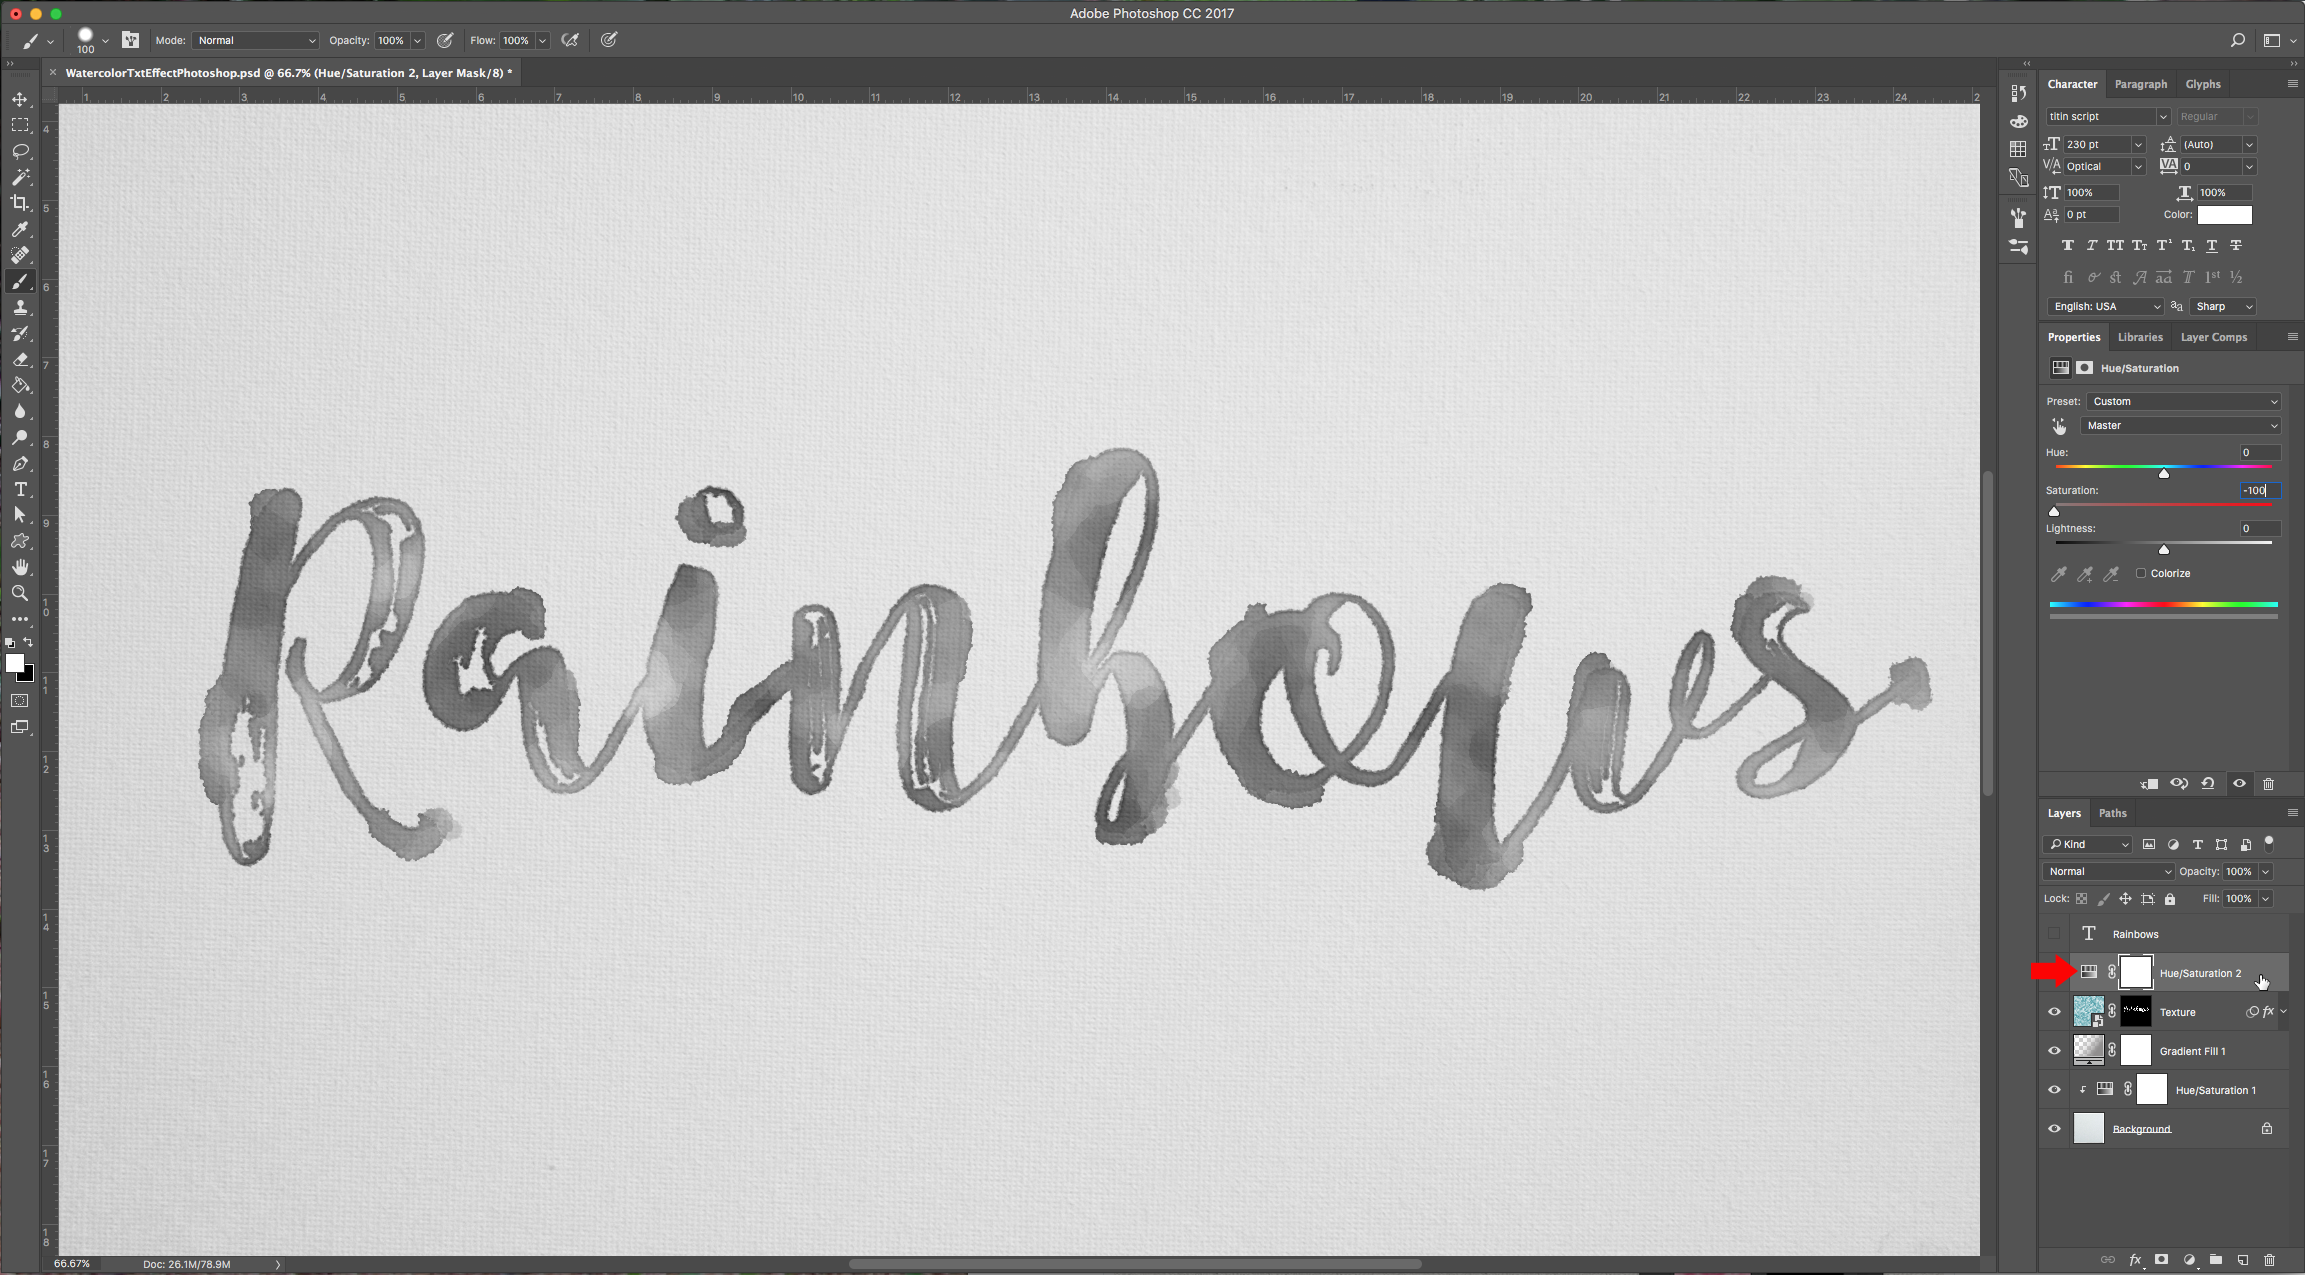
5 – Let’s add a “Hue/Saturation Adjustment” layer and clip it to the “Texture” layer. Change the Saturation value to -100.
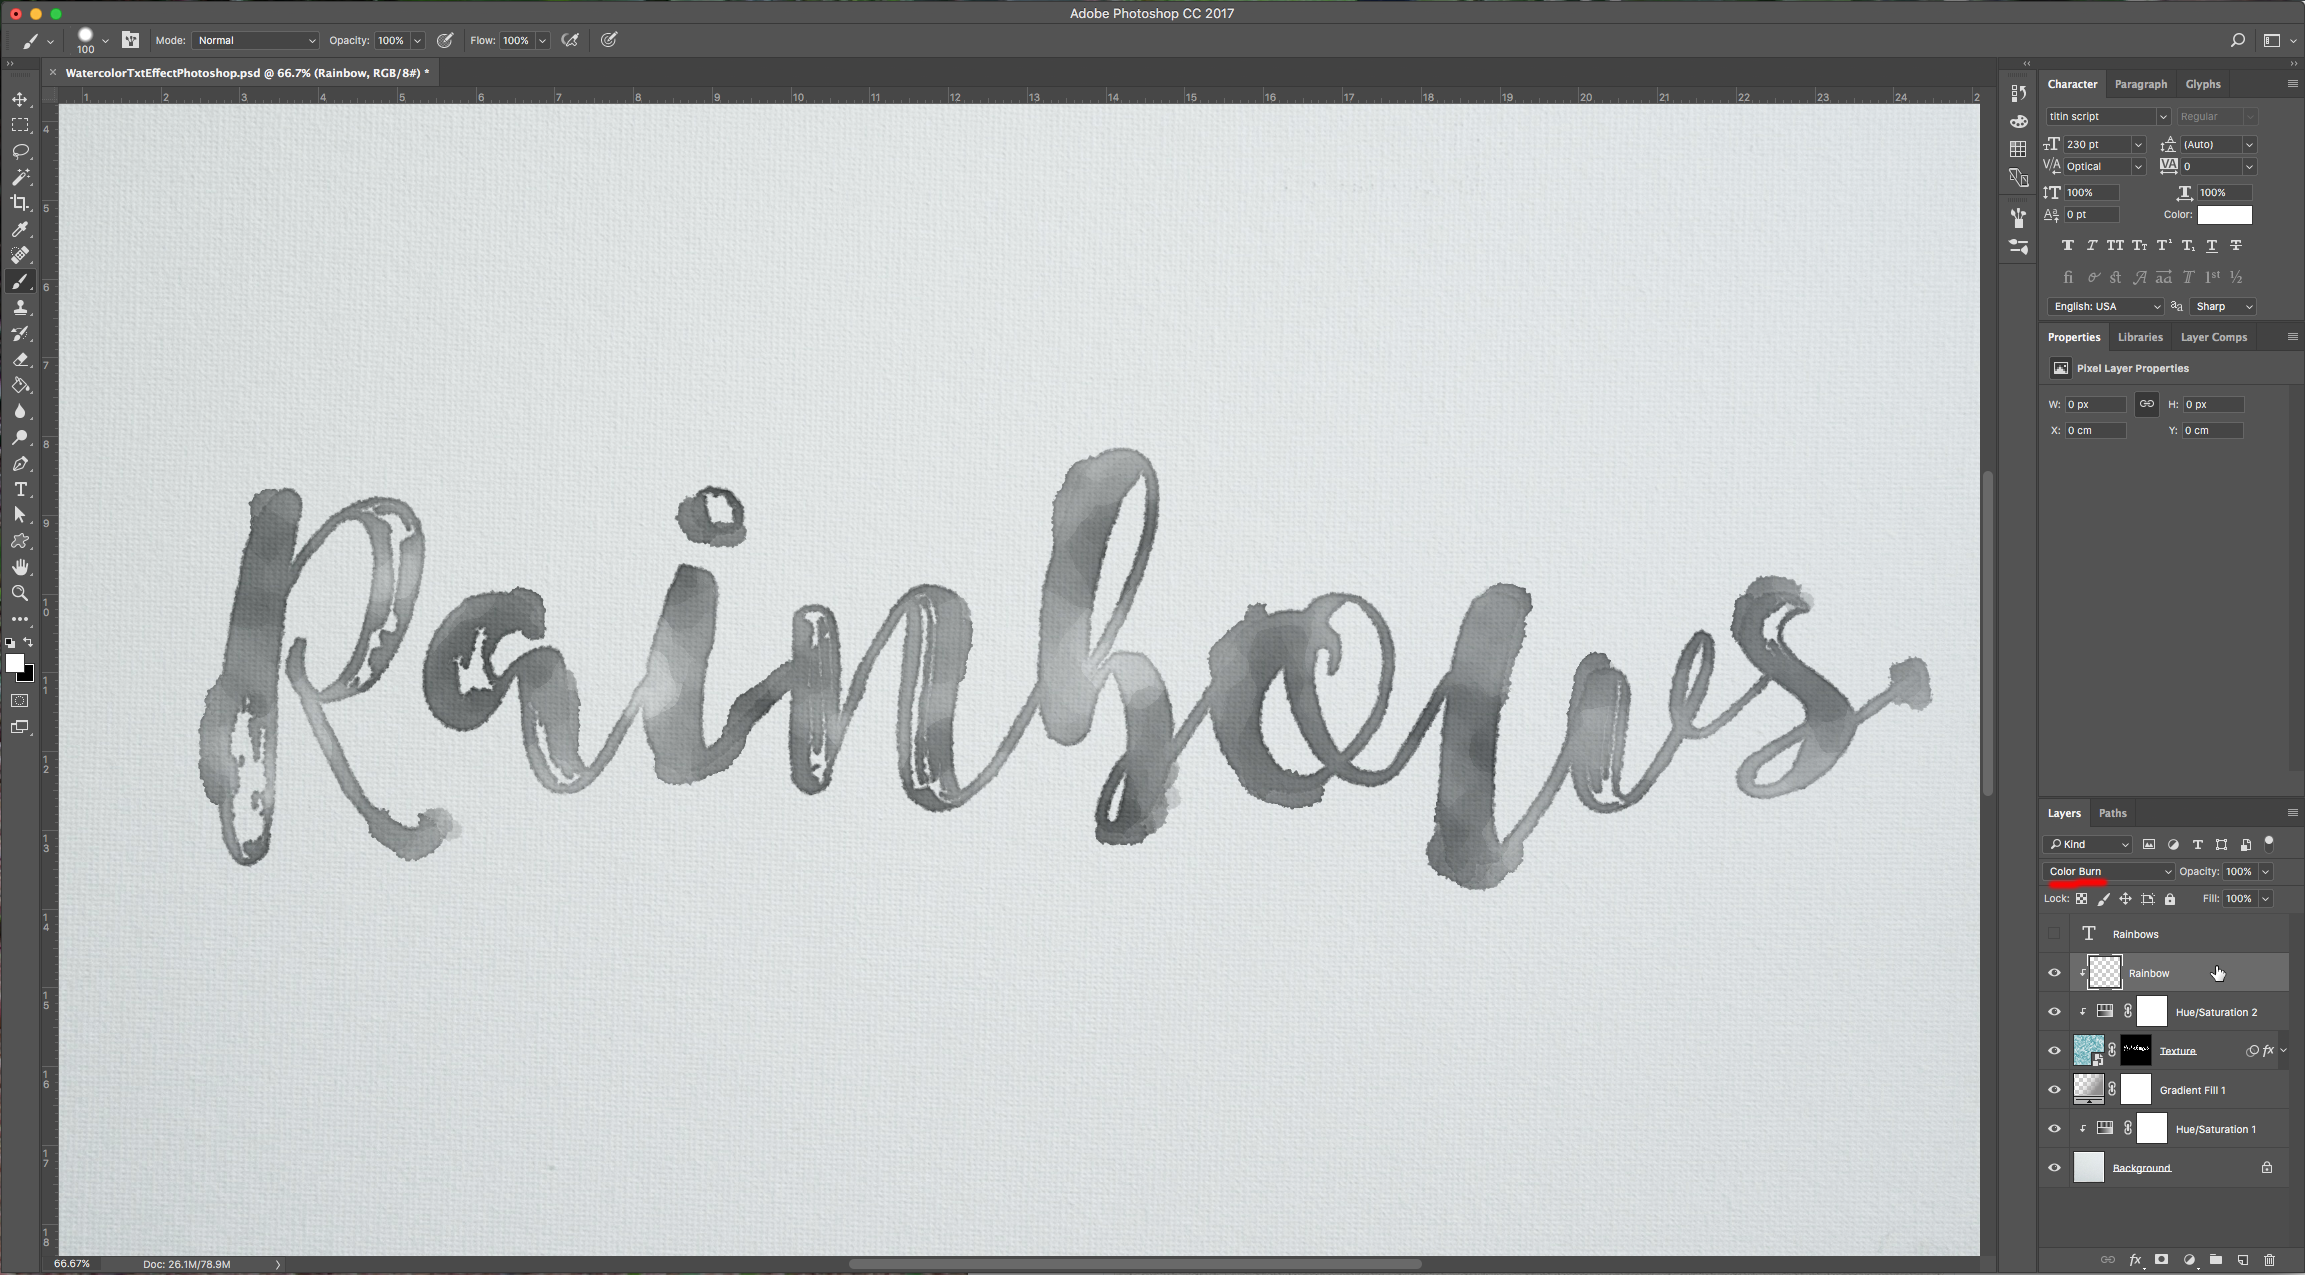
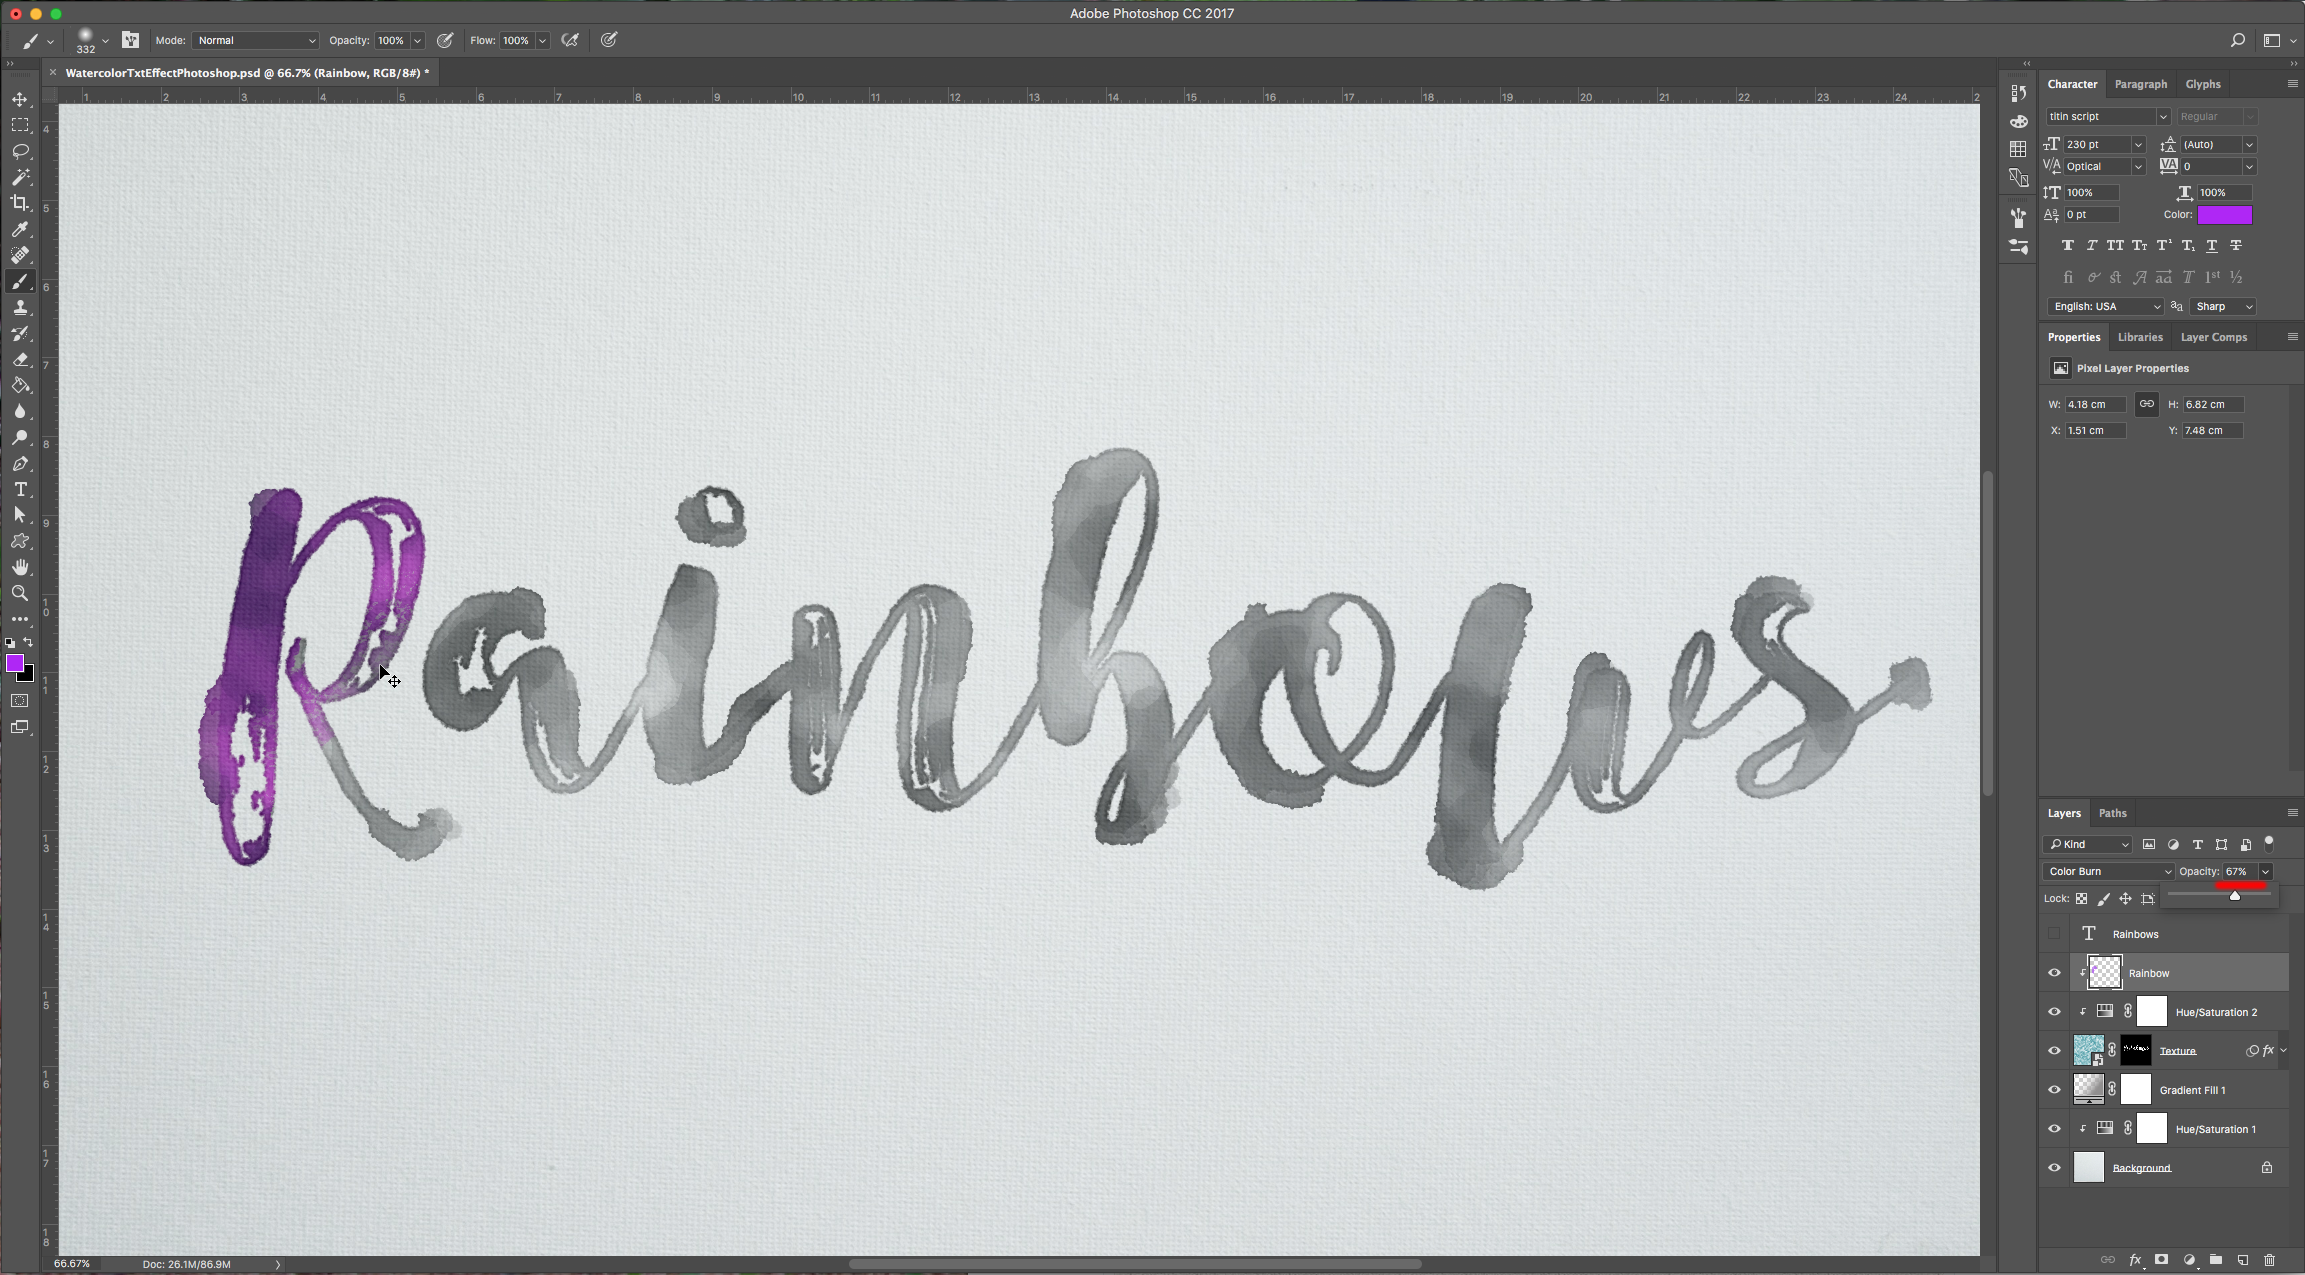
6 – Create a new layer on top of this adjustment layer and set the Blending Mode to “Color Burn” name it “Rainbow”, lower opacity to about 70% and clip it to the “Hue/Saturation” layer.
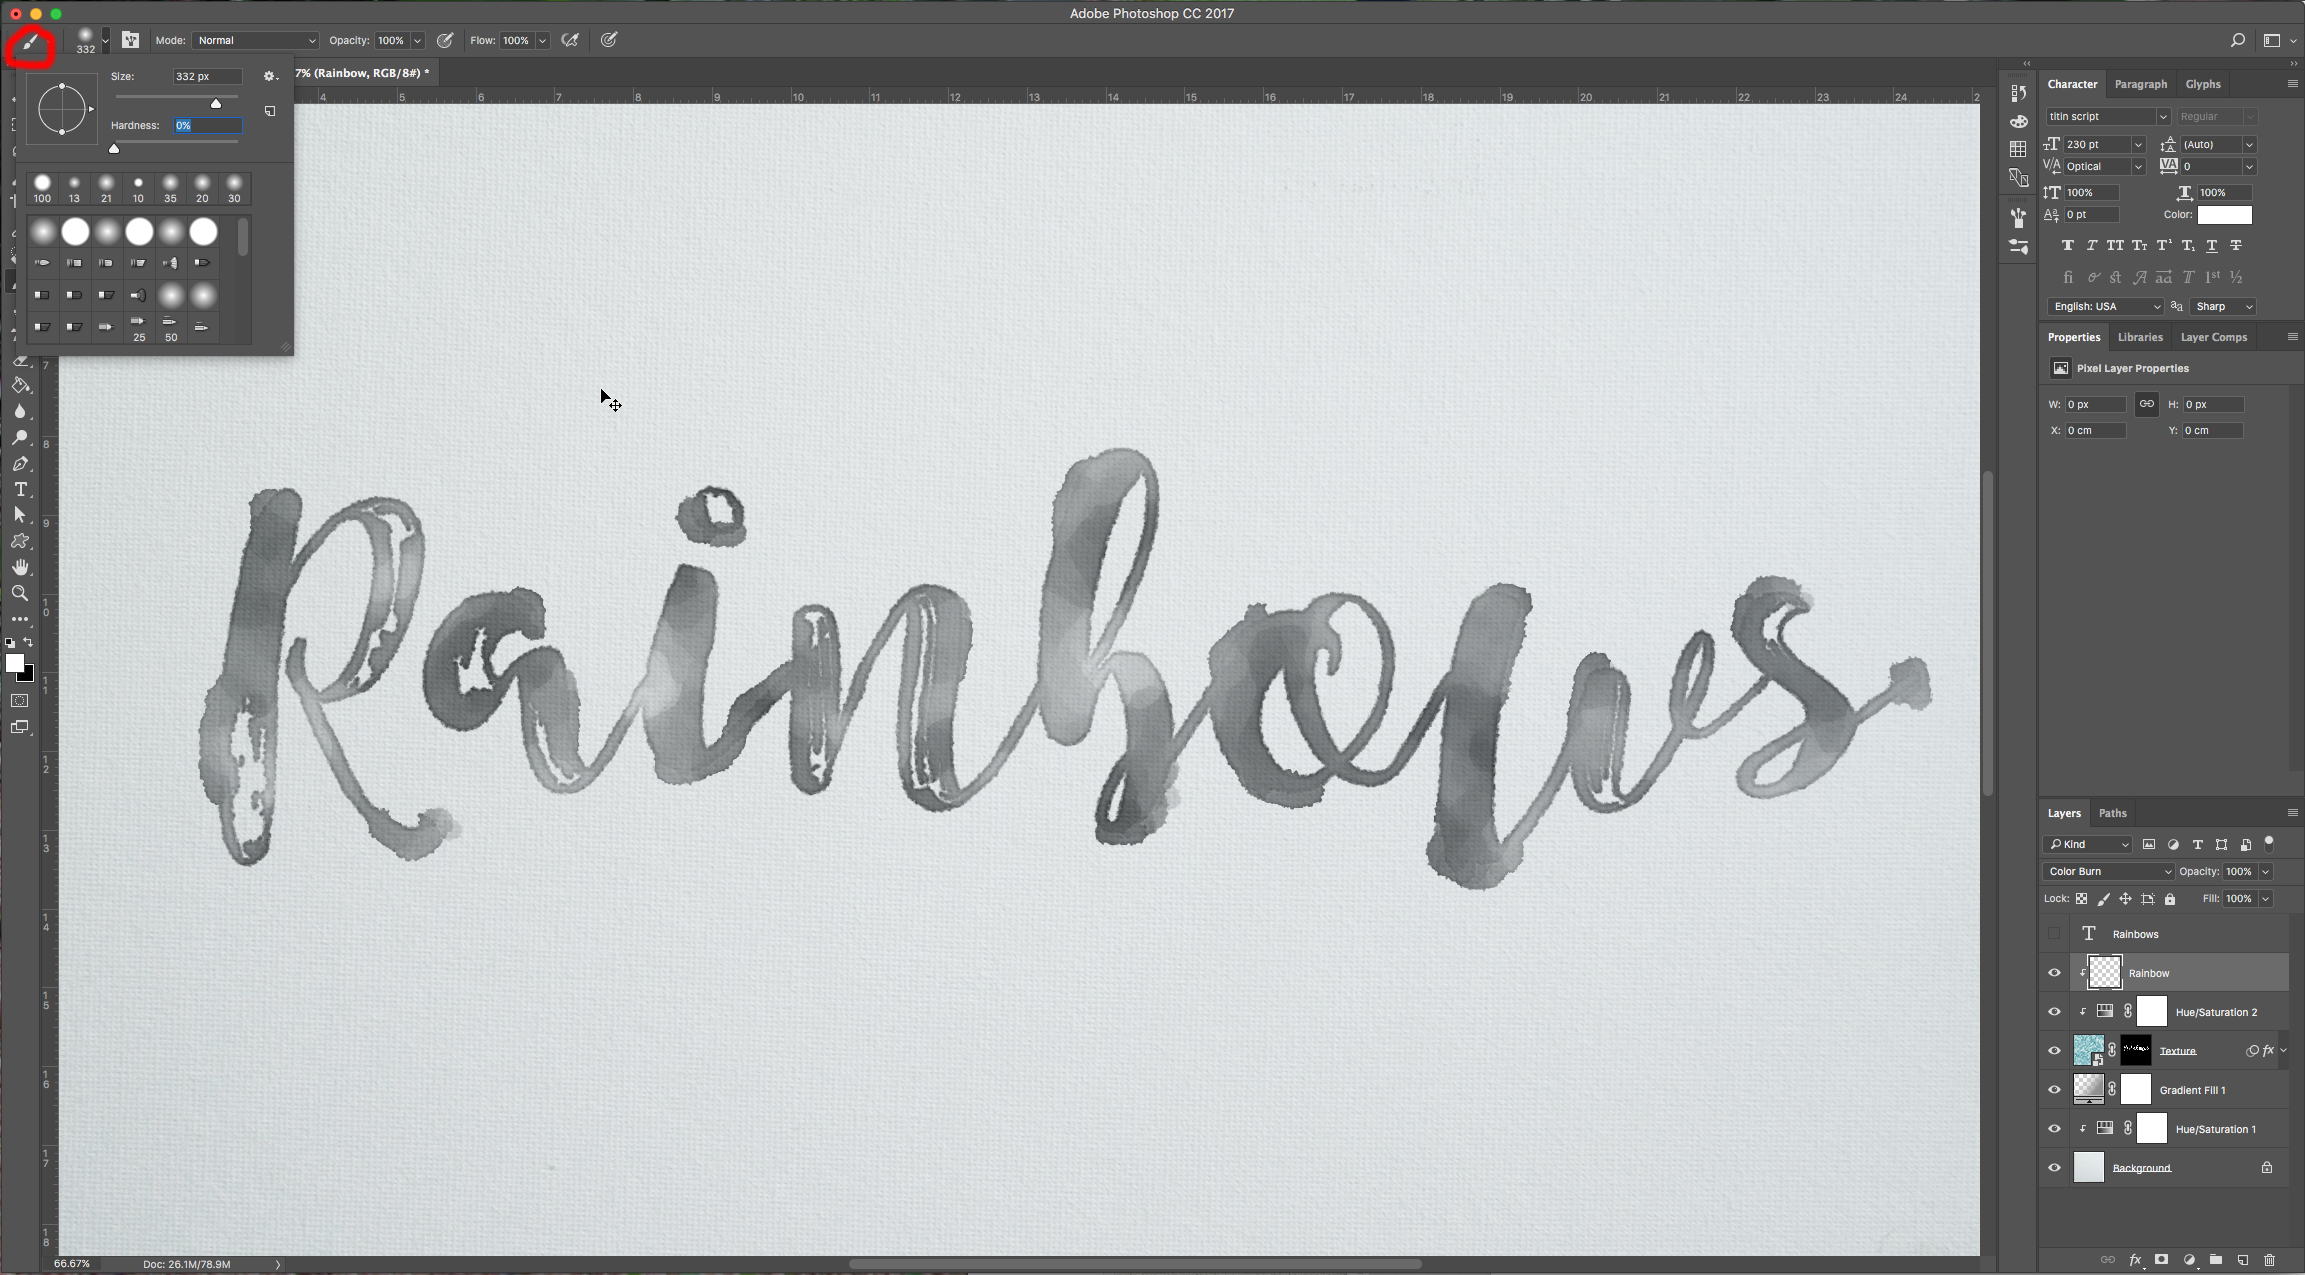
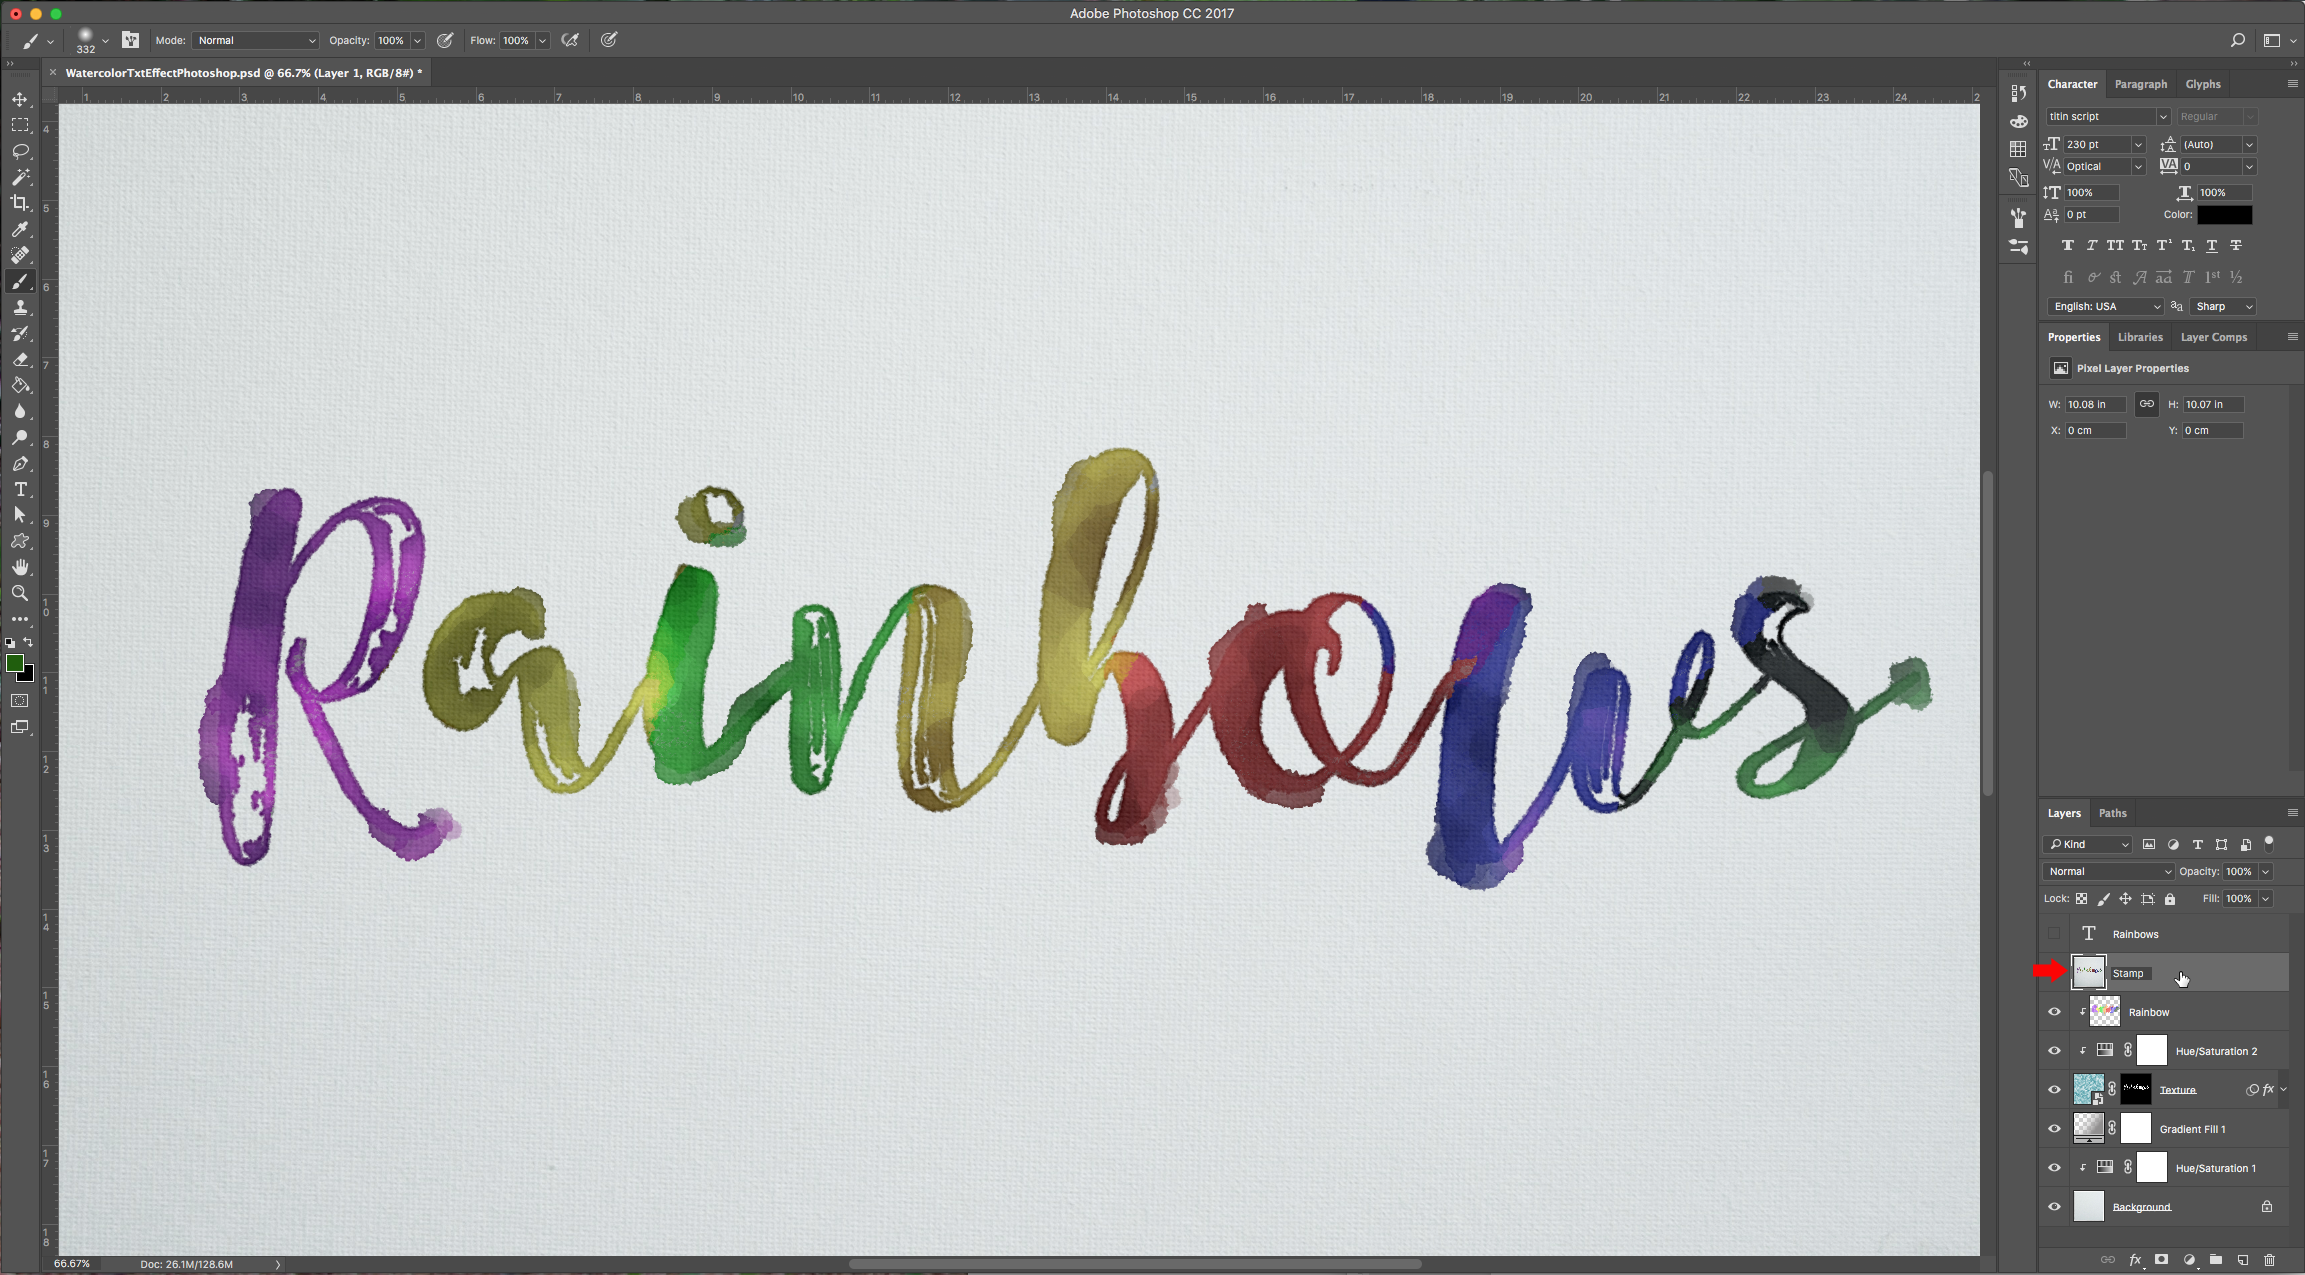
7 – Select a big soft brush and paint some colors over your text.

8 – To apply more filters, create a new layer on top and click Shift + Command/Control + Option + E to create a “Visual Stamp” of your text and apply your filter to that. Don’t forget to convert your “Visual Stamp” layer into a “Smart Object” so you can undo or tweak the changes.

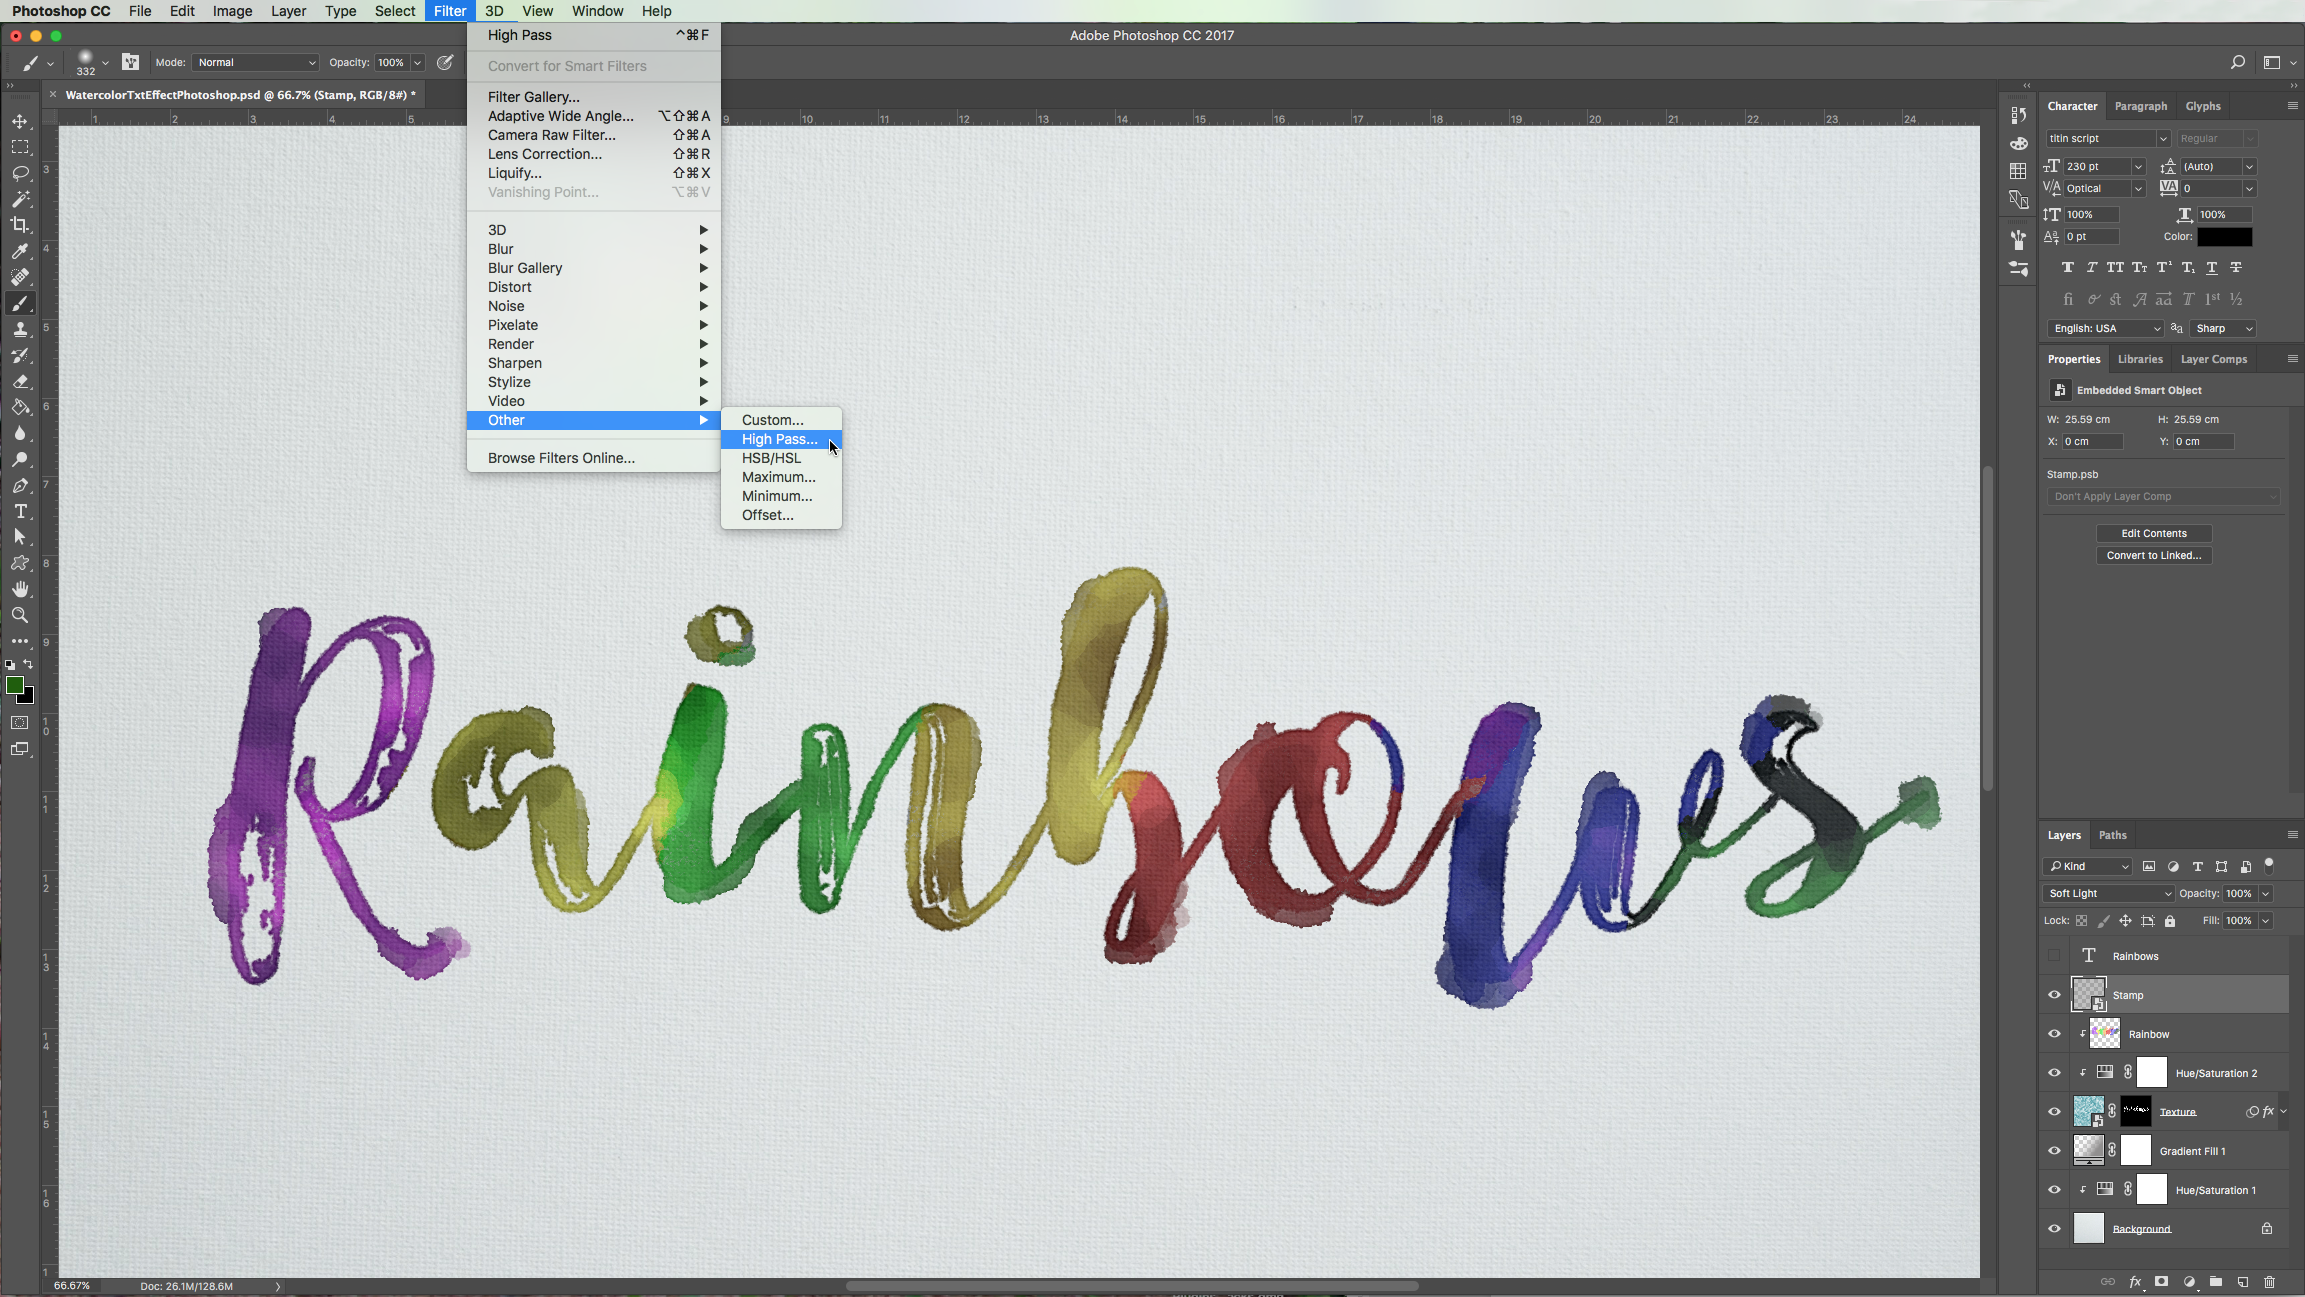
9 – Example: Go to Filters > Other > High Pass and use a Radius of 1.5 pixels, click Ok and then change the Blending Options of the layer to “Soft Light” with an Opacity of 60%.
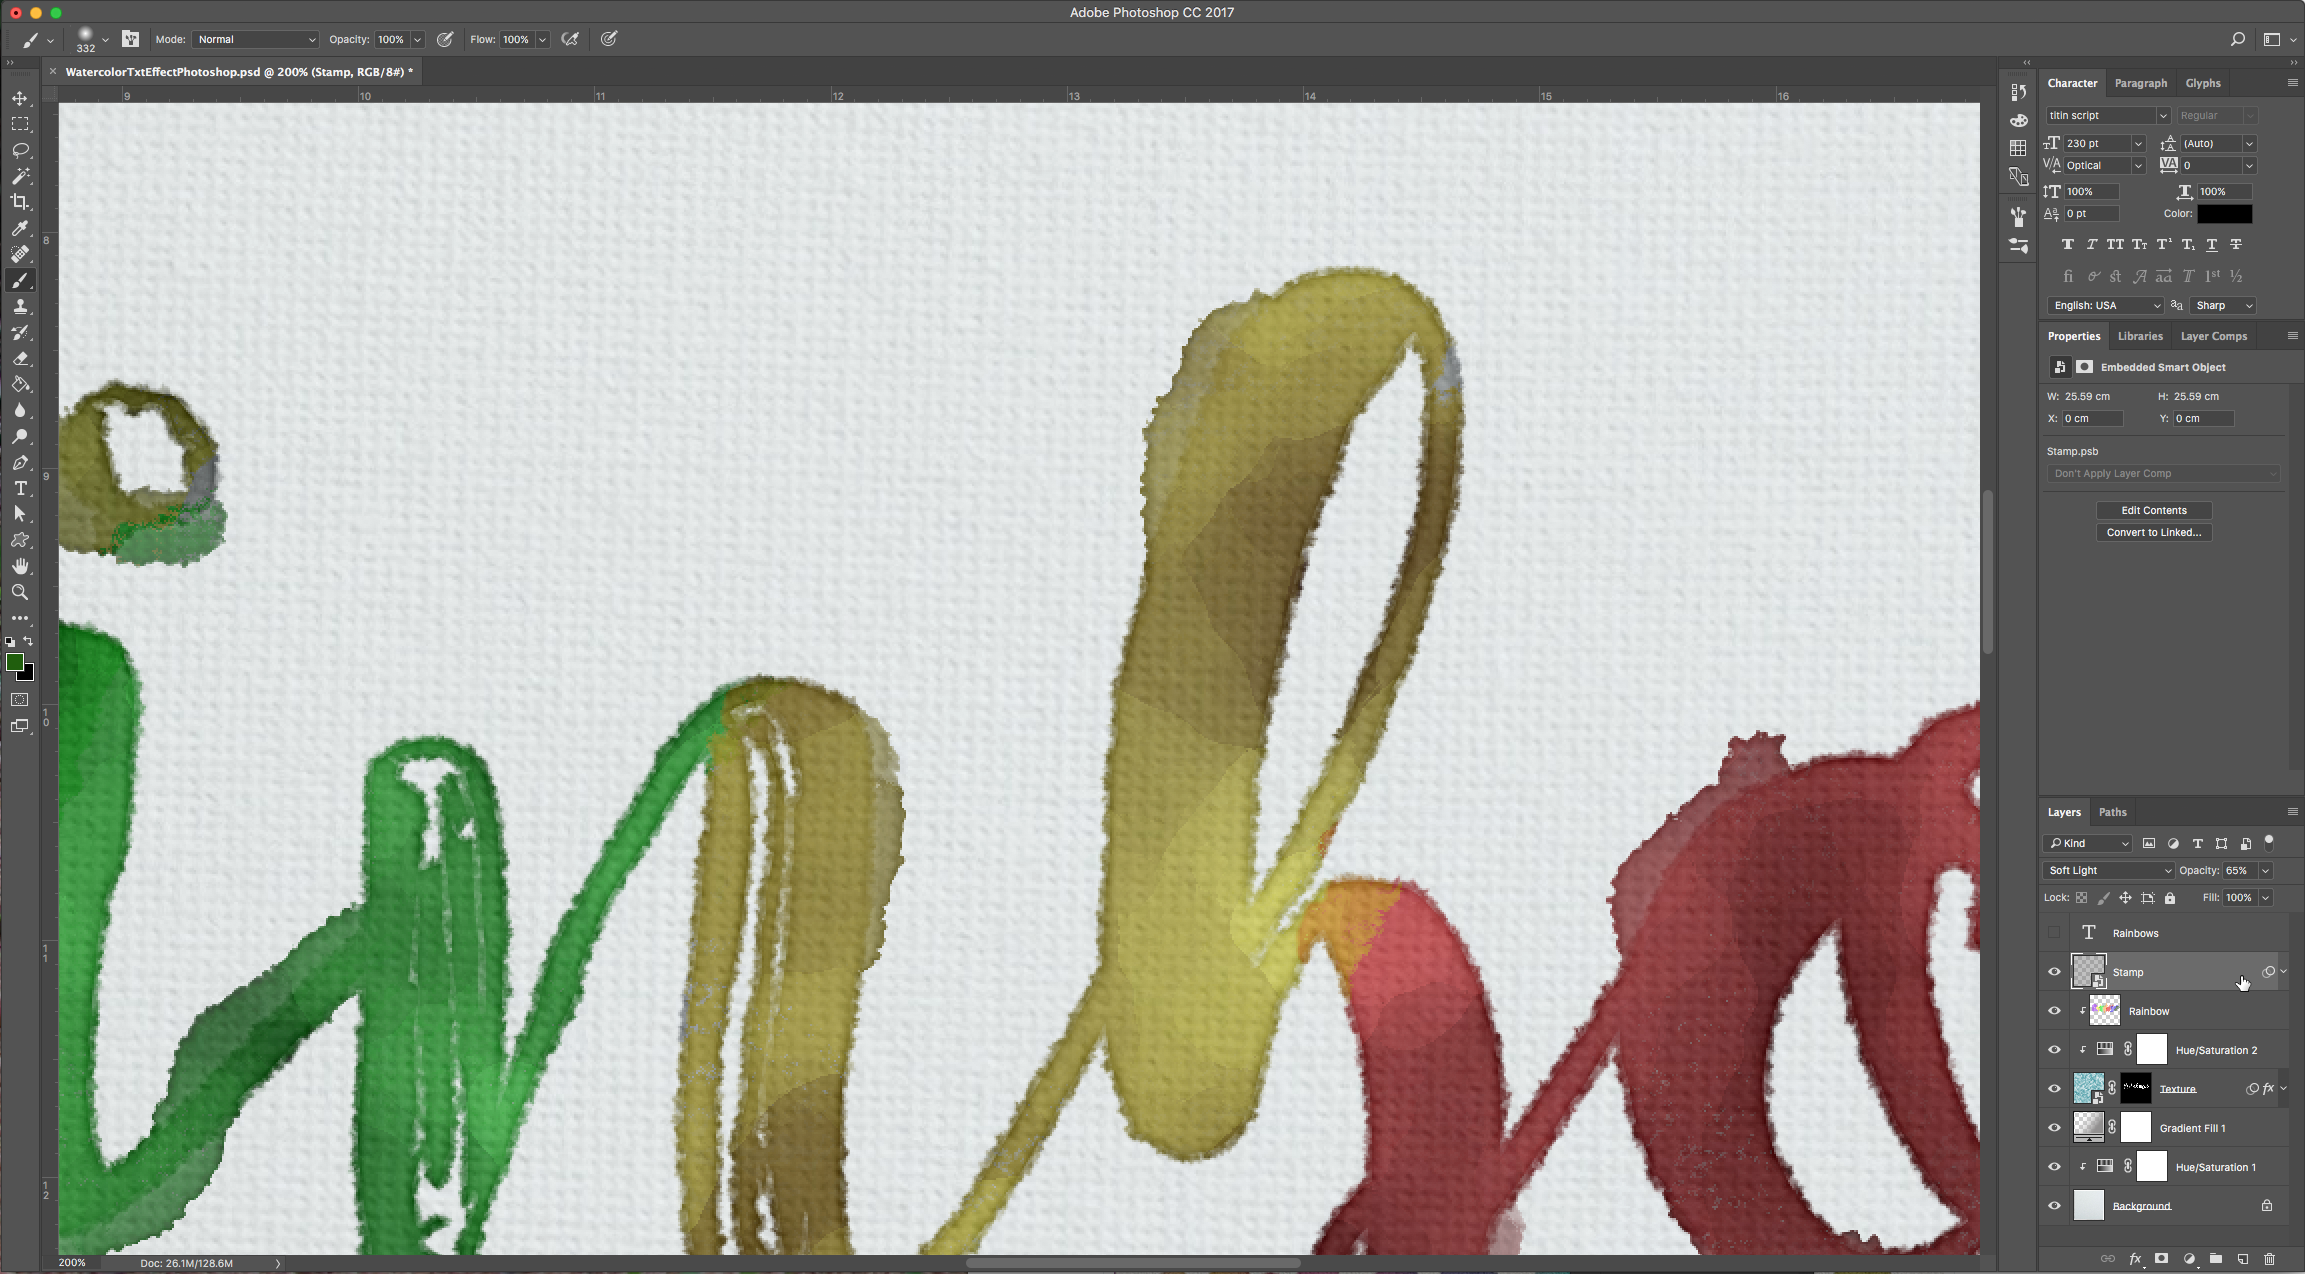
10 – Your image should look a bit like this:
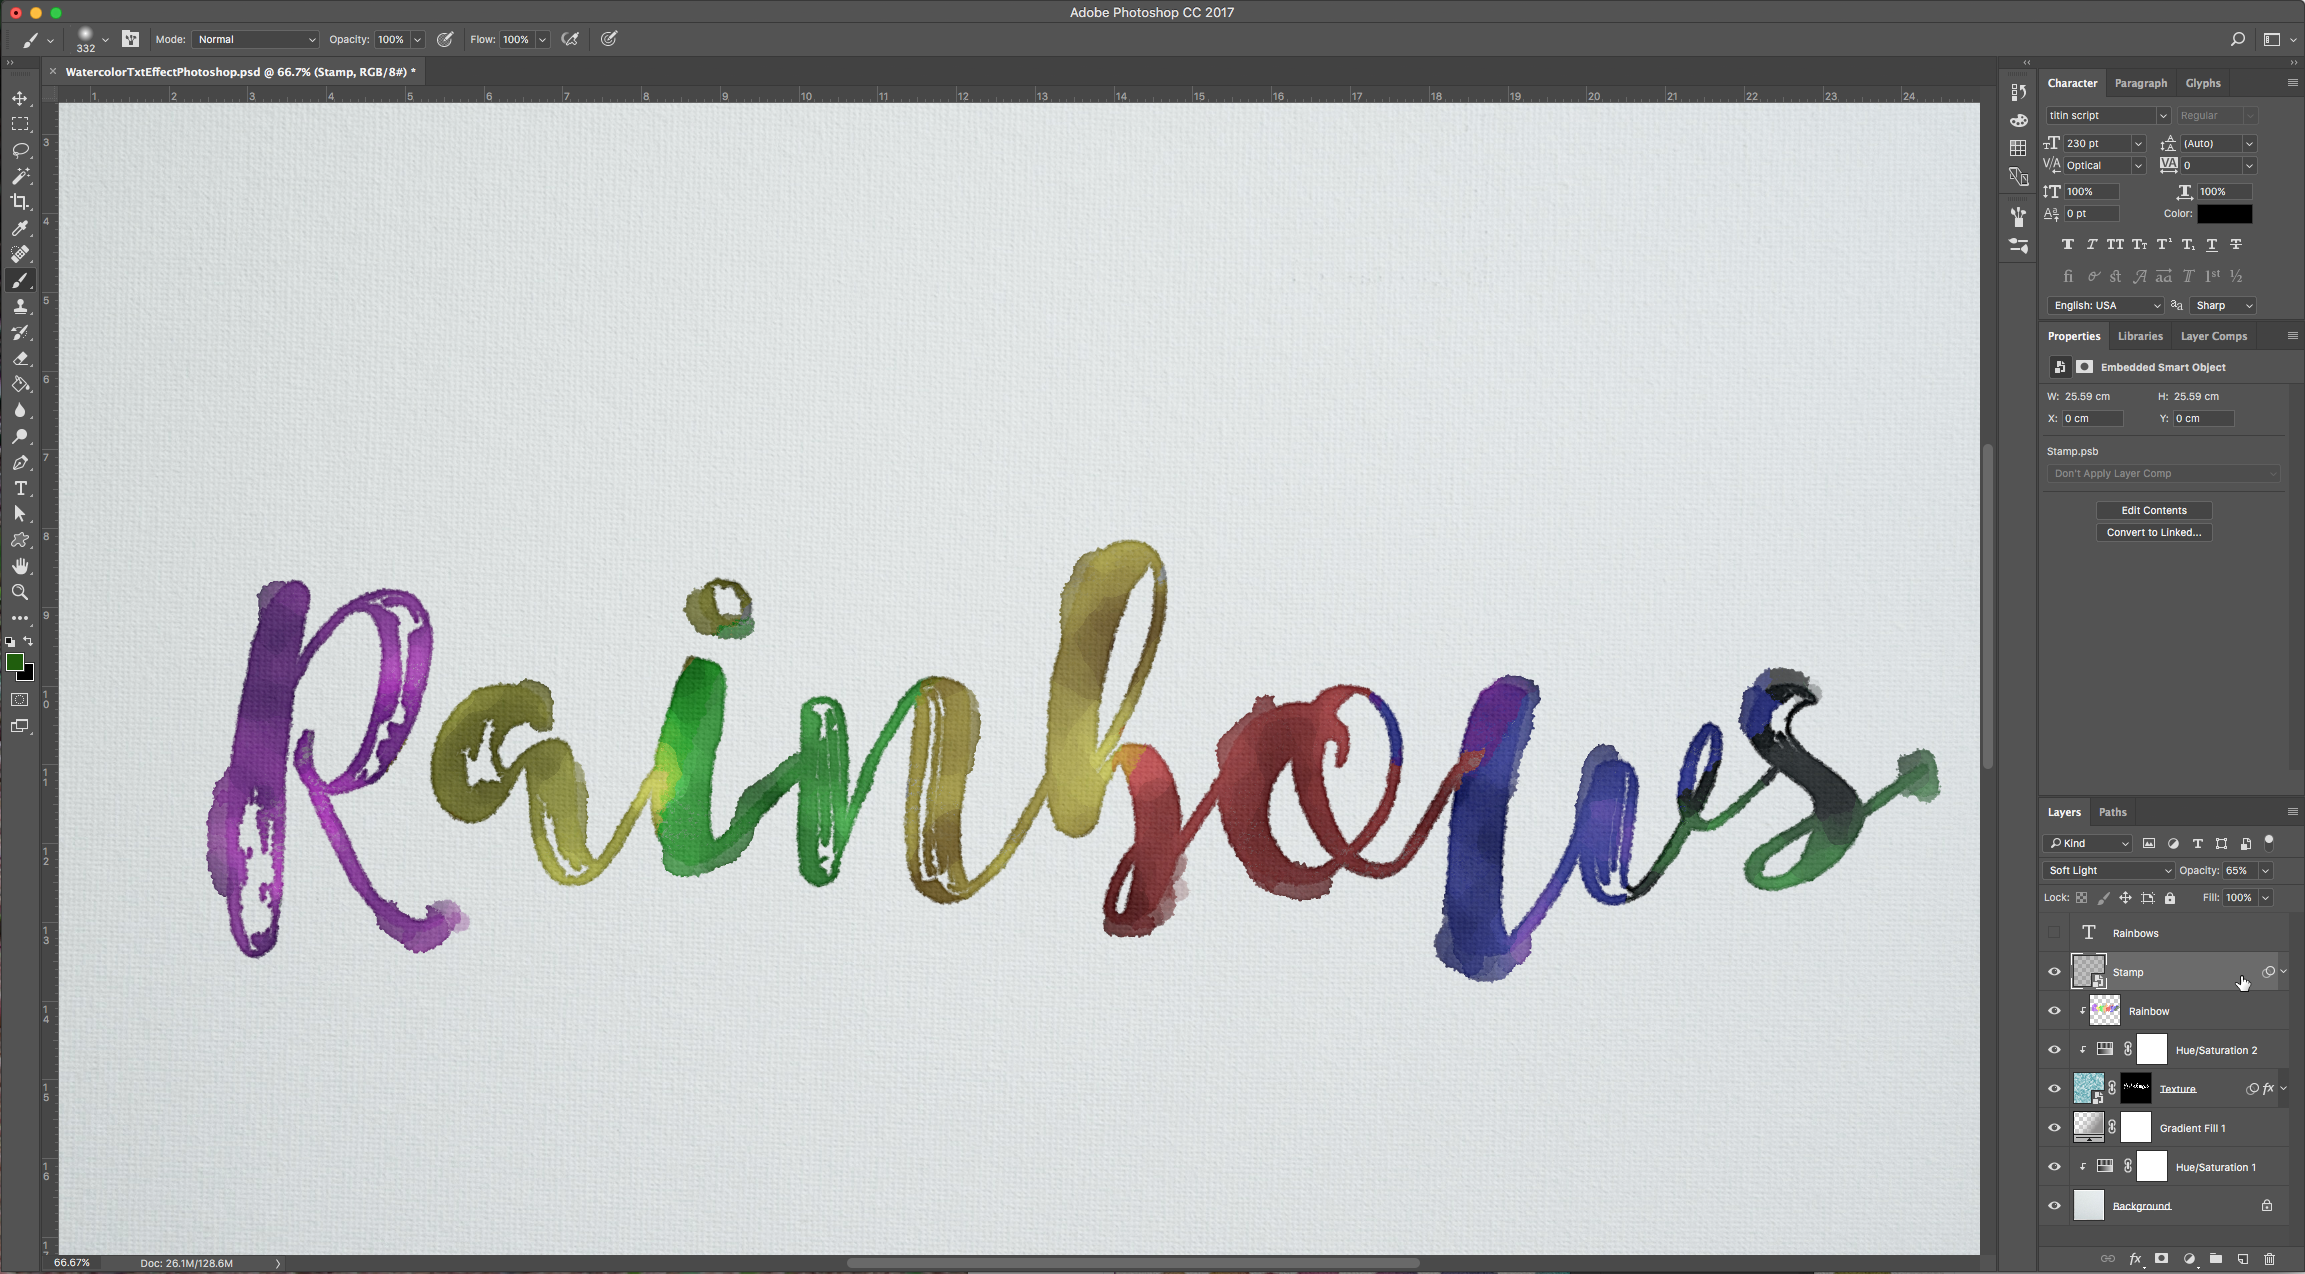
You can repeat this last steps many times and create multiple “Visual Stamps” to apply many filters.
Check Part 1 of this tutorial here.
1 – Create a new “Gradient Layer” under your “Texture” layer. Use a “Transparent to Fill Color” gradient with #d3d1d1 and #918f8f as colors, the Style as Radial and a 250% Scale. Hit Ok.
2 – Change the “Gradient Layer” Blending Mode to “Color Burn”.
3 – Let’s create a new watercolor brush to add some detail. Select the “Brush Tool” (B). Select a hard round tip and Use the following values in the “Brush Panel”:
Brush Tip Size:
Shape Dynamics:
Texture:
Dual Brush: Chalk 23 pixels tip.
Transfer:
And check “Noise” and “Wet Edges”.
4 – With your “Texture” layer mask selected draw some smudges and stains.
5 – Let’s add a “Hue/Saturation Adjustment” layer and clip it to the “Texture” layer. Change the Saturation value to -100.
6 – Create a new layer on top of this adjustment layer and set the Blending Mode to “Color Burn” name it “Rainbow”, lower opacity to about 70% and clip it to the “Hue/Saturation” layer.
7 – Select a big soft brush and paint some colors over your text.
8 – To apply more filters, create a new layer on top and click Shift + Command/Control + Option + E to create a “Visual Stamp” of your text and apply your filter to that. Don’t forget to convert your “Visual Stamp” layer into a “Smart Object” so you can undo or tweak the changes.
9 – Example: Go to Filters > Other > High Pass and use a Radius of 1.5 pixels, click Ok and then change the Blending Options of the layer to “Soft Light” with an Opacity of 60%.
10 – Your image should look a bit like this:
You can repeat this last steps many times and create multiple “Visual Stamps” to apply many filters.
by @lornacane
Check Part 1 of this tutorial here.


