Unlimited Downloads 15% off Marketplace Purchases Exclusive Software Access Unlimited Downloads
15% off Marketplace Purchases
Exclusive Software Access
Go Unlimited Maybe Later
DIY Shadow Box Ideas Anyone Can Make

DIY Shadow Box Ideas Anyone Can Make

You've probably seen all sorts of interesting shadow box ideas all over the internet. There are some stunning craft projects out there! The most popular of these seems to be the rolled flower version. They're quite beautiful but can be rather labor-intensive. If you're looking for a few shadow box ideas that don't require a huge time or material investment, then this tutorial is for you! I've got two similar yet different shadow box crafts at varying difficulty levels, but anyone can do either of these. Plus, I have some great tips and tricks to help your papercraft projects go smoothly and help you avoid any hiccups.

I'll walk you through the steps, share all about the designs I used, and give you some options for how to assemble your 3D shadow box. Just in case the two styles I have for you aren't your cup of tea, I have a ton of fantastic shadow box ideas to share as well. If only I had the time and materials to do them all! Get ready for some fun and unique art projects, my creative friends; we're going to dig in!

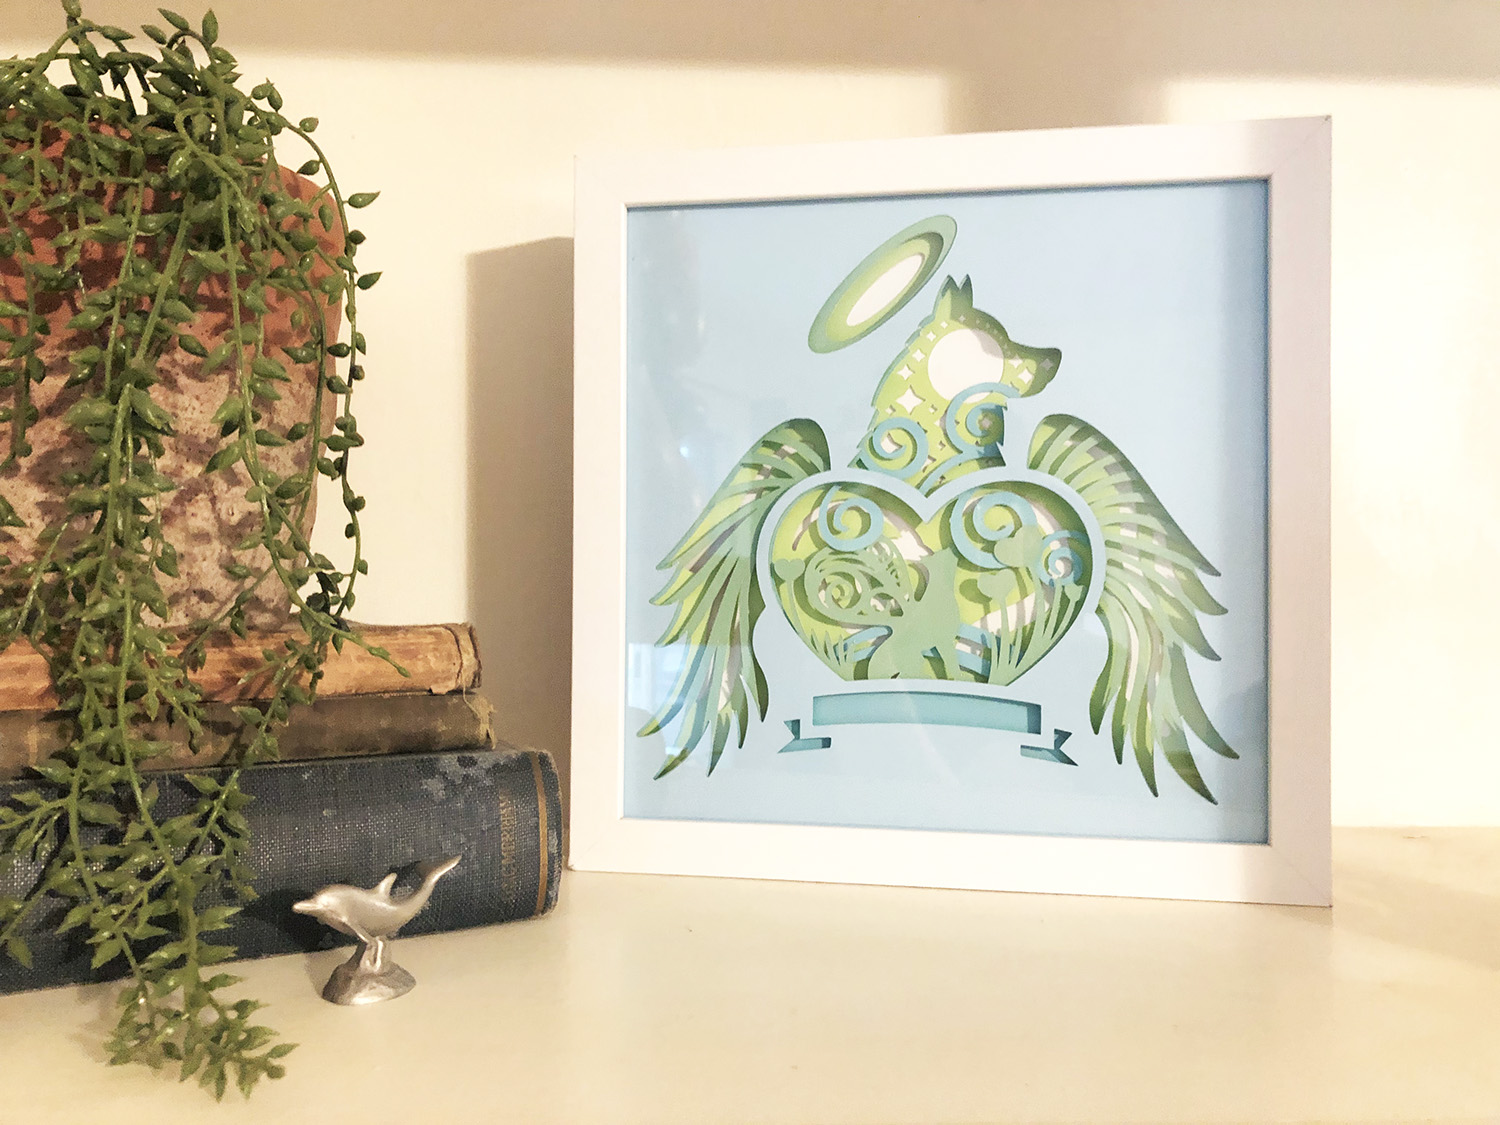
Completed Shadow Box Project #1

Memory Shadow Box Ideas: Paper Crafting Technique

One of the many ways that a shadow box can be used is for memorials or in memory-type projects. Whether that's a loved one, a pet, or just creating something special to showcase mementos. There is a large range of fantastic shadow box SVGs available in our Papercutting Templates category on Design Bundles. Check them out to find one that matches your style. Let's look at our first shadow box craft!

#1: How To Make a Memory Shadow Box

A shadow box makes a fabulous gift for a variety of occasions. They're a lovely wedding gift, baby shower present, or graduation memento. It also makes for a unique decor piece, especially when you DIY the project yourself! Have you noticed how wildly popular the 3D shadow box crafts have become lately but have been hesitant to give it a try? I'm using a Cricut Maker, but you can use any cutting machine for this project. Let's walk through the steps and ease some of those fears!

Supplies You Will Need for a Memory Shadow Box

  • Shadow Box- You can find these in many places like Amazon, Michaels, Ikea, etc.
  • Cardstock- Use medium-weight cardstock at 65 lb or higher, depending on your design's detail.
  • Foam Dots
  • Scissors or Paper Cutter
  • Adhesive Vinyl (optional)
  • SVG- I'm using this Dog With Wings design from the Plus Section

Memory Shadow Box Materials

Step 1. Upload Your Shadow Box SVG 

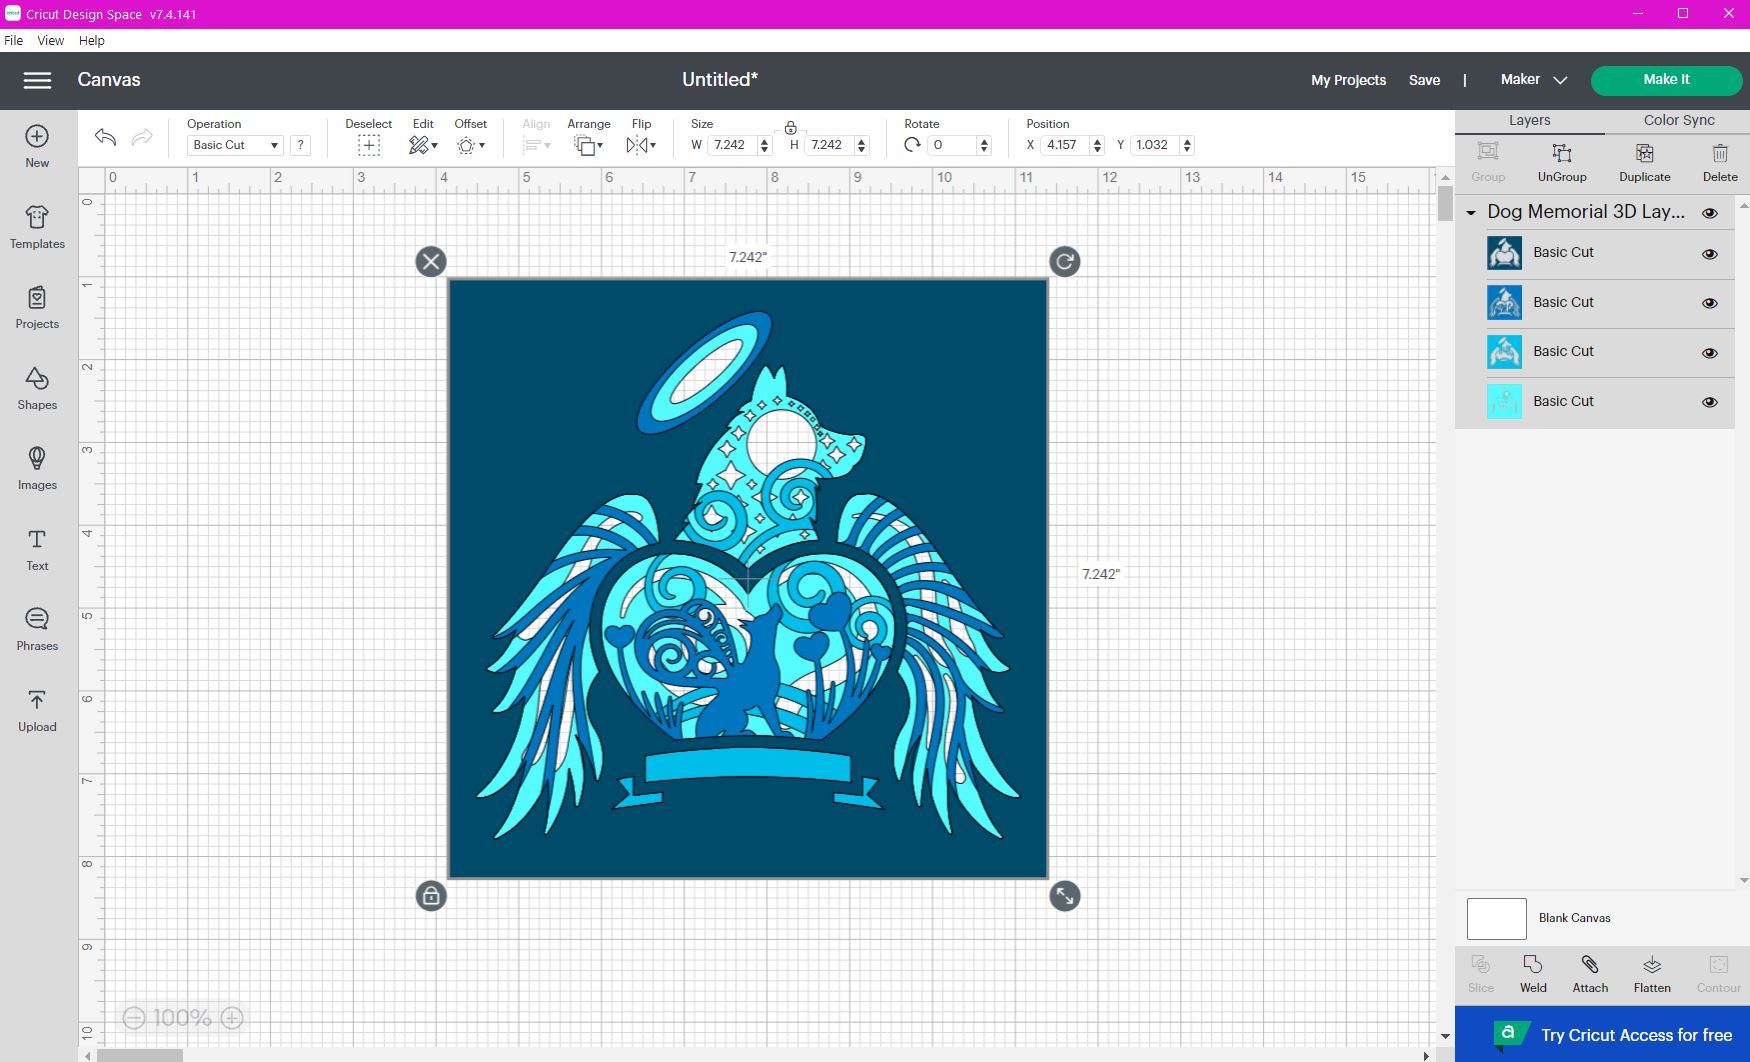
Download your shadow box SVG if you haven't already, and then upload it to Design Space or Silhouette Studio. Make sure that the design you're using has all layers in one file, or add all of them to your workspace at once. This is an important step because you need to make sure all layers are the same size! My shadow box is 9 inches by 9 inches, so I reduced the size of my design to 8.75 inches by 8.75 inches. This helps to make sure the cardstock fits inside the frame. You can also measure the inside of your shadow box to get exact measurements.

Shadow Box SVG in Cricut

Ungroup the layers. You can edit the colors if you like. I prefer seeing my design colored to match my materials, but I'm a visual person that way. Totally optional!

Ungrouped and Recolored Shadow Box SVG

Step 2. Cut Each Layer

Since my shadow box is 9 inches wide, I have to use 12-inch x 12-inch cardstock. If you have a smaller shadow box, you can use smaller cardstock and possibly fit more than one sheet on your mat at once. I needed to cut each layer individually. If the small pieces don't come loose after cutting, you'll need to remove those manually.

Top Tip: Anytime you're working with cardstock or papercrafts, it's best to flip your mat upside down and peel the mat away from the paper. This keeps your paper from curling!

Peel Mat from Paper

Step 3. Assemble the Layers

When working with layers, I like to do a dry run or two with my design to see how it will all fit together. For this project, you can do that by just stacking the cardstock together. It can help you figure out where to add the foam dots. I did this and still made a mistake in my placement! If you like, you can even place it inside the shadow box itself to get an idea of how it will look.

Once you're ready to proceed, you'll want to make sure you start with the very last or back layer. Lay it down, facing right side up, and add your foam dots or whatever product you're using to the corners and any middle sections if there is room (some designs don't allow space for that in the center sections). Repeat the process for each layer until they're all stacked together.

Add Foam to the First Layer

Step 4. Put Your Shadow Box Together

Now that all your layers are stacked together and connected by the sticky foam squares, you can fit them inside your shadow box. The shadow box I bought had an inside square, sort of like a mini frame. The back of my shadow box was covered in a tan fabric, which I didn't want to show, so I just put a piece of white cardstock as the final layer before putting the back on. Secure the tabs, and you're done!

Shadow Box Completed

Optional Step 5. Adding a Decal

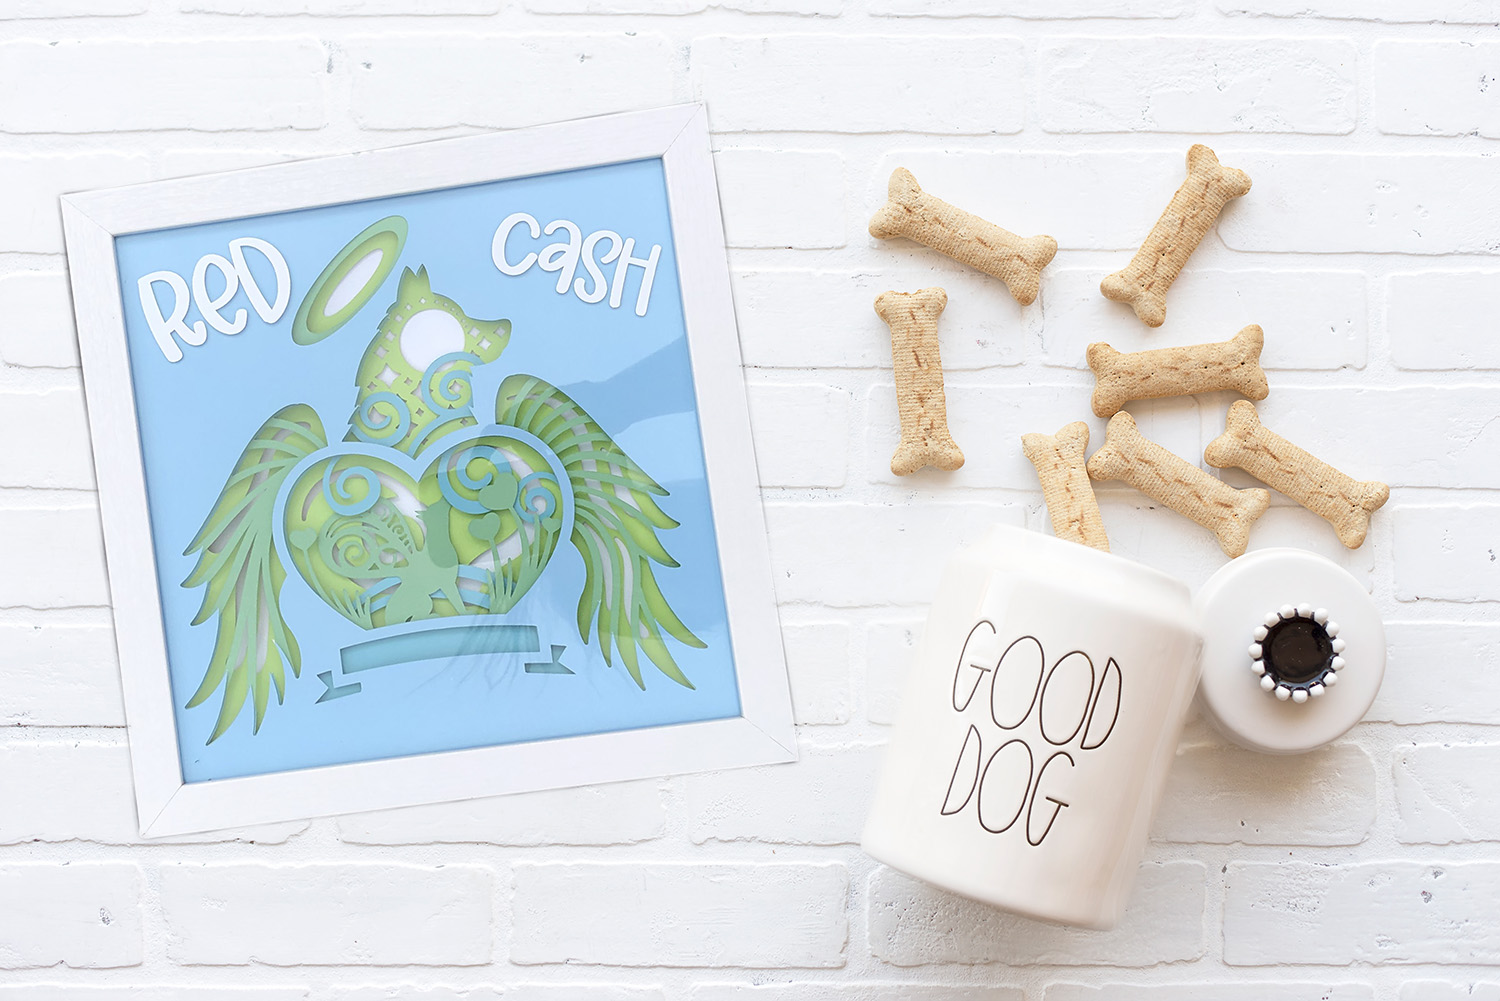
I love the way this turned out, but I wanted to do something to personalize my 3D shadow box. I used adhesive vinyl and cut out the names of two loved pets that passed away some years ago. I picked a thick font since I'm working with a small space. I chose Hen House, a cute marker font in the Plus section on Design Bundles. Have I mentioned how much I love having a Gold Plus Membership?! It's pretty fantastic!

DIY Shadow Box Ideas Anyone Can Make 8

Image Credit: Southern Market Designs

Personalized Shadow Box: Customize It Your Way

When it comes to personalized gifts with flair, you can't go wrong with DIYing a shadow box! Start with a few basic elements, build from there, and before you know it, you've created something outstanding.

#2: How To Make a Customized Shadow Box

There's probably never a wrong occasion or reason to craft with a shadow box. Except for possibly cats. Or dogs with swishy tails. Those two furry critters can knock anything with glass to the floor in an instant! Let's assume it's safe to proceed with our next project, shall we?

What You Will Need To Make a Custom Shadow Box

  • Shadow Box of any size or style
  • Cardstock or Scrapbook Paper
  • Vinyl
  • Transfer Tape
  • Glue or Tape
  • Hearts Clipart- I used this cute set of heart doodles (note that this set is not available as an SVG, but if you're a Plus Member, you can use the File Converter to change the Ai or EPS to an SVG)
  • Font of your choice- I used this lovely script font for the name

Materials for Custom Shadow Box

Step1. Cut Your Vinyl Decal and Name and Apply

Open your preferred software program and type out the name you want to use in the font of your choice. I really liked using the Forward Script font because it has some fun glyphs! You can use the measurement feature in Silhouette or Cricut to make sure your name and other graphics fit inside the shadow box frame or create a square shape to act as a template.

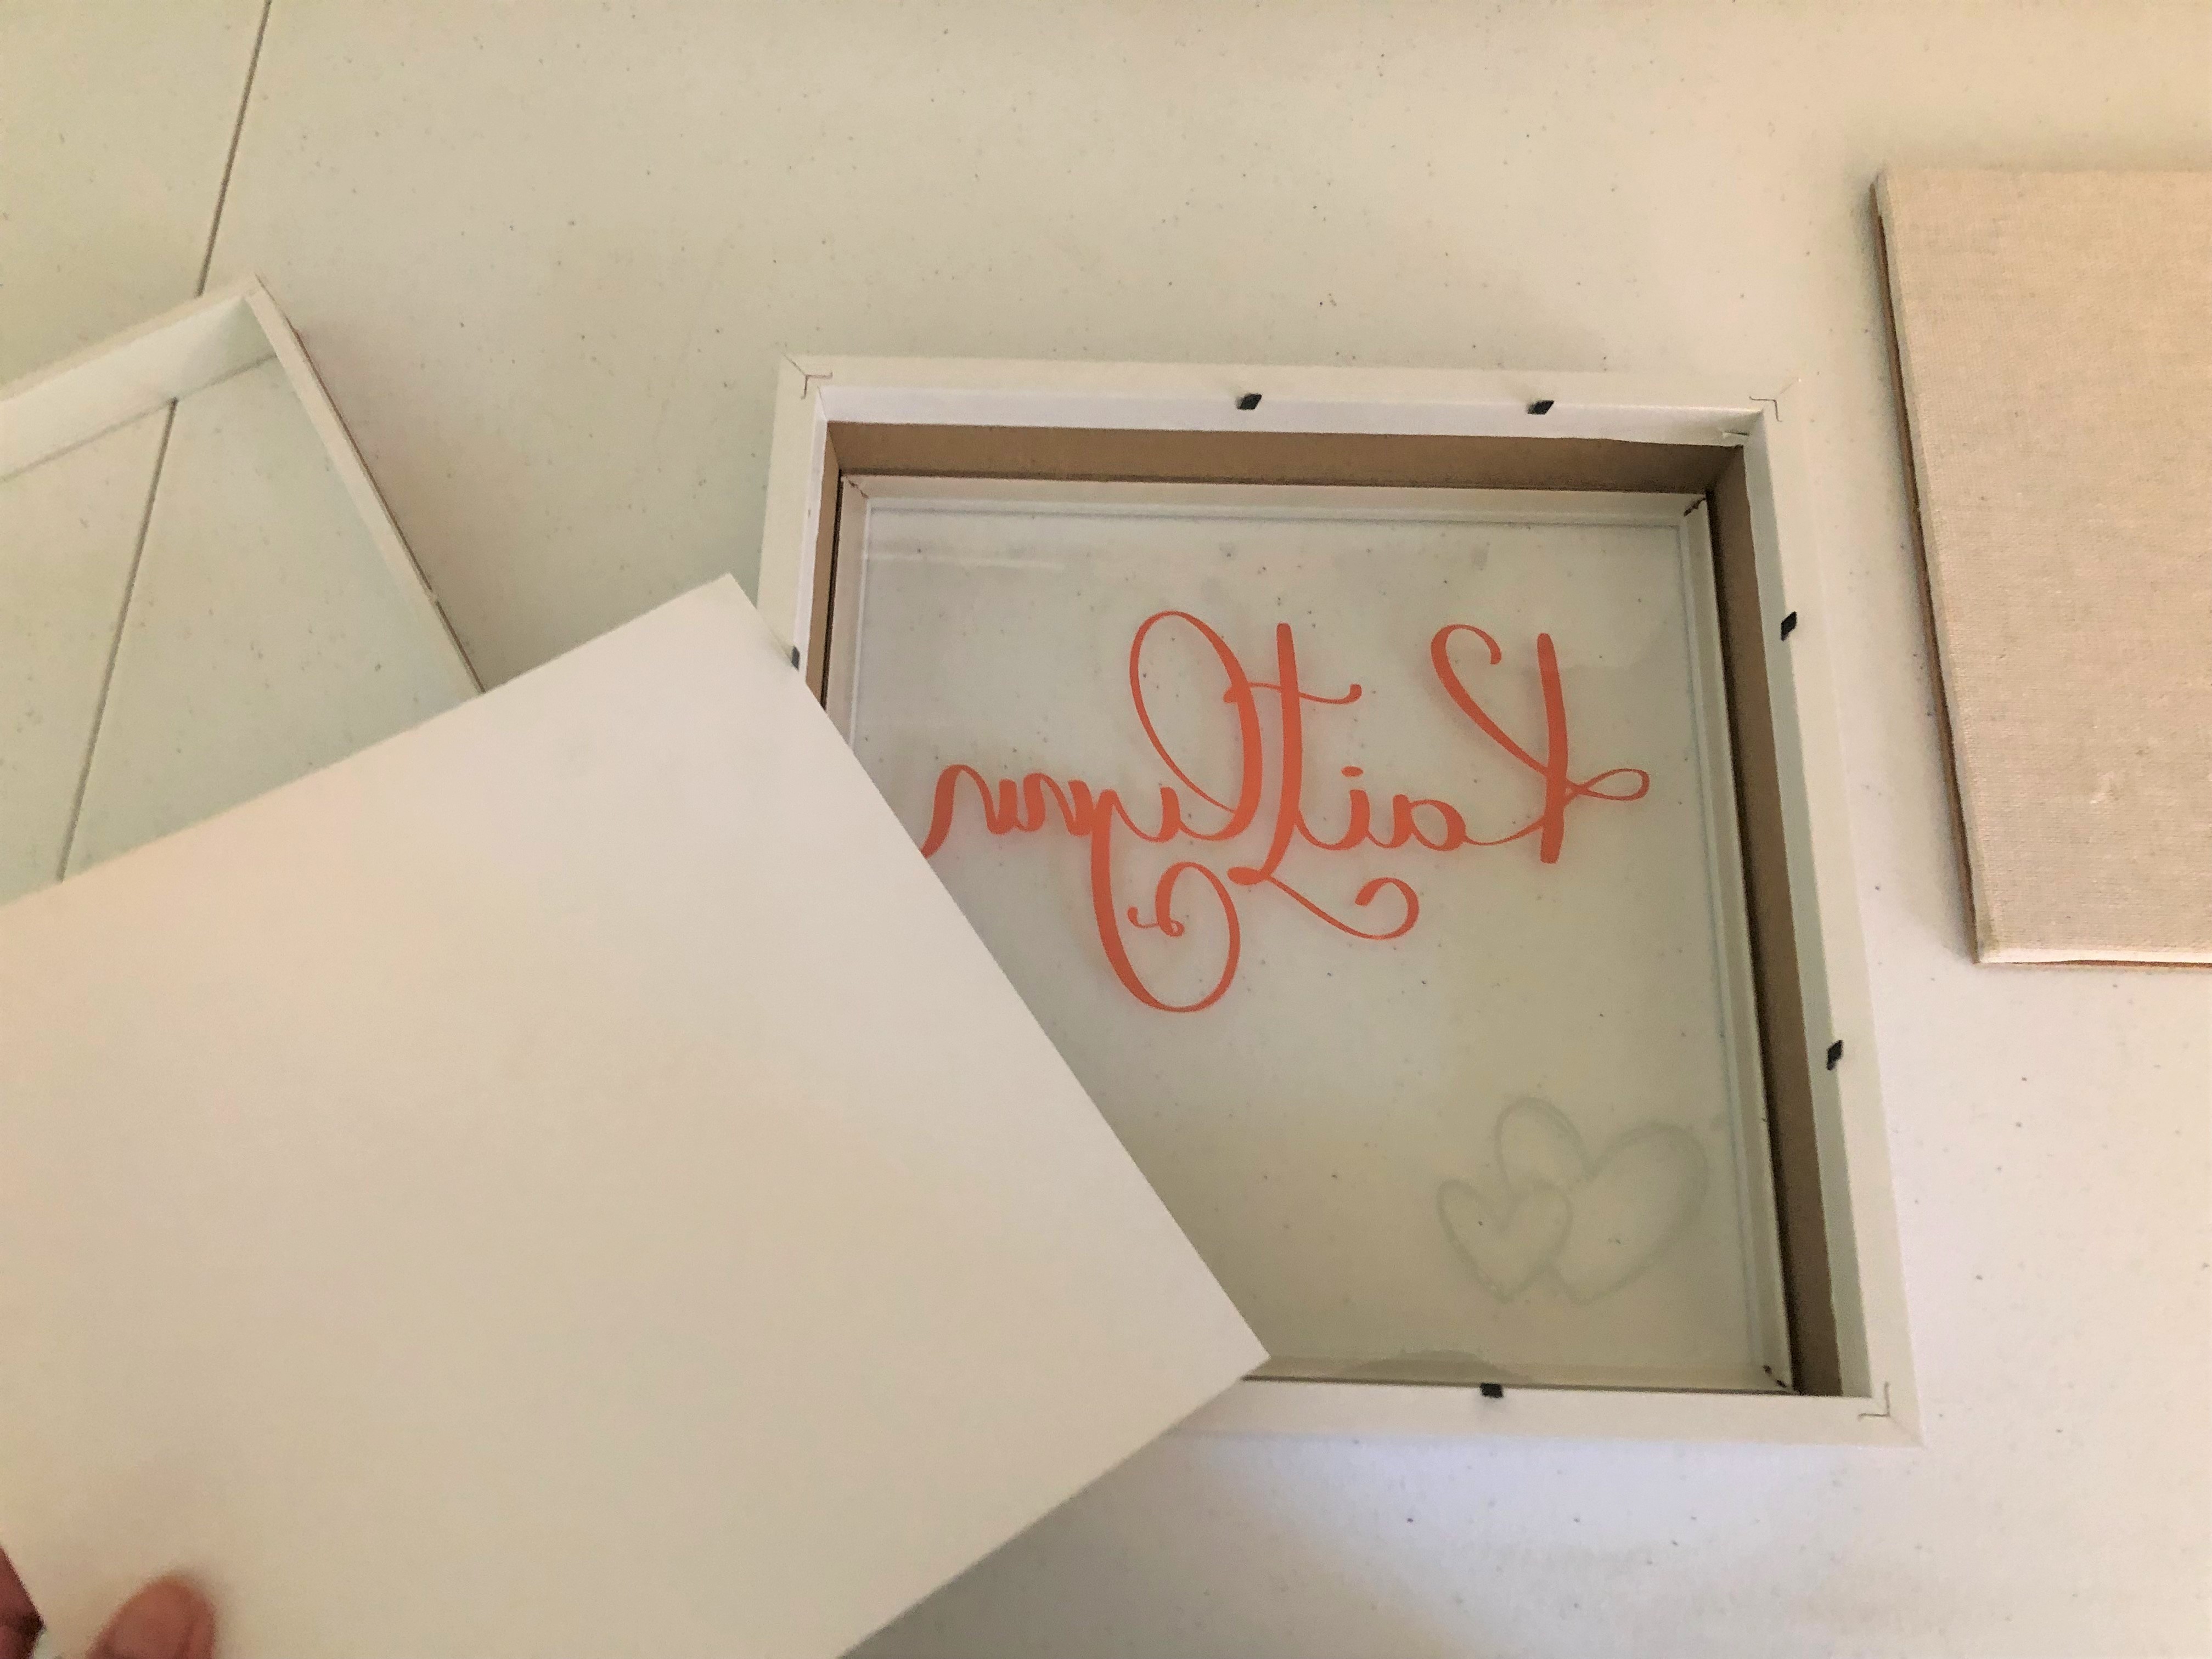
Once you've cut and weeded your vinyl and applied transfer tape, it's time to apply both to the glass. There are two options for the application step. You can either apply to the front of the glass (this is what I did so it removes easier in the future, no disassembly required) or mirror your image and apply to the inside of the glass.

Top Tip: Do a dry run before you apply the vinyl to check placement. I actually used a ruler to help me line up both the name and the hearts. It worked really well!

Line Up the Decals

Step 2. Cut Your Paper to Size and Attach to the Back

Either measure or trace the back of your shadowbox so you can cut your paper to fit. I used my Cricut paper cutter to trim my 12-inch x 12-inch paper to size. Scissors work too, but use a ruler or a straight edge of some sort to get a nice straight line before cutting! Once you've cut your paper or another decorative backing, you can attach it with glue, double-sided tape, or similar.

I elected to use double-sided tape so I can remove it later when I want to refresh my shadow box with a new style. Initially, I didn't attach the decorative paper and found I had a gap. It wasn't sitting flush because of all the space inside the shadow box. Attaching or gluing it down will help, or you can "stuff" the shadow box with something soft to keep it from moving.

Step 3. Put Your Shadow Box Back Together

Layer the pieces back into the frame in order, starting with the glass (make sure you have it facing the correct direction). If you wanted to, you could use that open space between the glass and the back and fill it with something fun like candy, confetti, pom poms, etc. That's it; you're done! This one is so quick and easy but still makes for a great craft. This style is one that's simple enough even the kids can join in for some crafting fun!

Put Your Shadow Box Back Together

Now that I've shared with you two simple and fun shadow box ideas that anyone can make, let's talk about other options! One of the great things about shadow boxes is that they're so flexible. You can use them to create a variety of different styles, add in fillers or lights, and so much more. They also make fillable shadow boxes with holes that you can use to insert items like coins/money, ticket stubs, etc.

Here are a few other shadow box ideas to help spur your creativity:

  • Use a sheet of frosted vinyl and do a subtraction technique with your text/quote. Add lights behind it for a glowing effect.
  • Create a memorial shadow box for a loved one. Lay a piece of their clothing inside and use vinyl and a memorial SVG for the glass.
  • Show off your travels with a fun map SVG and use photos from your adventures to highlight your visits.
  • Collect sand and shells from your favorite beach and create a beach scene. Add a fun beach quote SVG to the glass.
  • Make something special for the graduate in your life and use the shadow box to preserve their cap and tassel. Place a decal on the glass using an inspirational quote or a graduation quote SVG.

No matter what style of shadow box you choose or how many shadow box ideas you have in your head, the process to create one is sure to be fun! I hope this tutorial provided you with inspiration to tackle this project and make your own 3D shadow boxes. We'd love to see what you create, so be sure to tag us on social media and join our Facebook community group if you haven't already! You're welcome to share your projects there as well.

You may also be interested in ...

Make a Family Quote Canvas Frame
How-to

In 2 Steps Make A Family Quote Canvas Frame

In this blog post discover how to easily add a family quote using HTV to a canvas frame.
Make a cute Winter Snowman Pillowcase
How-to

Make A Cute Winter Snowman Pillowcase

We are going to show you how to make a snuggly worthy pillowcase with a cheerful Winter Snowman
How to Make a Snowflake Card with your Cricut Joy
How-to

How To Make a Snowflake Card With Your Cricut Joy

Quickly make a beautiful and intricate snowflake card with your Cricut Joy cutting machine
Help Center
ol image