Unlimited Downloads 15% off Marketplace Purchases Exclusive Software Access Unlimited Downloads
15% off Marketplace Purchases
Exclusive Software Access
Start your 7 Day Free Trial Start Plus Trial Maybe Later
How To Make A Social Media Plaque For Your Small Business

How To Make A Social Media Plaque For Your Small Business

social media plaque for small business

The past year has been really tough on small businesses and for most, social media has been the only way they've been able to reach their customers and audiences. Now that things are starting to open back up and events such as craft and wedding fairs are allowed again it's important that you take every chance you can to makes sure customers can find you online.

Today we're going to show you how to make an eye-catching branded social media plaque so that you can make sure your customers are able to find and follow you online. The easier you make it for people to find your details, the more likely they are to follow!

How To Make A Custom Acrylic Social Media Plaque

Here's what you'll need :

Materials

  • A4 Acrylic Display Stand (we got ours from Amazon)
  • Vinyl
  • Transfer Tape

Tools

  • Cricut Machine
  • Weeding Tool
  • Vinyl squeegee

Setting Your Design Area

For this project, we'll be using an A4 acrylic sign. In order to make sure all of our elements are scaled correctly, I'm going to make an A4 sized rectangle in Cricut Design Space as a baseto work with.

To do this you want to click 'Shapes' from the right-hand menu andselect asquare. Once you have the square on your canvas you can click the little padlock on the bottom left hand of the shape and then drag out the arrow on the bottom right of the shape to turn it into a rectangle that fits an A4 piece of paper's proportions (21cm x 29cm)

A (Brush) Stroke Of Genius

Something that is increasingly popular at the moment, you might have seen it being used a lot on keyrings recently, is using a paint stroke effect as a background for a project so that's what we're going to use today too!

Finding an SVG File

If you type in brushstroke SVG to the Design Bundles search bar then you'll have a lot of options come up, have a scroll through and see which ones seem best suited to your project.

For our project, I think we're going to be best off layering a brushstroke file to cover the entirety of the plaque as most of what's available is better suited to square or circle projects. It's not a problem though, this is really easy to do in Design Space!

layering SVGs

All we need to do is add in our SVG file and then duplicate it a few times so that it'll cover the area, you can also flip them horizontally/vertically, adjust the width and height of themto give a bit of variety to the pattern.

welded layered SVG

Once you are happy with the arrangement you just need to highlight the files and click 'weld' to turn them into one piece. You could also slice the weld result so that it fits nicely inside your rectangle but I'm actually going to leave this with a bit of overhang as I'd rather trim off the edges when it's on the acrylic than try to line it up perfectly.

I'm sending this to cut now as I want to get it applied to my plaque before I start looking at text placement, this is just so I know exactly what sort of space I'm working with.

Applying Your Background

When you're working with a large piece of vinyl it's important to work slowly, the slower you apply the vinyl the less chance that you will get air bubbles (air bubbles can be fixed so it's not a big issue but it's always better to avoid them if possible).

With large images, I start by attaching transfer tape tothe whole thing and then peeling back maybe a cm or two of the backing paper, that way I can line up the edge of my image to the plaque and work my way across.

I then slowly work my way across the whole image smoothing it down whilst peeling the backing paper off a cm at a time.

If you are left with any air bubbles you can use a squeegee or something flat and rigid like a bank card to push them out to the edges of the vinyl - if you find they won't move then you just need to stick a pin into the bubble to release the air and smooth it out by pushing from the outside of the bubble towards the hole.

Time To Add Some Text

The next thing for us to do is to pick some fonts that go well together to really make our plaque eye-catching.Whenever I'm looking for some new fonts to try out I head straight to the Free Fonts section of the FontBundles site (because who doesn't love a freebie!).

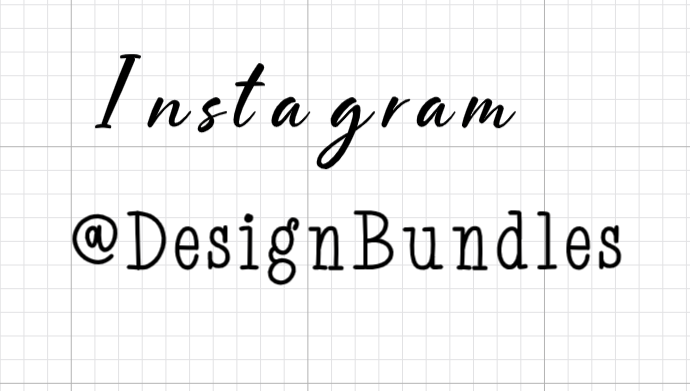
I decided I needed script font and a serif font for this project as I wanted each heading to stand out from the information part of the text. I ended up choosing Rosseville and My Skinny Type.

Don't Forget To Join Up Script Fonts

When I use a script font with vinyl I like to make sure the letters are actually joined up in the finished cutso that it looks like cursive handwriting. Let's do a quick mini-tutorial on how to achieve this!

How To Connect Cursive Lettering in Design Space

Select the text that you want to connect. With the text highlighted click on the 'ungroup' button (it's in your right-hand canvas panel). Once they are ungrouped you'll be able to select each letter individually.

Working from the end of the word we are going to select the last letter and then use the arrow keys on our keyboard to move it to the left so that it is touching the next letter or as close to it as possible (depending on the style of the font, not all letters will touch, as is the case with the r and a in this example. It's up to you to make the choice for what looks best in your design).

We keep going until we get to the first letter in the word, if it's a capital letter then we don't join it (we follow the same rules as if it were written cursive). Once we have all of our letters in the right place we highlight them all and click on 'weld', this makes sure that when they are cut the machine sees it as one continuous line and doesn't try to cut the letters individually.

Arranging Our Design

At the start of this project we arranged our brushstroke design on the A4 sized rectangle we made to represent our plaque, this comes in super helpful now as it means we can use that to arrange all of our text so that it sits centrally on the frame.

All we have to do is highlight all the layers and click on the 'Align'button in the top menu, select the 'Center horizontally' option and it'll make sure that they are aligned perfectly. We can then use our arrow keys to make sure we're happy with the spacing between them all.

Once you are happy with the layout, highlight your text and click on attach - that way it'll cut in the exact orientation and spacing you have it set to on-screen!

Attaching Your Text

Once we've cut and weeded out text we get to the job of applying it, We're going to use the same technique as we did with the brushstroke background since it's a large piece of vinyl.

First off you want to check your positioning (it can help to secure the bottom with a small piece of tape if you're worried about it moving around) and then peel back the first cm or so of backing paper and carefully apply the decal.

Work down the decal in sections, carefully peeling back a bit at a time and smoothing it as you go. Once the backing paper is fully removed you can give it another press down with a squeegee and then carefully start removing the transfer tape. Again make sure to go slowly with this and check that any small bits of text are nice and secure.

And there we have our finished plaque!

There are so many ways to customise this - why not use your brand colours as the background or try having your business logo printed on to printable vinyl to add. You could even add a QR code to take people directly to your website or socials (there are free sites that can help you create a QR code, just search QR Code Generator). How about looking at adding flowers or embellishments to theplaque, there are so many ways to make them completely unique to you and your business!

You may also be interested in ...

How to make custom waterproof garden cushions
Arts and Crafts

How To Make Custom Waterproof Garden Cushions

Summer is fast approaching and it's the perfect time to start...
Mothers Day Gifts Round Up main image 1
Arts and Crafts

DIY Mother's Day Gifts Round Up

We share DIY Mother's Day gifts that are sure to make Mom happy! Find creative inspiration inside.
How To Make A No Sew Faux Leather Coin Purse
Arts and Crafts

How To Make A No Sew Faux Leather Coin Purse

Do you ever find those crafts where you just want to keep making them...
Help Center
ol image