- By Nadine Spires
- 8 Mins
- Intermediate
- Drawing Tutorials
How to Draw a Football Helmet
In this tutorial learn how to draw a football helmet and create clipart for the big game.
Today's tutorial is all about the game, the spirit, being a team player and having some creative fun. We are going to show you how to draw an awesome football helmet with our step by step guide. One of America’s most loved sports, football can be played inside or outside. With intricate plays and hard hits, every player wears a helmet for protection.
So let's show you how to create a football helmet drawing.

Before you begin, let's huddle and get all of our drawing supplies together. You can use our drawing tutorials with any medium you have on hand, like markers, crayons, Procreate, or Photoshop.
If you are using Procreate for this tutorial like we are, there are tons of Procreate inking brushes you can use to sketch and outline your drawing.
Step 1 - Create the Basic Football Helmet Shape
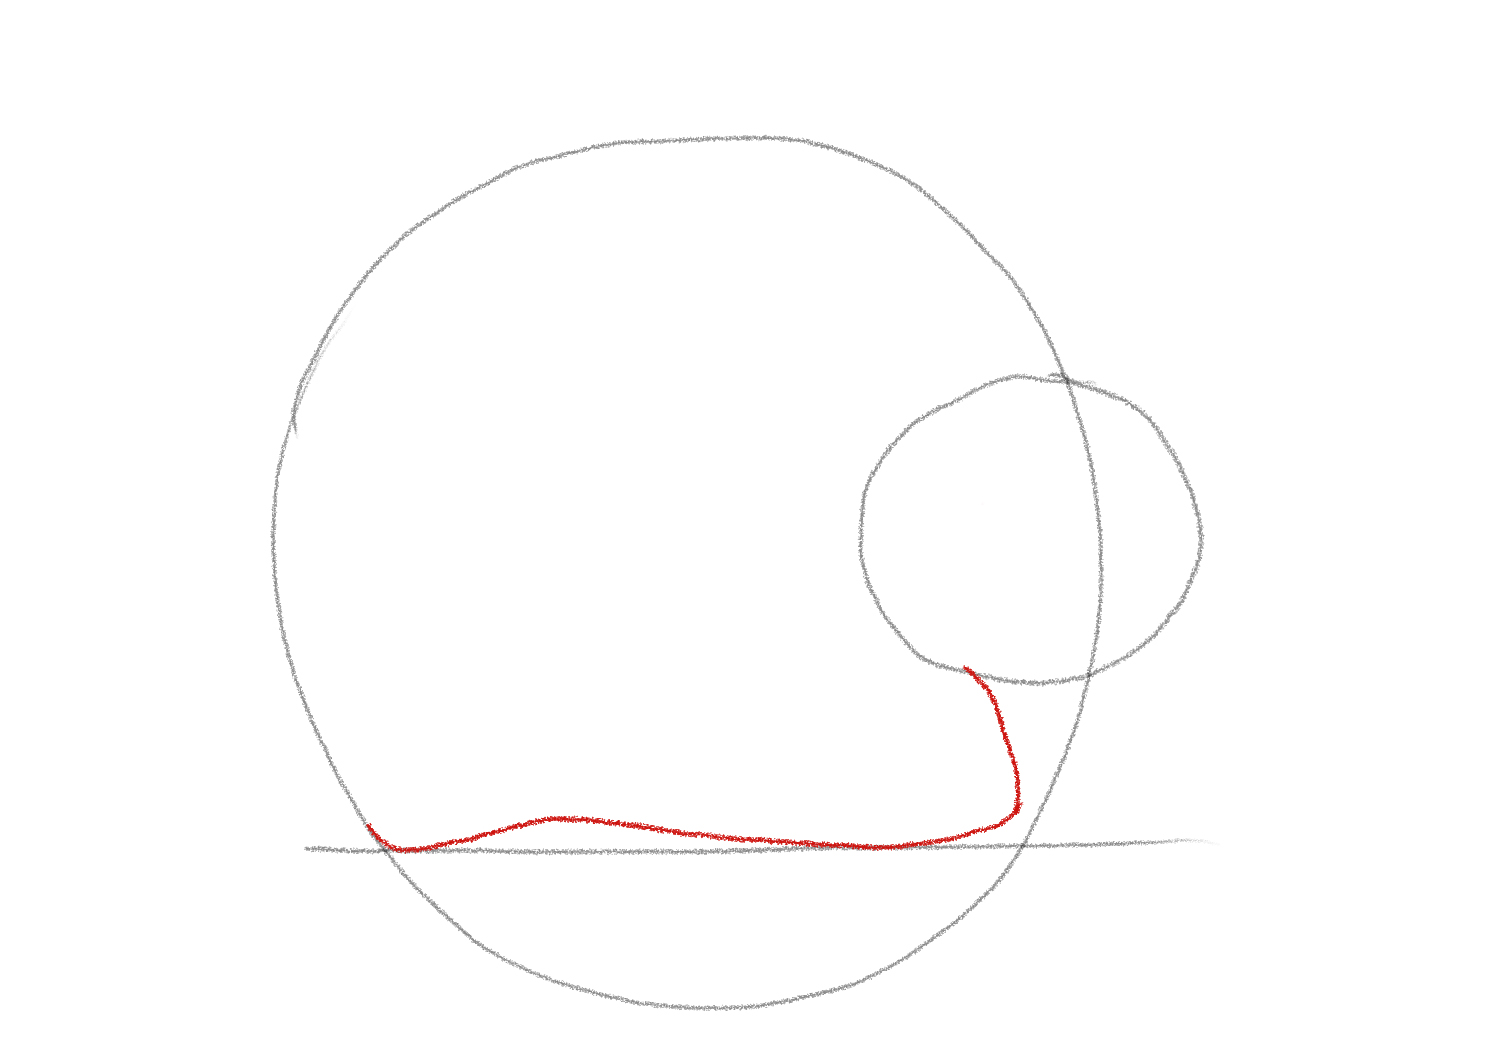
First, we need to create the basic rough shapes that make up our football helmet. Use a pencil or a light-colored medium. This will make the sketch easier to remove or hide later on when adding color. Starting with the first basic shape, sketch a rough circle, in the size that you want your helmet to be.

Next, sketch a horizontal line one-fourth from the bottom of your circle. Then, on the right side, draw a smaller circle halfway between the top of the big circle and the line. Use our example sketch below for a visual guide.

Let's draw the bottom part of the helmet by creating the curved base shape. Sketch a line starting from the back end of the small circle. Draw this line down towards the bottom line with a slight curve. Then, carry on to draw towards the back of the helmet, adding a shallow curve.

Step 2 - Define the Football Helmet Shape
Continuing with our rough sketches, we are going to add definitions and details to our football helmet shape.
Add Shape to the Helmet
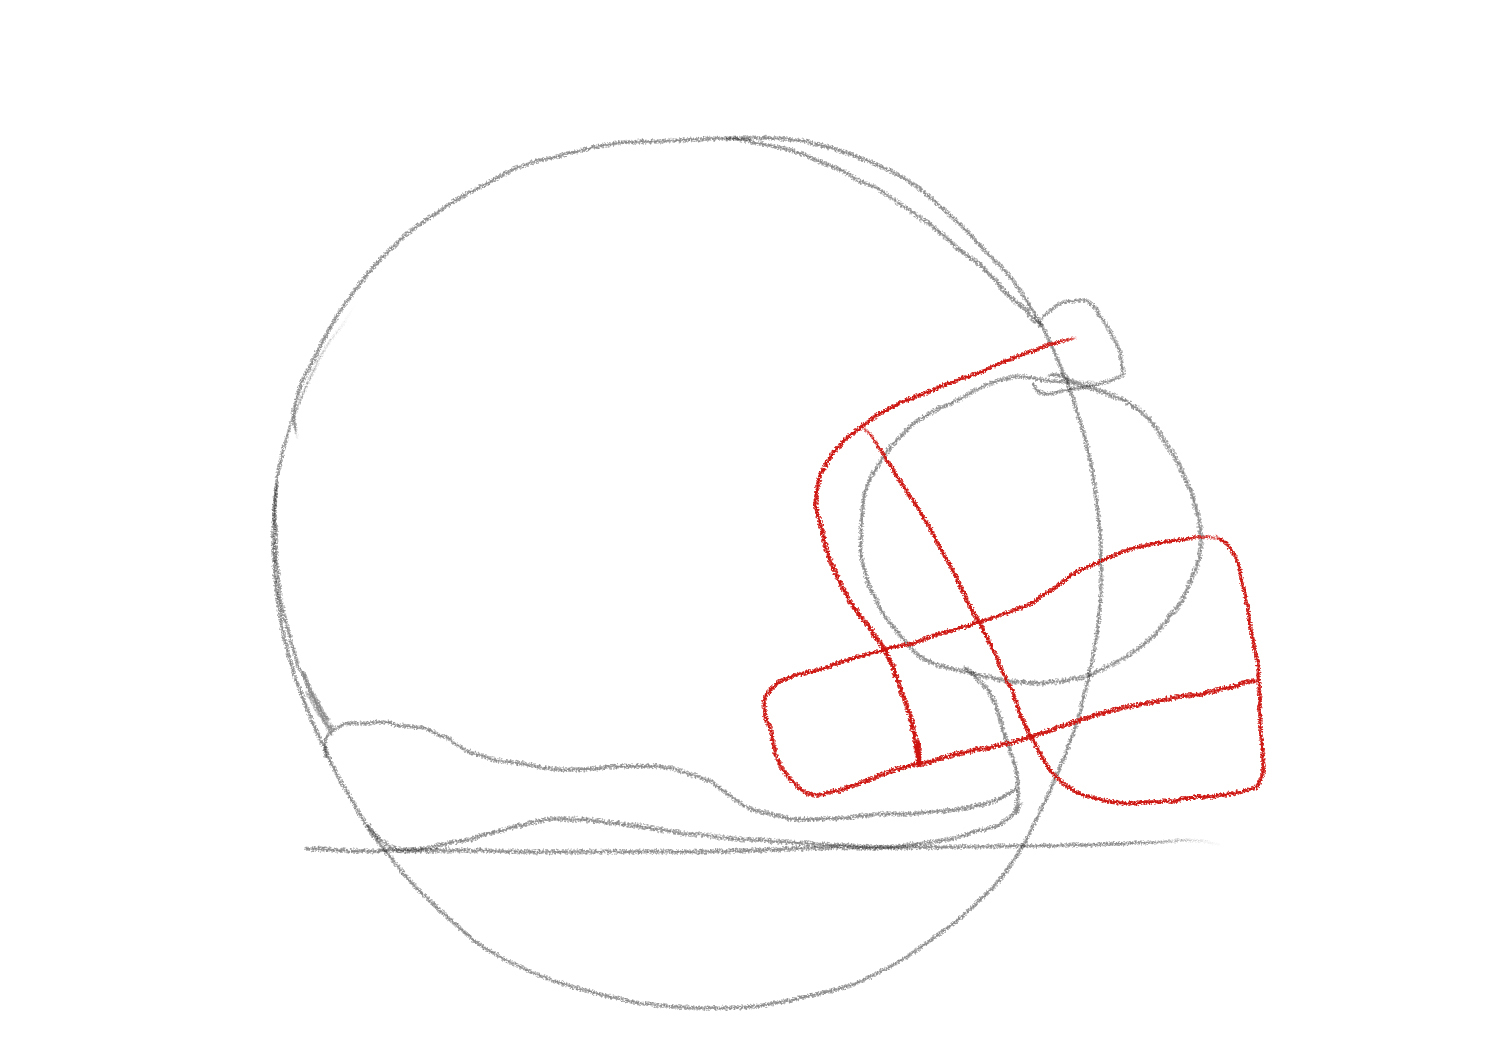
Our example below shows where we added new lines in red. We started at the bottom with a wavy line just above the base shape that we added in Step 1. We followed the curve of the base shape to the back of the helmet design. Make this line higher towards the back.
Roughly draw a rounded square just above the smaller circle on the right. Place this on the outside of the helmet design.

Add the Protective Face Bars
Next, we are going to add the protective bars. Start by creating the design of the face bars. Begin at the top of the small circle, and sketch a series of lines down and around to the bottom.
There are different designs for football helmet face masks. So feel free to use a reference photo or copy our example below.

Next, we need to widen the face bars. Following the line sketched above, draw a parallel line on the other side, creating thicker face bars. We added two rough shapes for the holes on the side of the football helmet.

Step 3 - Outline Your Football Helmet Sketch
We are done making rough sketches, and will now move on to outlining our design. Use a defining medium that is permanent like a pen, or marker, and outline your sketch lines. Pay close attention to which lines you want to keep, as you don't want to draw the overlapping sketch lines.

Once you are done outlining, you can go ahead and remove your rough sketches.

Step 4 - Add Color to Your Football Helmet
In our last and final step, we are going to add some color. You can use any color for your sketch, even colors that match your favorite team.

Add some final detail to your football helmet with white highlights and black shadow lines.

Touchdown! Great job, now you know how to draw a football helmet. Why not turn your drawing into stickers or sublimation designs for your next football game event? Drawing tutorials are a great way to improve your skills and we hope you enjoyed drawing a football helmet with us.
6 Related Drawing Tutorials
In today’s tutorial, you are going to learn how easy it is to draw a football. Draw for fun, prep for the big game, or create a sports clipart for your projects. We will show you step-by-step how to create this design so that you can be ready for ...
Today we are guiding you through the steps on how to draw a lemon. With fresh citrus scents and funny faces, many people love lemons. Delicious for cooking or baking, Lemons also add a fun personality to any artwork. You can even get creative by turning your drawing into stickers ...
Formed in different shapes with a variety of colors, today we are learning how to draw a seashell. Not only beautiful, seashells play an important role for numerous sea creatures. Mollusks create shells to protect their soft bodies. Shells are also used every day by other animals like crabs and ...
We all know the beauty of flowers and their endless array of colors and textures. In this step-by-step tutorial, we’ll show you how you can draw a Poppy flower and add color and detail to bring it to life.Before we get started, grab your supplies. You can use ...
Today we take you step-by-step on how to draw a peach. Peaches are a favorite among many people. From peach cobblers to color palettes and popular sayings, a peach will cross your path in one way or another.Before starting this drawing tutorial, get your supplies together. Our drawing tutorials ...
In today's tutorial, we take you through the steps on how to draw a coral reef. The ocean holds many diverse living creatures. From whales and jellyfish to corals of different shapes, sizes, and colors. A Coral Reef is just one of the many colorful worlds that we will explore ...

 All your Font Needs


