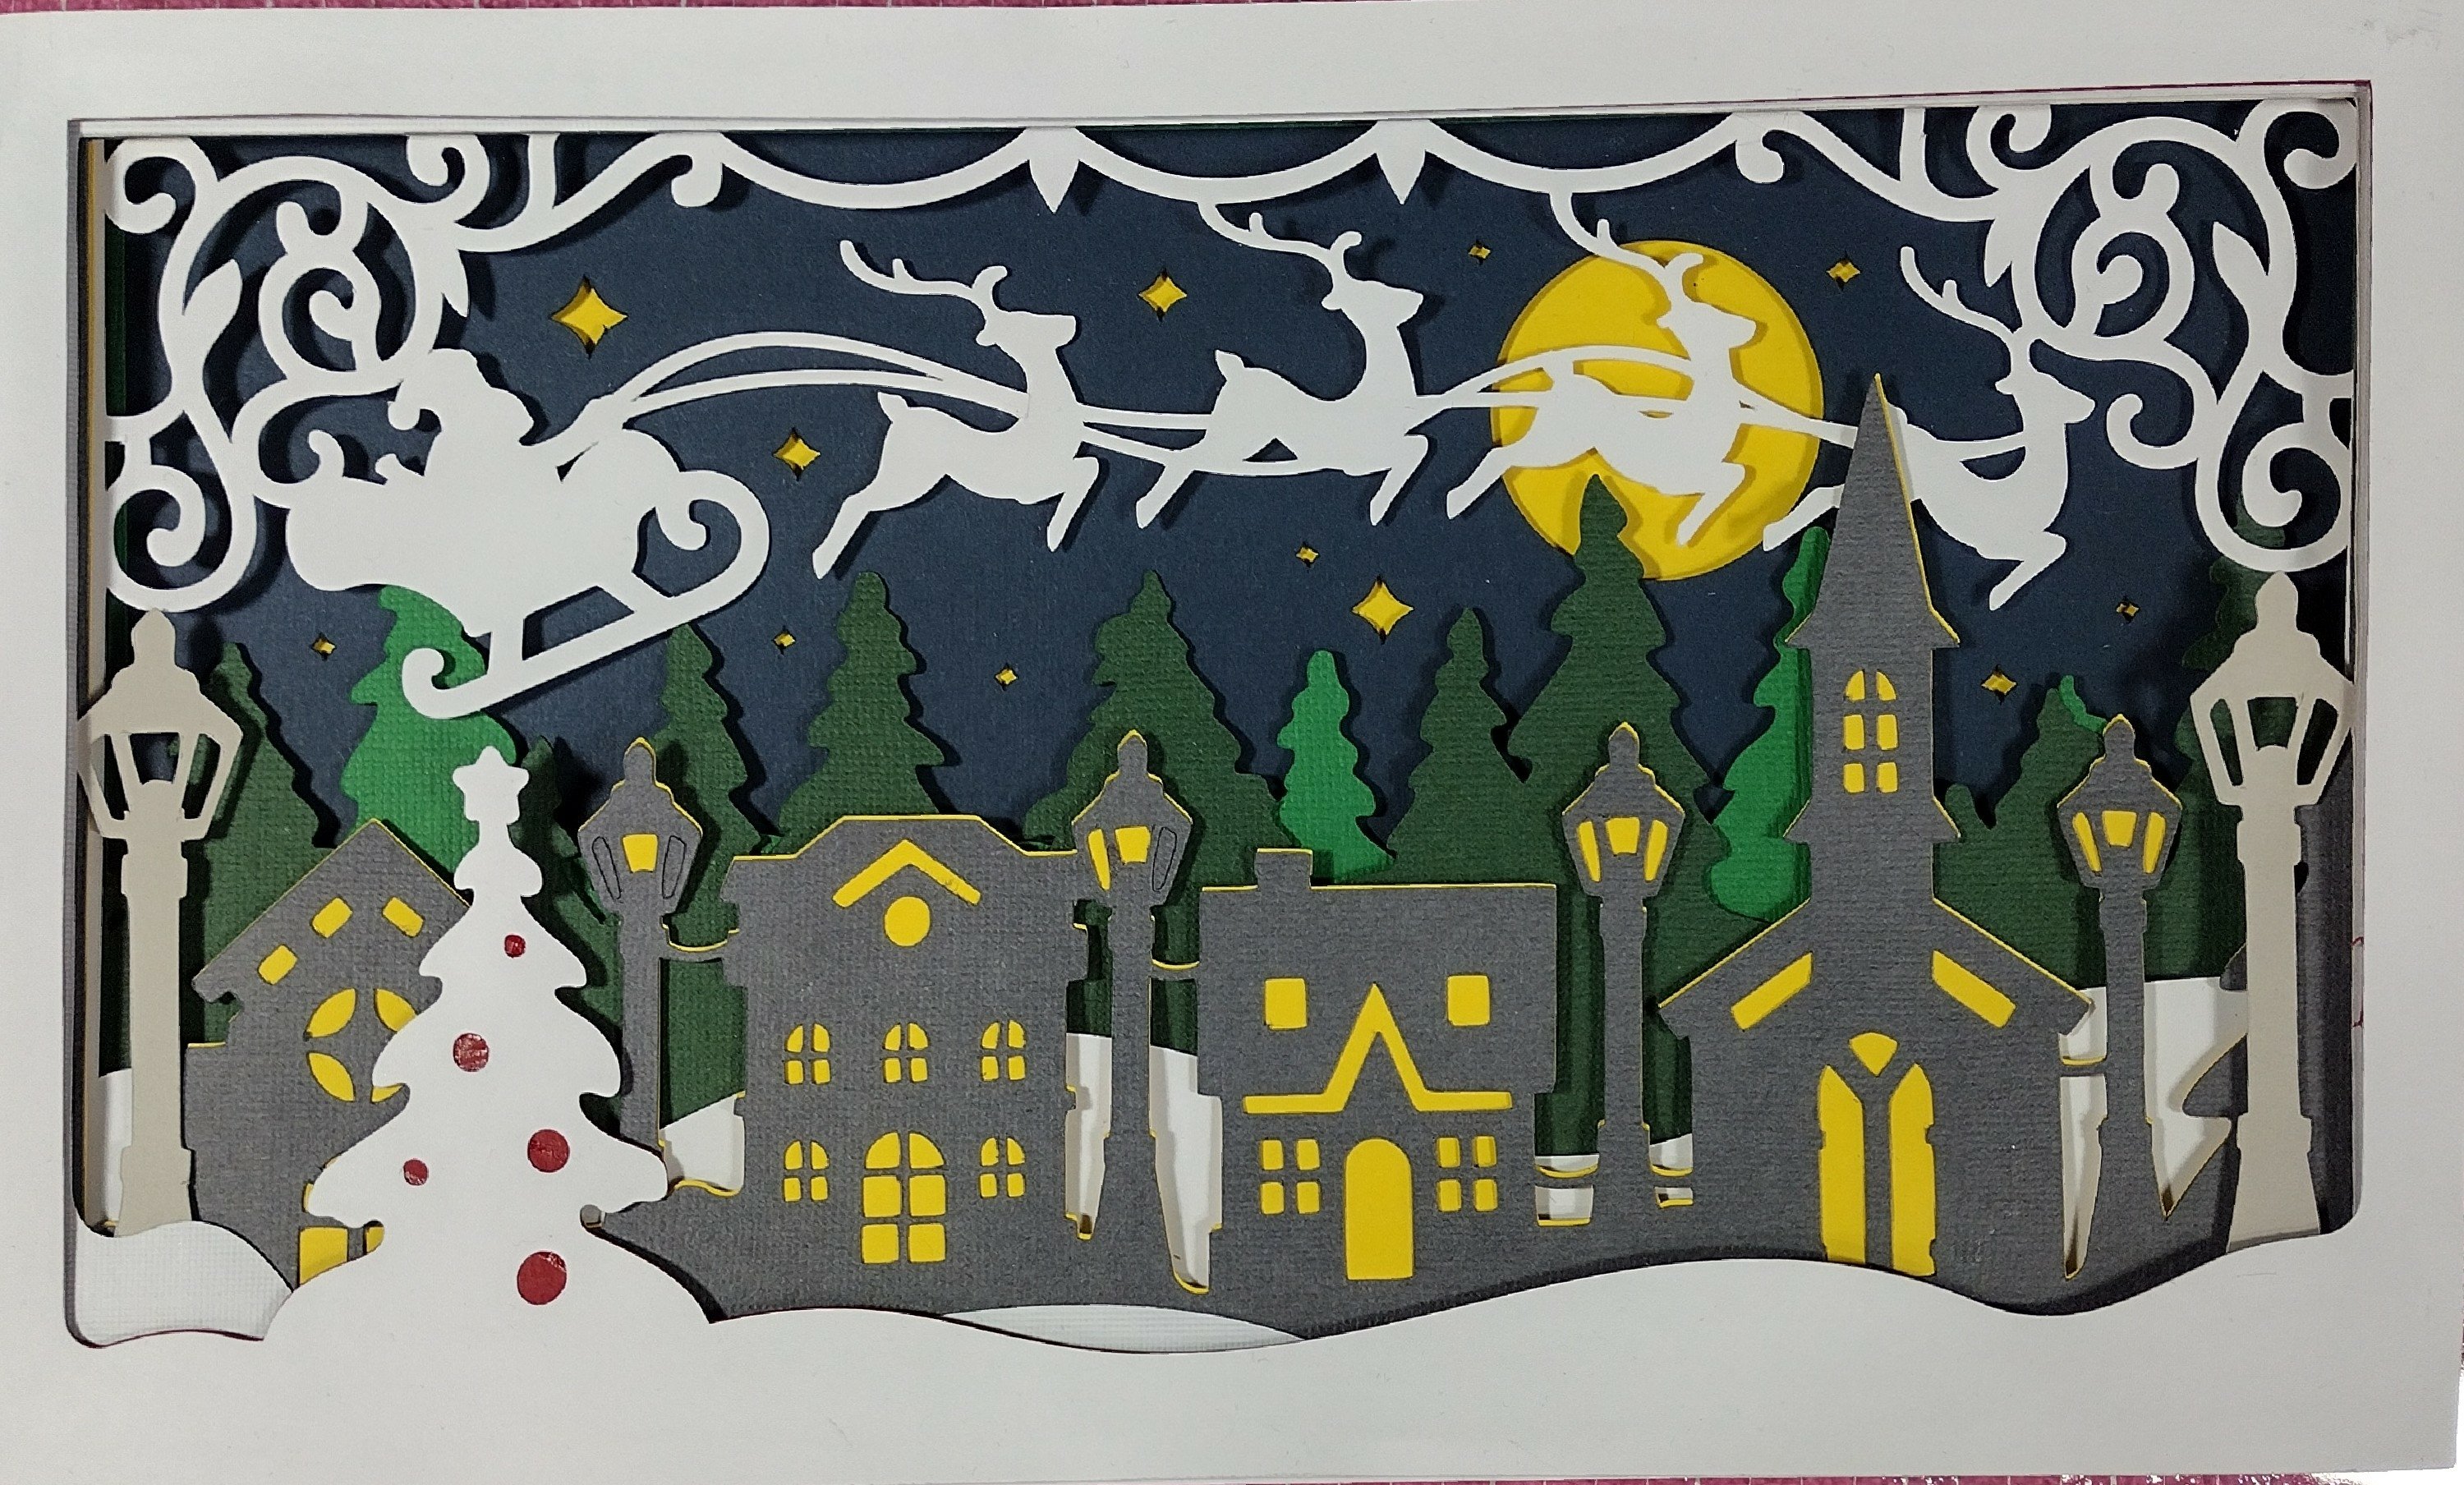
Christmas Village 3D Layered | Christmas Shadow Box Cut File
Get your home ready for the holidays with this fun 3D decoration.
Fully layered, the Christmas Village is the perfect festive project to take you through the winter season.
Accommodating to any skill level, all you need is a cutting machine and this SVG file to make your own Christmas Village.
Update: November 10, 2023
Optimized points and paths for faster cutting.
Added new sizes, now offering three options to choose from: 10x7 inches, 10x8 inches, 12x7 inches.
This project will surely attract attention both in your living room or on your wall. You can also sell the physical product to boost your business or just gift it to friends.
Use this digital file to cut and craft an amazing Christmas Village Scene from cardstock, plywood, and a number of different materials.
- Download the digital file to your computer.
- Upload the digital file format to your software.
- Use your cutting machine to cut each layer.
- Stack the layers in the correct order, using the guide provided.
- For cardstock layers, use double-sided adhesive foam dots, tabs, or tape to create space between each layer. Then, stack each layer on top of the other to achieve a 3D look.
- You can use glue alone, but if the materials are thin, you will lose the height and 3D appearance of the design.
Features:
- 10-Layer Design.
- Suitable as decoration or wall art, and it makes a great gift for friends and family.
- You can sell the physical project.
- Compatible with various cutting machines.
- Includes both vector and raster files.
You get:
- Vector Files: Ai, Eps, SVG, PDF (Stacked and Spread Layers)
- Raster JPG and PNG Files
- Ideas For Colors and Materials
- Guide - Quick assembly guide
This is a digital file download. No physical item will be sent to you.
After purchasing, you will receive 1 ZIP archive file containing all file types mentioned above. First, you will need to extract the files from the ZIP archive file.
Recommendations:
- The cut files are compatible with different cutting machines: Silhouette Cameo 3, Silhouette Cameo 4, Cricut Explore Air 2, Cricut Maker, Glowforge, K40, Beamo Flux, Epilog, Atomstack, and other CO2 laser machines
- It is best to use the SVG file format because it is compatible with most cutting machines and vector software (Adobe Illustrator, Inkscape). You can resize without losing image quality.
- For Basic Silhouette Studio use the DXF file.
- You can decrease and increase the size of the design. However, when reducing the design, you will need to consider the thin/small elements.
- Try different color cardstock for different results. Experiment with glitter/sparkle cardstock for a more interesting effect. If you are using wood material you can paint it in different colors. Remember to always check your machine manual to ensure the machine can support the different materials and for the tools needed to cut these materials).
- Materials like cardstock, plywood, MDF, acrylic, wood, plexiglass, plastic can be used. But may vary depending on the machine you have and the materials supported. Please reference the instruction manual of your cutting machine to choose the best material for you.
- Keep in mind that SVG files may show up as internet icons or HTML documents on your computer, use your machine software to open the SVG files.
- The finished product looks great as is or can be framed inside a complementary shadow box to enhance or emphasize the beautiful artwork. As well, using double-sided foam dots, tabs, or tape between each layer, will add more depth and dimension to the final product.
I would love to see photos of your projects where you used this design. You can mention pixaroma on different social networks or you can contact me and I would love to see your beautiful creation. :)
Please feel free to contact me if you need any further information.
Try out my other fun Christmas SVG Cut Files: https://designbundles.net/pixaroma/christmas-svg-cut-files
Check my entire collection of cut files: https://designbundles.net/pixaroma/svg-cut-files