Unlimited Downloads 15% off Marketplace Purchases Exclusive Software Access Unlimited Downloads
15% off Marketplace Purchases
Exclusive Software Access
Go Unlimited Maybe Later
Cute Flower Pot Ideas You Can Make With Your Cricut

Cute Flower Pot Ideas You Can Make With Your Cricut

Spring has officially arrived, crafters, so it's time to spruce up your outdoor spaces with these cute flower pot ideas! Shift your creative focus to the outside and get ready to DIY painted flower pots with me. I love when the weather warms up, and you have that itch to get dirty and plant some flowers! I'm lucky to live somewhere where the weather stays pretty nice all year long, so that itch to jazz up my patio and yard (that's garden for you UK folks!) comes pretty early. I have three fantastic crafts for you today, and we're going to have some fun.

All three of these crafts are done using the Cricut, but you can use any cutting machine or even try ready-made stencils or cutting by hand. I'll share what I learned about each DIY, my tips and tricks, and tell you what I'd do differently the next time. Are you ready to get crafty with me and check out these cute flower pot ideas? Let's get to it!

DIY Painted Flower Pots

As I said, there are three unique crafts in this tutorial, and they're all perfect for getting you Spring ready in no time. There are so many cute plant SVG designs, as well as spring and summer SVG options! I did use paint for two of the three pots. We'll dig into each one a bit, and I'll share the steps so you can make these yourself!

Supplies You Will Need for Your Flower Pot Crafts

This list of supplies includes everything you need for all three flower pot crafts in this tutorial. Some are used only for one of them, and others for all of them. I'll make sure to point those out for you!

  • Cutting Machine-Cricut, Silhouette, Brother, etc
  • Mat and Tools-Squeegee, Tweezers/Weeder, etc
  • Adhesive Vinyl and Transfer Tape-I recommend using removable vinyl for stenciling
  • Flower Pots-Pick a variety of styles and shapes
  • Paints and brushes-I recommend using outdoor paint for pots going outside
  • Sealer-Clear acrylic sealer, either gloss or matte
  • Sticker Paper (for craft #3)-Clear or white works well. Grab it on Amazon! https://amzn.to/3xbiULr
  • SVG Designs- Painted Flower Pots

On Island Time, Aloha SVG, Monstera Leaf SVG

  • SVG Design- Clear Stickers

Sunflower Bundle

  • SVG Designs- Kawaii Faces

Kawaii Faces Bundle 1, Kawaii Faces Bundle 2

Disclaimer: Designbundles.net is a participant in the Amazon Services LLC Associates Program, an affiliate advertising program designed to provide a means for sites to earn advertising fees by advertising and linking to Amazon.com.

Supplies You Will Need for Your Flower Pot Crafts

#1. How to Stencil Using Plant SVGs

You can easily change how you use an SVG design, just in the way you weed the material. Have you tried using vinyl to create stencils for paint projects before? It's so easy!

Completed Painted Flower Pots

Step 1. Prep Your Flower Pots

This is important if you're using terra cotta pots like I am. Those guys are dirty and dusty, even when they're brand new. Either give them a scrub or wipe them down with a damp rag and allow them to dry. Once completely dry, you can begin painting. I'm using DecoArt Patio Paints and loved how well they worked. Apply as many coats as needed. I found that some colors required extra coats. You can use something inside your pot to help prop it up while painting, but you'll still be covered in paint if you're like me! Allow the paint to completely dry. It's best to give your pots 24 hrs to dry before you start adding your stencils fully.

Paint your Flower Pots

Step 2. Cut and Apply Your Stencils

Download your Plant SVG if you haven't already and get it uploaded to your software. Measure the surface area where you'll be applying your stencil, and then resize your design as needed. I determined that I could go as large as three inches on these larger pots at the widest/tallest. After cutting and applying the stencil, I realized I could likely have sized my designs a bit larger. That's how you learn...trial and error! Make sure you're leaving a good amount of space between each of your design elements, so there's room for applying paint. If you don't know what I mean, you'll see in a moment!

Measure the Flower Pot

Place your vinyl on the mat and send it to cut on your cutting machine. Remove the vinyl from the mat and get your weeding tools out. Now, instead of weeding away the outsides/extra pieces, you will weed away the design itself. If you haven't done a stencil with vinyl before, this will feel wrong, but hang in there! You can see in the photo below that I've weeded away the monster leaf and left the outside. Use transfer tape to apply the decal to the pot where you want the designs to go, leaving space for the next piece.

Placing the Vinyl StencilStep 3. Paint Your Designs

Painting when using a stencil is different from painting a portrait or other artwork. It's best to use a foam dauber rather than a traditional brush. Add a little paint to a paper plate or other surface that you can work from. Load your dauber with a little bit of paint and then pounce up and down on the plate or other surface to remove most of the paint. Then use that same upward/downward pouncing motion to apply the paint to your stencil. You'll want to hold your dauber upright as you pounce lightly.

Apply Paint to the Stencil

Apply only a light coat across the entire surface of the design, and be sure to keep the paint off the pot itself, or you'll be doing lots of touchups. The photo below shows how it should look after one coat. Allow the paint to dry, and continue adding more coats until you get the coverage you want. Depending on how pigmented your paints are, this could require quite a few coats! Once the paint has mostly dried, you'll remove the vinyl and reveal your beautiful painted designs. Top Tip: Use fine-point tweezers to get under any small pieces of vinyl and pull them away.

One Coat of Paint

You'll use this same process for pretty much any style of stencil or design. I did a set of three pots and coordinated the colors and designs. Here you can see one with a cute beach quote I did. One thing to keep in mind when using a design as is, without editing spacing, etc., is that there may not be room for your paint dauber to fit between the words. I ran into this with the quote design I used for my navy blue pot. I ended up using a tiny brush to paint part of the stencil since I couldn't fit my smallest paint dauber in that space. See what I mean? To avoid this, you'll want to ungroup the design and increase the spacing between the elements (flowers, words, etc.).

On Island Time SVG Stencil

Step 4. Apply the Sealer

This step is optional but highly recommended if you plan on watering your plants inside the pots. Take your pots outdoors or in a very well-ventilated area and prop them up on something, so the edges don't touch the ground. I used mason jars and other spray paint cans inside for that. Apply multiple thin coats of your sealer, waiting for each coat to dry first. Then flip them over and do the same for the inside.

Sealing the Pots

Step 5. Plant Your Flowers

It's time to get dirty! Take those DIY painted flower pots and fill them with your favorite potting soil and flowers! When my bag of potting soil is full, I like to use a plastic cup to scoop the soil into my pots. It keeps things a little cleaner. Now you're ready to enjoy your new flowers!

Adding Flowers to the Flower Pots

#2. Using Stickers To Decorate

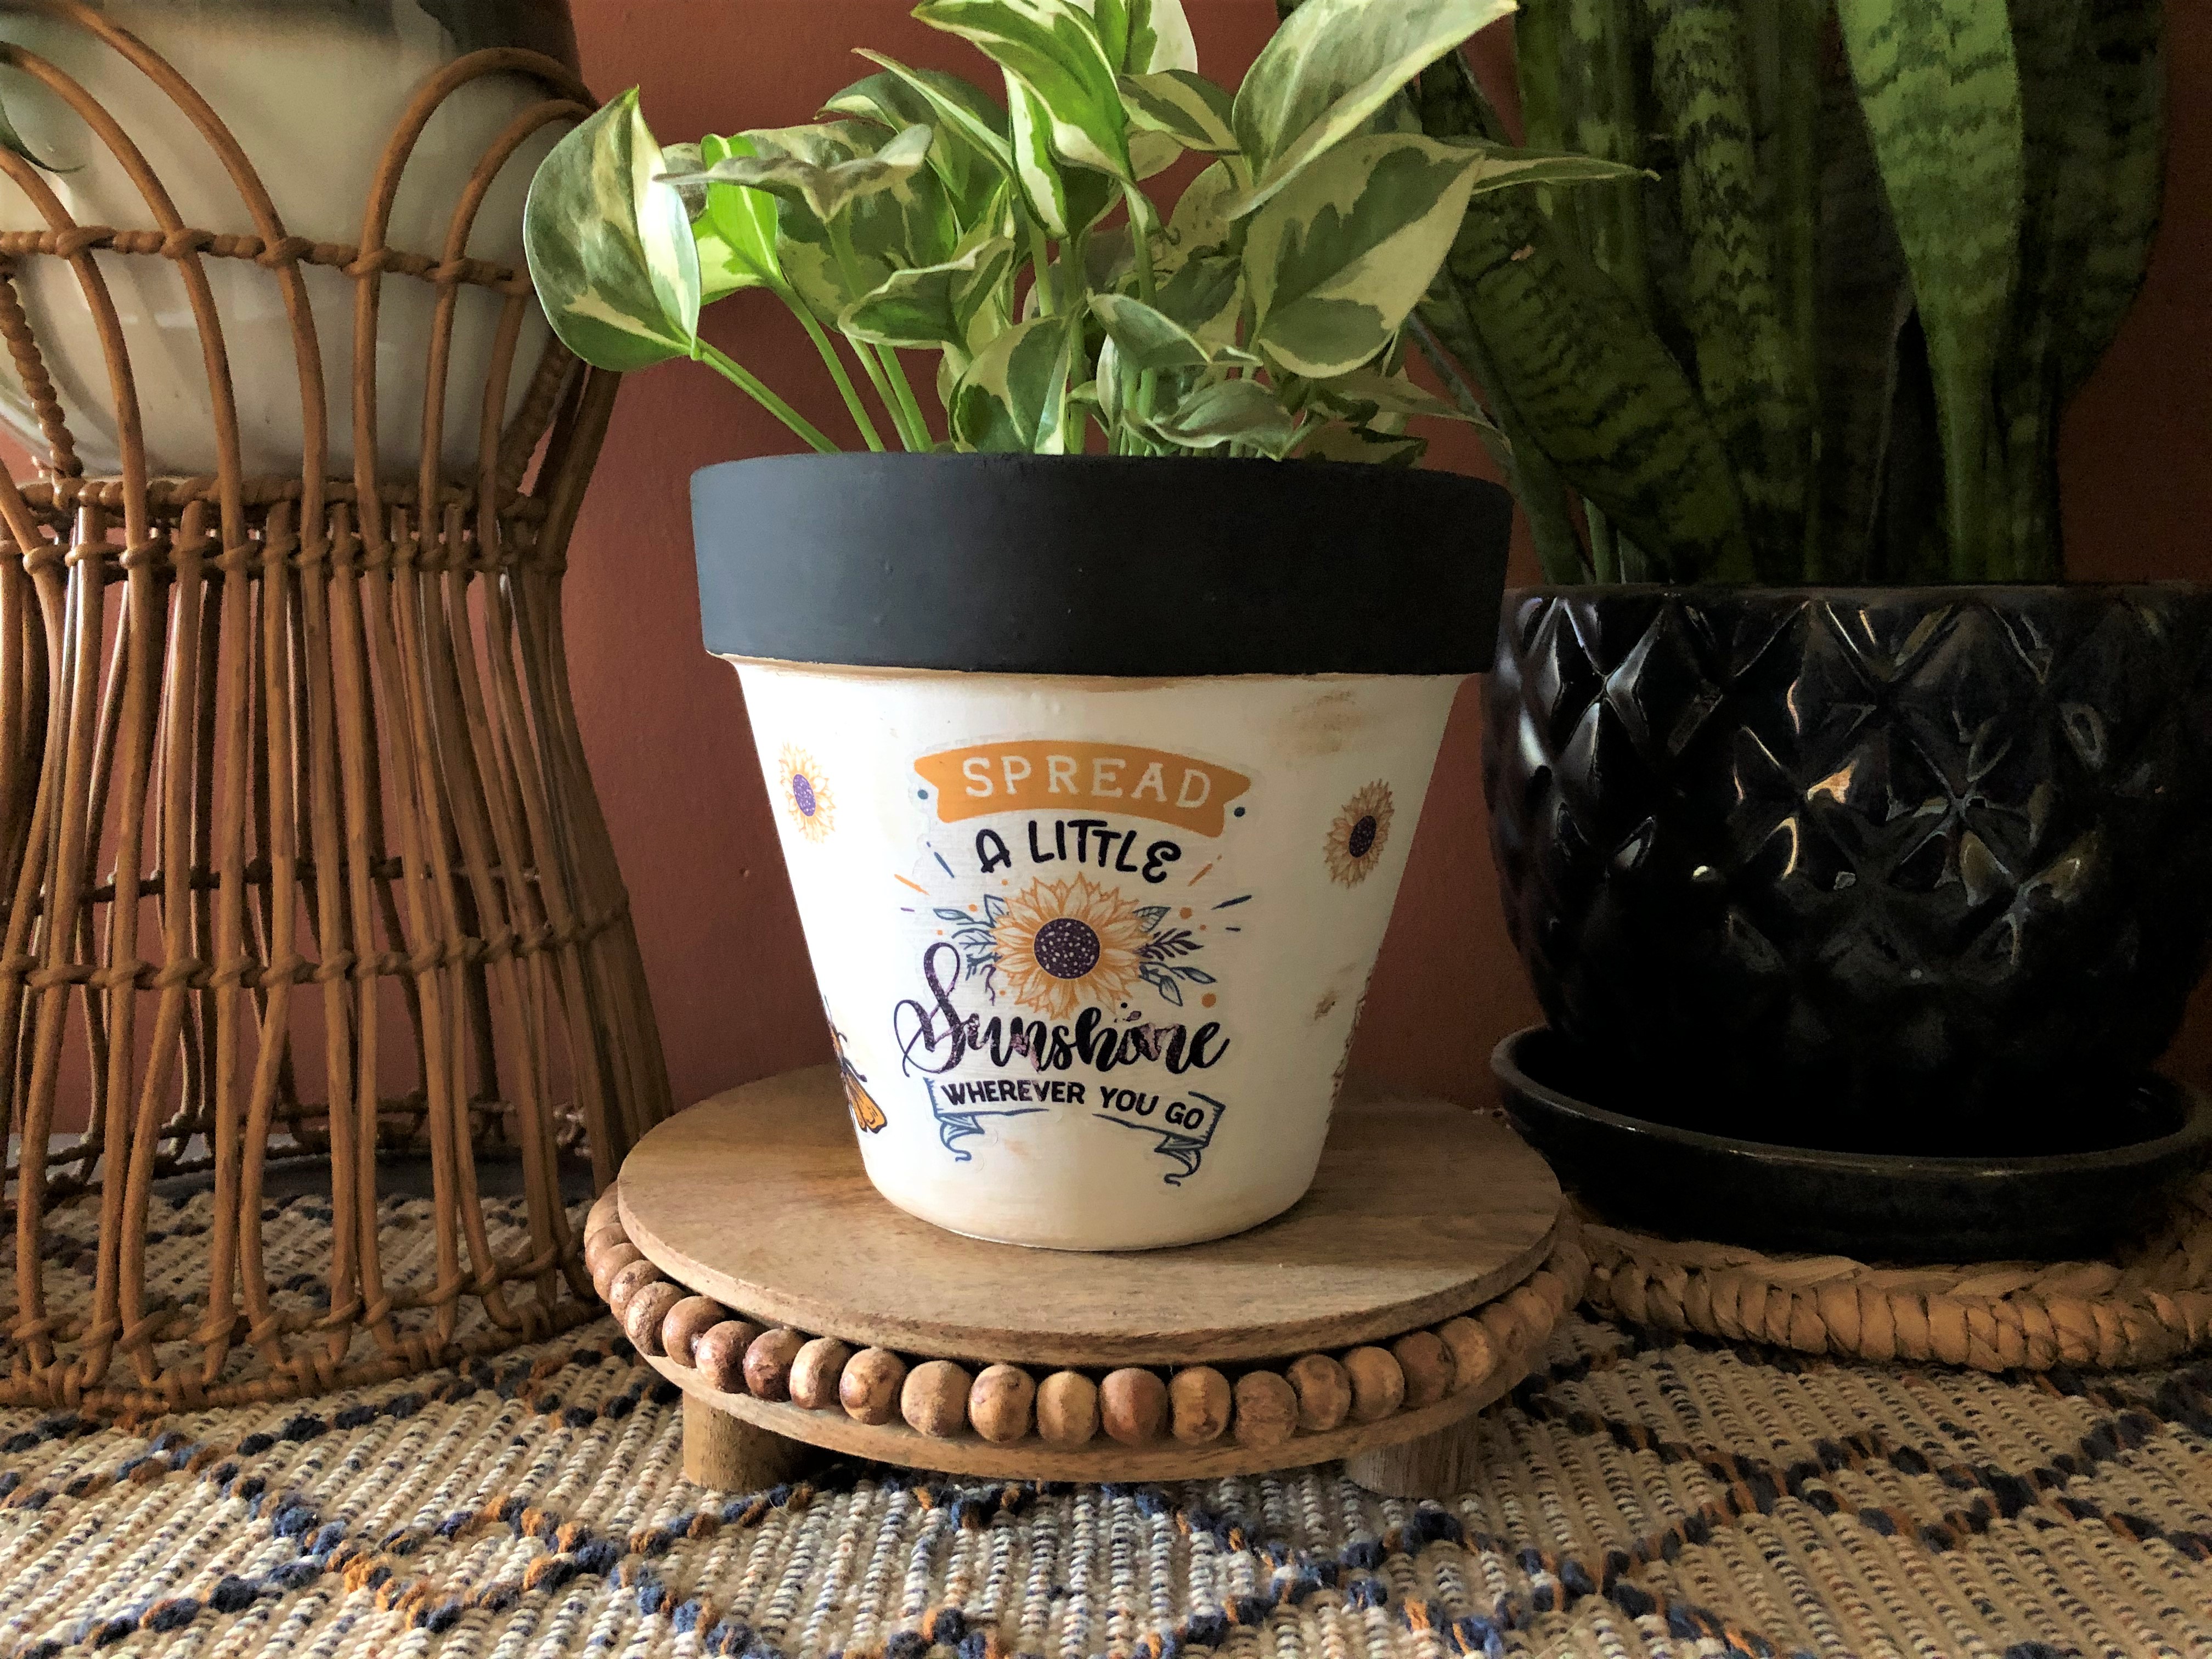
I love creating stickers, so I wanted to see if I could try out my new clear sticker paper for this project. I don't have a sublimation printer yet, so I'm limited to simpler designs when I craft (especially when working with small items). Clear sticker paper was a fantastic choice to get those design details without using sublimation. Color me excited!

Flower Pot With Clear Sticker Design

Step 1. Paint the Flower Pot

Follow the same steps to prep your flower pot for this project as you would the ones we did earlier. I didn't have white outdoor paint, so I used interior paint. I won't use this one outside, so it should be safe. If you want to try this technique for an outdoor project, I'd suggest using outdoor paint.

Step 2. Prep and Cut Your Stickers

Measure the space for your stickers the same way you would a decal or stencil. Upload your print and cut sticker design to your cutting software and then follow the printing and cutting steps. If you want a step-by-step tutorial on how to create your own stickers and how to complete the printing and cutting steps, check out Design School for those details. Since I was only using part of my sticker sheet for the sunflowers, I added a few others to make the most of my paper. Be sure to check the supply list at the beginning of this post for the Plant Quote SVG bundle I used!

Sticker Designs Cut and Ready

Step 3. Apply the Stickers

I've worked with white sticker paper quite a bit and found this clear version trickier. The paper seems to be more delicate, and the ink didn't dry nearly as quickly. I actually ended up smearing the design after I applied it, giving it a vintage look. Since I didn't want to redo the stickers, I added a little brown wax to the pot to give it an aged feel.

Apply the Stickers

You can see how translucent the colors are in my design (even after being applied to the white pot). I recommend using darker, more statured colors to help counteract that effect, but it sure is a lovely look with that slight transparency. Continue applying your stickers around the pot until you're happy with the results.

Apply Stickers All the Way Around

After finishing the stickers, I decided to paint the top section black to give it a little pizazz. I love the way this one turned out! I did apply the clear sealer to this one as well, even though I won't likely use it outdoors.

#3. Adding Decals to Flower Pots

This one is by far the simplest of the three projects and techniques! If you know how to cut adhesive vinyl, then you can do this craft.

Kawaii Face SVG Decals

Step 1. Cut Your Kawaii Face Decals

I used two different bundles of kawaii faces for these adorable flower pots that I picked up at Michaels craft store. As with any project, make sure you measure the surface you're working with and adjust the size of your design accordingly. These were rather small, so I picked faces that had thicker lines. Follow the steps on your software and cutting machine to load, cut, and unload your designs.

Step 2. Reverse Weed the Design and Apply

I used the reverse weeding technique since we're working with such small images. Cut the excess vinyl around the design away, and then place the entire thing down on your transfer tape. Pull the backing away, and then the excess vinyl. What you'll have left is just the design, and you don't have to fight those small pieces! Apply the decal to the pot, smooth it in place, peel away the transfer tape, and you're done. It doesn't get any easier than that! Face decals like these are fun to add a little something extra to everyday items.

Reverse Weeding the Designs

There are so many cute flower pot ideas, and you could probably create a hundred different styles. Overall this is an inexpensive DIY project that will bring you joy and pleasure every time you see your beautiful flowers. Have you tried DIY painted flower pots before? Even if paint isn't your preferred medium, there are many other ways you can decorate flower pots like I did with stickers or decals. Get creative and try out new techniques or styles. You just never know how things will turn out and who knows, you may even create a new viral fad!

If you try this craft or use any of the designs, we'd love to have you share with us in our Facebook community!

You may also be interested in ...

Make a Family Quote Canvas Frame
How-to

In 2 Steps Make A Family Quote Canvas Frame

In this blog post discover how to easily add a family quote using HTV to a canvas frame.
Make a cute Winter Snowman Pillowcase
How-to

Make A Cute Winter Snowman Pillowcase

We are going to show you how to make a snuggly worthy pillowcase with a cheerful Winter Snowman
How to Make a Snowflake Card with your Cricut Joy
How-to

How To Make a Snowflake Card With Your Cricut Joy

Quickly make a beautiful and intricate snowflake card with your Cricut Joy cutting machine
Help Center
ol image