How to Use a Cricut Machine to Cut Vinyl
*Cricut Explore Air is used.
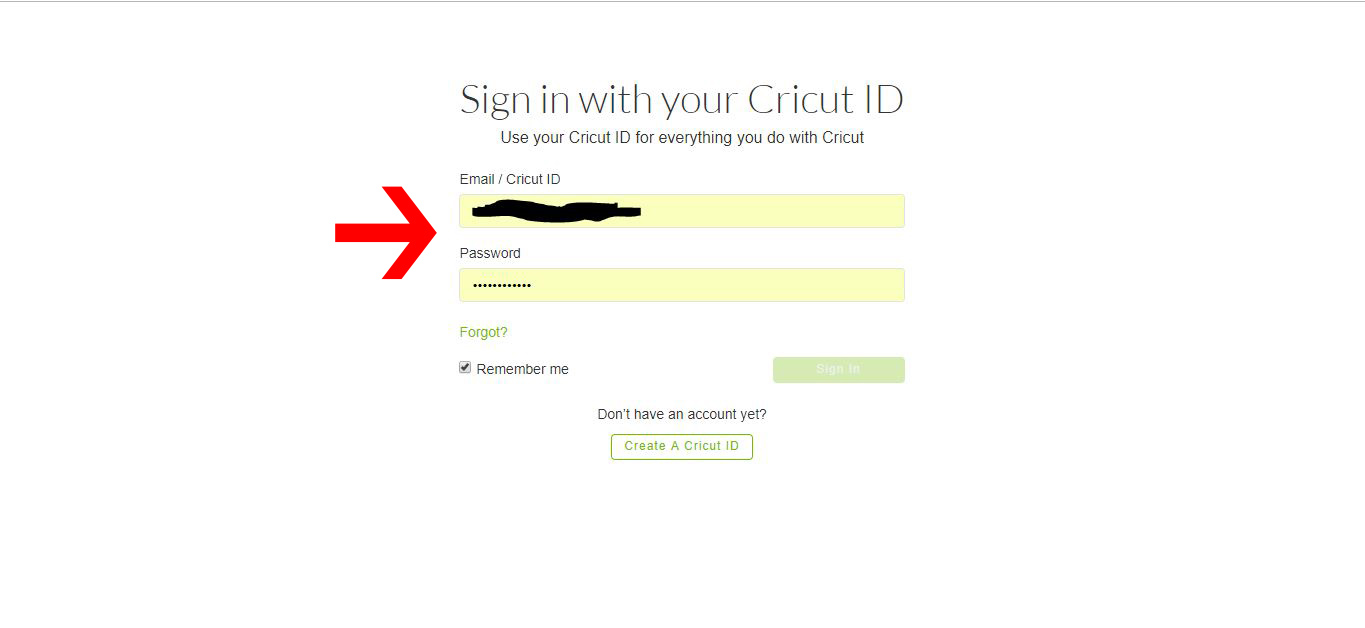
1- Log in to Cricut Design Space.
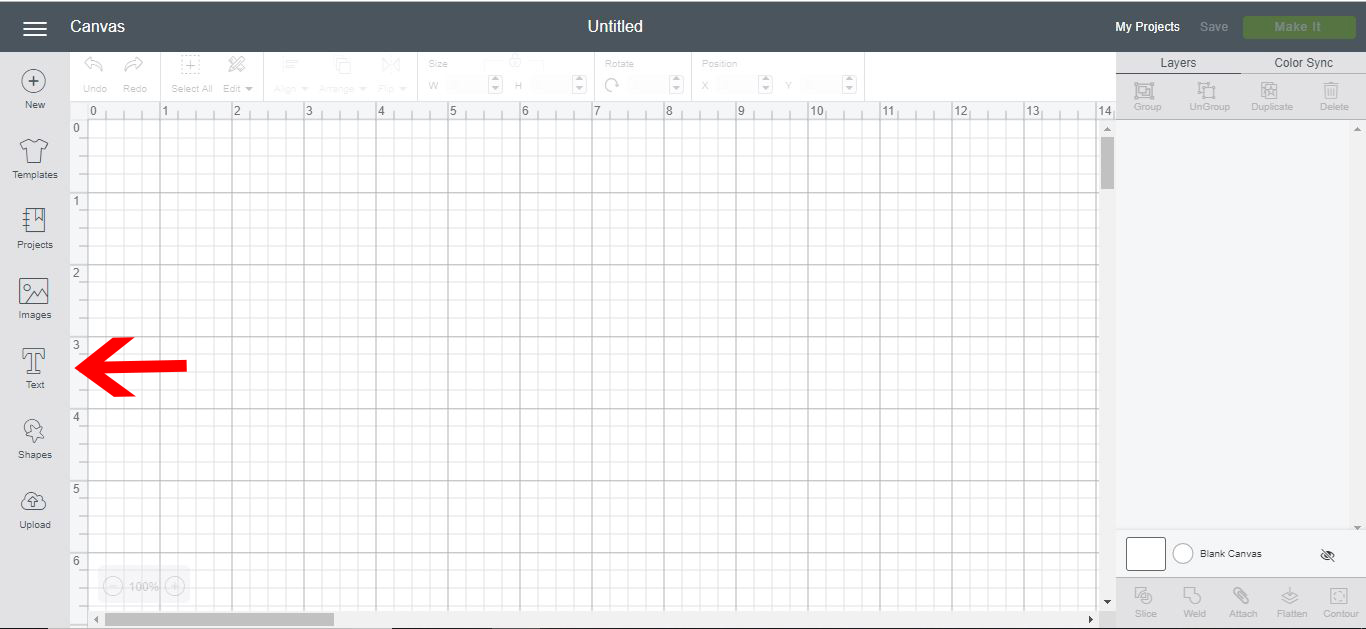
2-Click on the new project icon.
3-To create text to cut in vinyl, select the text icon.
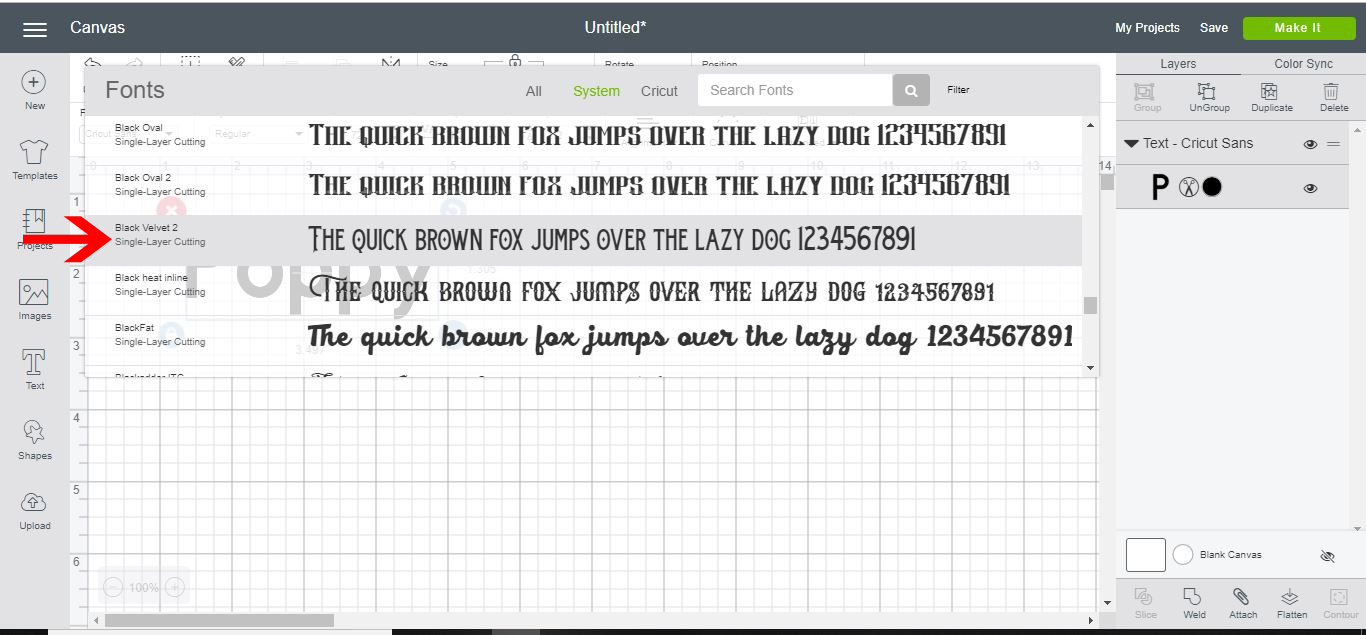
4- Type your text. Then click on the font icon.
5- Select the font you would like your text. I am using Black Velvet 2 from fontbundles.net
6- Your text is now ready to cut in vinyl.
To cut an image- Click on the image icon.
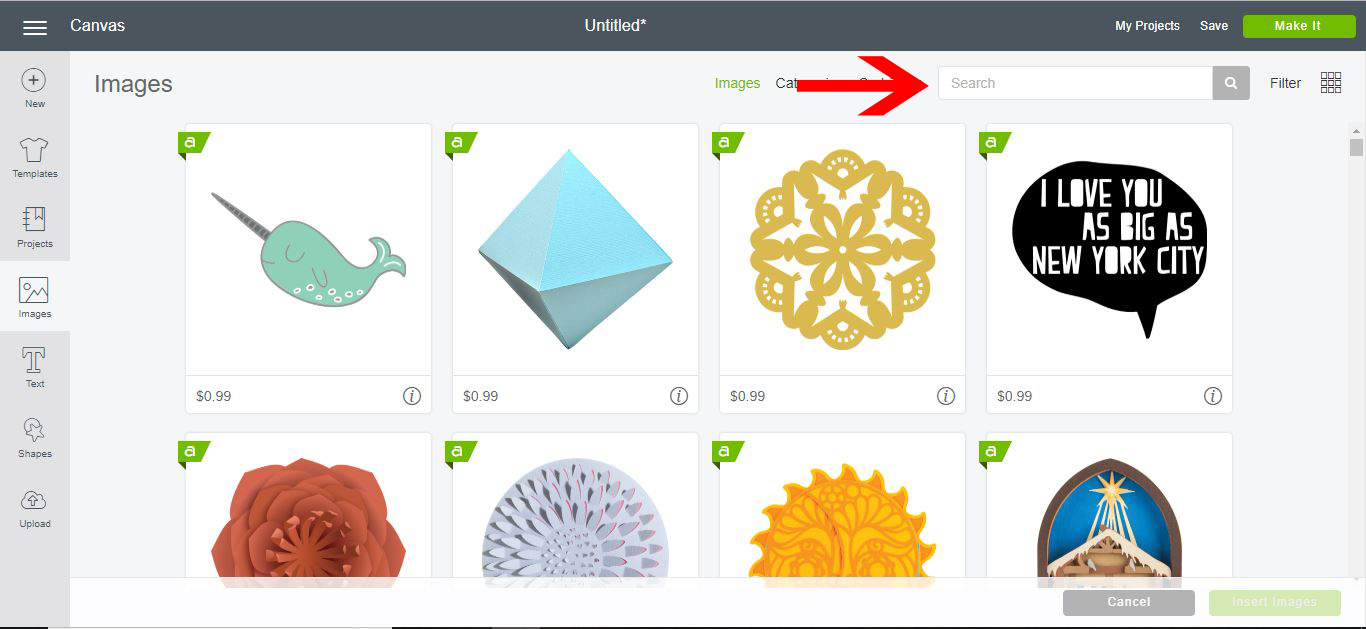
7-Click on the search icon and find an image.
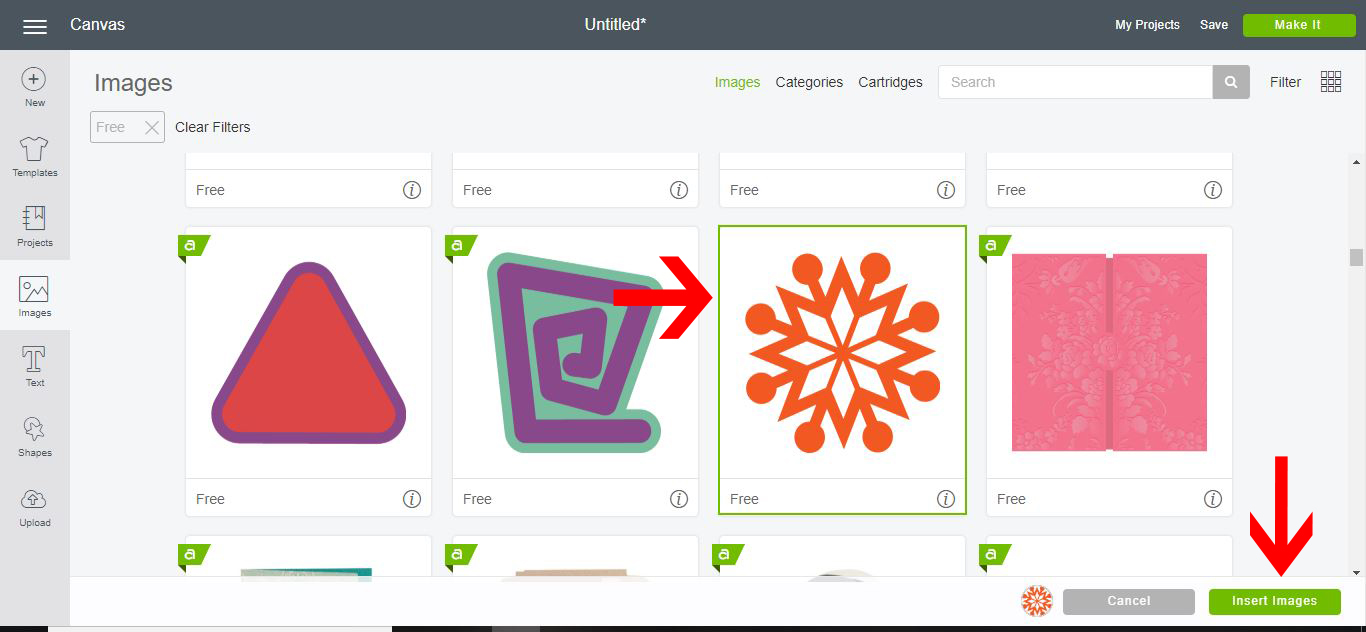
8- Click on the image you would like. You can search for free images. Once you have picked your image, click insert image.
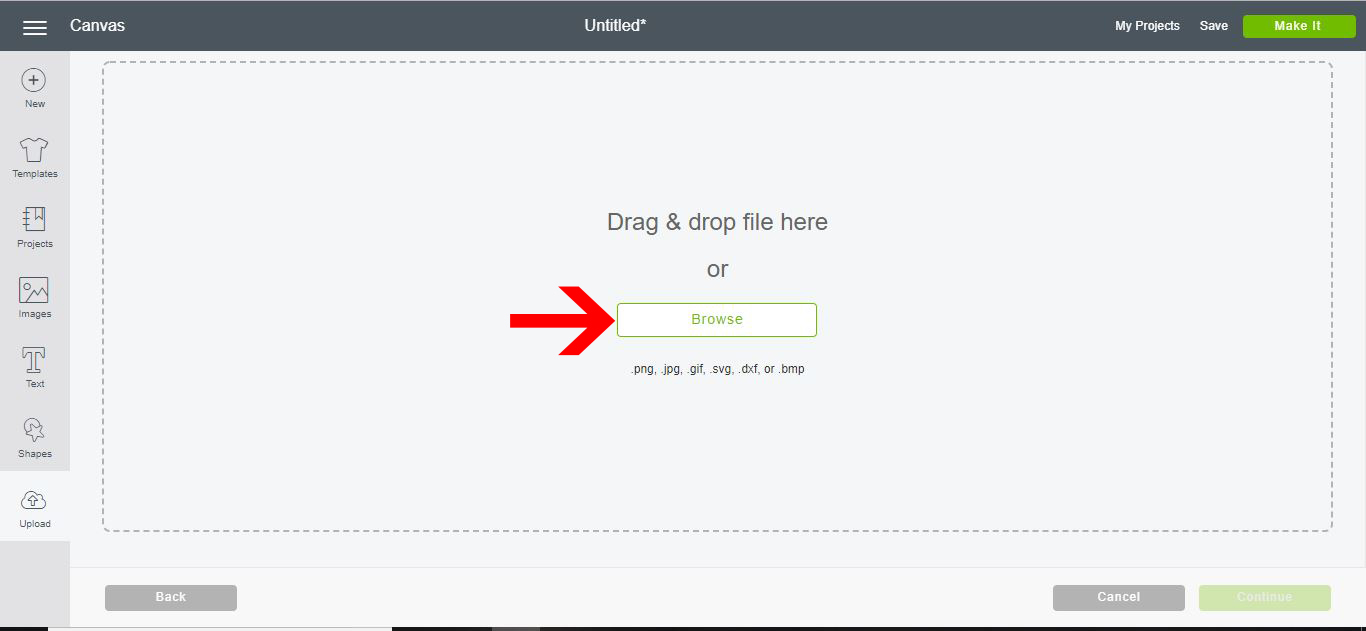
9- If you would like to use your own image click on the uploads icon. Then click on the upload images option.
10- A new window will open. Click on the Browse icon.
11- Select your image.
12- Your uploaded image will appear on the screen. I am using the Pineapple SVG from designbundles.net. Click Save.
13- The image will now appear in the recently uploaded images. Click on the image, then click on insert image.
14- Your image will now appear on the design space.
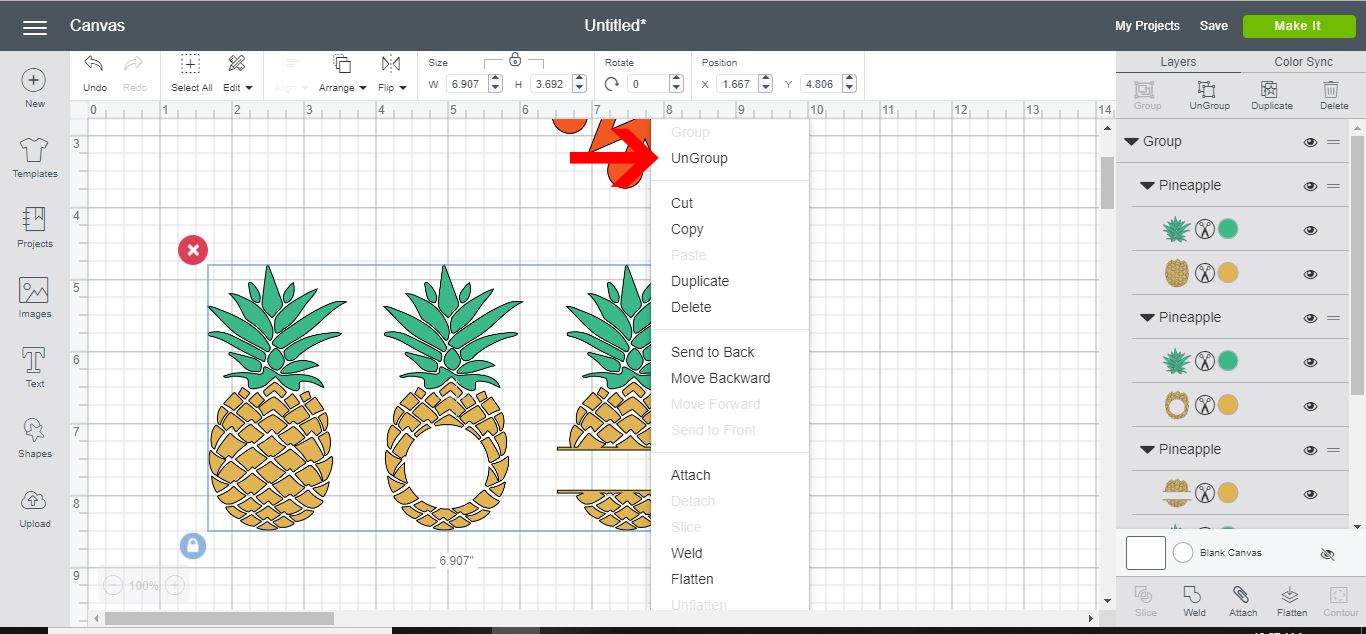
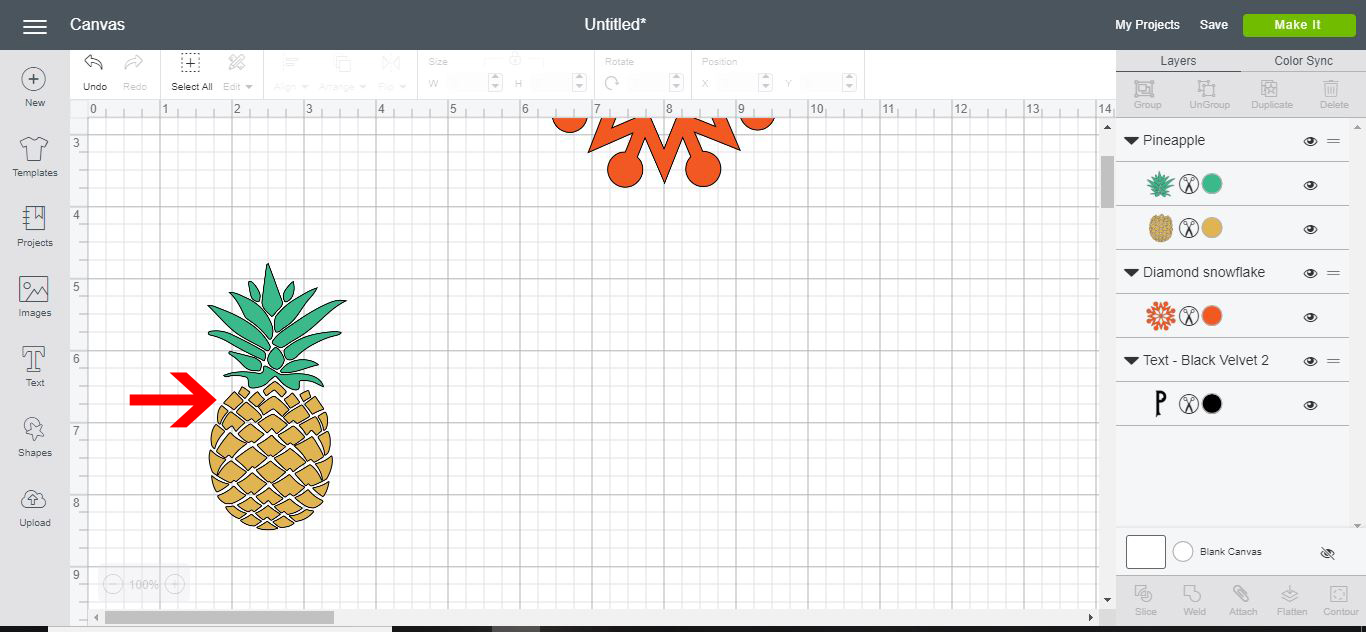
15- To select only part of the design to cut in vinyl, you can right-click and ungroup your image.
16- Your image is ready to be cut in vinyl.
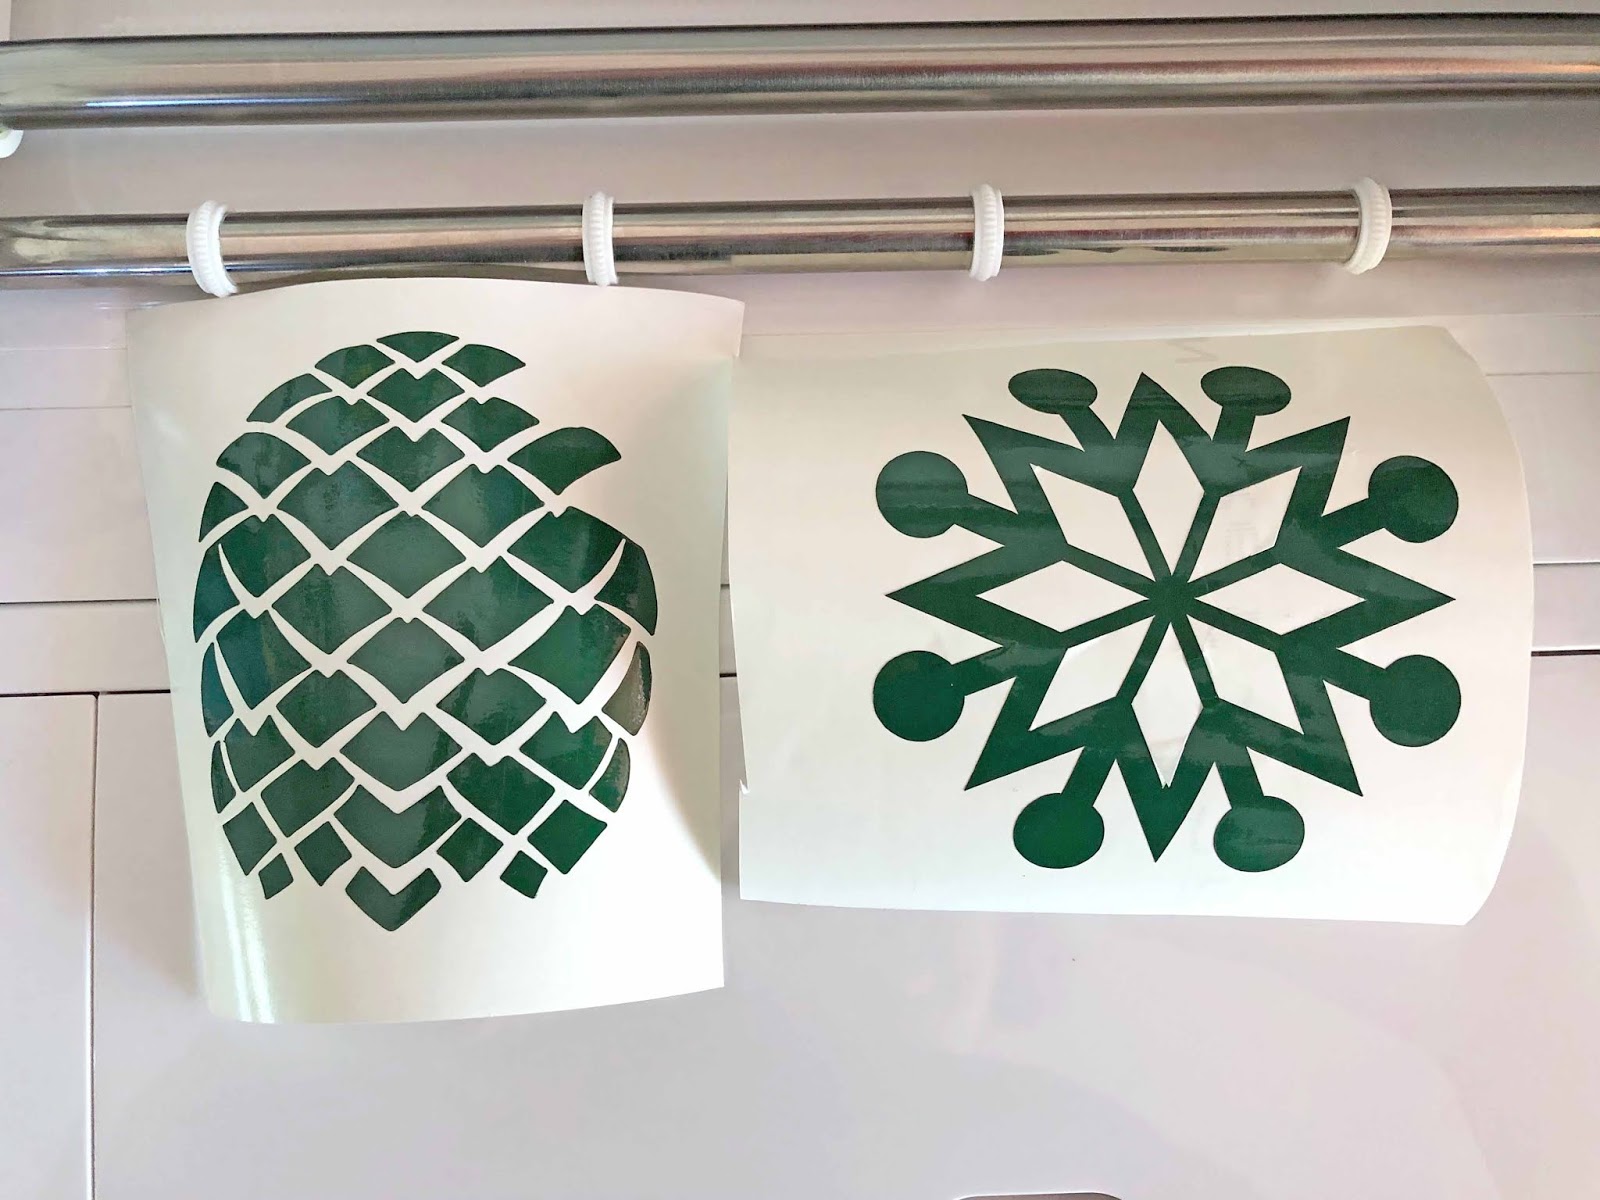
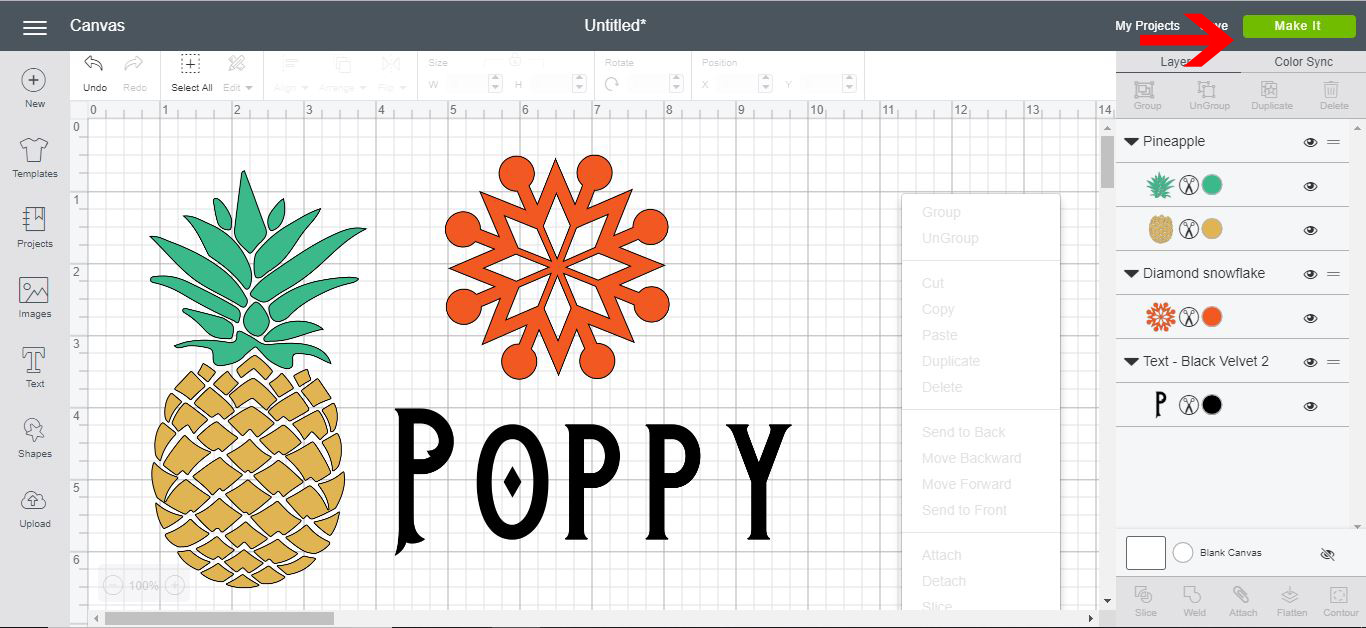
17- As you can see below all these different types of text and images can now be cut in vinyl. Click on Make it.
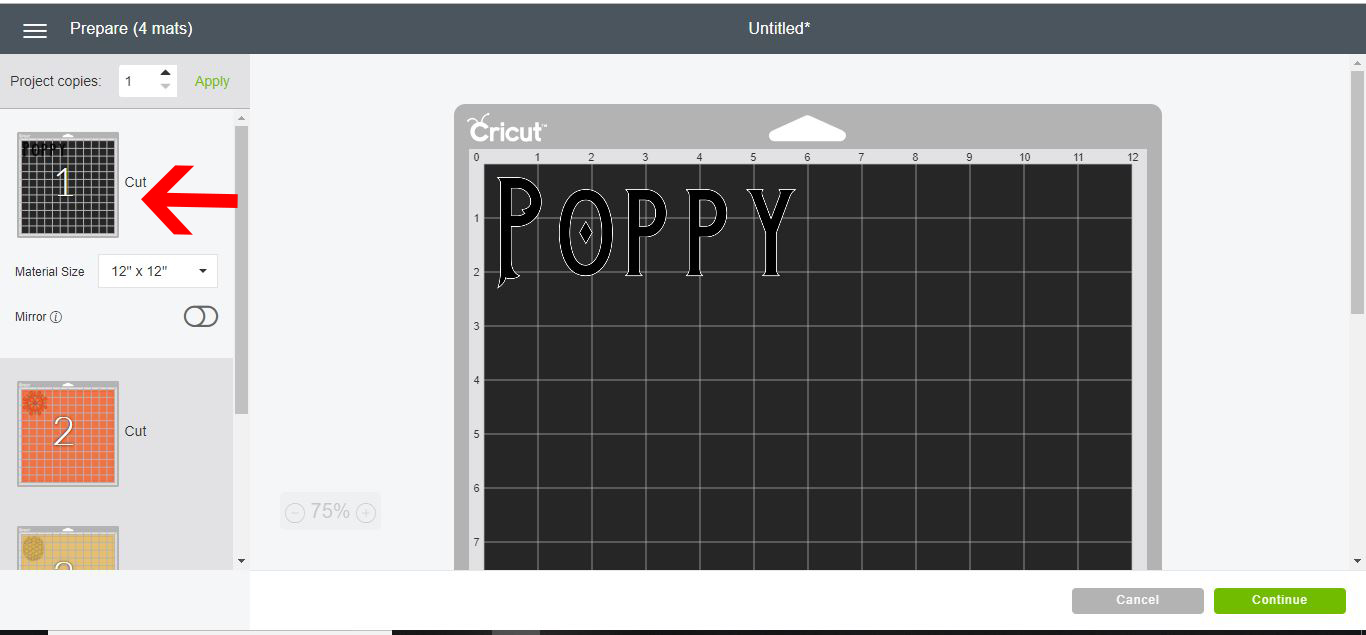
18- A cut screen will appear. You can see on the left all the different parts of the images to be cut in vinyl. Depending on what color your images were in the design area, you can cut each part separate.
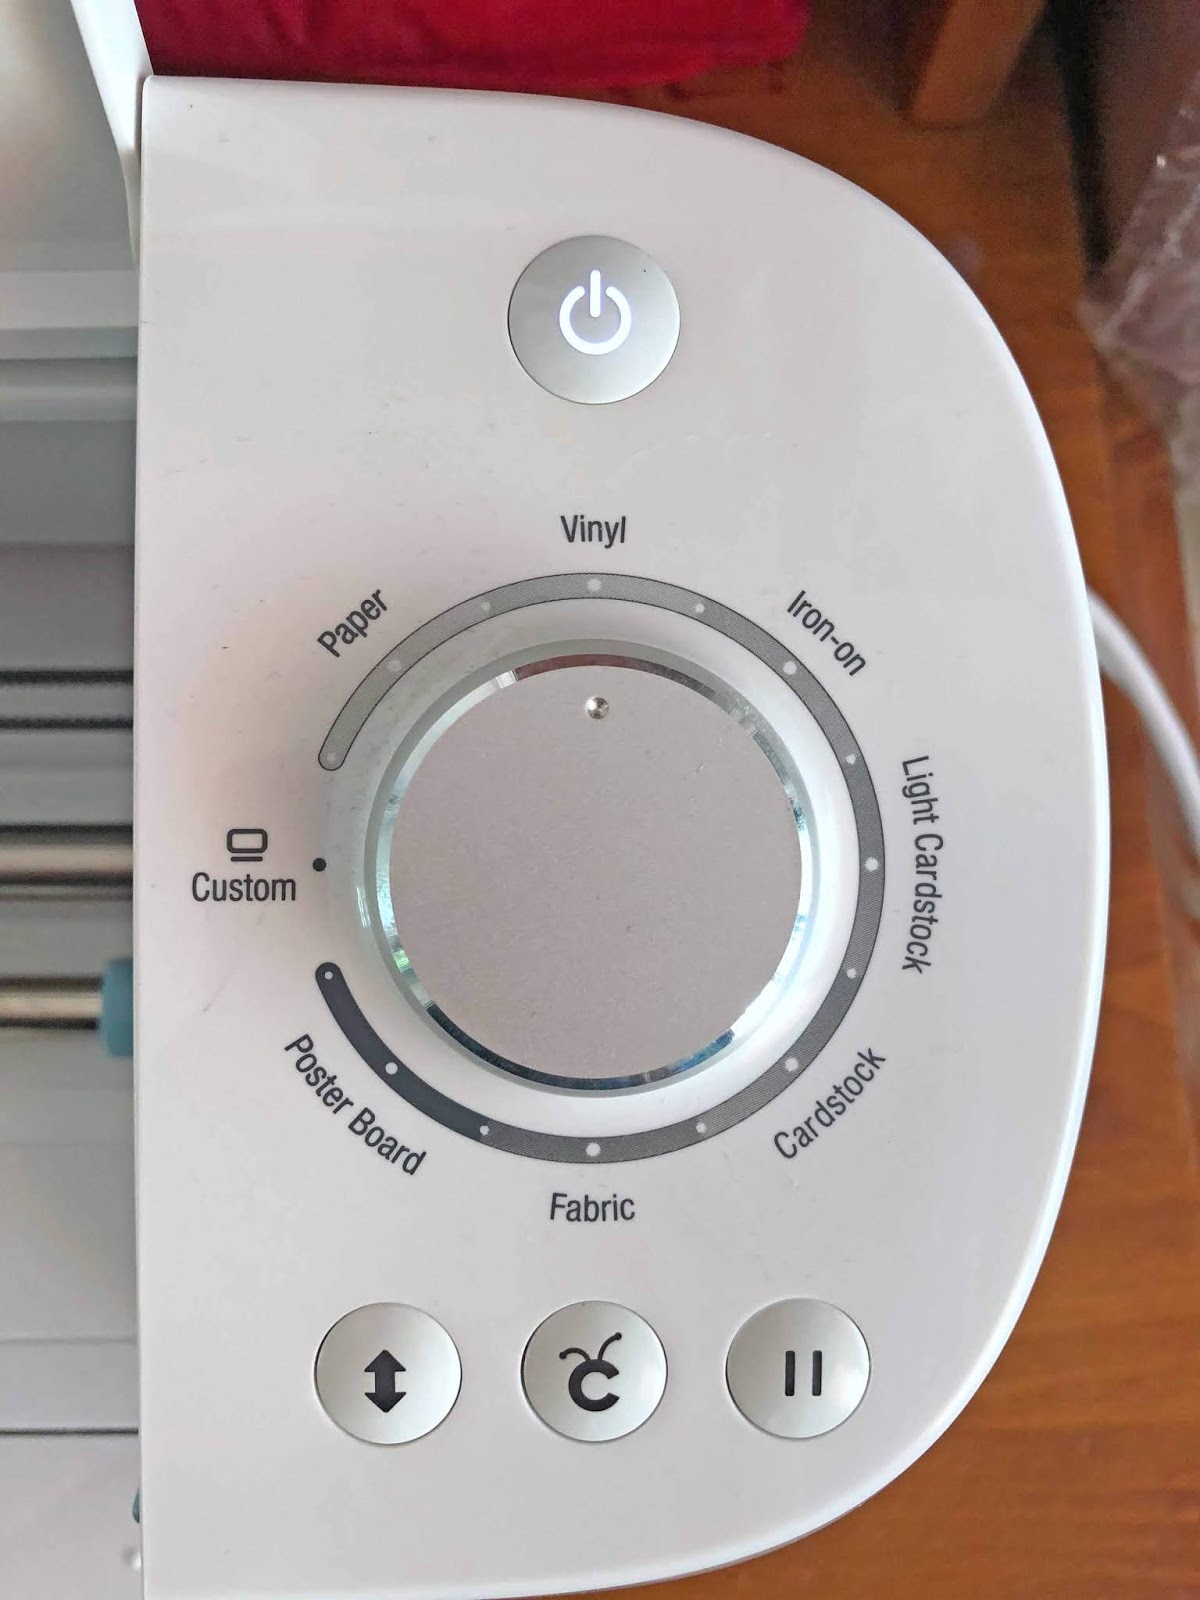
19- With your machine connected, your next step is to click on the media. To cut vinyl select the premium outdoor vinyl option.
20- Turn the dial on your machine to the vinyl icon. (note if you need to use a specific depth, select the custom option on the dial.)
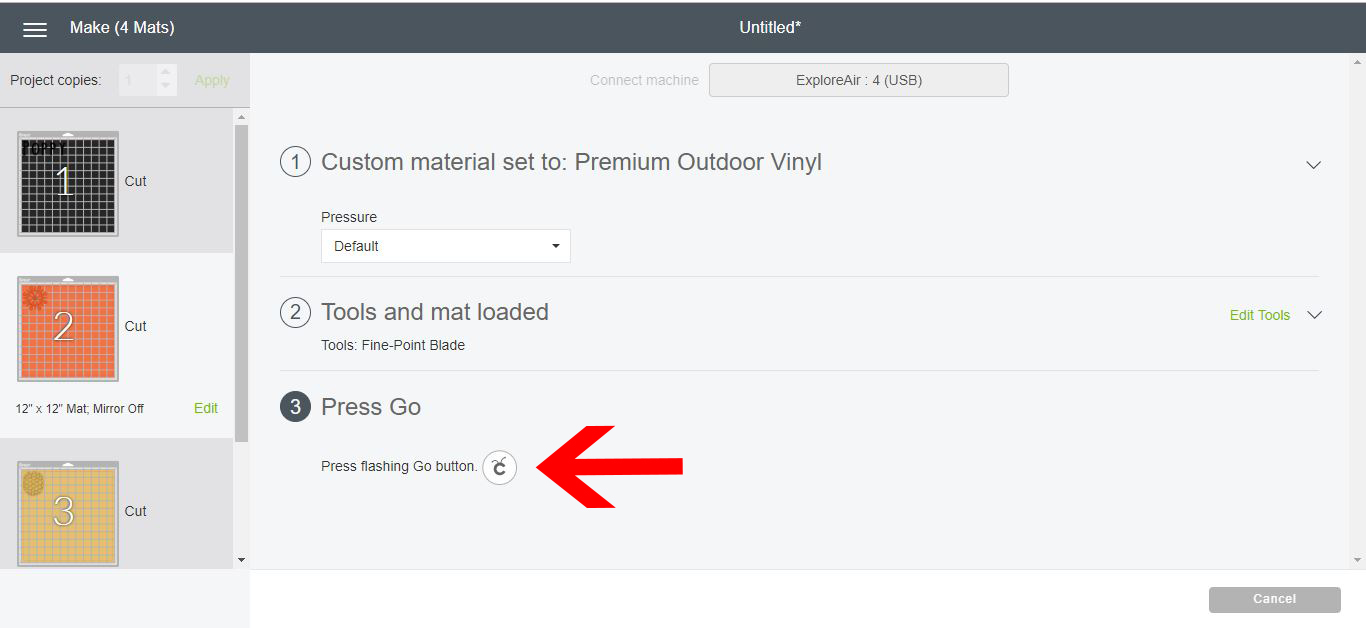
21-Load your mat with the vinyl on it. Then click on the go button on your machine.
23- As the machine cuts the vinyl there will be a countdown percent on your screen.
24- Your designs are now cut. You can weed the vinyl and use it on your projects.
1- Log in to Cricut Design Space.
2-Click on the new project icon.

3-To create text to cut in vinyl, select the text icon.
4- Type your text. Then click on the font icon.
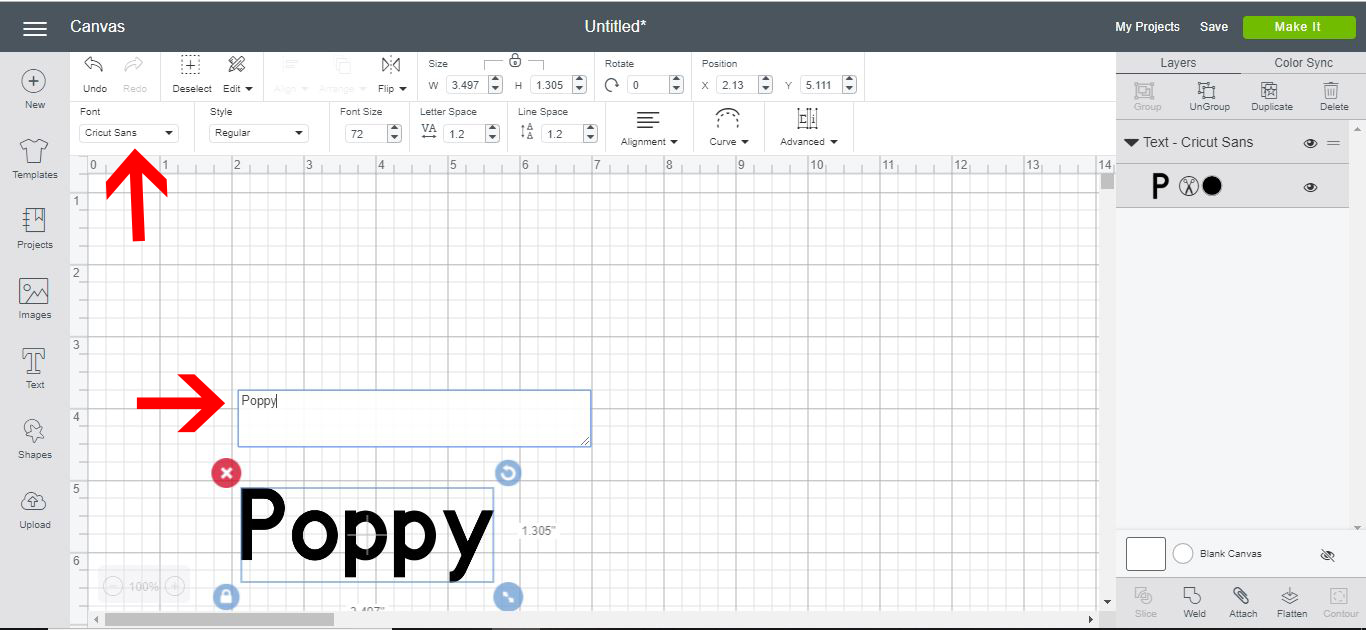
5- Select the font you would like your text. I am using Black Velvet 2 from fontbundles.net
6- Your text is now ready to cut in vinyl.
To cut an image- Click on the image icon.

7-Click on the search icon and find an image.
8- Click on the image you would like. You can search for free images. Once you have picked your image, click insert image.
9- If you would like to use your own image click on the uploads icon. Then click on the upload images option.

10- A new window will open. Click on the Browse icon.
11- Select your image.
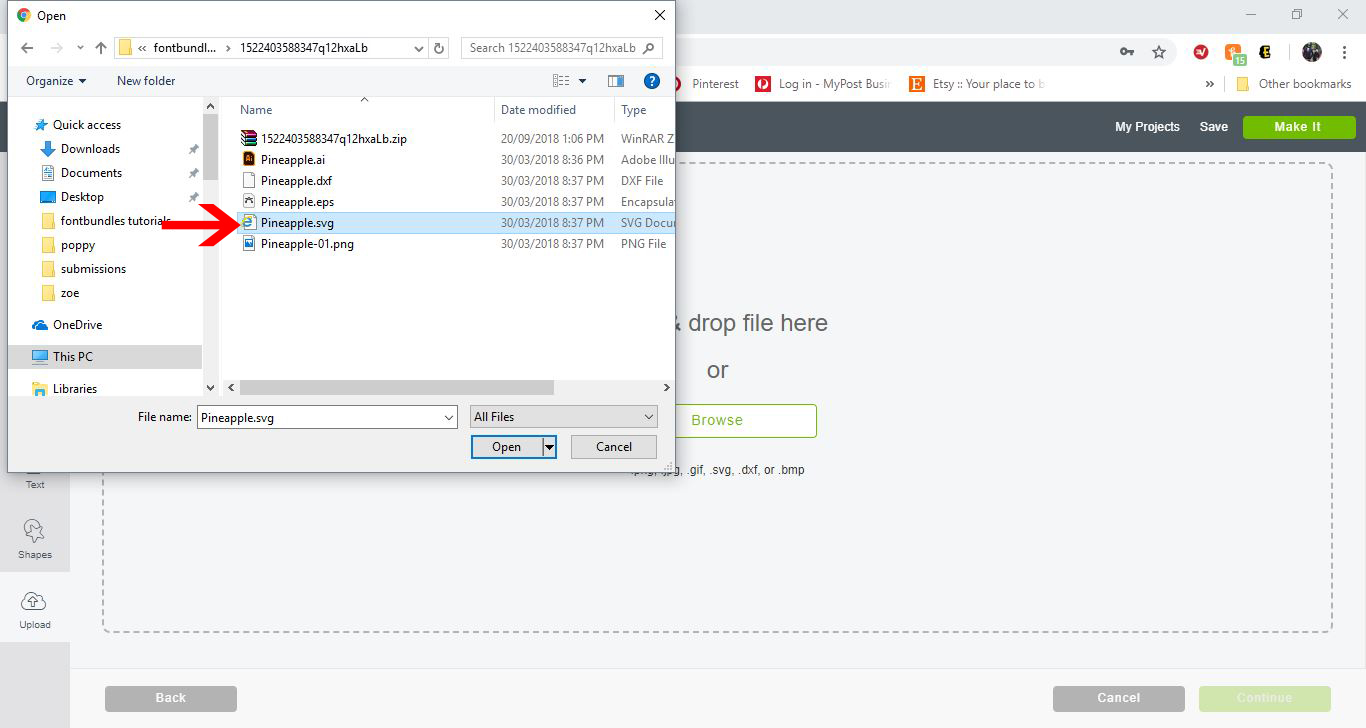
12- Your uploaded image will appear on the screen. I am using the Pineapple SVG from designbundles.net. Click Save.

13- The image will now appear in the recently uploaded images. Click on the image, then click on insert image.
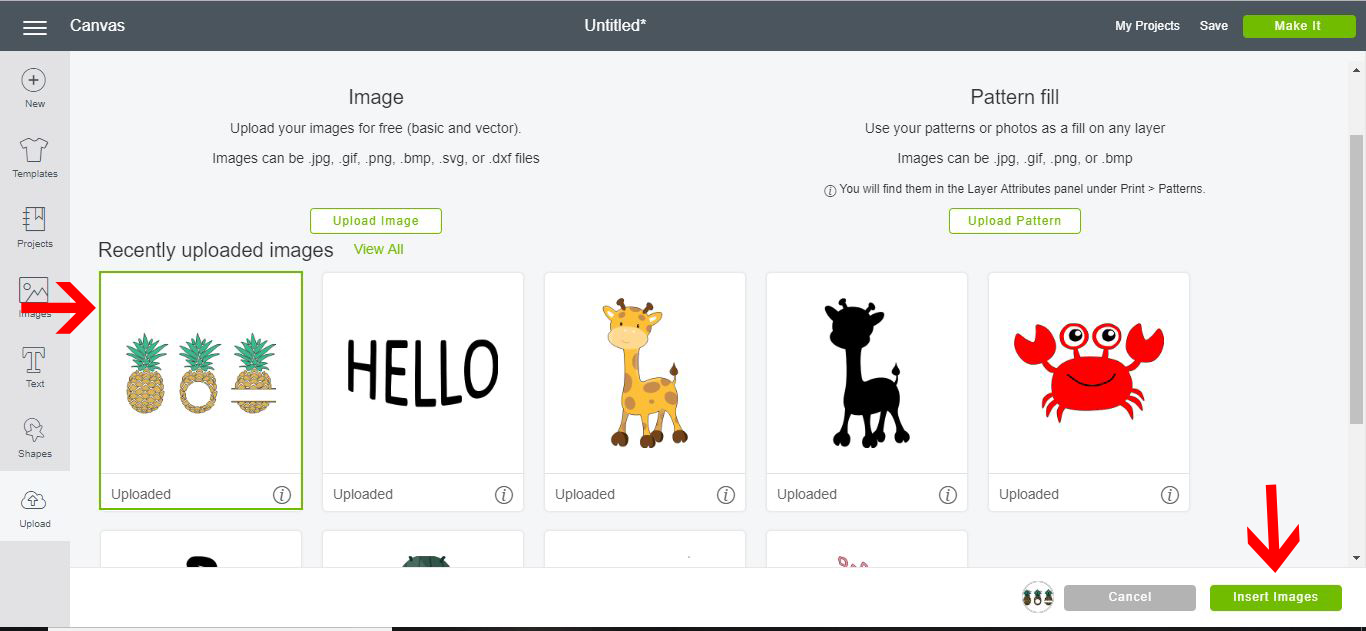
14- Your image will now appear on the design space.
15- To select only part of the design to cut in vinyl, you can right-click and ungroup your image.
16- Your image is ready to be cut in vinyl.
17- As you can see below all these different types of text and images can now be cut in vinyl. Click on Make it.
18- A cut screen will appear. You can see on the left all the different parts of the images to be cut in vinyl. Depending on what color your images were in the design area, you can cut each part separate.
19- With your machine connected, your next step is to click on the media. To cut vinyl select the premium outdoor vinyl option.

20- Turn the dial on your machine to the vinyl icon. (note if you need to use a specific depth, select the custom option on the dial.)
21-Load your mat with the vinyl on it. Then click on the go button on your machine.
22- The machine will start cutting your designs.

23- As the machine cuts the vinyl there will be a countdown percent on your screen.

24- Your designs are now cut. You can weed the vinyl and use it on your projects.