- By Design Bundles
- 4 Mins
- Cricut Tutorials
How to Use the Snap Rotation Function in Cricut Design Space
Today we’ll create an easy flower design. To start, open a new project in Cricut Design Space.
Step 1- Insert heart shape and duplicate
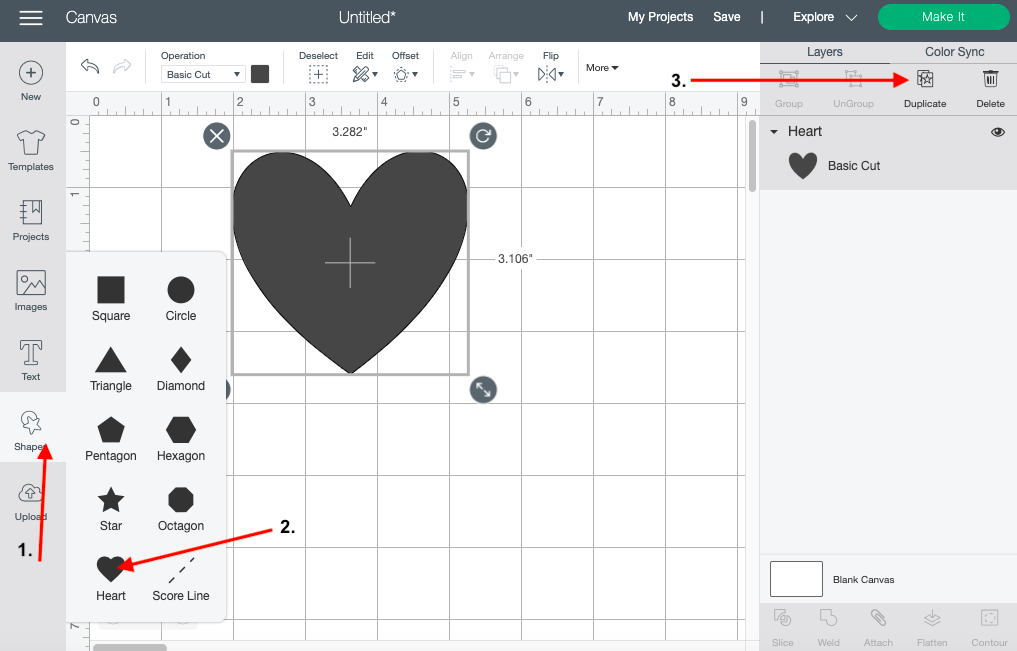
First, we will create a heart shape by using the shapes tool in Cricut Design Space. After creating the heart shape, click the duplicate icon which is on top of your layers panel. We’ll be using these two items to create the design.
Step 2 - Snap rotate and align center horizontally
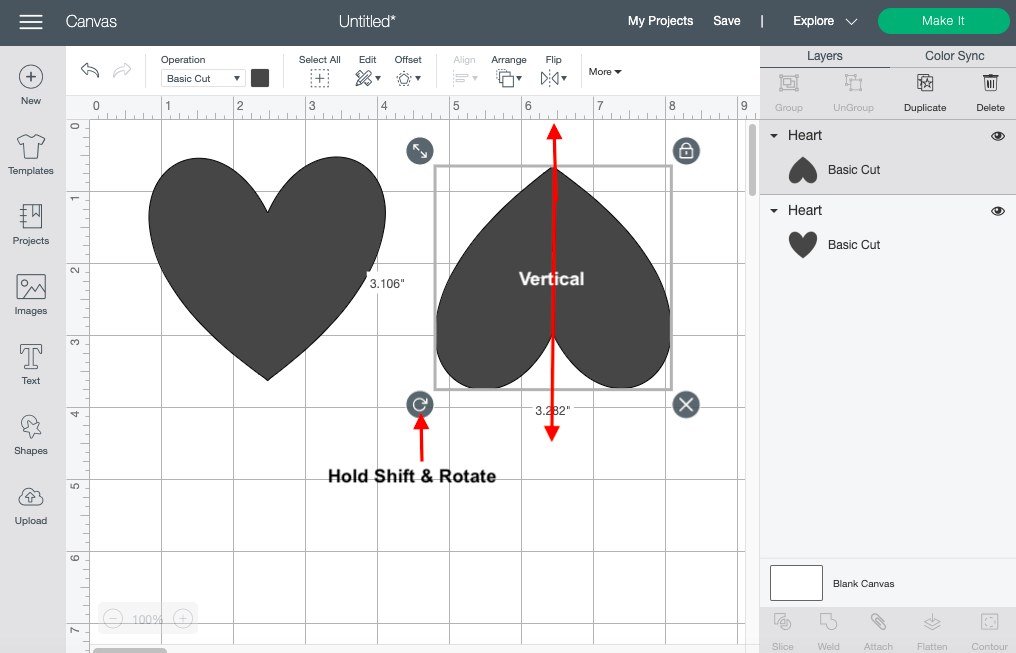
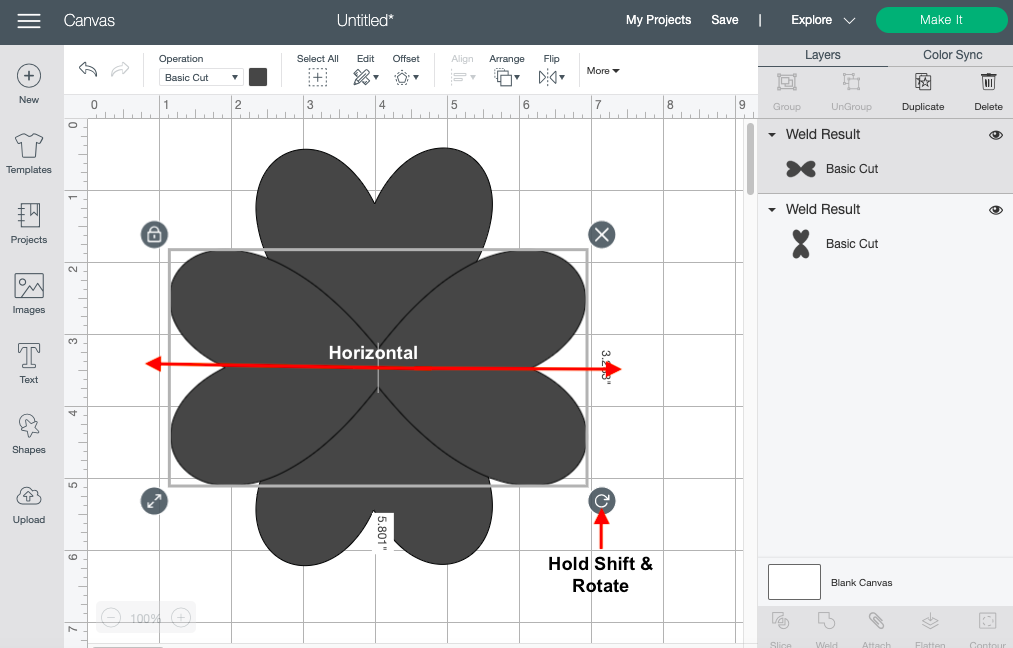
We will be flipping the duplicate heart and repositioning it. Select the duplicate heart. Next, snap rotate by holding down the shift key and rotating the shape to 180 degrees vertically. This will turn the shape upside down, which is what we want.
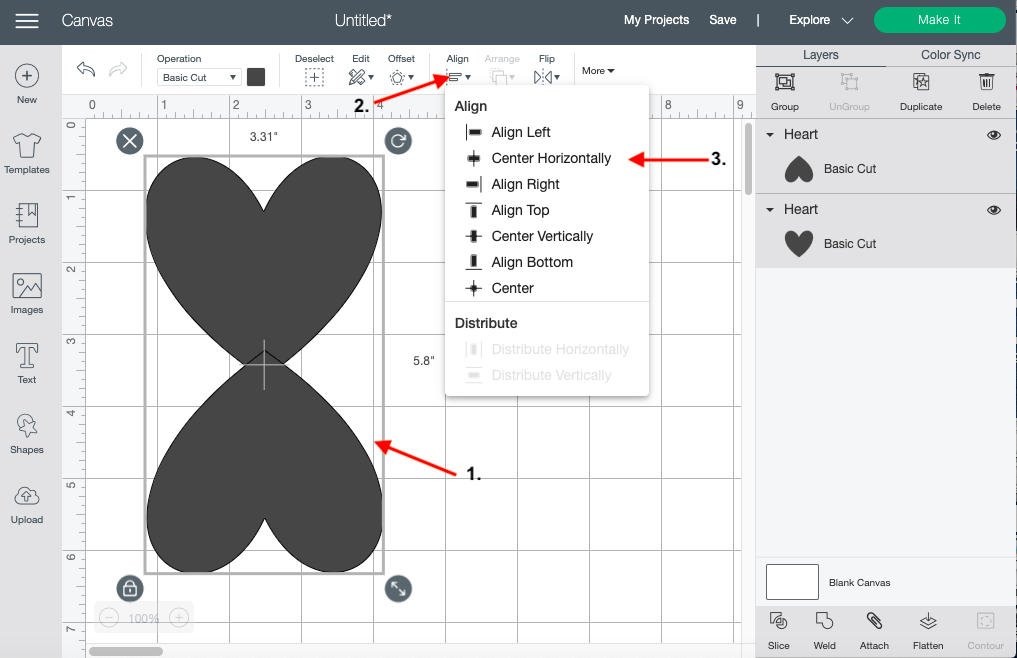
Place the heart shape slightly over the object that you first created. Select both items and align the center horizontally by clicking the Align icon on the top toolbar.
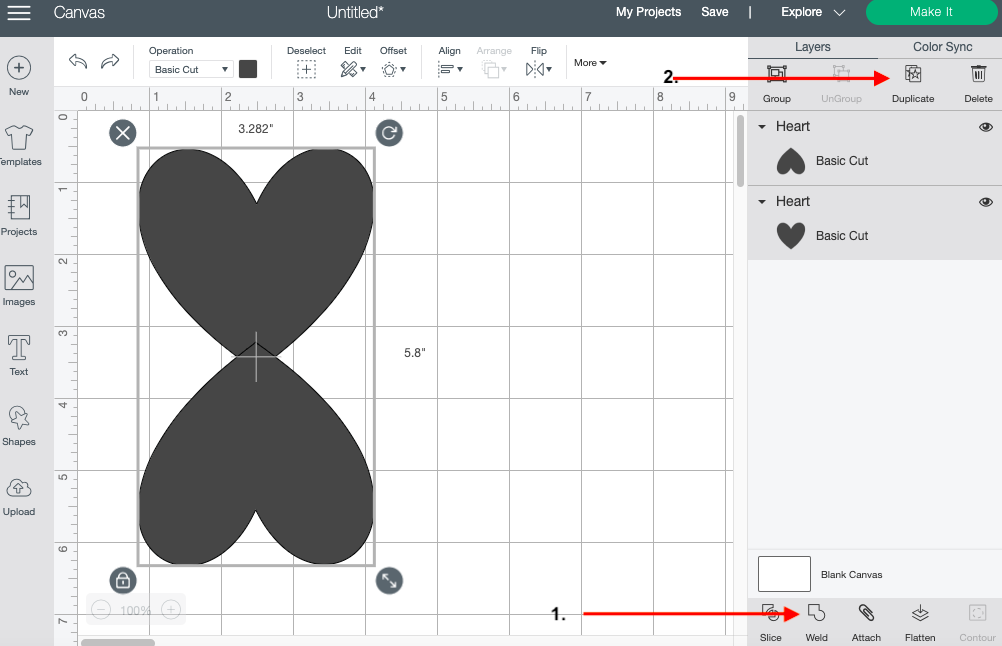
Once you are done, click the Weld tool at the bottom of your layers panel. You will now have one solid figure. Click the Duplicate button once again to make a copy of your shape.
Step 3 - Snap Rotate and Center Align Objects
After duplicating your object, repeat step two. This time rotate your object horizontally and place it on top of the original one.
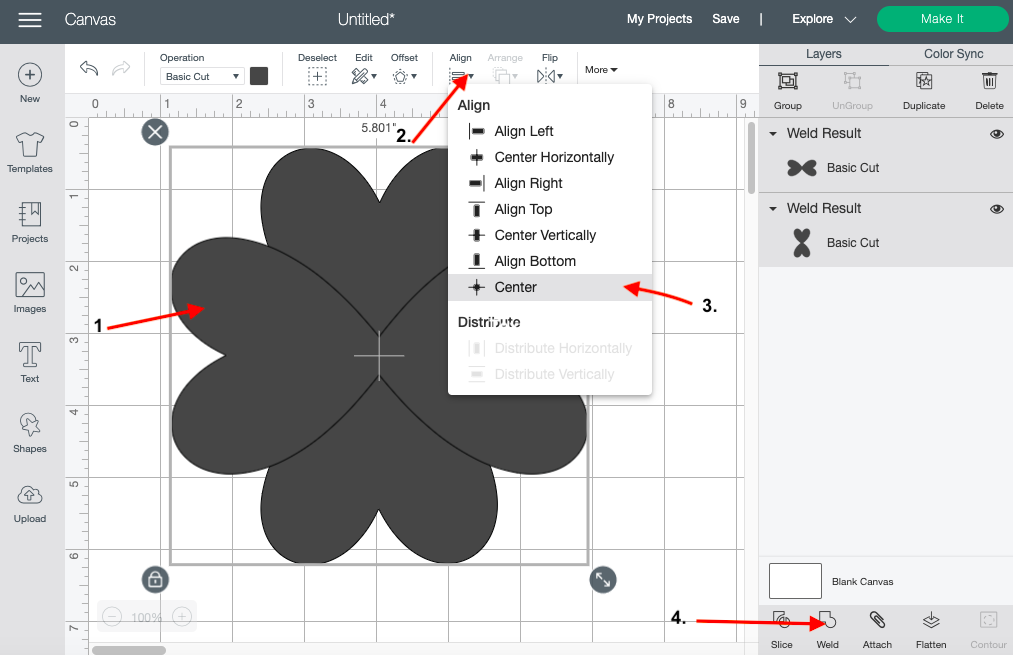
Select both objects and click the Align button on the top toolbar. Then, select Center at the bottom of the pop-up window. Click Weld on the bottom of your layers panel to make one solid form.
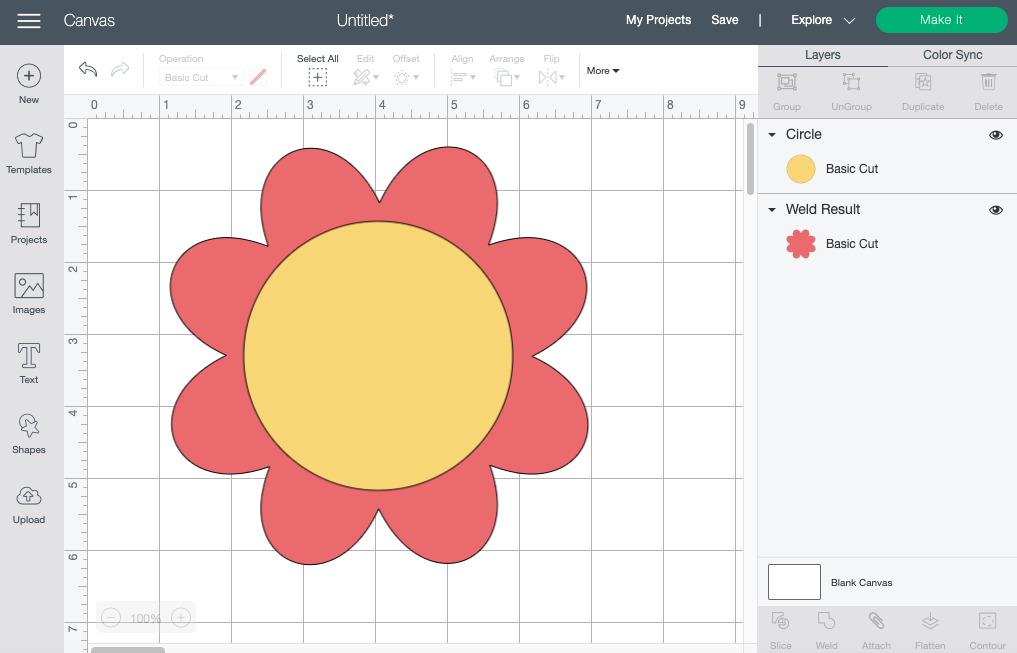
Insert a circle into your canvas and finish up your flower. You have easily created a design using the Snap Rotation feature.
If you liked this tutorial make sure to check out our tutorials on how to make a layered image and how to use the slice tool in Design Space.
6 Related Cricut Tutorials
The edit toolbar in Cricut Space Mobile app is filled with unique tools that can help create and modify your current project. Using it can be overwhelming and somewhat frustrating for someone just starting out. However, we can help you with that. In our easy-to-follow tutorial we will go over ...
In this tutorial we will learn how to use the layers toolbar in Cricut Design Space Mobile app. This will allow us to make changes to select layers within our design. It’s extremely helpful when working with a multiple-layer design such as the 3d layered mandala SVG that we’...
Today we’ll focus on how to use the Slice tool in Cricut Design Space App. If you're using the desktop version of Cricut, make sure to check out this guide on slicing in Design Space on the desktop.Step 1. Create a New ProjectAfter signing in, create a new Cricut ...
*Cricut expression air 2 machine used. 1- Open design space. Click on new project.2- Click on the text icon.3- Type your text in the text box. As you type the text will appear on the design space.4- with your text selected, click on the font type drop down ...
If you want to split an image to create a monogram, cut a shape out from a photo, or are curious about what the Slice Tool in Cricut Design Space can do then keep reading.First, you will need to make sure that you have downloaded and unzipped the file. ...
Follow our easy to use tutorial for using Font Glyphs on the iPad with the Cricut Design Space app.

 All your Font Needs


