
How to Use the Edit Toolbar in Cricut Design Space Mobile App
The edit toolbar in Cricut Space Mobile app is filled with unique tools that can help create and modify your current project. Using it can be overwhelming and somewhat frustrating for someone just starting out. However, we can help you with that. In our easy-to-follow tutorial we will go over each tool within the edit toolbar. You will also learn how the tools can help us in the creative process.
To demonstrate each tool, I’ll be using a Daisy layered SVG from Designs Bundles.
To begin, create a new project in Cricut Design Space and upload your SVG. We have an easy-to-follow guide on using the Upload Icon in Cricut Design Space, if necessary.
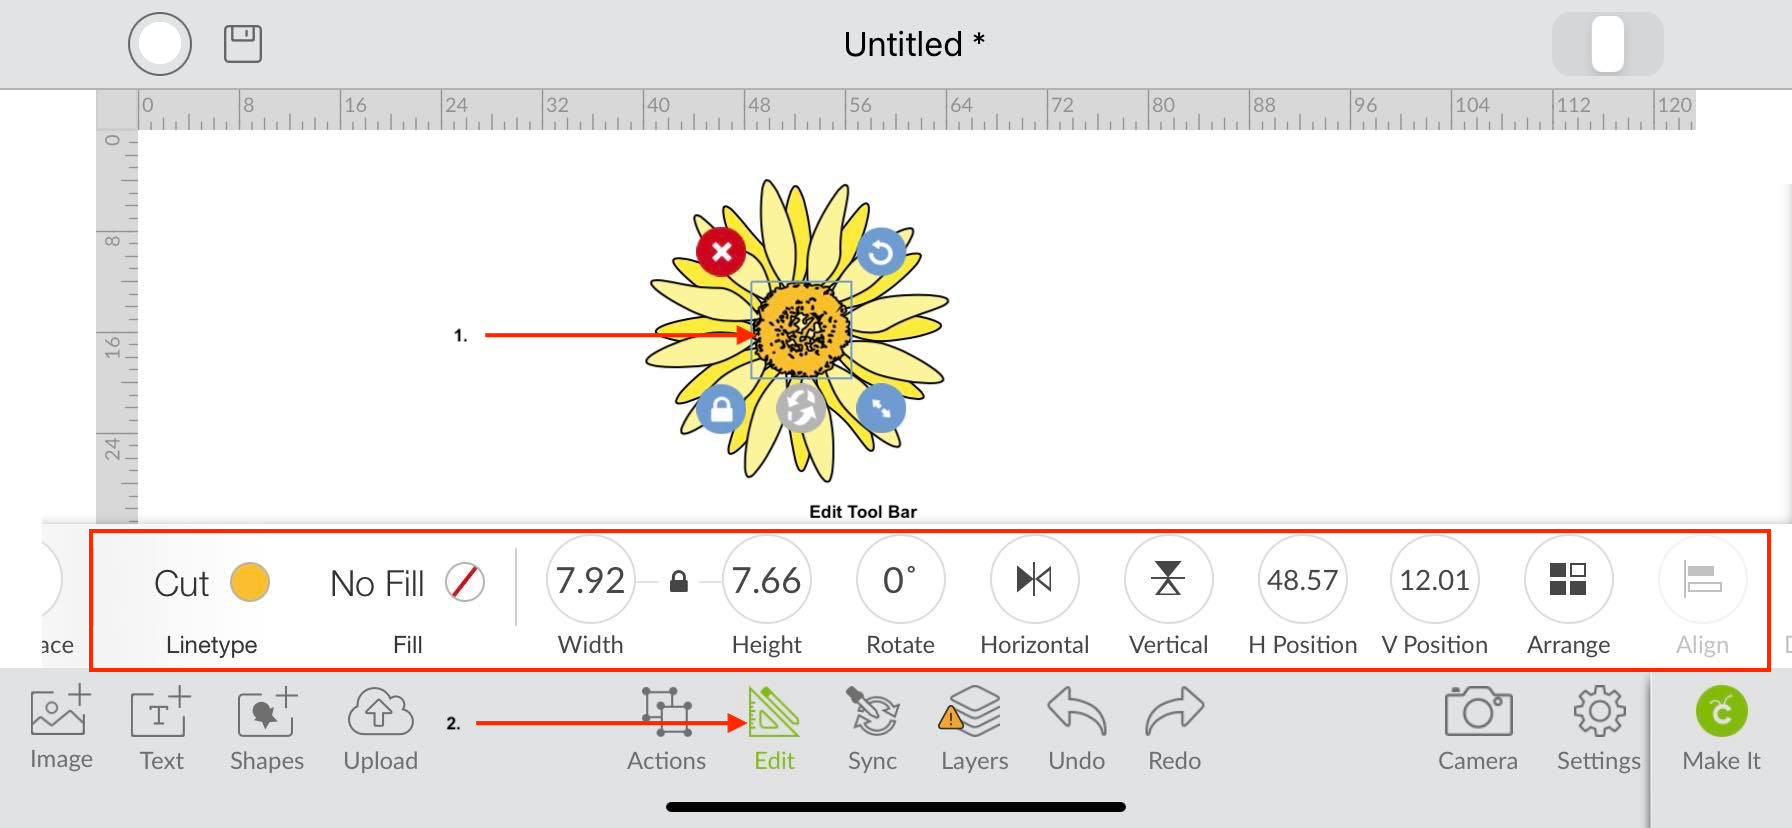
Step 1 - Open your Edit Toolbar
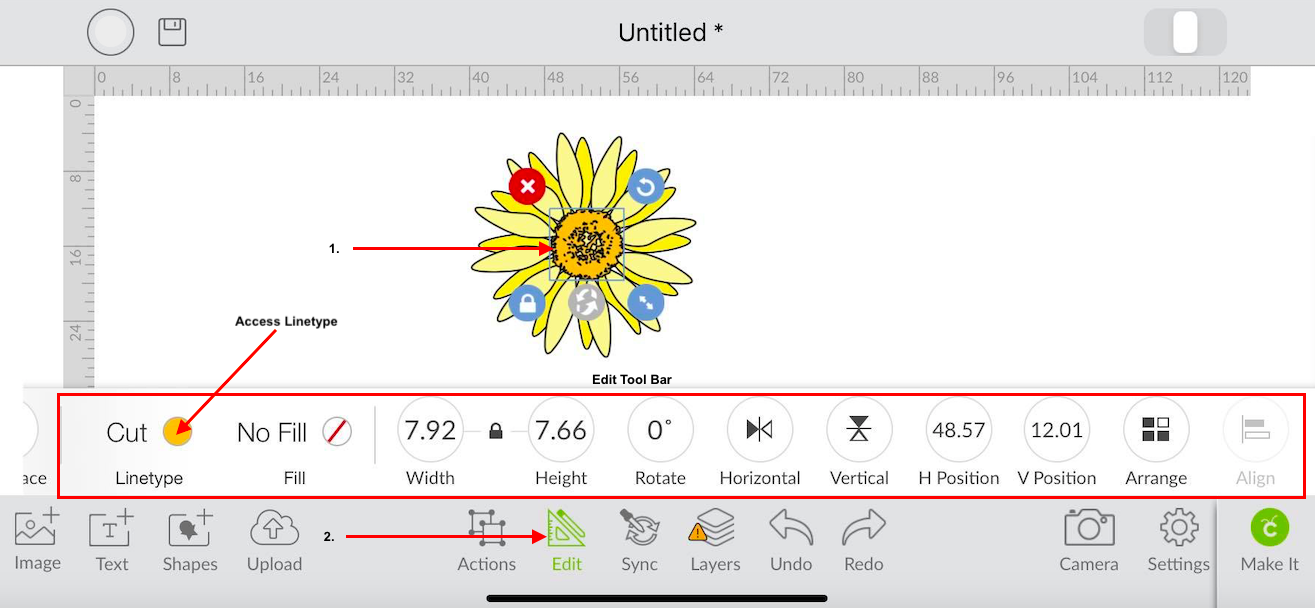
With your design selected, click the Edit icon on the lower toolbar. Another toolbar will appear right above it, which is known as your Edit toolbar. Within this toolbar, you can make changes to your selected item using the different tools.
Step 2 - Changing Project type and Color
First we will learn how to use the Linetype and Fill tool. These tools will help us change the type of project we want to create as well as the color.
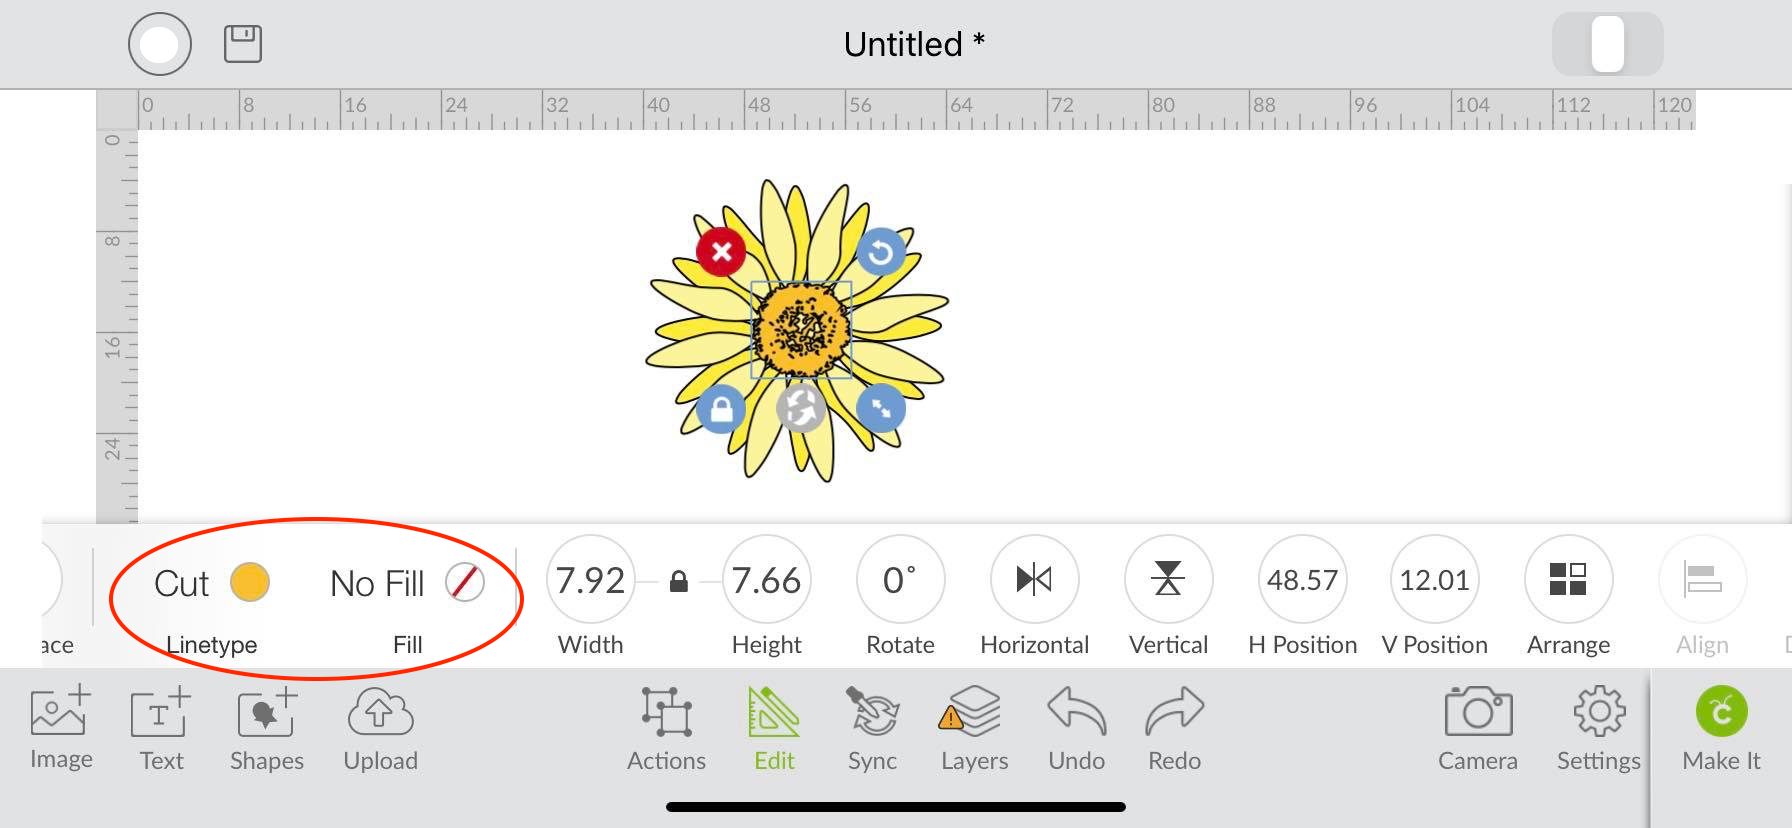
Use the Linetype Tool
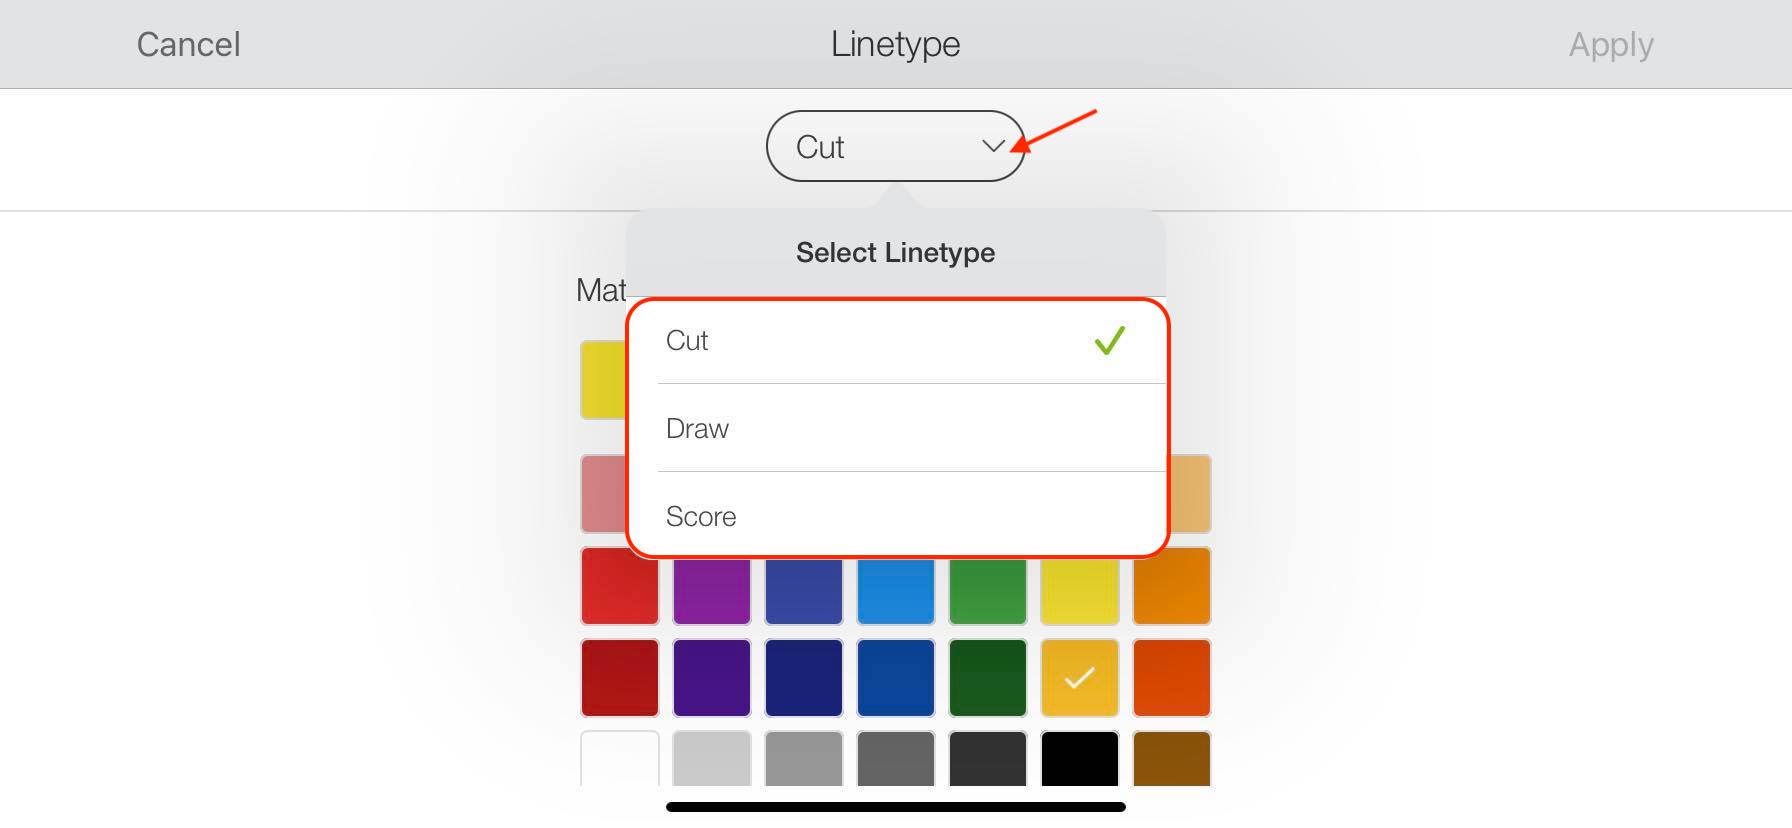
Let’s begin with our Linetype tool. With your item selected click on the small circle next to the word “cut”. Please note that the word will change based on your selection under linetype.
After clicking on the small circle, a window will appear on your screen, known as your Linetype window. In this window, you can change the color of your selected item by clicking on a color swatch of your choice. A checkmark will appear on that selected swatch, and your item change to that color. You can also drag the circle on the bottom to choose different shades of your desired color.
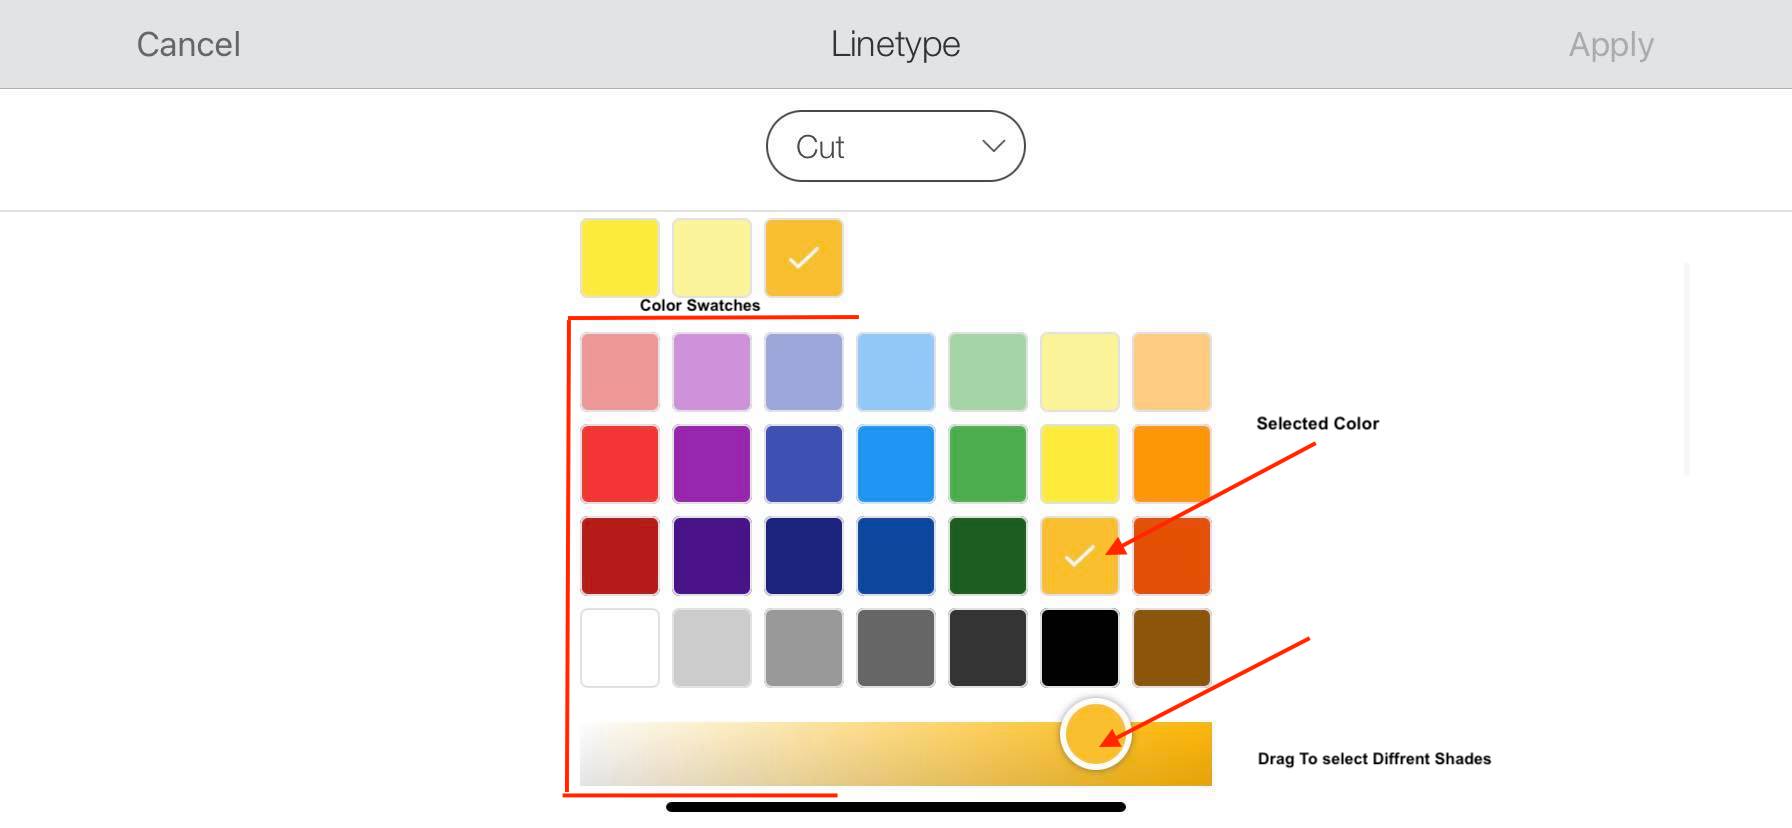
You can also change the Linetype of the selected item. Simply click on the tab on top of the window and a small pop-up will appear. You can now choose between Cut, Draw or Score to change the project type altogether.
The cut setting is used when the project only requires you to cut out the item. This means that you are not doing any type of printing or writing, only cutting out the set of layers.
The cut setting is great to use when cutting out silhouettes, multiple layered designs using HTV, or even making a 3D cut design. The cut line is usually the default setting for Cricut Design Space.
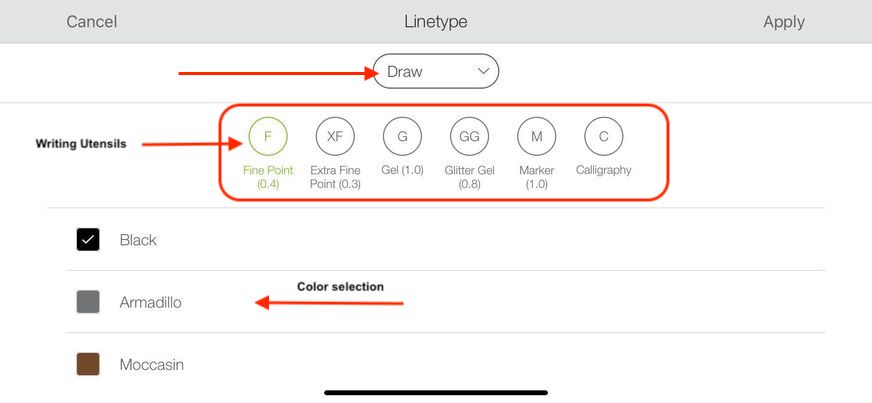
Next on the list is Draw. When you select Draw, another window will appear. Here you can choose what type of writing utensils you will be using for the project. This can range from gel pens to even markers.
You can also choose a color based on the type of writing utensil selected. Finally, you can change which parts of your project to draw. This can be adding a personal touch to a greeting card or invitation.
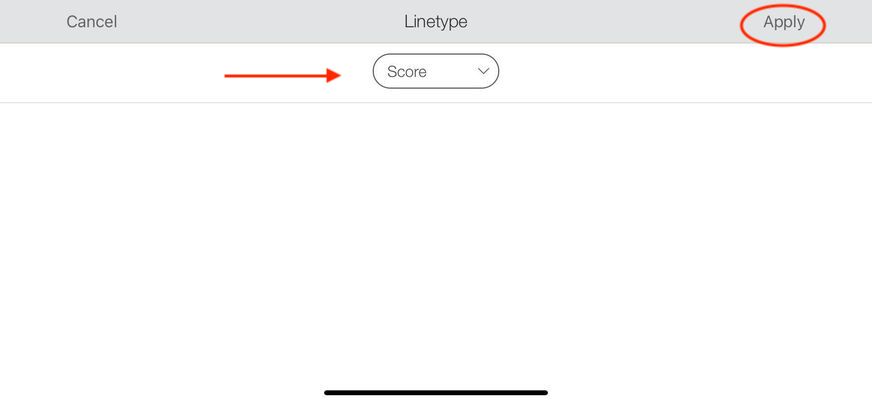
Last but not least is the score line. This tool is used when you need to create creases and folds for items such as cards, envelopes, or intricate gift boxes.
Use the Fill Tool
You are also able to use the Fill tool to change it dramatically as well. With your item selected click on your Fill tool.
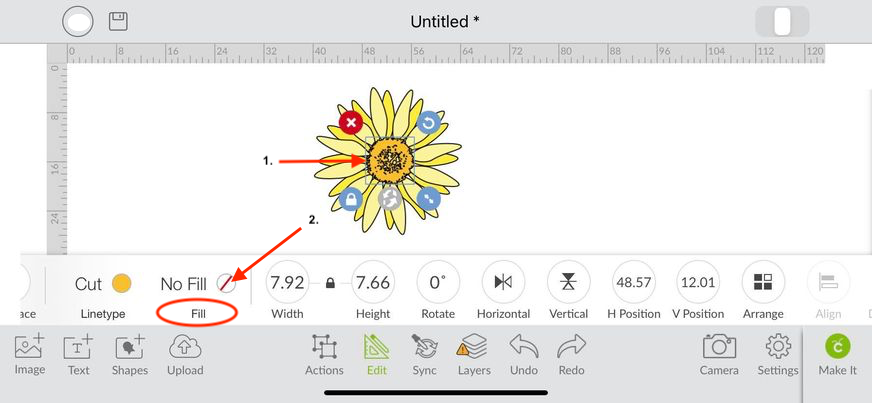
The Fill tool window will appear where you can use the tab to click Print. A color swatch will come up allowing you to choose the color for selected items. When the settings have been chosen, click Apply on the upper right-hand corner. Using this setting will allow you to print out the artwork and then cut it. The setting is excellent to use when creating stickers, cards, or any other project requiring you to print then cut.
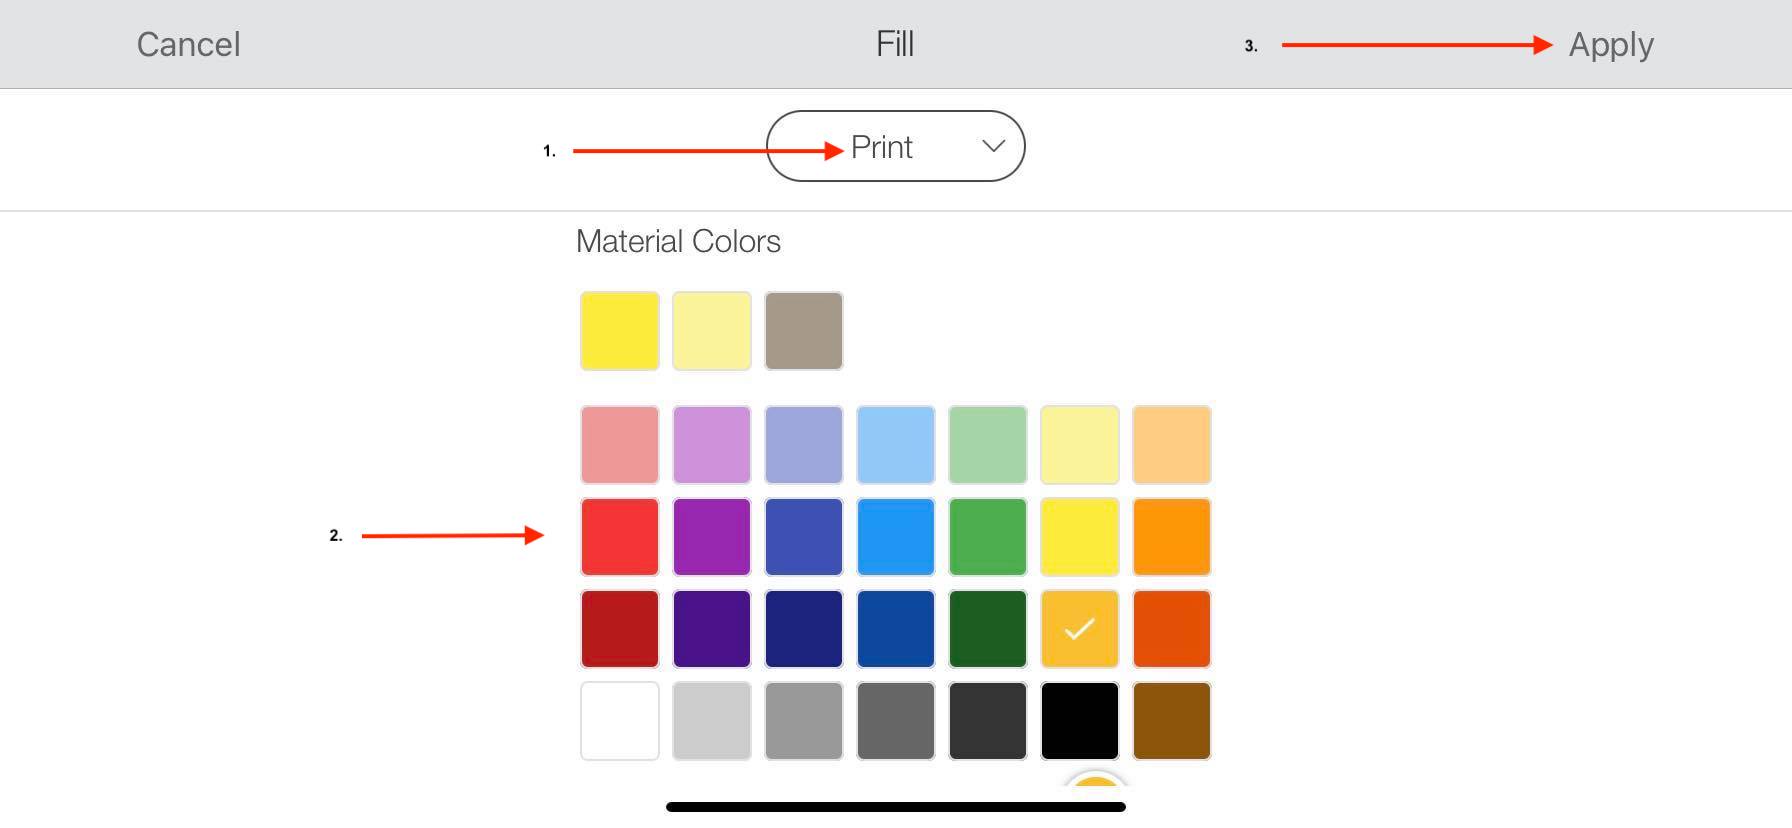
After you click apply you will see on the Edit toolbar that the selected item will now print out.
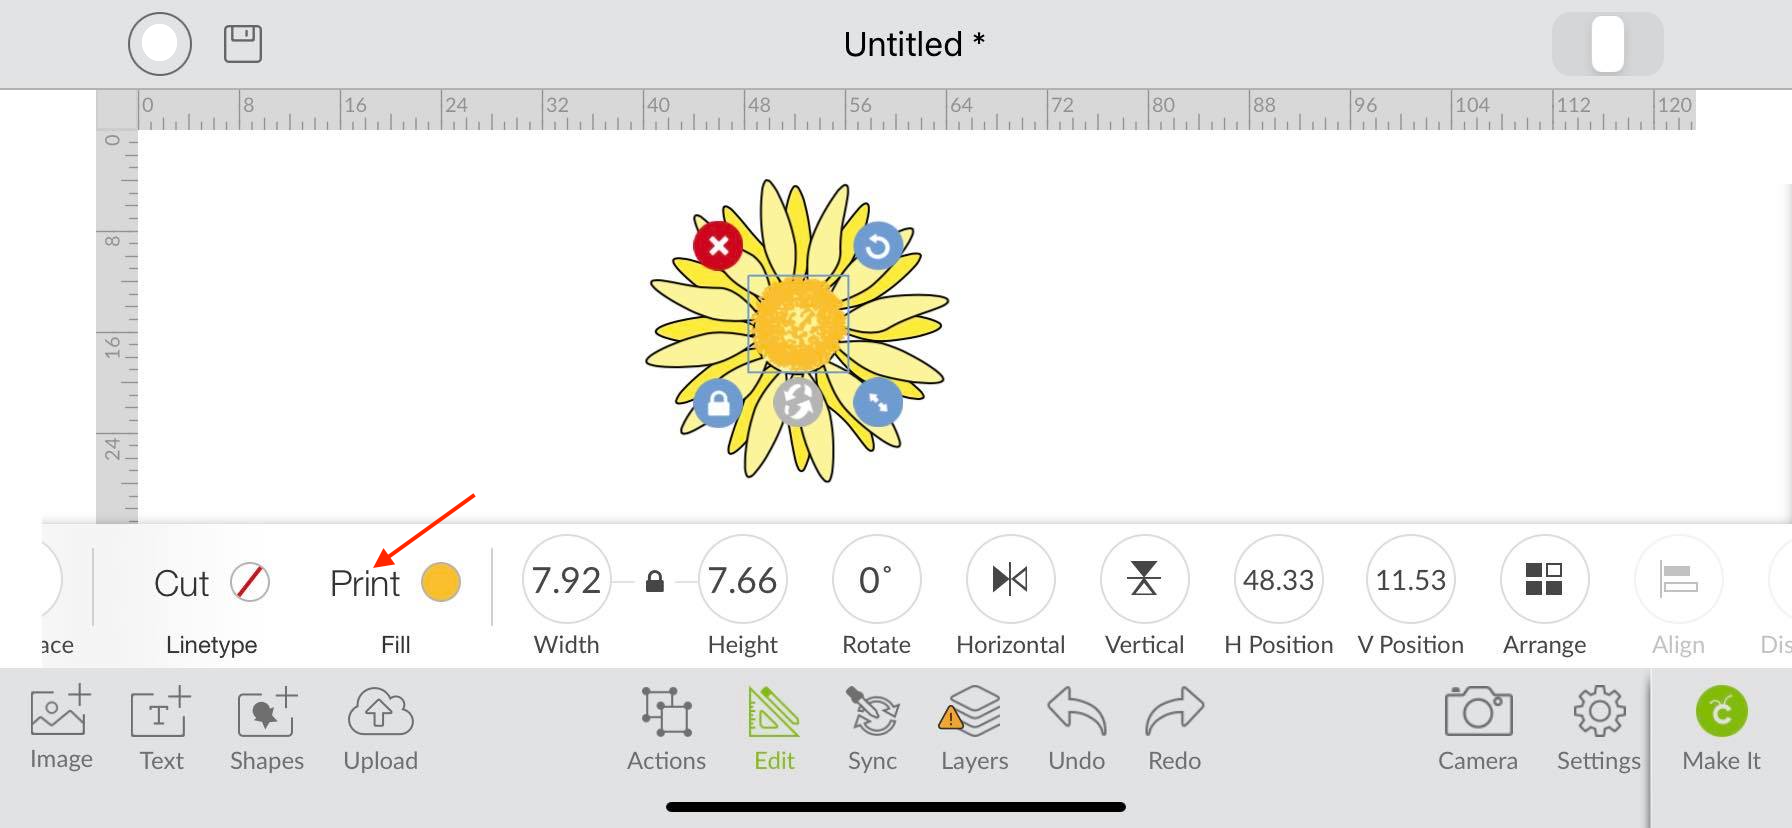
You are able to use the Linetype and Fill tool to communicate with your machine on how to handle the project materials.
Step 3 - Resizing and Rotating Design
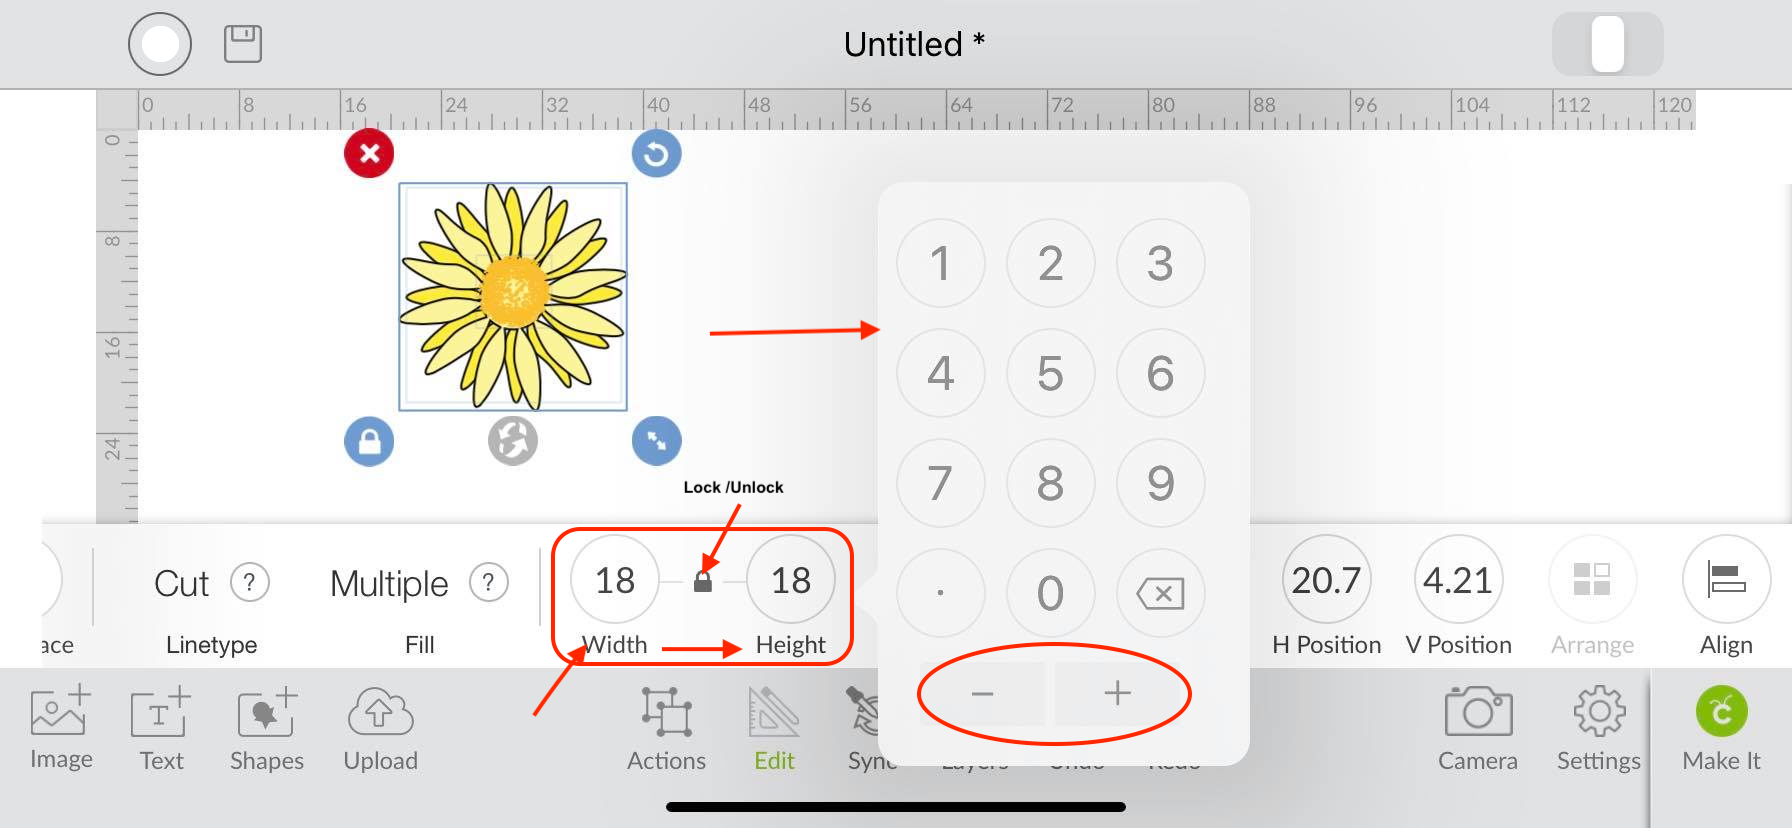
Next, we will focus on resizing our artwork using the width and height tools under the edit icon. Correctly resizing your image is important, especially when you are working with intricate designs. We’ll also go over how we can quickly rotate our design.
To start, select your items and then click on either width or height. A small window will appear with a set of numbers on top and symbols on the bottom. You can type in the preferred height or width. Do this by using the number pad that appears and decimal point if needed. You can also use the minus and plus symbols on the bottom to resize your item. For an evenly distributed image, keep the width and height tools on lock mode. If you need to resize either the width or height individually, click the lock button once to unlock.
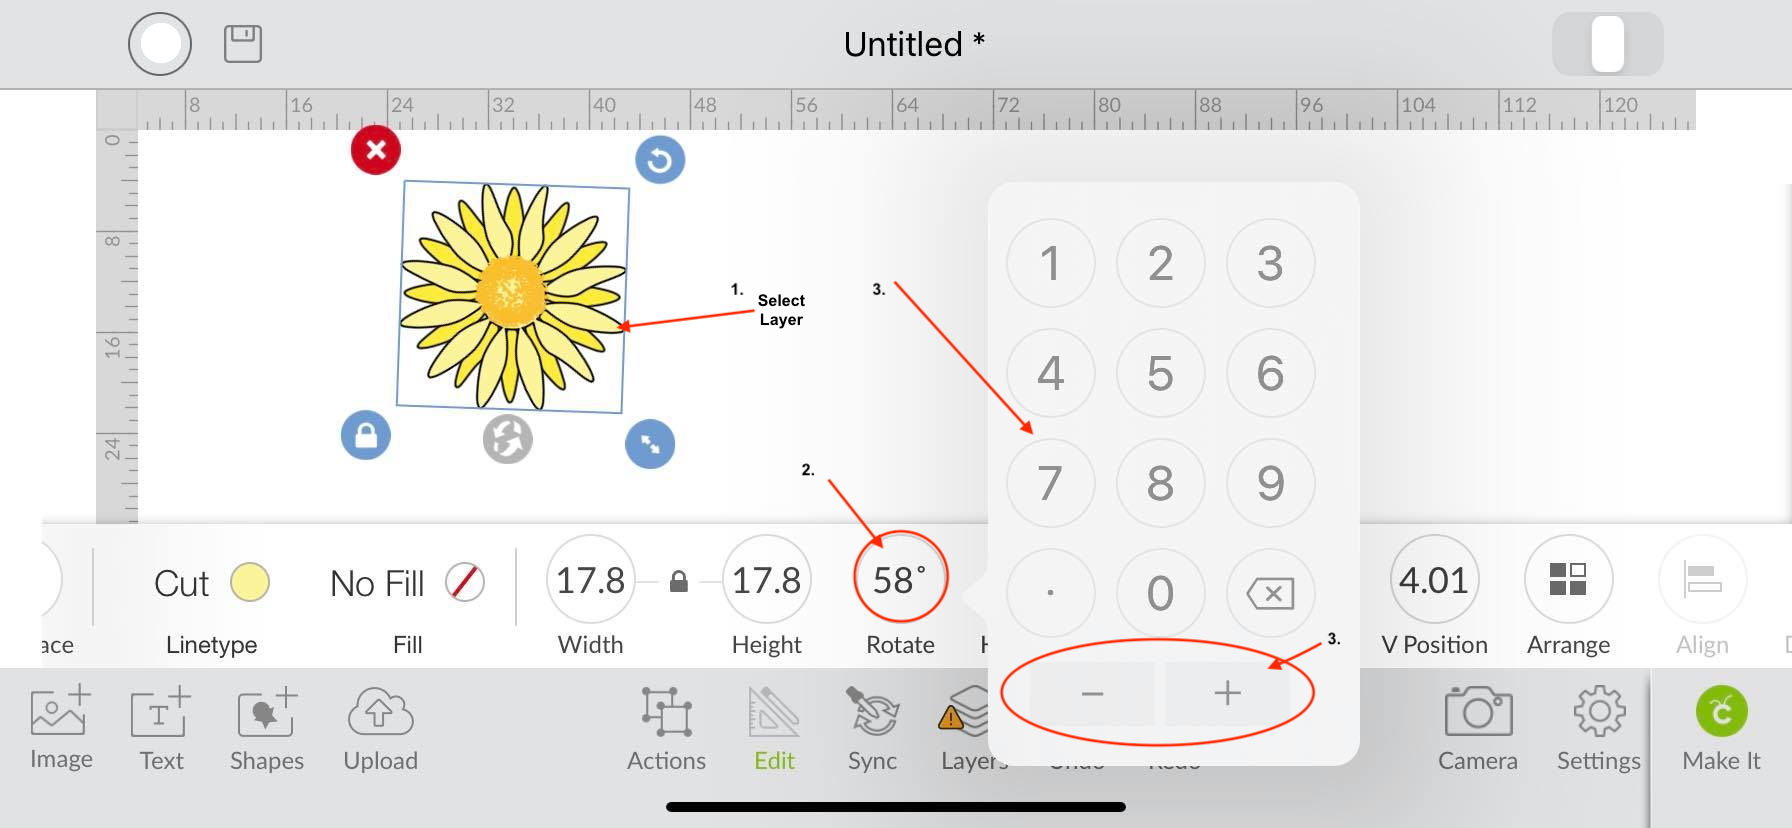
Next, select a layer of your image that you would like to rotate. I chose to rotate the lighter yellow layer. After selecting the layer, click the Rotate tool. A window will appear similar to the one we used to resize our image. We can use the numbers for our desired rotation or use the plus and minus buttons on the bottom.
Step 4 - Mirror Artwork
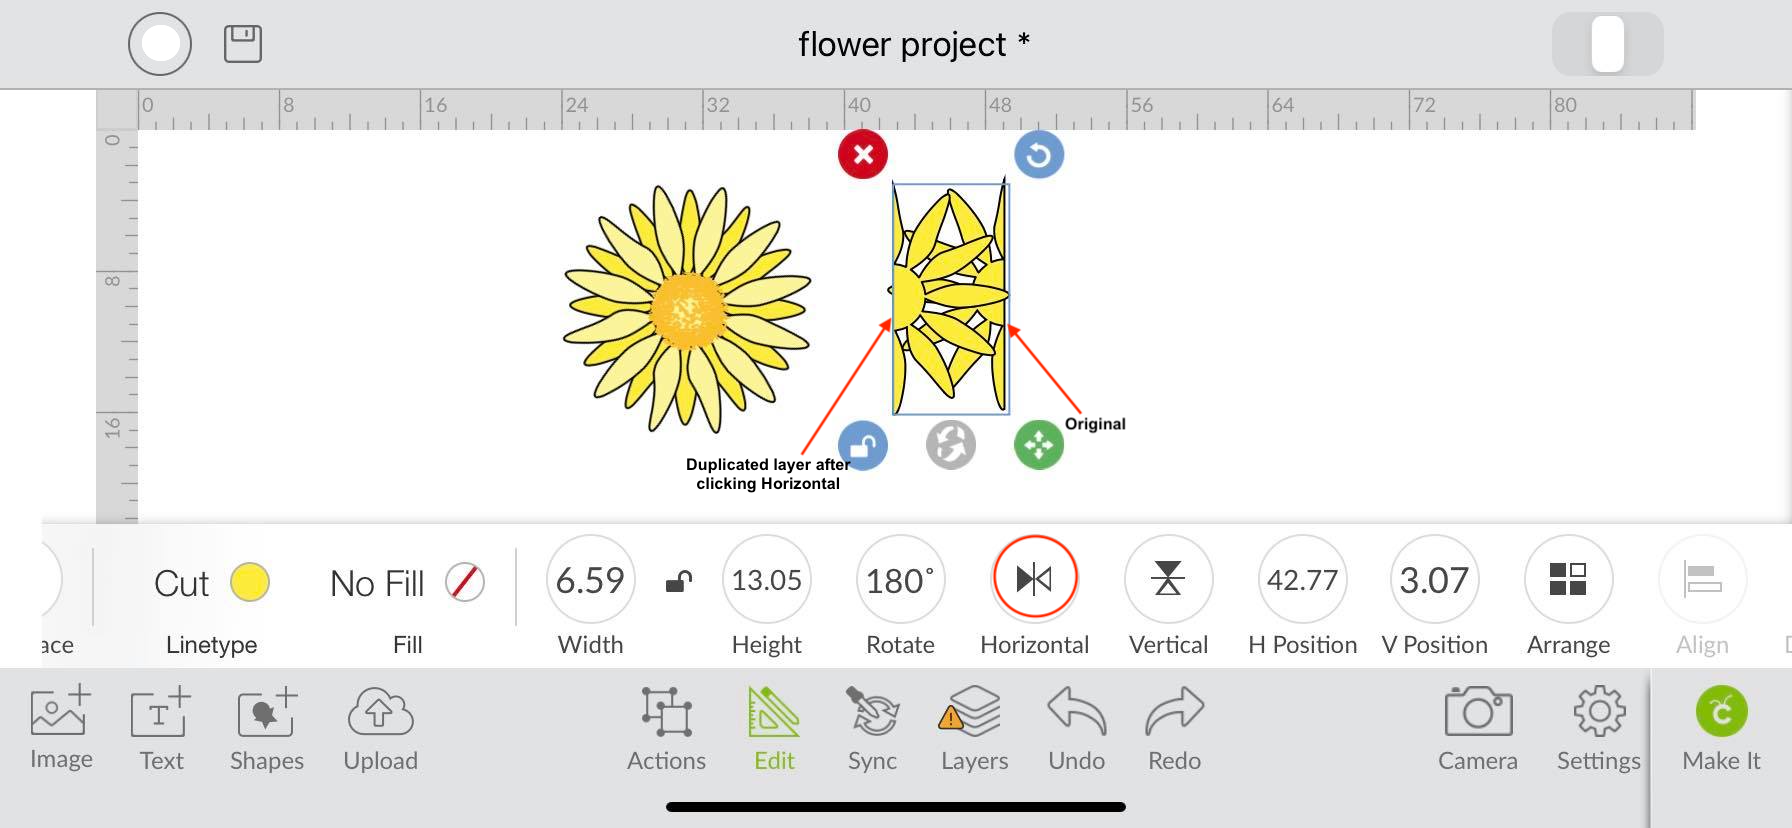
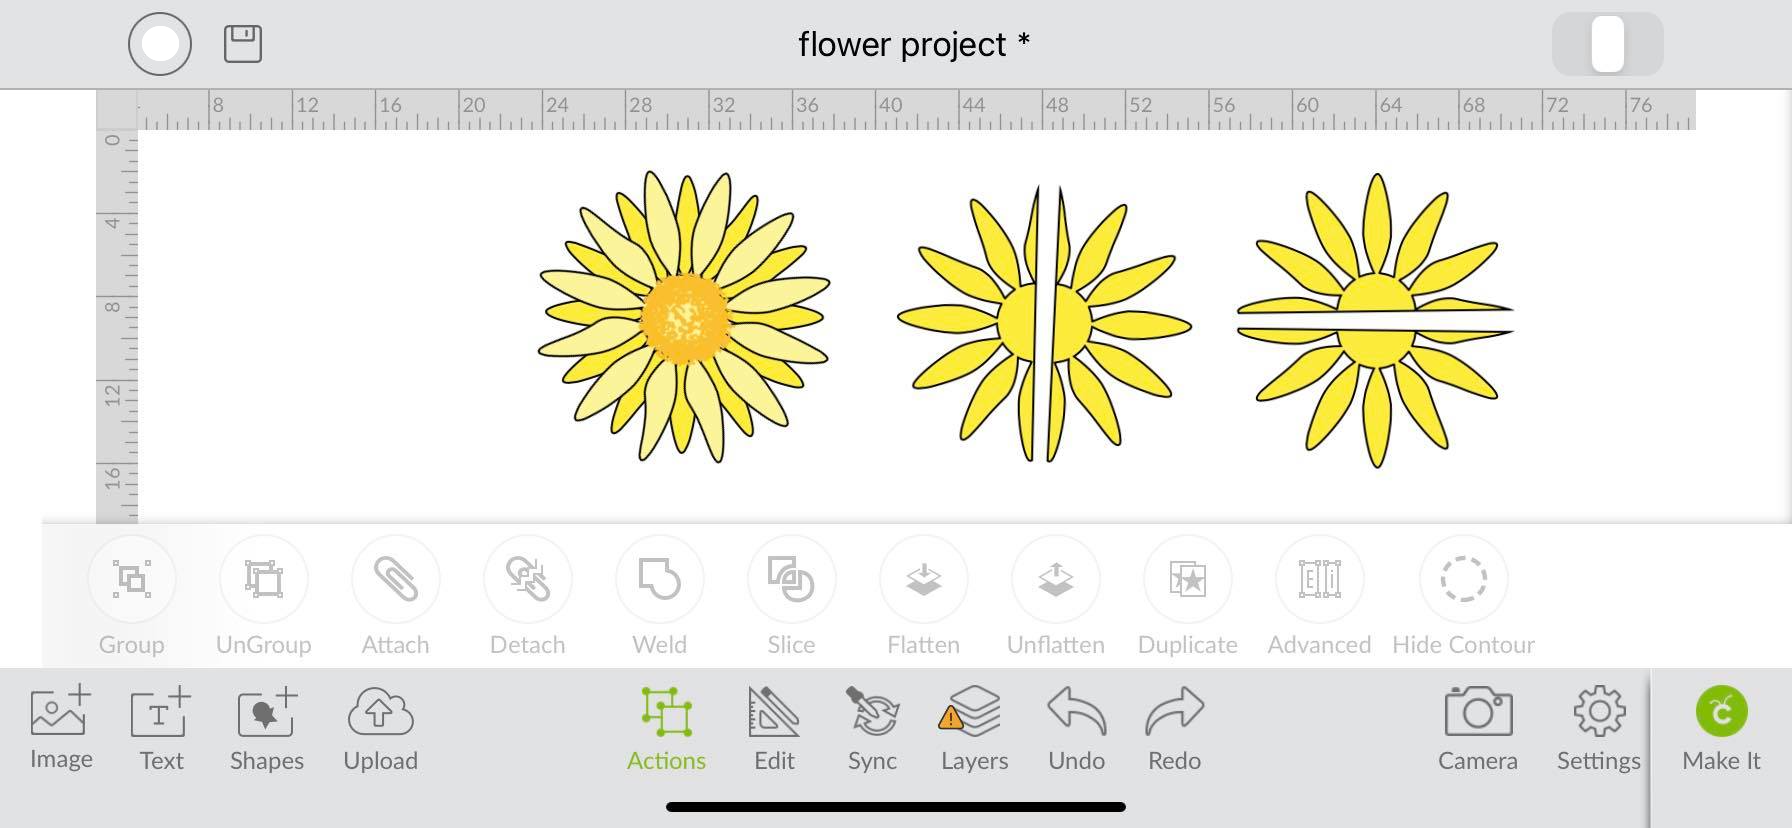
At times you may want to mirror your artwork for specific projects or create a new design. This would be a favorite option for creating Monograms. The Horizontal and Vertical icons in the edit toolbar can help with that. To demonstrate the tools, I have sliced my flower down the middle and duplicated it. Selecting my duplicated layer, I clicked on the Horizontal tool. You can see that the object has mirrored the original image.
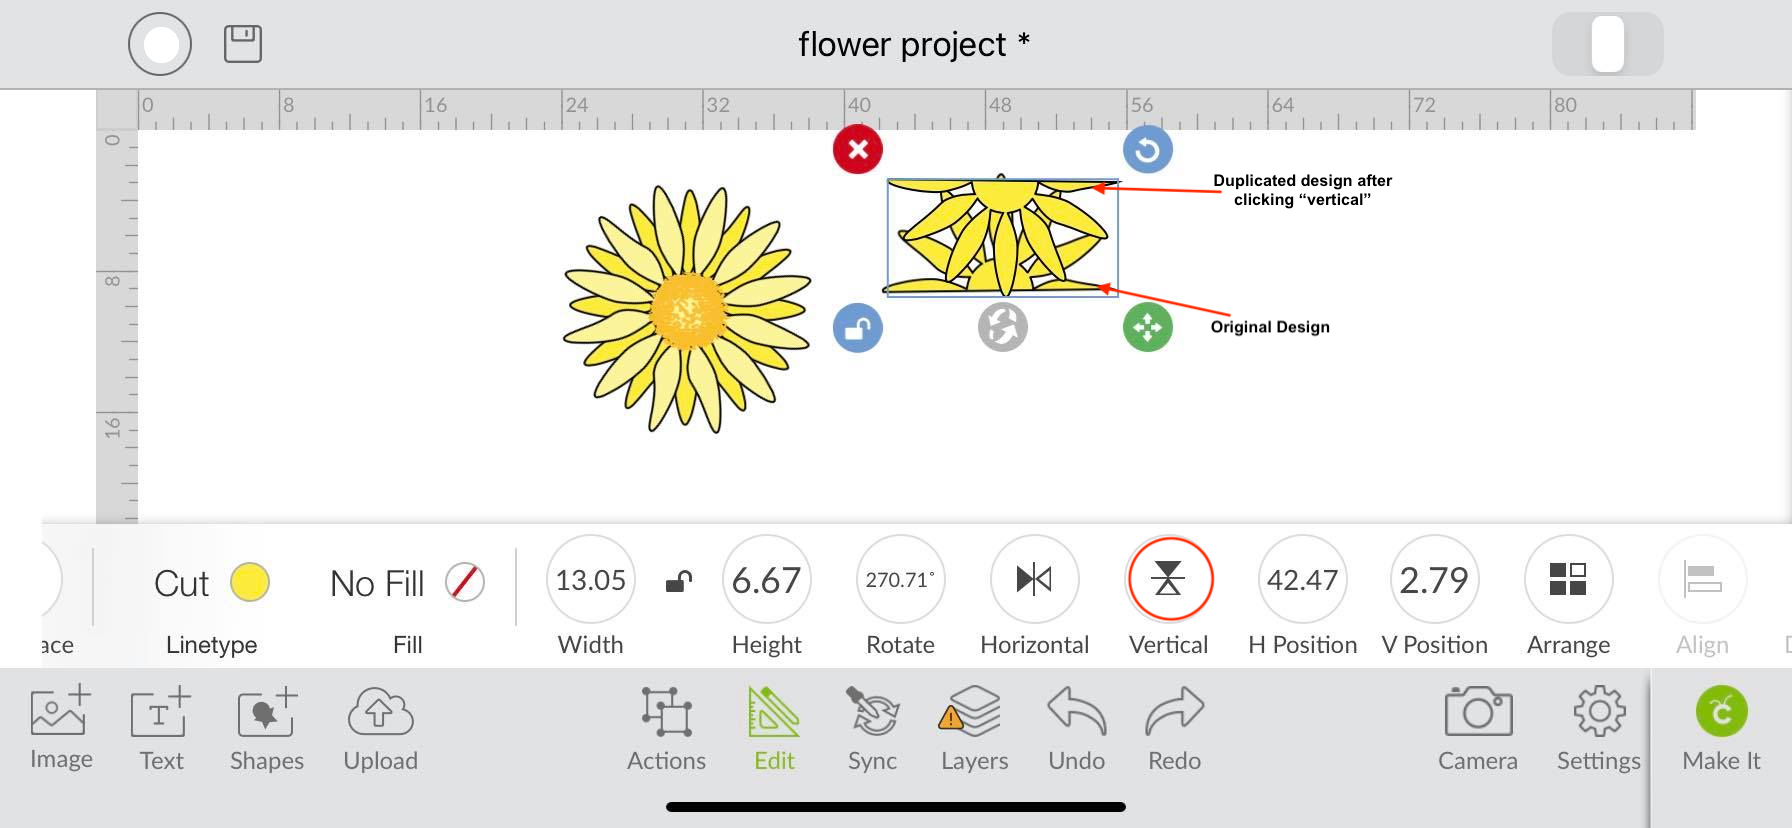
The Vertical tool is used in the same way. Select the object you would like to mirror and then click the Vertical icon.
You can now proceed to use the items as you wish.
Step 5 - Positioning Image on the Canvas page
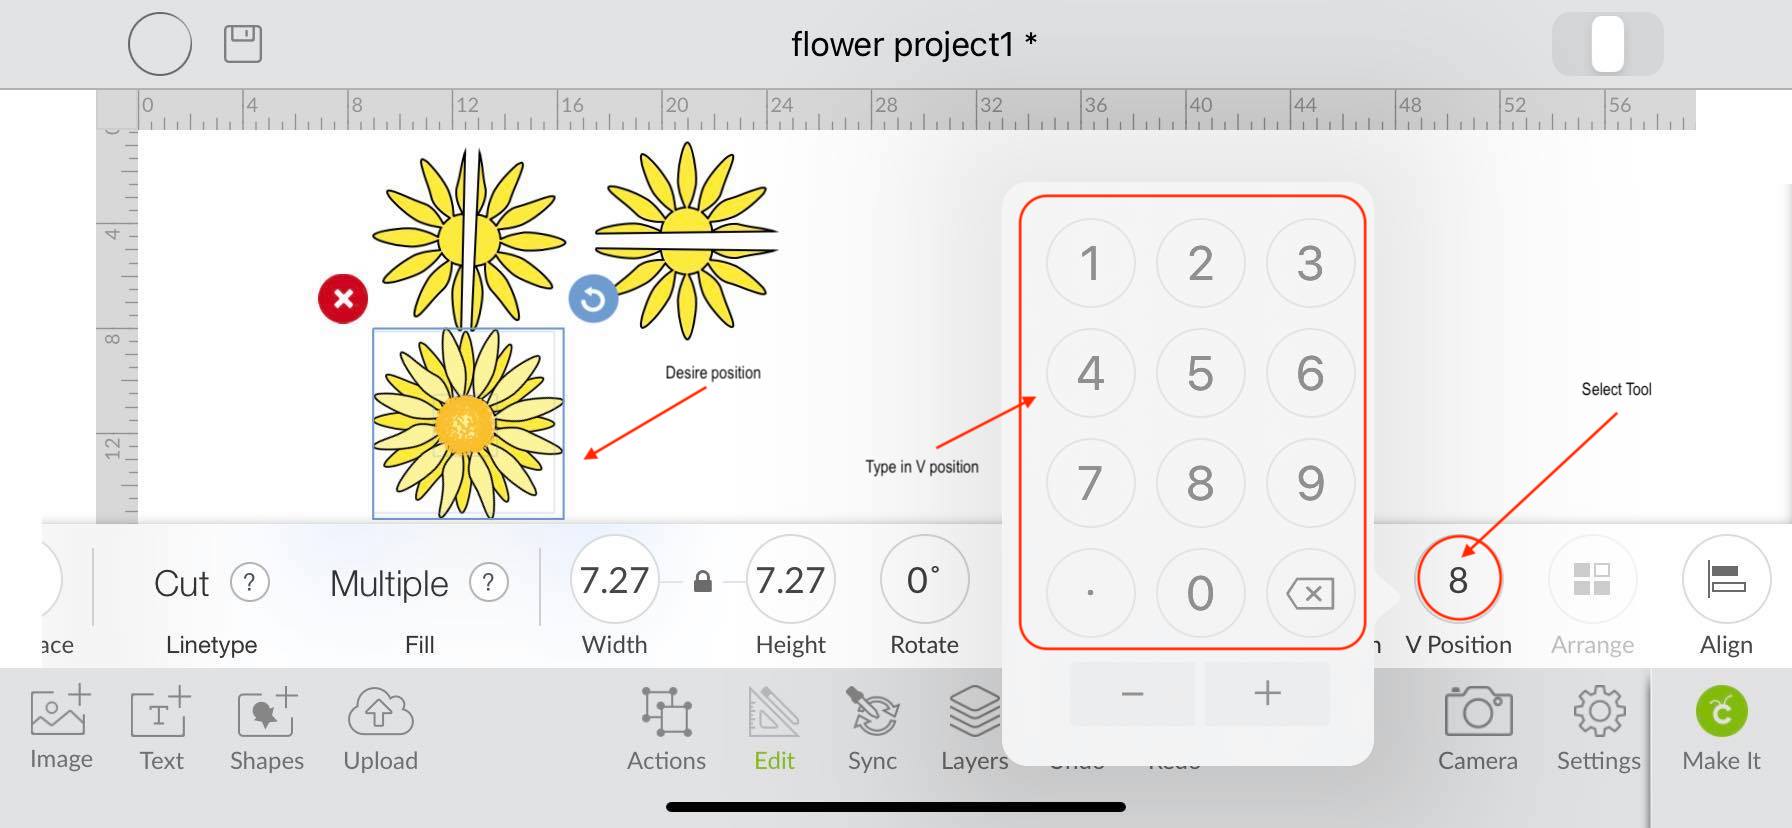
Images can be positioned anywhere on the canvas by selecting and dragging. But did you know you can do the same thing using the H position and V position tools? Instead of dragging each image, select the object and click one of the position tools. The H position tool moves the object left and right while the V position tool moves the item up and down.
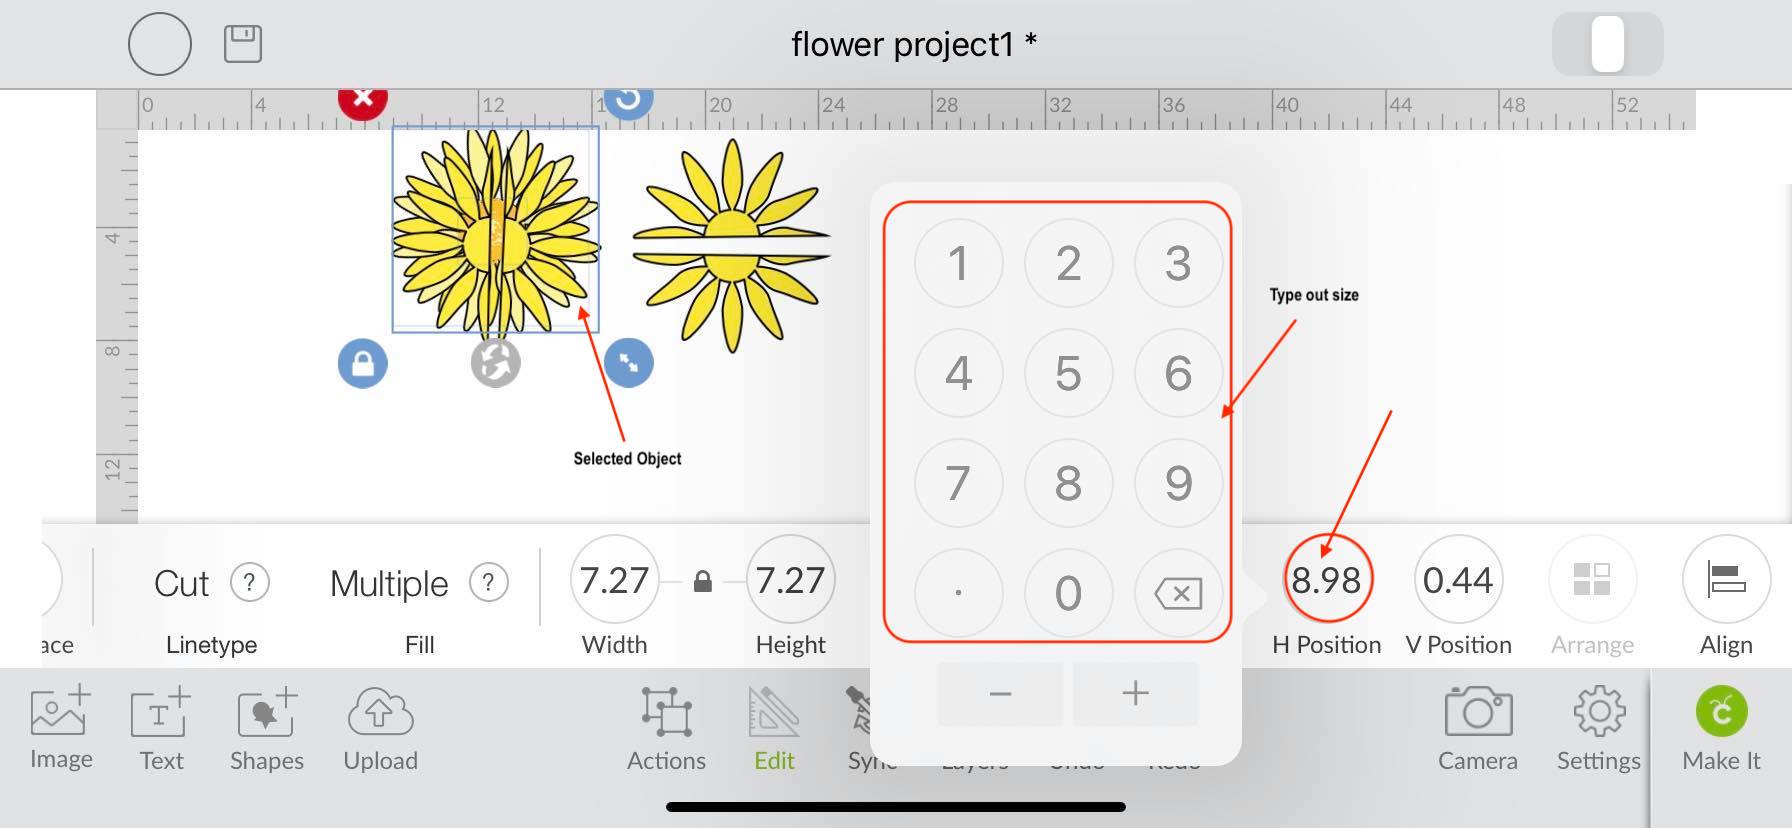
To show an example, I will move my original flower currently underneath the split flower, next to it. First, select the object and click the H position tool. A pop-up will appear similar to the one we used to rotate our image. Enter the position you want using the numbers or by clicking the plus or minus symbols on the bottom.
The characters move in increments of 0.03. I used 8.98 for my position. You can view the numbers you enter under the H position tool. My item has moved 8.98 down directly underneath the split flower.
Using the same process, click on the V position tool and type in 8. Again you will be able to view the number you entered under the V position tool. My object is now sitting right below my split flower as desired.
Step 6 - Arrange the Layers
In this step we will discuss how to arrange layers. First, select the object and click the Arrange tool. A pop-up window will appear, and you can choose one of the options on the list. Cricut provides visuals for each option to assist us better when using this tool.
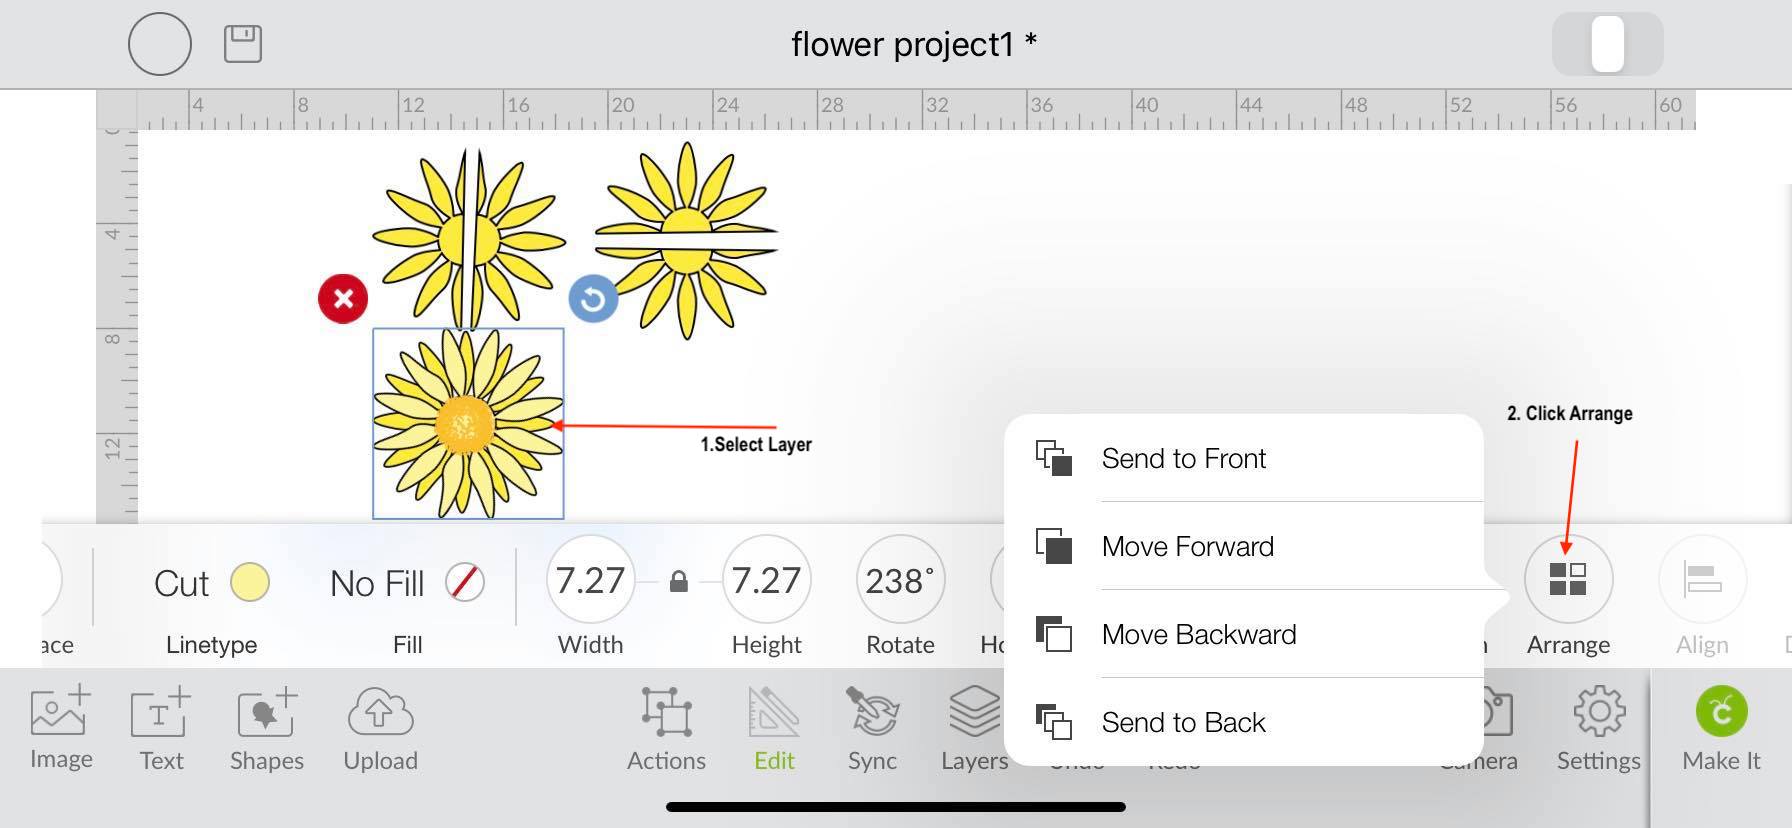
Send to Front Option
When using Send to Front, you are telling Cricut that you want the selected layer moved to the top. You could move the last layer to the top quickly with this option. In the image below the action has already been applied, which is why it is greyed out.
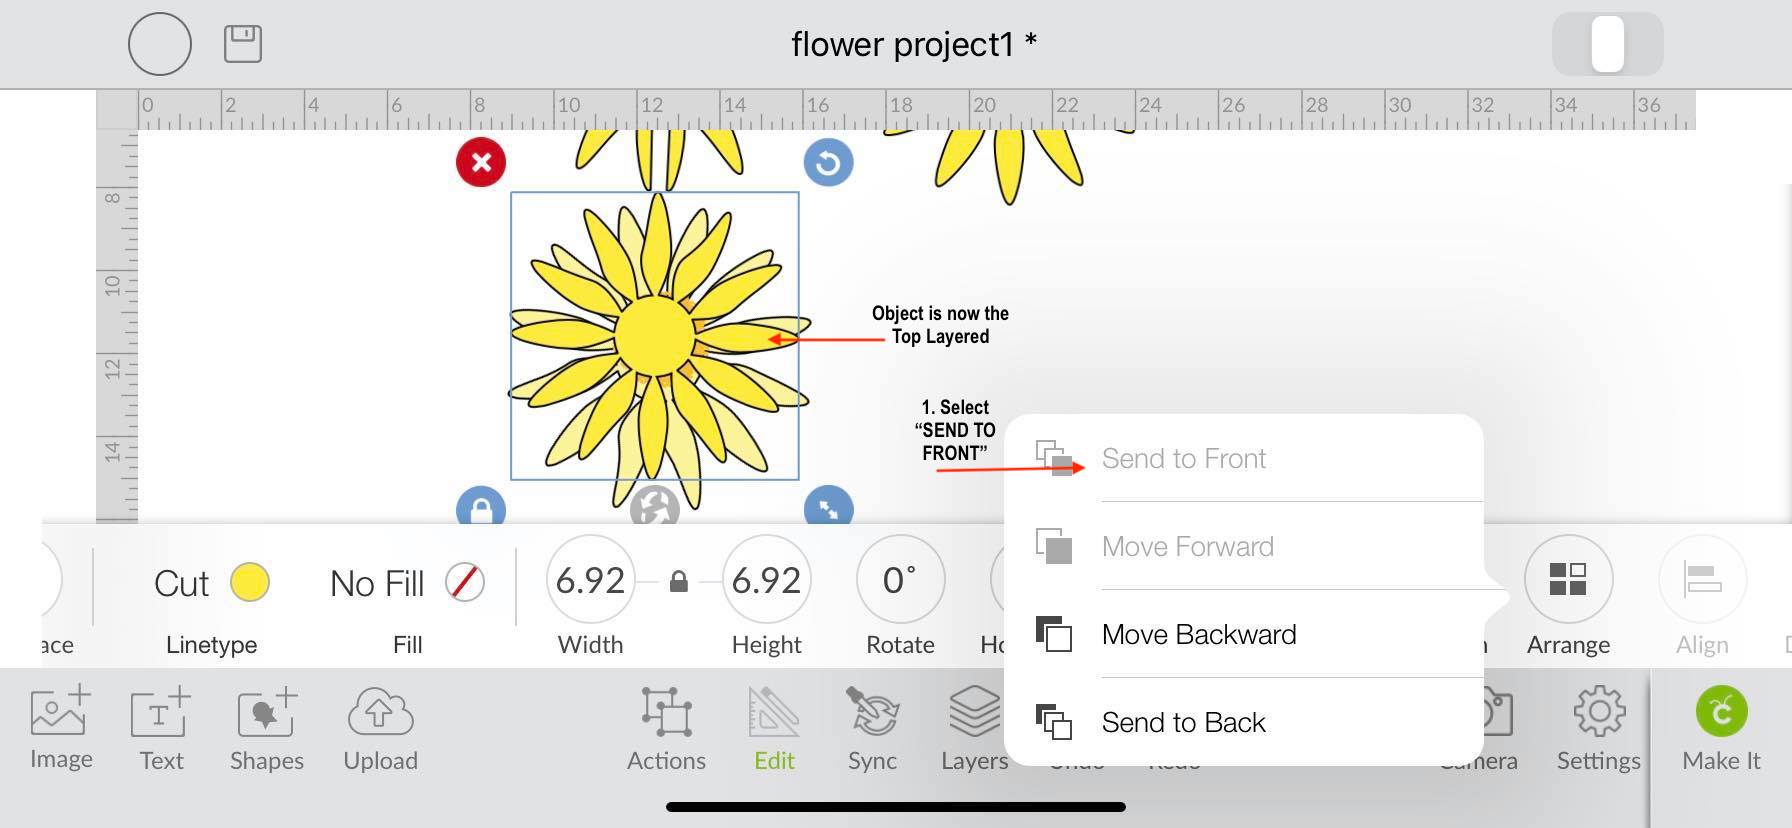
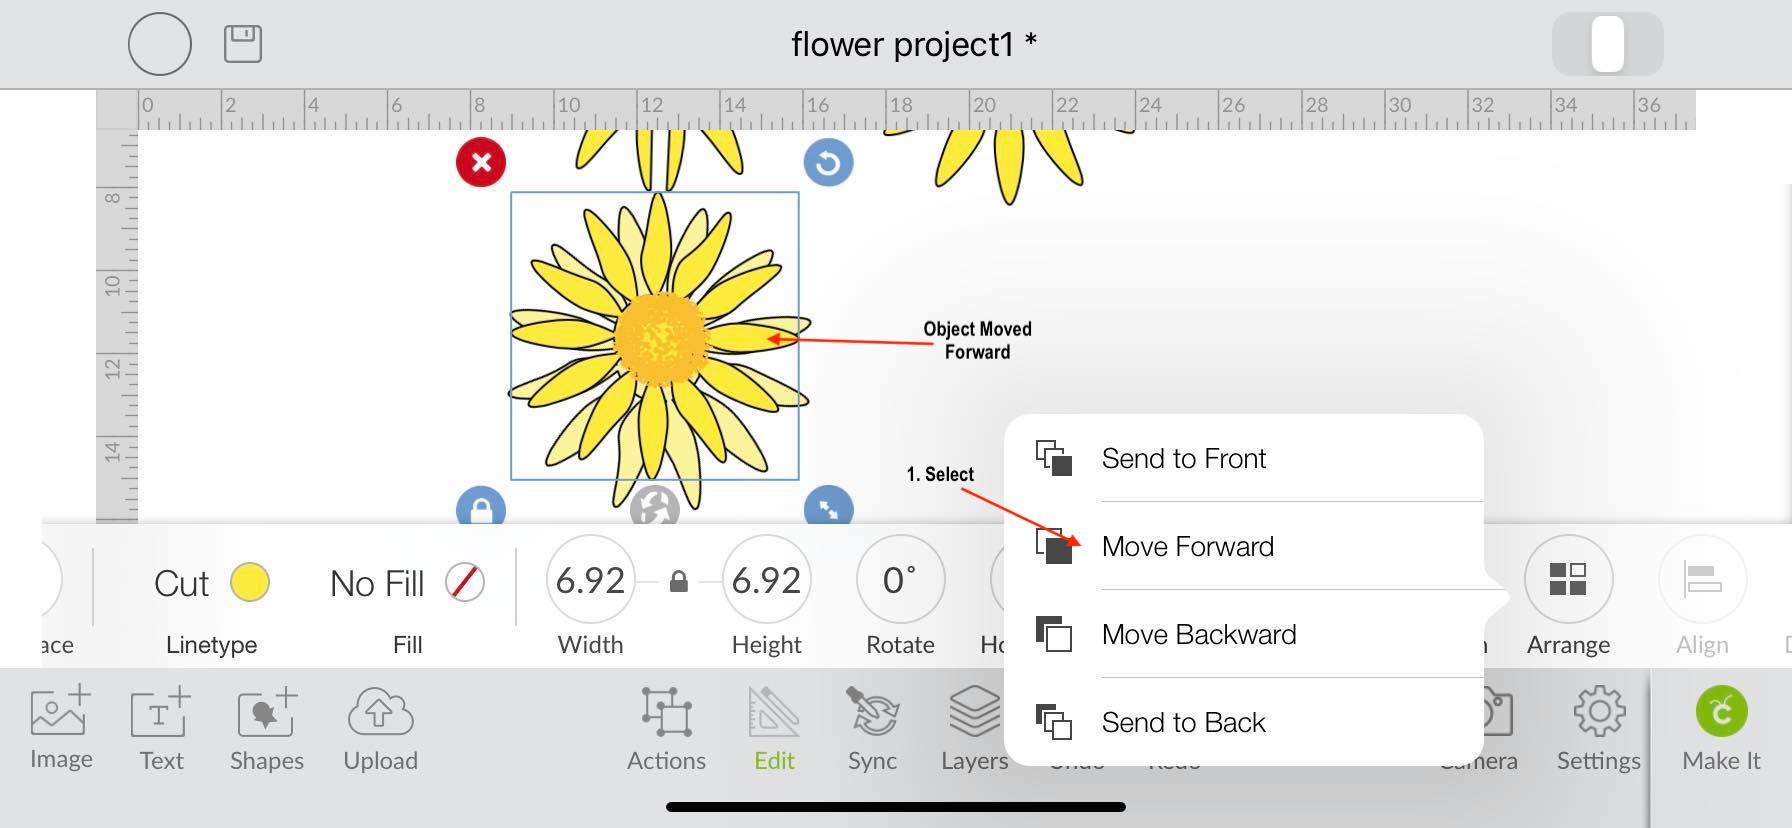
Move Forward and Move Backward options
Next, we will use the Move forward button, which is the second option on the list. When using this option your item will only move up one layer at a time. If your item is the third layer in the design it will move up one layer. This means it will now be the second layer and the second layer will have moved down and become the third.
The Move backwards button shifts the item down one layer at a time. So you could move a layer of petals beneath another layer.

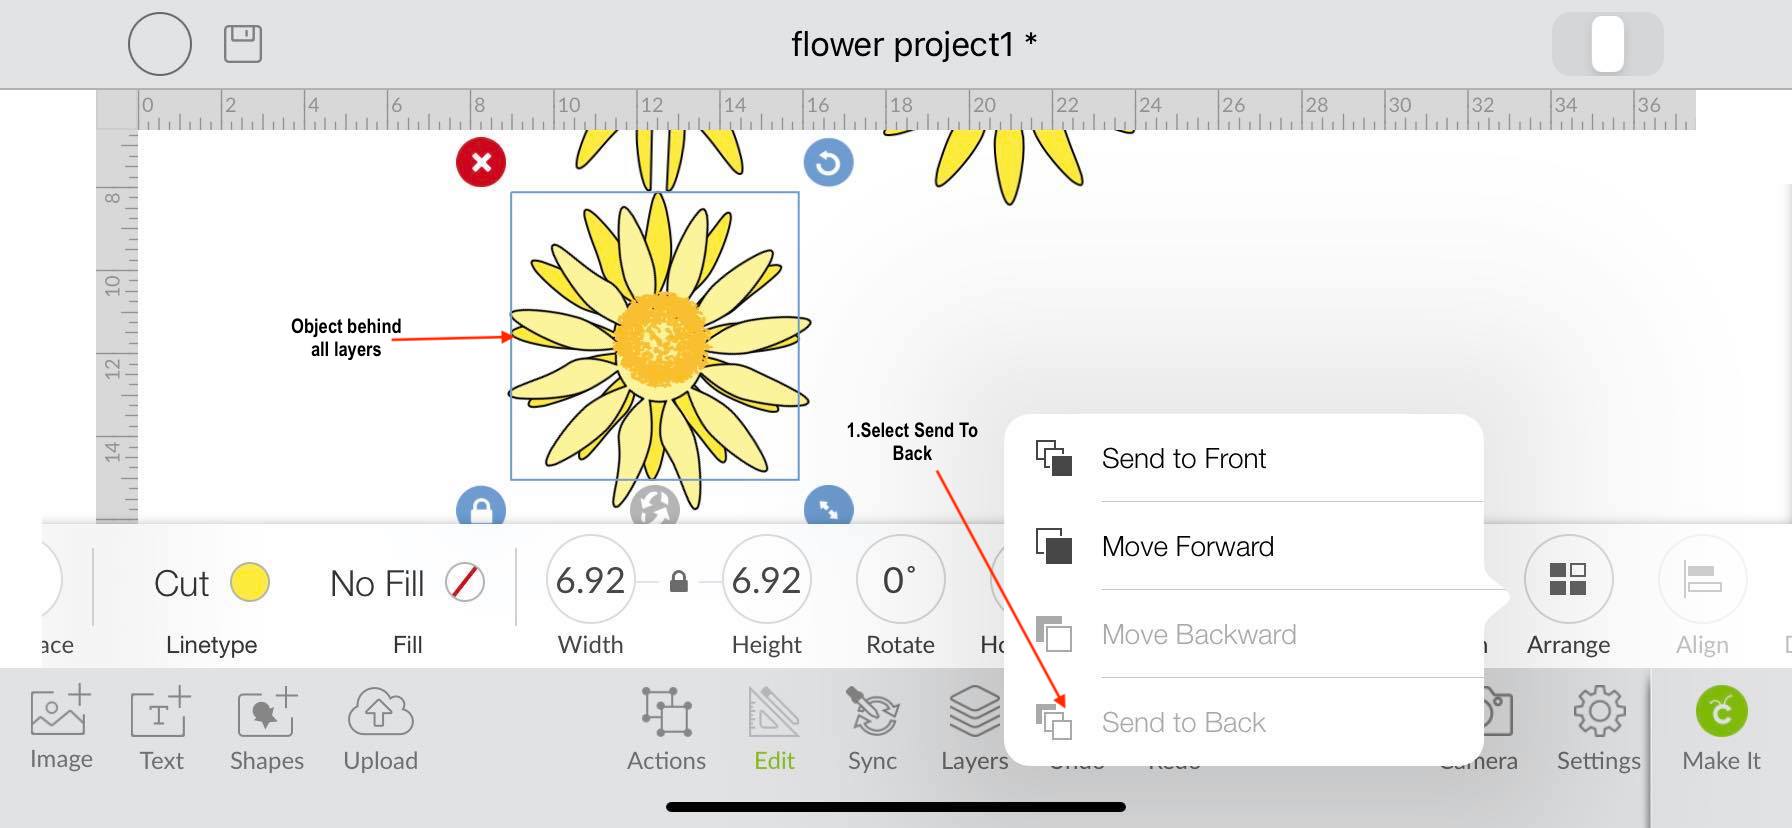
Send to Back option
When you select Send to back the object will be placed behind all present layers. This will move the object from its current layer to the bottom of the design.
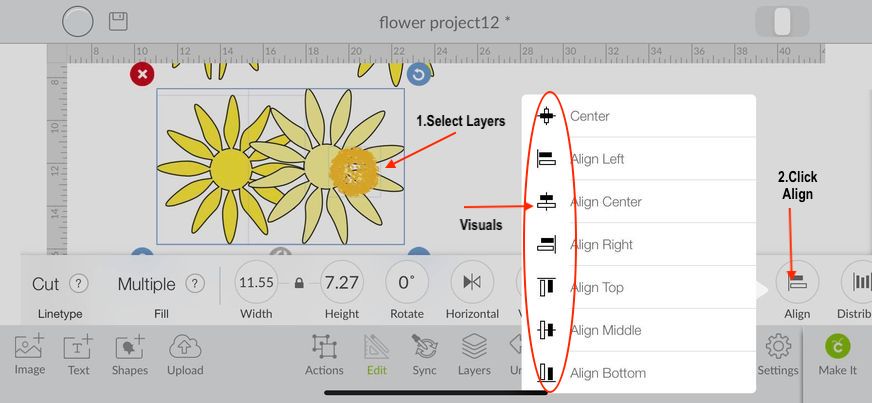
Step 7 - Align the layers
Now that I have rearranged my flower, I want to line it back up using my Align tool.
First, select the layers you want to line up and then click Align. A pop-up window will appear with several options that you can choose from. Using the Align tool for the first time may be a little confusing, but the visual that Cricut provides us will make it a lot easier. Let us go over some of these visuals and how to use them.
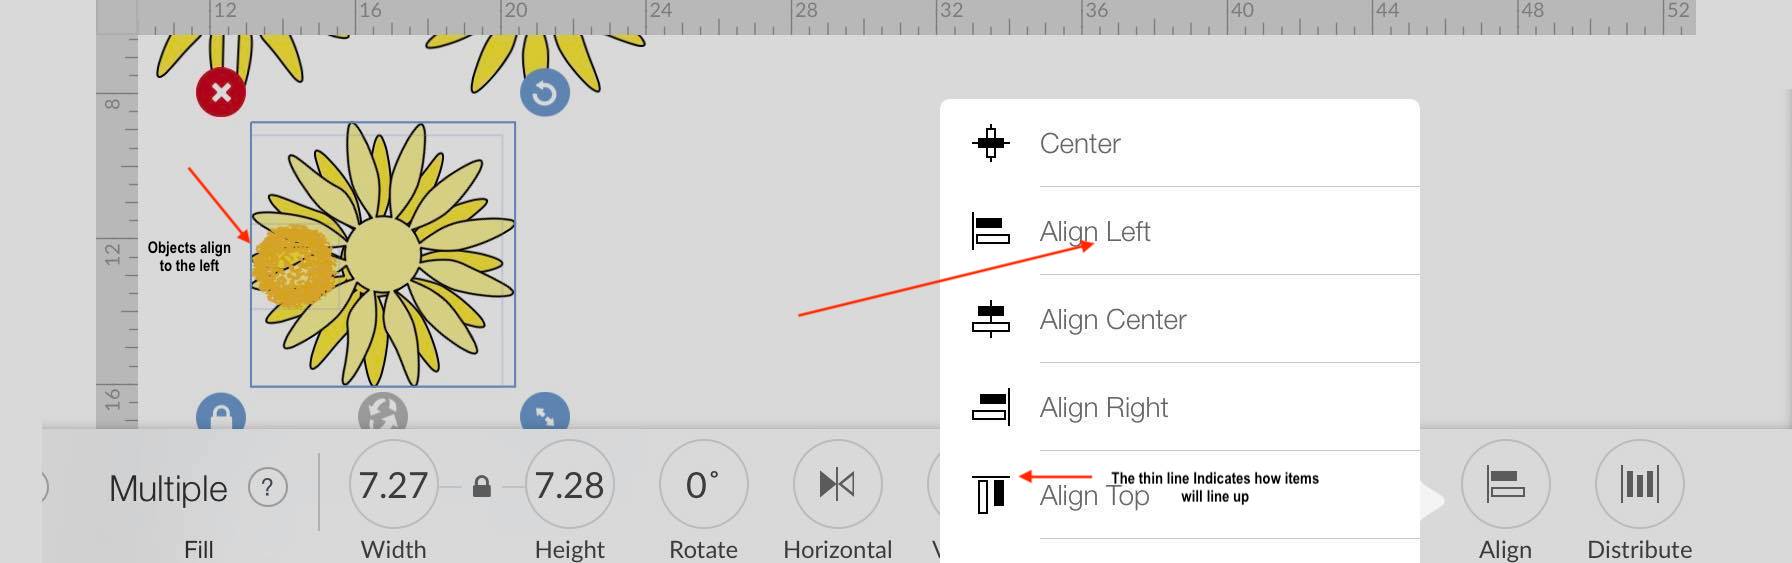
The thin black lines on the visuals indicate how the selected items will align. For example, if I click on Align to the left all my items will be placed towards the left as seen in the photo below.
Now if I click on the Center option, based on the visual given, all my items should align horizontally as well as vertically.
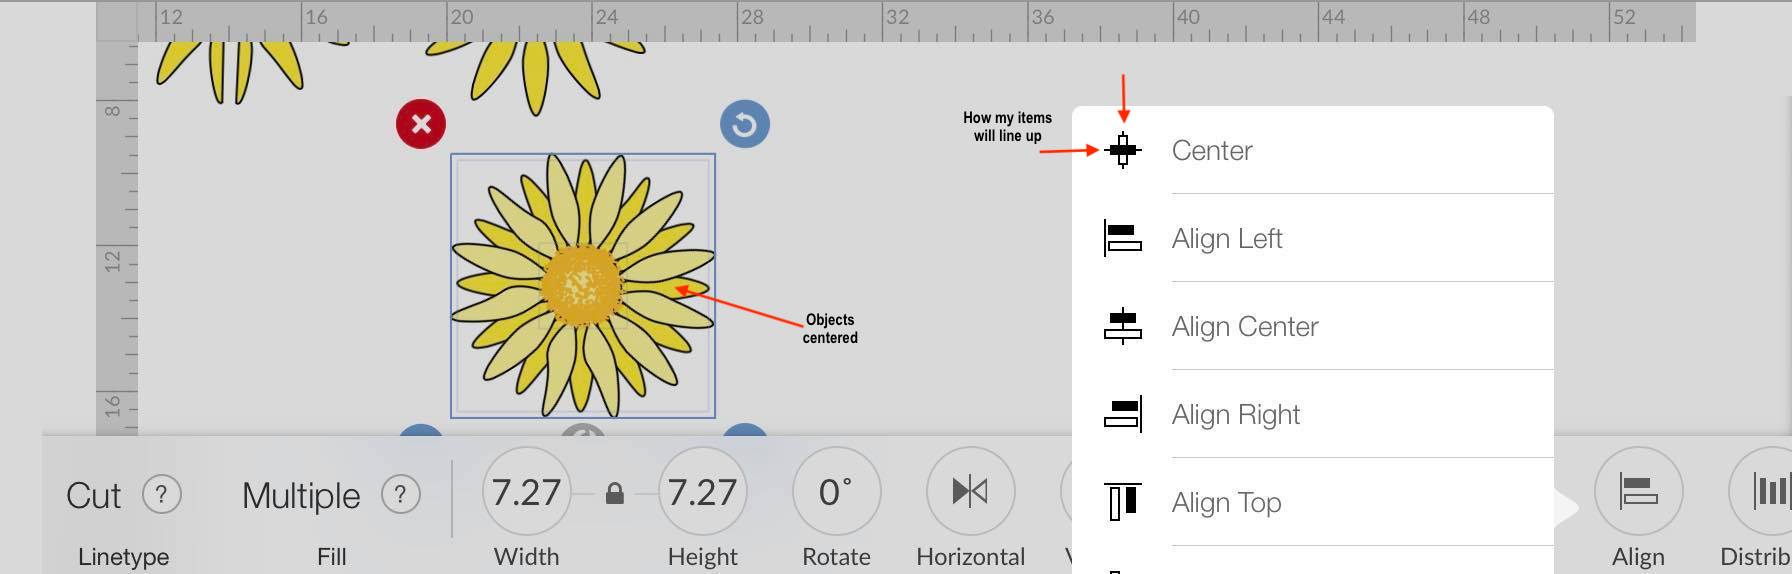
As you can see the object align according to the visual shown. Now my flower is back to its normal state, we can move on to our final tool.
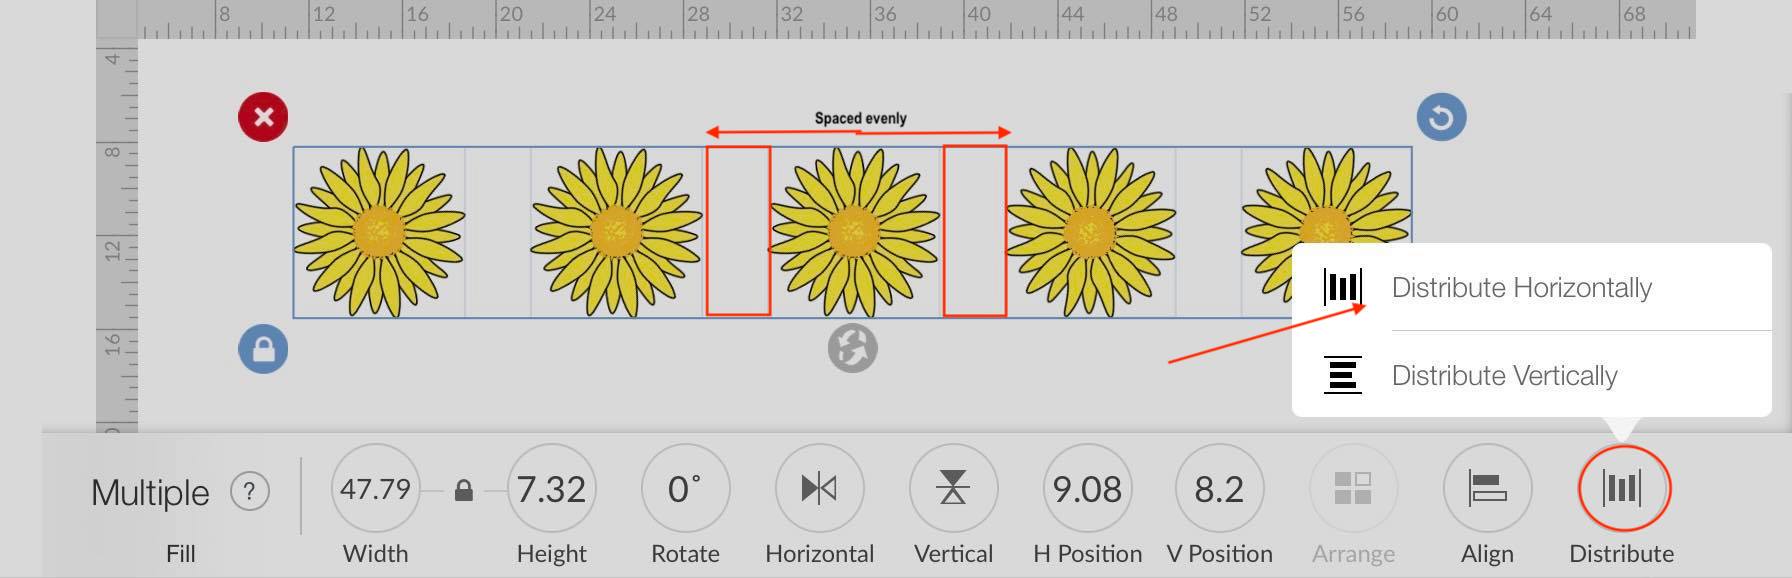
Step 8 - Distribute Tool
The Distribute tool is used to space several objects evenly between the far left and far right objects. To show how this works, I have placed one flower on the right and one on the left. I will duplicate my flower several times and then select all of them. After selecting the objects, click the Distribute icon. Next, click Distribute Horizontally. This will evenly space the items from left to right. If needed, you could use the Align options above one the objects have been Distributed.
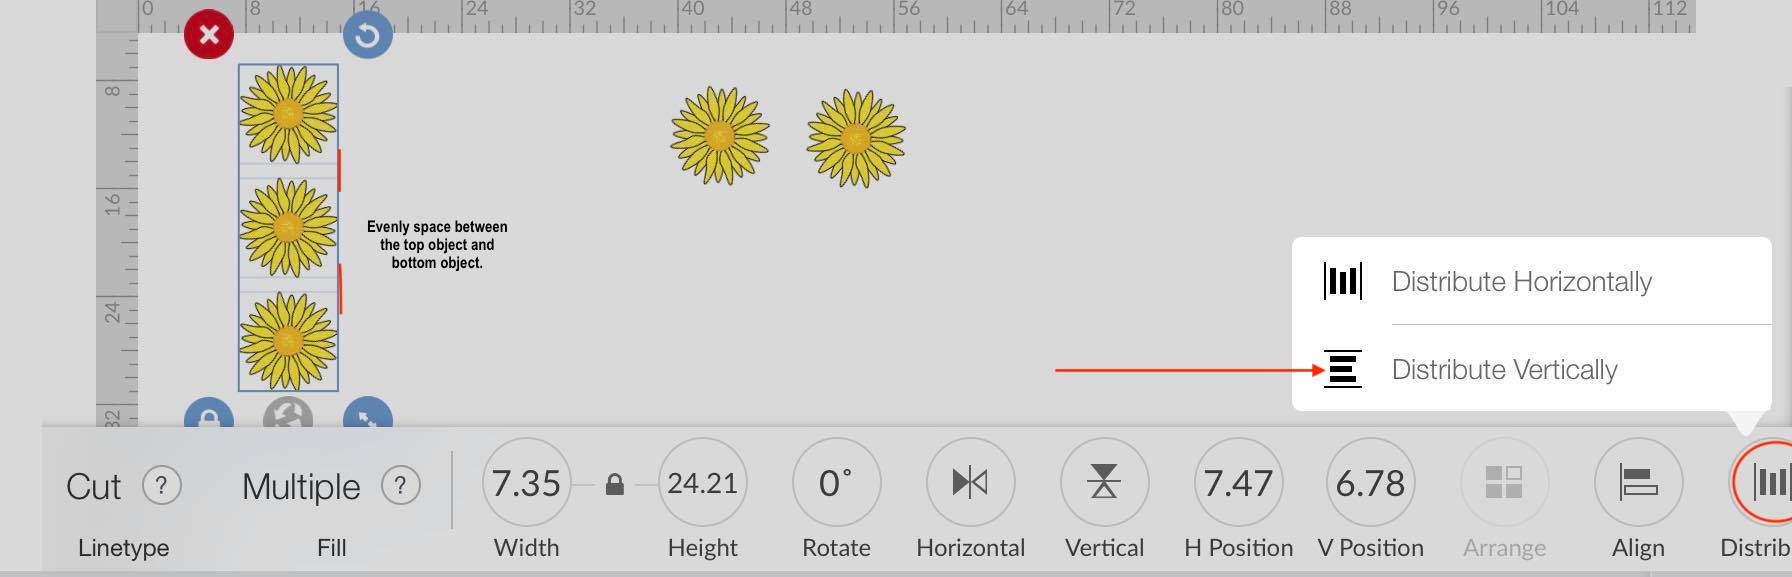
Next we will use the Distribute Vertical tool. Here this tool will evenly distribute items vertically between the furthest top and bottom objects. As with above, a flower was placed at the top and another at the bottom. After duplicating, all were selected and then vertically distributed.
Yay, we did it! I hope that you enjoyed this tutorial and gained some insight on how to use the edit toolbar in Cricut.
If you liked this tutorial, make sure to check out our other tutorials such as how to curve text in Cricut and how to make a split monogram in Cricut Design Space app.


