


By Design Bundles
Cricut Tutorials8 min
How to Make a Split Monogram in Cricut Design Space Mobile App
Today we’ll create a split monogram that you can easily make anywhere using the Cricut mobile app.
Step 1. Create a New Project
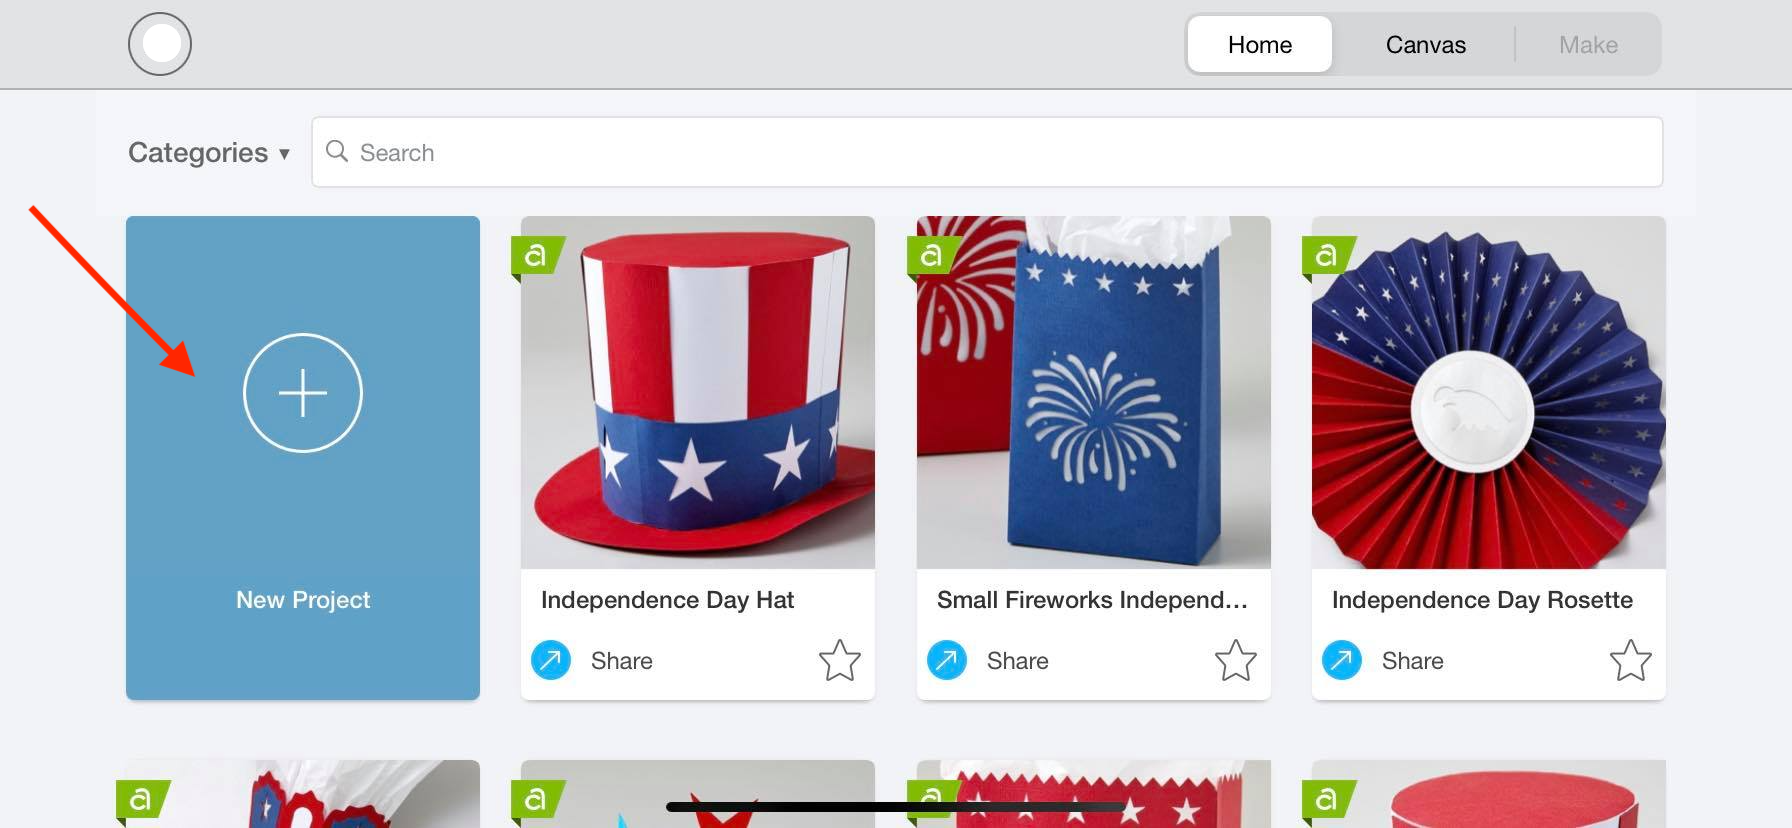
After logging in, create a new project in Cricut Design Space. You can simply do this by clicking the blue rectangle box that is labeled New Project.
Step 2. Type out Your Text
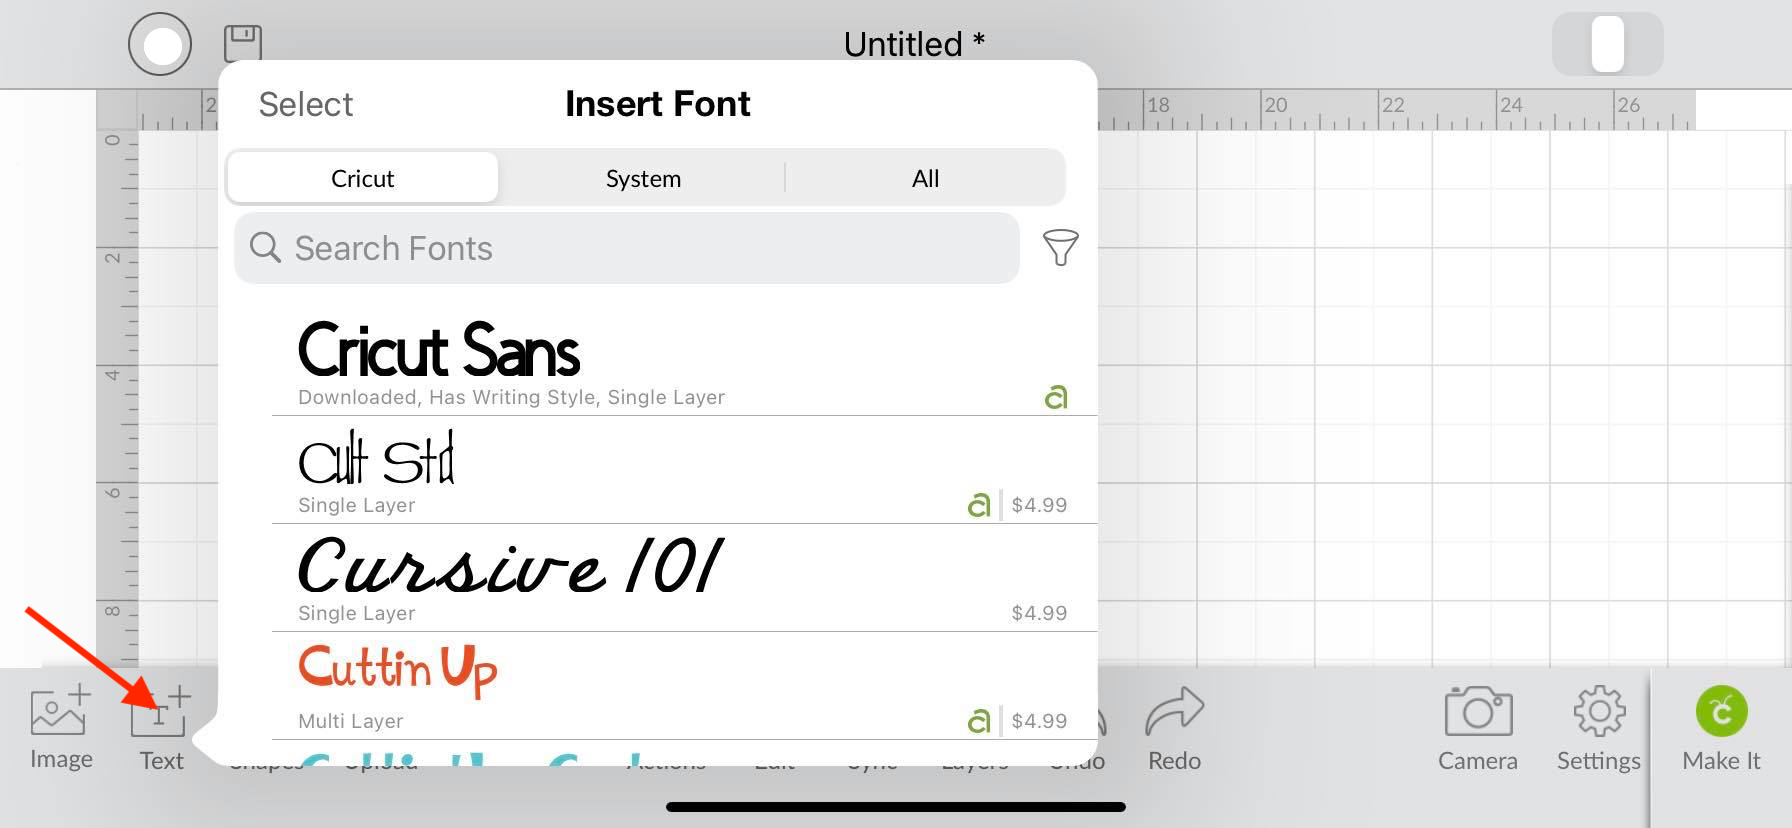
Click on the big “T” at the bottom of your screen to type out your text.In this tutorial we are using a thick script font called Adorable. There are a ton of Cricut fonts available on Font Bundles to choose from. If you need a more in depth guide, we have a great tutorial regarding the text tool in Cricut Design Space app.
Step 3. Create a Rectangle
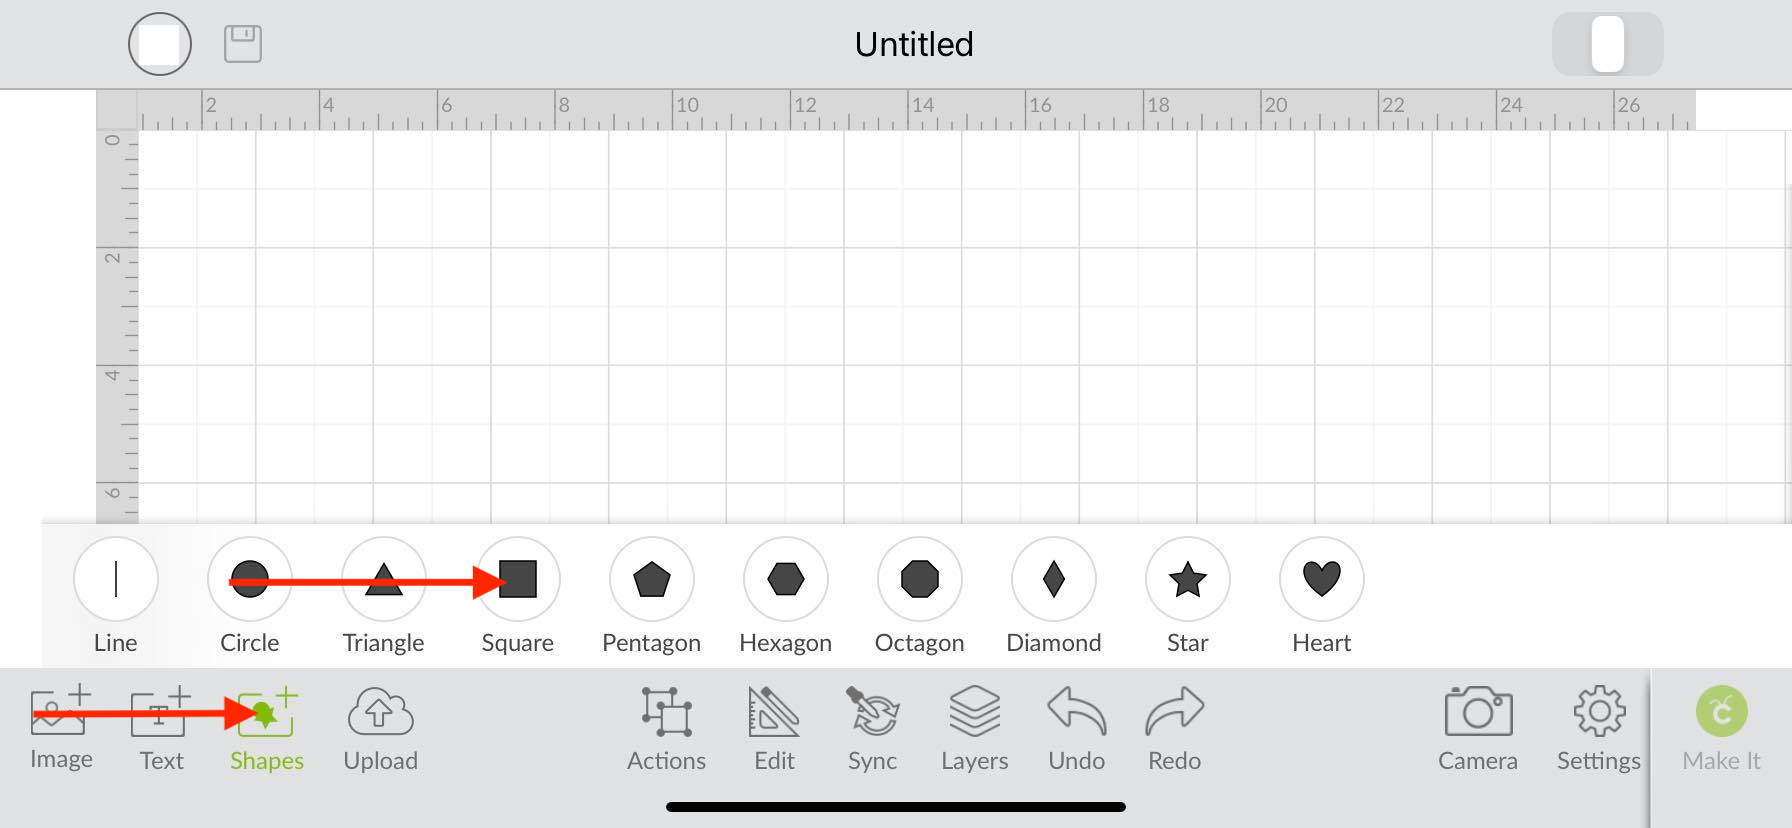
Insert your square using your shapes tool located at the bottom toolbar. This will allow us to create a split in the letter.
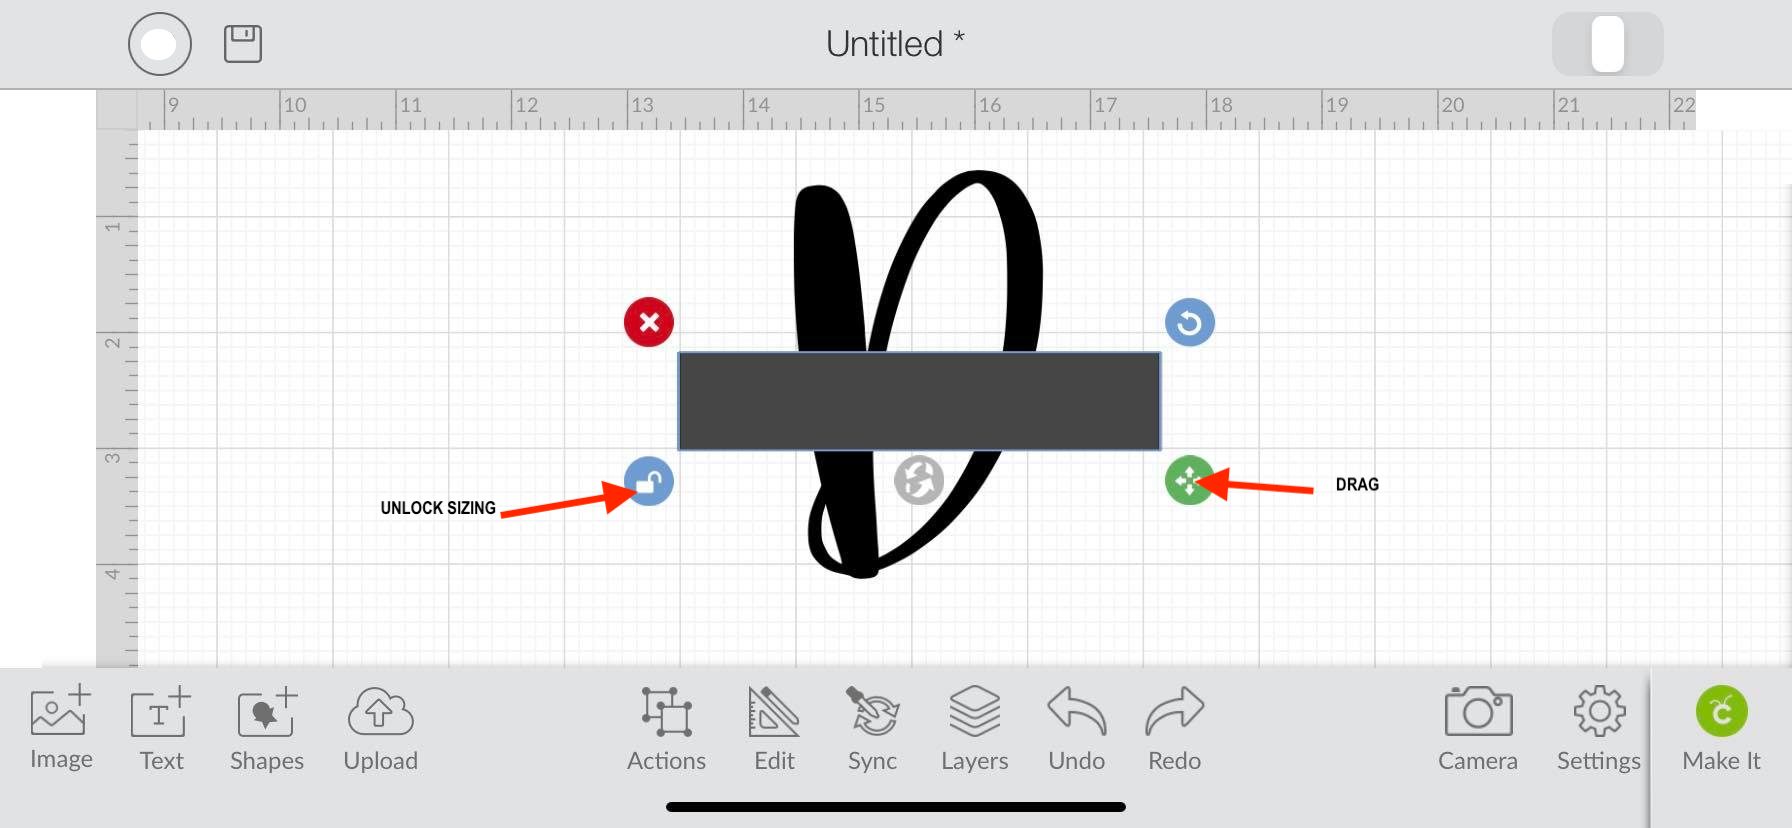
Once you have it on your screen select the shape and unlock the sizing by clicking on the bottom left circle which will have a lock in it. Click the circle on the bottom right to to resize your shape into a long rectangle. After creating your rectangle, place the shape right in the center of your letter.
Step 4.Slice Both Objects
Drag your finger over both objects on your canvas screen to select them and then click on the Slice button. We have a more in depth guide on using the Slice tool in Design Space mobile app if needed.
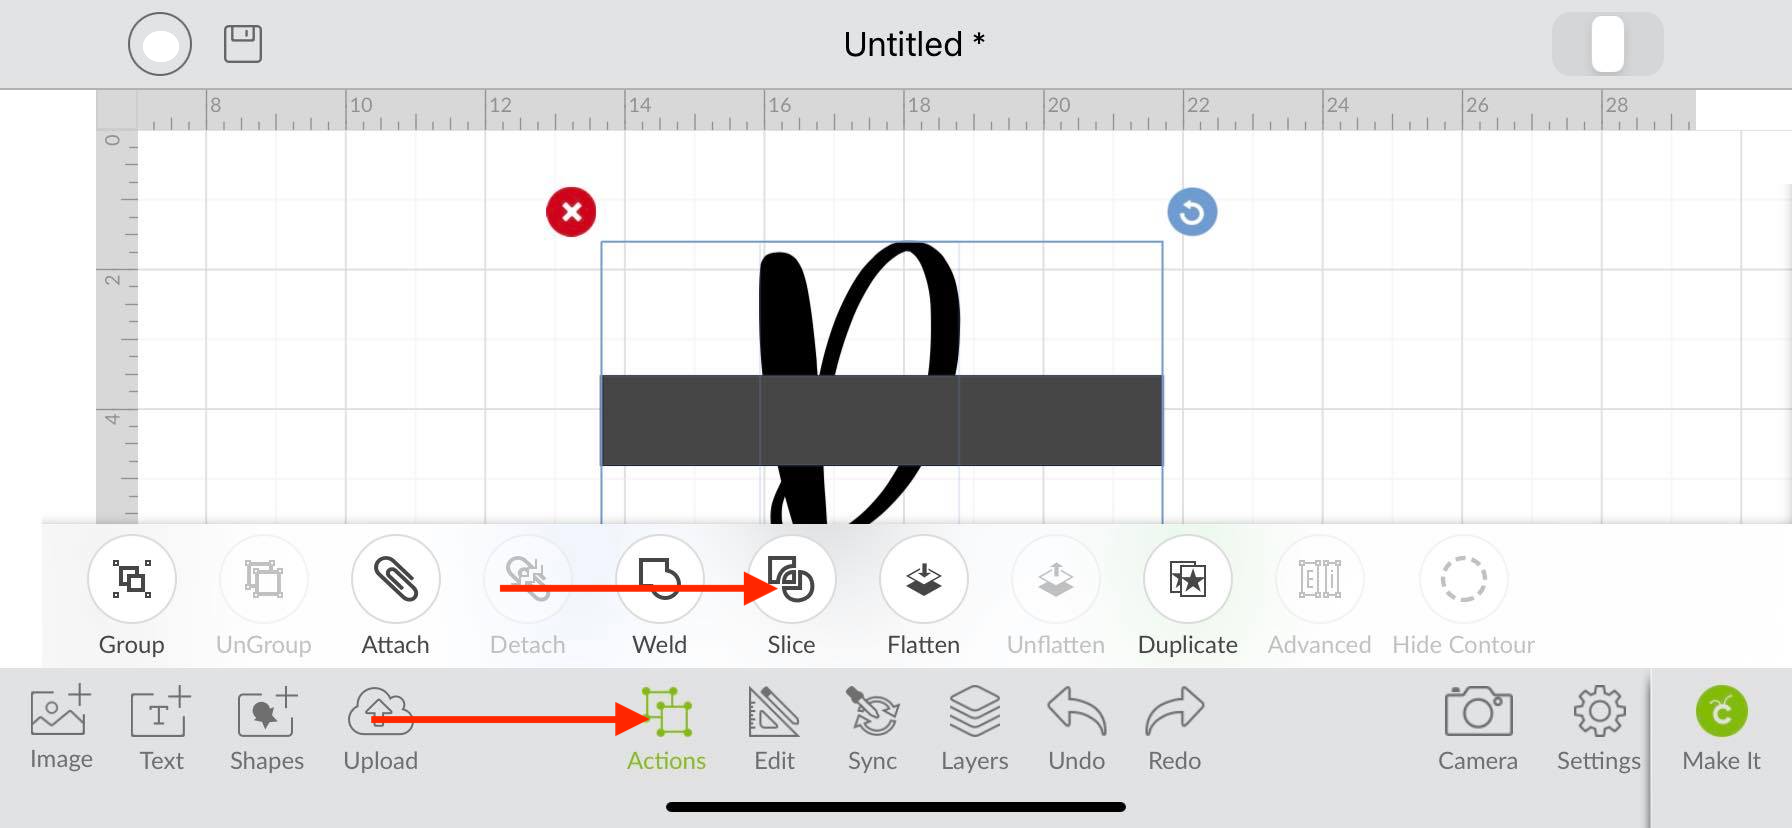
After you have sliced your items, you can pull them apart and delete. You will now have an empty space in the middle of your letter.
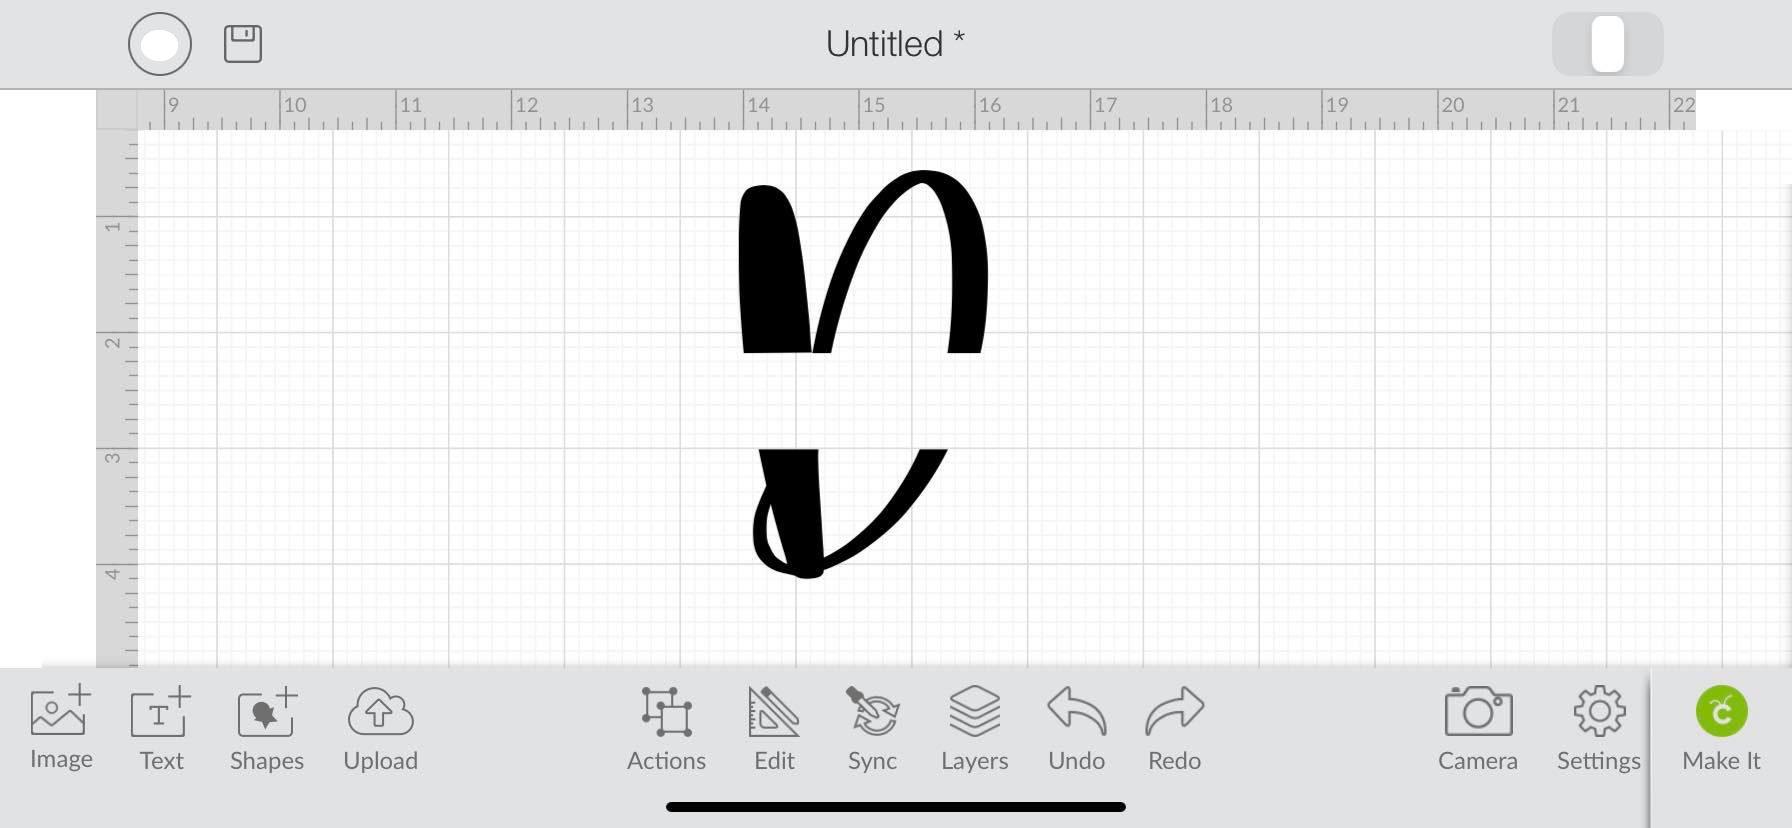
Step 5. Create a Rectangle And Duplicate
Now create another rectangle using your shapes tool just like we did before. Duplicate this rectangle by clicking on the Action Icon and then by clicking Duplicate.
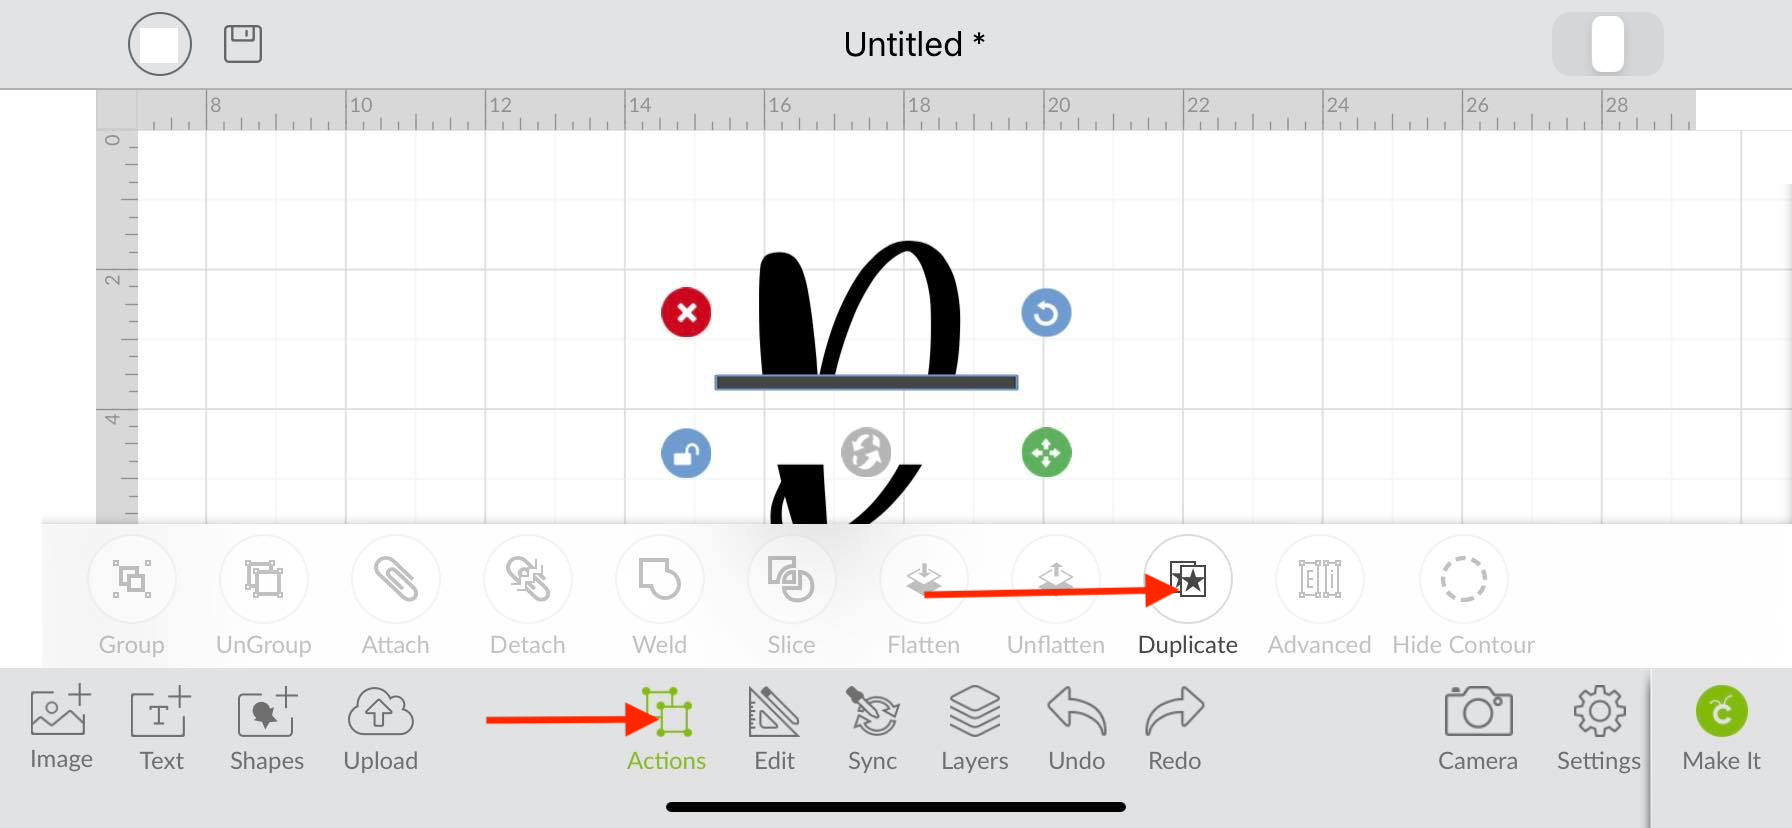
You will now have 2 rectangle shapes that you can add to your design. One will go on the upper center part of your letter and the other will go on the bottom center part.
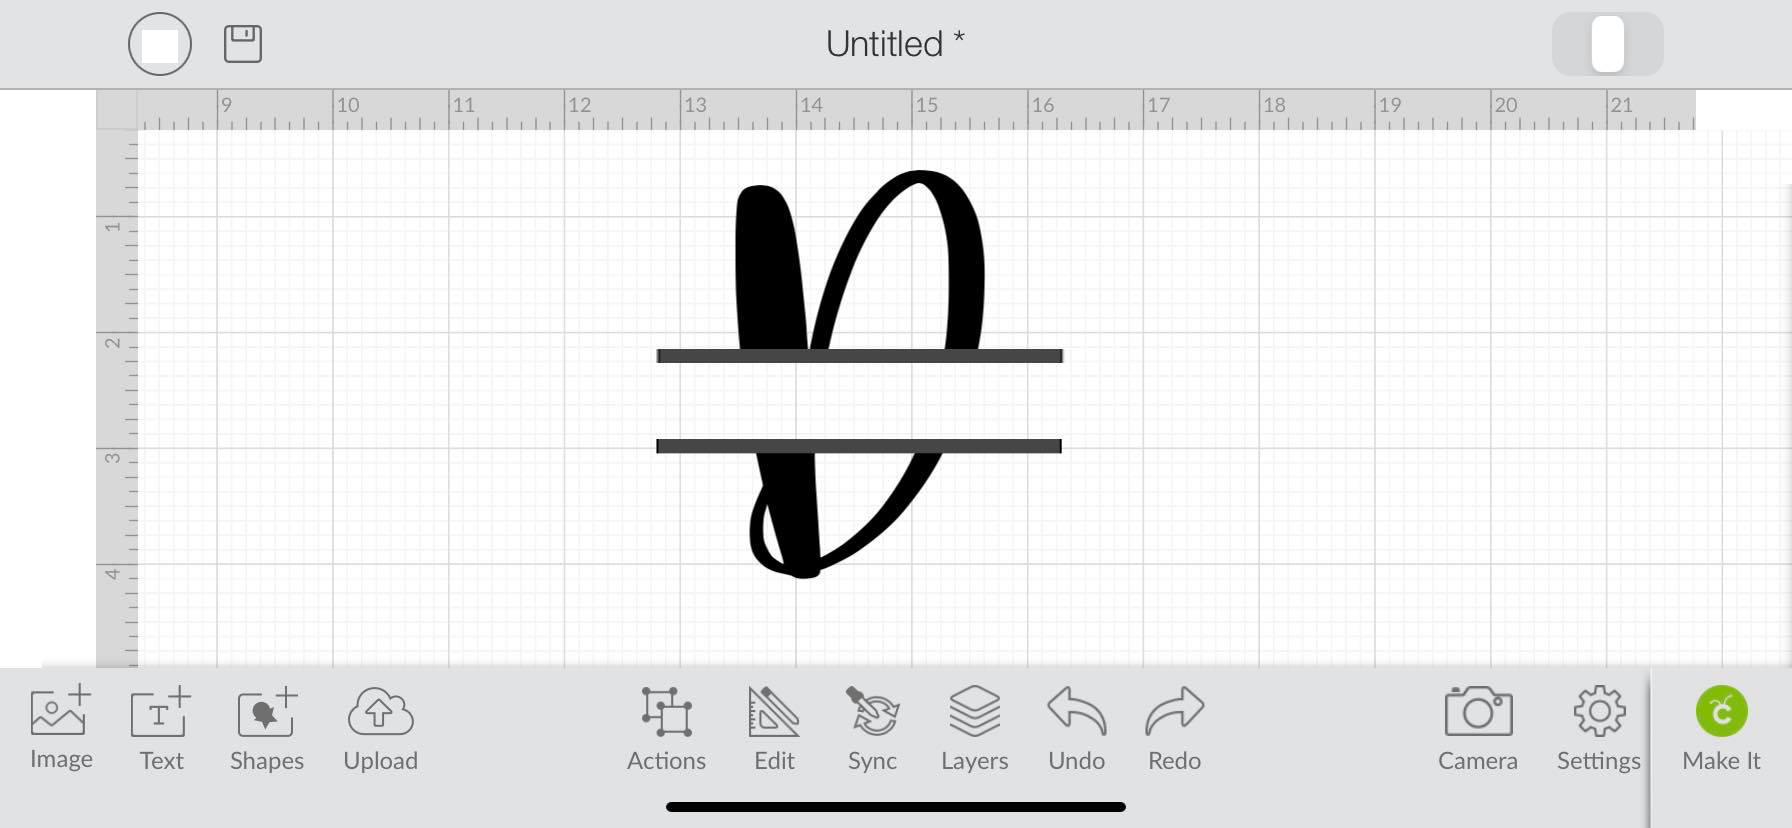
Step 6. Align objects
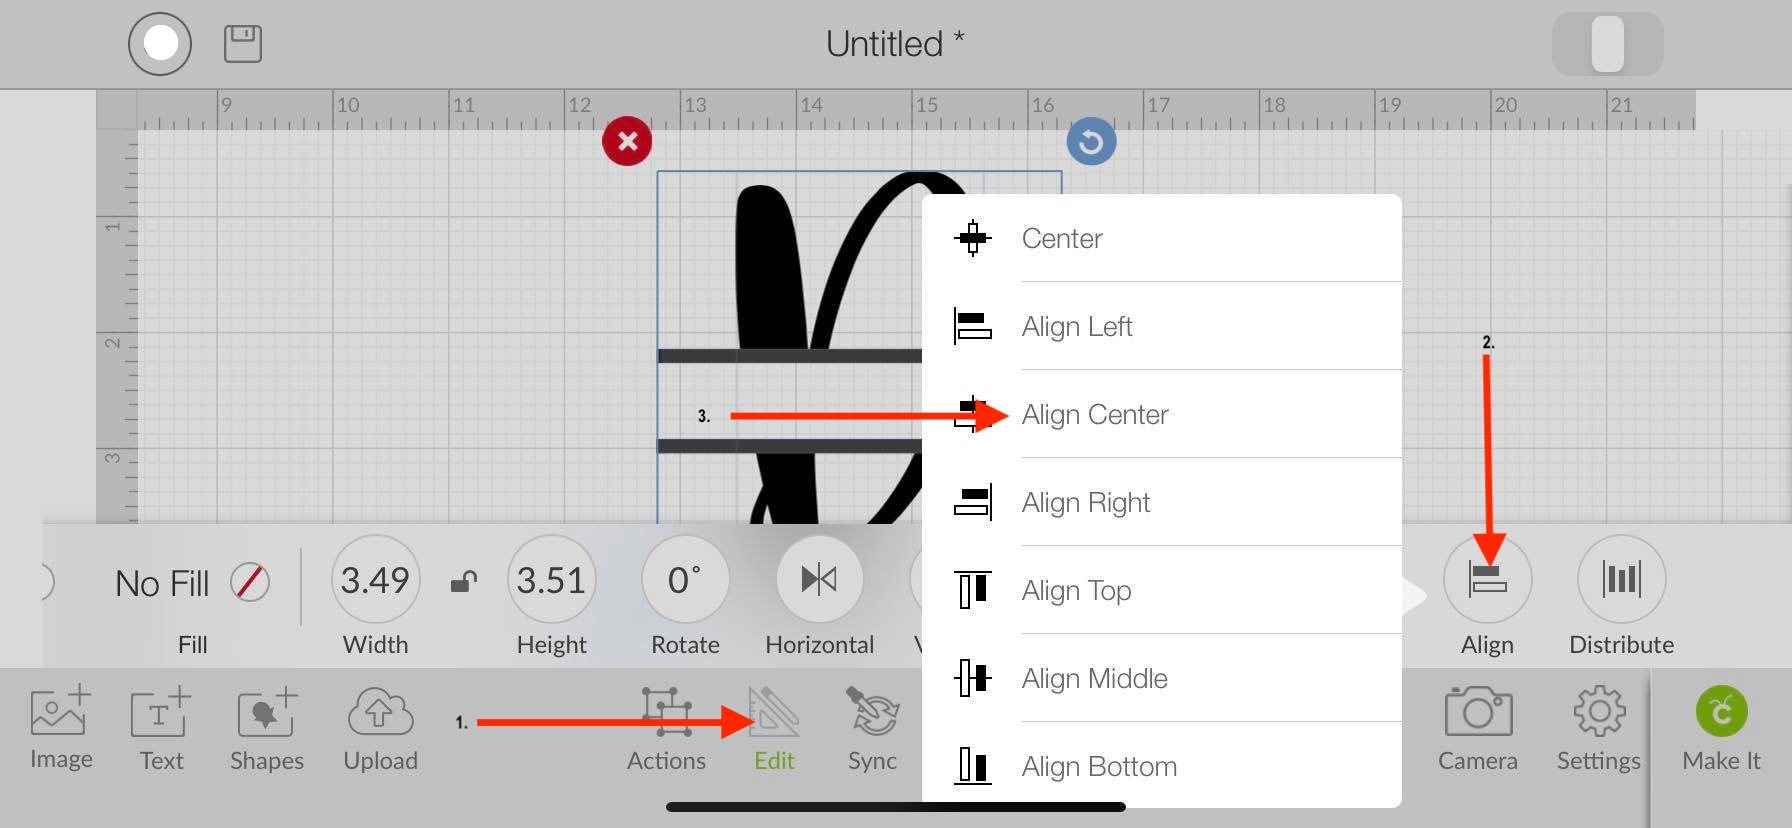
Before you move on to the next step you want to make sure that all the items are evenly aligned together. To do this click on the Edit icon. Another toolbar will pop up and you can now click on Align and then click on Align Center.
Step 7. Weld Objects Together
If everything looks good, you can now weld your objects together.
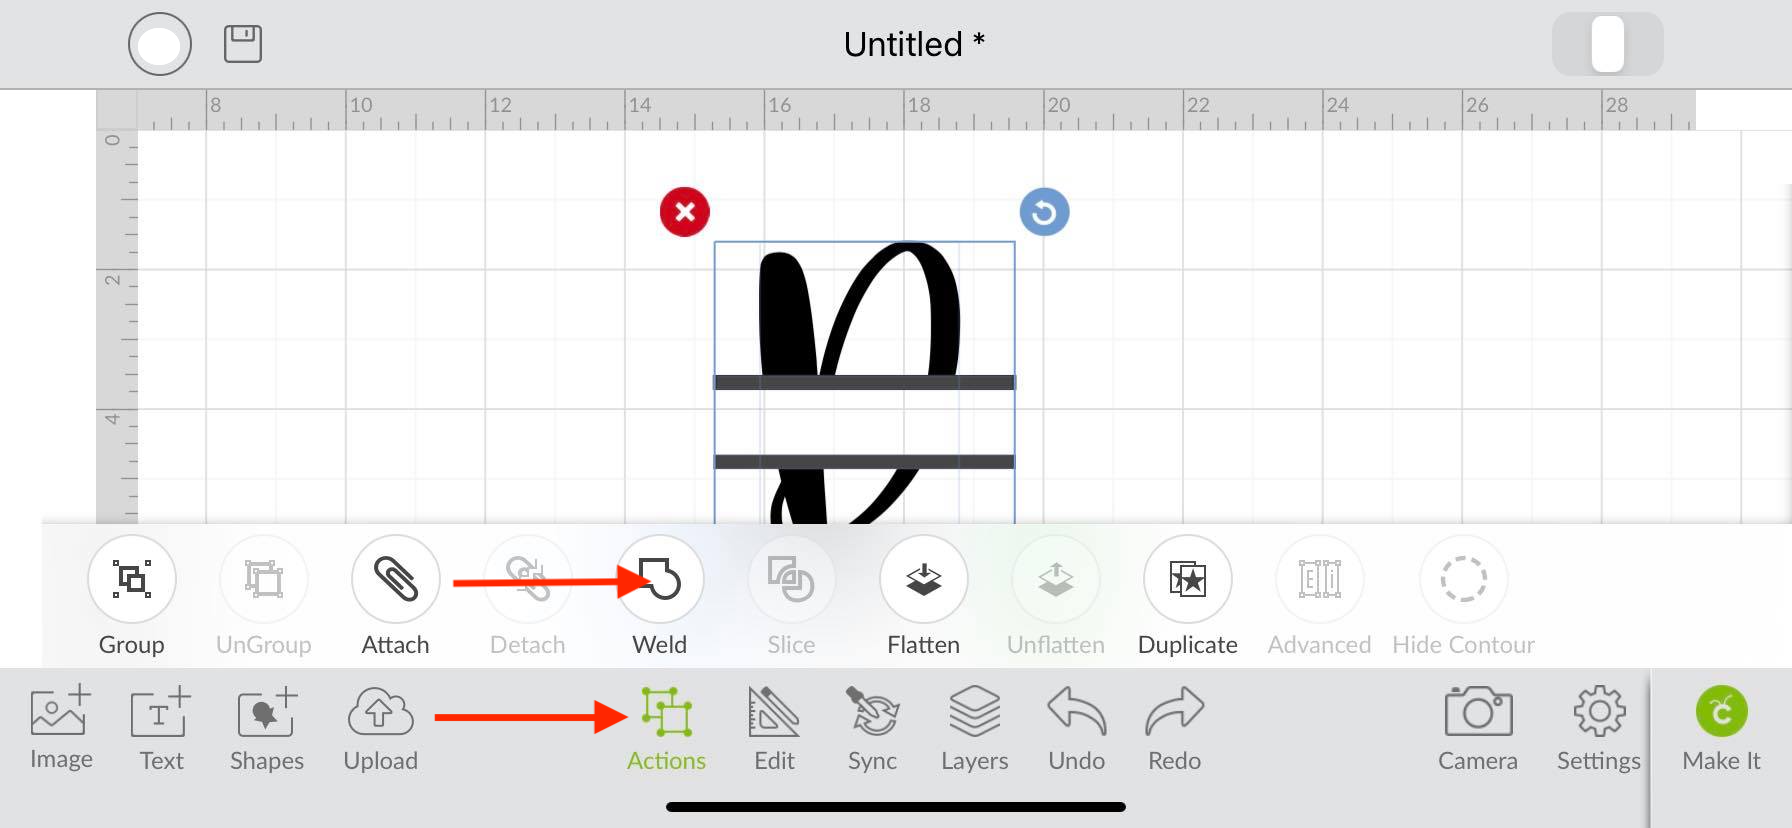
Click the Action icon. A toolbar will popup right above it and you can now click the well button.
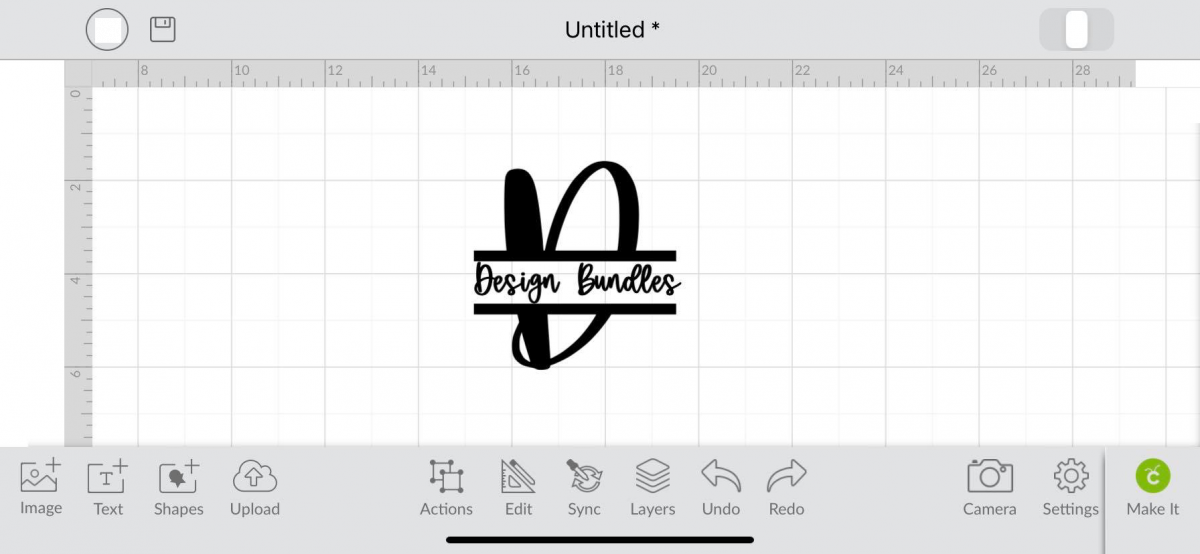
You have successfully created a monogram in Cricut Design Space App. Just add a name and you will be set. Please note that this is a single layer monogram design. If you would like a two tone design repeat steps three and four, but this time create a big enough shape to cover half of your monogram.
If you're using the desktop version of Cricut, make sure to check out this guide on making monograms in Cricut on a desktop.
Related Tutorials
Cricut Tutorials
Simple Monogram Design in Cricut Design Space Mobile App
Cricut Tutorials
How to Curve Text in Cricut Design Space Mobile App
Today we’ll focus on how to curve Text in Cricut Design Space App....
Cricut Tutorials
How to Print then Cut in Cricut Design Space Mobile App
Learn how to easily use the Print then Cut Feature in Cricut Design Space Mobile App.
Cricut Tutorials
Text Options in Cricut Design Space Mobile App
Cricut Tutorials
How to Weld Text in Cricut Design Space Mobile App
In this tutorial we will show you how to weld text in the Cricut Design Space App.
Cricut Tutorials
How to Use the Slice Tool in Cricut Design Space Mobile App
Discover how to slice in Cricut Design Space Mobile App using the Slice Tool.


