


By Design Bundles
Cricut Tutorials8 min
How to Access Premade Projects in Cricut Design Space Mobile App
Today we’ll learn how to use Premade designs in Cricut Design Space mobile app. Thankfully, Cricut made it possible to not only create in Design Space but to be able to save and then access the same premade designs at a later date. Having this option in Design Space is quite useful especially when you're in a time crunch.
To begin, open the Cricut Design Space app and make sure you are on the Cricut home screen. This will look similar to the Design Space desktop version.
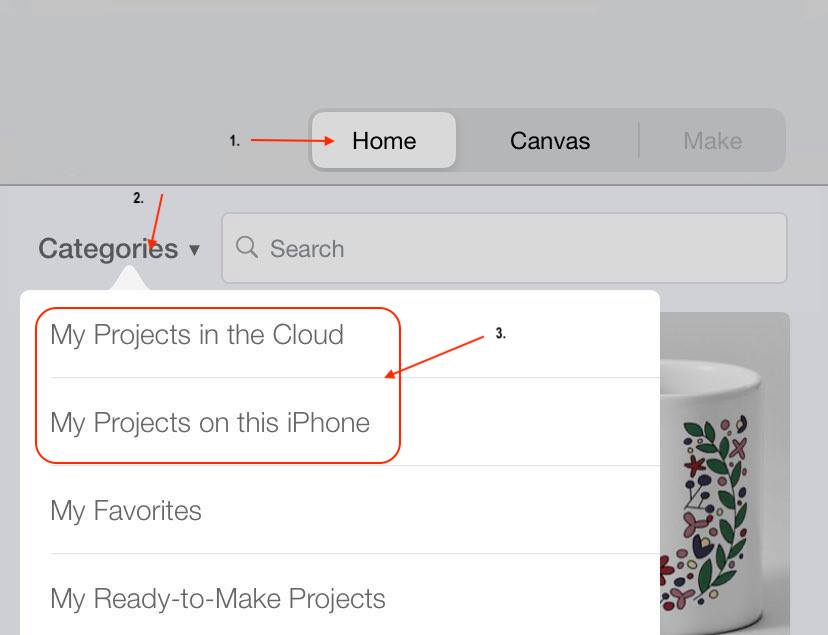
To locate our premade design click on the Categories tab on the left-hand corner of the home screen. A pop-up window will appear and you can now select My project in the Cloud or My projects on this Iphone. You will want to select the one that you used to save your artwork in Design Space.
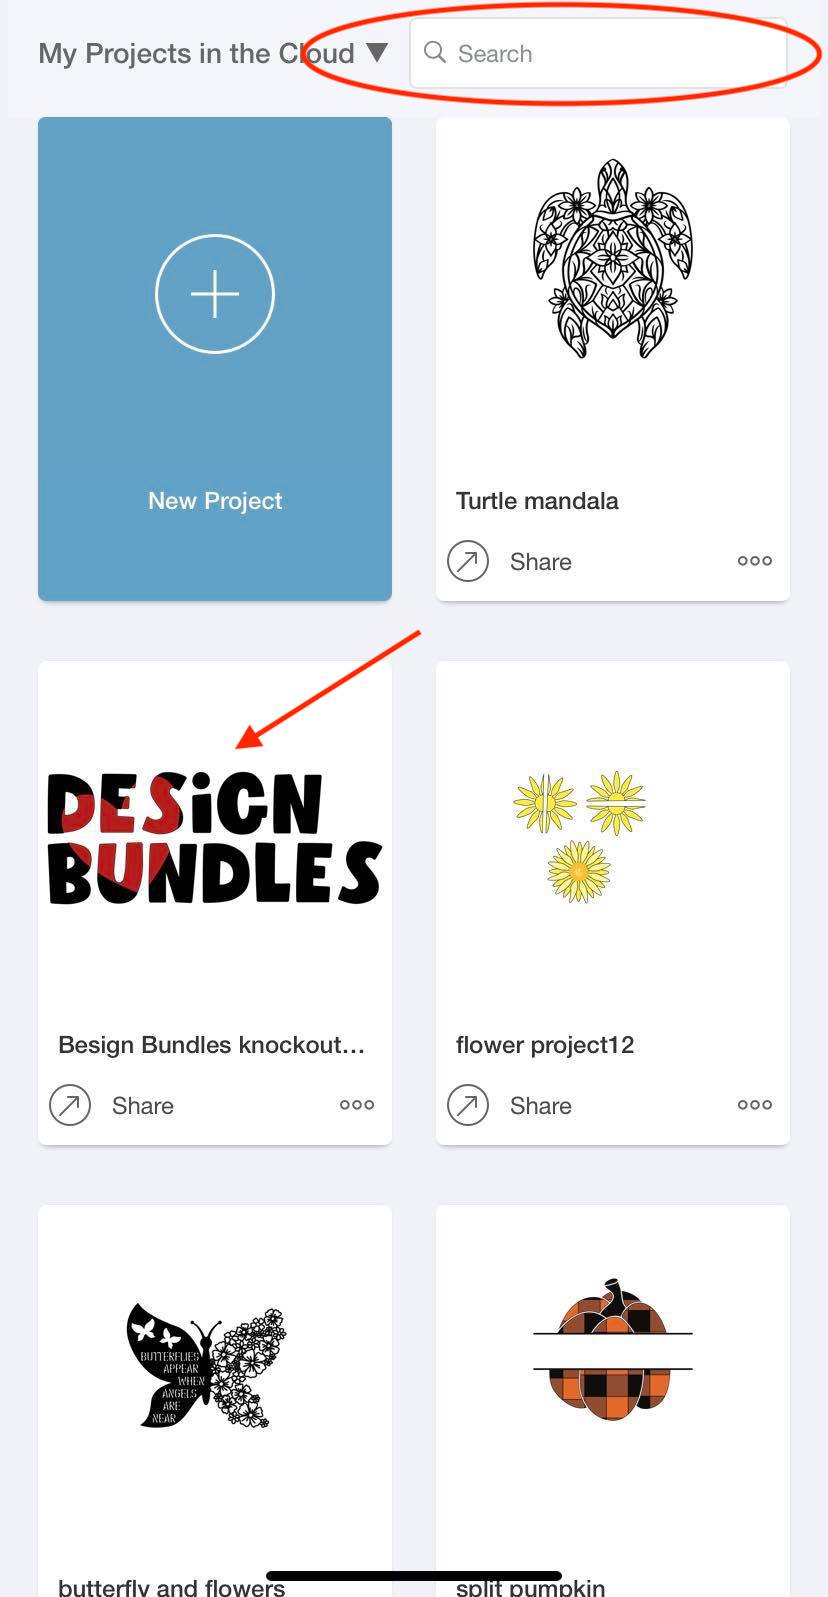
On the next page you can scroll through your saved projects or use the search tab to easily bring up the project you want. Simply click on the premade project to proceed to the next page.
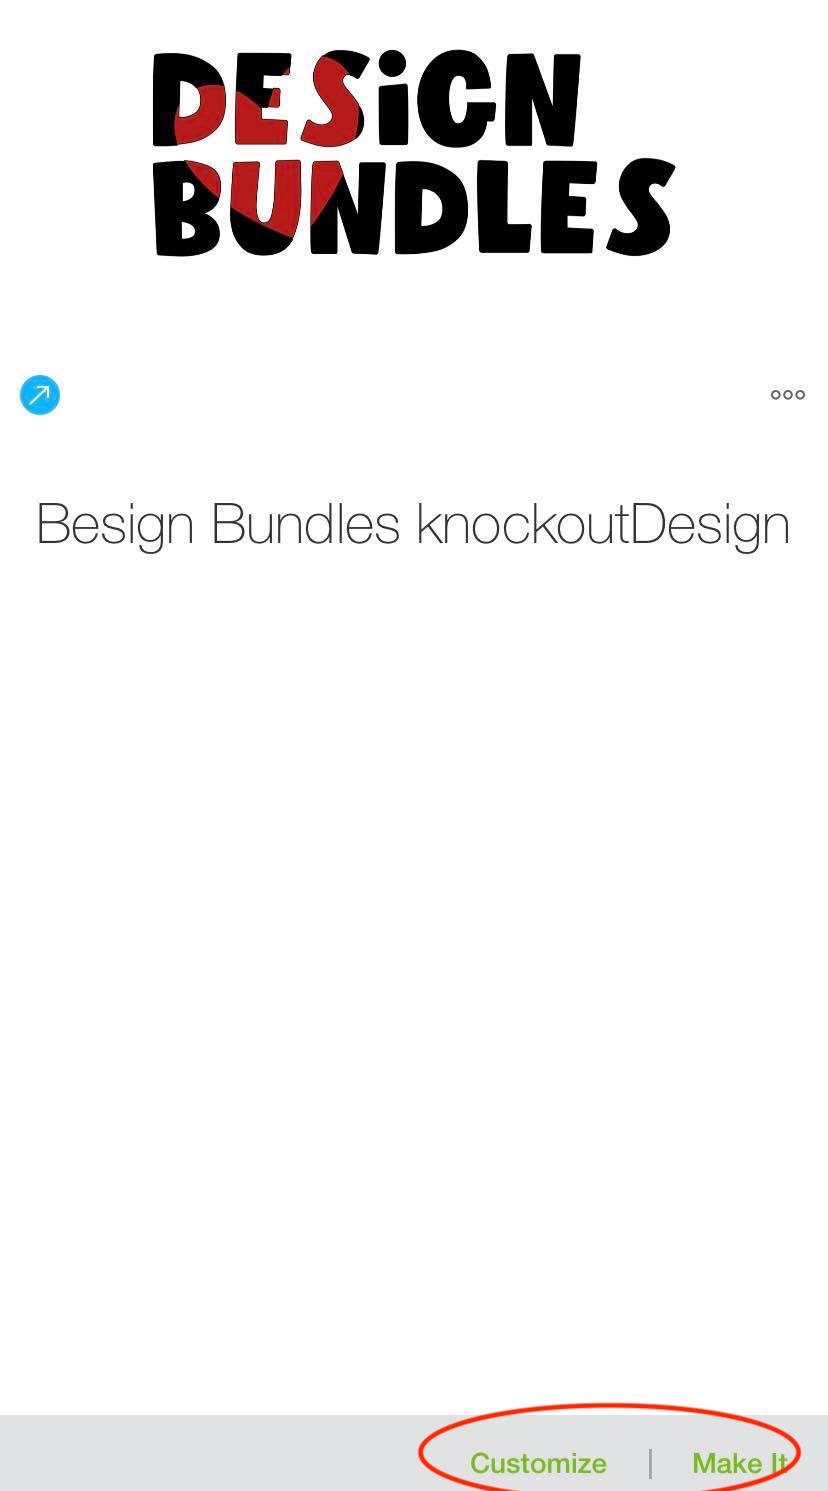
You can now click on the green Customize or Make it button on the lower right hand corner to continue using the premade project.
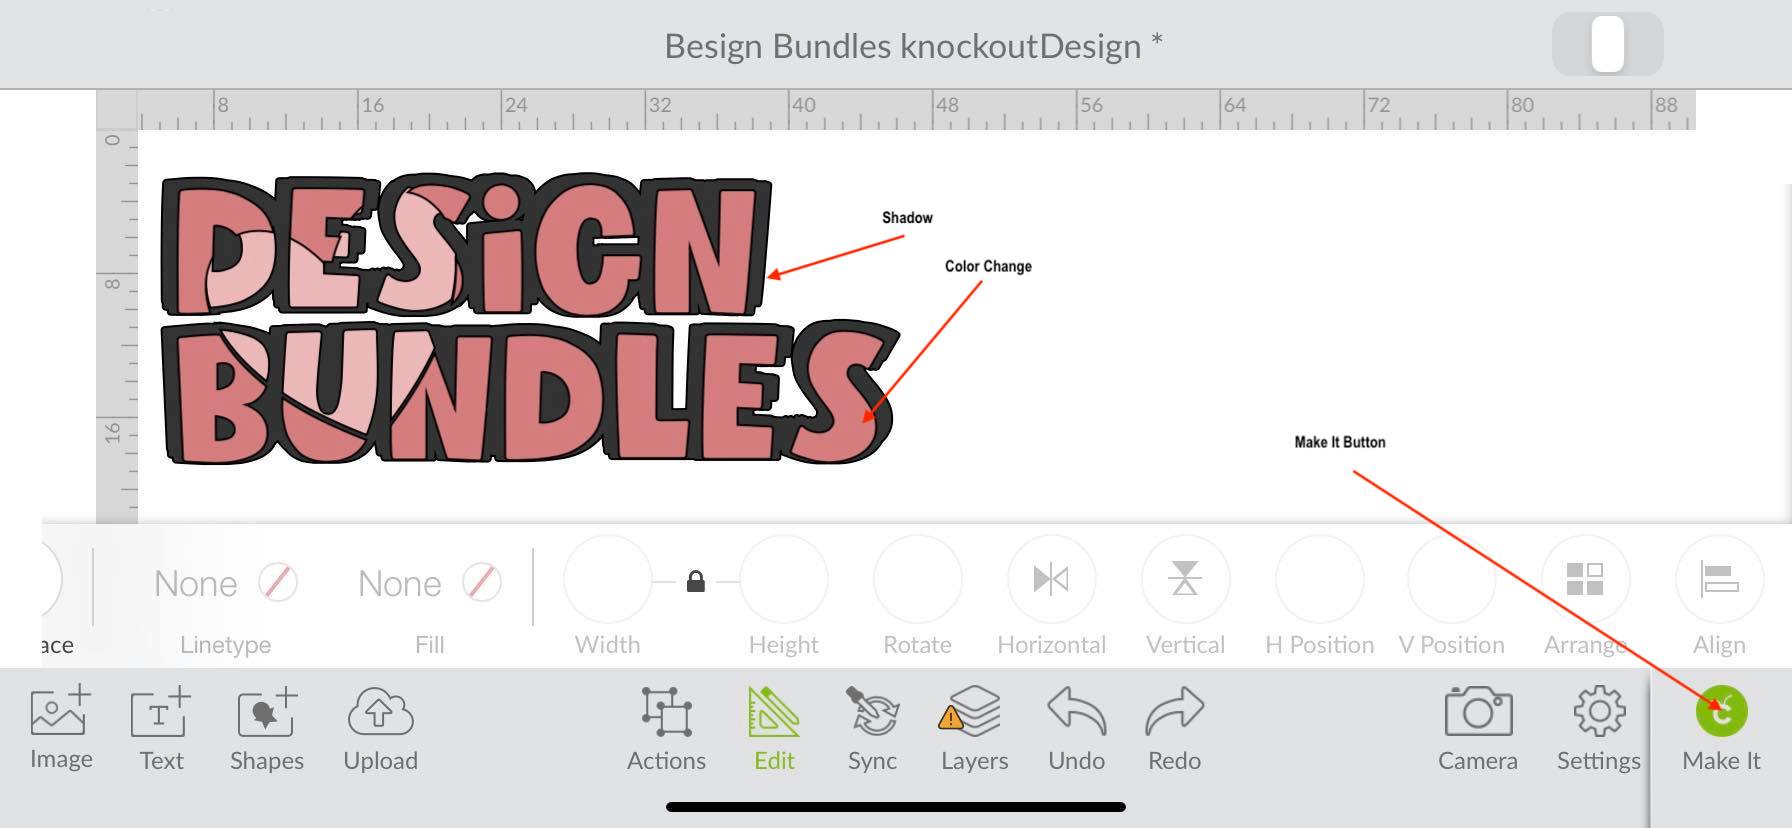
If you choose to customize the premade design you will be redirected to the canvas page. On the canvas page you can make changes to the design. This can range from a simple color change to creating a shadow . Once you are finished on the canvas page you can click the green Make it button.
After clicking the Make it button the program will direct you to the preview page. On this page you can view the design against the cutting mat template.
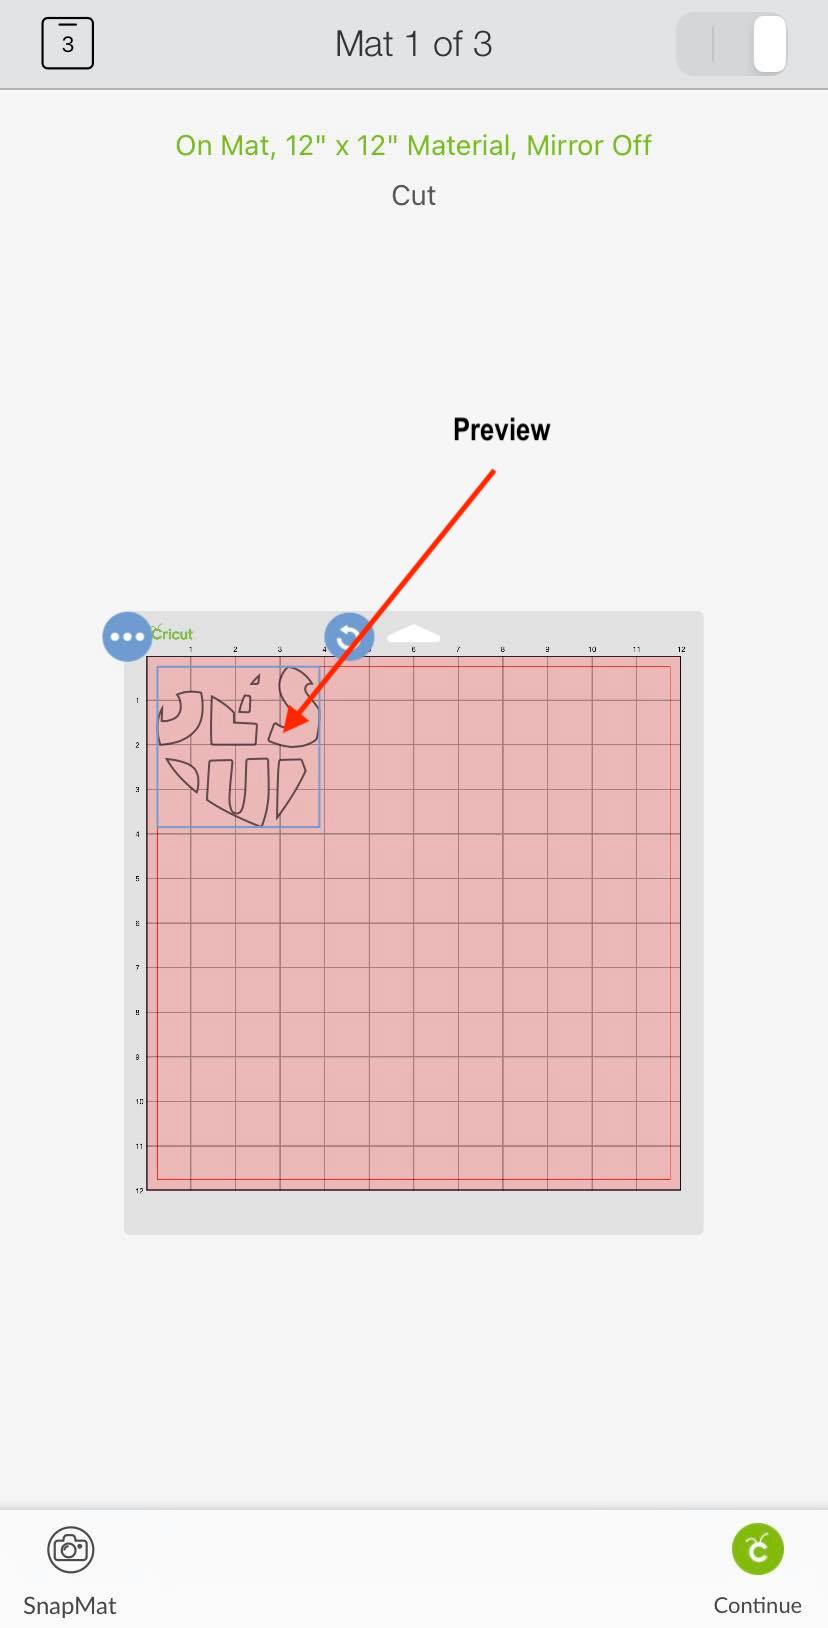
This is also a great time to mirror your image if you are using iron on materials. You can do this by clicking on the little square on the upper left-hand corner. When the window appears simply select each layer individually and use the toggle button to turn the Mirror Feature on and off. You can also create more copies of your design as well rearrange your cutting mats.
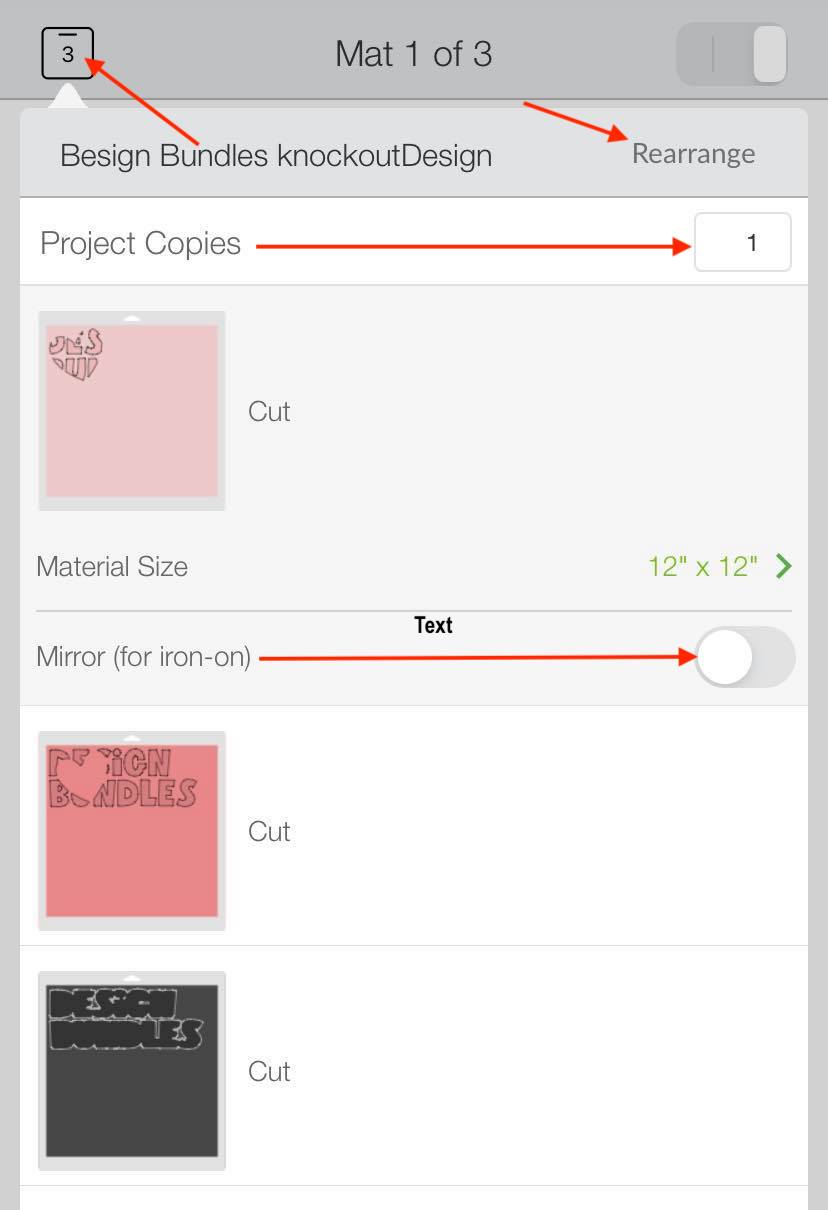
Click the Rearrange button on the right-hand corner. Next, hold down the three vertical lines and drag to the desired space. When you are finished click Done.
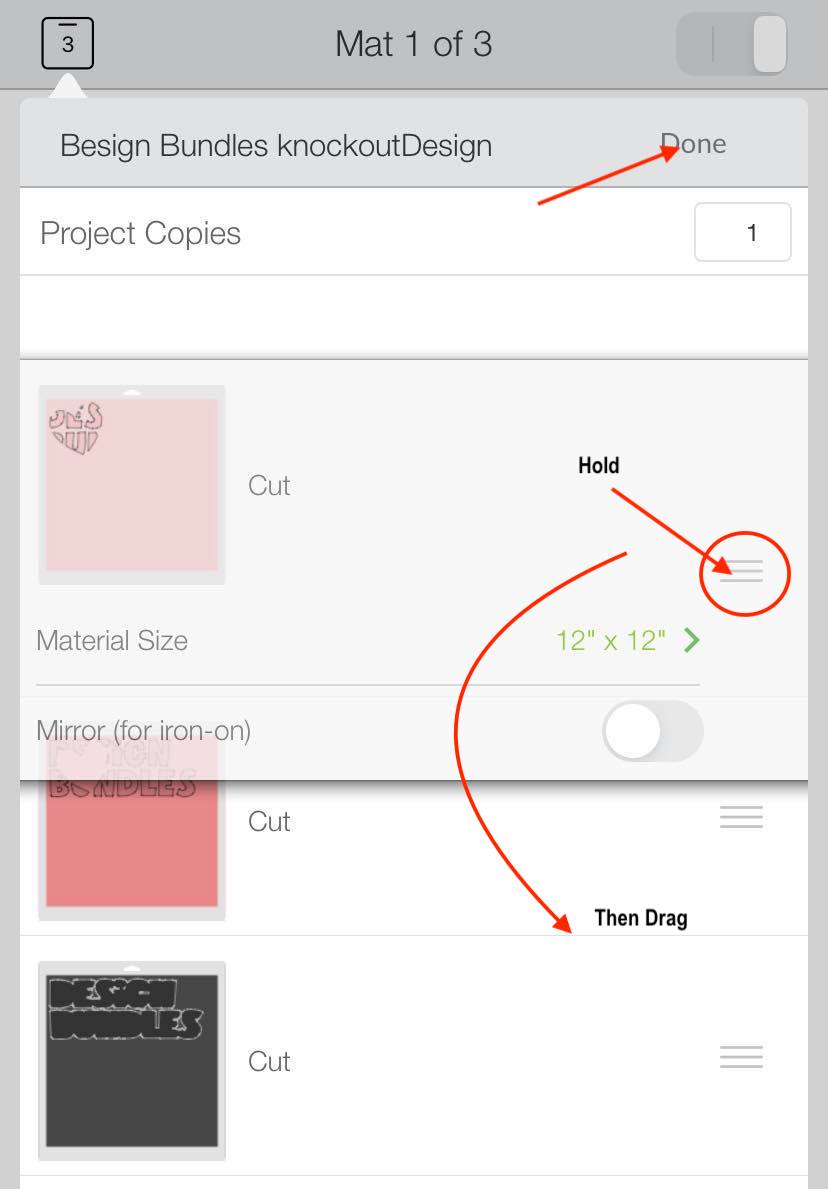
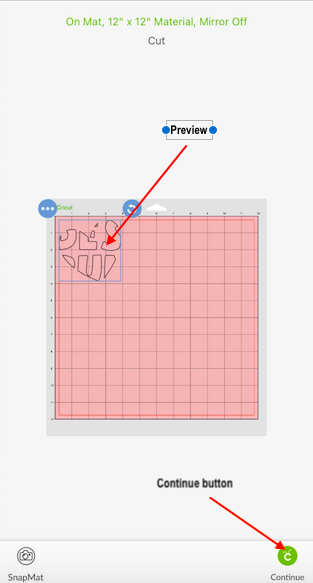
When you are finished click on the small square on the upper left-hand corner to exit the window. Back on the preview page click the green Continue button and follow the Design Space app prompts to cut out your premade project.
There you go, it is as simple as that. If you liked this tutorial make sure to check out our other guides on creating a split monogram design and making print then cut projects in the Cricut Design Space Mobile app.
To begin, open the Cricut Design Space app and make sure you are on the Cricut home screen. This will look similar to the Design Space desktop version.
Step 1 - Locate and Select a Premade Design
To locate our premade design click on the Categories tab on the left-hand corner of the home screen. A pop-up window will appear and you can now select My project in the Cloud or My projects on this Iphone. You will want to select the one that you used to save your artwork in Design Space.
On the next page you can scroll through your saved projects or use the search tab to easily bring up the project you want. Simply click on the premade project to proceed to the next page.
You can now click on the green Customize or Make it button on the lower right hand corner to continue using the premade project.
Step 2 - Customize Premade Design
If you choose to customize the premade design you will be redirected to the canvas page. On the canvas page you can make changes to the design. This can range from a simple color change to creating a shadow . Once you are finished on the canvas page you can click the green Make it button.
Step 3 - Make it Project Settings
After clicking the Make it button the program will direct you to the preview page. On this page you can view the design against the cutting mat template.
This is also a great time to mirror your image if you are using iron on materials. You can do this by clicking on the little square on the upper left-hand corner. When the window appears simply select each layer individually and use the toggle button to turn the Mirror Feature on and off. You can also create more copies of your design as well rearrange your cutting mats.
Click the Rearrange button on the right-hand corner. Next, hold down the three vertical lines and drag to the desired space. When you are finished click Done.
When you are finished click on the small square on the upper left-hand corner to exit the window. Back on the preview page click the green Continue button and follow the Design Space app prompts to cut out your premade project.
There you go, it is as simple as that. If you liked this tutorial make sure to check out our other guides on creating a split monogram design and making print then cut projects in the Cricut Design Space Mobile app.
Related Tutorials
Cricut Tutorials
Add Images/Premade Images in Cricut Design Space Mobile App
Cricut Tutorials
How to Curve Text in Cricut Design Space Mobile App
Today we’ll focus on how to curve Text in Cricut Design Space App....
Cricut Tutorials
How to Print then Cut in Cricut Design Space Mobile App
Learn how to easily use the Print then Cut Feature in Cricut Design Space Mobile App.
Cricut Tutorials
Text Options in Cricut Design Space Mobile App
Cricut Tutorials
How to Weld Text in Cricut Design Space Mobile App
In this tutorial we will show you how to weld text in the Cricut Design Space App.
Cricut Tutorials
How to Use the Slice Tool in Cricut Design Space Mobile App
Discover how to slice in Cricut Design Space Mobile App using the Slice Tool.


