- By Design Bundles
- 4 Mins
- Cricut Tutorials
How to Shadow an Image in Cricut Design Space
Step 1. Create a New Project
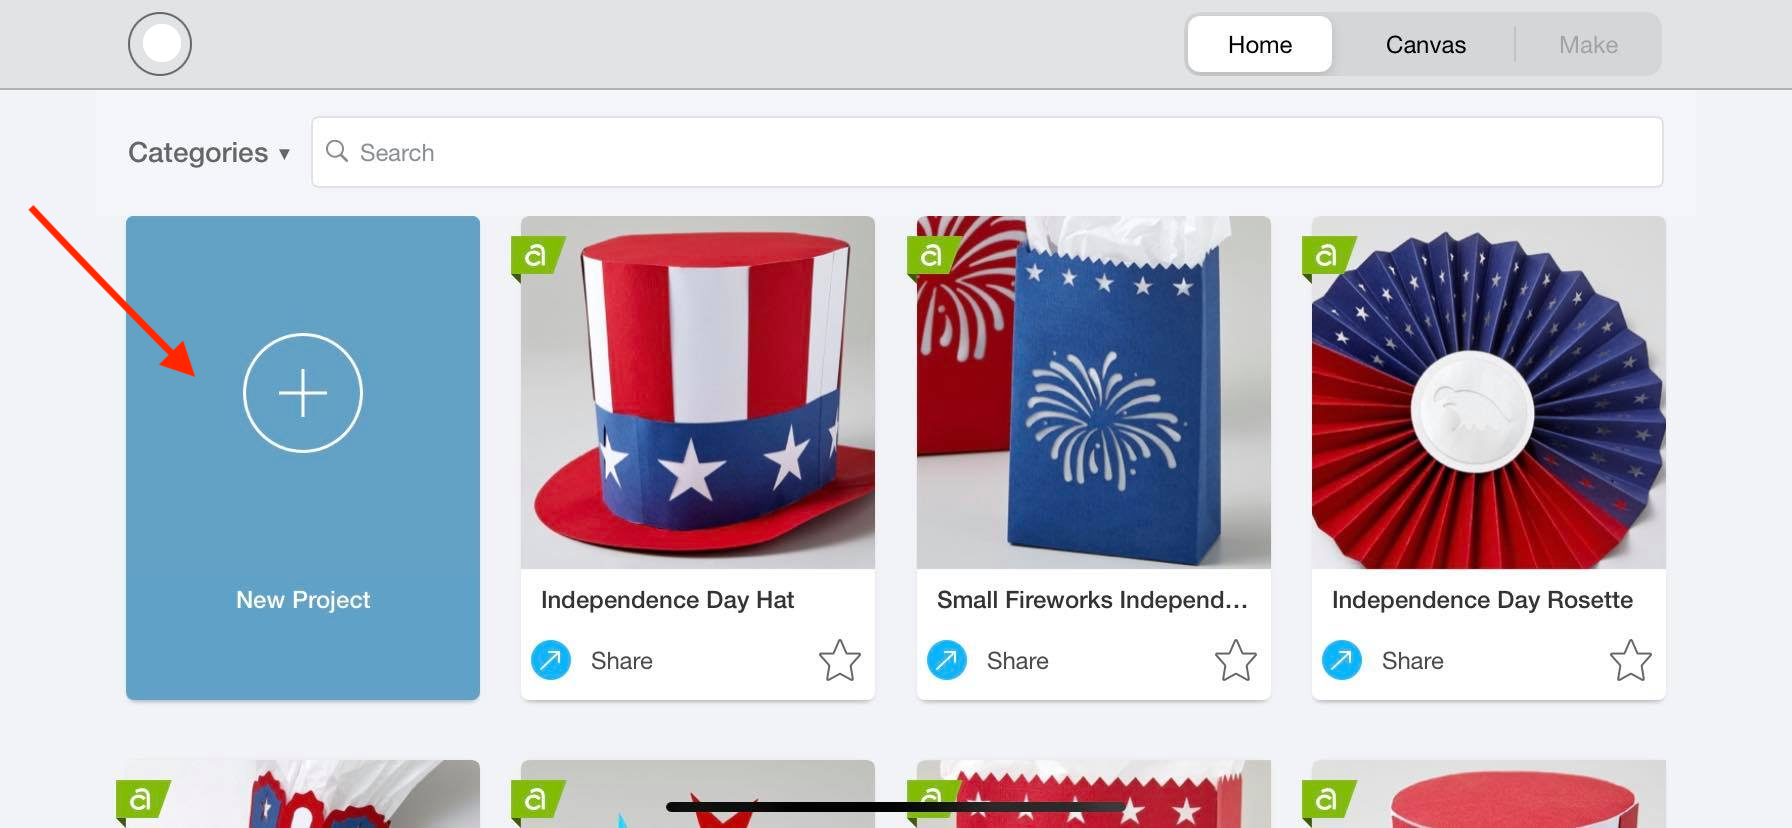
Open Cricut Design Space and create a new project. You can simply do this by clicking on the blue rectangle box that is labeled New Project.
Step 2. Upload your Image
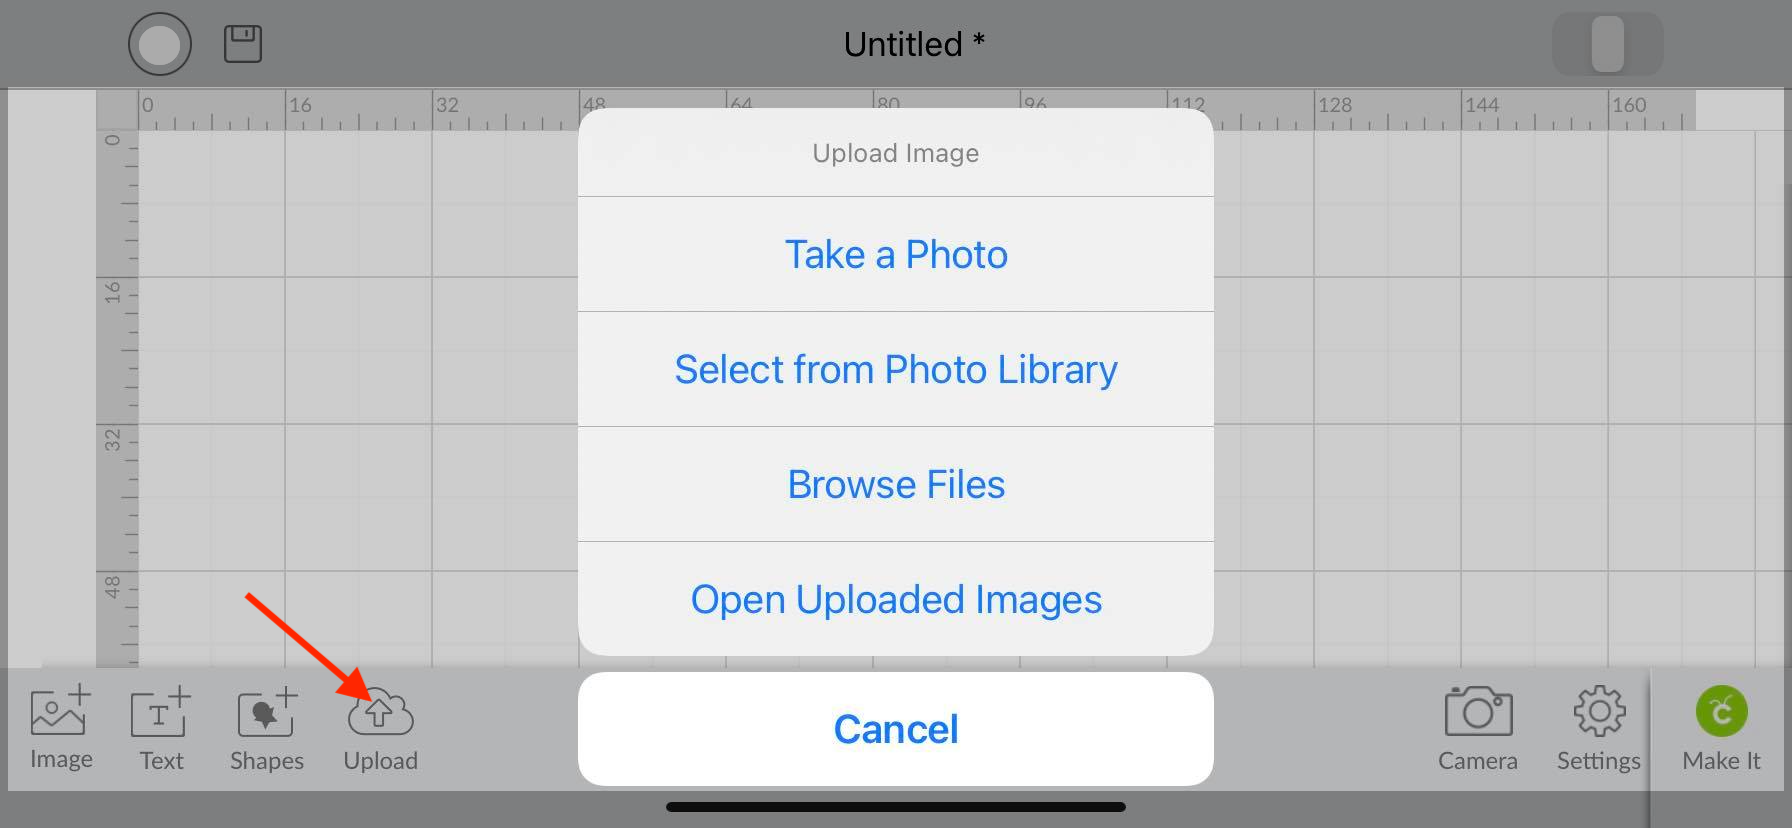
First, you will need to upload your images to Cricut Design Space app. Today we will use a cheetah illustration to use in our project.
Step 3. Duplicate image
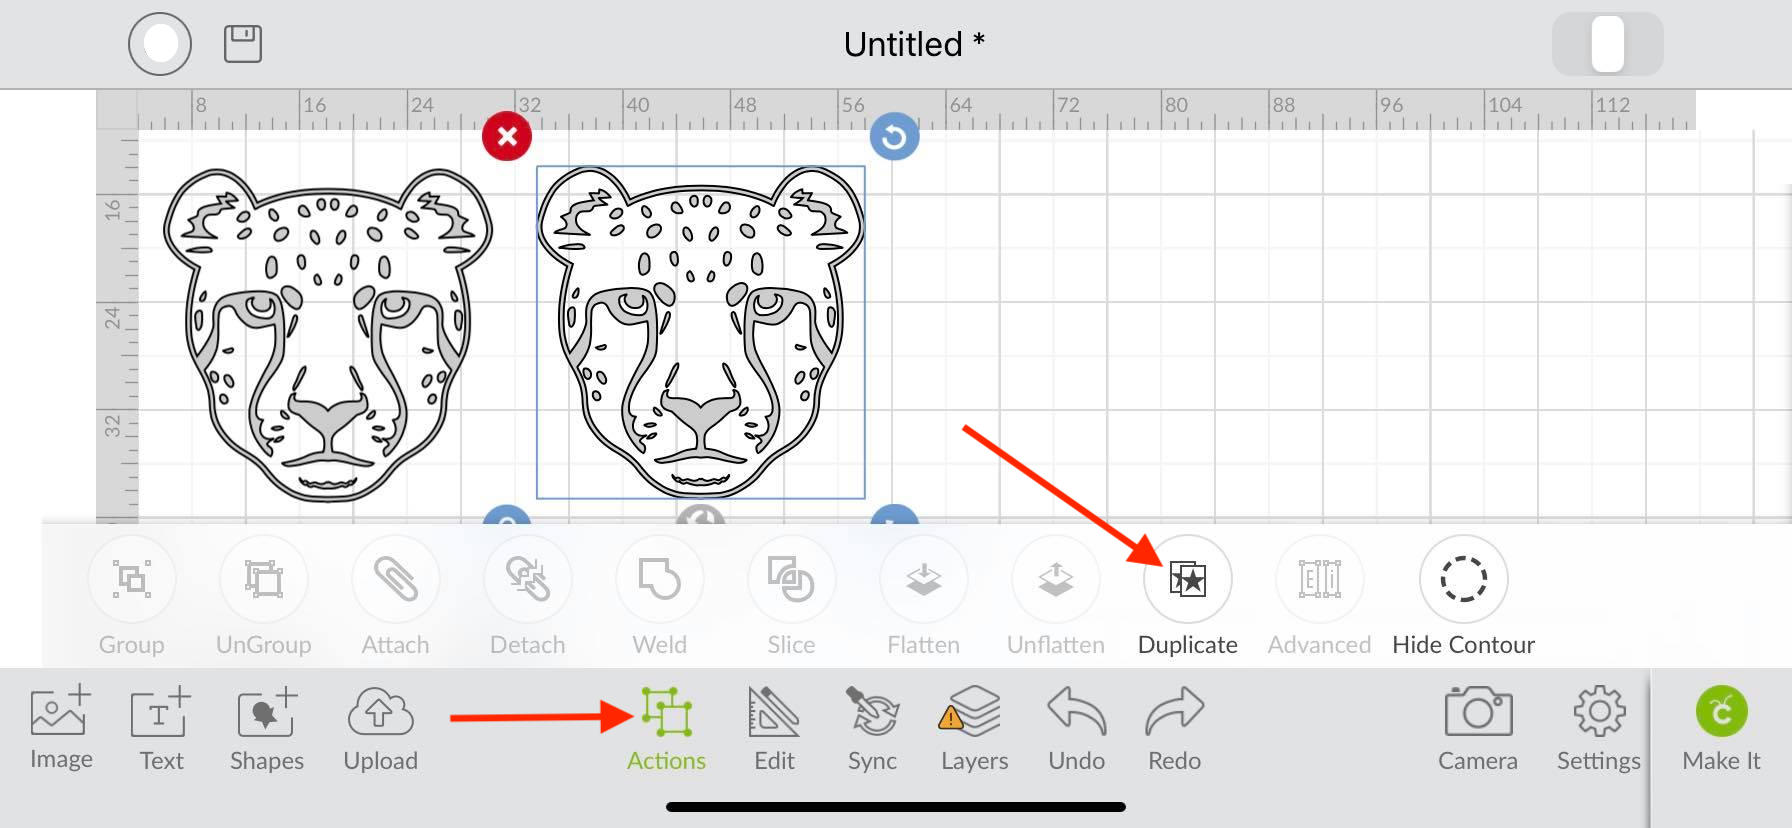
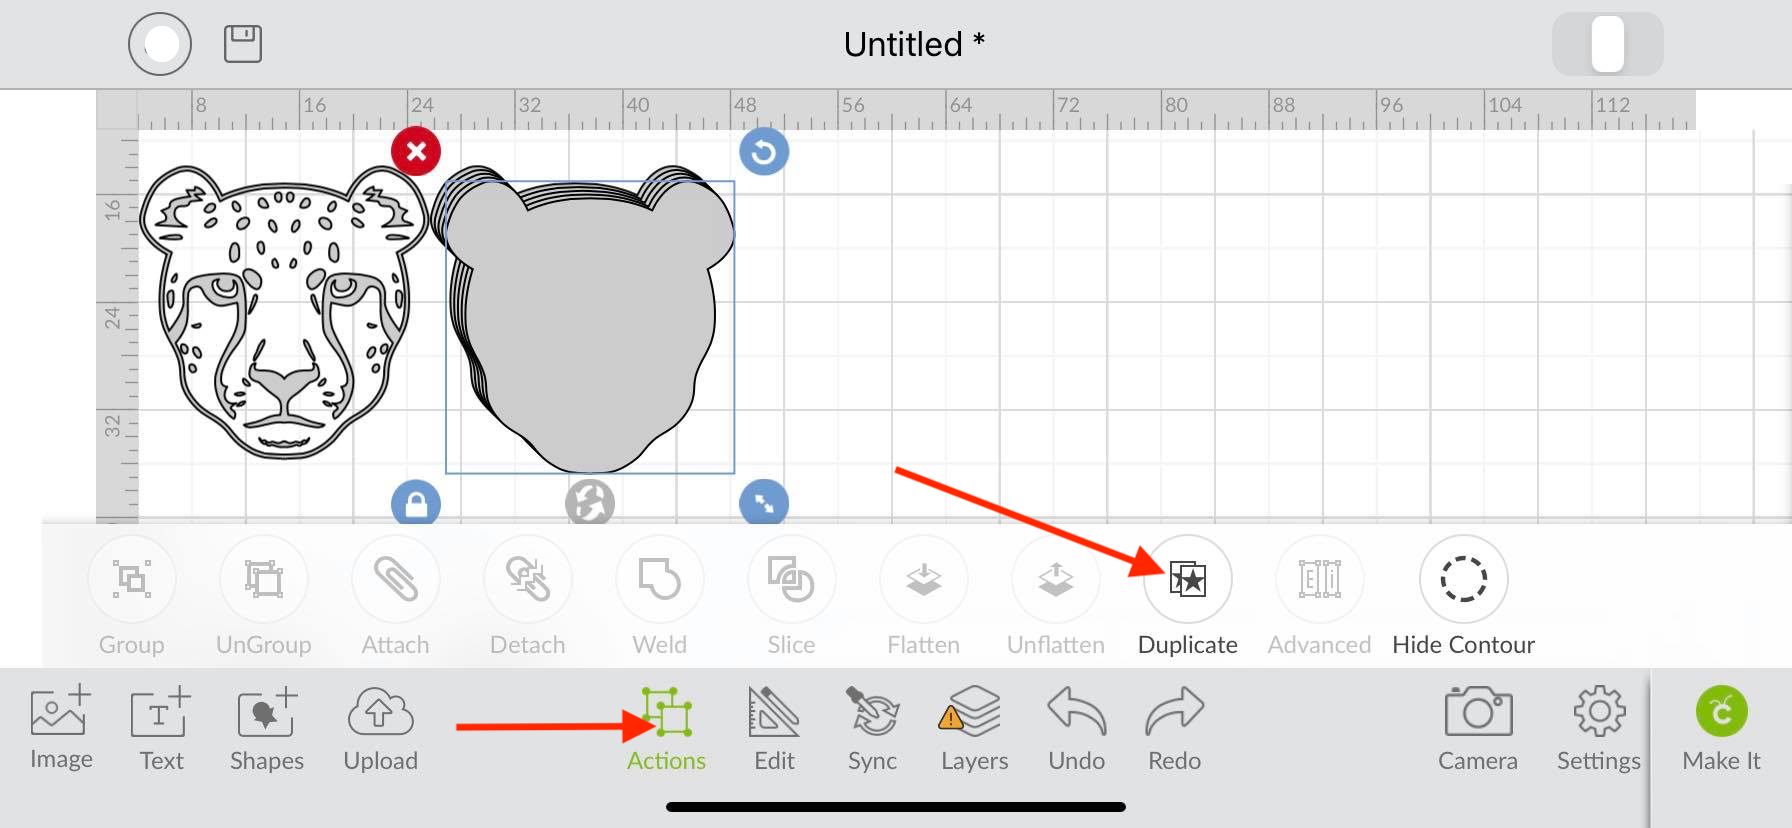
After, select your image and duplicate. Click on the Action icon and then click Duplicate on the pop up toolbar. This will become your shadow layer.
Step 4. Contour Duplicate Layer
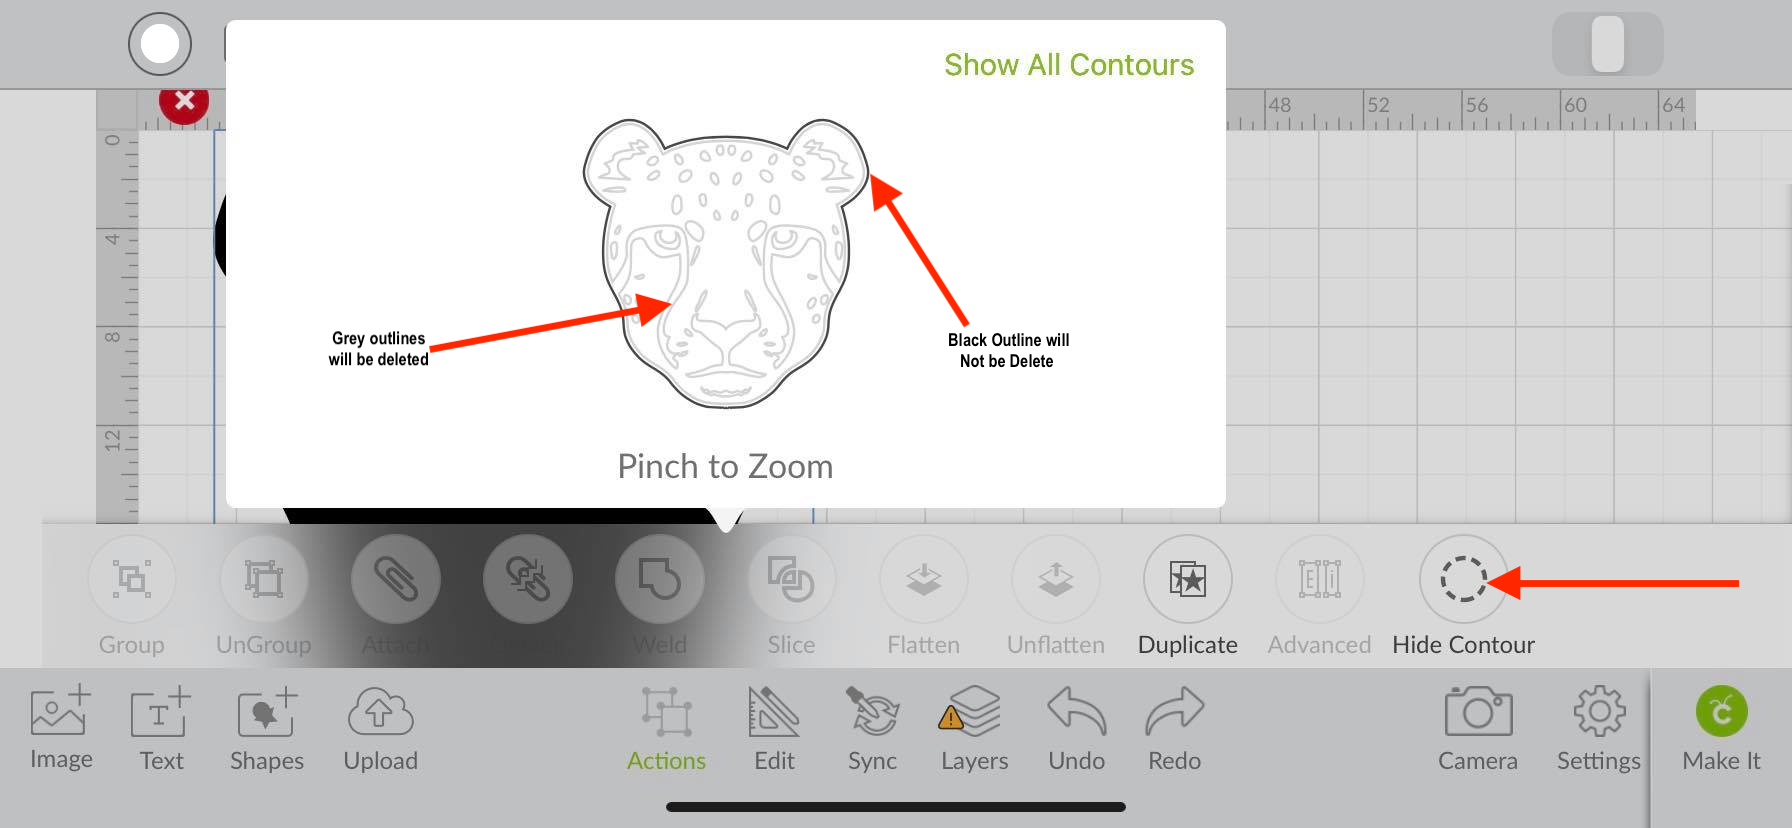
Next, we will use the contour tool to remove the inside details of the image.This will leave us with the silhouette of our image. We have a great tutorial on using the contour tool in the Design Space app if needed.
Step 5. Duplicate Shadow Layer Multiple Times
Now that you have a silhouette of your image, create several duplicates. This will help us create the shadow. To do this, click the action icon and then the duplicate icon multiple times.
Step 6. Recolor and Arrange
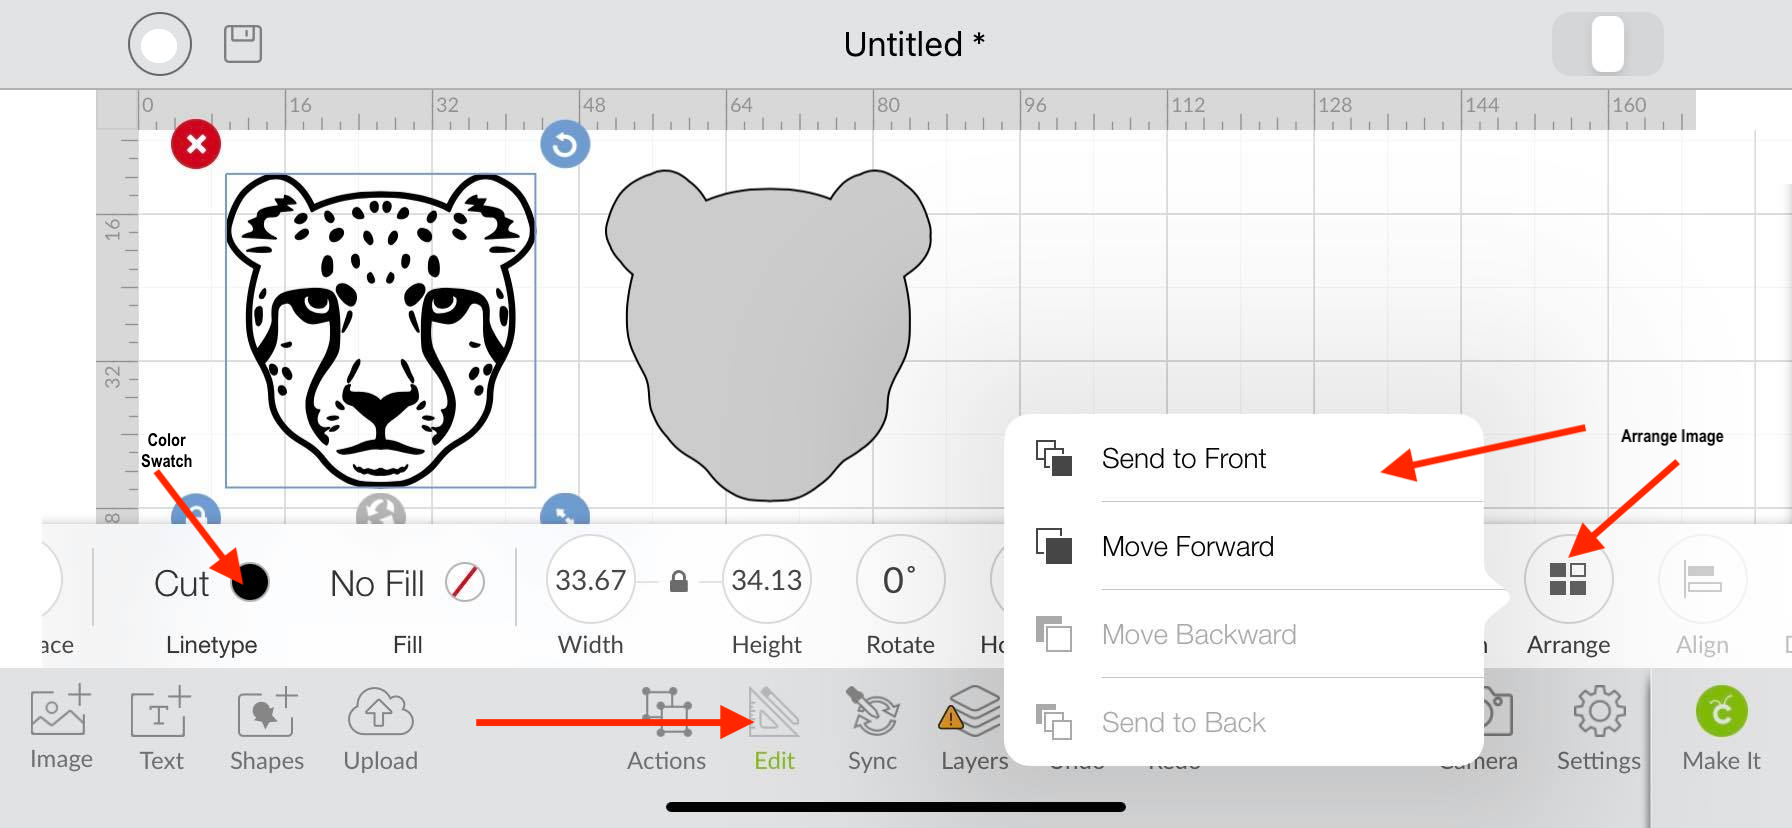
Before you start creating the shadow, recolor your original illustration and bring it to the front. You can do this by using your Color Swatch and Arrange tool which you can find under your Edit icon. This will make it a lot easier to view your placement when you arrange your shadow layers.
Step 7. Arrange your Shadow Layers
Now, arrange your layers behind the original image you just recolored. Slightly move each one to the right, left, bottom or top.
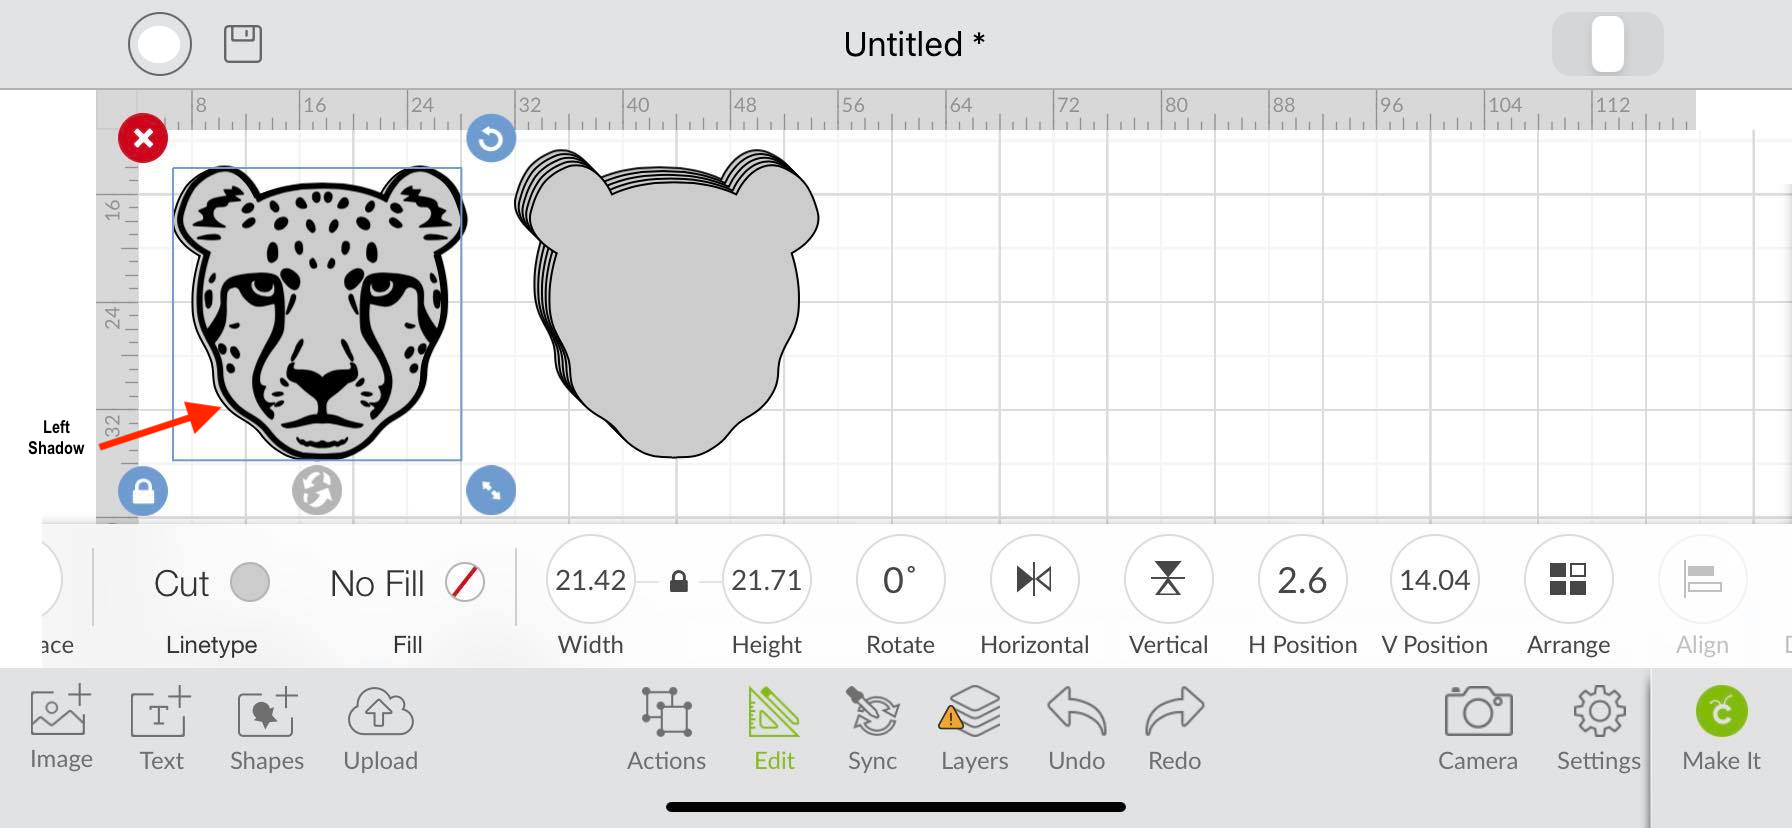
You will notice that a shadow is being created around the image. Continue this process until you have completed a shadow around the whole image.
Step 8. Weld Shadow Layers
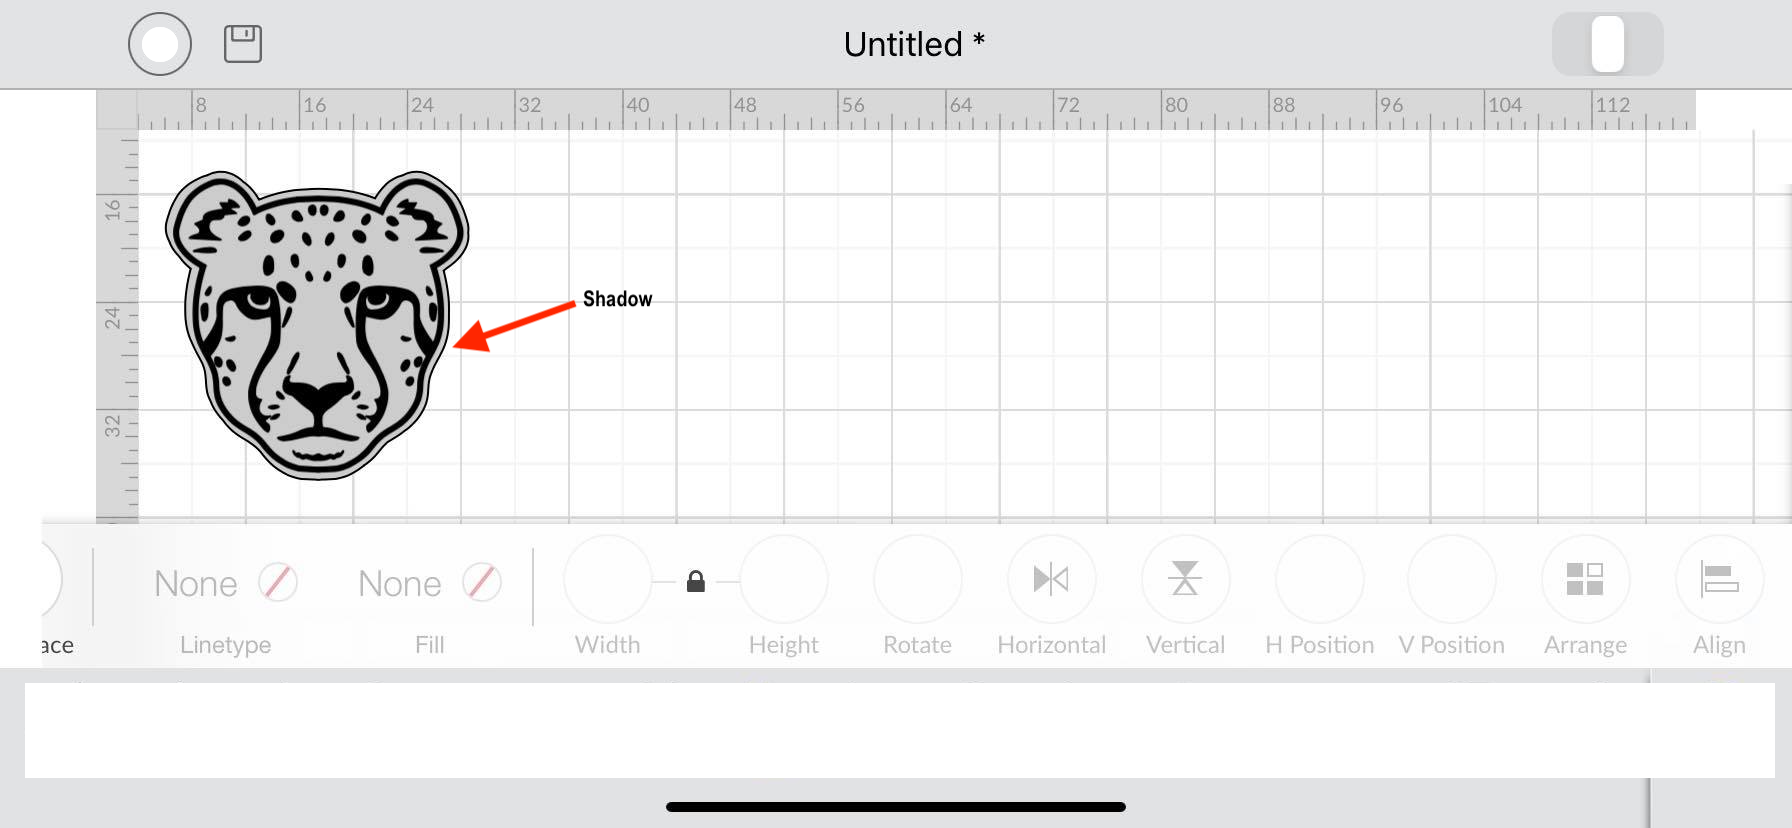
To finish, select the shadow layers and weld together. You can do this by clicking on the Action icon and then the weld icon.
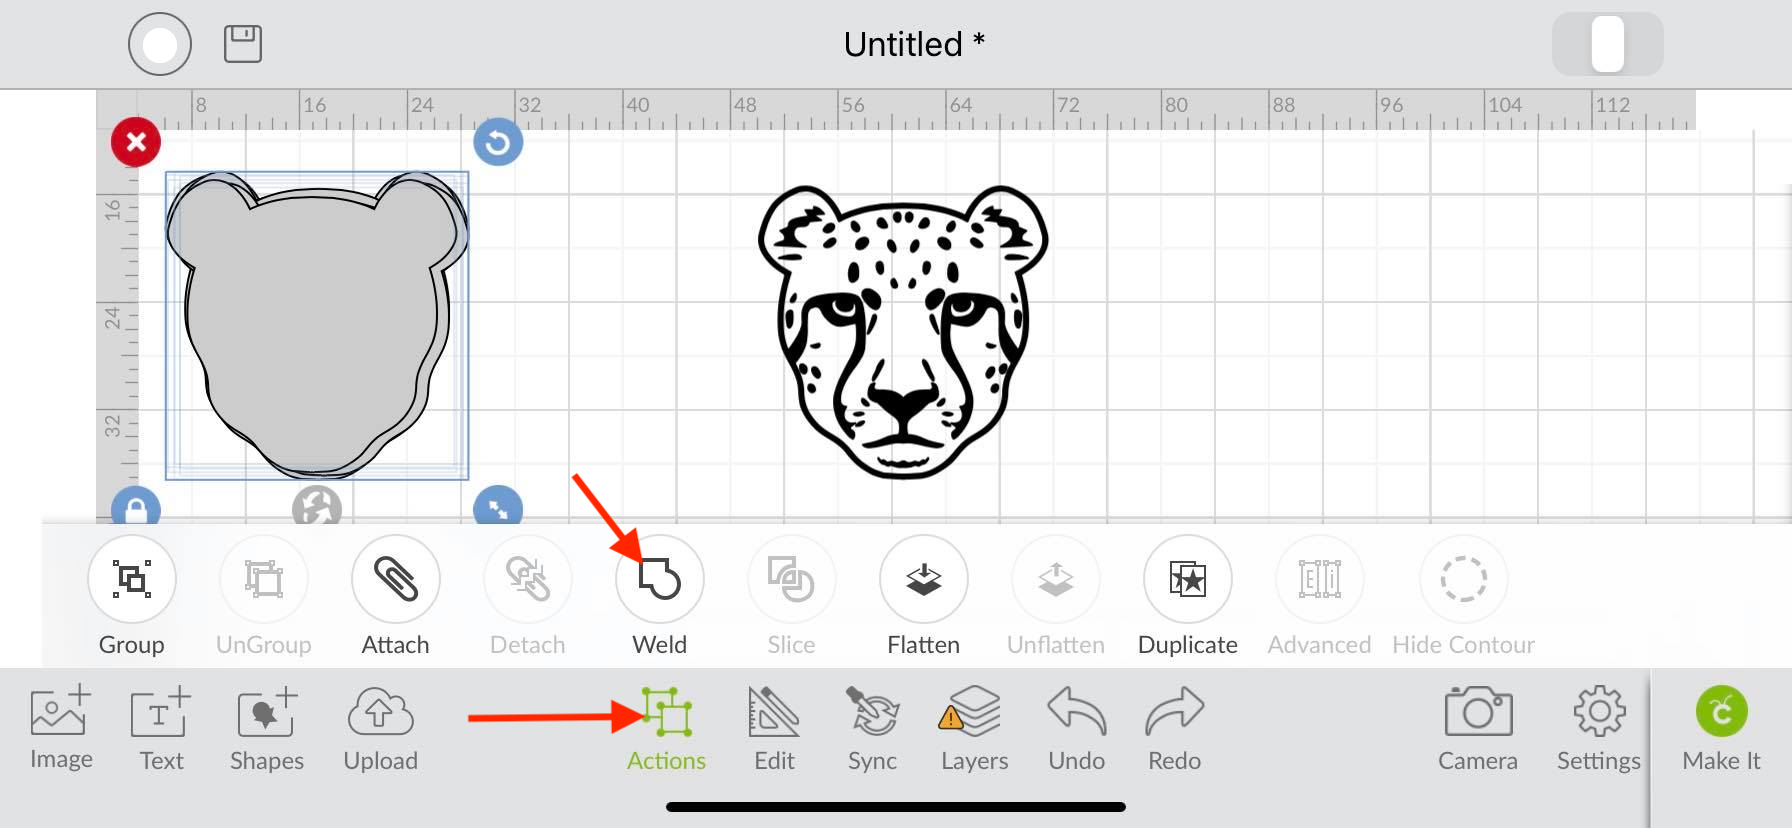
You have successfully created a shadow in cricut design space app. If you like this tutorial, check out our other Cricut tutorial on offsetting text in Design Space.
6 Related Cricut Tutorials
1- Open Cricut Design Space. Click on the upload image icon on the left toolbar.2- In the next screen click on upload image.3- Your uploaded image will appear onscreen. As you can see there are multiple images on this design but we only need a couple of the ...
If you want to split an image to create a monogram, cut a shape out from a photo, or are curious about what the Slice Tool in Cricut Design Space can do then keep reading.First, you will need to make sure that you have downloaded and unzipped the file. ...
Does flatten, attach, weld, and slice confuse you too? No worries, we get asked this question all the time! In this tutorial we will show you how to flatten an image in Cricut Design Space as well as why you might want to do this.Check out our guide on ...
1- Open Cricut Design Space. Click on upload.2- Select upload image.3- Click on browse.4- We have uploaded our single layered image. To make it multi layered for paper piecing etc we need to create a background base, then separate each color for cutting. Click on complex , then ...
1- Open Cricut Design Space. Select the text tool.2- Type your text. Select your font. I will be using the Dallon font from fontbundles.net.3- Click on your text and then adjust the letter spacing.4- Adjust the letter spacing so all the letters touch a tiny bit.5...
1-Open the Cricut Design Space App.2- Tap on a new project.3- Tap on image.4- Select your image. The contour tool will only work if the image has several layers. Flattened image will not work. Once you have selected your image insert the image.5- Select your image. ...

 All your Font Needs


