
How to Offset Text in Cricut Design Space
Wow! Did you know that you can now offset text in Design Space? If you haven't tried it yet, you are going to want to. This feature can help take your text projects to the next level in an instant. Try it out yourself and believe me you are going to want to offset in Cricut all the time.
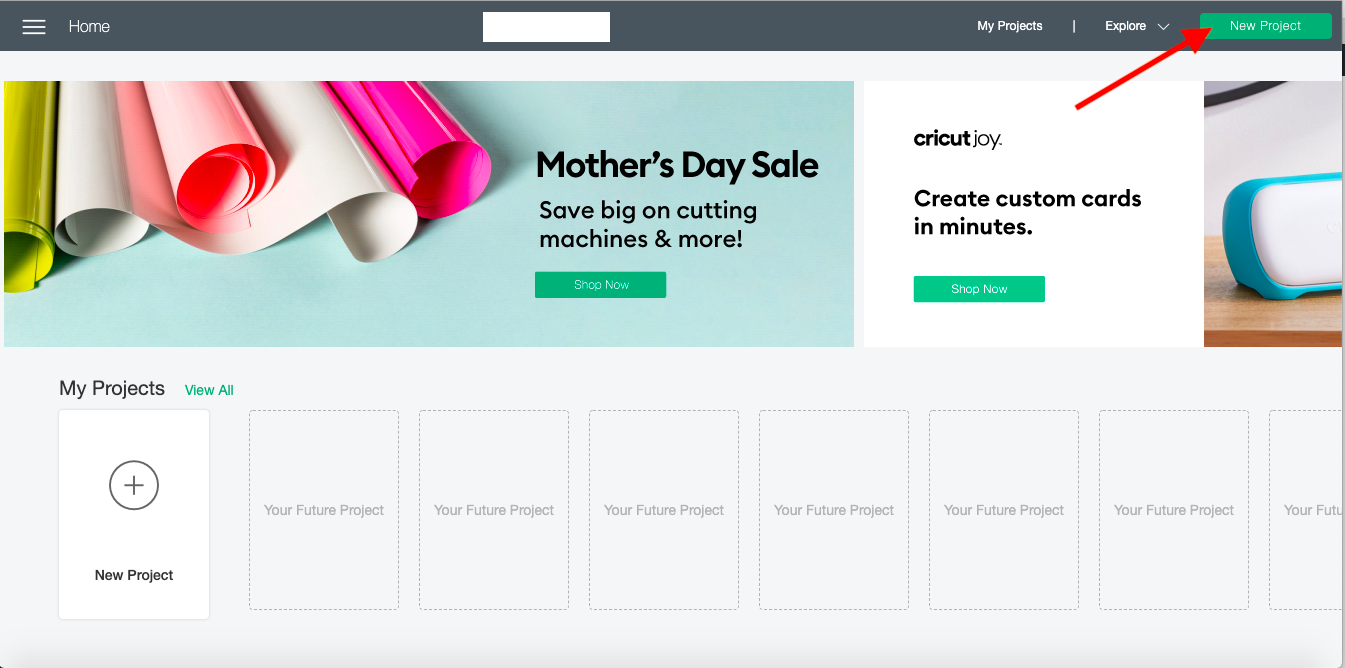
Okay it's time to start. Make sure your Cricut program is opened up and you are logged in. Once you are logged in you will be on the Cricut home page. This is where you will be able to start a new project by simply clicking on the green button that is labeled New Project on the top right hand corner.
Once you click on the button you will be redirected to the canvas page and that's when all the fun happens!!
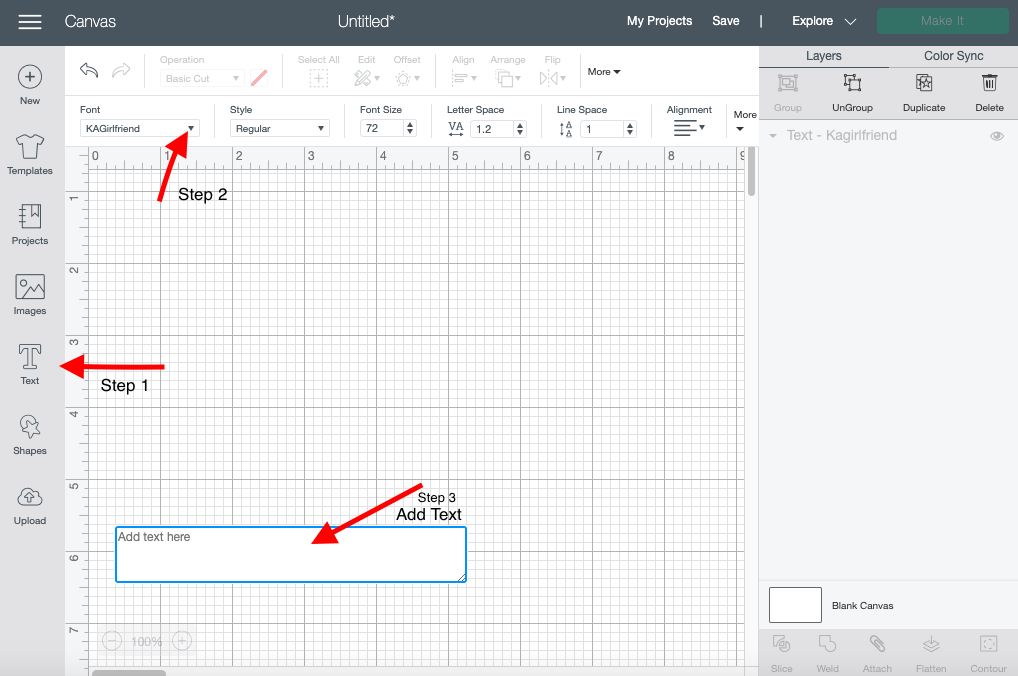
It’s finally time to choose a font from your Cricut Library for your project. Click on the big “T” icon on the left side of your canvas to get started. A rectangle box will appear on the screen. This is where you will enter your text. You will also notice that a toolbar will appear on top of your canvas screen as well where you will be able to change your font.
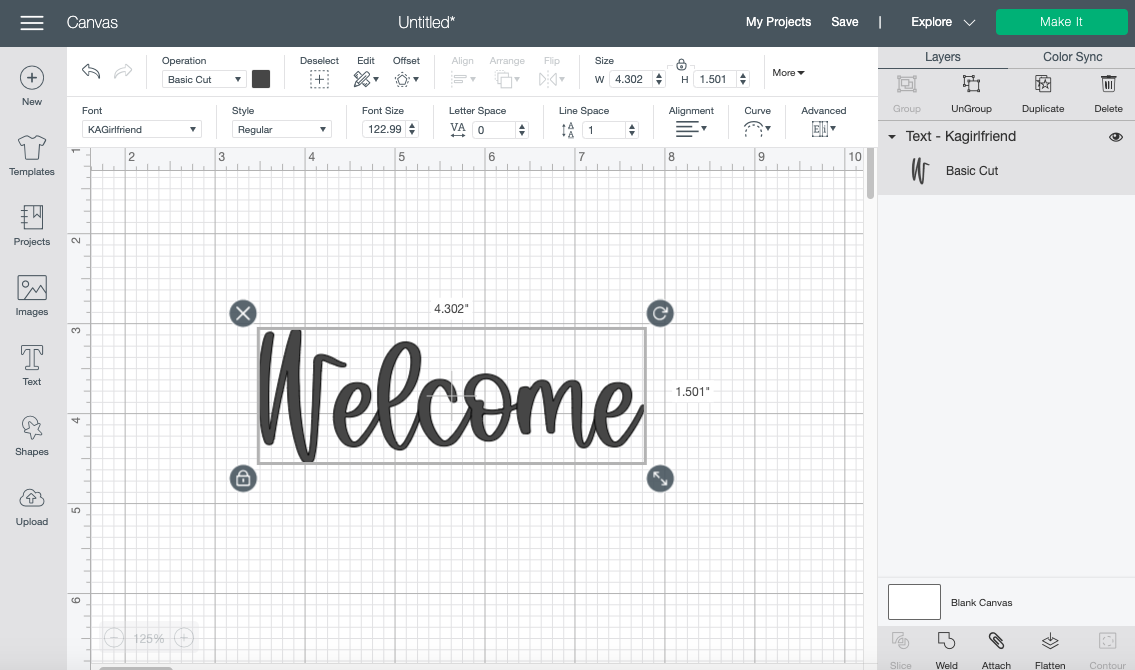
For this project I’ll be searching and using a wonderful script font called Girlfriend by KA Designs. I absolutely love the flow of this Script font and think it will work great for this project.
When using a script font like Girlfriend you would normally have to reduce the spacing to kern the font. Amazingly Cricut just came out with an automatic kerning feature that will save you so much time. If you want to know all about the new kerning feature we have a great tutorial that explains it all.
Yay!! It’s finally time to offset your text and it's super easy to do. Click on your text, and a main toolbar will appear on top of your canvas screen. Press the offset button on the toolbar. This is located between your edit and align tool.
A small box will appear on the screen along with a blue preview line around your text. You will now have a couple options to create your offset text.
First one will be distance. You will notice a thin grey line with a little grey button that you can drag back and forth. Start from the middle of the line where the grey button should be and slowly drag to the right. The further you go toward the right the larger the offset will be around your text.
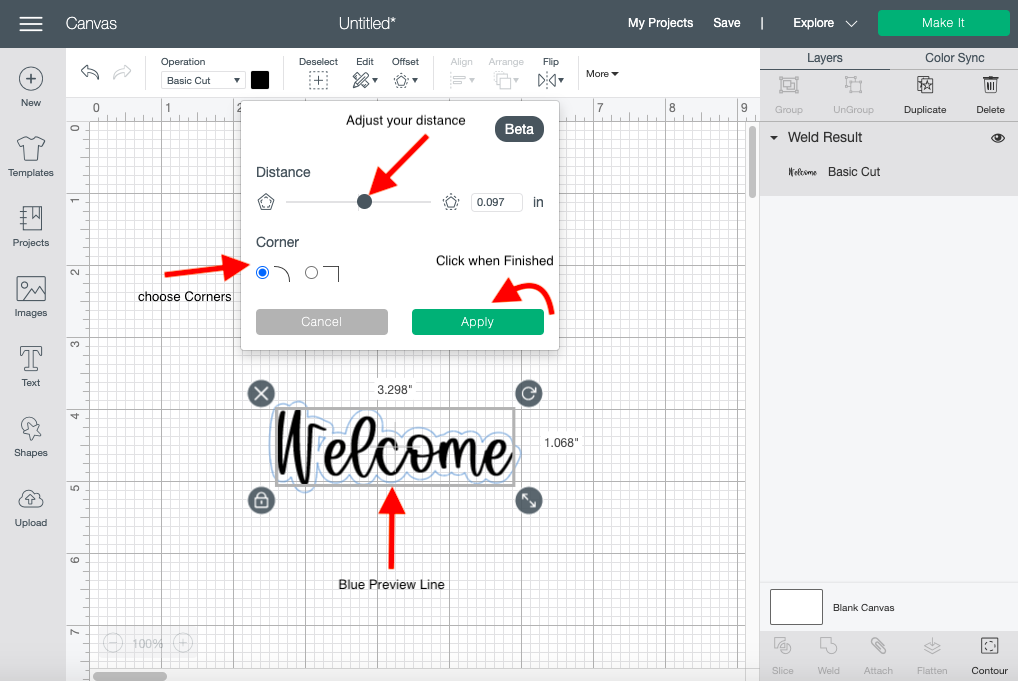
Once you have adjusted your distance click on the type of corners you want. I always select rounded corners so the offset looks a little smoother. Pick the one that will work the best with your project. Now that you've gotten your settings perfect click on the green “Apply” button on the right hand corner.
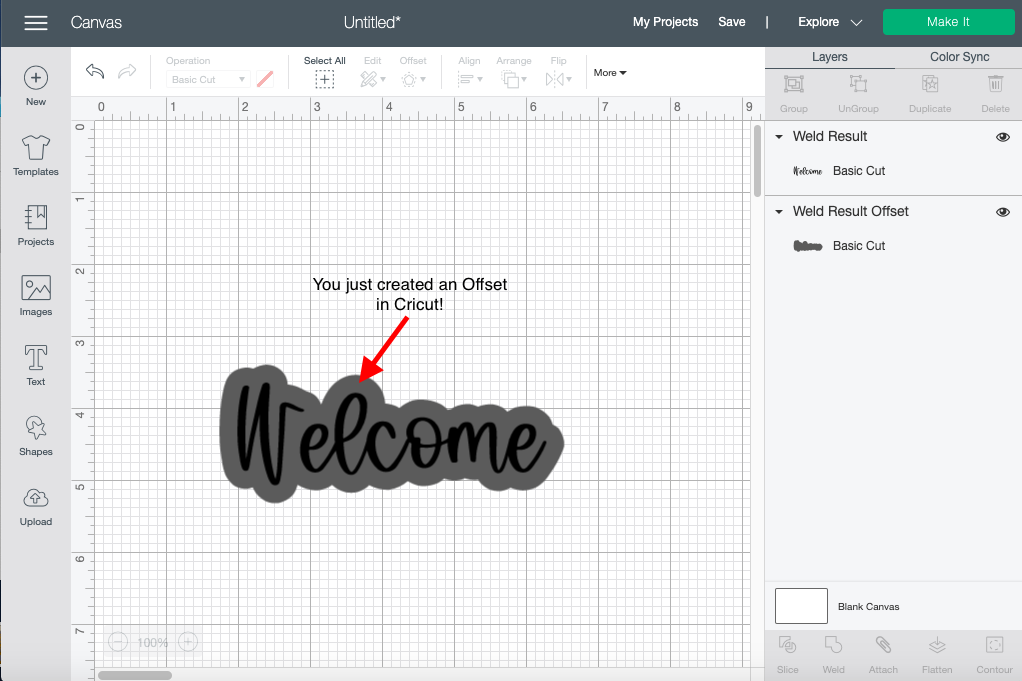
You have officially created an Offset in Cricut Design Space. Continue to practice and add offsets to your other projects. You can even turn a simple SVG into a Print then Cut Sticker PNG with the Offset feature. This is just one idea that you can try out in the future.
Step 1. Create A New Project In Design Space
Okay it's time to start. Make sure your Cricut program is opened up and you are logged in. Once you are logged in you will be on the Cricut home page. This is where you will be able to start a new project by simply clicking on the green button that is labeled New Project on the top right hand corner.
Once you click on the button you will be redirected to the canvas page and that's when all the fun happens!!
Step 2. Choose a Font
It’s finally time to choose a font from your Cricut Library for your project. Click on the big “T” icon on the left side of your canvas to get started. A rectangle box will appear on the screen. This is where you will enter your text. You will also notice that a toolbar will appear on top of your canvas screen as well where you will be able to change your font.
For this project I’ll be searching and using a wonderful script font called Girlfriend by KA Designs. I absolutely love the flow of this Script font and think it will work great for this project.
When using a script font like Girlfriend you would normally have to reduce the spacing to kern the font. Amazingly Cricut just came out with an automatic kerning feature that will save you so much time. If you want to know all about the new kerning feature we have a great tutorial that explains it all.
Step 3. Offset Text in Design Space
Yay!! It’s finally time to offset your text and it's super easy to do. Click on your text, and a main toolbar will appear on top of your canvas screen. Press the offset button on the toolbar. This is located between your edit and align tool.
A small box will appear on the screen along with a blue preview line around your text. You will now have a couple options to create your offset text.
First one will be distance. You will notice a thin grey line with a little grey button that you can drag back and forth. Start from the middle of the line where the grey button should be and slowly drag to the right. The further you go toward the right the larger the offset will be around your text.
Once you have adjusted your distance click on the type of corners you want. I always select rounded corners so the offset looks a little smoother. Pick the one that will work the best with your project. Now that you've gotten your settings perfect click on the green “Apply” button on the right hand corner.
You have officially created an Offset in Cricut Design Space. Continue to practice and add offsets to your other projects. You can even turn a simple SVG into a Print then Cut Sticker PNG with the Offset feature. This is just one idea that you can try out in the future.


