How to fill text in cricut design space for foiling.
*3rd party software is required to fill shapes as cricut design space does not have this capability. using 3rd party software is at your own risk.
1- To fill text you will need to download and install Inkscape free software Once this is installed you will need to download and install a crosshatch extension for Inkscape. Go to evil mad scientist online and download the Axidraw software for your PC/mac.
2- Once downloaded install the extension.
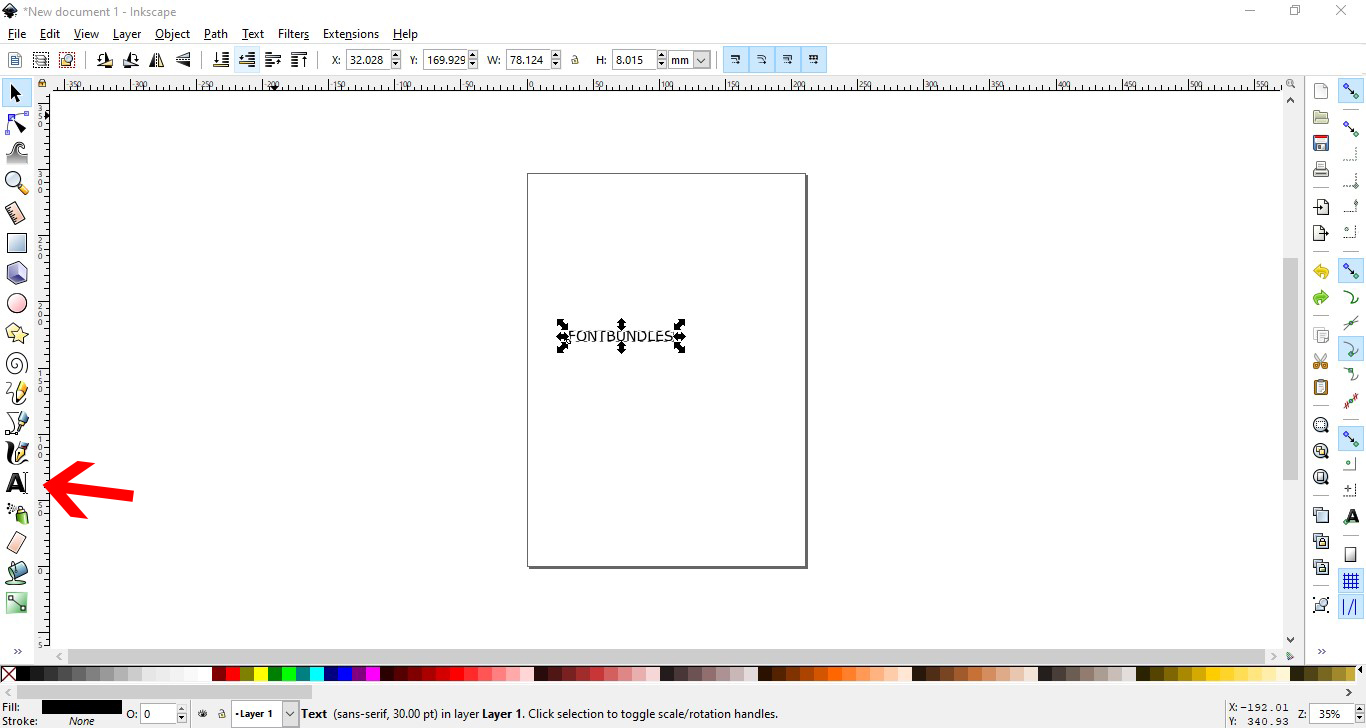
3- Open Inkscape. Type your text.
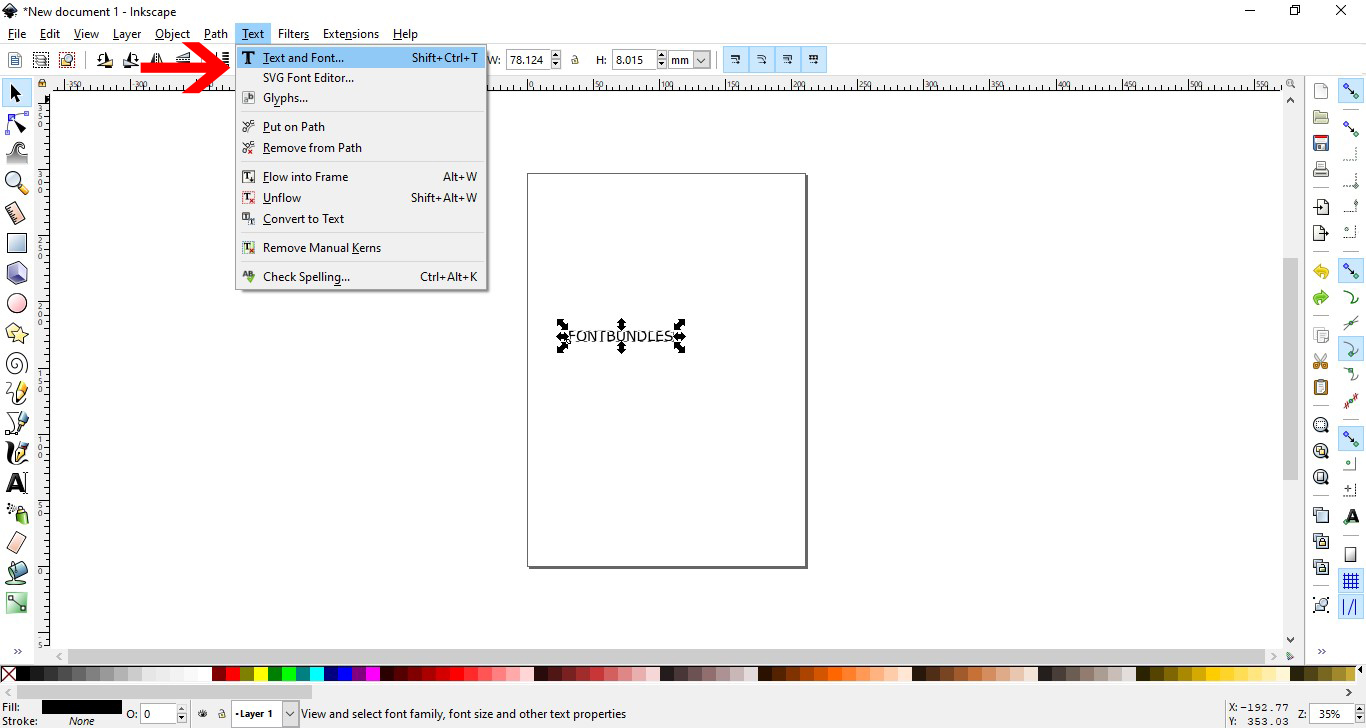
4- Click on the text and font option.
5- Select the font you want to use. I am using luducudu font from fontbundles.net . Click apply
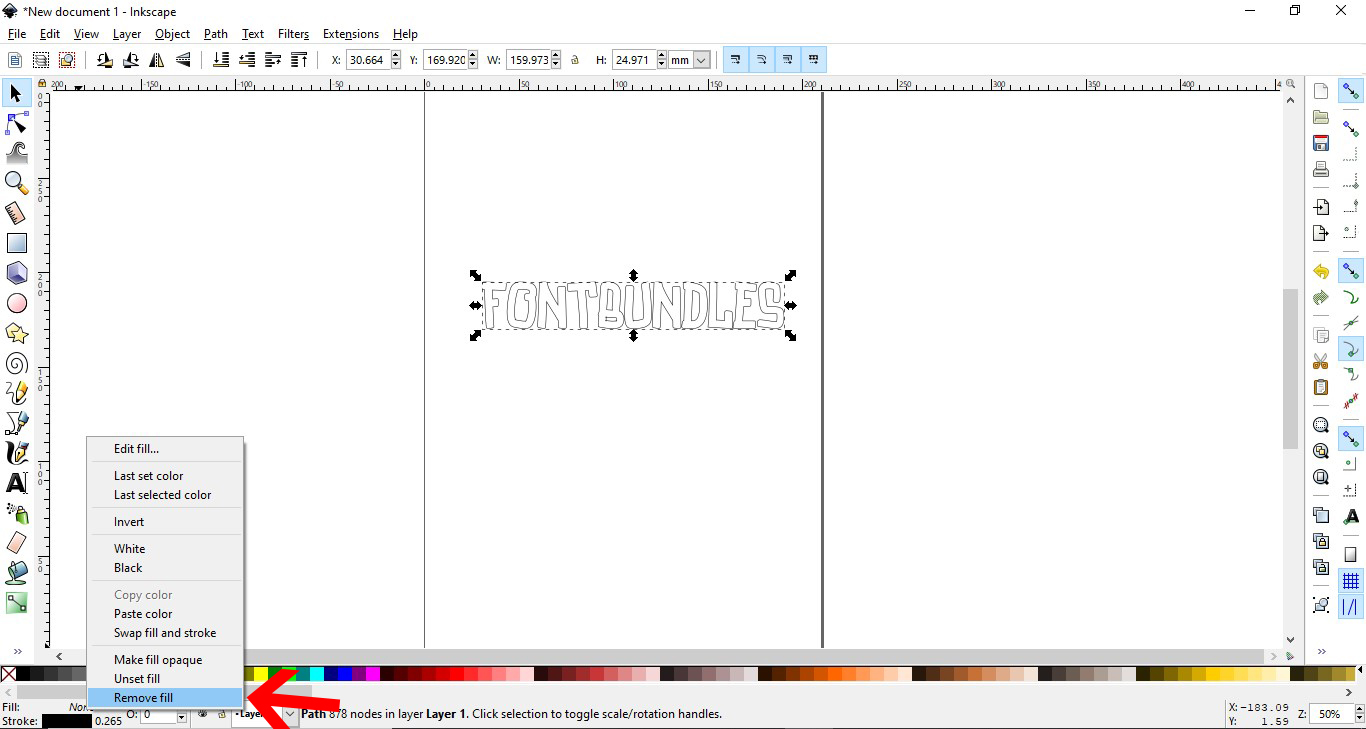
6- With the text selected go to Path - Union.
7- Change the stoke option to black and the fill to no fill.
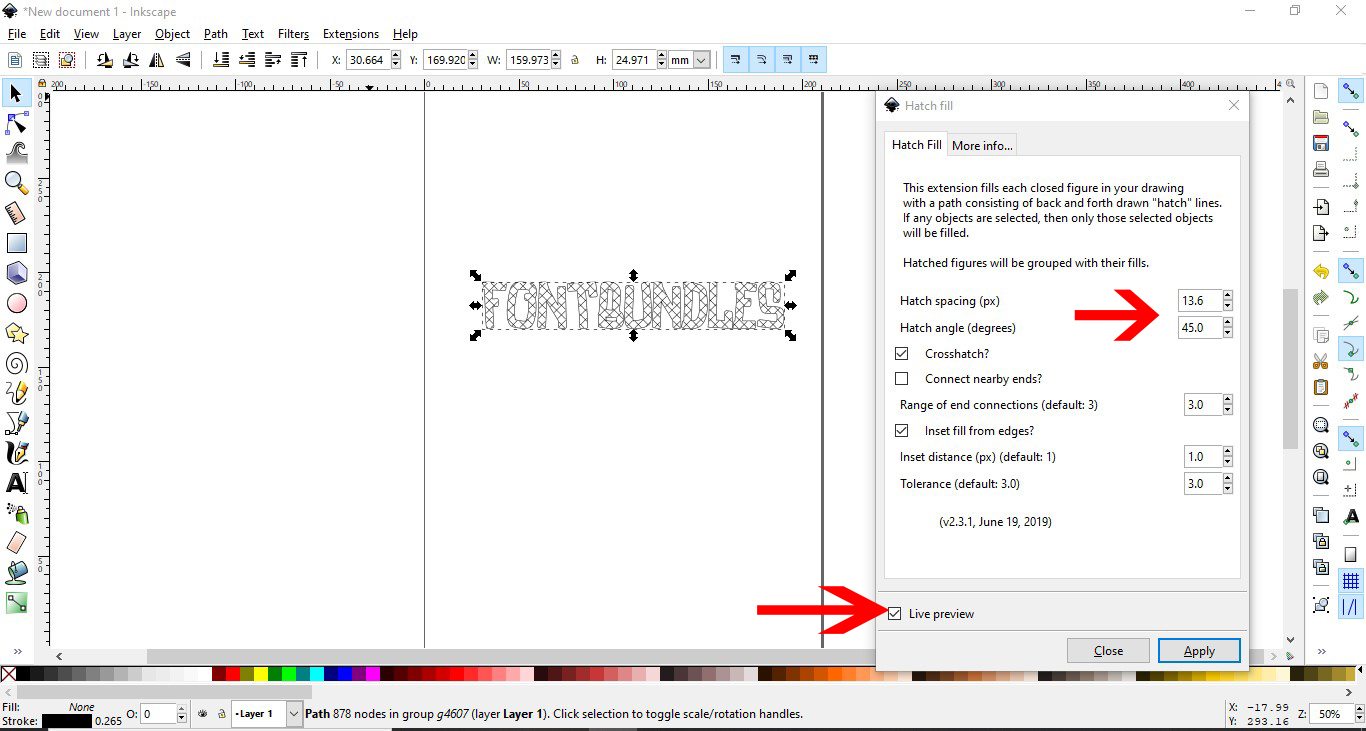
8- Go the extensions- axidraw utilities - hatch fill
9- A new window will pop up. Click on live preview. Adjust the size of the fill and add crosshatch if needed. Click apply.
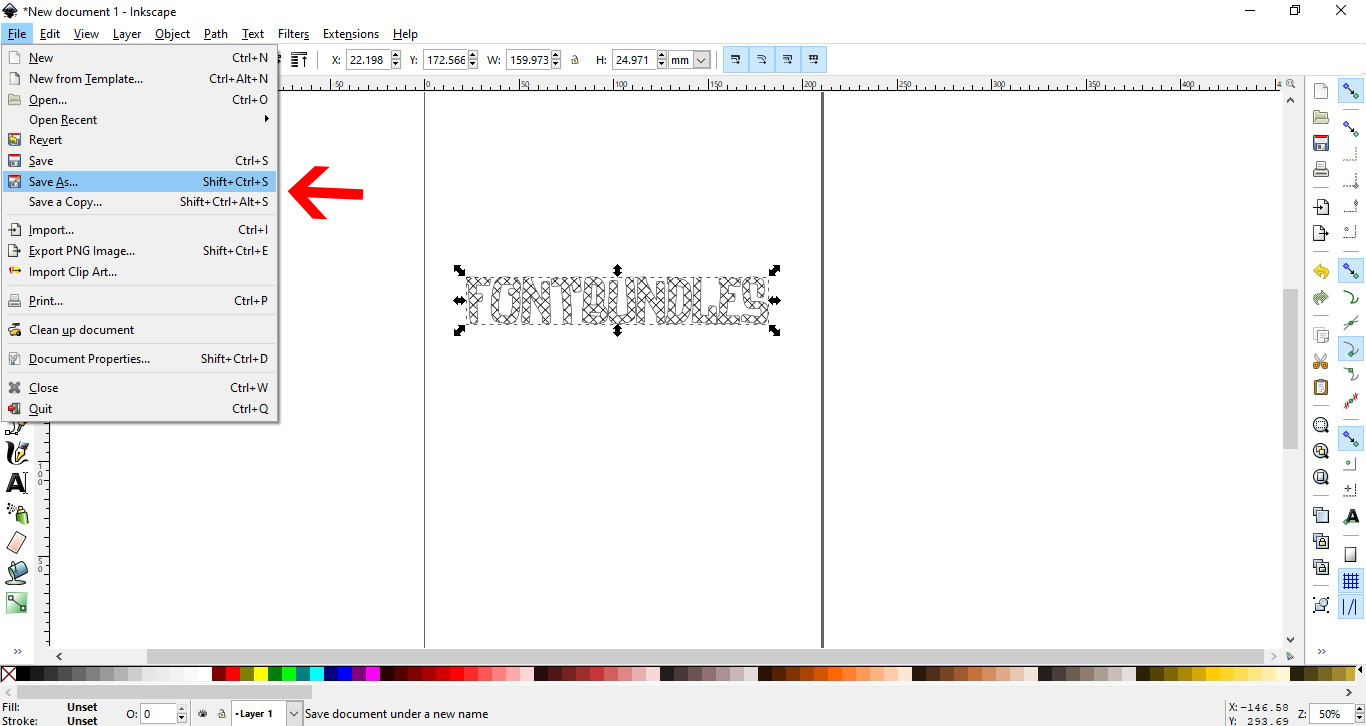
10- Once you are happy go to file- save as.
11- Save as a SVG file.
12- Open Cricut design space. Click upload.
13- Click on upload.
14- Click on browse.
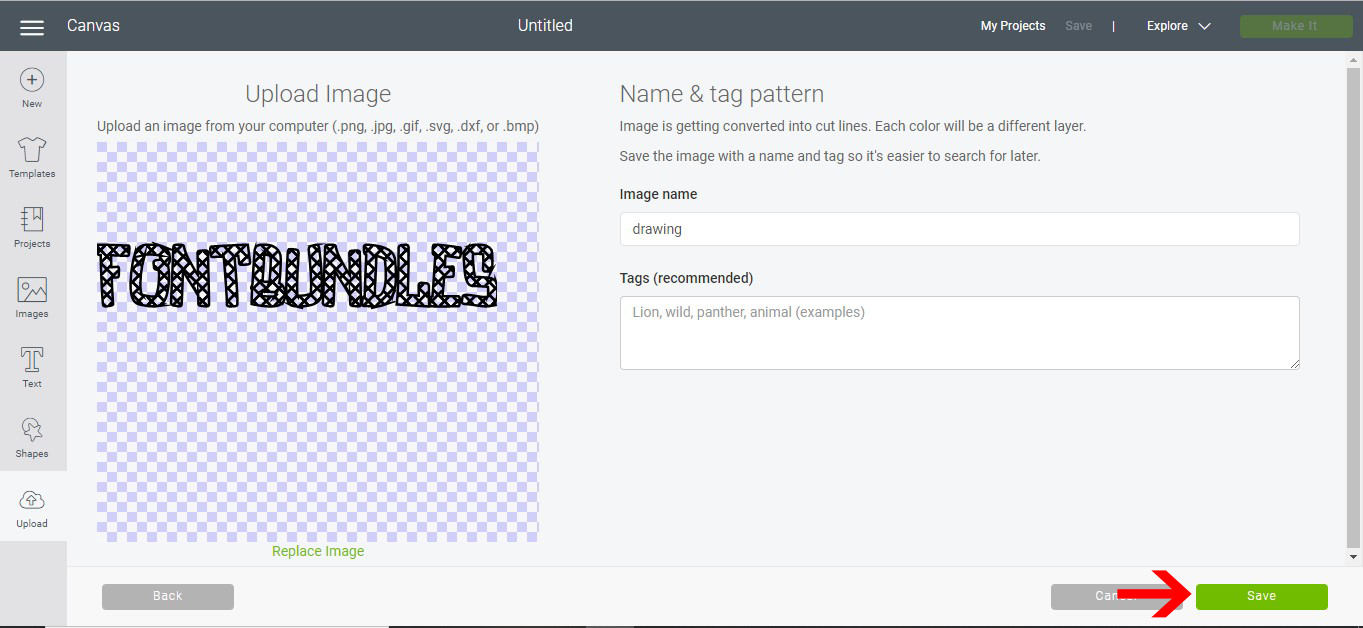
15- upload your design. Save.
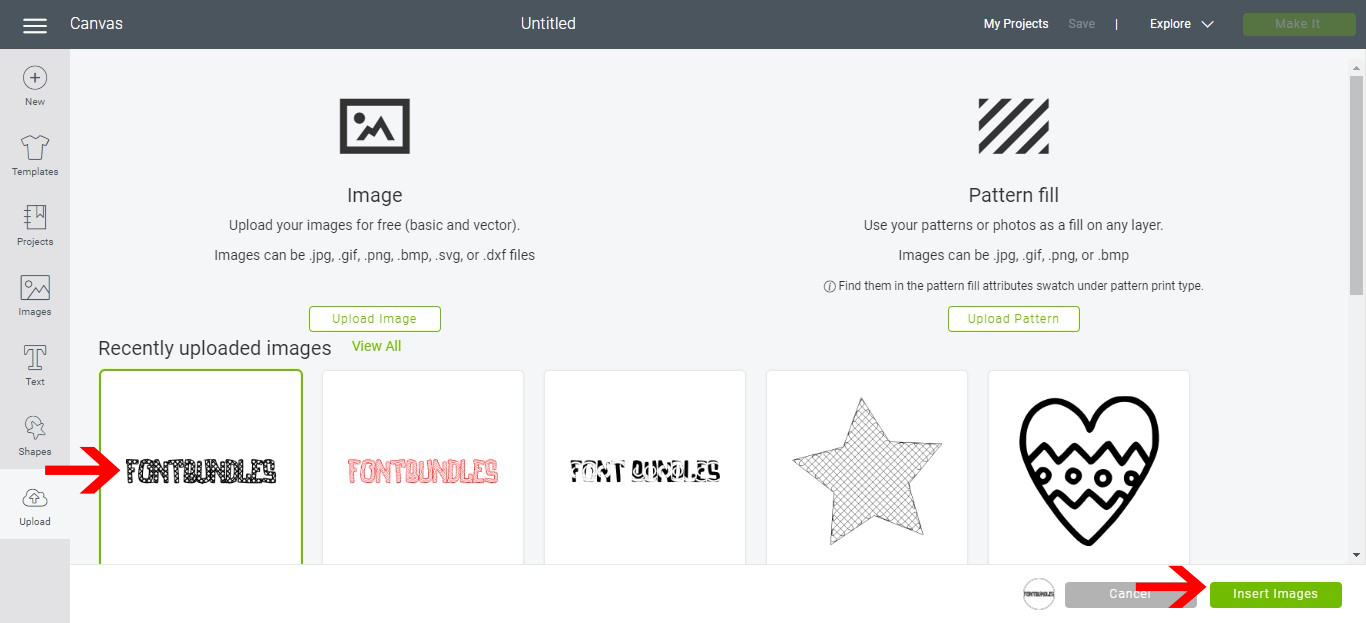
16- Click on the saved text and insert.
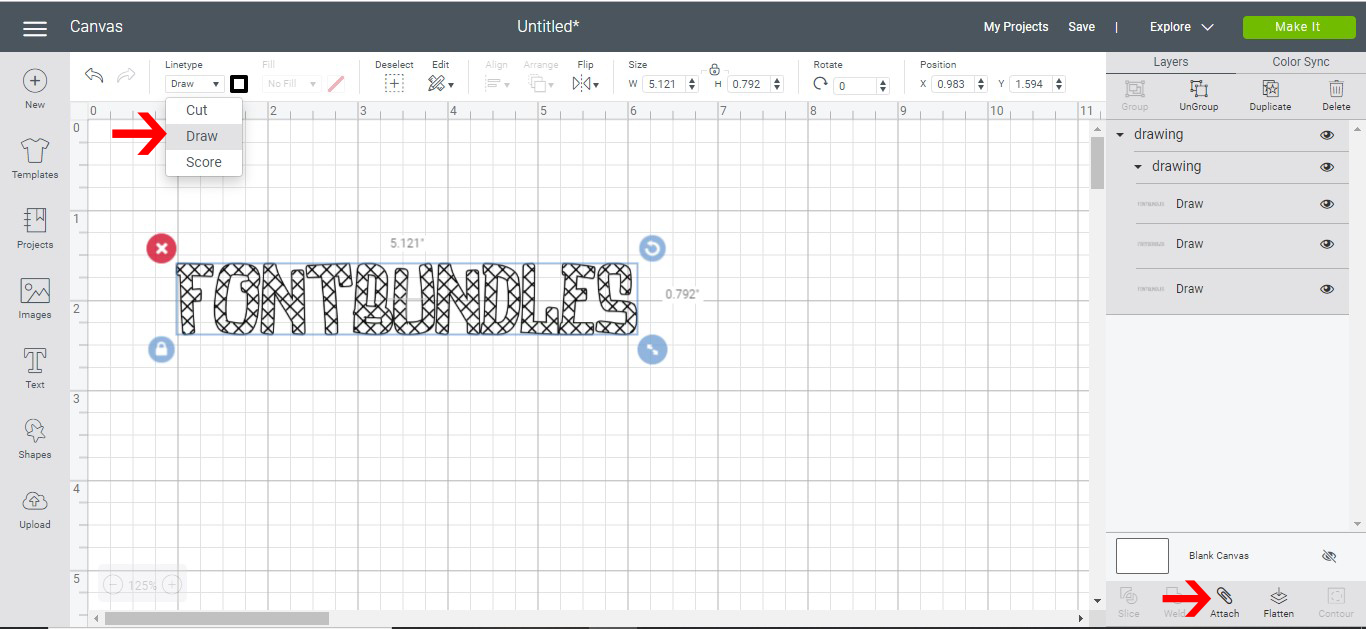
17- Your text will appear on the design space. Click on the line type option.
18- Select the draw option. Next Click attach.
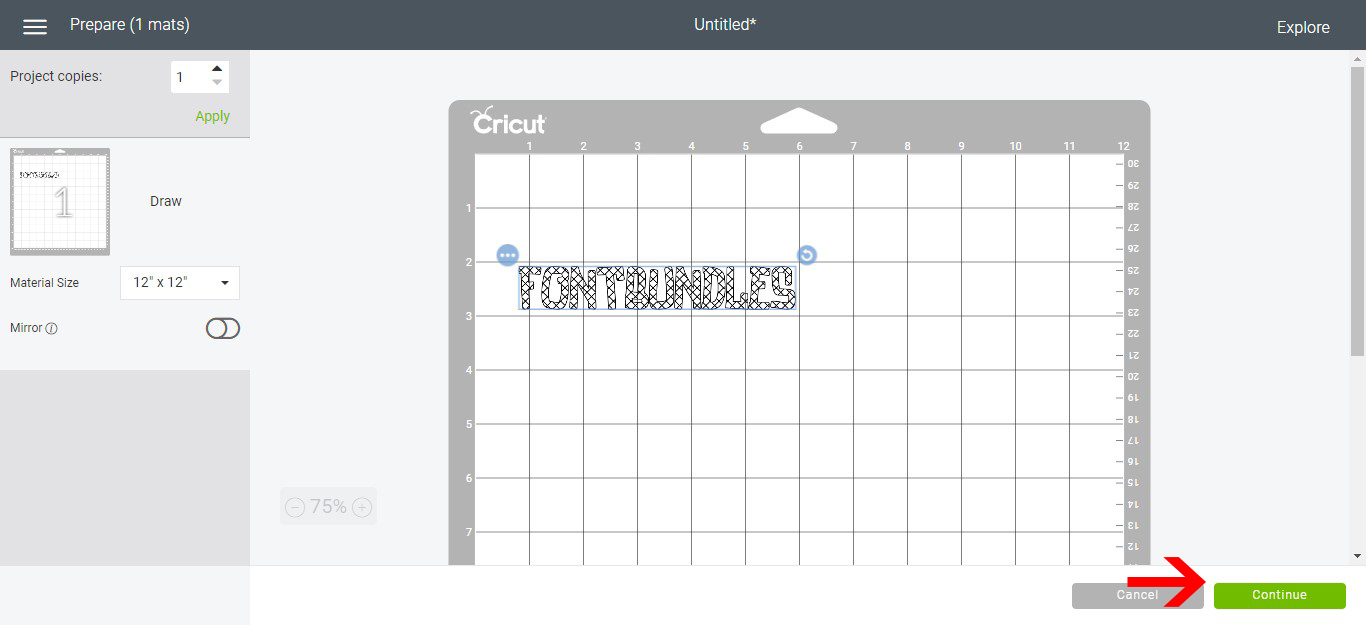
19- Click make it. Check the text on the cutting mat and click continue.
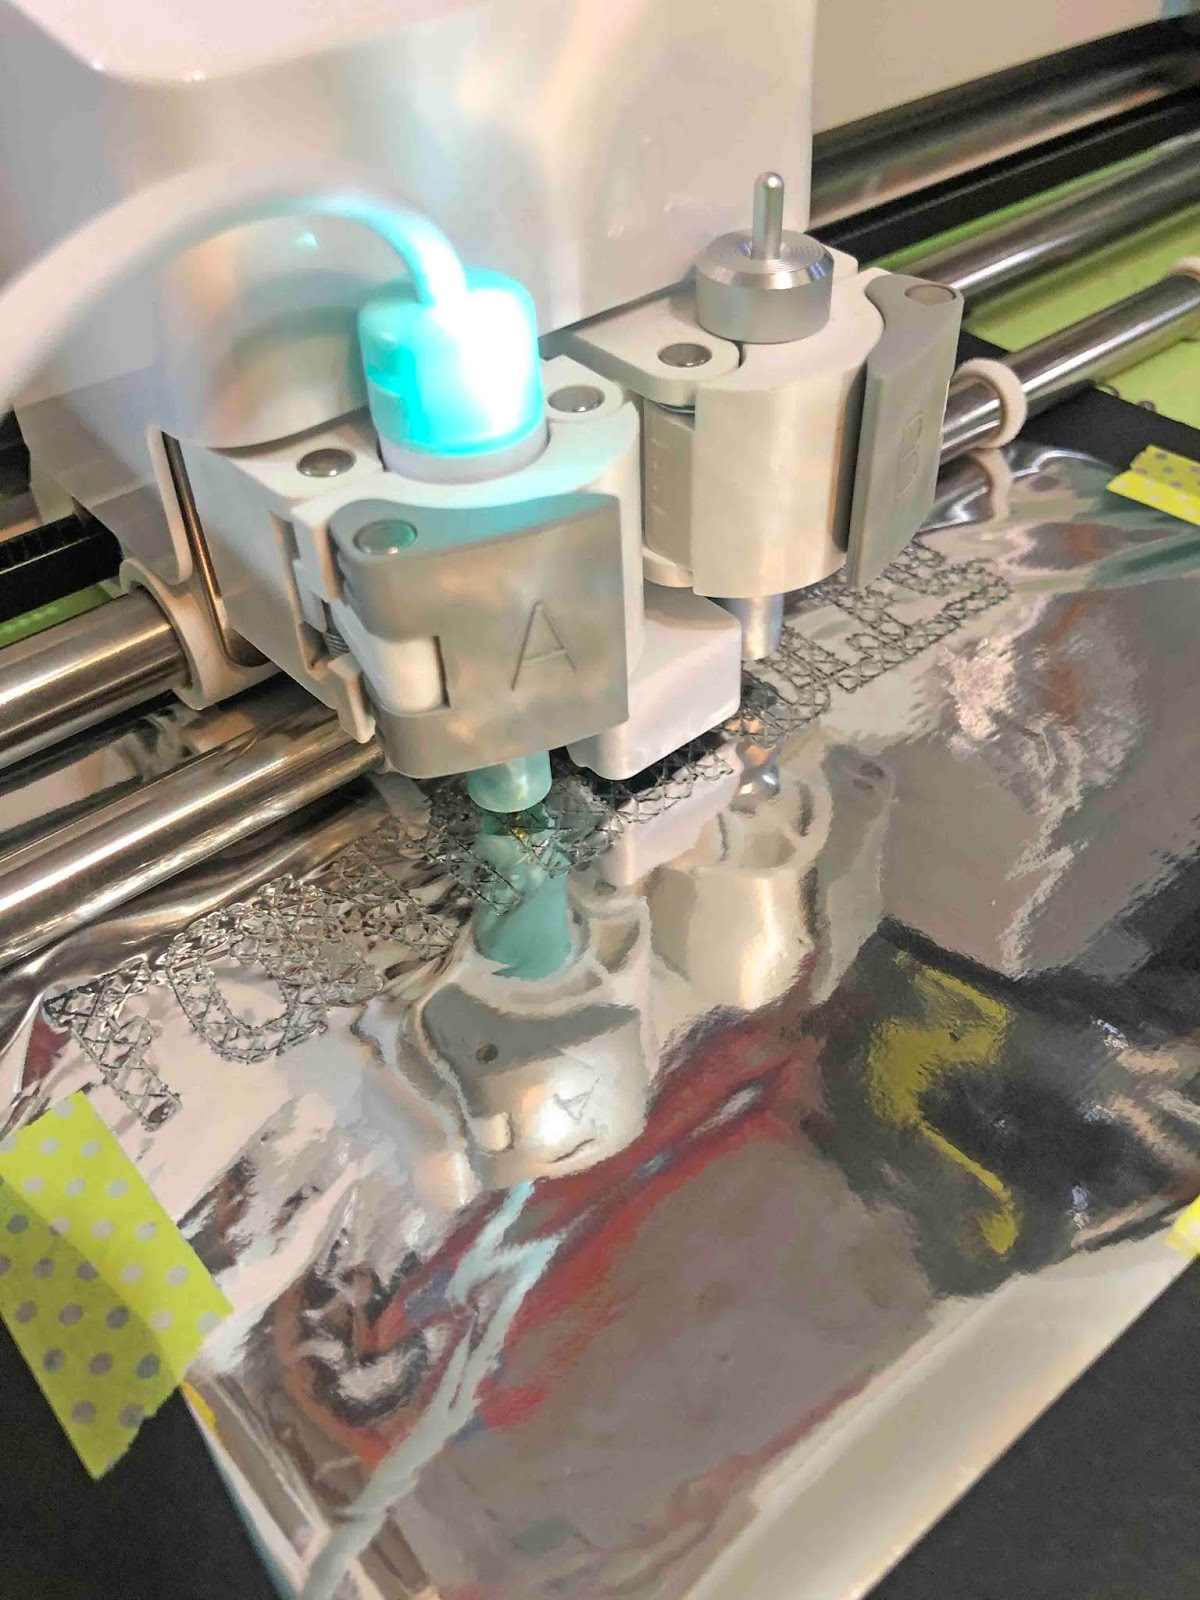
20- Make sure you have selected the correct media on your dial, then click go.
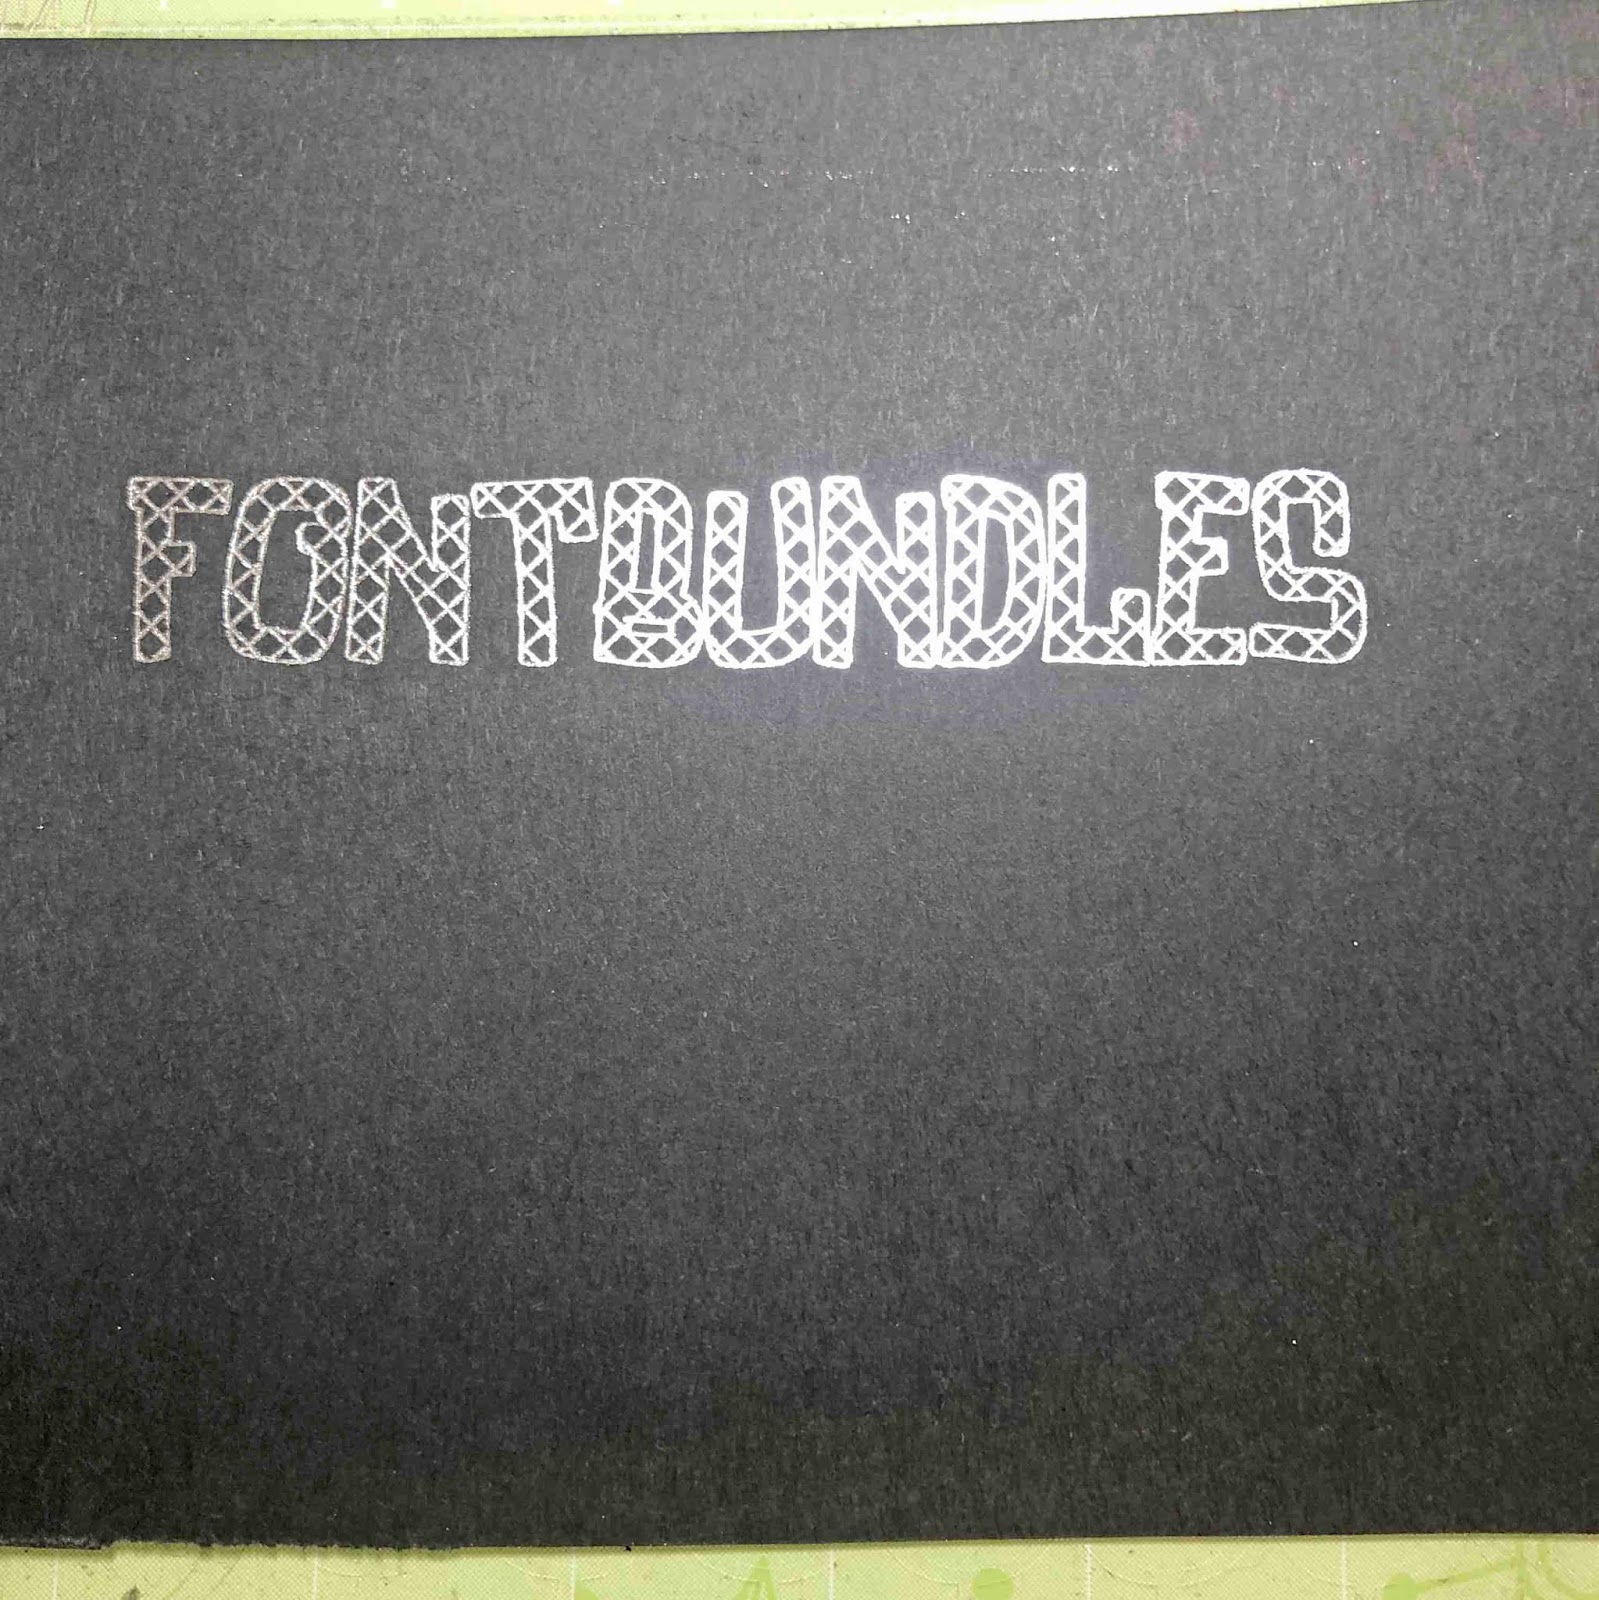
21- Your design will start to foil.
22- Your text will now be filled.
1- To fill text you will need to download and install Inkscape free software Once this is installed you will need to download and install a crosshatch extension for Inkscape. Go to evil mad scientist online and download the Axidraw software for your PC/mac.

2- Once downloaded install the extension.

3- Open Inkscape. Type your text.
4- Click on the text and font option.
5- Select the font you want to use. I am using luducudu font from fontbundles.net . Click apply

6- With the text selected go to Path - Union.

7- Change the stoke option to black and the fill to no fill.
8- Go the extensions- axidraw utilities - hatch fill

9- A new window will pop up. Click on live preview. Adjust the size of the fill and add crosshatch if needed. Click apply.
10- Once you are happy go to file- save as.
11- Save as a SVG file.

12- Open Cricut design space. Click upload.

13- Click on upload.

14- Click on browse.

15- upload your design. Save.
16- Click on the saved text and insert.
17- Your text will appear on the design space. Click on the line type option.

18- Select the draw option. Next Click attach.
19- Click make it. Check the text on the cutting mat and click continue.
20- Make sure you have selected the correct media on your dial, then click go.

21- Your design will start to foil.
22- Your text will now be filled.