
Filling text in Cricut Design Space using Silhouette Studio software
Learn how to fill text with a pattern using Silhouette Studio, then import to Cricut Design Space.
In this tutorial we will use the Business Edition of Silhouette Studio. It allows us to save as a SVG file. You can still use the free Silhouette Studio edition. But instead of saving as a SVG in Silhouette Studio, take a screenshot of the design and use a JPEG to SVG converter online.
Text fill is a great way to get a foil filled design. For this tutorial I will be using a layered font called Luducudu. We have an awesome selection of Funny fonts if you would like to use a different one.
Step 1 - Add and edit your text with a sketch fill
Let us begin by opening Silhouette Studio then clicking on the text icon. You will find the text tool on the left side panel with a capital letter A.

Click anywhere on the canvas mat and start typing out your text. Next, change your font. Do this by going to the Text Style Panel on the right hand side. This shows as a capital letter A with a line next to it. Select Text Style in the panel, the first icon, and choose your text.

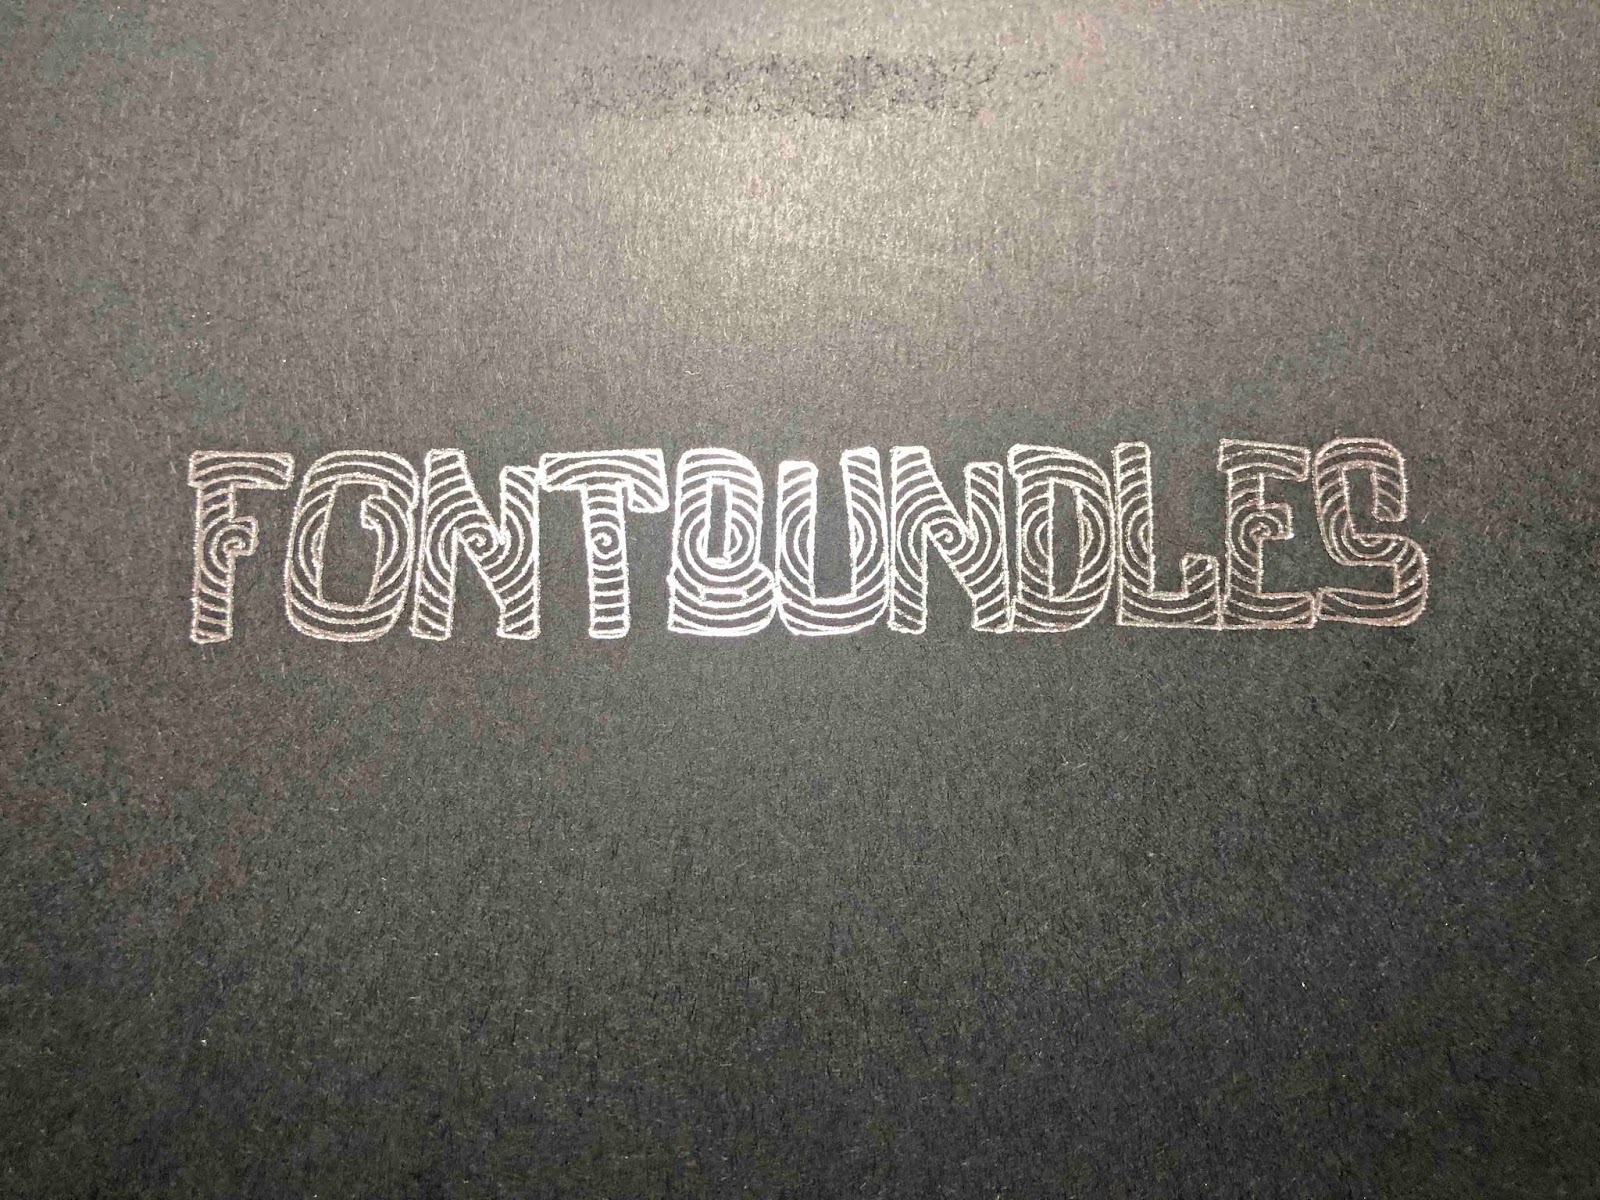
Now, go to the Line Effects panel, represented as some squiggly lines. The panel will automatically open with the Line Effects options (the first icon at the top).
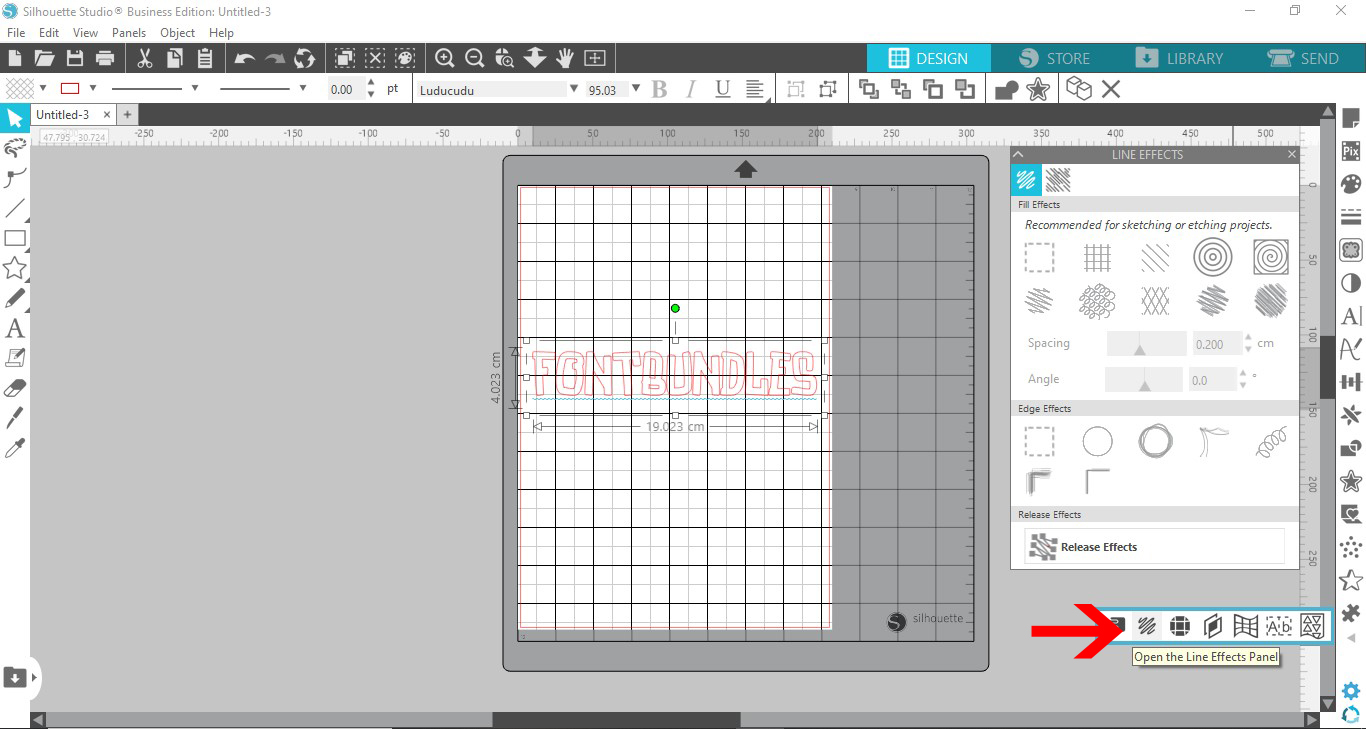
With your text still selected, choose a fill effect from the panel. We chose the Spiral effect, which is the last one on the first row. You can adjust the spacing and the angle as you wish. We left our settings as is.

Step 2 - Save the file format to be used in another program
As we are using the Business Edition we are able to save the file as an SVG. If you only have the free edition, then follow these quick steps.
Remove the grid from the mat area. Do this by going to the Page Setup panel, the top most icon on the right side panel. Drag the Transparency slider all the way to the right so it shows as 0.00. Now that your background is white, take a screenshot of the design. Next, look for an online converter tool and convert the file to a SVG.
For my SVG file I went to the File menu, clicked on Save As and selected Save to hard drive.
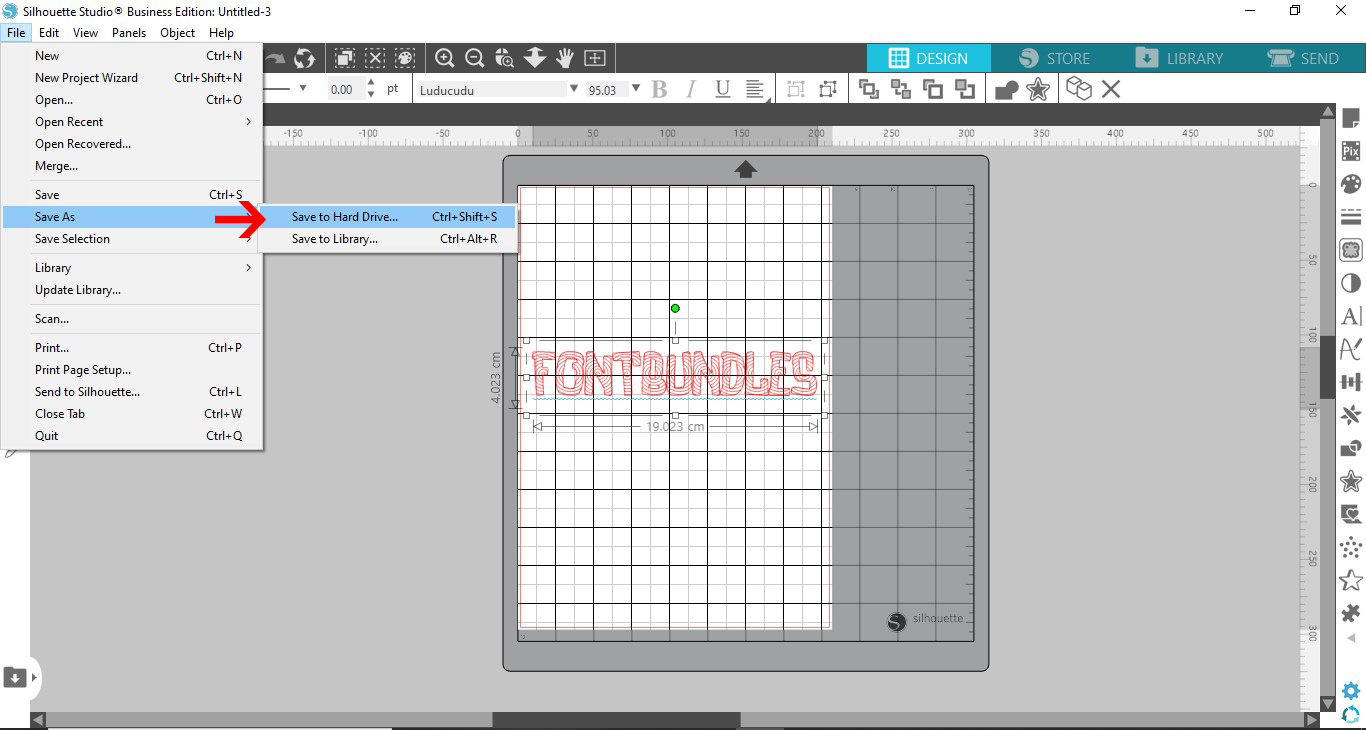
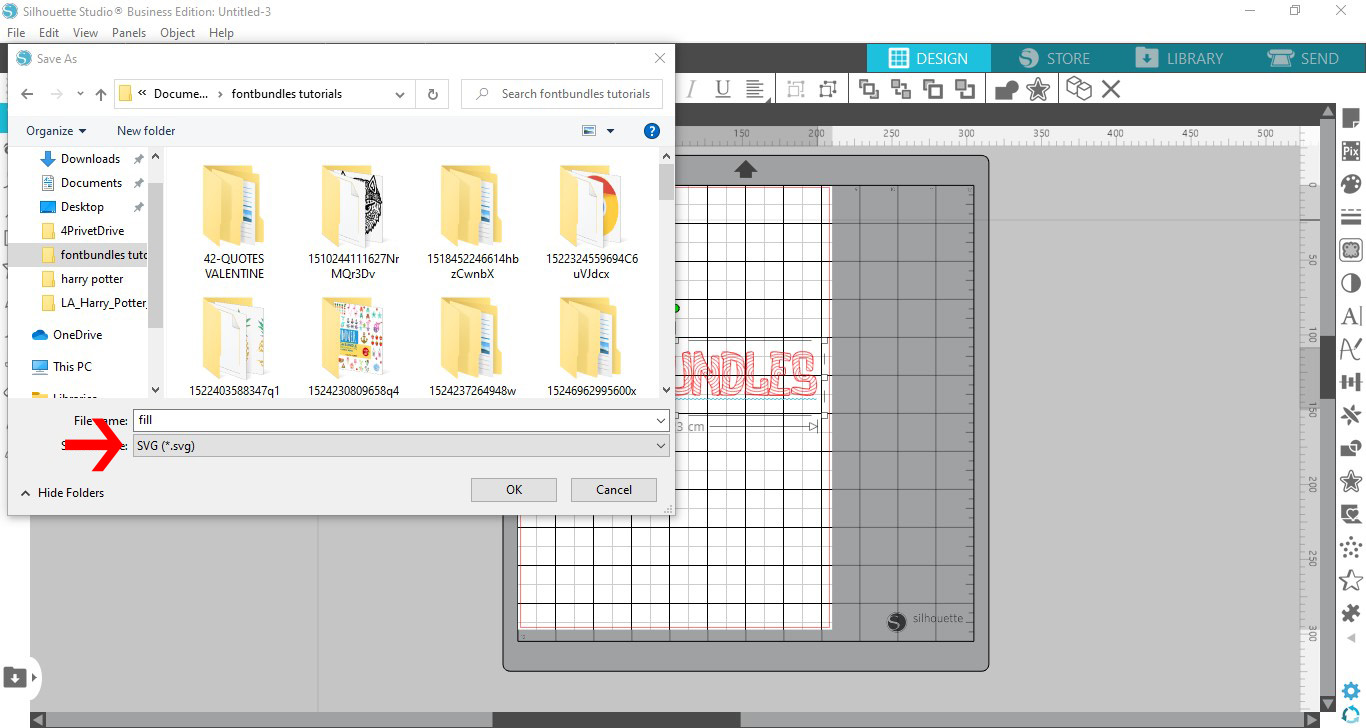
In the Save As menu, choose your location and name your file. Then go to Save as Type, click on the drop down arrow and choose SVG.
Step 3 - Open in Cricut Design Space
Your design is ready to be used in another program. Click to open Cricut Design Space then click the Upload icon.

In the window that appears, click on Upload Image.

Another window will appear allowing you to browse through your files and find your design. Click on Browse.

Upload your SVG, check on the image name and add tags if needed. We have a great tutorial on how to upload SVG files to Cricut Design Space if needed.

Your design has now been uploaded to the library. A window will appear with your library designs. Select the design and click Insert Images.

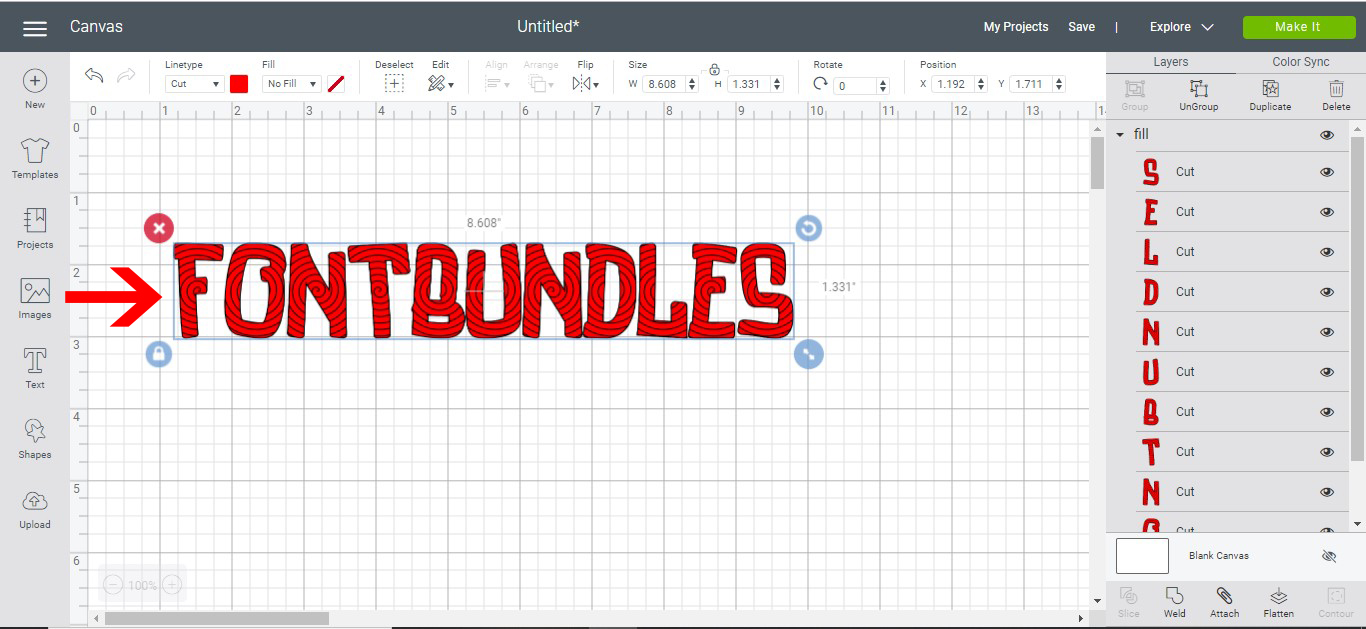
Your design will load as a cut file as shown in the image below.
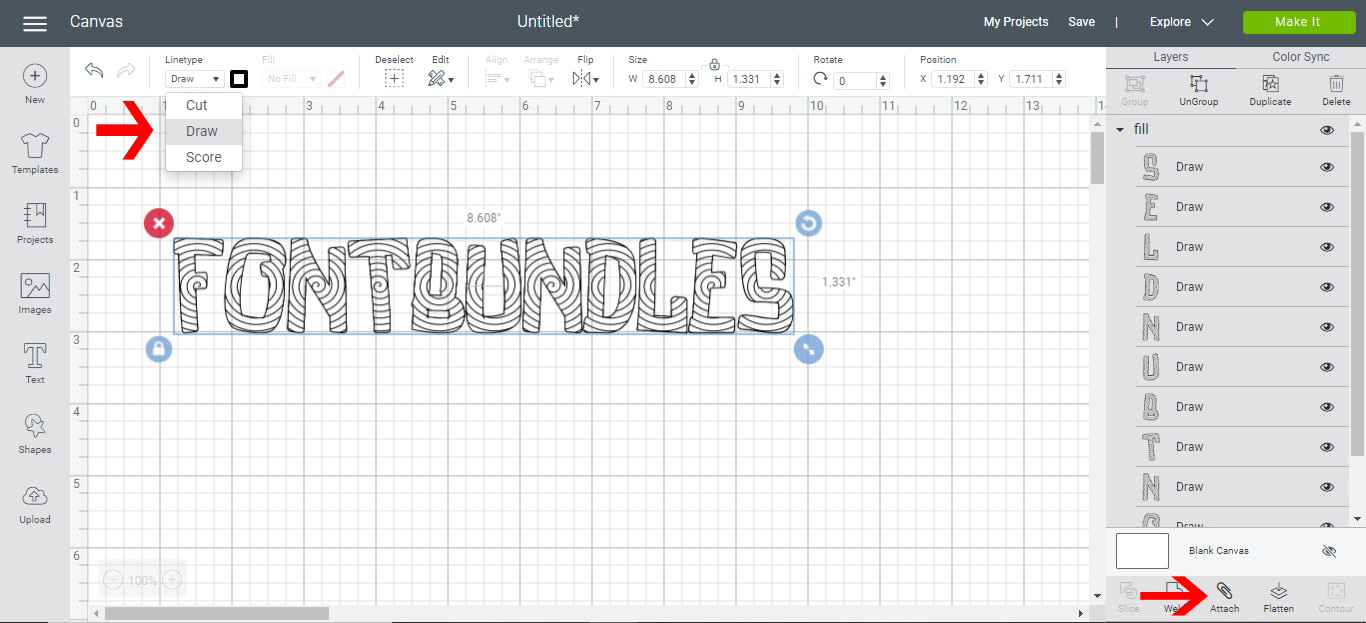
At the top of the screen you will find the Draw option. With the text selected, click on Draw to attach the text. Next, click on the green Make it button at the top right corner.
Step 4 - Set up the material settings
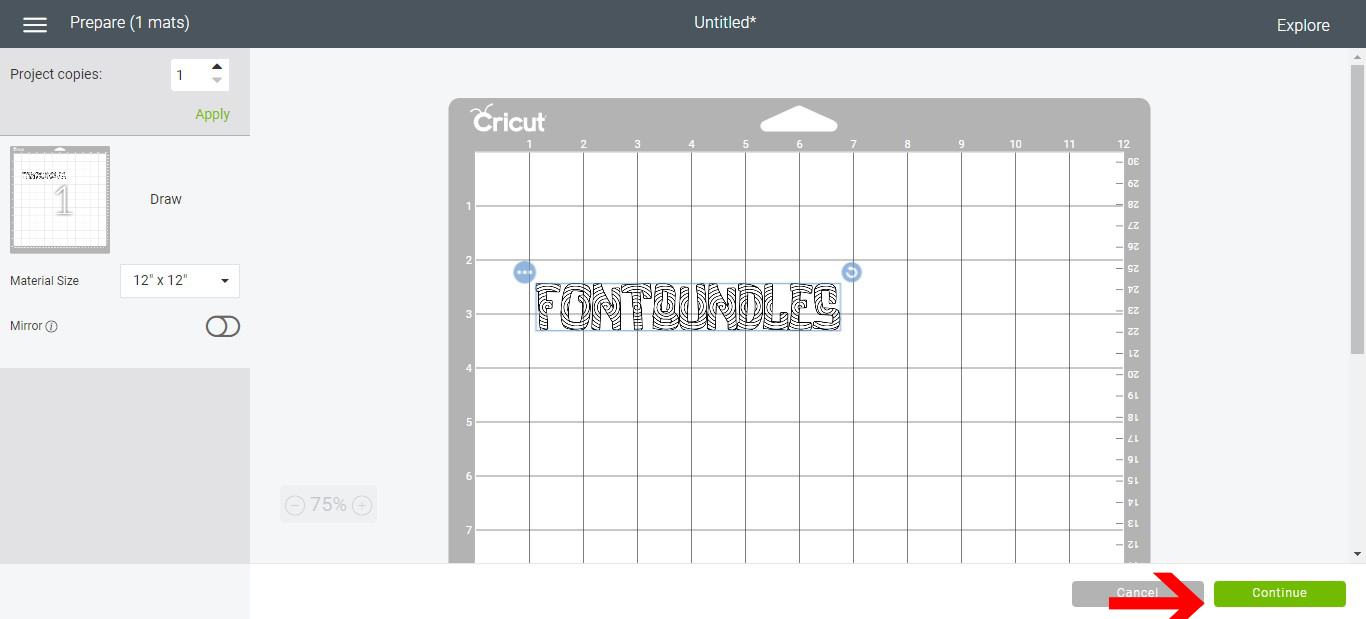
We are now in the final stage of the project. Once you click Make it, you will be taken to the preview screen. If everything looks the way you want, click on the Continue button bottom right.
Select your media according to your needs. You can also follow my media set up below. Once ready, be sure that the Foil Quill has heated up for about 5 min. Be careful when handling as the tool will be very hot. Insert the Foil Quill into the selected carriage.
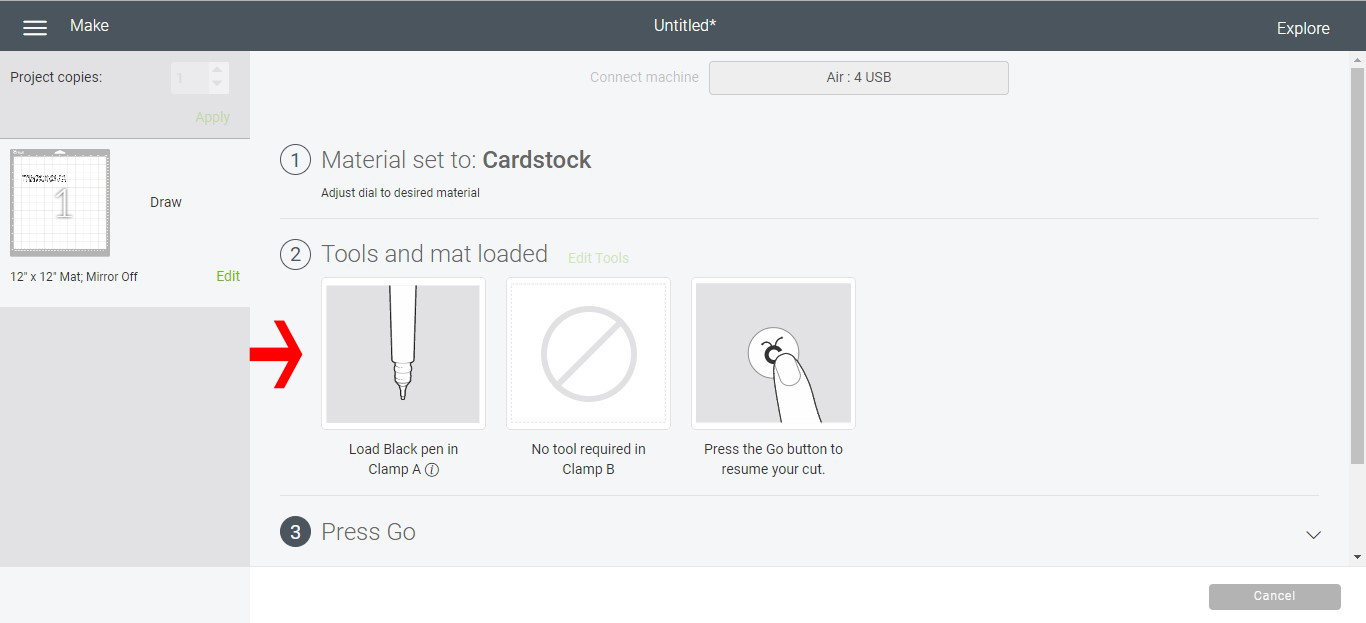
On your Cricut machine, set the dial to your media. I set my dial to Cardstock.
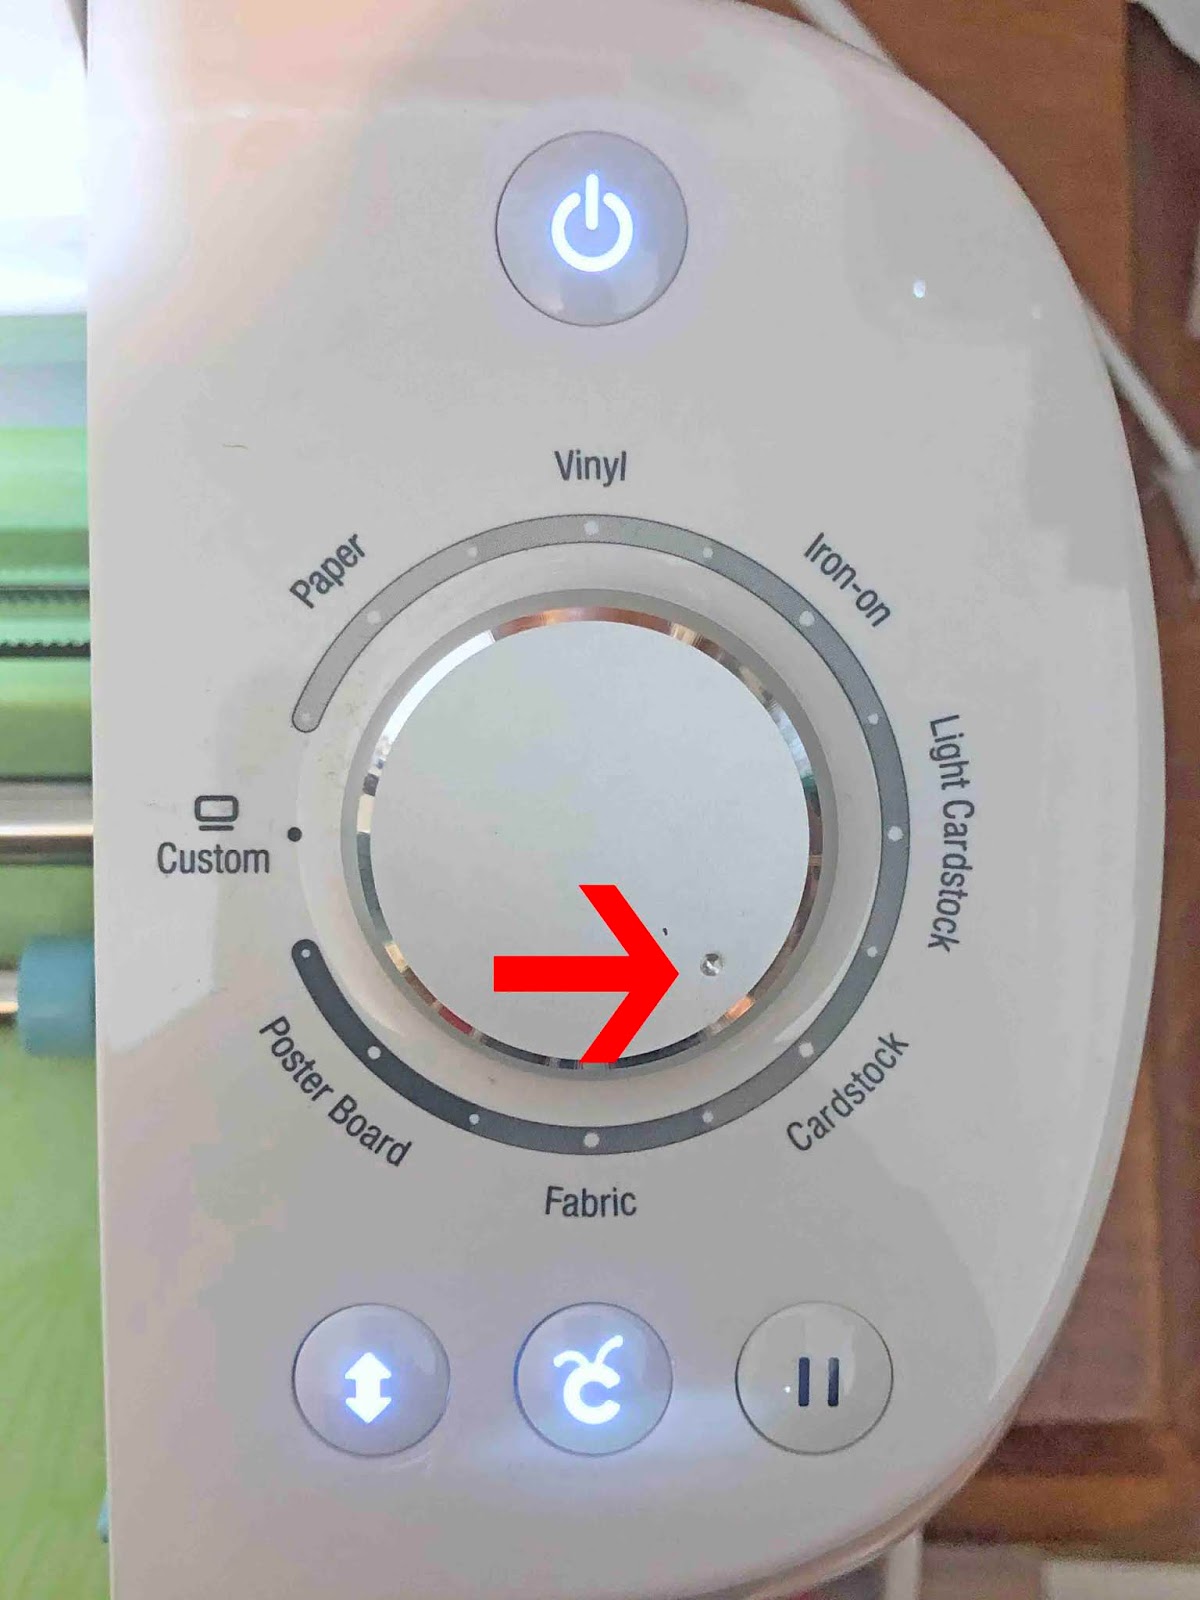
Back in the software, click Go and your design will begin to foil.

Once completed, remove the Foil Quill (careful, it's hot) and place safely aside. Remove your mat, take off the tape and peel back the foil to reveal your design. You now have a lovely filled and foiled text. You can change the width between the lines of fill to make it a pattern or a full fill.
Well done on creating a lovely foiled project. If you enjoyed this tutorial, follow our other tutorials like foiling on vinyl and adding foiled accents to stickers in Cricut Design Space.


