Unlimited Downloads 15% off Marketplace Purchases Exclusive Software Access Unlimited Downloads
15% off Marketplace Purchases
Exclusive Software Access
Start your 7 Day Free Trial Start Plus Trial Maybe Later
3 Eye Catching Fall Decor DIY Tutorials for Your Home

3 Eye Catching Fall Decor DIY Tutorials for Your Home

Fall is just around the corner, and with it brings colder nights, hot chocolate, big comfy jumpers, and lots of excuses to get crafty with some fun fall decor!

Decorating for any season is fun, but fall is one of those extra special ones - not only does it mark a time when there's lots of colorful change in our environment, but it also includes 2 holidays - Halloween and Thanksgiving!

3 Eye-Catching Fall Decor DIY Tutorials for Your Home 23

Disclaimer: Designbundles.net is a participant in the Amazon Services LLC Associates Program, an affiliate advertising program designed to provide a means for sites to earn advertising fees by advertising and linking to Amazon.co.uk.

3 Fabulous Fall Decor DIY's for Your Home

Today we're going to go over some of our favorite fall decor DIYs that you can use to brighten your home over the coming months. Stay tuned to learn how to make a light-up fall bottle, and a magical color-changing potion bottle with two in-depth tutorials. As a bonus prize, we end with an overview of how to make a custom fall wreath!

#1 How To Make a Light Up Fall Bottle

With the nights drawing in as we progress through fall, one of the best ways to add some coziness to your home is with fairy lights!

3 Eye-Catching Fall Decor DIY Tutorials for Your Home 15

This is a nice and quick DIY that would be great for the kids (make sure to supervise with the glue gun or use a child-friendly 'cool melt' glue gun). The design idea can also be used for other seasons too - why not try adding silk flowers for spring or pom pom snowballs for winter!

Disclaimer: Designbundles.net is a participant in the Amazon Services LLC Associates Program, an affiliate advertising program designed to provide a means for sites to earn advertising fees by advertising and linking to Amazon.co.uk.

What You'll Need to Make a Light Up Fall Bottle

3 Eye-Catching Fall Decor DIY Tutorials for Your Home 16

Step 1. Create a Mini Garland

Trying to add the leaves into the bottle individually can be a bit difficult as they can tend to clump together; the easiest way to remedy this is by hot gluing the leaves directly to your fairy light wire as that helps to give them some more structure and disperses them around the bottle evenly.

3 Eye-Catching Fall Decor DIY Tutorials for Your Home 17

Add a dab of glue to the back of each leaf and then press the wire into the glue and hold for a few seconds until it is set. Continue along the whole length of the string light; I placed a leaf in between each LED so that there were evenly distributed.

3 Eye-Catching Fall Decor DIY Tutorials for Your Home 18

Once you are finished, you will end up with something like this. It might not seem like a lot of foliage, but once this is inside your bottle, it'll be more than enough to fill it.

Step 2. Fill Your Bottle

To fill your bottle with your garland, you simply start slowly pushing them through the neck of the bottle.

3 Eye-Catching Fall Decor DIY Tutorials for Your Home 19

The wire will gradually curve itself around the inside of the bottle; if you feel like it's bunching up on one side, you can stick a pen or pencil through the neck of the bottle and gently push on the wire to make it form a slightly different shape.

3 Eye-Catching Fall Decor DIY Tutorials for Your Home 20

The lights I used were a bit too small to fit nicely in the neck of the bottle, so I had to hot glue the battery pack to the bottom side of my cork - luckily, this now makes it nice and easy to turn the fairy lights on and off!

Step 3. Attach Your Decal

Give the face of the bottle where you plan to stick the decal a wipe down with rubbing alcohol and let it dry.

3 Eye-Catching Fall Decor DIY Tutorials for Your Home 21

Carefully peel your vinyl off the backing paper with the carrier sheet and position it on your bottle. Add some finishing touches (I choose to add some jute string around the neck of the bottle to hide the fairy light battery pack), and you're all done!

3 Eye-Catching Fall Decor DIY Tutorials for Your Home 22

#2 How To Make a Magical Color Change Potion Bottle

Mystical and magical decor is a big trend at the moment, so we've given it our own Halloween chic twist and created a tutorial to show you how to make magic color changing potion bottles. These look so effective as spooky seasonal decor, and they'd be a fantastic craft to make and sell at craft fairs.

3 Eye-Catching Fall Decor DIY Tutorials for Your Home 24

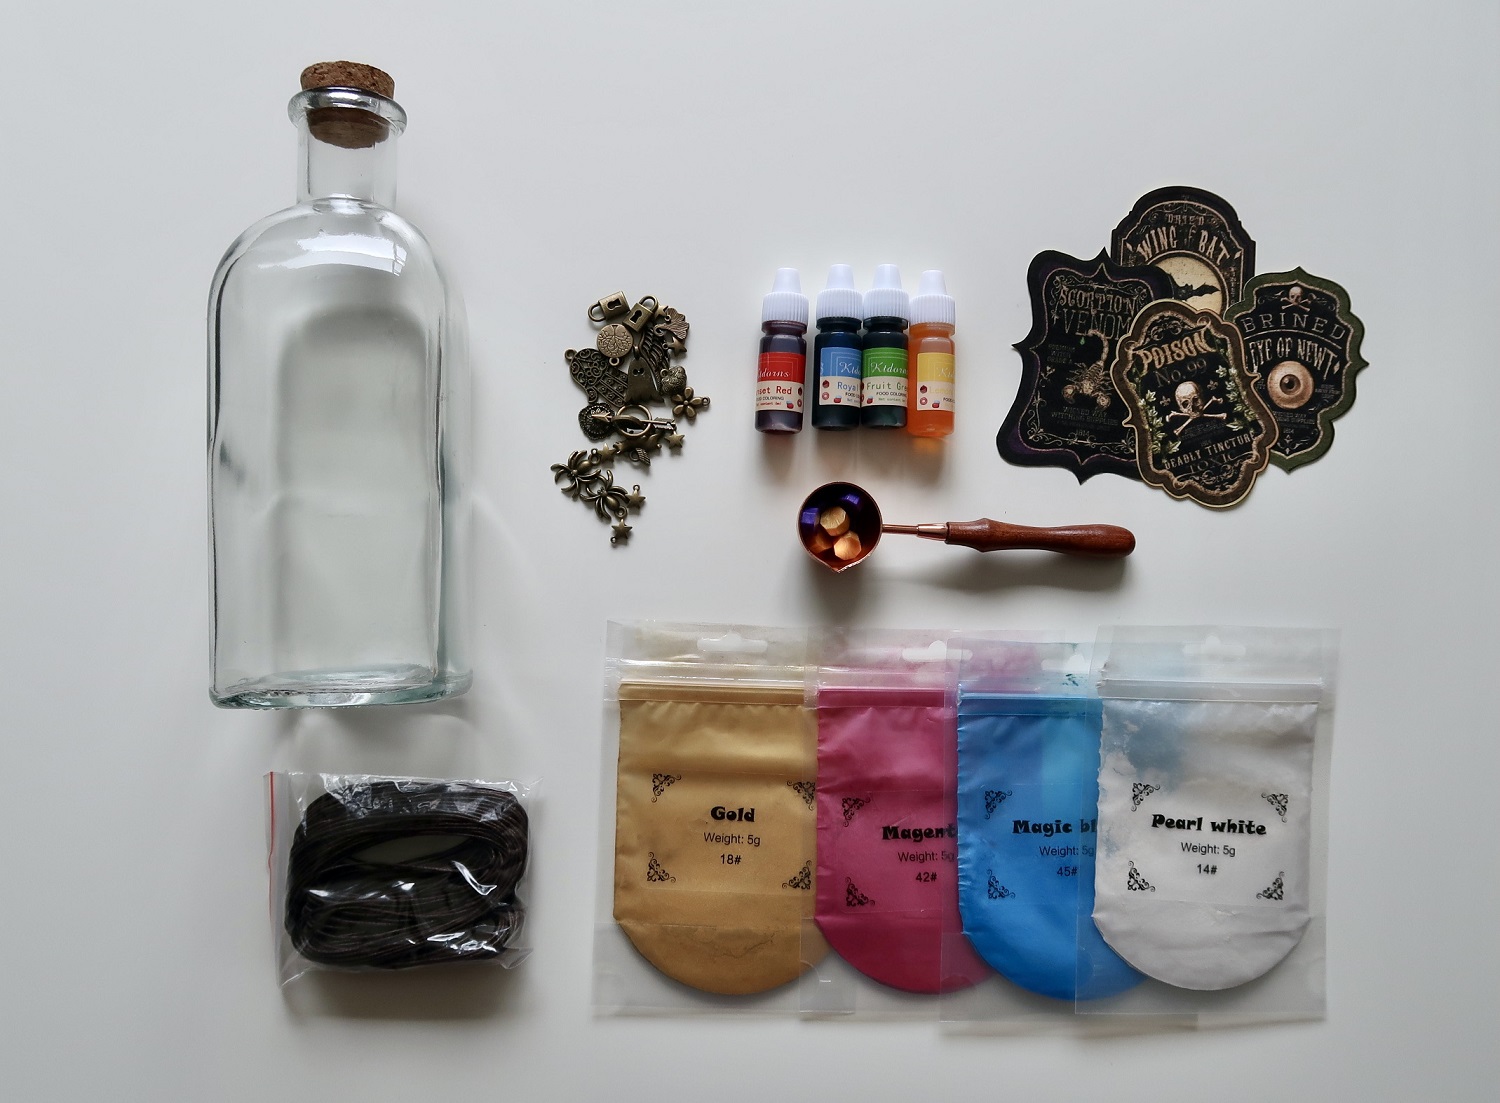
What You'll Need to Make a Magic Color Change Potion Bottle

3 Eye-Catching Fall Decor DIY Tutorials for Your Home 2

Step 1. Download and Print Your Stickers

For this DIY, I'm using a fun Halloween Apothecary Labels design set from GraphicsCandy. As soon as I saw this pop up on my product feed I knew I'd have to use it for something and it triggered the creative thought process that led to the creation of this tutorial!

3 Eye-Catching Fall Decor DIY Tutorials for Your Home 1

Image credit: GraphicsCandy

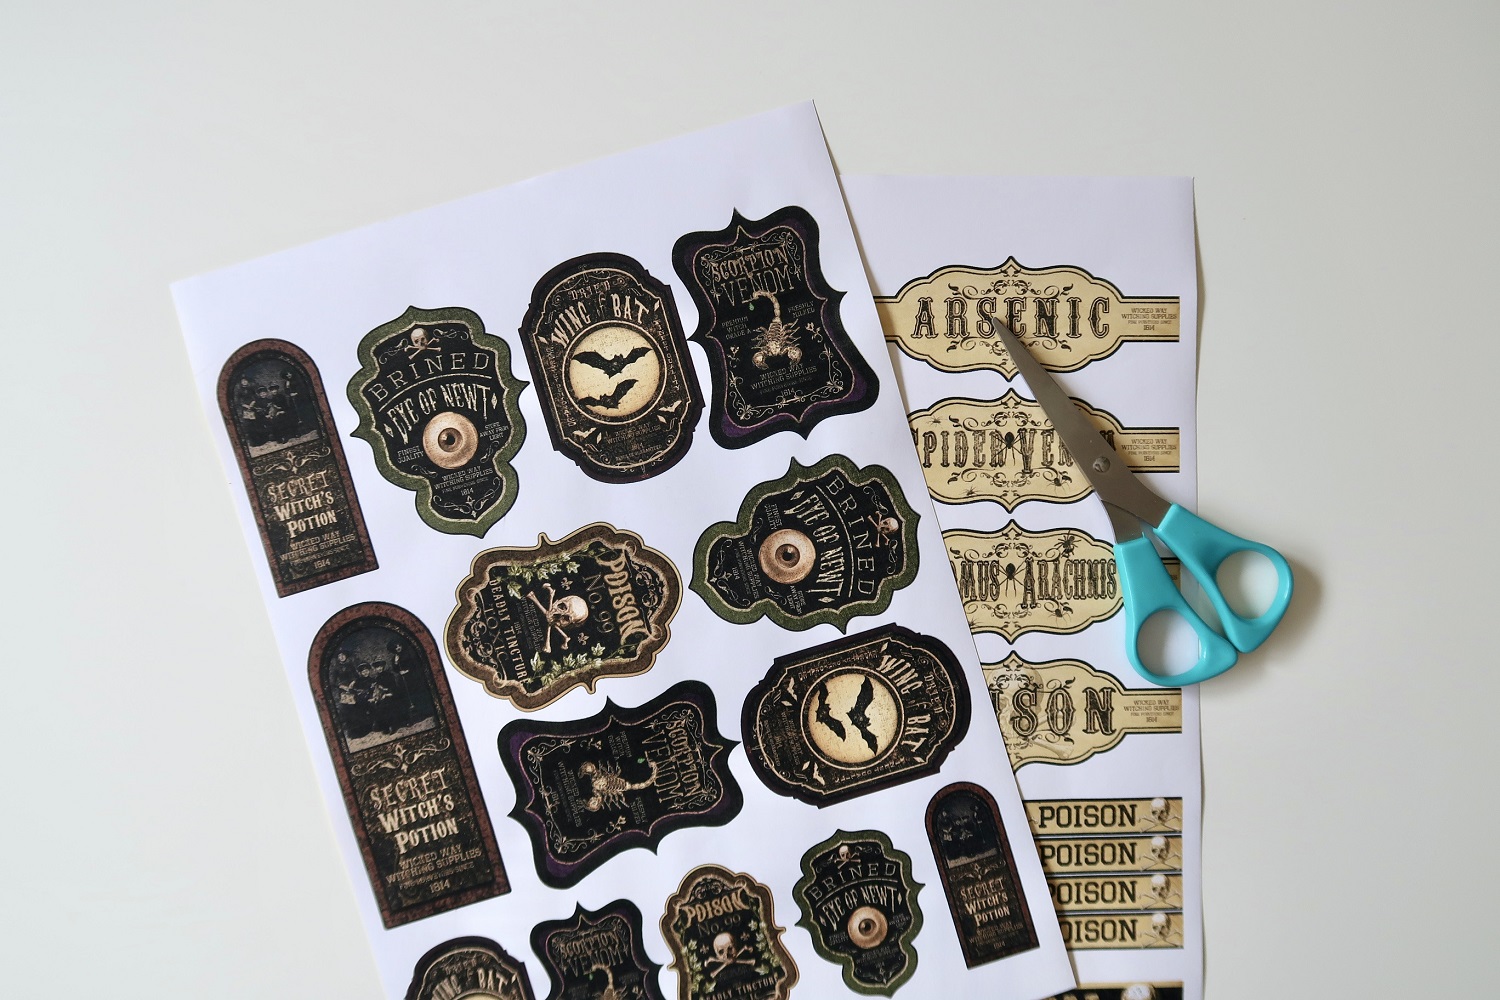
When you download these files from Design Bundles, they come arranged as separate images for each label (so you could resize them and add them to a whole multitude of projects), and they also have a PDF page printout that lays all the images out in various sizes so that it's nice and easy to print off directly on to sticker paper!

3 Eye-Catching Fall Decor DIY Tutorials for Your Home 3

I chose to print off both sheets as I wasn't sure what design would fit best on my bottle and the PDF print gives you a few varying sizes. Make sure to cut as close to the edge of the design as possible when cutting the stickers out; you don't want there to be any white showing around the edge.

Step 2. Pick Your Poison!

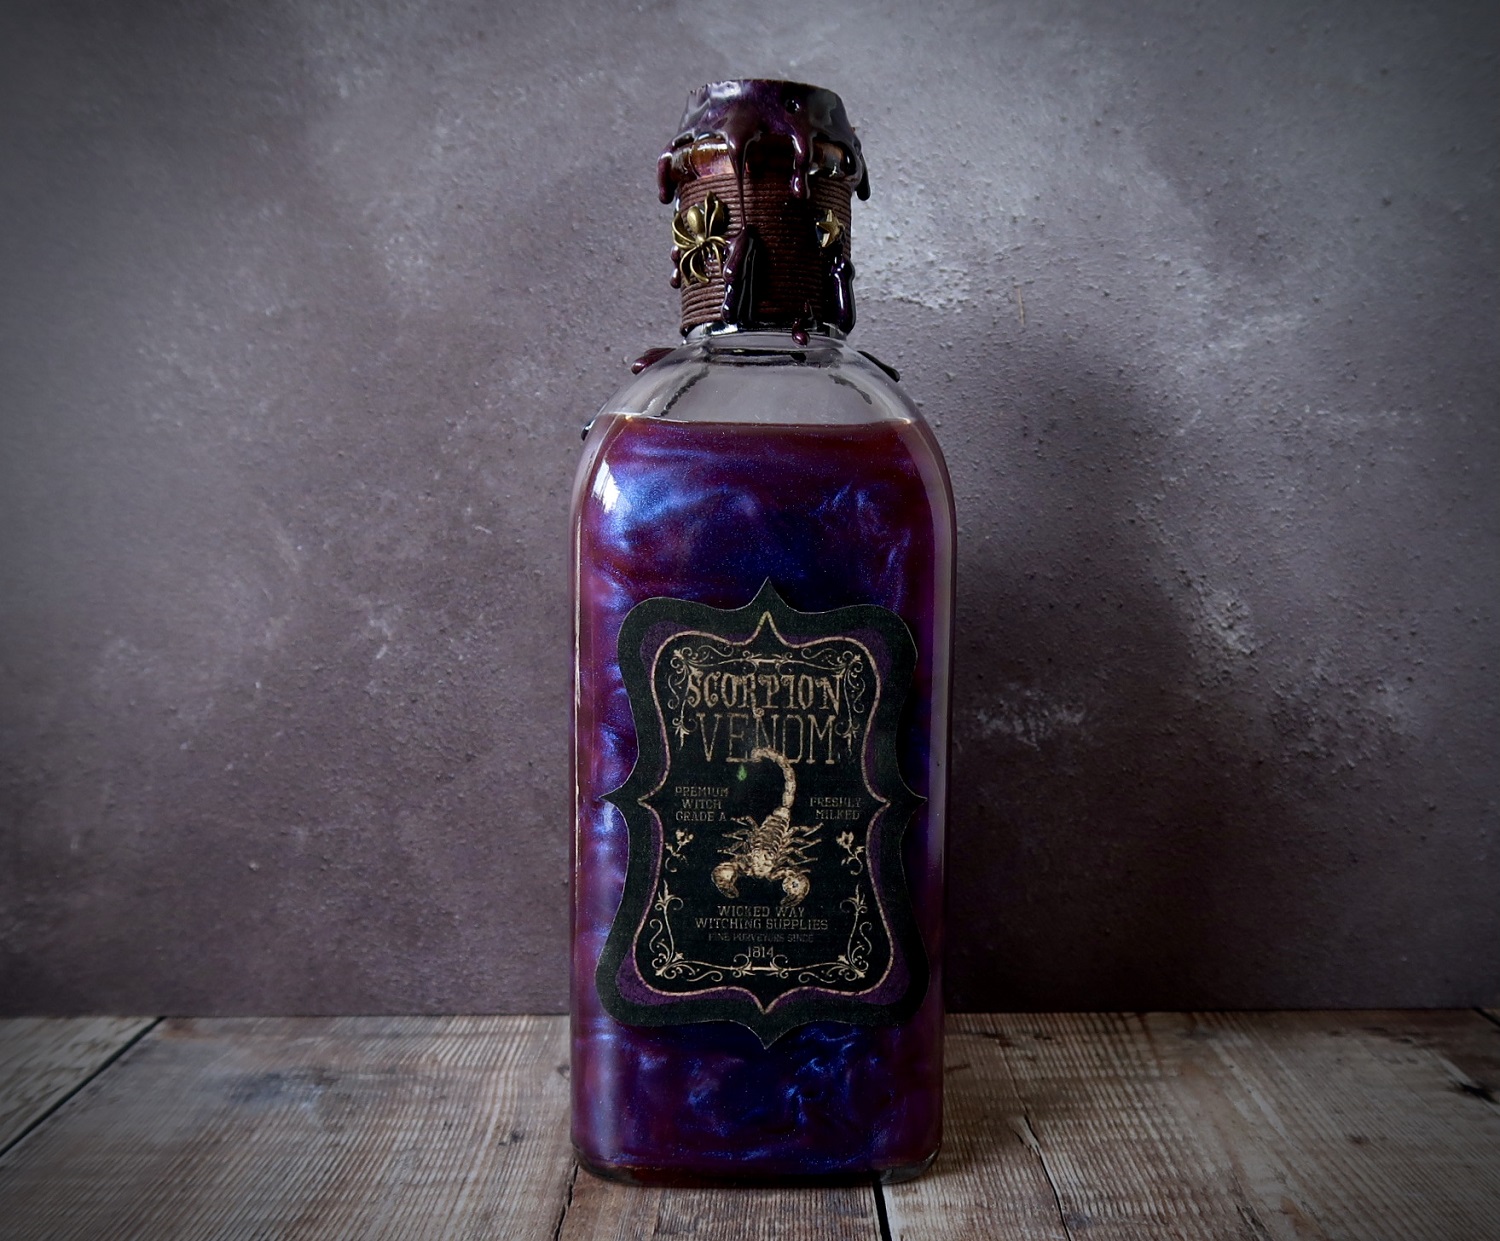
The purple Scorpion Venom sticker ended up fitting my bottle the best, so that's what helped me decide on my color theme; the sticker's standout color is purple, so I'm going to be mixing a 'potion' that magically changes to a deep purple color.

3 Eye-Catching Fall Decor DIY Tutorials for Your Home 4

If we think back to our color wheel, we know that red and blue make purple, so I'm going to take red food dye and mix it with water to make the liquid for the bottle, then when I add blue mica powder and give it a shake, it'll make this amazing shimmery purple mixture.

3 Eye-Catching Fall Decor DIY Tutorials for Your Home 5

Step 3. Prepare Your Bottle

Give your bottle a good clean and rinse out; while doing that, check to see how much water it will hold so you know how much color solution to make. Set it aside to dry.

Step 4. Magical Mixing

Fill a mixing jug with water and stir in your food coloring until you've reached the desired shade.

3 Eye-Catching Fall Decor DIY Tutorials for Your Home 6

Next comes the magic part!

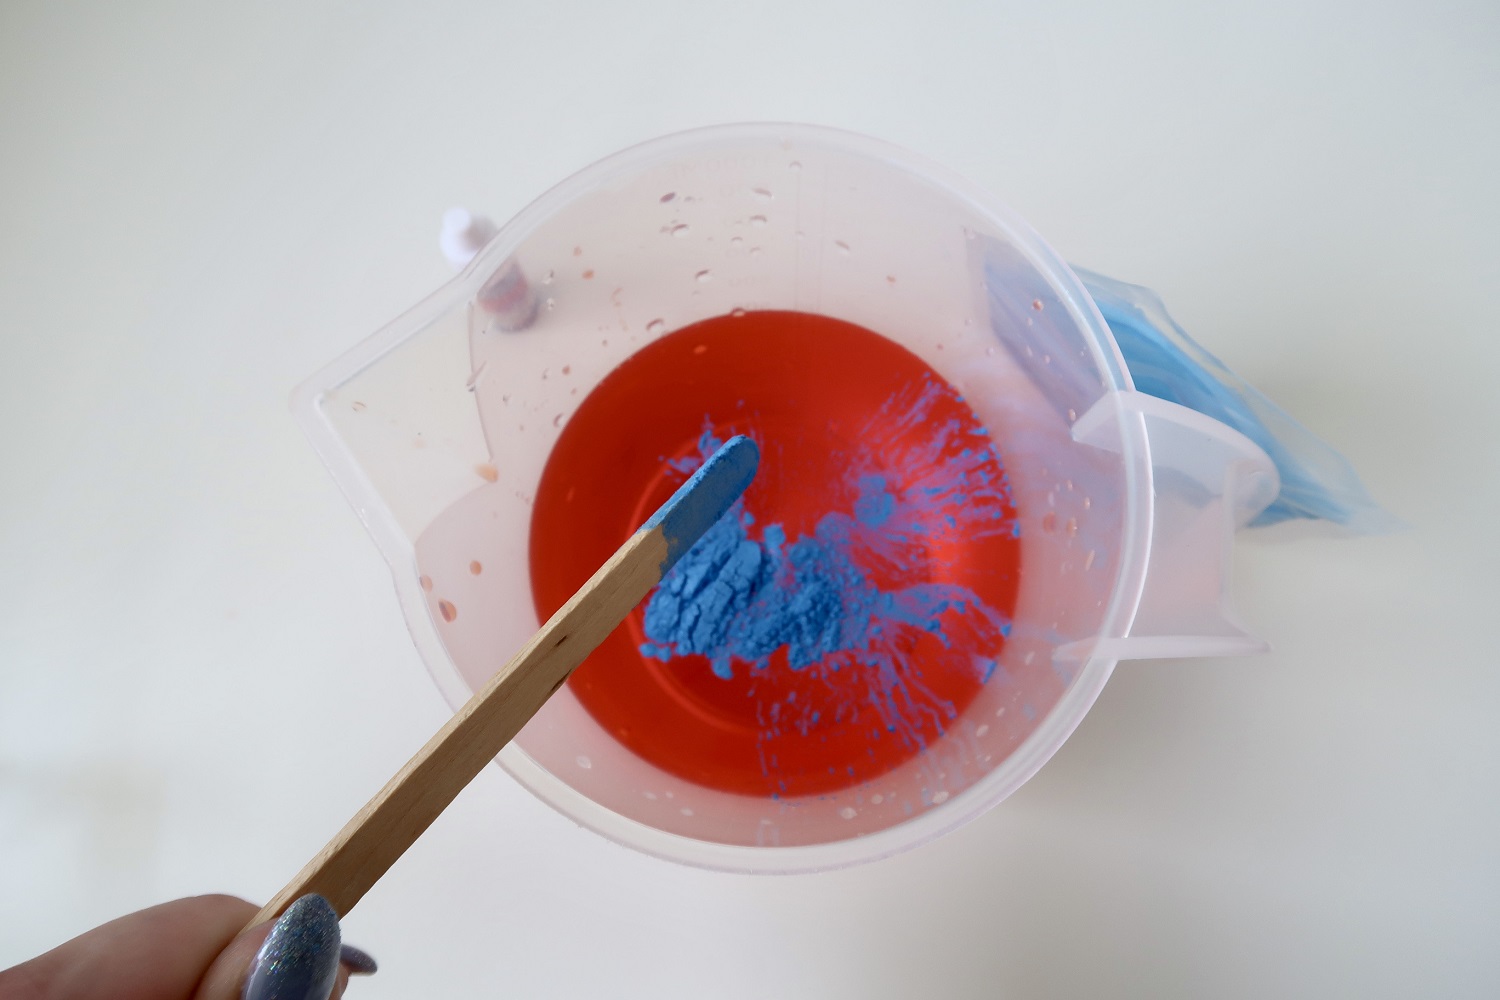
Get your mica powder and gradually add it to the mixture bit by bit (I find this easiest to do with a lolly stick as you only need a small amount at a time). Add some and then stir the mixture to see if you've got to the right color; if it's not vibrant enough, add a little more powder.

3 Eye-Catching Fall Decor DIY Tutorials for Your Home 7

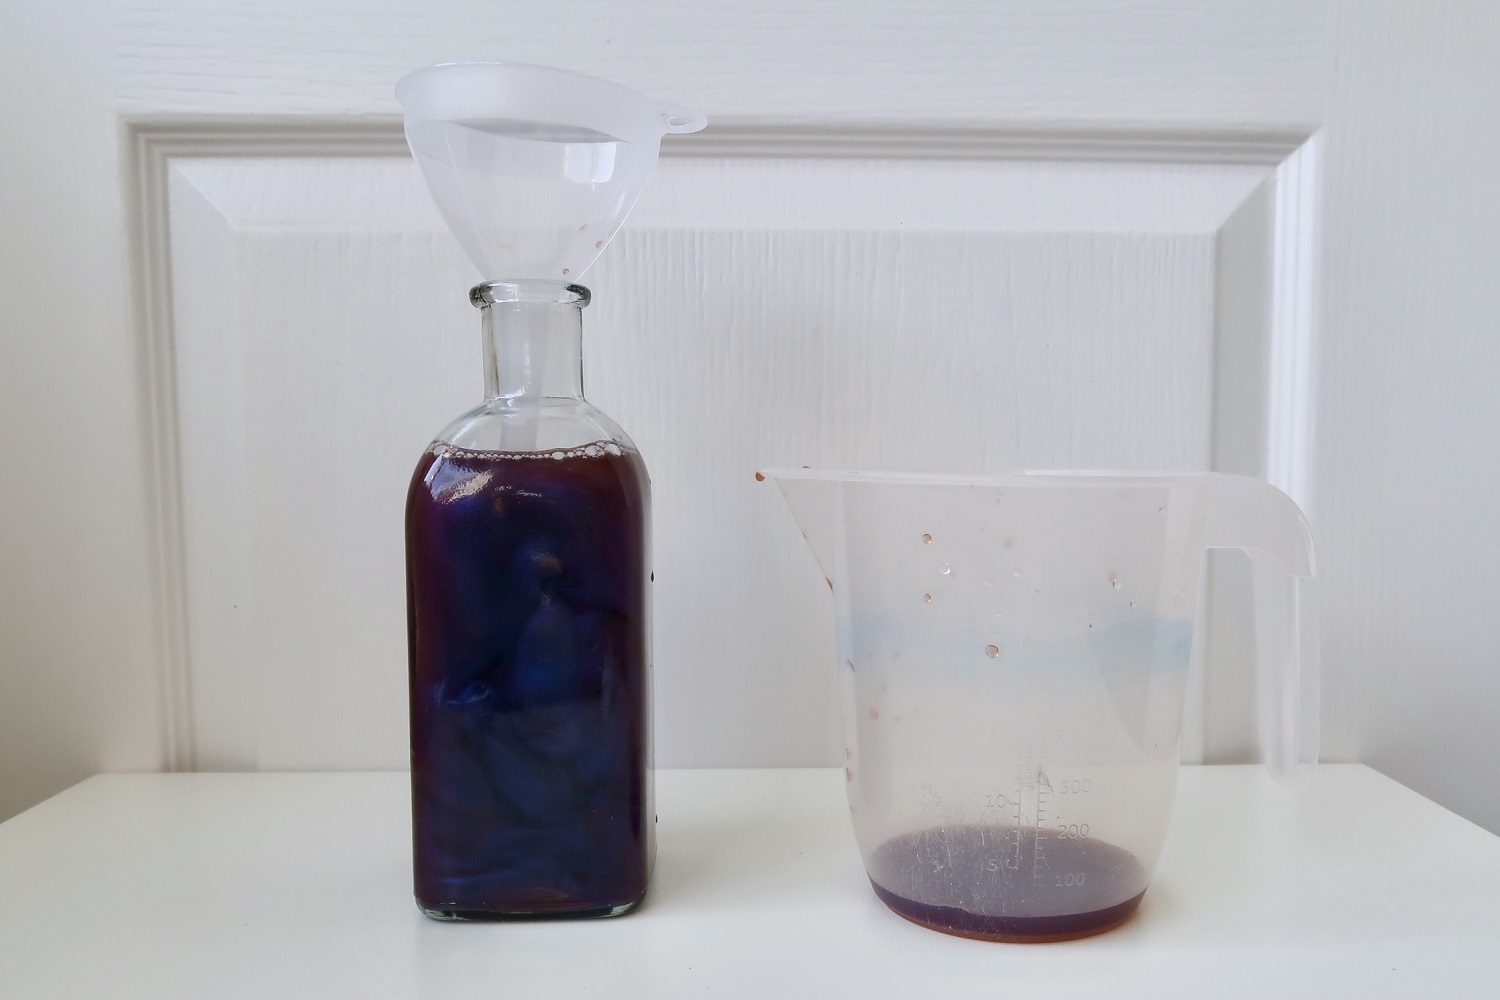
When you are happy that your 'potion' is the right color, you can go ahead and pour it into your bottle - I like to use a funnel for this as its stops any spillages.

3 Eye-Catching Fall Decor DIY Tutorials for Your Home 8

Once your potion is decanted into its bottle, you'll want to make sure it's sealed. My bottle has a cork stopper, so I'm going to add a small bead of hot glue around the edge of the neck of the bottle and then push the cork in to create a seal. When the hot glue is set, give the bottle a good shake-up to see if you have any leaks - if you do, dry the cork and bottle off and then add some more hot glue. Don't worry if it looks a bit messy; it'll end up hidden by the end of the project.

Step 5. Time To Decorate Your Bottle

Now that the bottle is sealed and safe from any leaks, we can add the finishing touches!

Firstly, I'm going to apply my sticker. It would be best to wipe the bottle down with isopropyl alcohol first so that you know it's completely clean and the label will stick well.

3 Eye-Catching Fall Decor DIY Tutorials for Your Home 10

Next, I'm going to add some waxed cotton cord around the neck of the bottle along with a few little charms to give it a bit more of an olde worlde apothecary look.

3 Eye-Catching Fall Decor DIY Tutorials for Your Home 9

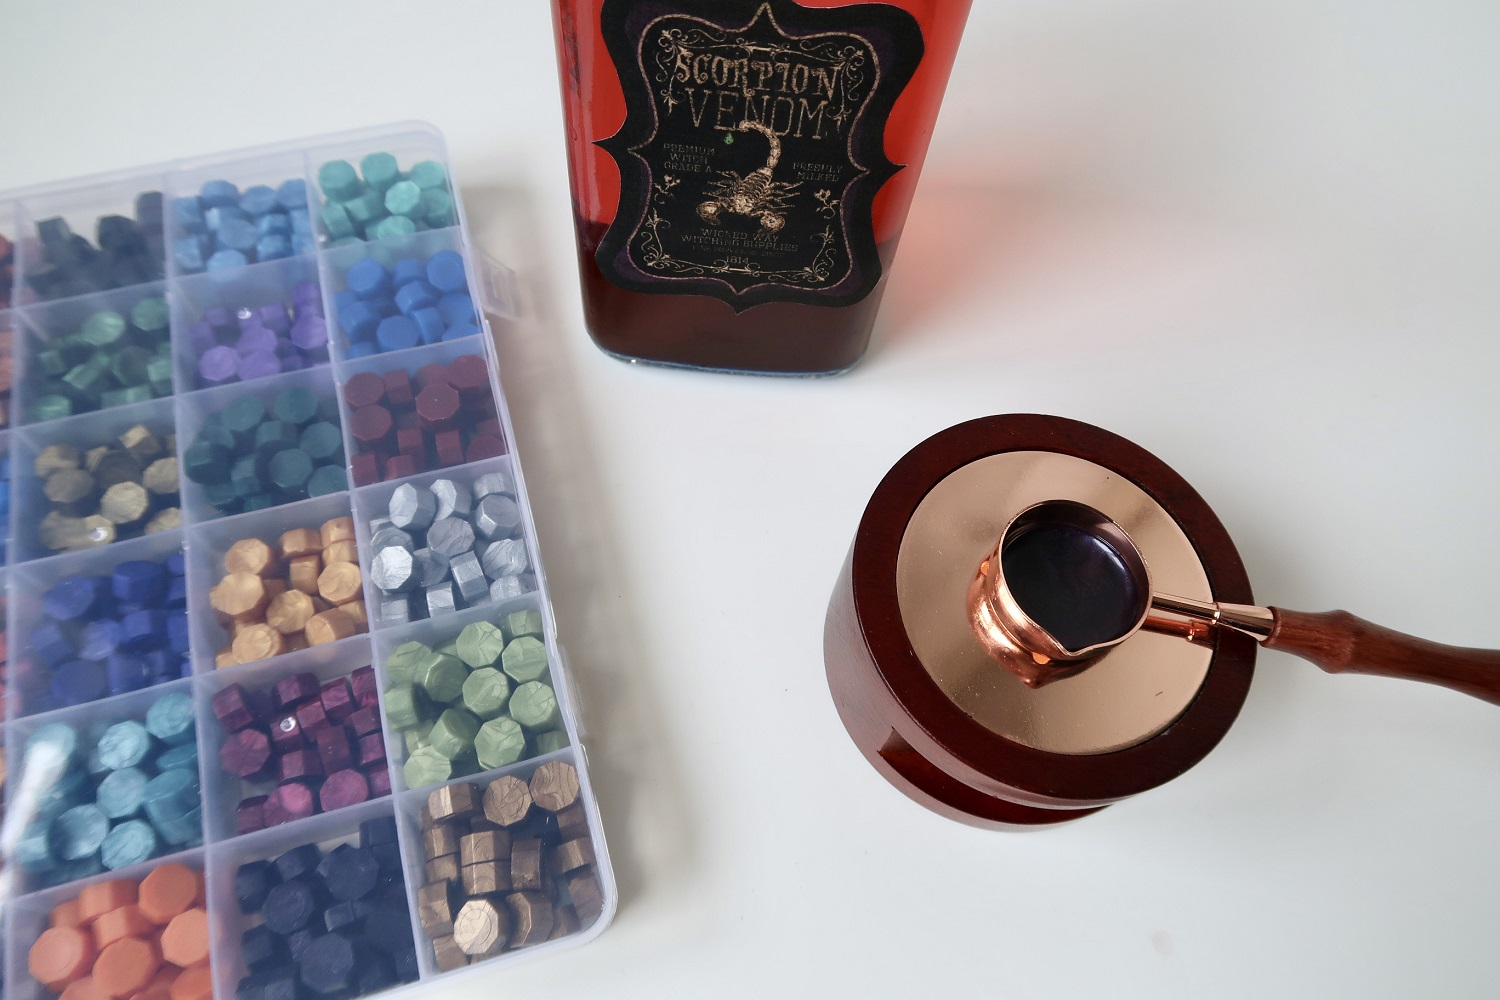
Then, for the finishing touch? I'm going to 'seal' the bottle with wax! I'm using a wax seal kit (like you'd use for envelopes or wedding invites) for this as it comes with a really helpful little ladle to pour the wax.

3 Eye-Catching Fall Decor DIY Tutorials for Your Home 11

There is a kind of trick to doing this and getting the nice dips down the side, which I'll explain as best I can. When you pour your wax, you want to start right on the very edges of your cork/stopper, allow it to flow down, and then you go back in and fill in the gap in the middle with more wax. Imagine it as almost tracing around the outside of the cork with wax.

3 Eye-Catching Fall Decor DIY Tutorials for Your Home 12

If you find that it goes a bit wrong or that you can't get it to sit nicely on the very top bit of your cork where you've filled in, you can get a hairdryer on a high setting and carefully reheat the wax to allow it to settle a bit flatter.

Step 6. Give It a Shake

Once your wax has set, you're ready to give your bottle a shake to see that magical color change happen and get the full effect of your project! I've found that it takes around an hour for the mica powder to settle again fully and the liquid to go back to its original color after it's been shaken up.

3 Eye-Catching Fall Decor DIY Tutorials for Your Home 23

#3 How To Make a Custom Fall Wreath

One of the nicest ways to decorate the outside of your house for any season is with a wreath. This is a super versatile DIY as you can 're-dress' the top of your wreath each season! Start by finding a suitable piece of wood for the main part of your wreath (there are plenty of options to purchase online) and stain it a color to suit the rest of your outdoor aesthetic. Next, apply a greeting decal with permanent vinyl or use vinyl as a stencil to paint one on there.

3 Eye-Catching Fall Decor DIY Tutorials for Your Home 14

You want to make sure to avoid the top quarter of the sign when positioning your message, as that's where you will be adding your decoration. Create a hanging loop or point for the back of the wreath; since the top part of the wood will be covered, you could even drill some hardware through onto the back for the hanging point.

To create a removable decoration plate, you want to use a thin foam poster board and cut it to be a bit smaller than the area you will cover with decorations. Cover this decoration plate with your embellishments, make sure that the poster board or felt is not visible underneath. Then attach the velcro command strip to the back and secure the opposite side to the wooden wreath round. When you switch the decorations out for the next holiday or season, remove the current decor plate and add the next one with the velcro.

Happy Crafting!

Hopefully, these fun fall decor DIYs have inspired you to get creating and conjuring up your own fantastical designs! If you'd like even more inspiration check out Top Halloween Craft Ideas for Your Cricut! P.s. We love seeing the projects you create using Desing Bundles products, so please do share some pictures of them with us over in our Facebook Group,The Design Bundles Customer Community.

You may also be interested in ...

Seller Spotlight: Bella B Studio
Creativity

Seller Spotlight: Bella B Studio

Join us for another exciting installment in our Seller Spotlight...
3 of the Top Christmas Craft Ideas for Your Cricut
Creativity

3 of the Top Christmas Craft Ideas for Your Cricut

We look at the best Christmas craft ideas for your Cricut and share 3 mini-tutorials
Unique Cricut Maker Projects To Inspire Crafters and Creatives
Creativity

Unique Cricut Maker Projects To Inspire Crafters and Creatives

Get inspiration for 8 unique projects you can make with your Cricut Maker
Help Center
ol image