Combine Two Images in Photoshop
For this tutorial, you will need two images to combine. We used a desert background and one of some Children playing with water.
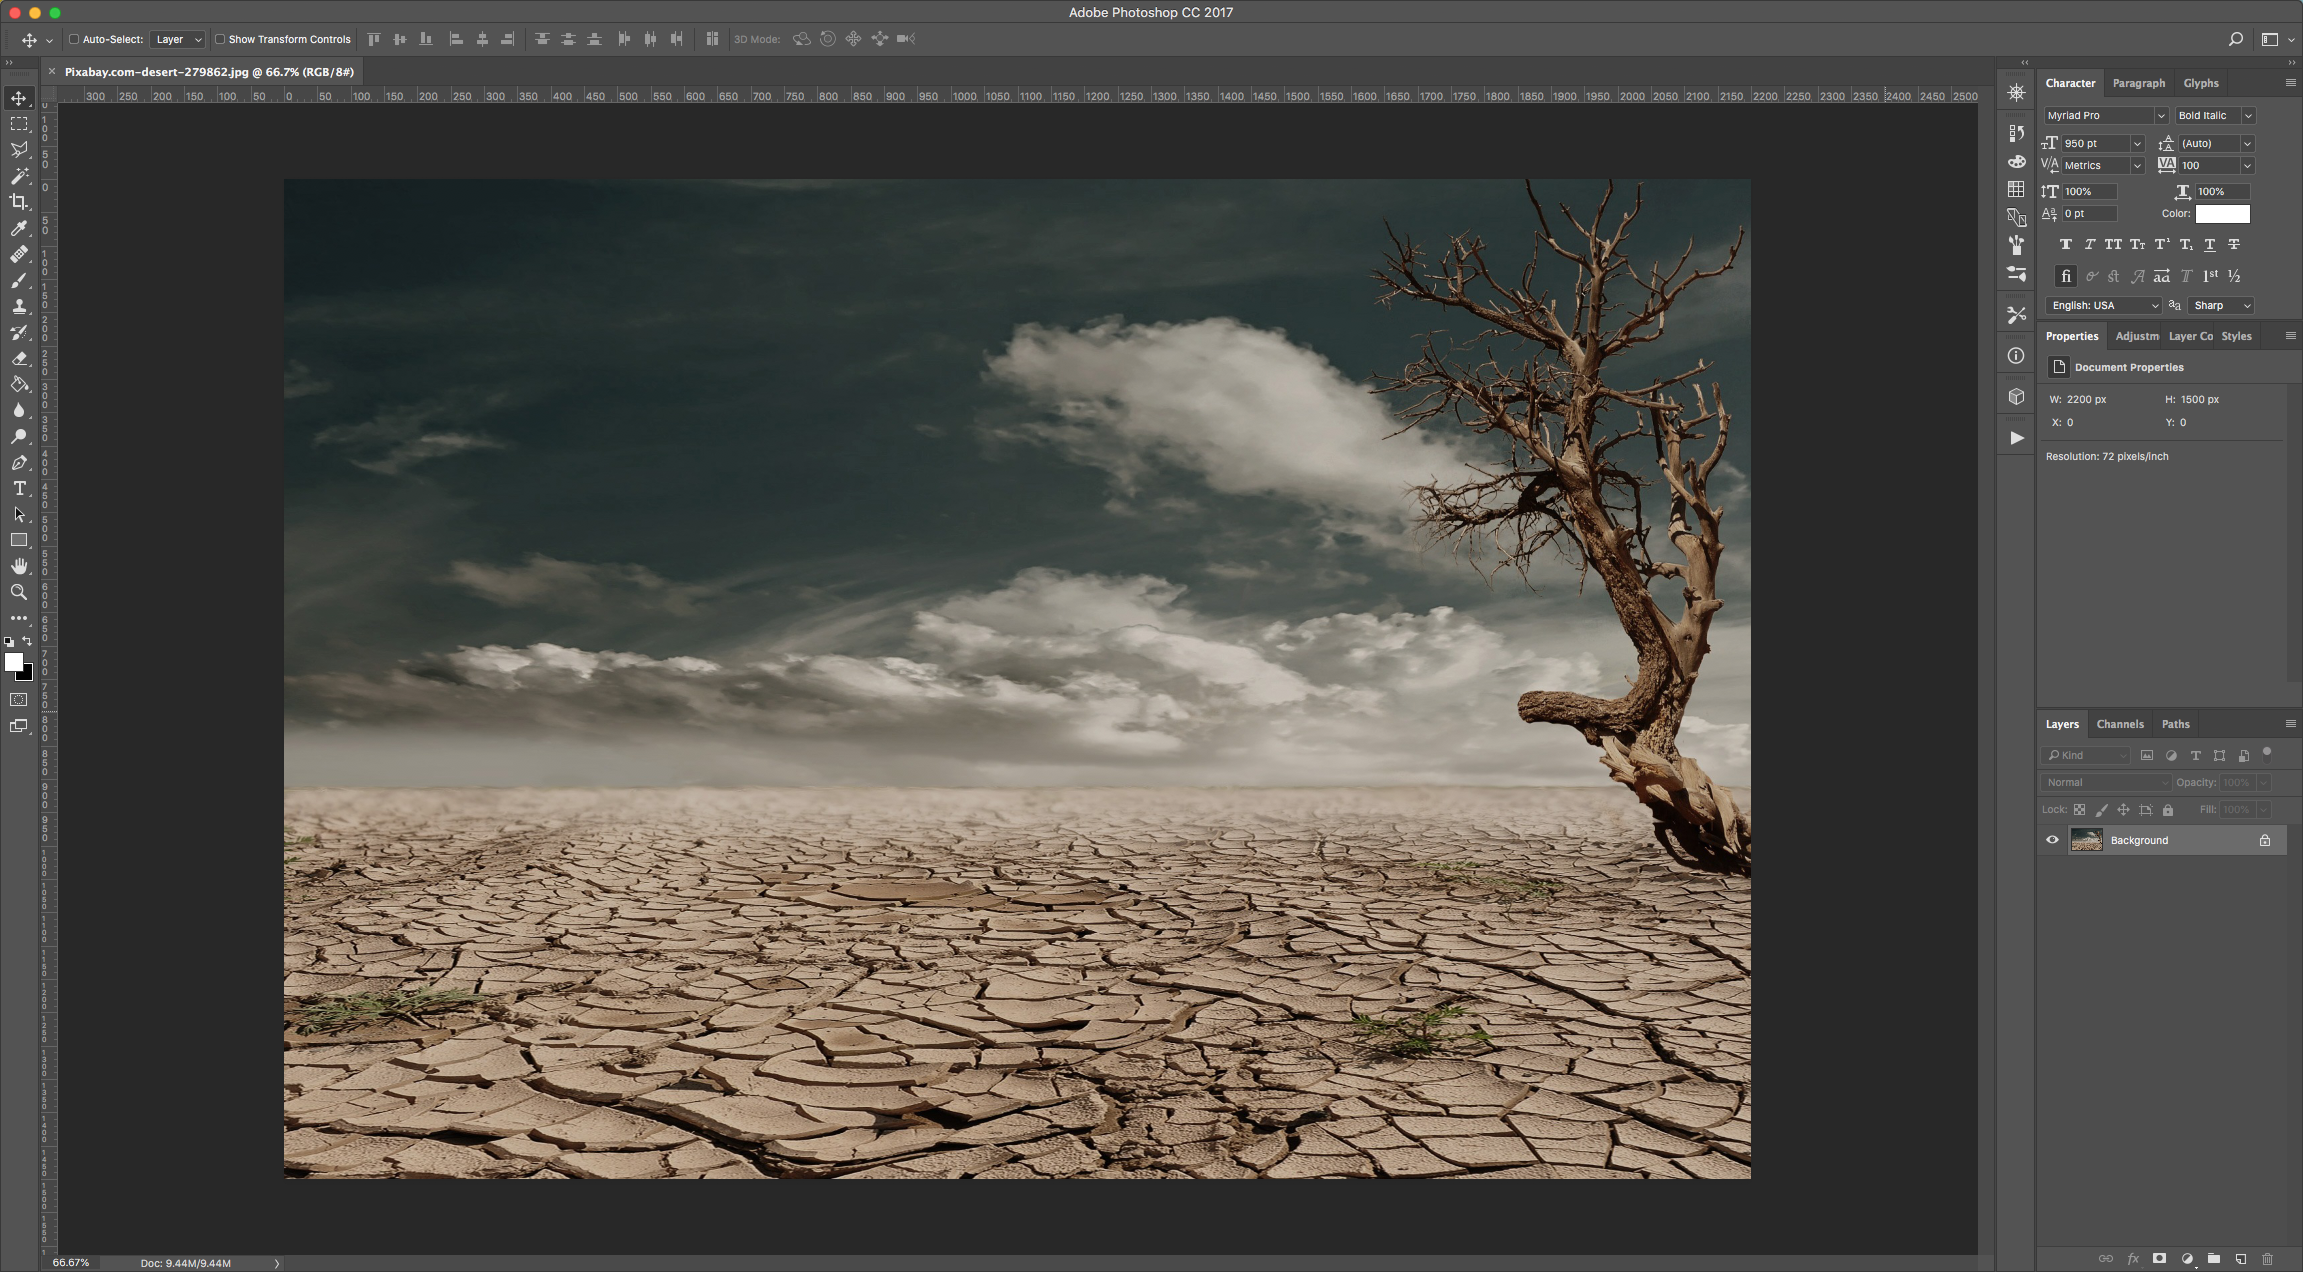
1 - In Photoshop, open the Image you chose as “Background”.
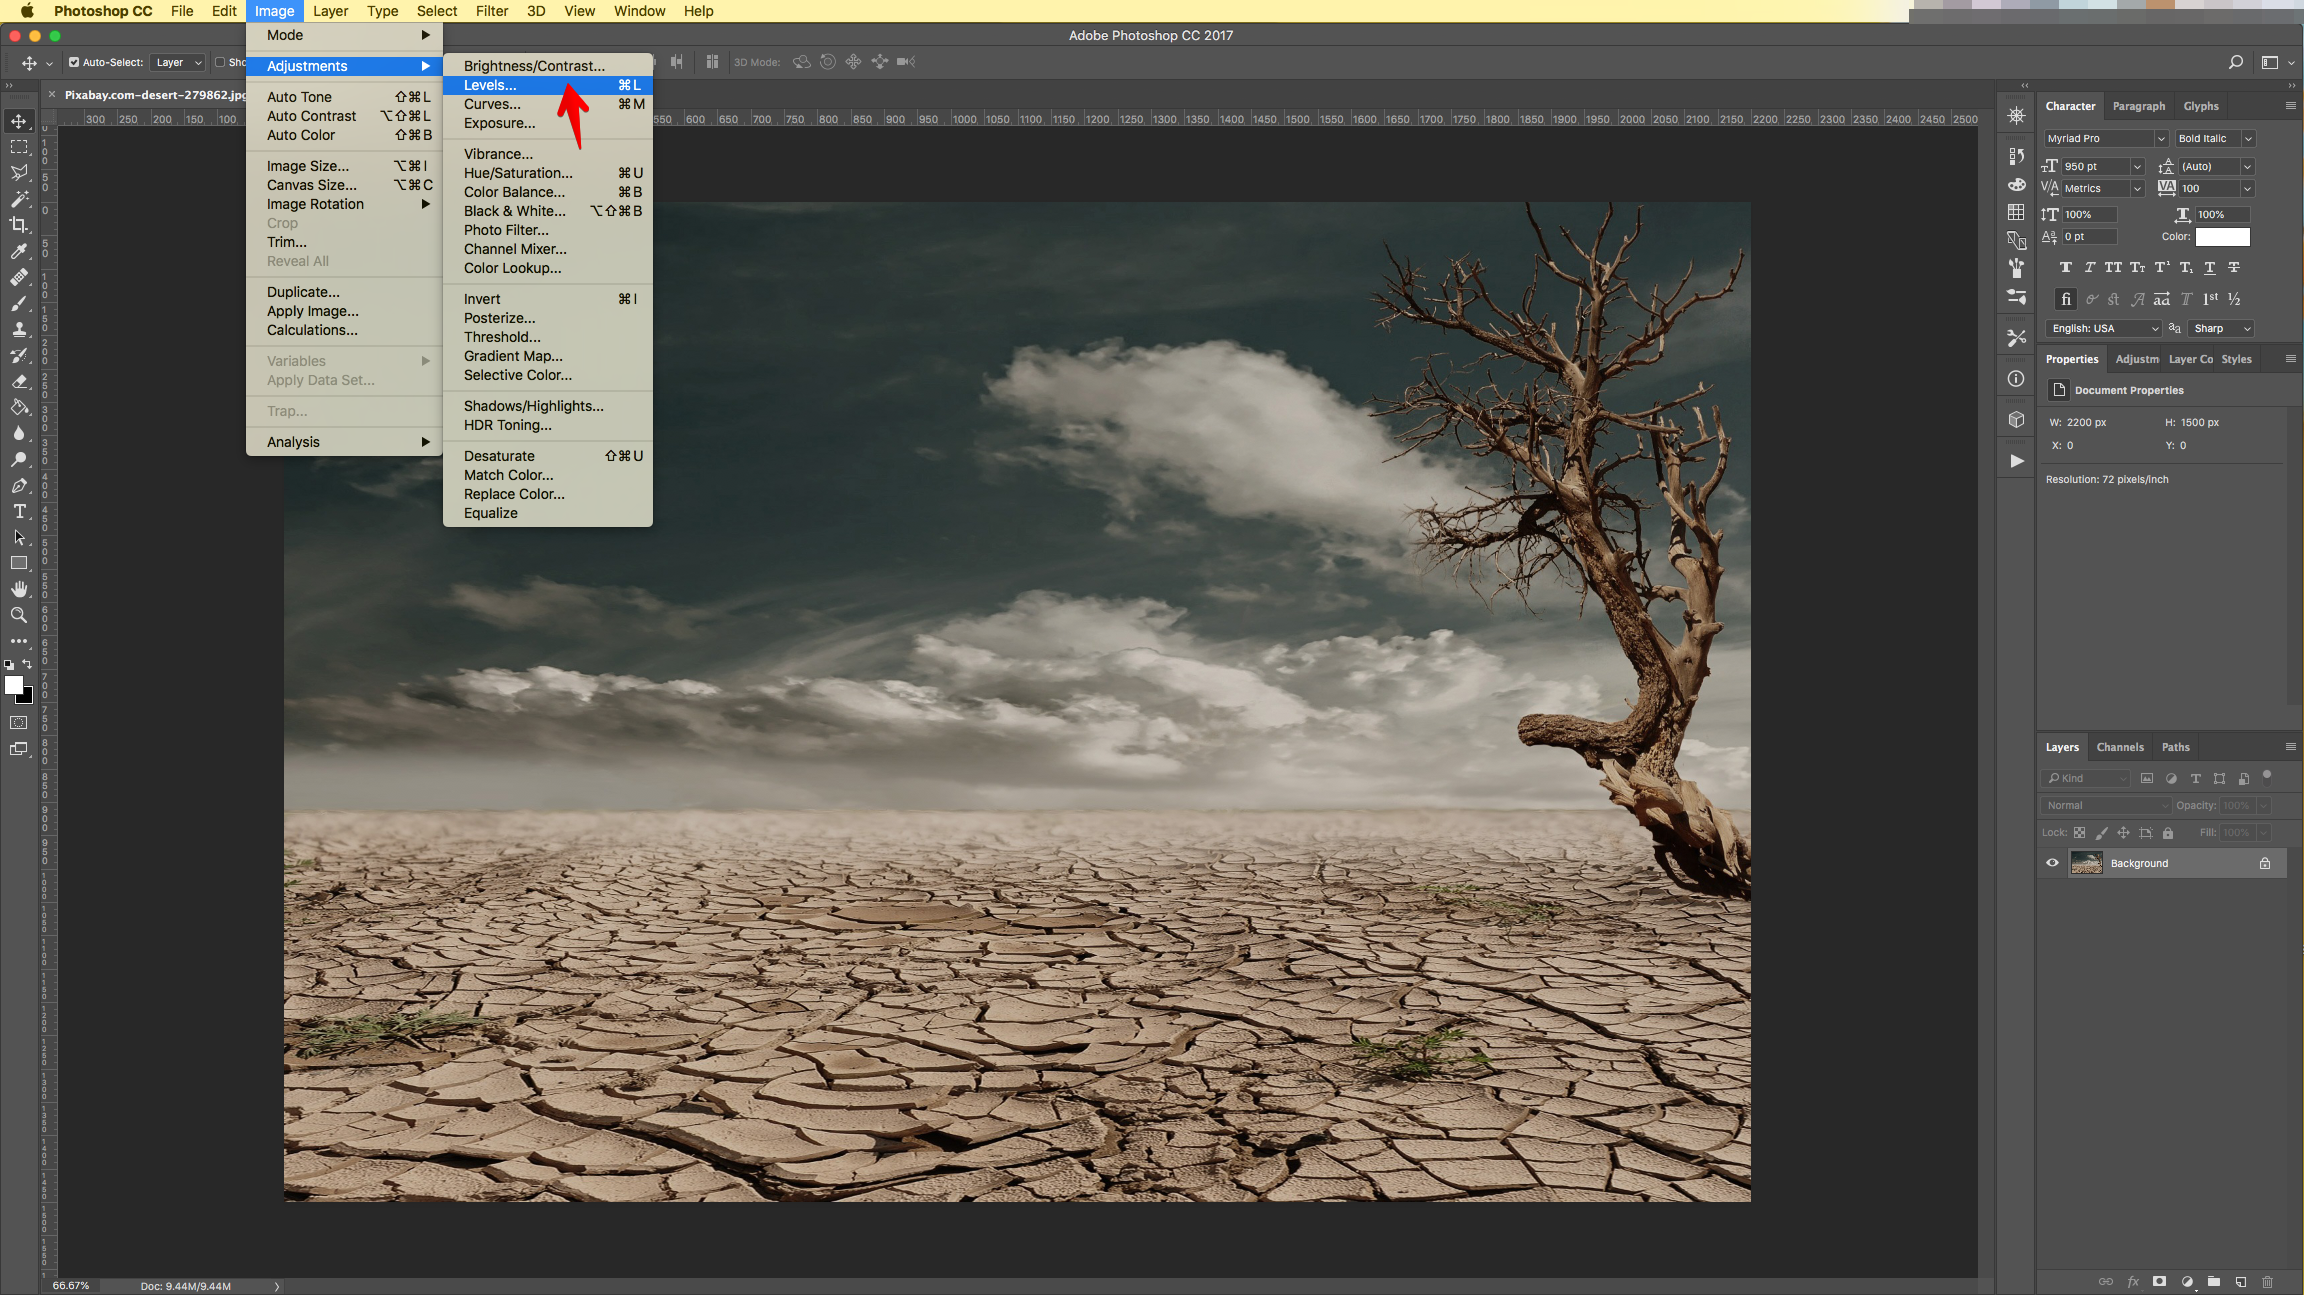
2 - Go to Image > Adjustments > Levels (Command/Control + L) and click the “Auto” button.

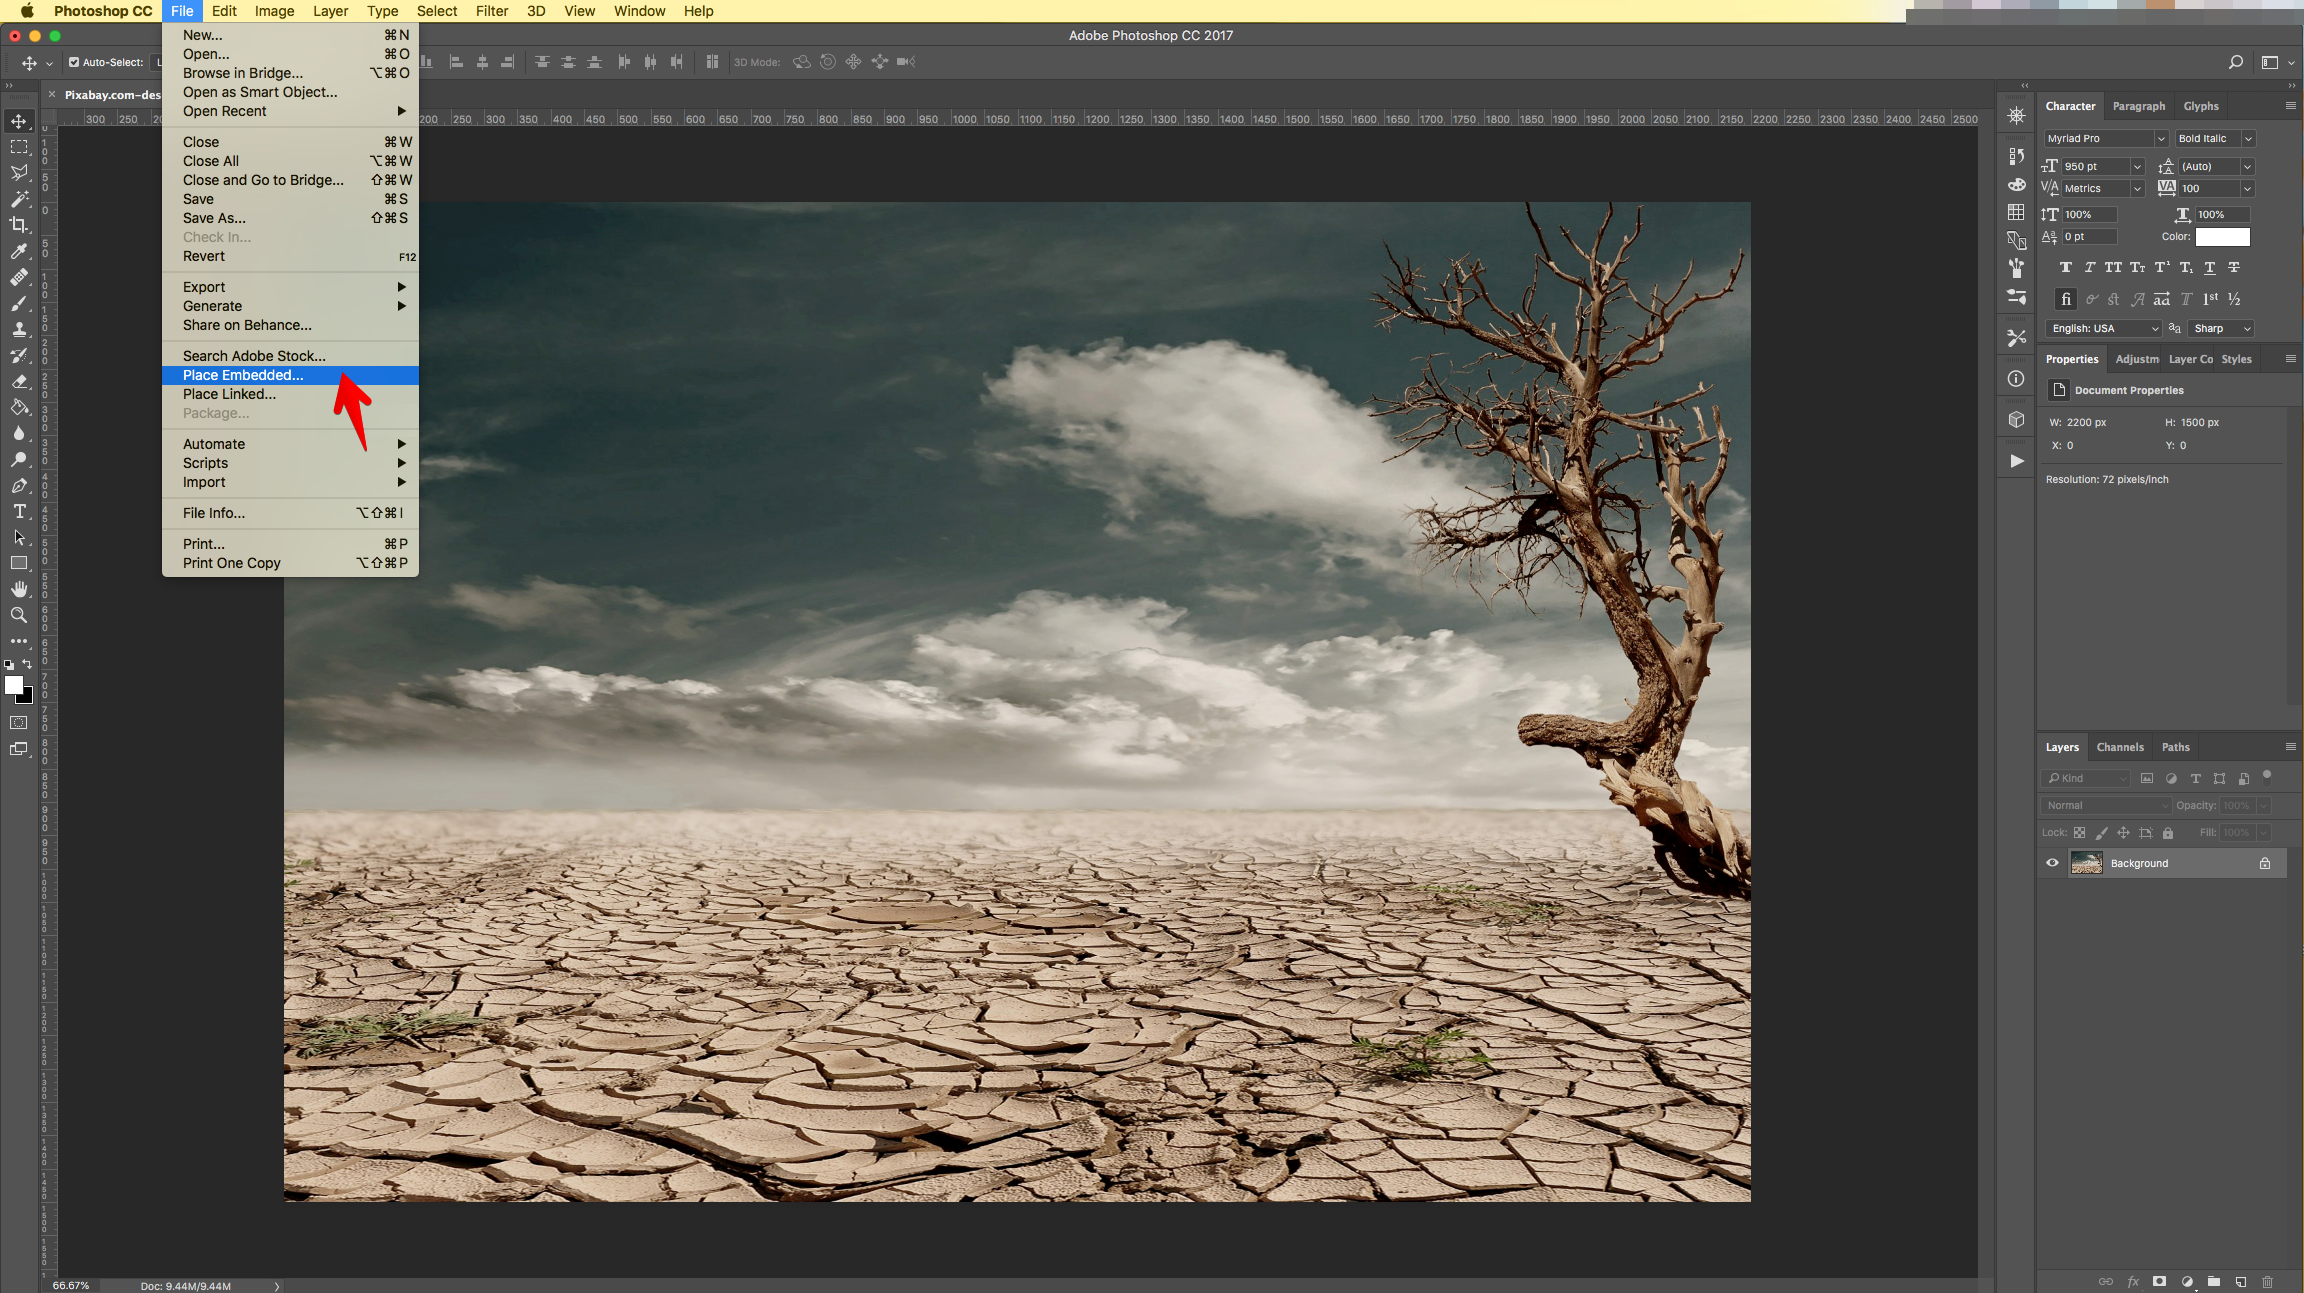
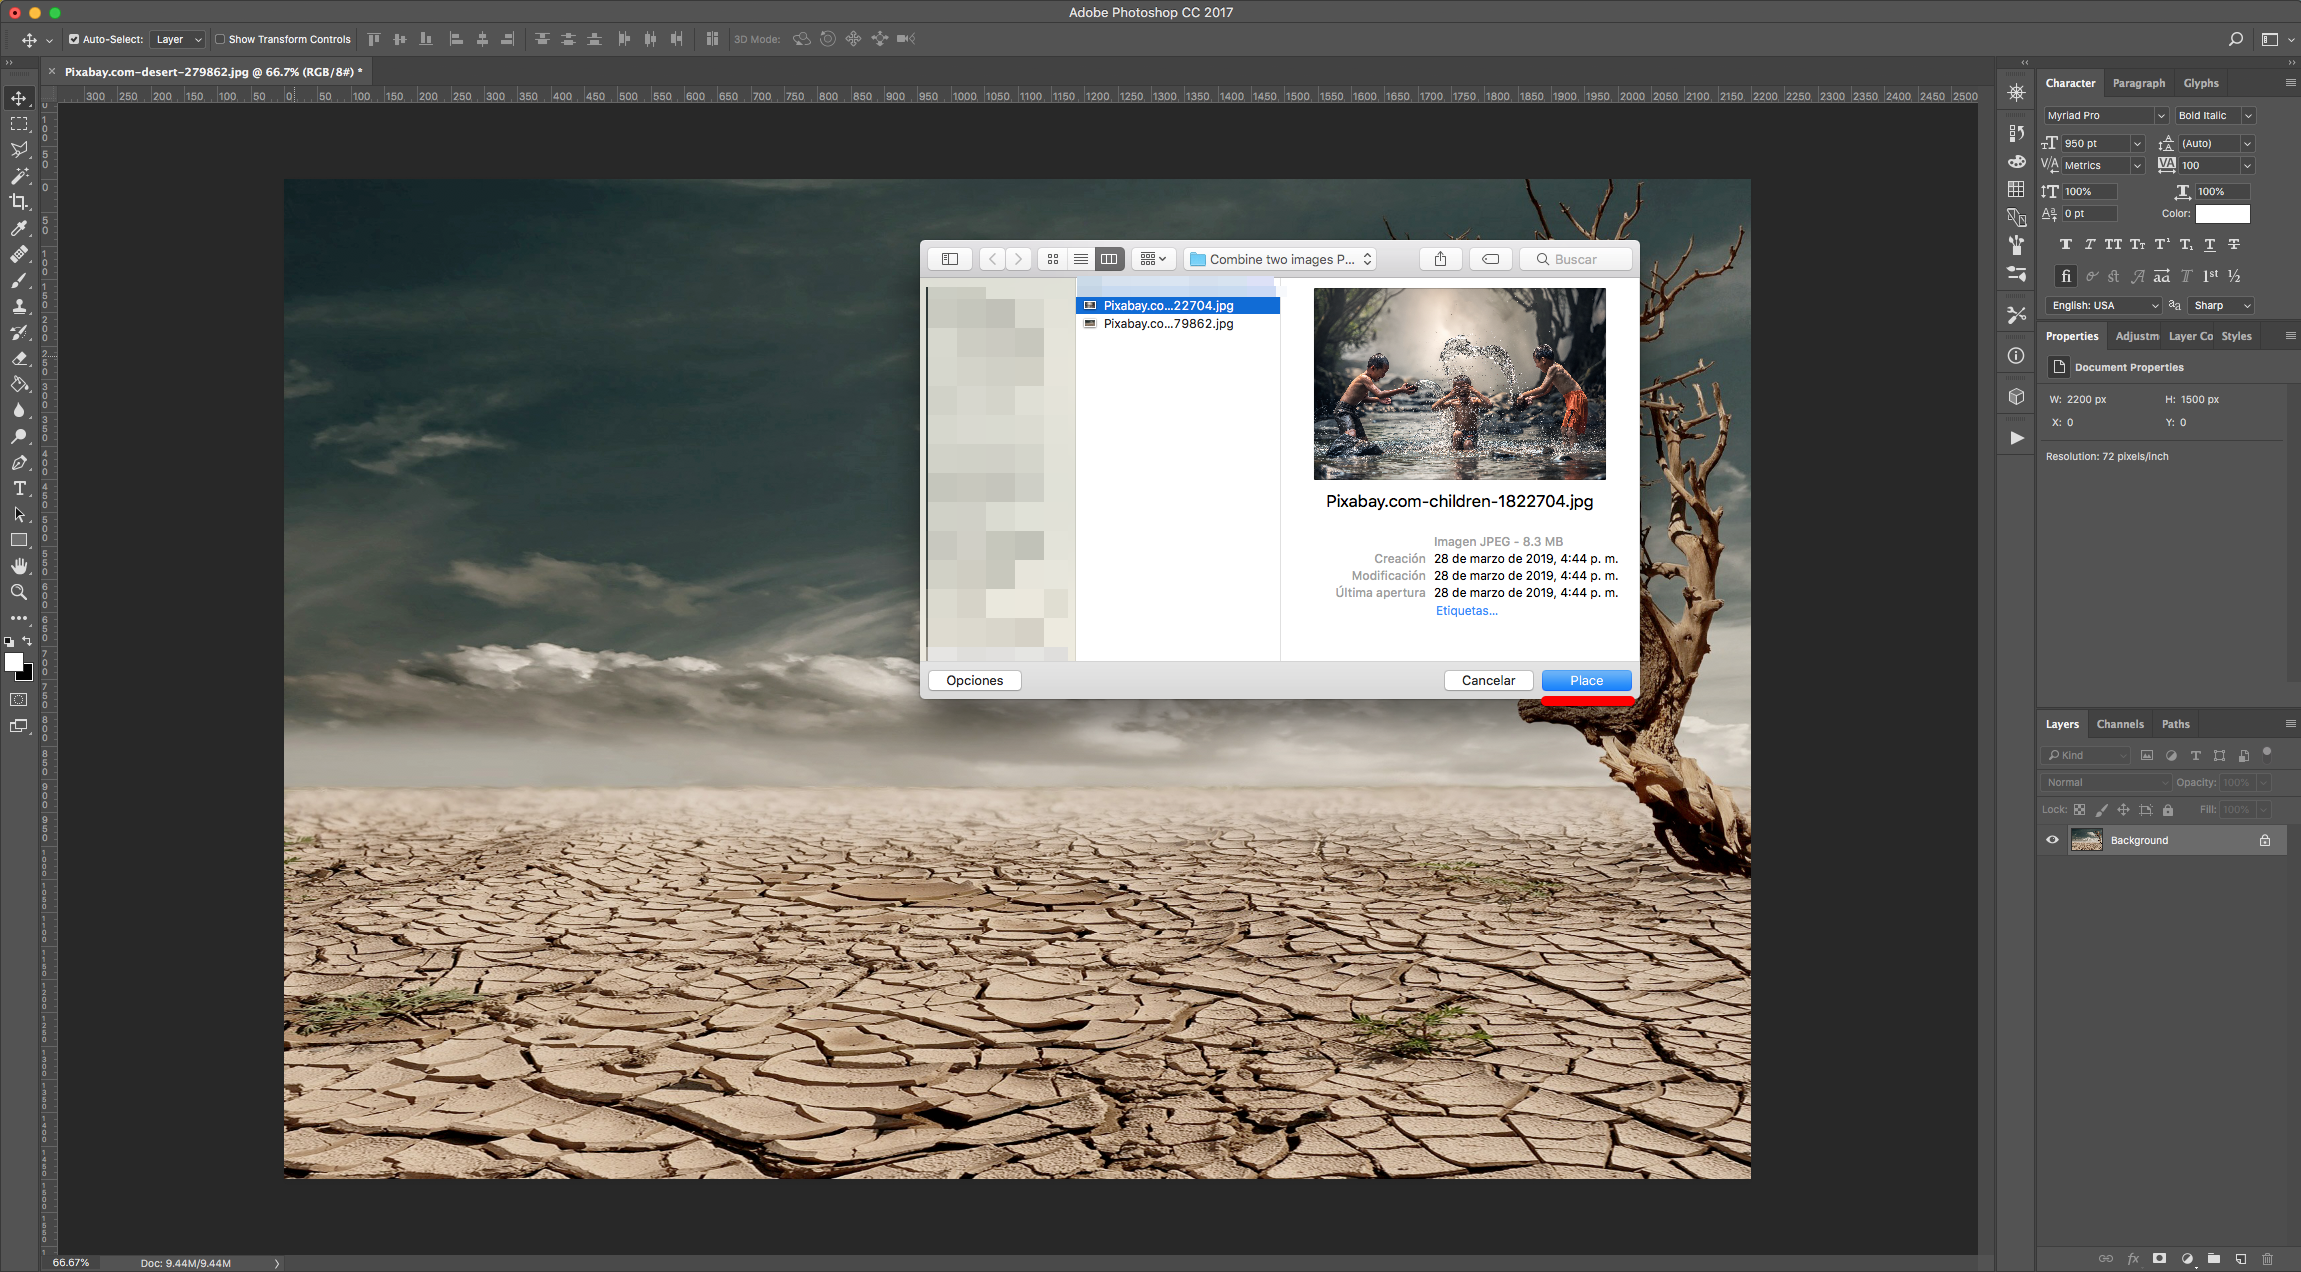
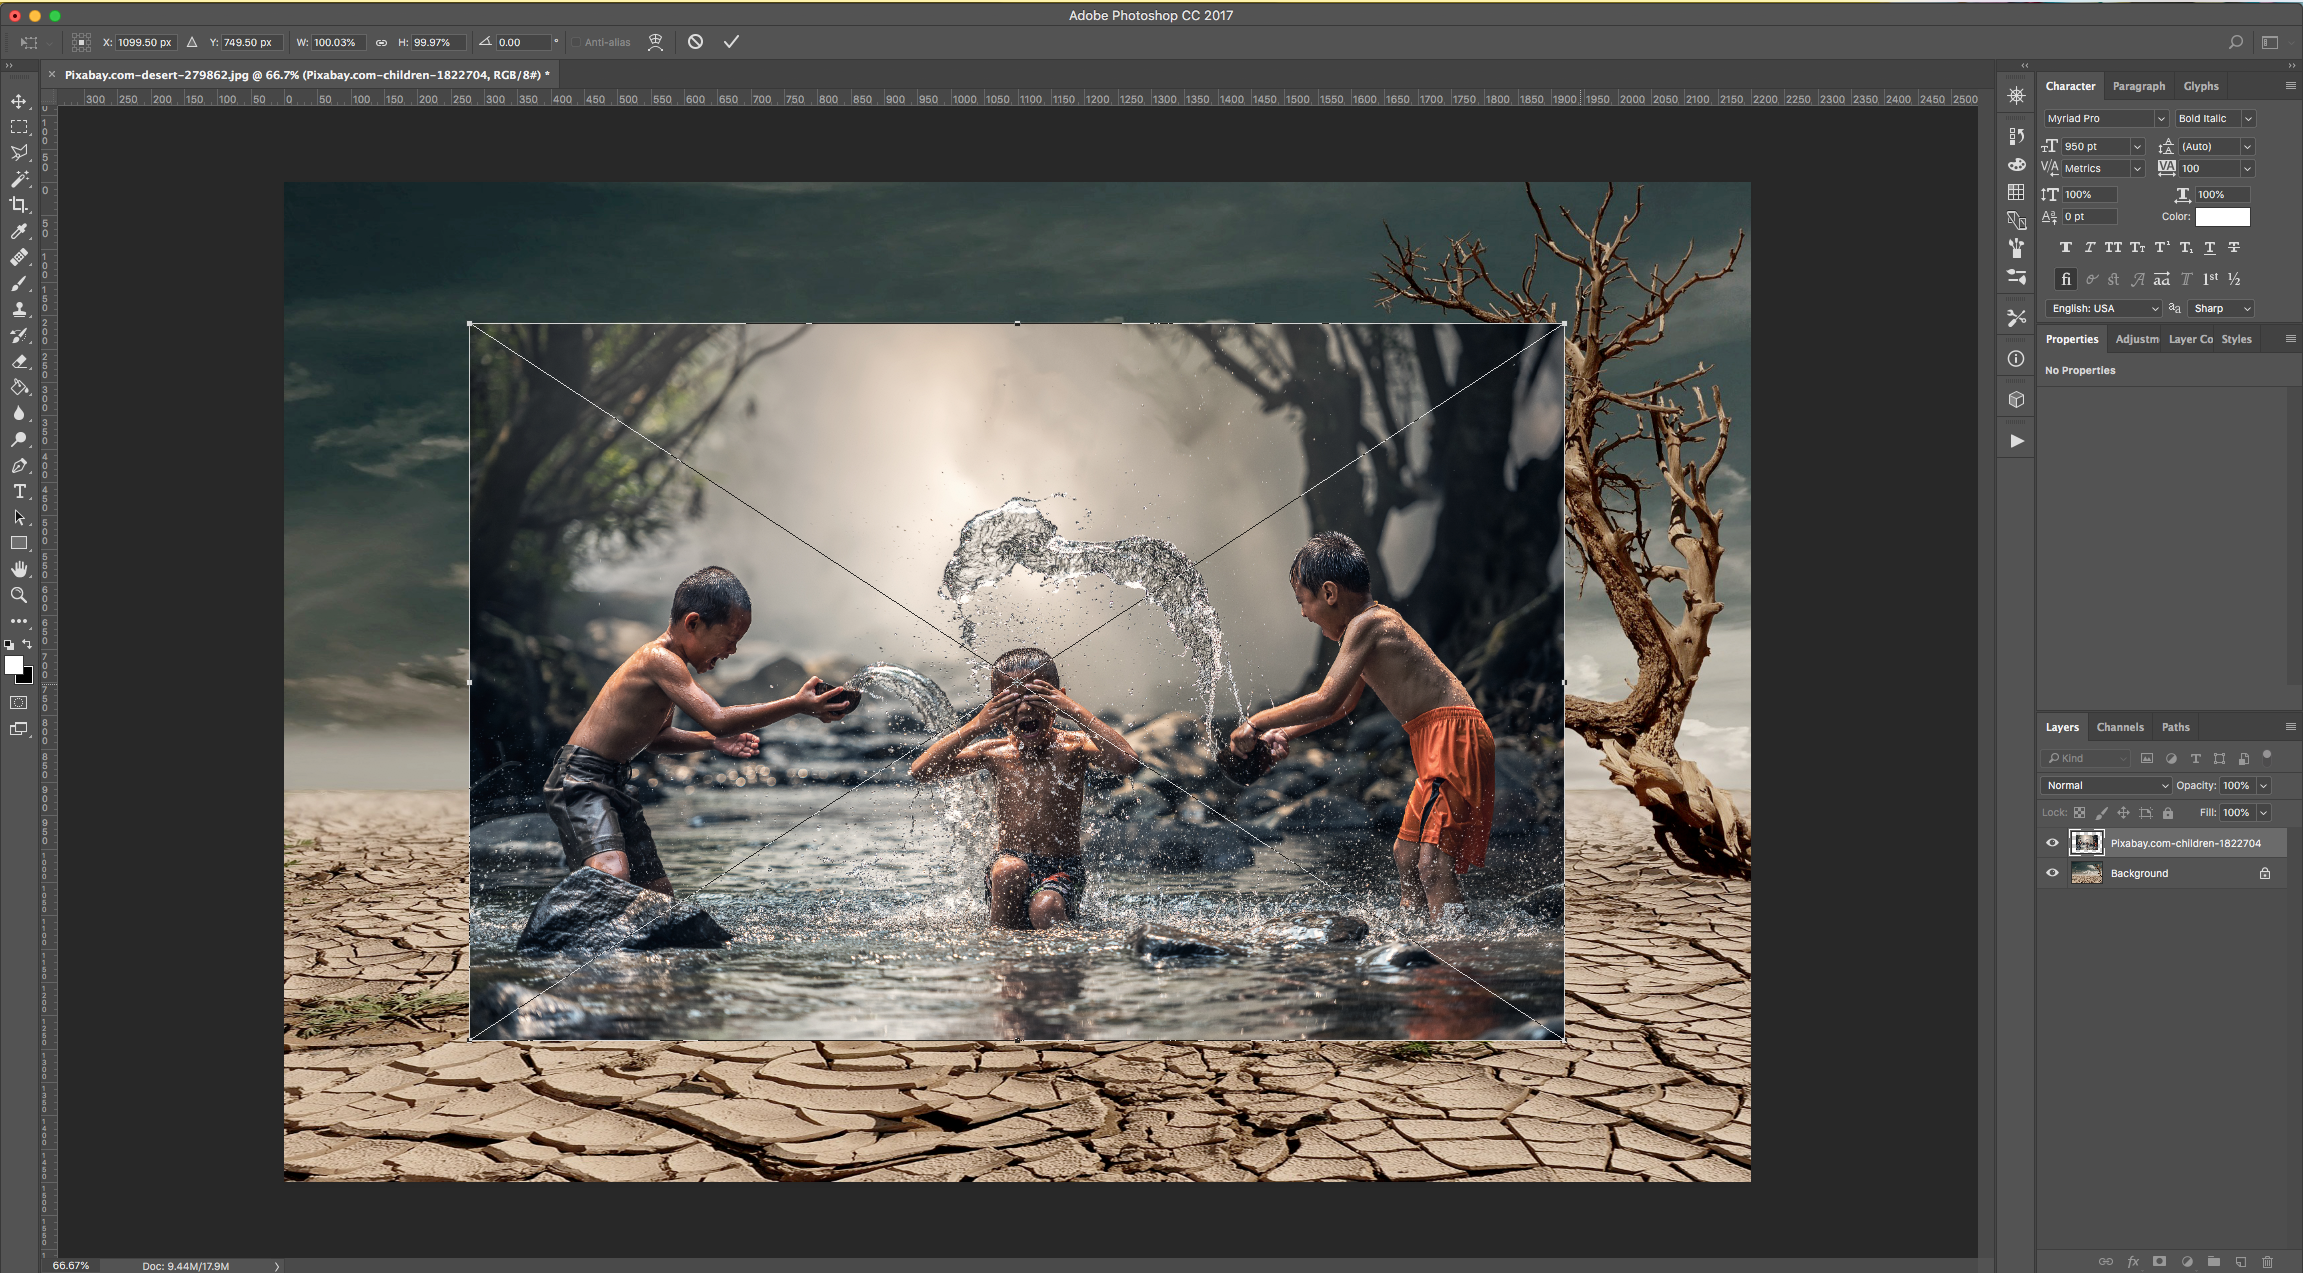
3 - Go to File > Place Embedded... and navigate to the other image you want to use. Select it and click “Place”.
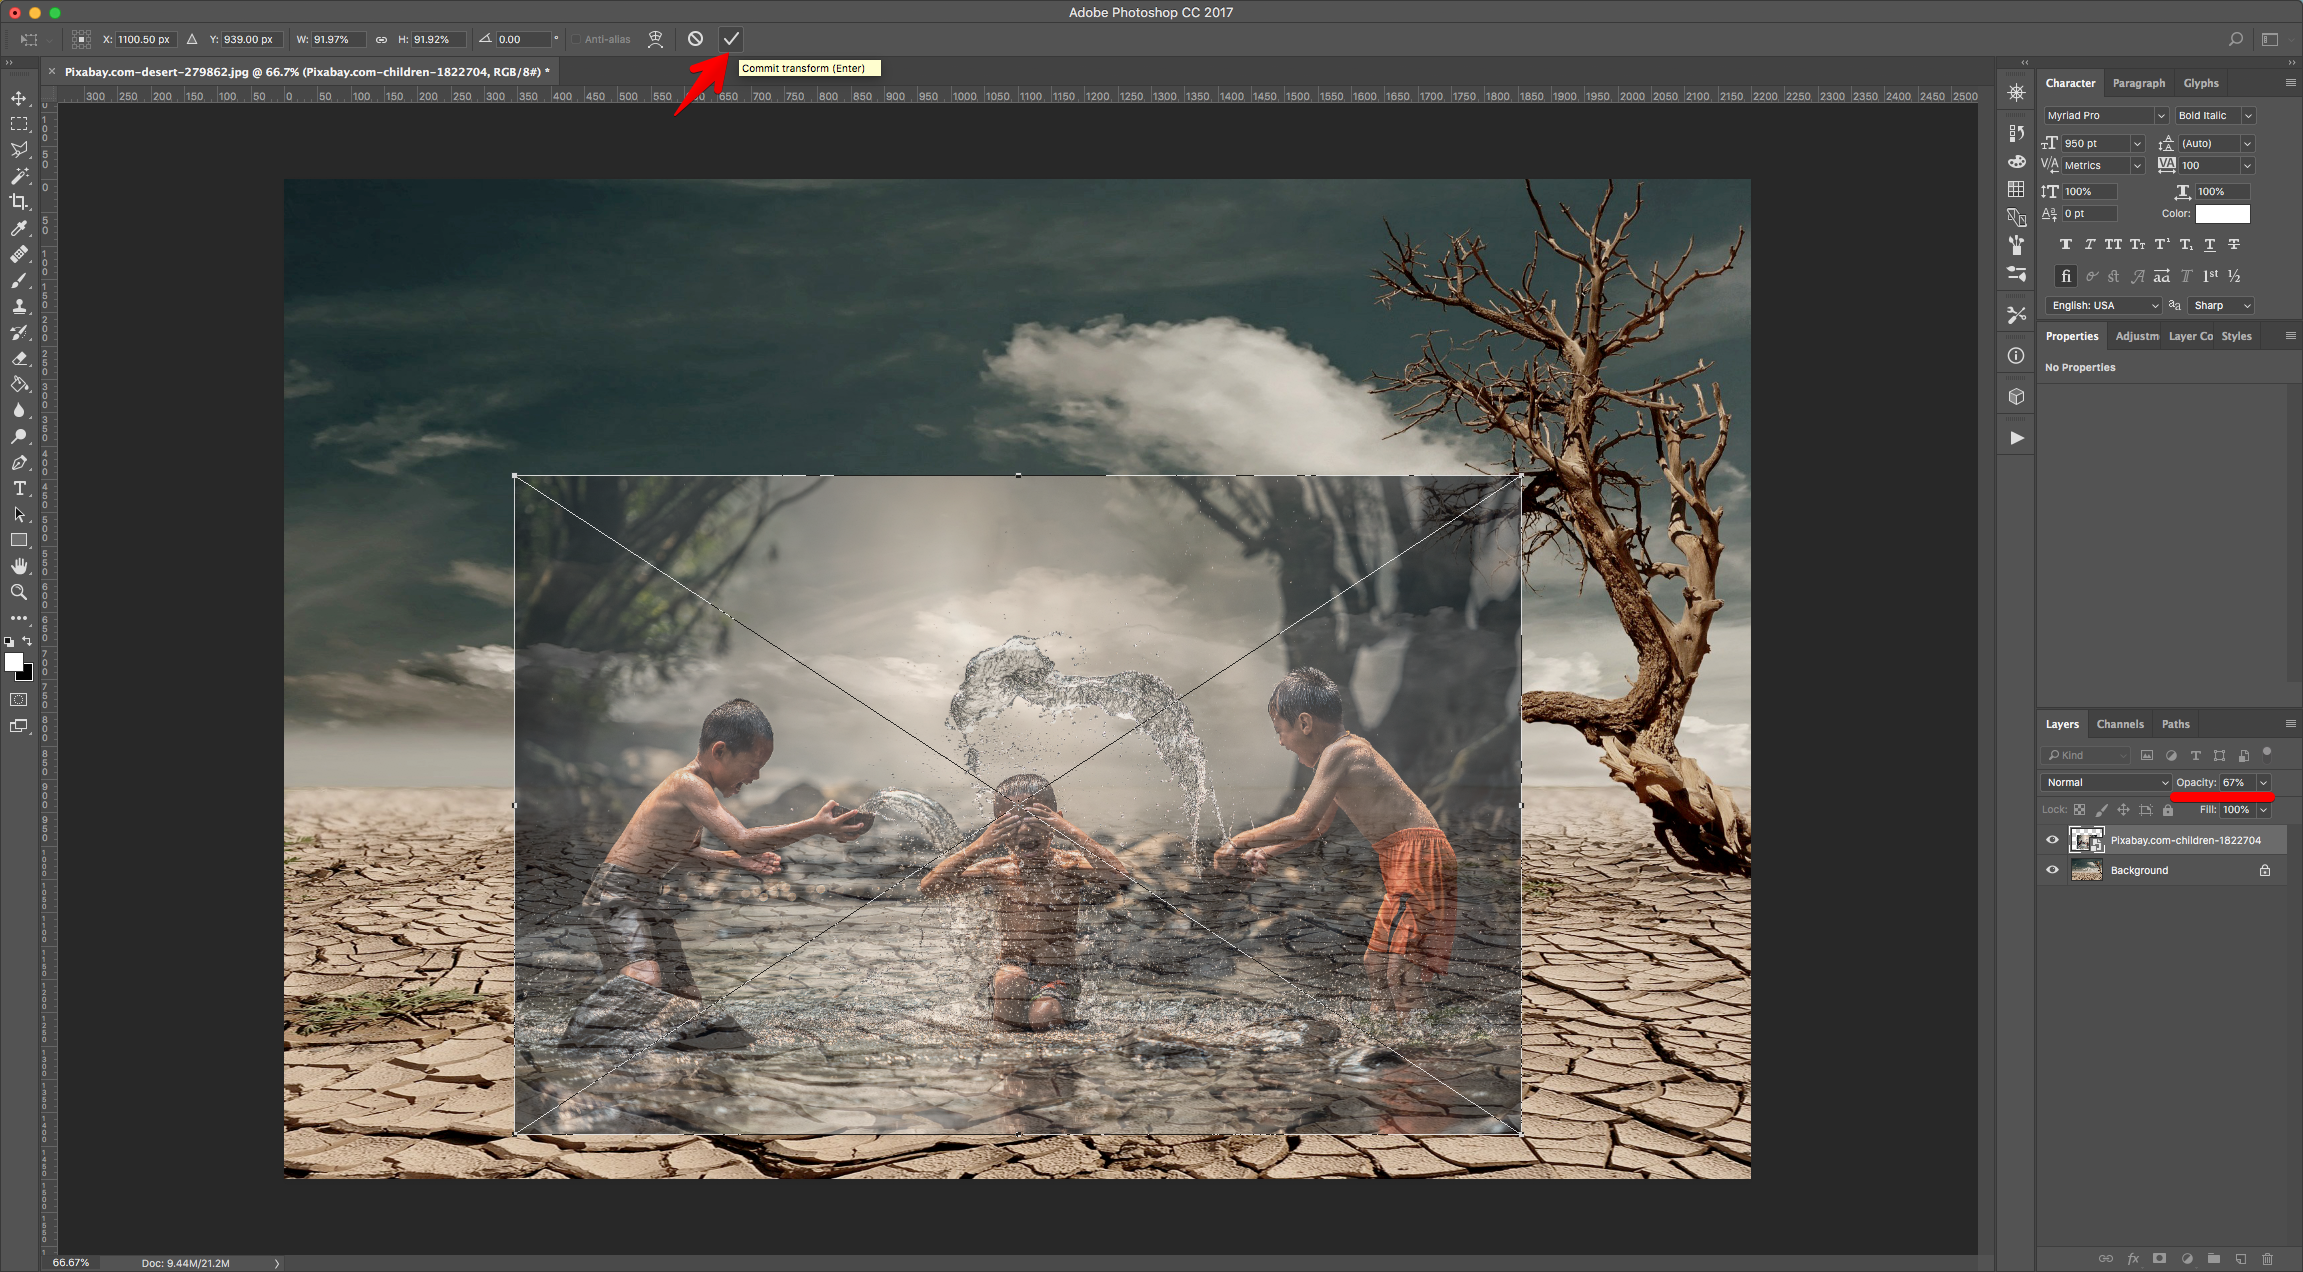
4 - Resize it if needed. You can lower the “Opacity” to achieve the proper placement and then click “Enter” or the small “Checkmark” on the Top Menu to “Commit Transform”.
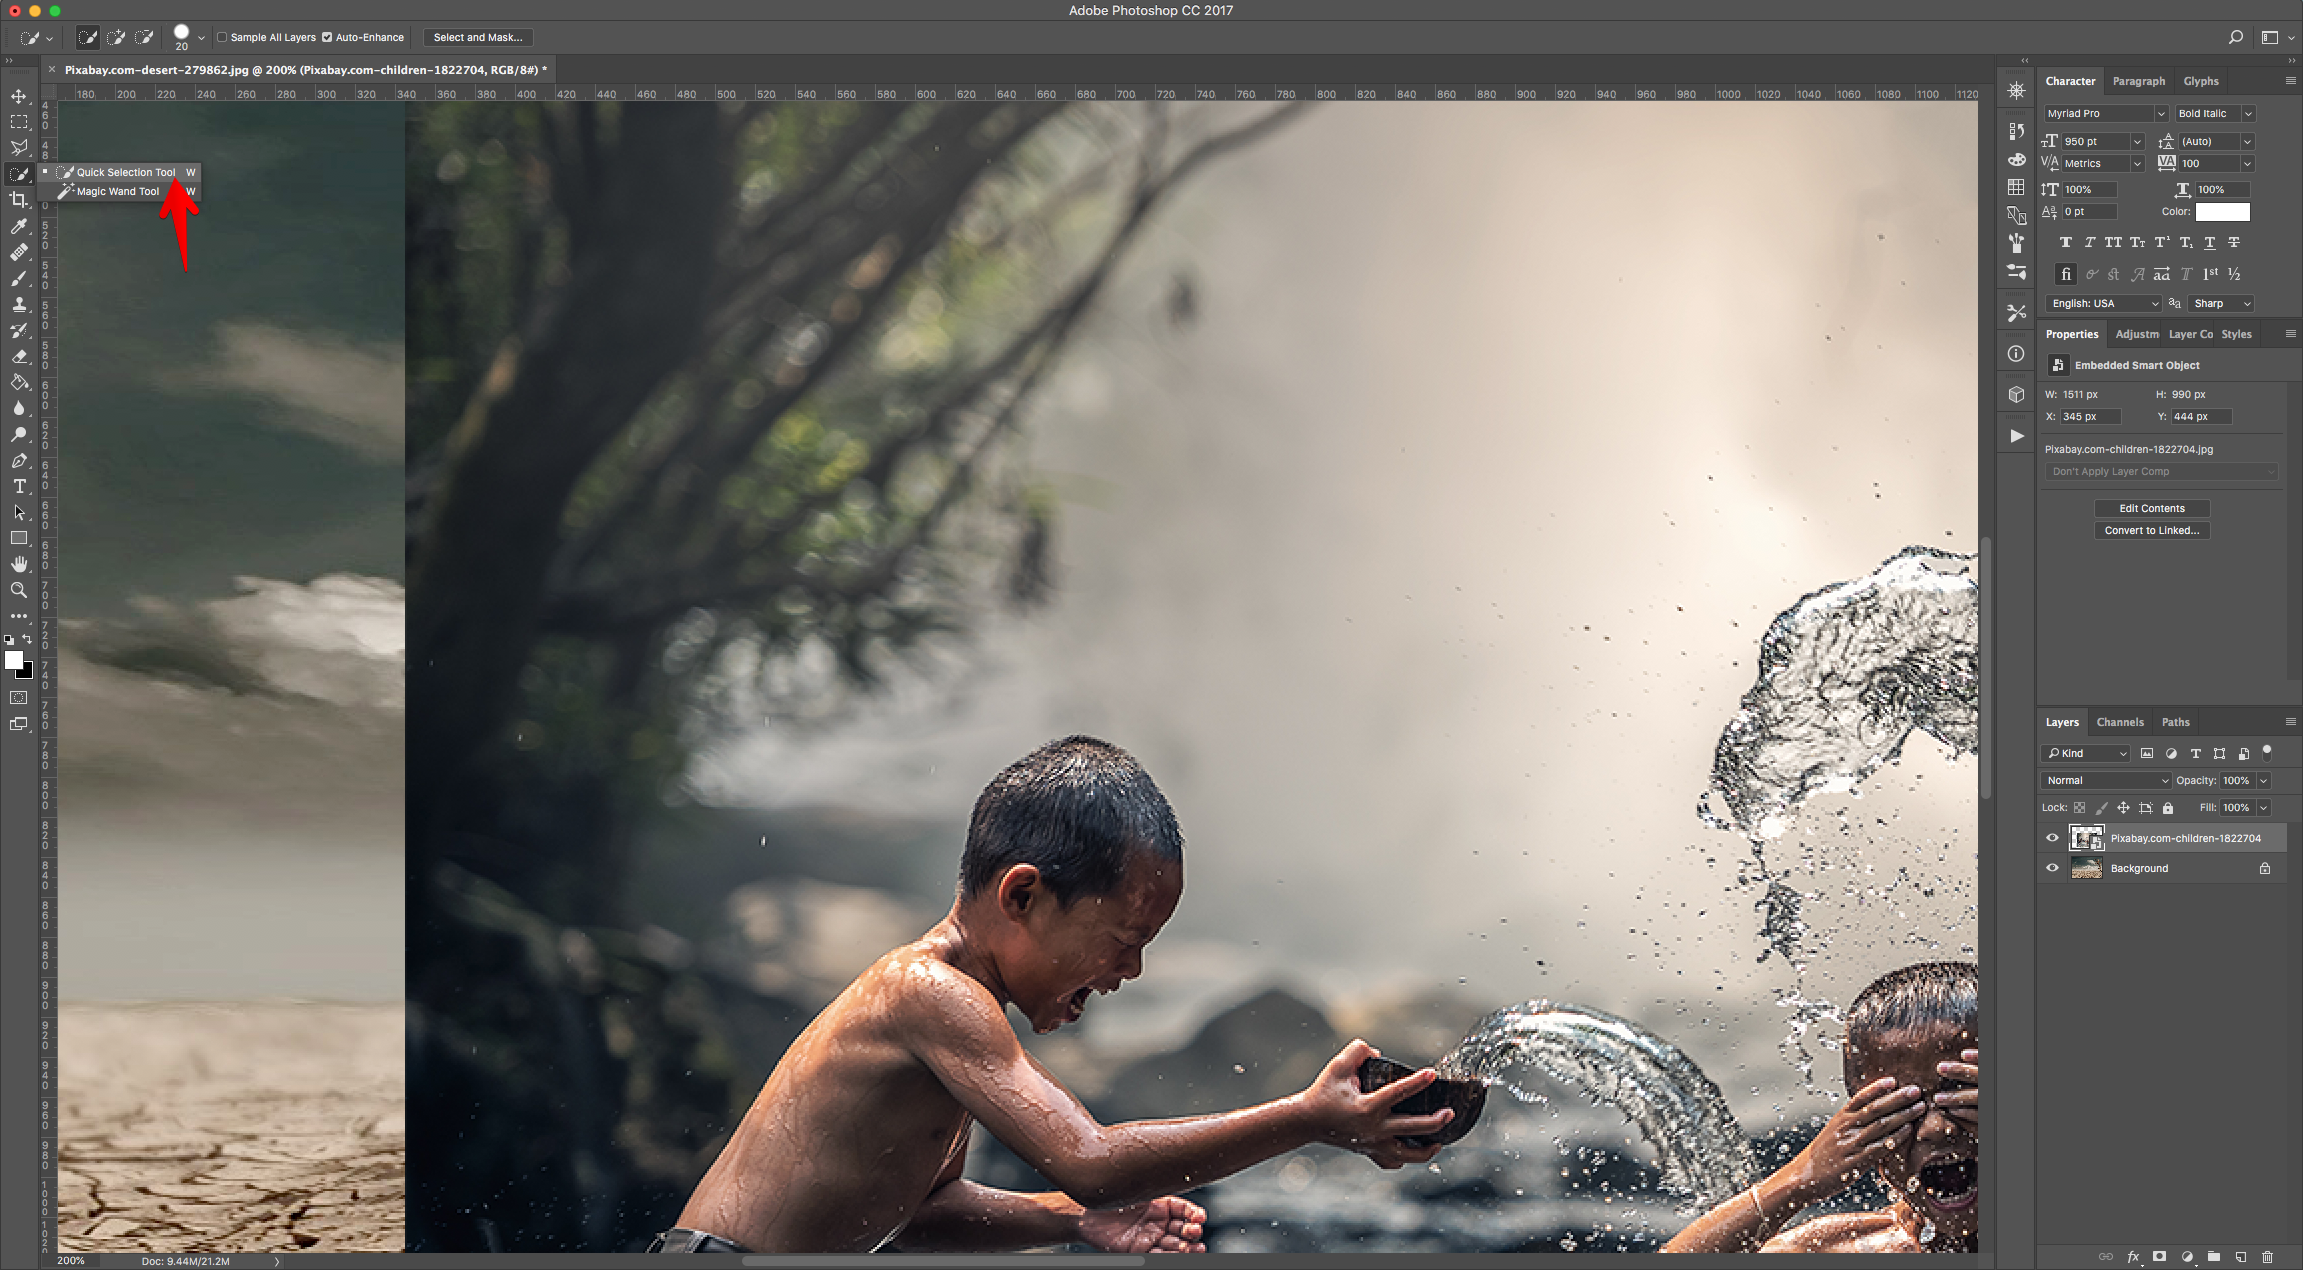
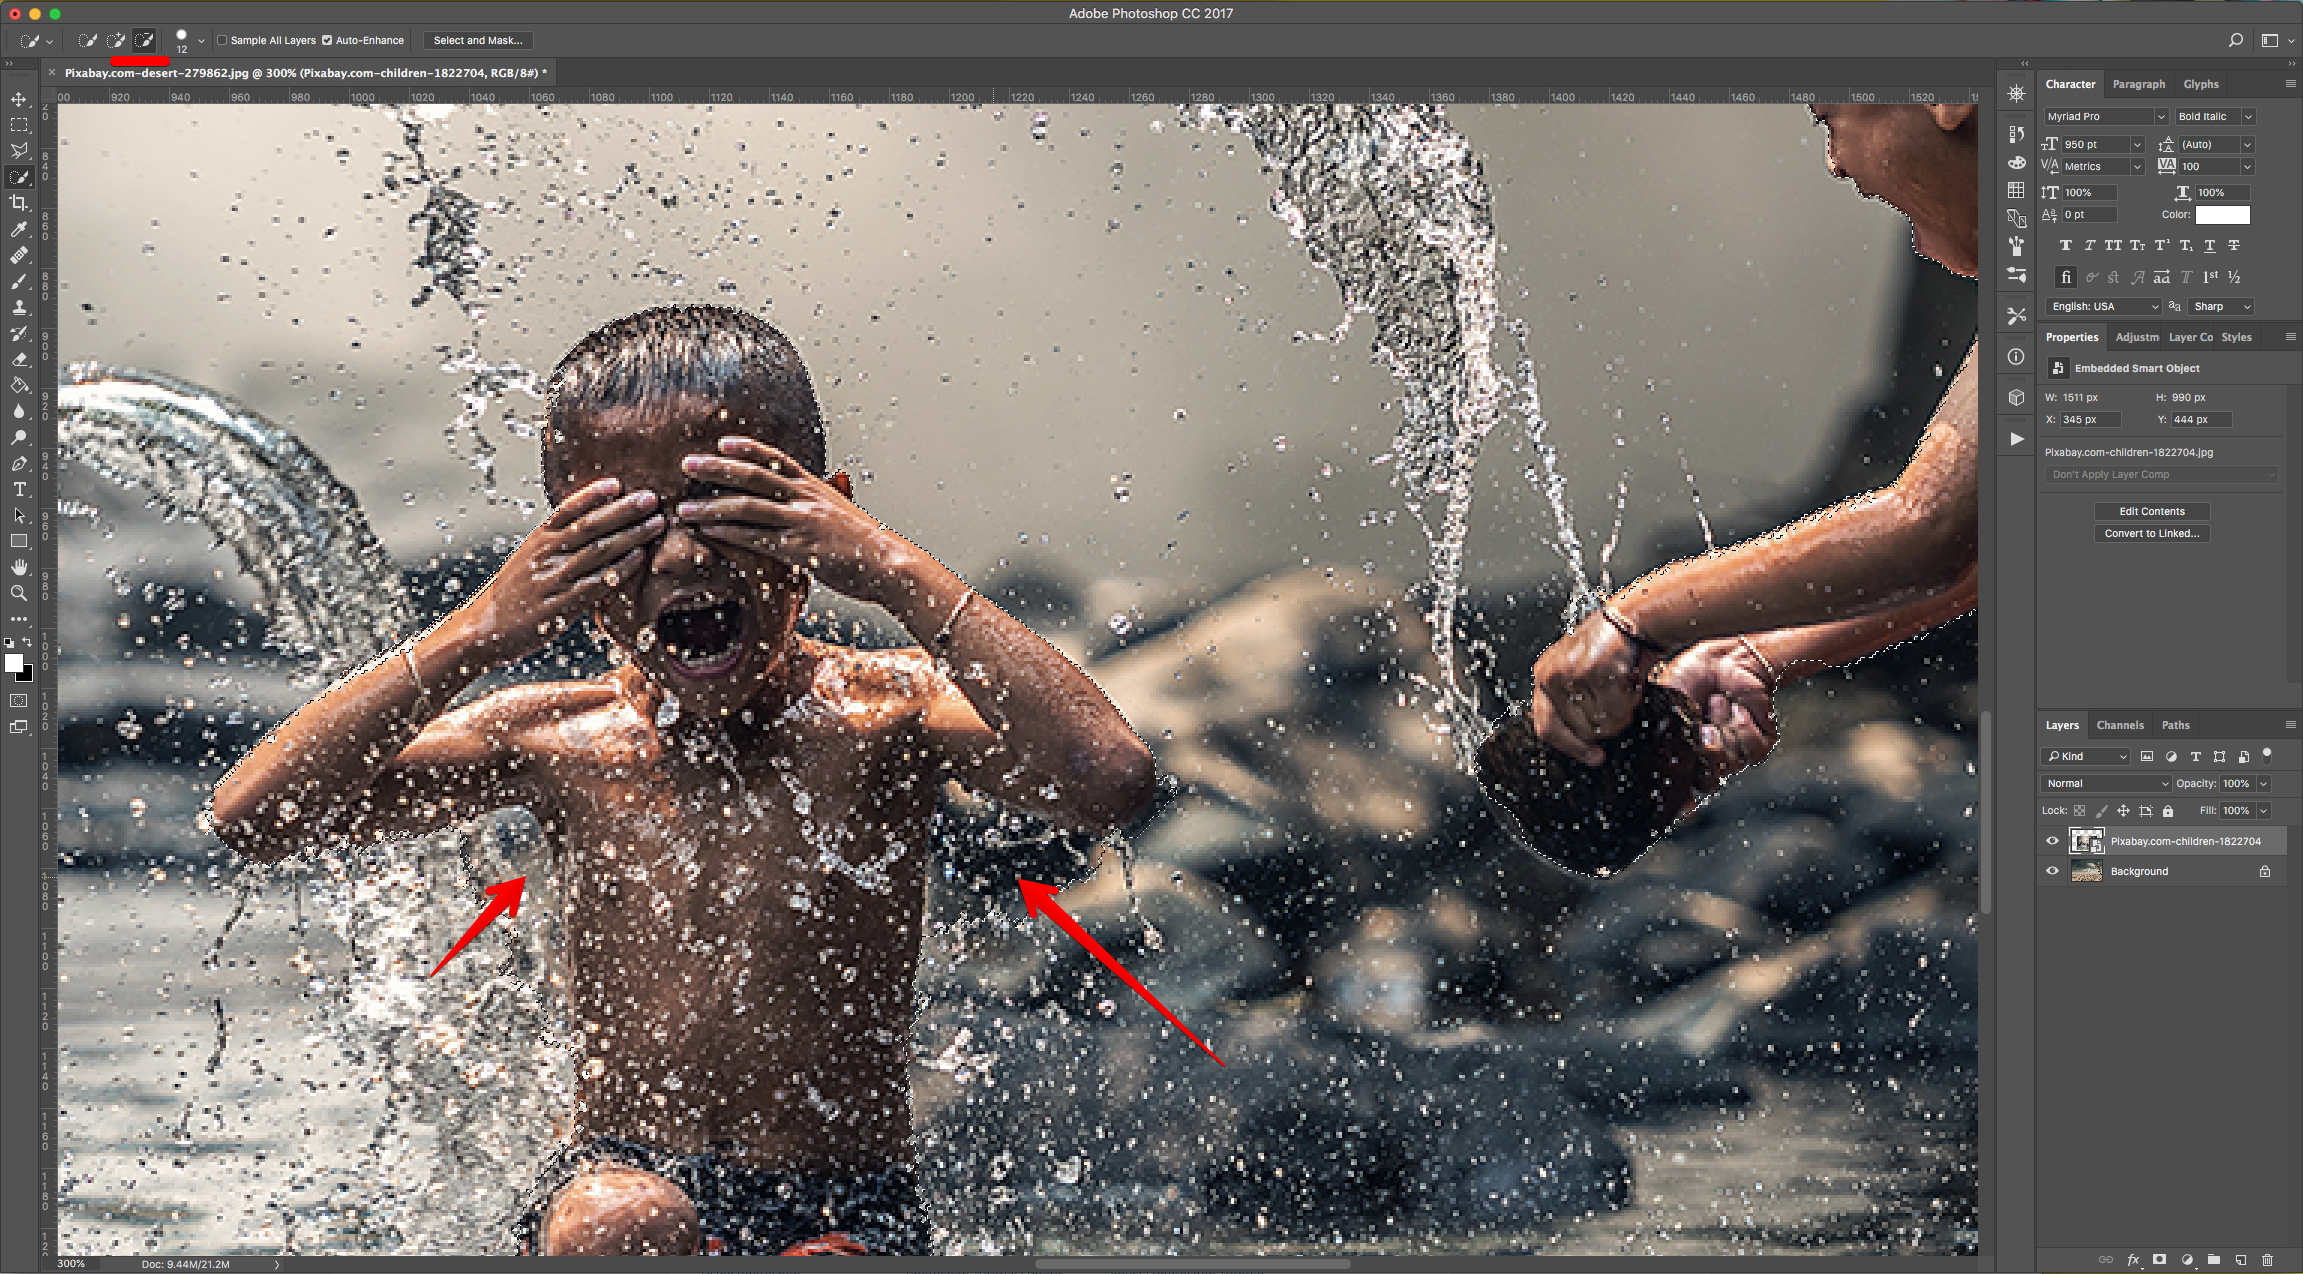
5 - Turn the “Opacity” back to 100% and use The “Quick Selection Tool” to select the parts of the front image you wish to keep. Use the “Add to Selection” option in the Top Menu if needed.
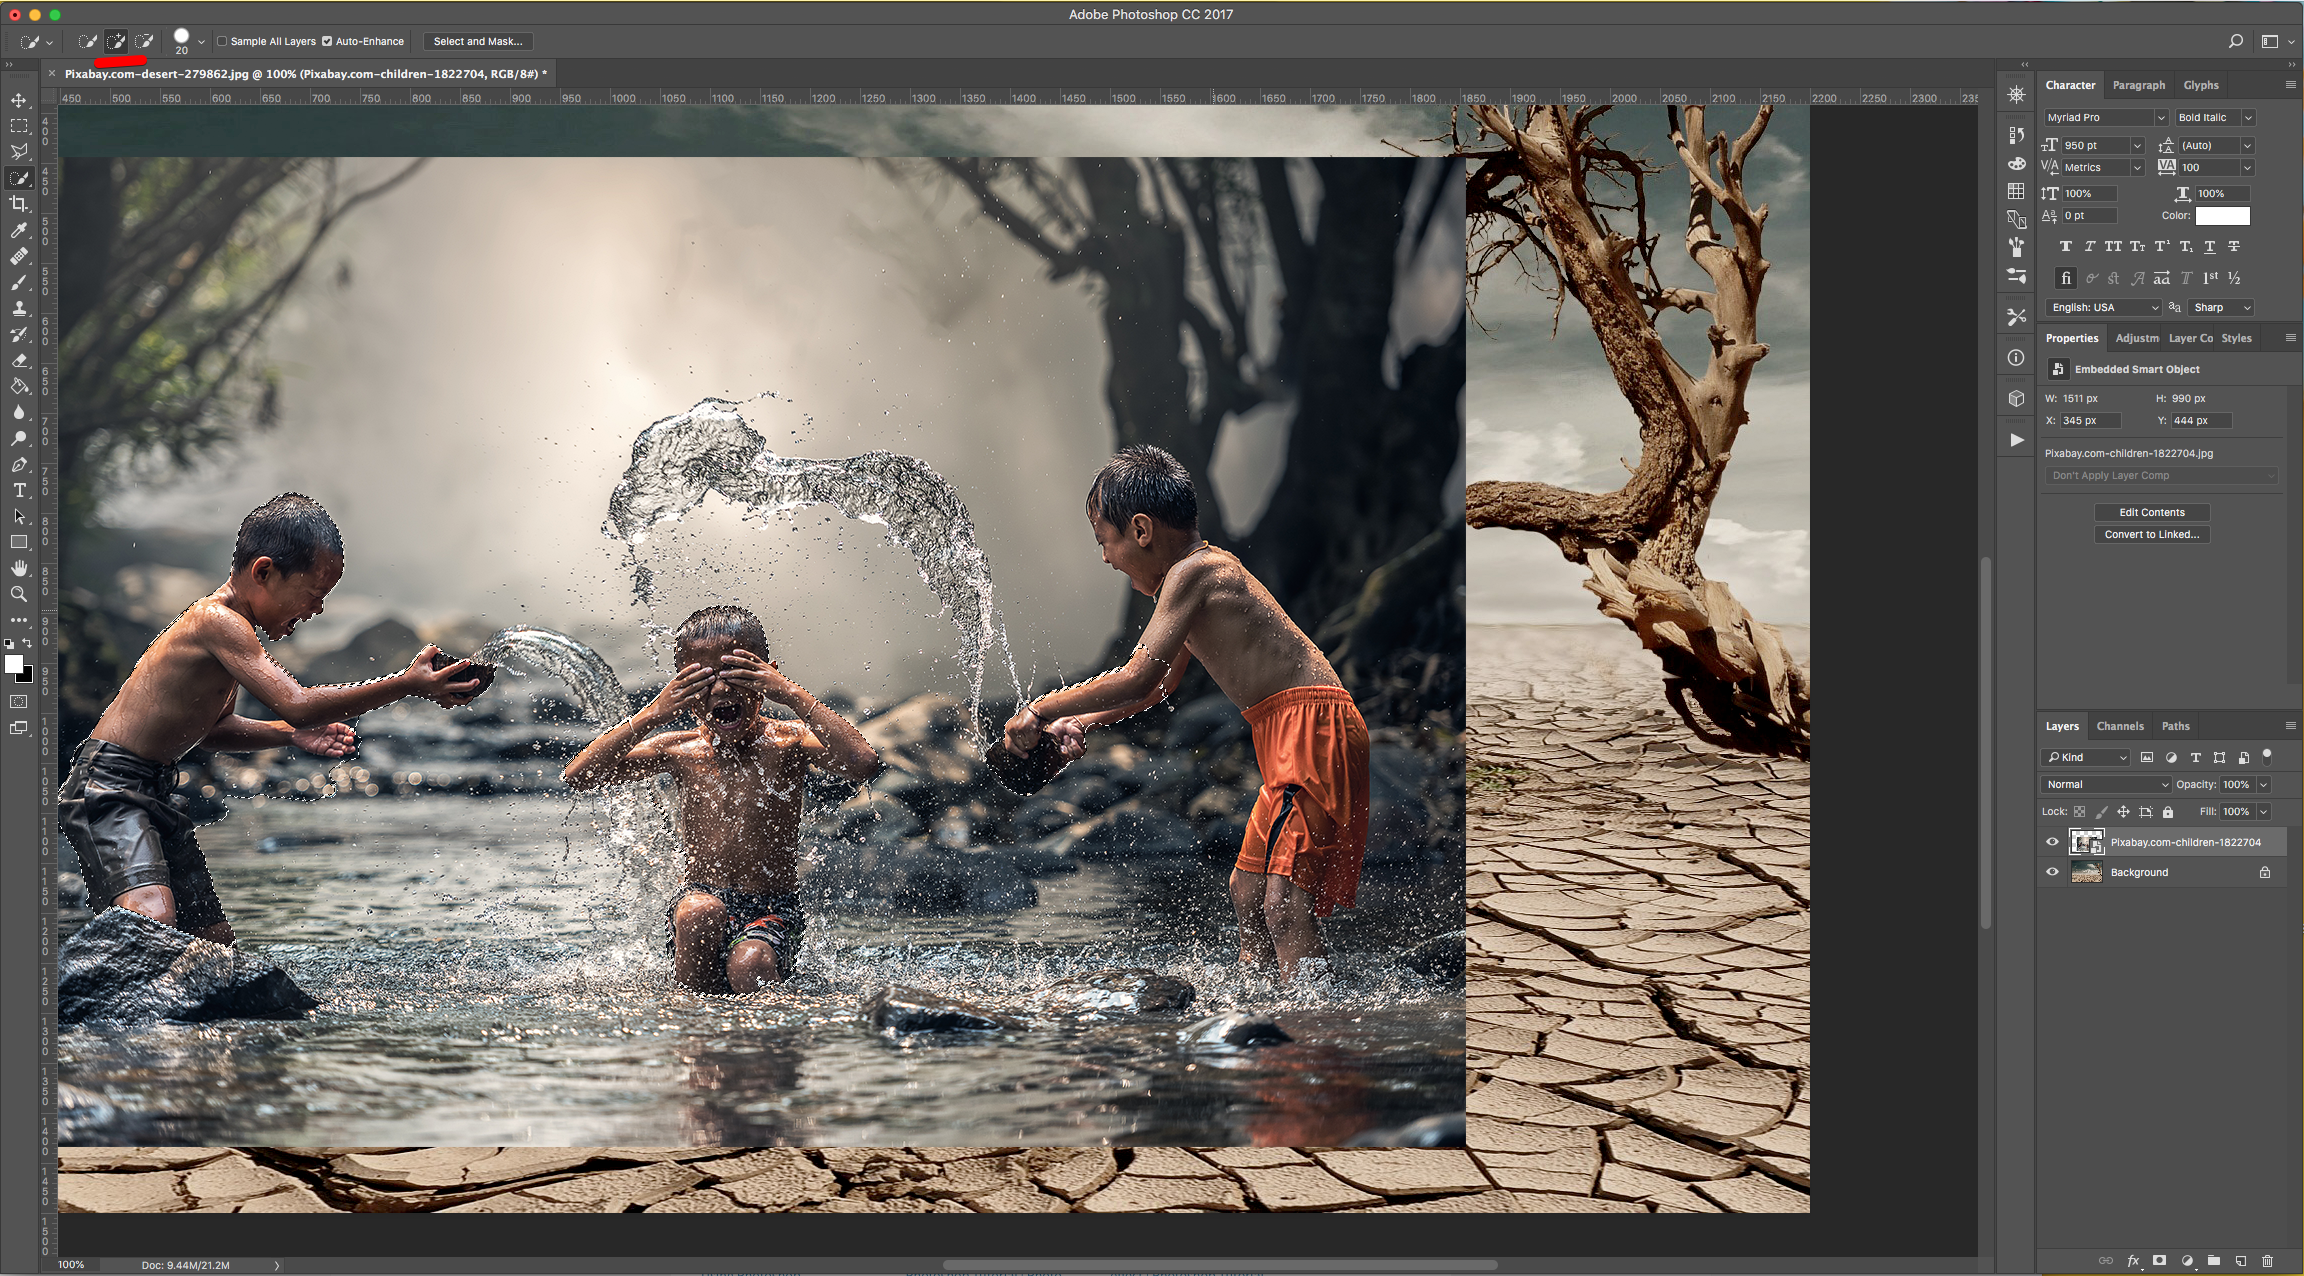
6 - Then, the “Remove” from Selection option to clean up the parts you don’t want.
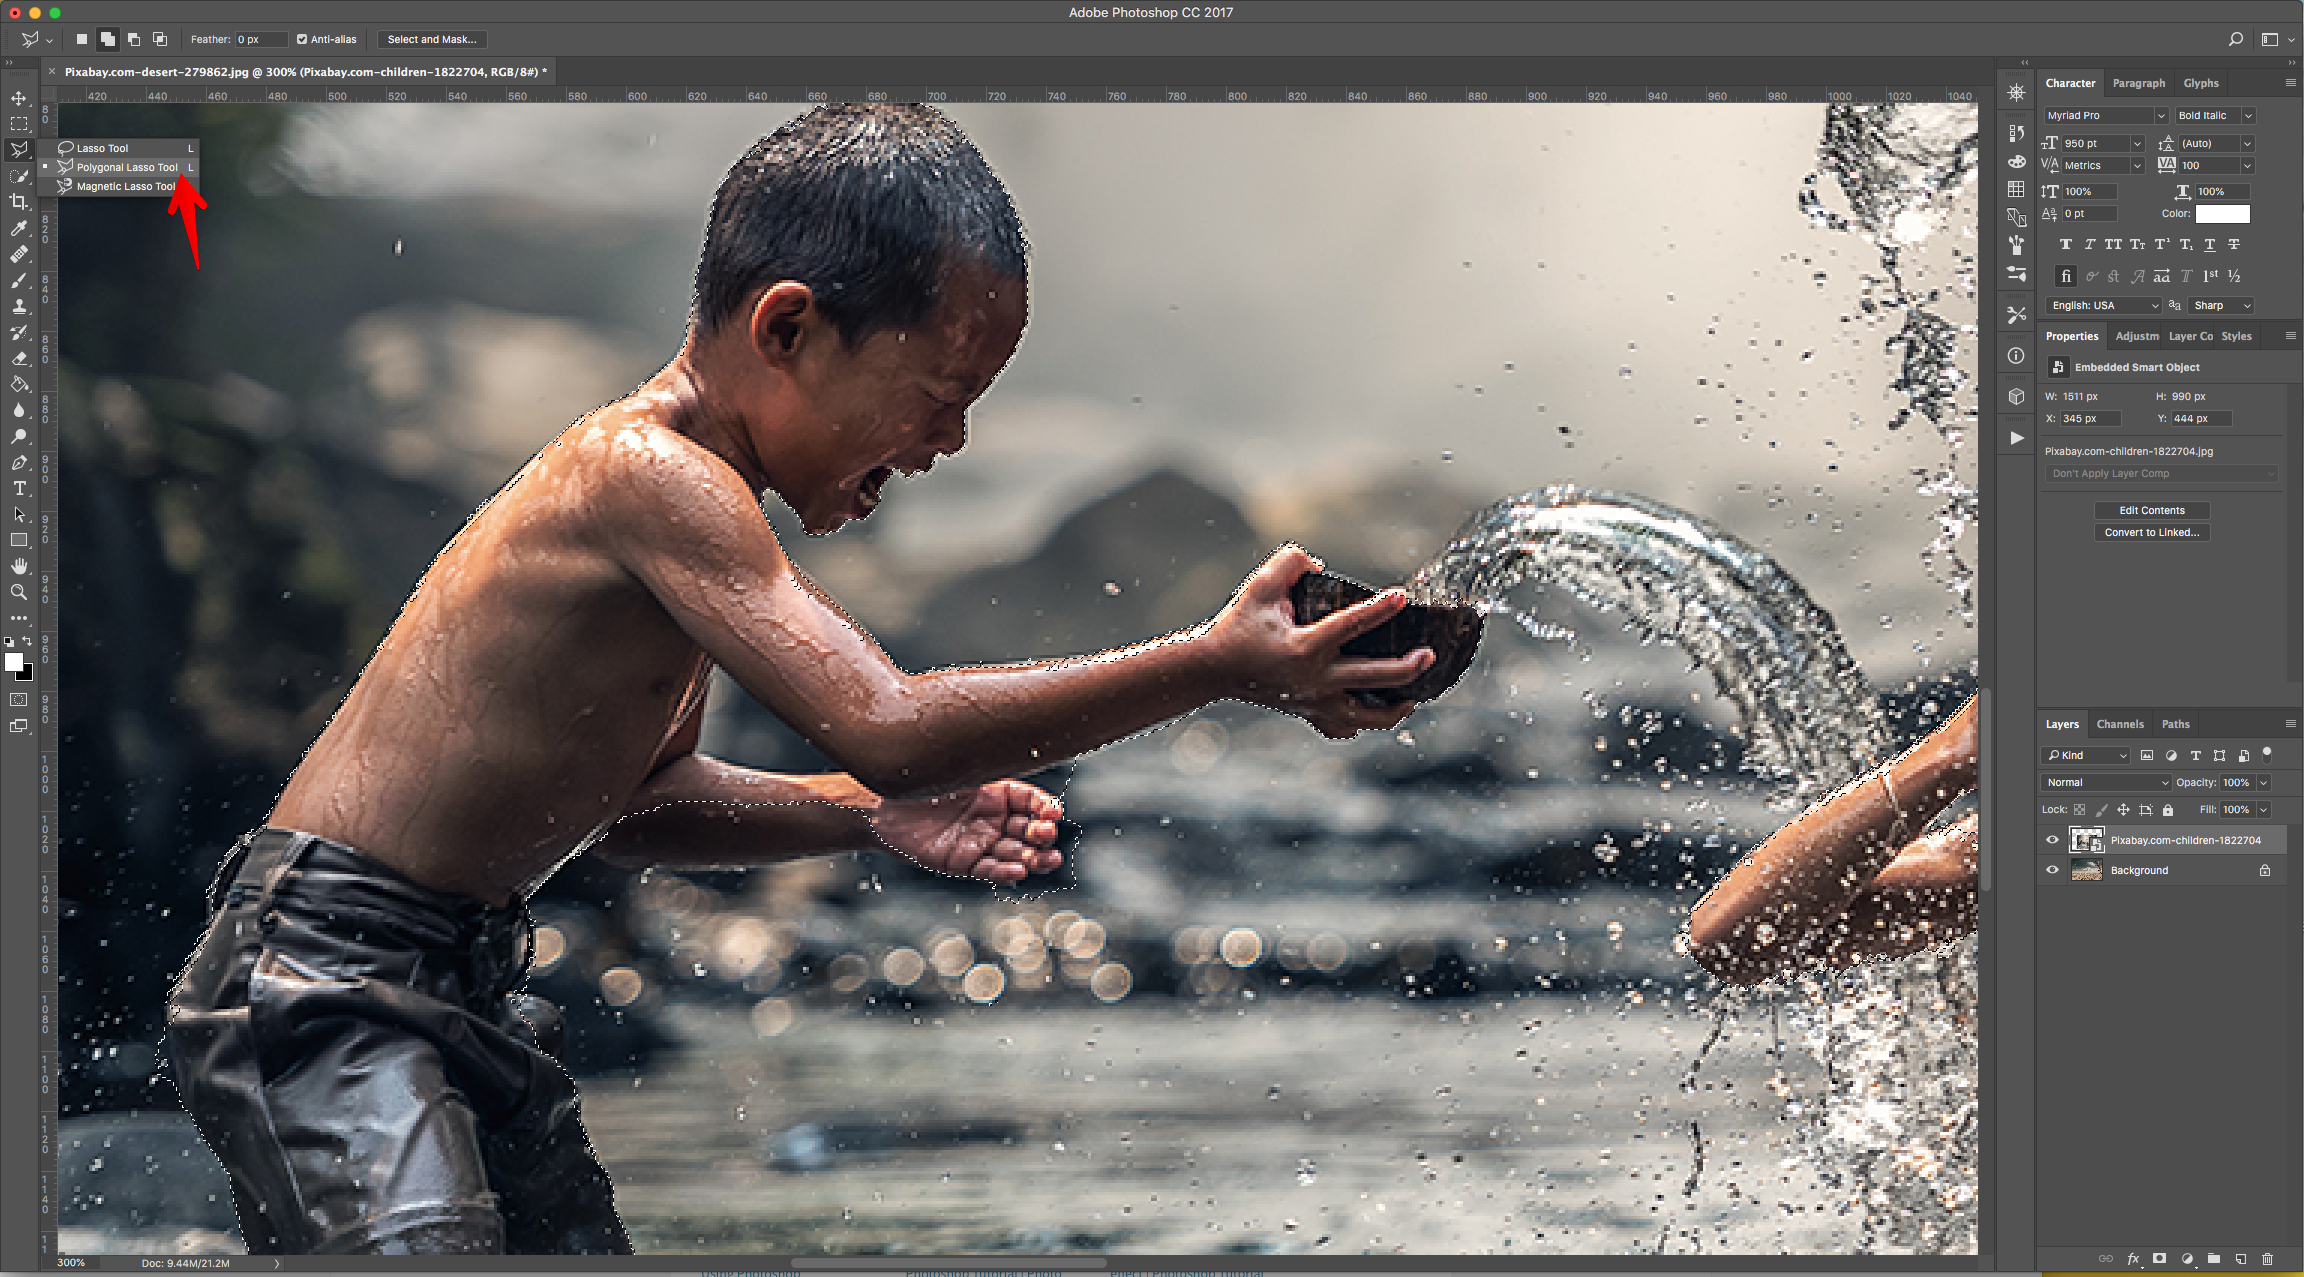
7 - You can use the “Polygonal Lasso Tool” (L) to clean the selection further. But, remember that it doesn’t need to be perfect.

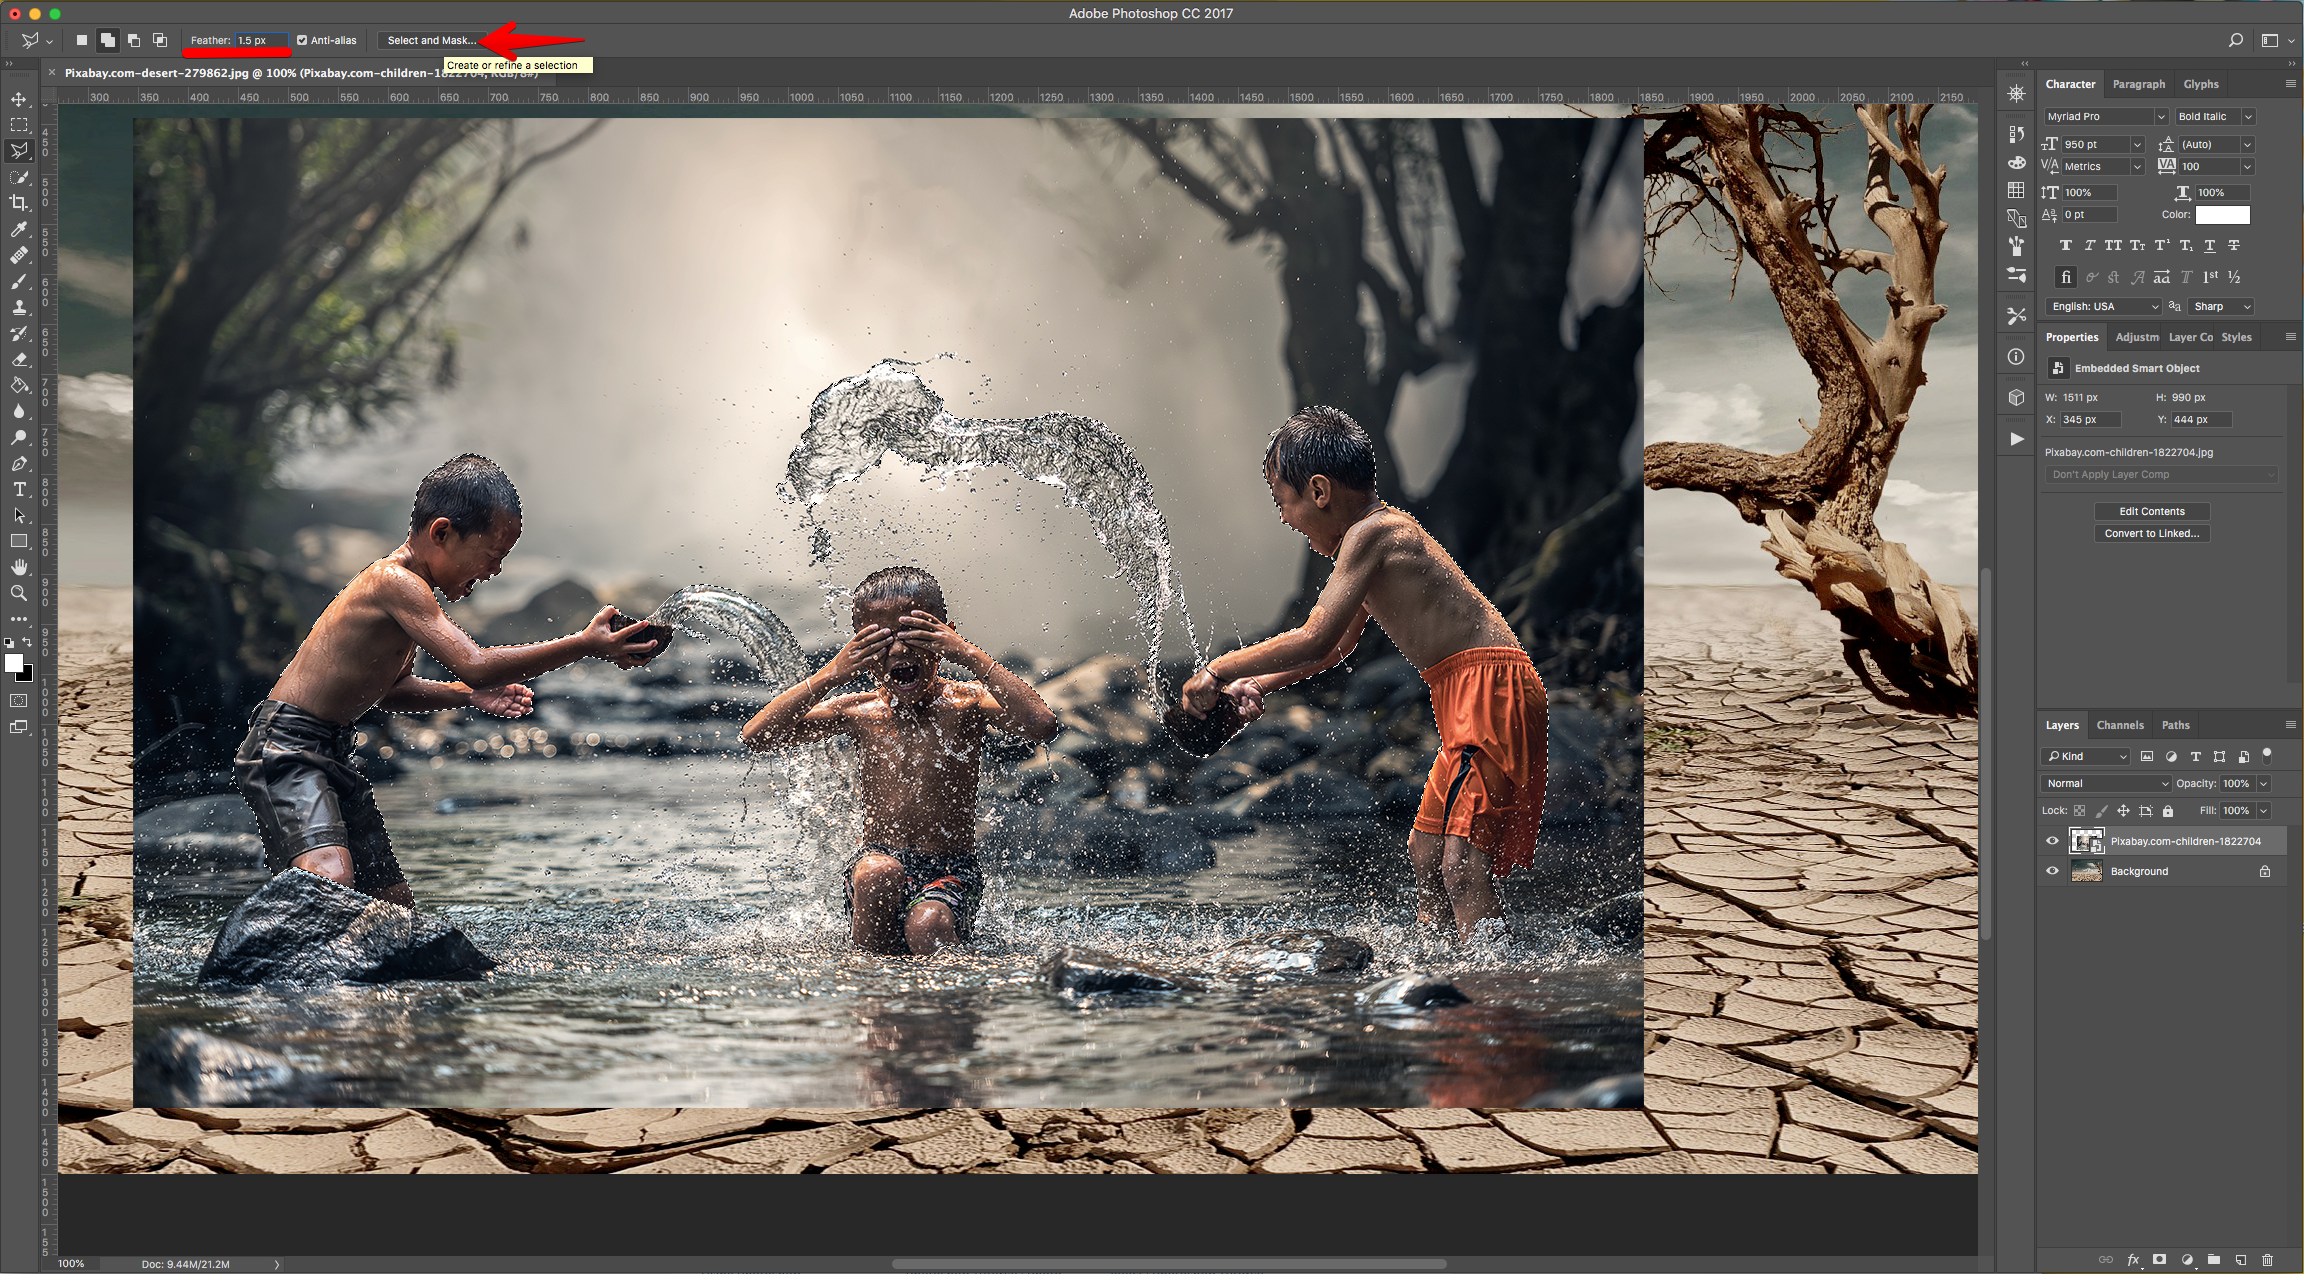
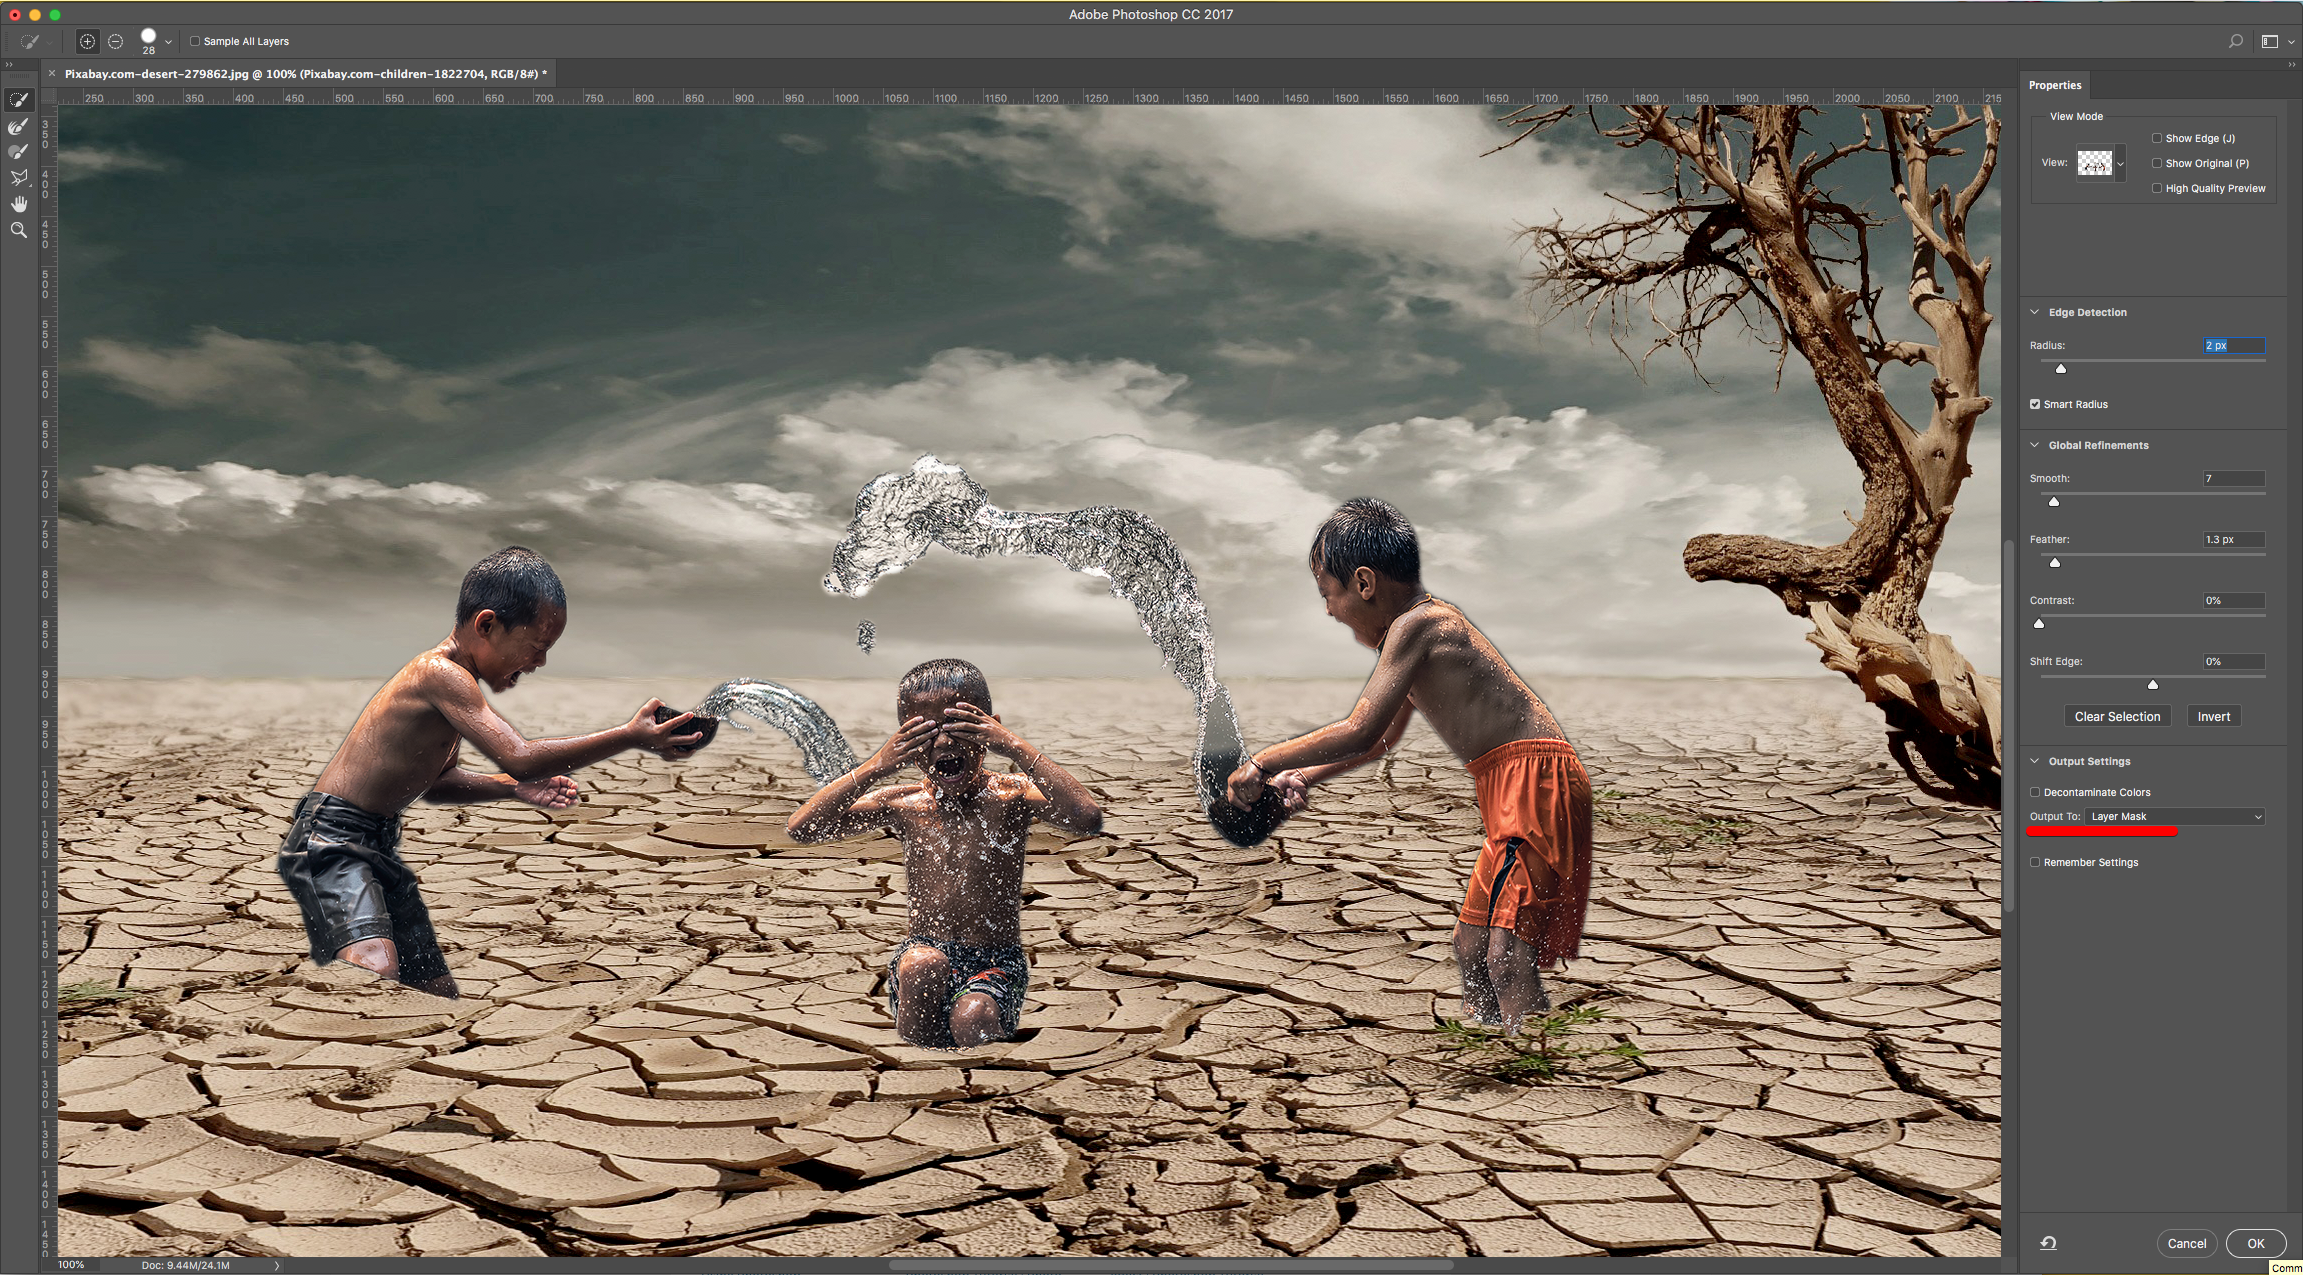
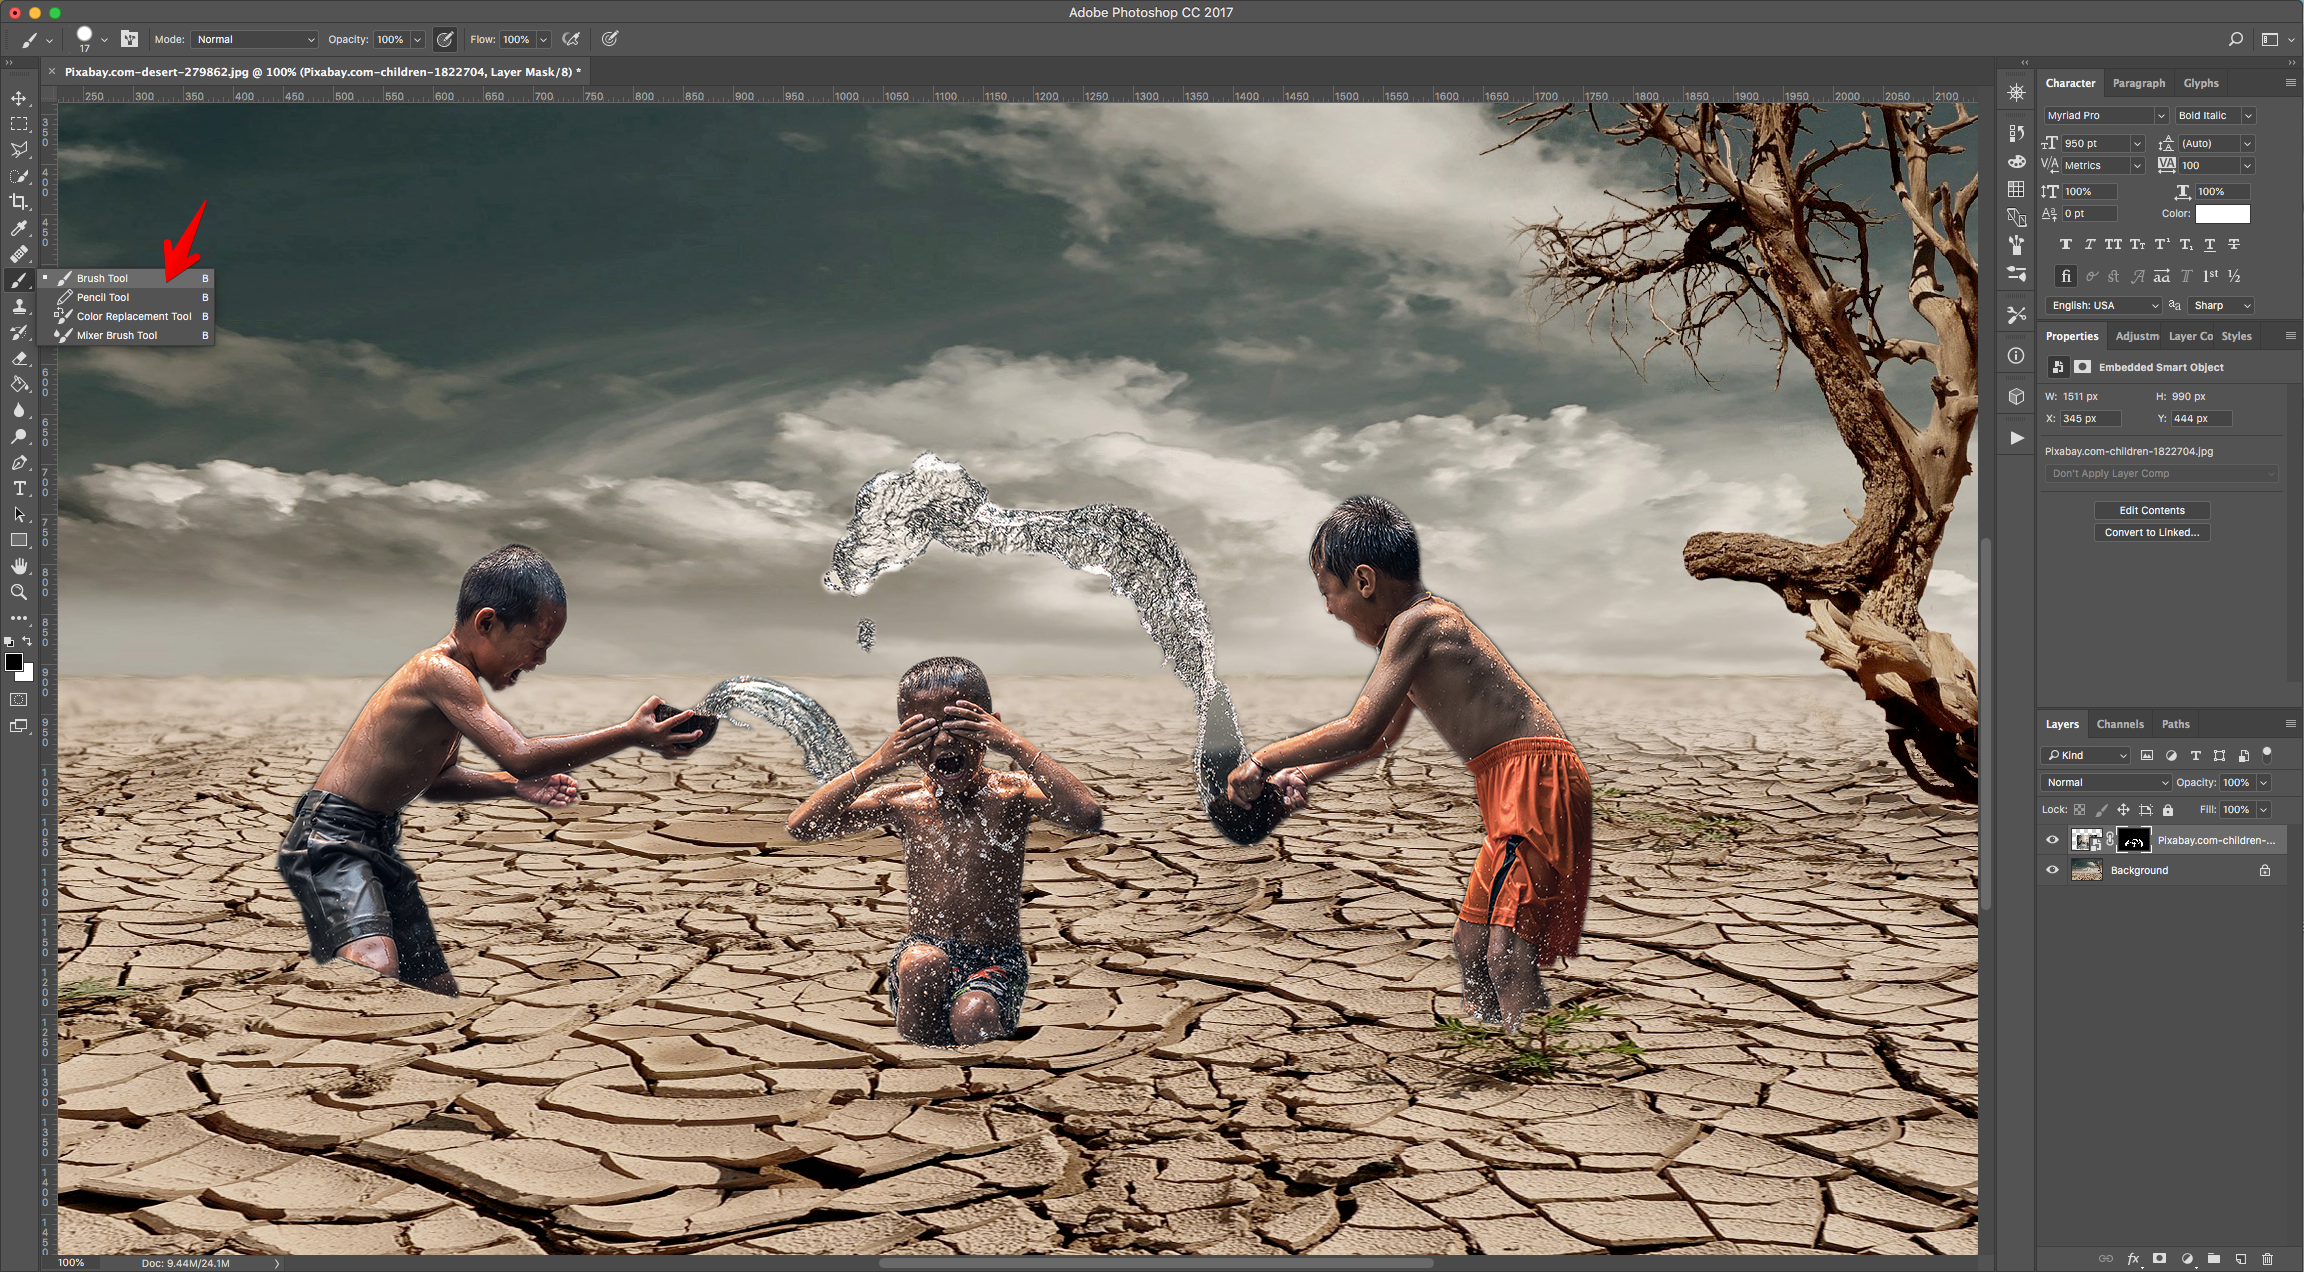
8 - In the Top Menu add a “Feather” of 1.5 px and click on the “Select and Mask” button. Change the “Radius” and other options if needed and choose “Output to Layer Mask”.
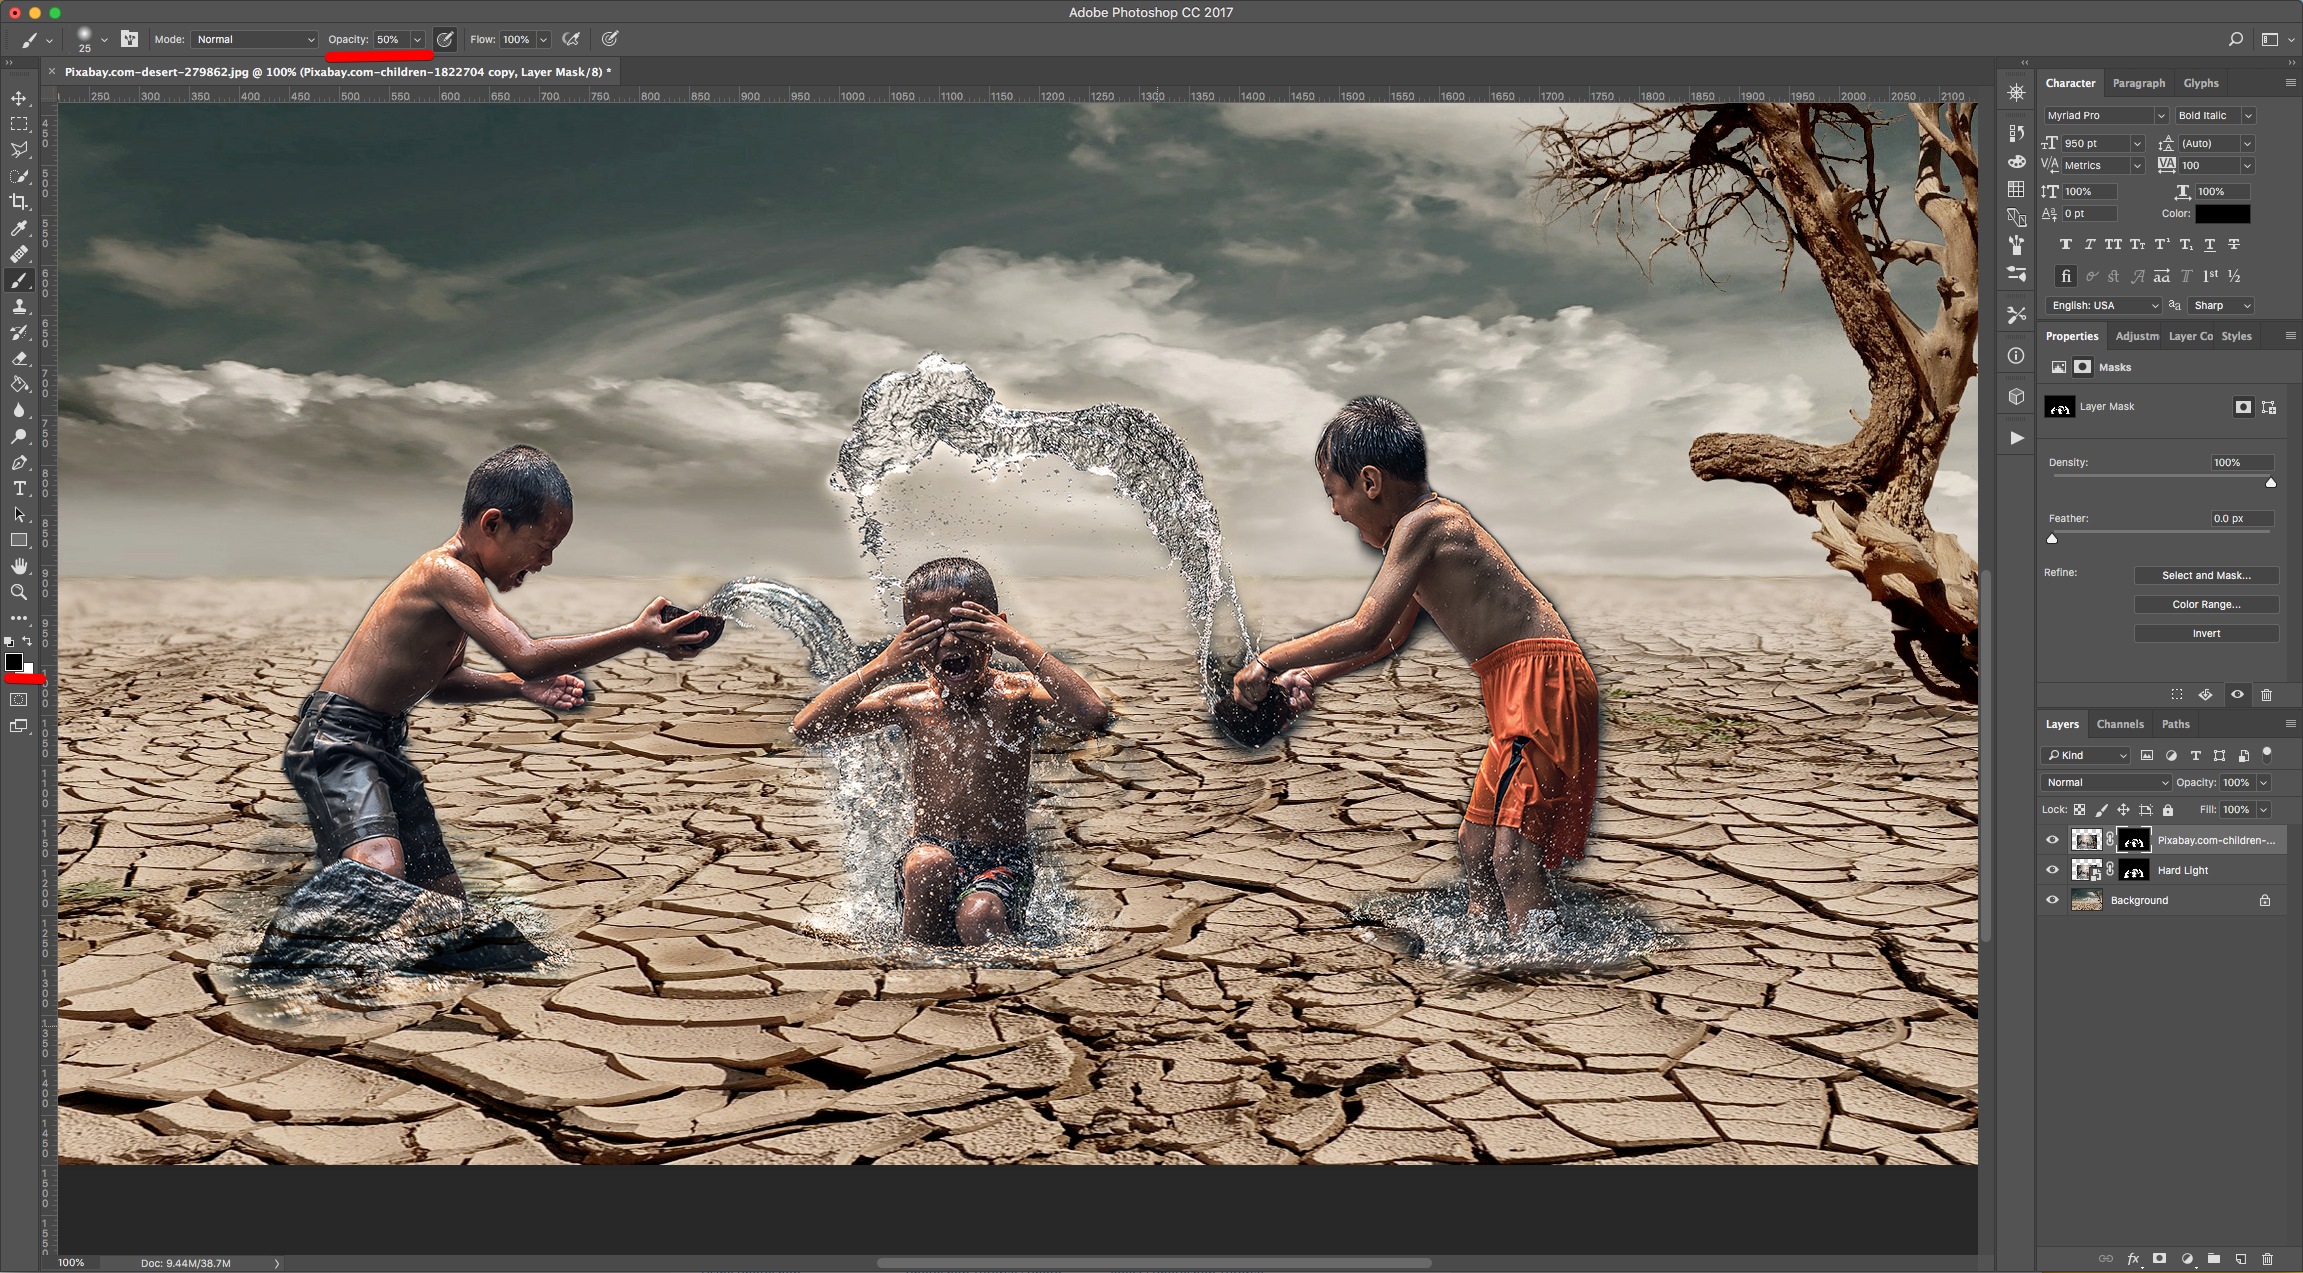
9 - Male sure the “Mask” Thumbnail is selected and use the “Brush Tool” (B) with a Medium and Soft brush (49 px and 0% “Hardness”) to bring out some of the Water around your subject. Remember to make sure that White is your “Foreground” color.
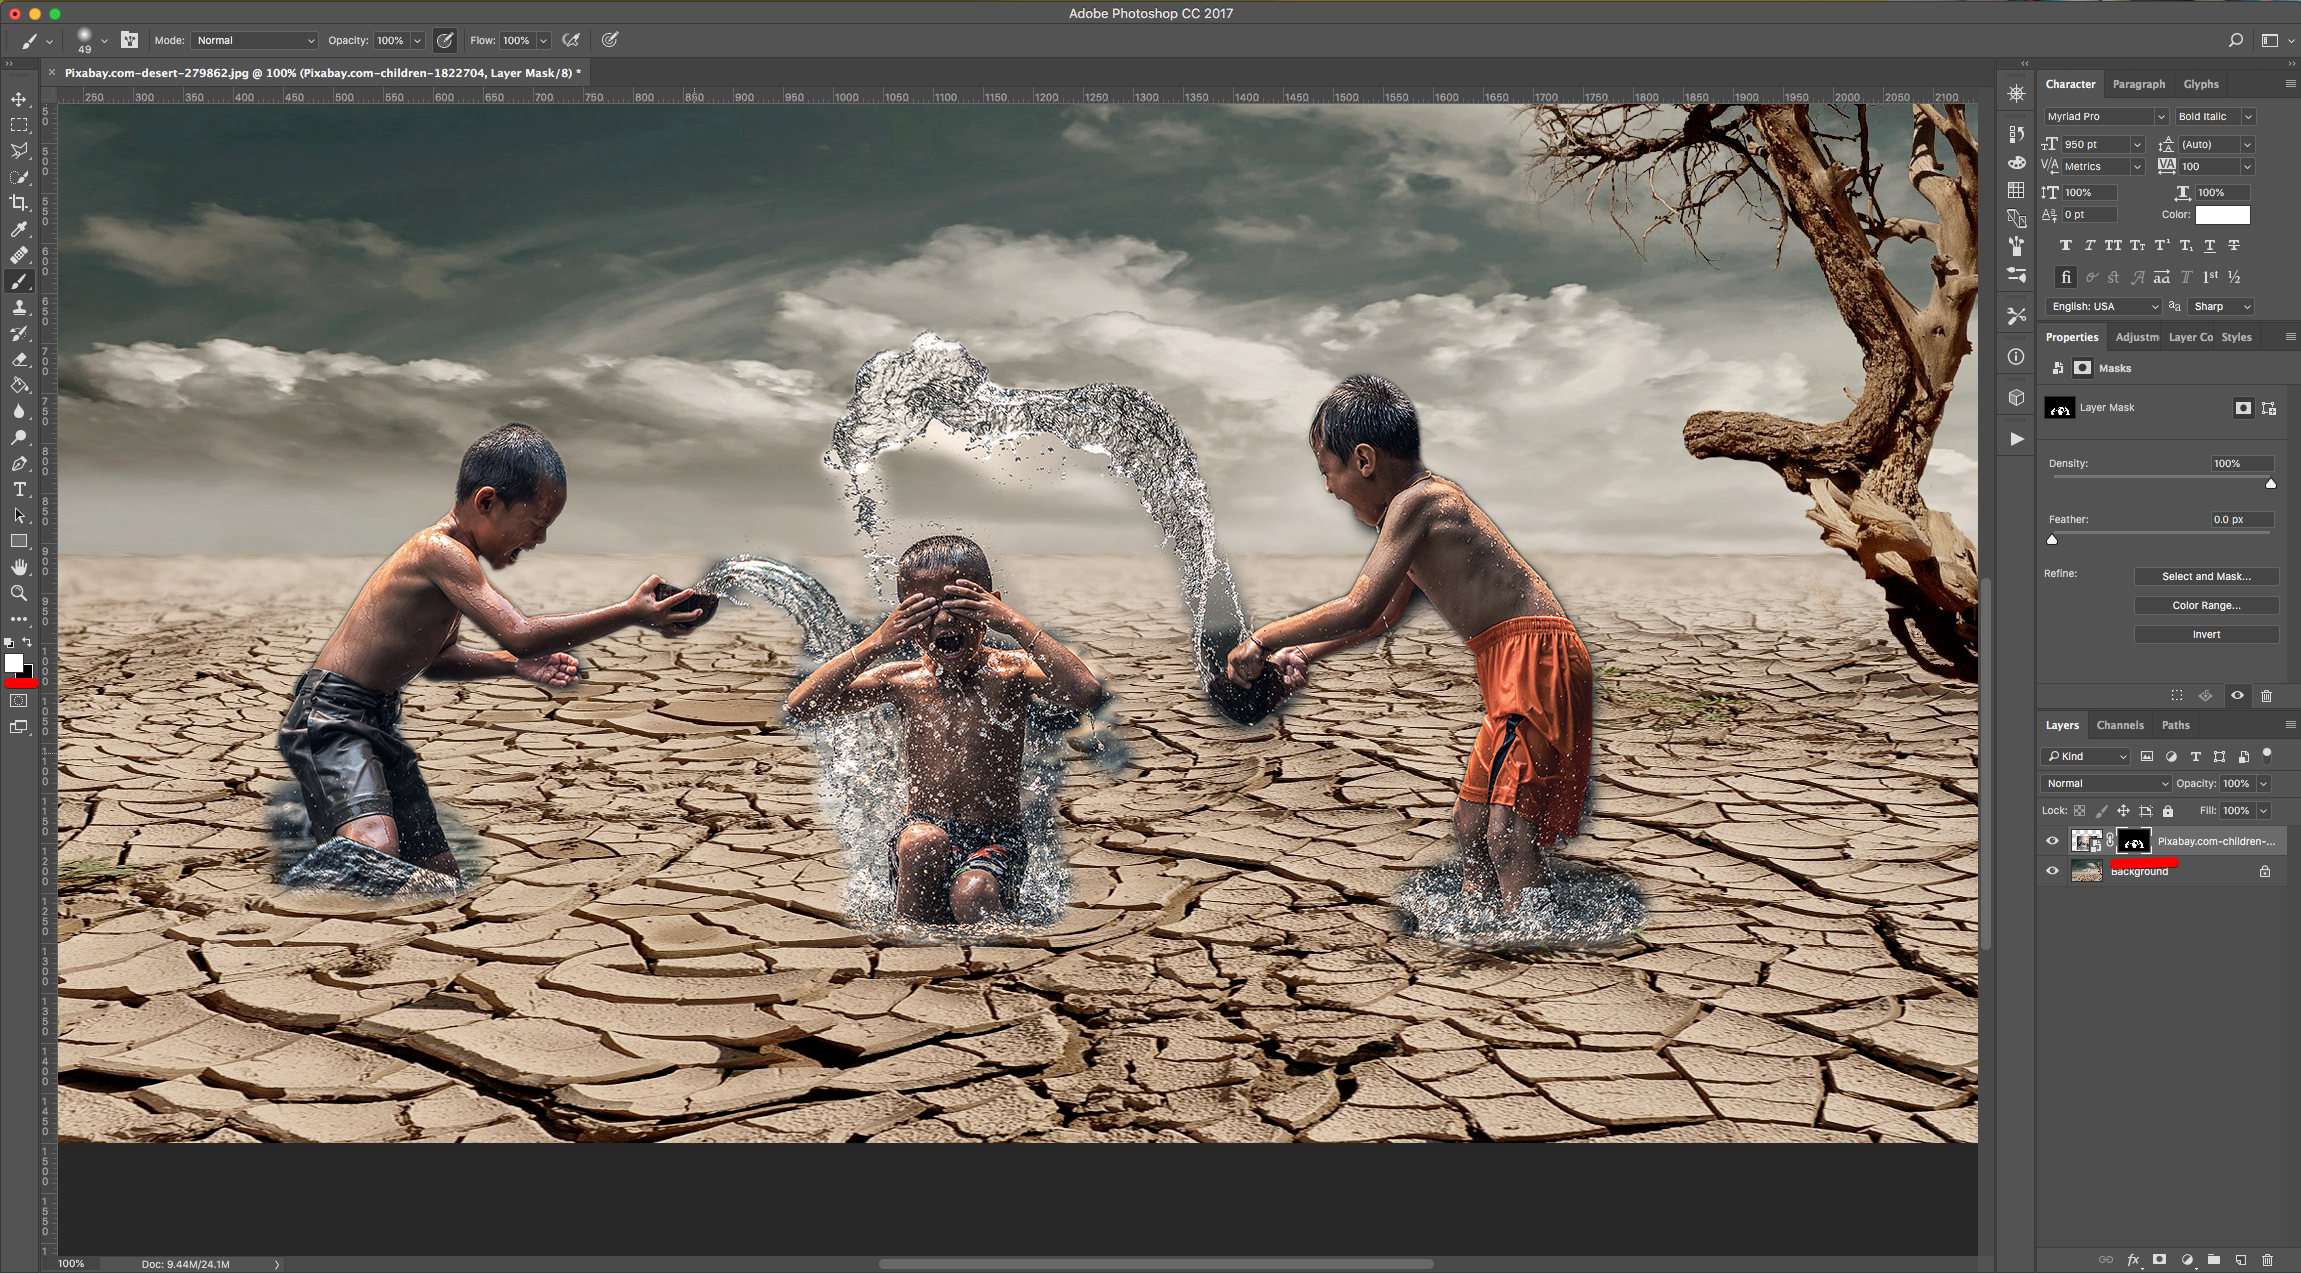
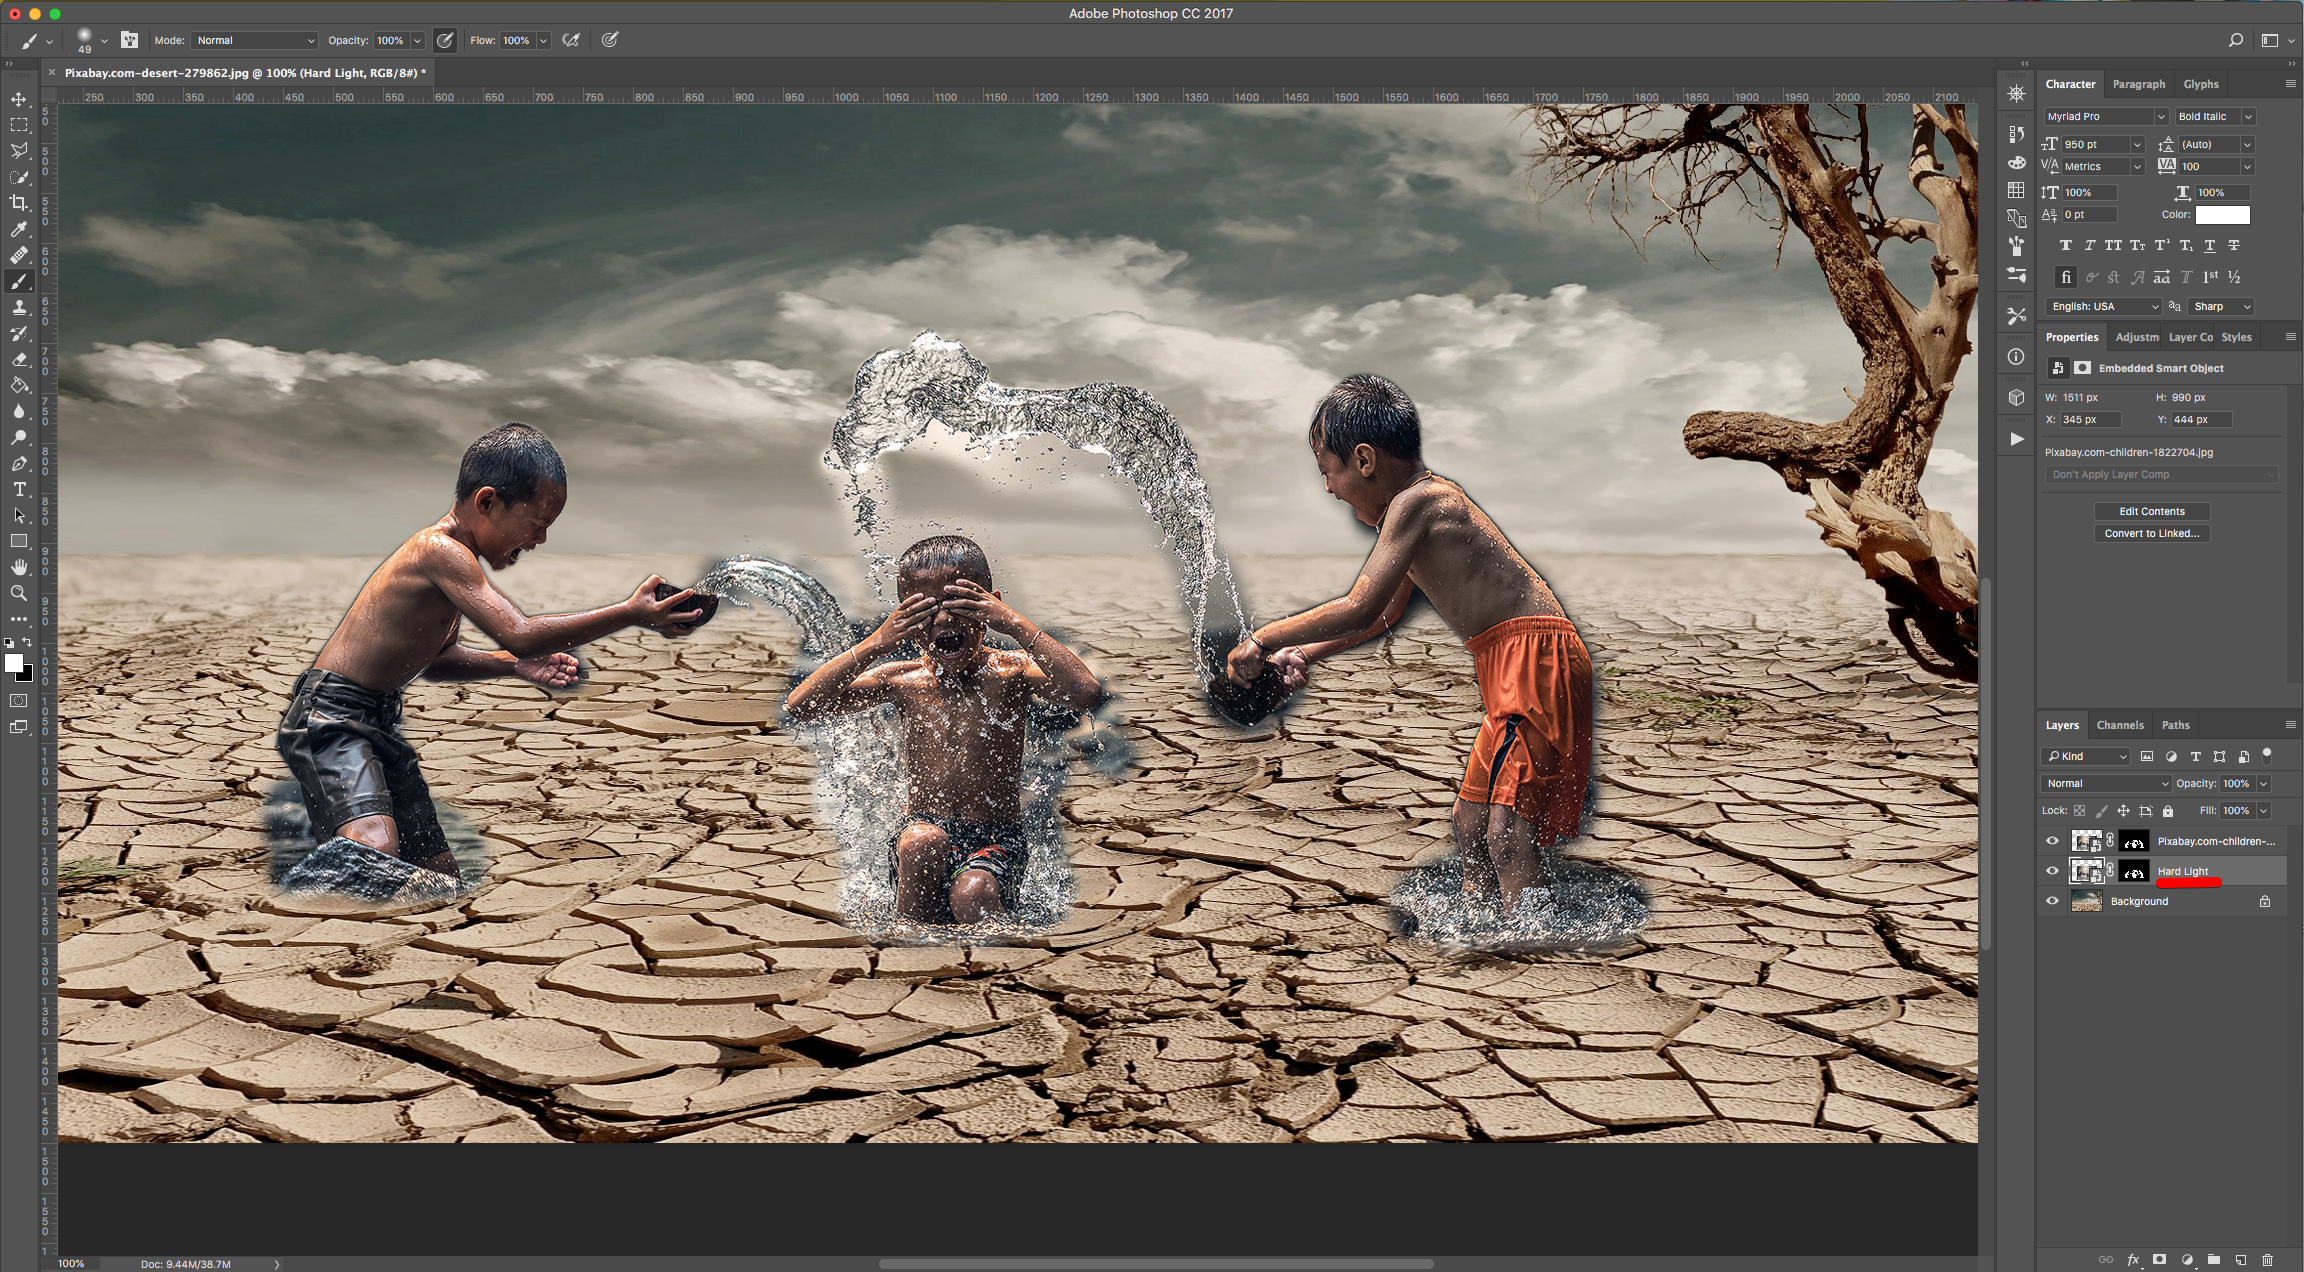
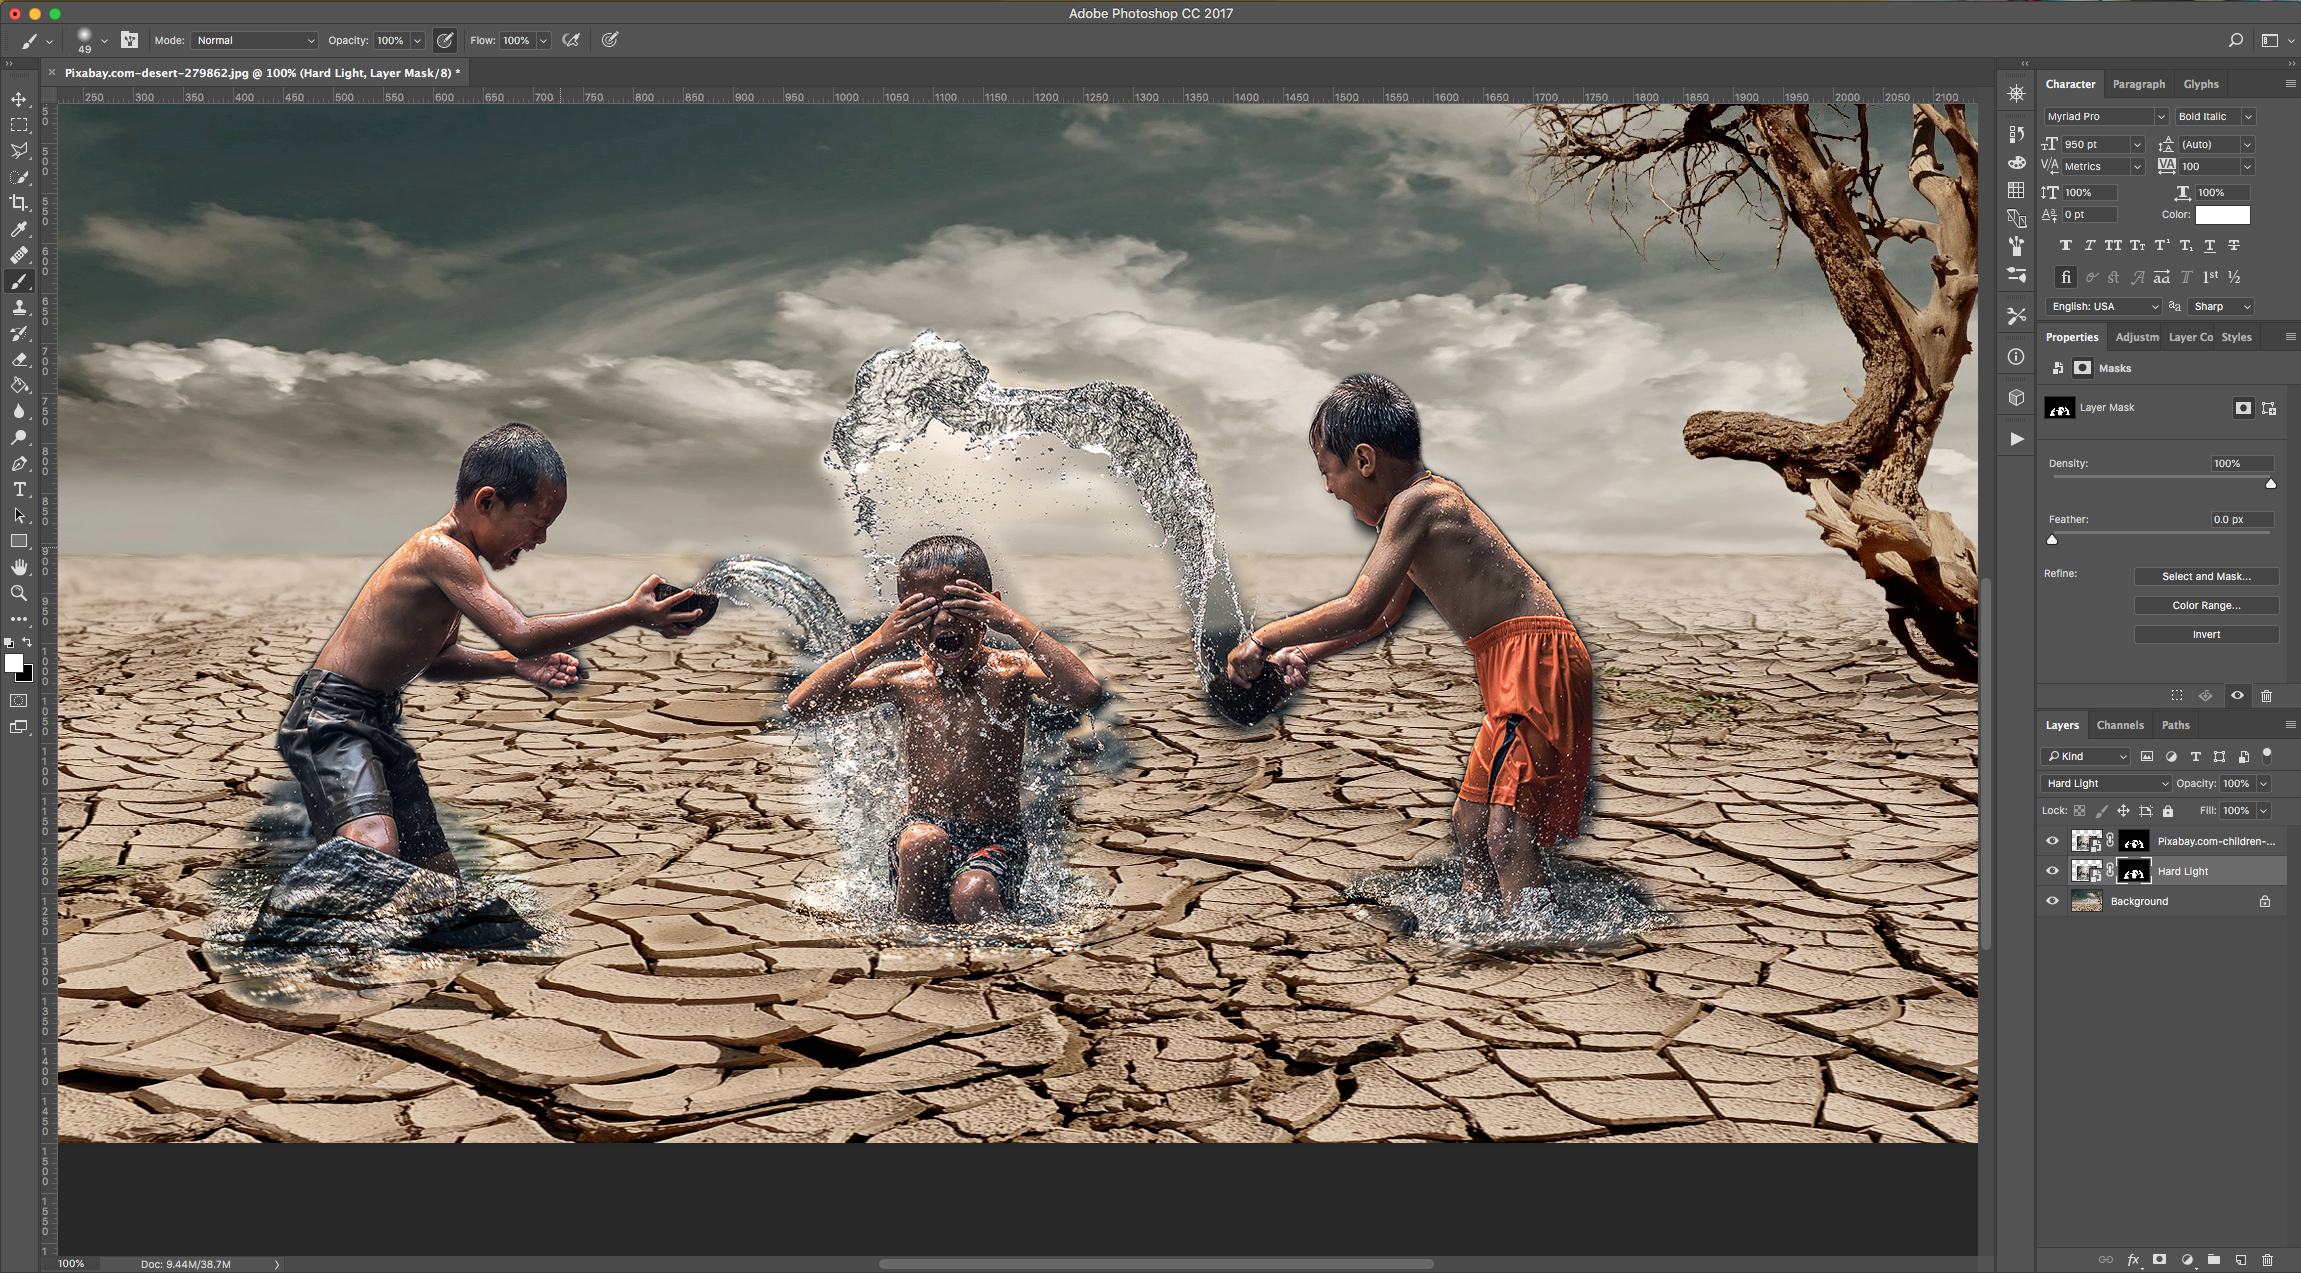
10 - Duplicate the layer (Command/Control + J) and rename the bottom one “Hard Light”. Change its “Blending Mode” to “Hard Light” and use the “Brush Tool” (B) to bring out more background around the subjects to blend the two images o bit more.
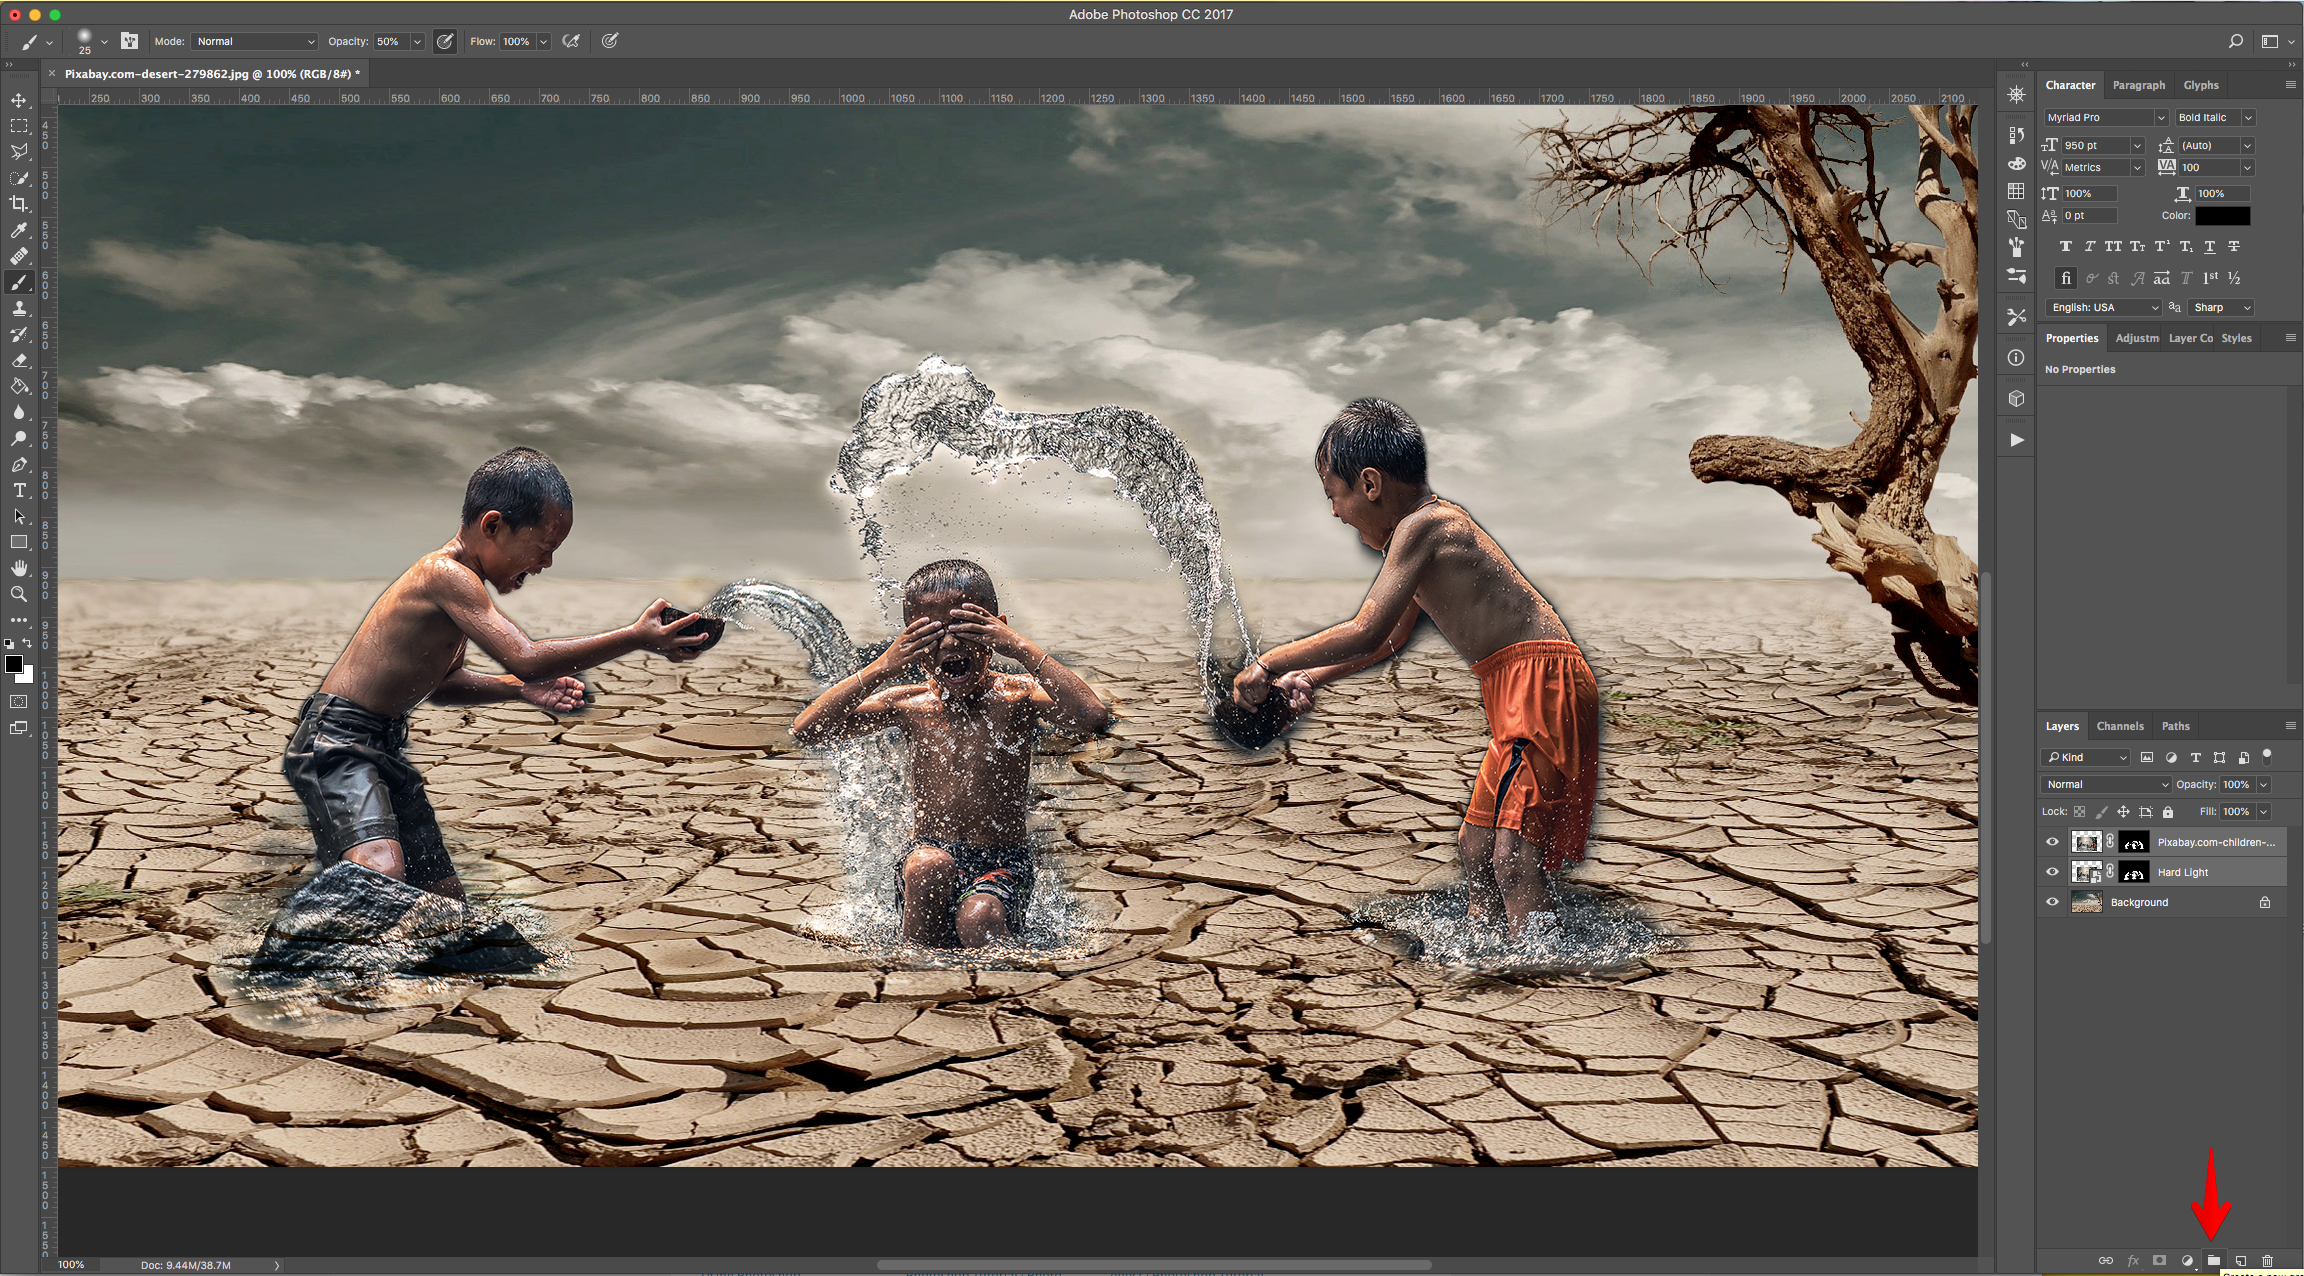
11 - Select the “Clouds” Layer, right-click on top of its Thumbnail and choose “Convert to Smart Object”.
12 - Select the both Layers (“Shift” key) and “Group” them together by clicking on the small Folder icon at the bottom of the Layers Panel.
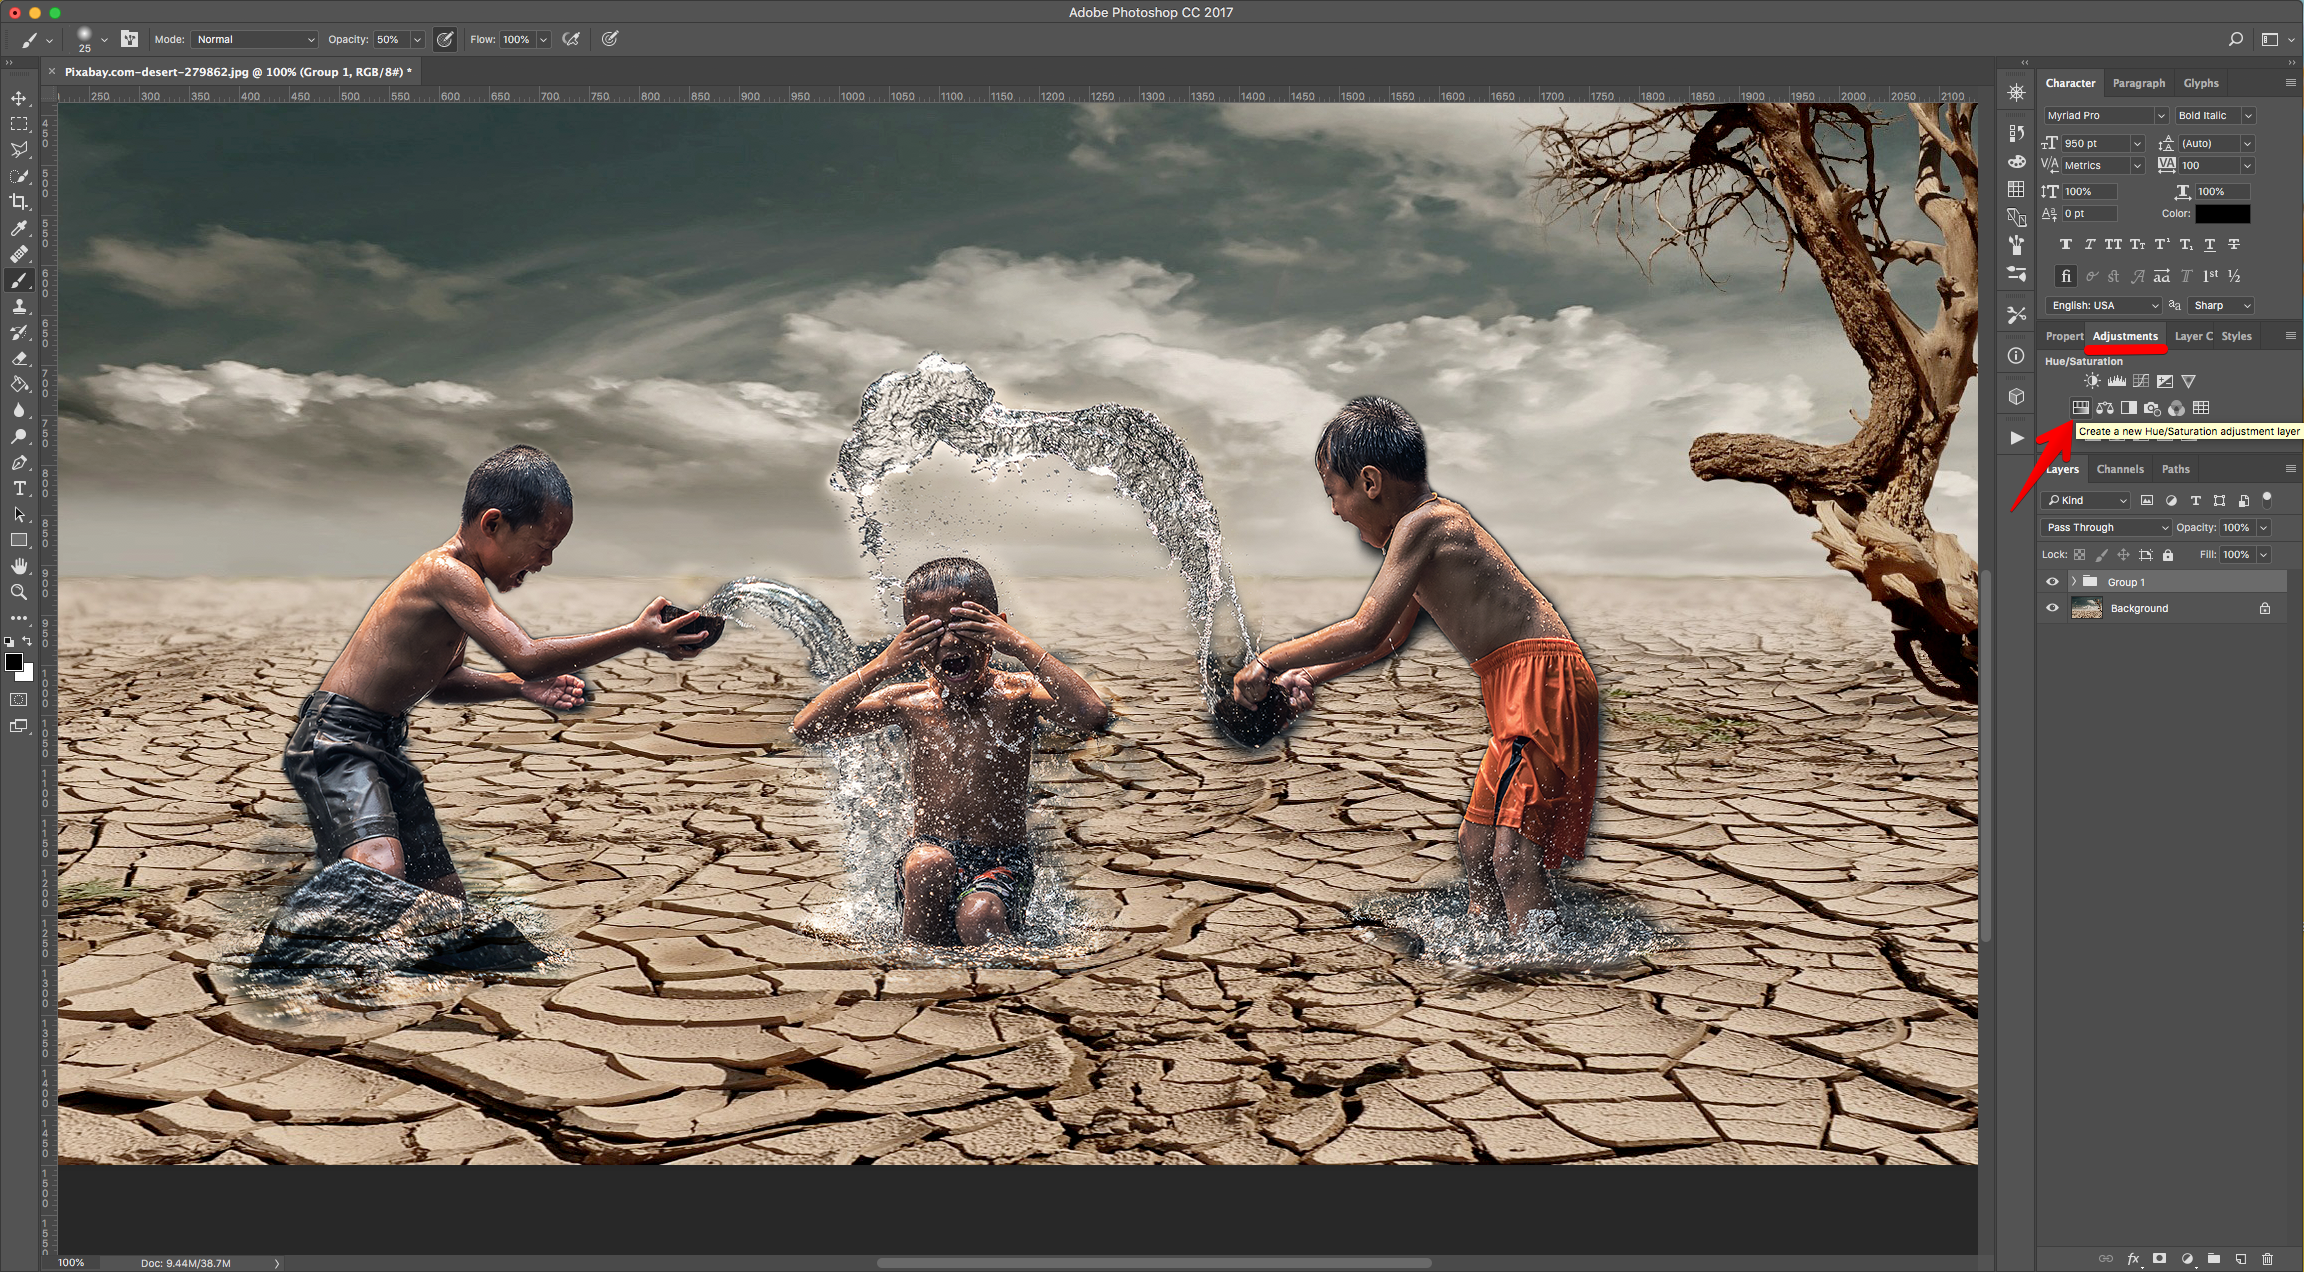
13 - Go to the “Adjustments Panel” and create a “New Hue/Saturation Adjustment Layer”. Clip it down by clicking on the small icon at the bottom of the “Properties Panel”.
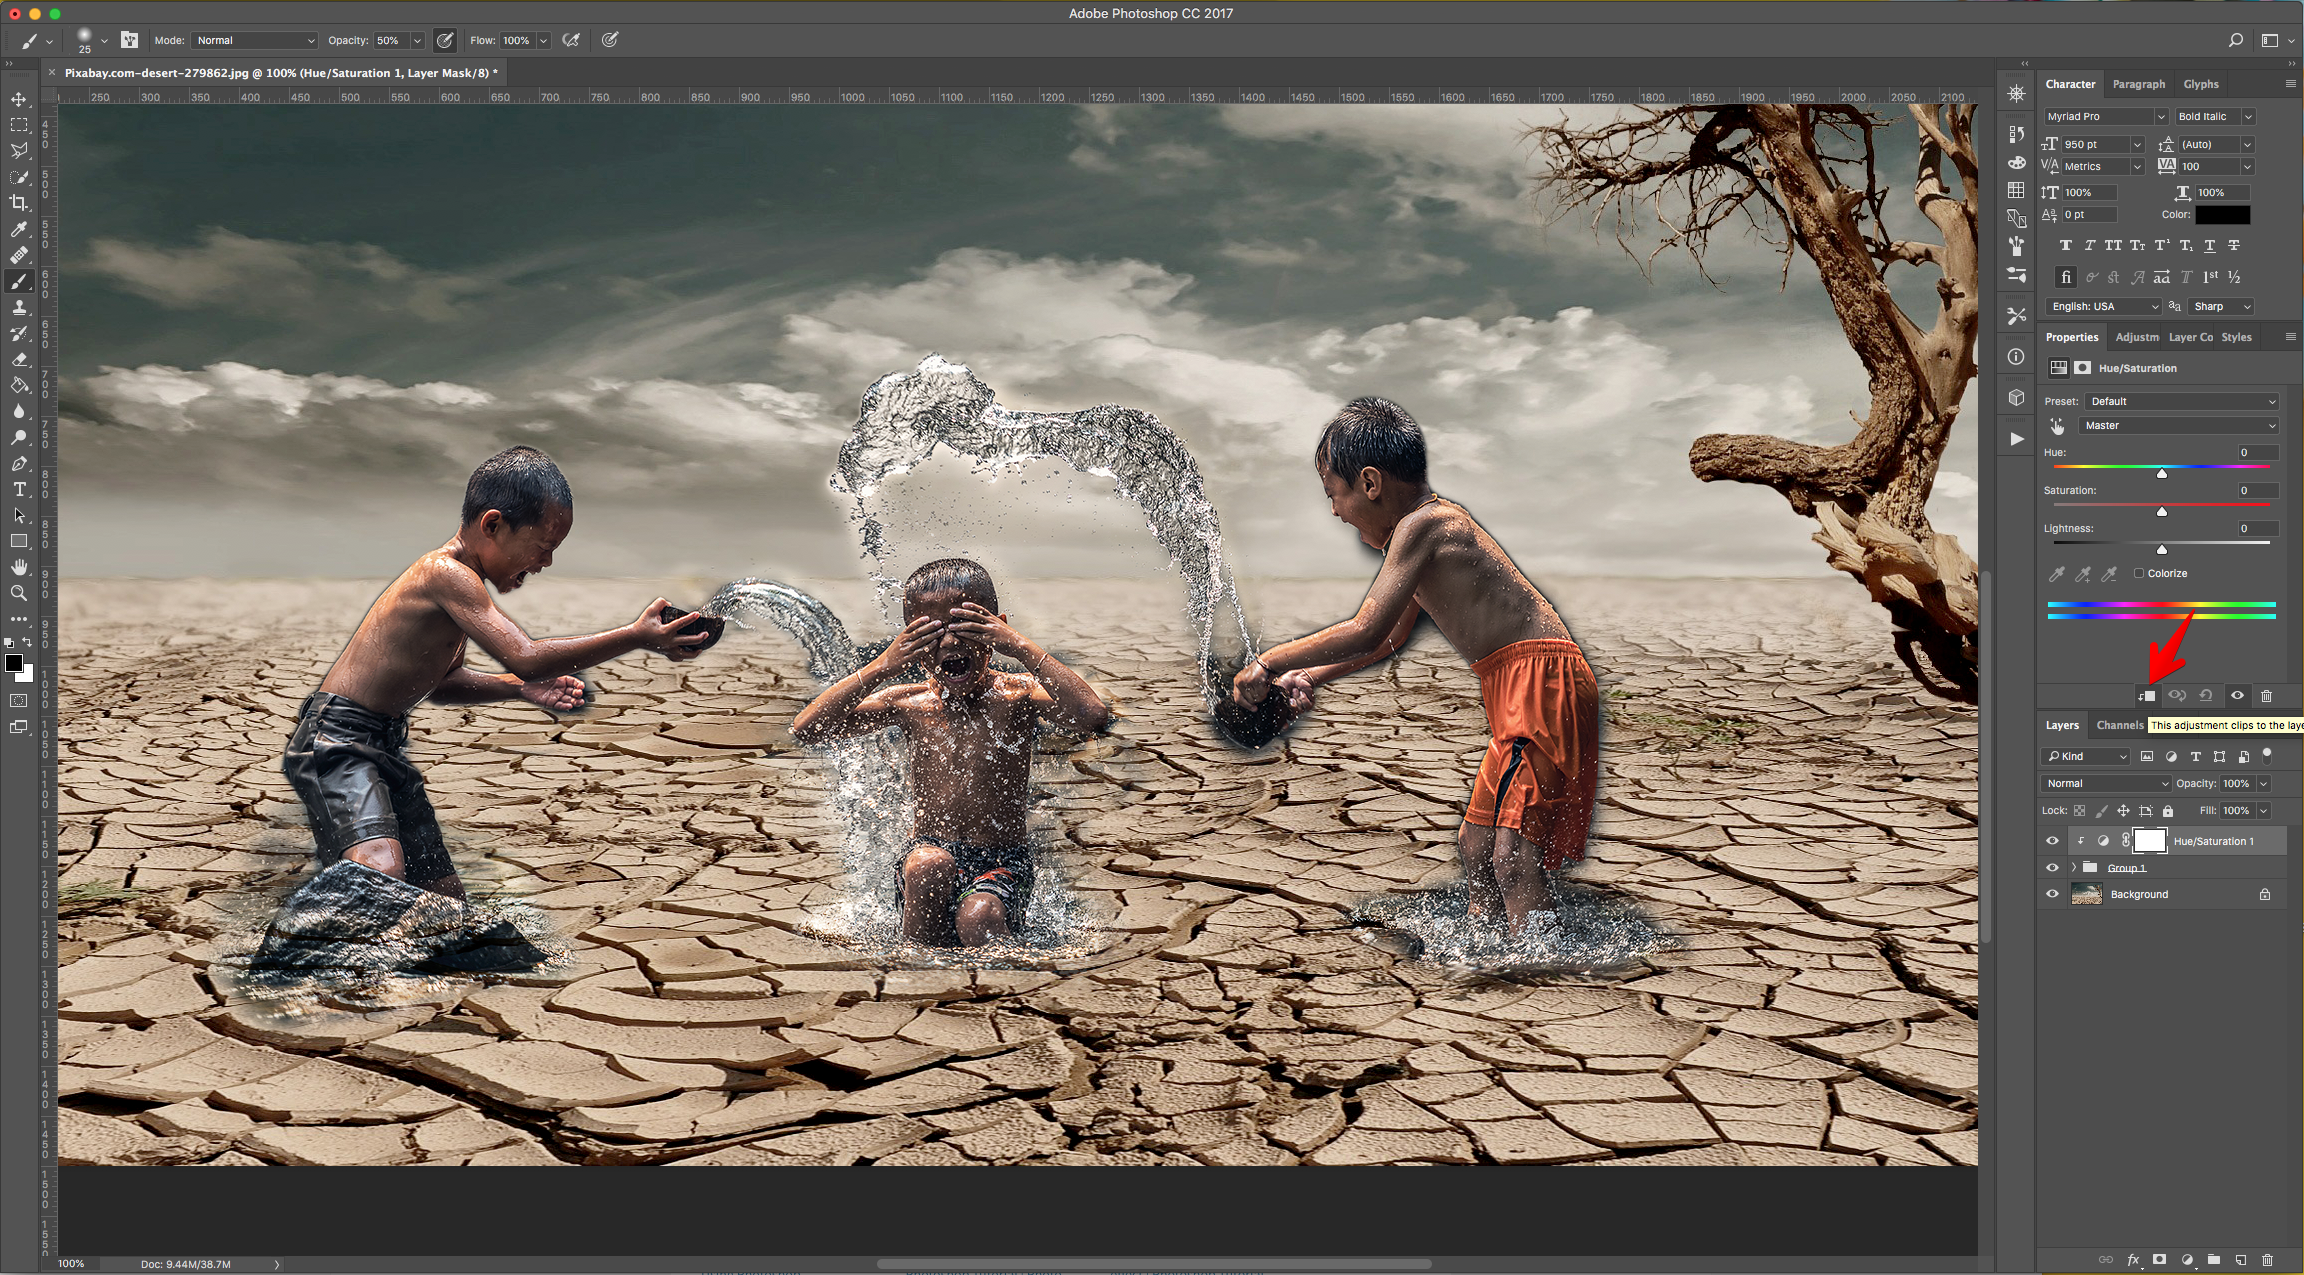
14 - Choose “Custom” from the “Preset” Tab, “Cyan” from the one under and lower the “Saturation” all the way to -100. Repeat with the “Blue” Tab.


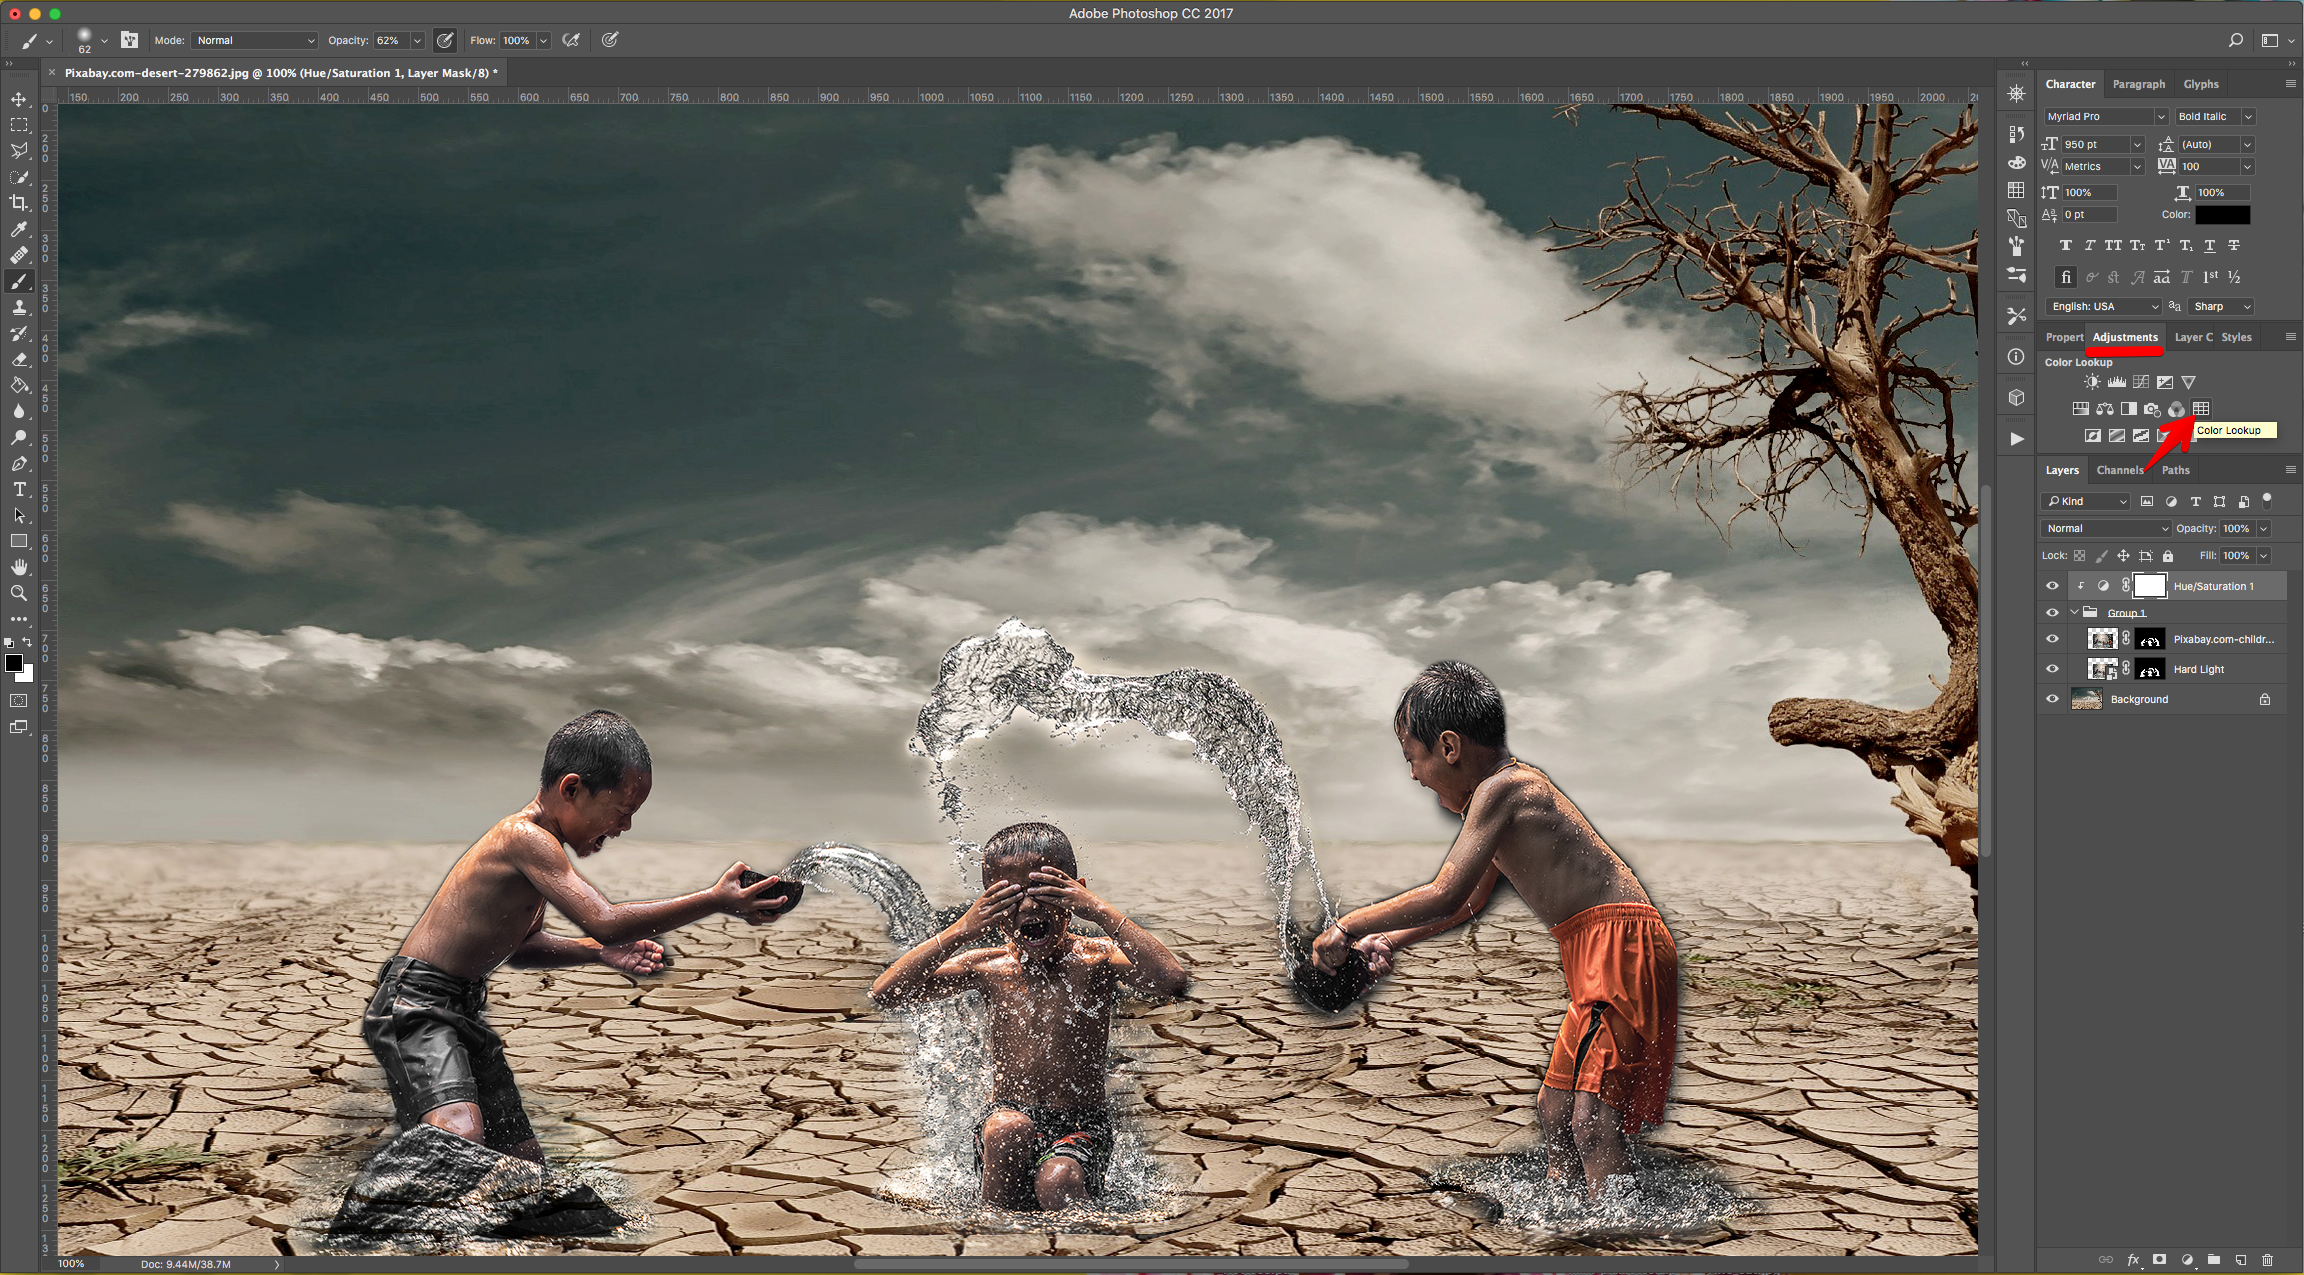
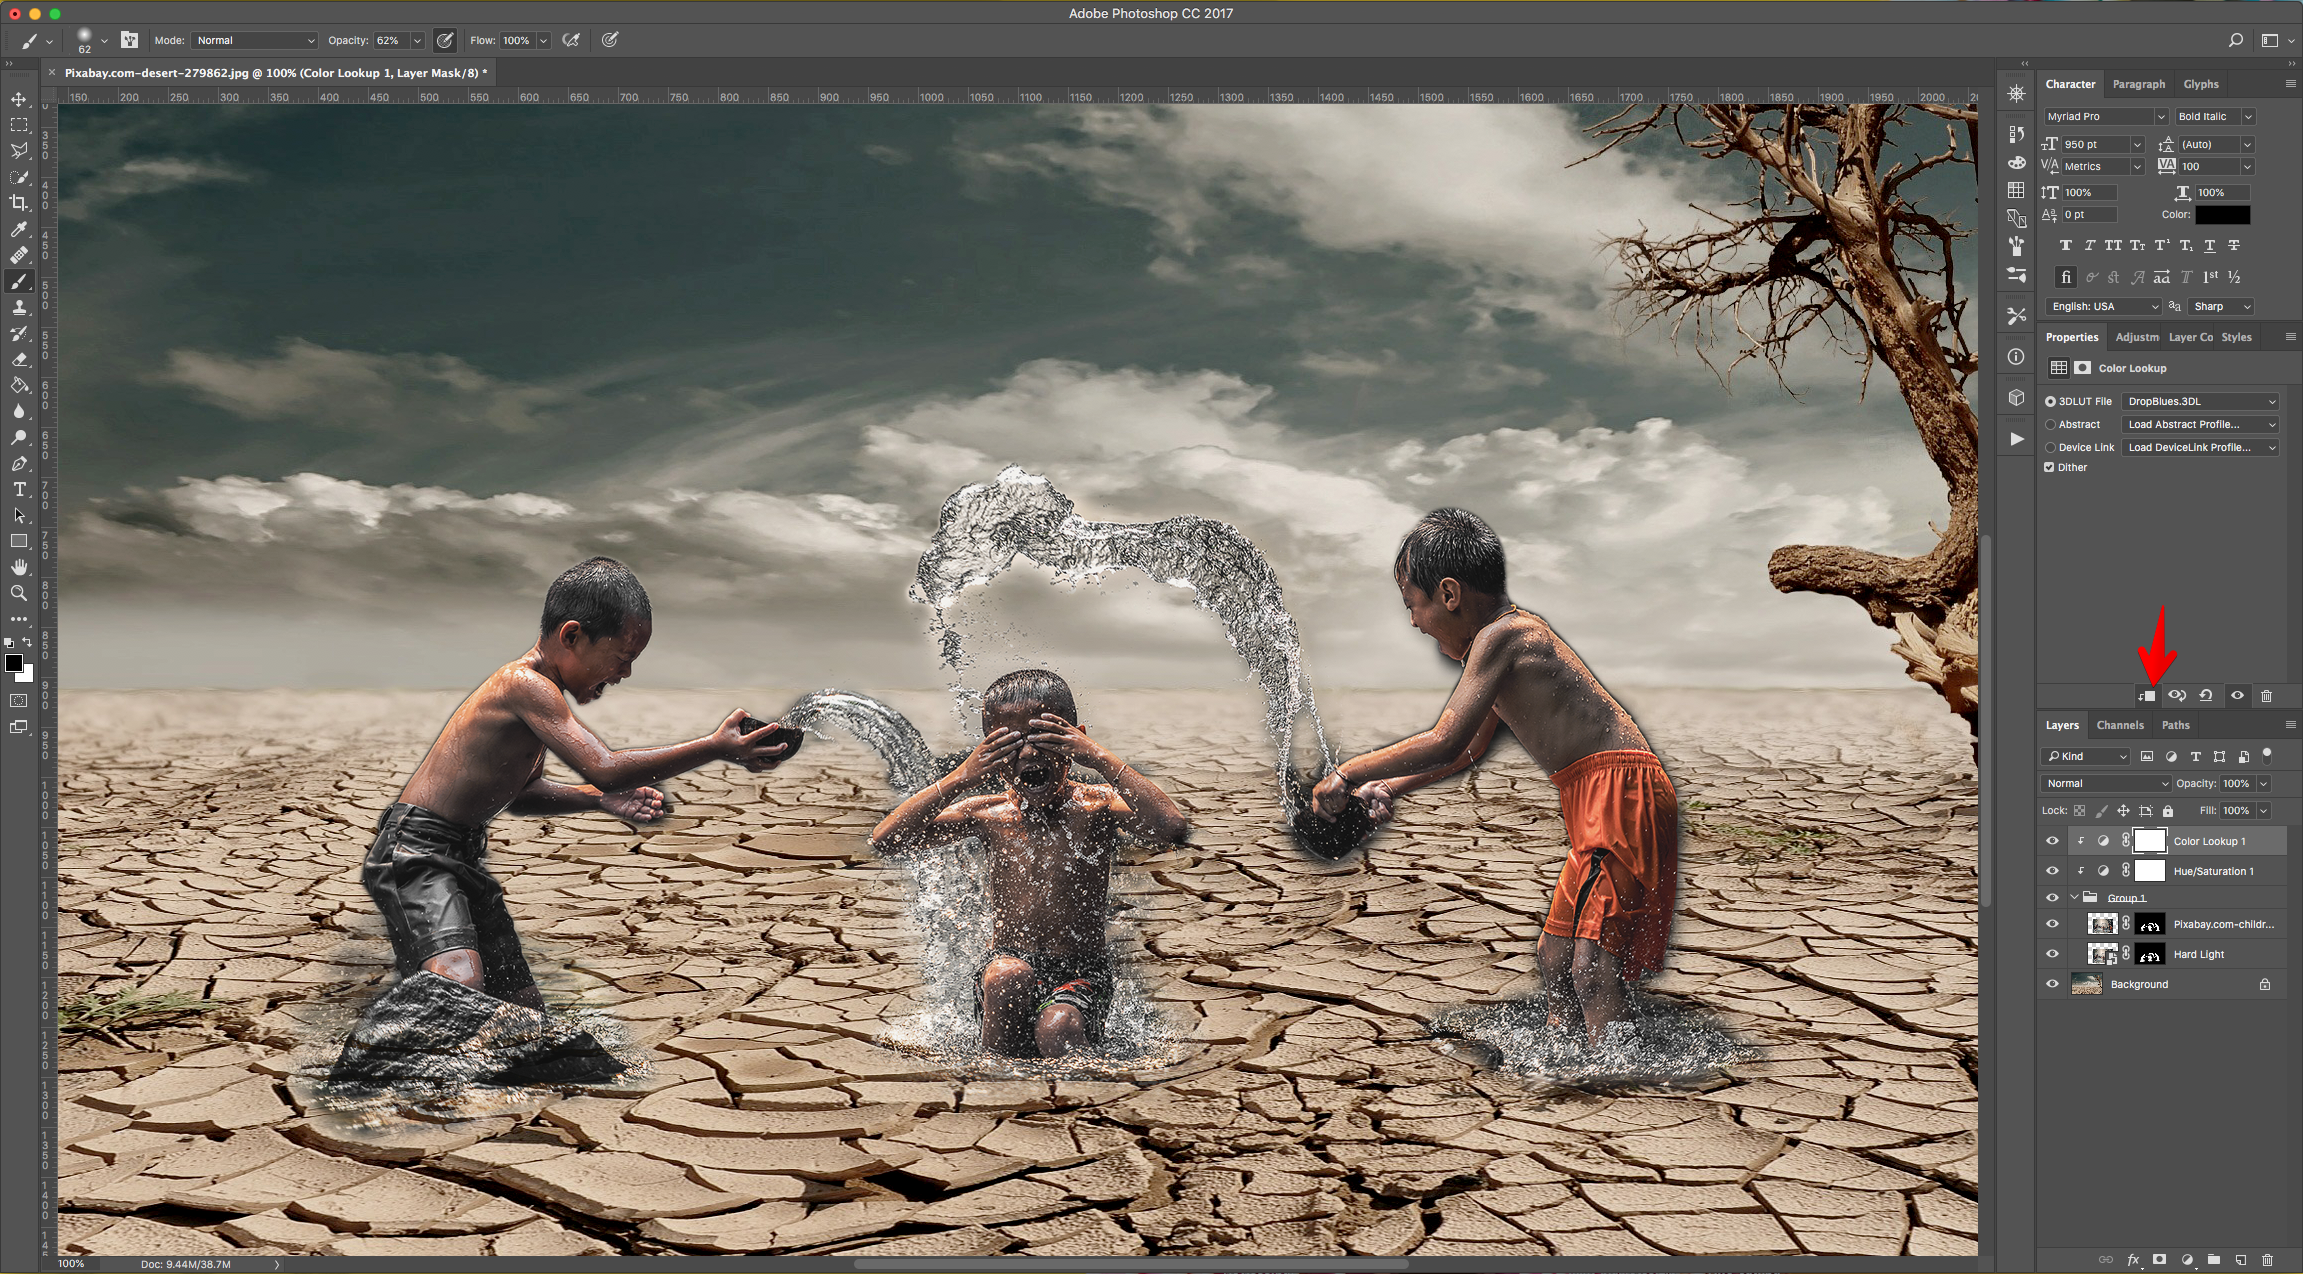
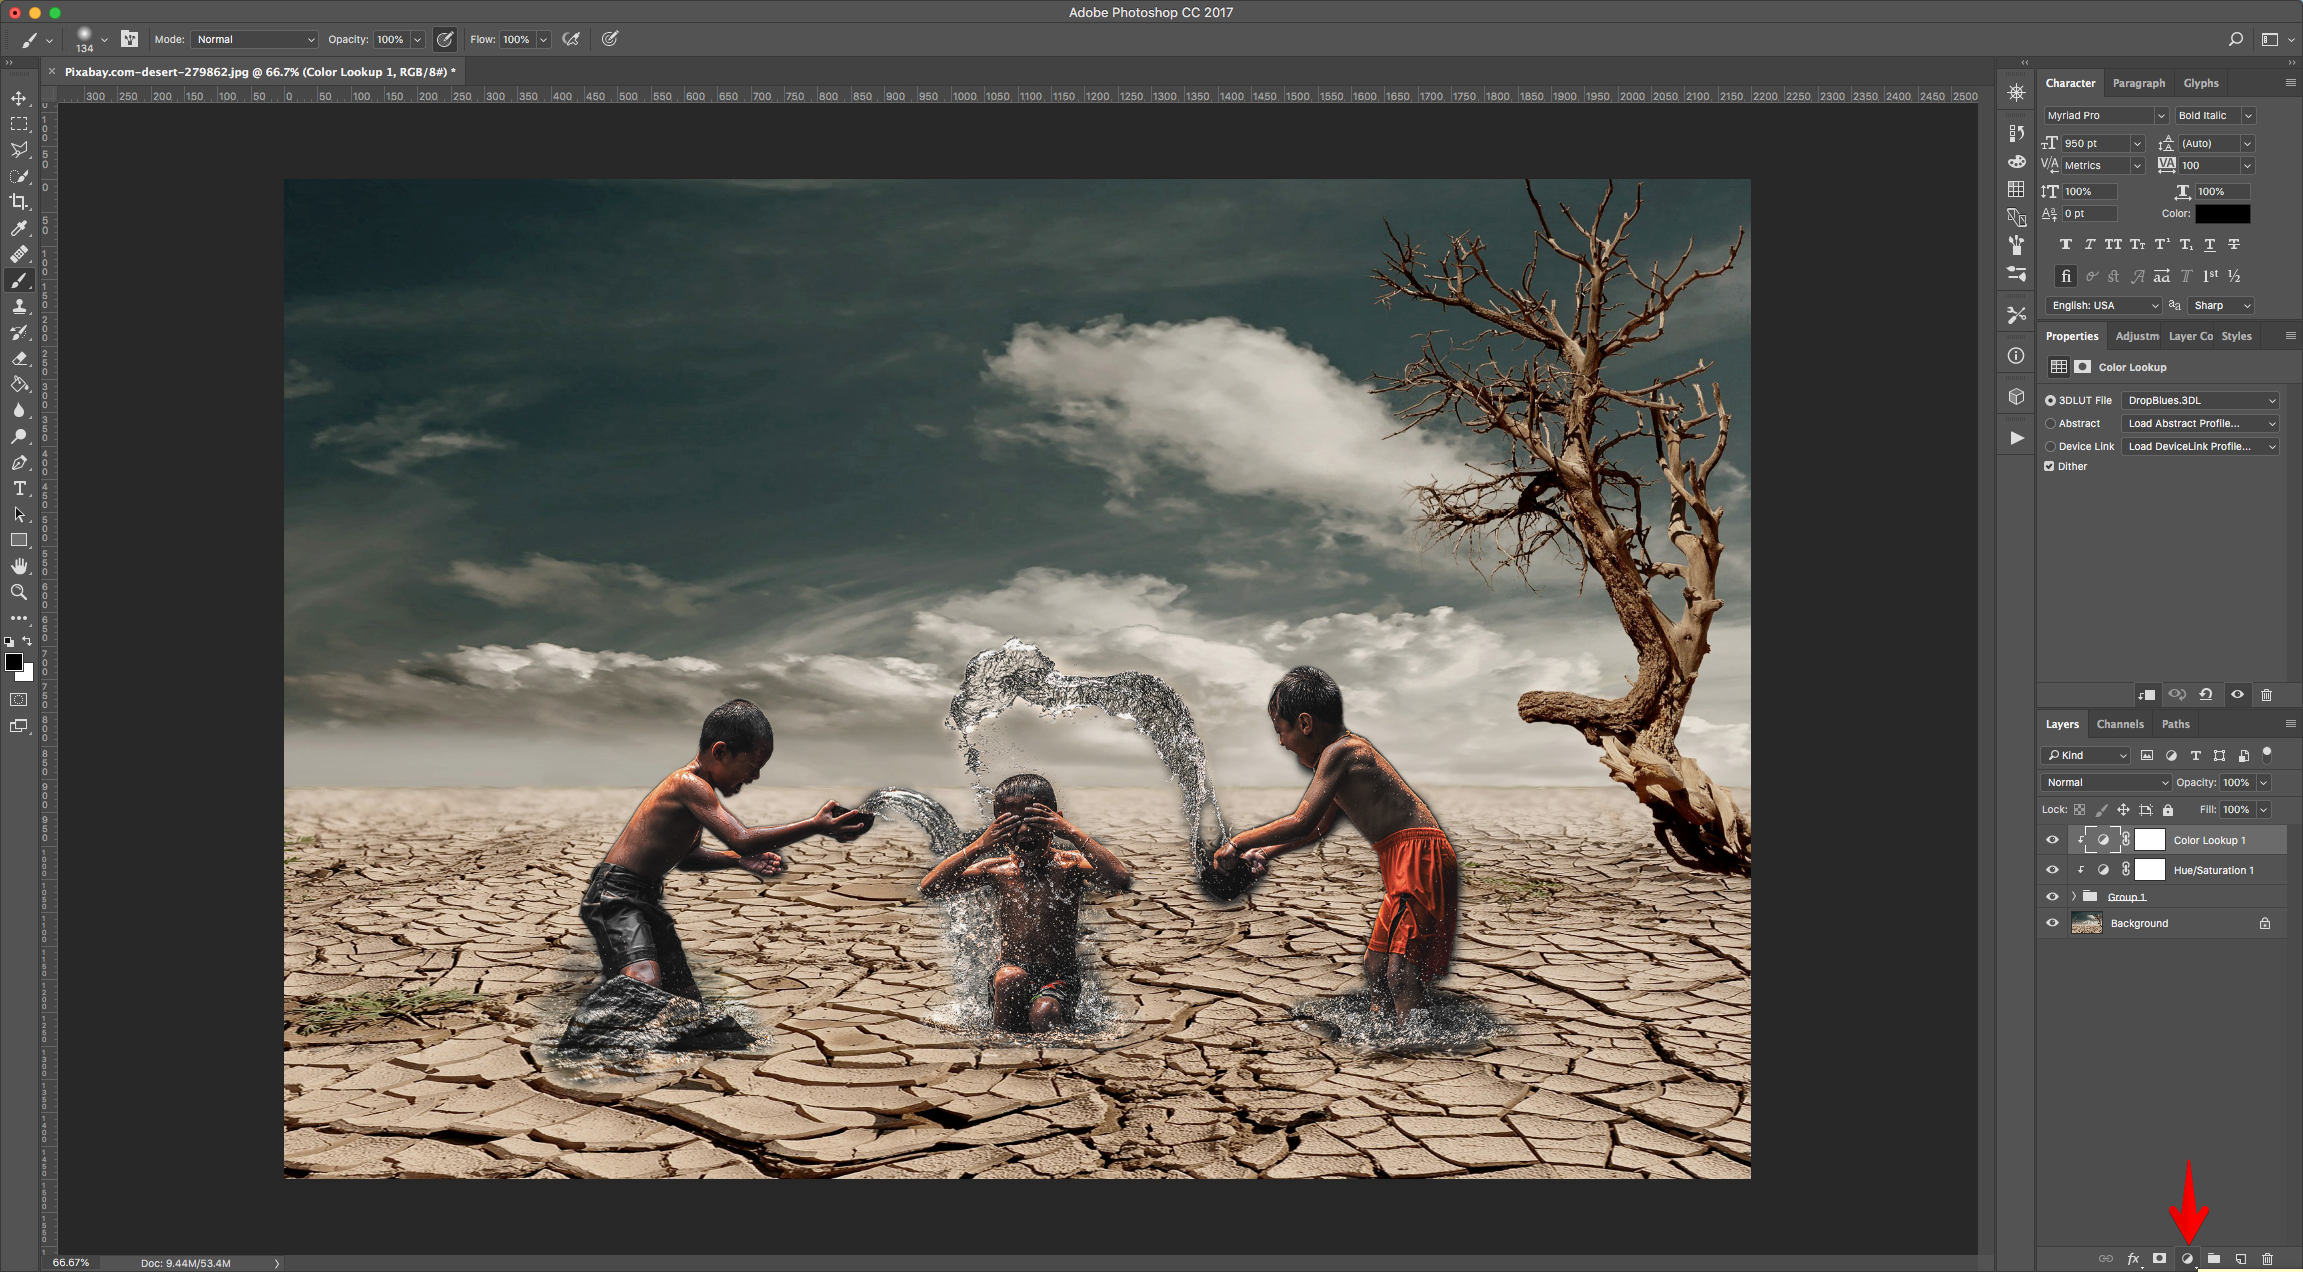
15 - Now, create a “Color Lookup Adjustment Layer” on top of everything, clip it down too and choose “DropBlues.3DL” from the “3DLUT File” Tab.
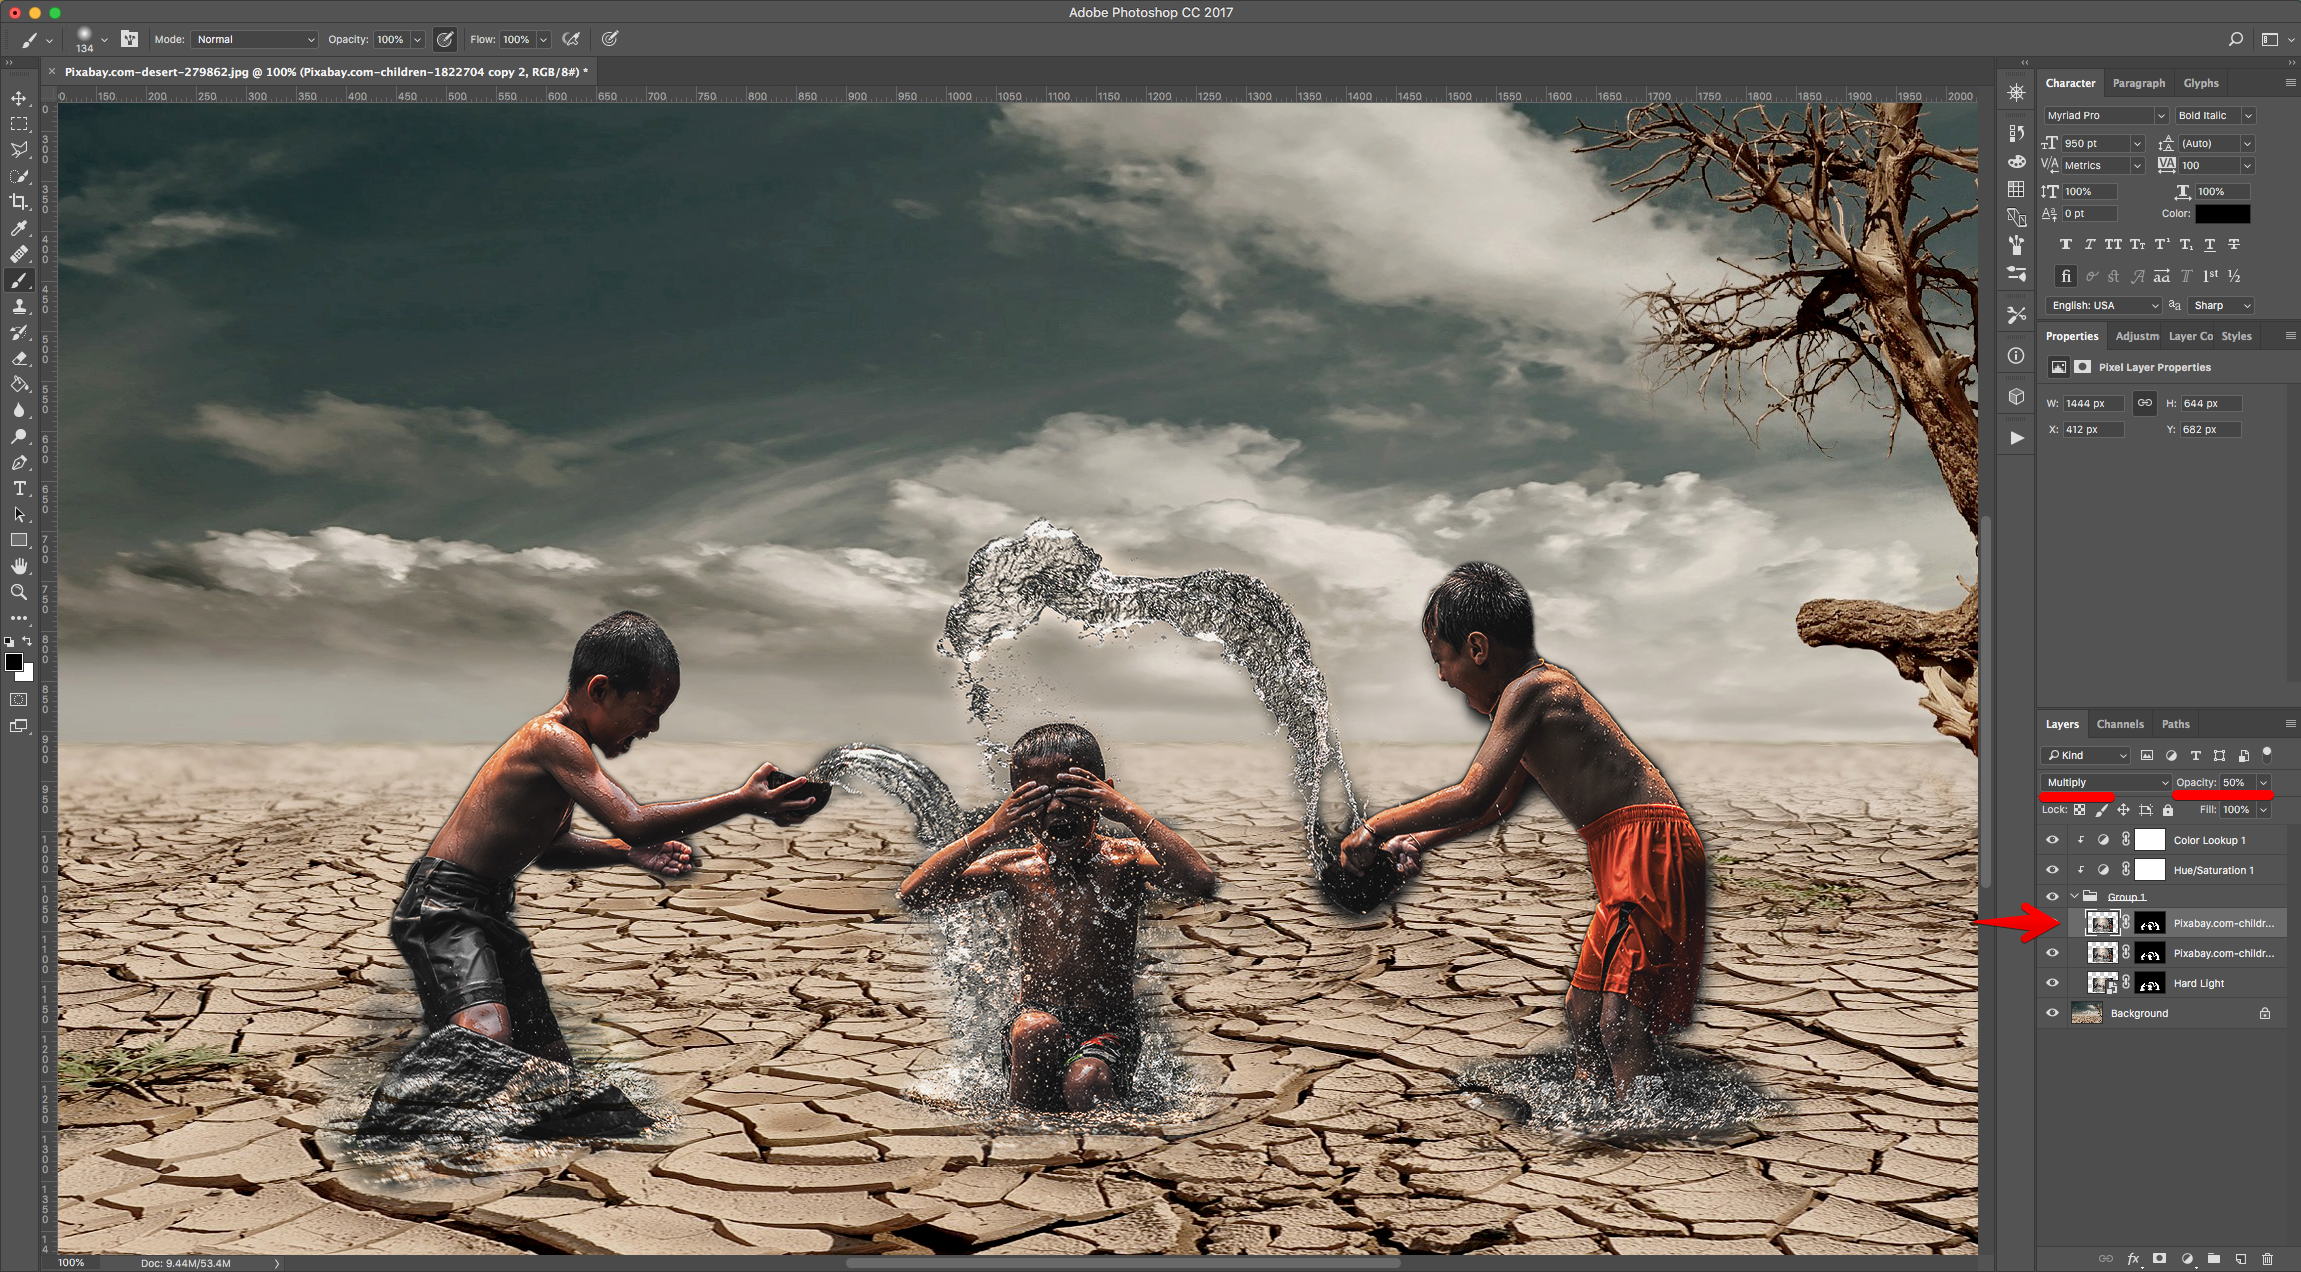
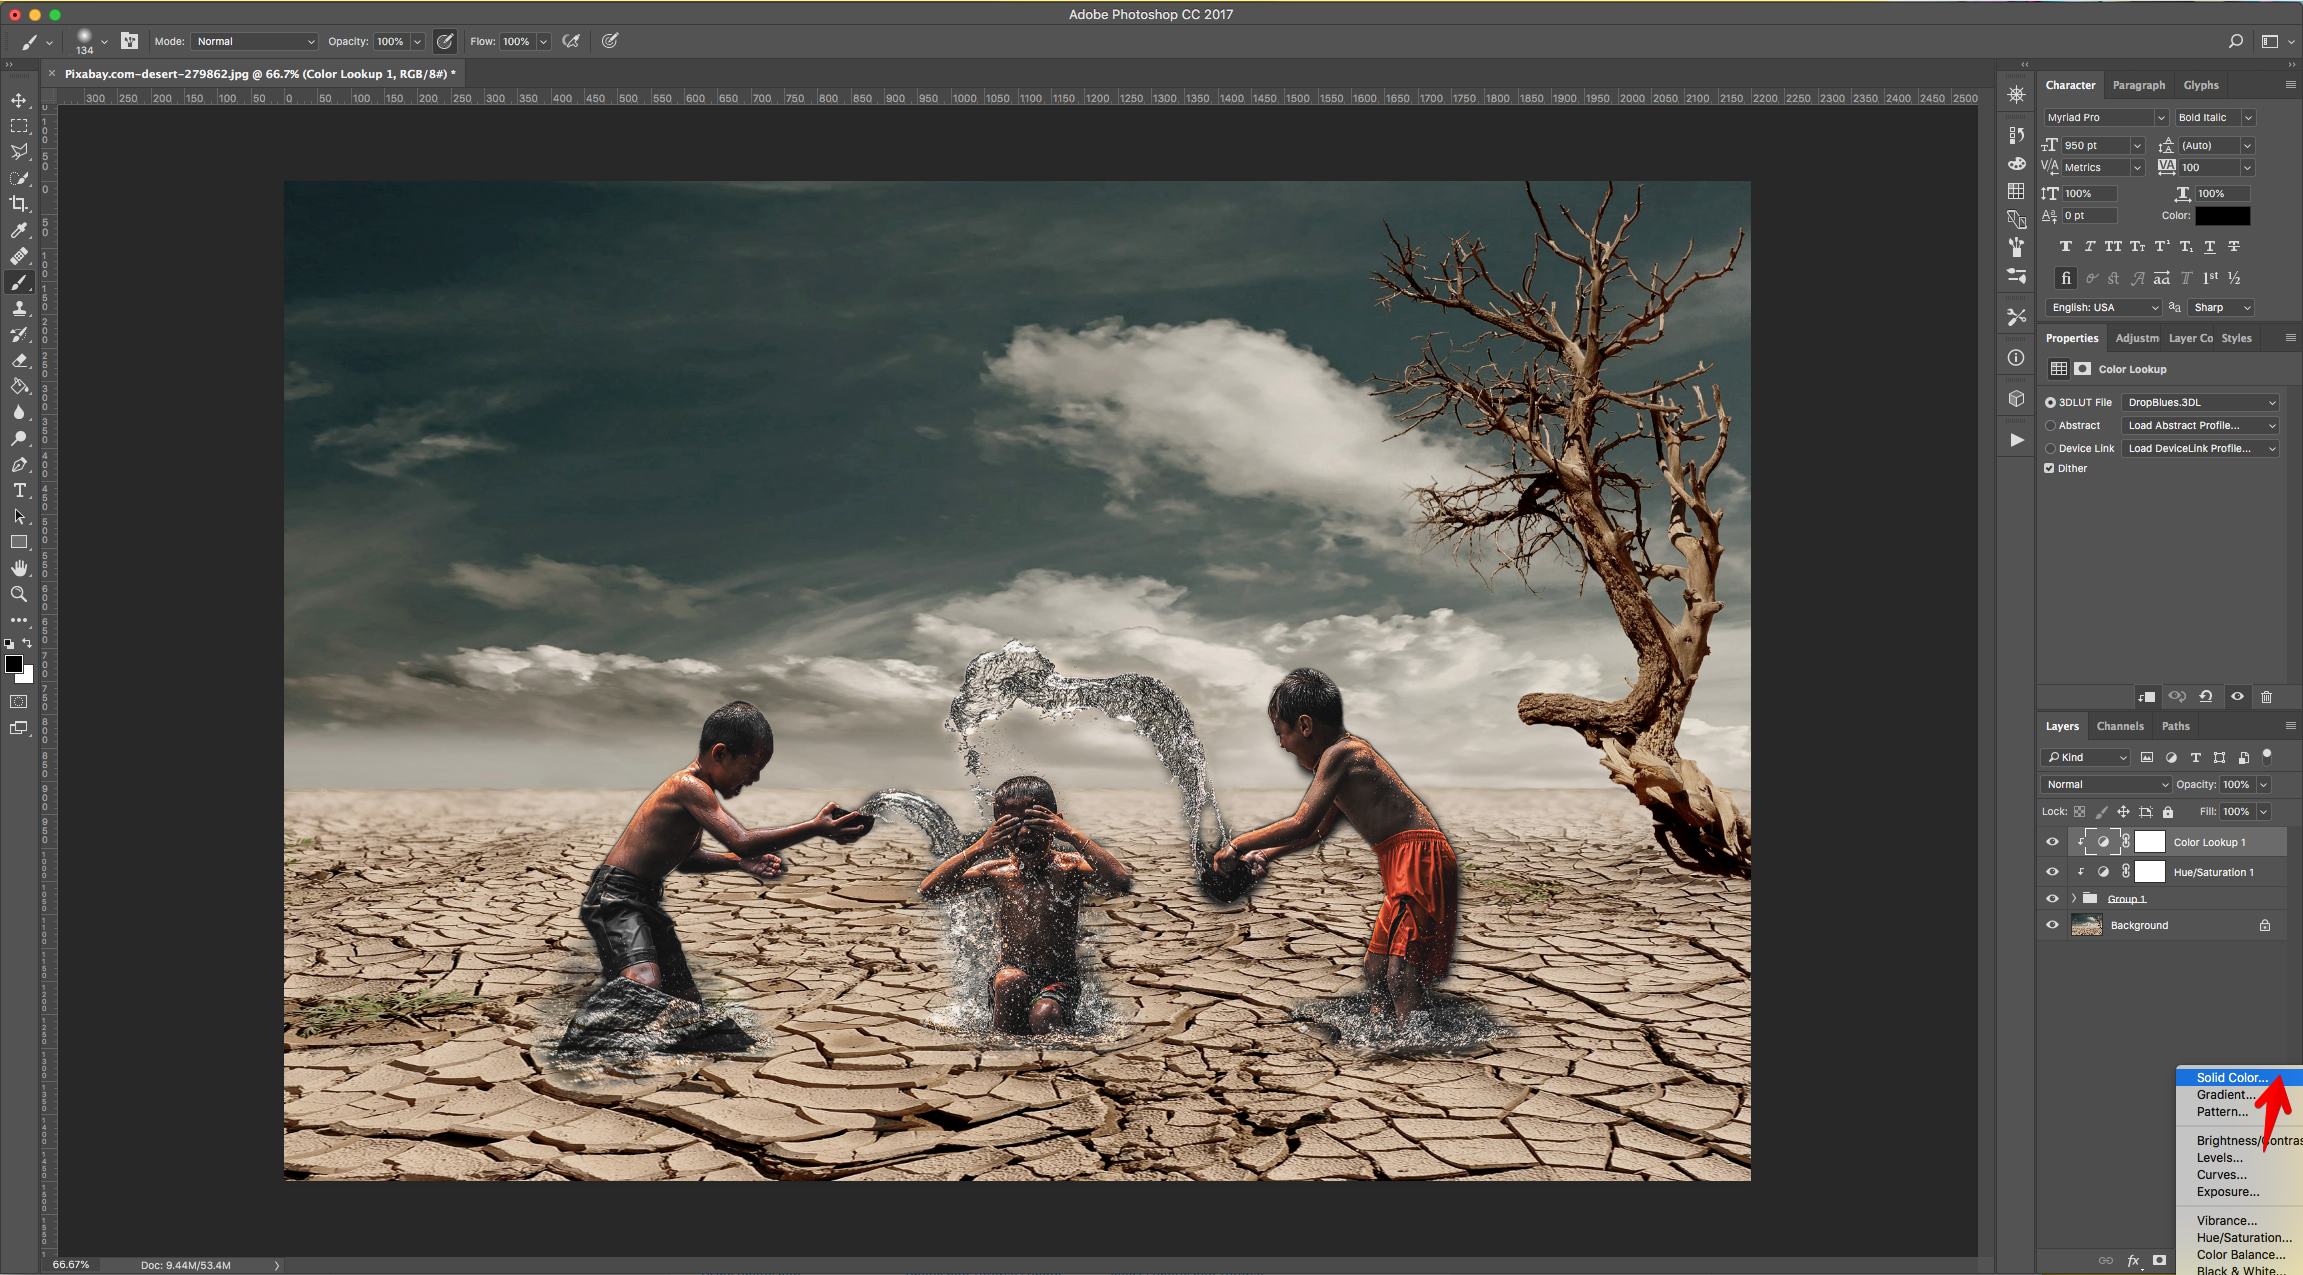
16 - Open the “Folder” by clicking on the small Arrow on the left side of its Thumbnail, select the top layer and “Duplicate” it (Command/Control + J). Change the duplicate’s “Blending Mode” to “Multiply” and the “Opacity” to 50%.
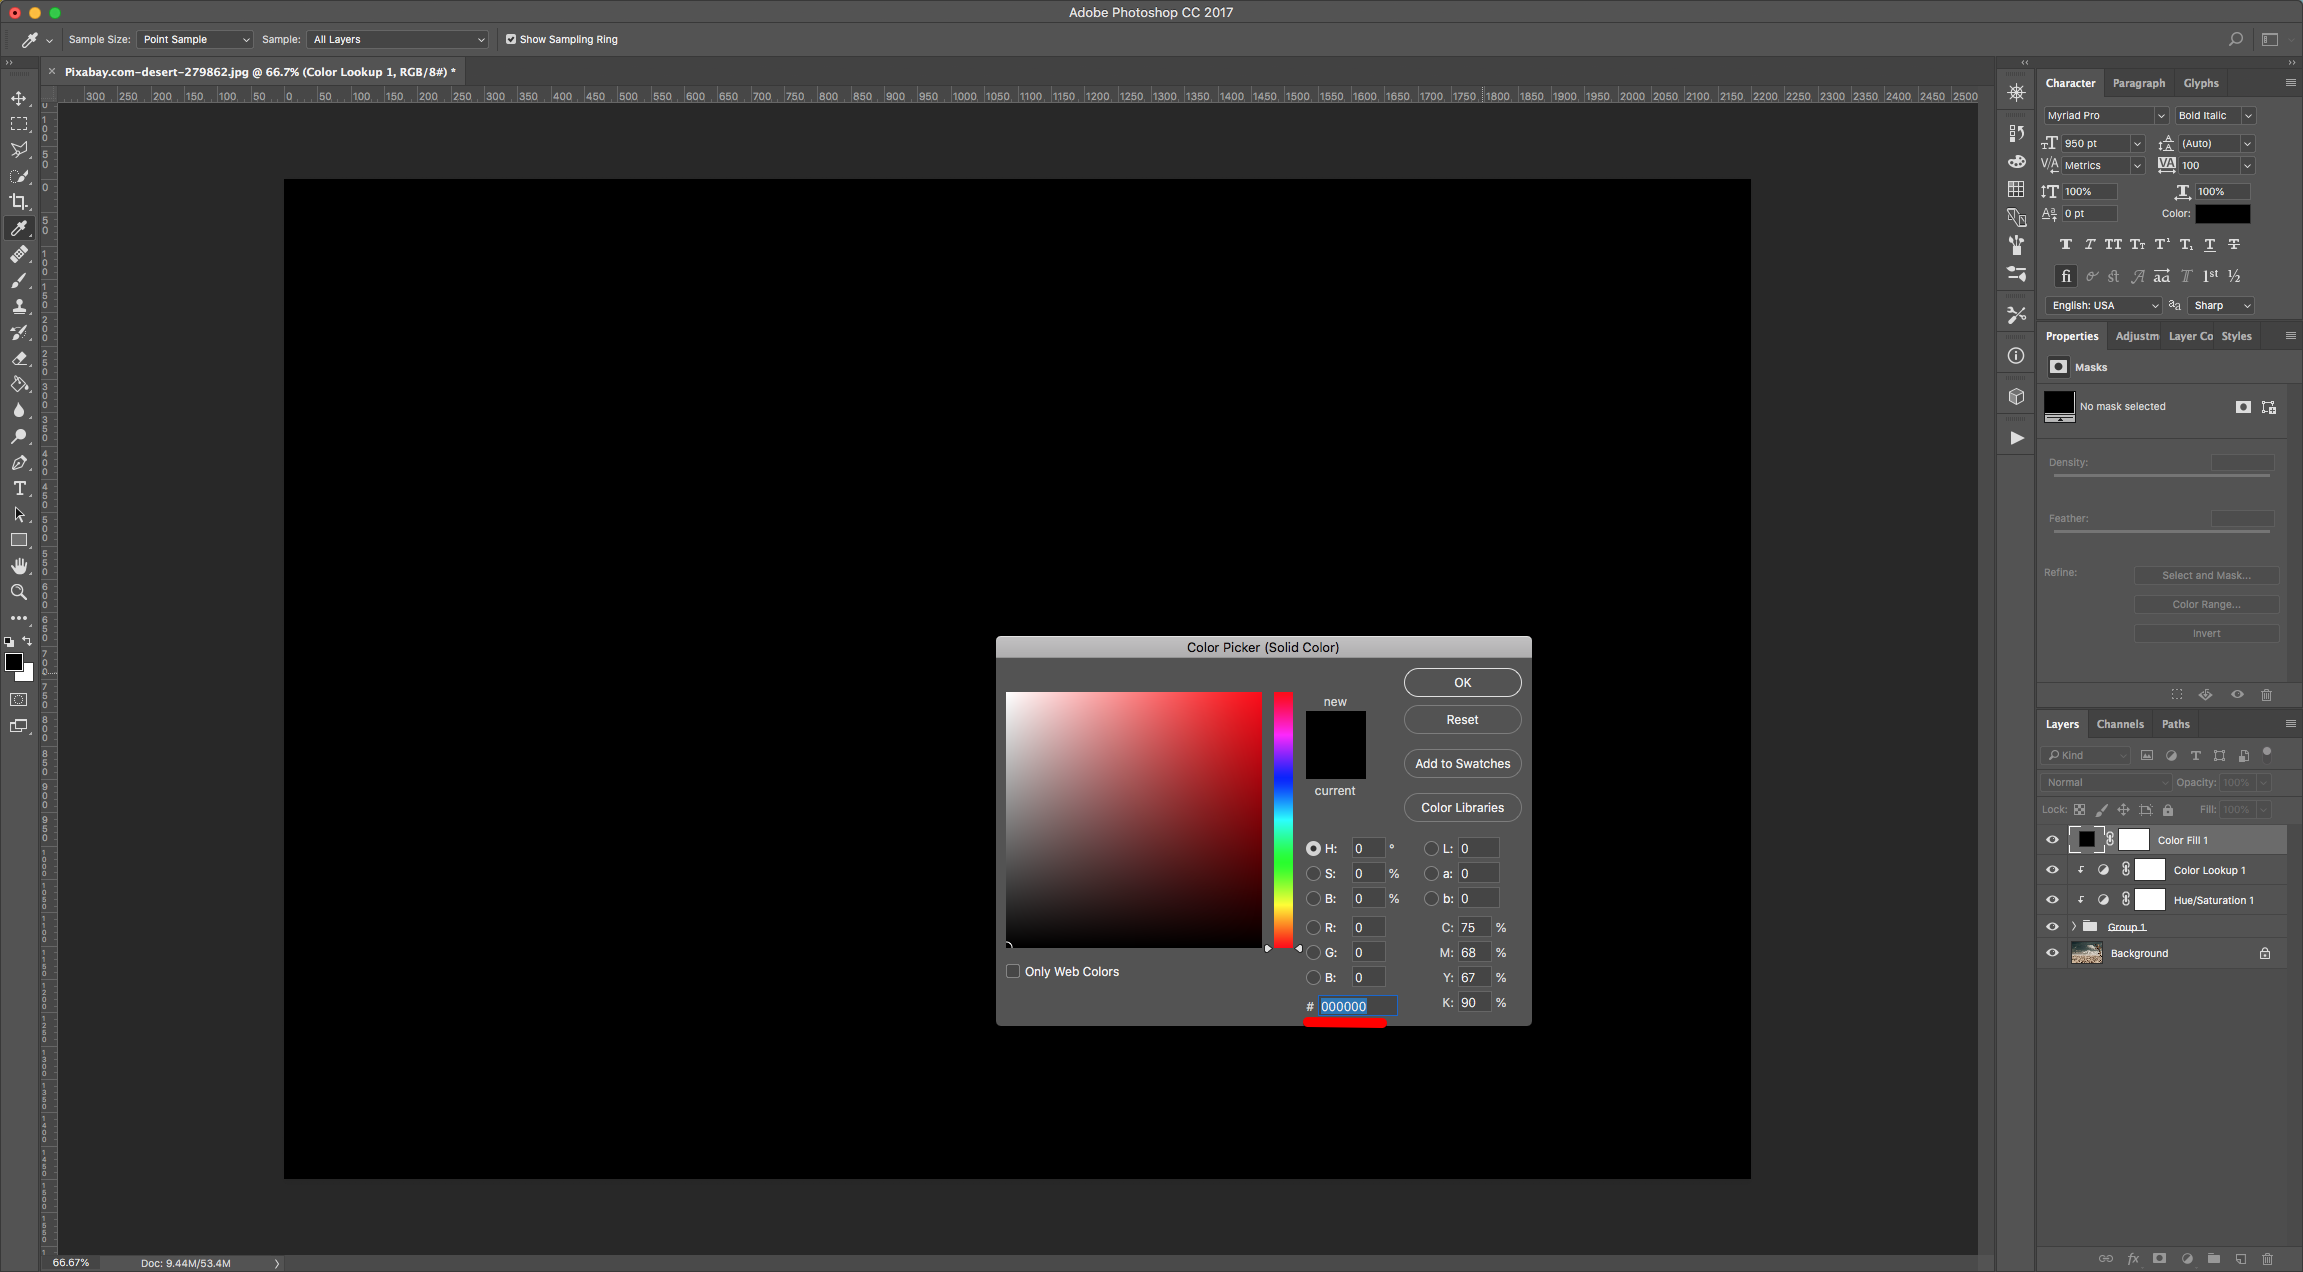
17 - Create a “New Color Fill Adjustment Layer” on top of everything by clicking on the small Black and White circle at the bottom of the “Layers Panel” and choose “Solid Color”. Use Black as “Fill” color (#000000).
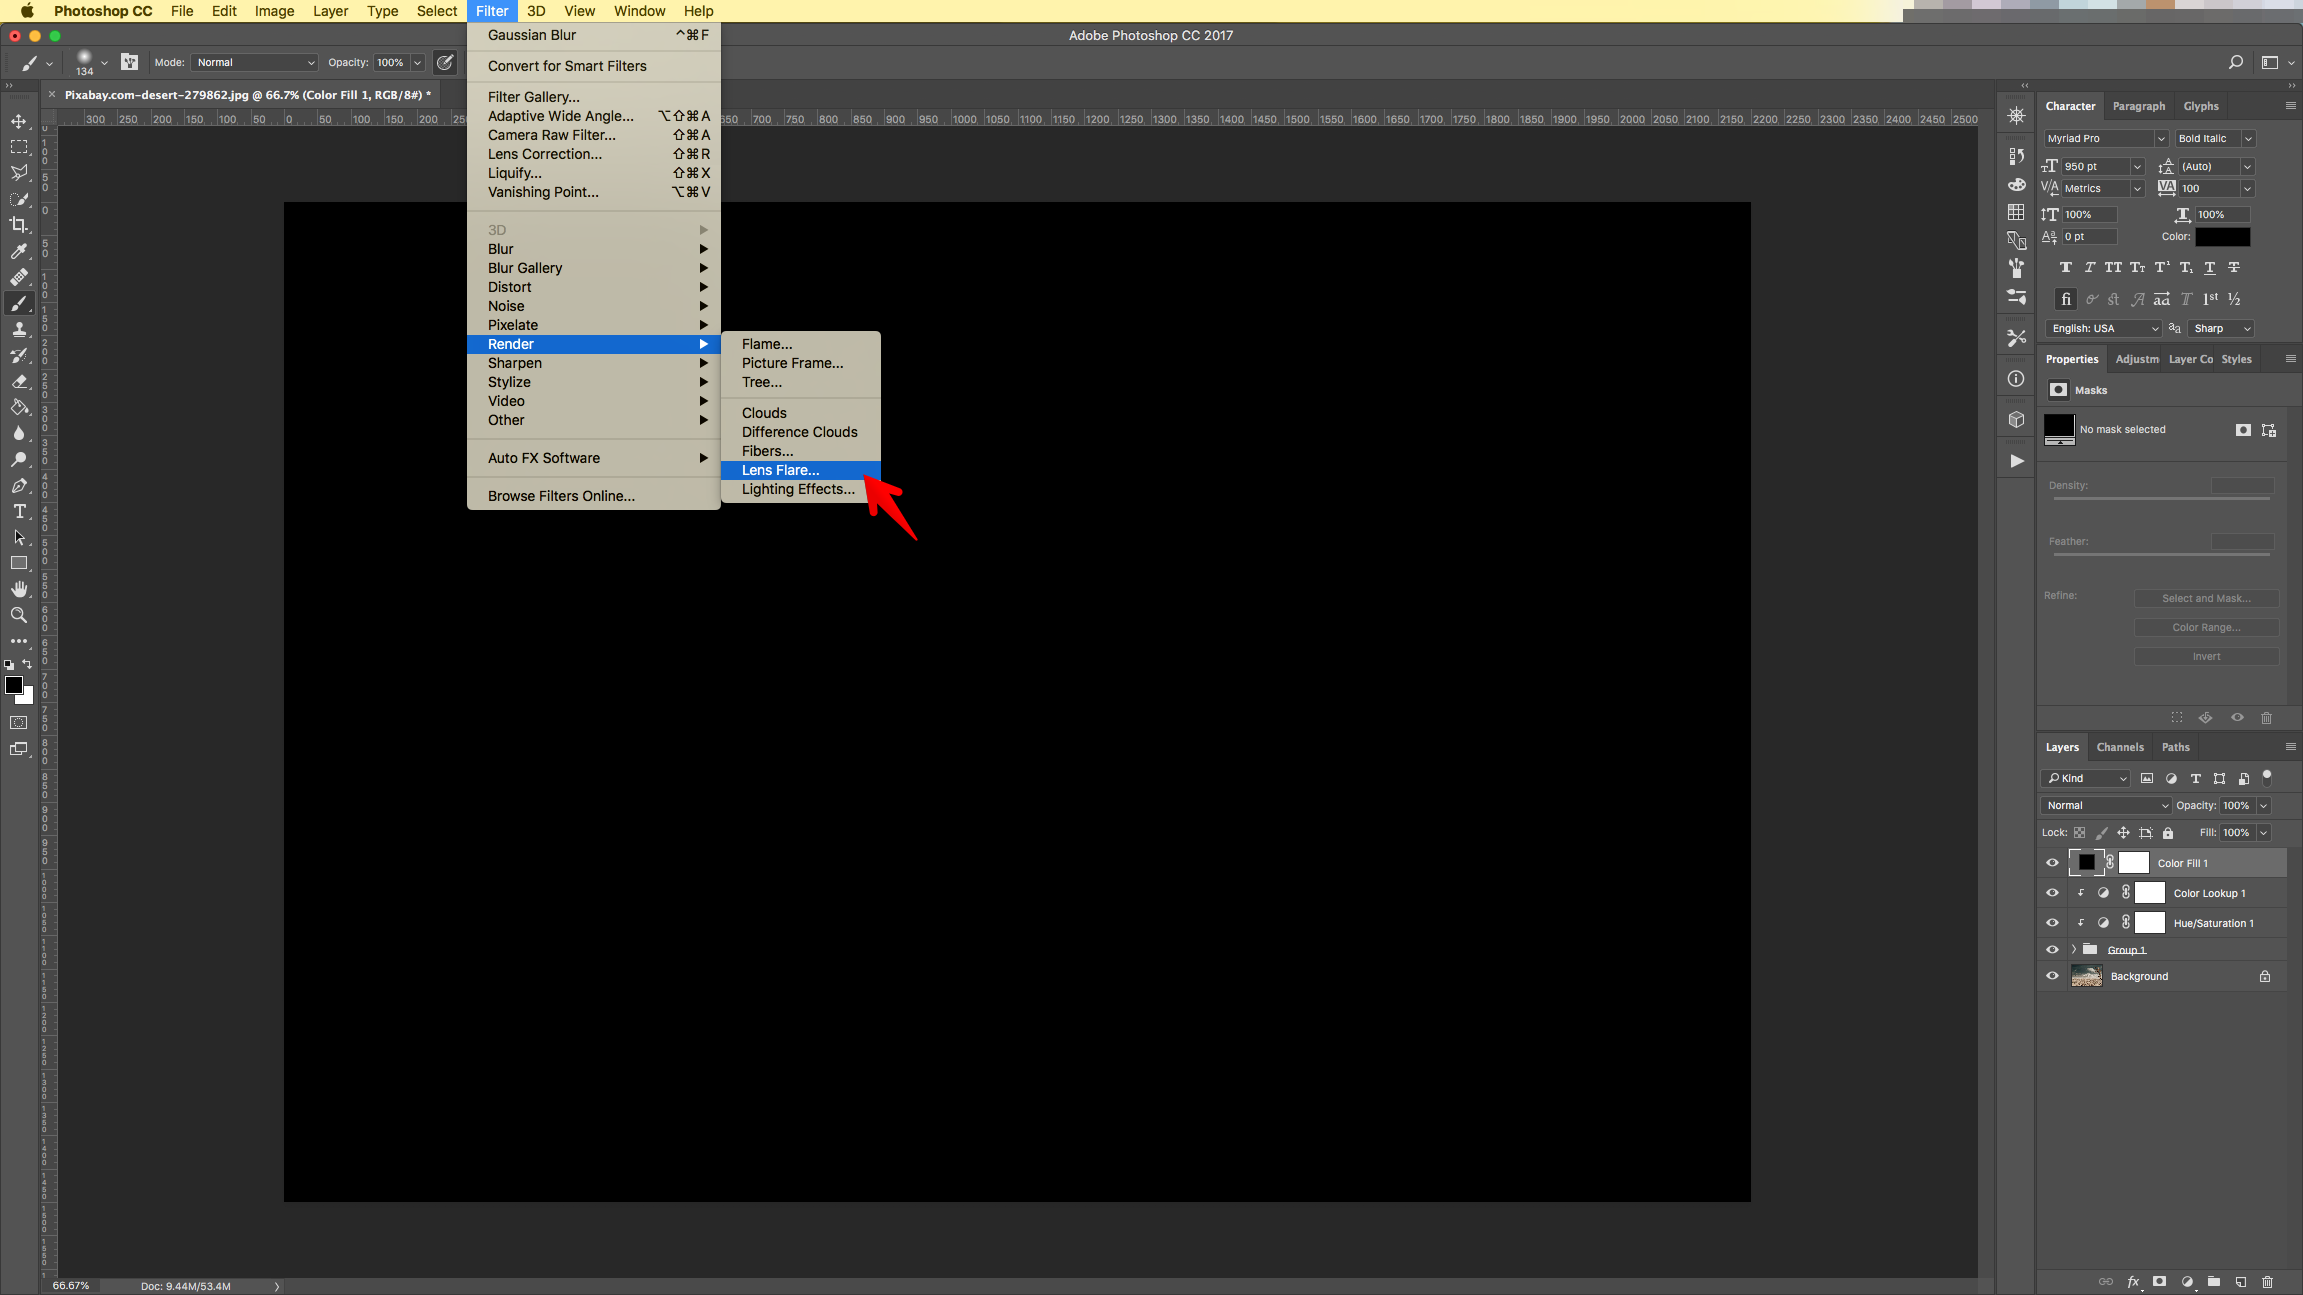
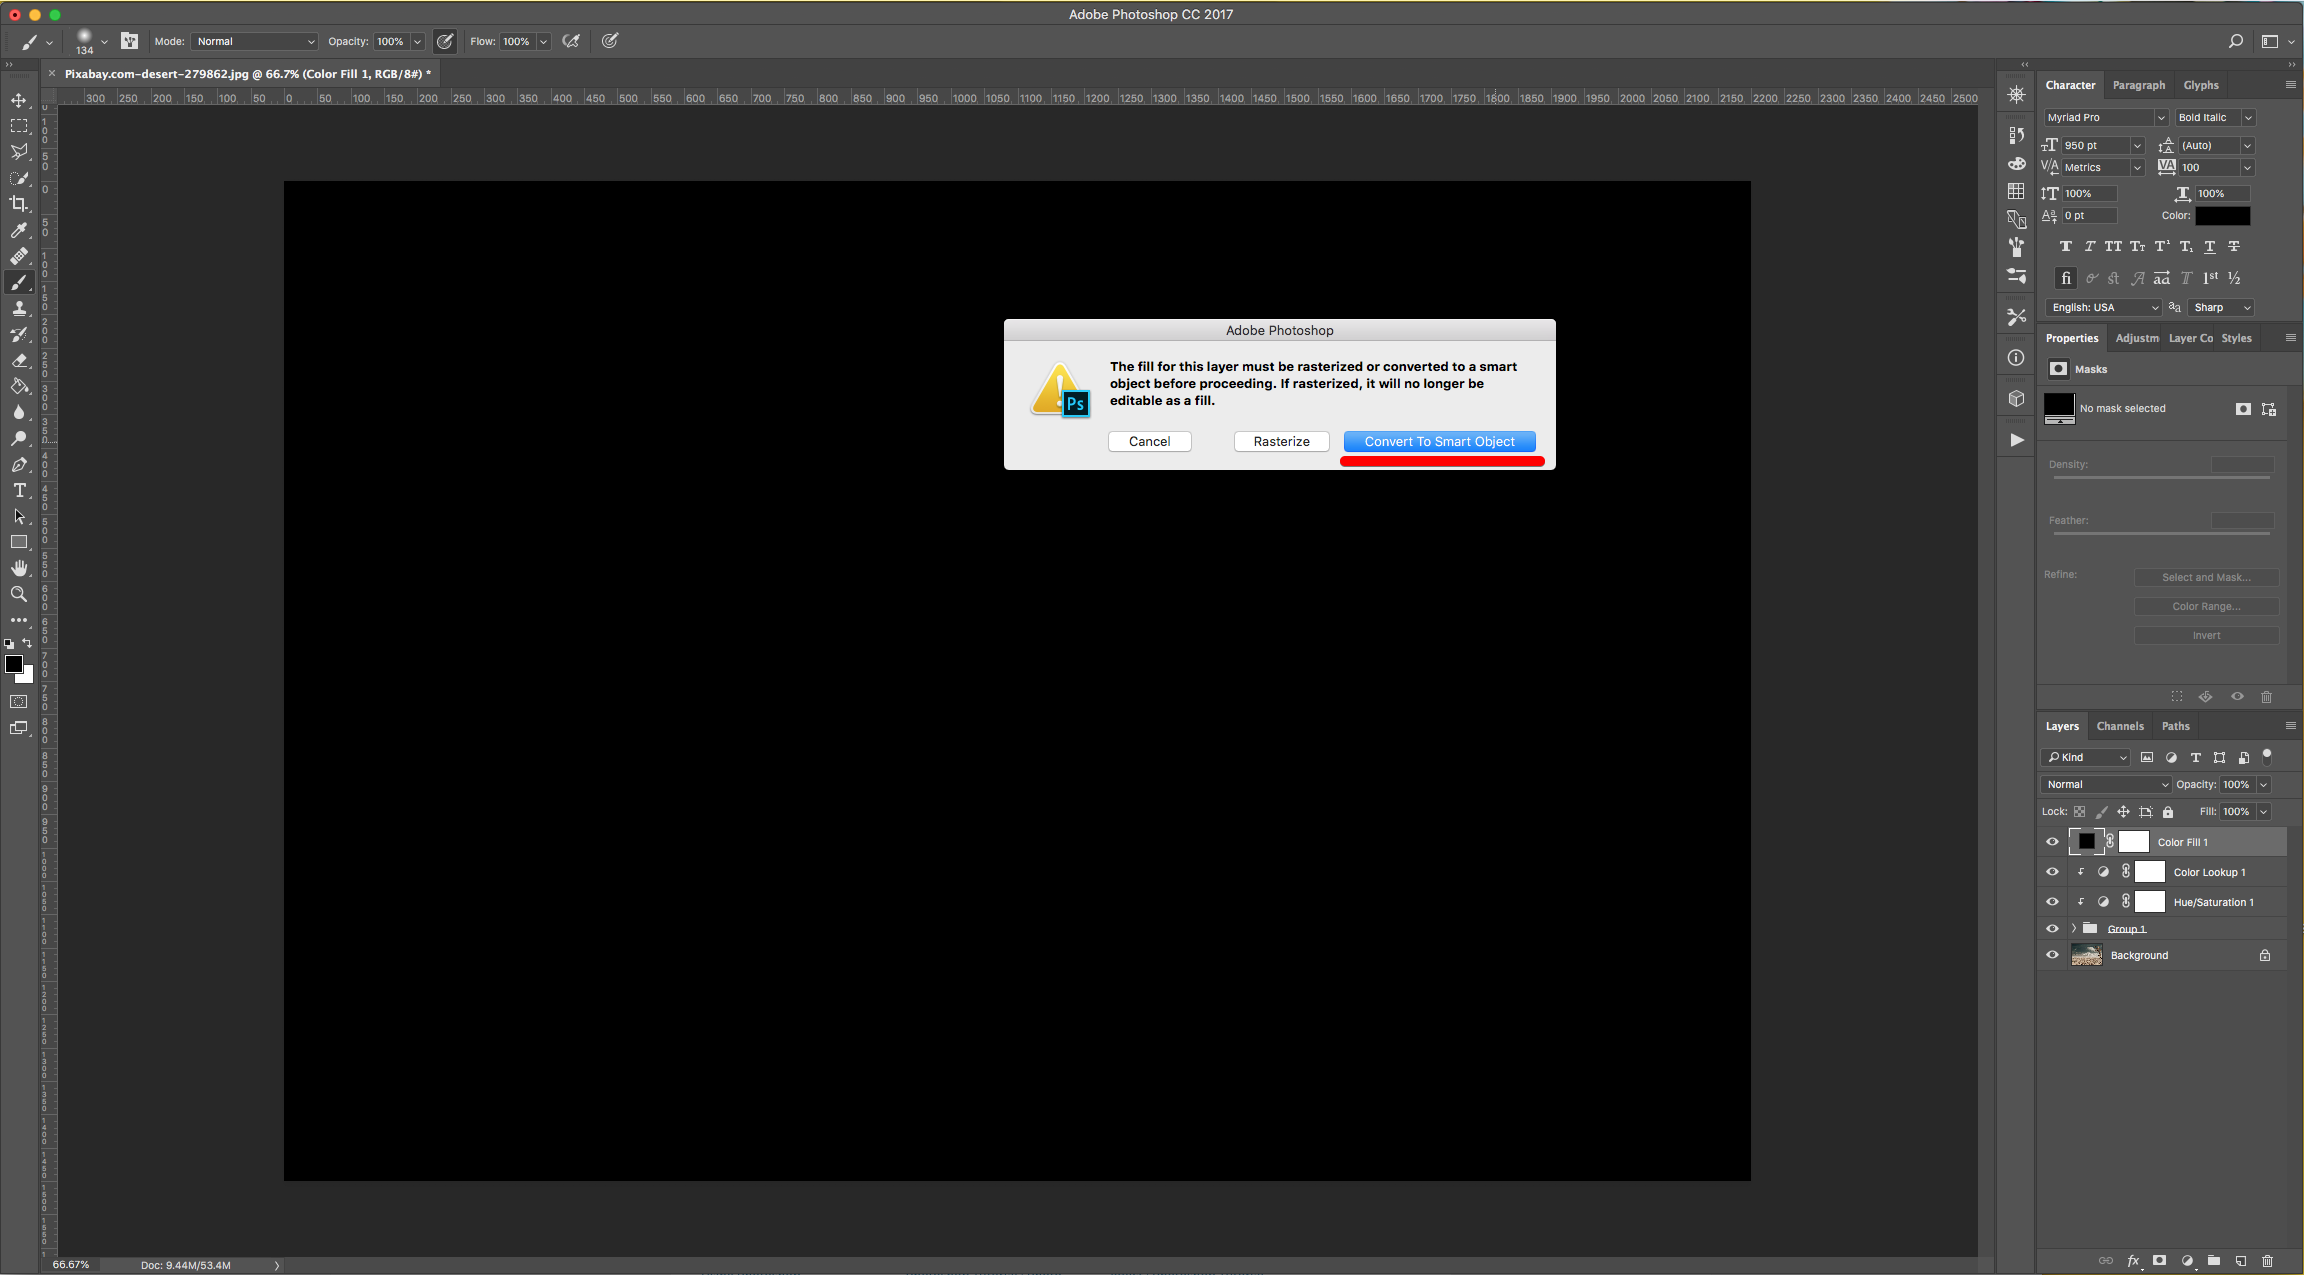
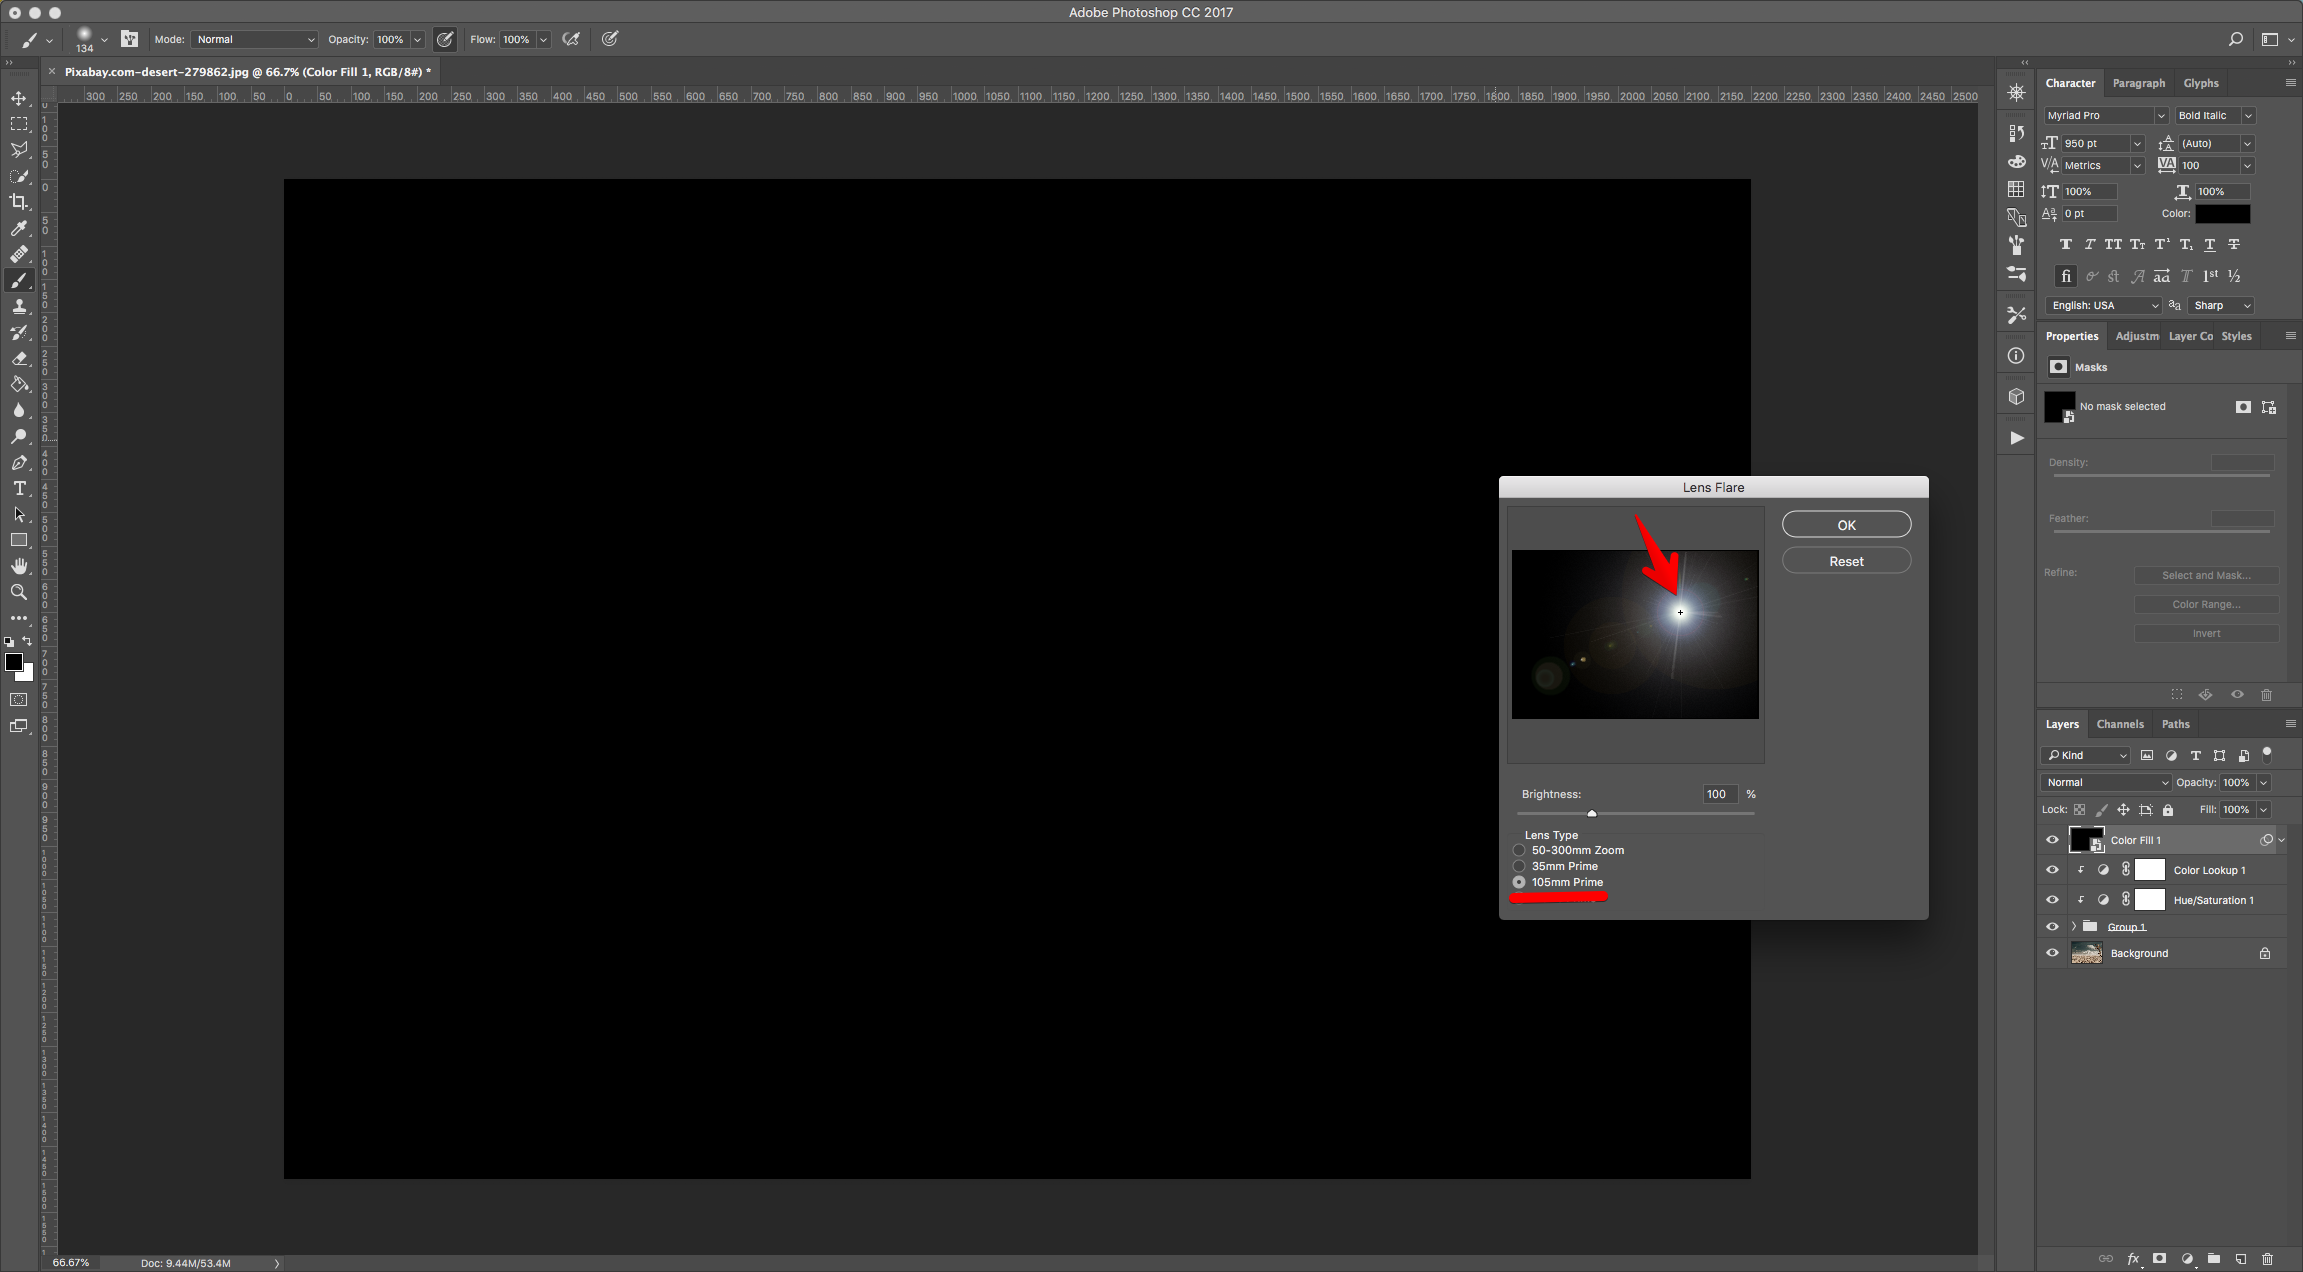
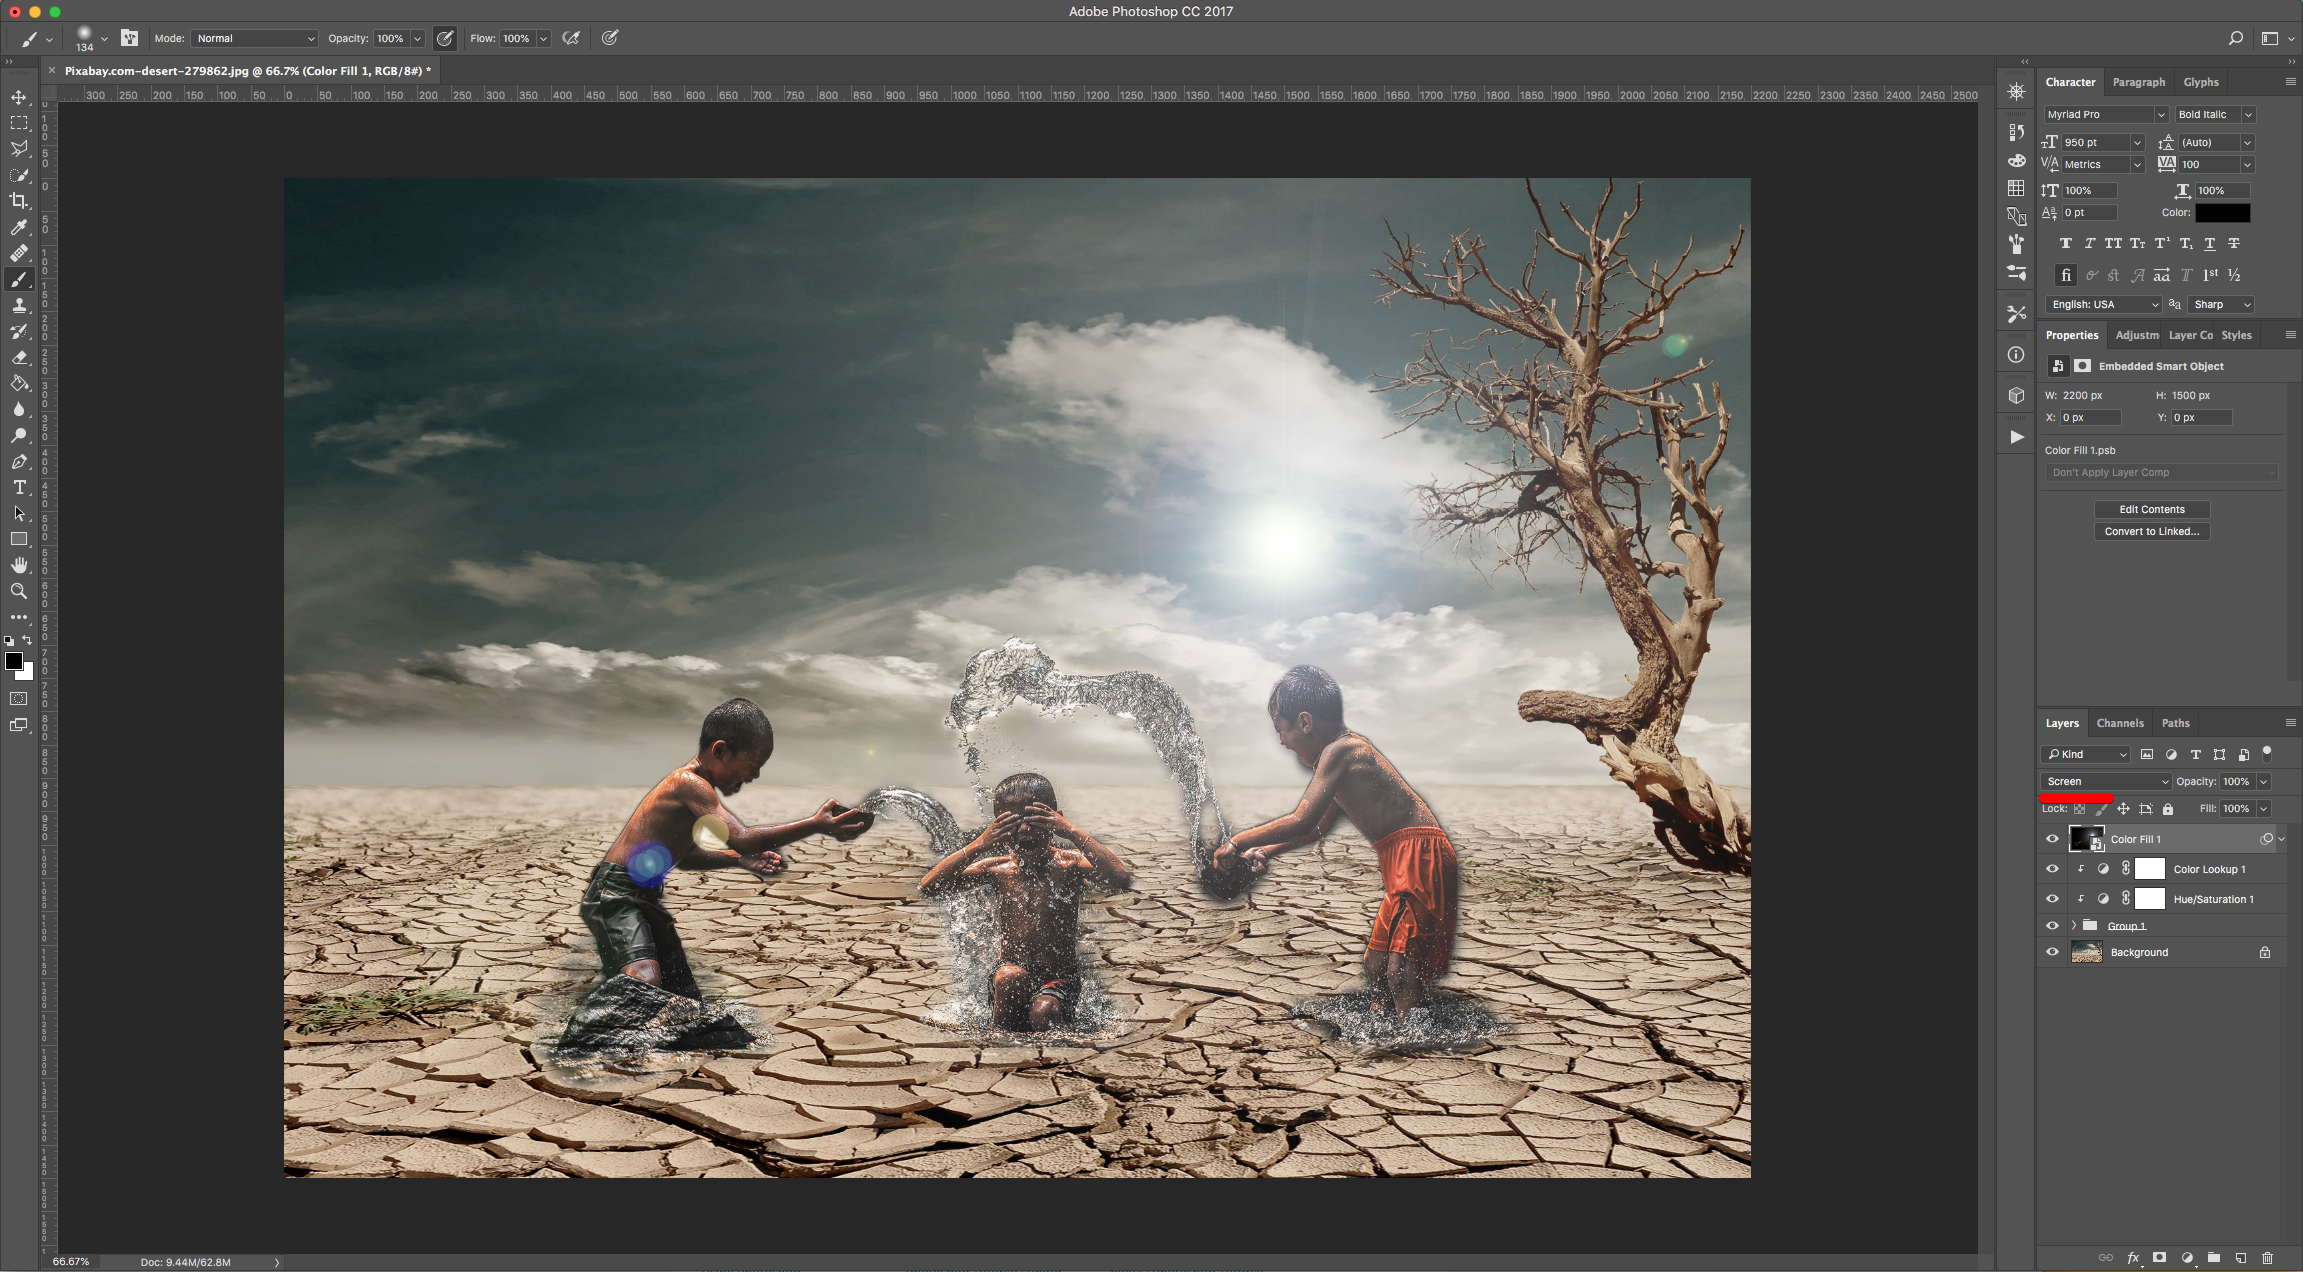
18 - Go to Filter > Render > Lens Flare, choose “Convert To Smart Object” if asked and use the 105 mm Prime option. Position the Flare where the light source (Sun) should be and click “OK”. Change the “Blending Mode” to “Screen”.
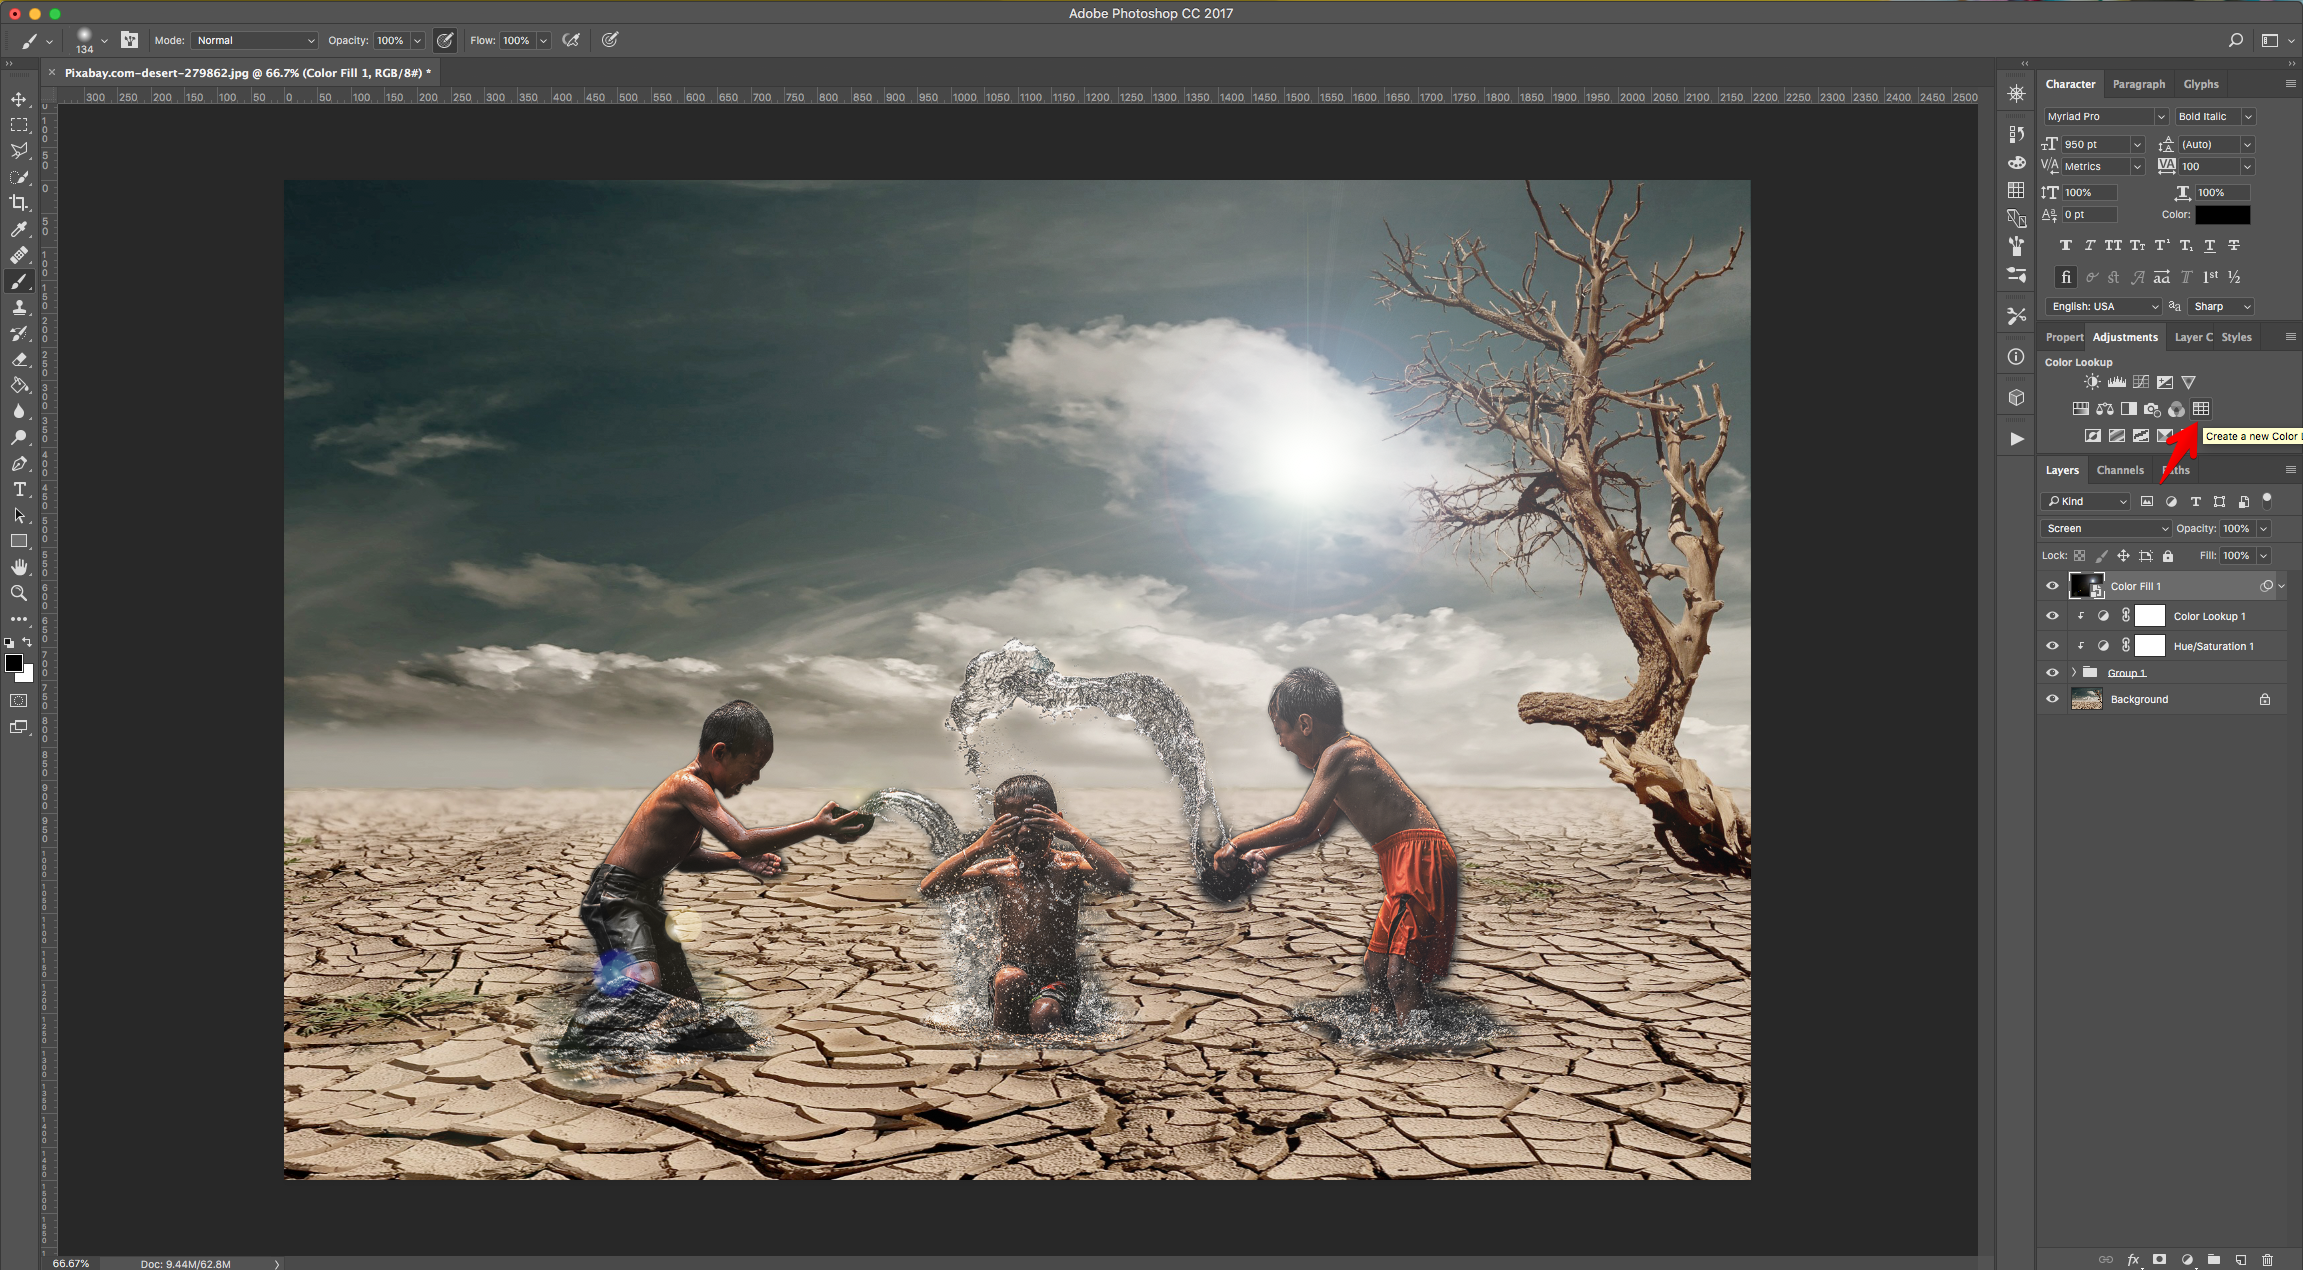
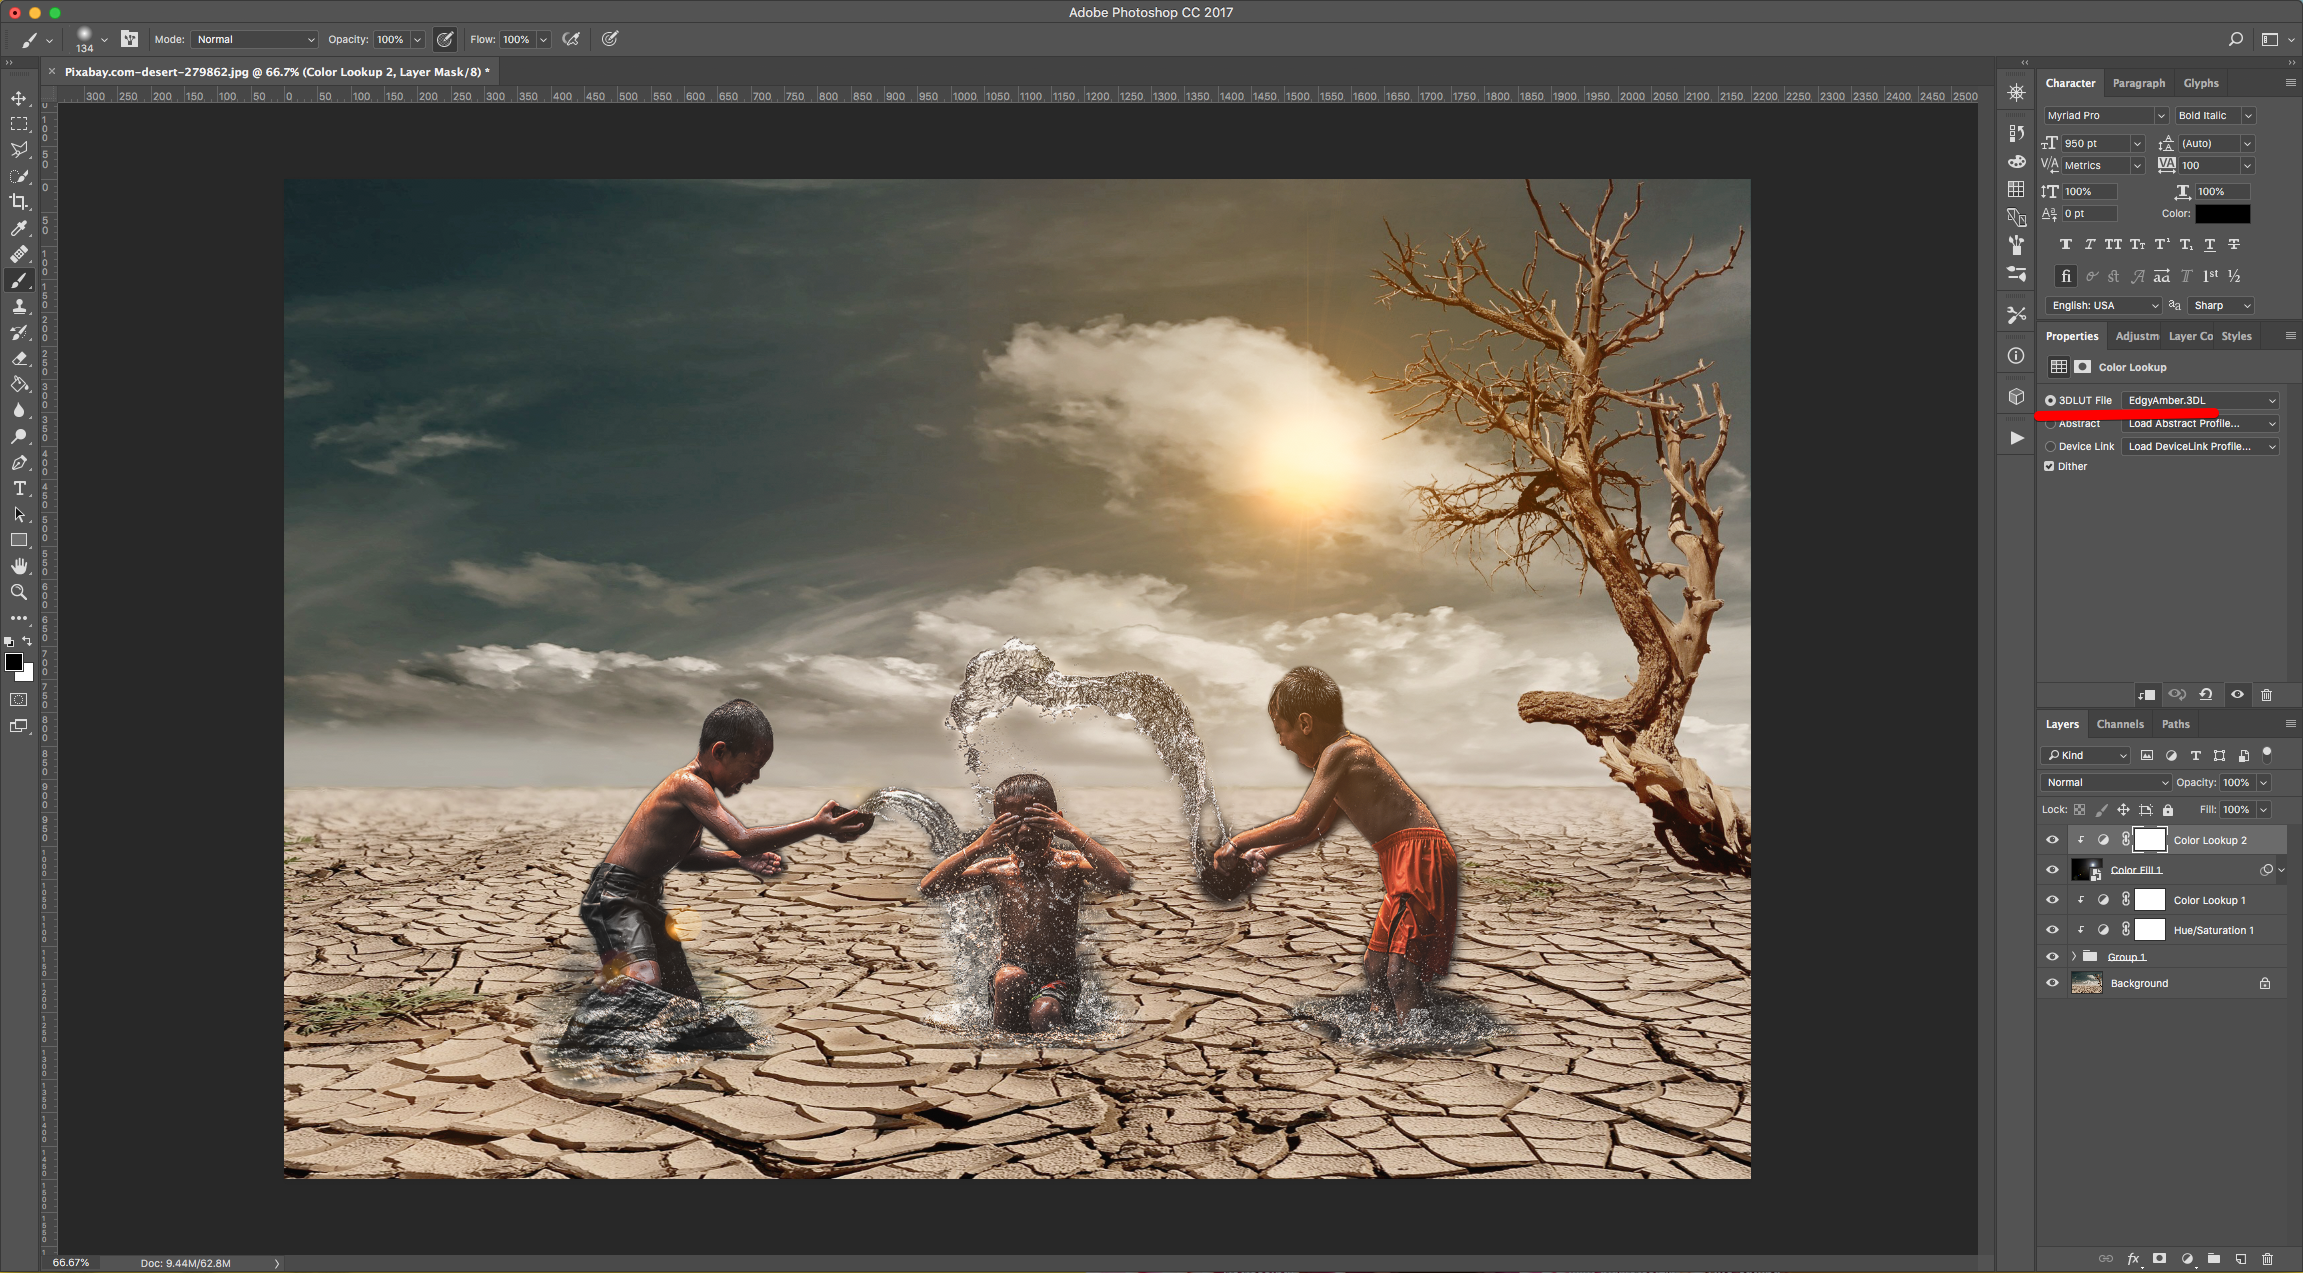
19 - If you need to reposition the Flare, just double-click on top of the “Filter” Thumbnail and fix it.

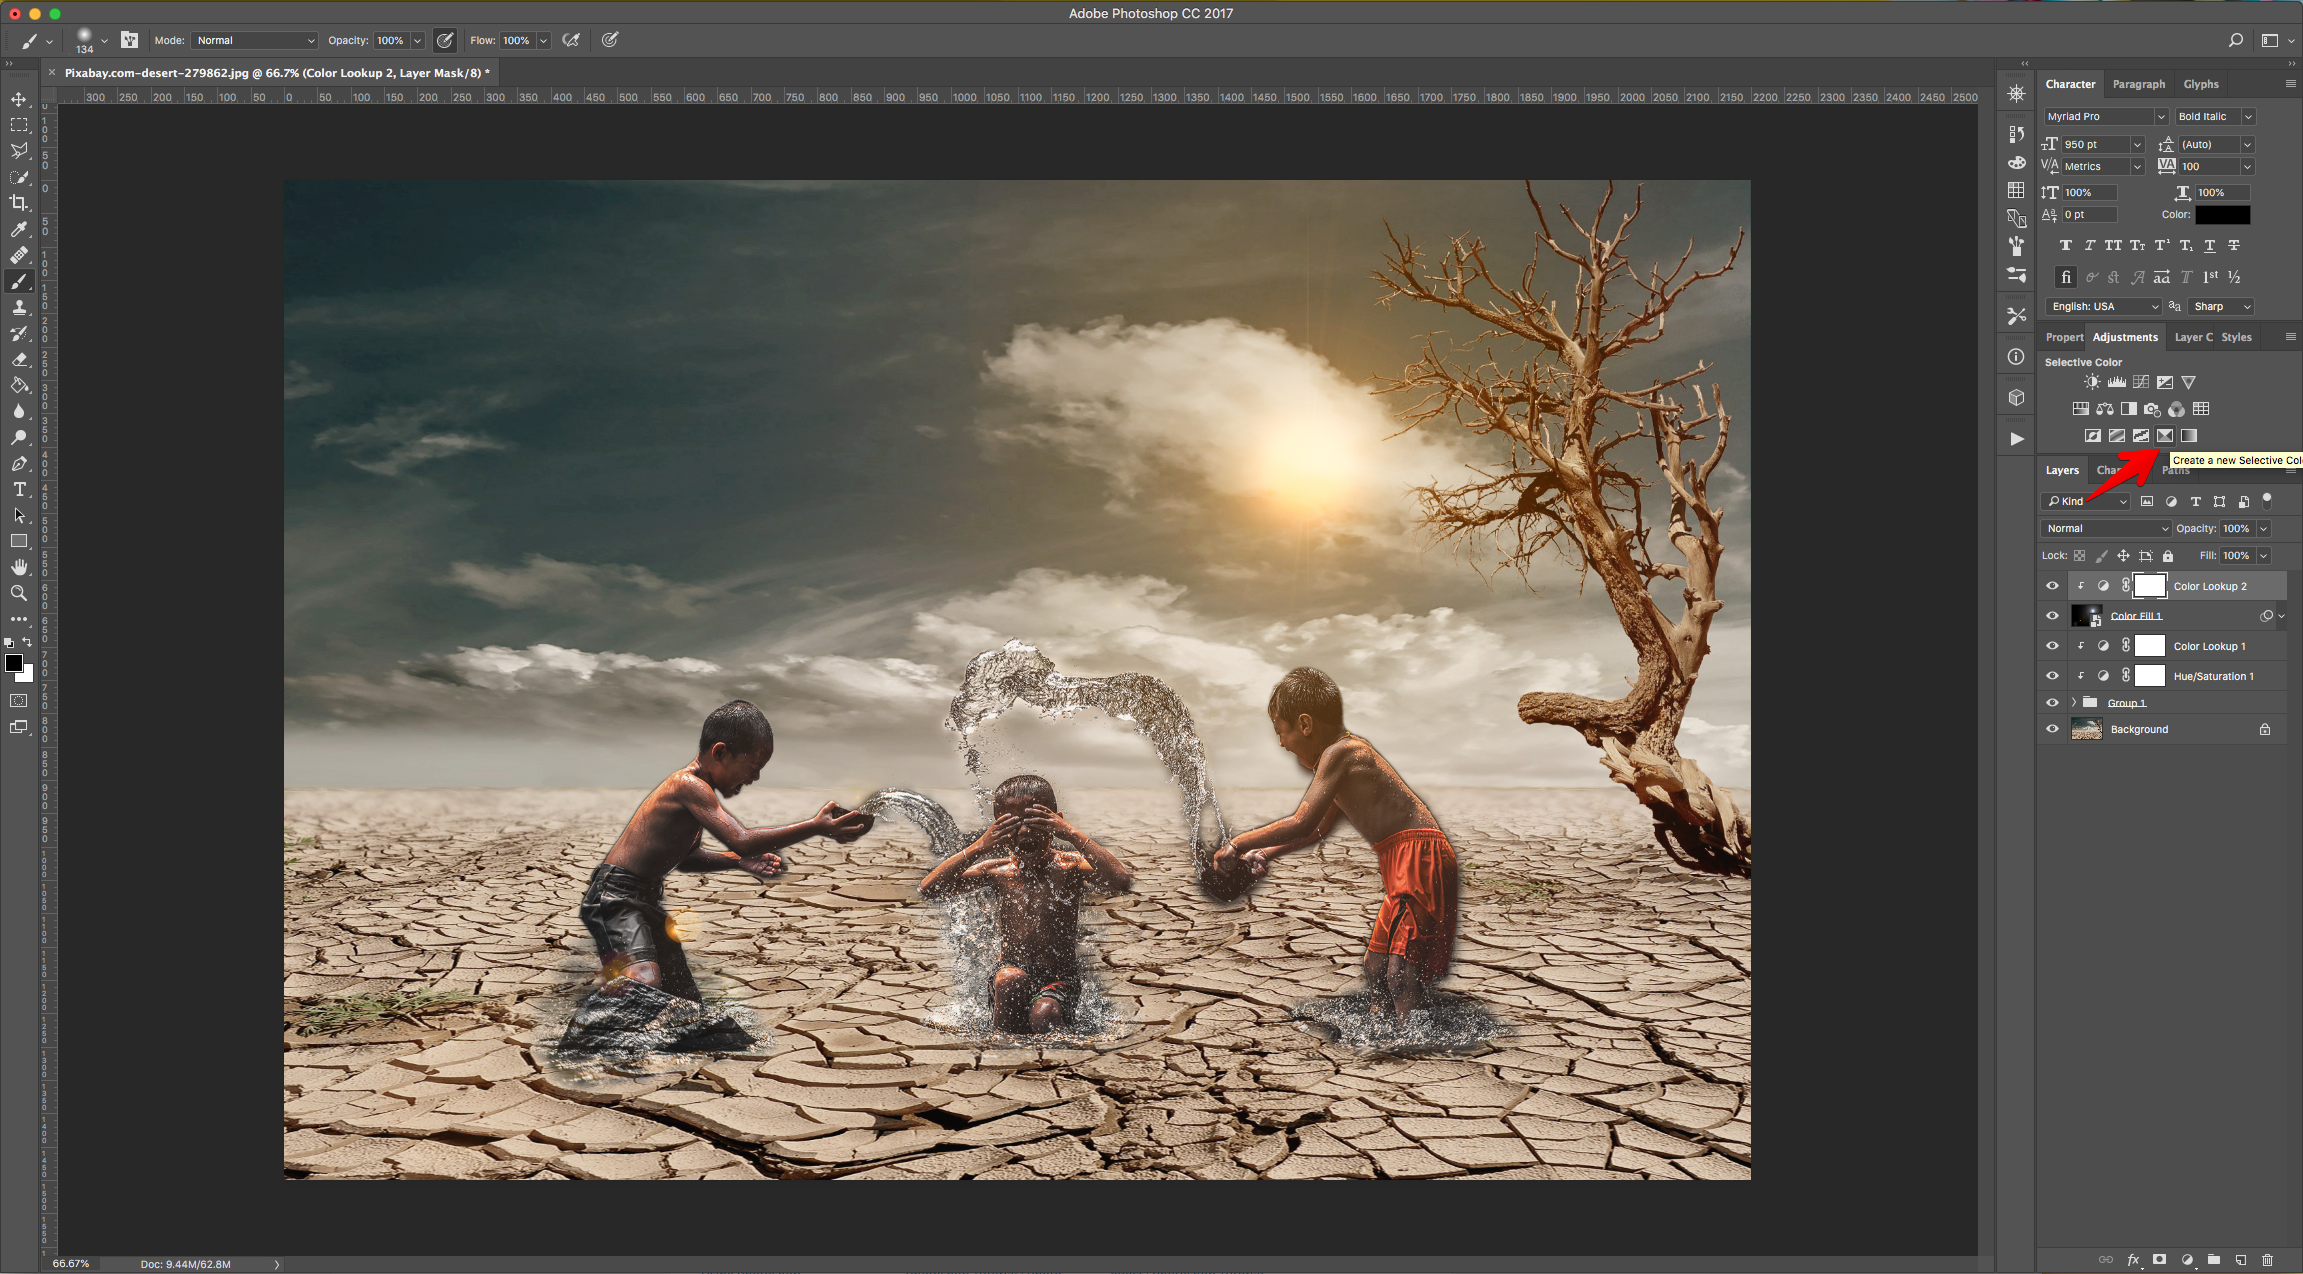
20 - Create a “Color Lookup Adjustment Layer” on top of everything, clip it down and choose “EdgyAmber.3DL” from the “3DLUT File” Tab.
21 - Then, create a “Selective Color Adjustment Layer” on top, don’t clip it down this time. Choose the “Neutrals” Tab and move the levers until you get a better blend between images.
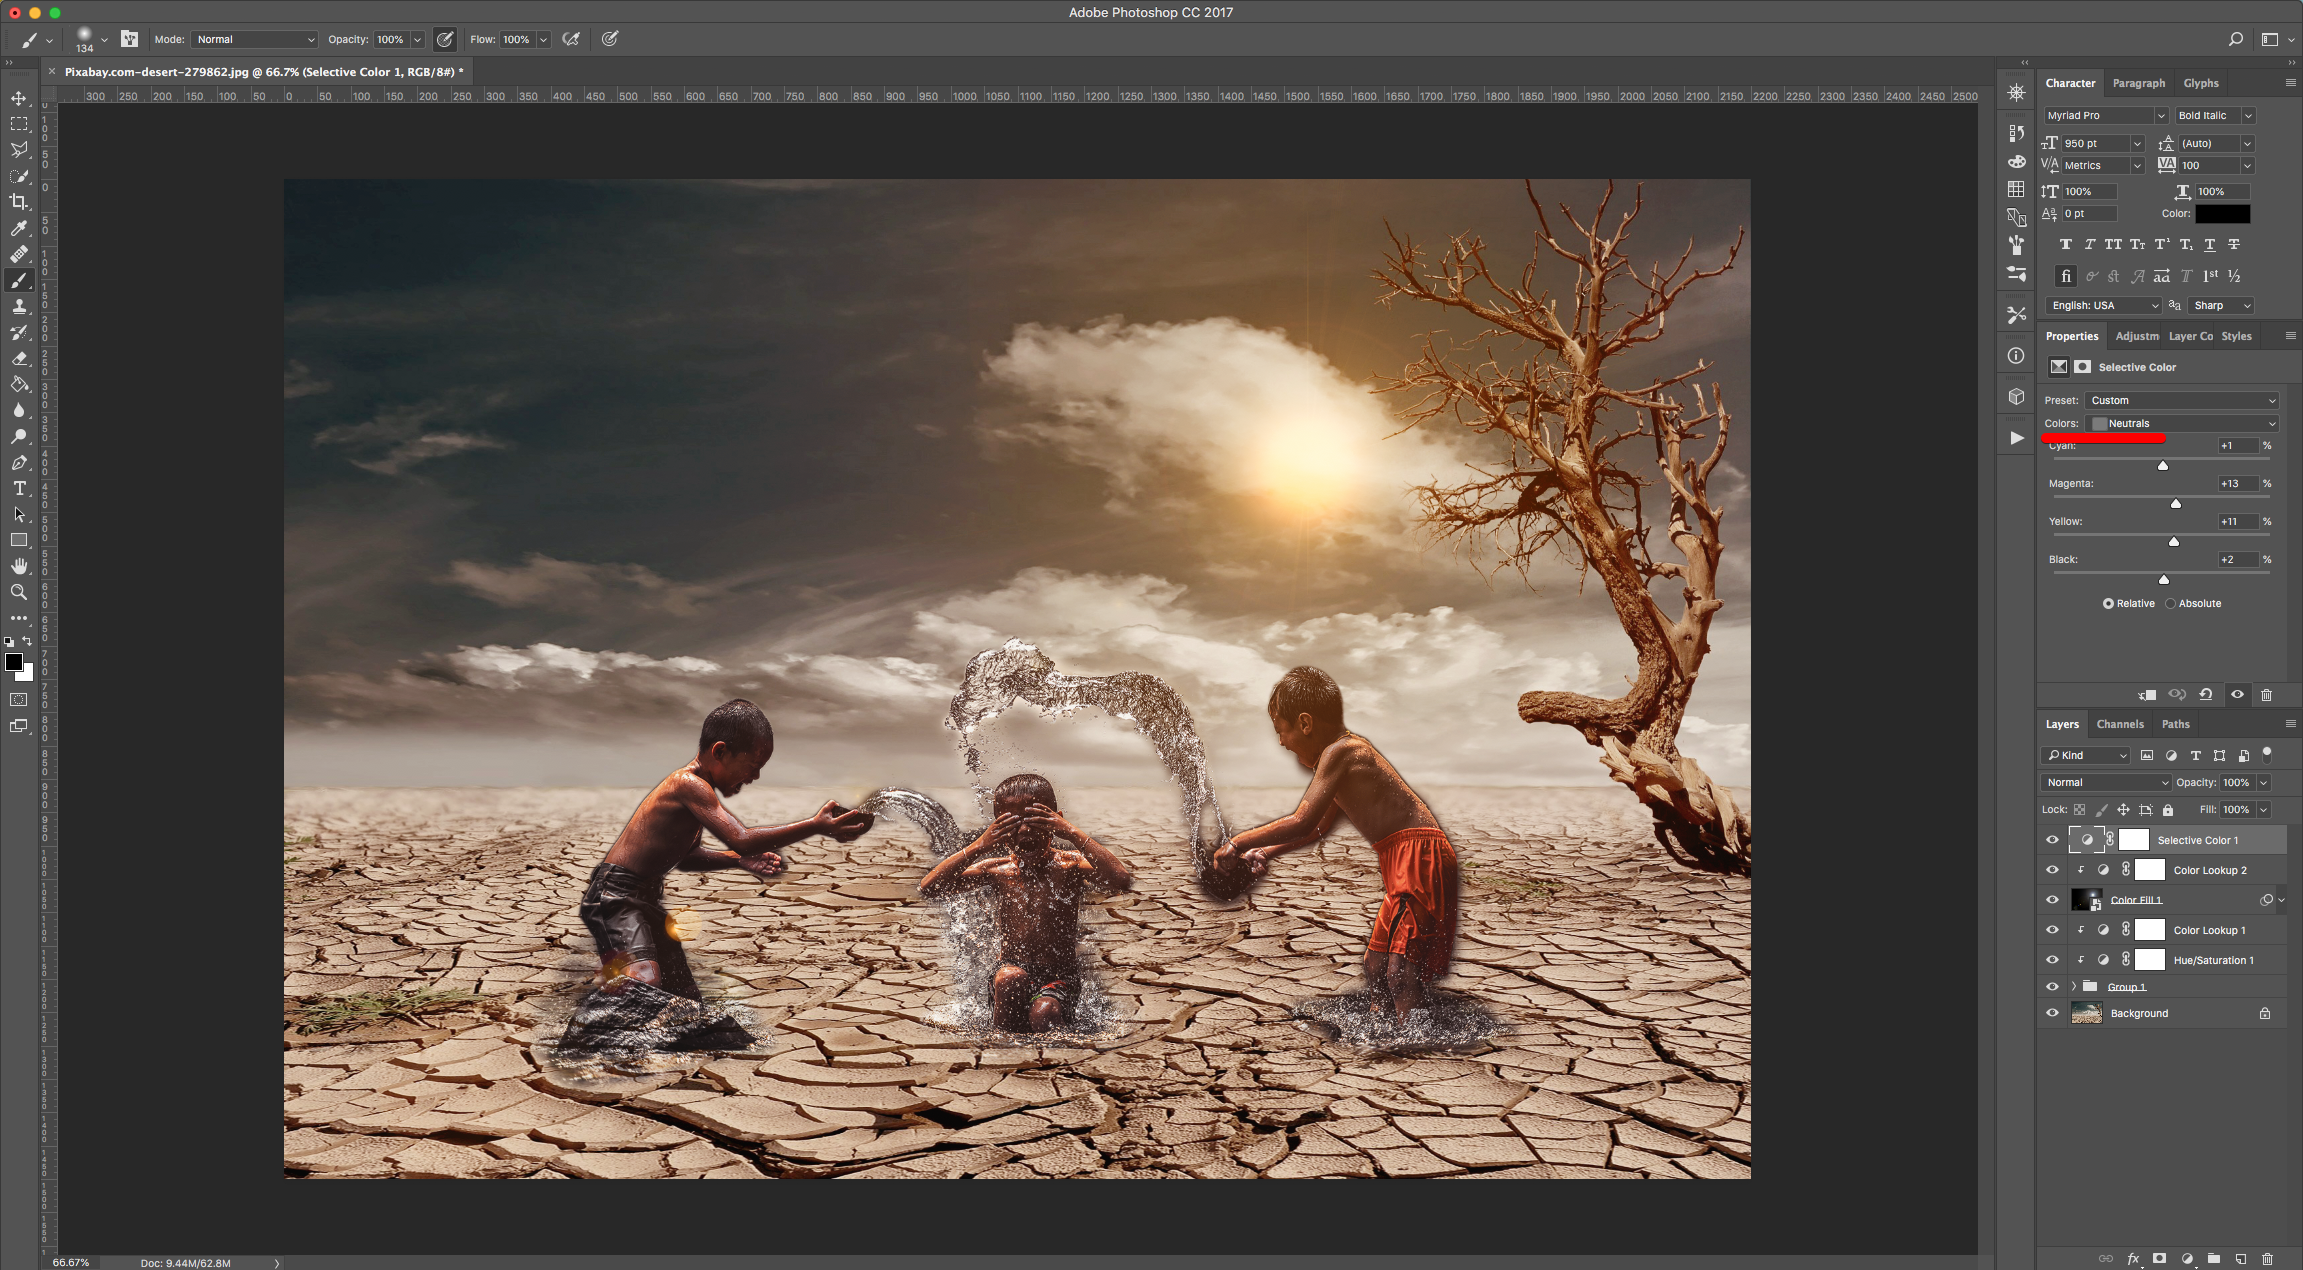
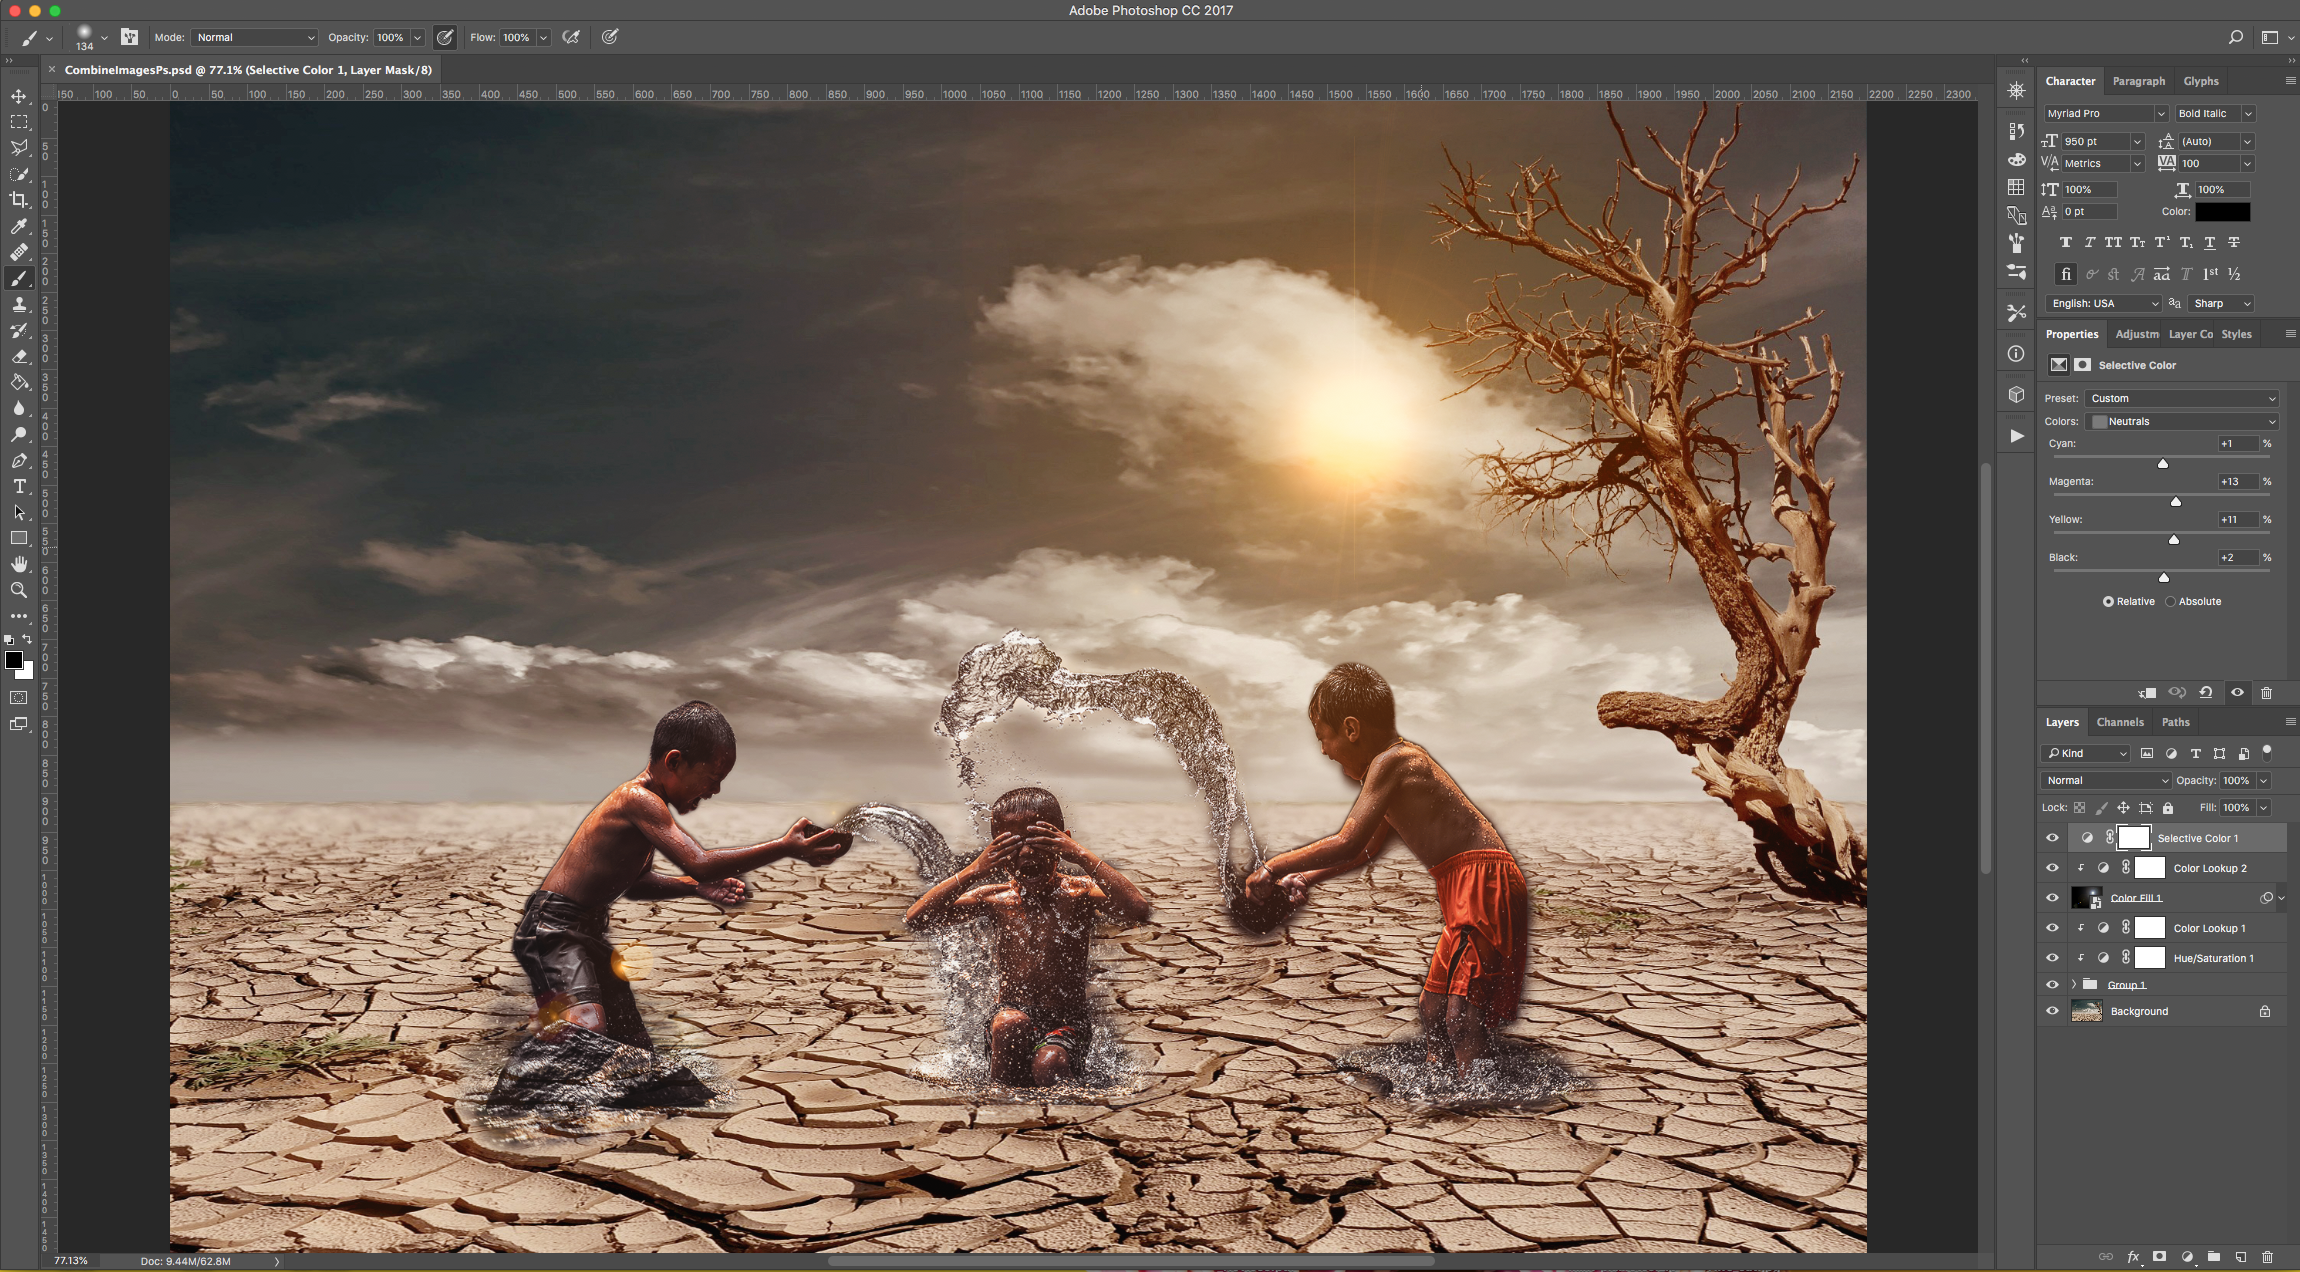
22 - Check it out.
1 - In Photoshop, open the Image you chose as “Background”.
2 - Go to Image > Adjustments > Levels (Command/Control + L) and click the “Auto” button.
3 - Go to File > Place Embedded... and navigate to the other image you want to use. Select it and click “Place”.
4 - Resize it if needed. You can lower the “Opacity” to achieve the proper placement and then click “Enter” or the small “Checkmark” on the Top Menu to “Commit Transform”.
5 - Turn the “Opacity” back to 100% and use The “Quick Selection Tool” to select the parts of the front image you wish to keep. Use the “Add to Selection” option in the Top Menu if needed.
6 - Then, the “Remove” from Selection option to clean up the parts you don’t want.
7 - You can use the “Polygonal Lasso Tool” (L) to clean the selection further. But, remember that it doesn’t need to be perfect.
8 - In the Top Menu add a “Feather” of 1.5 px and click on the “Select and Mask” button. Change the “Radius” and other options if needed and choose “Output to Layer Mask”.
9 - Male sure the “Mask” Thumbnail is selected and use the “Brush Tool” (B) with a Medium and Soft brush (49 px and 0% “Hardness”) to bring out some of the Water around your subject. Remember to make sure that White is your “Foreground” color.
10 - Duplicate the layer (Command/Control + J) and rename the bottom one “Hard Light”. Change its “Blending Mode” to “Hard Light” and use the “Brush Tool” (B) to bring out more background around the subjects to blend the two images o bit more.
11 - Select the “Clouds” Layer, right-click on top of its Thumbnail and choose “Convert to Smart Object”.
12 - Select the both Layers (“Shift” key) and “Group” them together by clicking on the small Folder icon at the bottom of the Layers Panel.
13 - Go to the “Adjustments Panel” and create a “New Hue/Saturation Adjustment Layer”. Clip it down by clicking on the small icon at the bottom of the “Properties Panel”.
14 - Choose “Custom” from the “Preset” Tab, “Cyan” from the one under and lower the “Saturation” all the way to -100. Repeat with the “Blue” Tab.
15 - Now, create a “Color Lookup Adjustment Layer” on top of everything, clip it down too and choose “DropBlues.3DL” from the “3DLUT File” Tab.
16 - Open the “Folder” by clicking on the small Arrow on the left side of its Thumbnail, select the top layer and “Duplicate” it (Command/Control + J). Change the duplicate’s “Blending Mode” to “Multiply” and the “Opacity” to 50%.
17 - Create a “New Color Fill Adjustment Layer” on top of everything by clicking on the small Black and White circle at the bottom of the “Layers Panel” and choose “Solid Color”. Use Black as “Fill” color (#000000).
18 - Go to Filter > Render > Lens Flare, choose “Convert To Smart Object” if asked and use the 105 mm Prime option. Position the Flare where the light source (Sun) should be and click “OK”. Change the “Blending Mode” to “Screen”.
19 - If you need to reposition the Flare, just double-click on top of the “Filter” Thumbnail and fix it.
20 - Create a “Color Lookup Adjustment Layer” on top of everything, clip it down and choose “EdgyAmber.3DL” from the “3DLUT File” Tab.
21 - Then, create a “Selective Color Adjustment Layer” on top, don’t clip it down this time. Choose the “Neutrals” Tab and move the levers until you get a better blend between images.
22 - Check it out.
by @lornacane


