
Enlarge Low Resolution Images in Photoshop
Learn how to resize an image in Photoshop without losing quality.
In this tutorial, we will be demonstrating how to enlarge a low-resolution image in Photoshop. If you find yourself needing to increase the size of a photo to fit your project's needs, but its resolution is too low, resulting in a blurry photo, this technique will help you fix it.
There is a limit to how much you can enlarge an image, and there are two important parameters to keep in mind: PPI and image size. PPI are the pixels per inch that make up the resolution of your image. The image size is simply the size of your image in inches, centimeters, points, etc. The larger the image, the better the chance for a decent result.
For our example, we will use a peacock feathers photo from the Plus Hub. Feel free to browse our photos for commercial use if you want to use a different image. For the purposes of this tutorial, we have decreased the resolution before starting the tutorial.
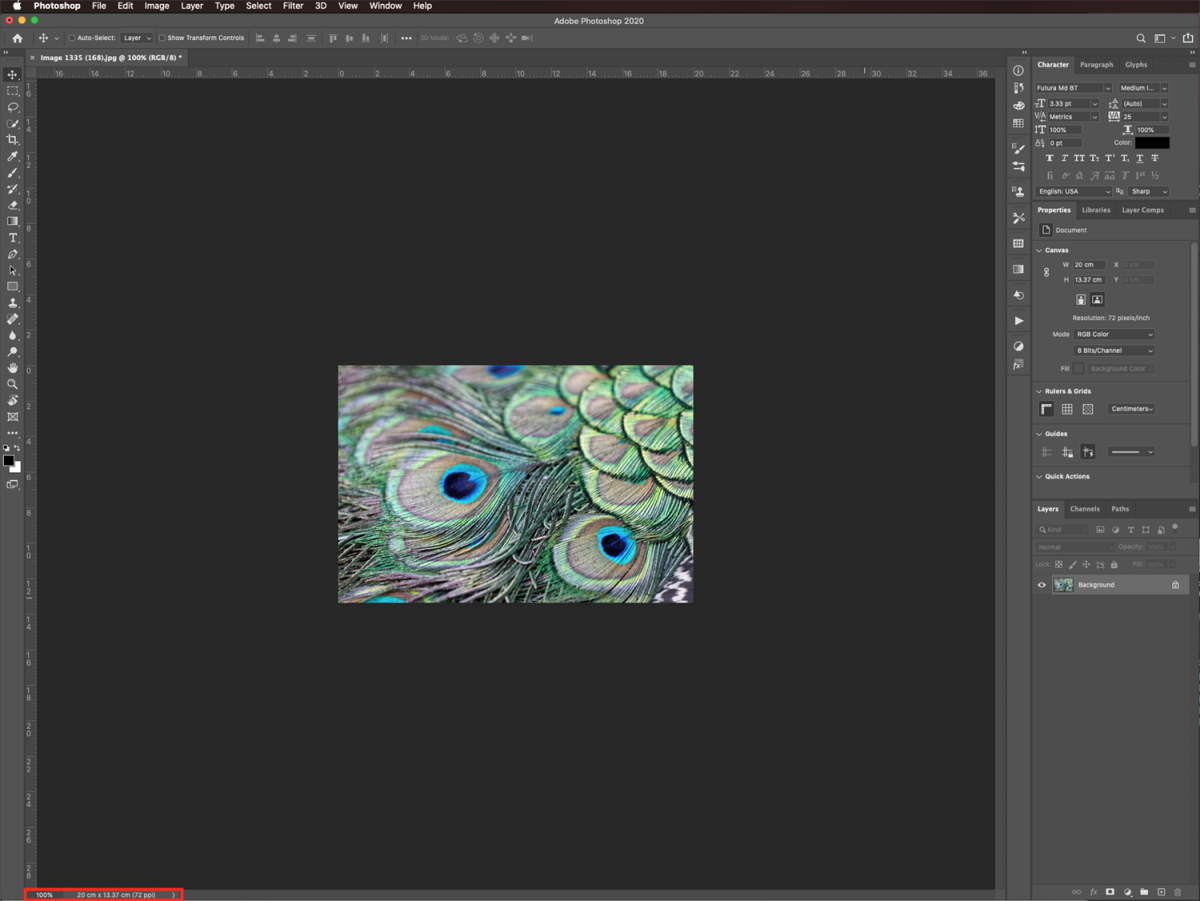
In Photoshop, open the low-res image you want to enhance. Zoom in to check how pixelated it is and what is the zoom percentage where it is more evident. This will help you determine if there’s a chance to make it look good.

For older versions of Photoshop, you may need to double-click on top of your background layer thumbnail to unlock it before applying the changes.
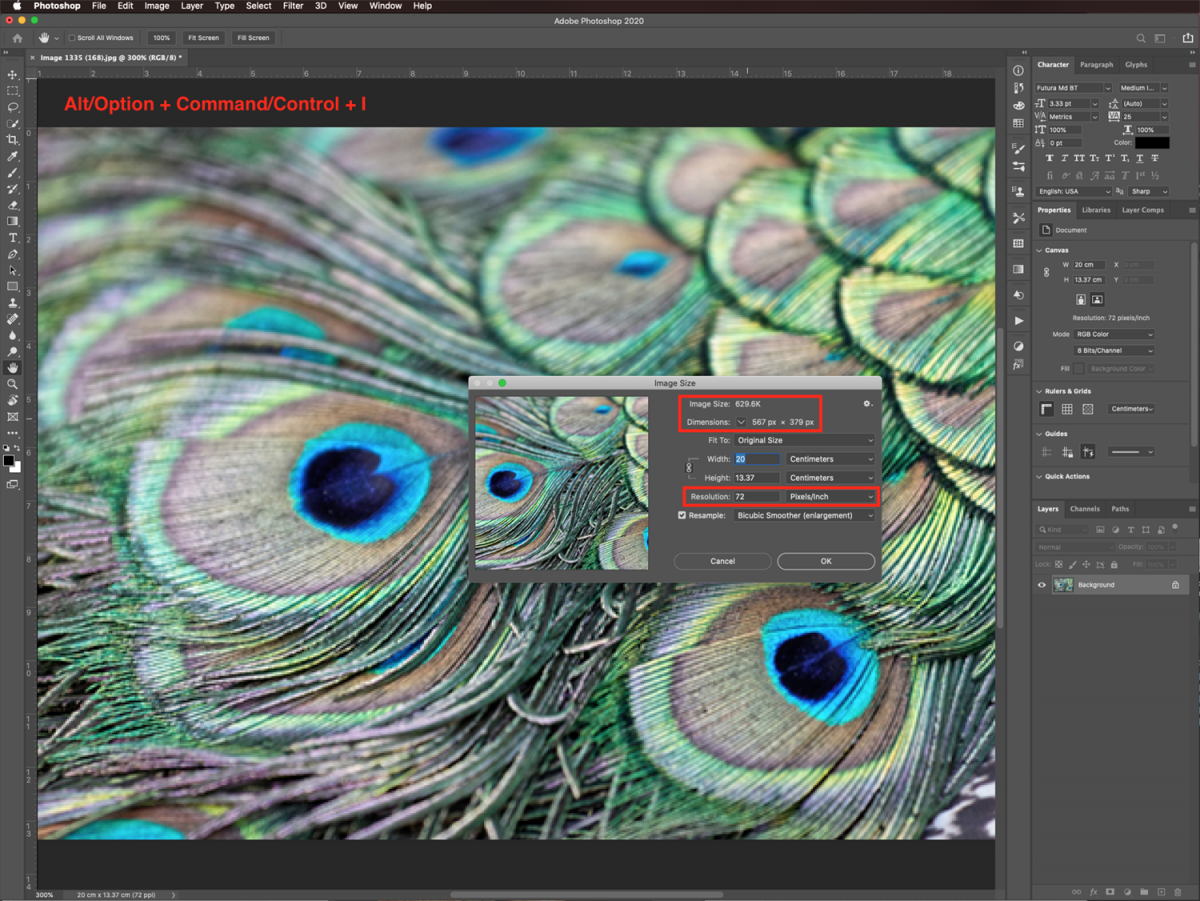
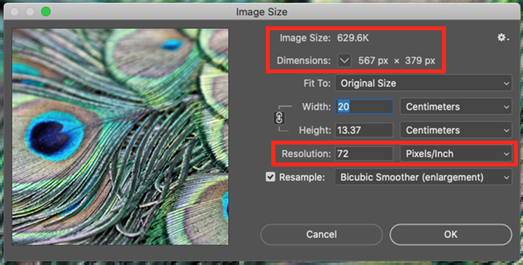
Go to Image > Image Size (Option/Alt + Command/Control + I) and check the resolution and the dimensions of your image both in size and pixels.
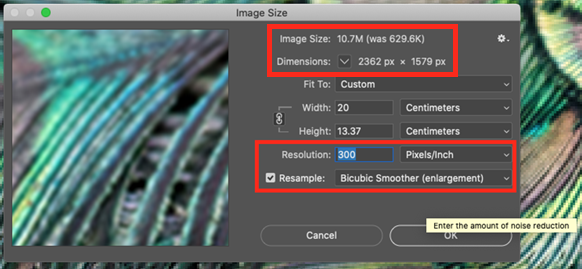
Change the resolution to 300 ppi. You will see that the dimensions increase. Change the Resample option to Bicubic Smoother (enlargement) and click Ok.
Checking the Resample box will allow you to adjust the size and resolution independently.
Next, to smooth the resulting image a bit, we are going to apply some filters.
Go to Filter > Noise > Reduce Noise and play around with the settings. Once you are satisfied, click Ok.
We used the following values in Basic mode:
Go to Filter > Blur > Gaussian Blur and use a Radius of 0.5 pixels.

Go to Filter > Filter Gallery > Artistic > Film Grain and use the following values:
You can also use other filters. Feel free to check them out and experiment.
Zoom in to your image to determine if it looks fine enough.
That’s it. Hopefully, this method of resizing images without losing quality in Photoshop was helpful to you.
We have more excellent tutorials for you to follow, such as how to flip an image, how to use the patch tool, and how to curve text in Photoshop.
There is a limit to how much you can enlarge an image, and there are two important parameters to keep in mind: PPI and image size. PPI are the pixels per inch that make up the resolution of your image. The image size is simply the size of your image in inches, centimeters, points, etc. The larger the image, the better the chance for a decent result.
For our example, we will use a peacock feathers photo from the Plus Hub. Feel free to browse our photos for commercial use if you want to use a different image. For the purposes of this tutorial, we have decreased the resolution before starting the tutorial.
Step 1 - Zoom in to Check How Pixelated Your Image Is
In Photoshop, open the low-res image you want to enhance. Zoom in to check how pixelated it is and what is the zoom percentage where it is more evident. This will help you determine if there’s a chance to make it look good.
Unlock Your Image If Needed
For older versions of Photoshop, you may need to double-click on top of your background layer thumbnail to unlock it before applying the changes.
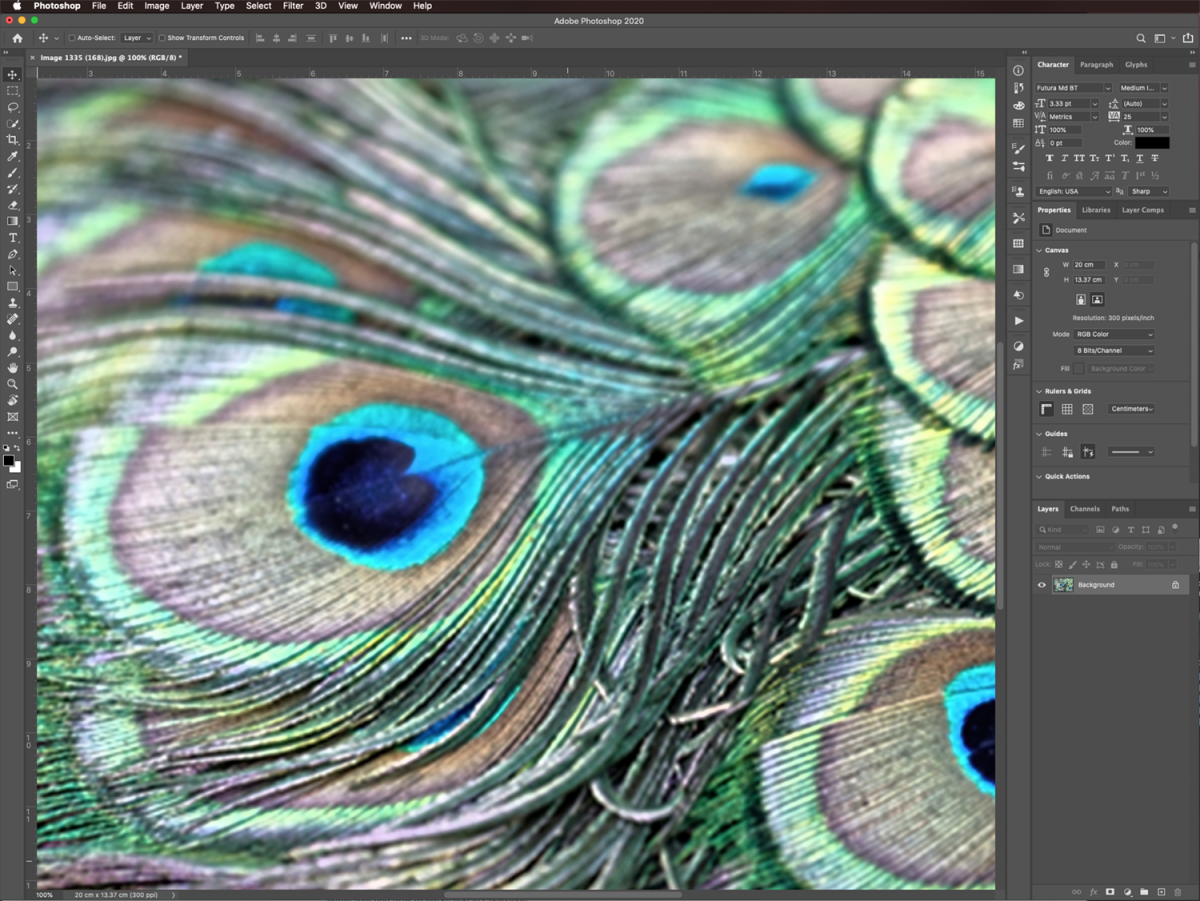
Step 2 - Change Your Image’s Resolution to Increase Its Size
Go to Image > Image Size (Option/Alt + Command/Control + I) and check the resolution and the dimensions of your image both in size and pixels.
Change the resolution to 300 ppi. You will see that the dimensions increase. Change the Resample option to Bicubic Smoother (enlargement) and click Ok.
Checking the Resample box will allow you to adjust the size and resolution independently.
Next, to smooth the resulting image a bit, we are going to apply some filters.
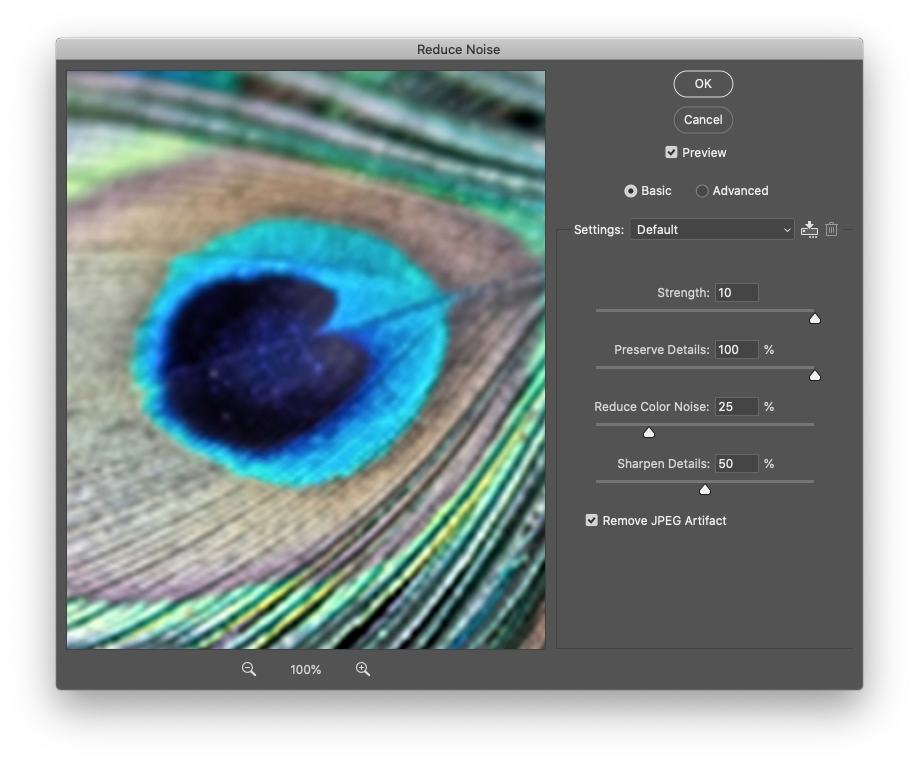
Step 3 - Apply a Reduce Noise Filter to Your Image
Go to Filter > Noise > Reduce Noise and play around with the settings. Once you are satisfied, click Ok.
We used the following values in Basic mode:
- Settings: Default
- Strength:10
- Preserve Details: 100%
- Reduce Color Noise: 25%
- Sharpen Details: 50%
- Remove JPEG Artifact: checked
Step 4 - Apply a Gaussian Blur Filter to Your Image
Go to Filter > Blur > Gaussian Blur and use a Radius of 0.5 pixels.
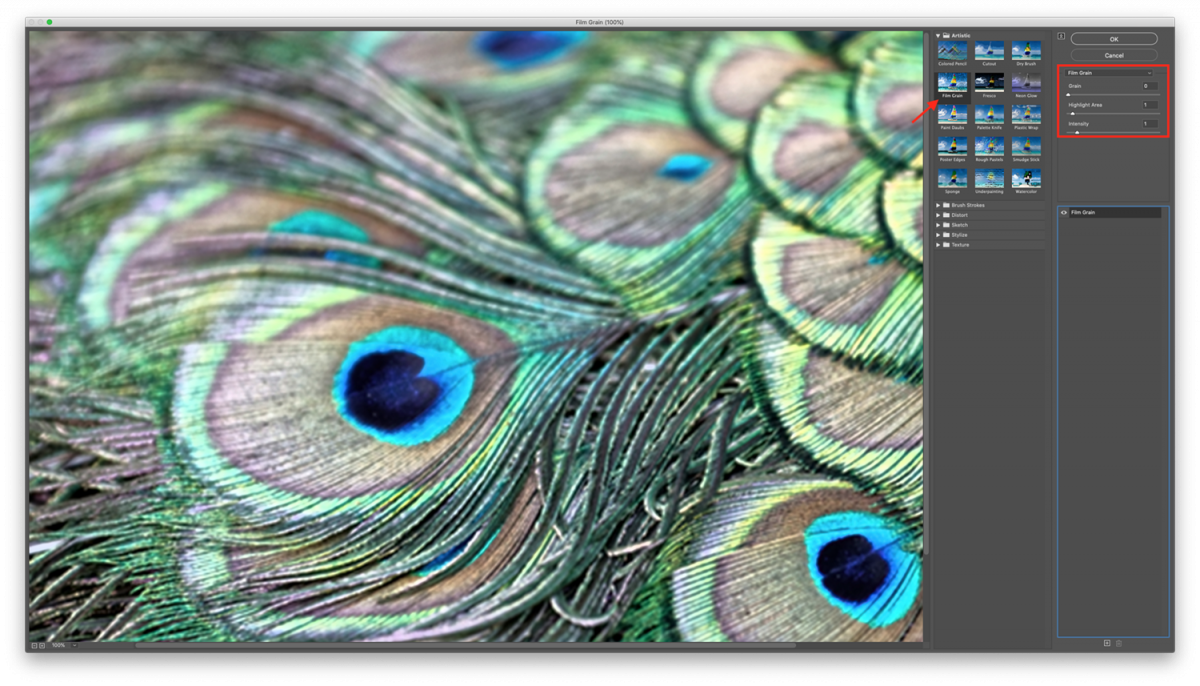
Step 5 - Apply a Film Grain Filter to Your Image
Go to Filter > Filter Gallery > Artistic > Film Grain and use the following values:
- Grain: 0
- Highlight Area: 1
- Intensity: 1
You can also use other filters. Feel free to check them out and experiment.
Step 6 - Zoom in to Check If the Final Result Suits Your Needs
Zoom in to your image to determine if it looks fine enough.
That’s it. Hopefully, this method of resizing images without losing quality in Photoshop was helpful to you.
We have more excellent tutorials for you to follow, such as how to flip an image, how to use the patch tool, and how to curve text in Photoshop.


