Yellow Brick Road Effect in Photoshop (2 Parts)
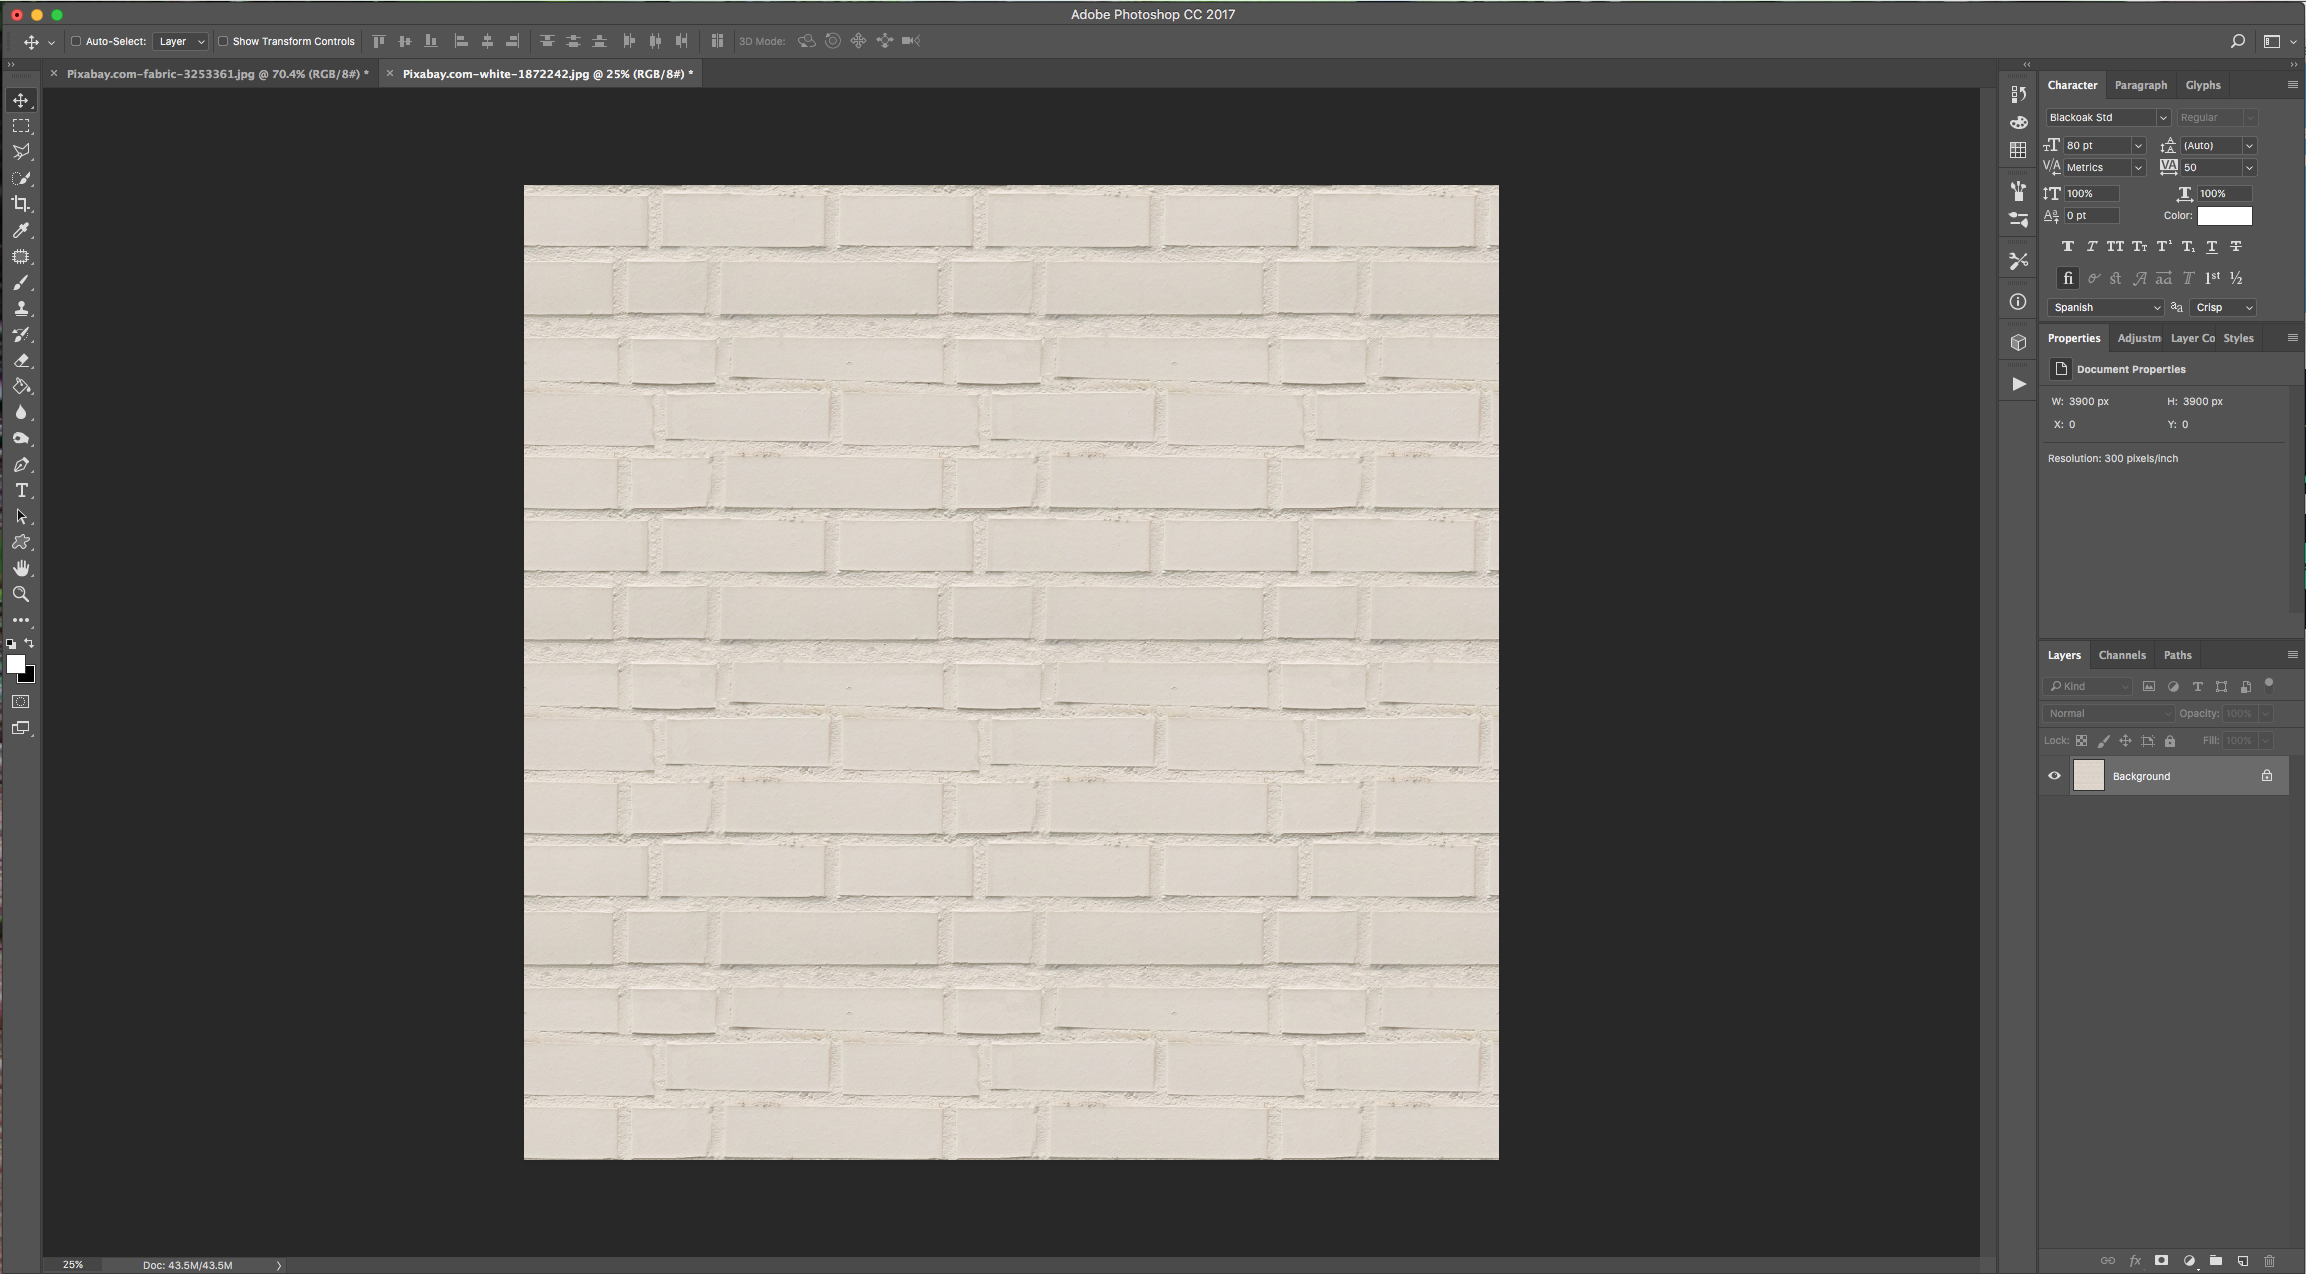
For this Tutorial, we are going to an image of “Grass” for the “Background, and a light-colored “Brick” Pattern.
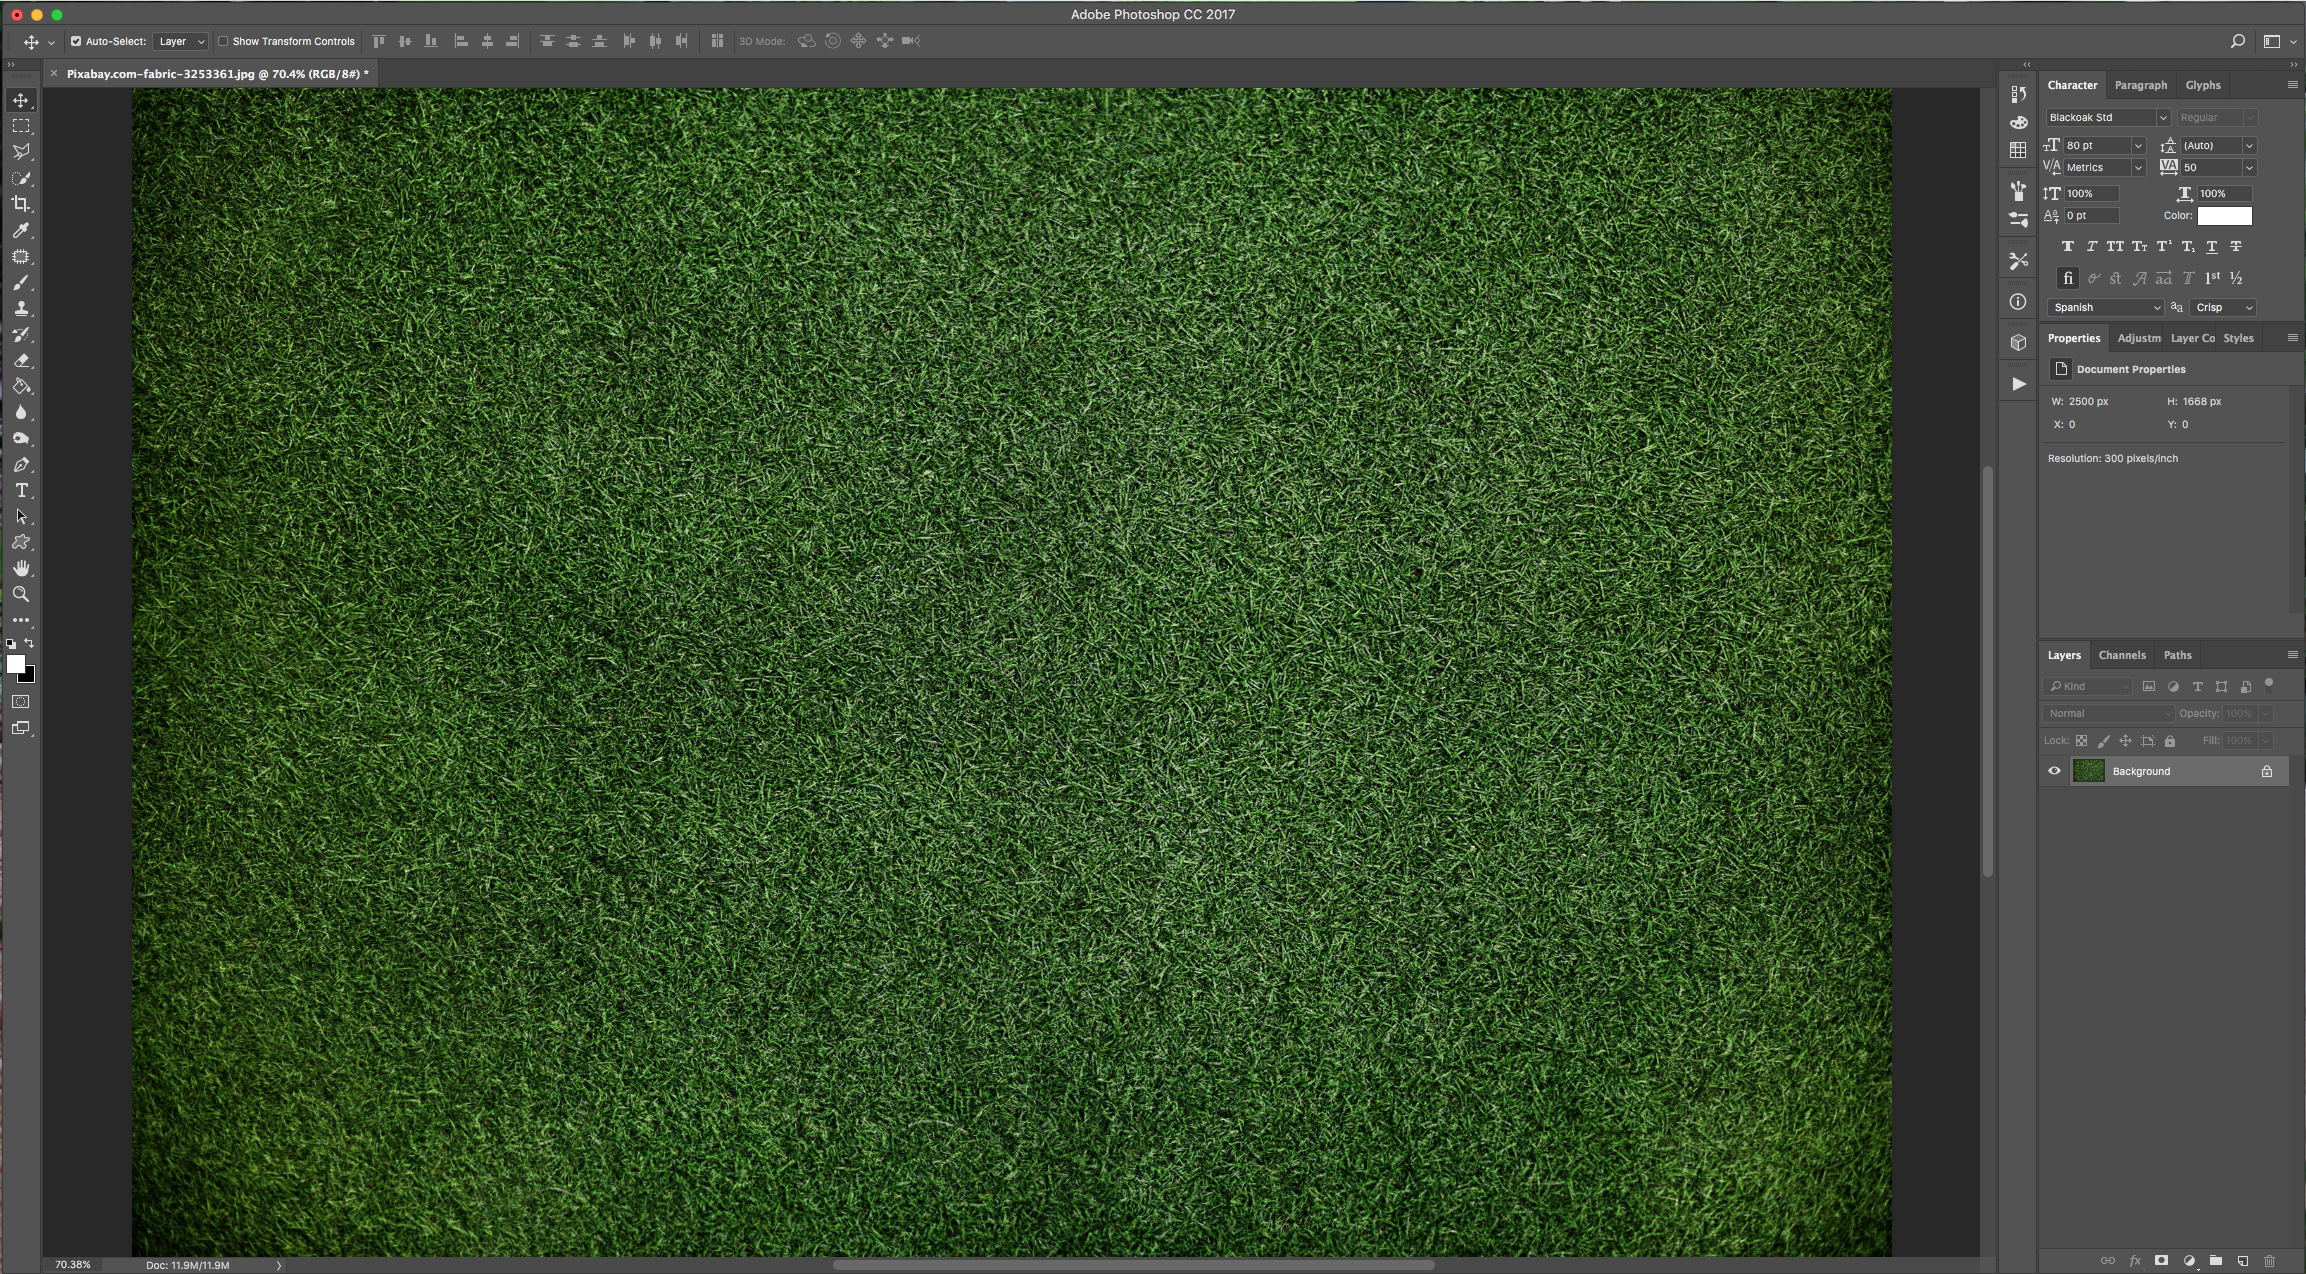
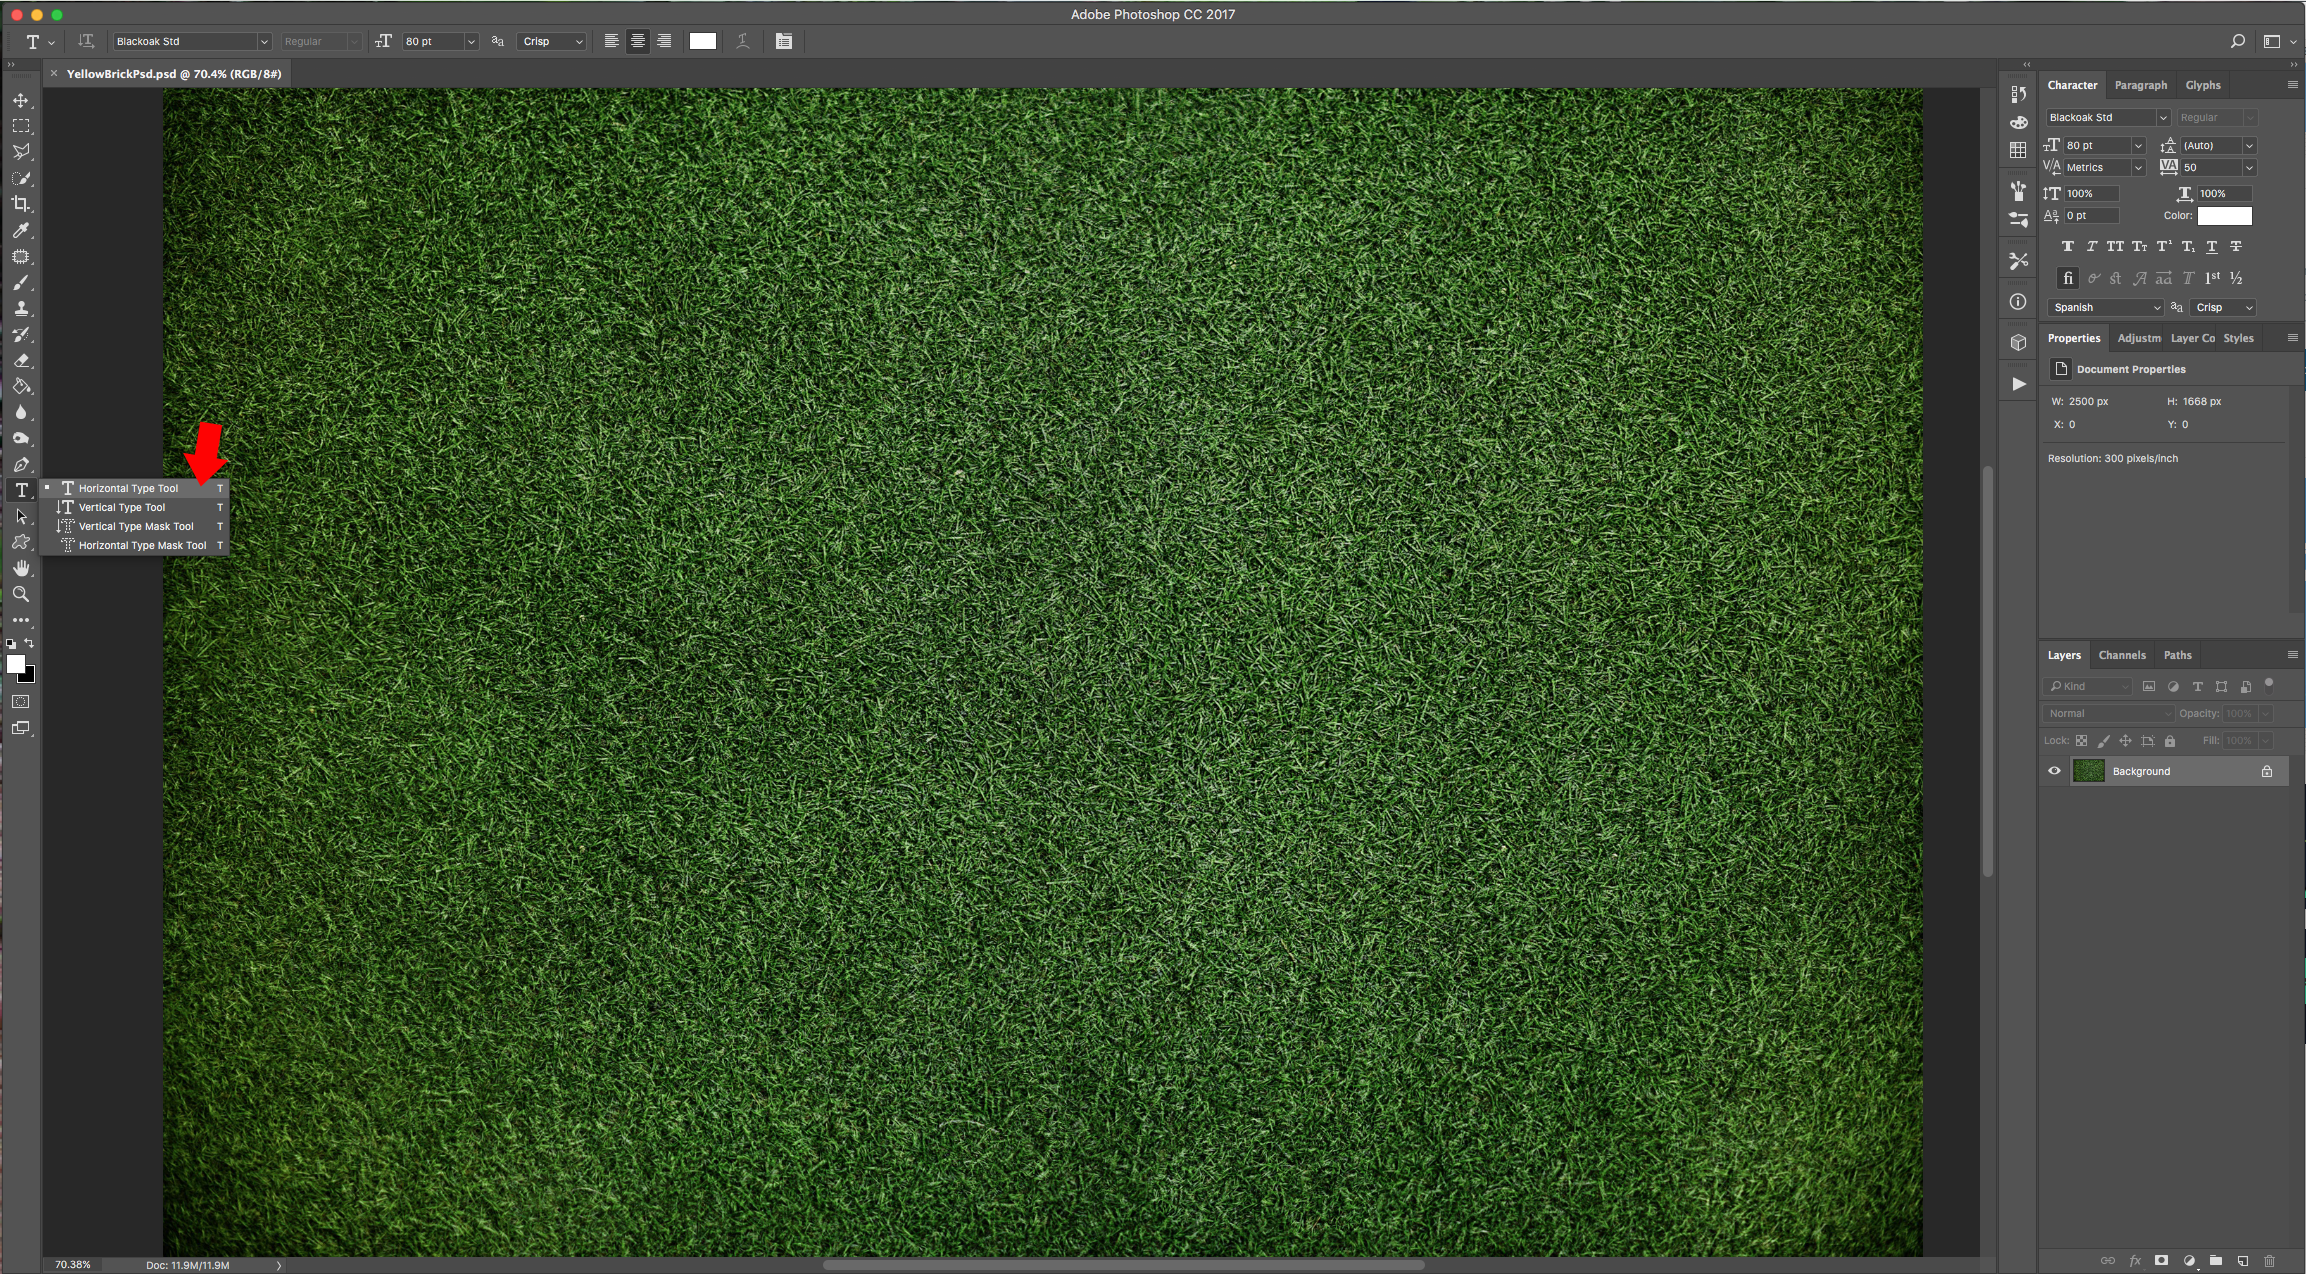
1 - In Photoshop, open the file you chose as “Background”.
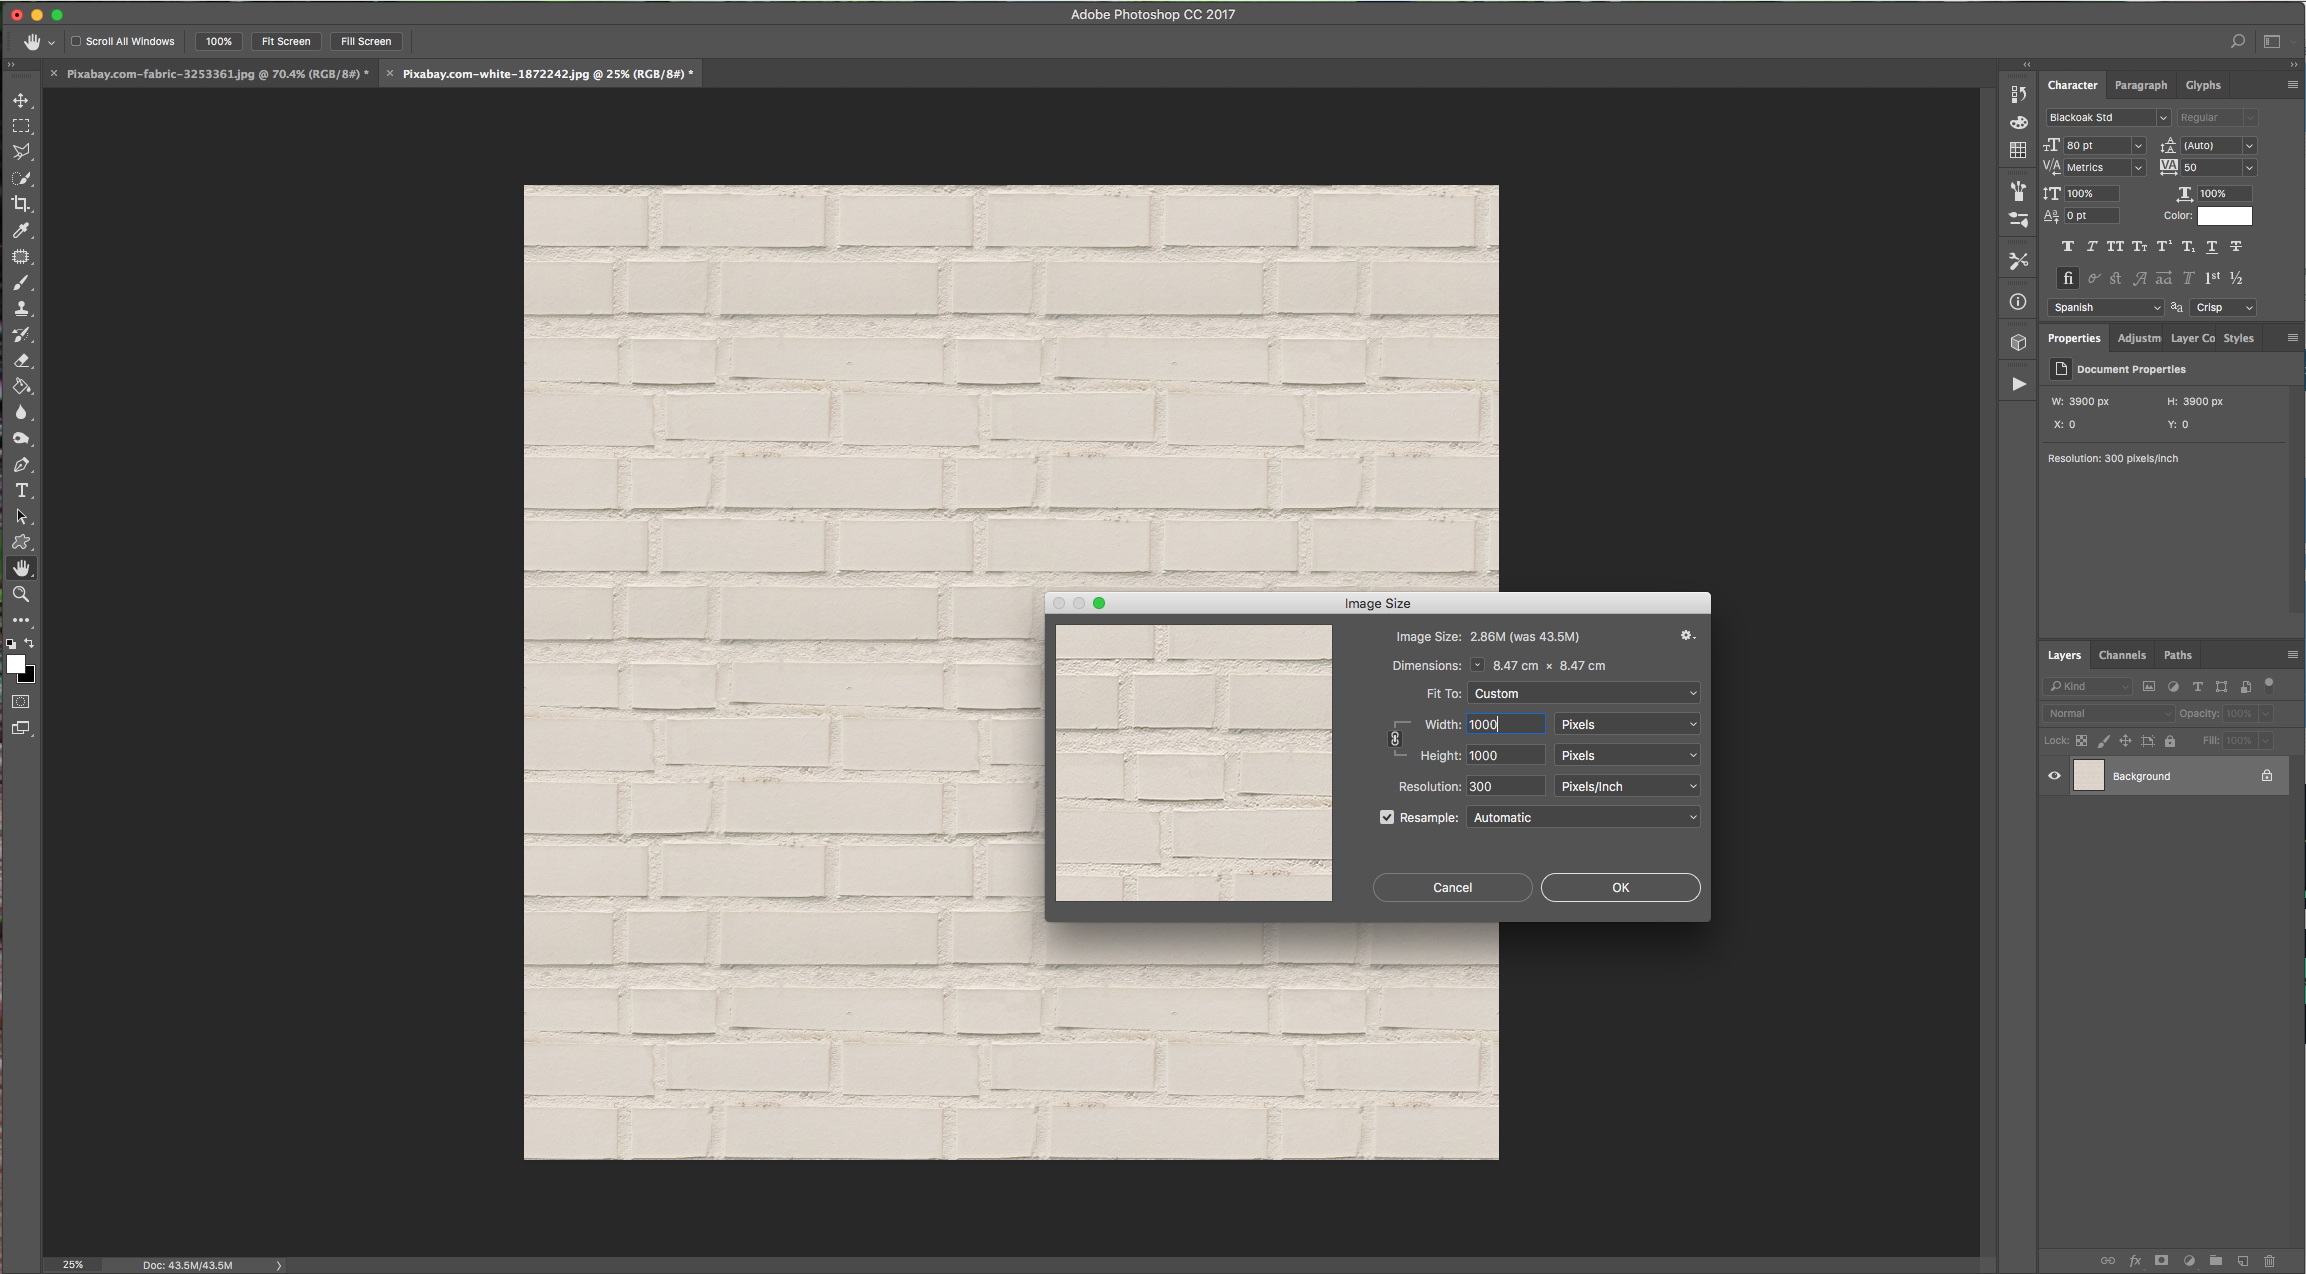
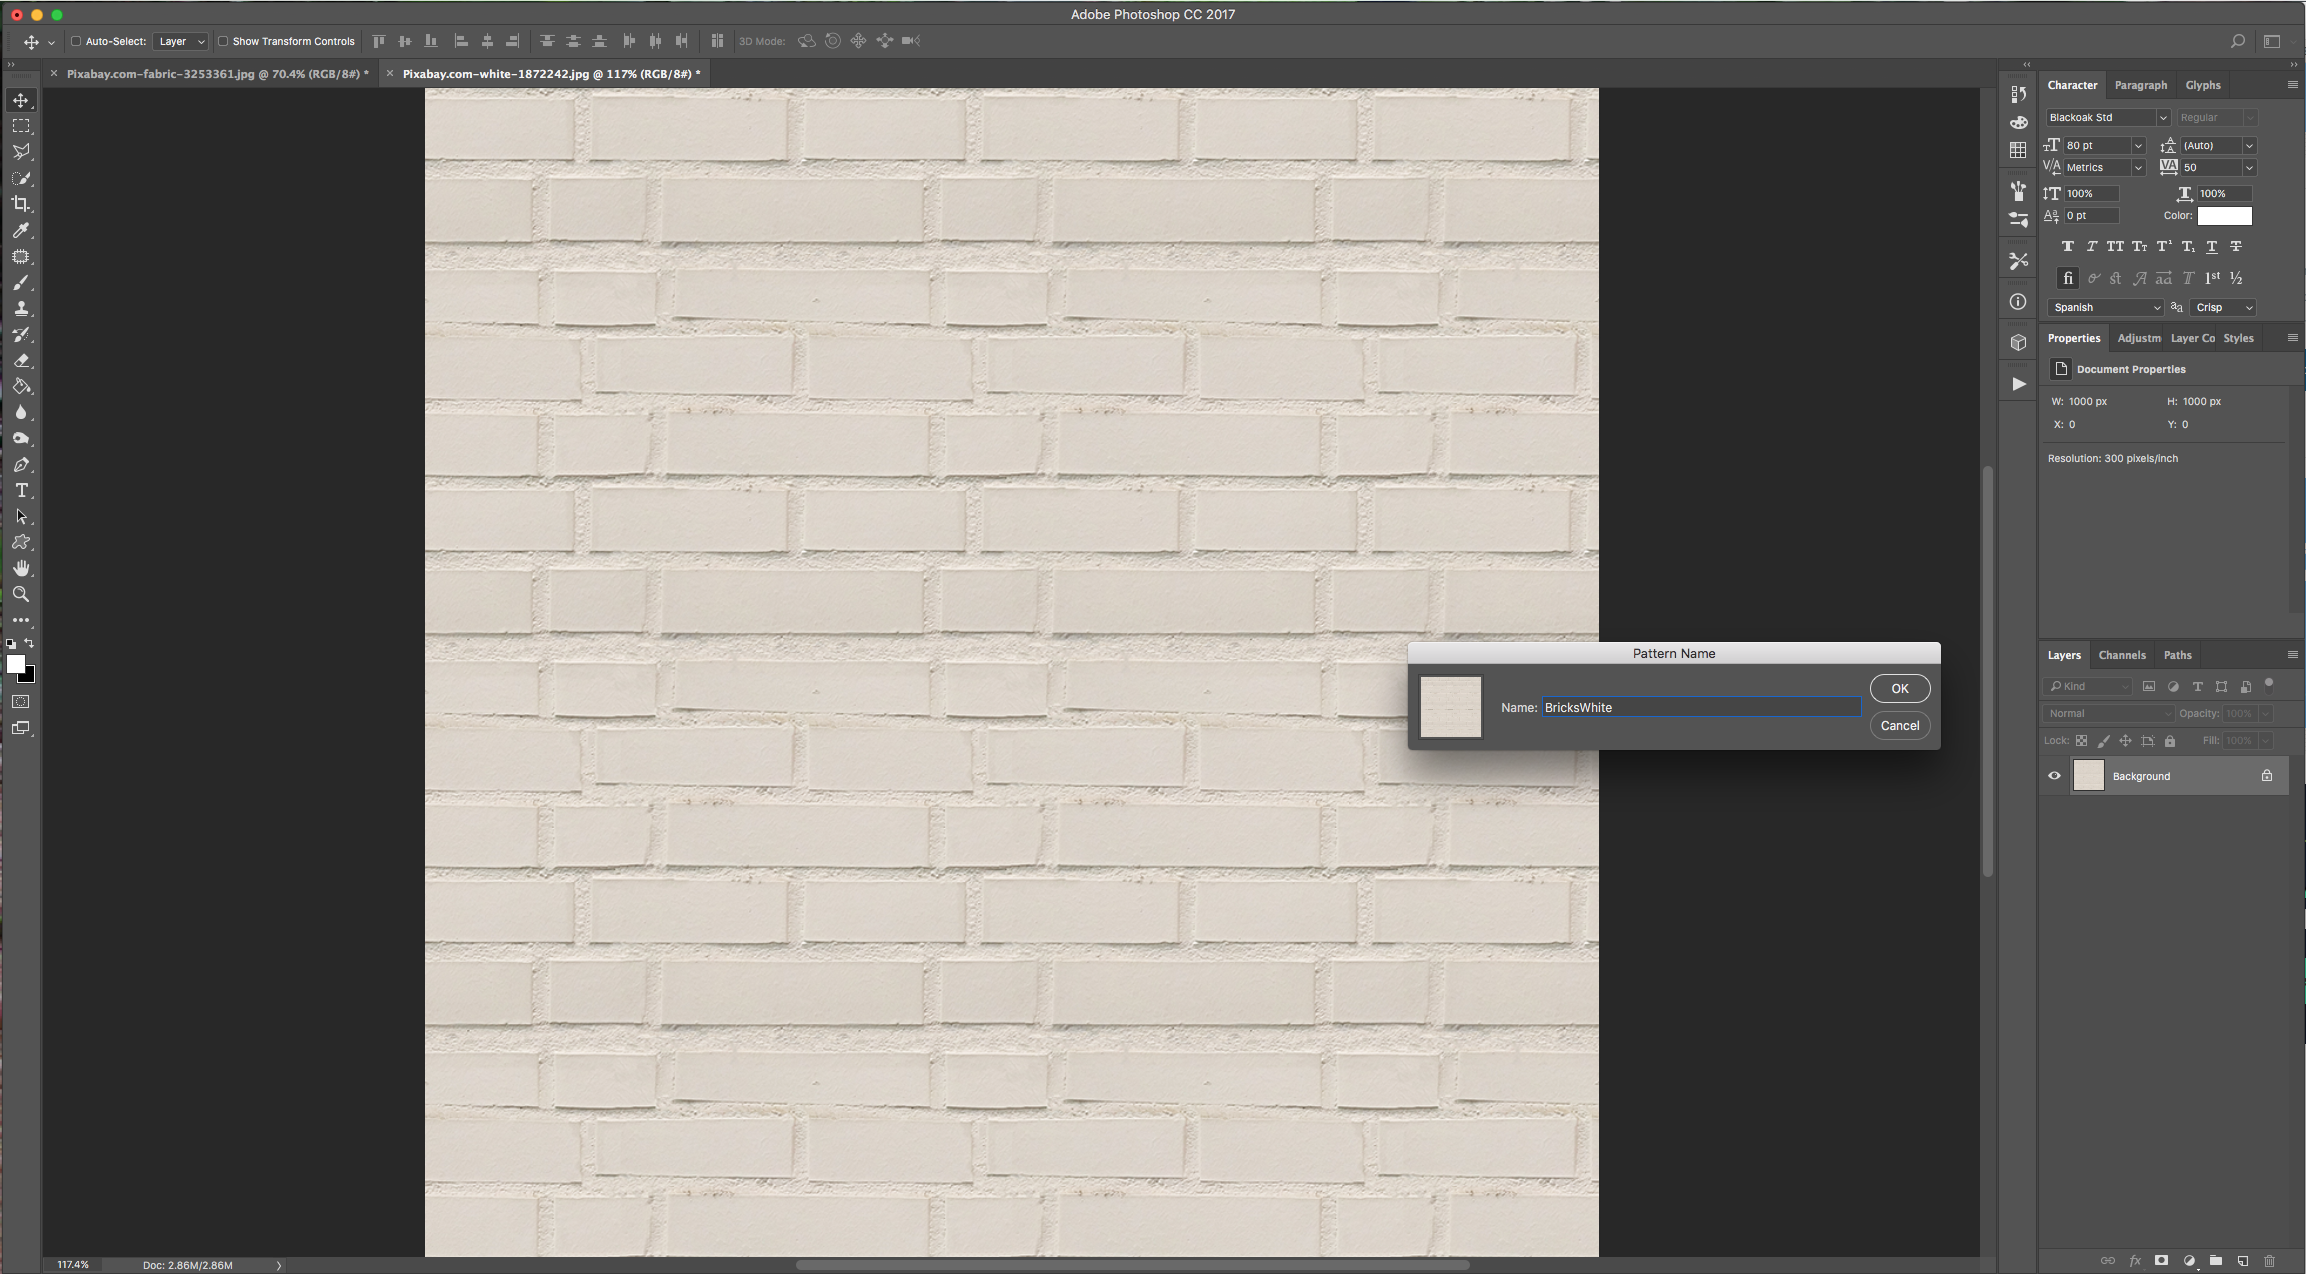
2 - Open the “Brick” Pattern image too. Open the “Image Size” Window (Command/Control + Alt/Option + I) and make it 1000 x 1000 Pixels @300 dpi.
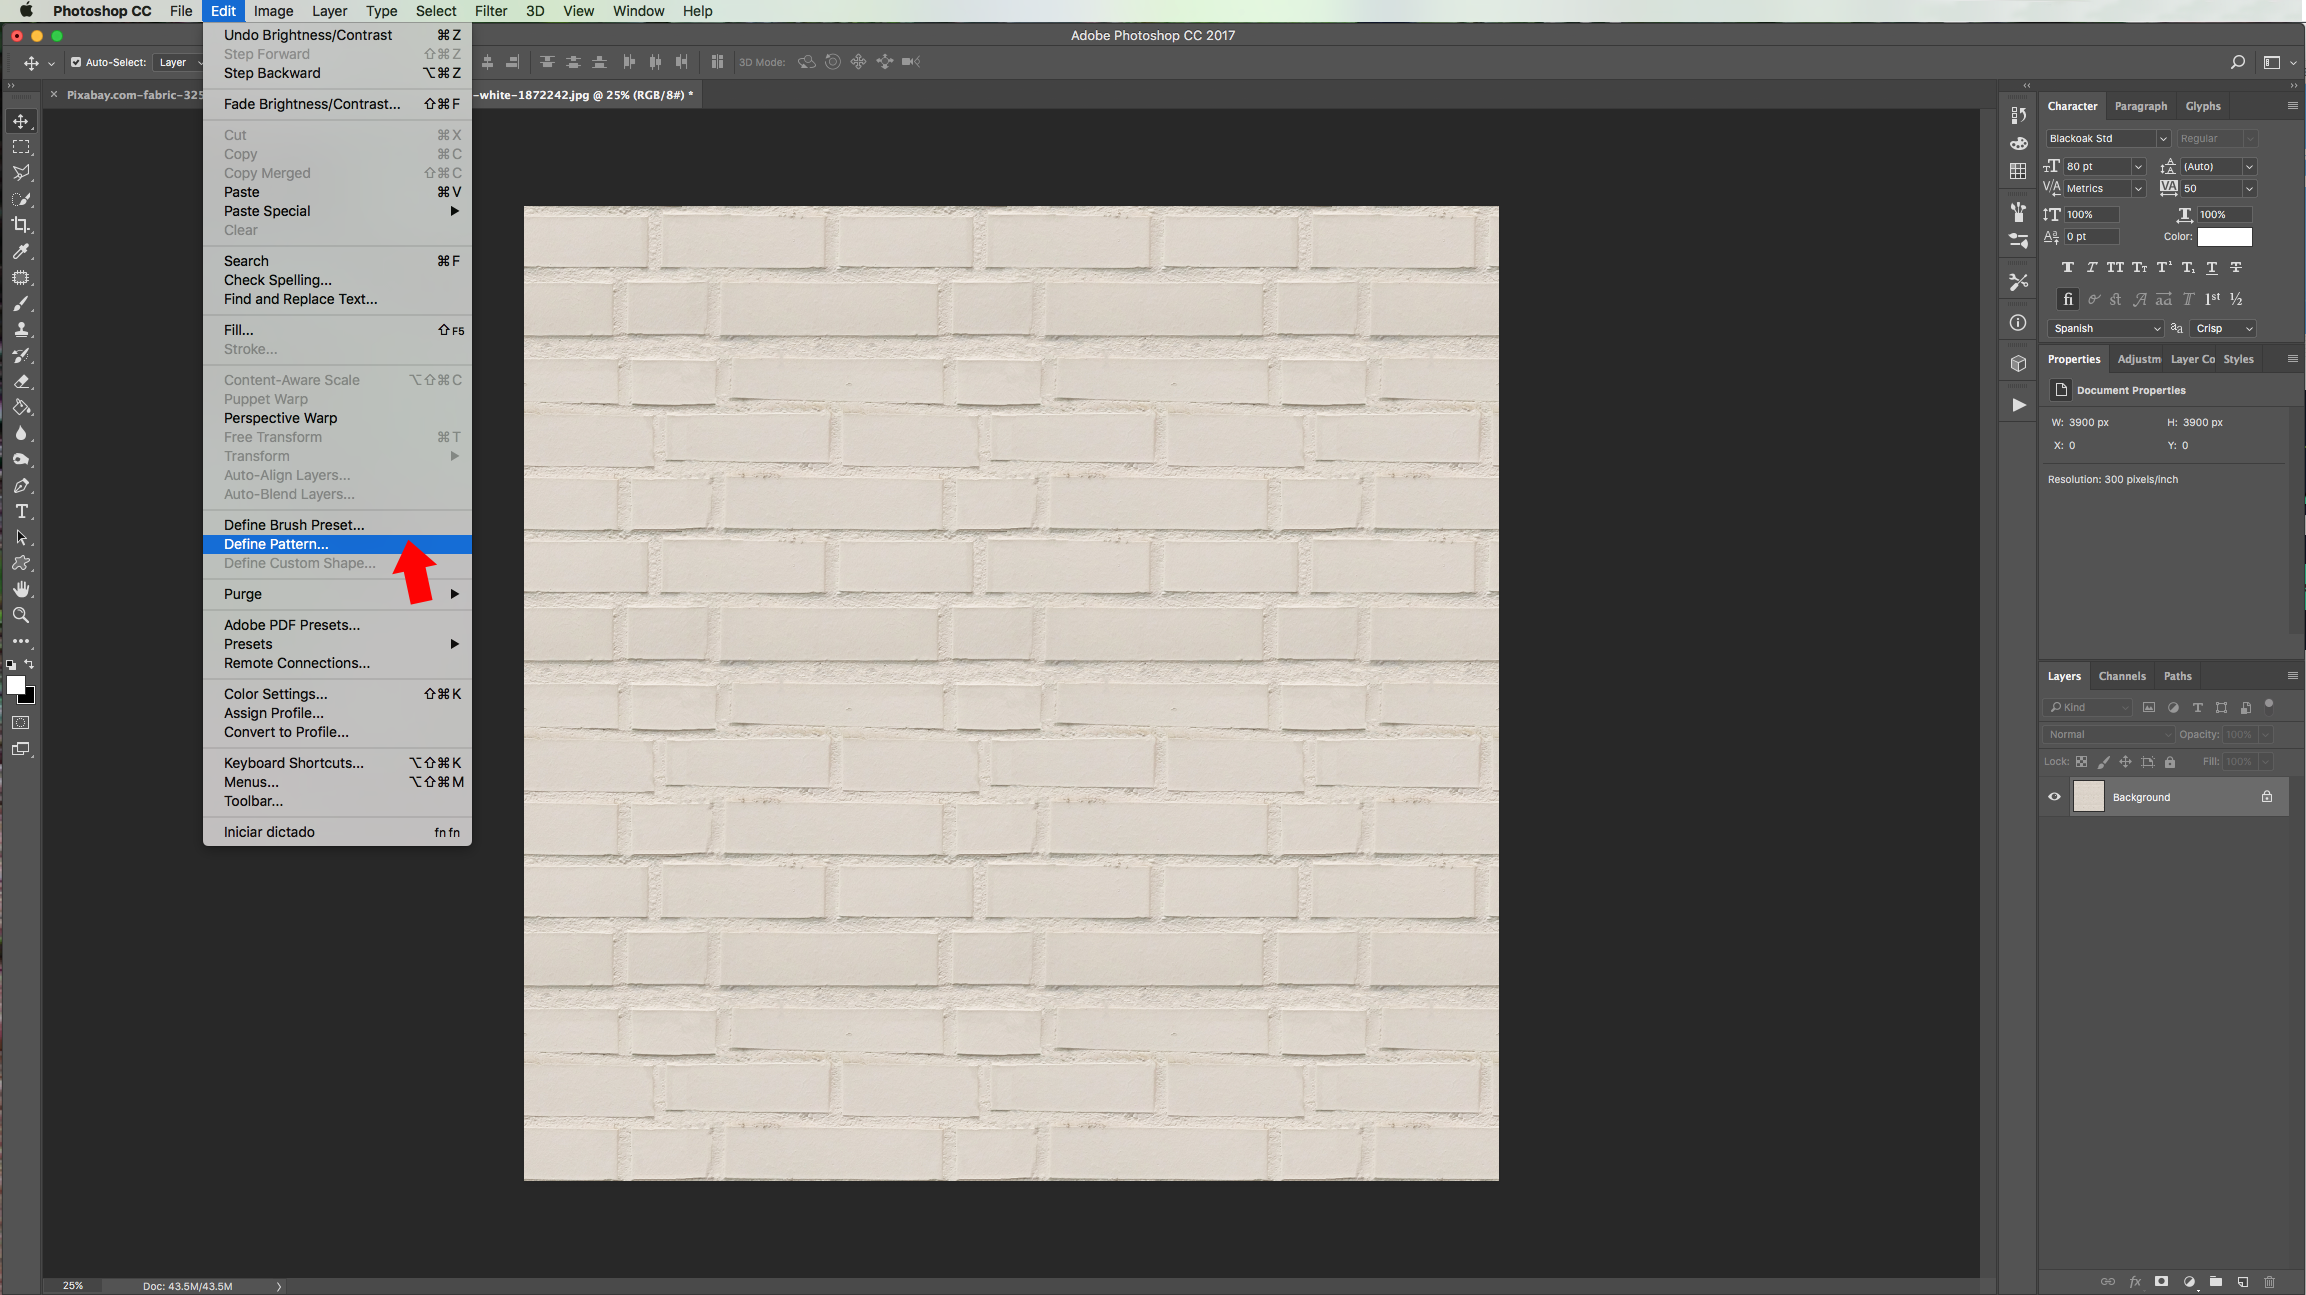
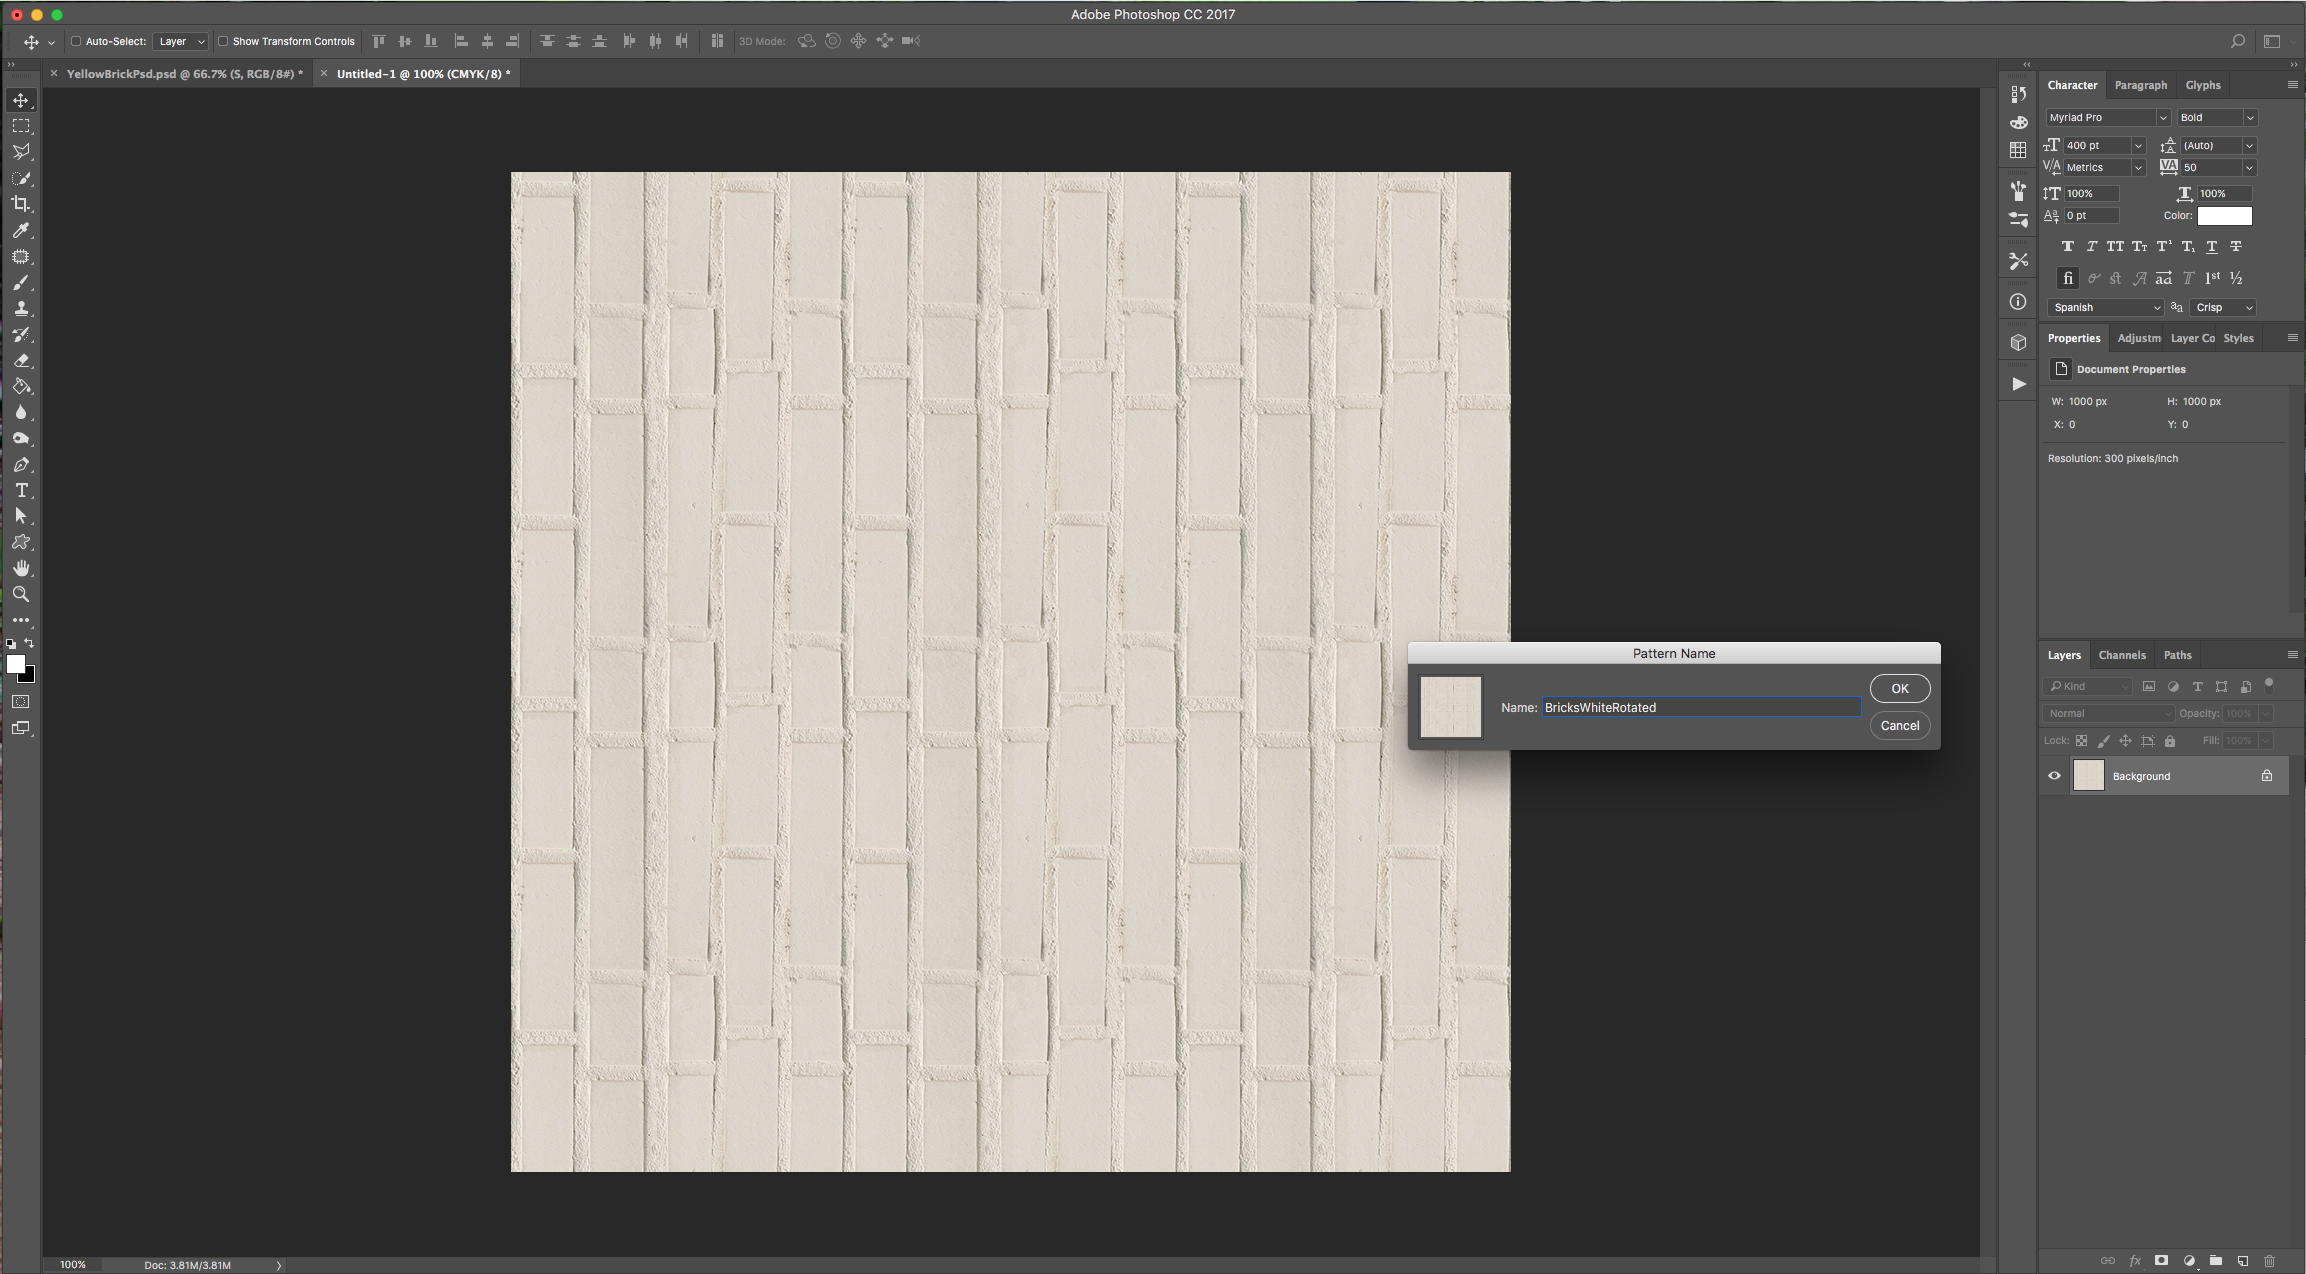
3 - Go to Edit > Define Pattern, give it a name and click “OK” to save it. Rotate your image 90° Counterclockwise and create a second (Horizontal) pattern.
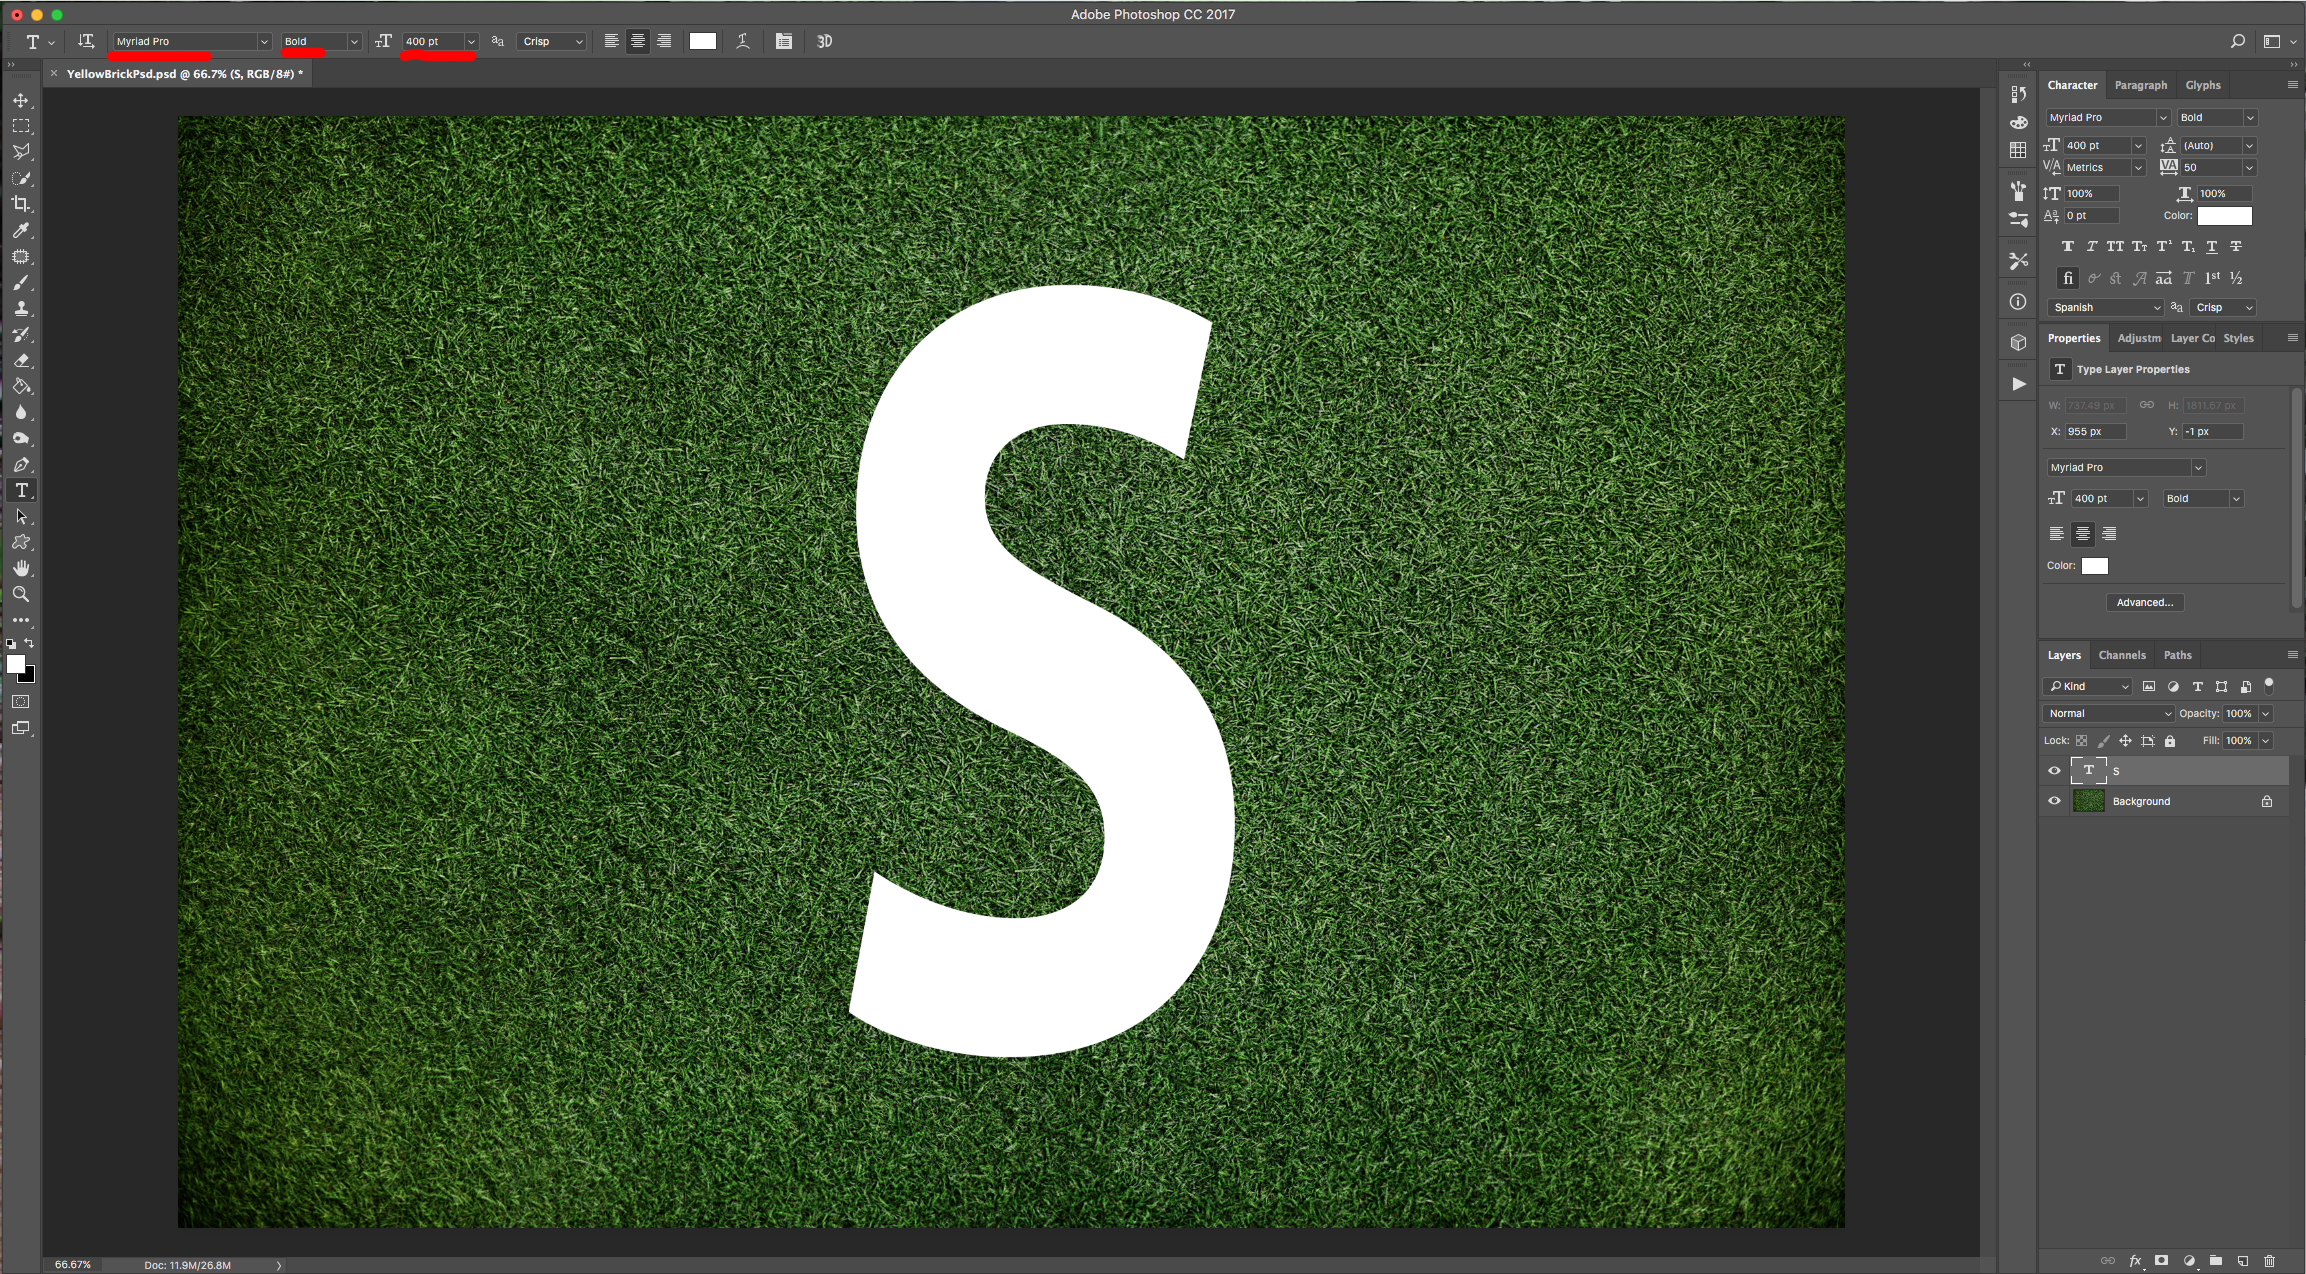
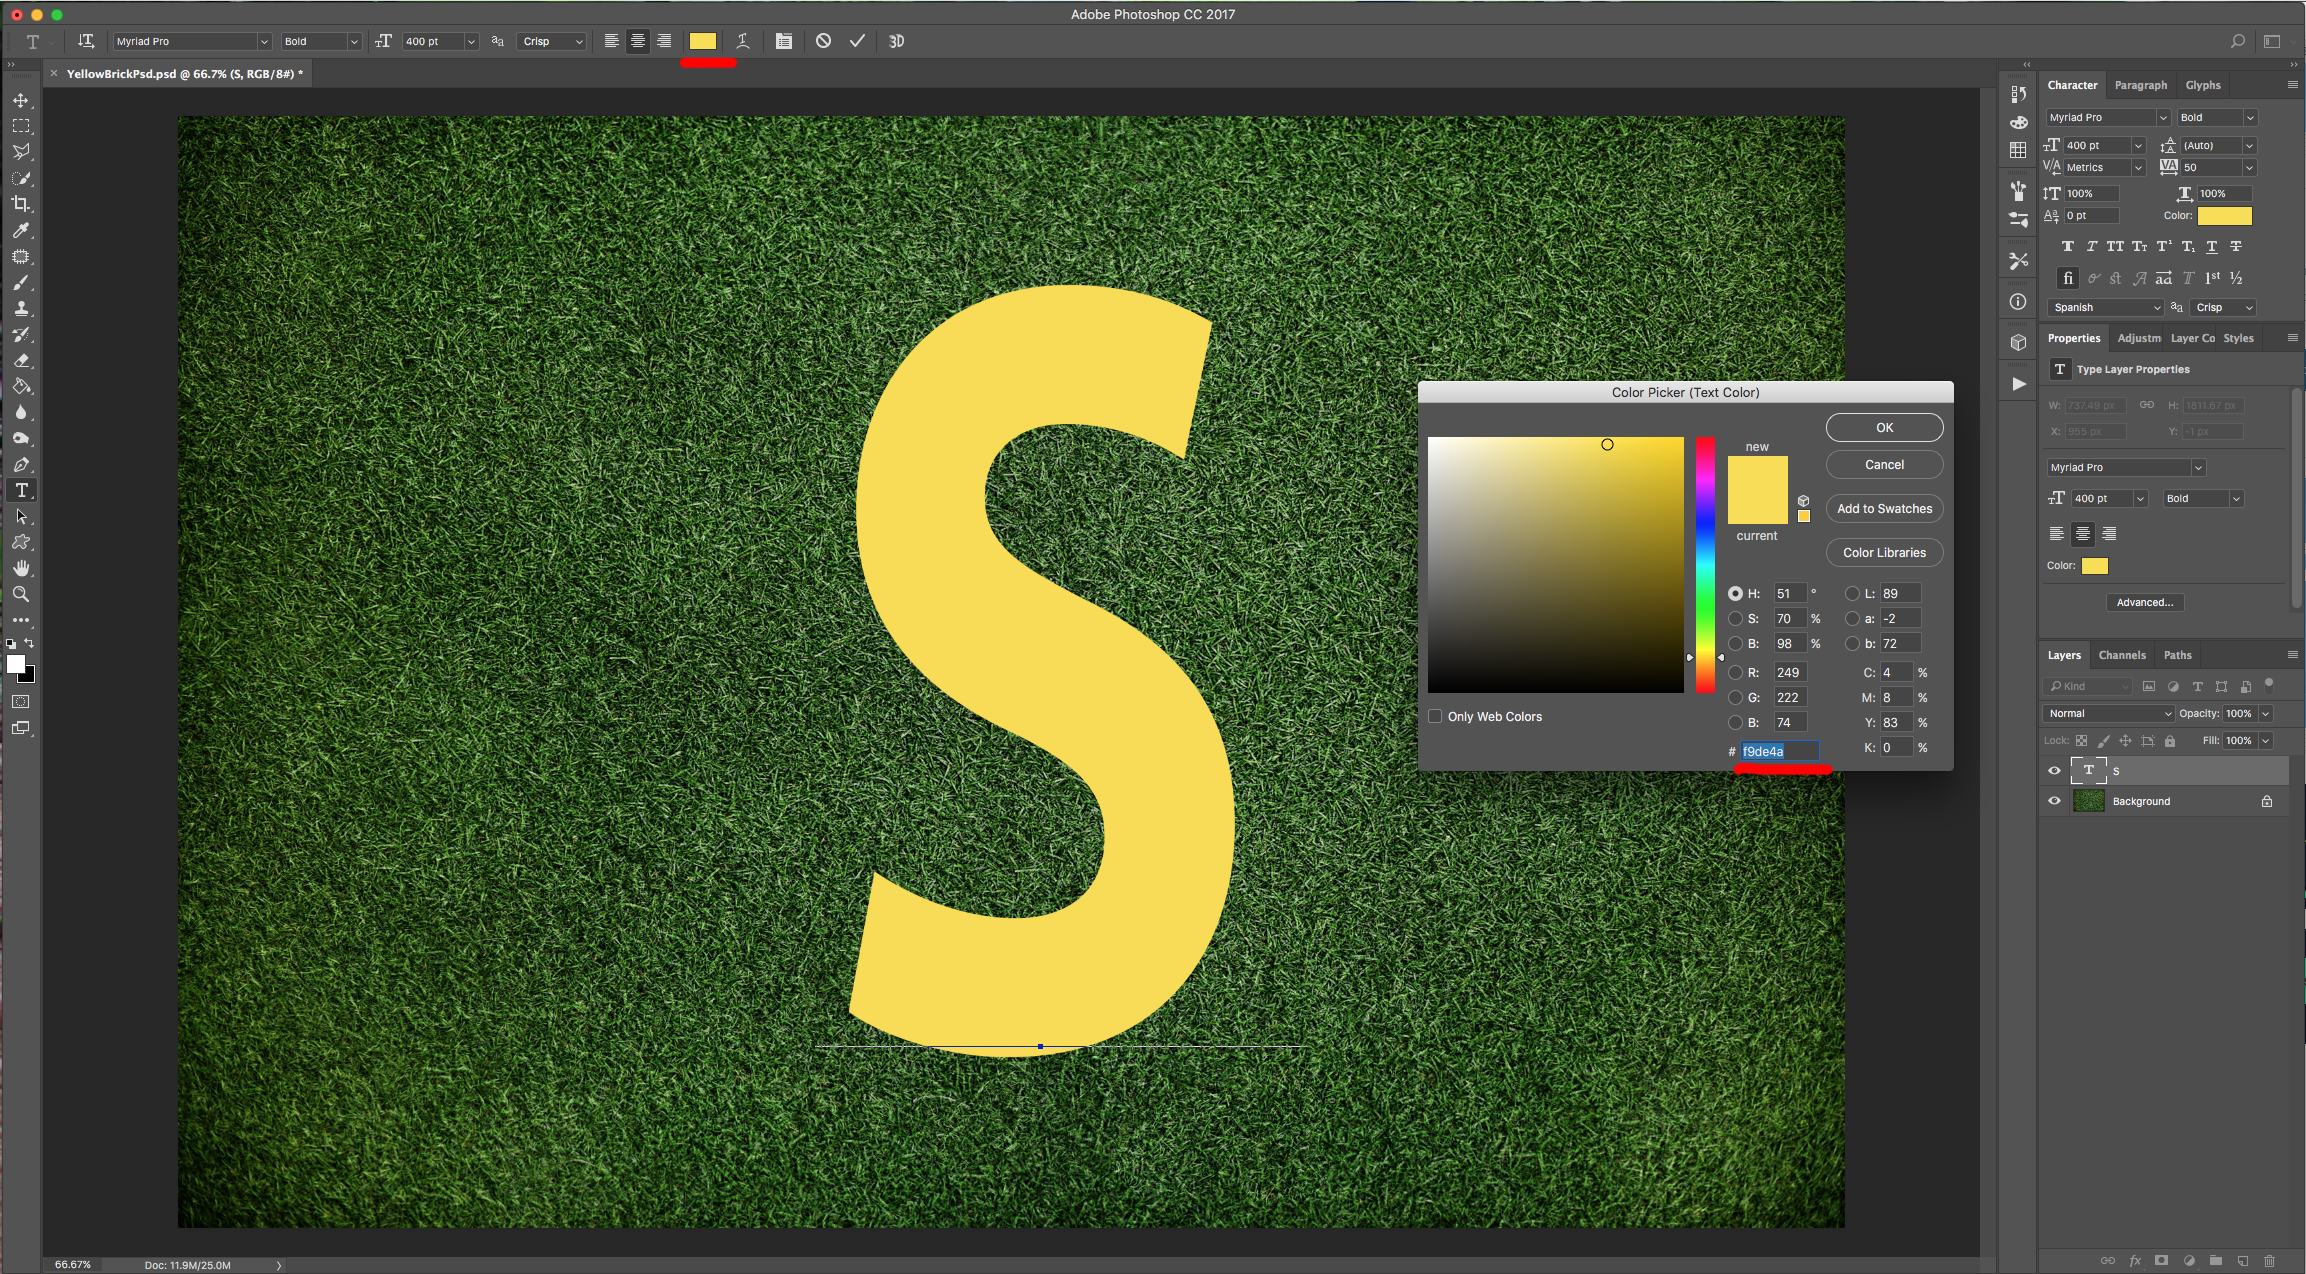
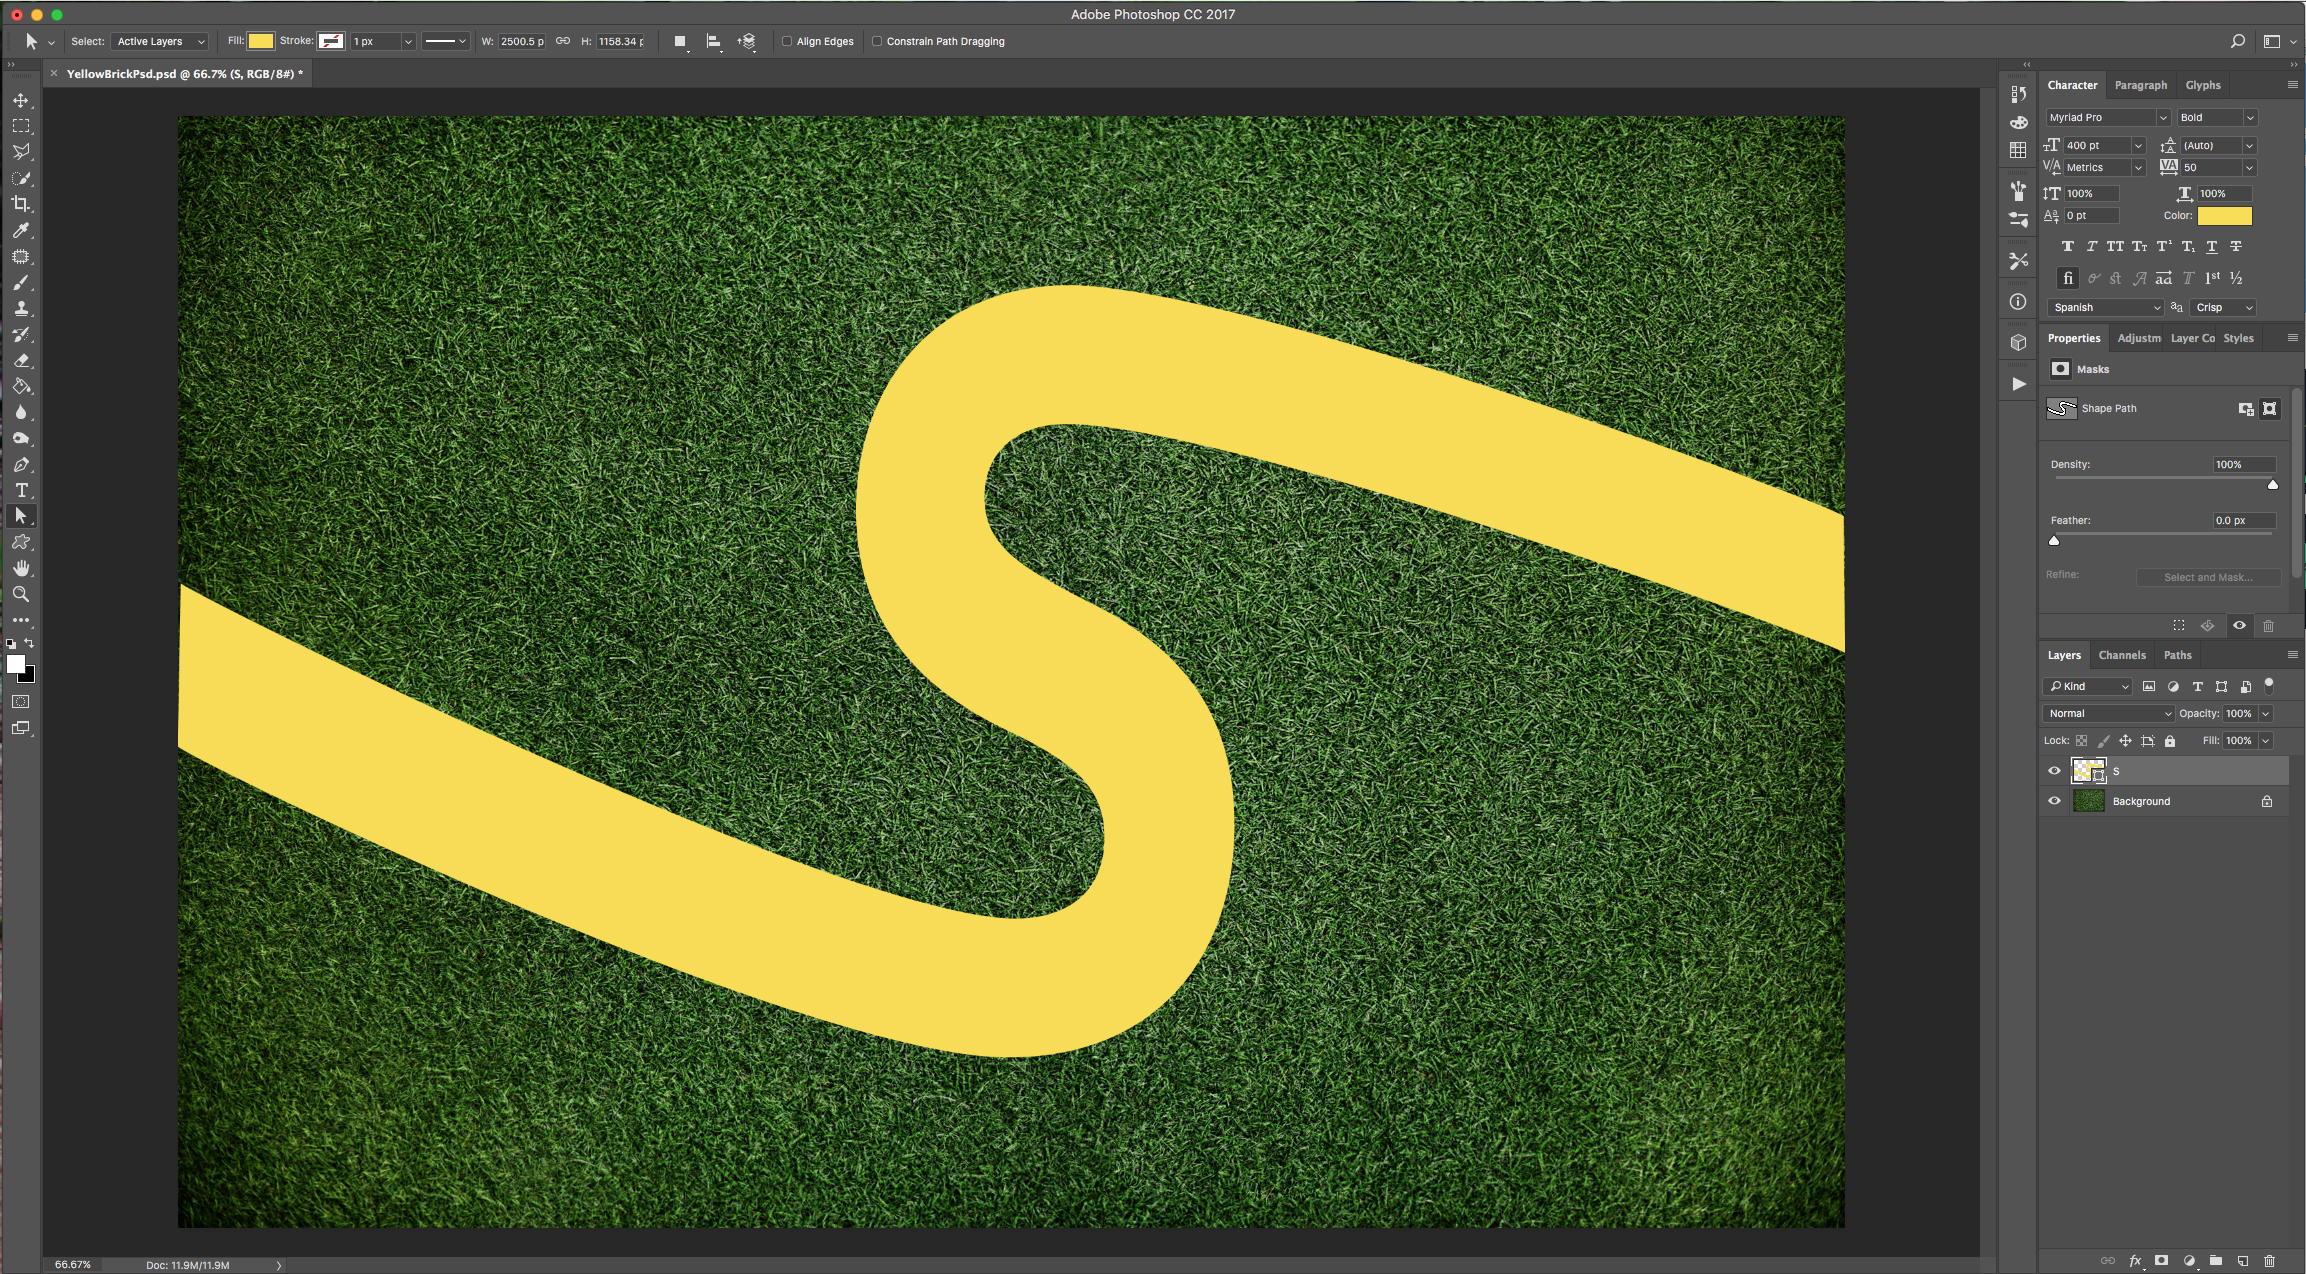
4 - Select the “Type Tool” (T), select your font (we used “Myriad Pro Bold”), and type your text. In this case we typed the letter “S”.
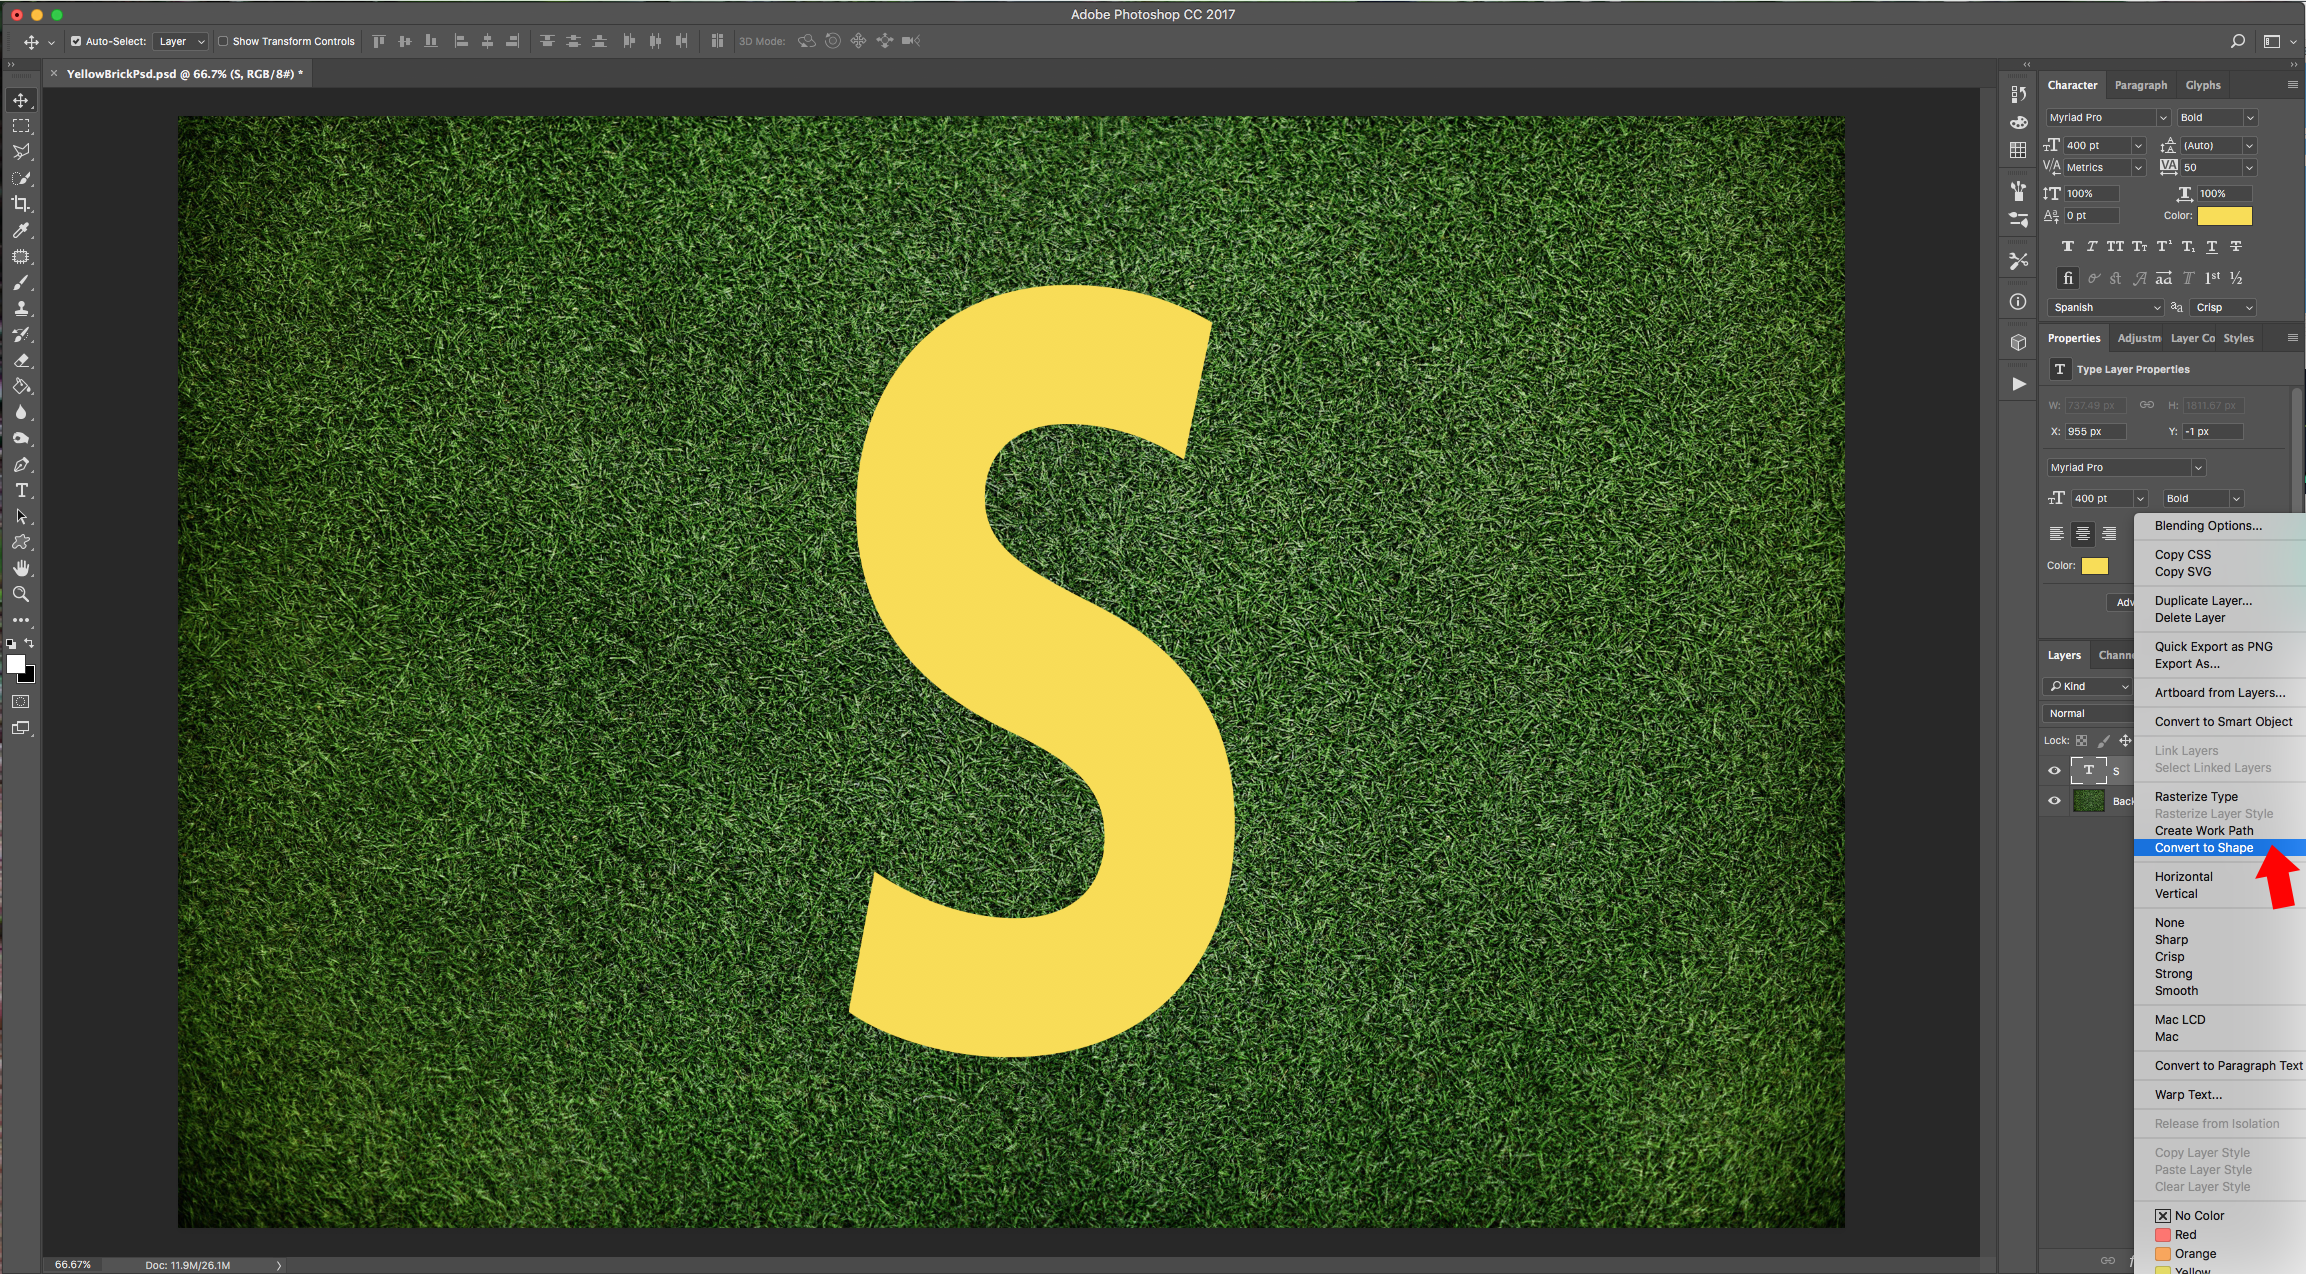
5 - Fill it with a Medium Yellow (we used #f9de4a), right-click on top of its thumbnail and choose “Convert to Shape”.
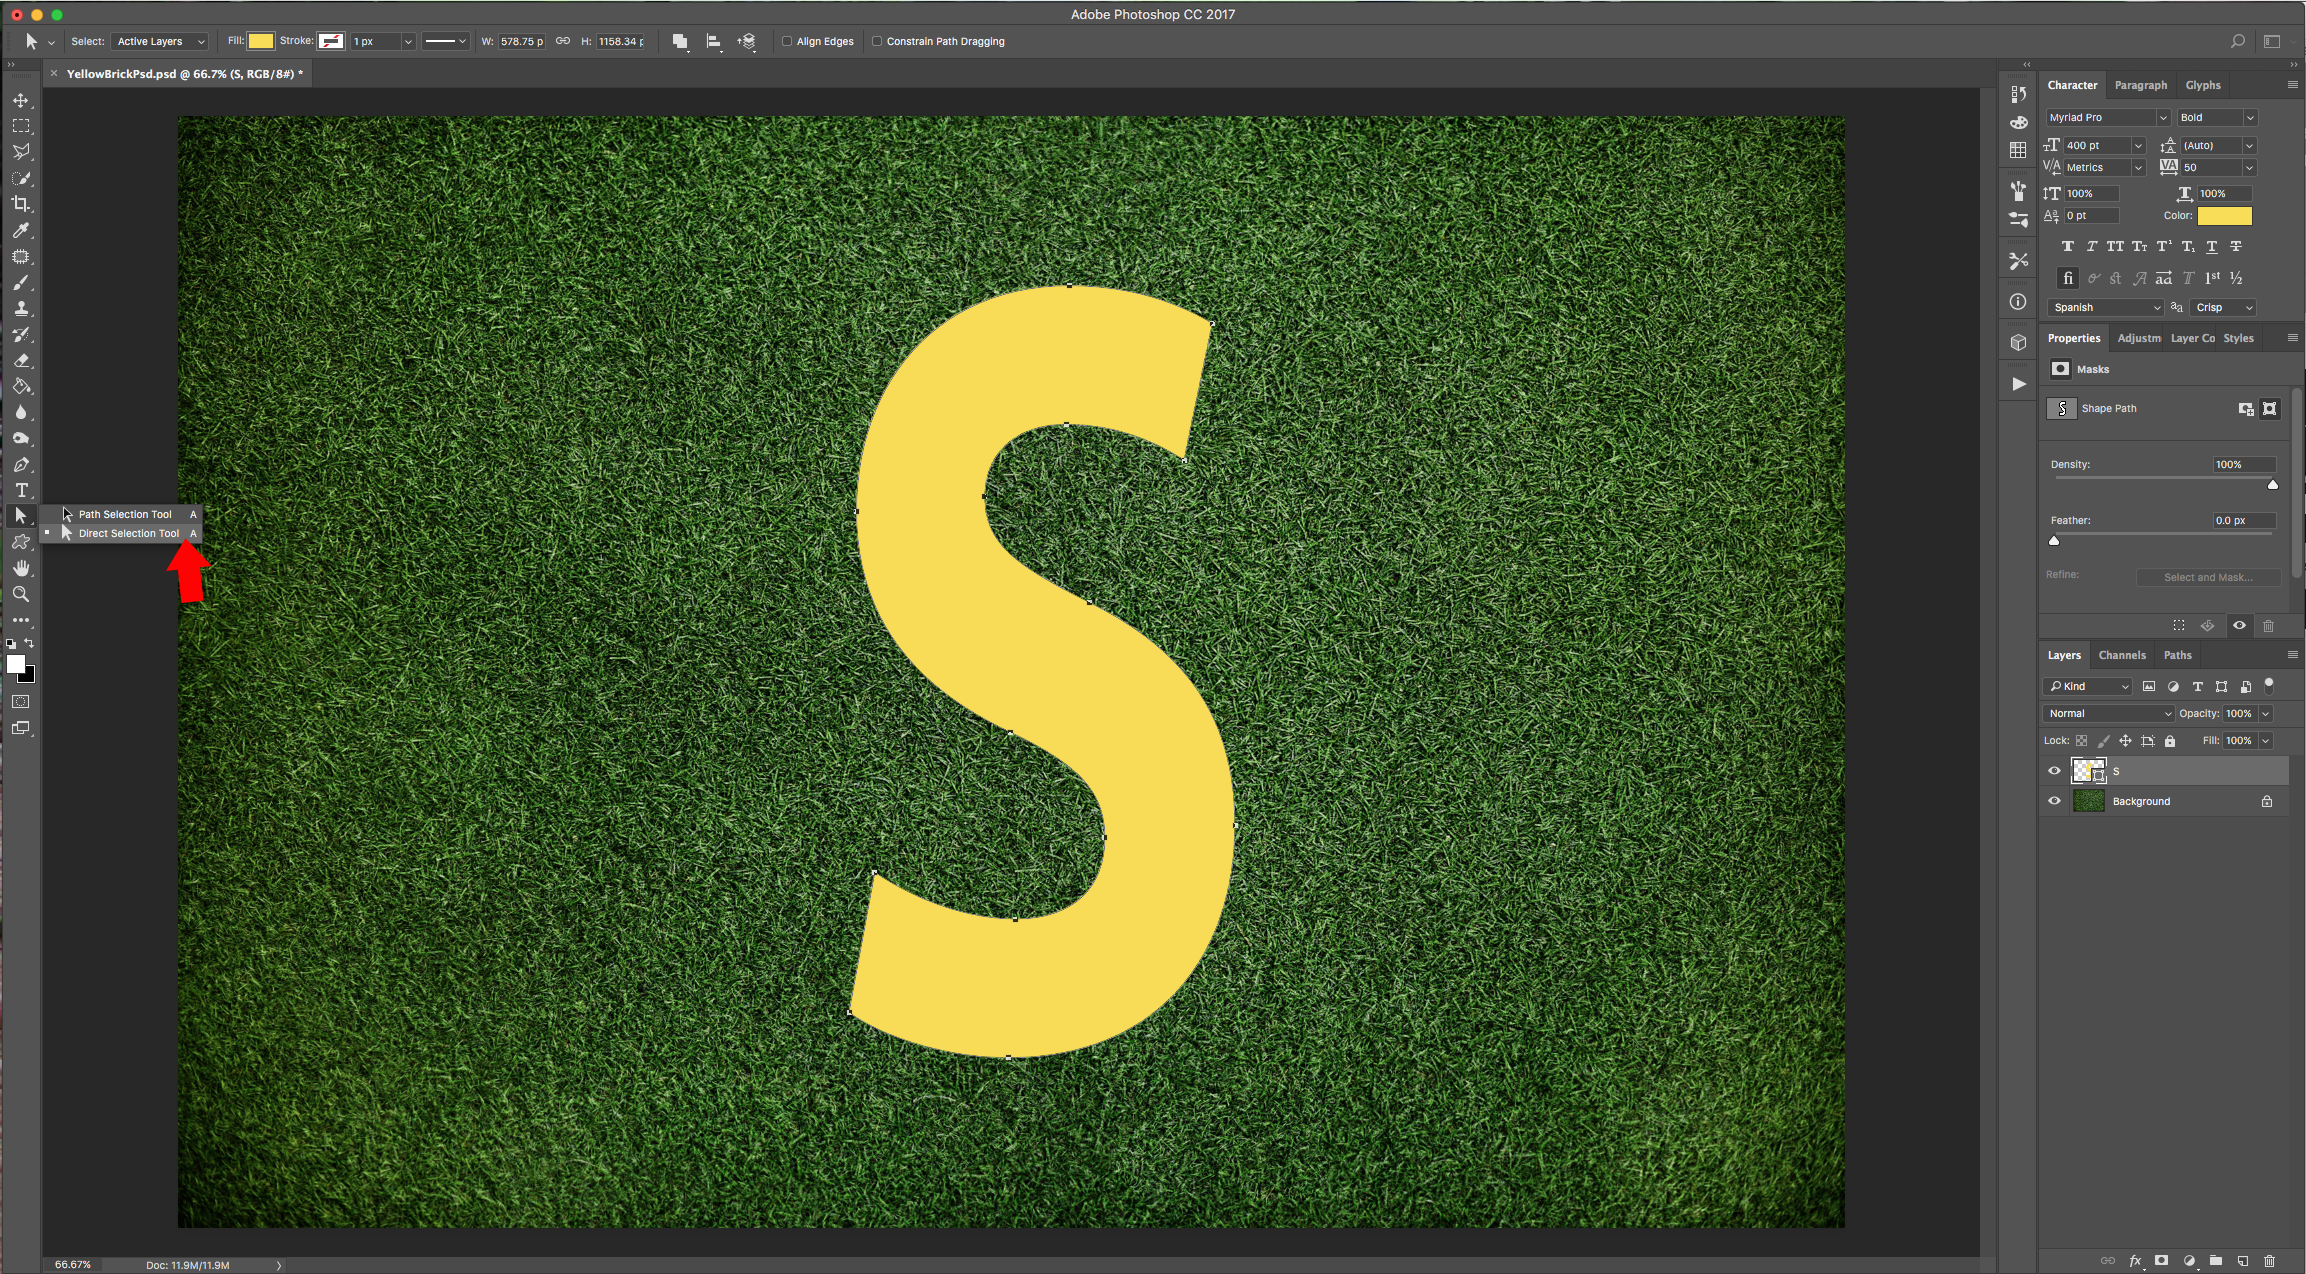
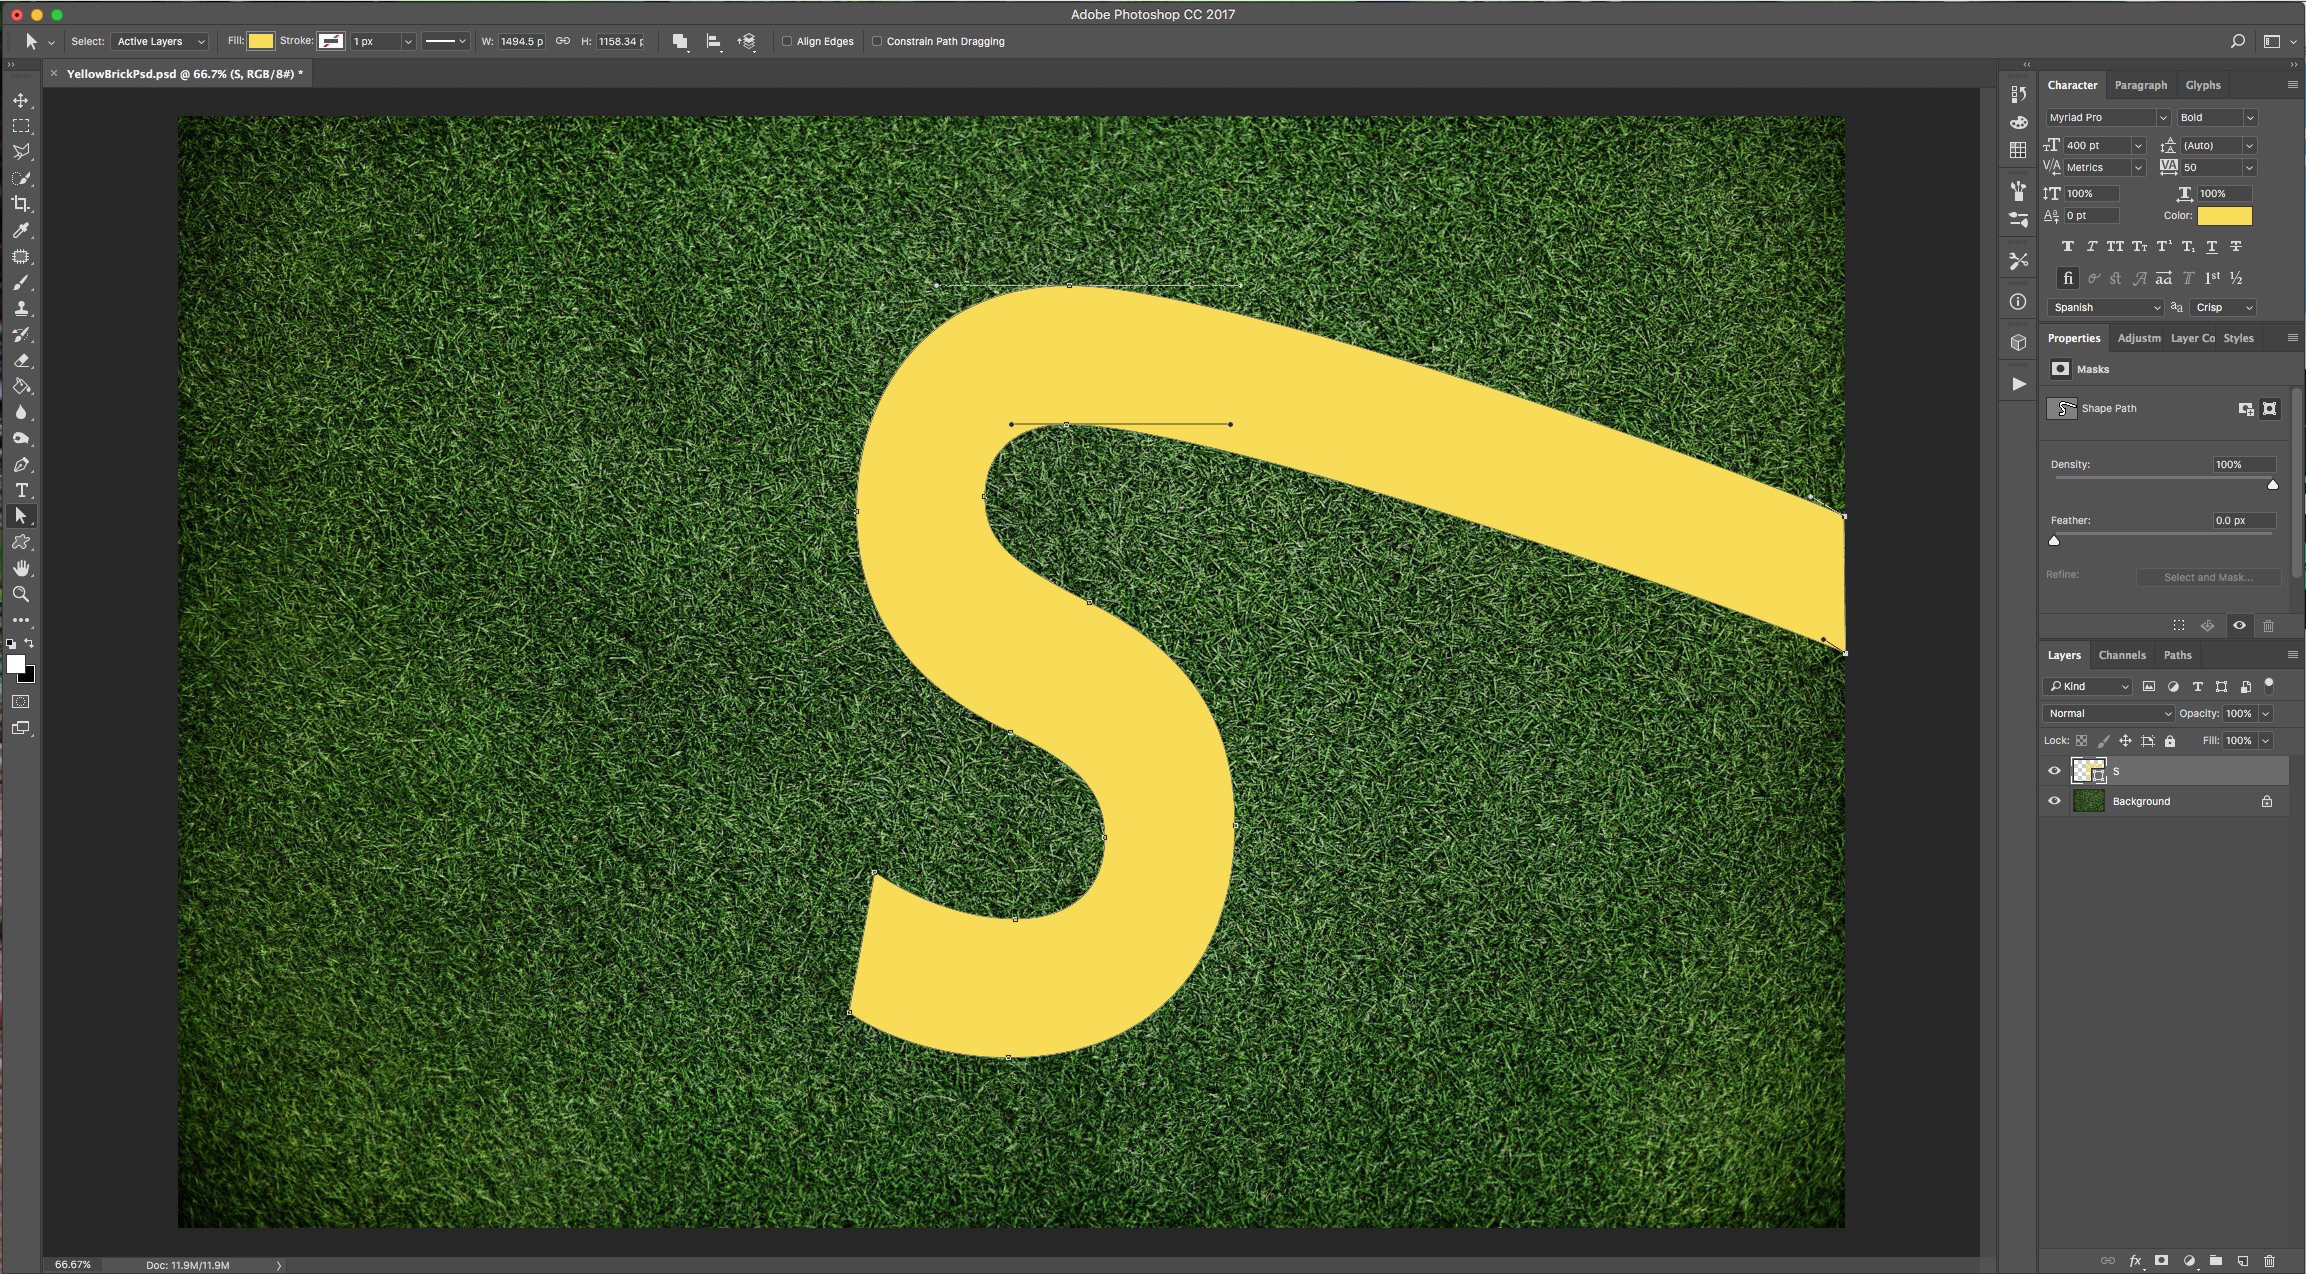
6 - Use the “Direct Selection Tool” (A) to select the two “End Points” on one side of the letter then drag them to the edge of the document. Fix the curvature by pulling the little “Handles” to make it look ok. Repeat with the other side of the “S”.
7 - Duplicate your Layer (Command/Control + J), lower the duplicate’s “Fill” to 0%. Next, make a duplicate of the 0% “Fill” Layer.


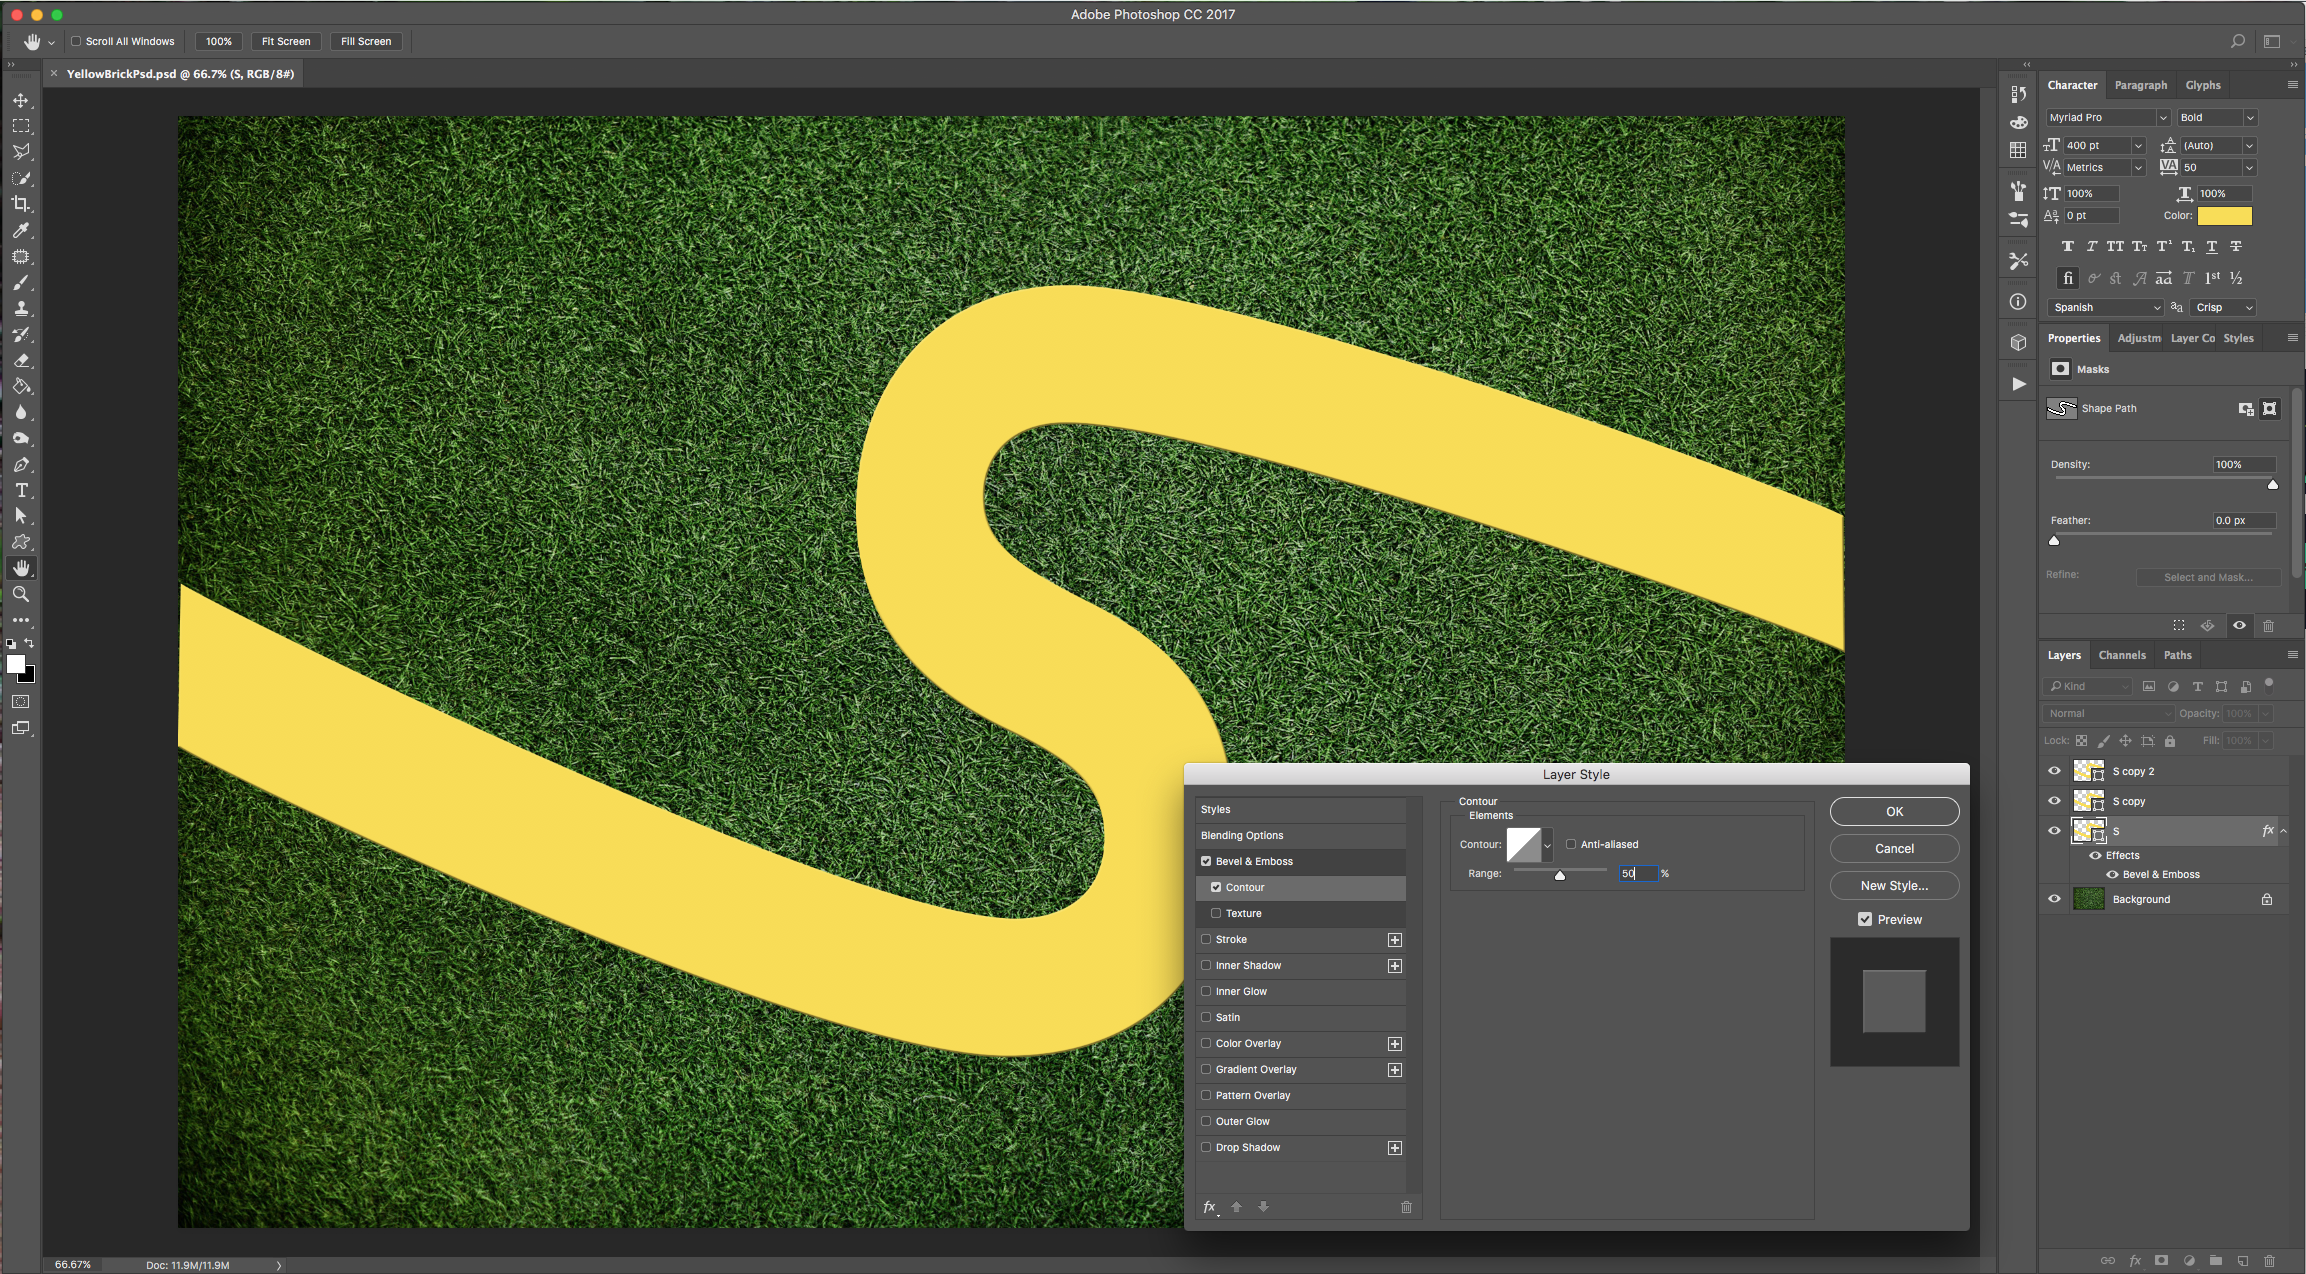
8 - Double-click on top of your original “S” Thumbnail and apply the following “Layer Styles”:
Bevel & Emboss:

Contour:
Texture: (Use one of the Patterns you created. We used the “Horizontal” one).

Pattern Overlay: (Use one of the ones you created. We used the “Horizontal” one).

9 - Double-click on top of your first duplicate “S” Thumbnail and apply the following “Layer Styles”:
Bevel & Emboss:

Contour:
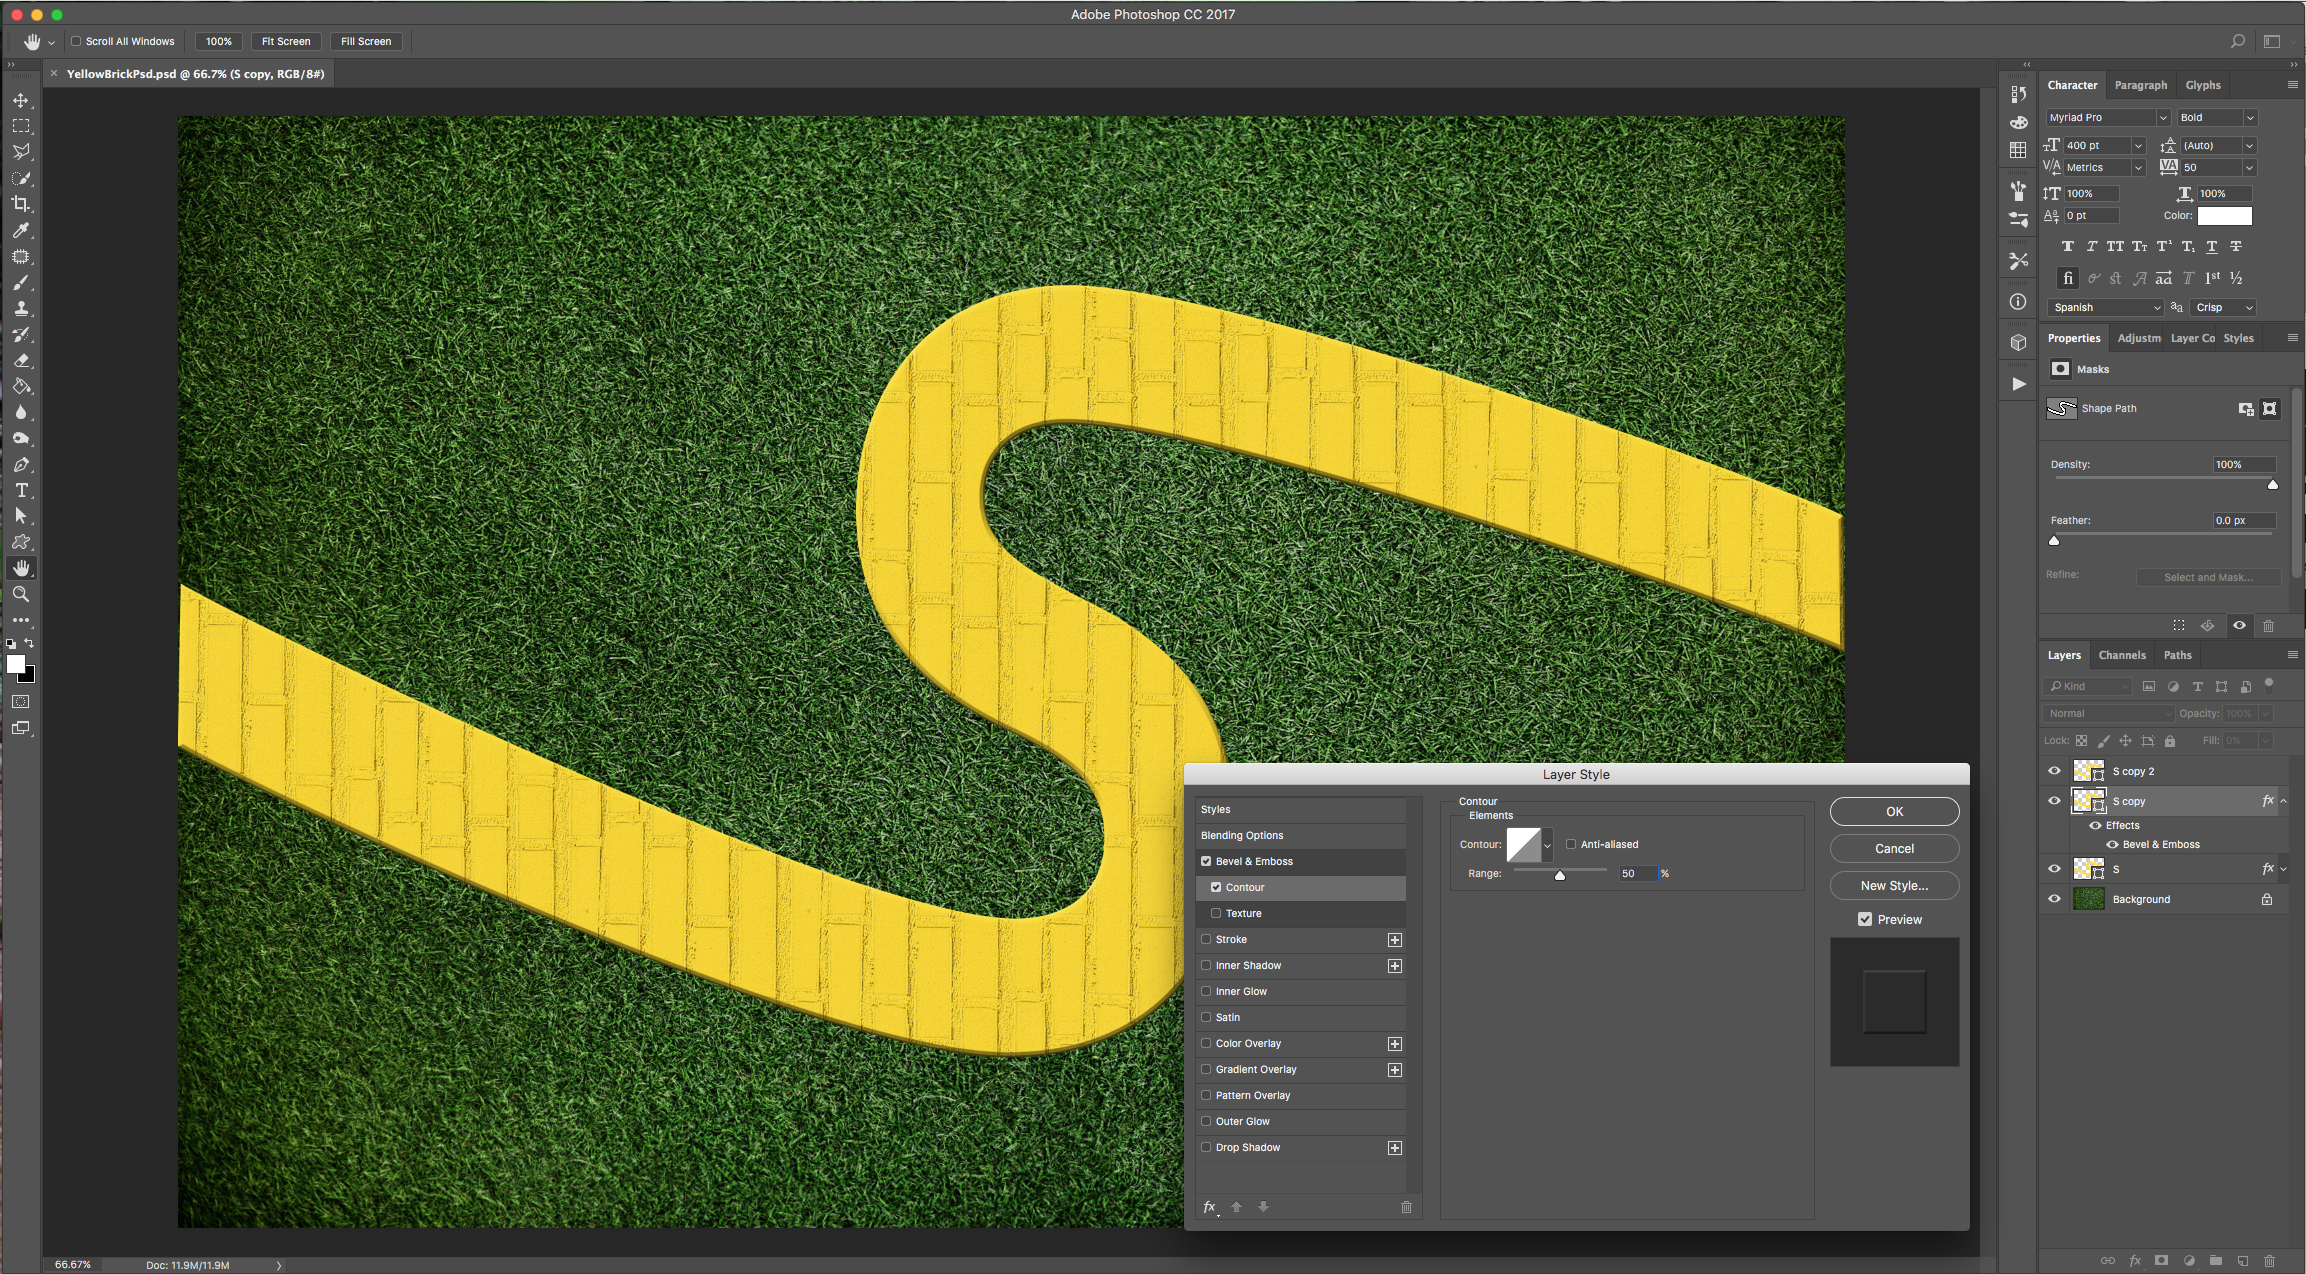
Texture: (Use one of the Patterns you created. We used the “Horizontal” one).

10 - 8 - Double-click on top of your second duplicate “S” Thumbnail and apply the following “Layer Styles”:
Bevel & Emboss:

Texture: (Use one of the Patterns you created. We used the “Horizontal” one).

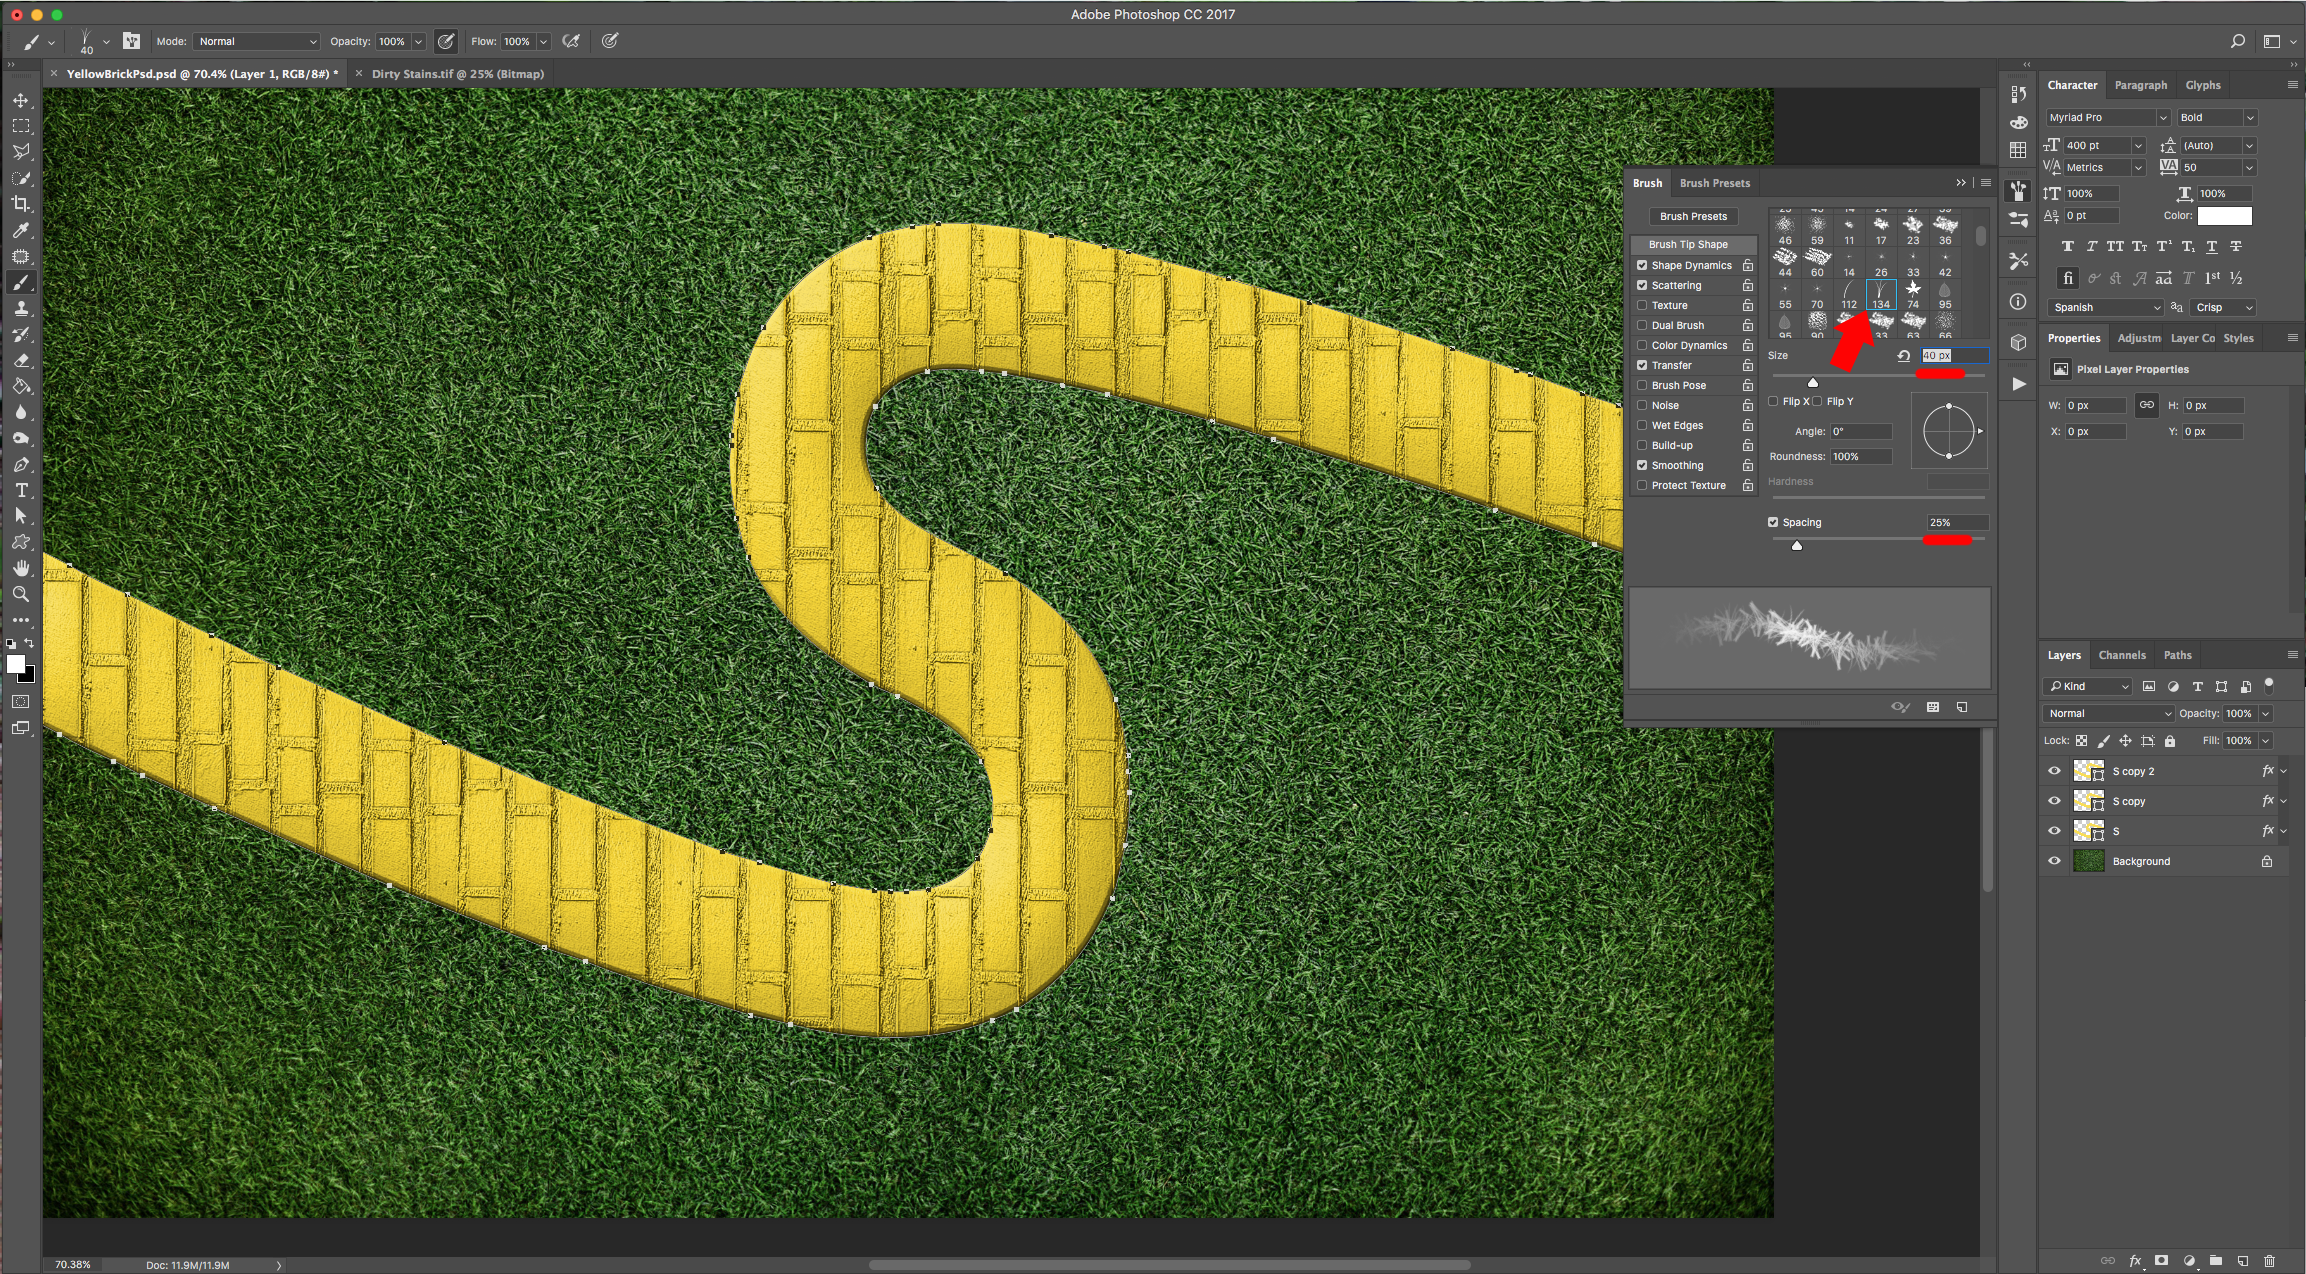
11 - Select the “Brush Tool” (B) and open the “Brush Panel”, select the “Grass” Brush (it should be one of the default brushes) and use the following values:
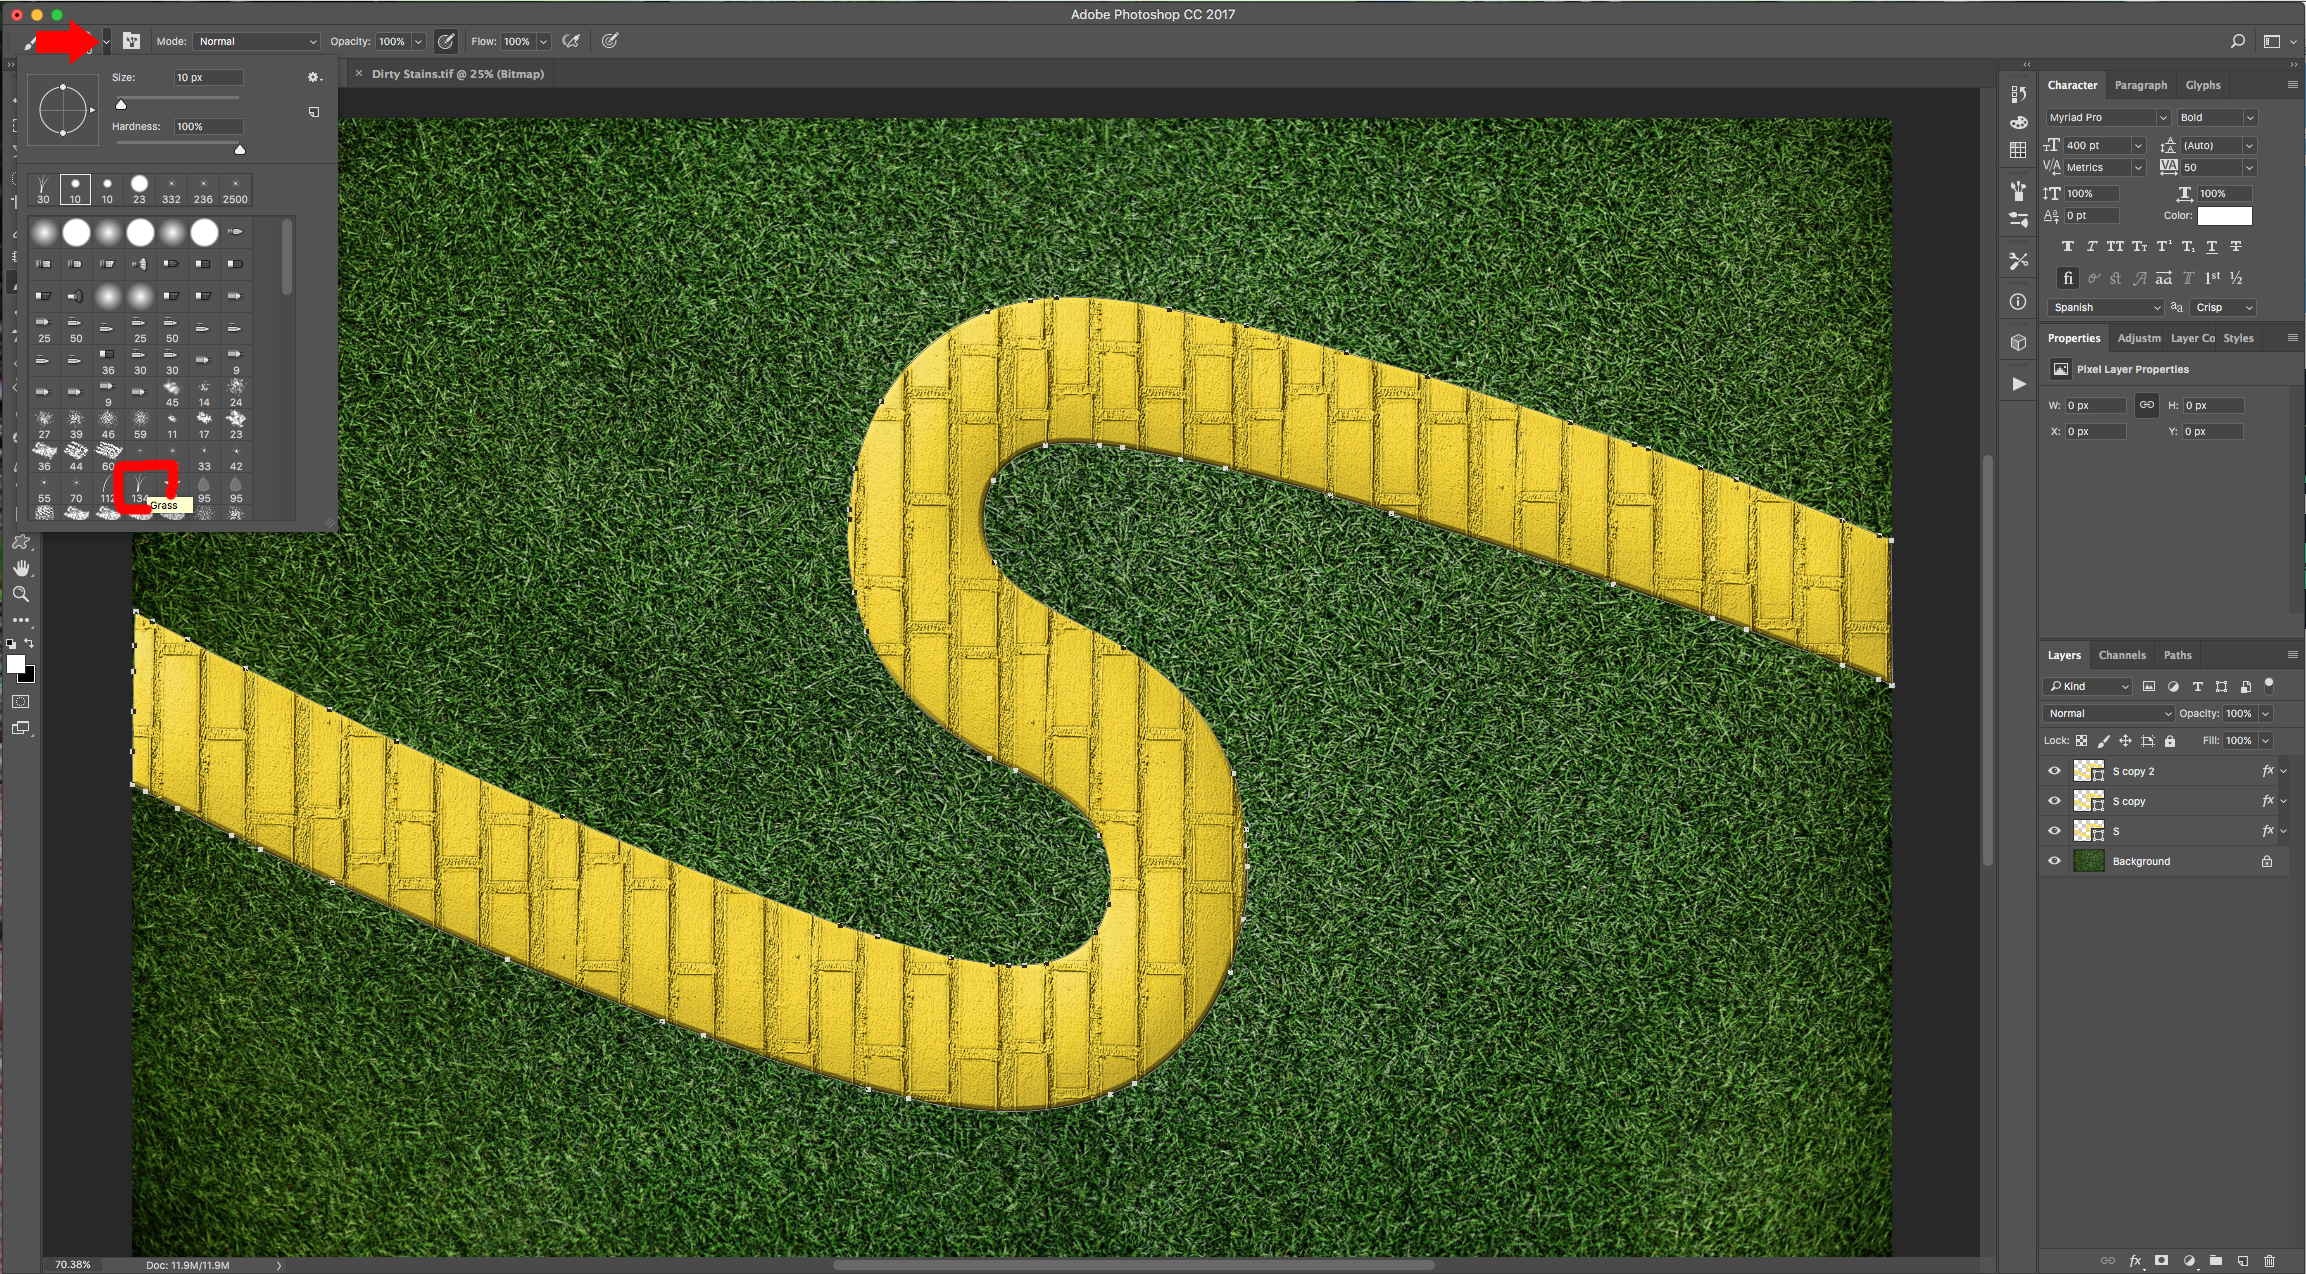
Brush Tip Shape:
Shape Dynamics:

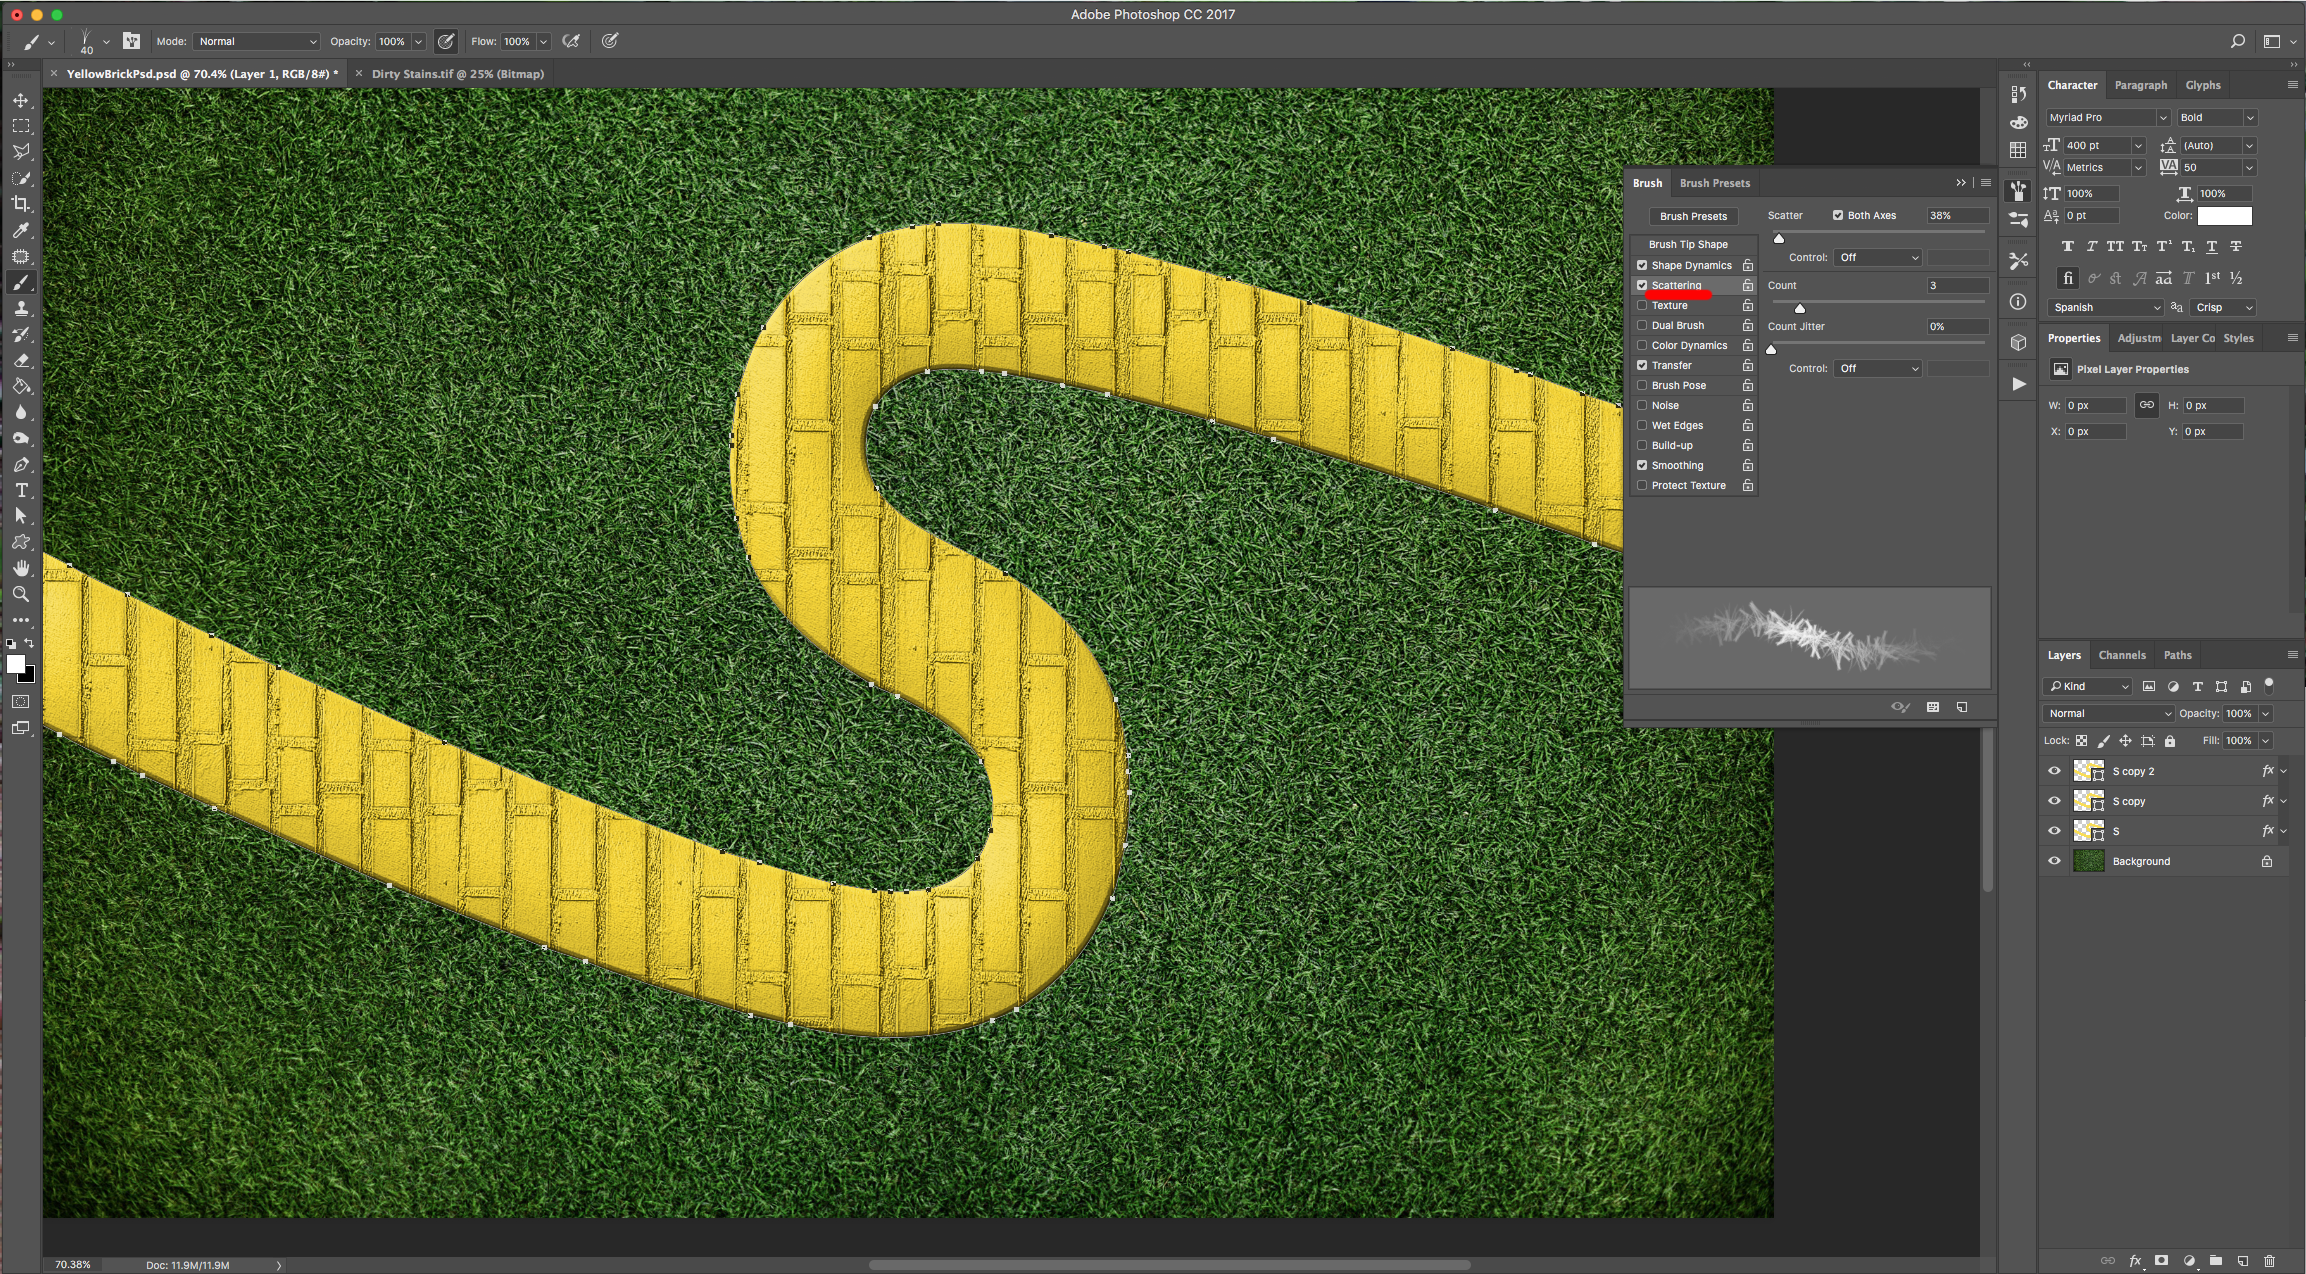
Scattering:
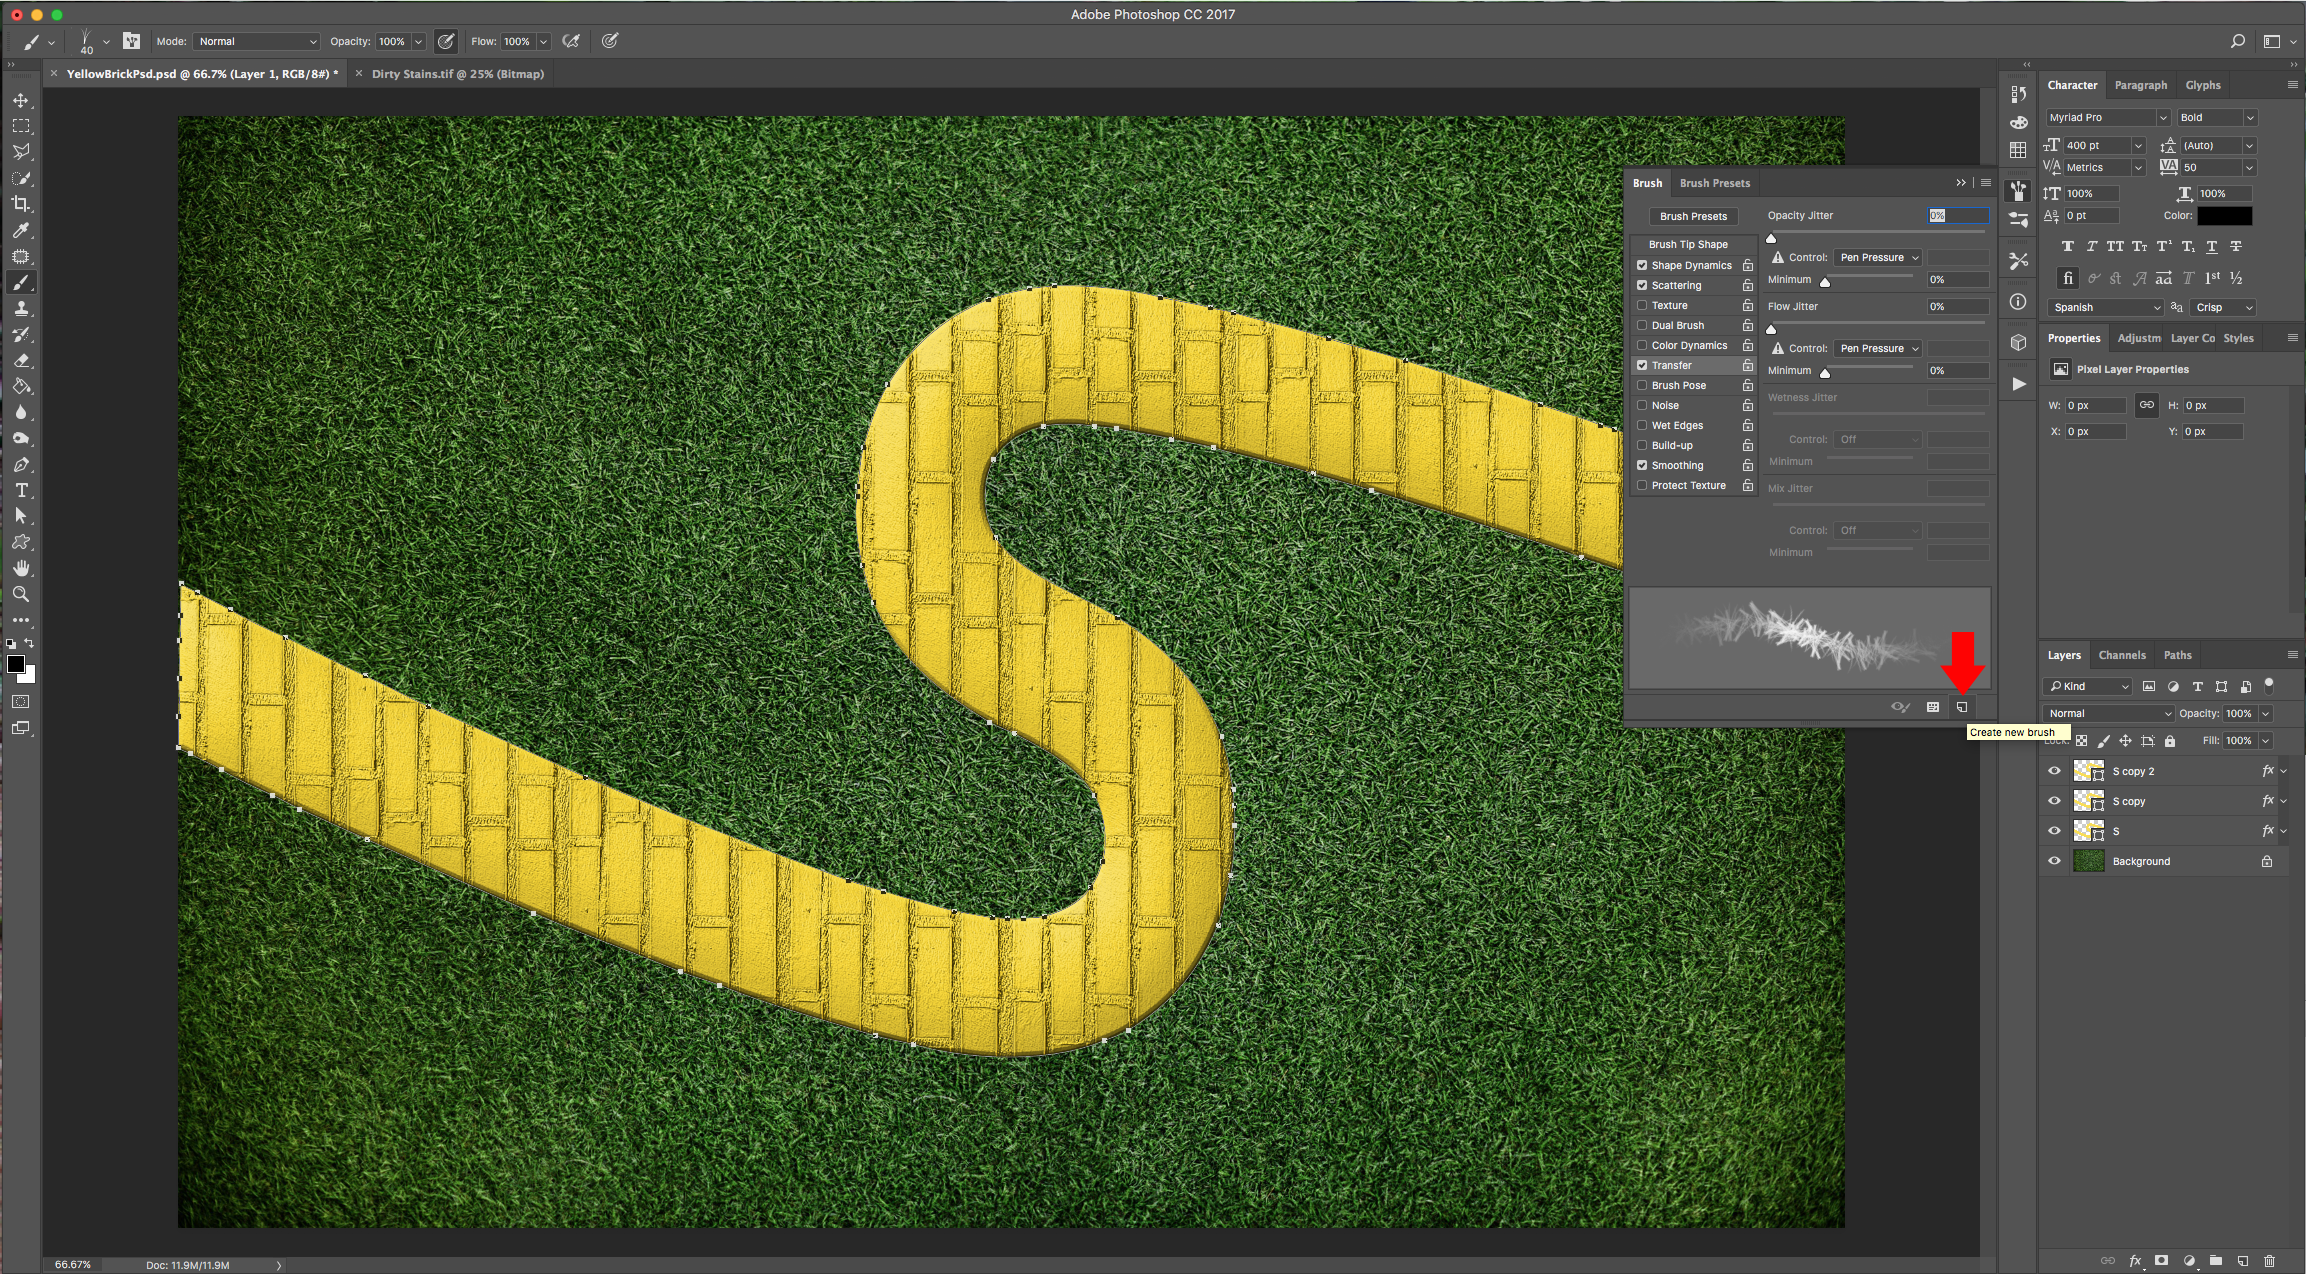
Transfer:

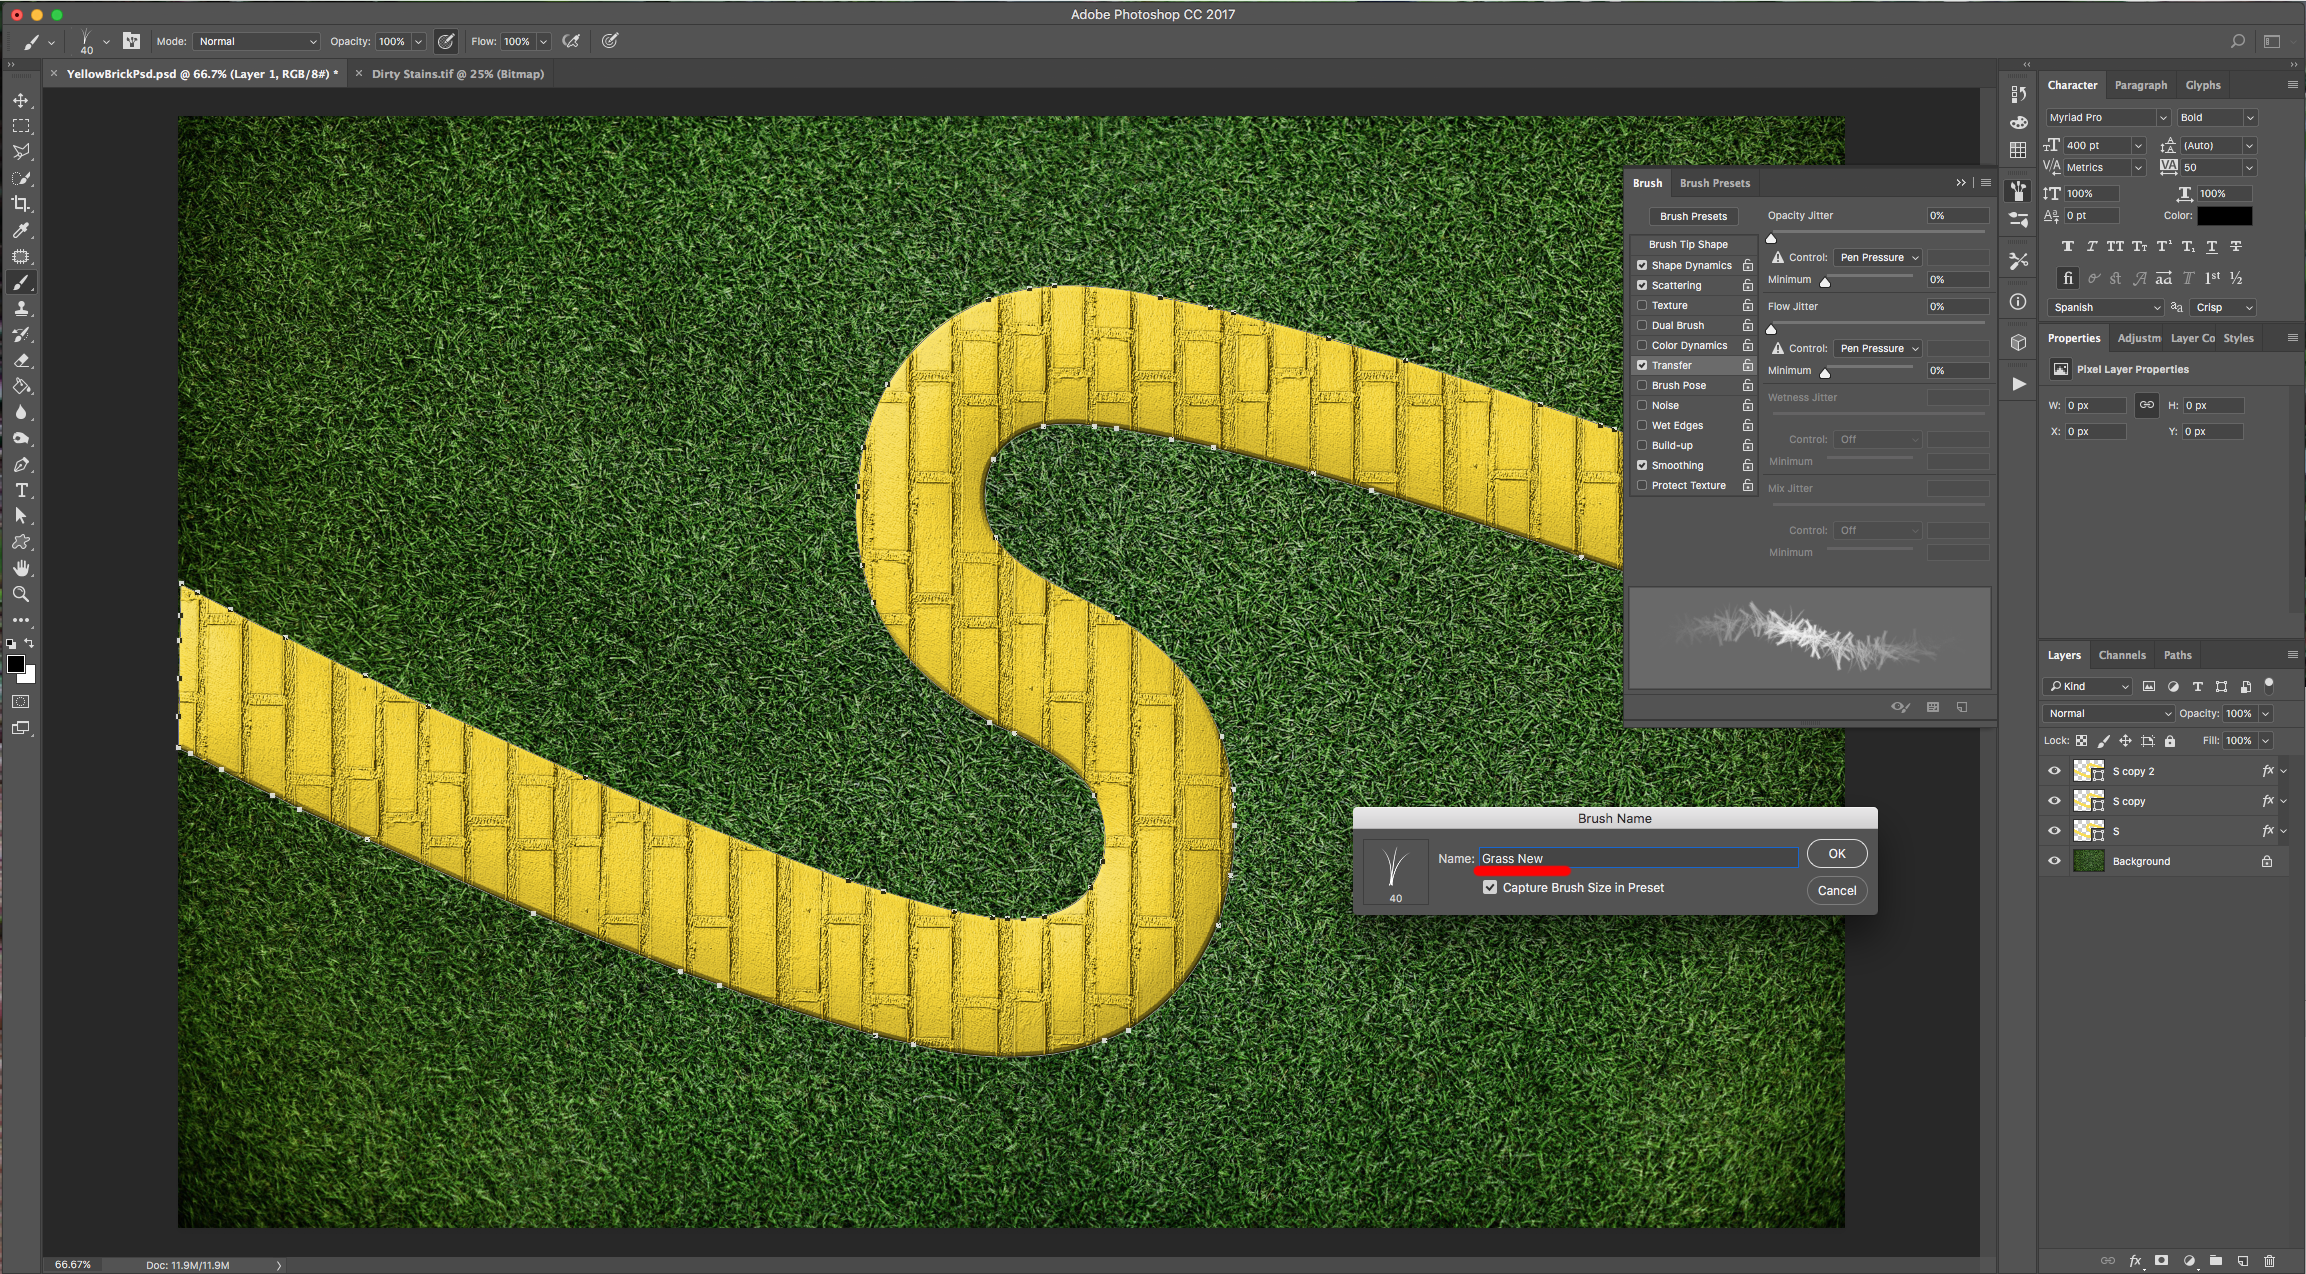
12: Click on the small “Create New Brush” button at the bottom of the Panel and save your brush.
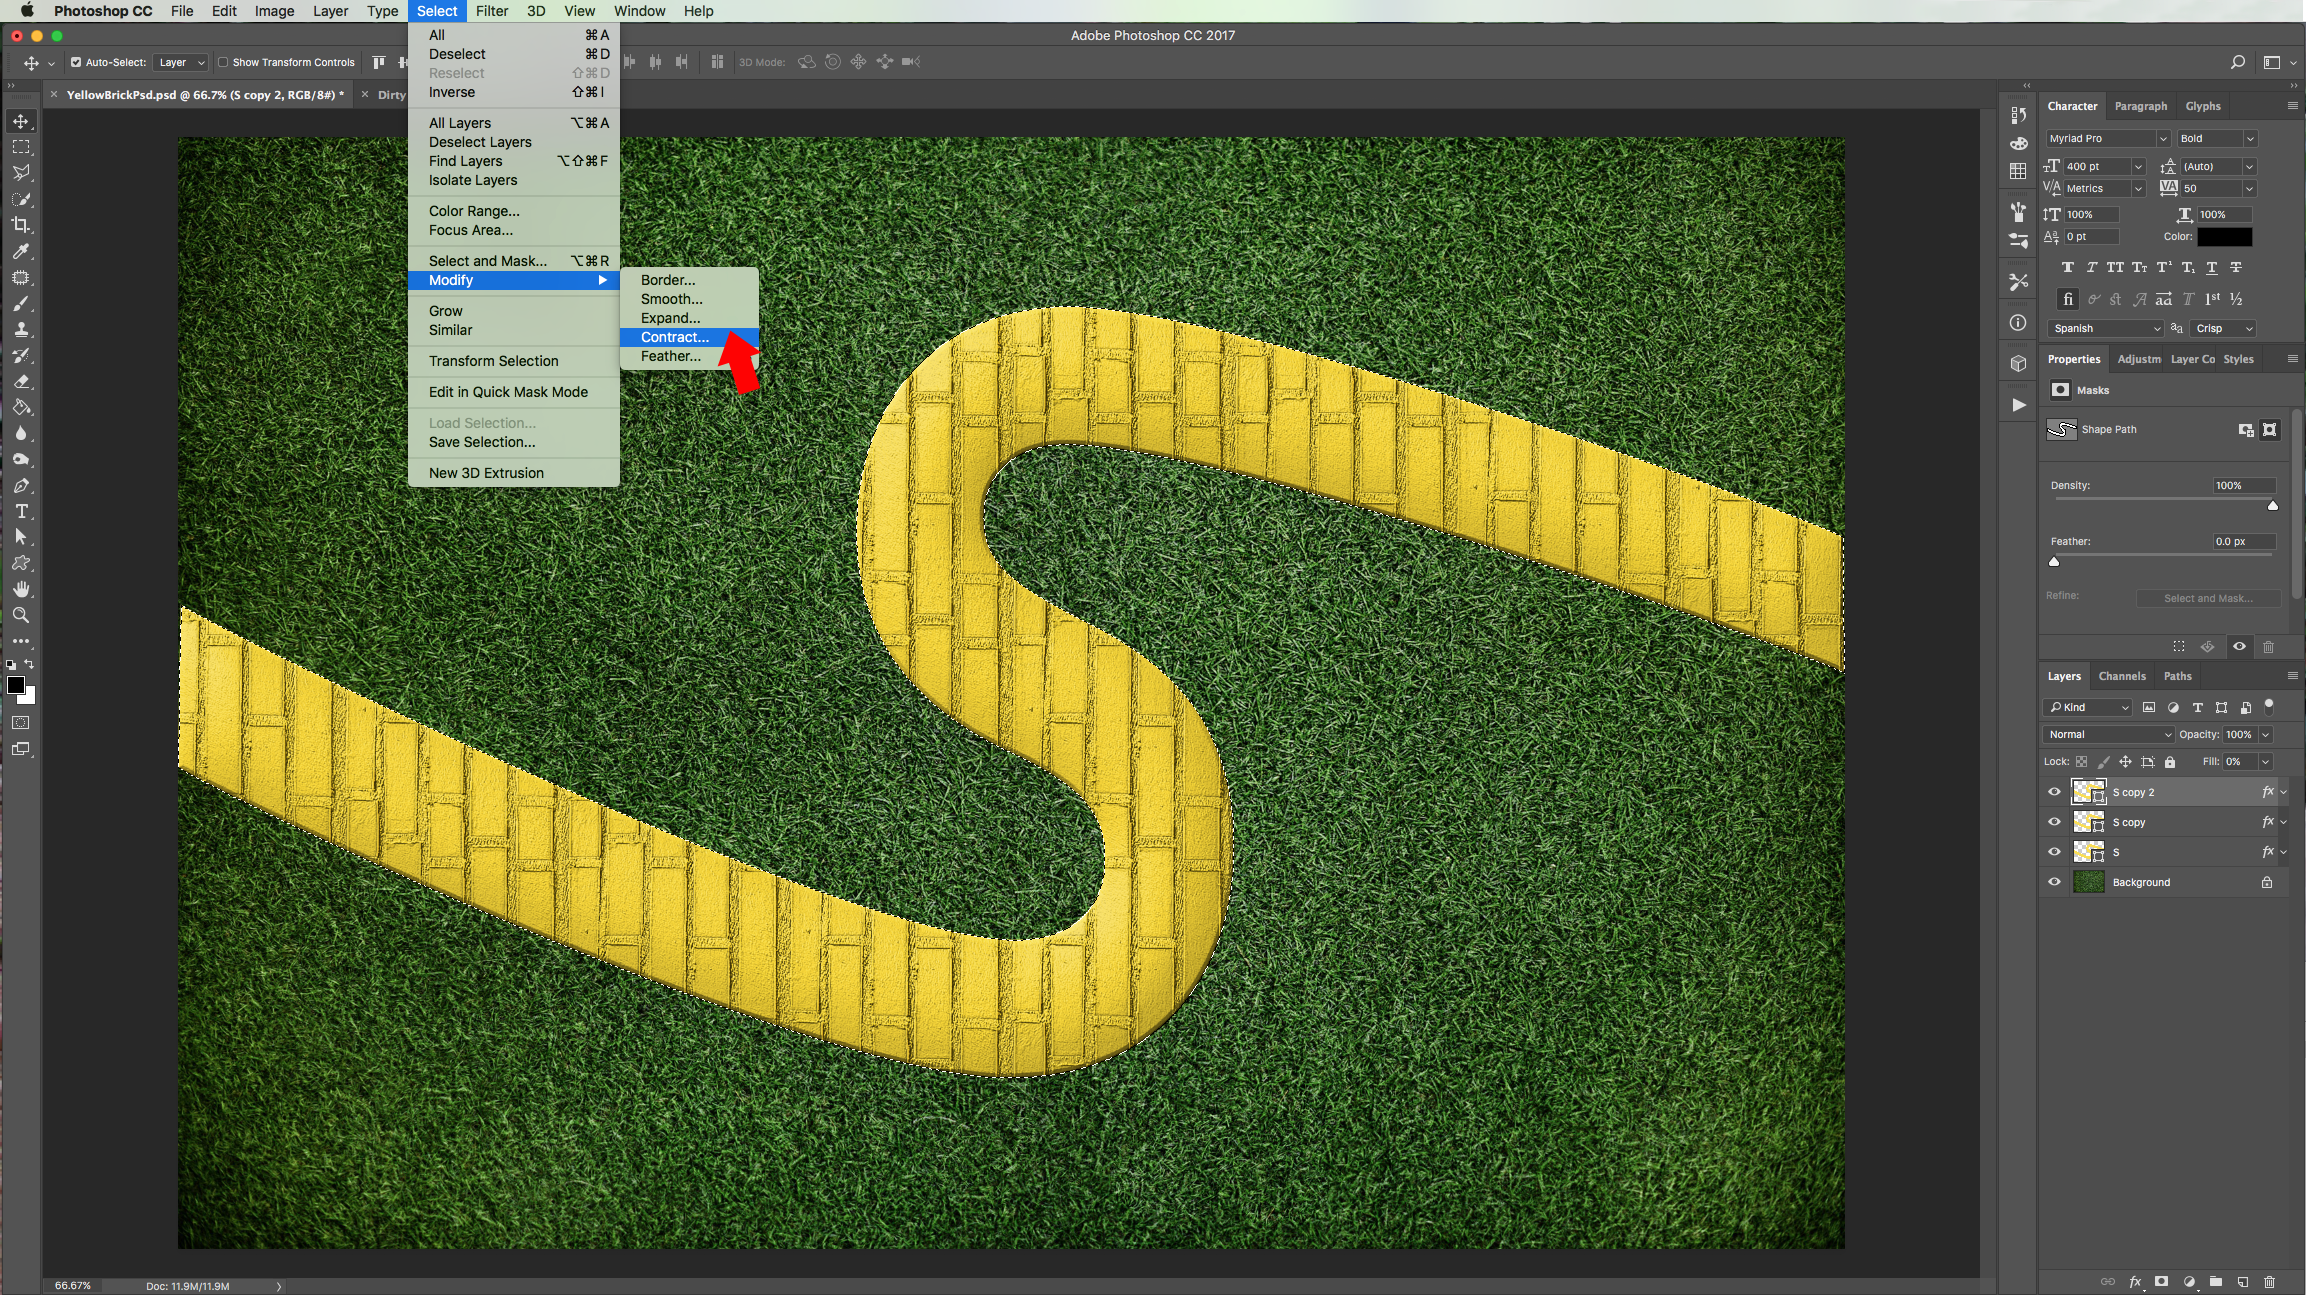
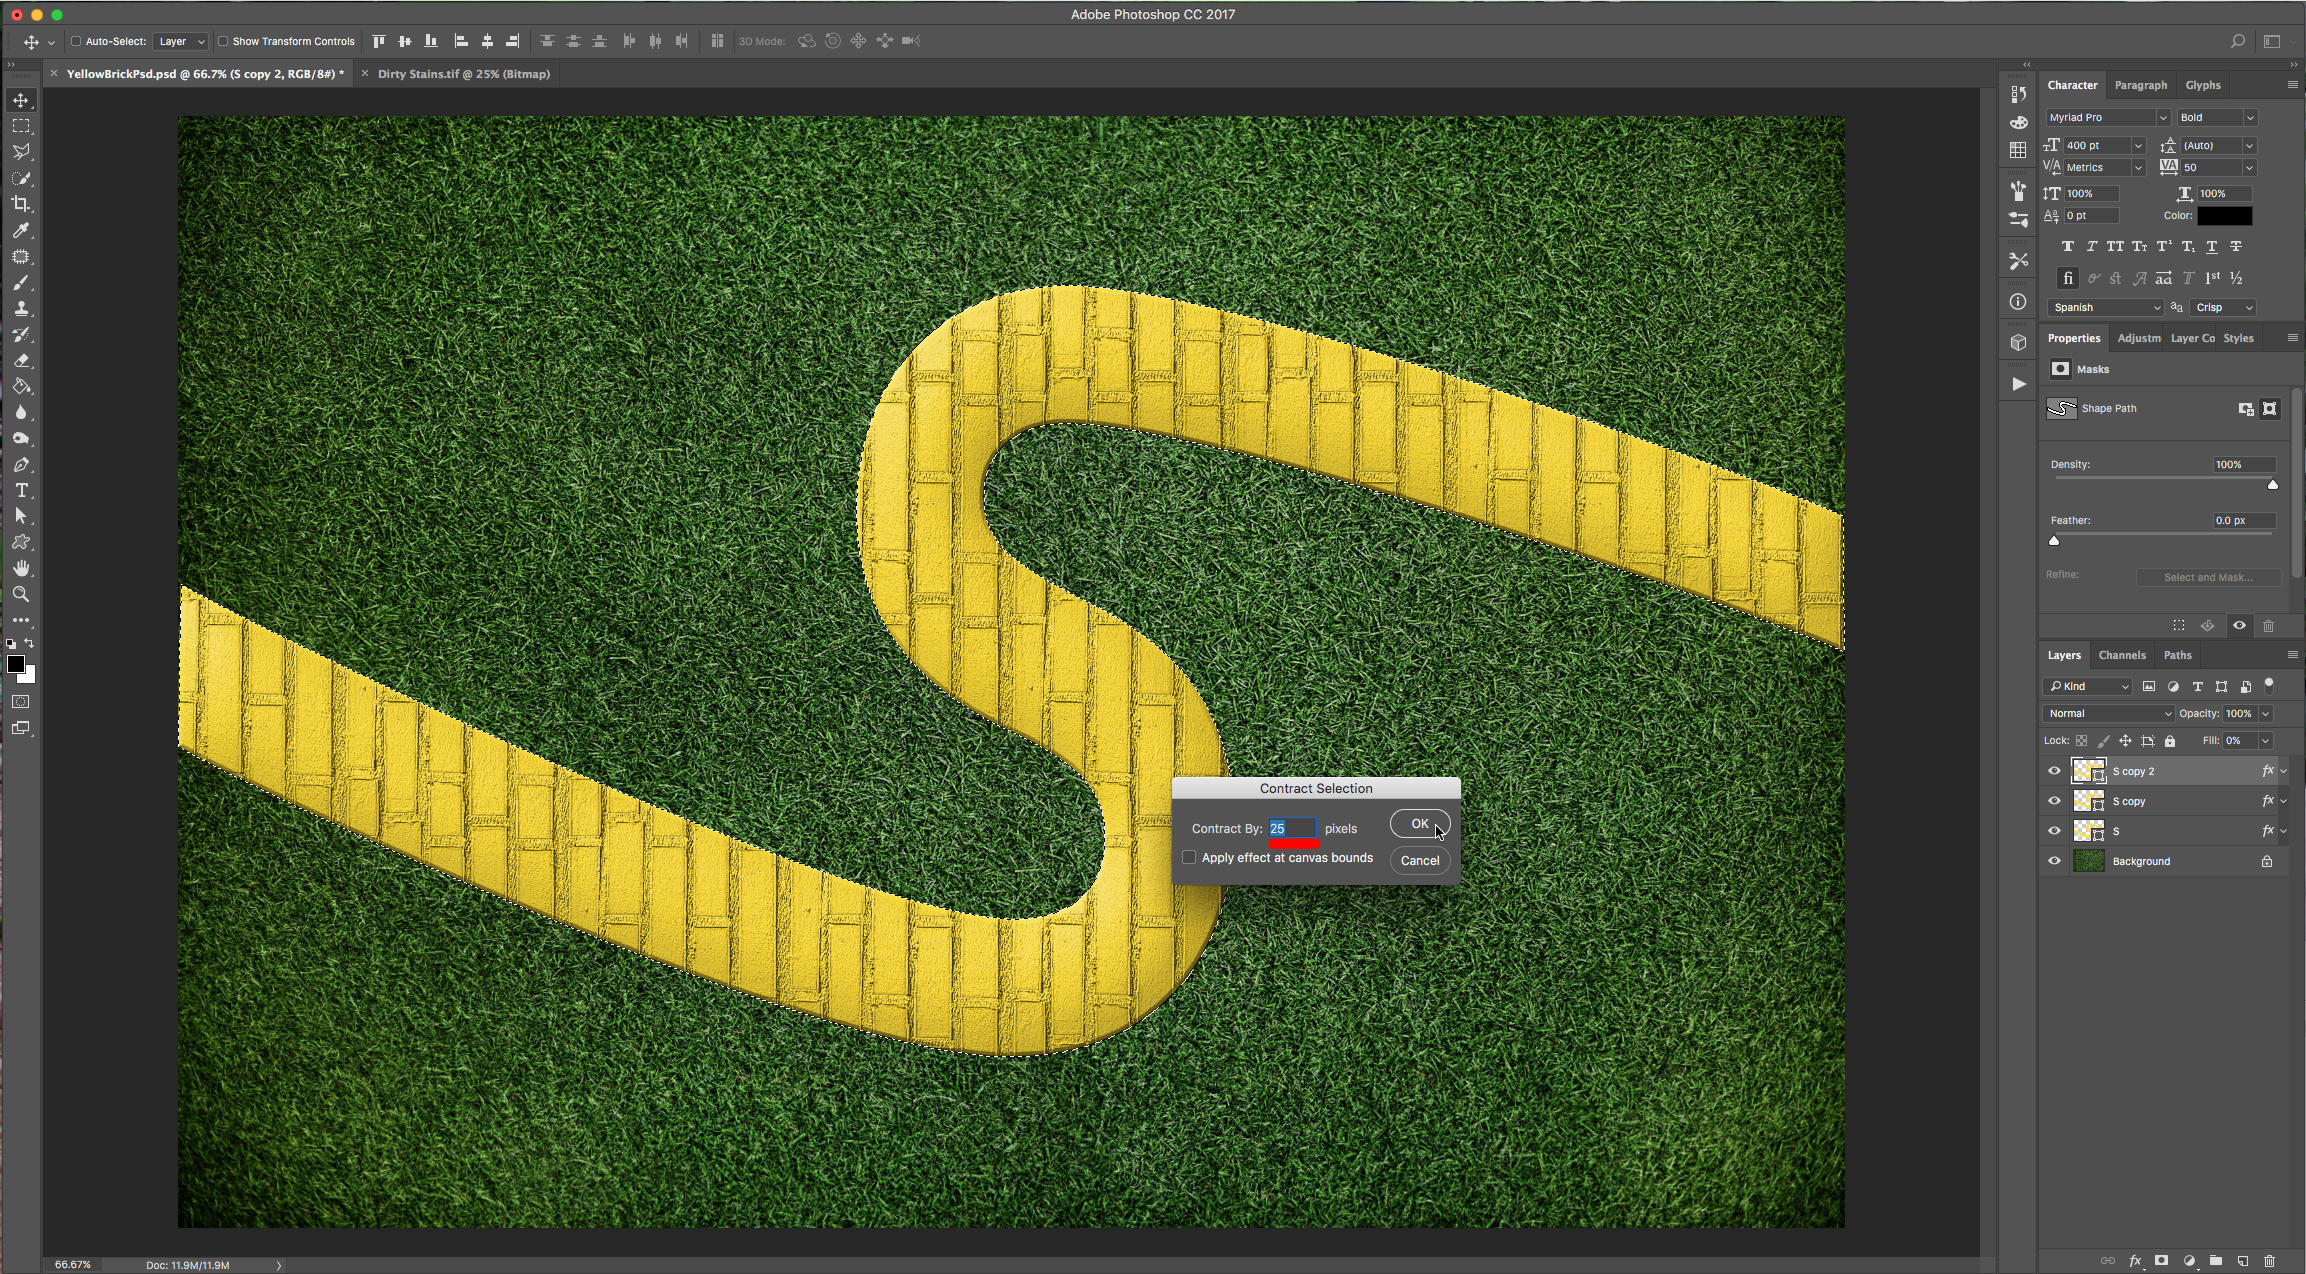
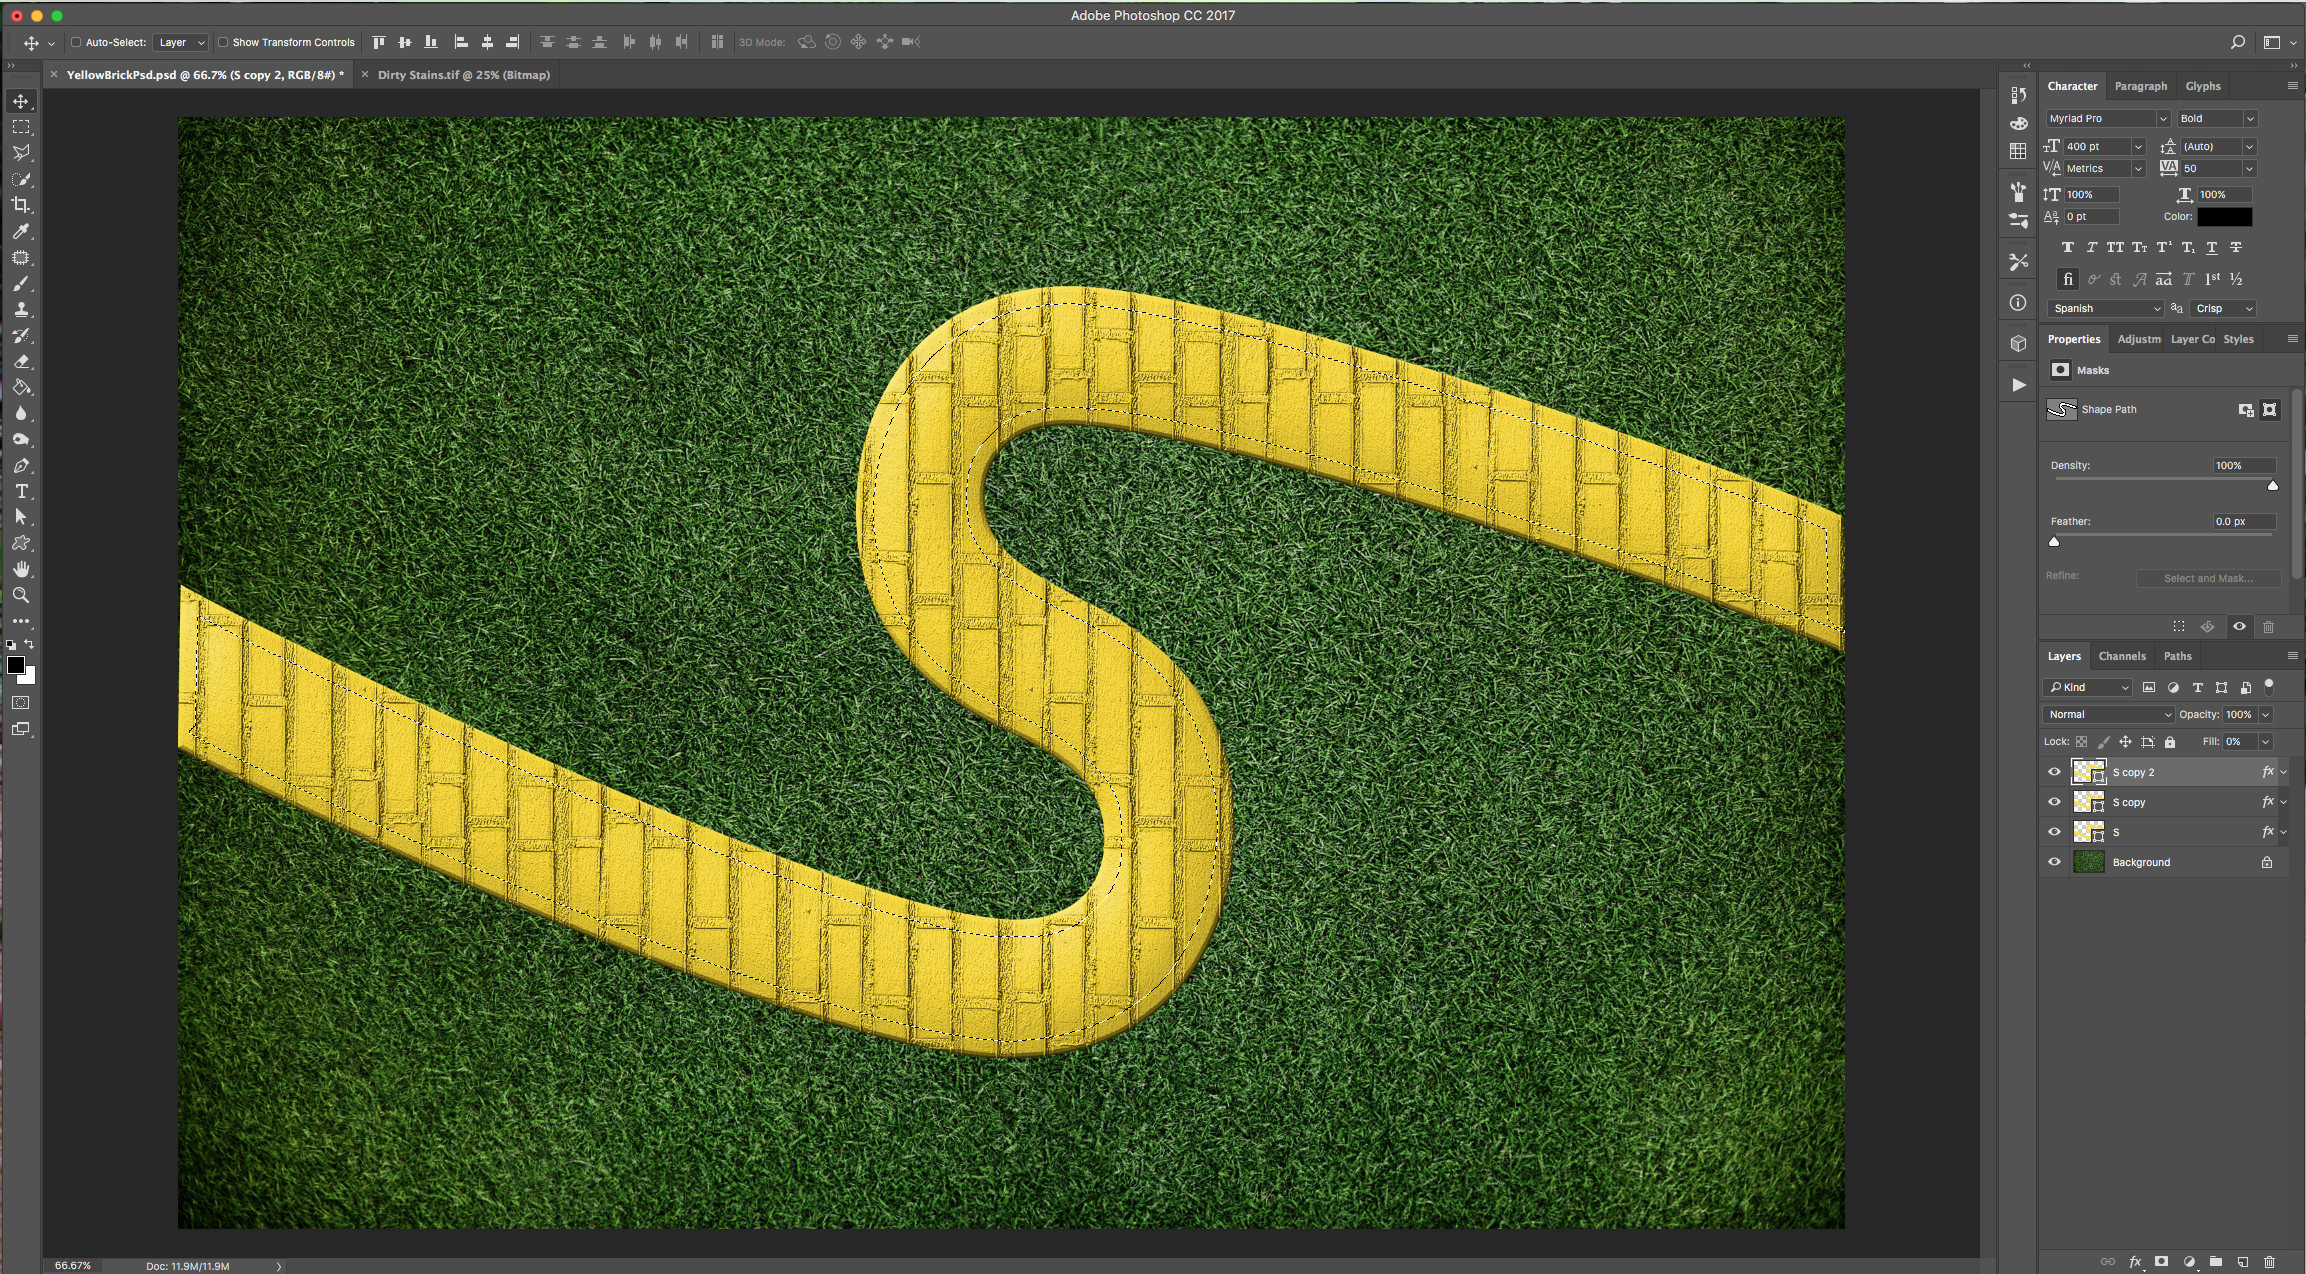
13 - With one of your “S” Layers selected, go to the “Properties Panel” and click the “Load Selection from Mask” button at the bottom of the Panel. Go to Select > Modify > Contract and use a value of about 25 Pixels.

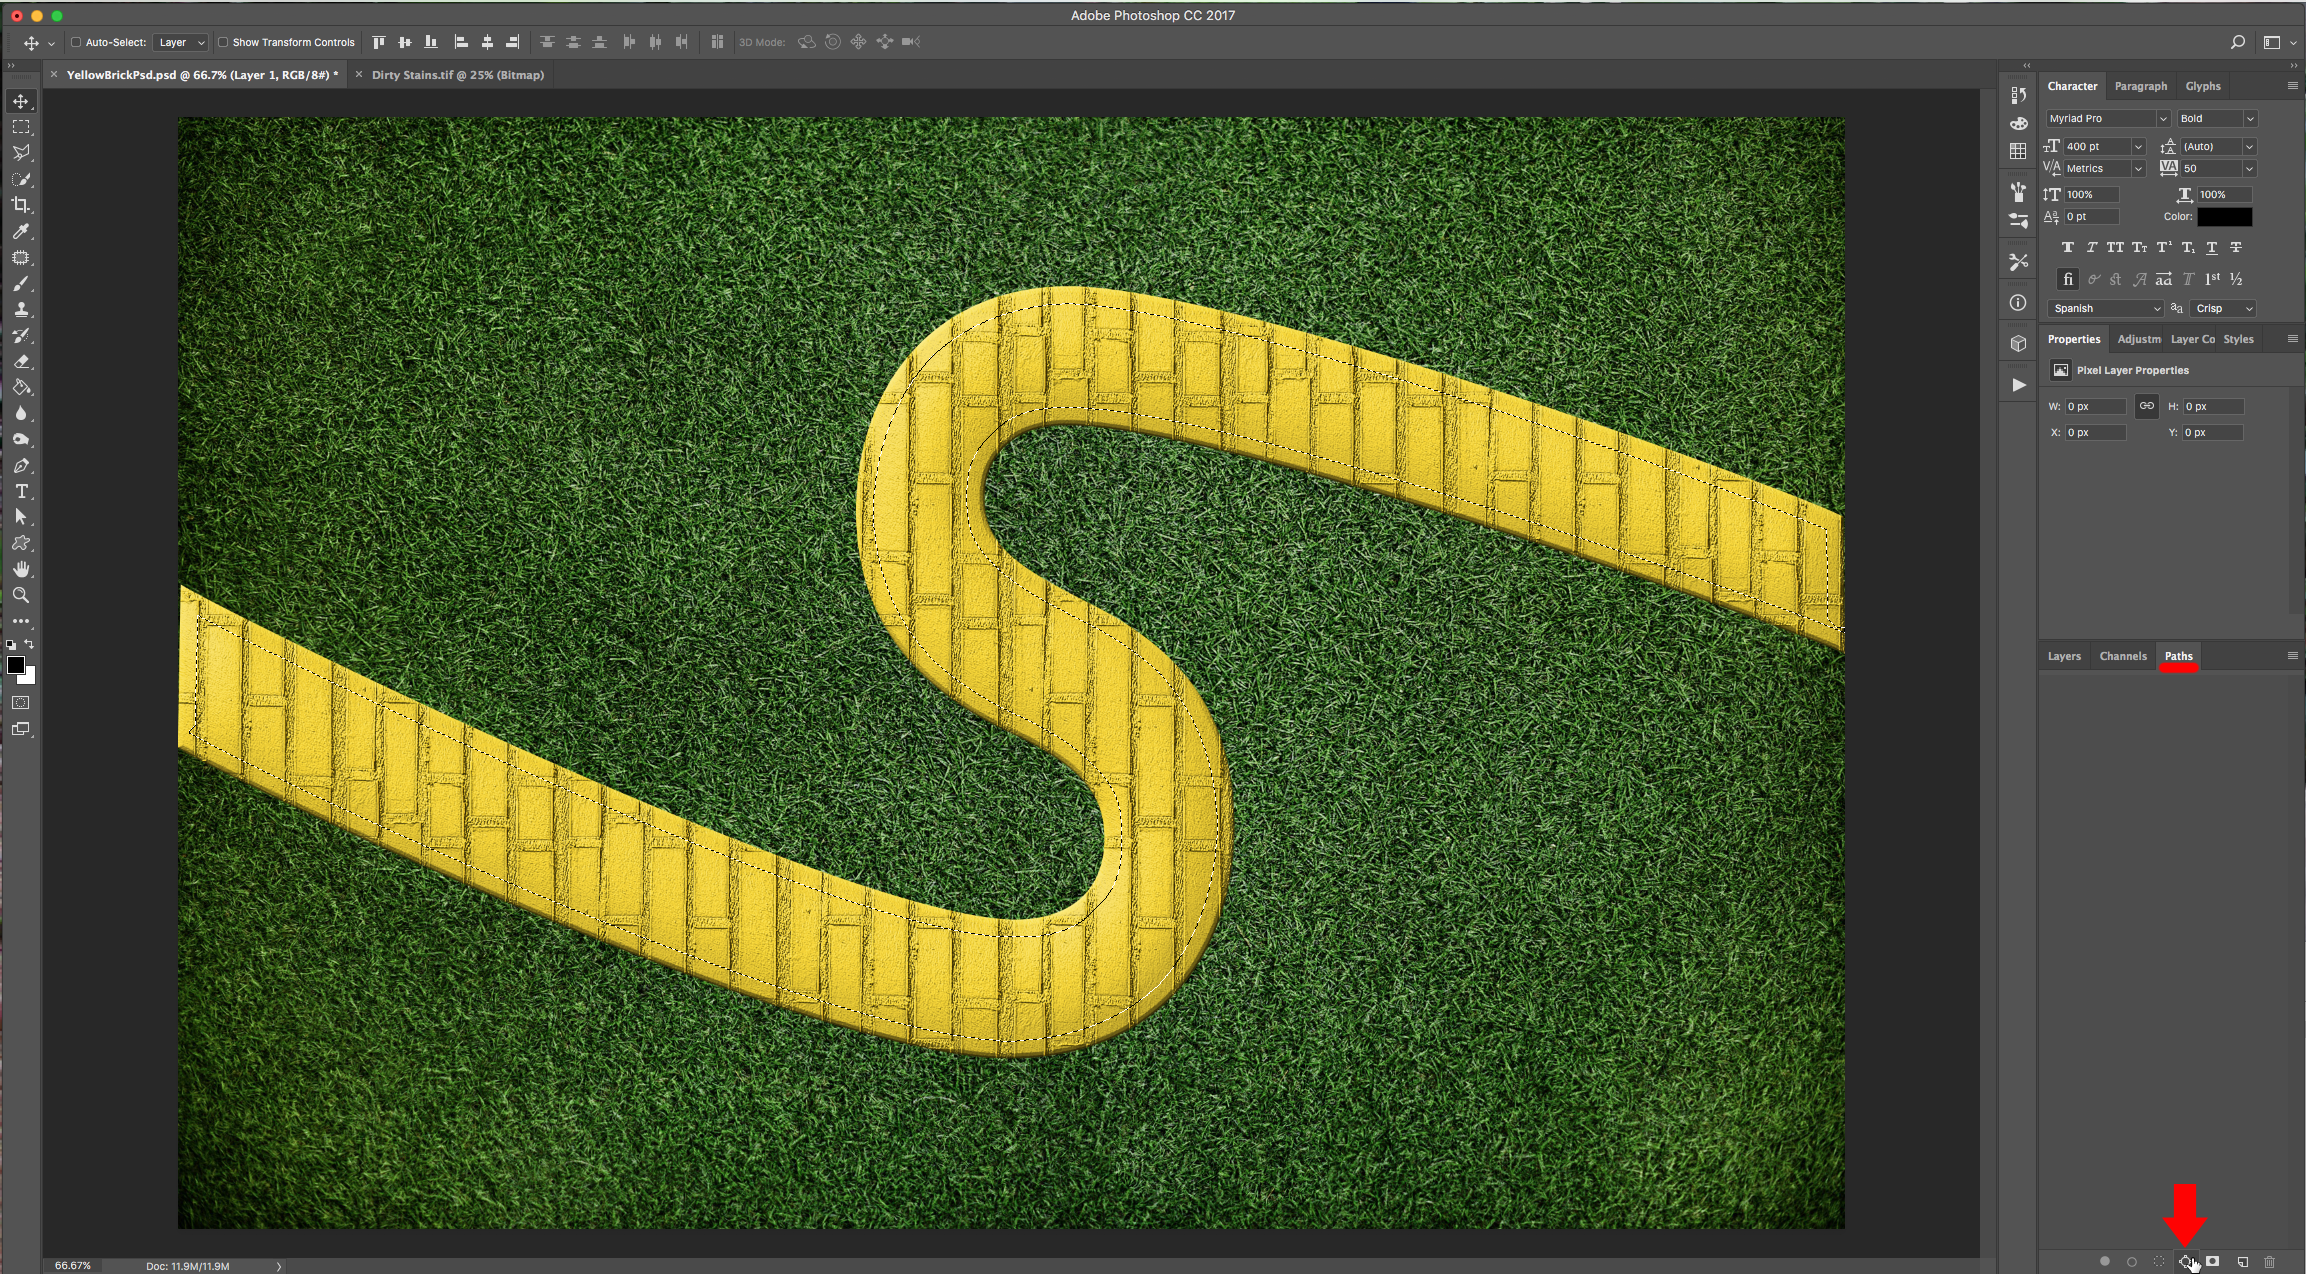
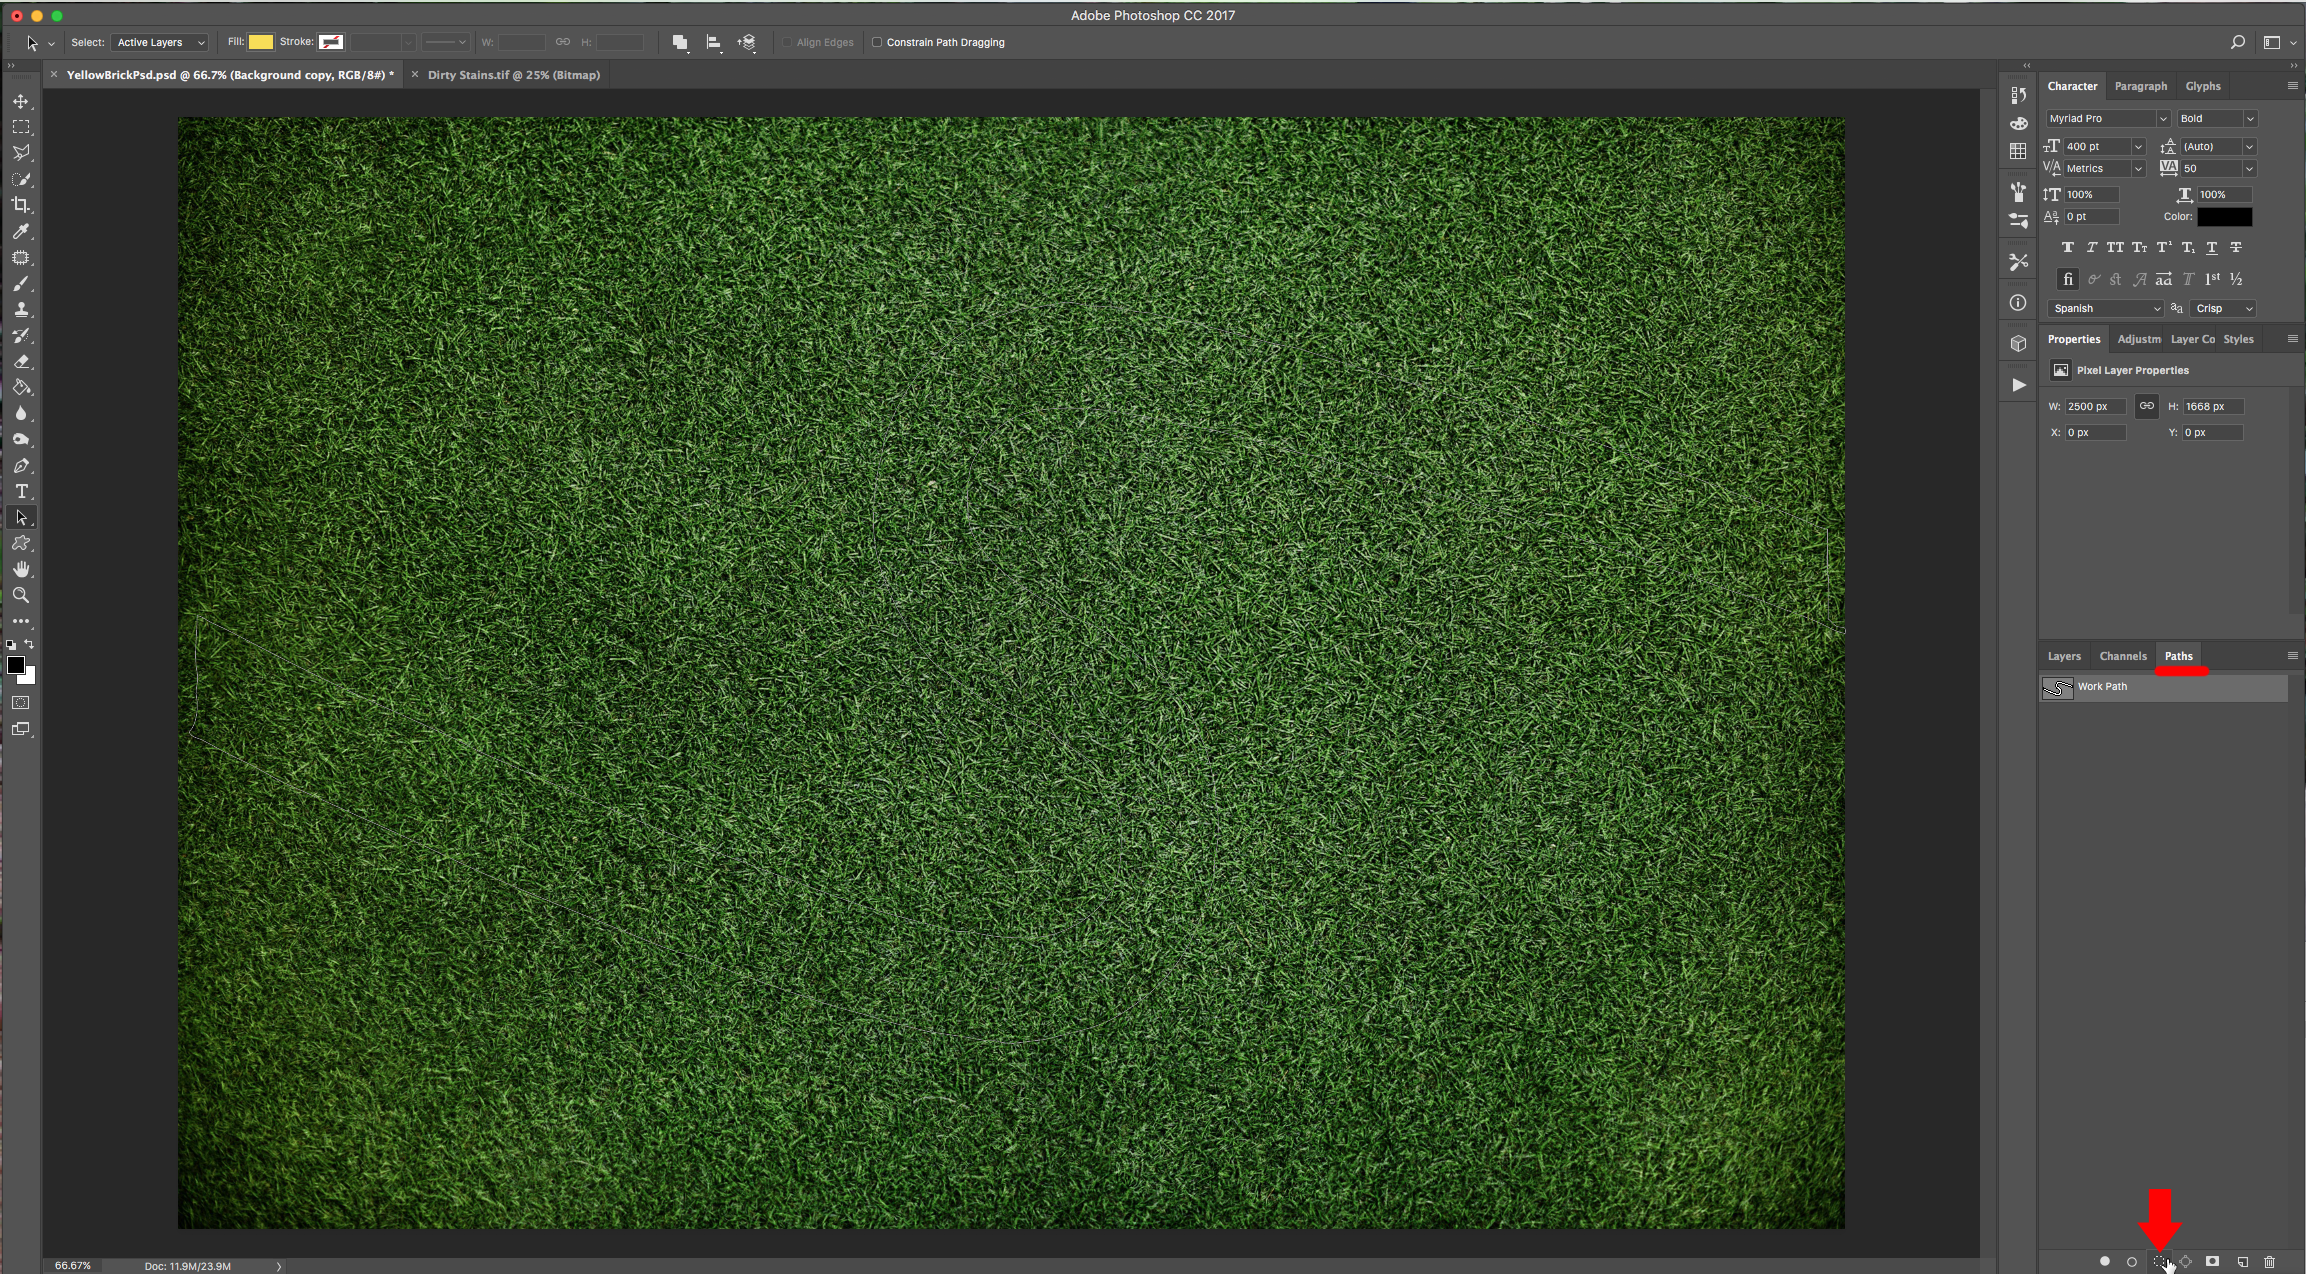
14 - Go to the “Paths Panel”, click on the “Make work path from Selection” button at the bottom of the Panel.
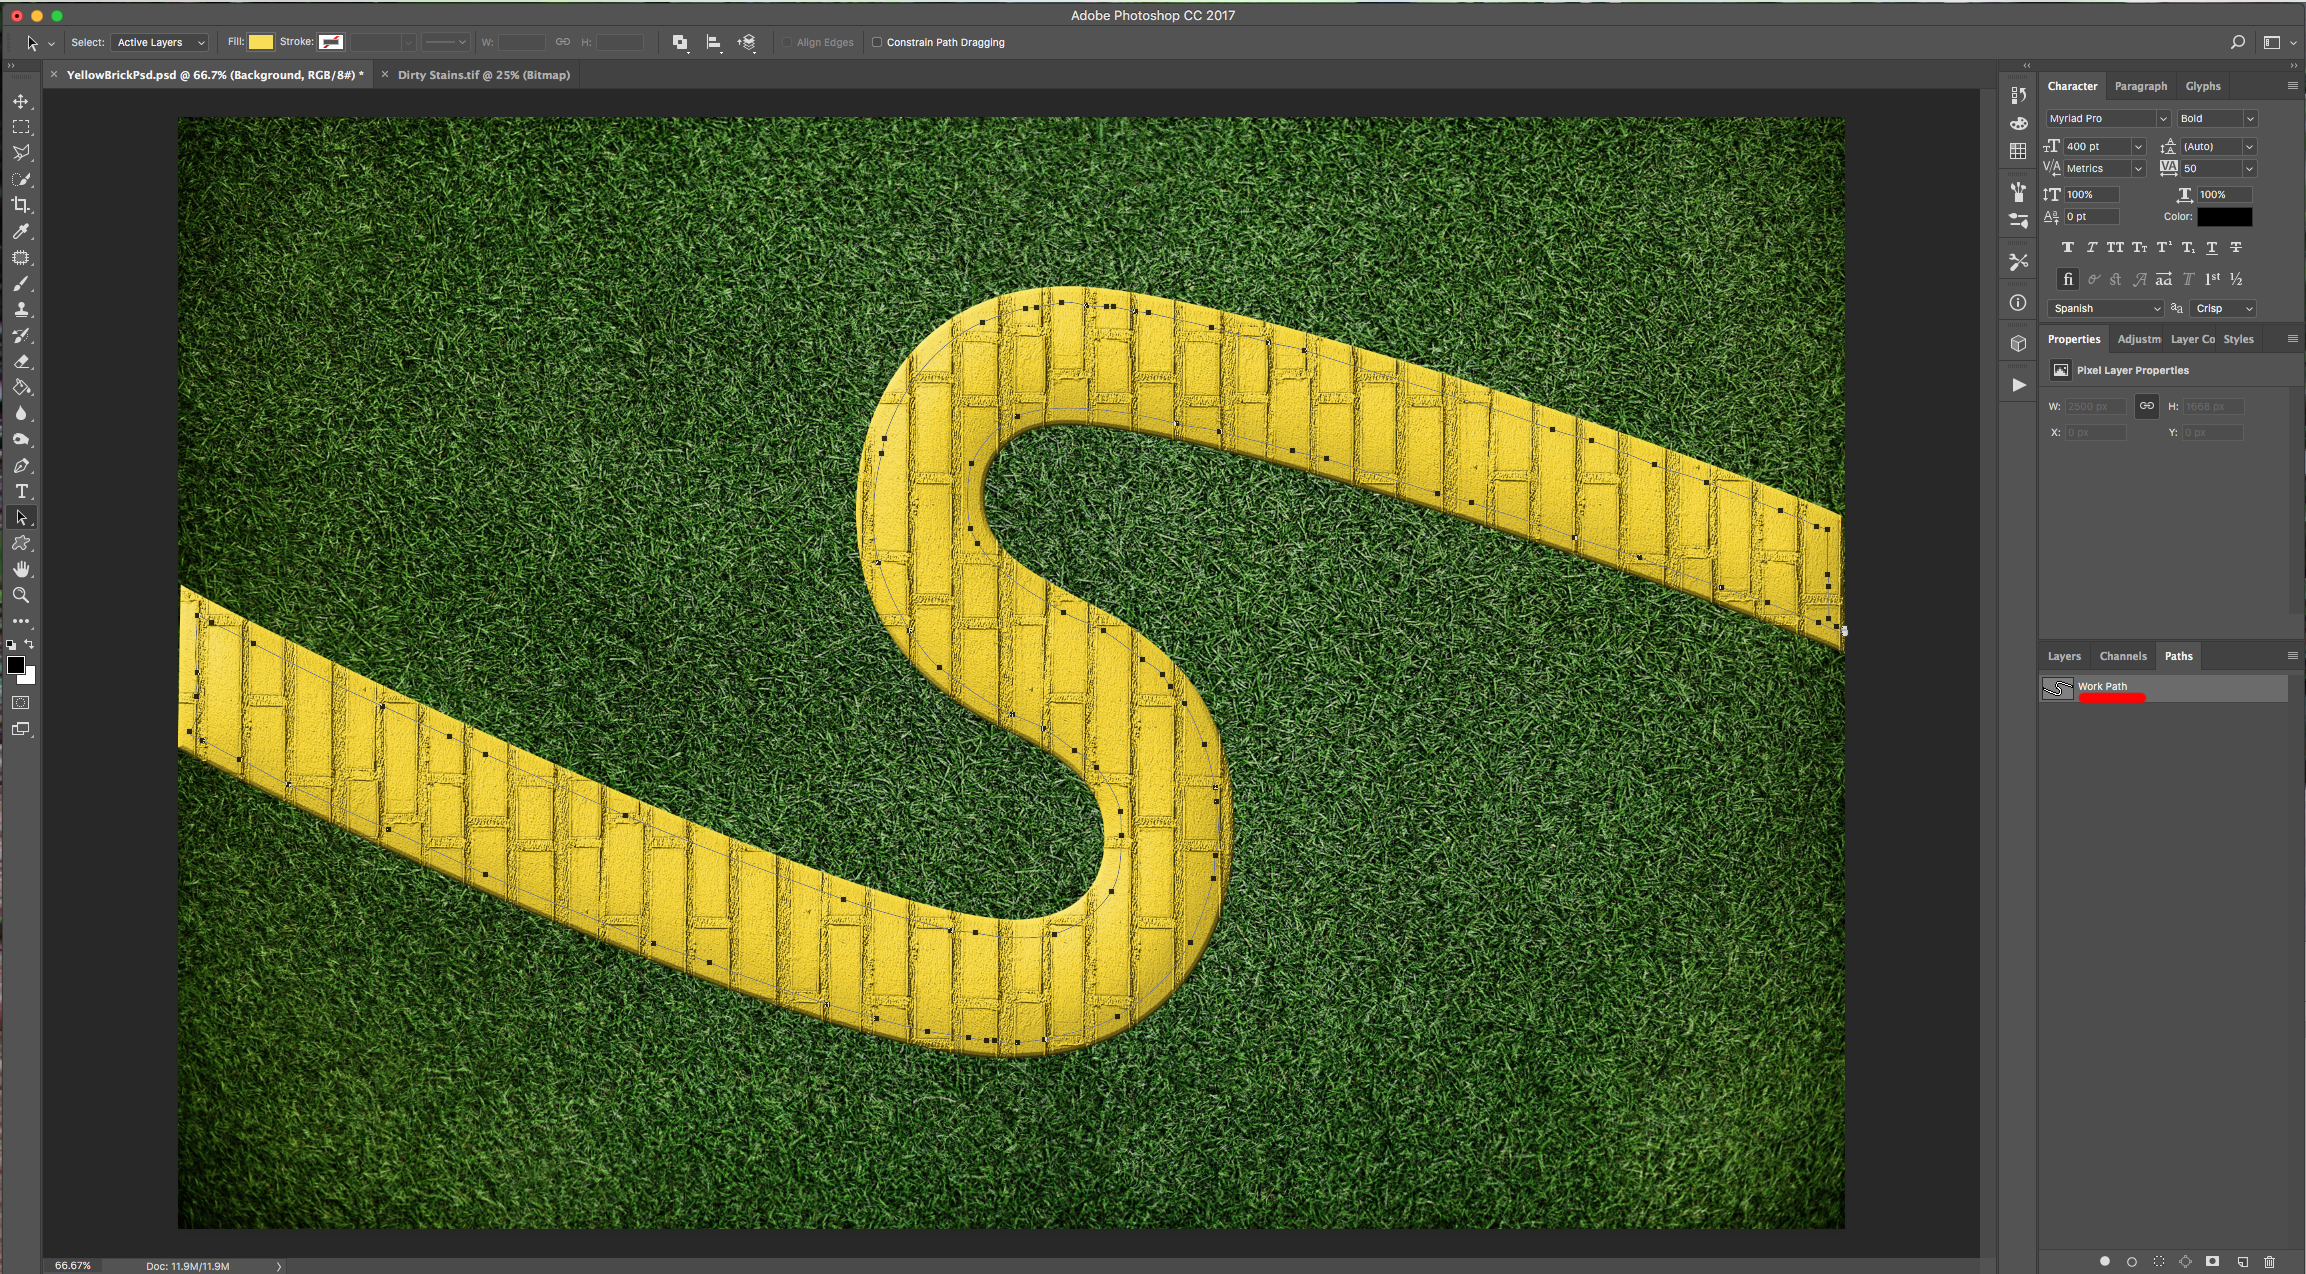
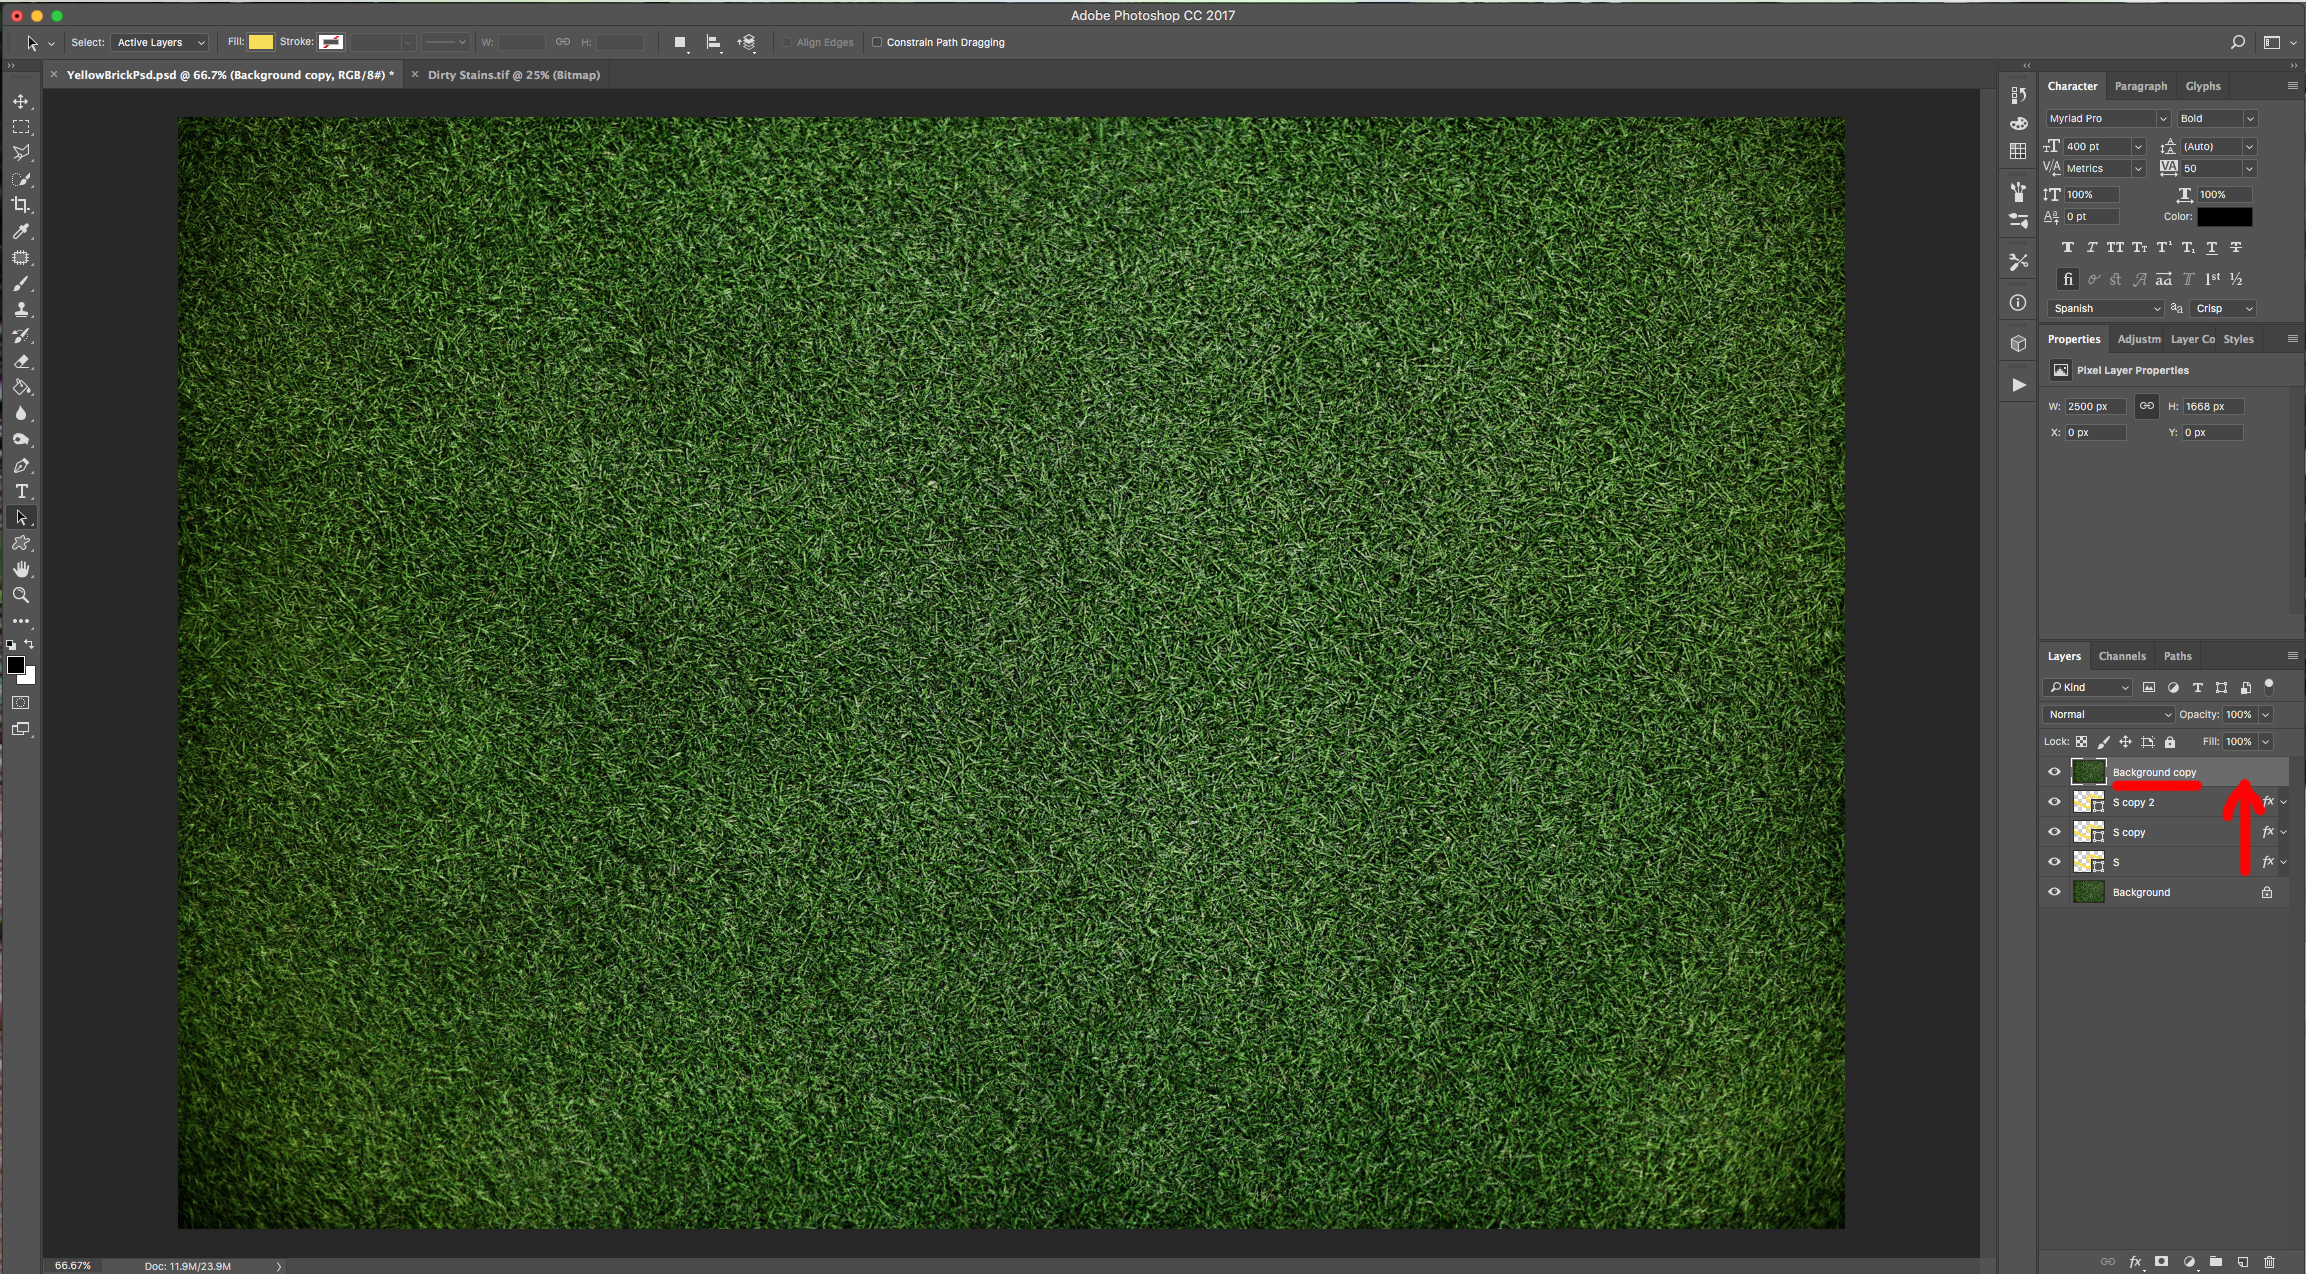
15 - Duplicate your “Background” Layer and drag the duplicate to the Top. Select your “Work Path” and make a selection, then delete the portion of the “Grass”.

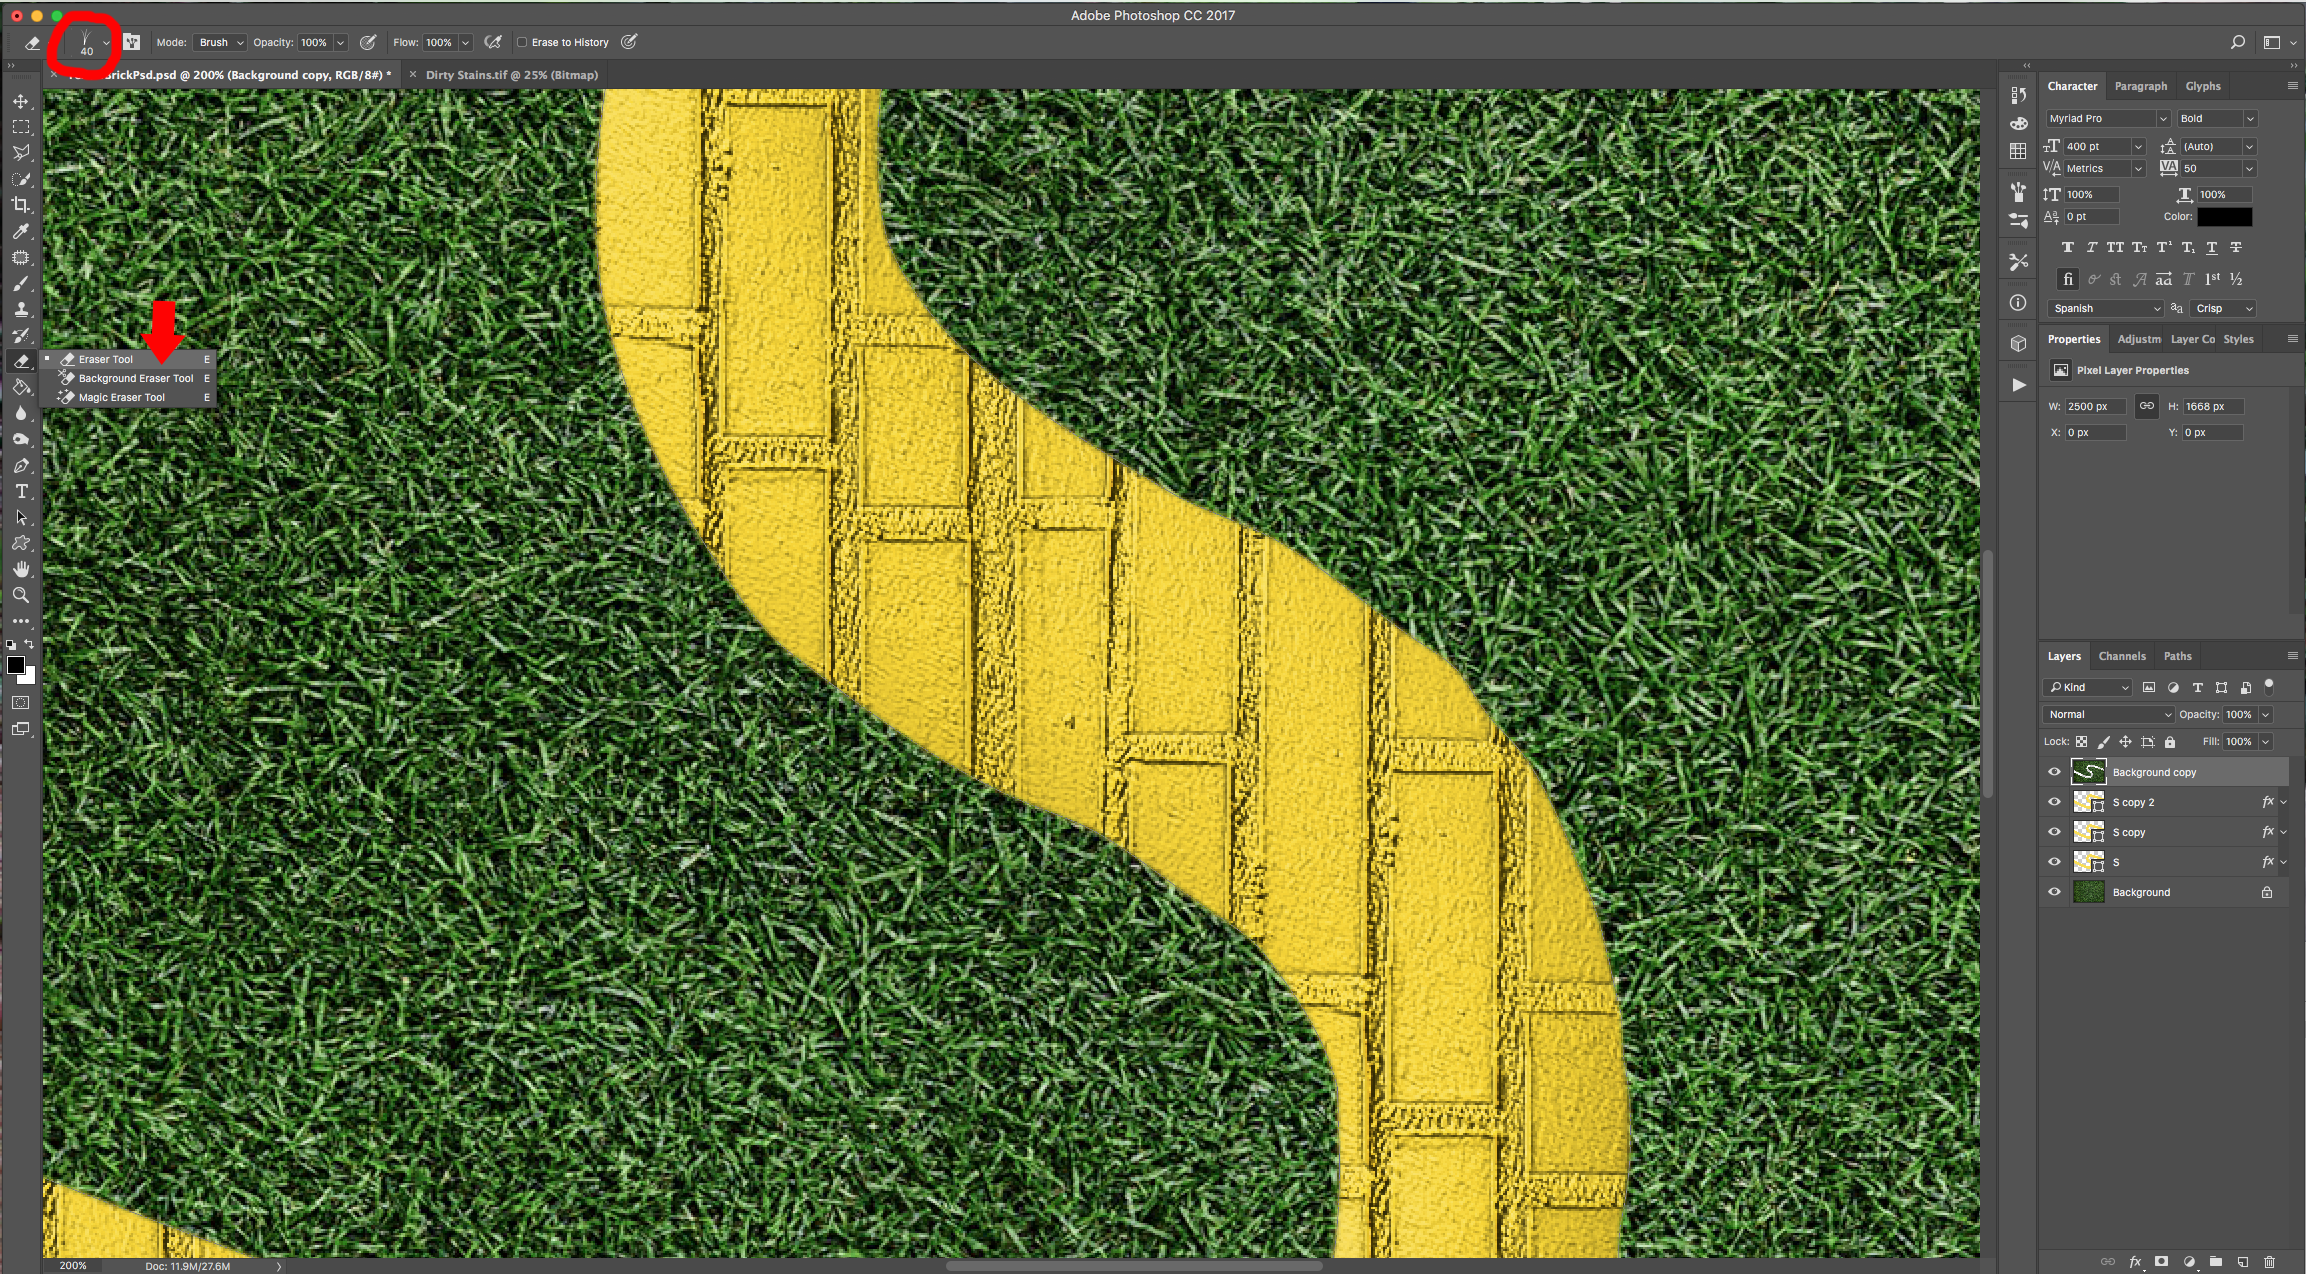
16 - Select your “Work Path” and the “Eraser Tool” (E) and make sure your newly created Brush is selected. Then hit the “Enter” Key to “Stroke” the Path with the “Eraser”. You can do this a couple of times if you want.


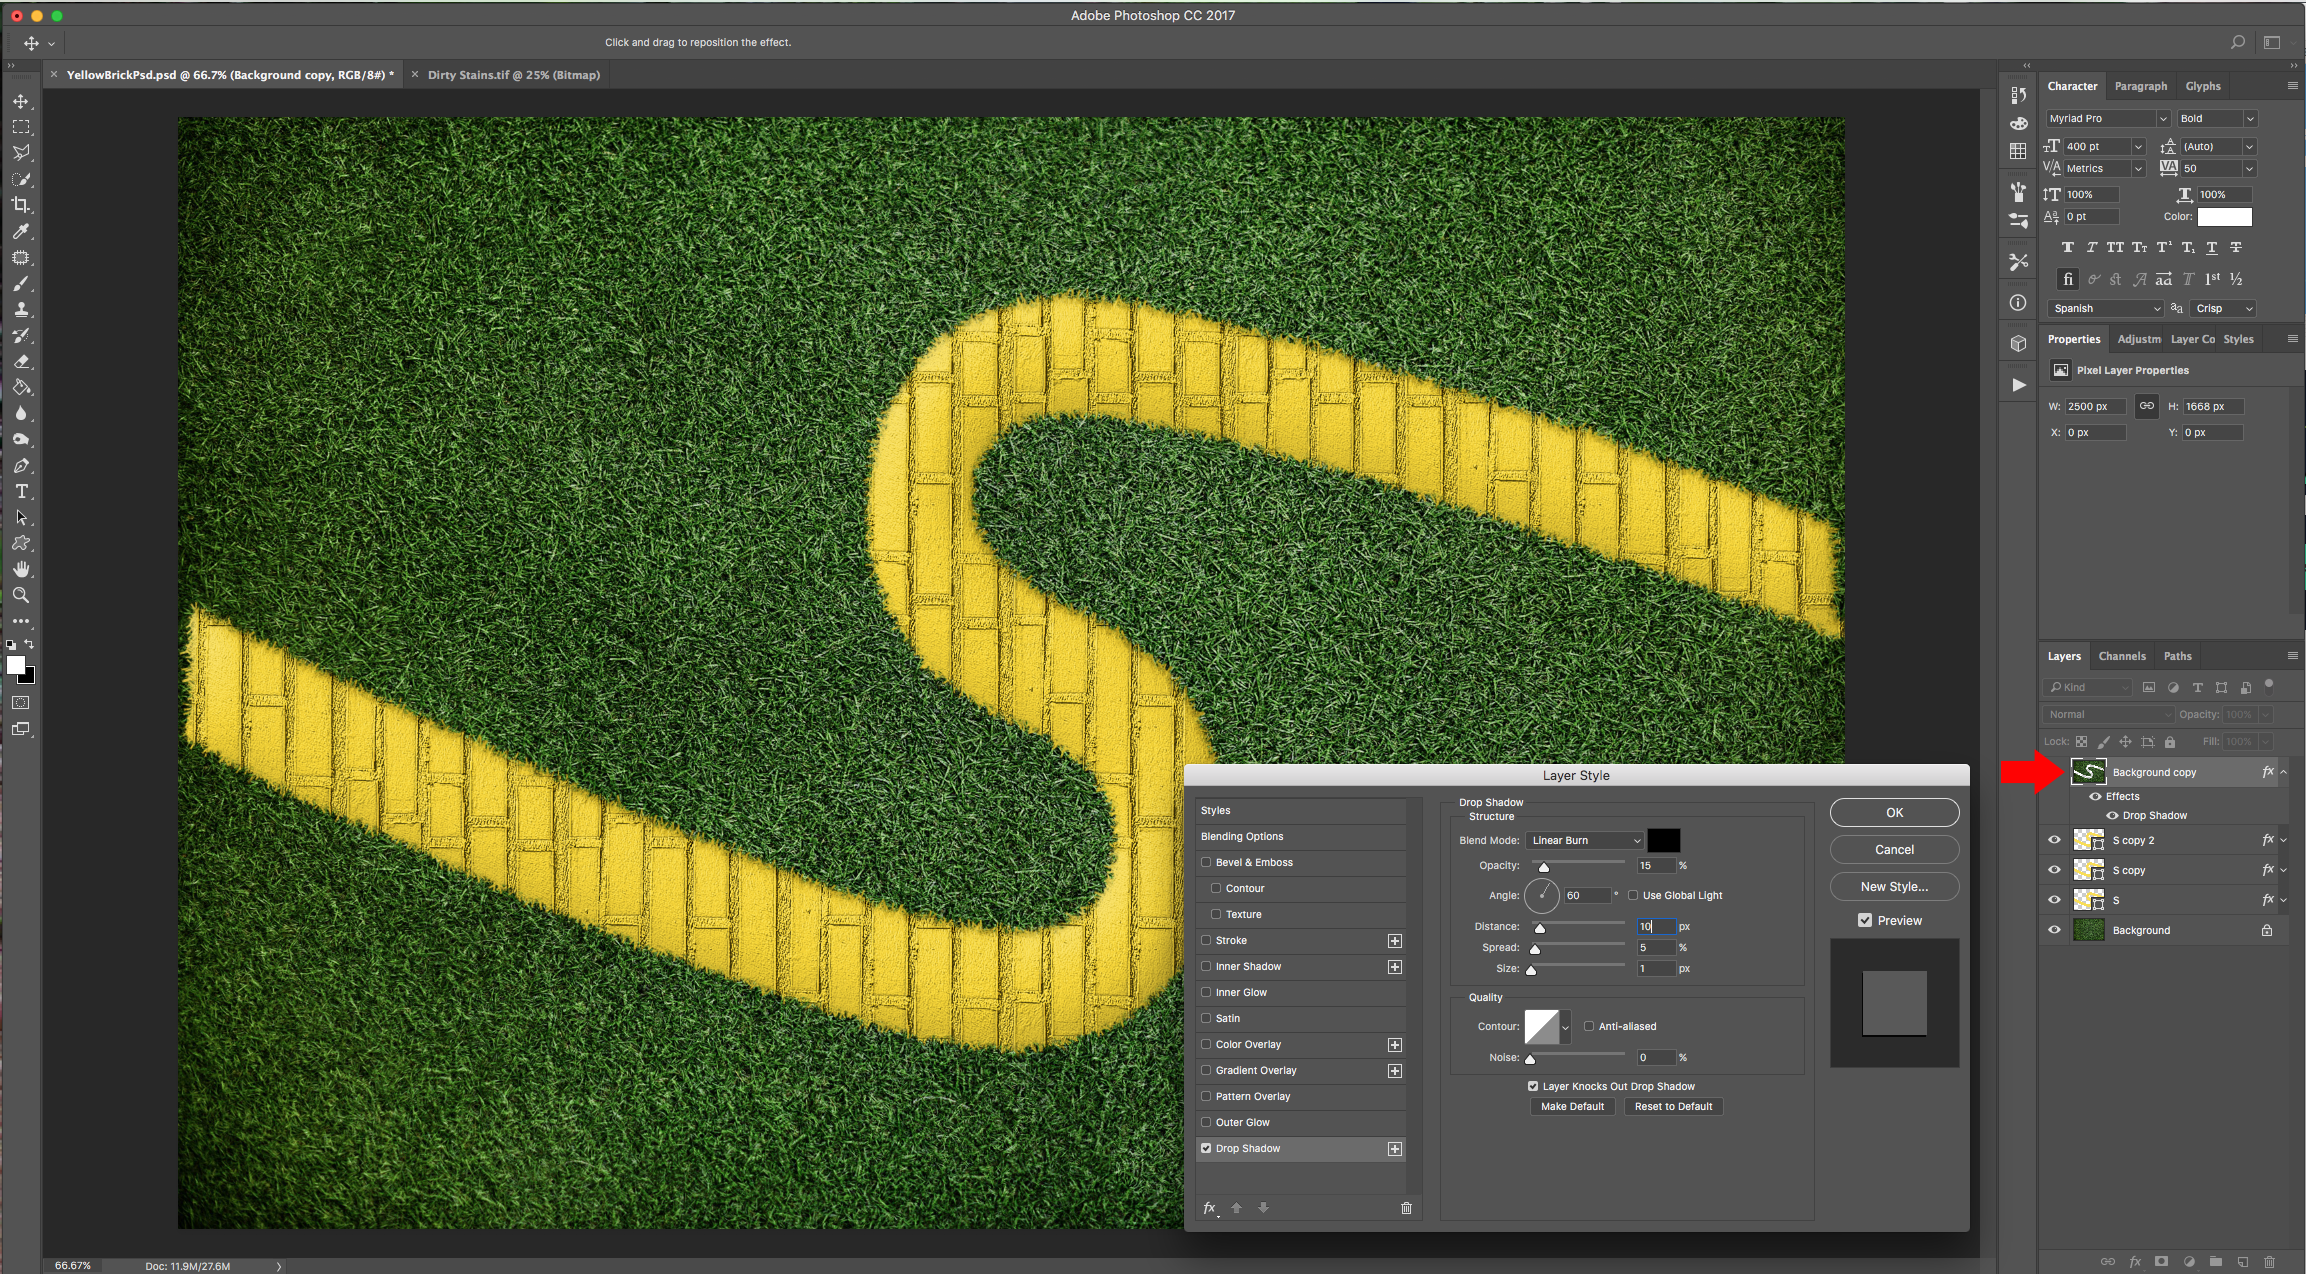
17 - Double-click on top of your Layer’s Thumbnail and apply the following “Layer Styles”:
“Drop Shadow”:
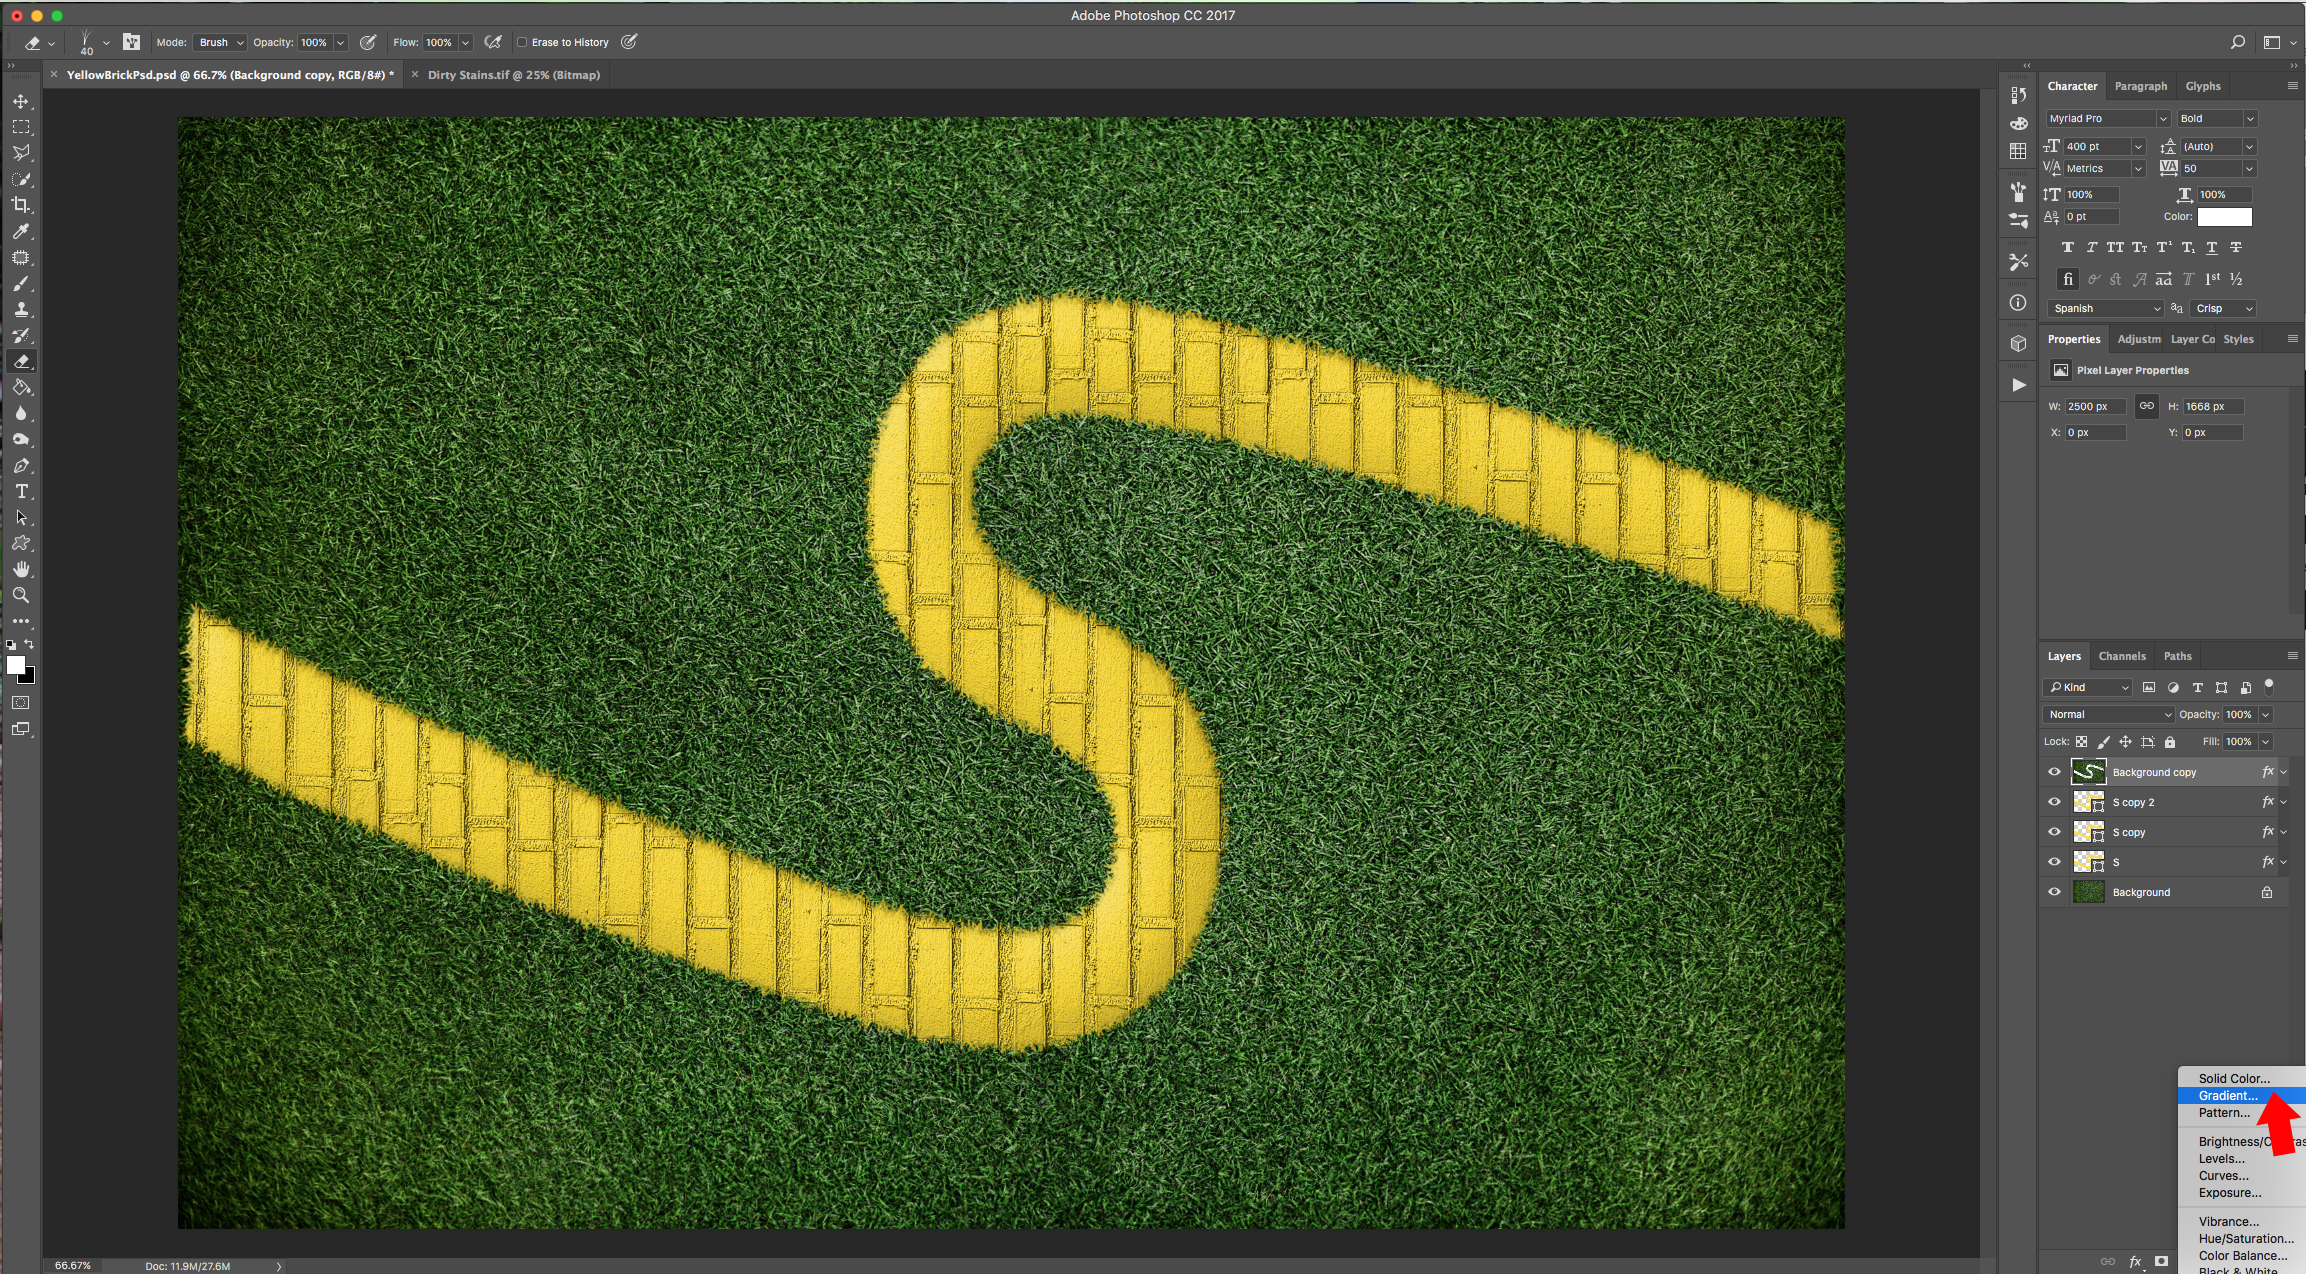
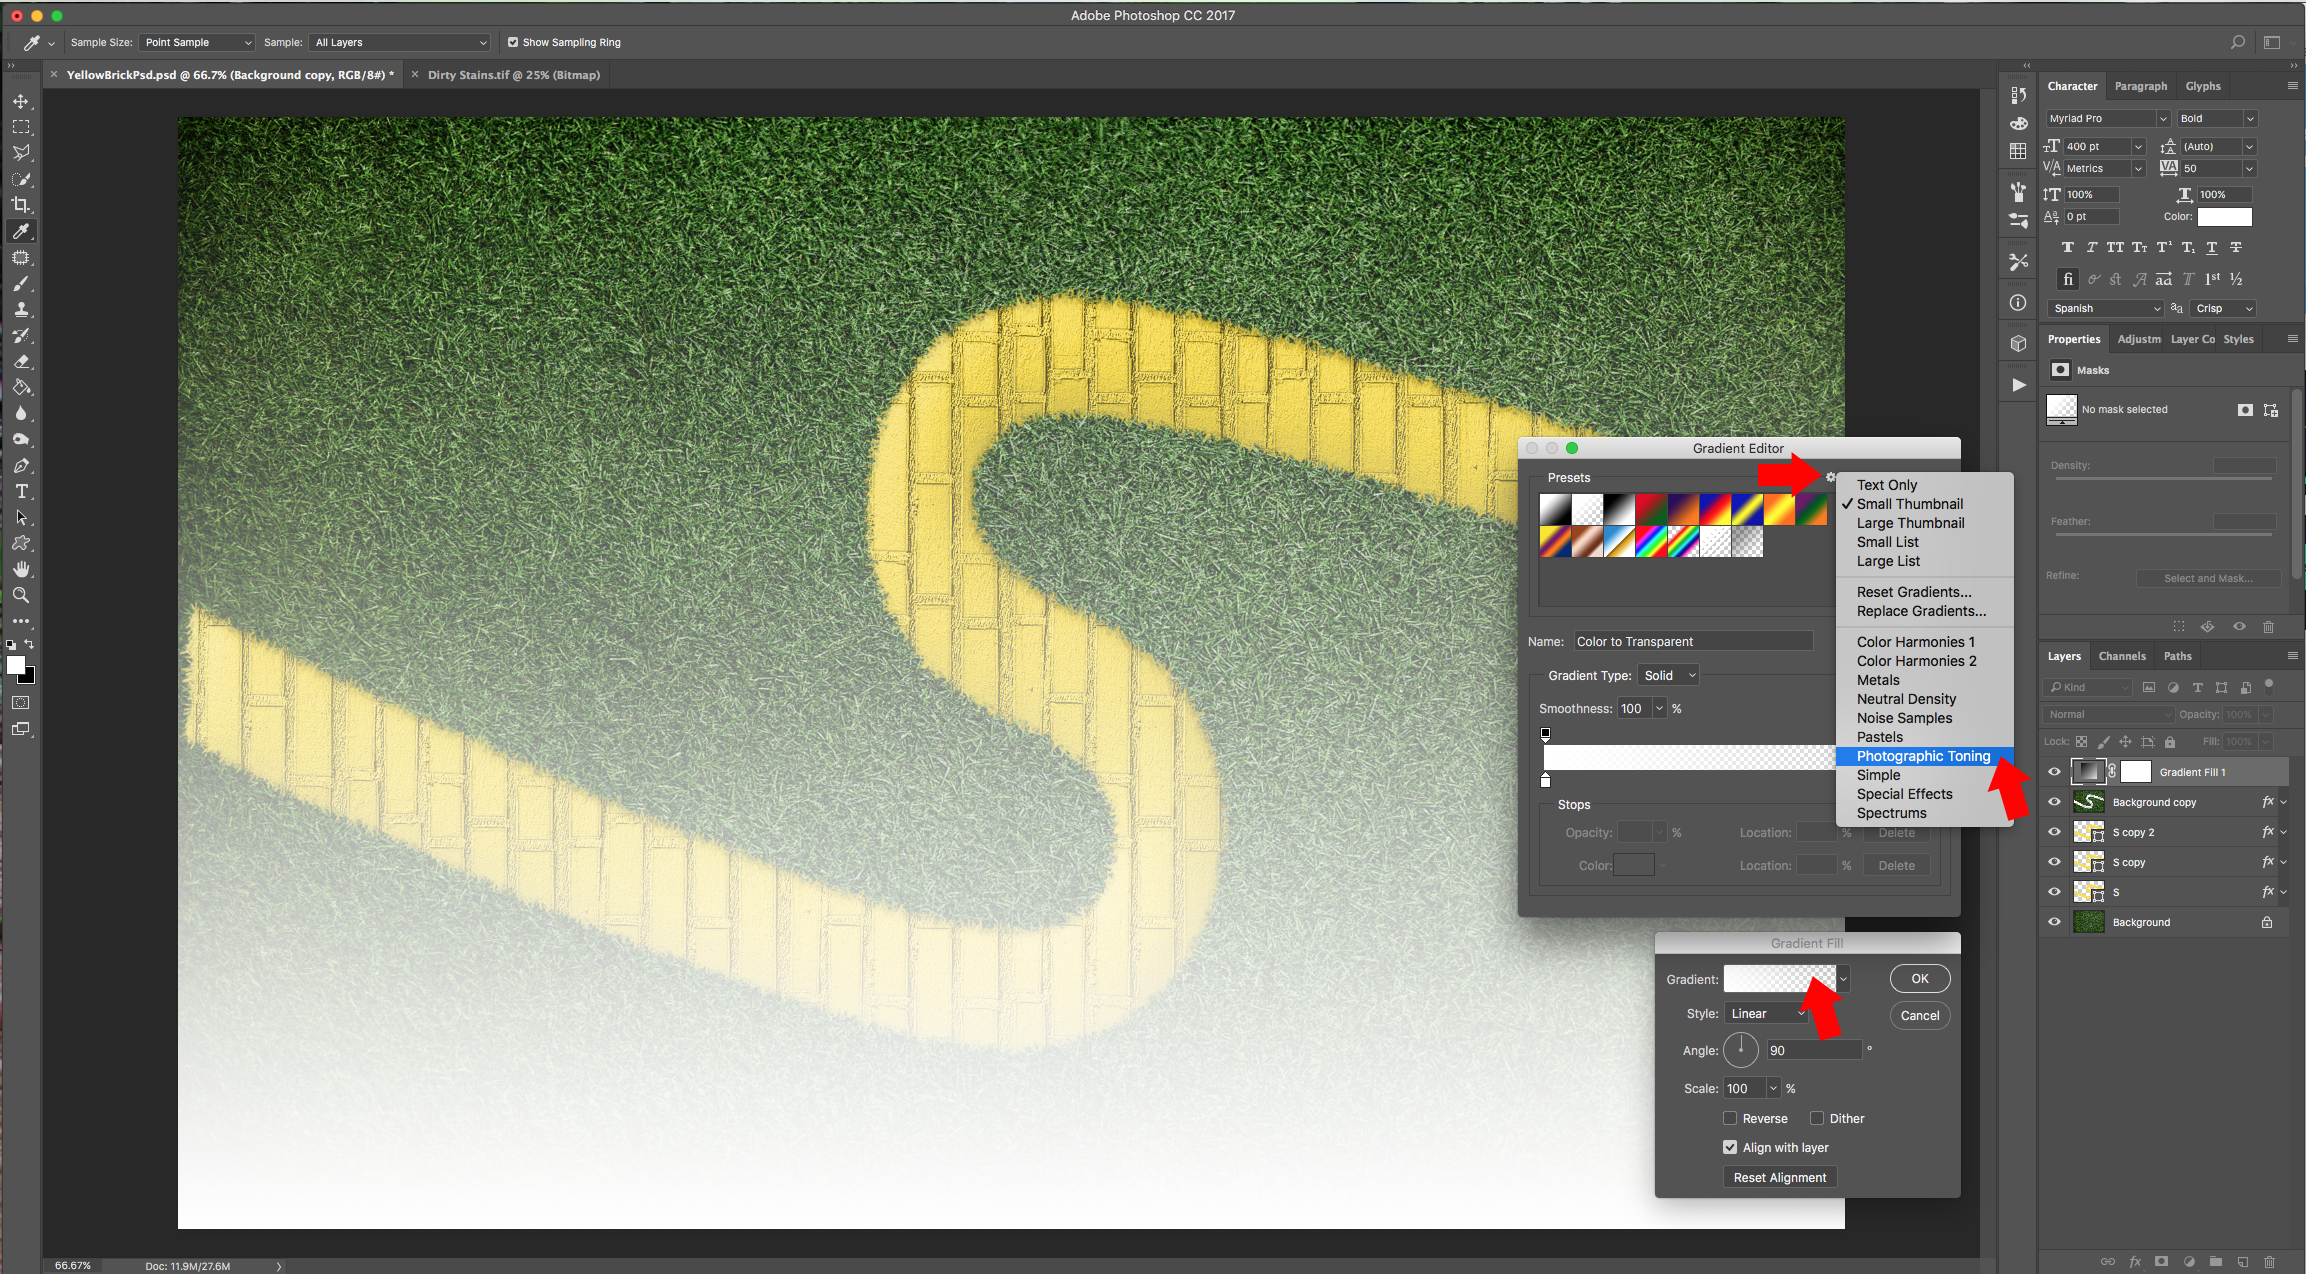
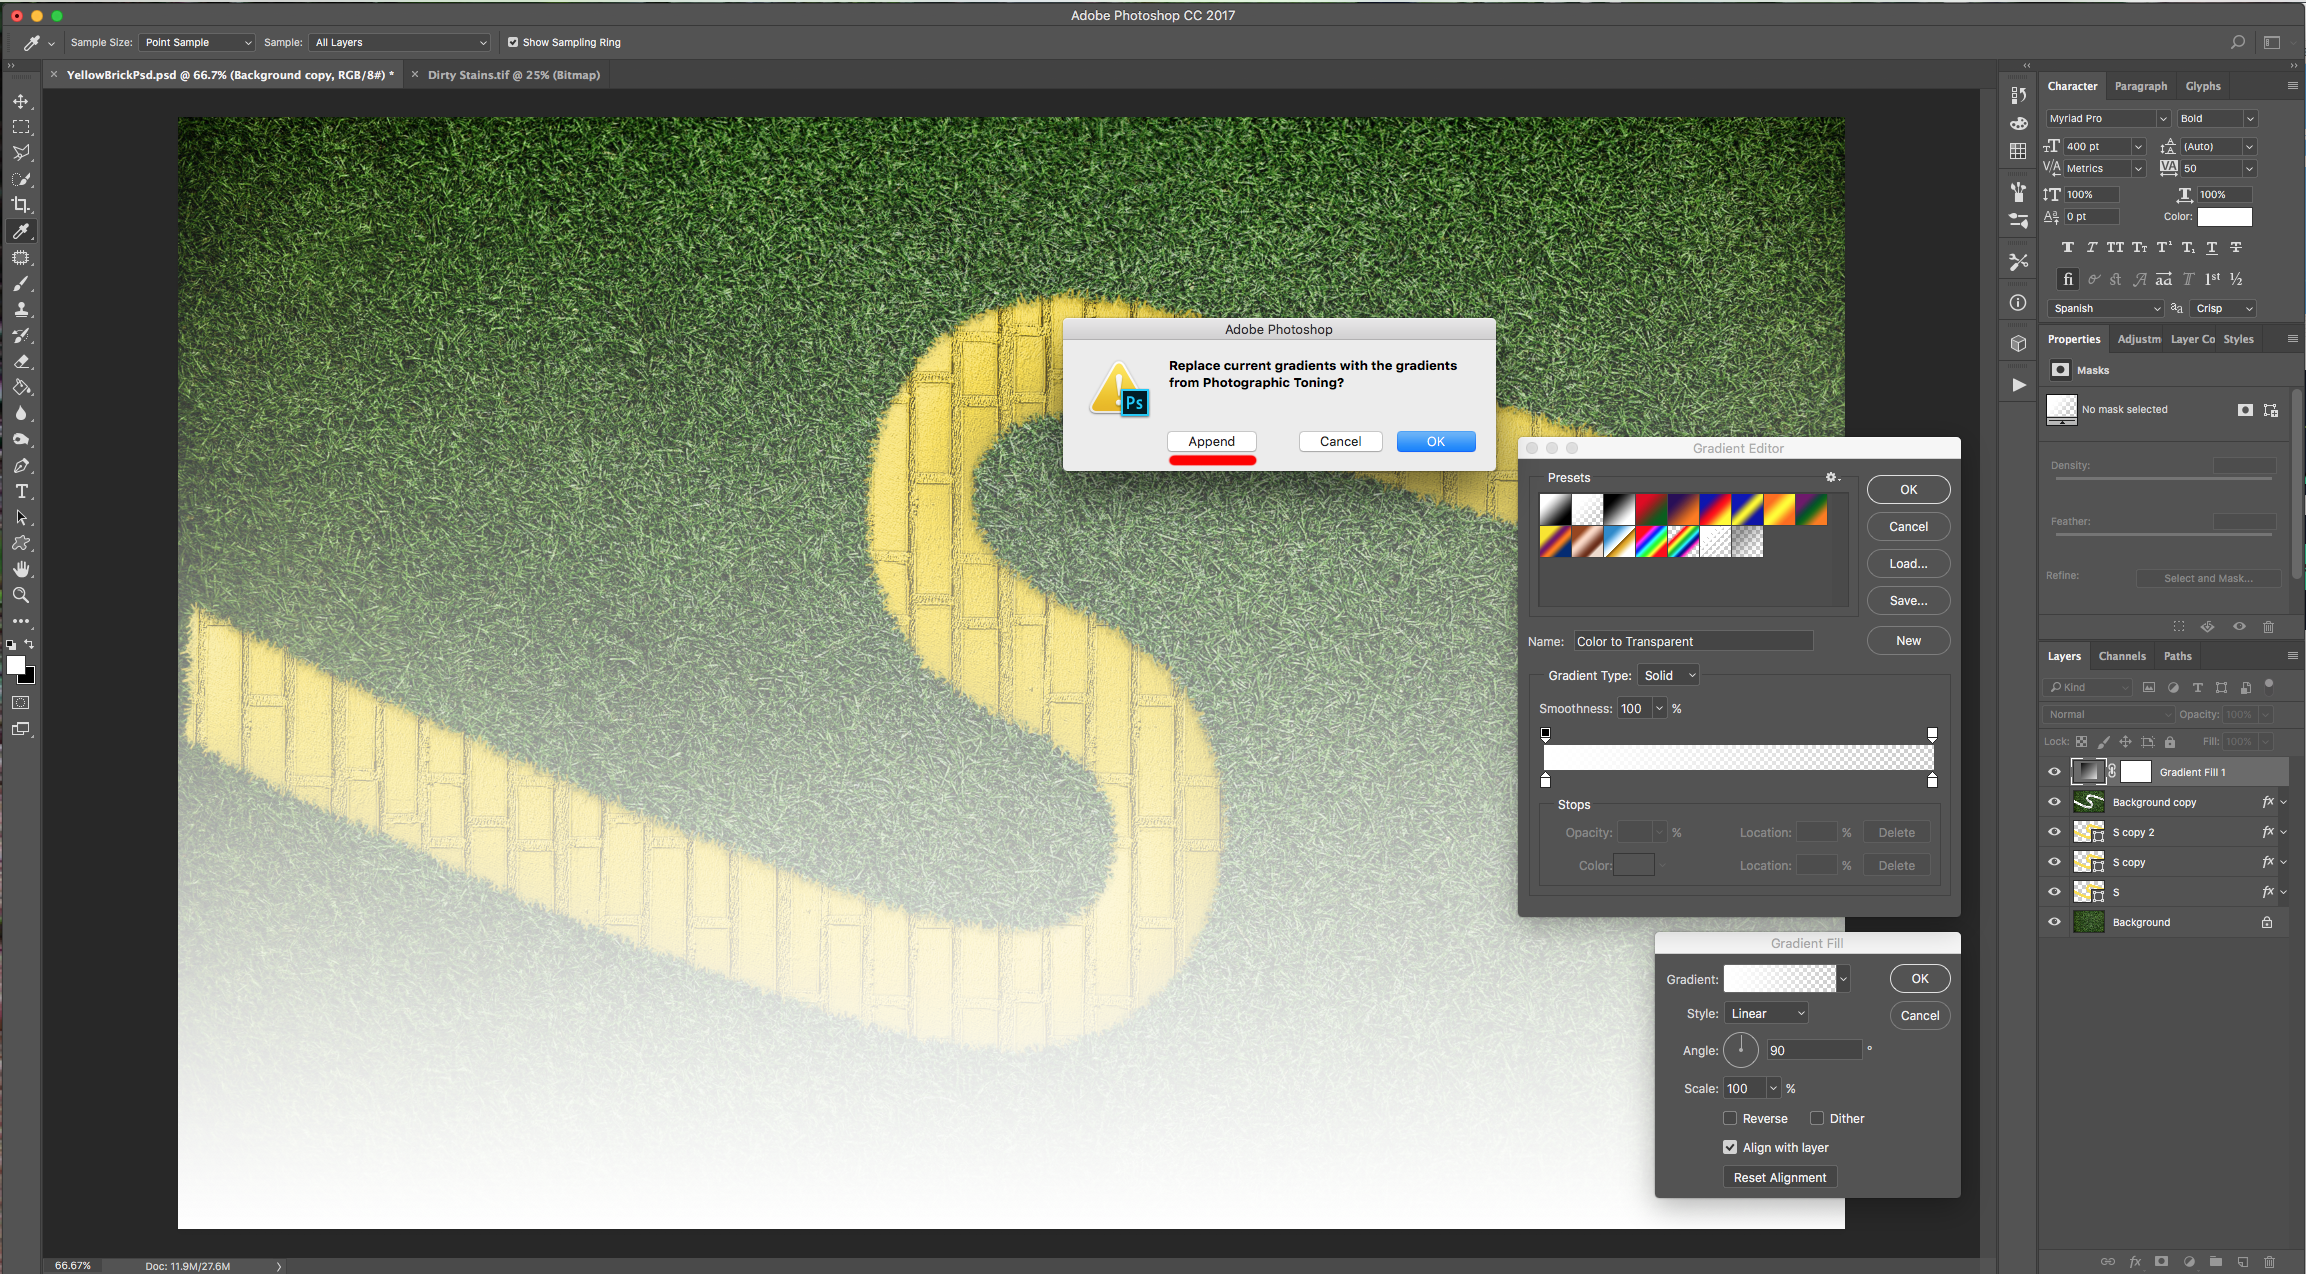
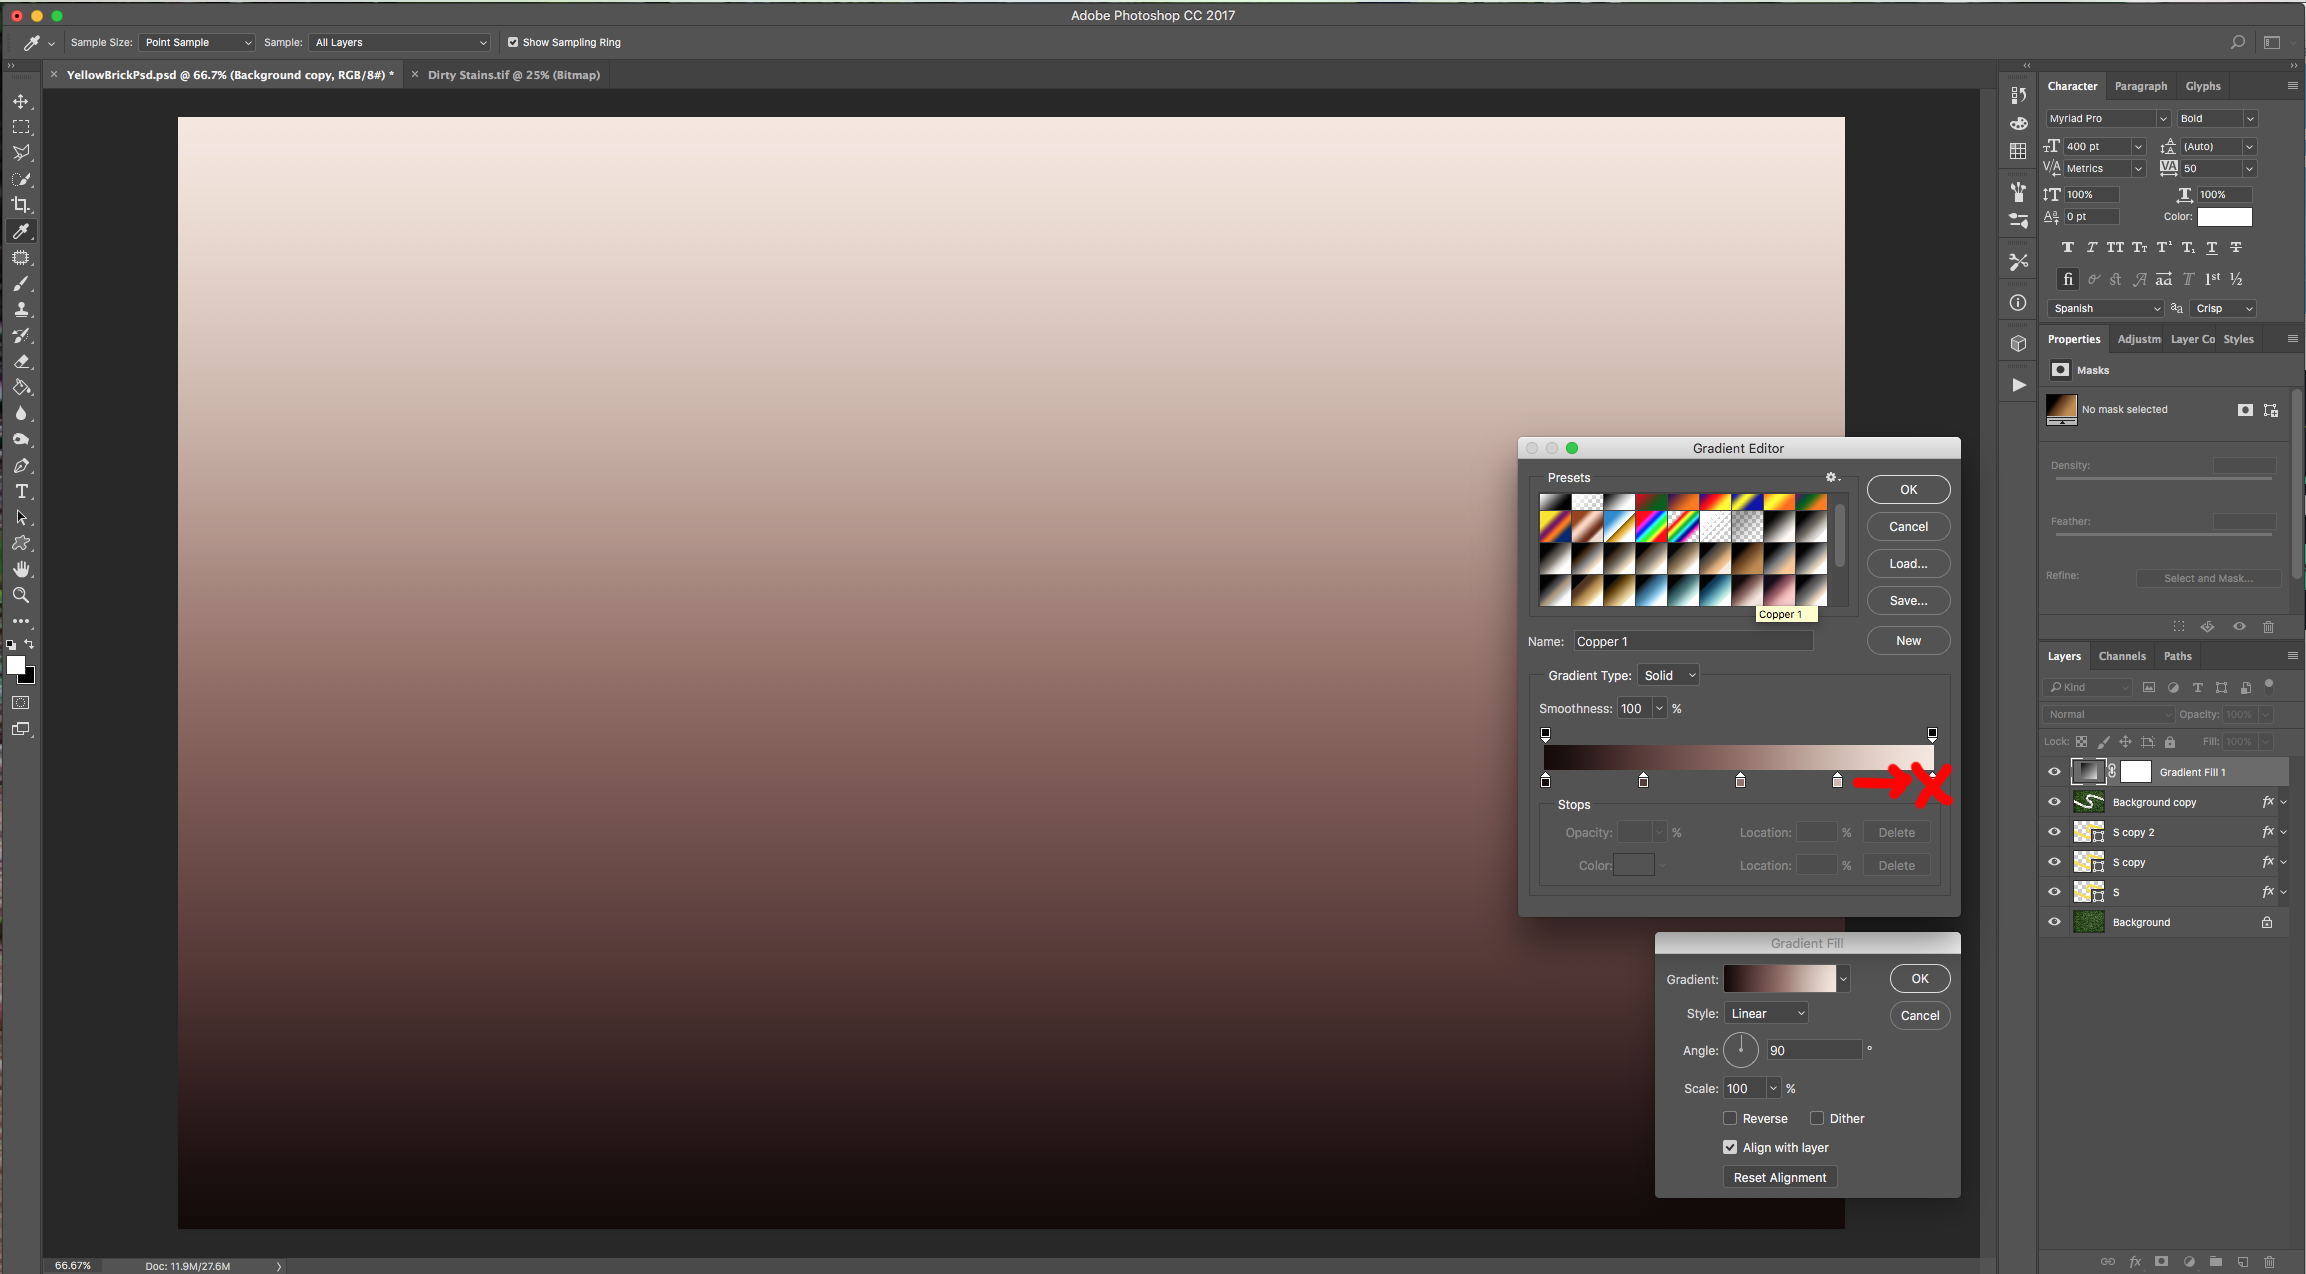
18 - Click on the small Black and White Circle button at the bottom of the “Layers Panel” and choose “Gradient” to create a “New Gradient Fill Layer”. Click on top of the “Gradient” to bring out the “Gradient Editor”, then in the small “Gear” icon on the Top - right to display the Menu and select “Photographic Toning”, then choose “Append” instead of “OK”.

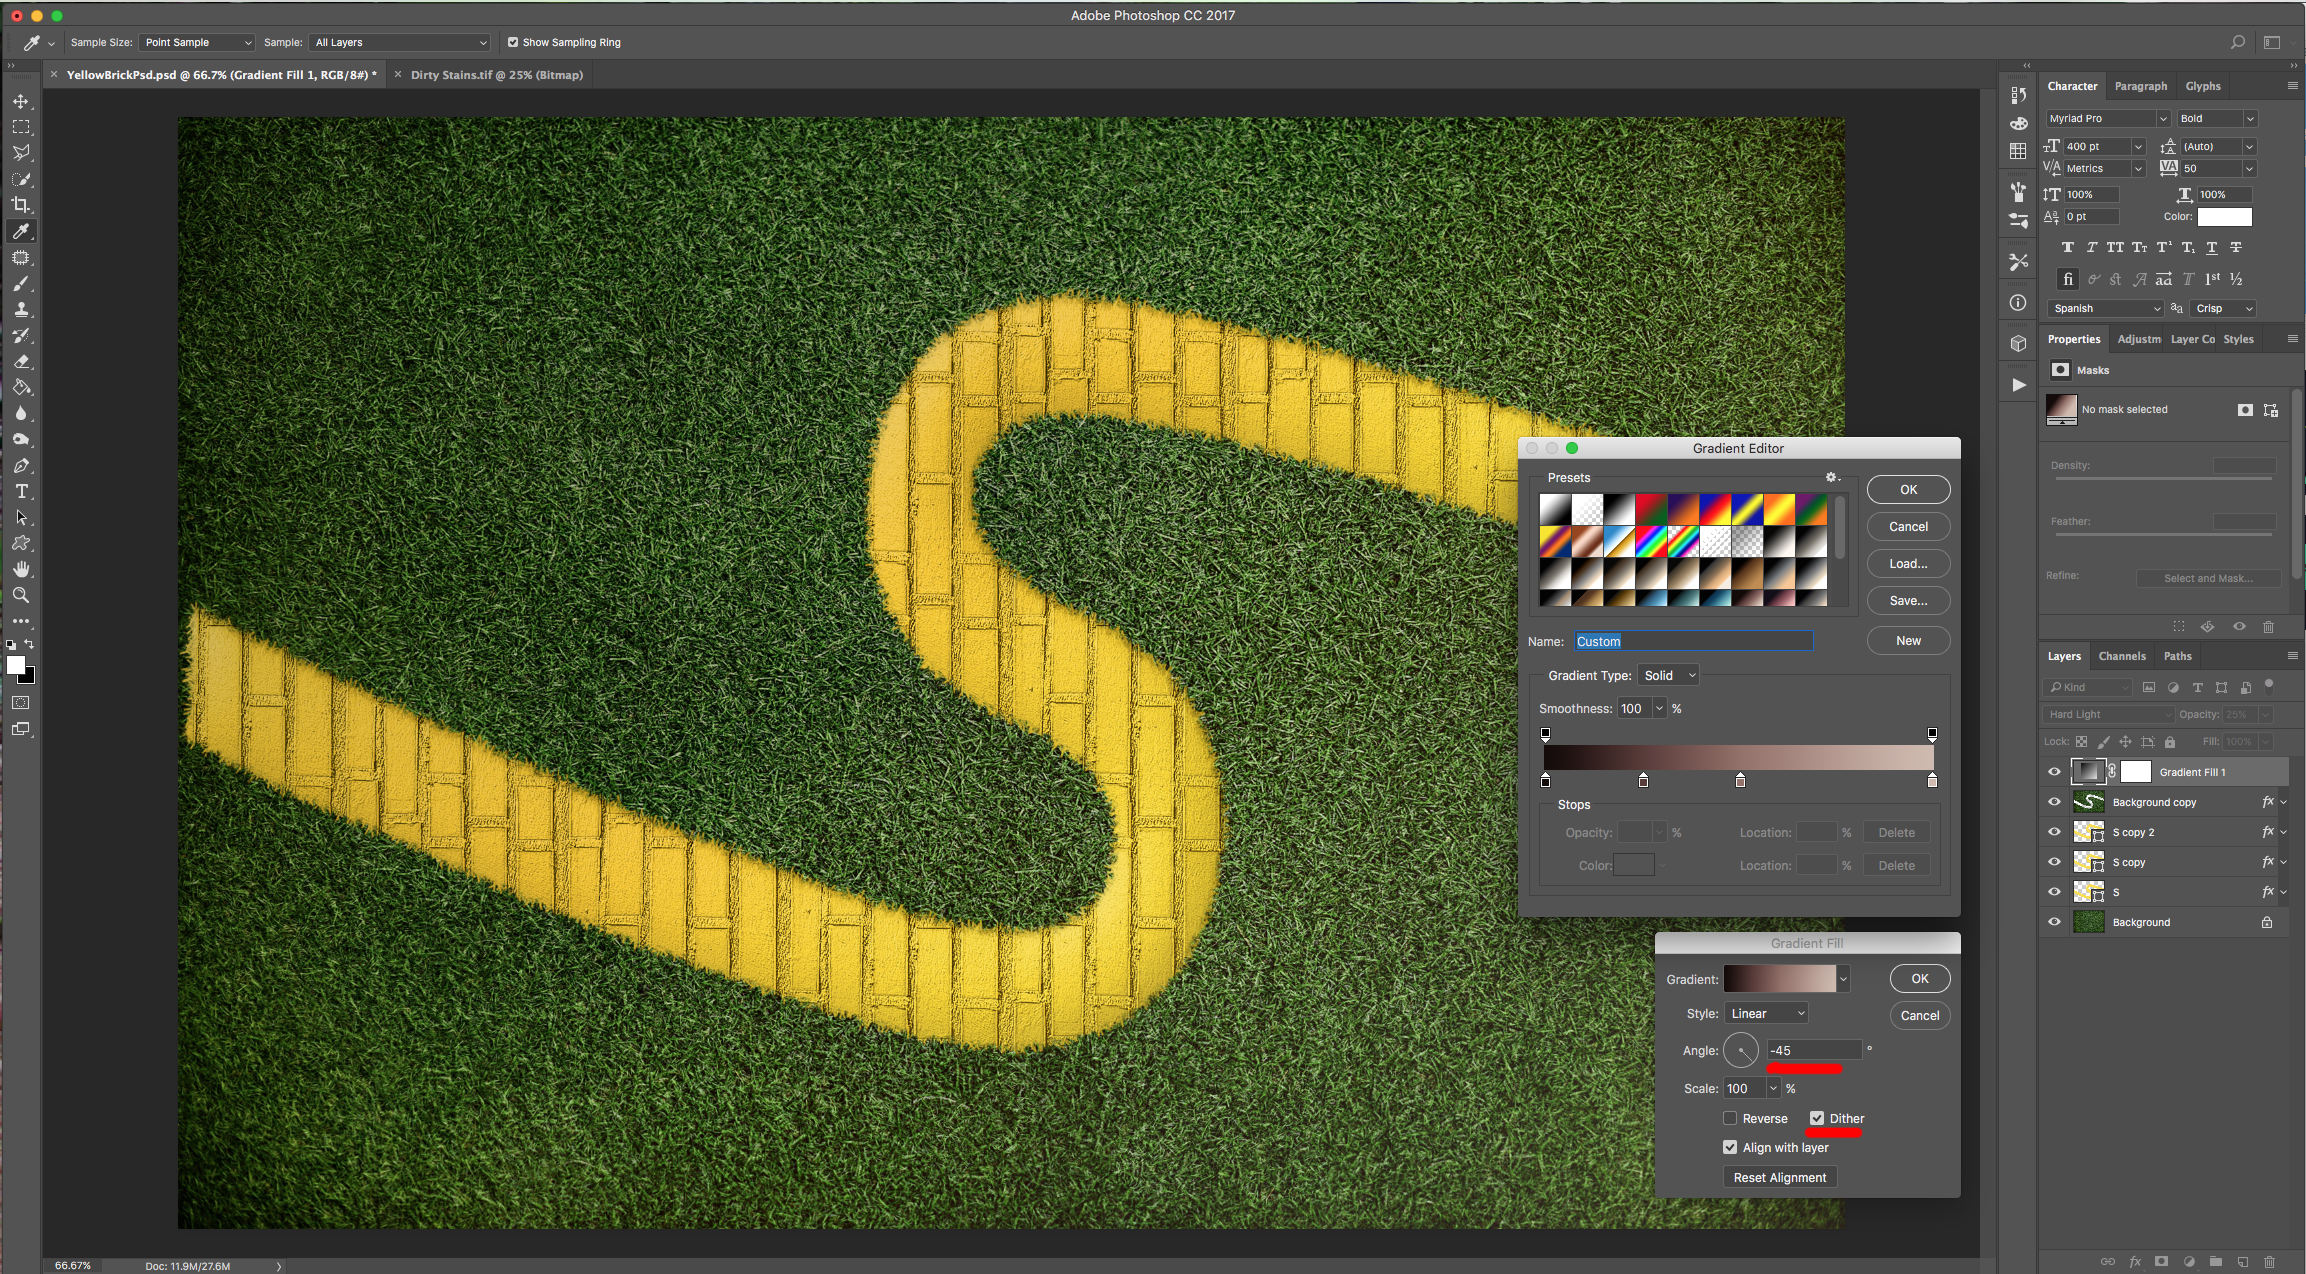
19 - Select the “Copper 1” Gradient and make the following modifications. Change the Angle to 45°, check the “Dither” box, and click “OK”.
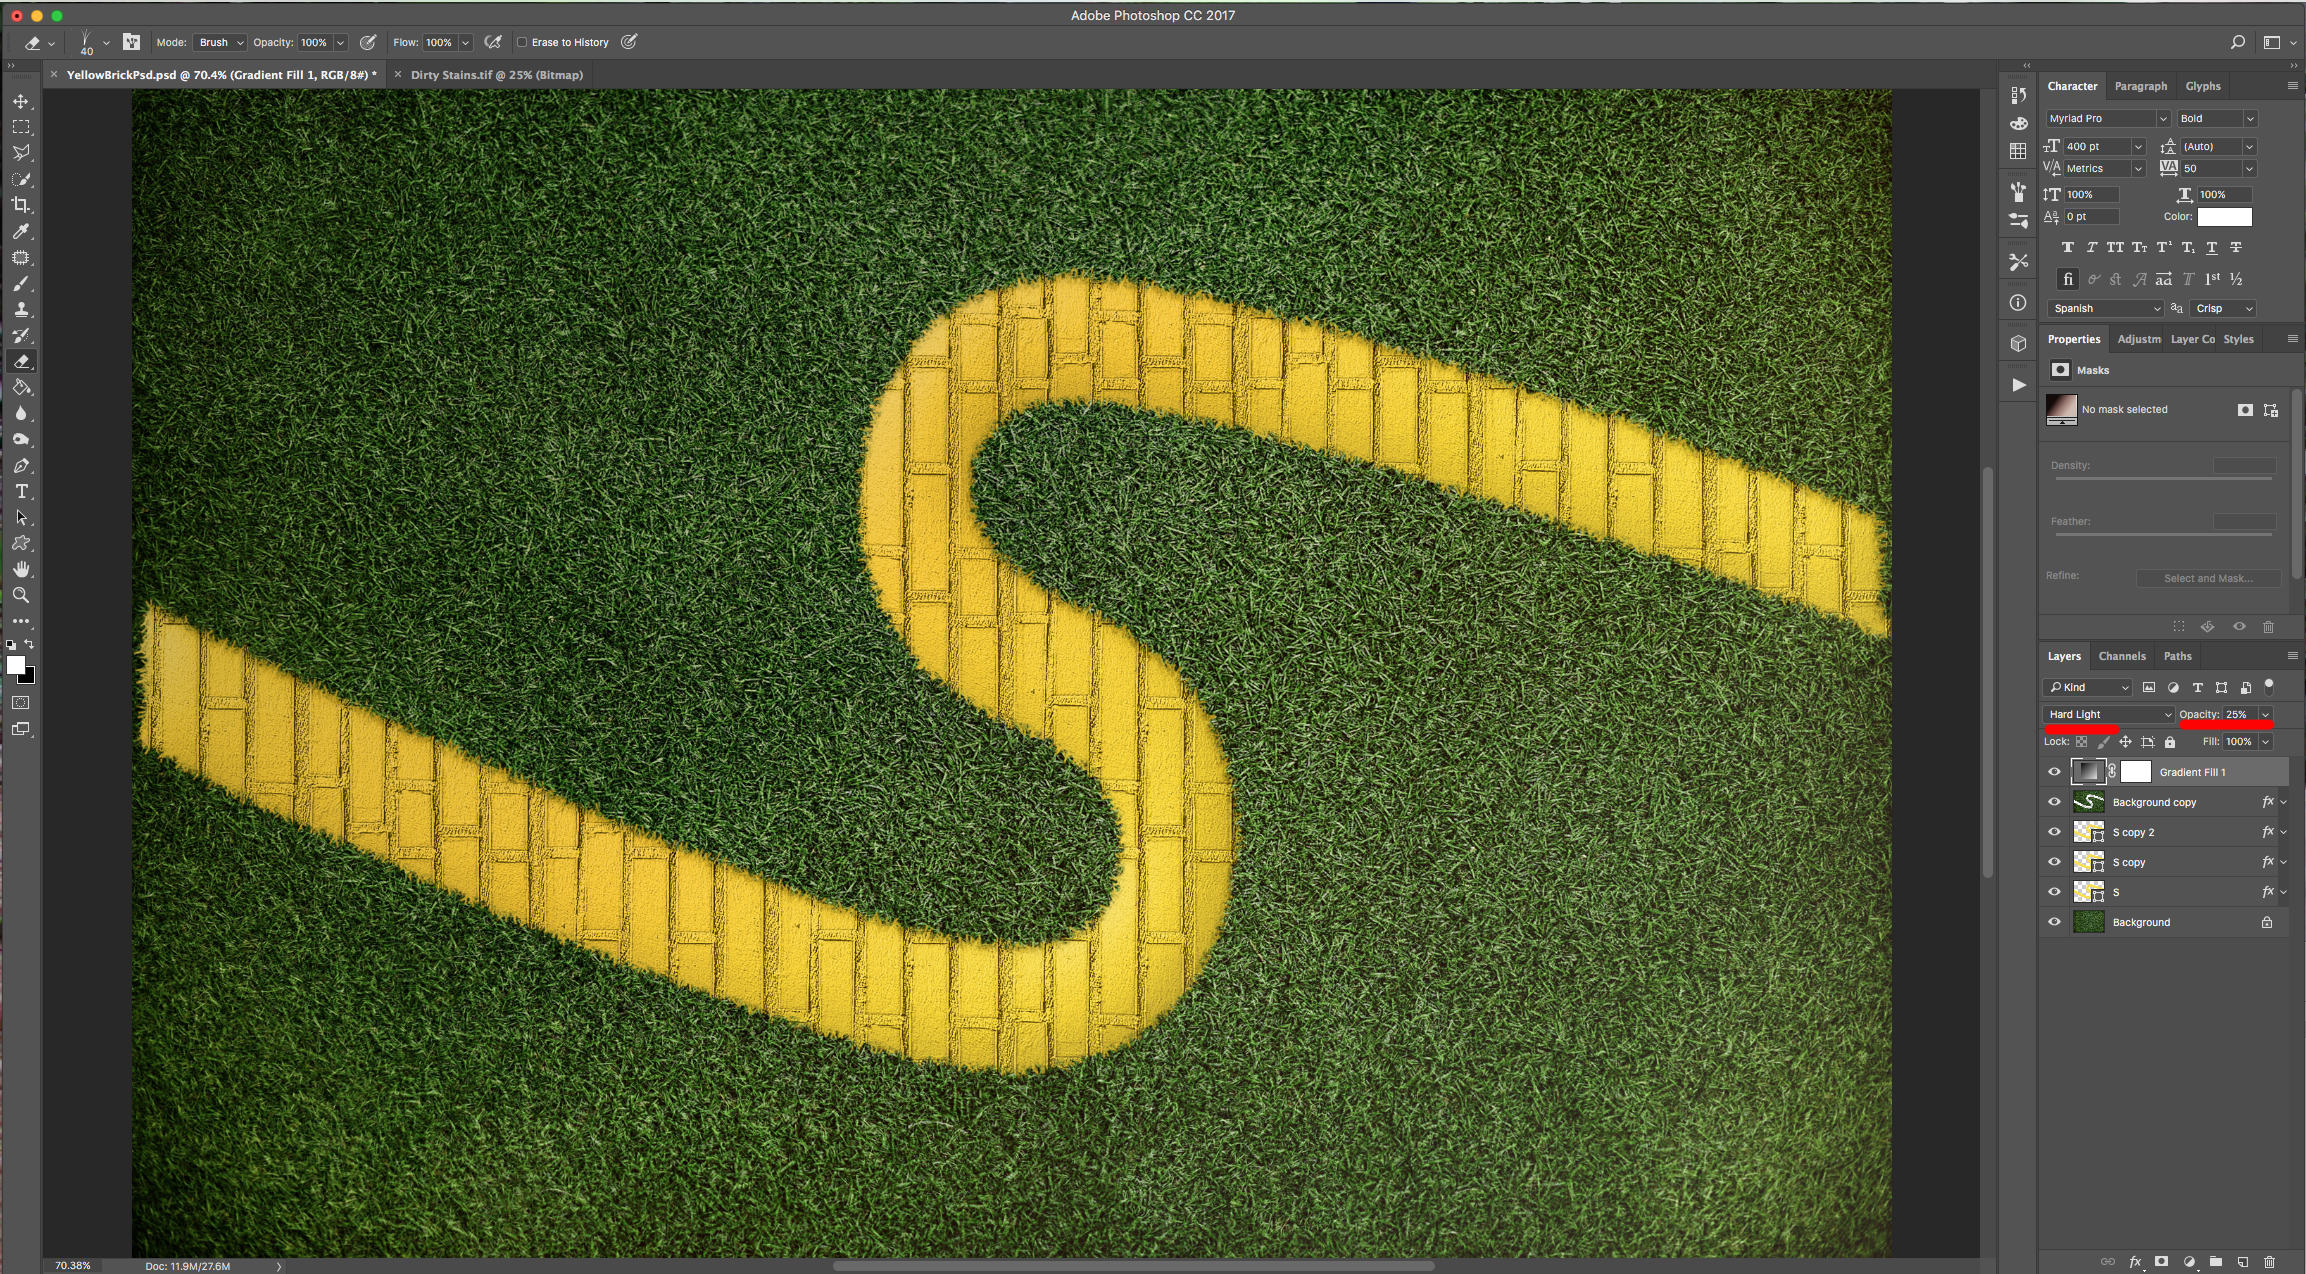
20 - Change the “Layer Style” to “Hard Light” and the “Opacity” to 25%.
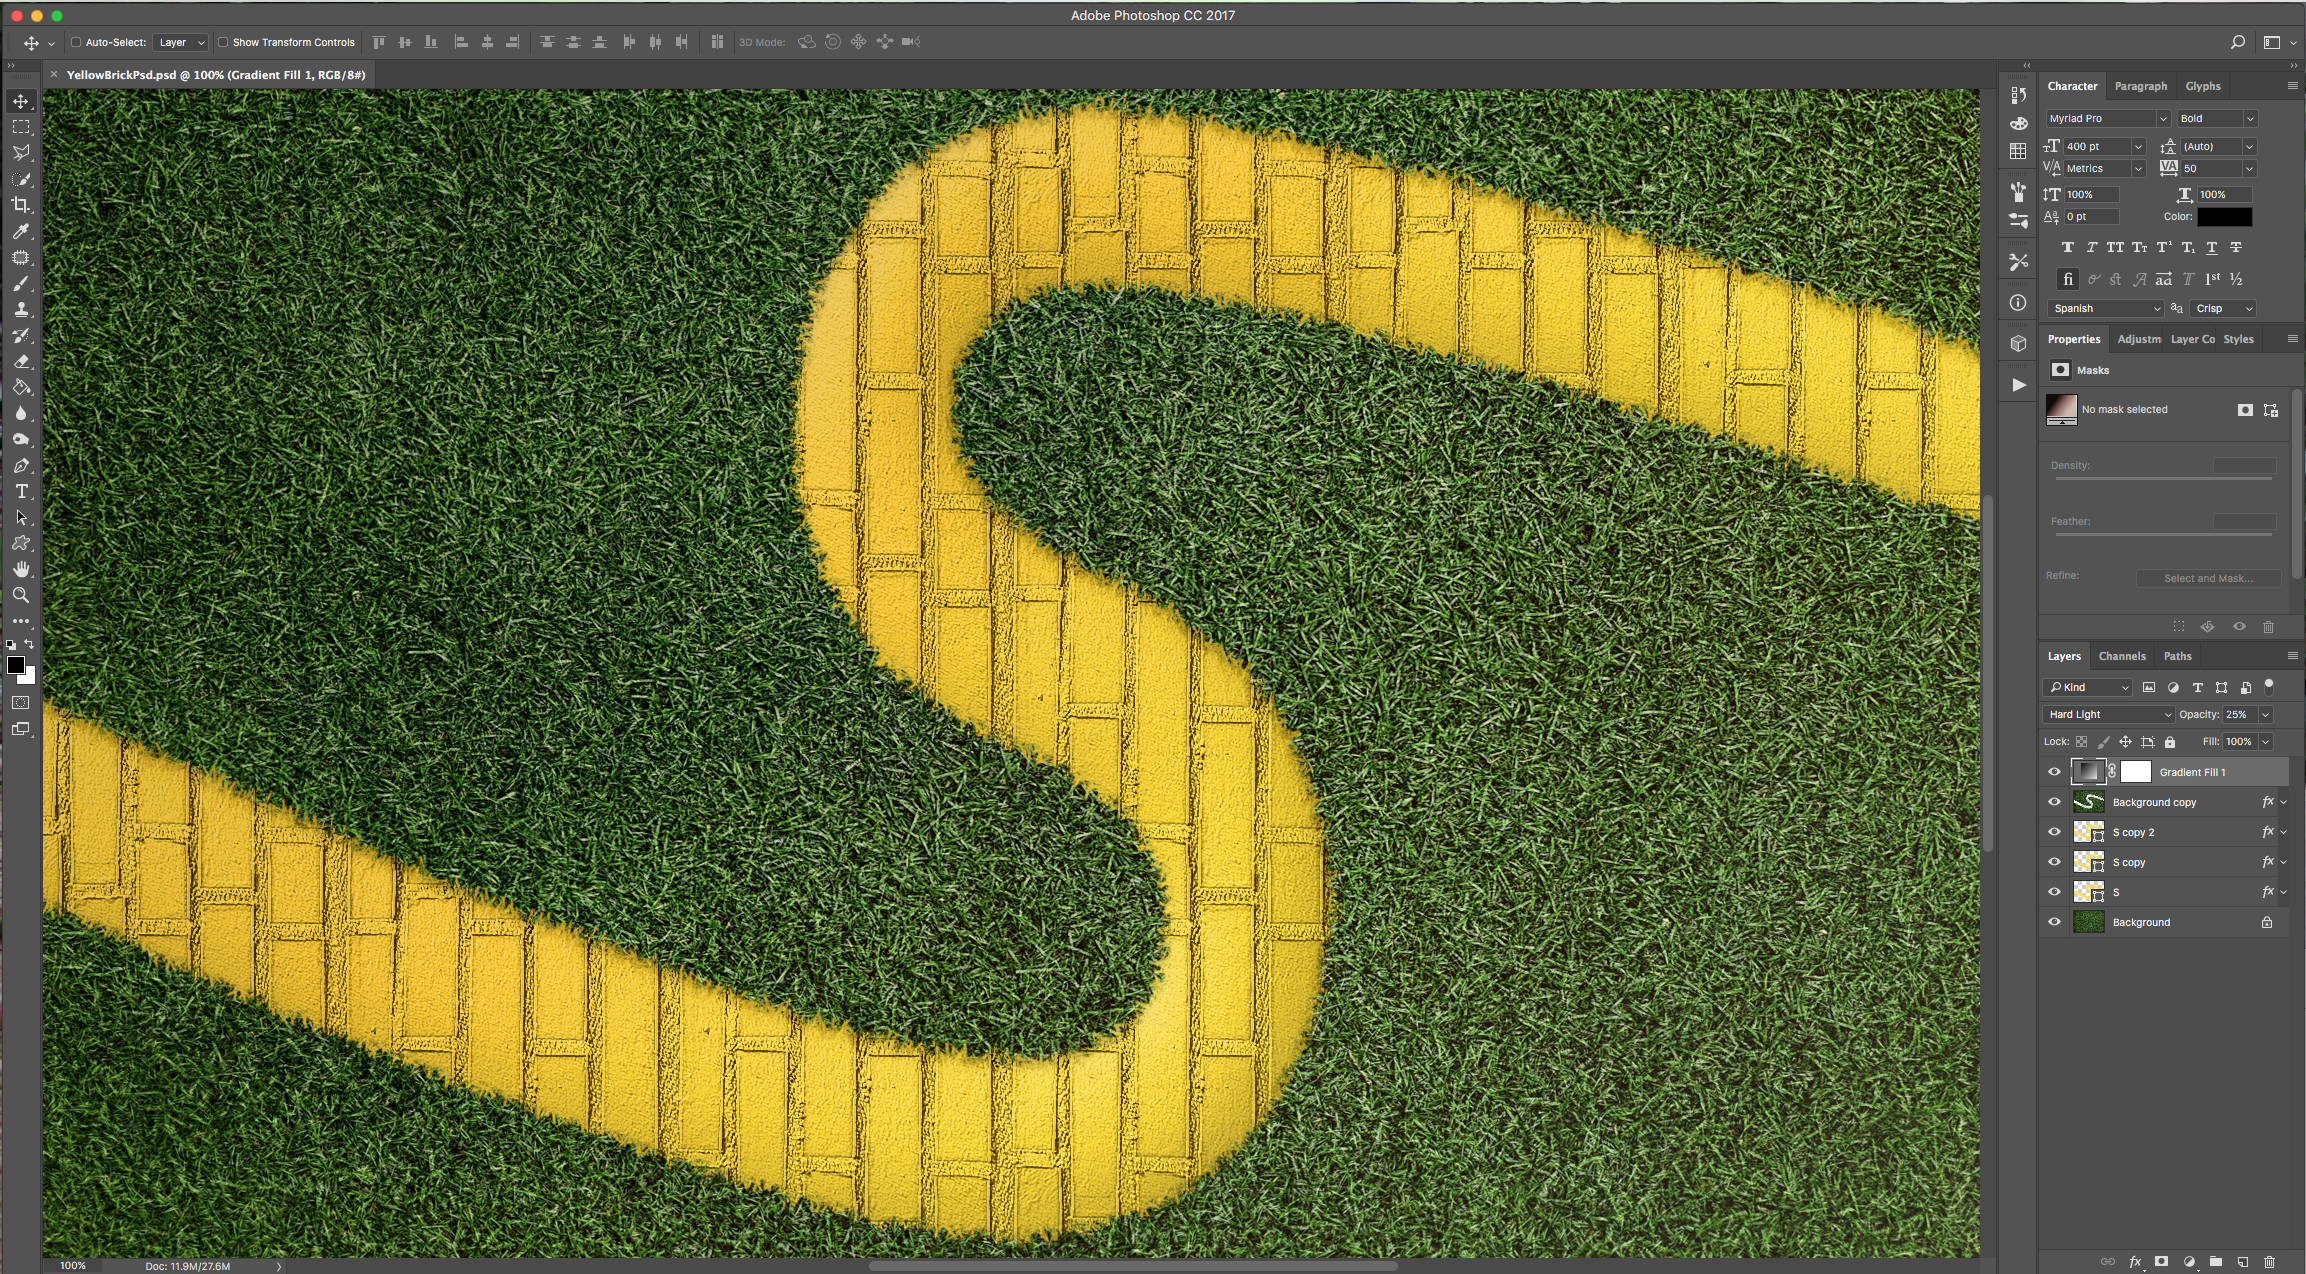
21 - Your Artwork should look like this.
1 - In Photoshop, open the file you chose as “Background”.
2 - Open the “Brick” Pattern image too. Open the “Image Size” Window (Command/Control + Alt/Option + I) and make it 1000 x 1000 Pixels @300 dpi.
3 - Go to Edit > Define Pattern, give it a name and click “OK” to save it. Rotate your image 90° Counterclockwise and create a second (Horizontal) pattern.
4 - Select the “Type Tool” (T), select your font (we used “Myriad Pro Bold”), and type your text. In this case we typed the letter “S”.
5 - Fill it with a Medium Yellow (we used #f9de4a), right-click on top of its thumbnail and choose “Convert to Shape”.
6 - Use the “Direct Selection Tool” (A) to select the two “End Points” on one side of the letter then drag them to the edge of the document. Fix the curvature by pulling the little “Handles” to make it look ok. Repeat with the other side of the “S”.
7 - Duplicate your Layer (Command/Control + J), lower the duplicate’s “Fill” to 0%. Next, make a duplicate of the 0% “Fill” Layer.
8 - Double-click on top of your original “S” Thumbnail and apply the following “Layer Styles”:
Bevel & Emboss:
Contour:
Texture: (Use one of the Patterns you created. We used the “Horizontal” one).
Pattern Overlay: (Use one of the ones you created. We used the “Horizontal” one).
9 - Double-click on top of your first duplicate “S” Thumbnail and apply the following “Layer Styles”:
Bevel & Emboss:
Contour:
Texture: (Use one of the Patterns you created. We used the “Horizontal” one).
10 - 8 - Double-click on top of your second duplicate “S” Thumbnail and apply the following “Layer Styles”:
Bevel & Emboss:
Texture: (Use one of the Patterns you created. We used the “Horizontal” one).
11 - Select the “Brush Tool” (B) and open the “Brush Panel”, select the “Grass” Brush (it should be one of the default brushes) and use the following values:
Brush Tip Shape:
Shape Dynamics:
Scattering:
Transfer:
12: Click on the small “Create New Brush” button at the bottom of the Panel and save your brush.
13 - With one of your “S” Layers selected, go to the “Properties Panel” and click the “Load Selection from Mask” button at the bottom of the Panel. Go to Select > Modify > Contract and use a value of about 25 Pixels.
14 - Go to the “Paths Panel”, click on the “Make work path from Selection” button at the bottom of the Panel.
15 - Duplicate your “Background” Layer and drag the duplicate to the Top. Select your “Work Path” and make a selection, then delete the portion of the “Grass”.
16 - Select your “Work Path” and the “Eraser Tool” (E) and make sure your newly created Brush is selected. Then hit the “Enter” Key to “Stroke” the Path with the “Eraser”. You can do this a couple of times if you want.
17 - Double-click on top of your Layer’s Thumbnail and apply the following “Layer Styles”:
“Drop Shadow”:
18 - Click on the small Black and White Circle button at the bottom of the “Layers Panel” and choose “Gradient” to create a “New Gradient Fill Layer”. Click on top of the “Gradient” to bring out the “Gradient Editor”, then in the small “Gear” icon on the Top - right to display the Menu and select “Photographic Toning”, then choose “Append” instead of “OK”.
19 - Select the “Copper 1” Gradient and make the following modifications. Change the Angle to 45°, check the “Dither” box, and click “OK”.
20 - Change the “Layer Style” to “Hard Light” and the “Opacity” to 25%.
21 - Your Artwork should look like this.
by @lornacane


