Blend Tool Halftone Effect in Photoshop and Illustrator
For this tutorial, you will a Black and White image to apply the “Halftone” effect to.
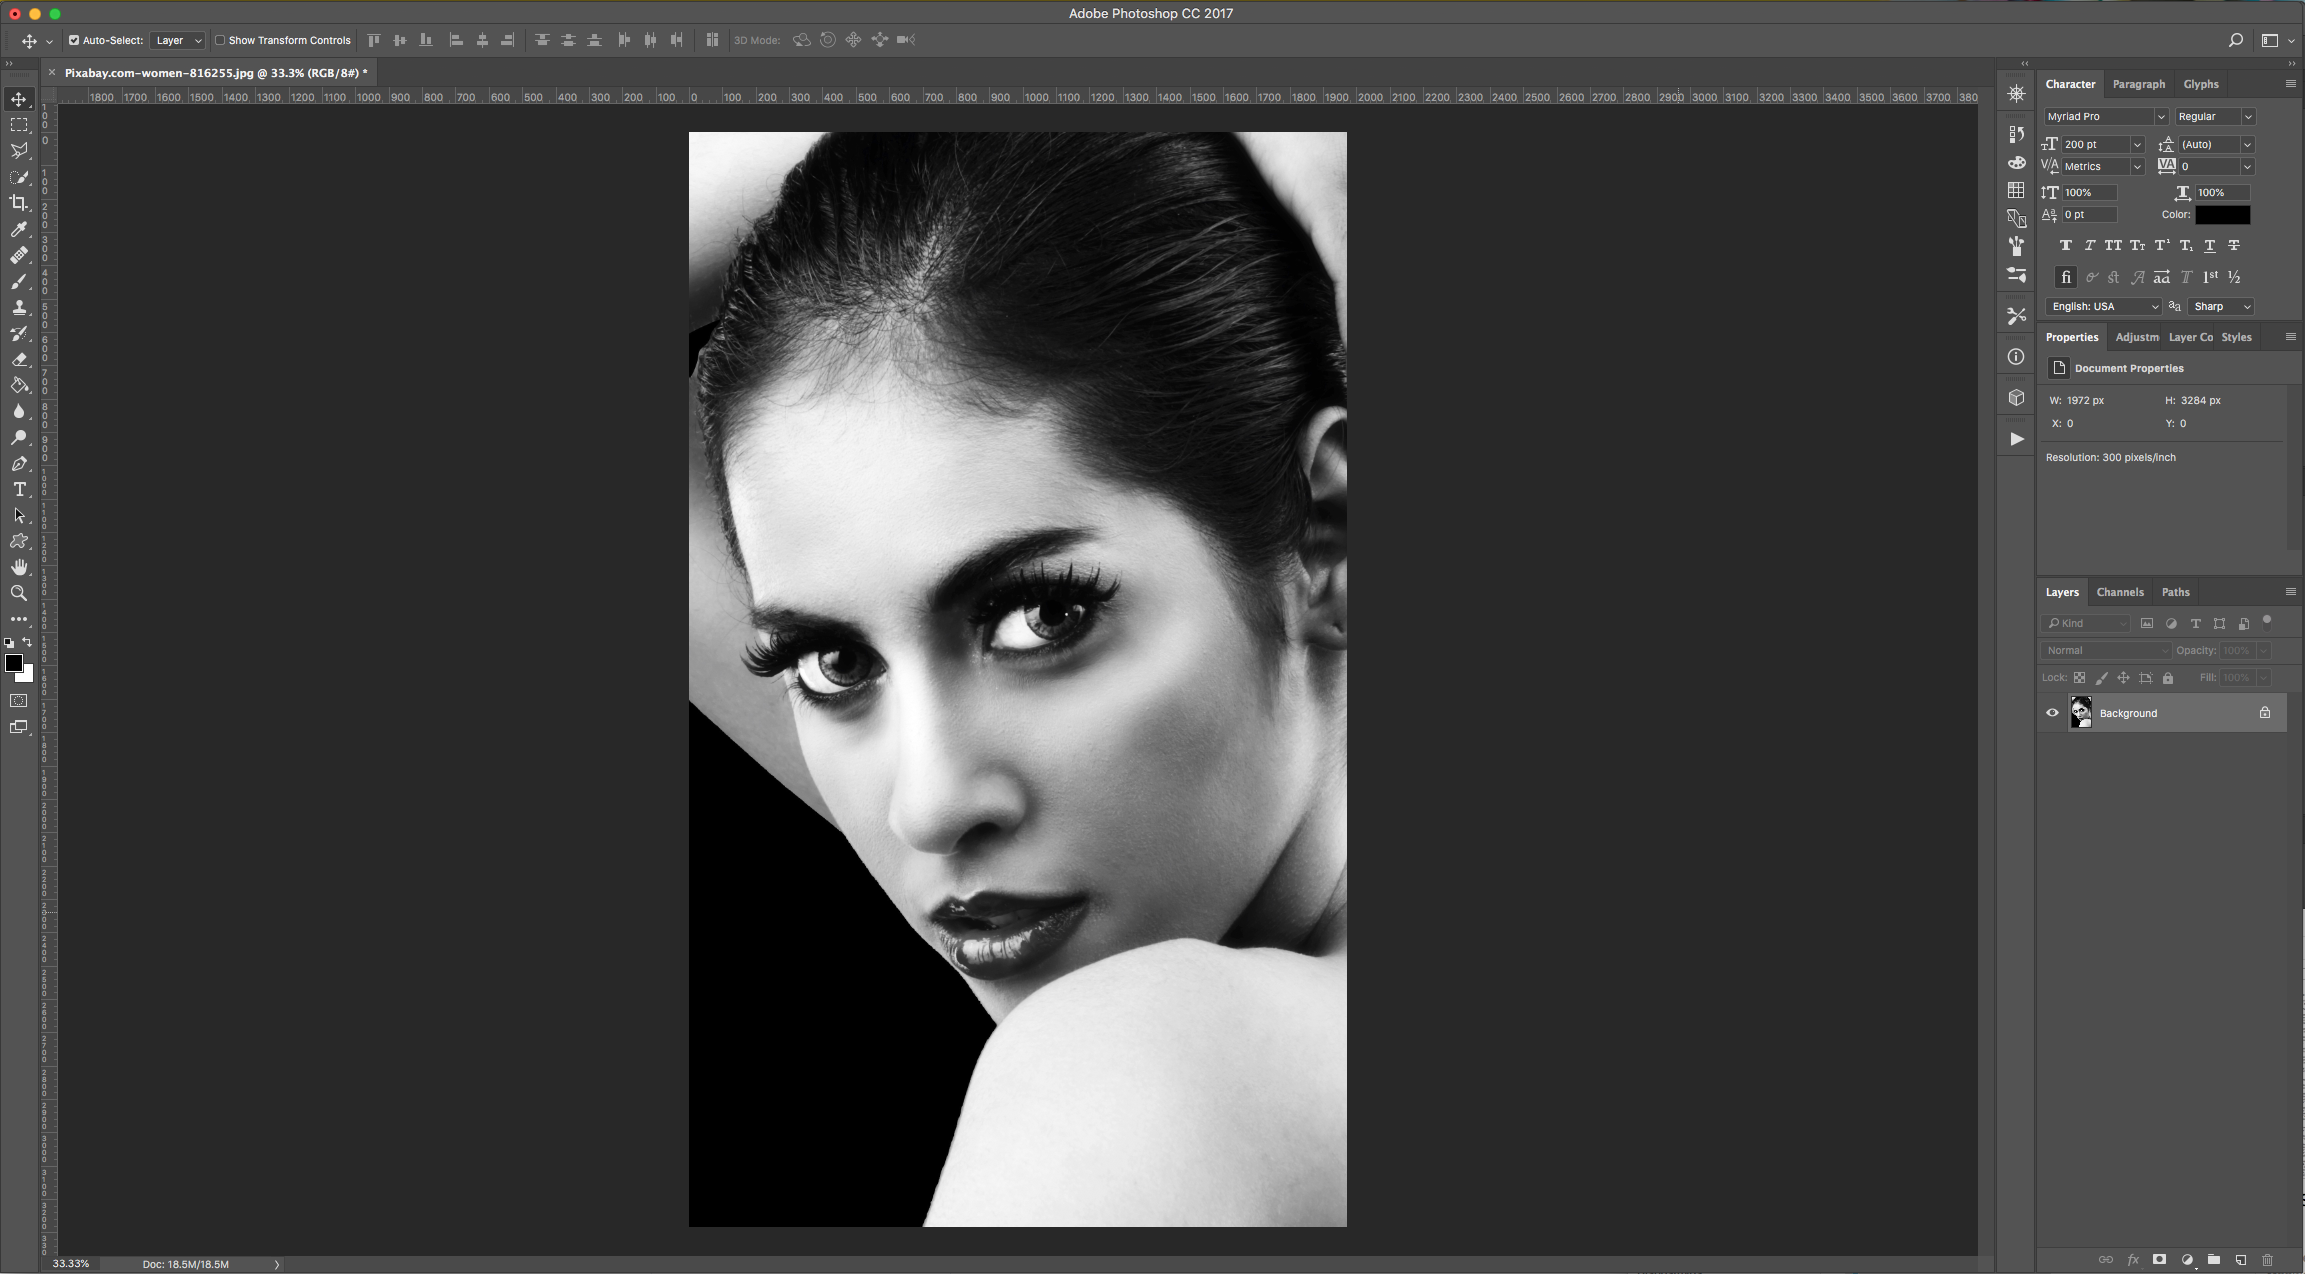
1 - In Photoshop, open the image you chose to work with.
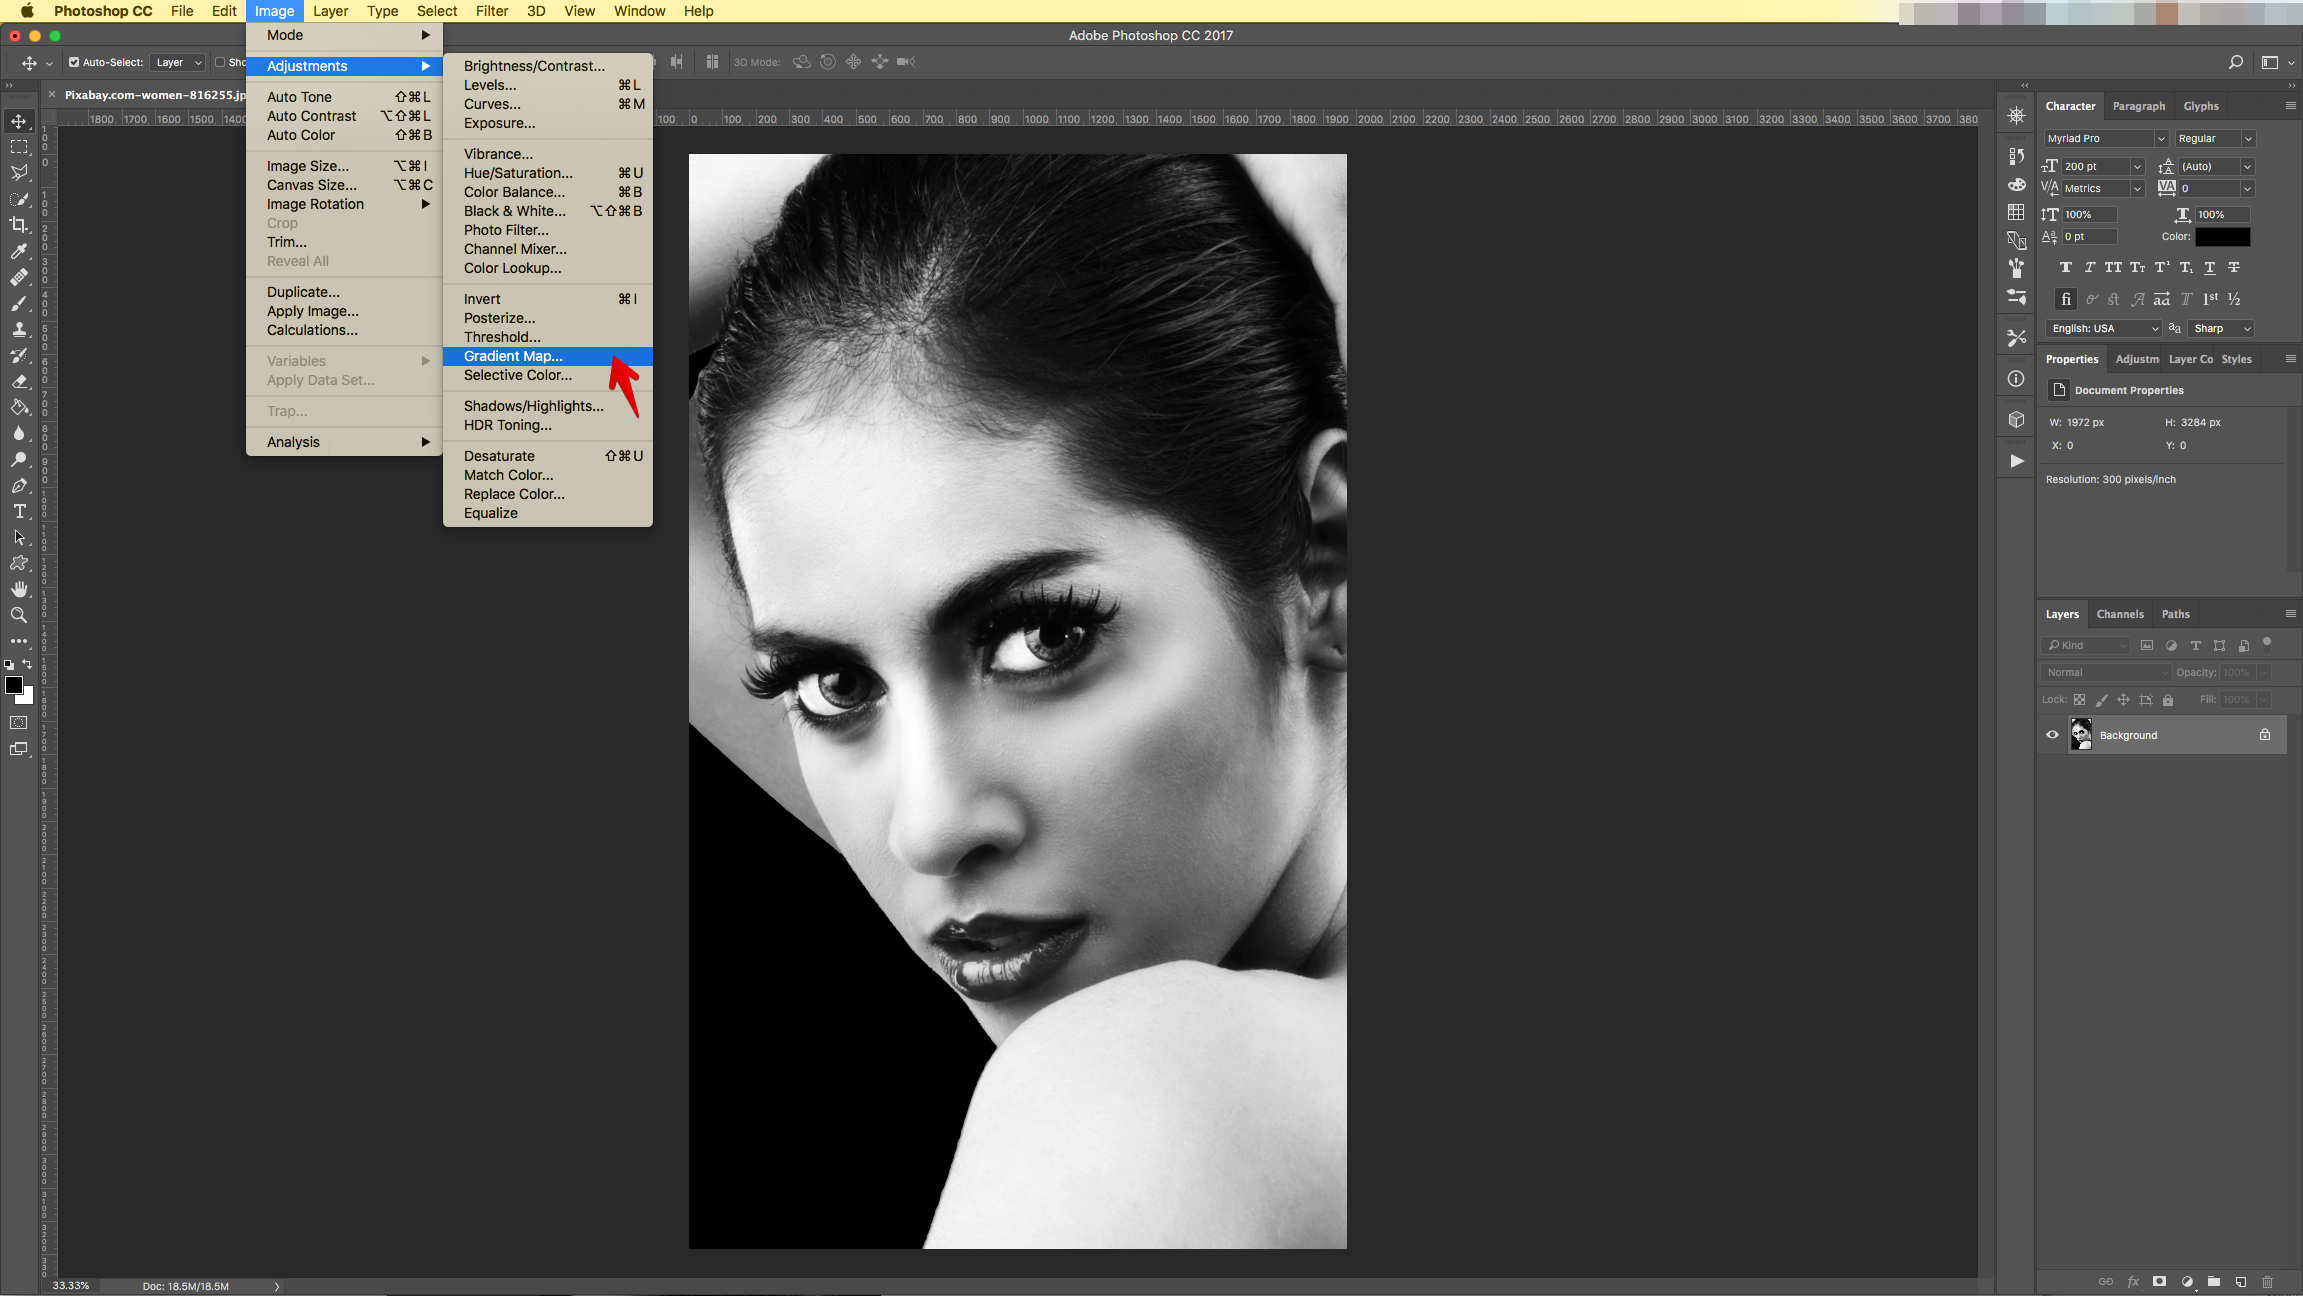
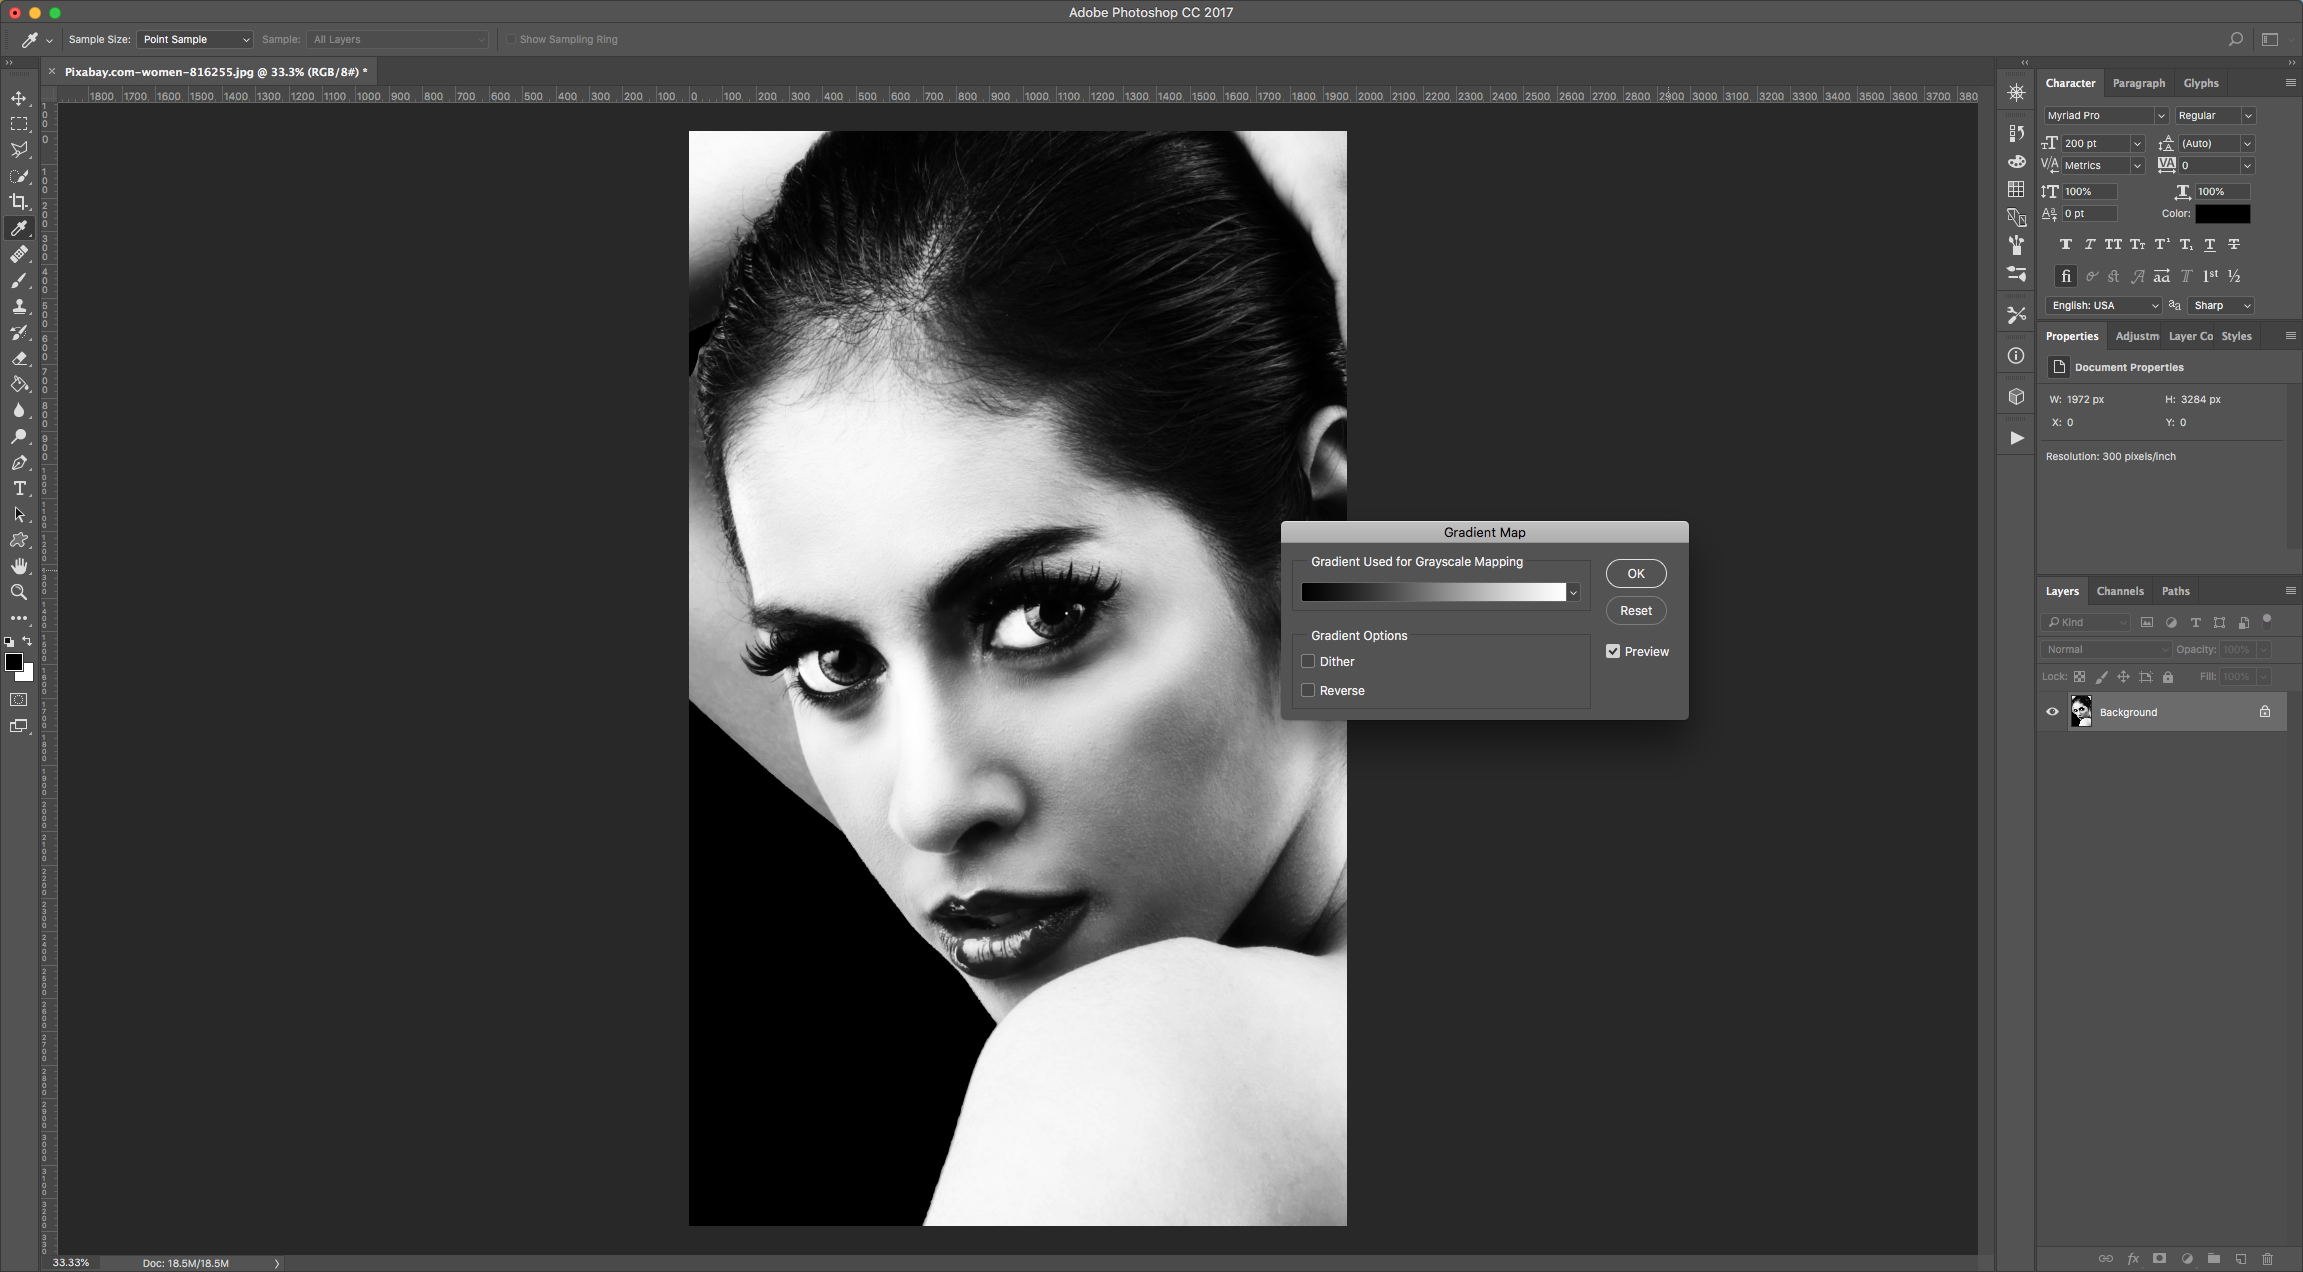
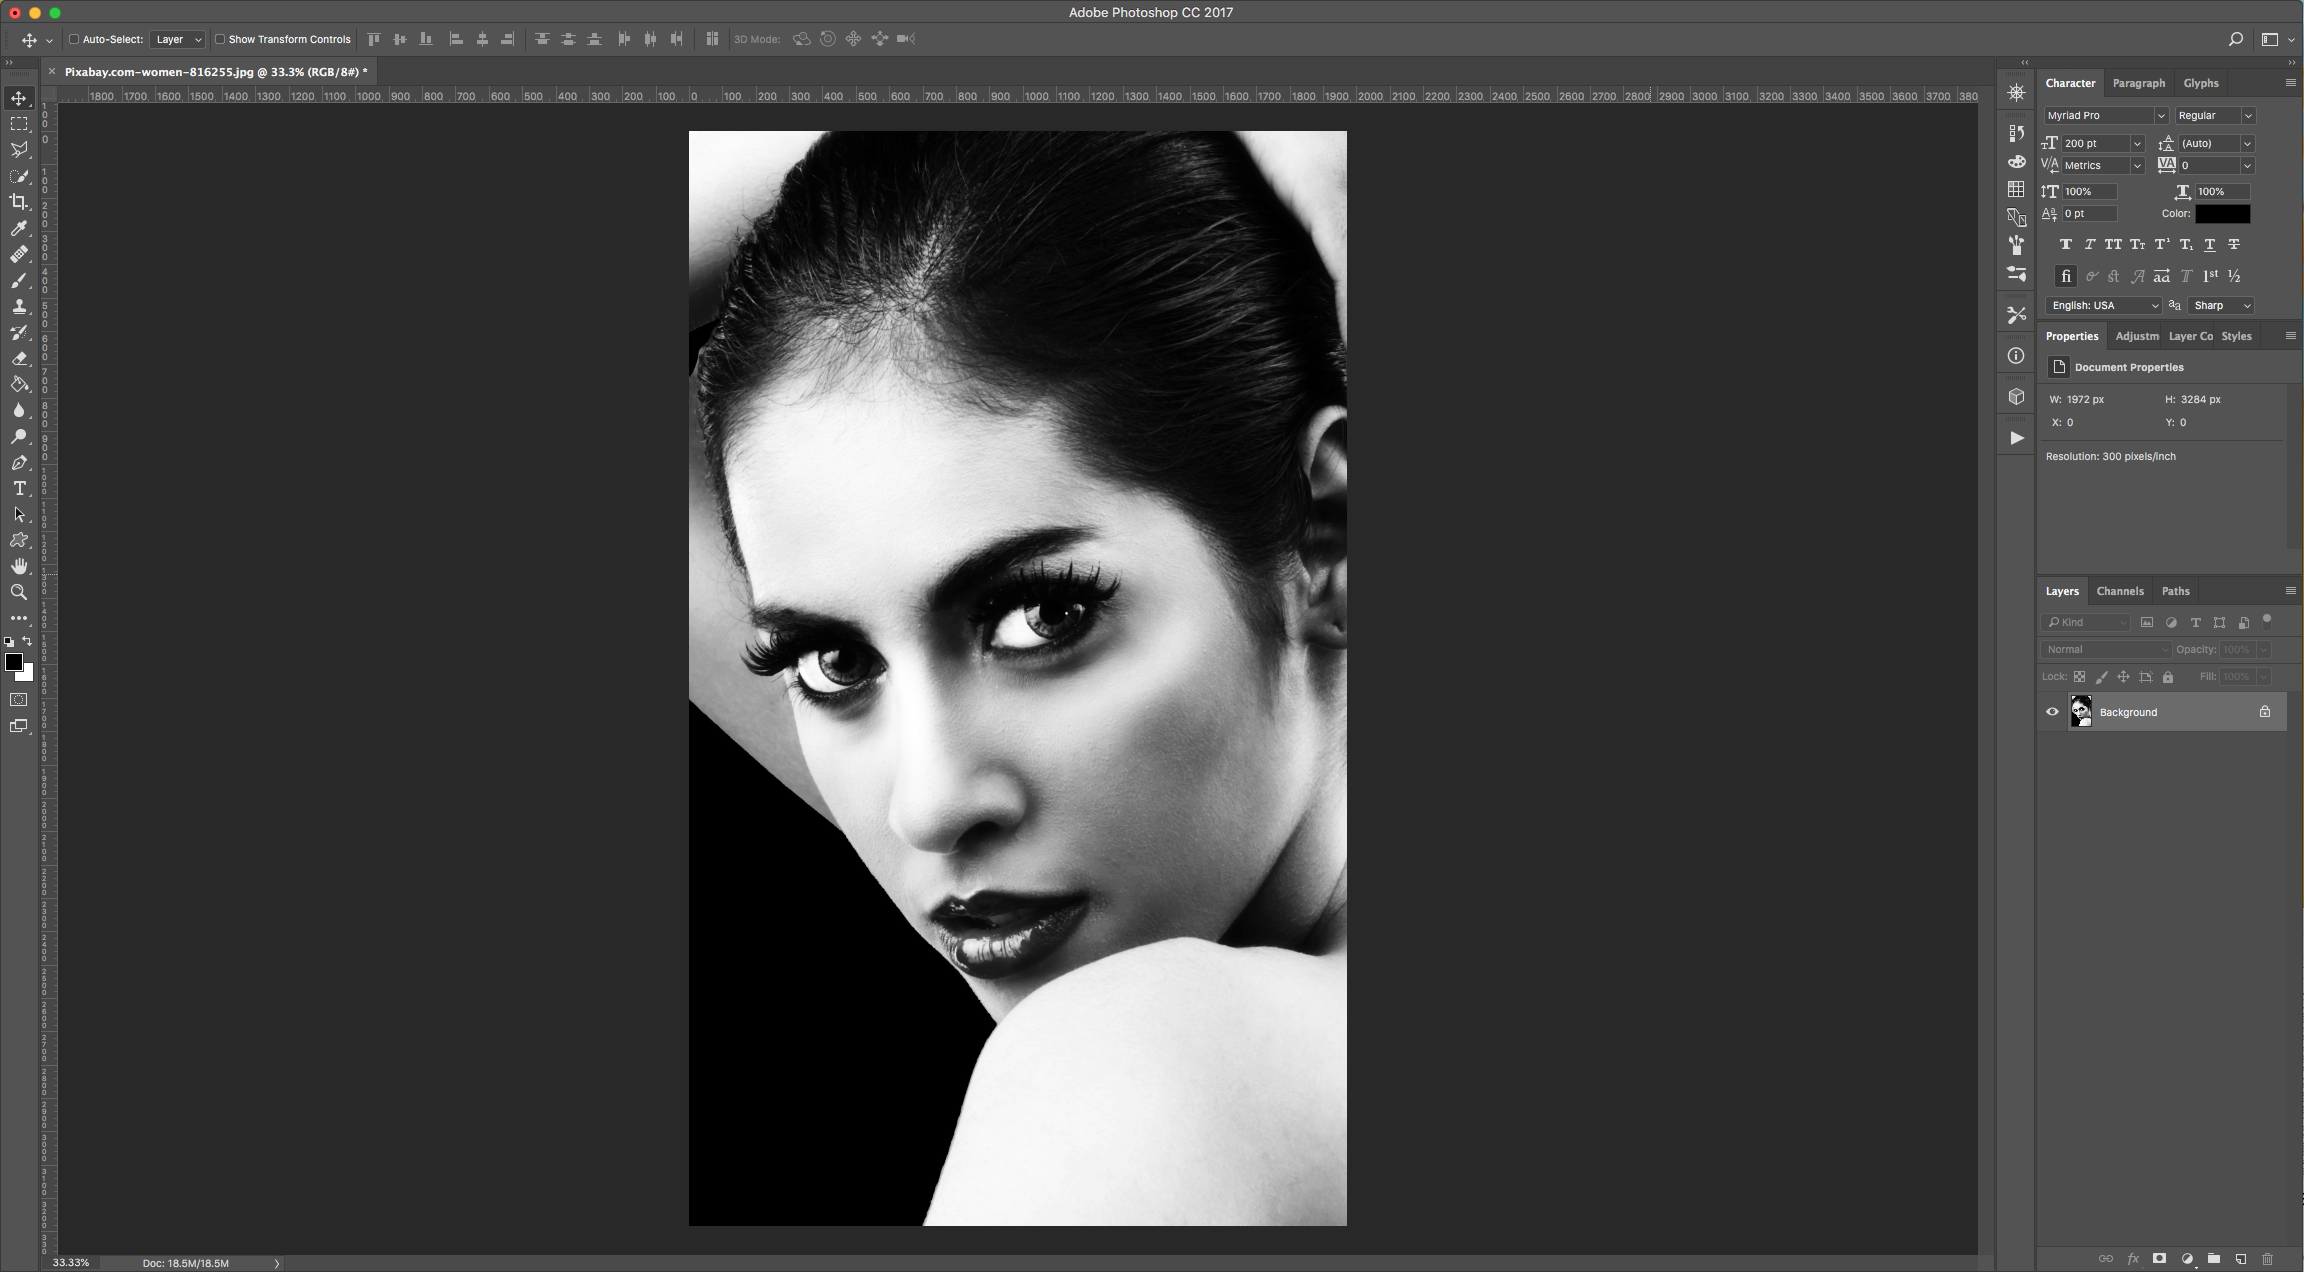
2 - Go to Image > Adjustments > Gradient Map and choose the “Foreground to Background Gradient” (Black to White) from the options and click “OK”.
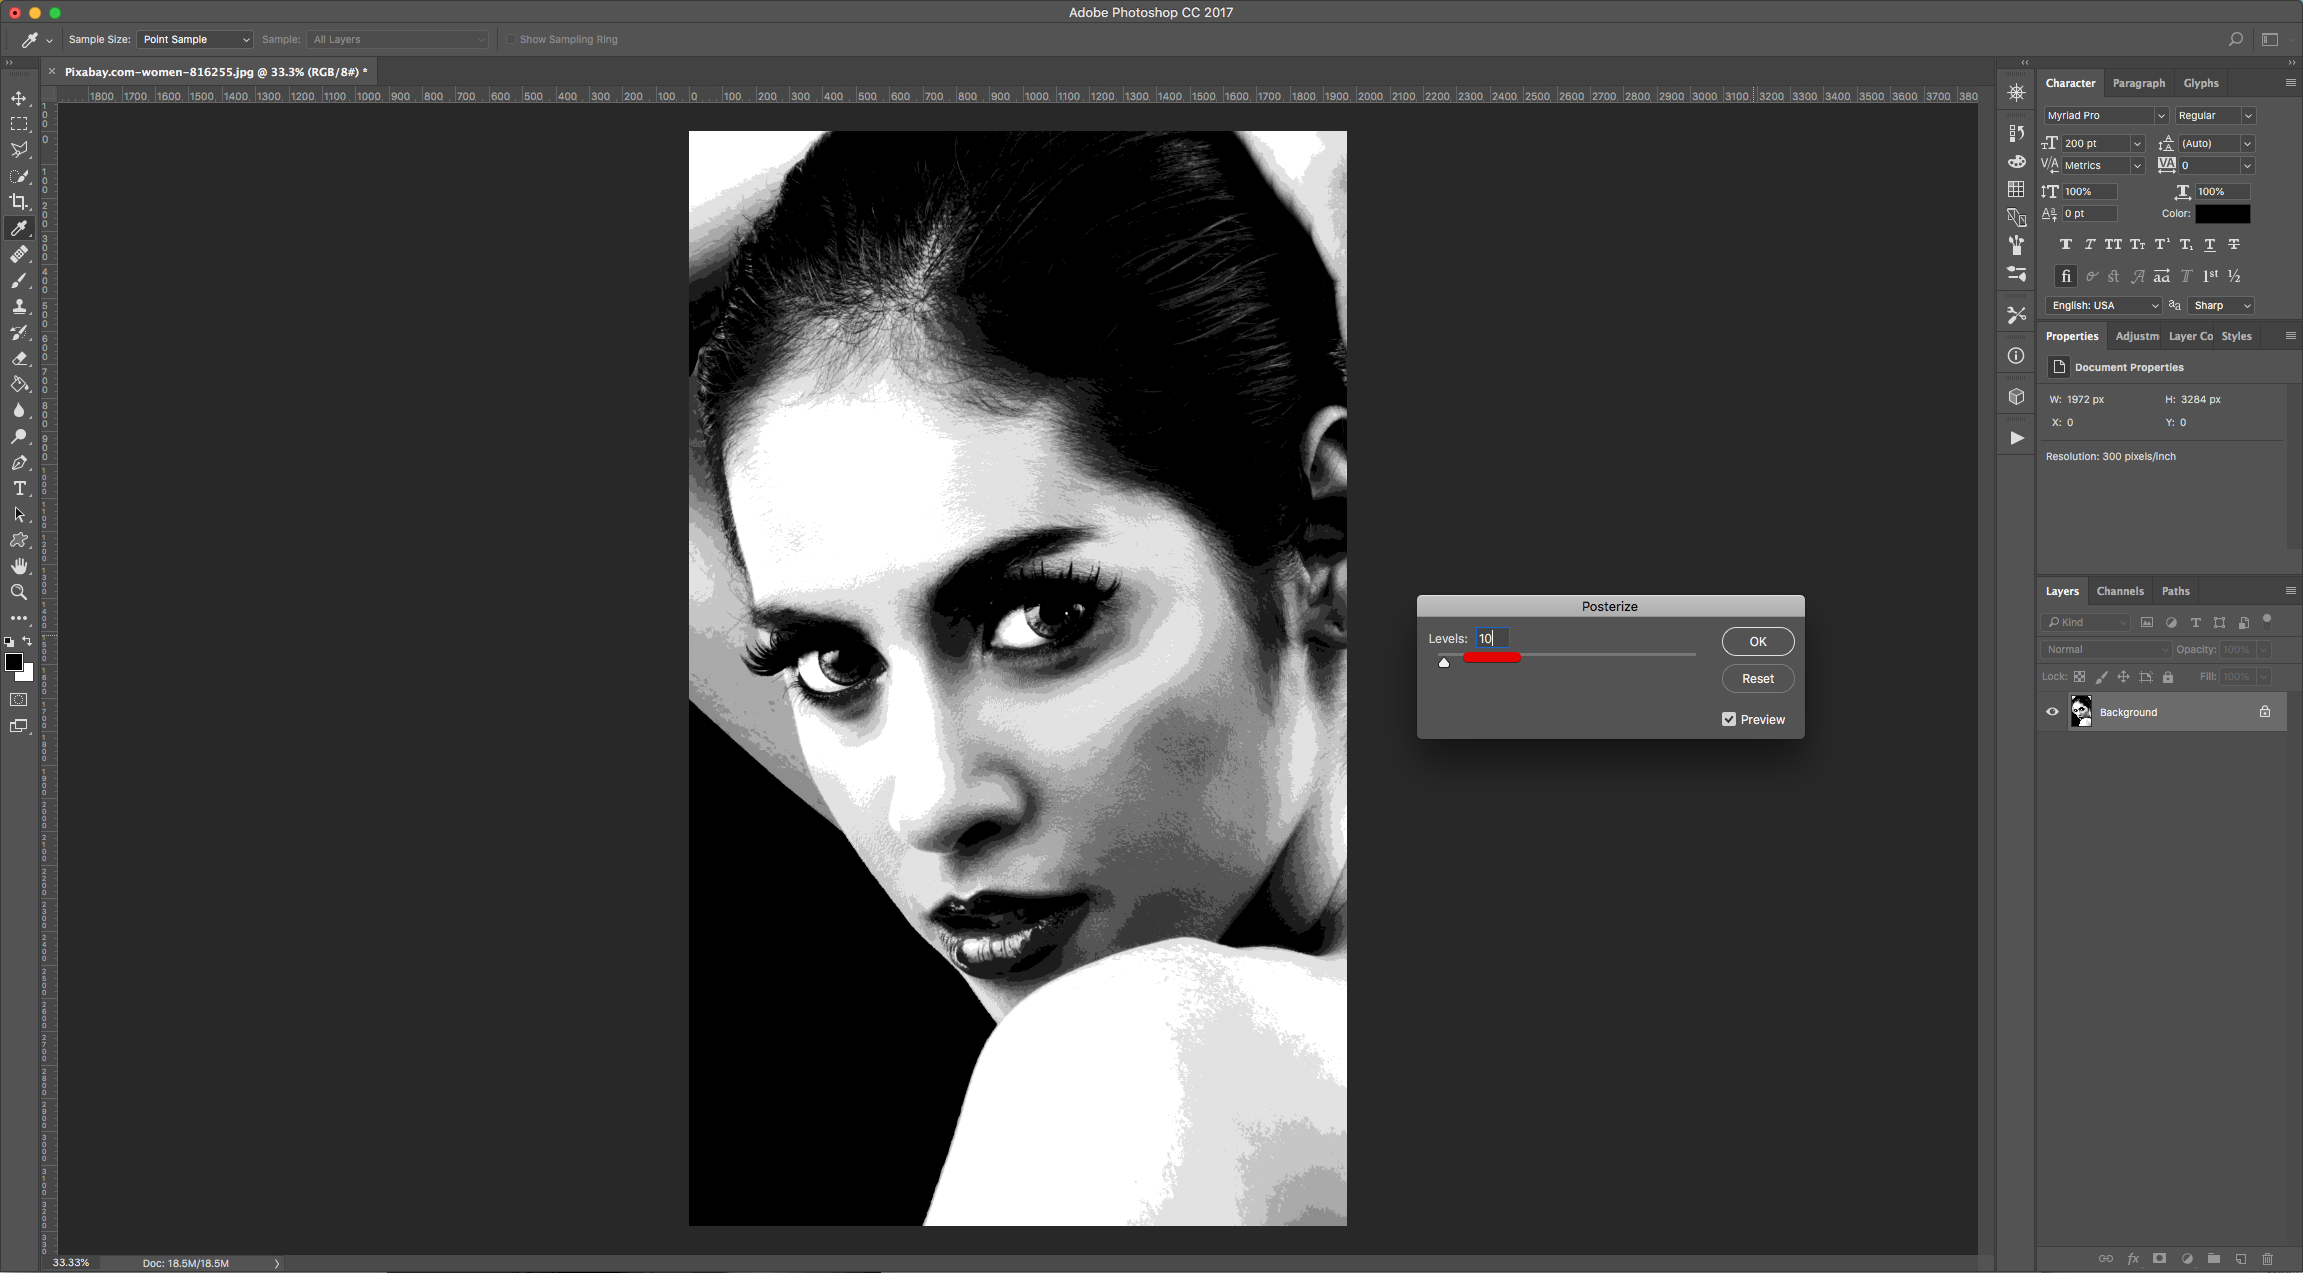
3 - Go to Image > Adjustments > Posterize and use a value of 10 Levels. This will bring out the light source that creates dark shadows and visible halftones and makes it easier to identity where our shading will be created.

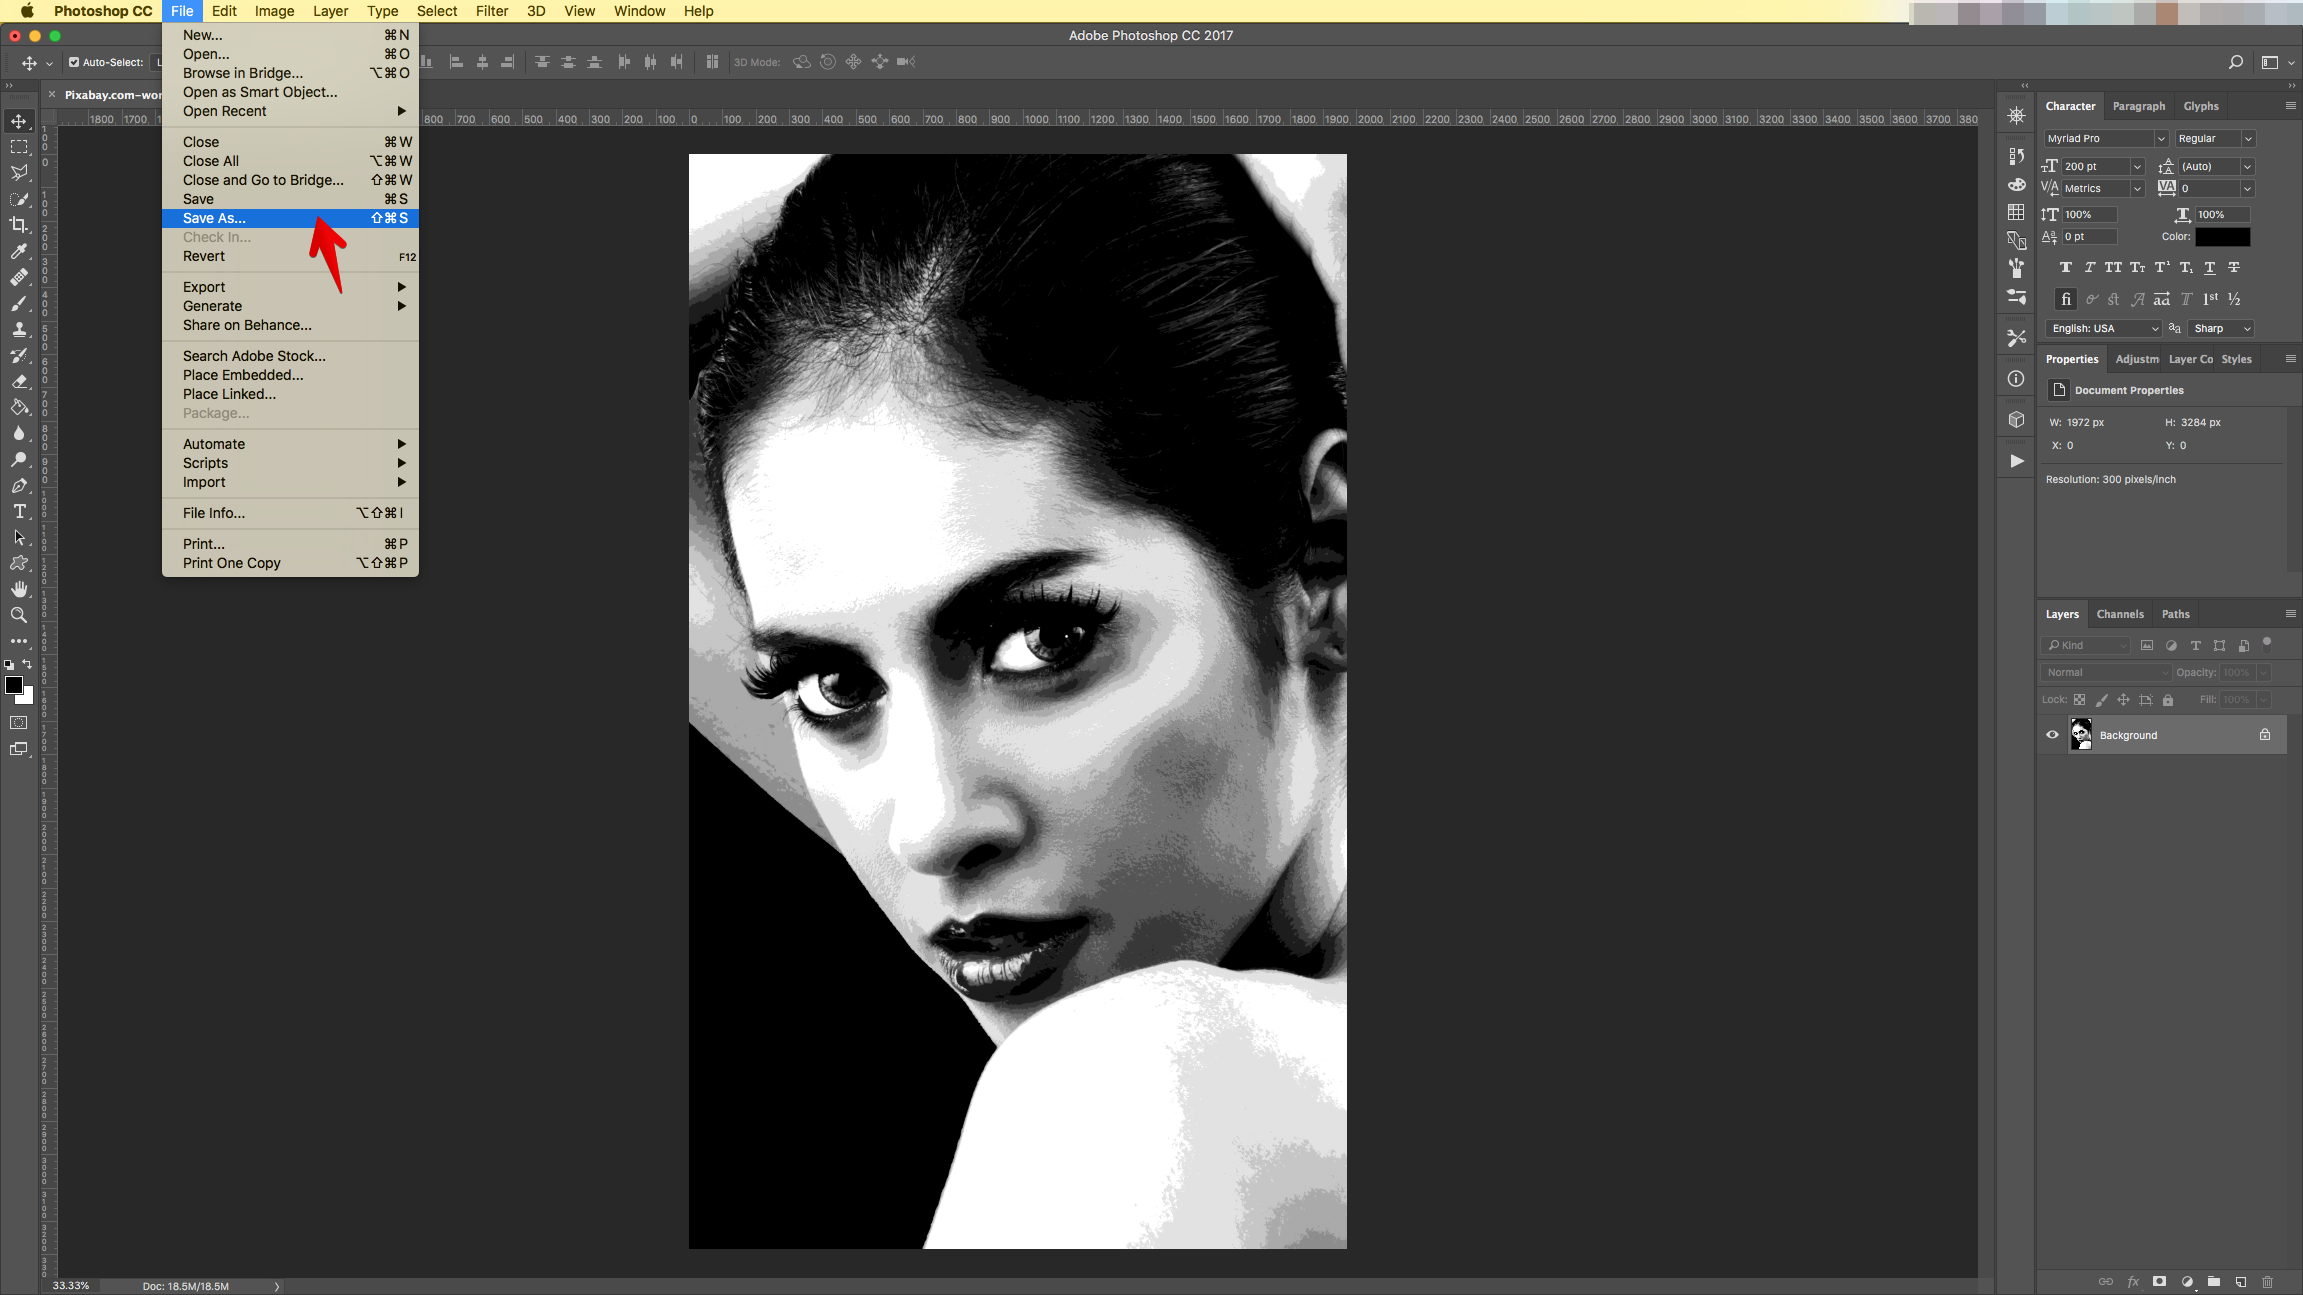
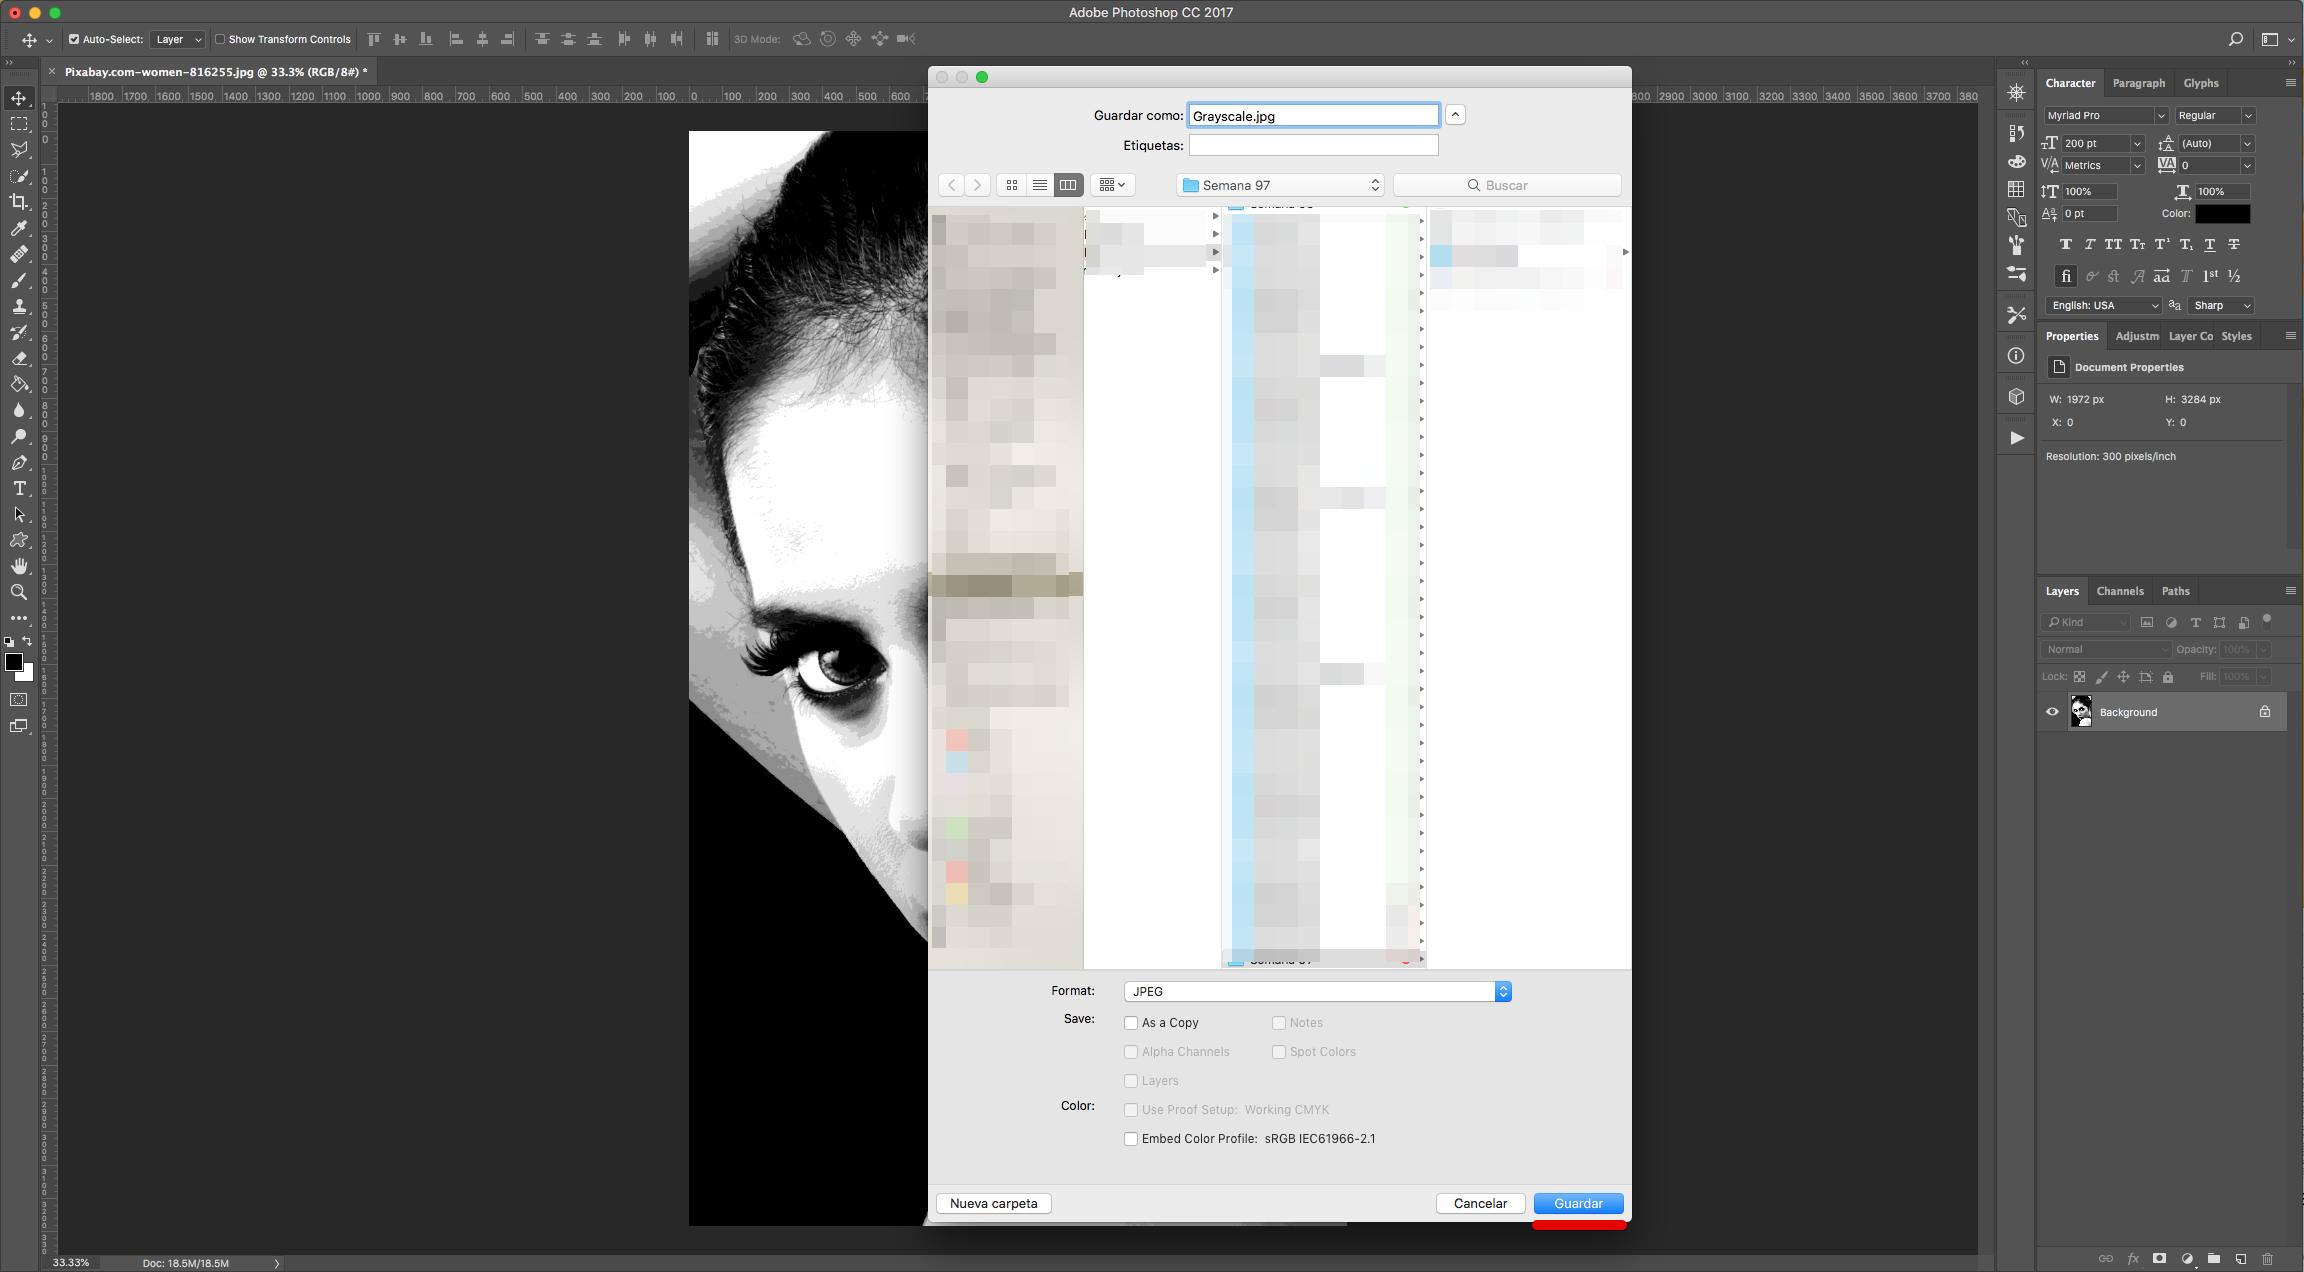
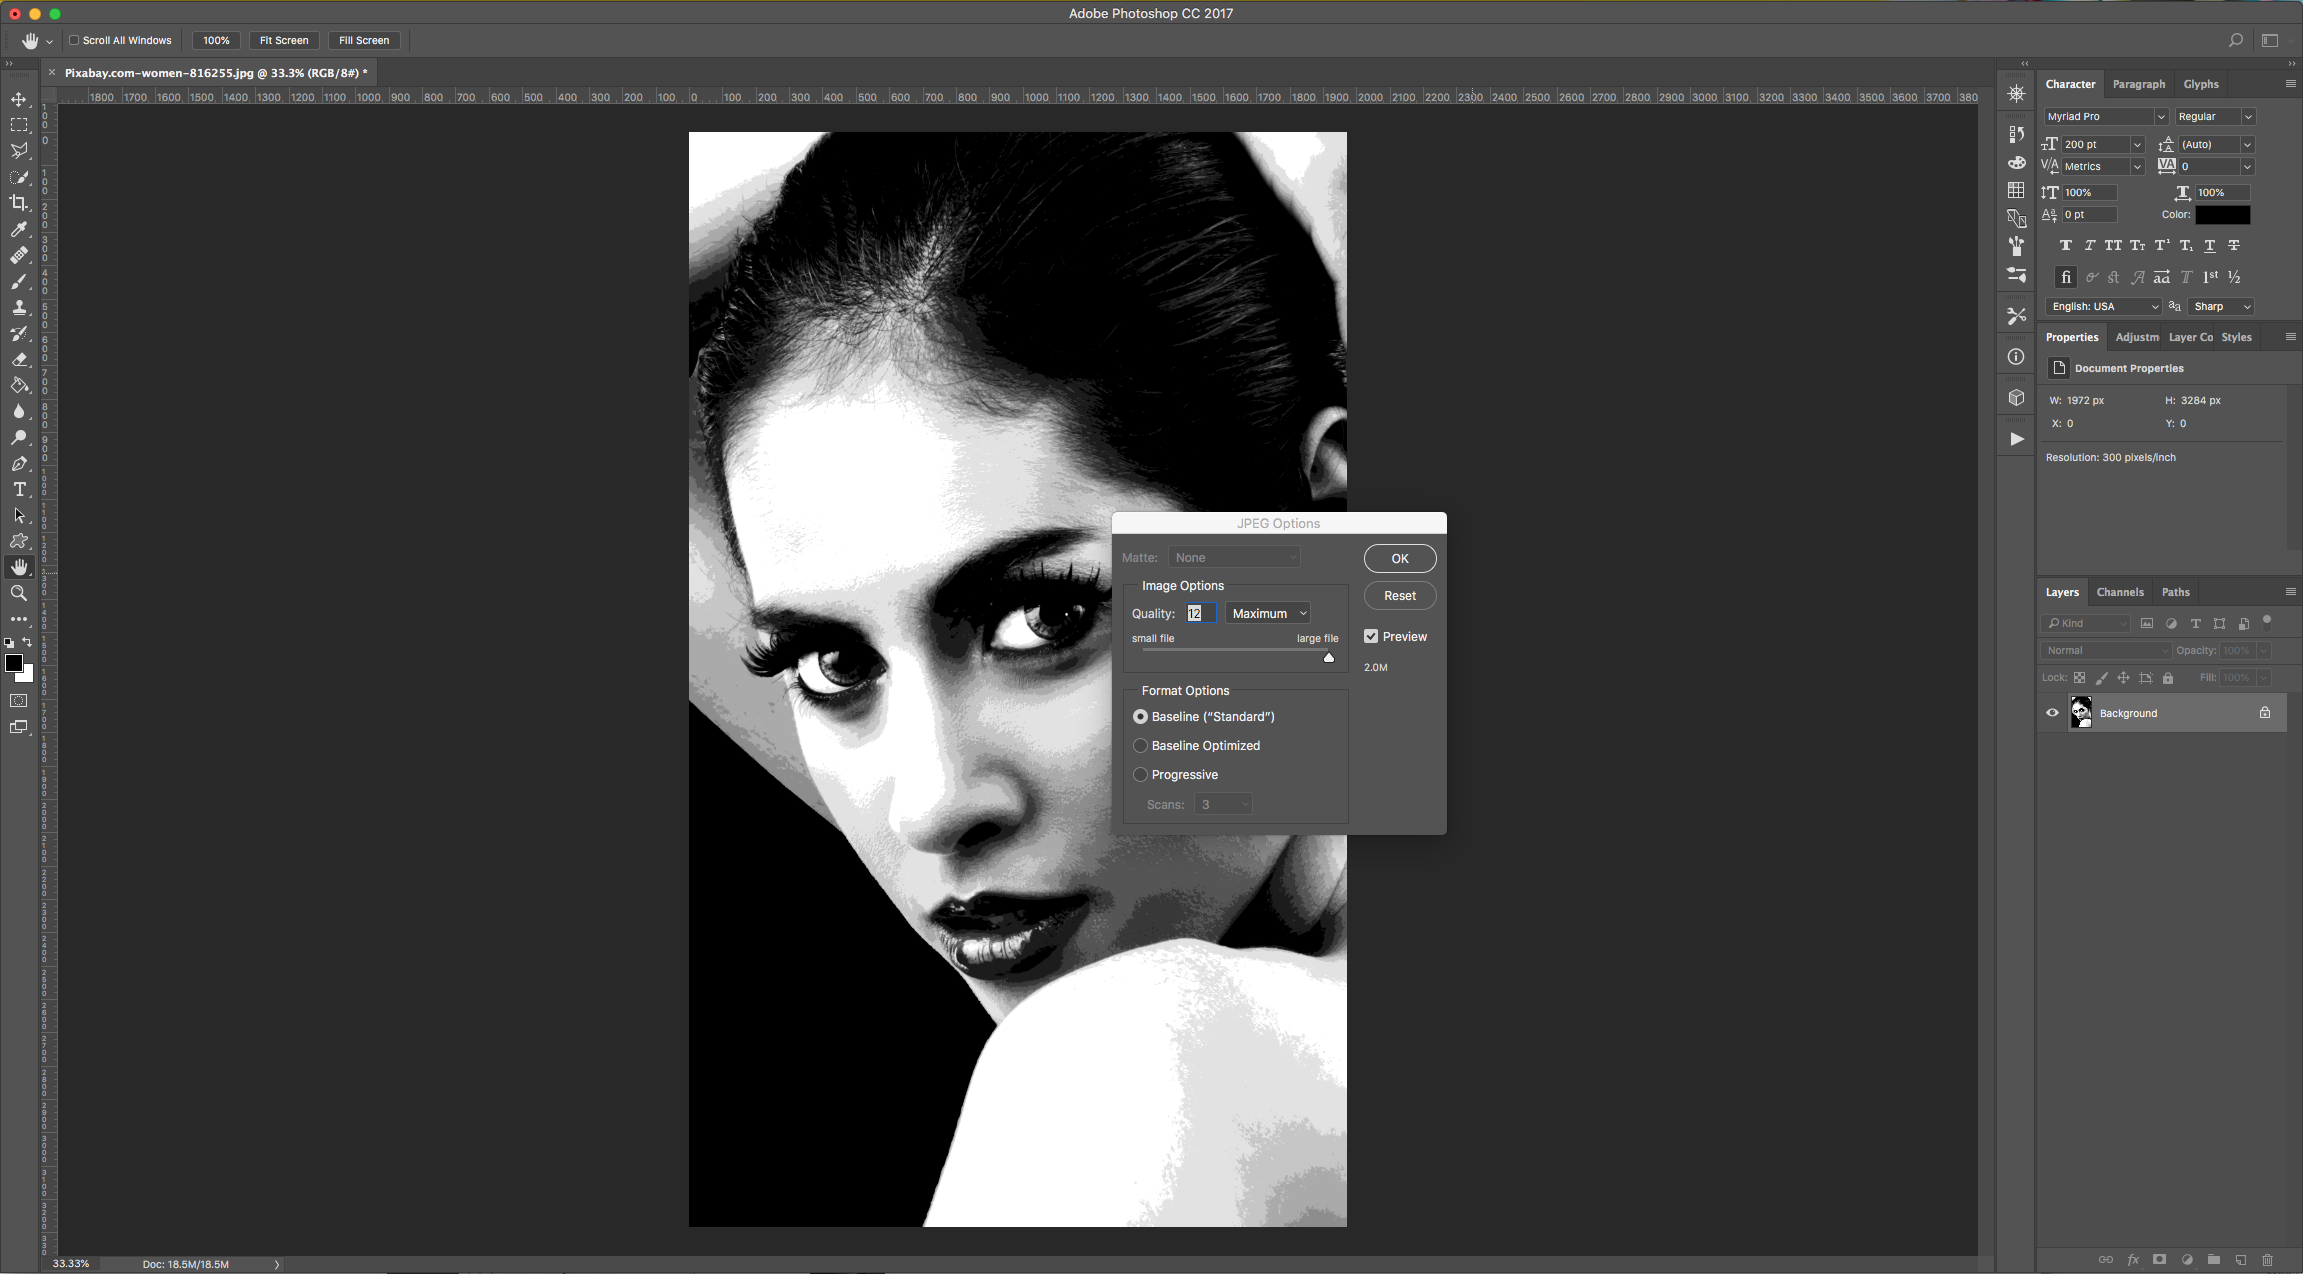
4 - Go to File > Save as (Shift + Command/Control + S), name it Grayscale and choose JPG as “Format”. Choose “Maximum Quality” and “Baseline (Standard)” and click “OK”.
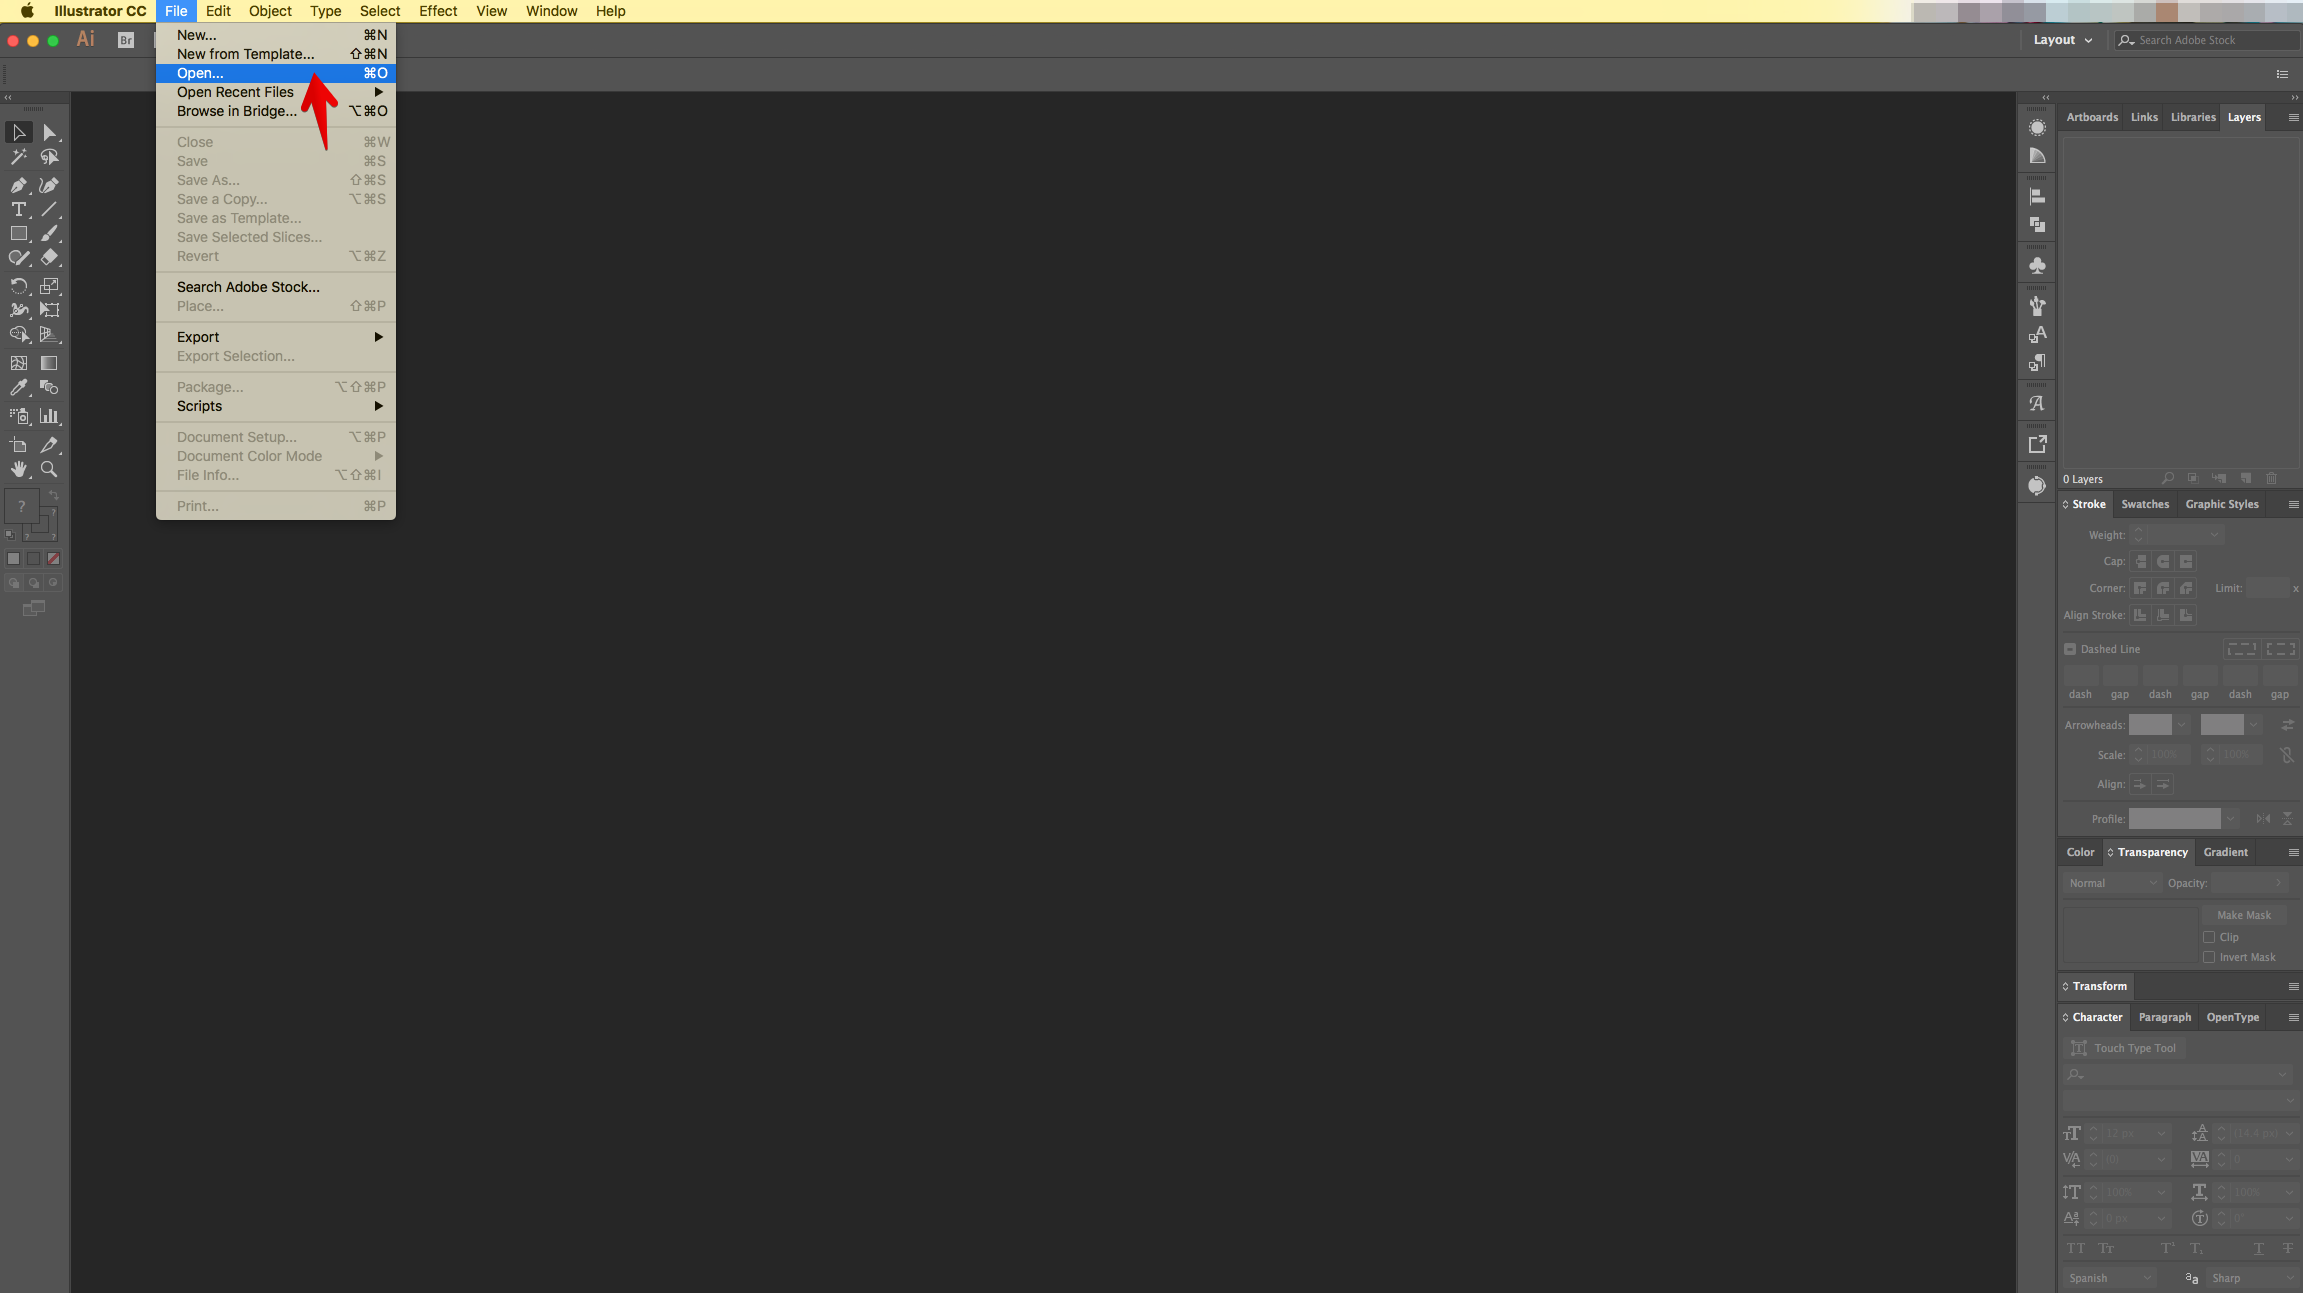
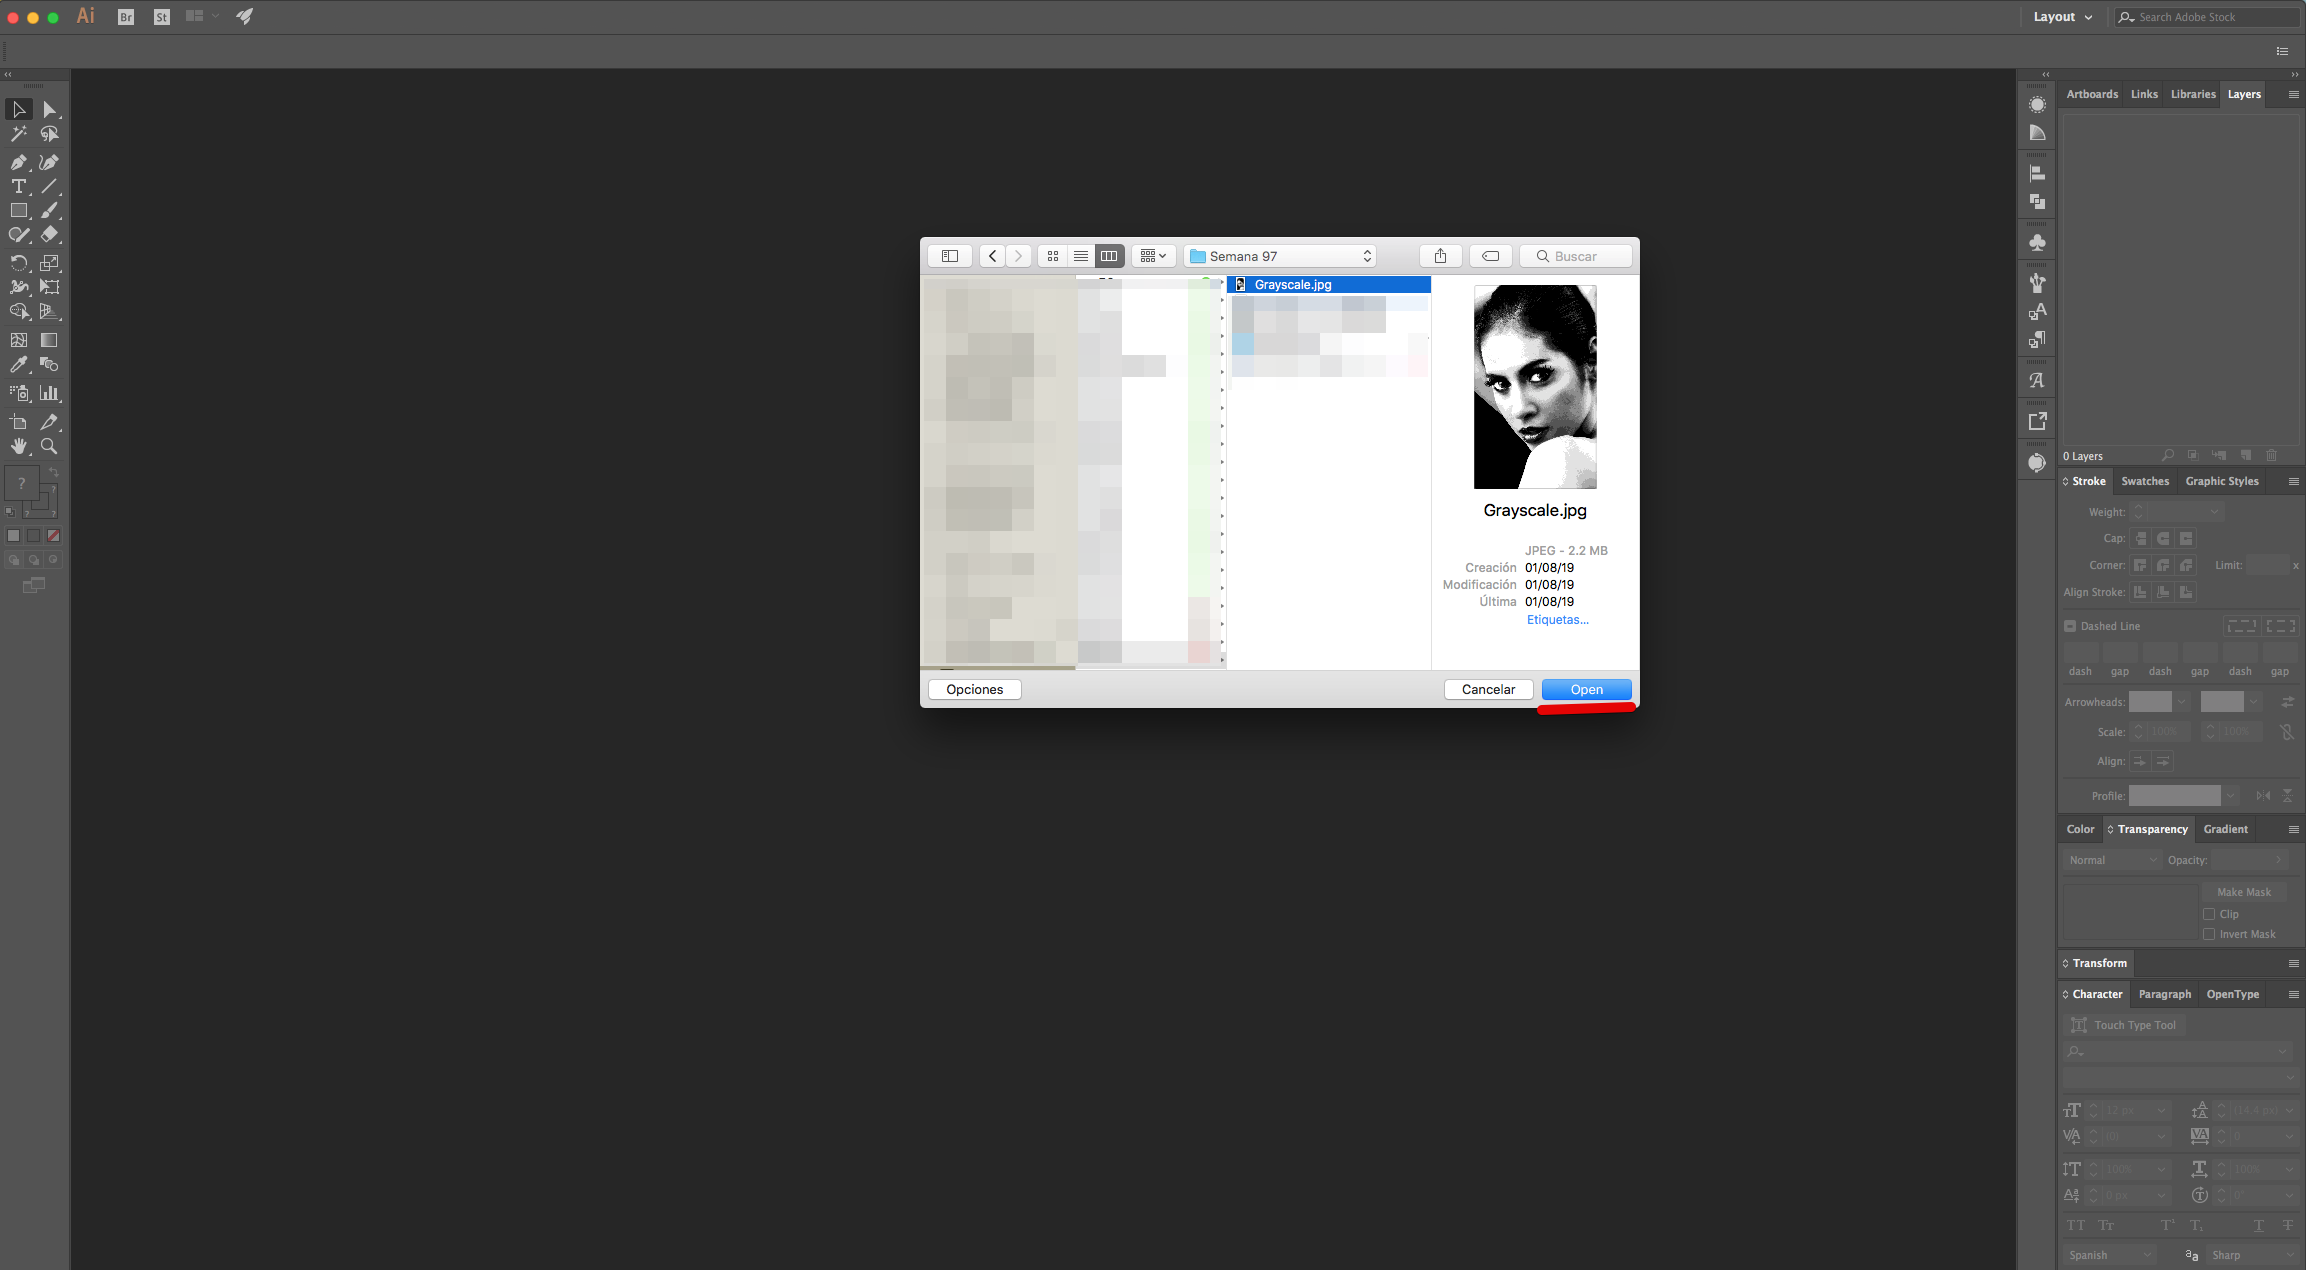
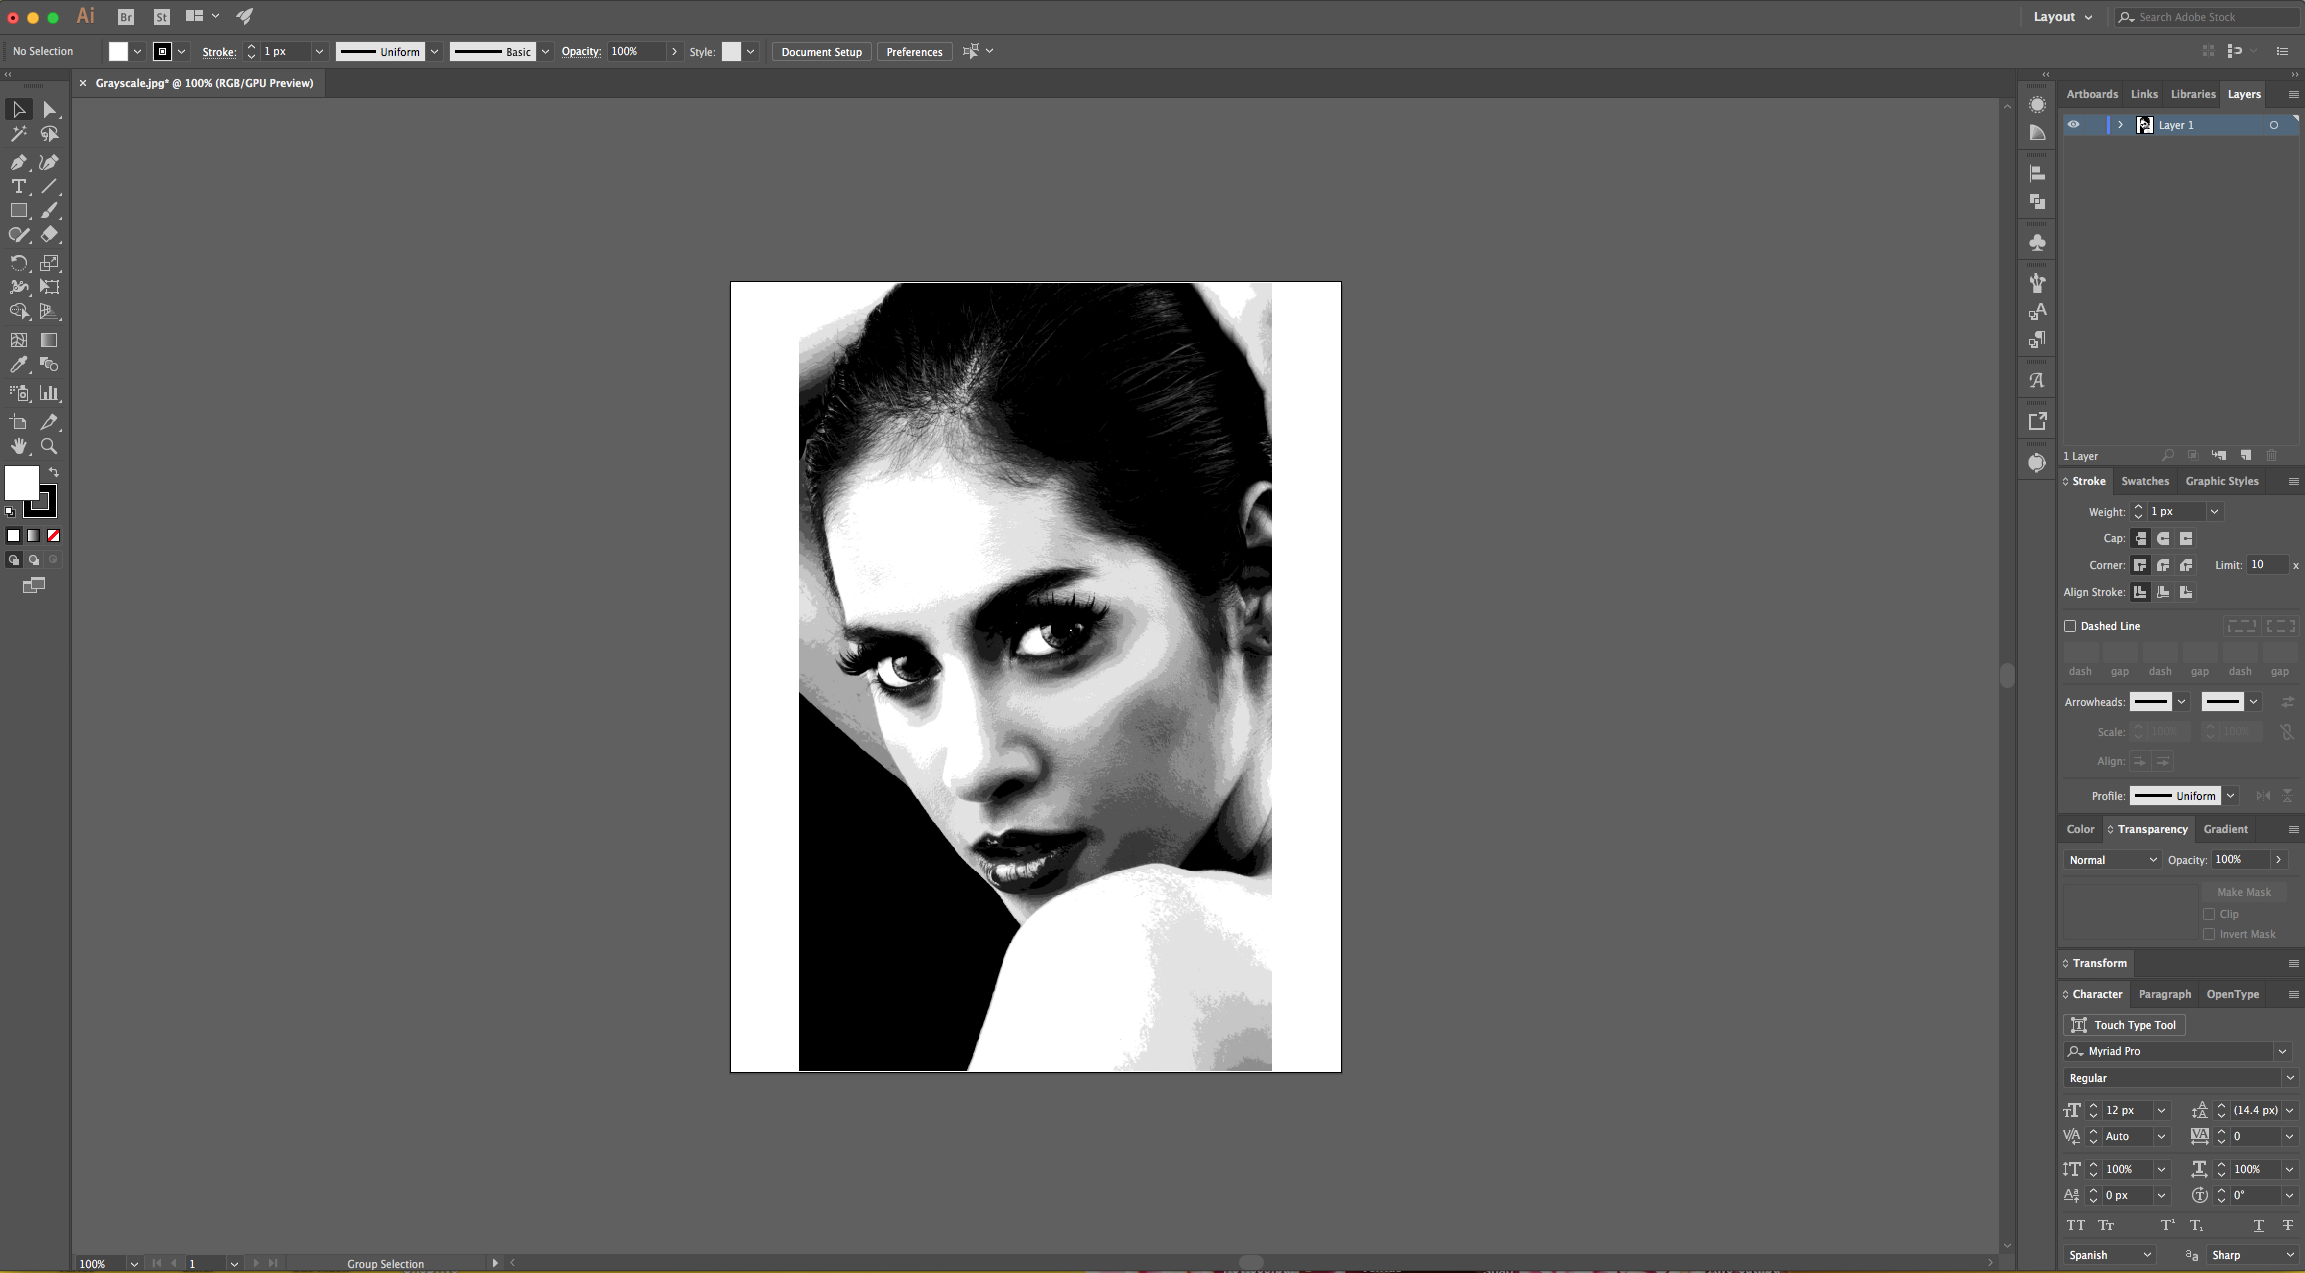
5 - In “Illustrator” open the “Grayscale.jpg” file you just saved. You may need to adjust the document’s settings.
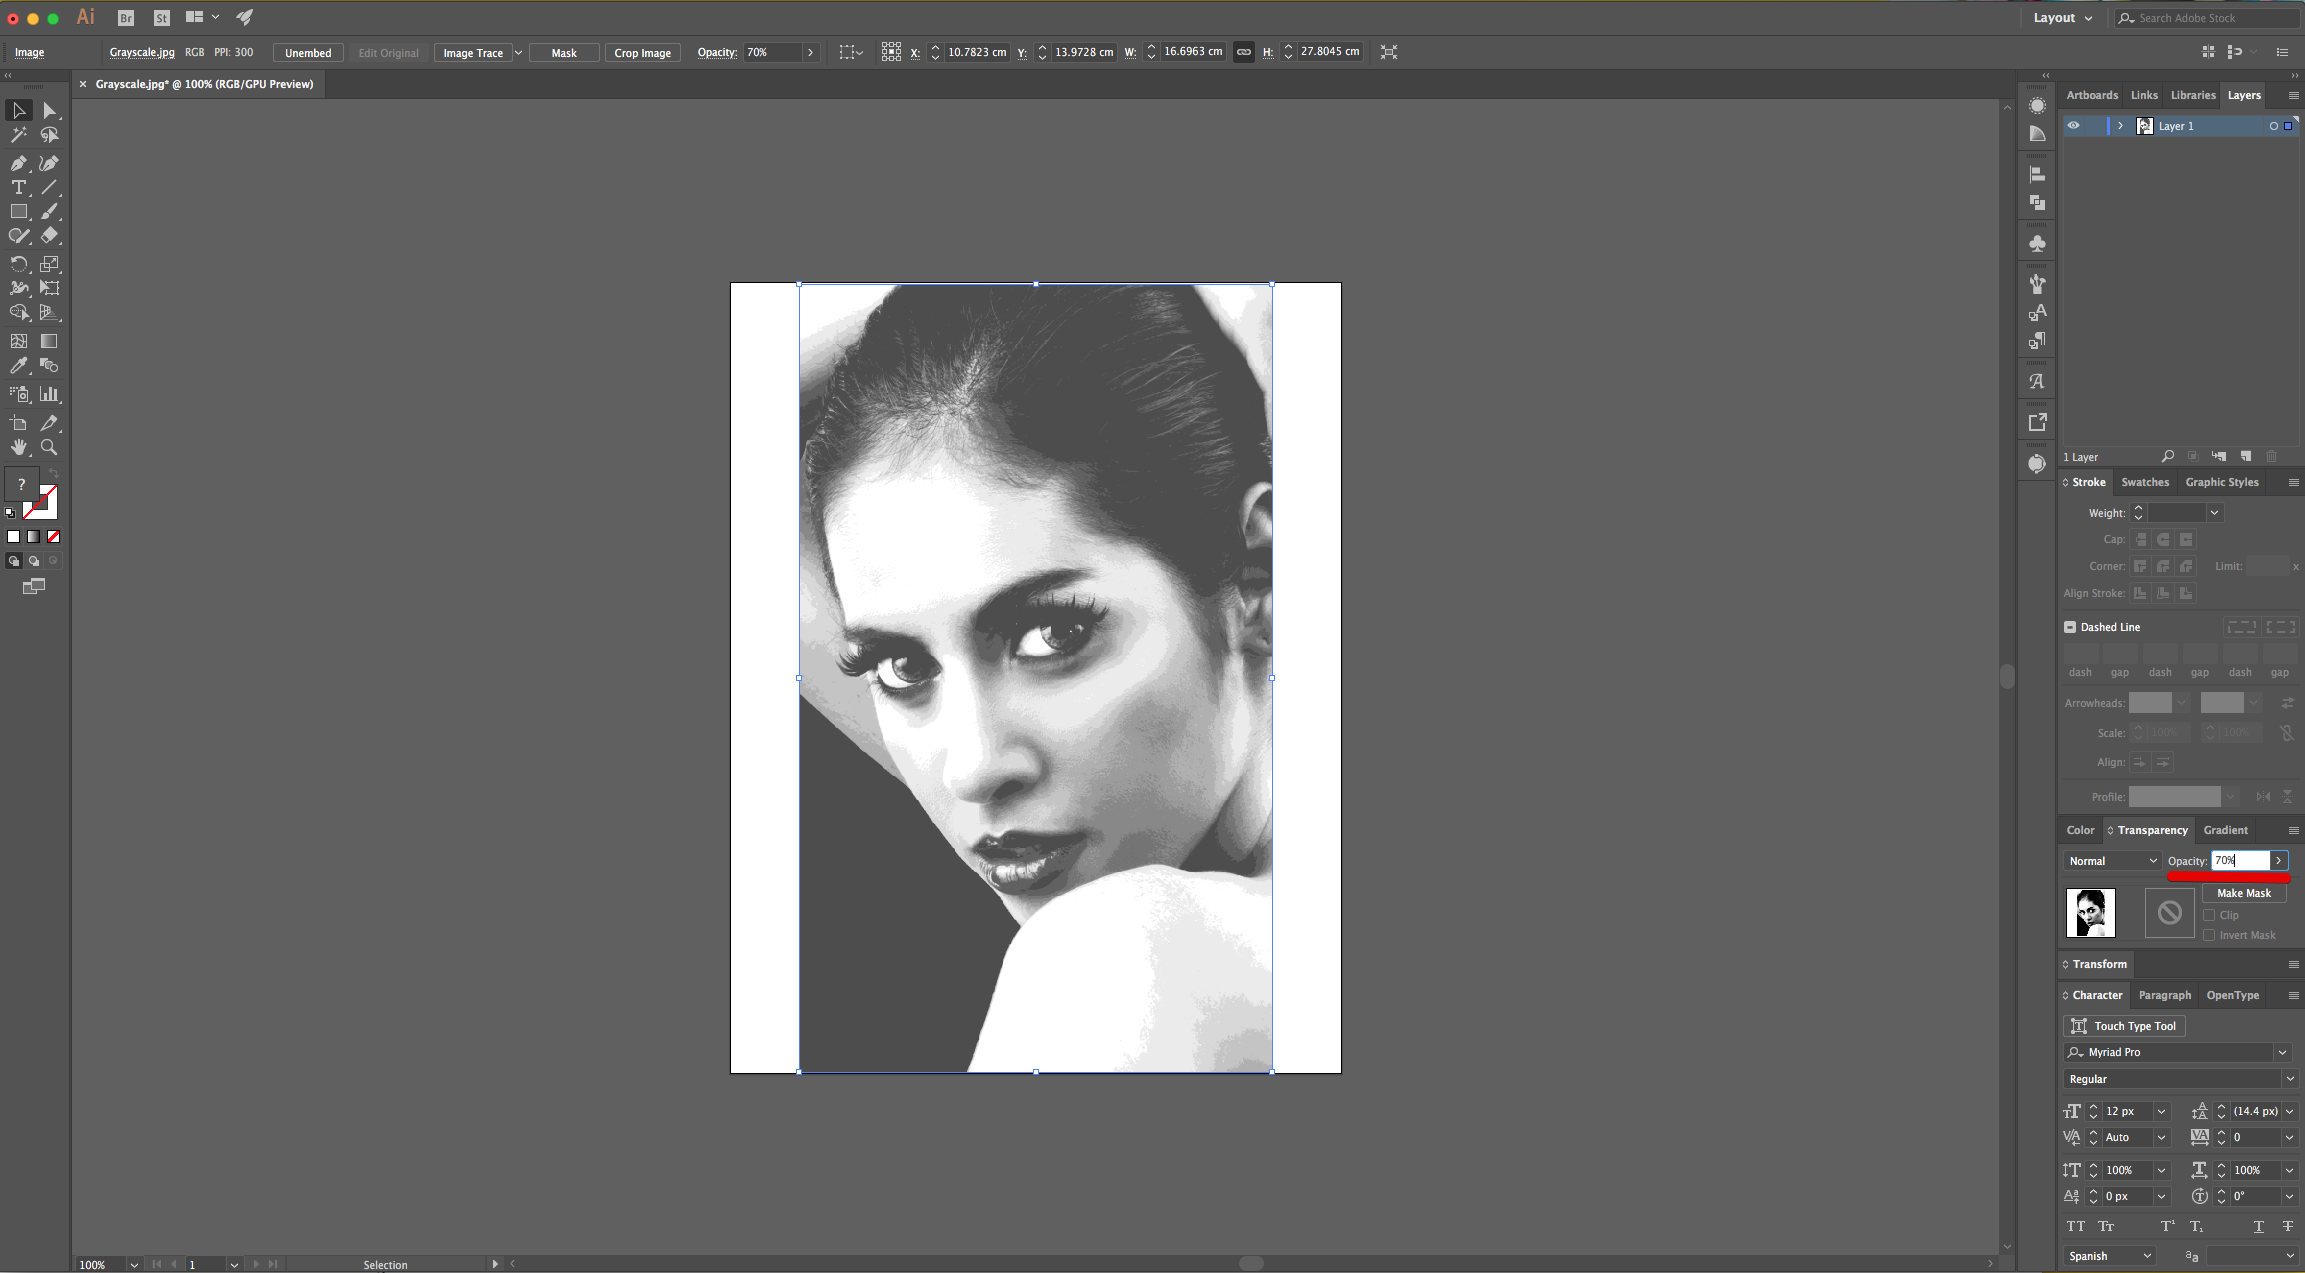
6 - In the “Transparency Panel” lower the “Opacity” of the image to 70%.
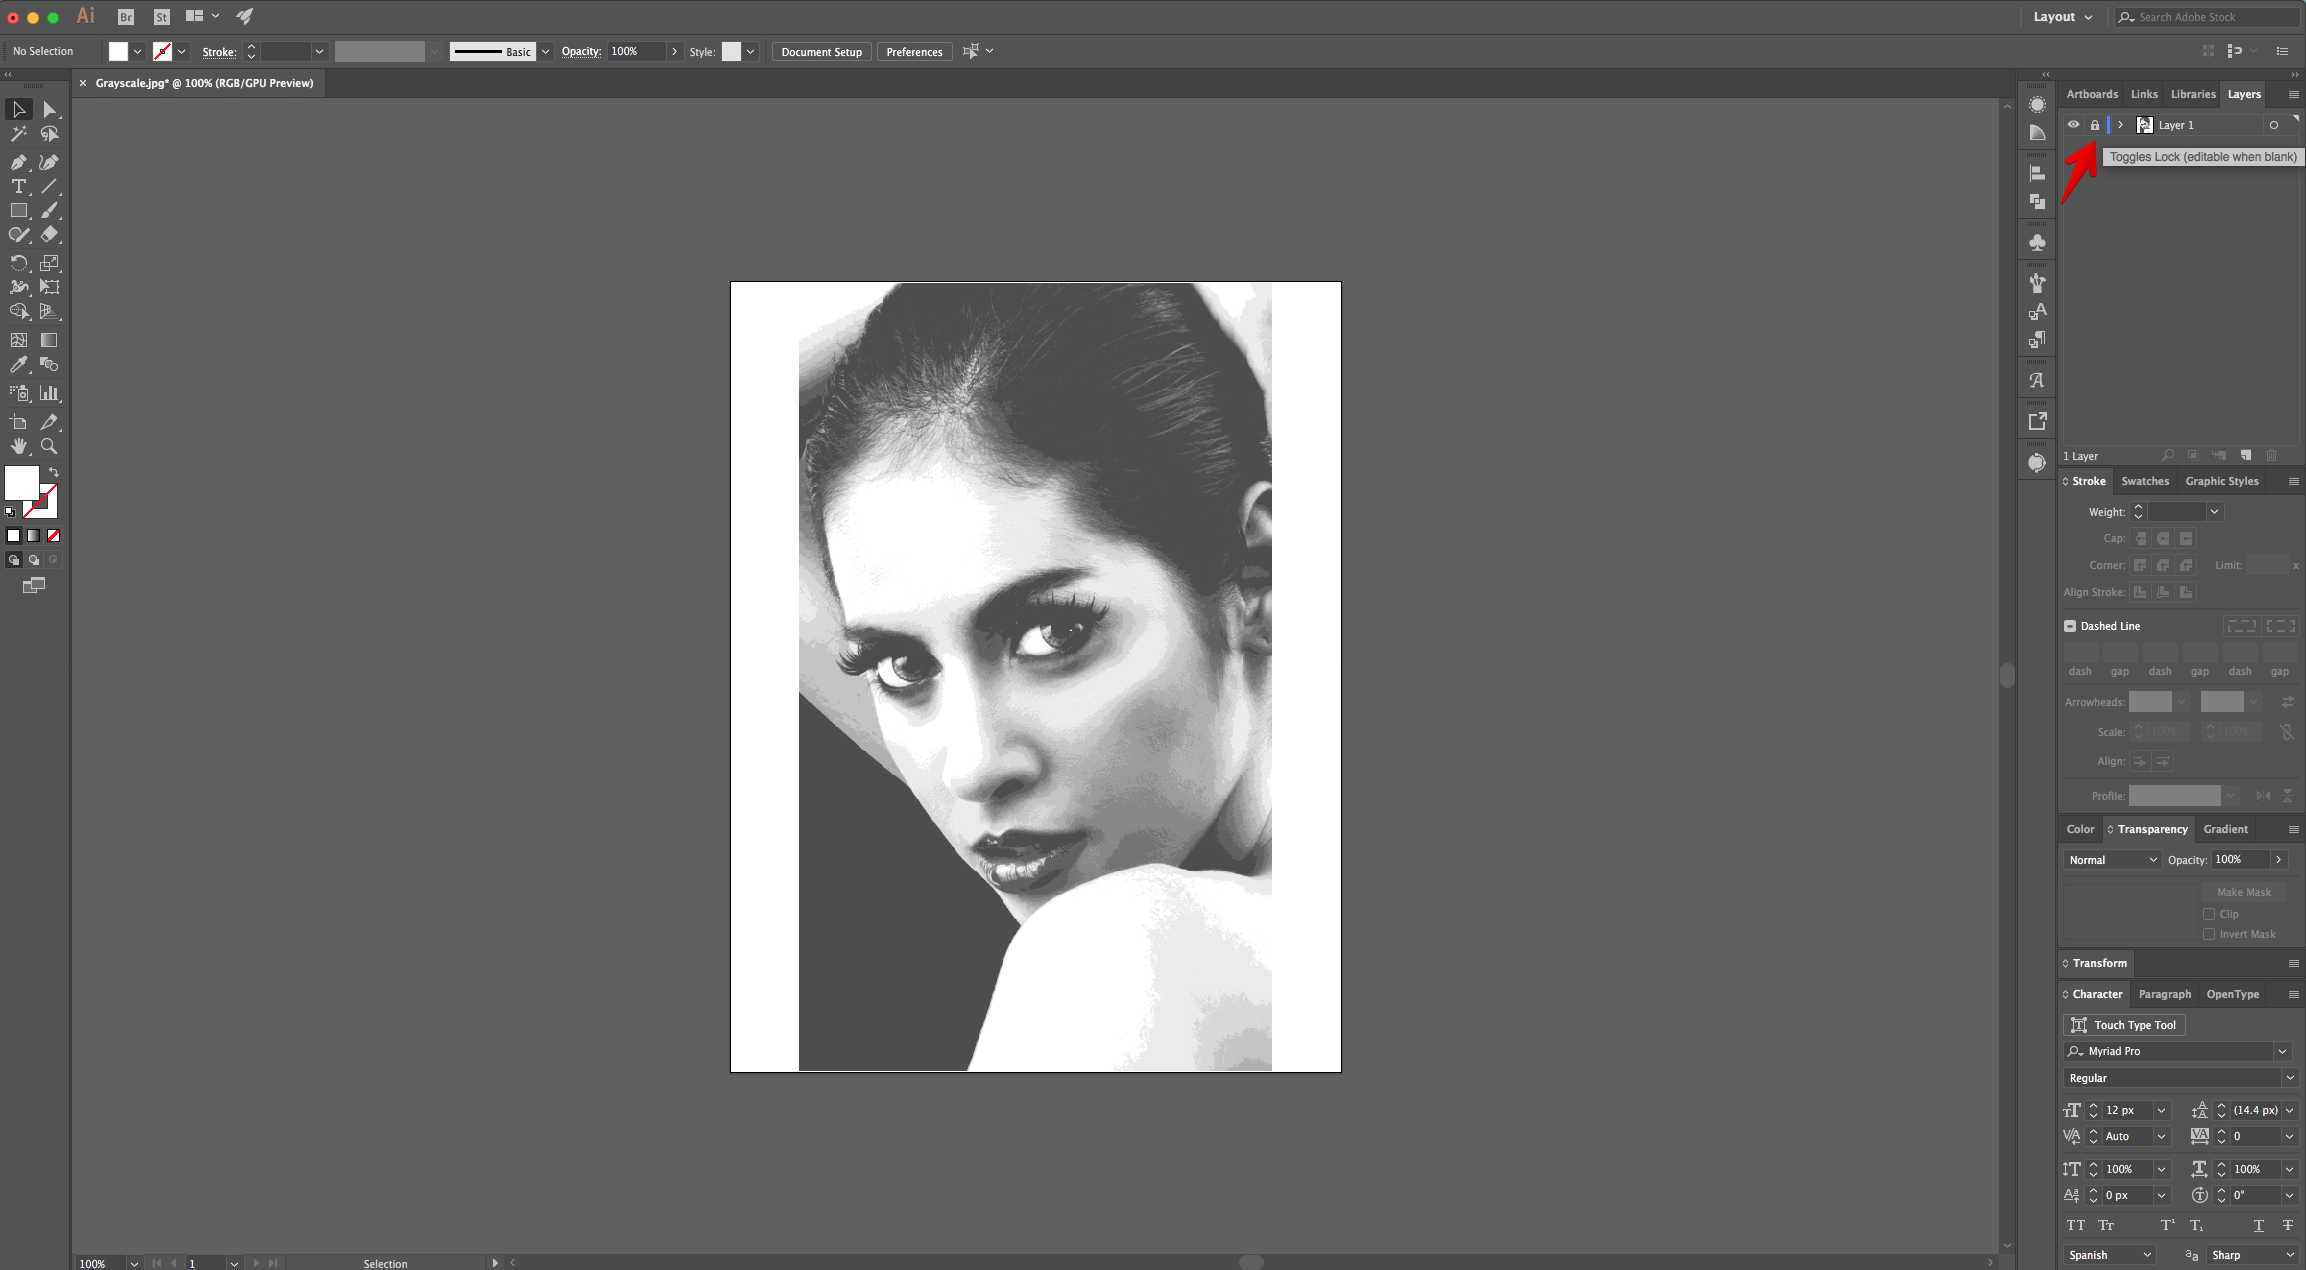
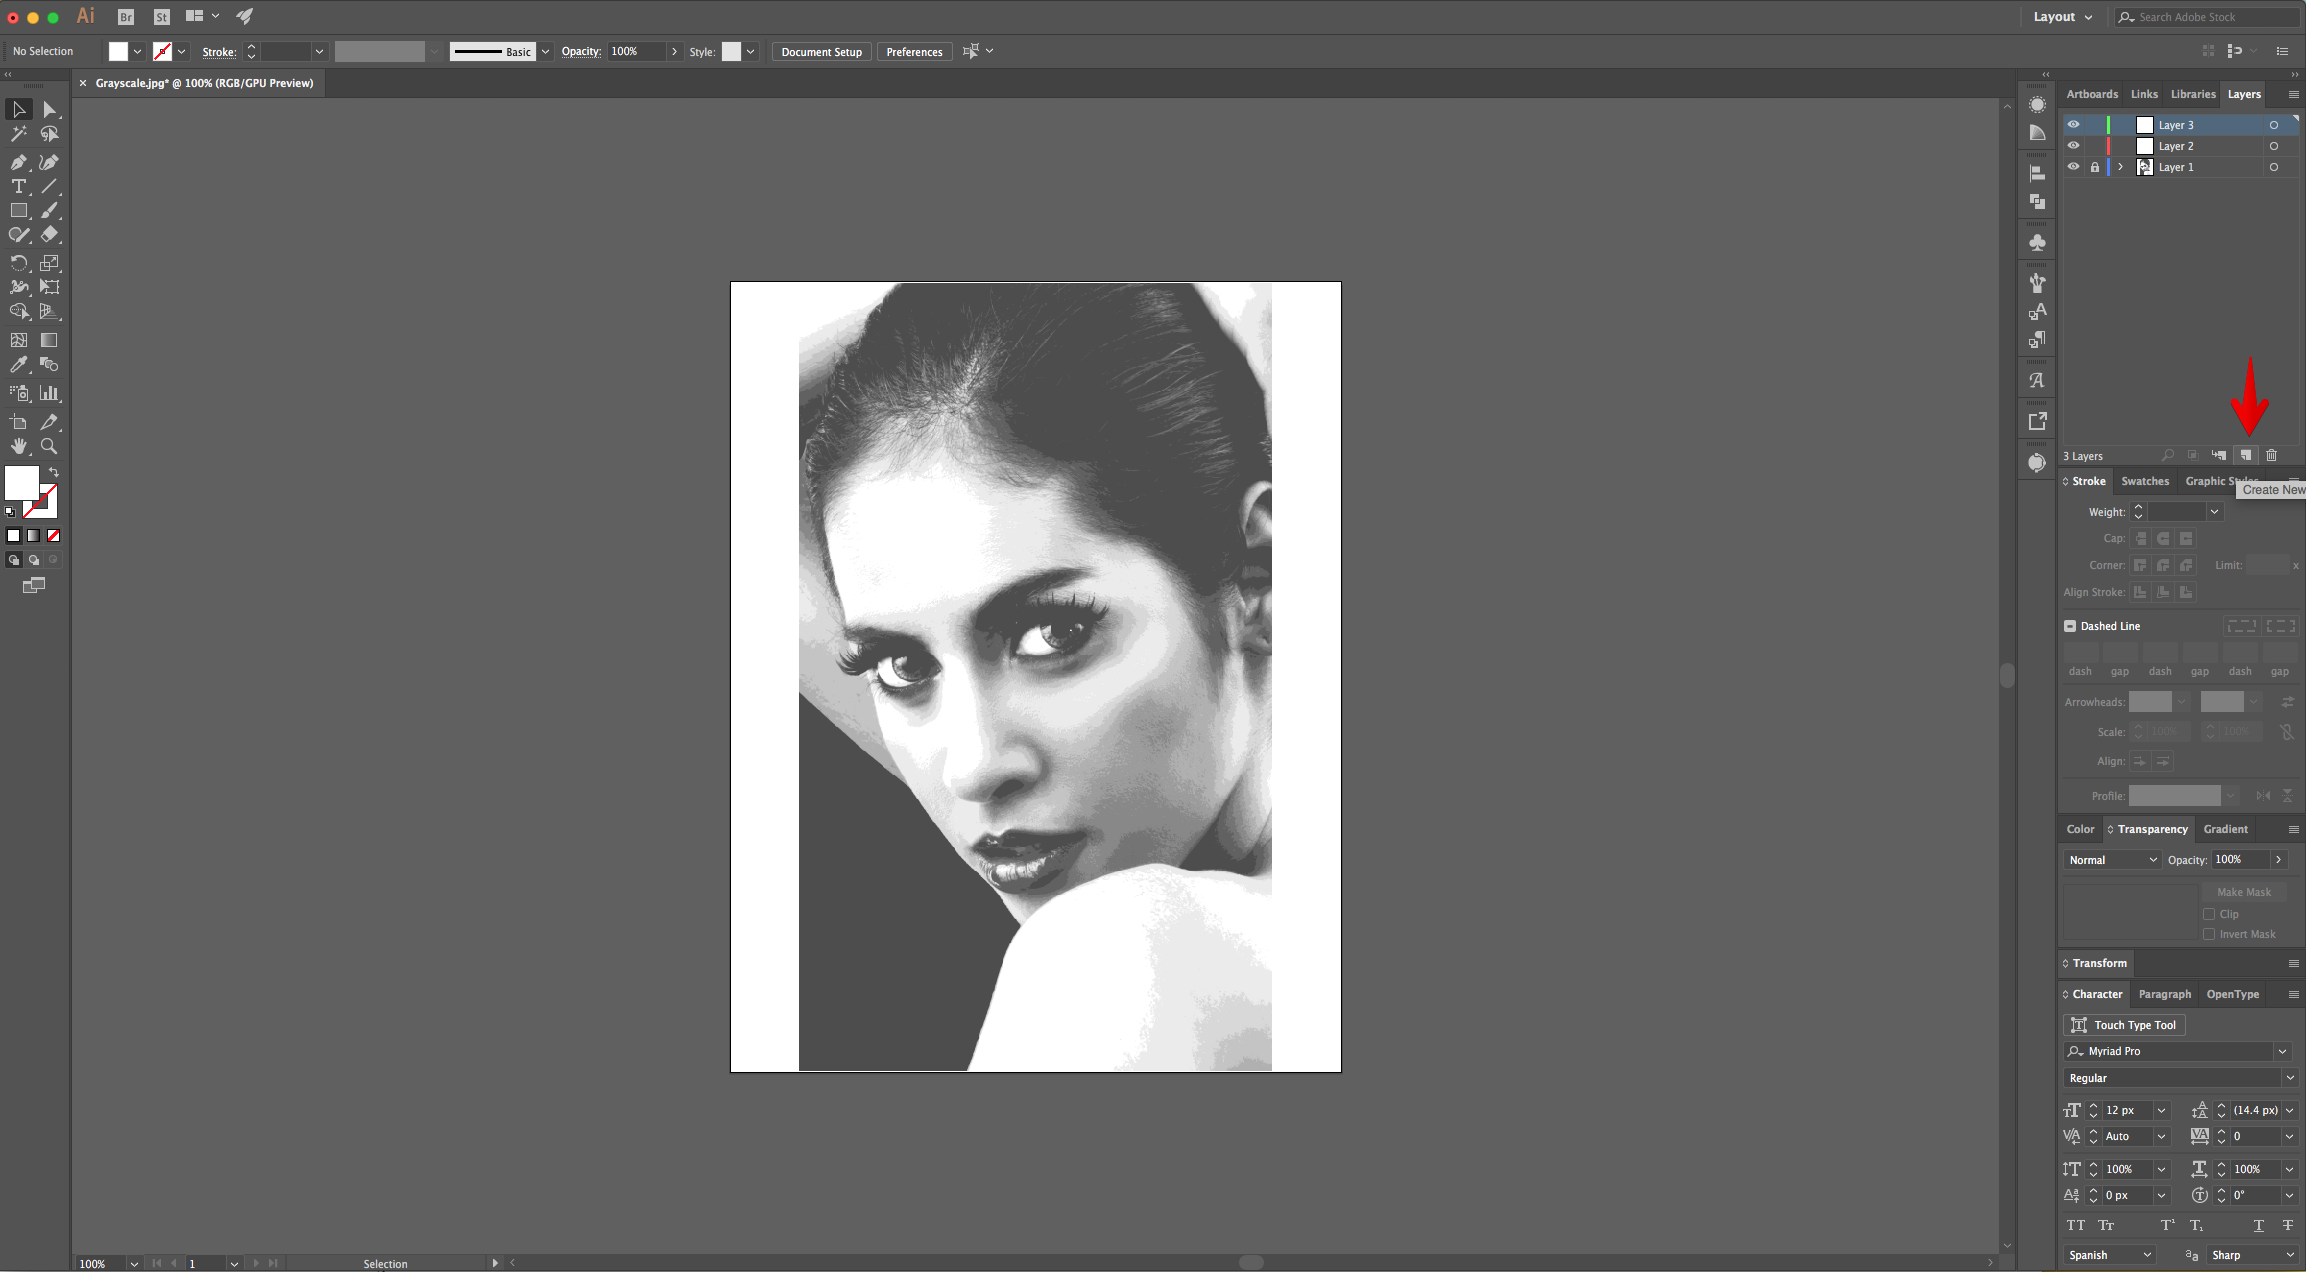
7 - Lock the Layer by clicking the small “Padlock” on the left side of its Thumbnail (Layers Panel) and then create two “New Layers”.
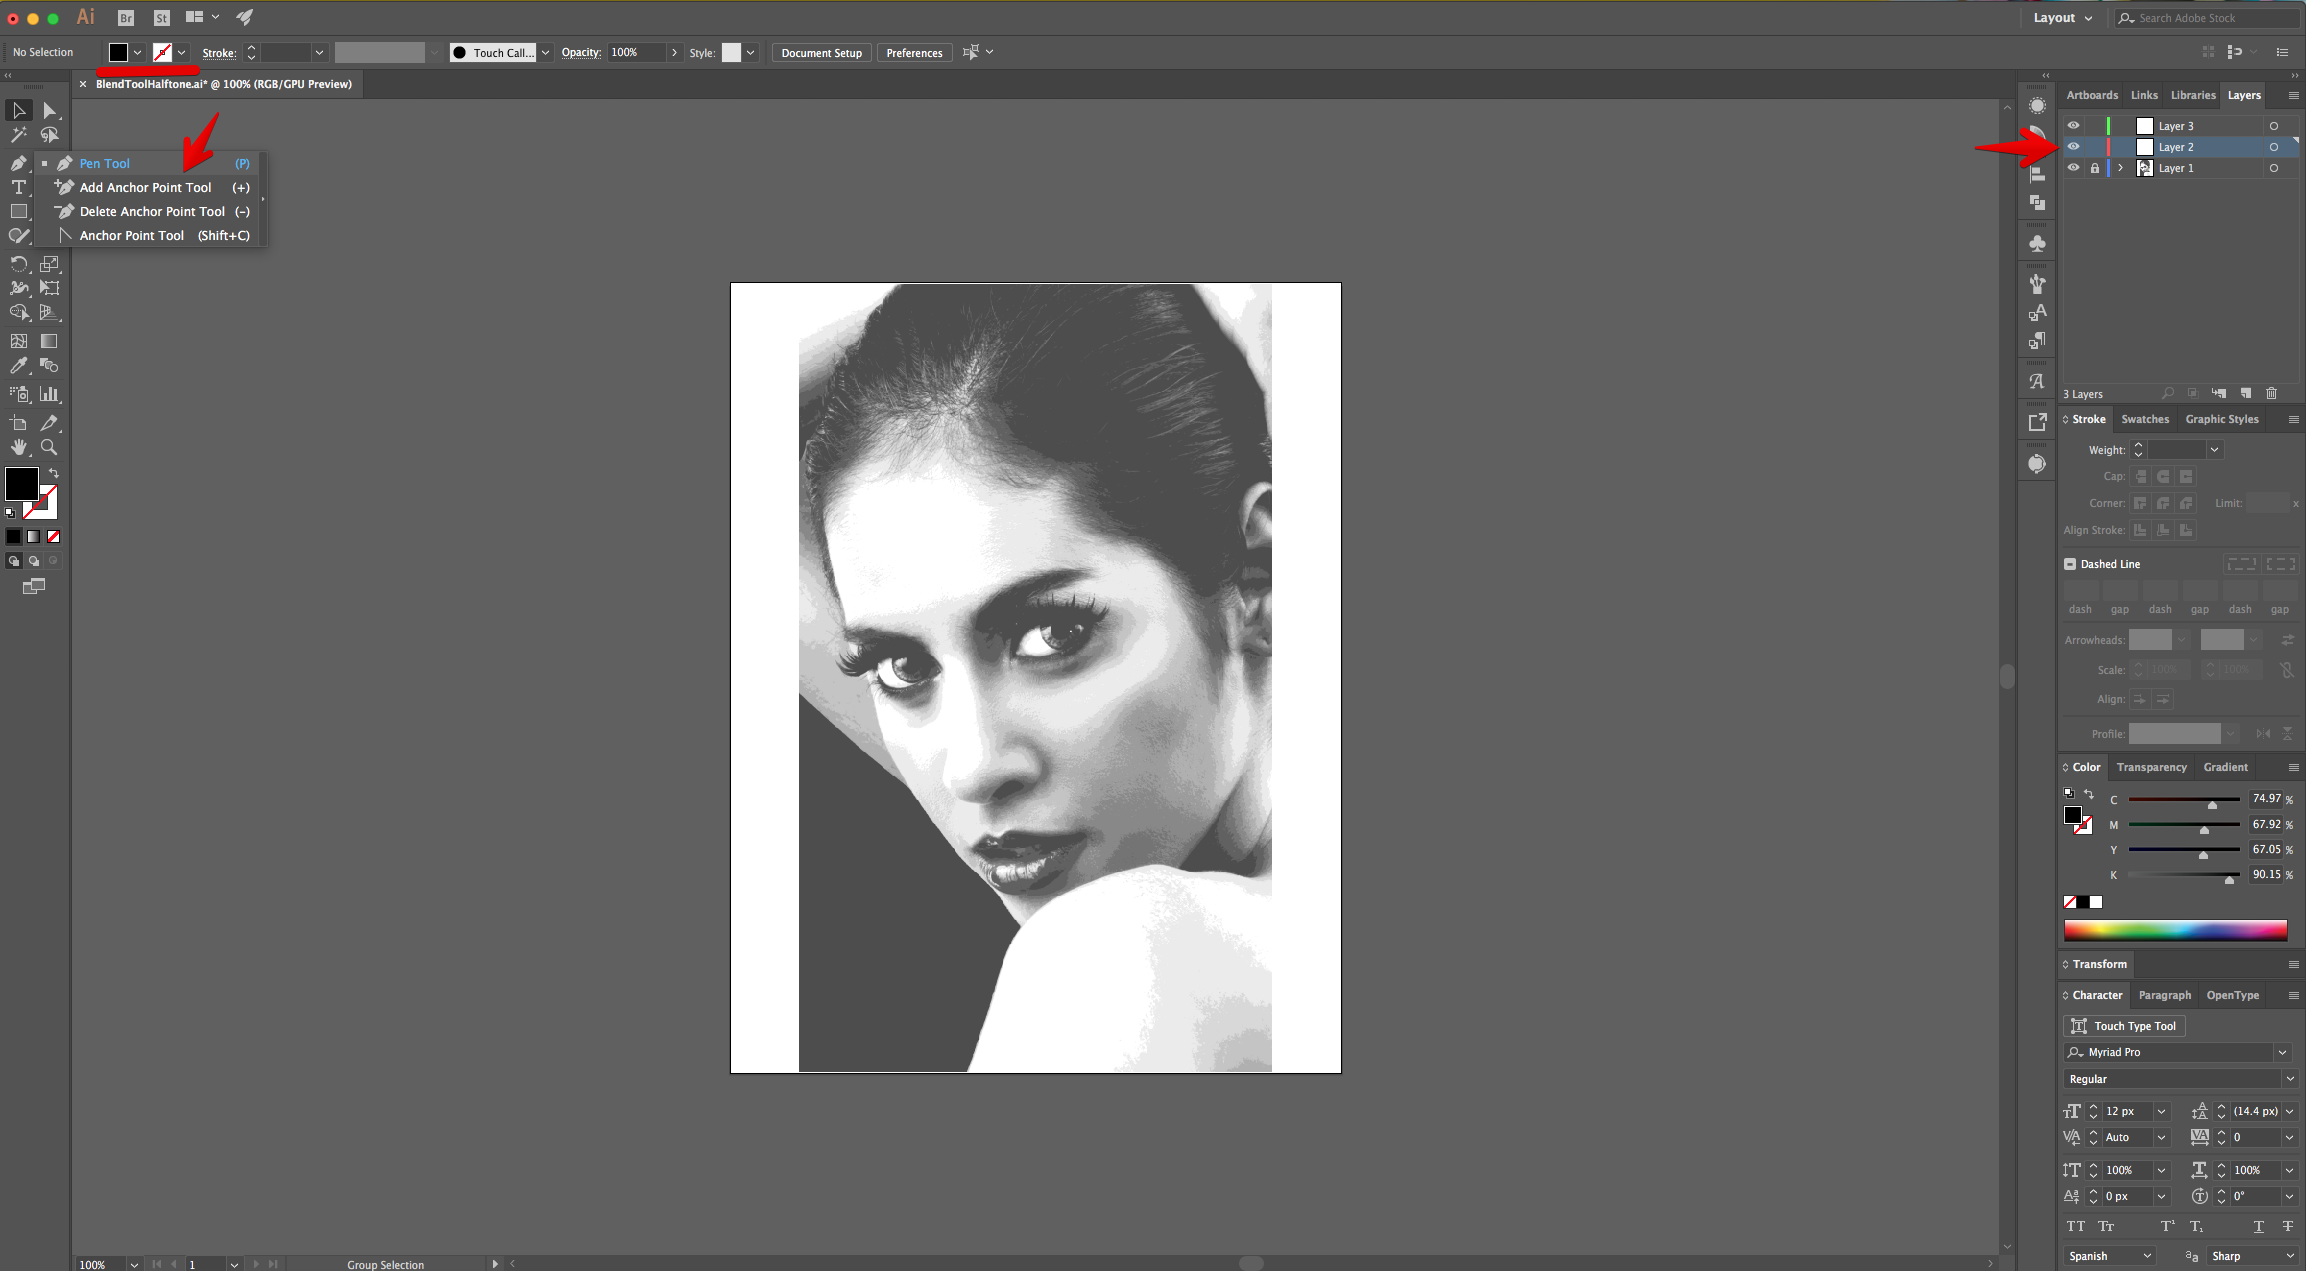
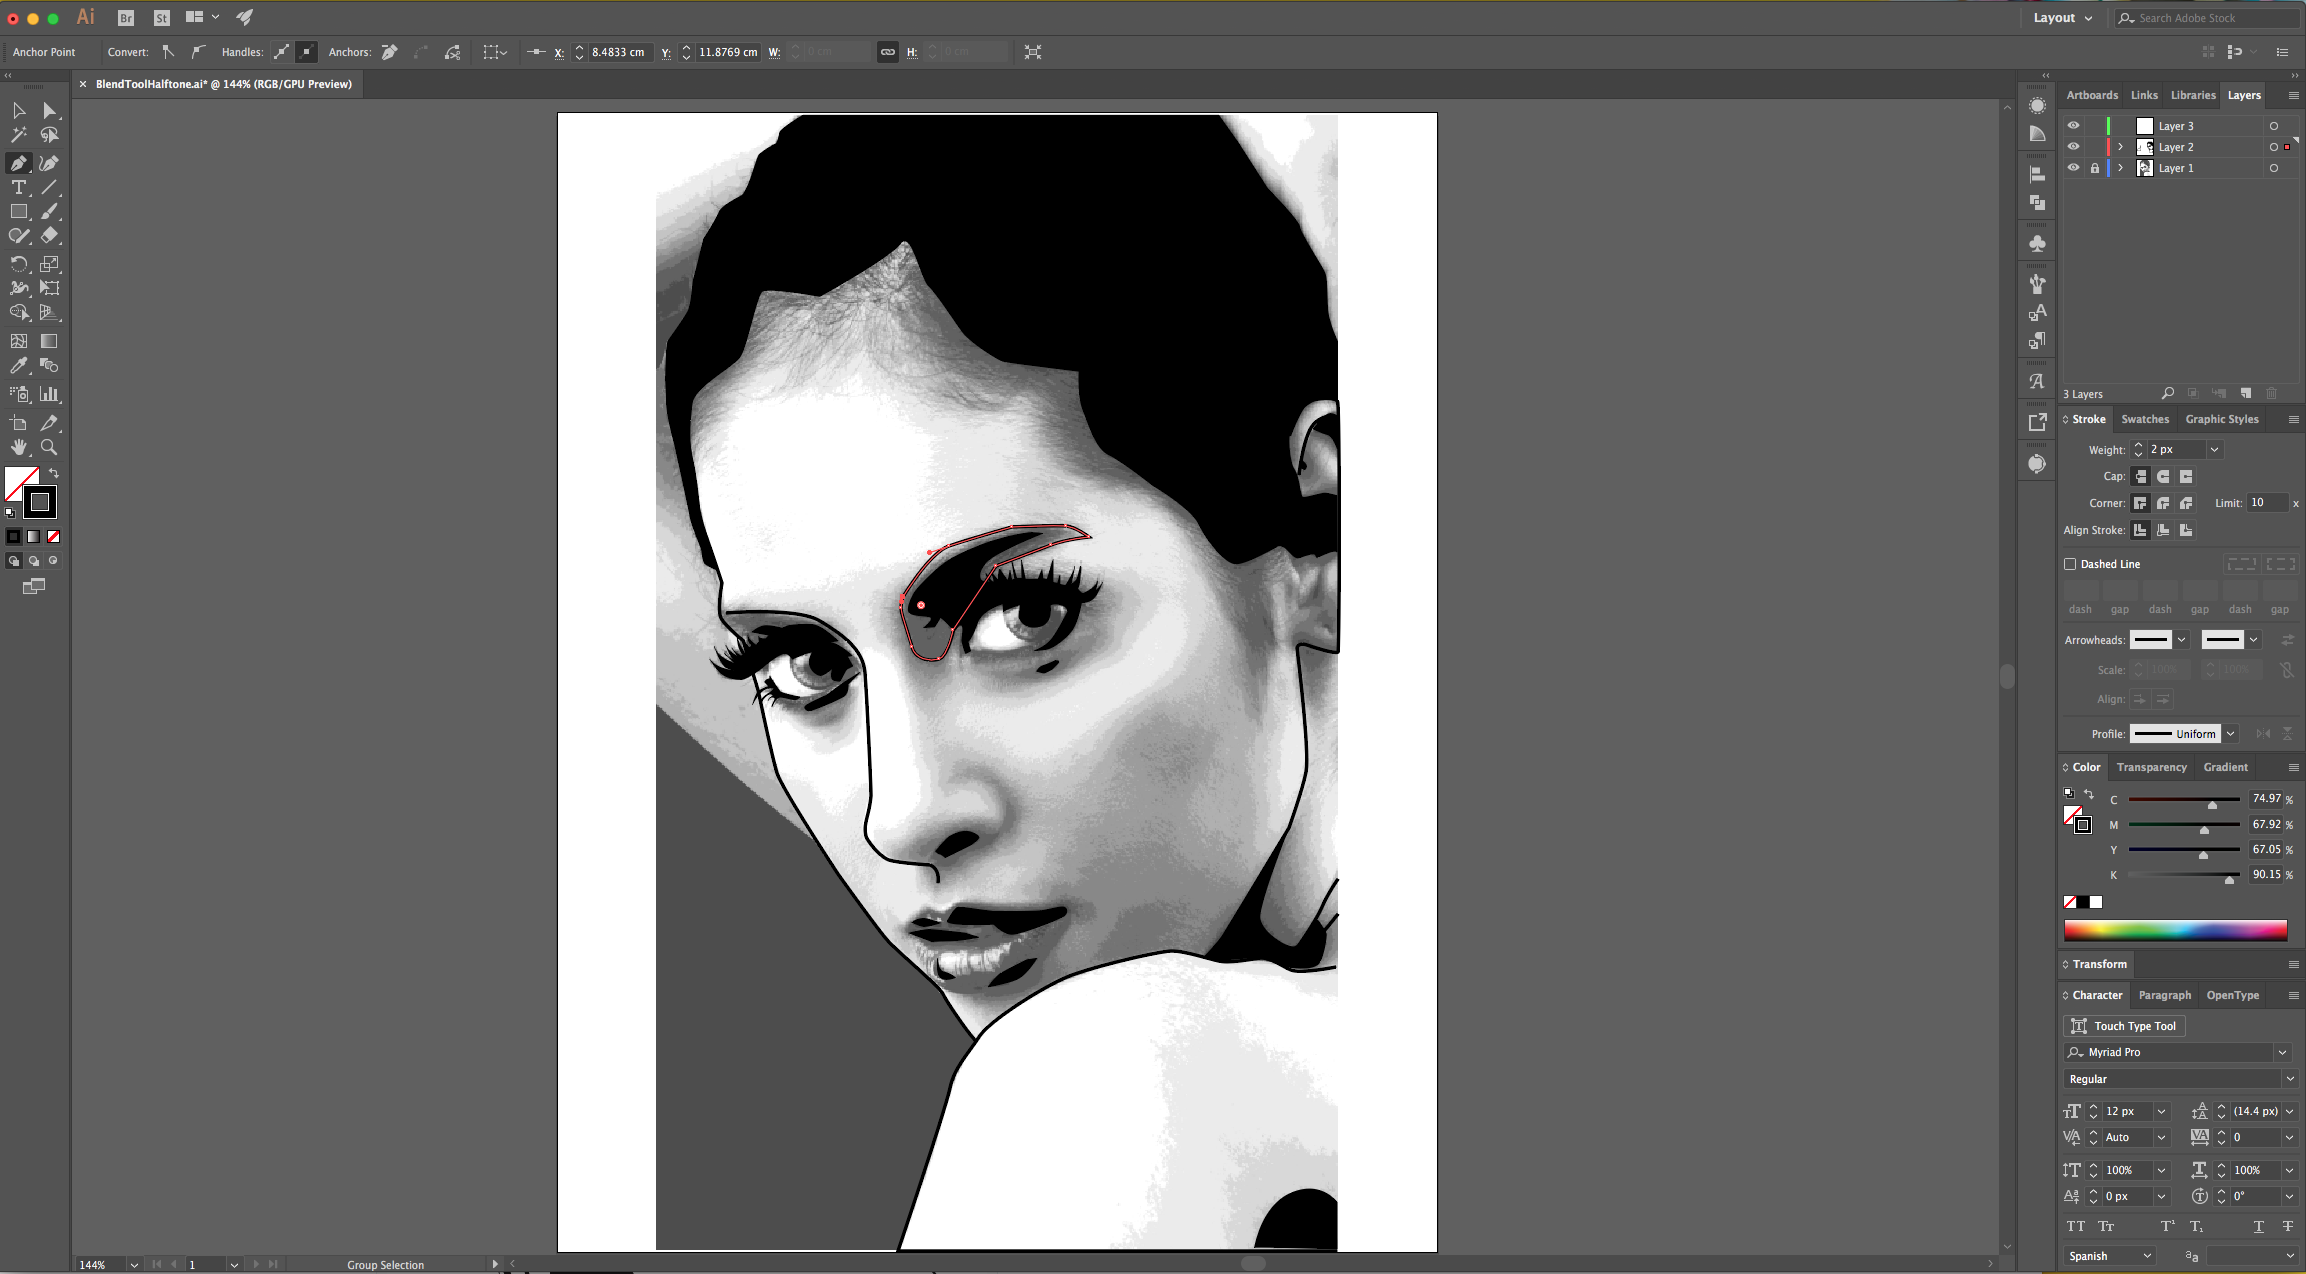
8 - Select the “Second Layer” to work on and choose the “Pen Tool” (P) with a Black “Fill” and “No Stroke”.
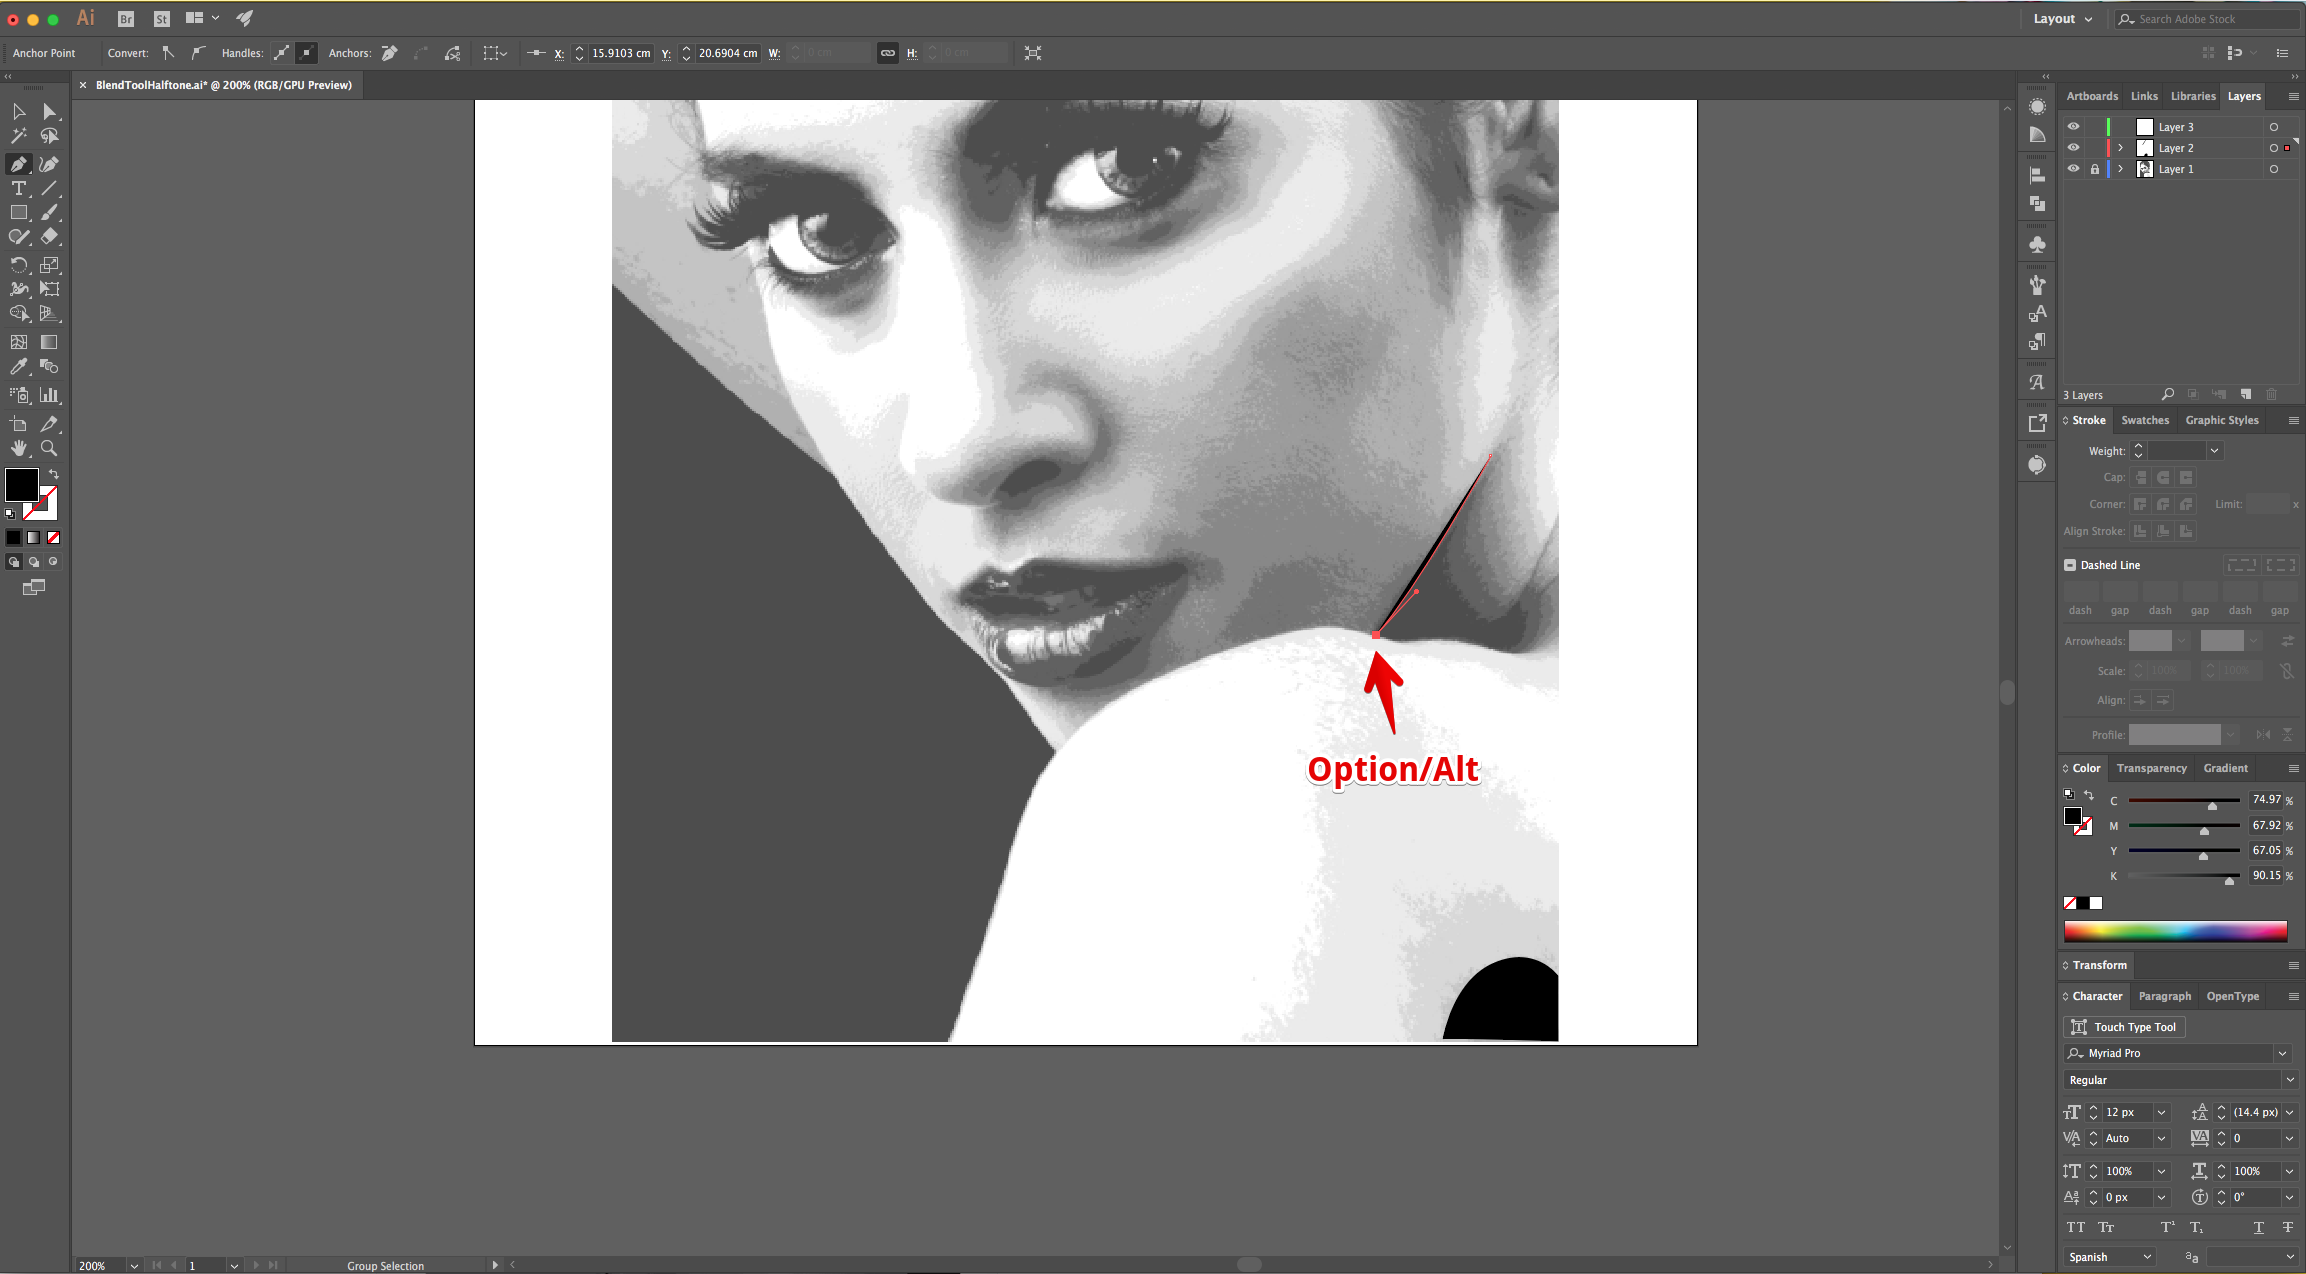
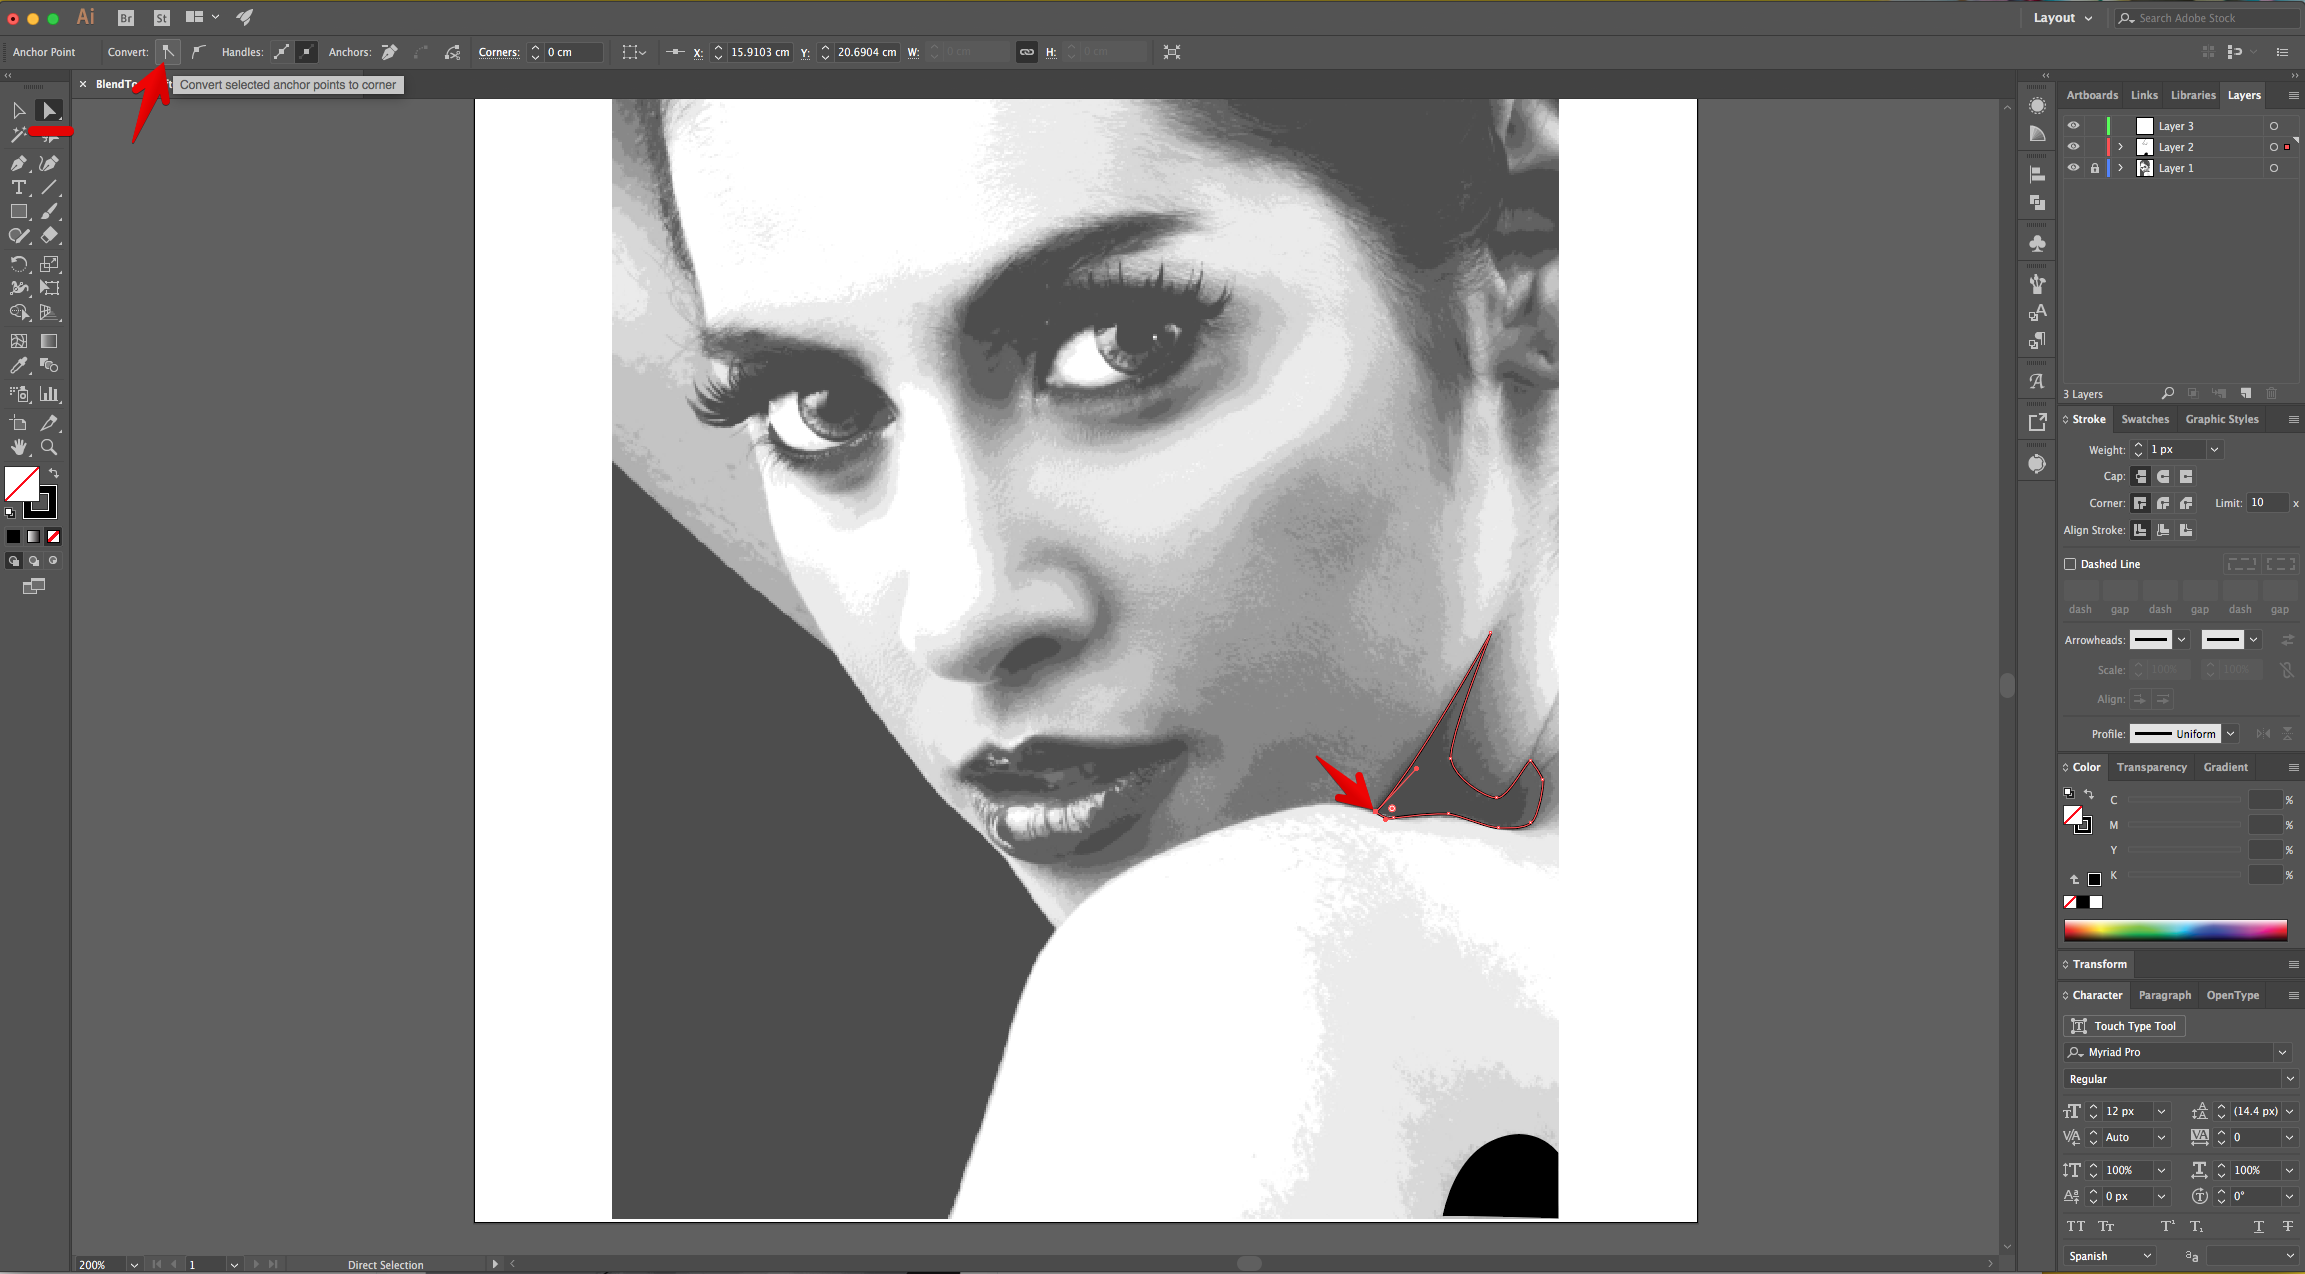
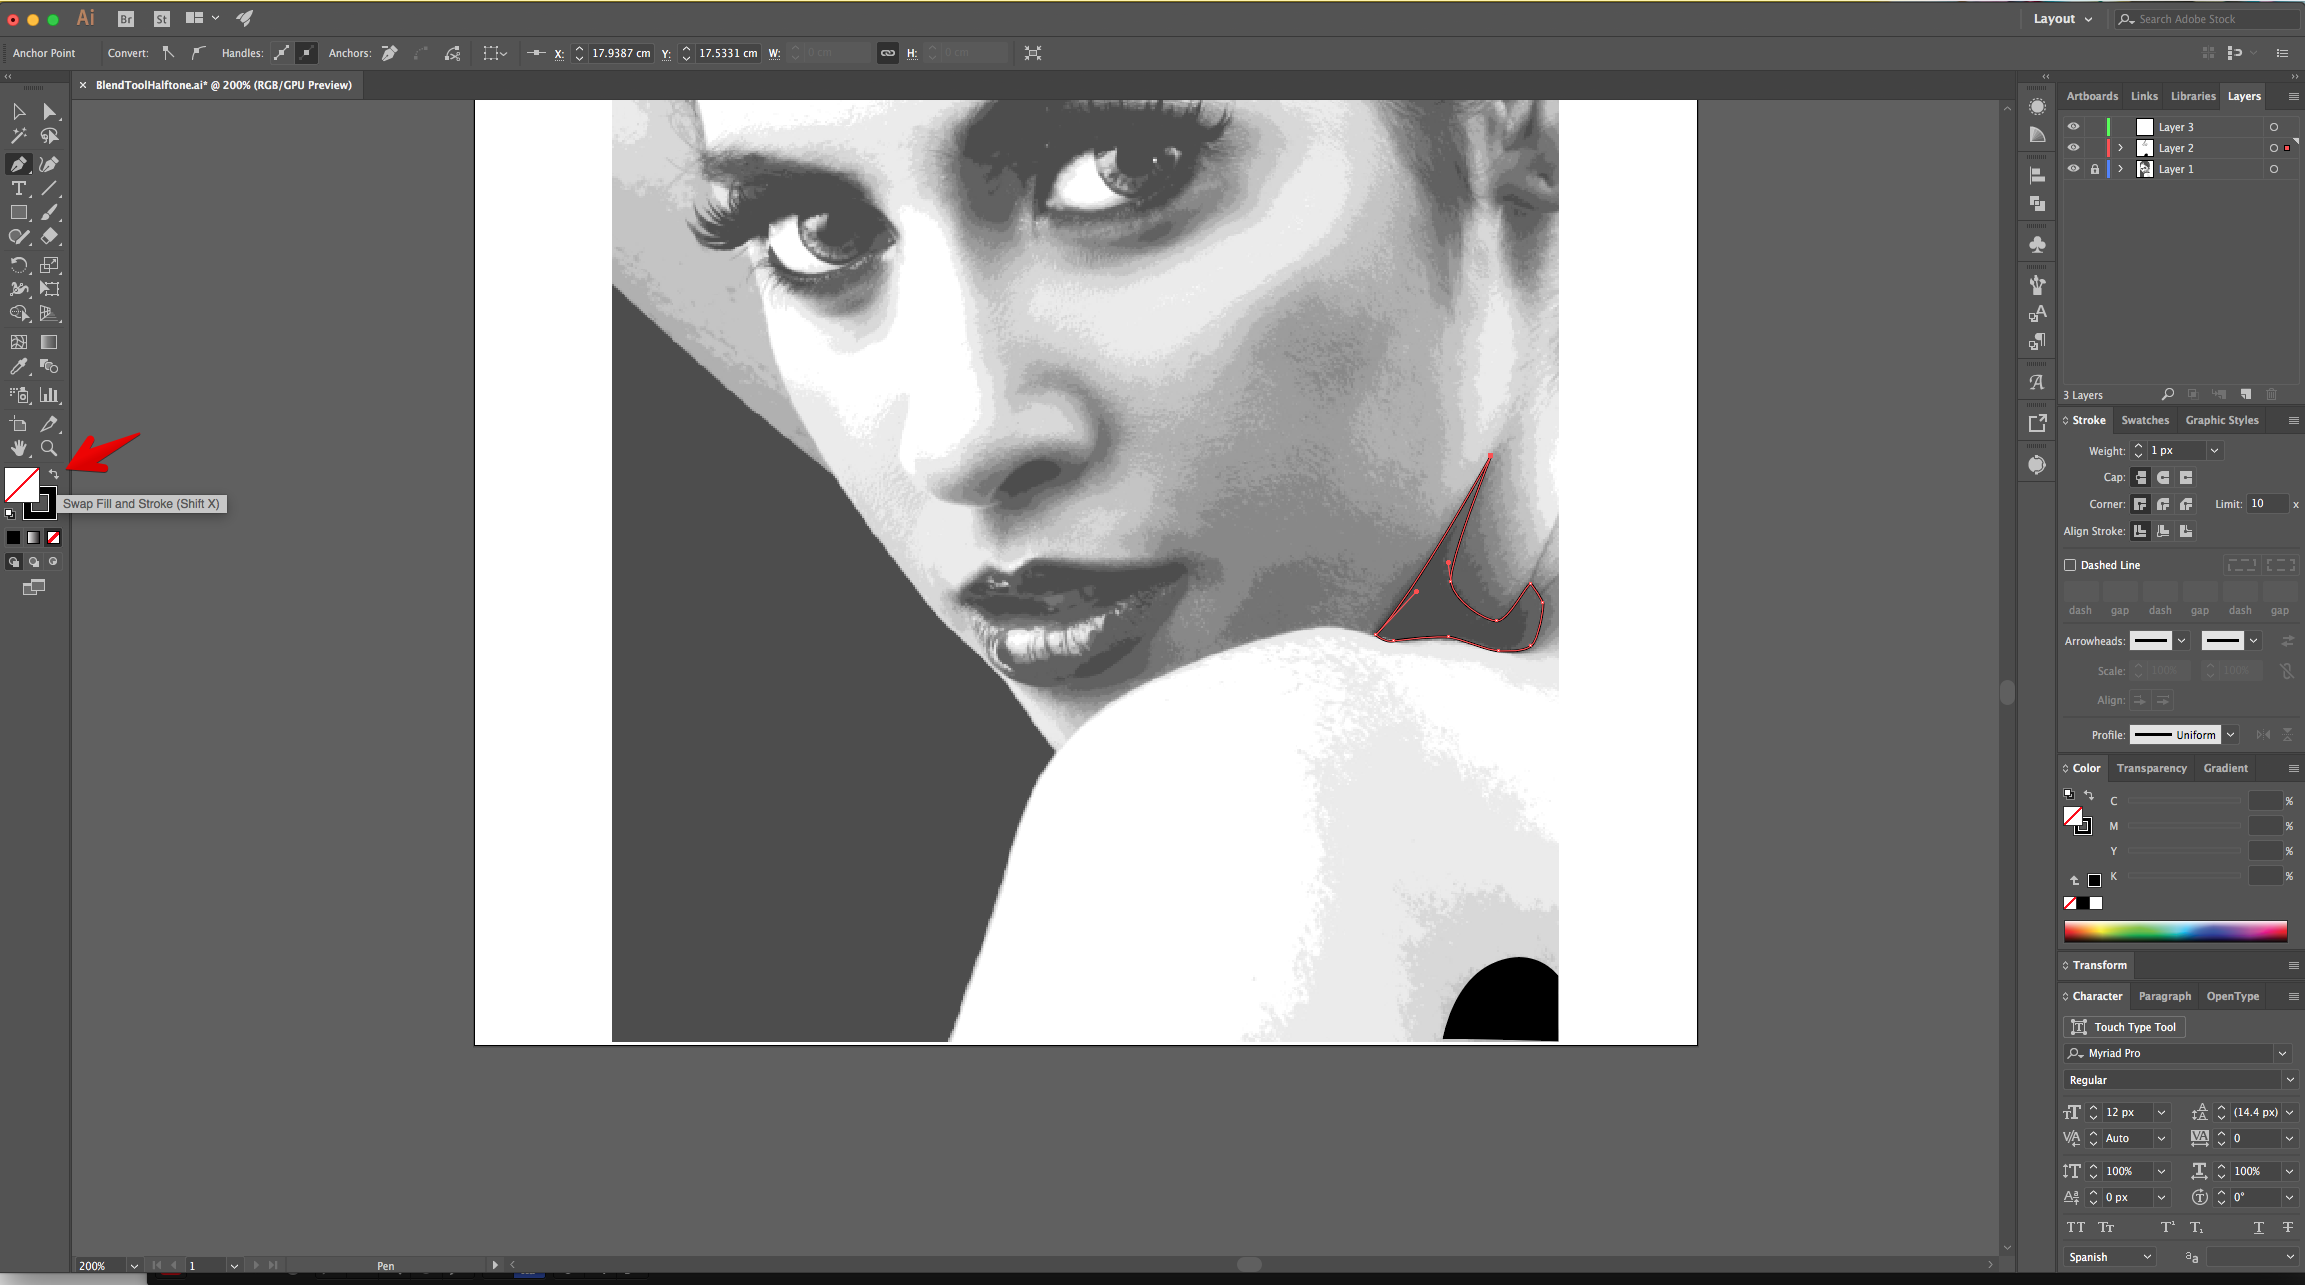
9 - Start creating Shapes outlining the “Shadows” of the subject. Click again on the “Anchor Point” after a curved path to get a straight line (or use the “Covert Selected Anchor Point” options in the Top Menu. You may need to Reverse Fill and Stroke colors to get a better view of your image.
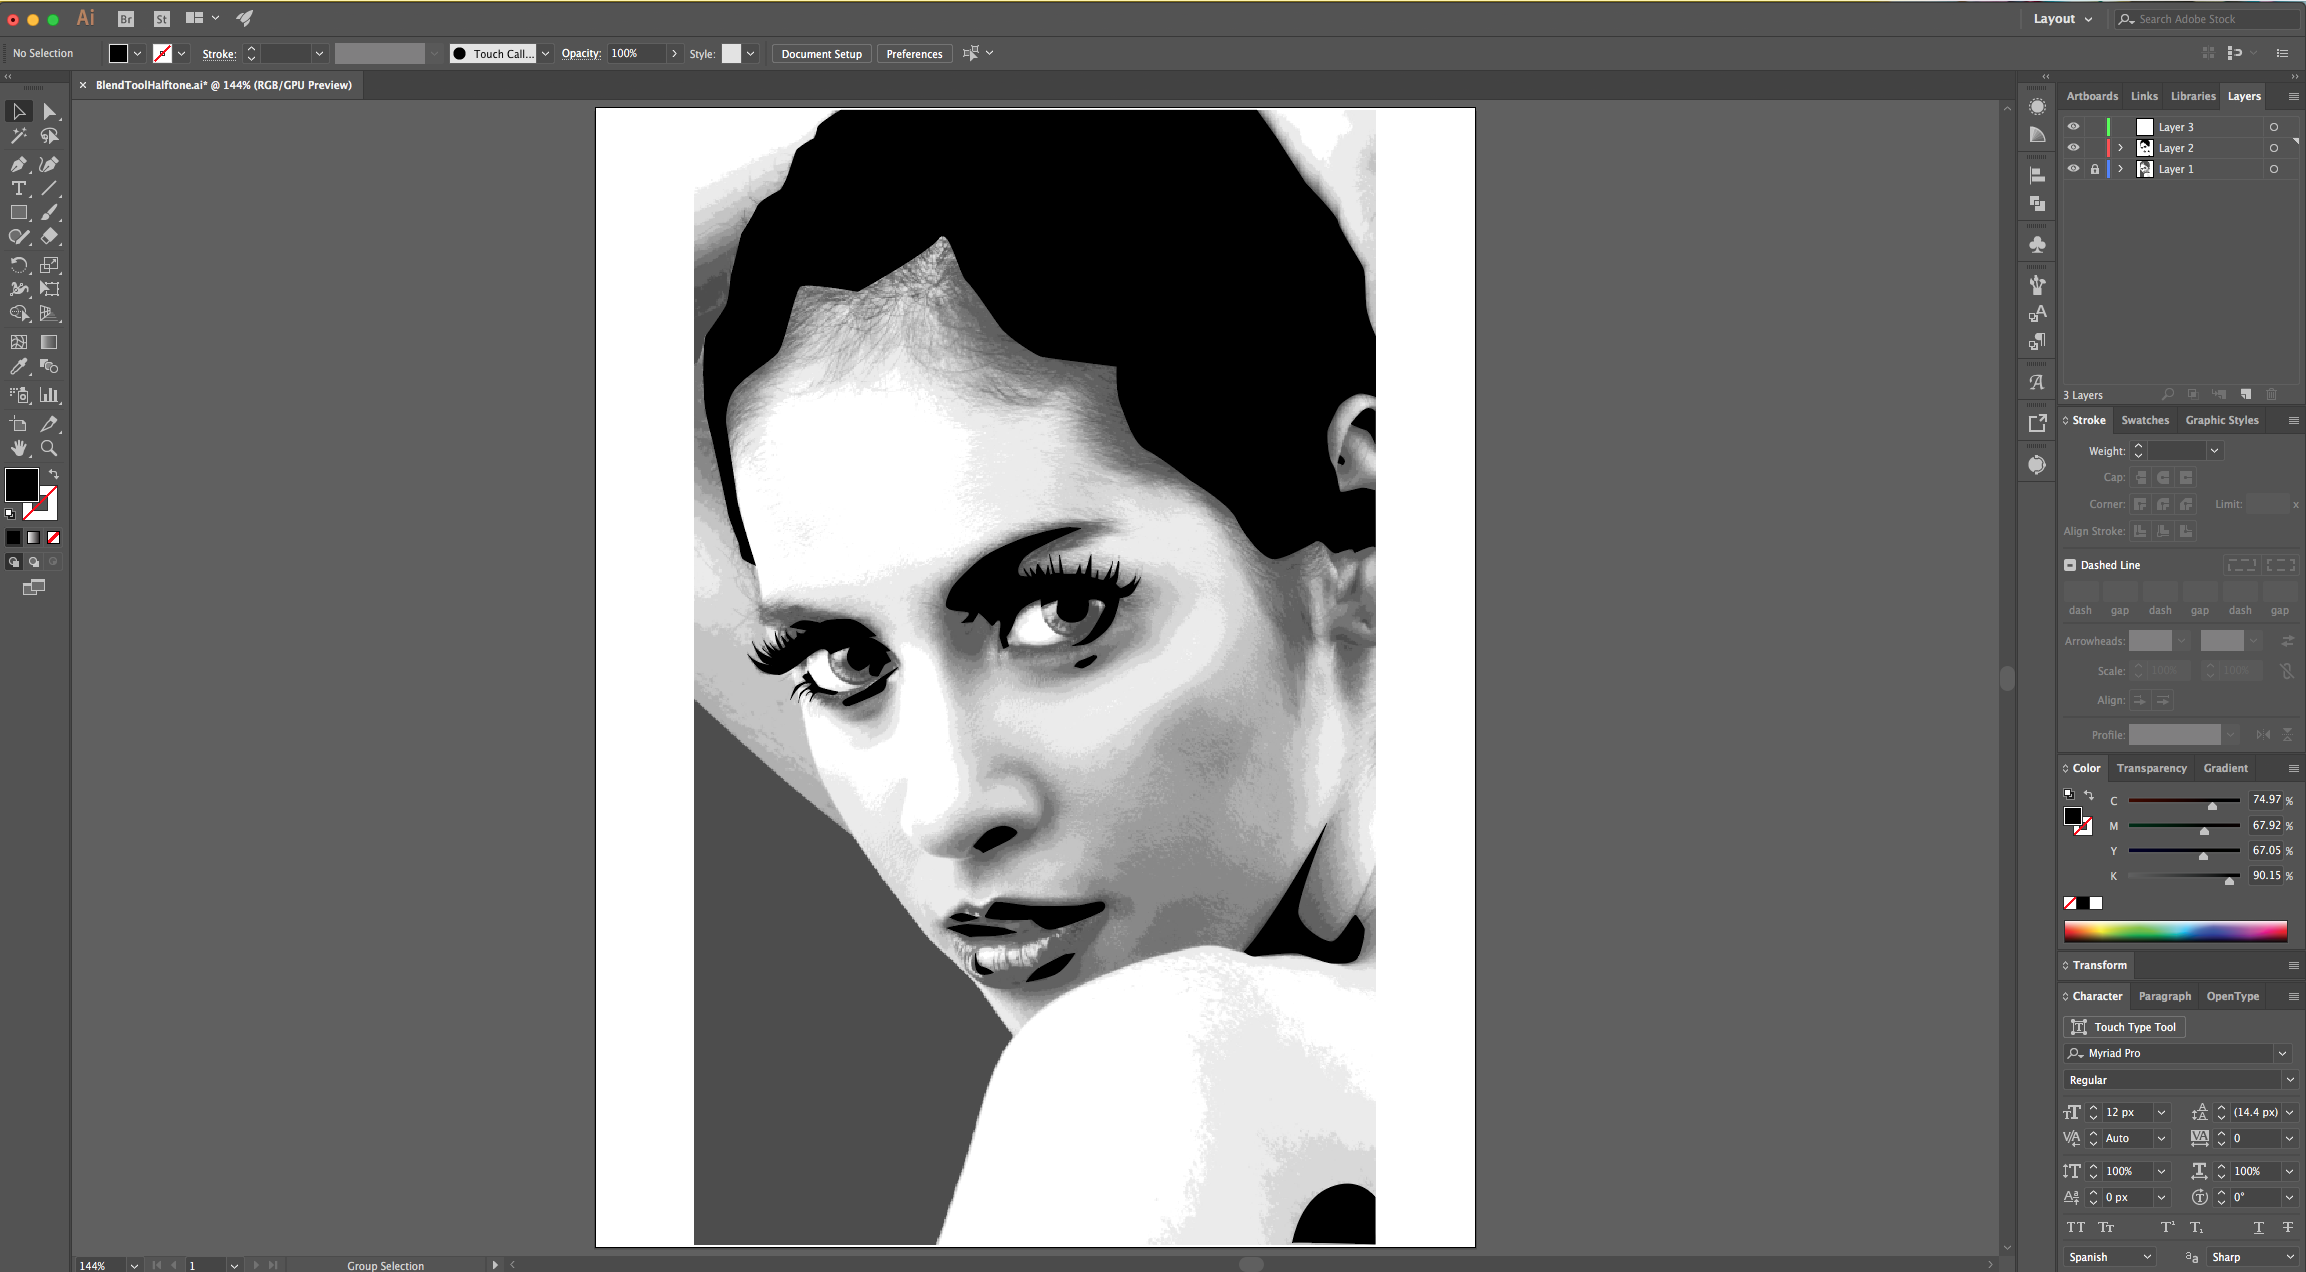
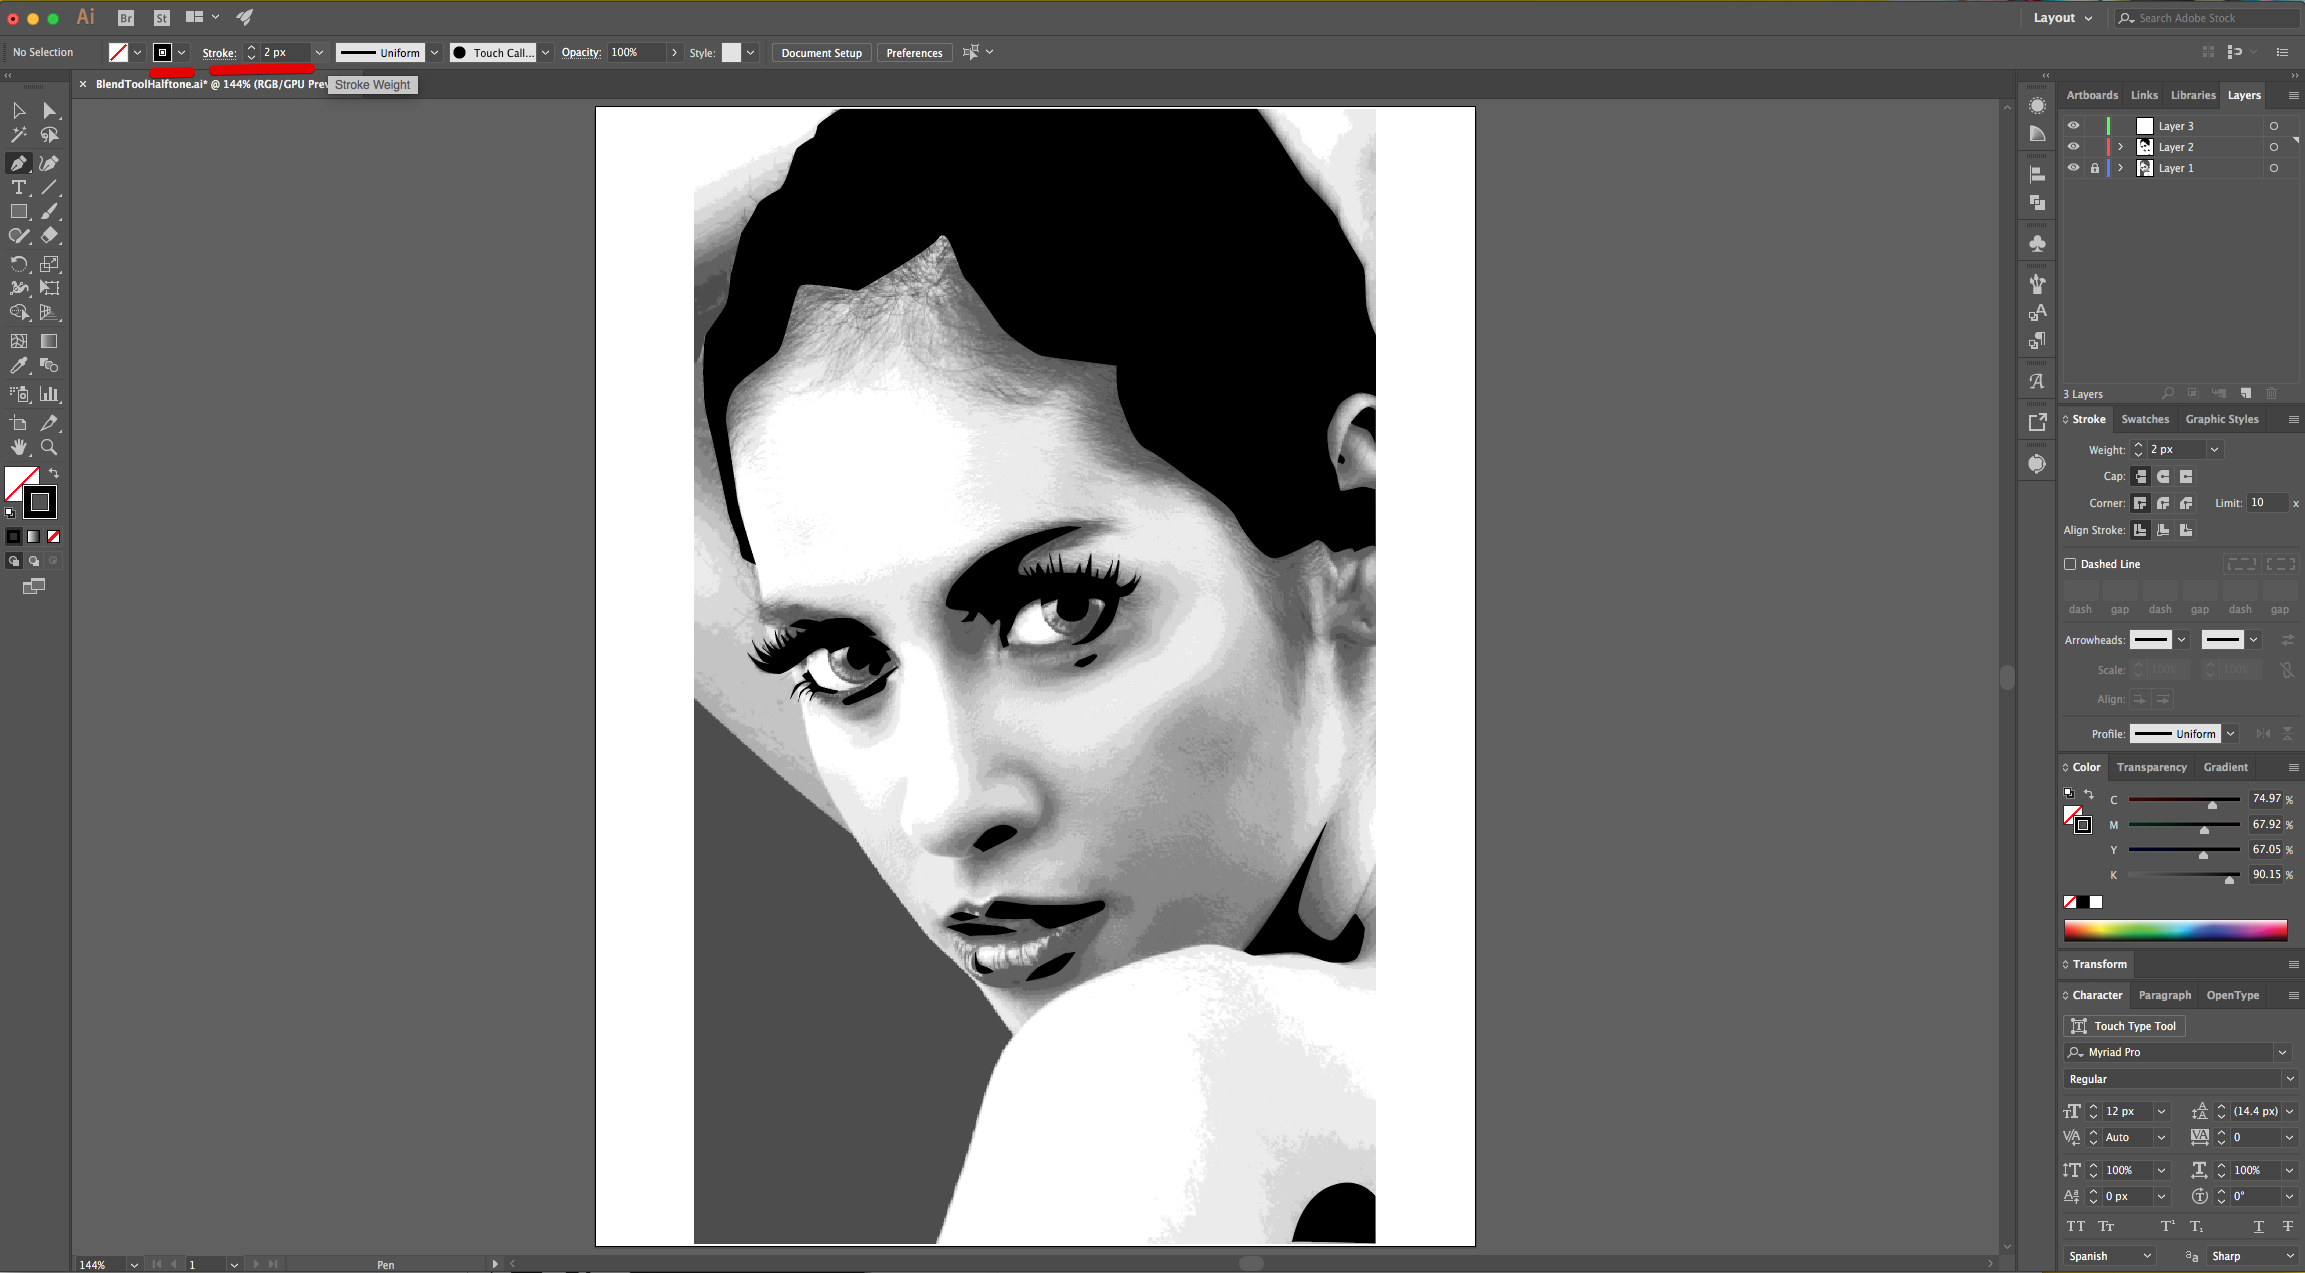
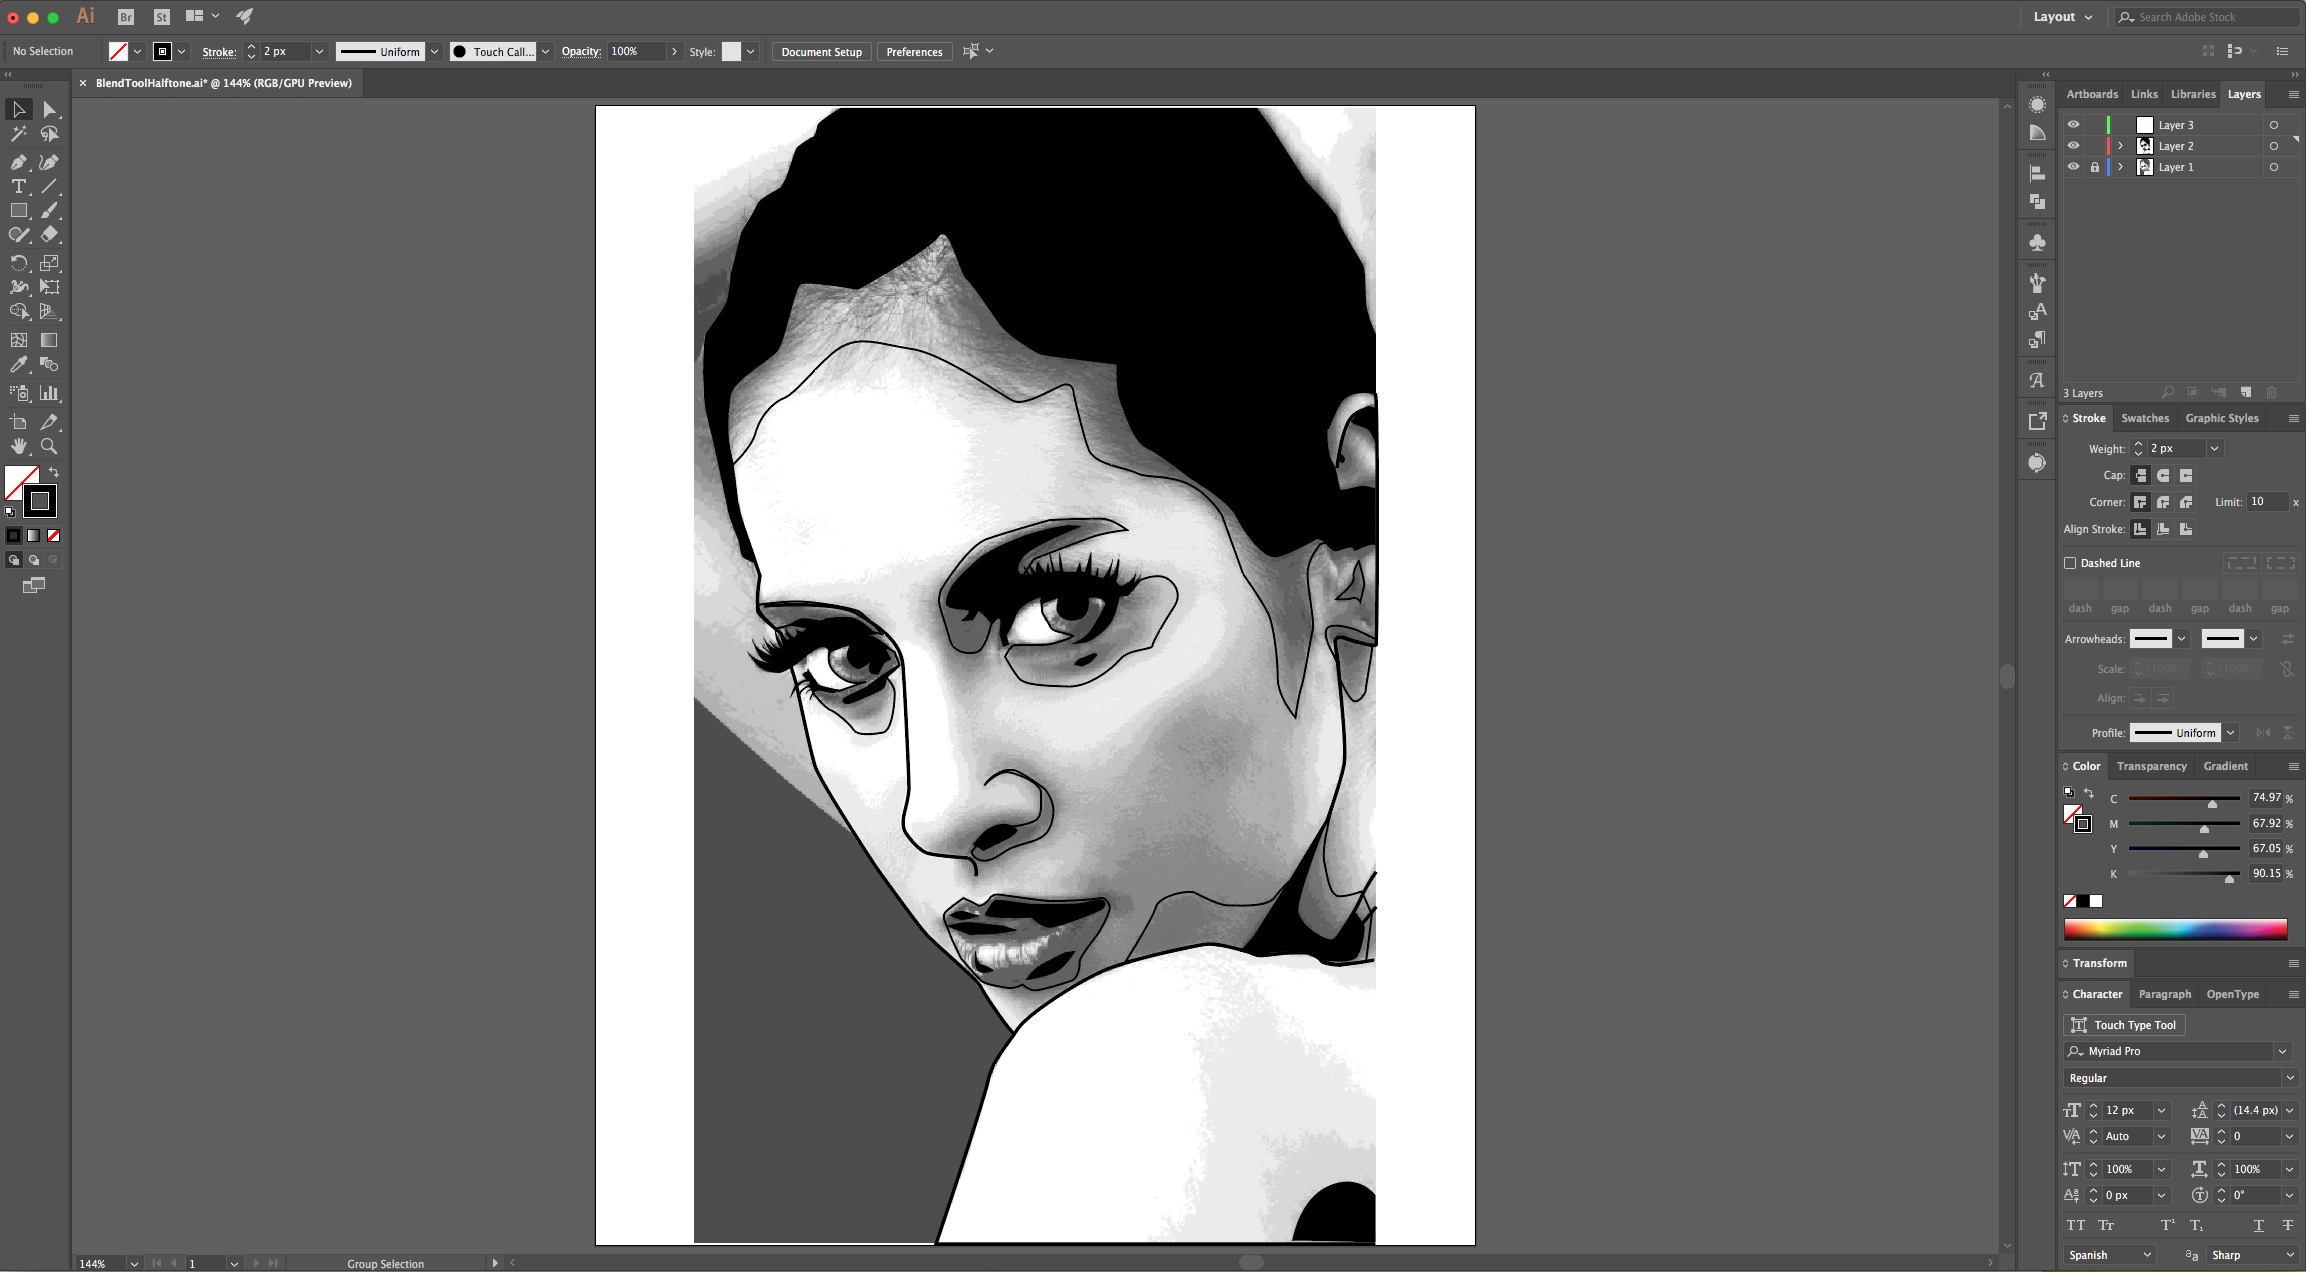
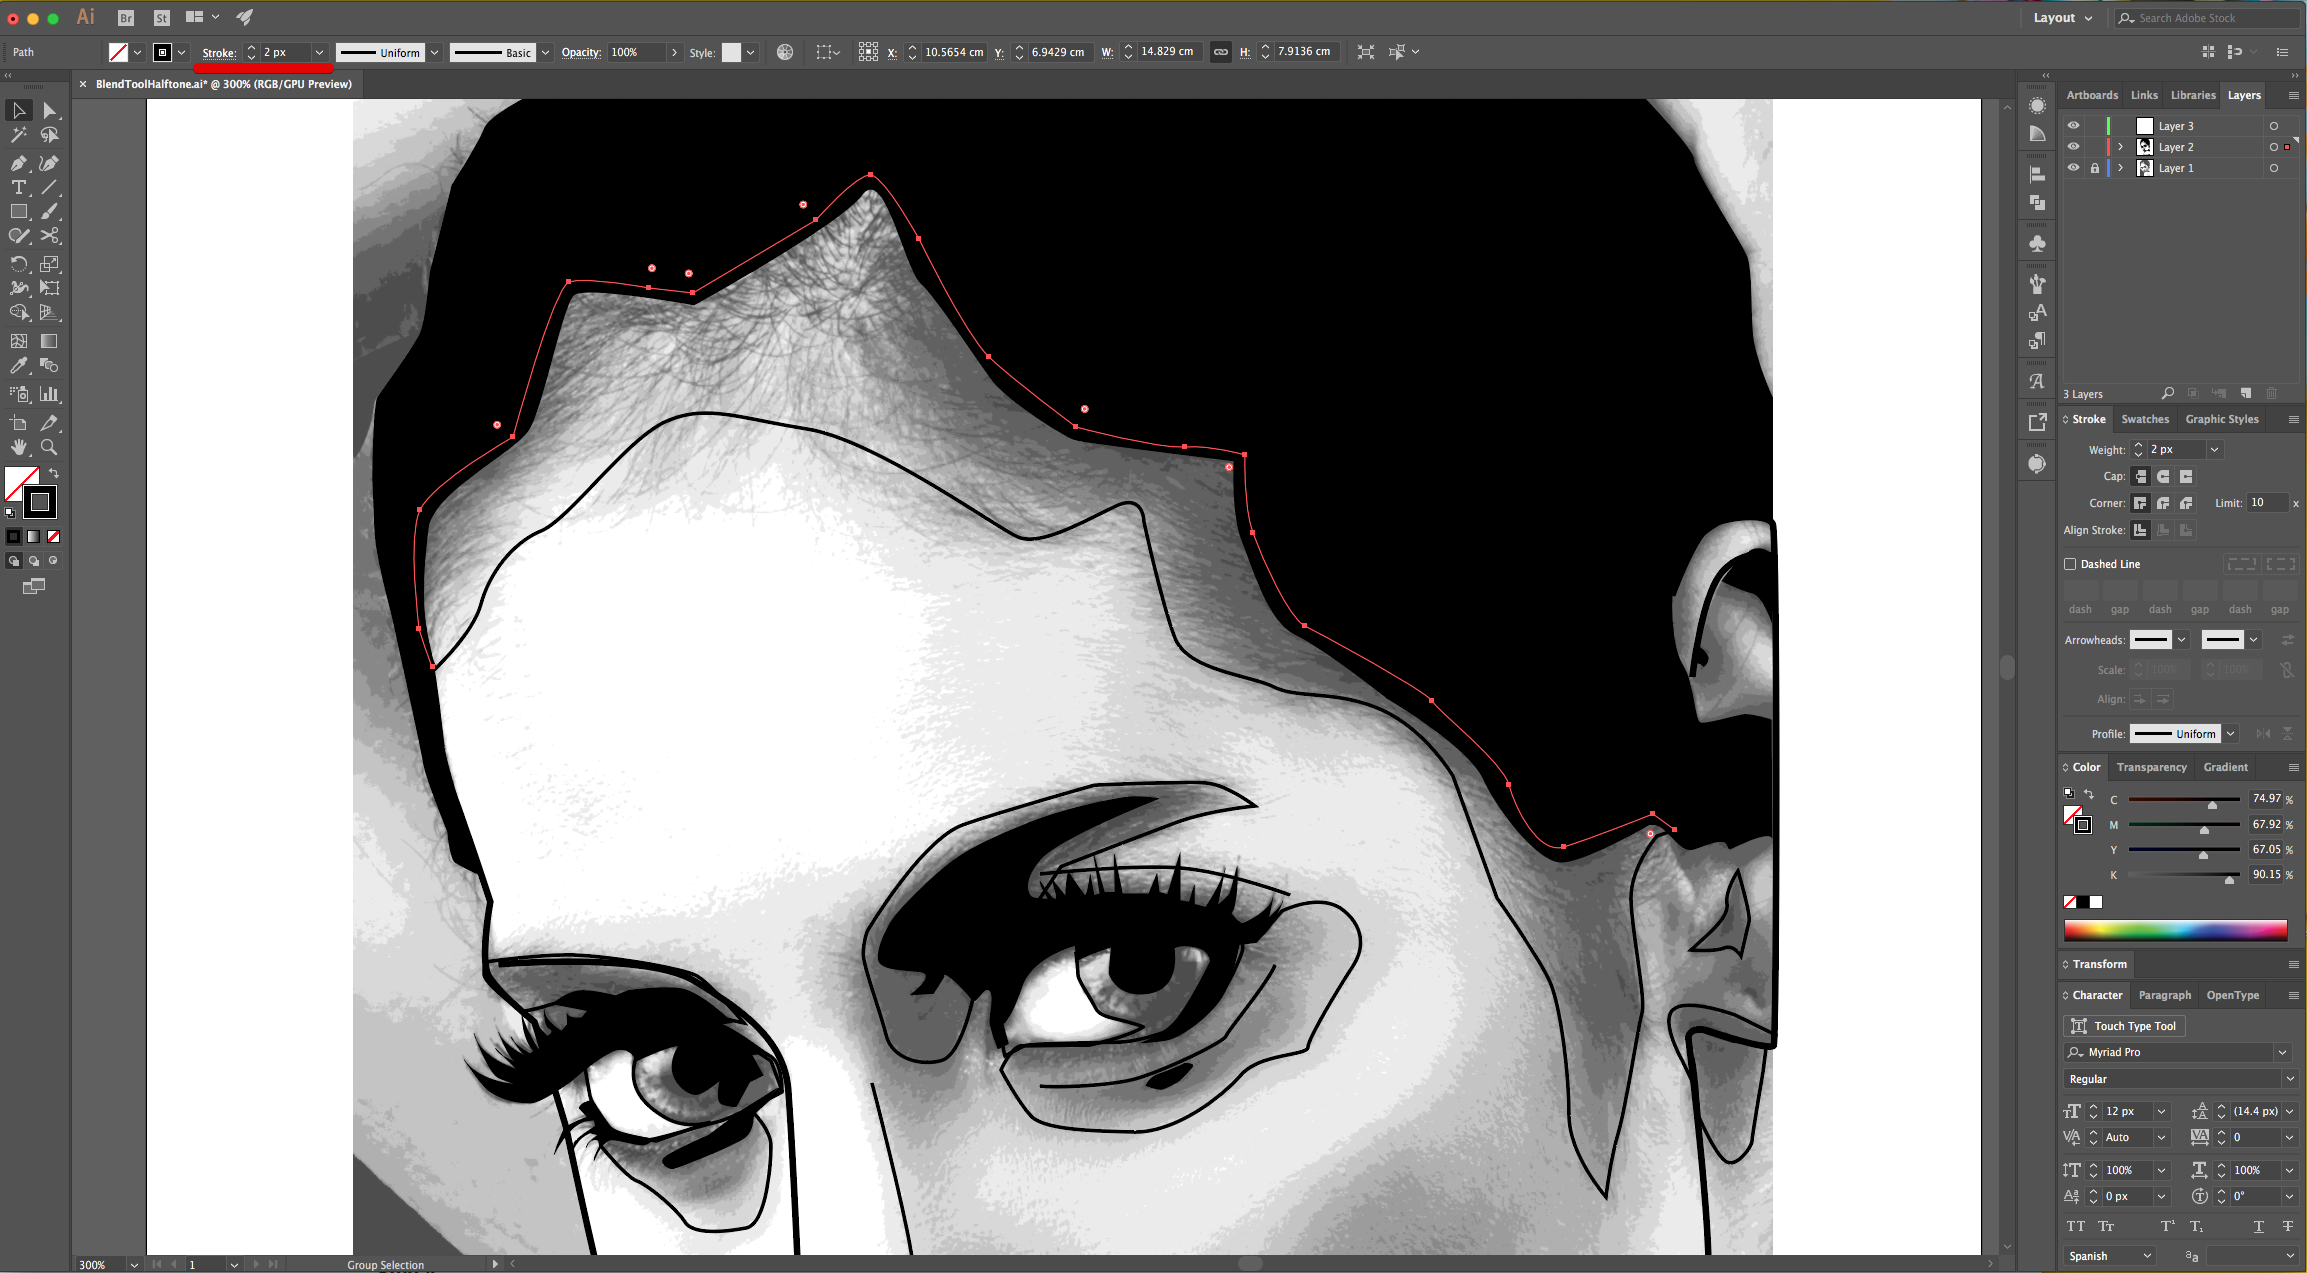
10 - Now, to create the outlines and shading areas of the major face features and body shape, use a 2 px “Stroke” and “No Fill”. Reduce the Stroke weight to 1 px to do some of the internal detailed outlines of your subject. You don’t need to close all the Paths.

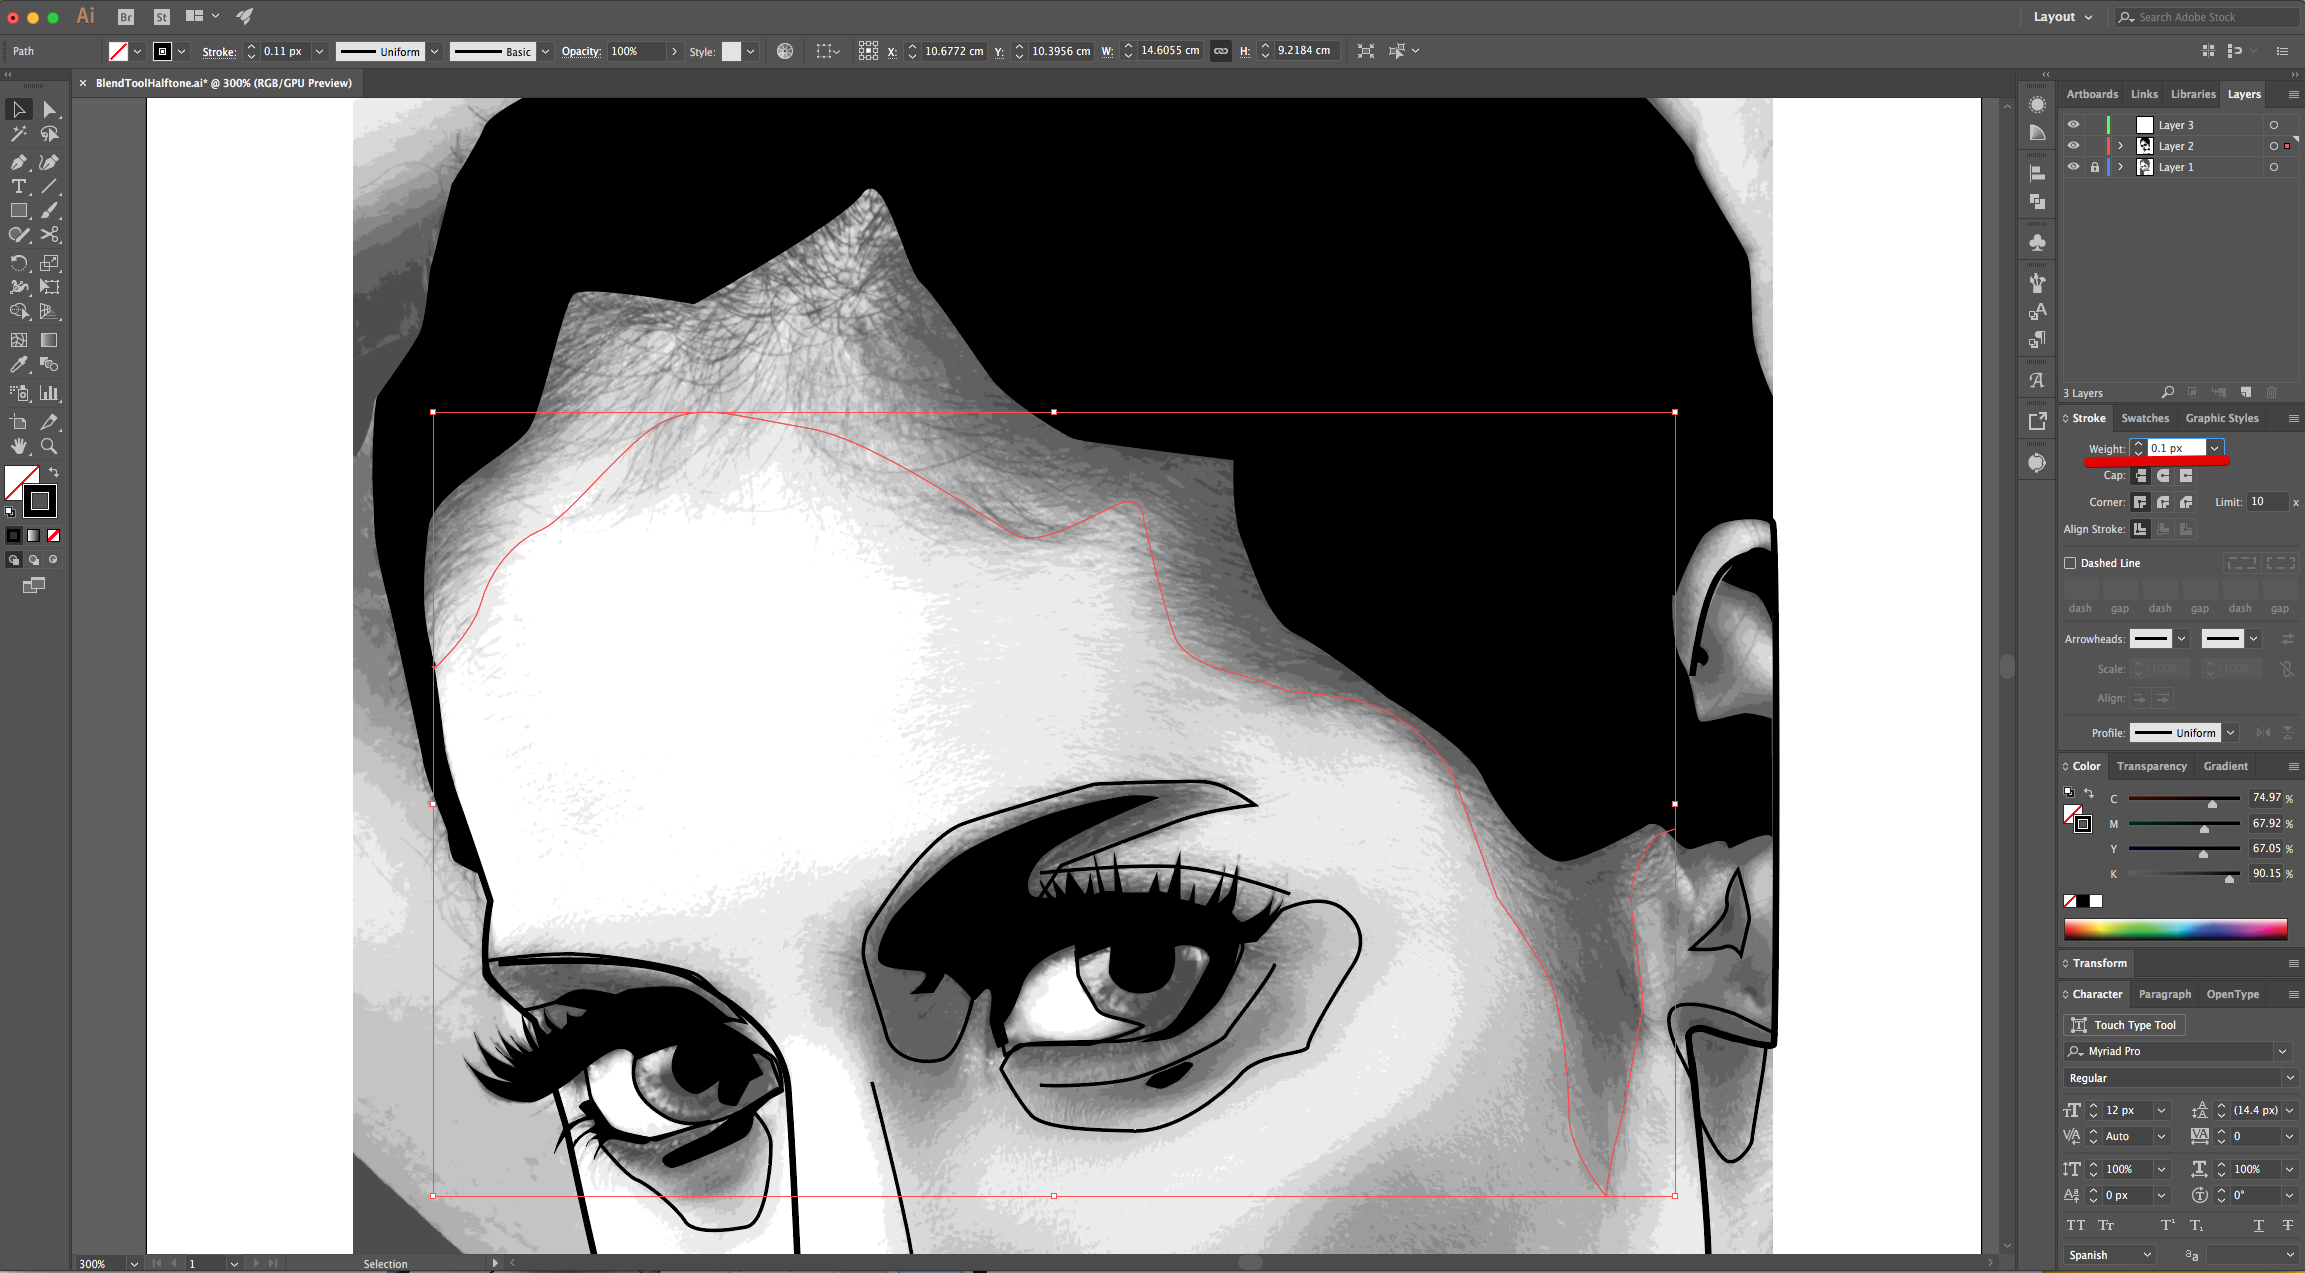
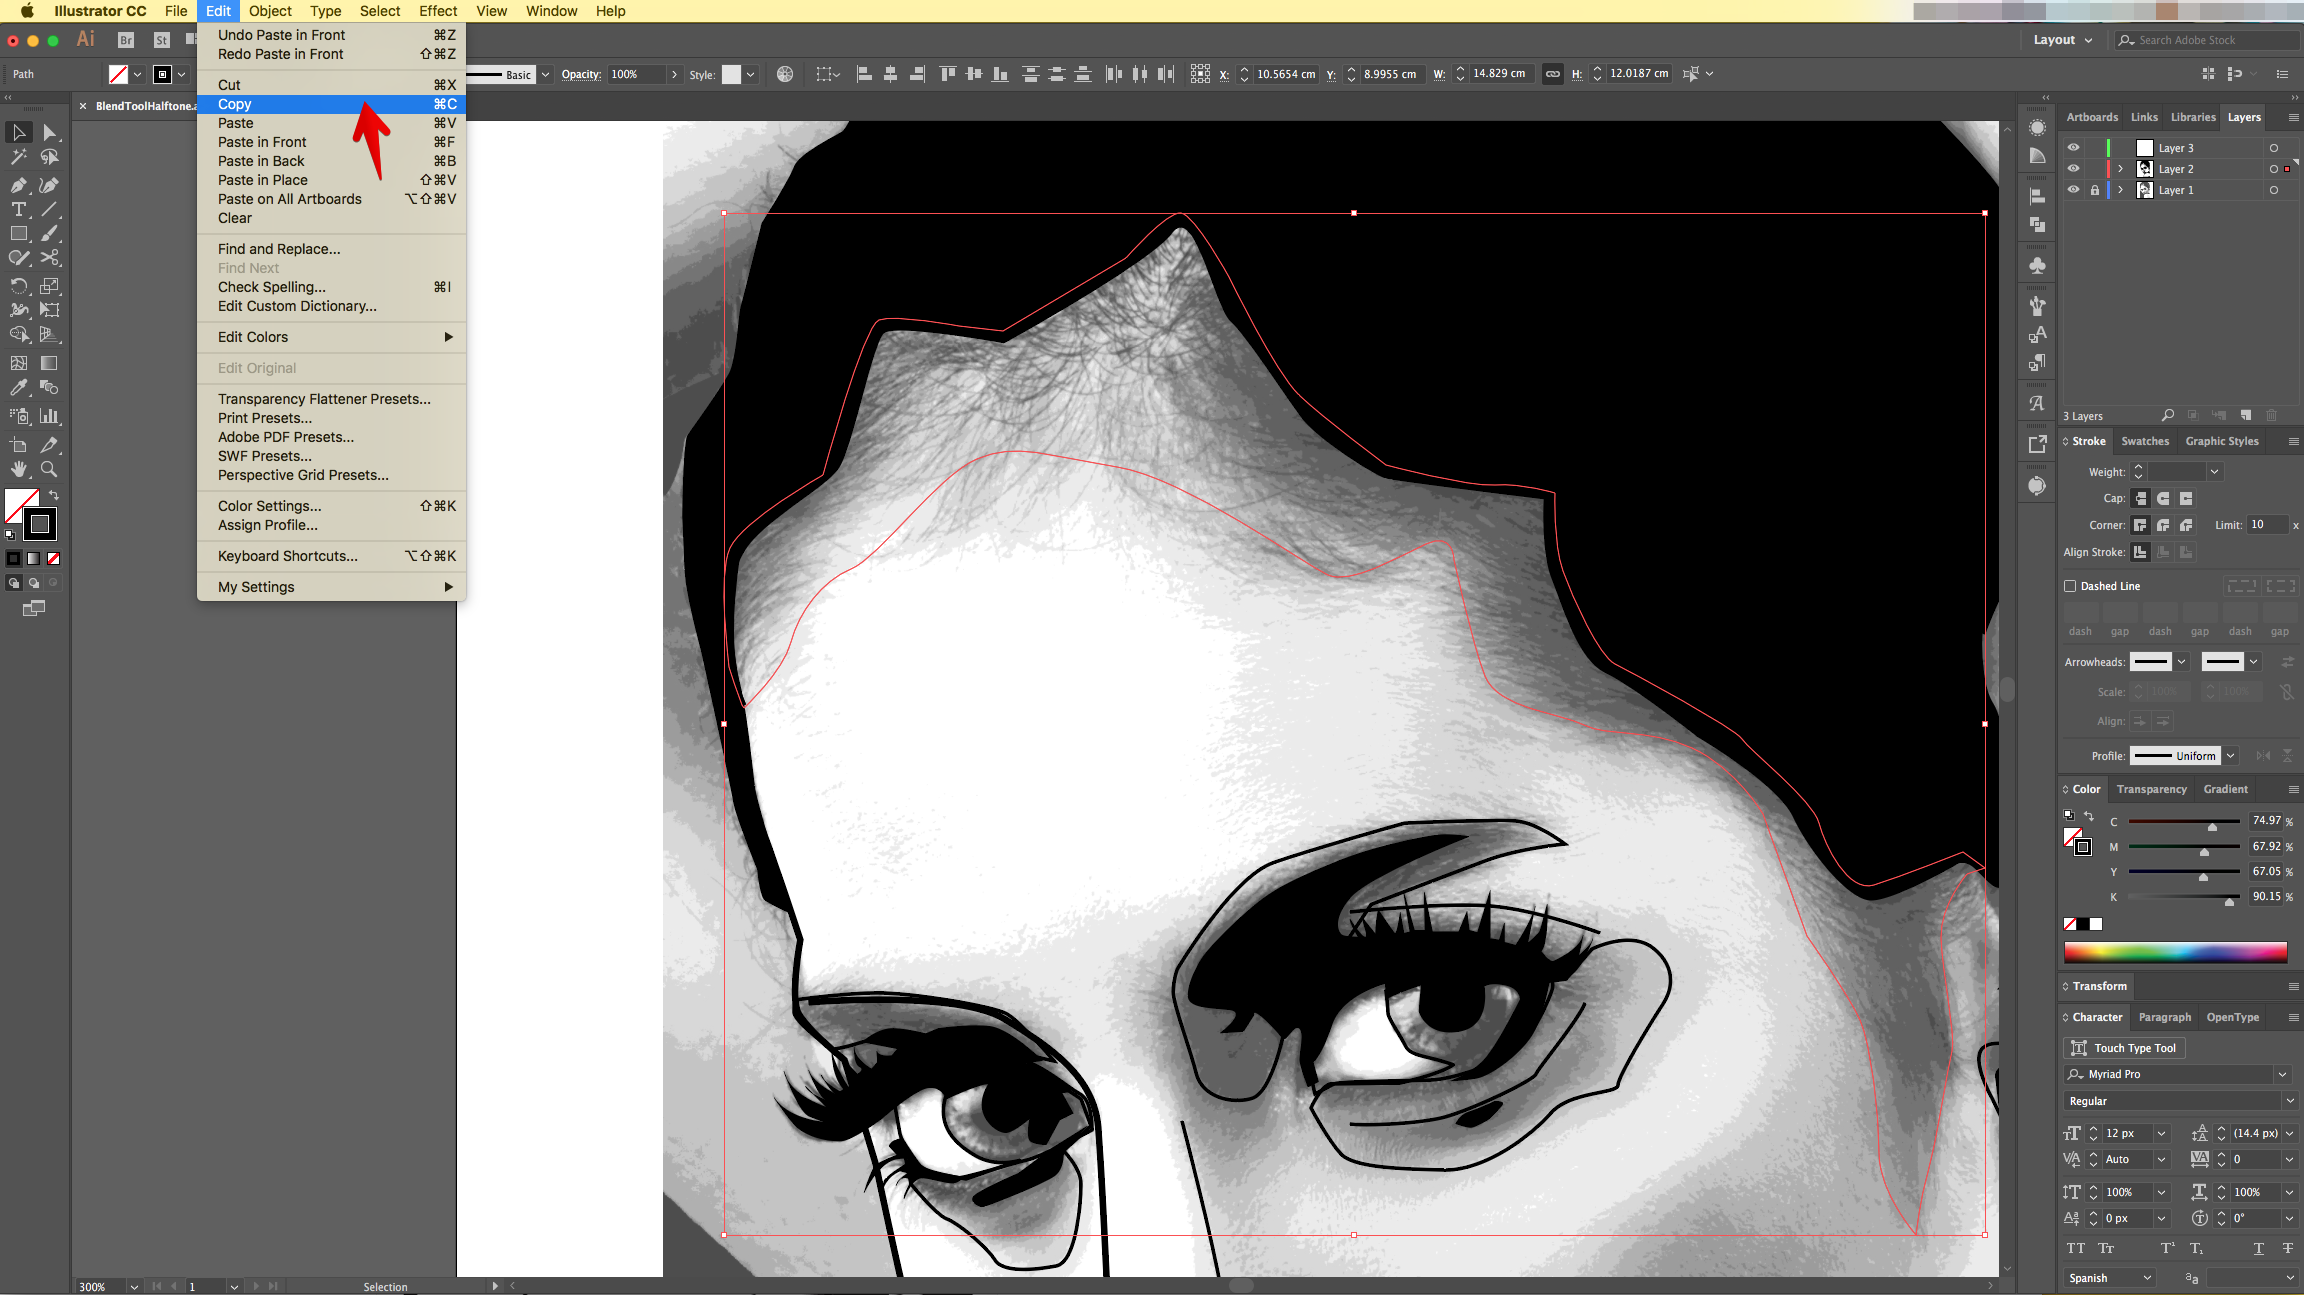
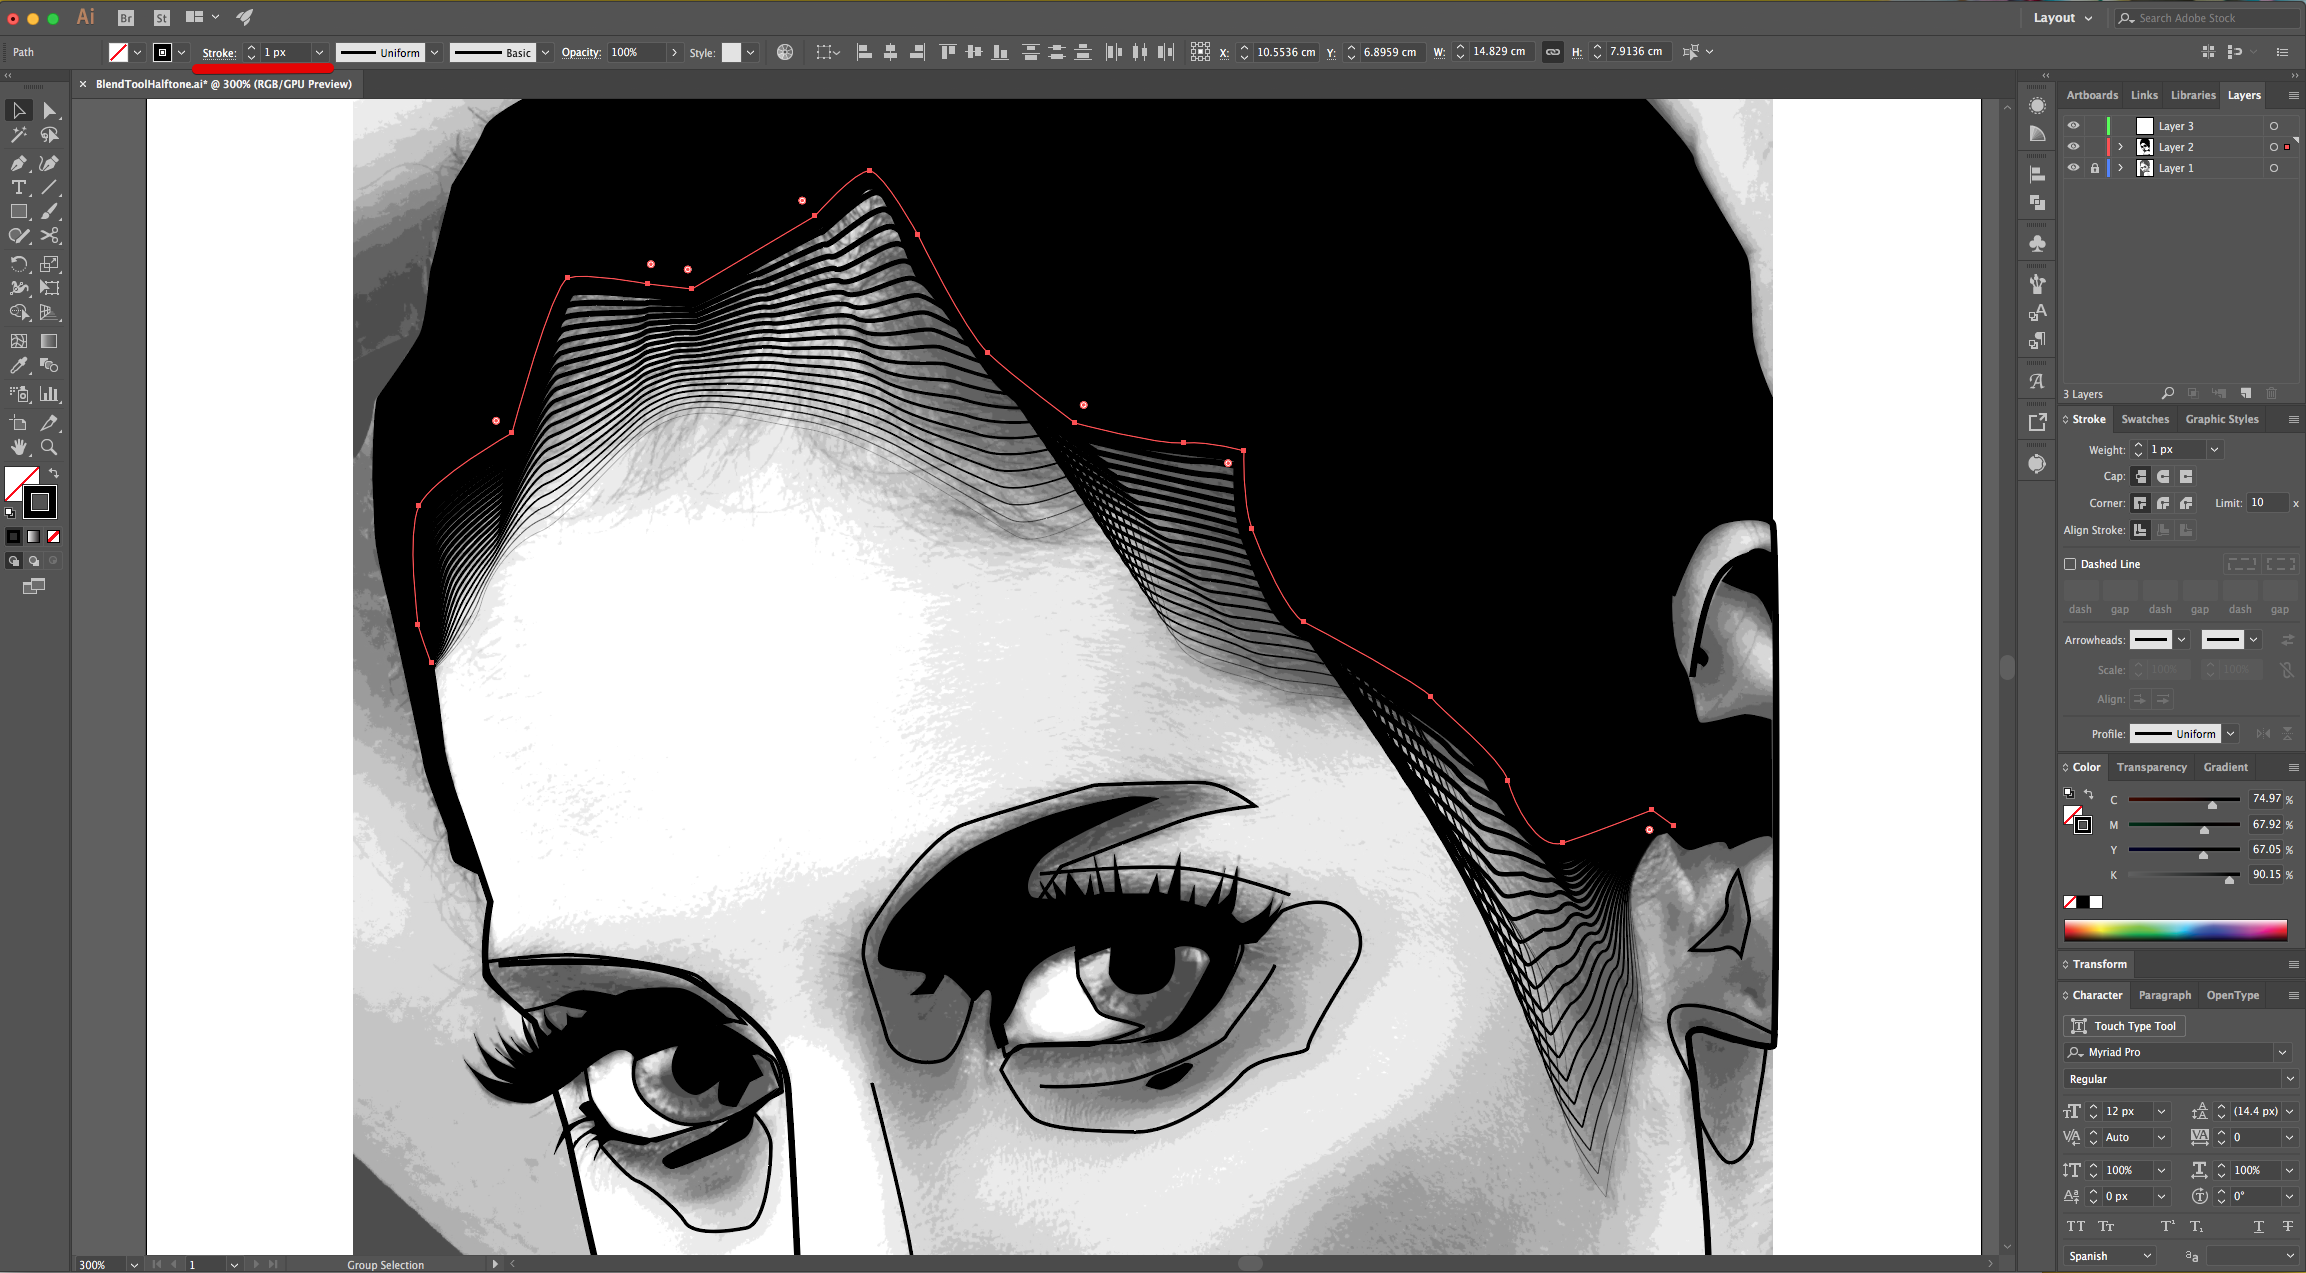
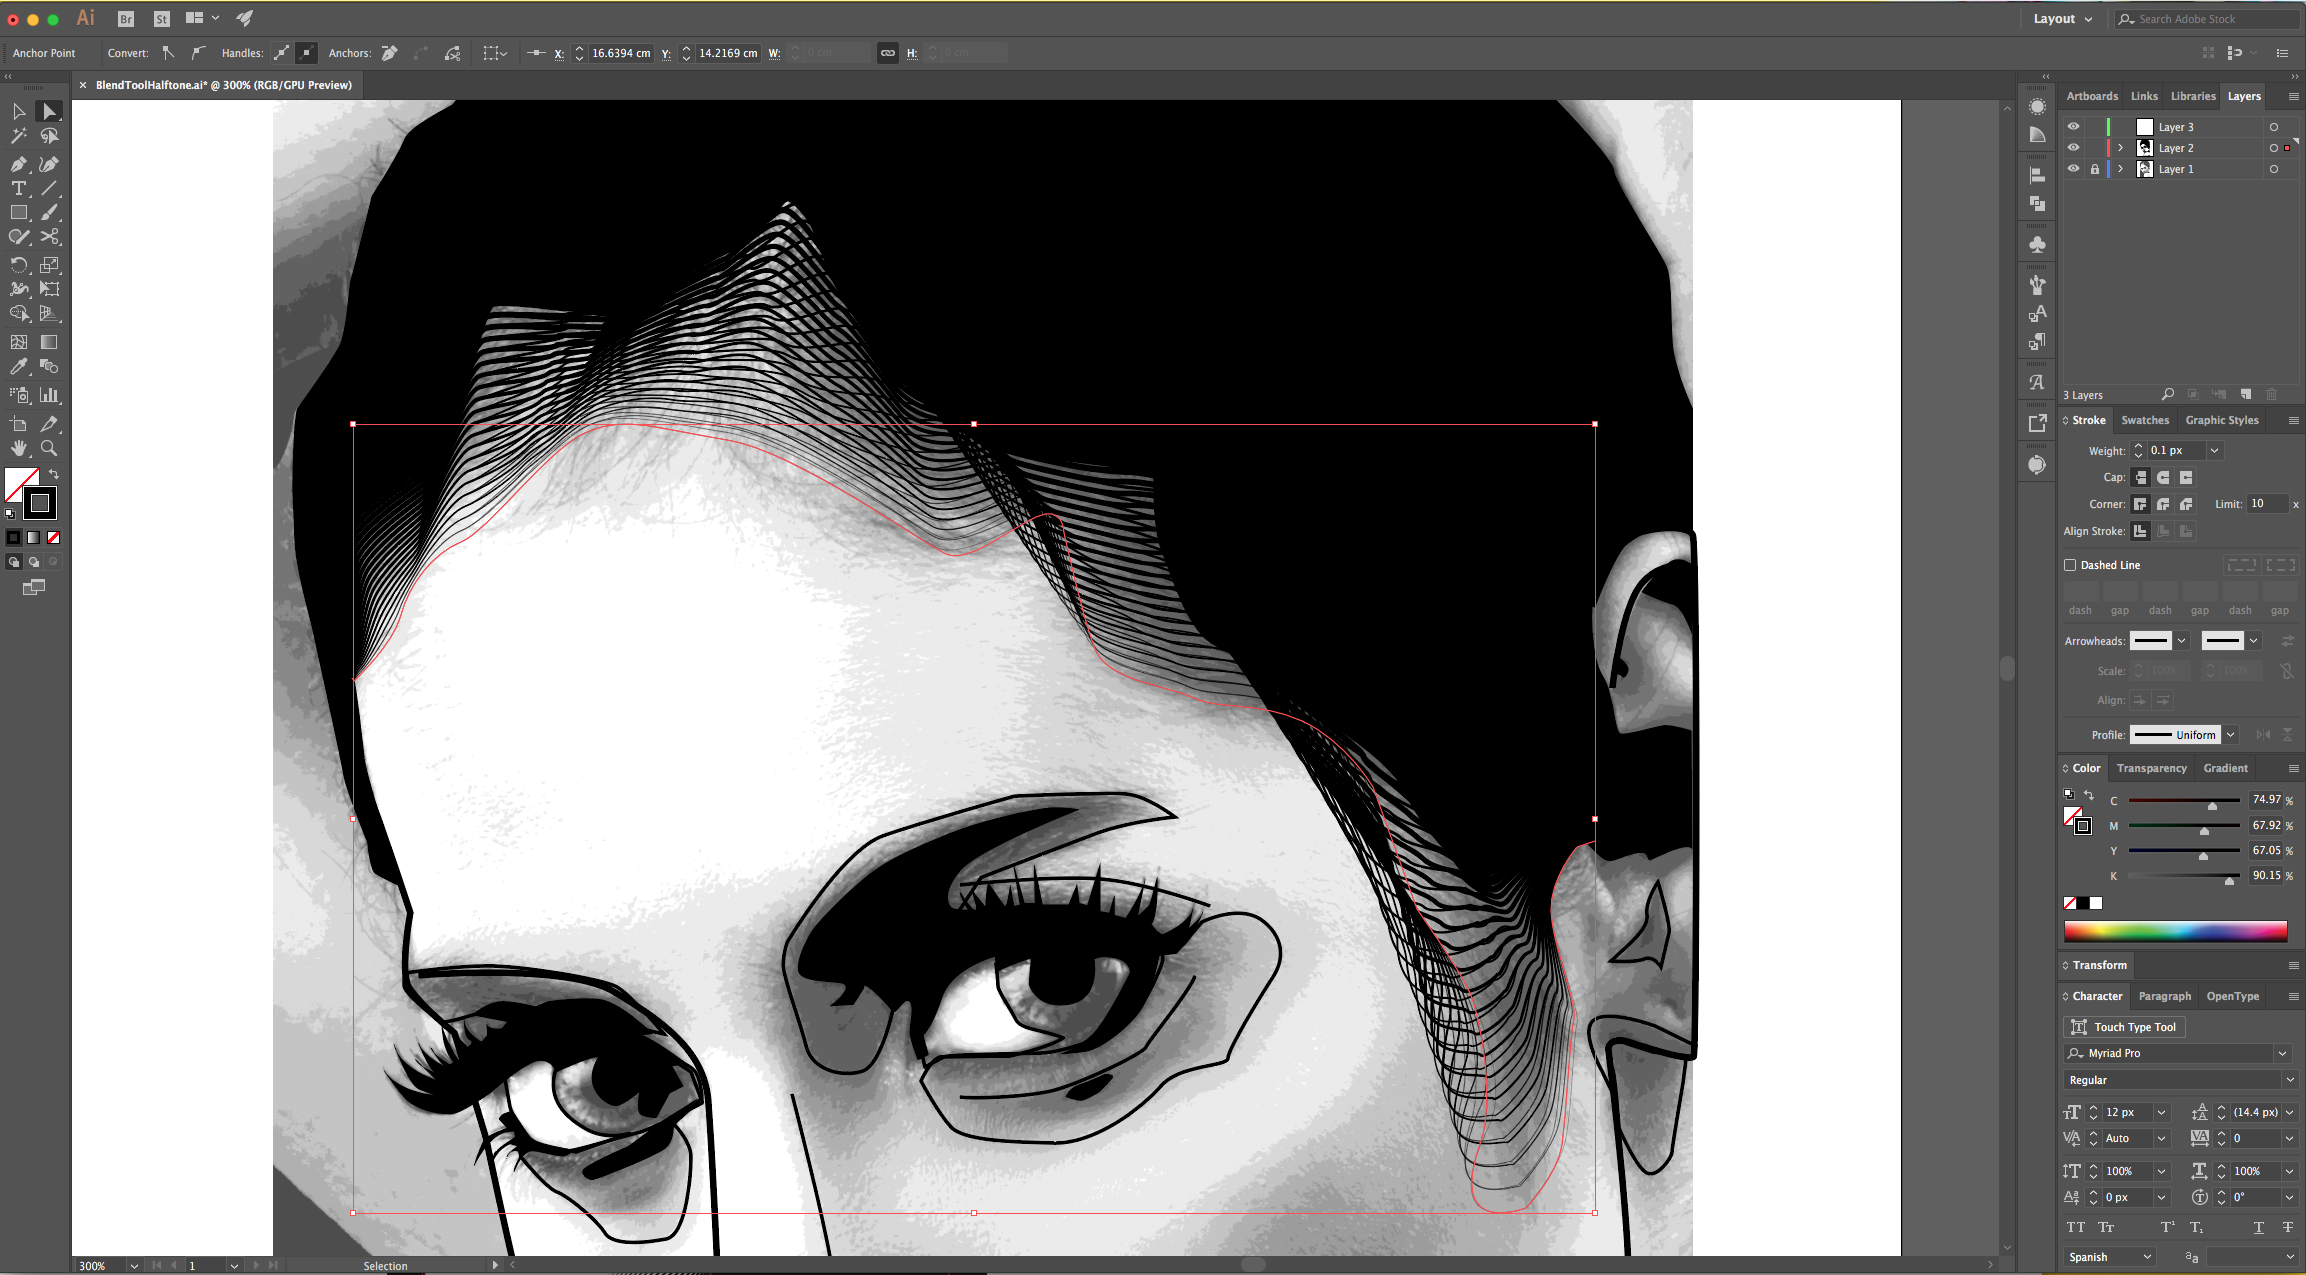
11 - Select one of the one shading paths you created, make sure that the line that is near the border of the “Shadows” is a 2 px Stroke and select the other side (inside the subject) and change the “Strike” weight to 0.1 px . Select both (“Shift” key), then “Copy” (Command/Control + C) and “Paste in Front (Command/Control + F).

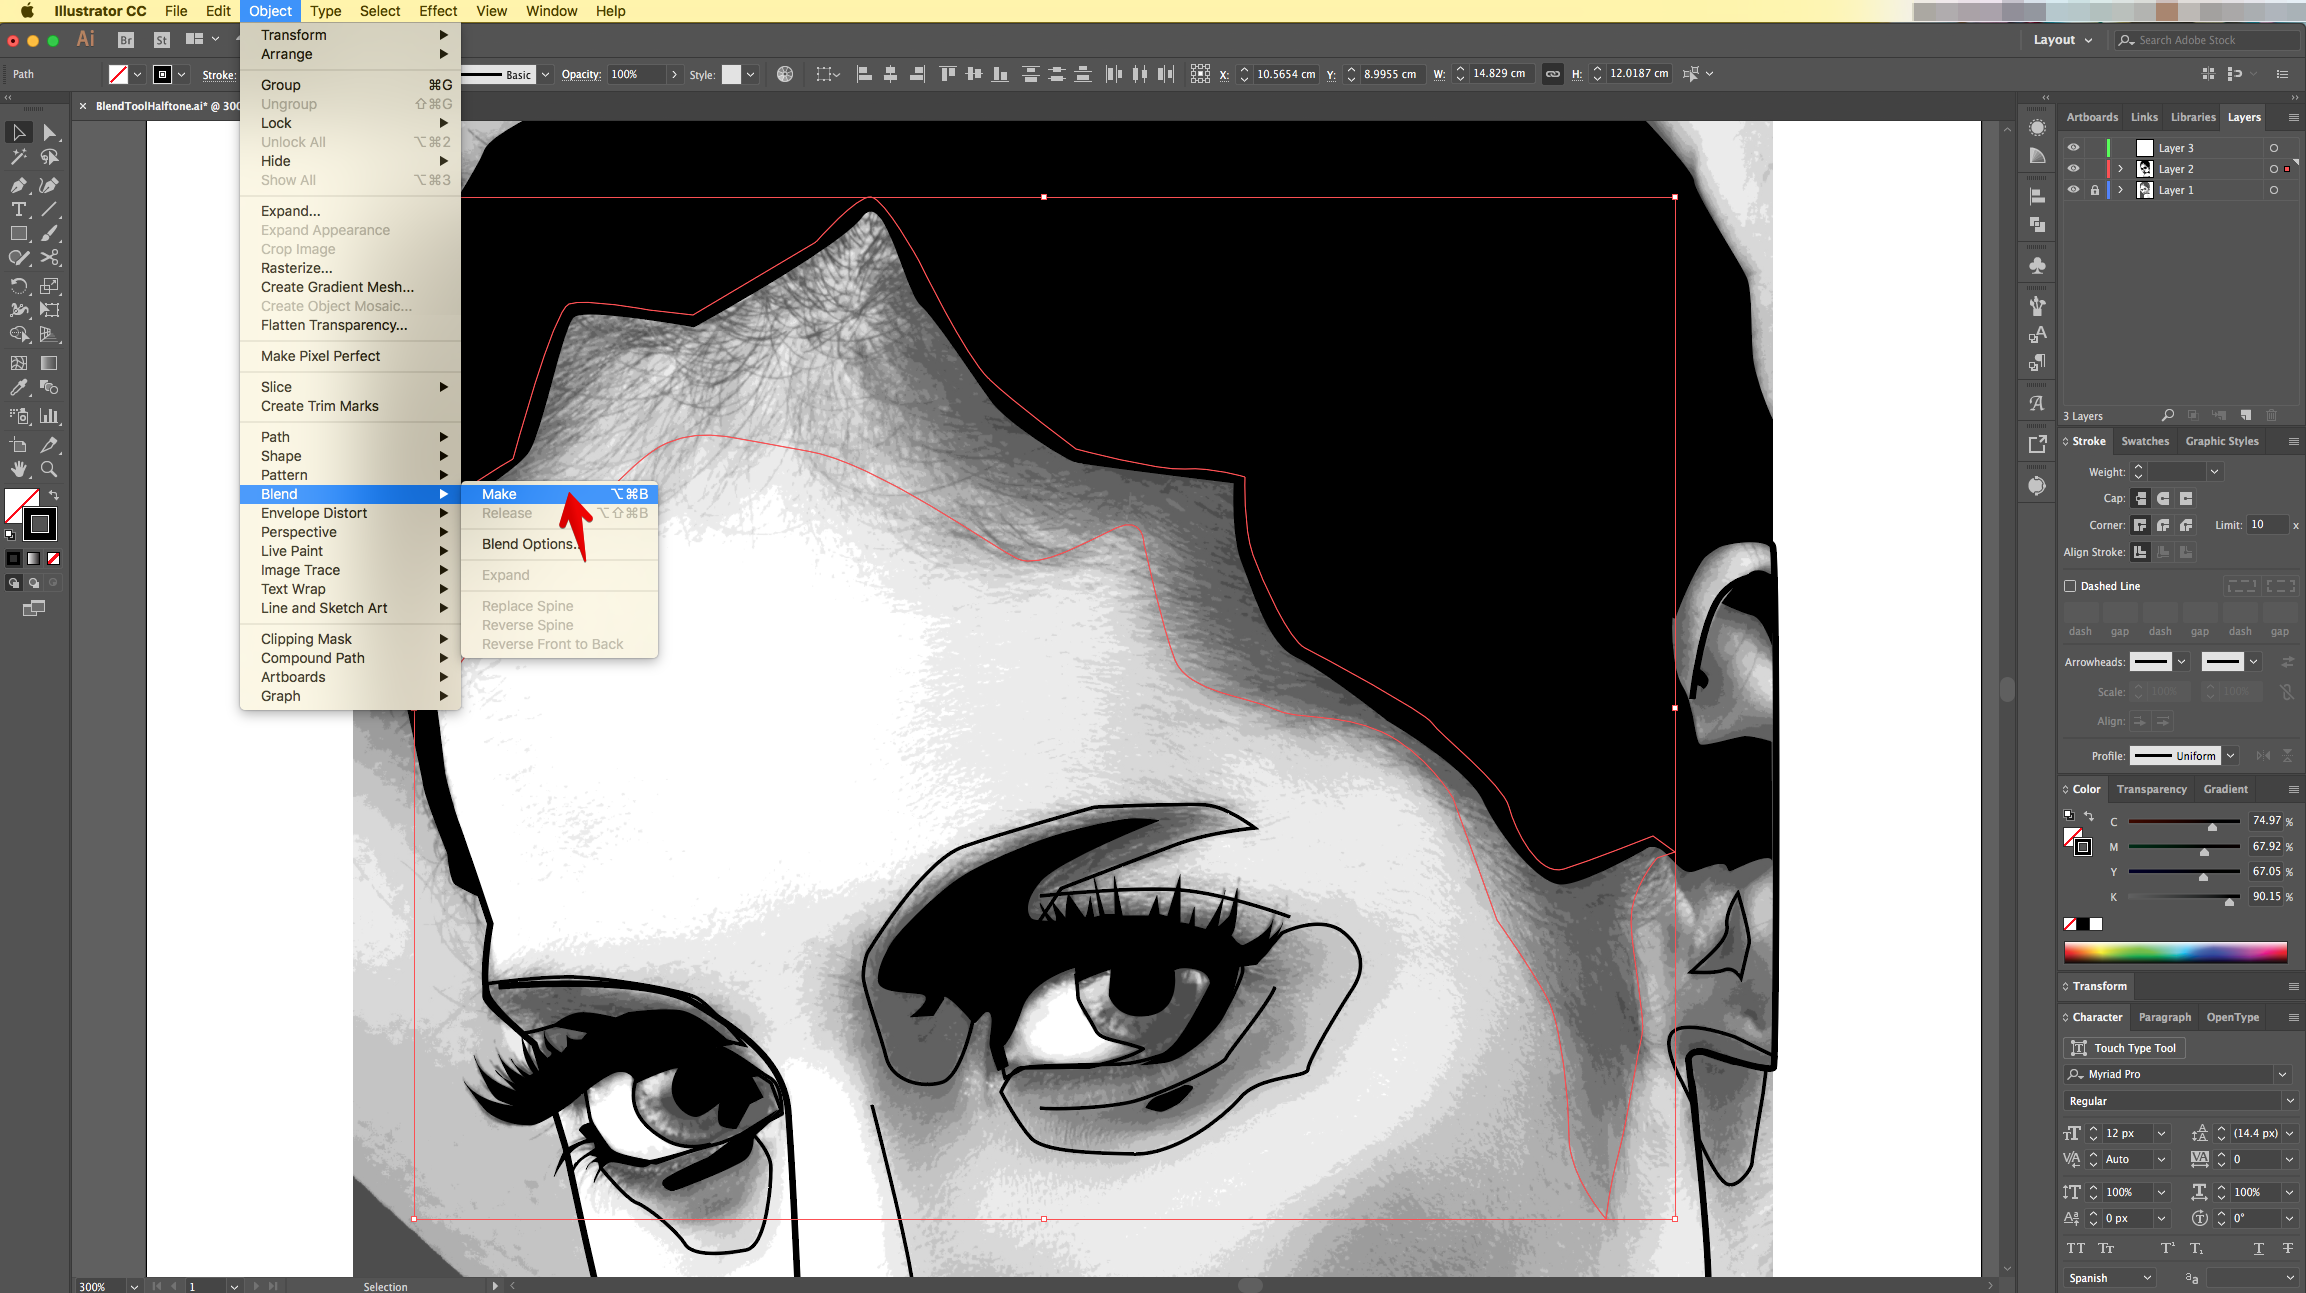
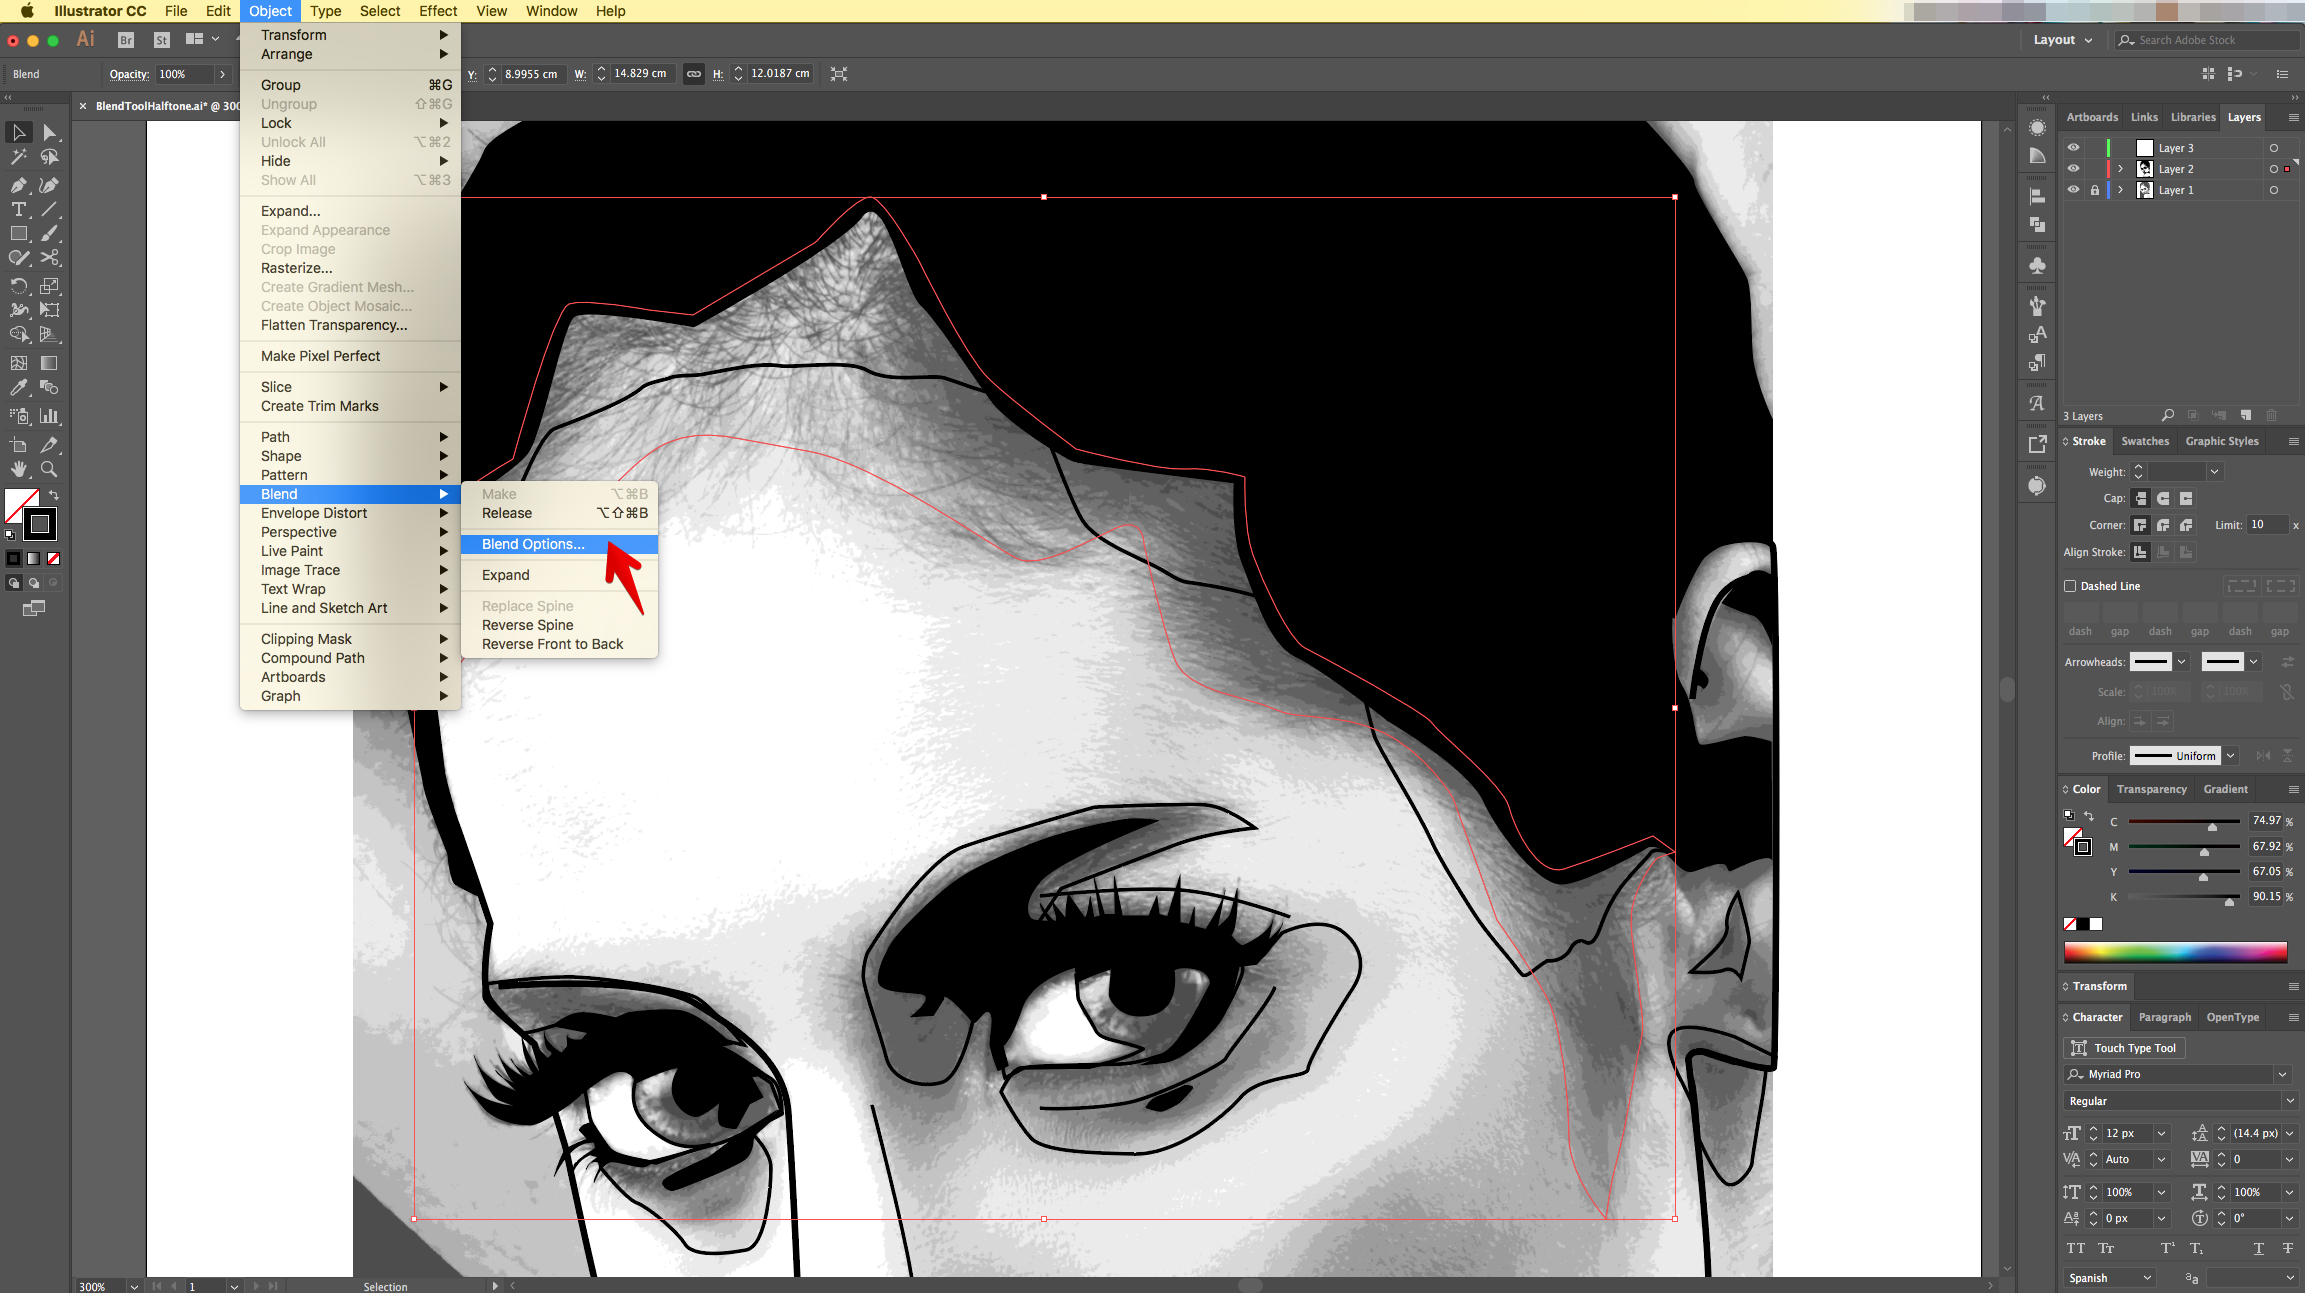
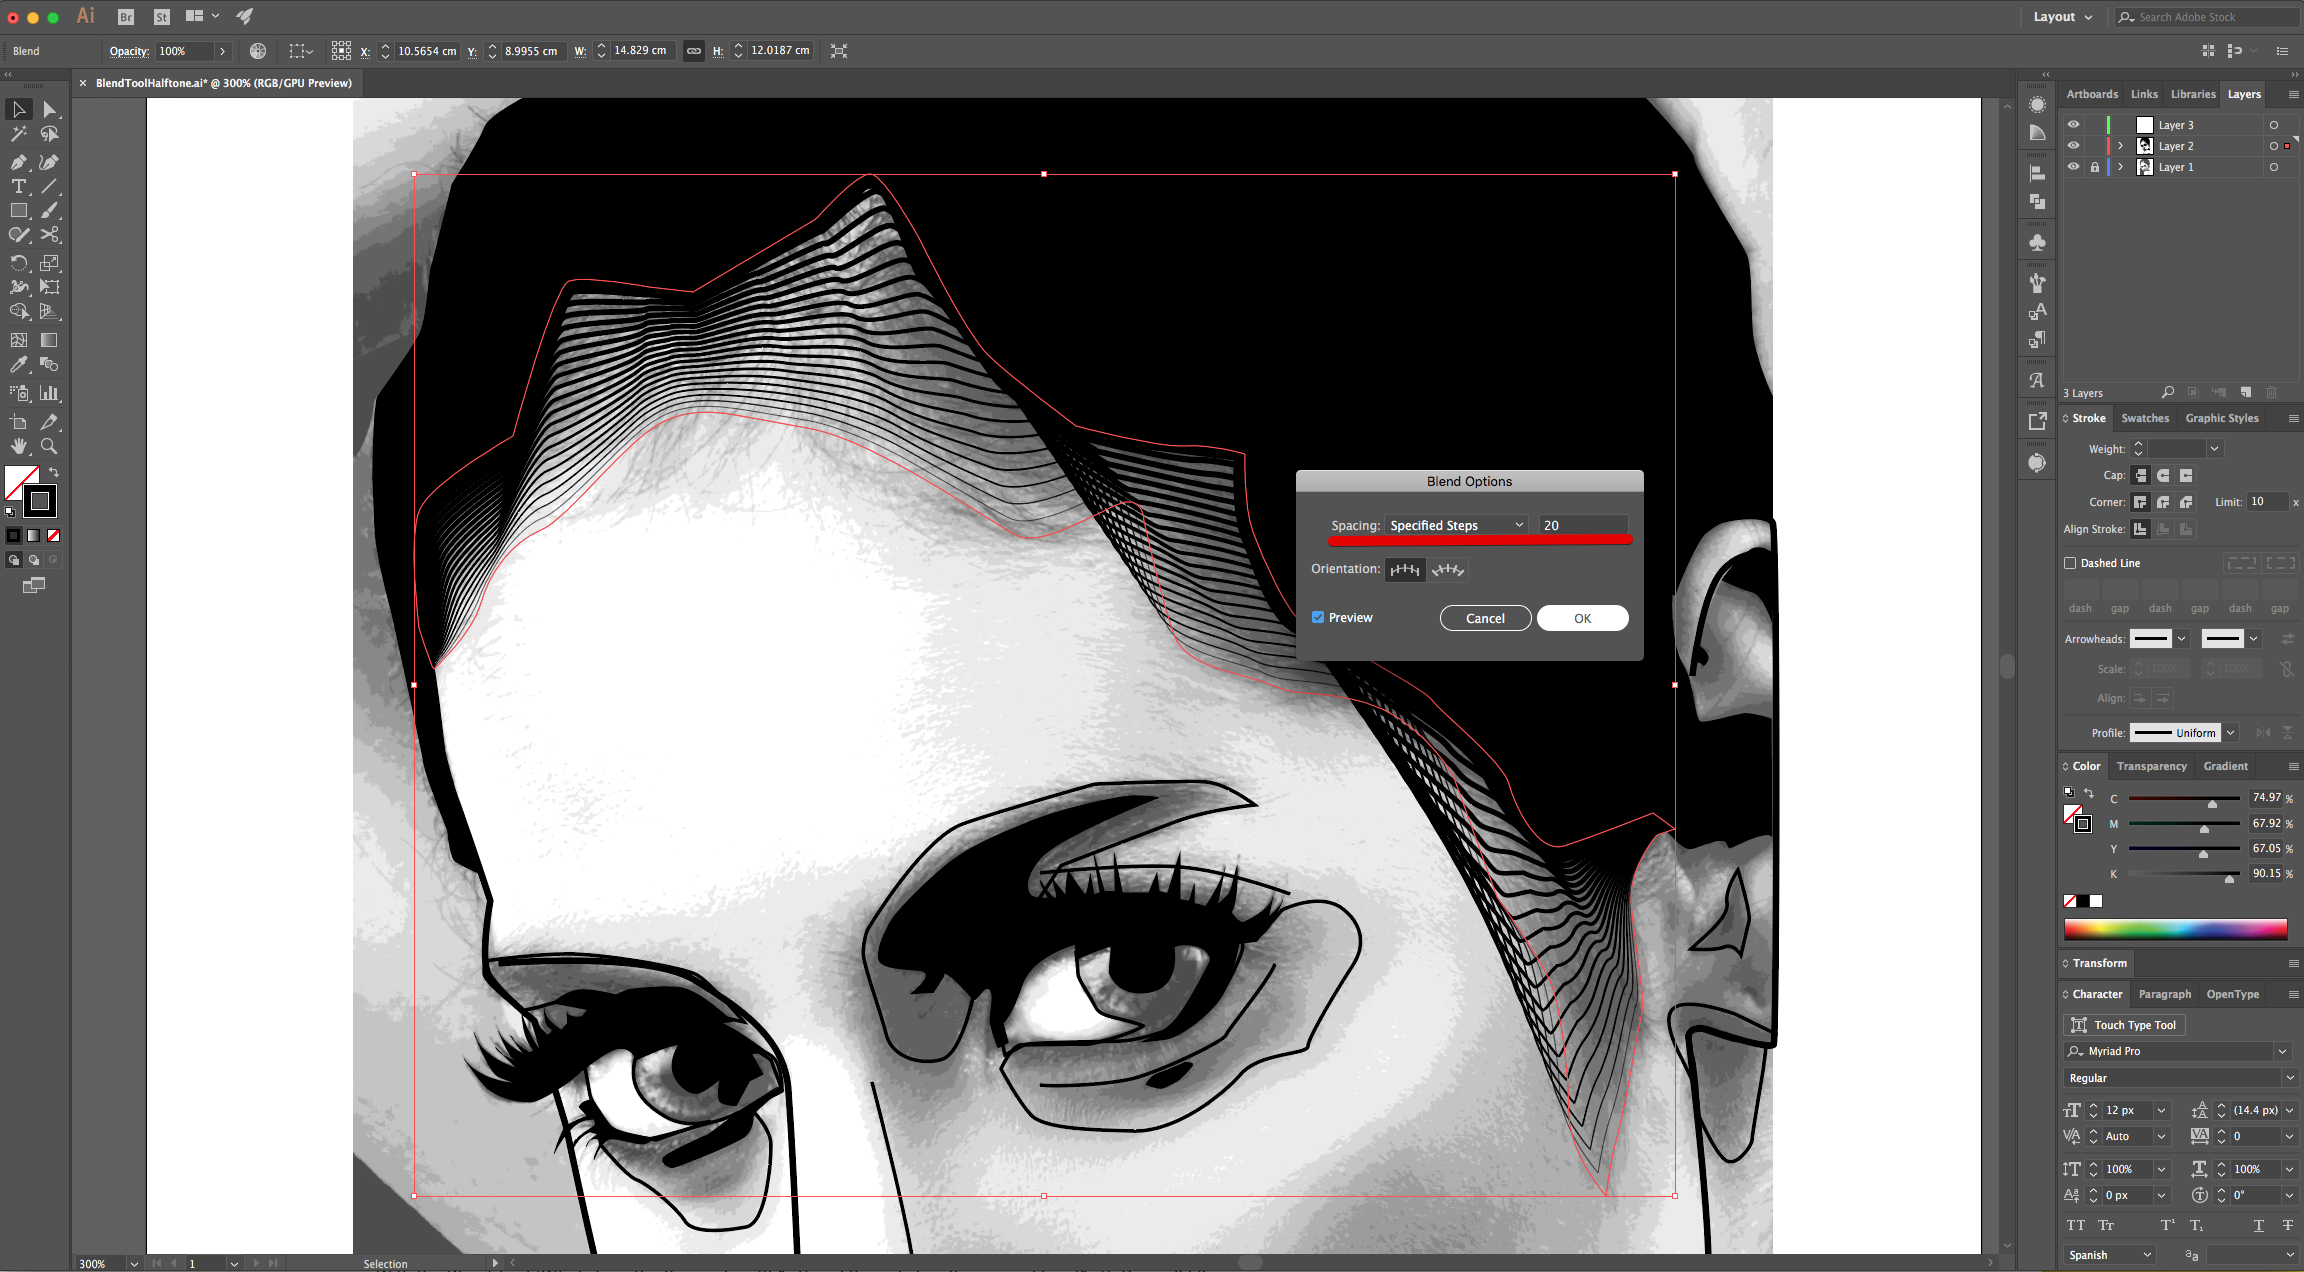
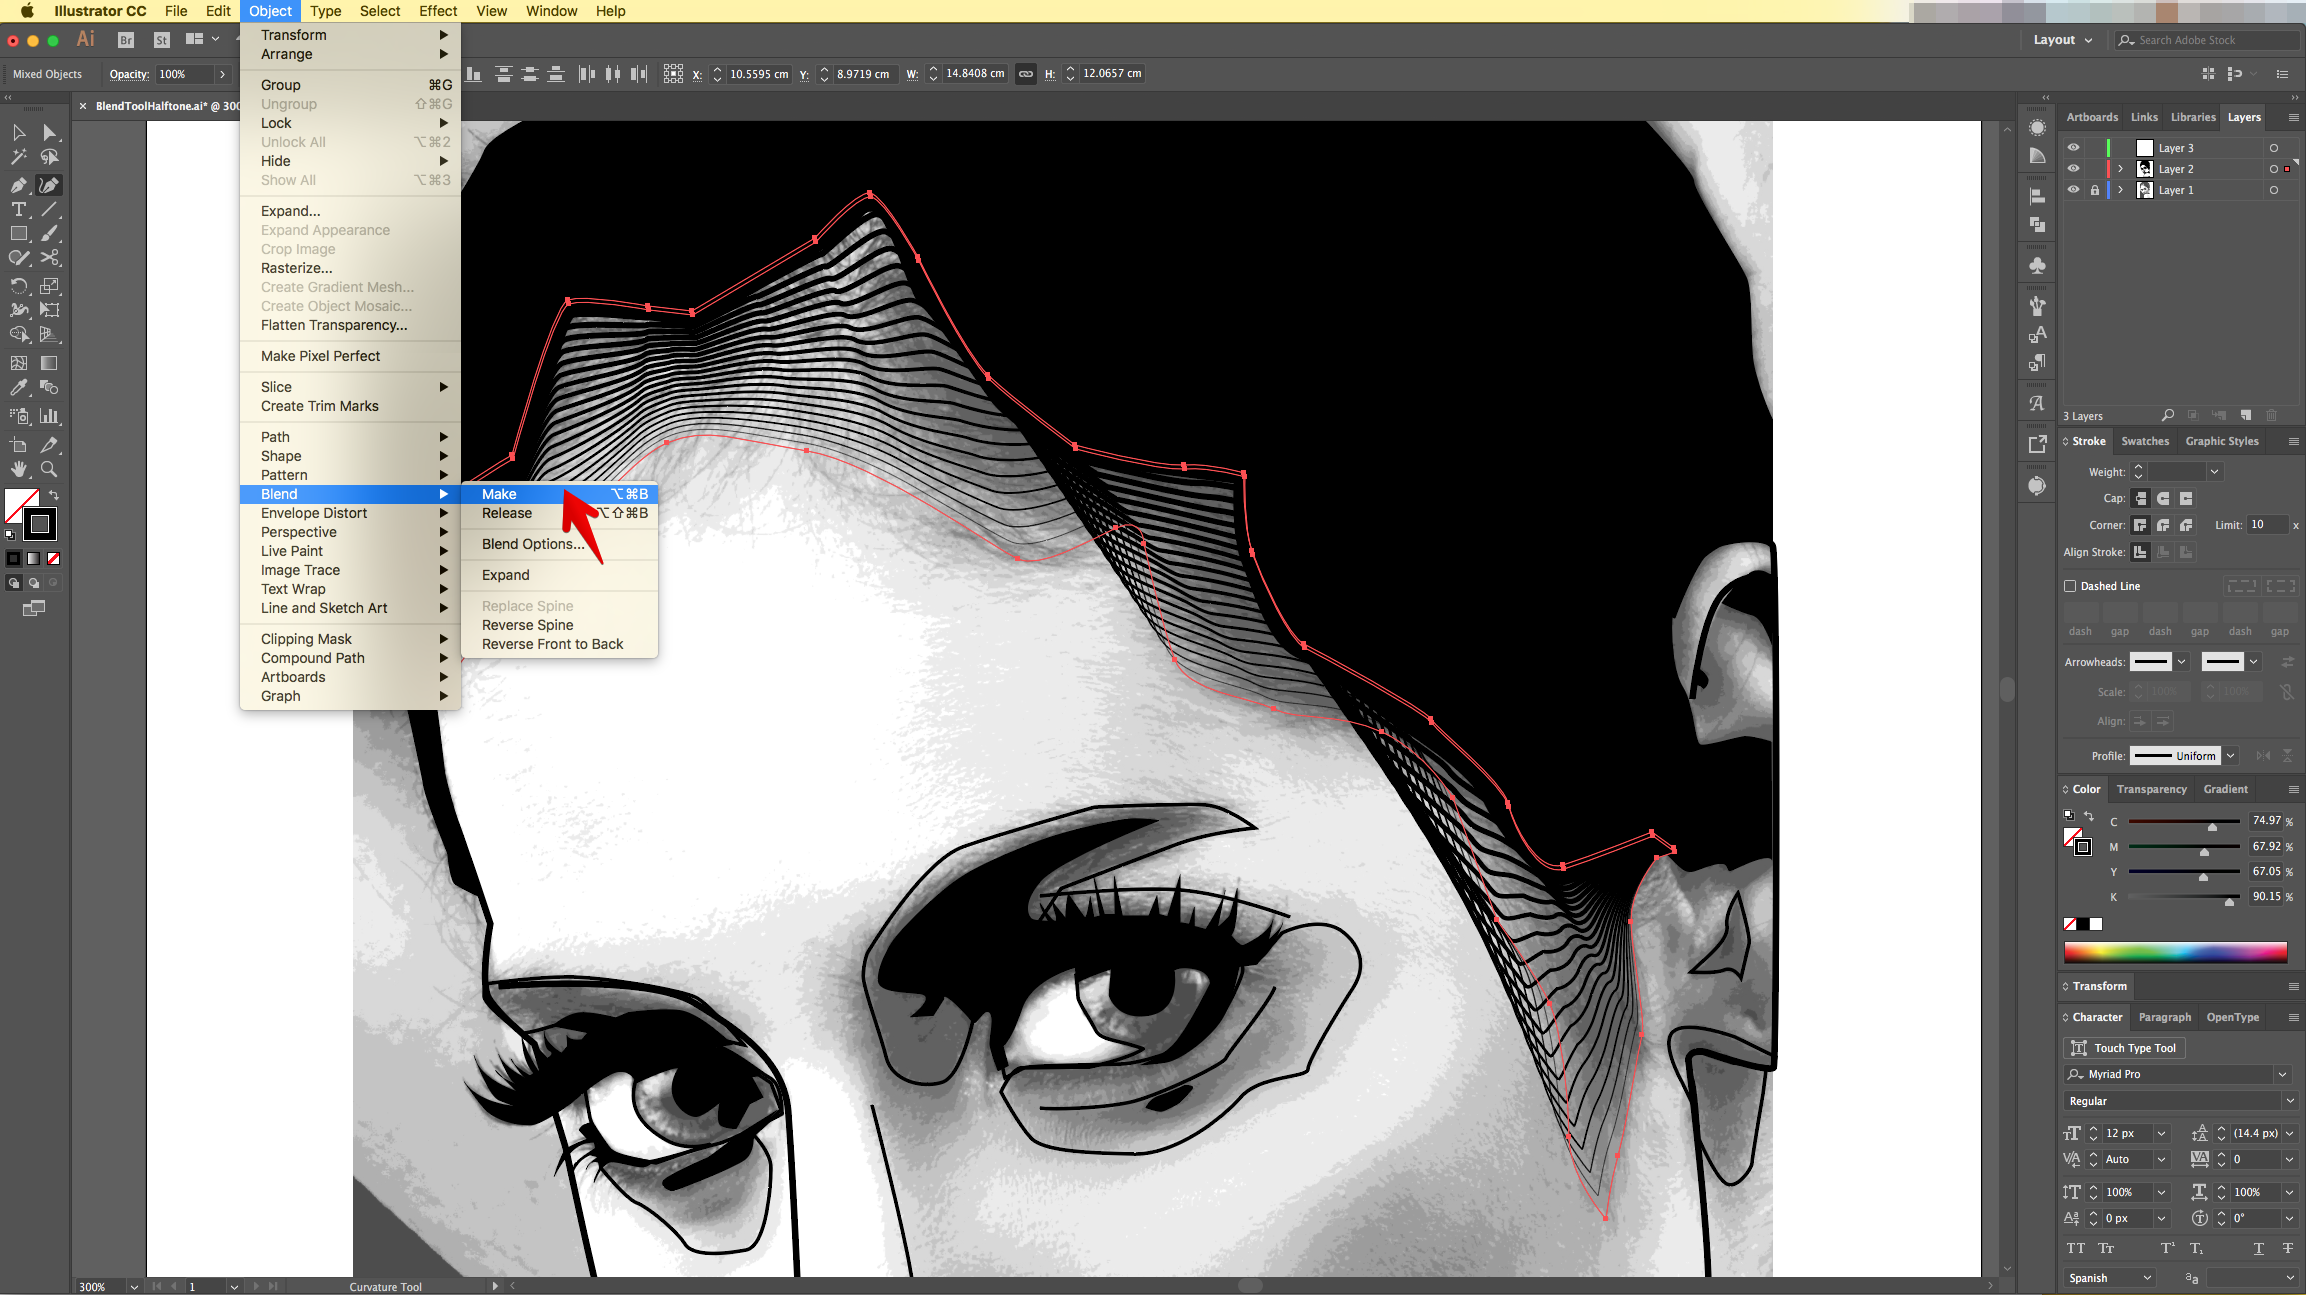
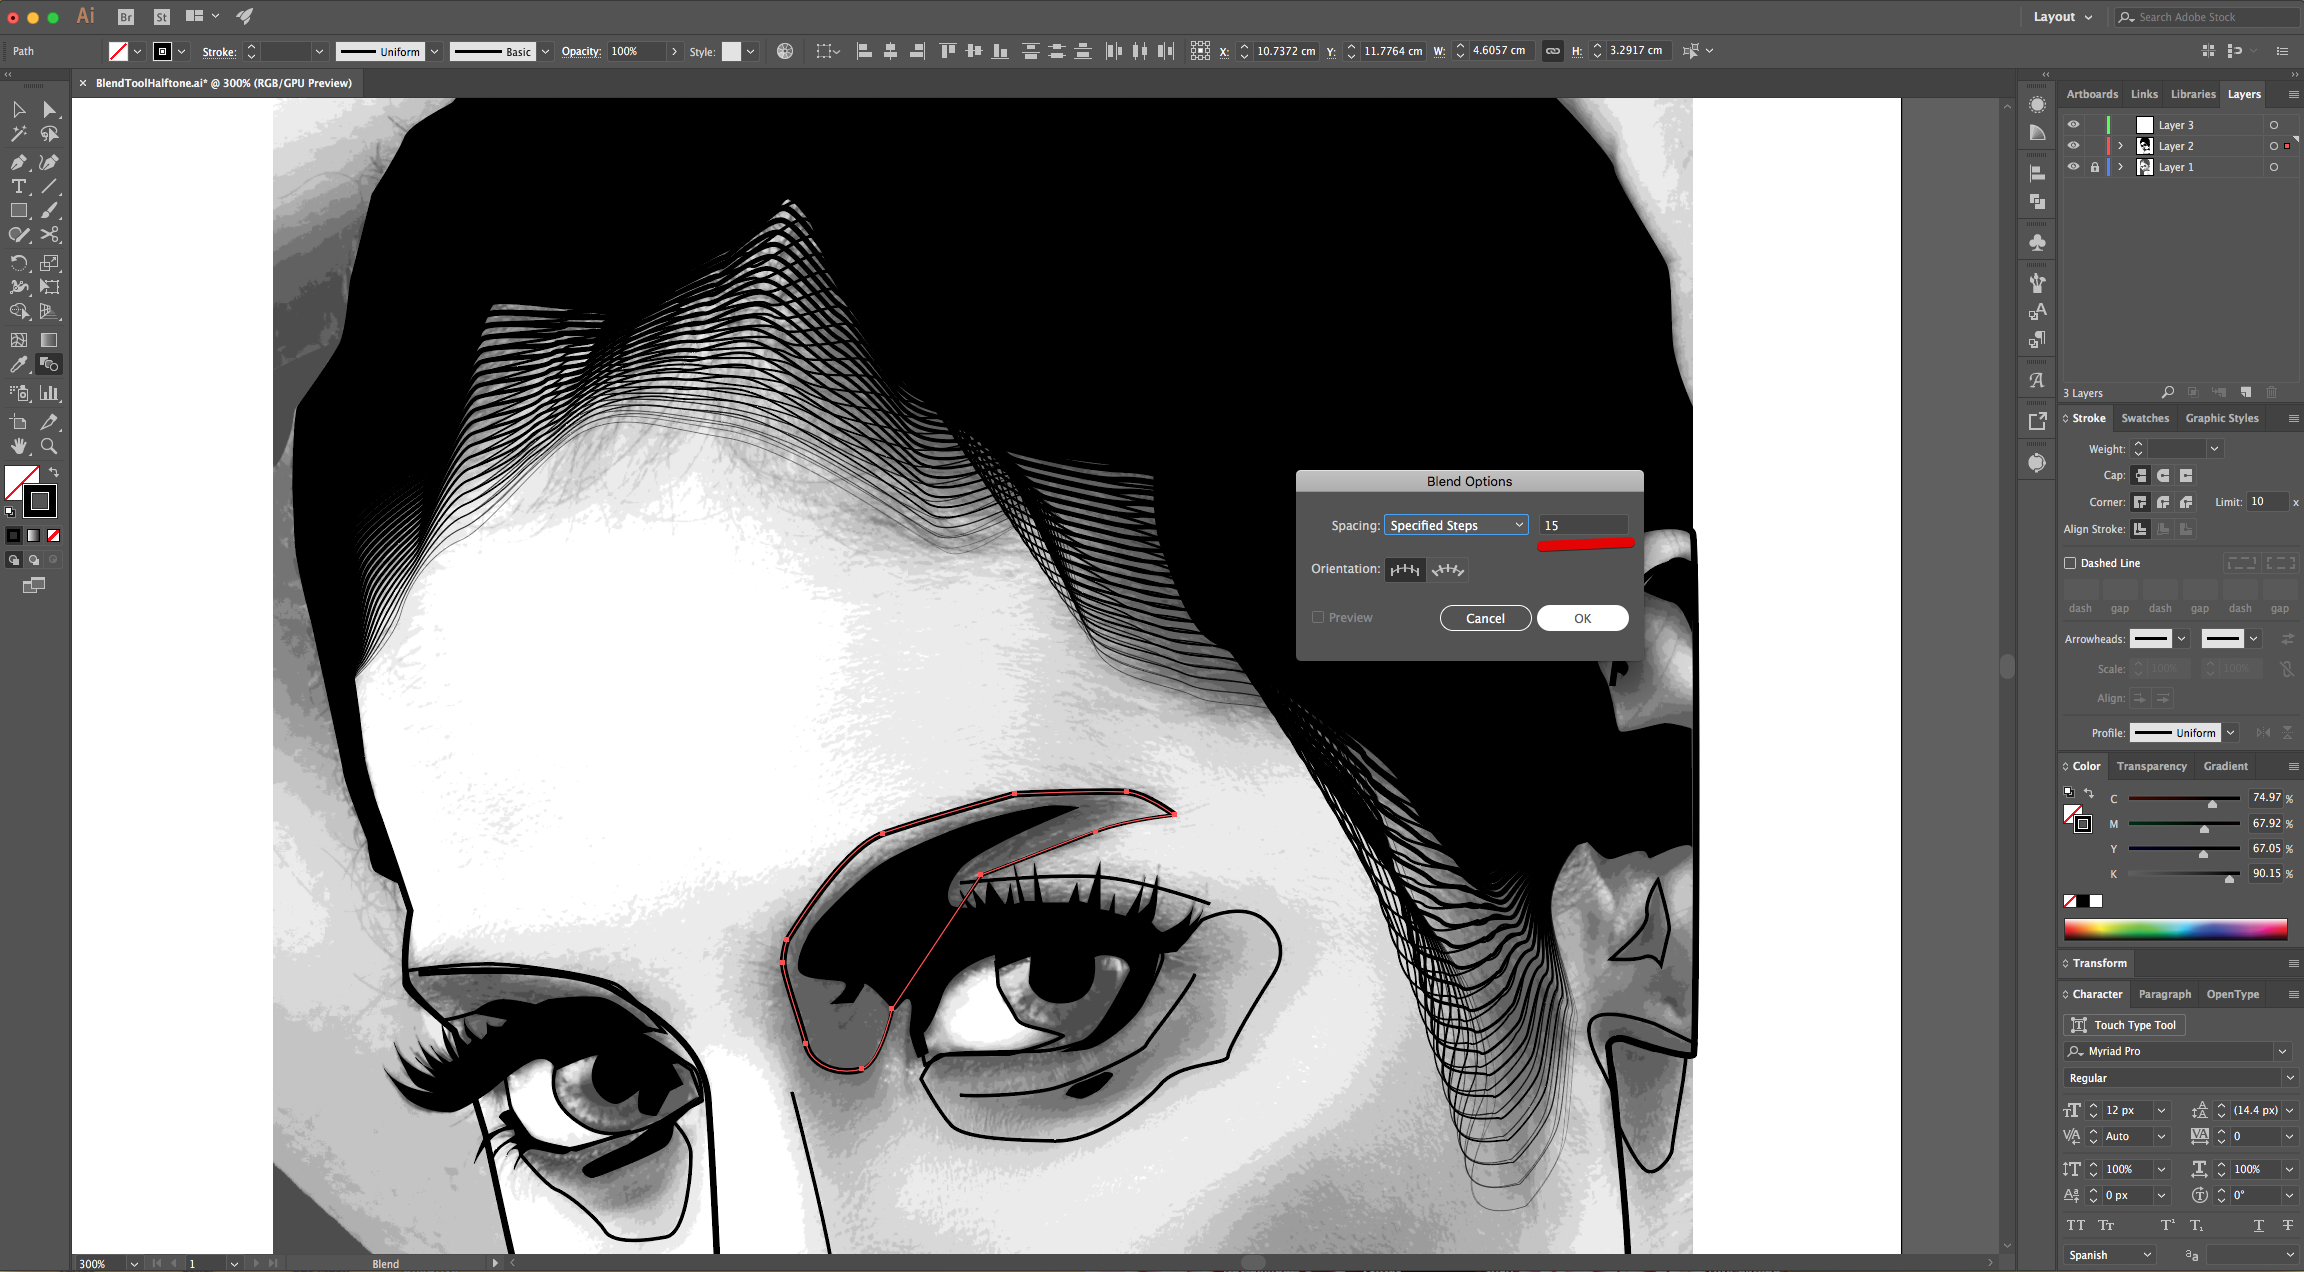
12 - Select the Top-most instances of the paths and go to Object > Blend > Make, then Object > Blend > Blend Options and use “Specified Steps” and a value of 20.
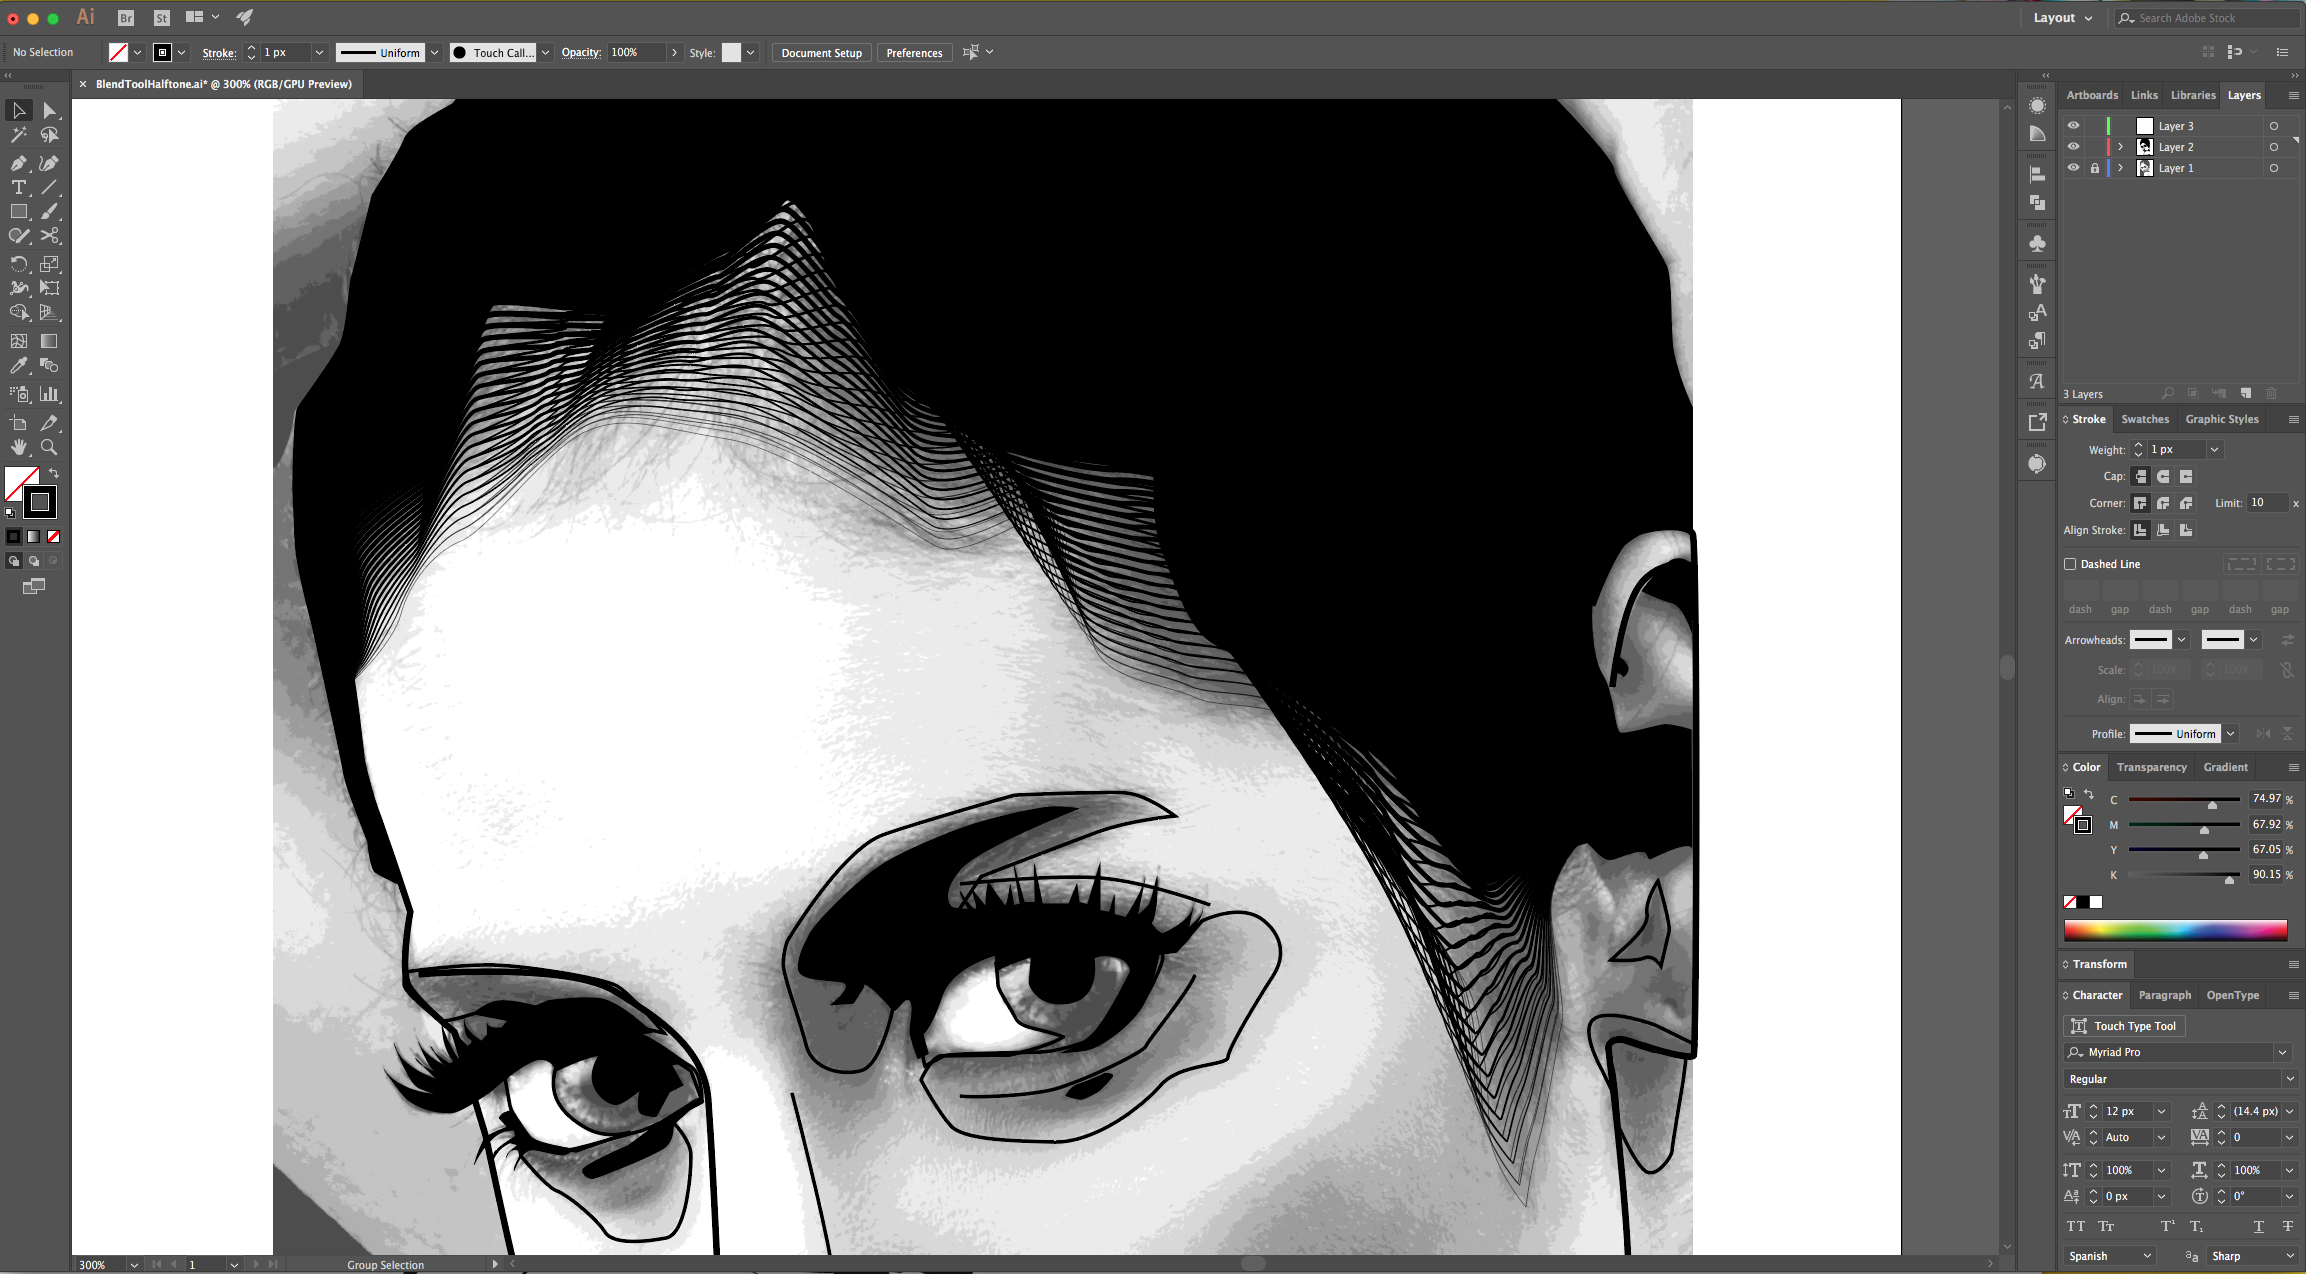
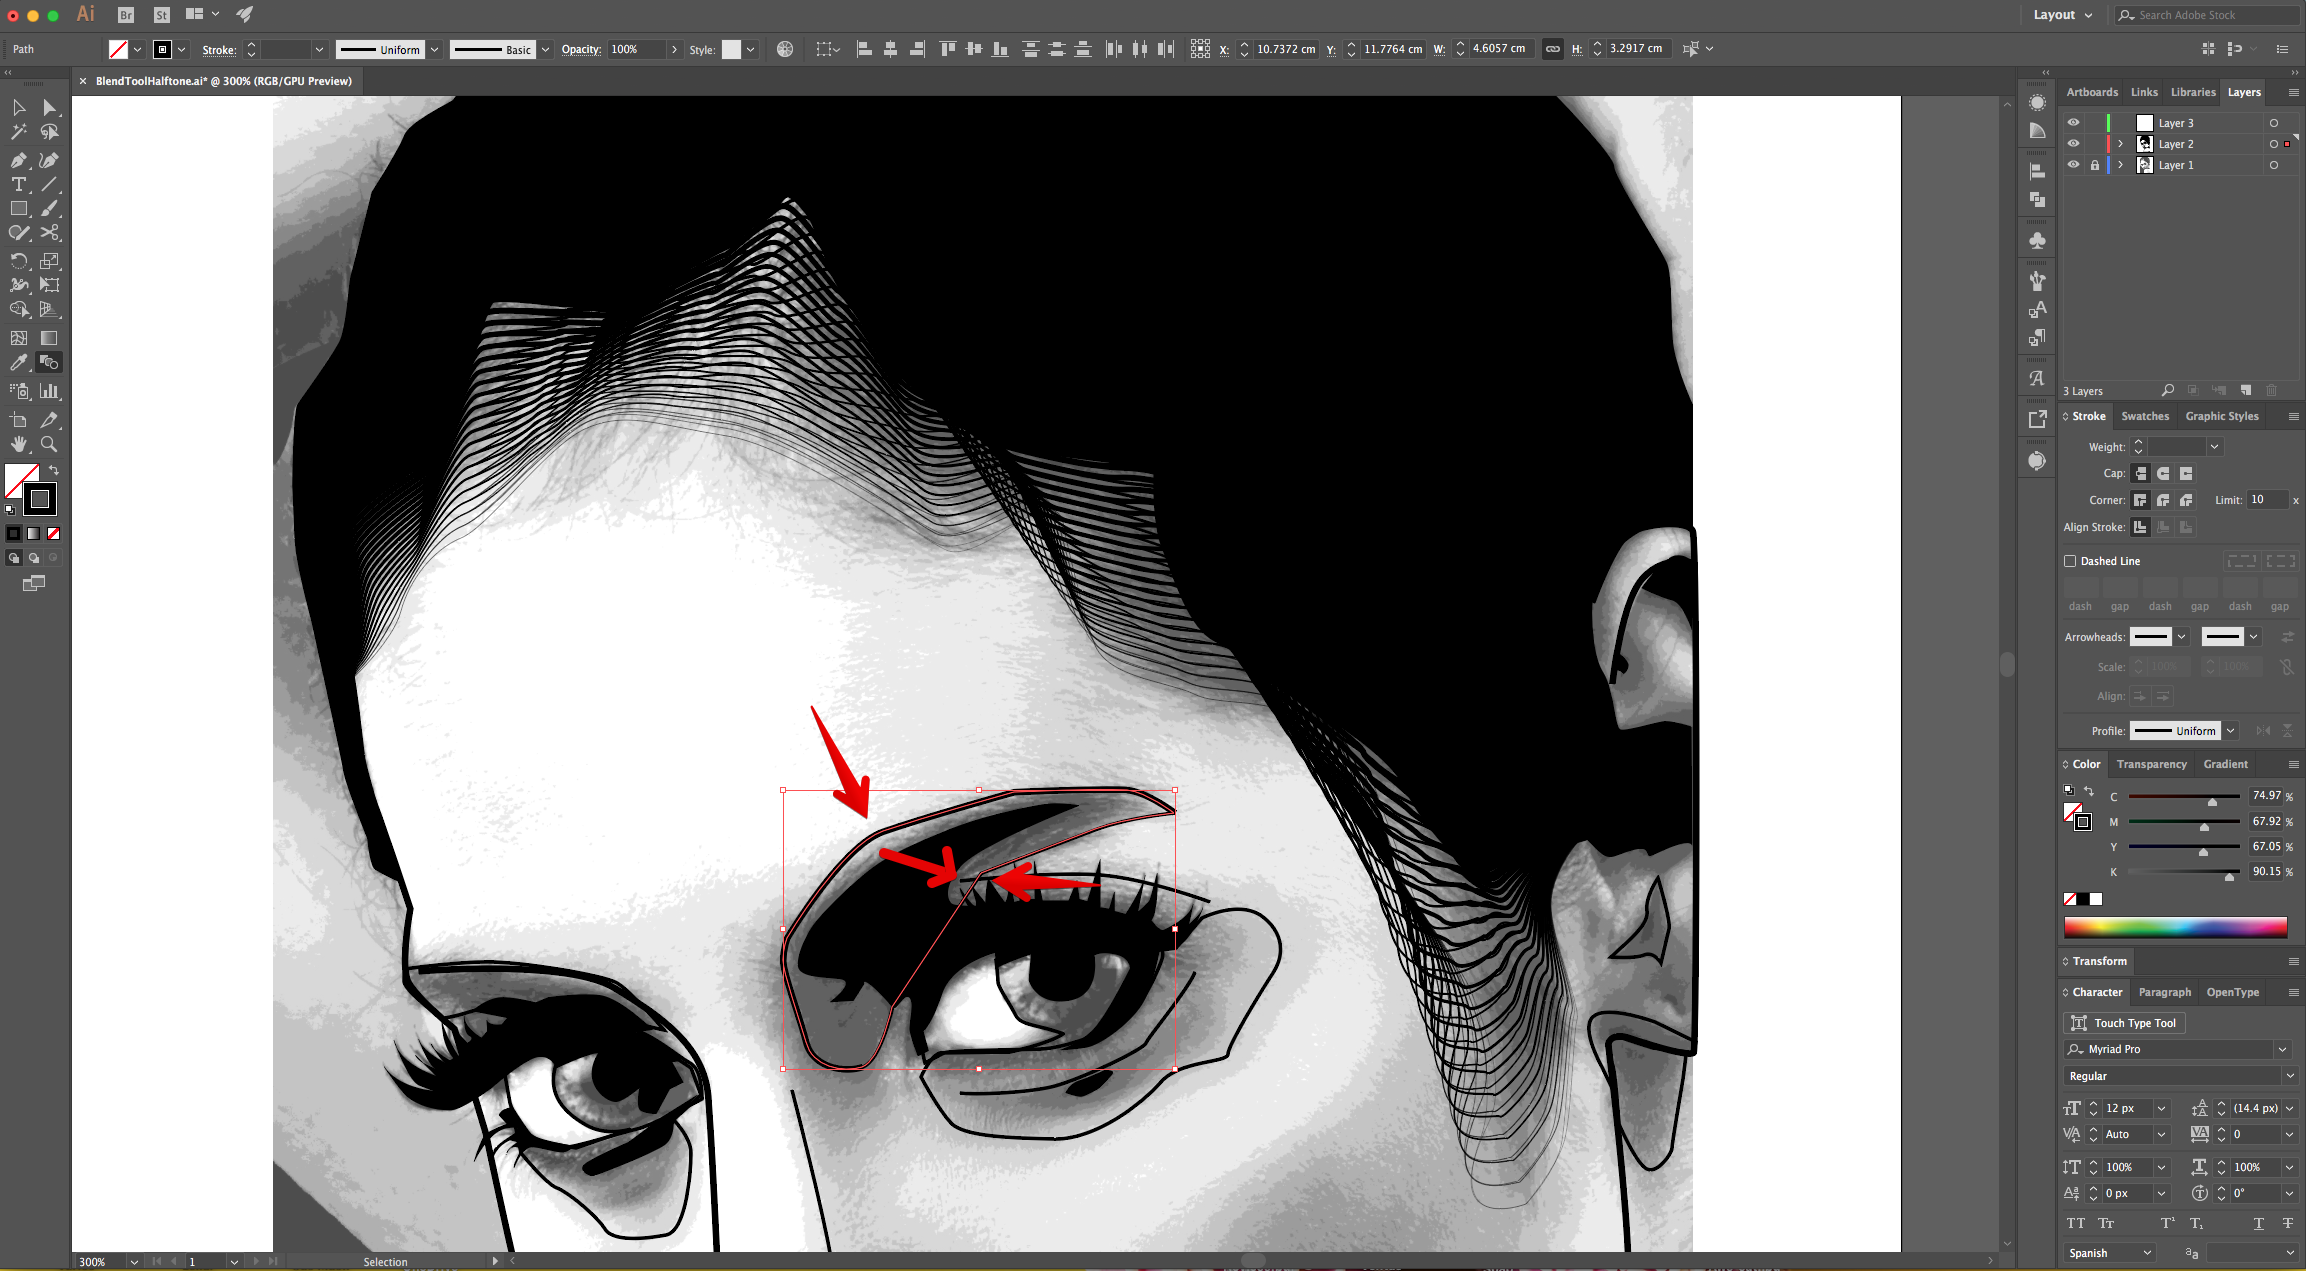
13 - Select the second instance of the path, change the “Stroke” weight of the thicker one to 1 px and repeat the “Blend”. To help you select the paths and to achieve a “Halftone” effect, move the first “Blended Path” to a side and Up or Down.
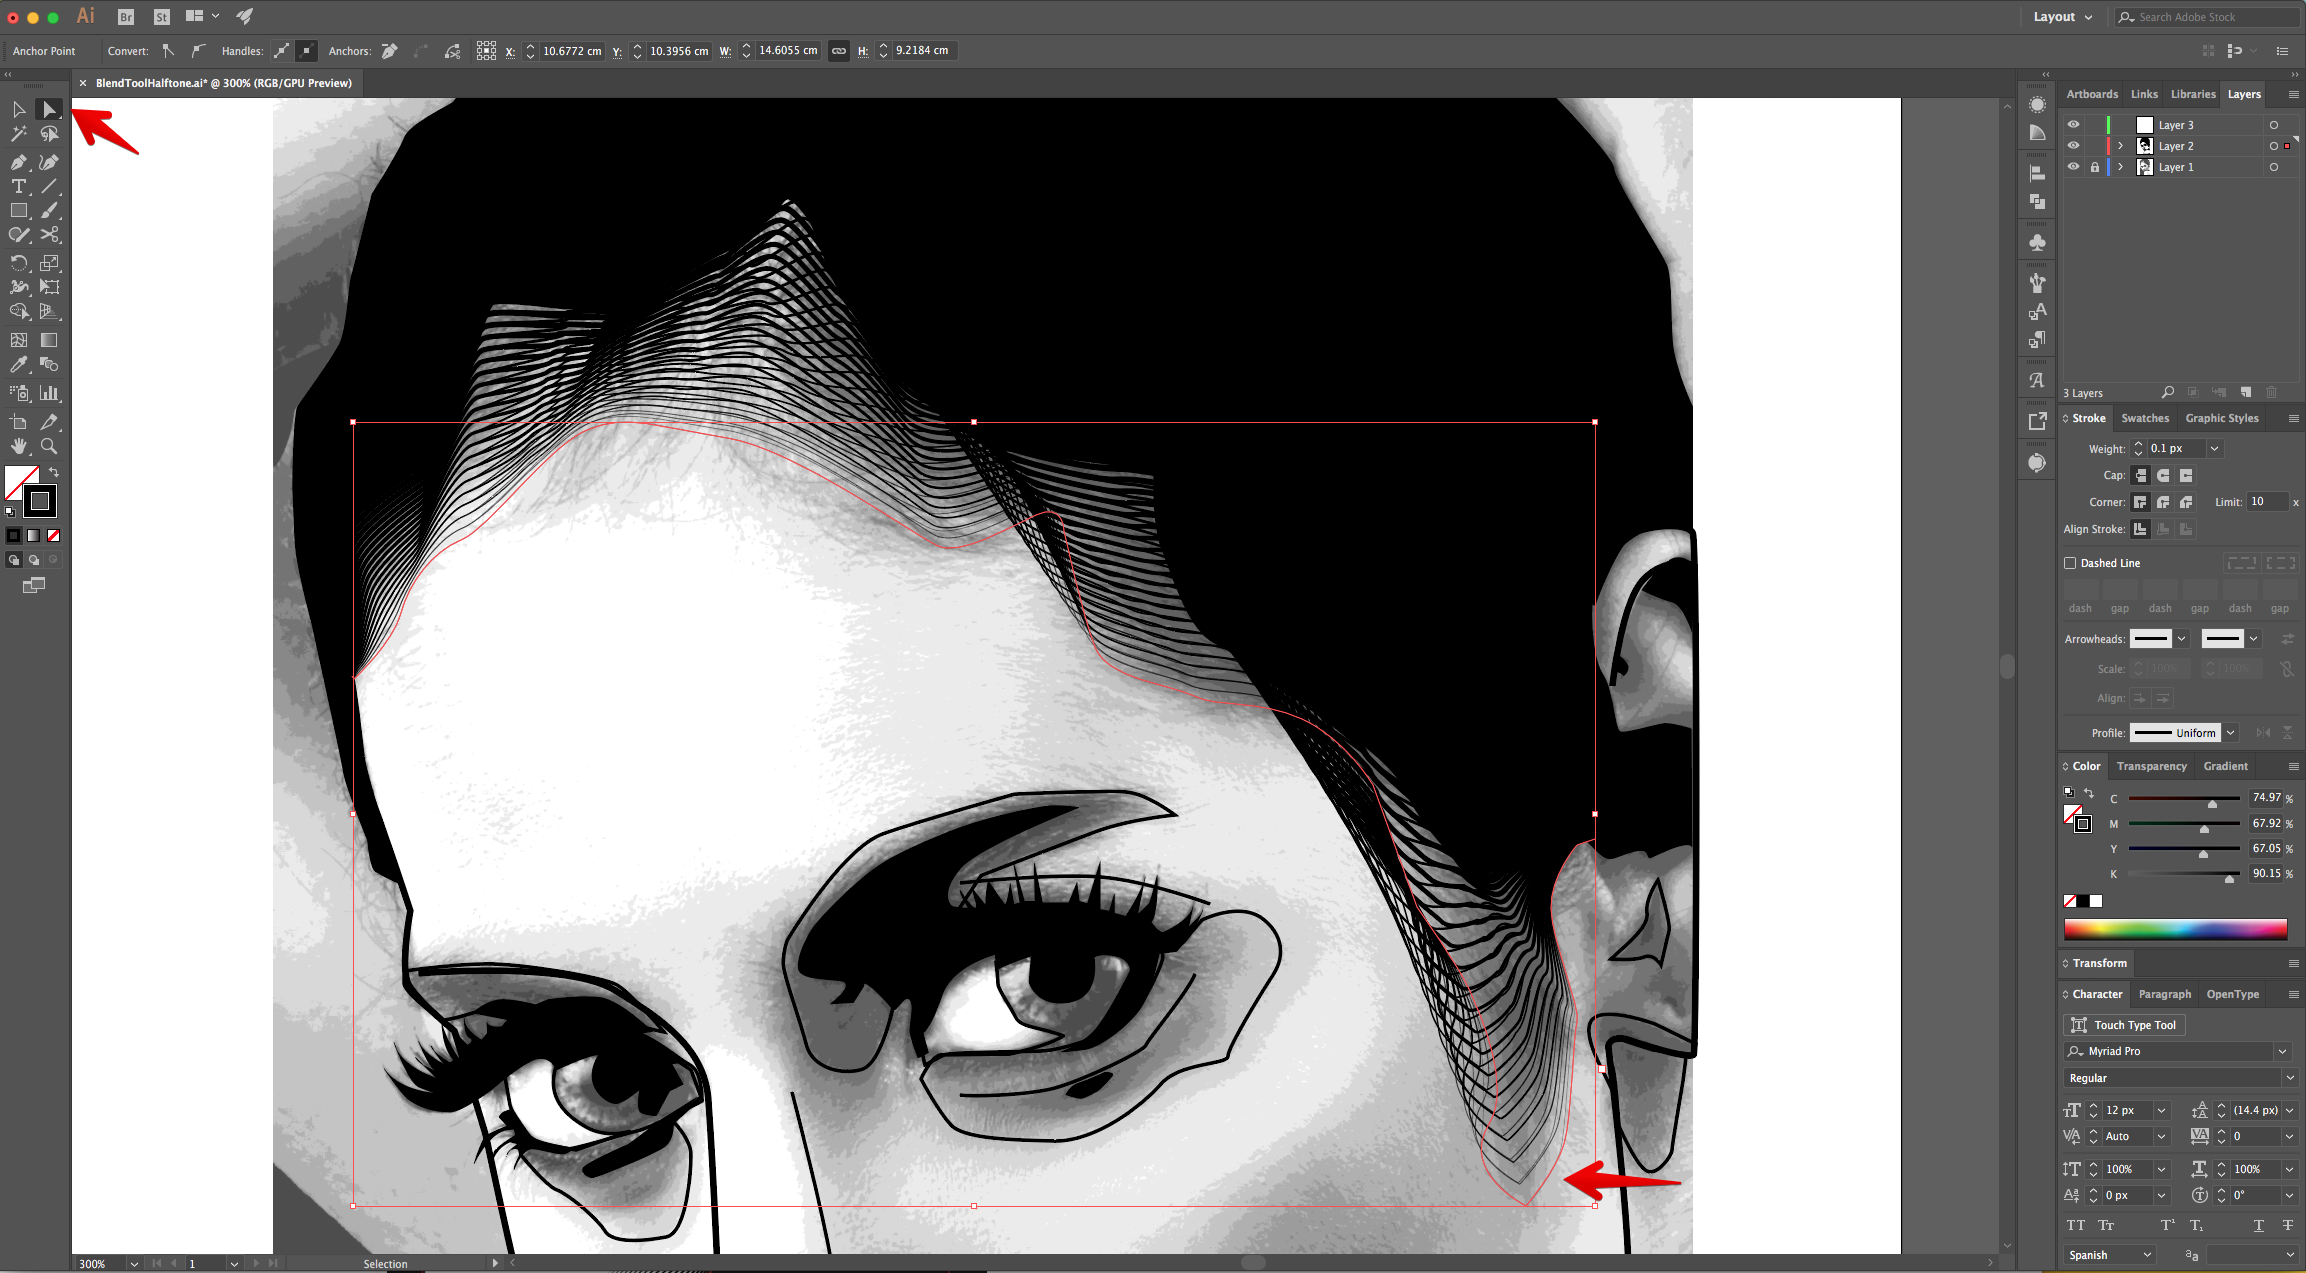
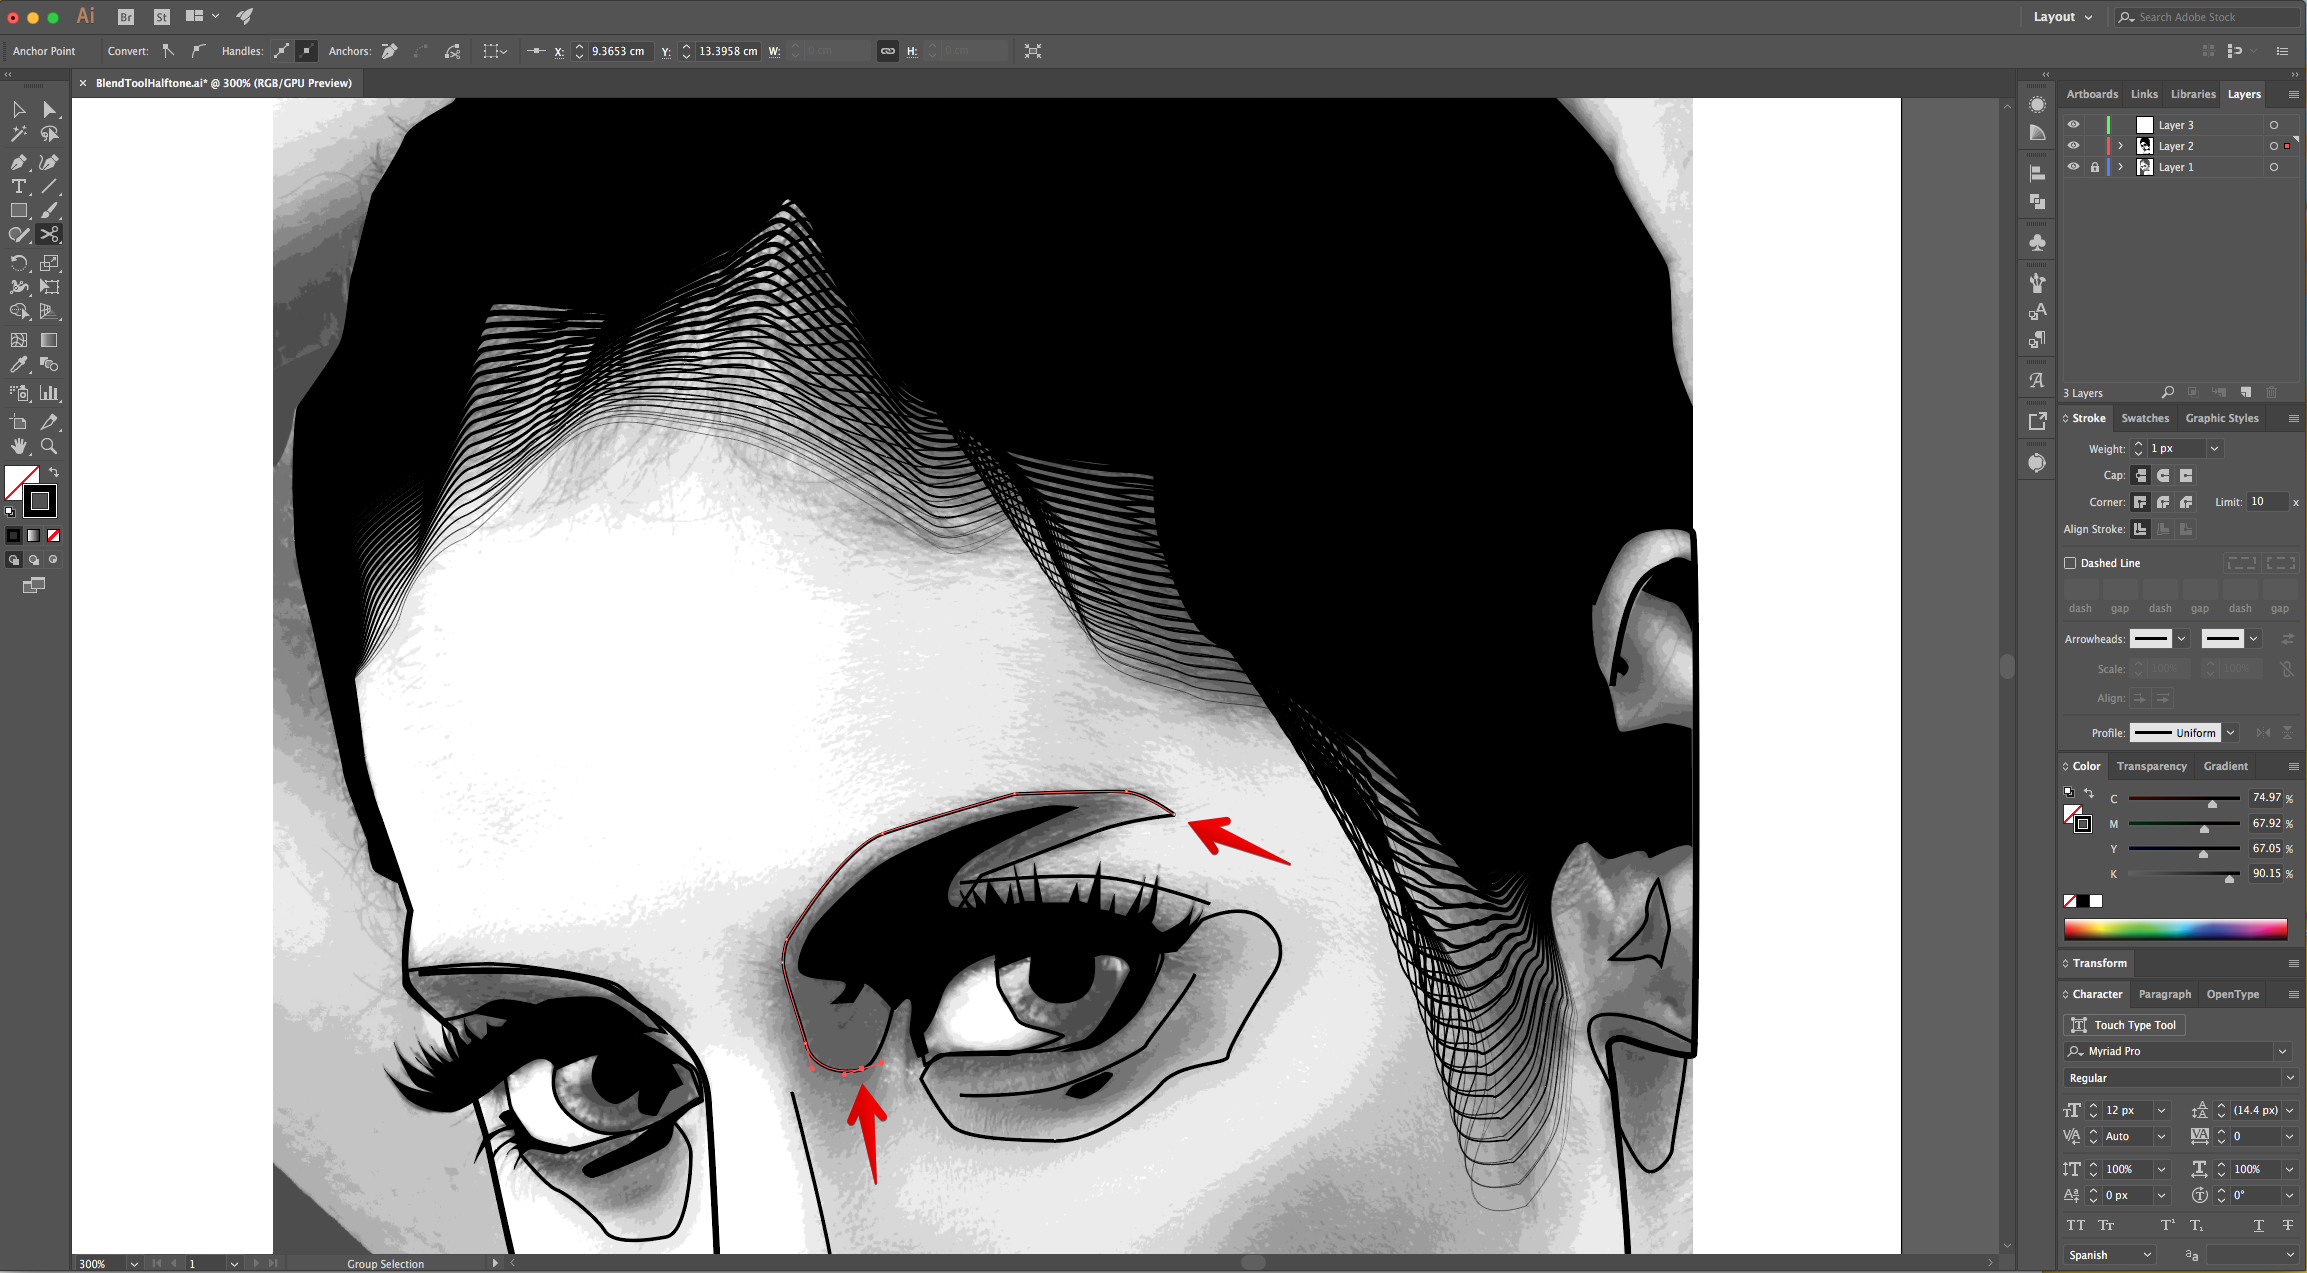
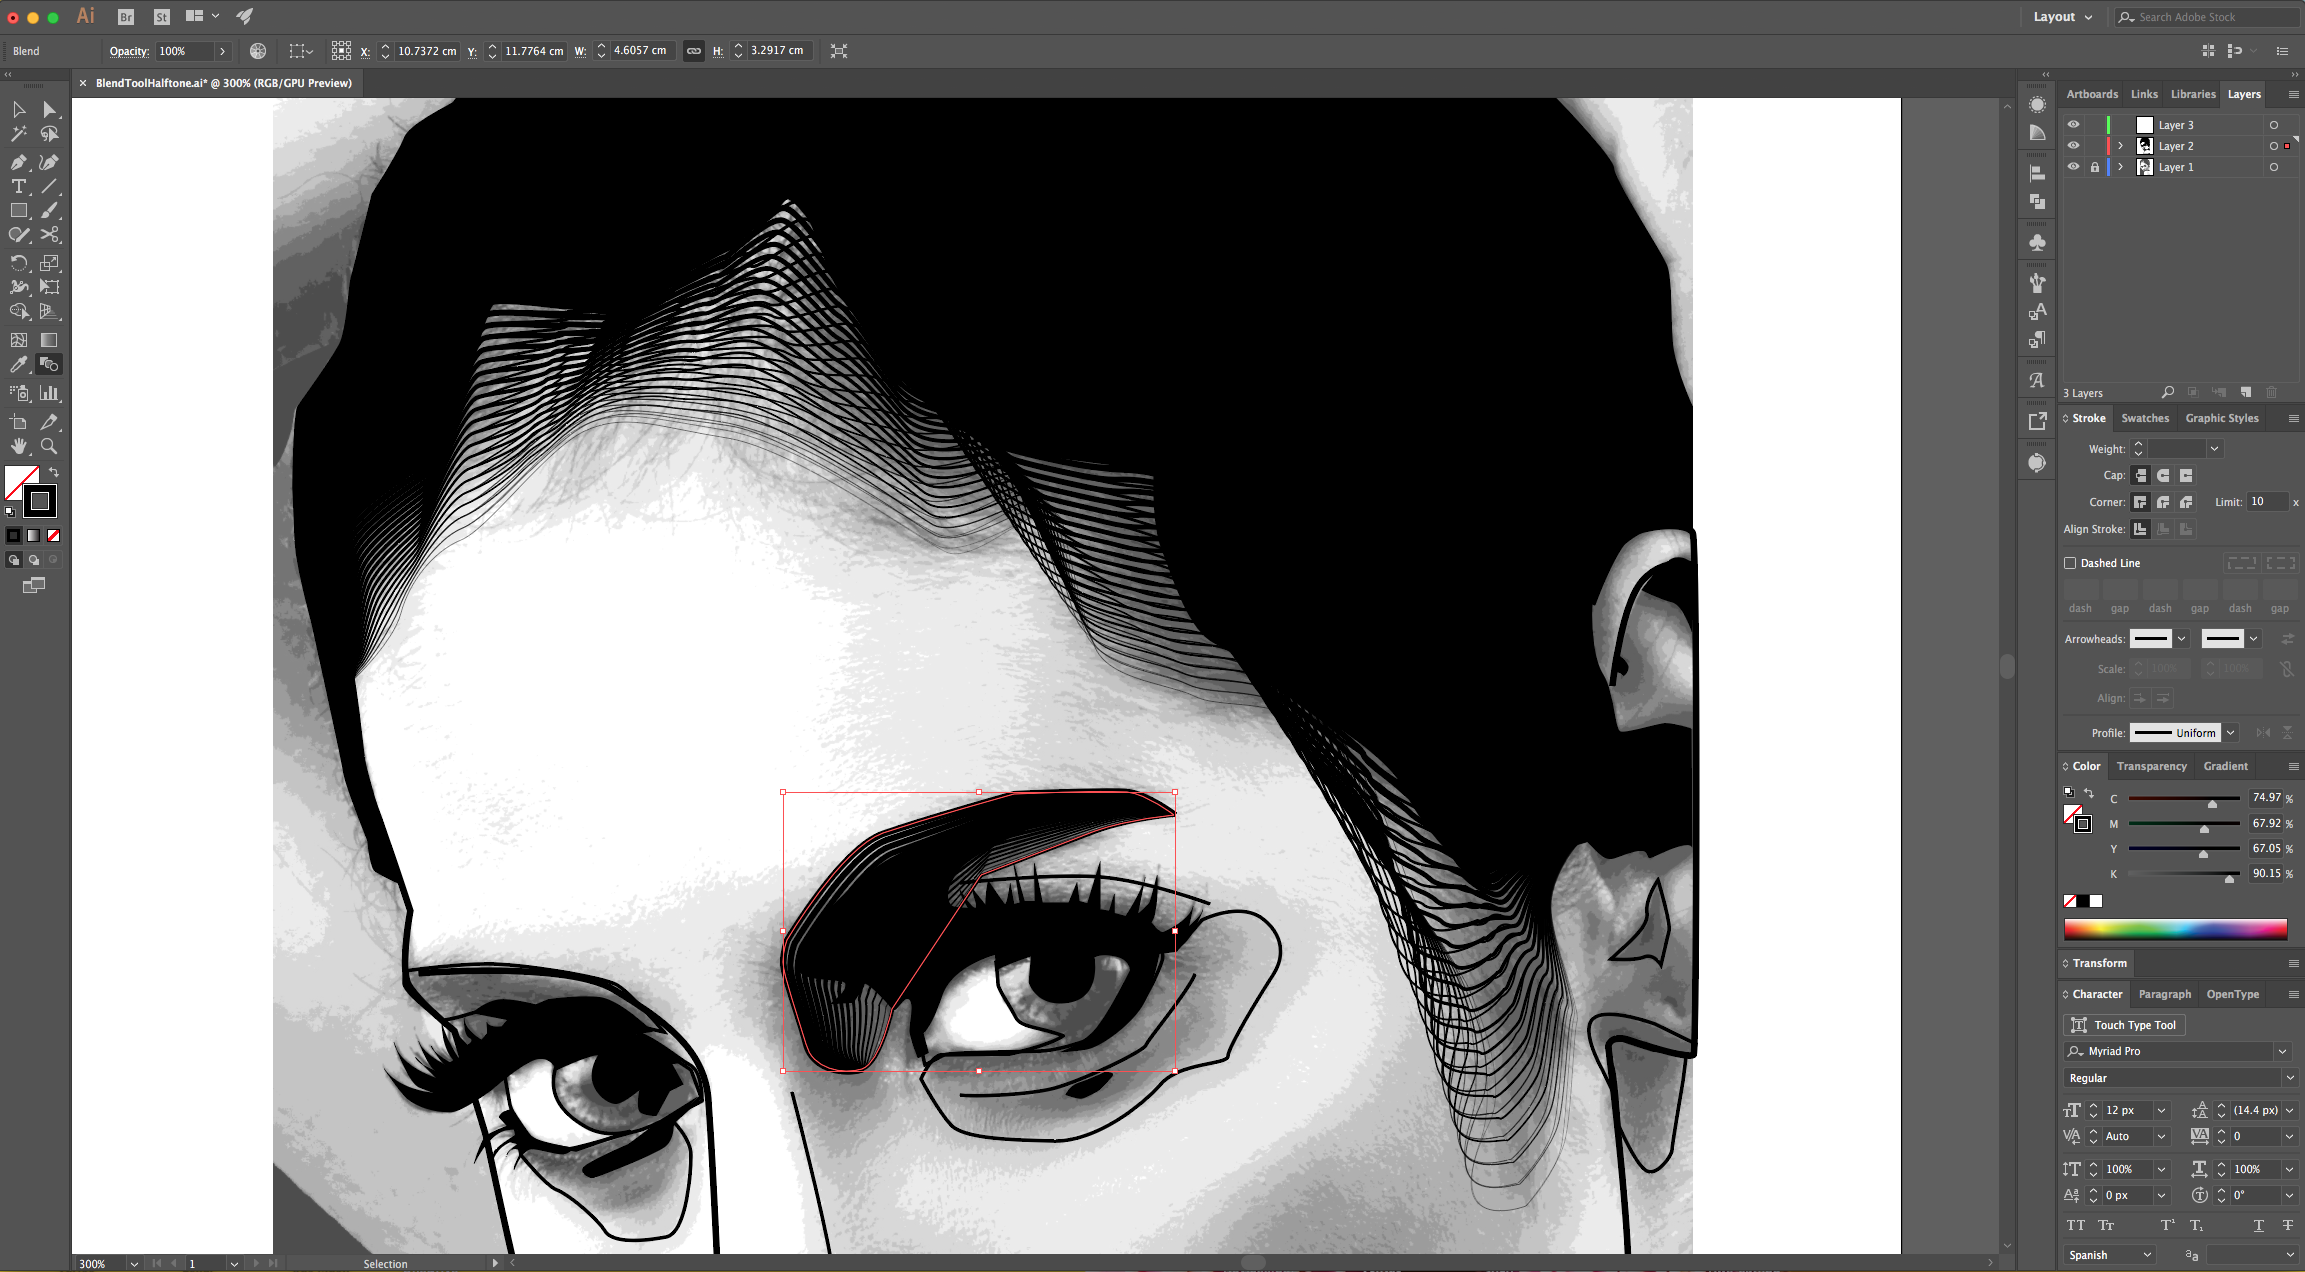
14 - Use the “Direct Selection Tool” (A) to select some “Anchor Points” in your paths and correct some shapes that may not be looking right.
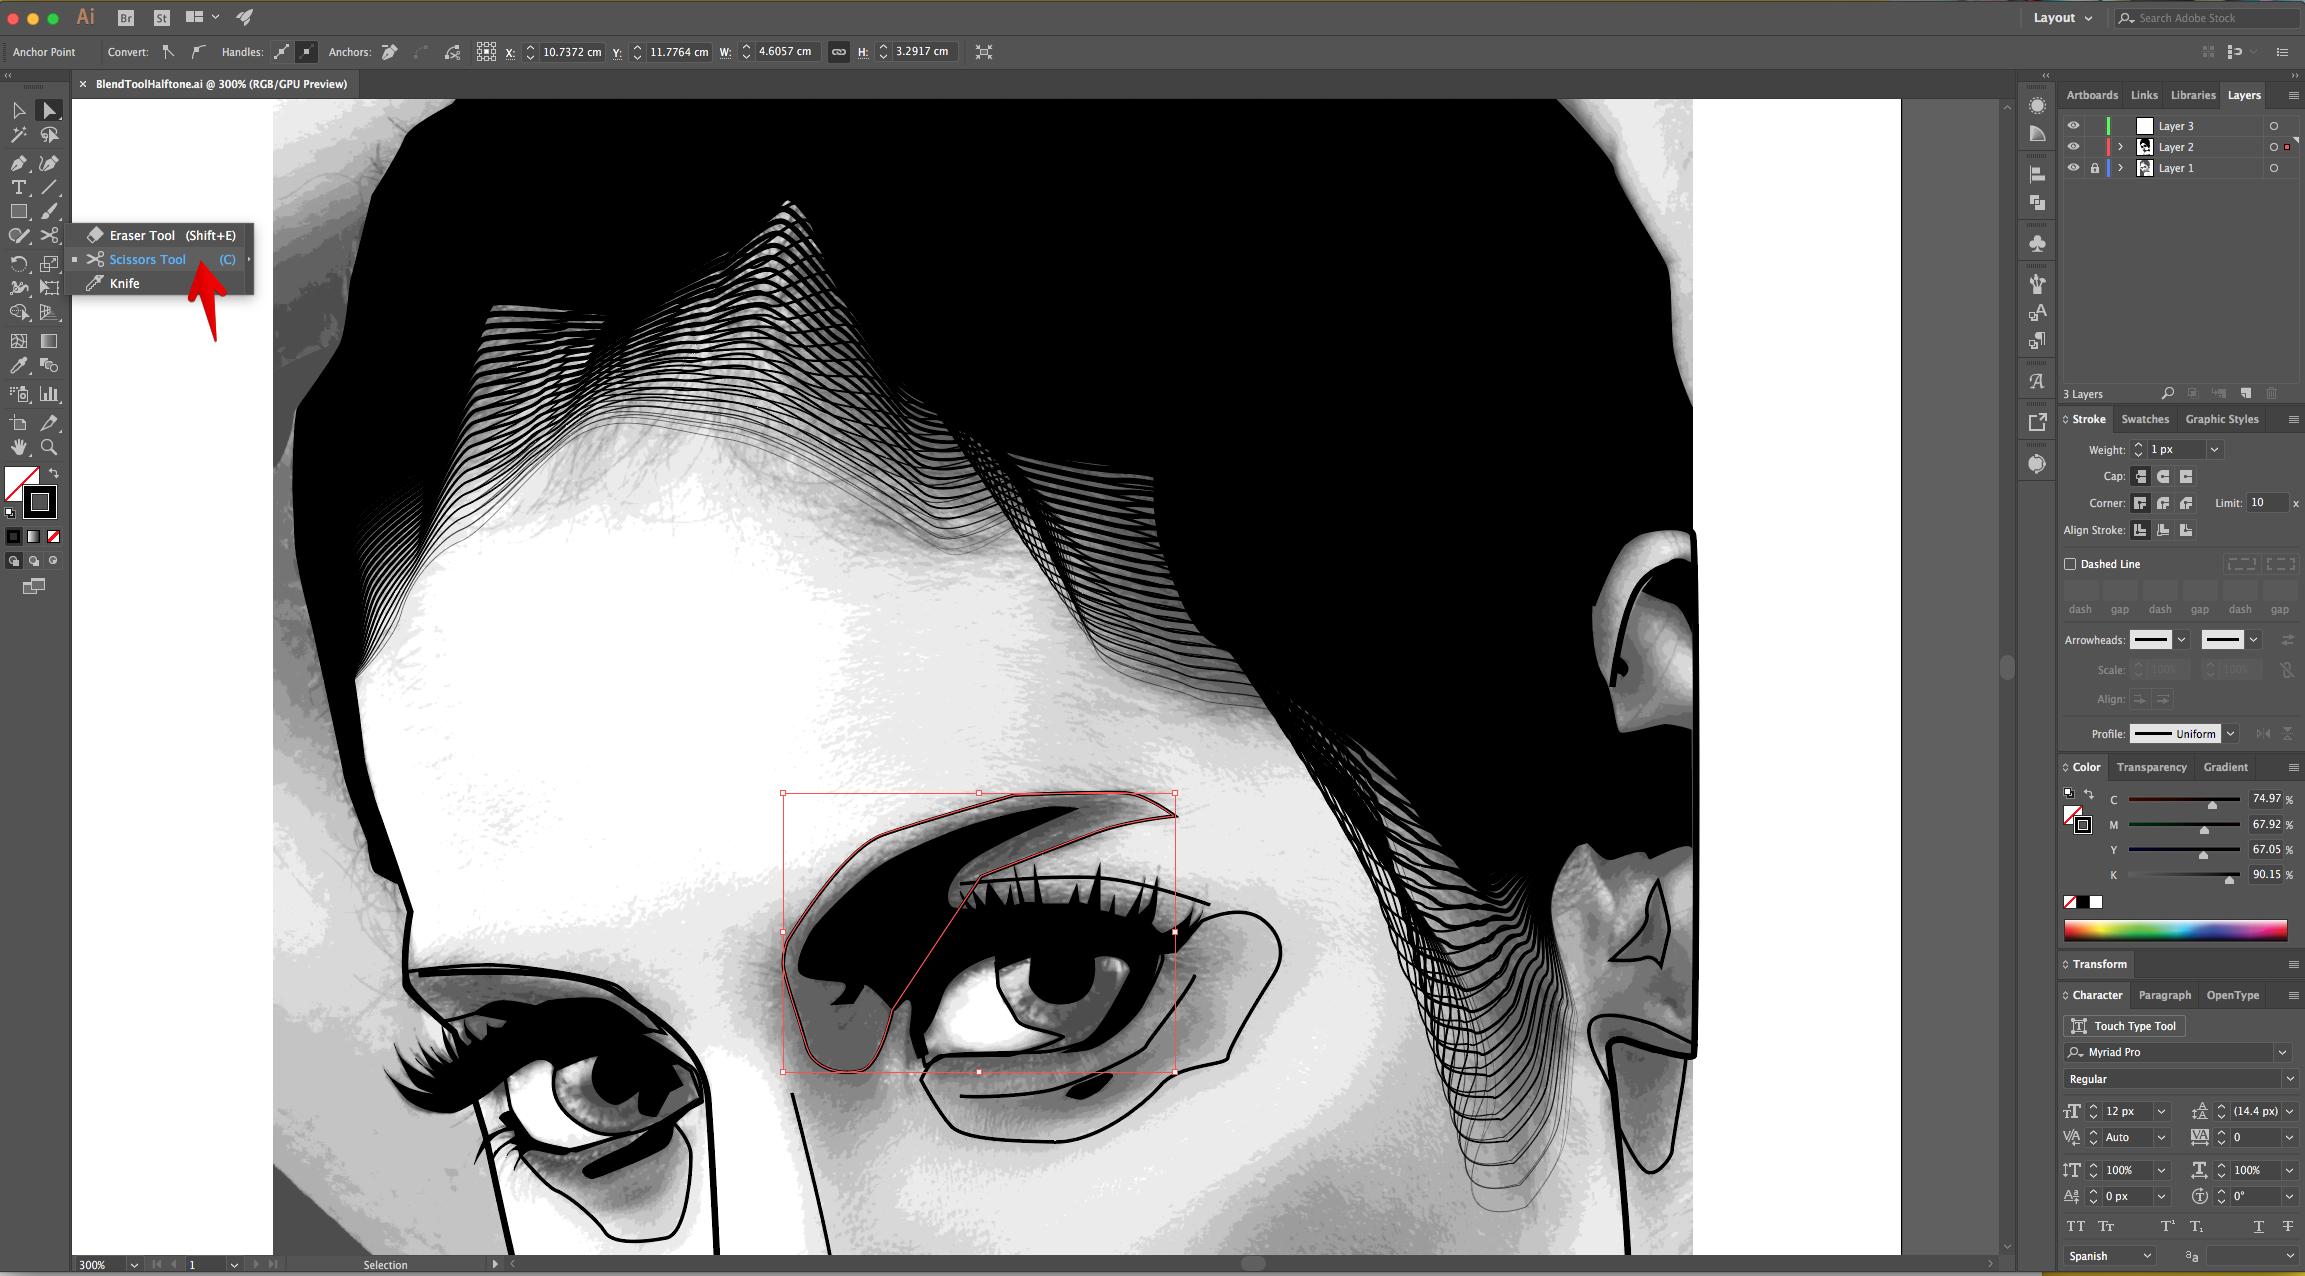
15 - If you created a closed Shape and you need to divide it, use the “Scissors Tool” (C).
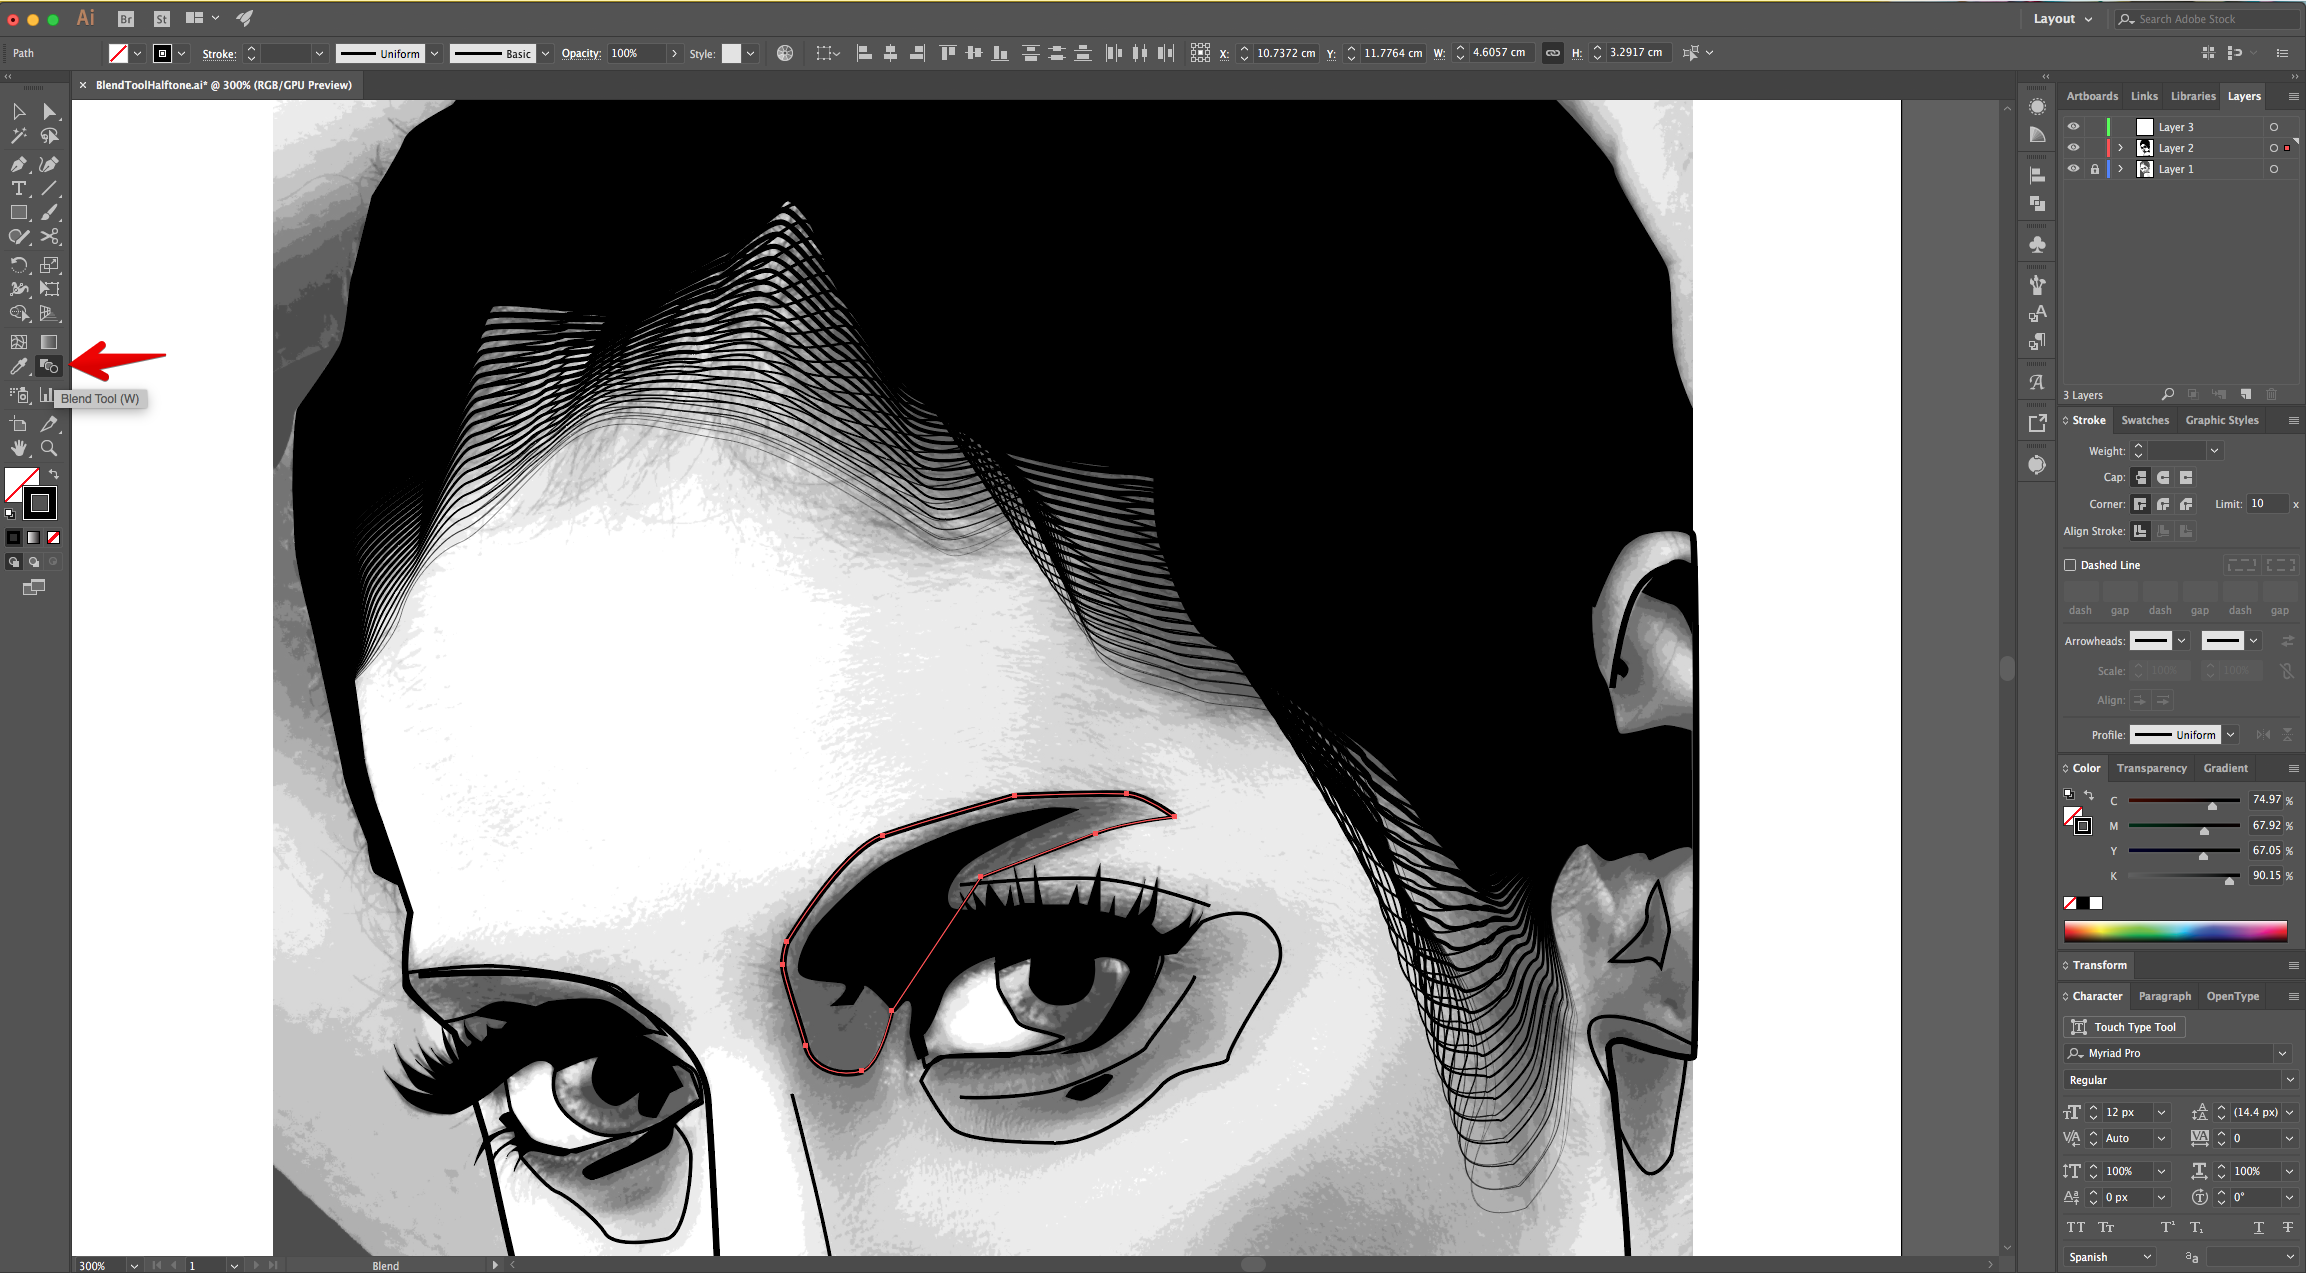
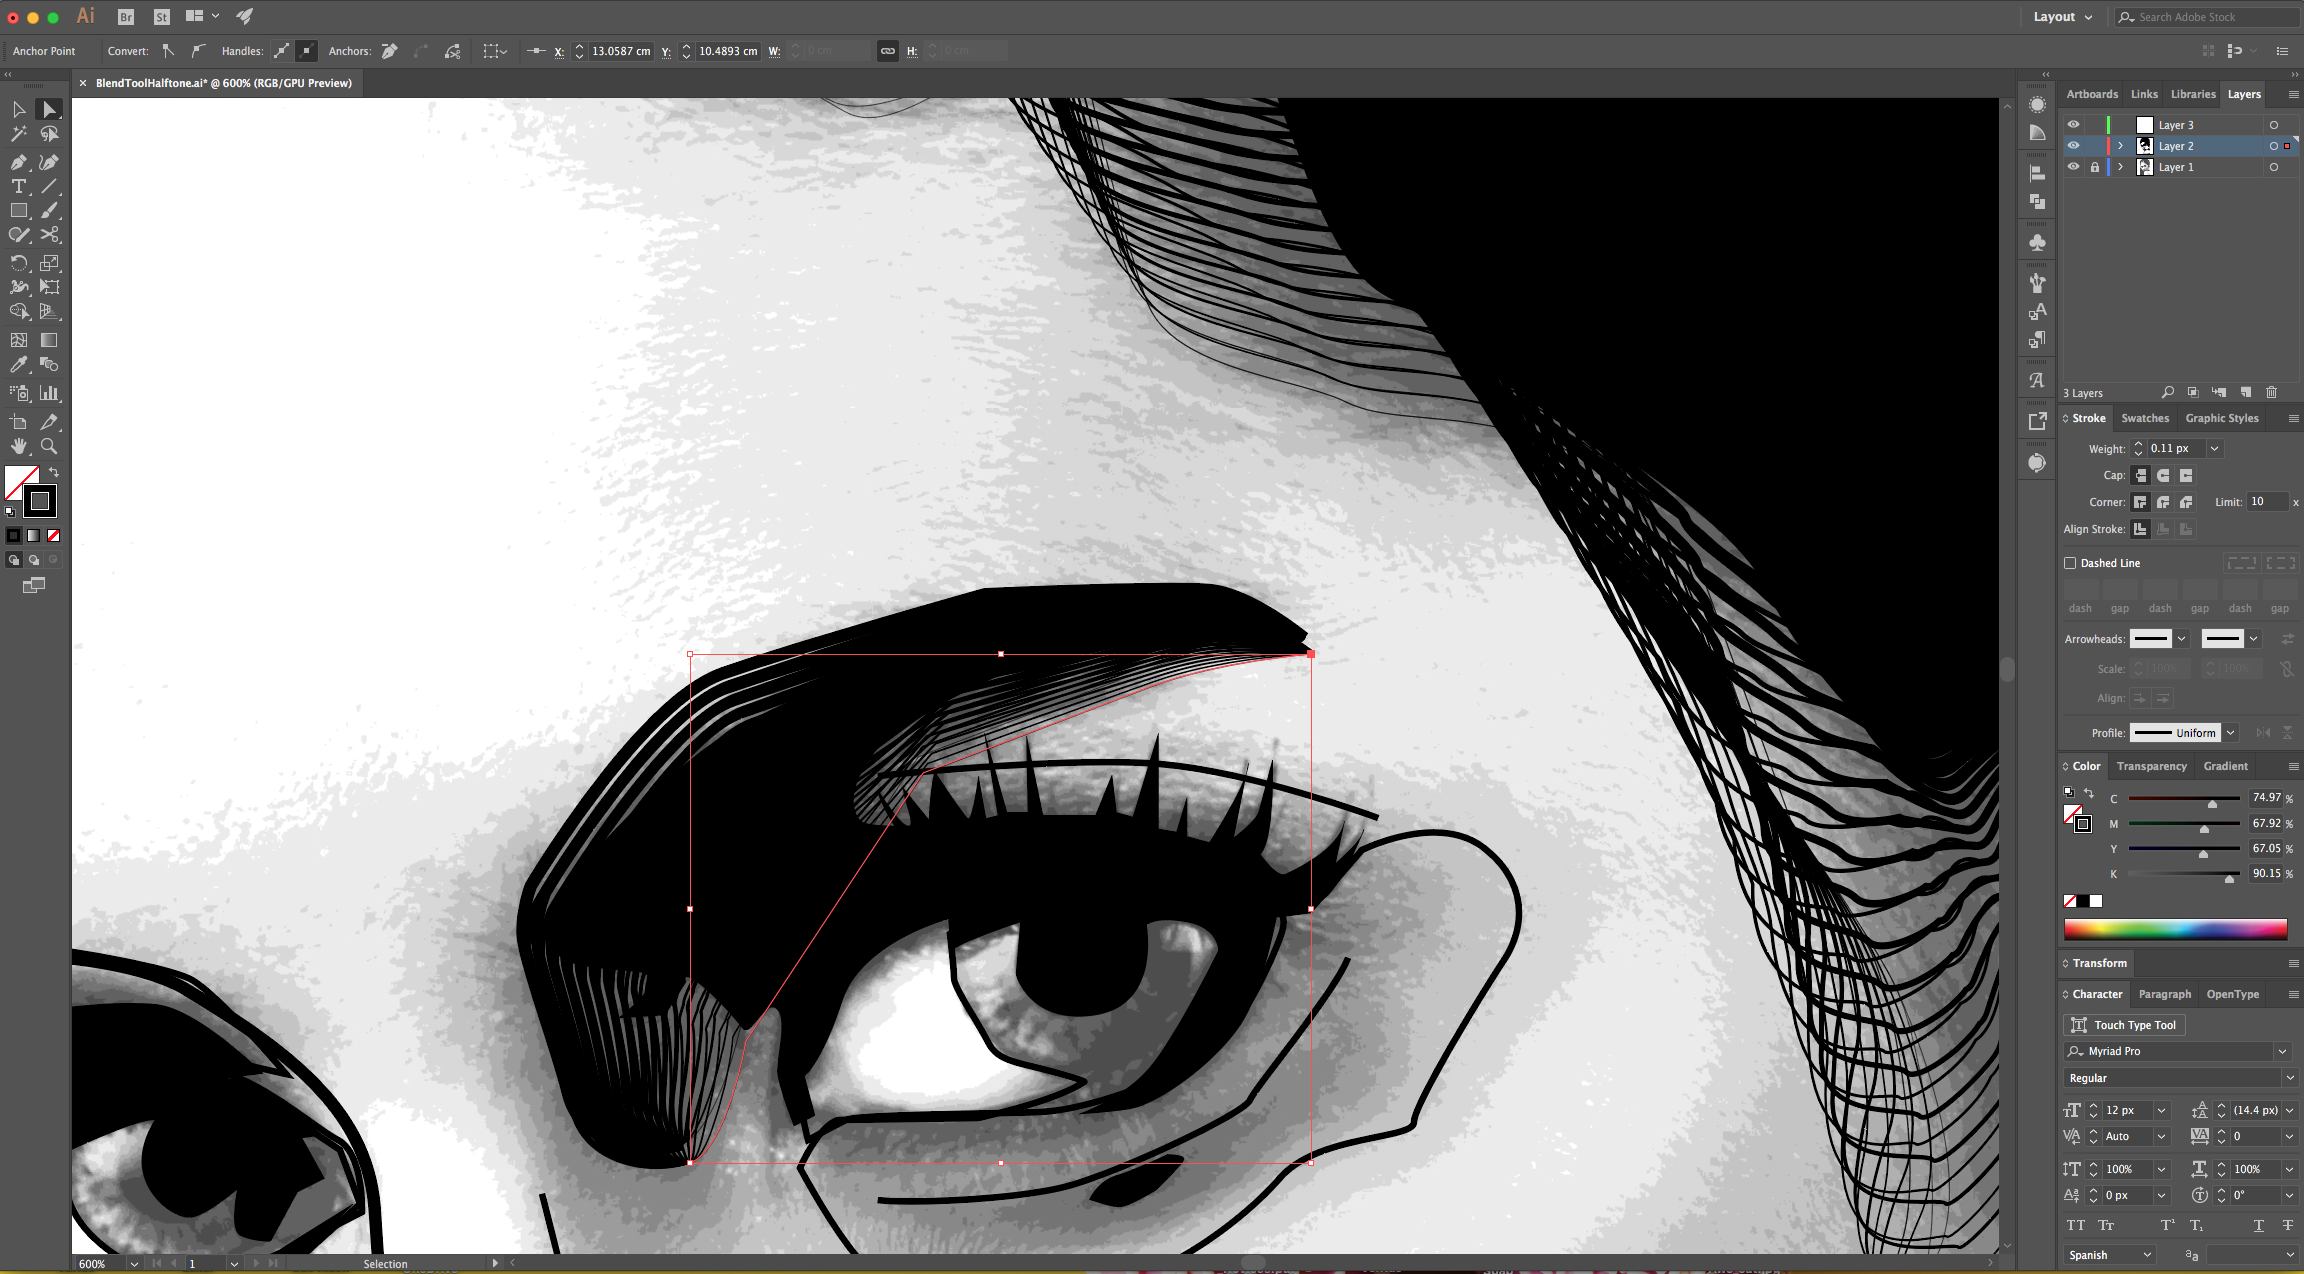
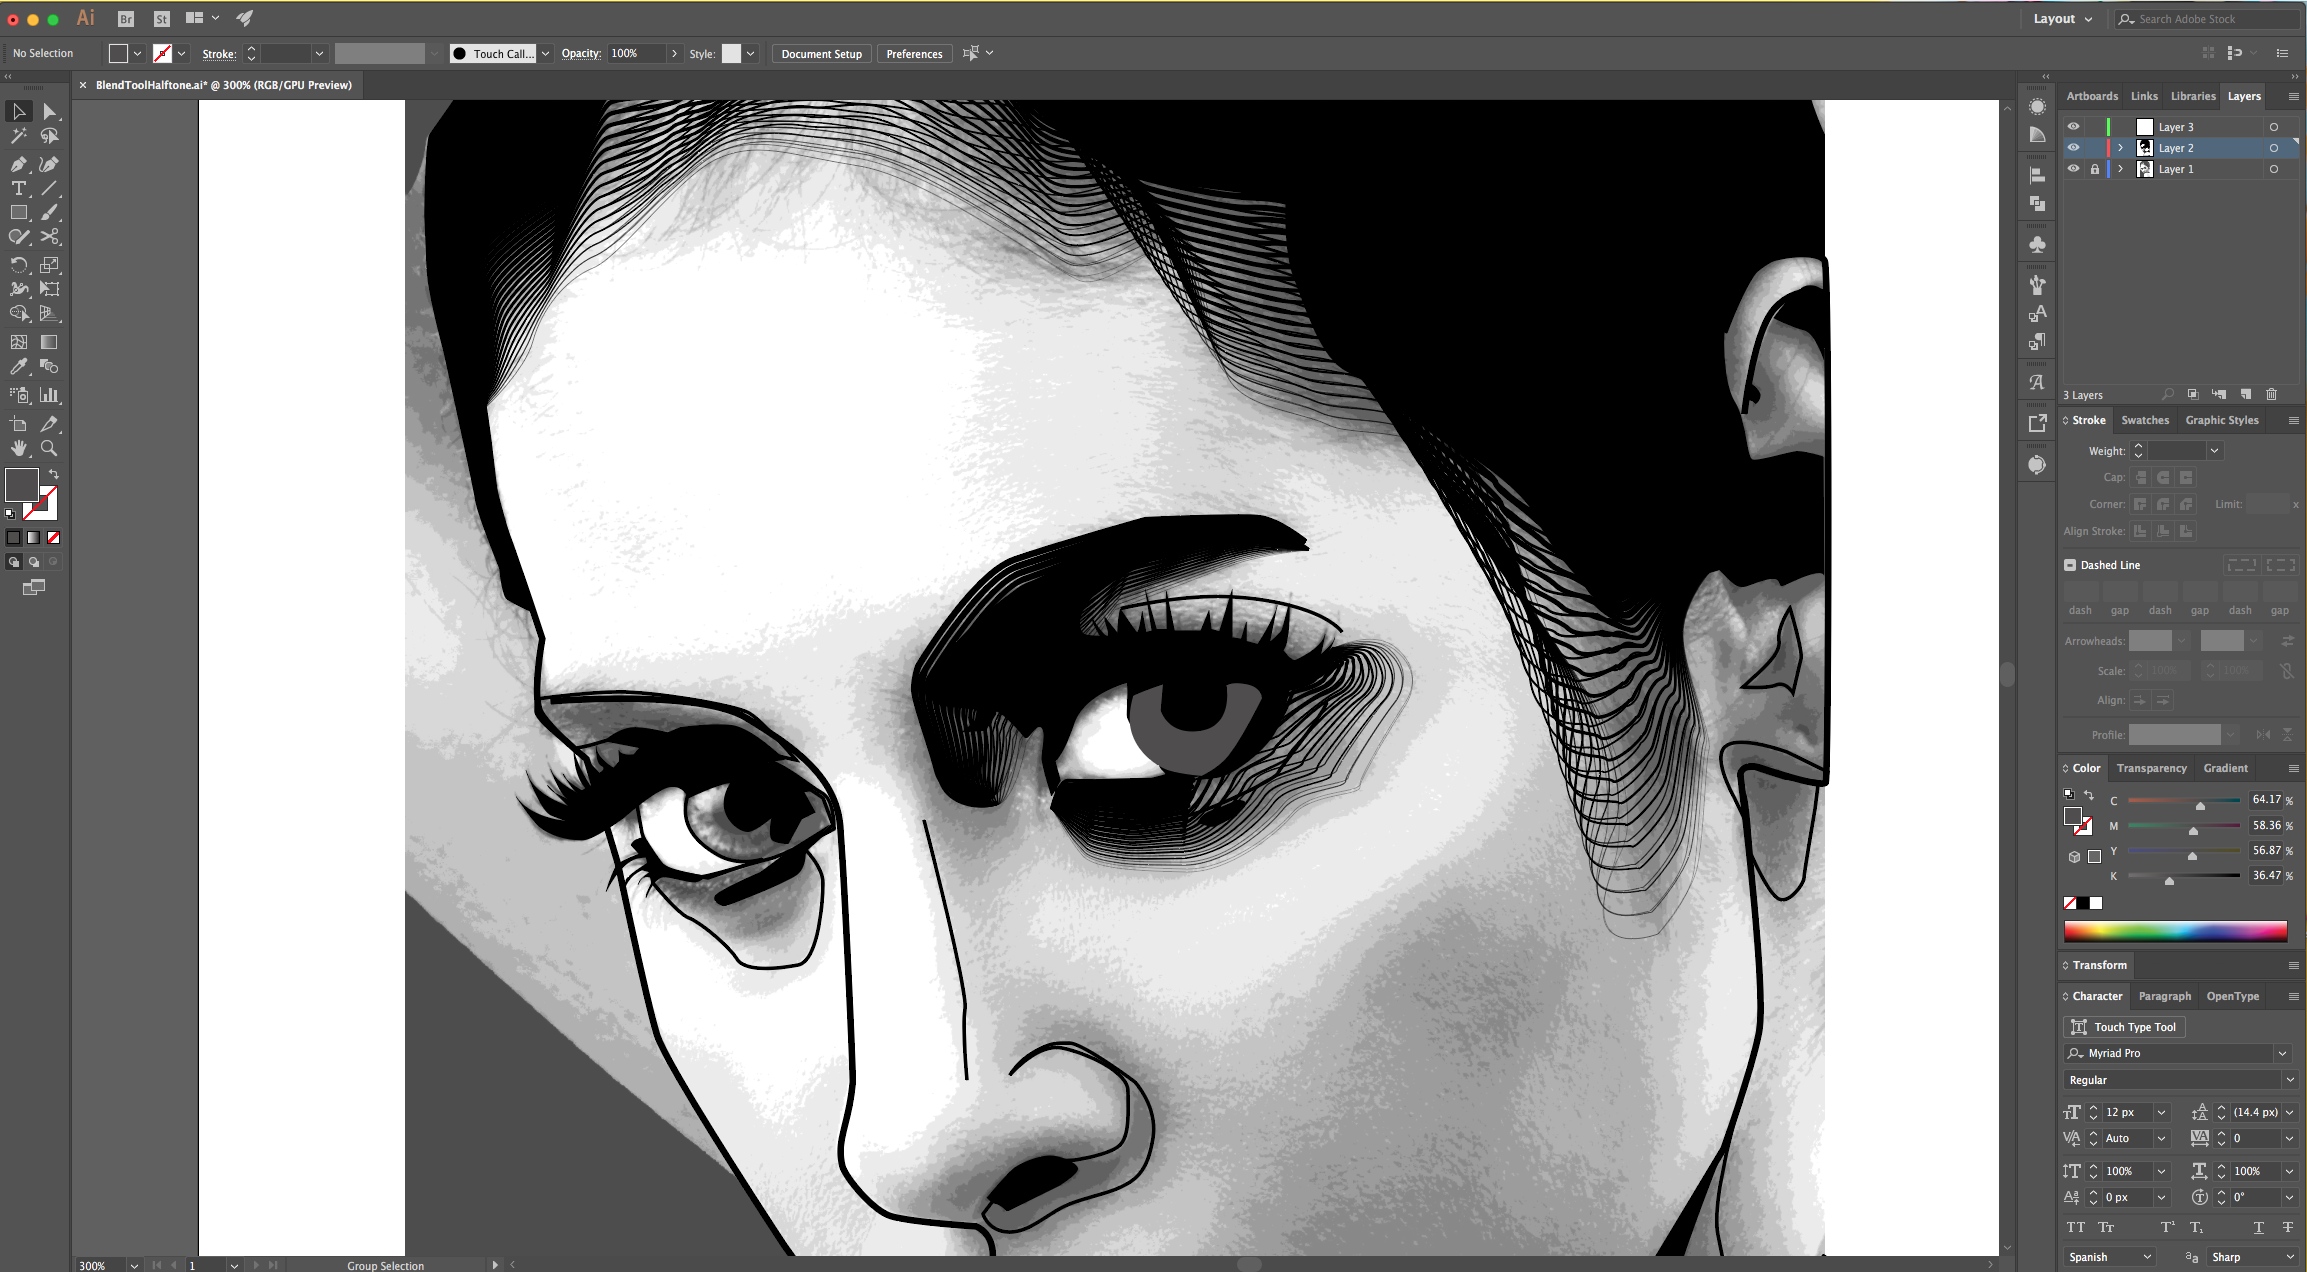
16 - Then keep creating Blends of the different shaded areas you created. You can use the “Blend Tool” (B) and click on the “Anchor Points” you want to use as Start and End points. You can also play around with the number of Steps used in the Blend. Use the “Direct Selection Tool” (A) to fix “End Points” that need it.
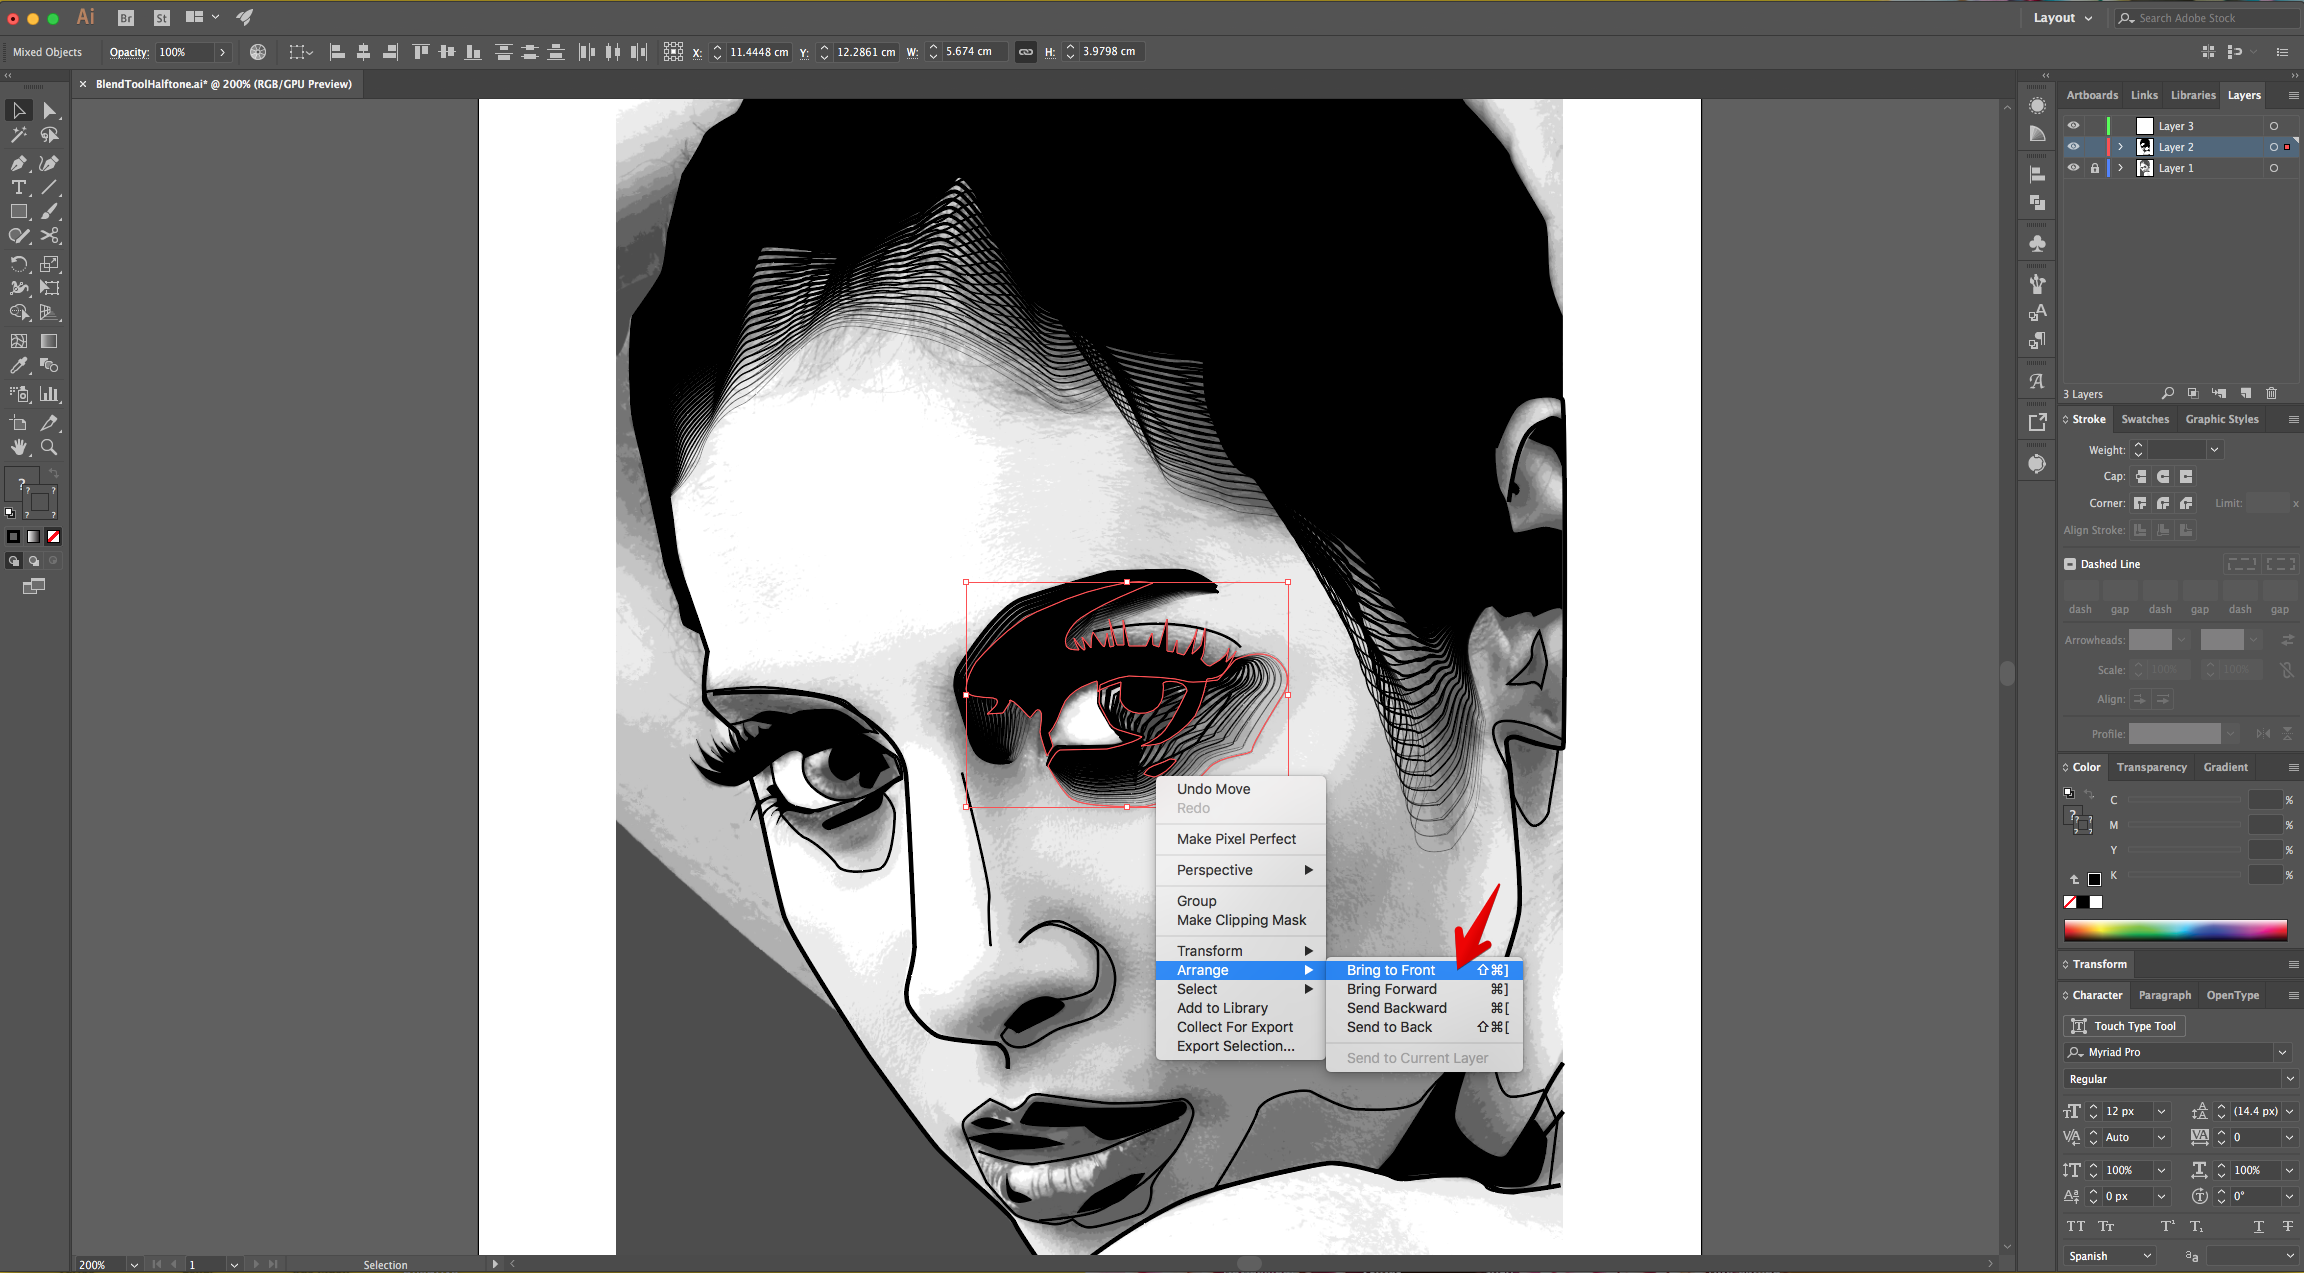
17 - You may need to arrange the placement of the different Paths. Select the first black filled “Shadows” you created, right-click on top and choose Arrange > Bring to Front. You can also add some Grey and White filled paths to cover the areas that should be filled with those colors.
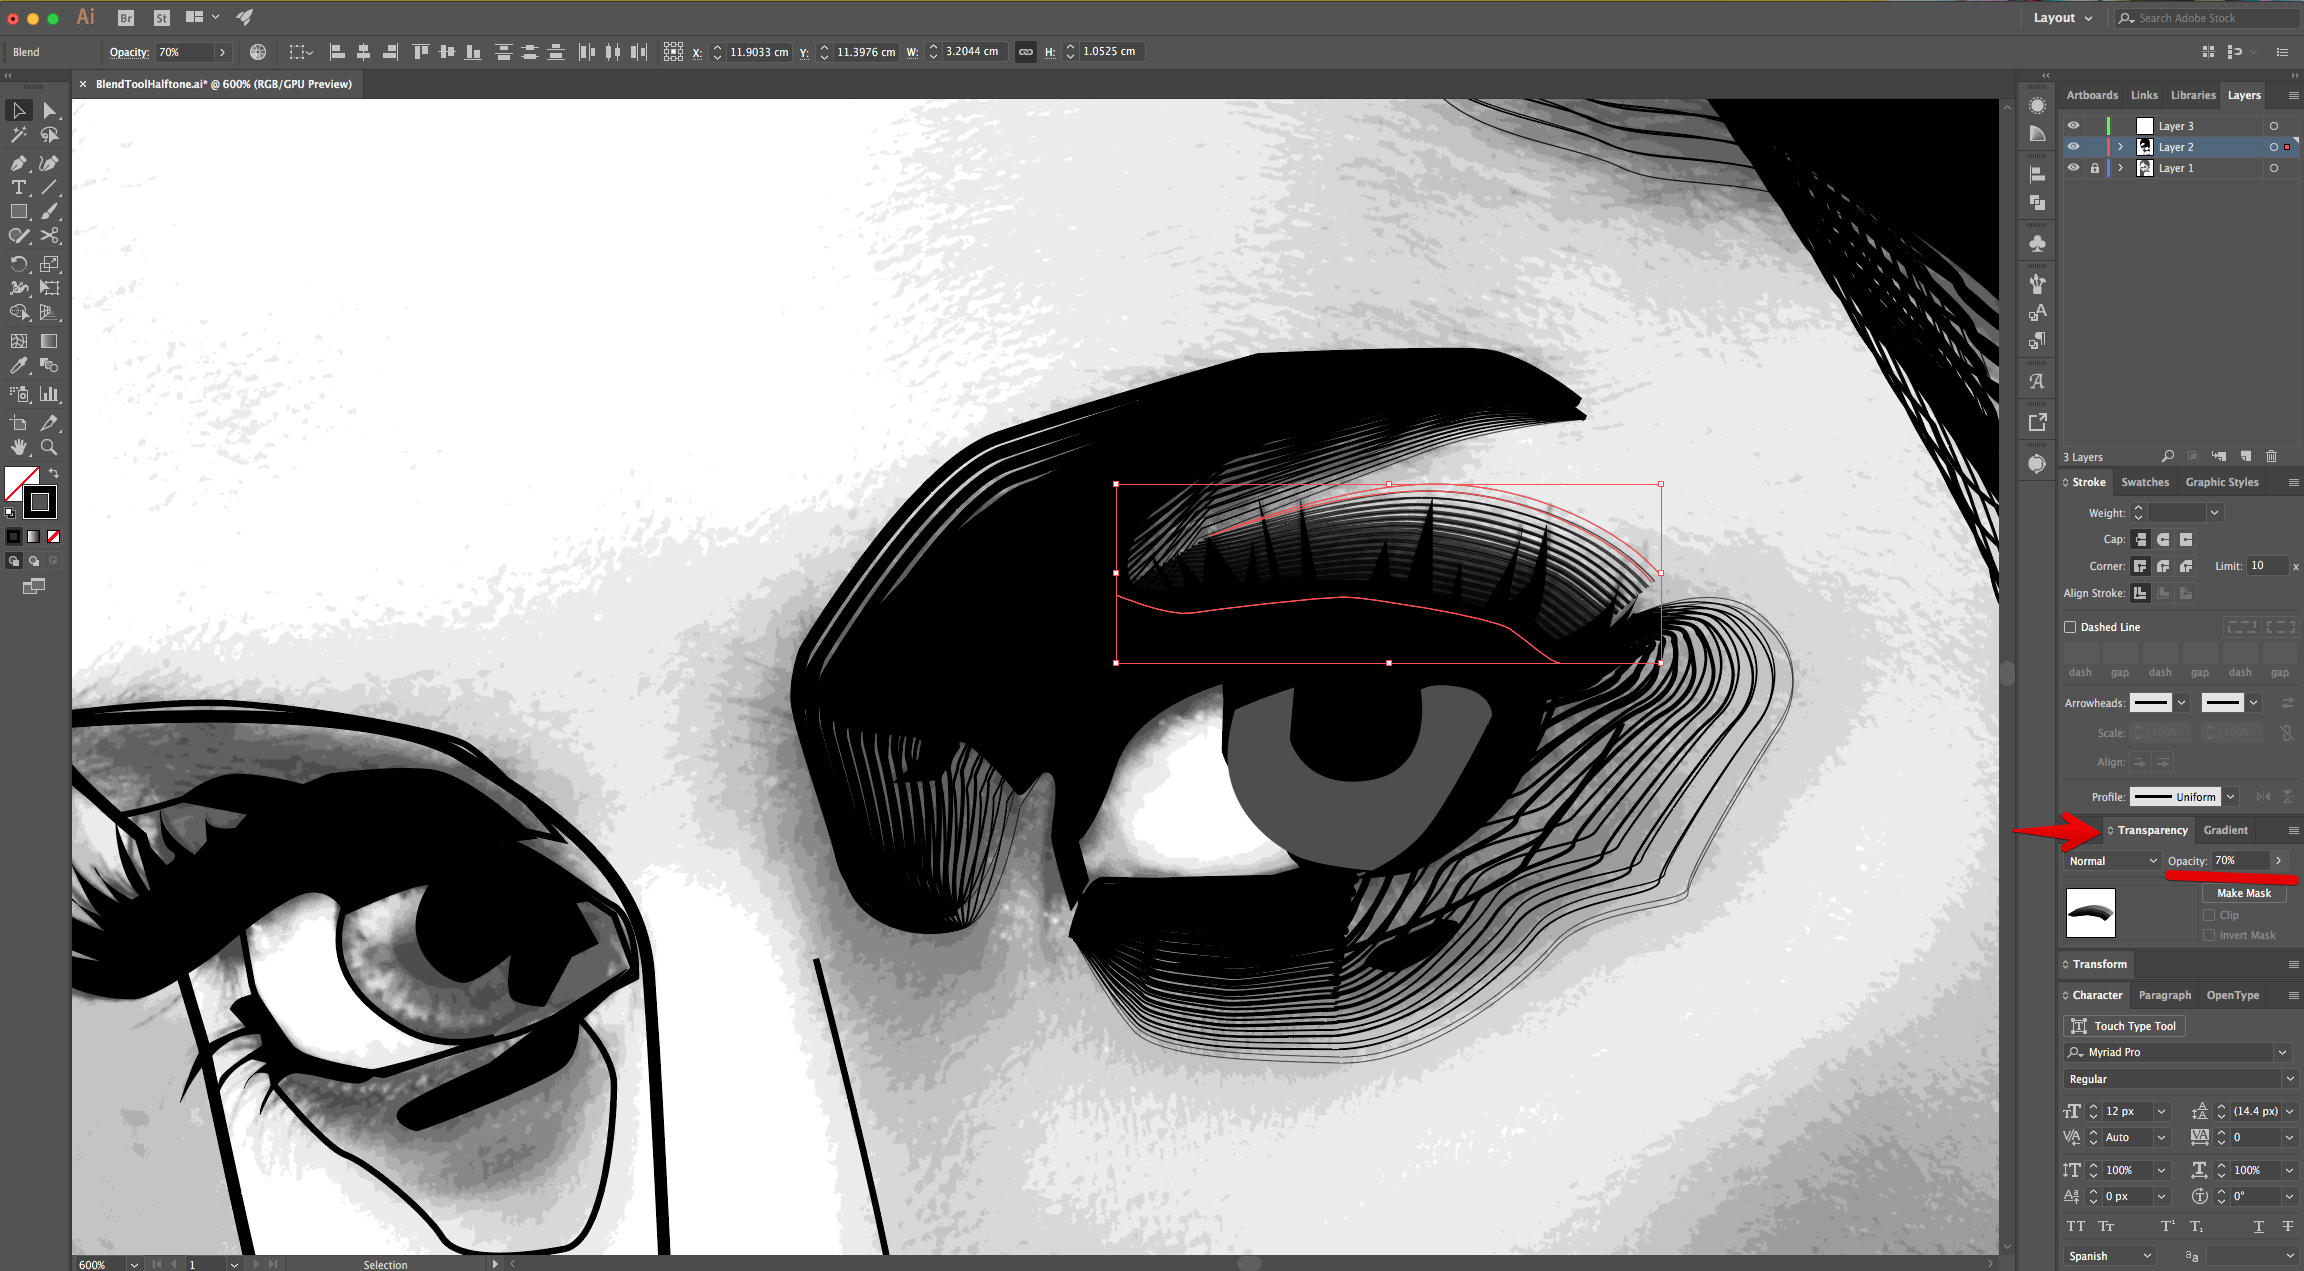
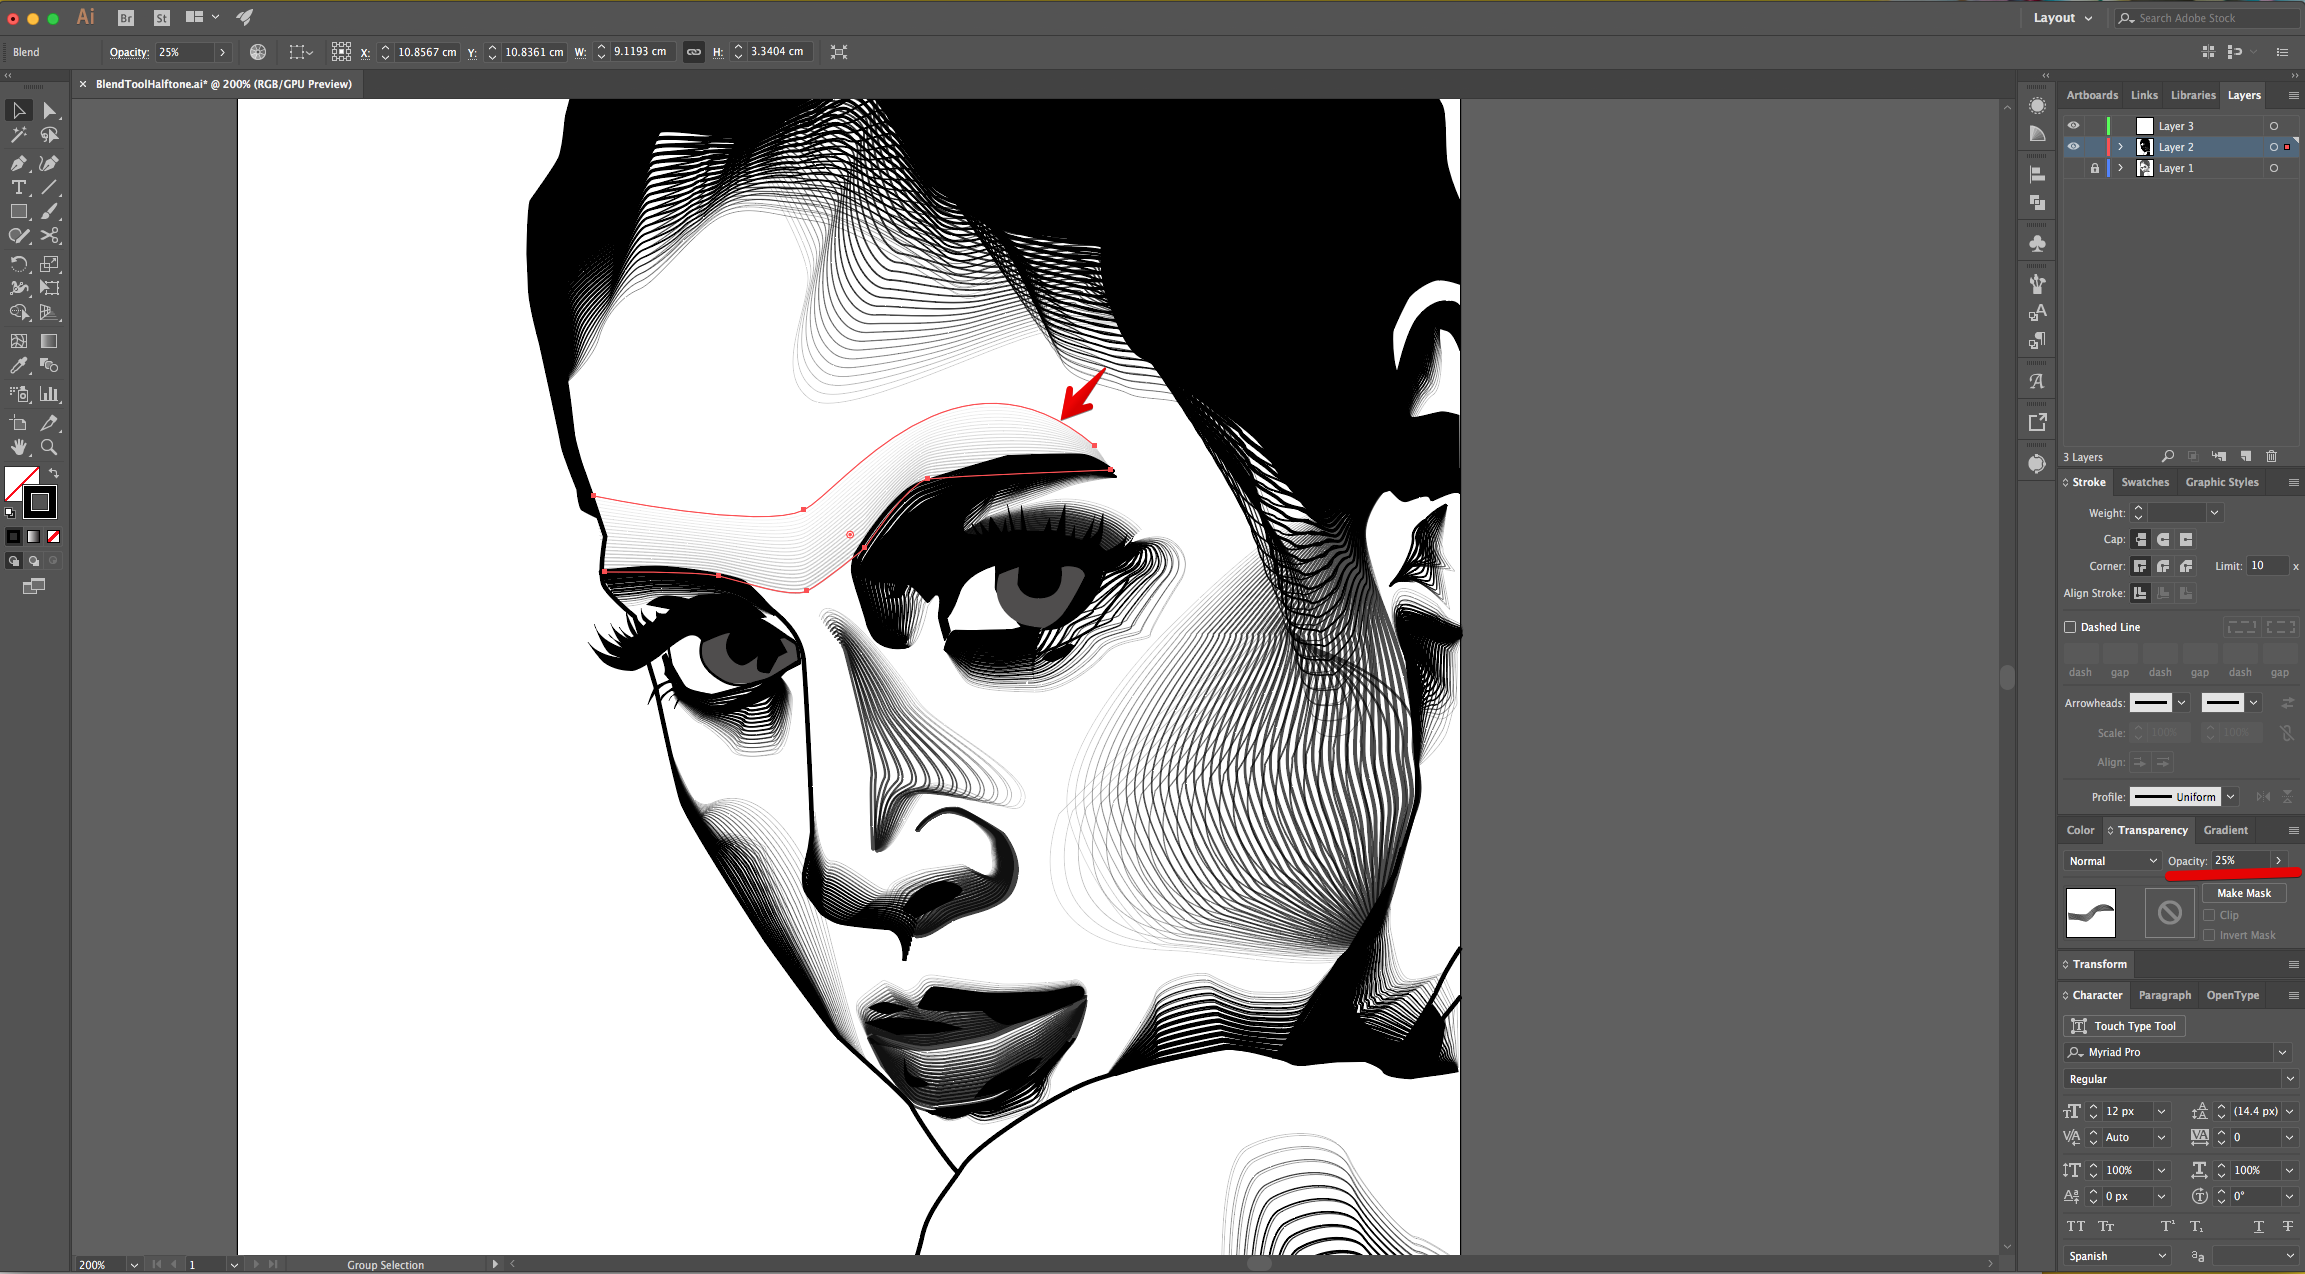
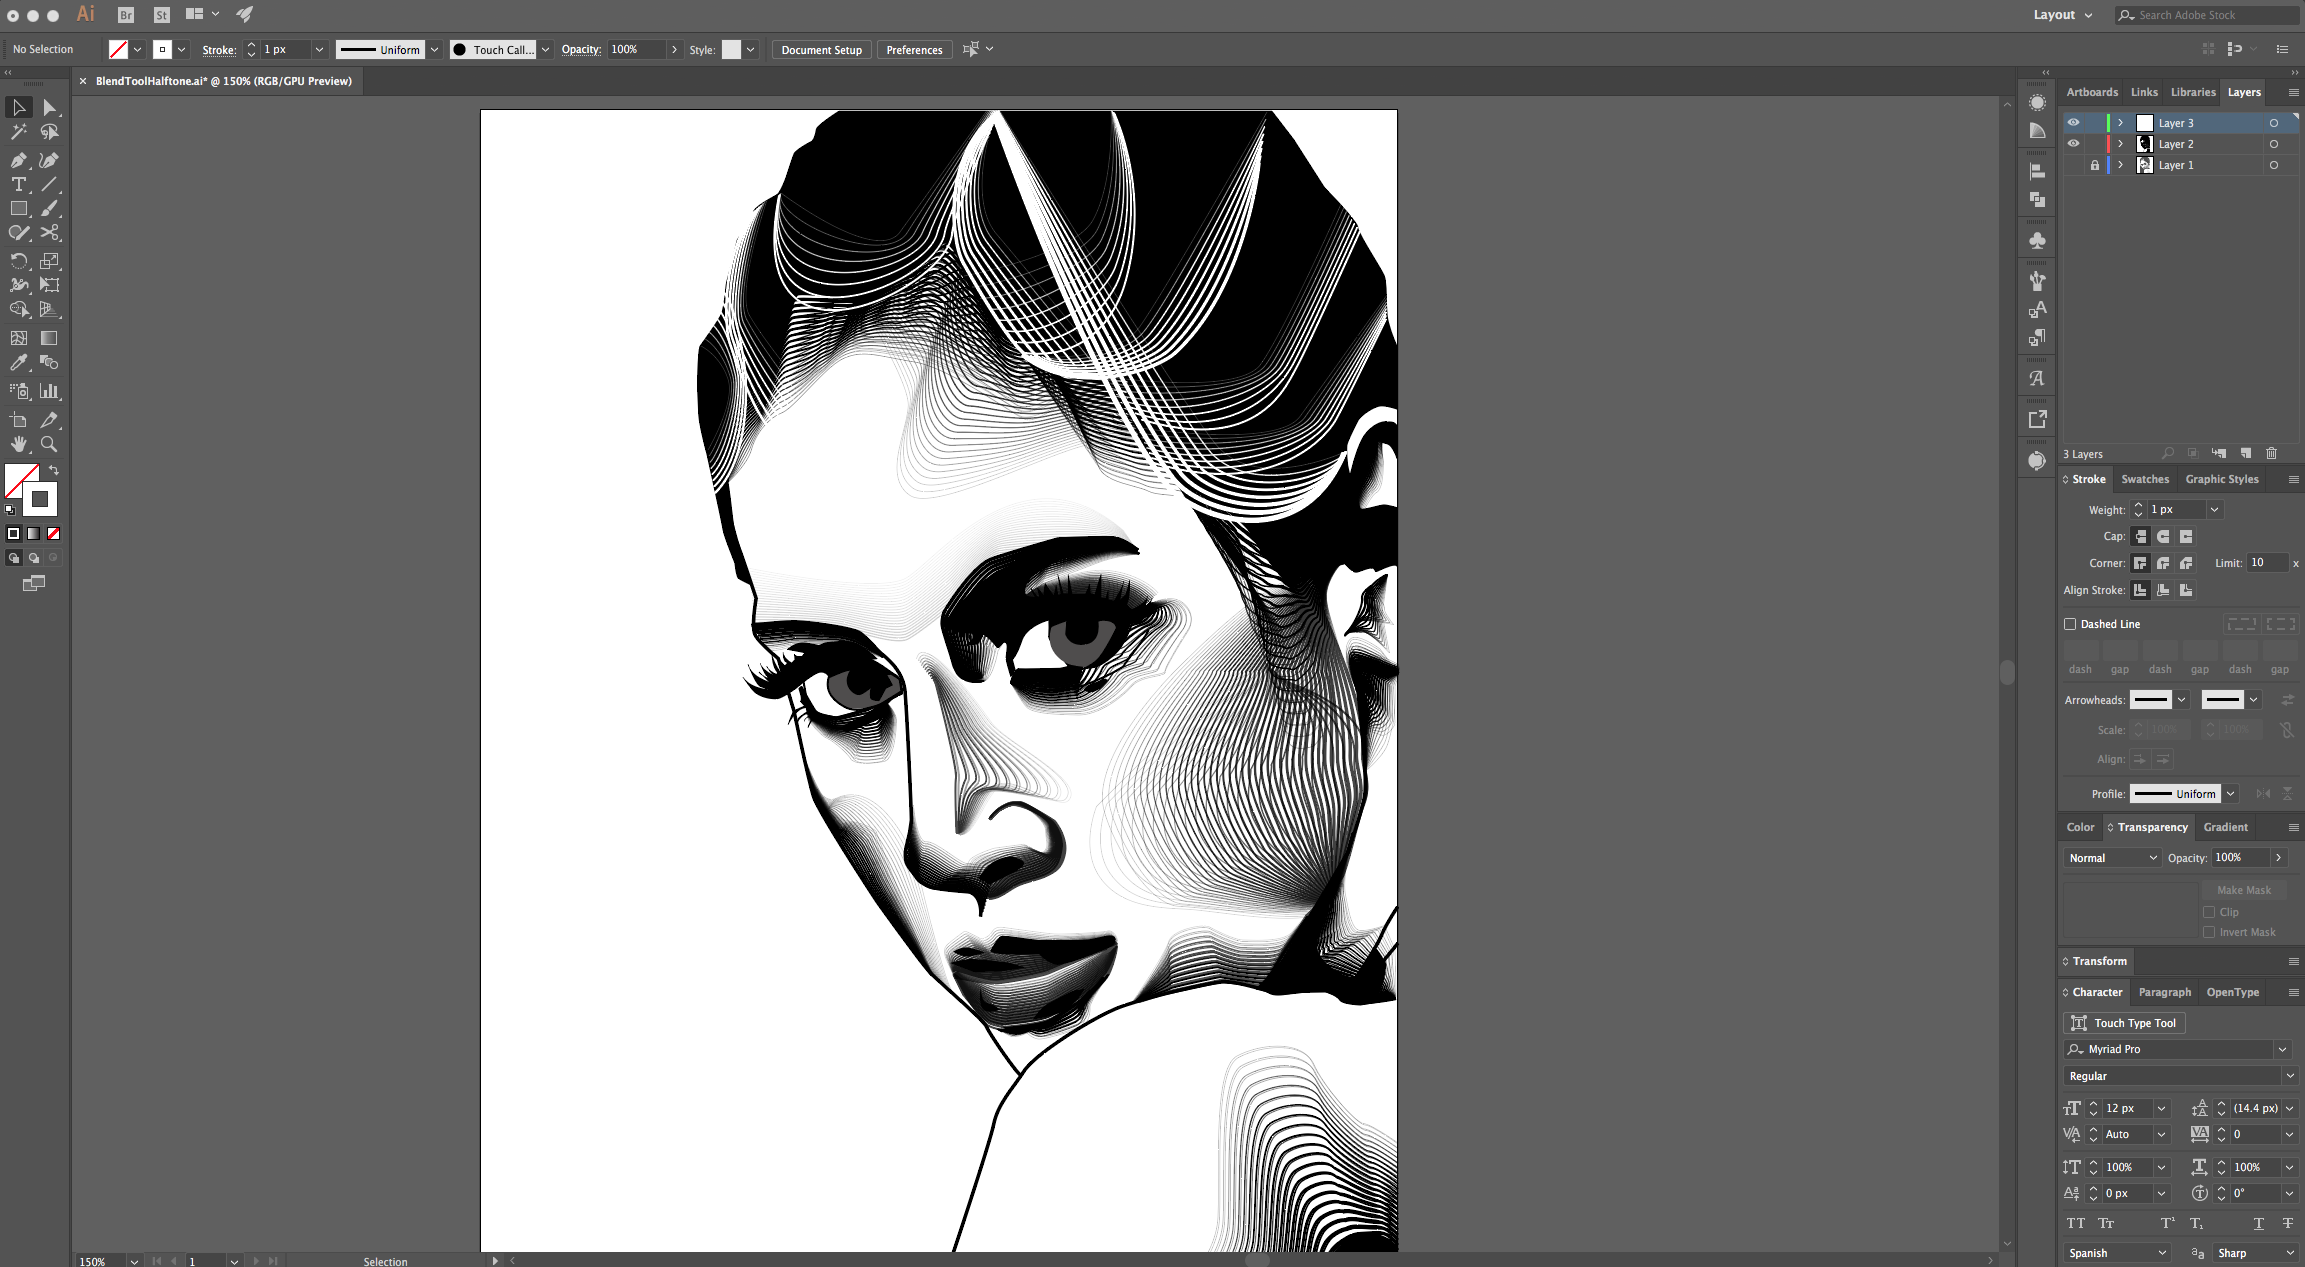
18 - Keep adding Blended Shadows and sometimes lower their “Opacity” in the “Transparency Panel”. Keep going until you create all the blends.
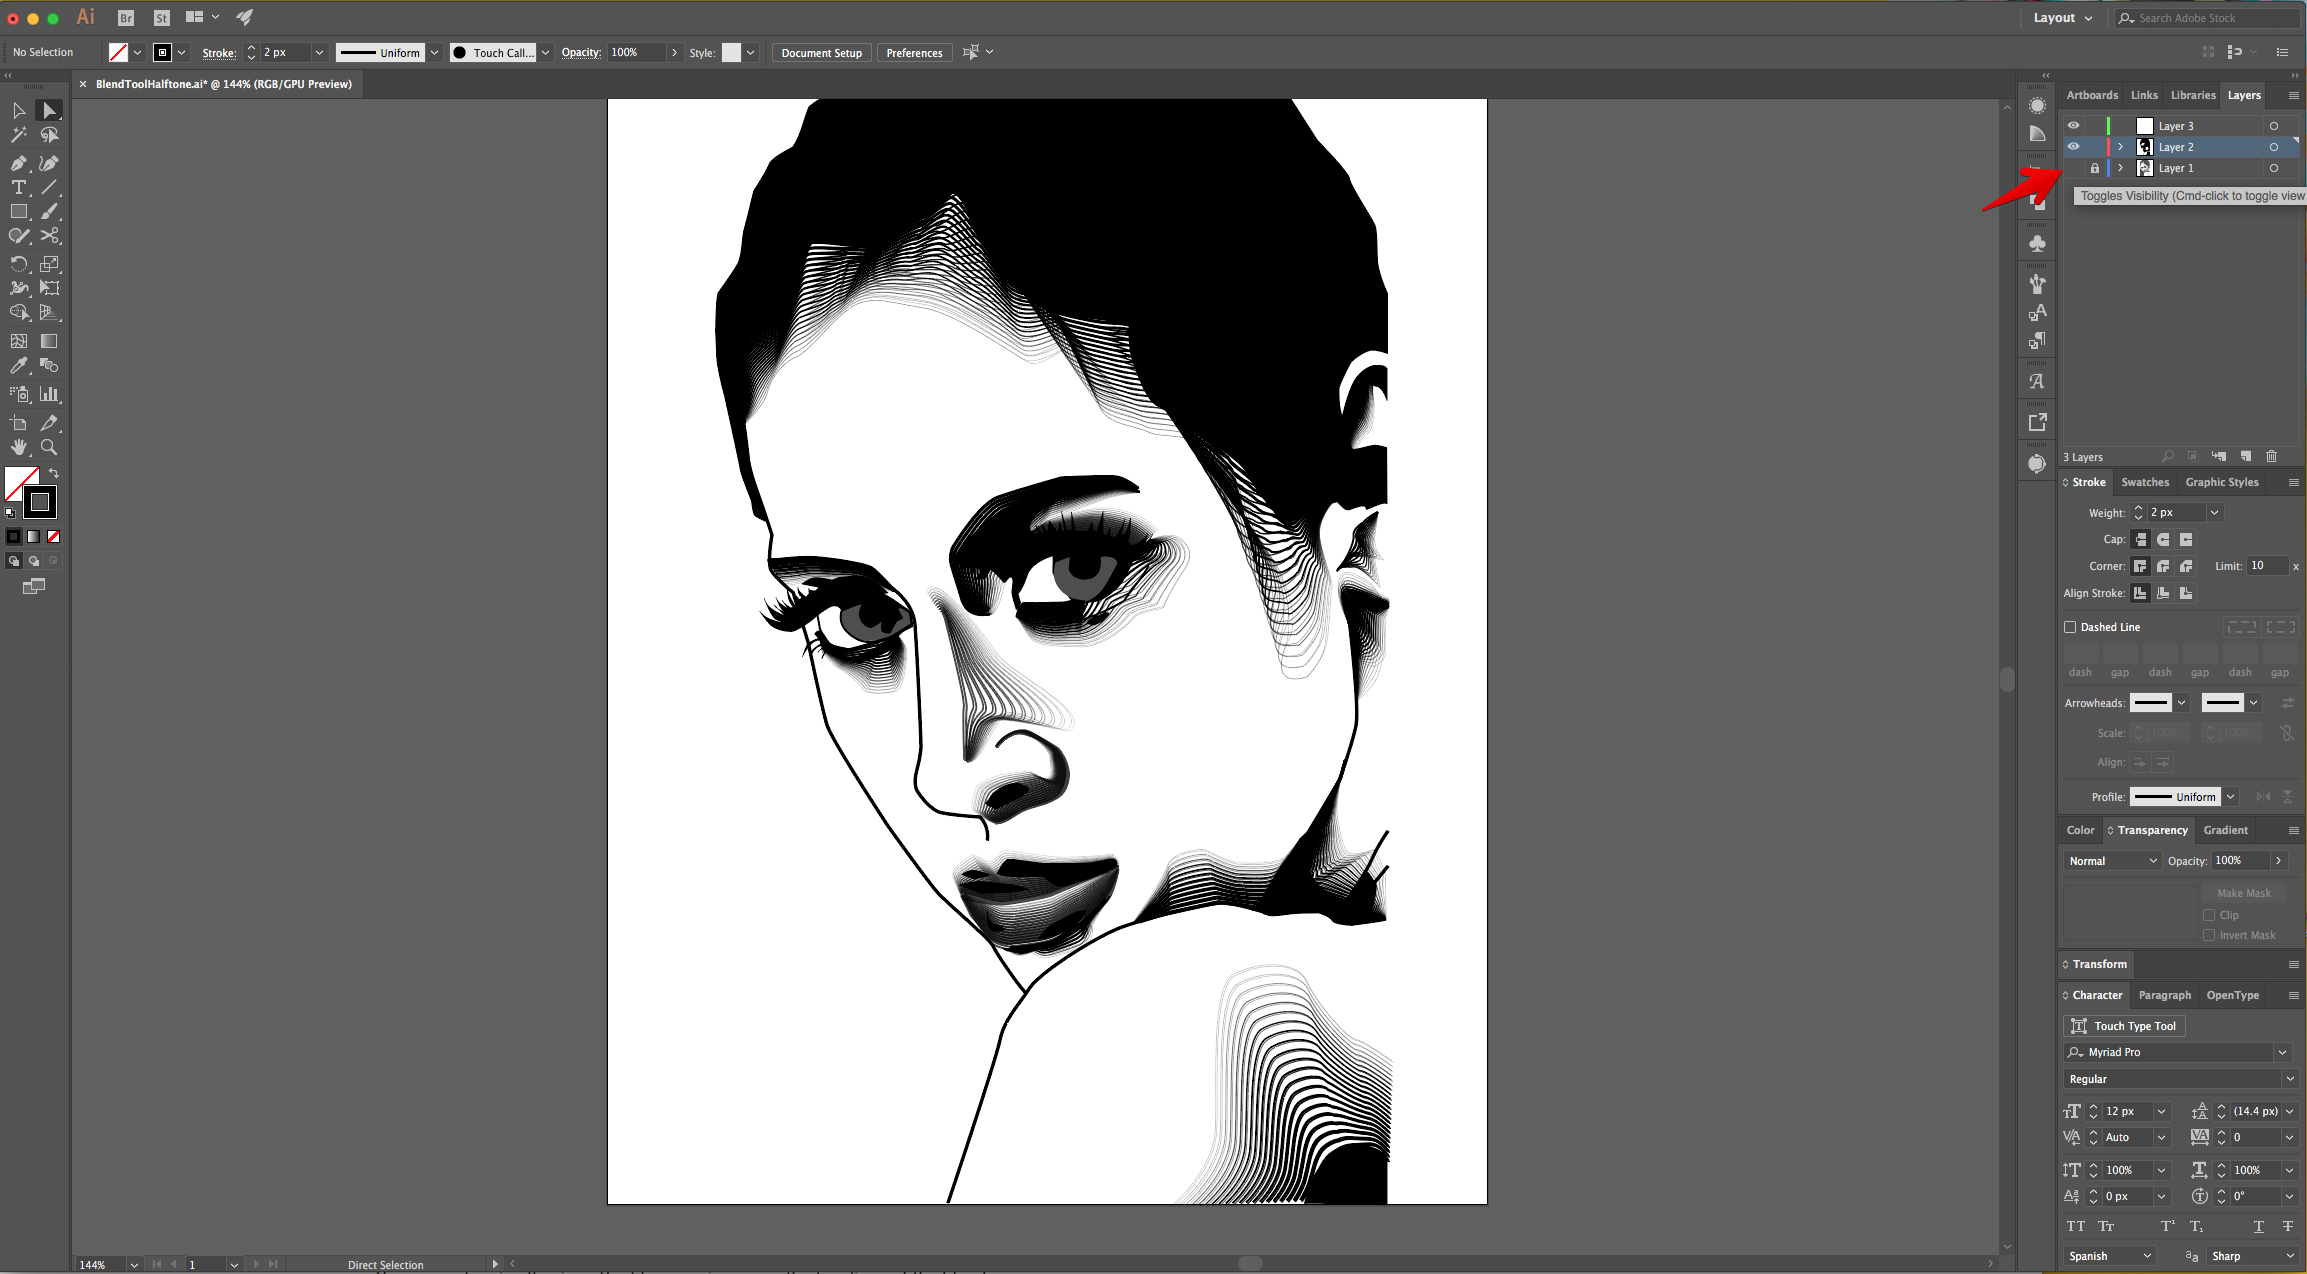
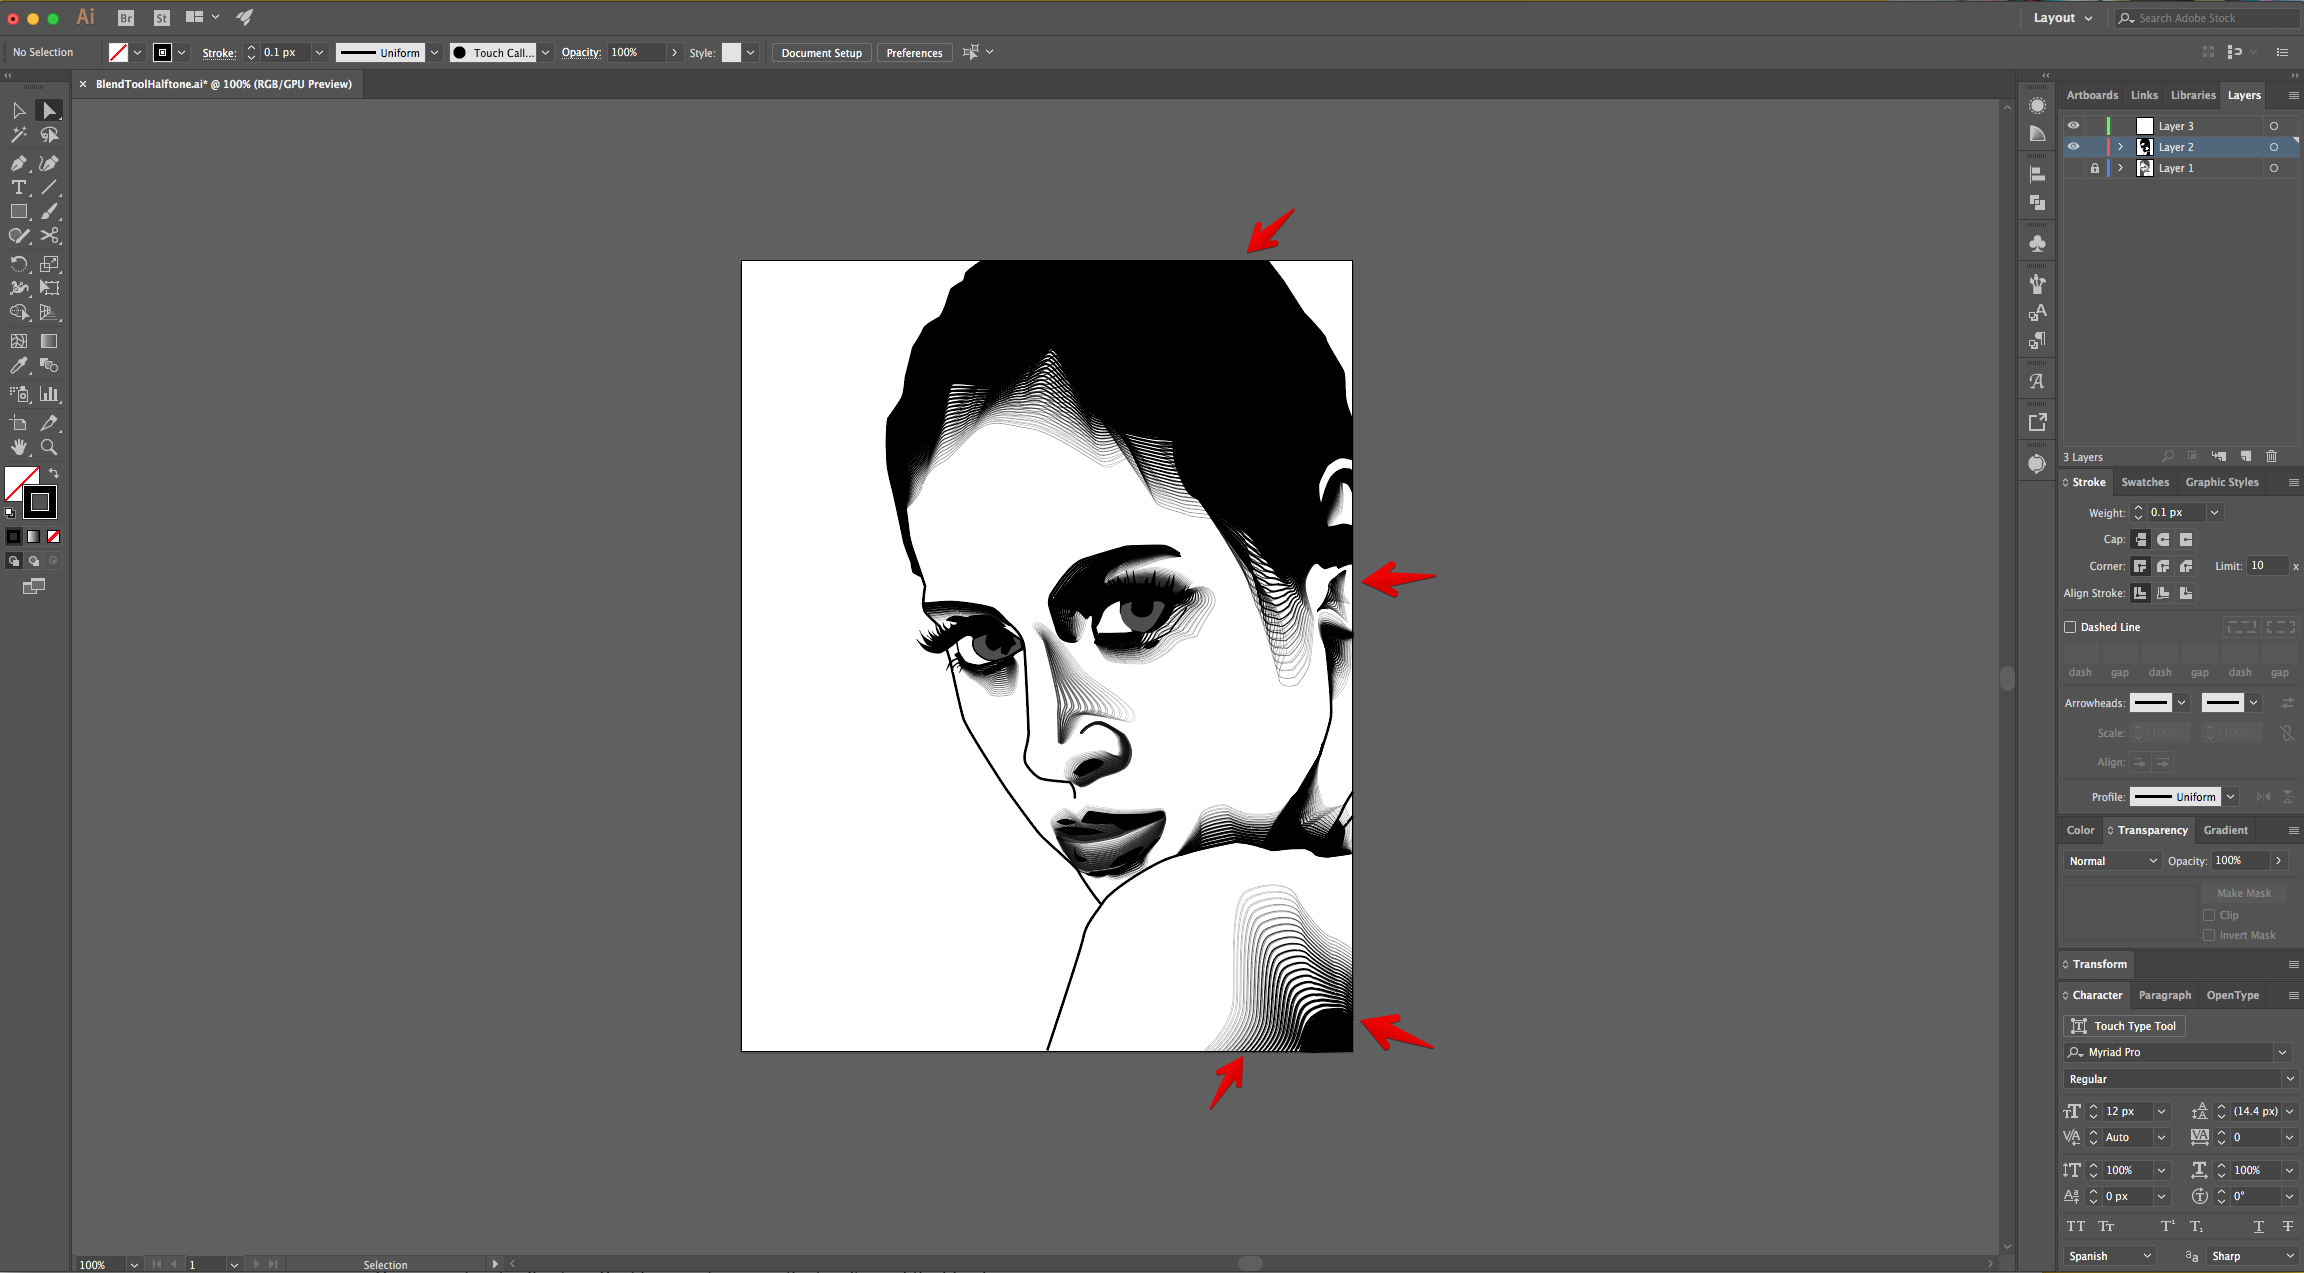
19 - Turn Off the bottom Layer visibility by clicking on the Small Eye icon on the left side of its Thumbnail to see your Artwork. Reposition it if needed.
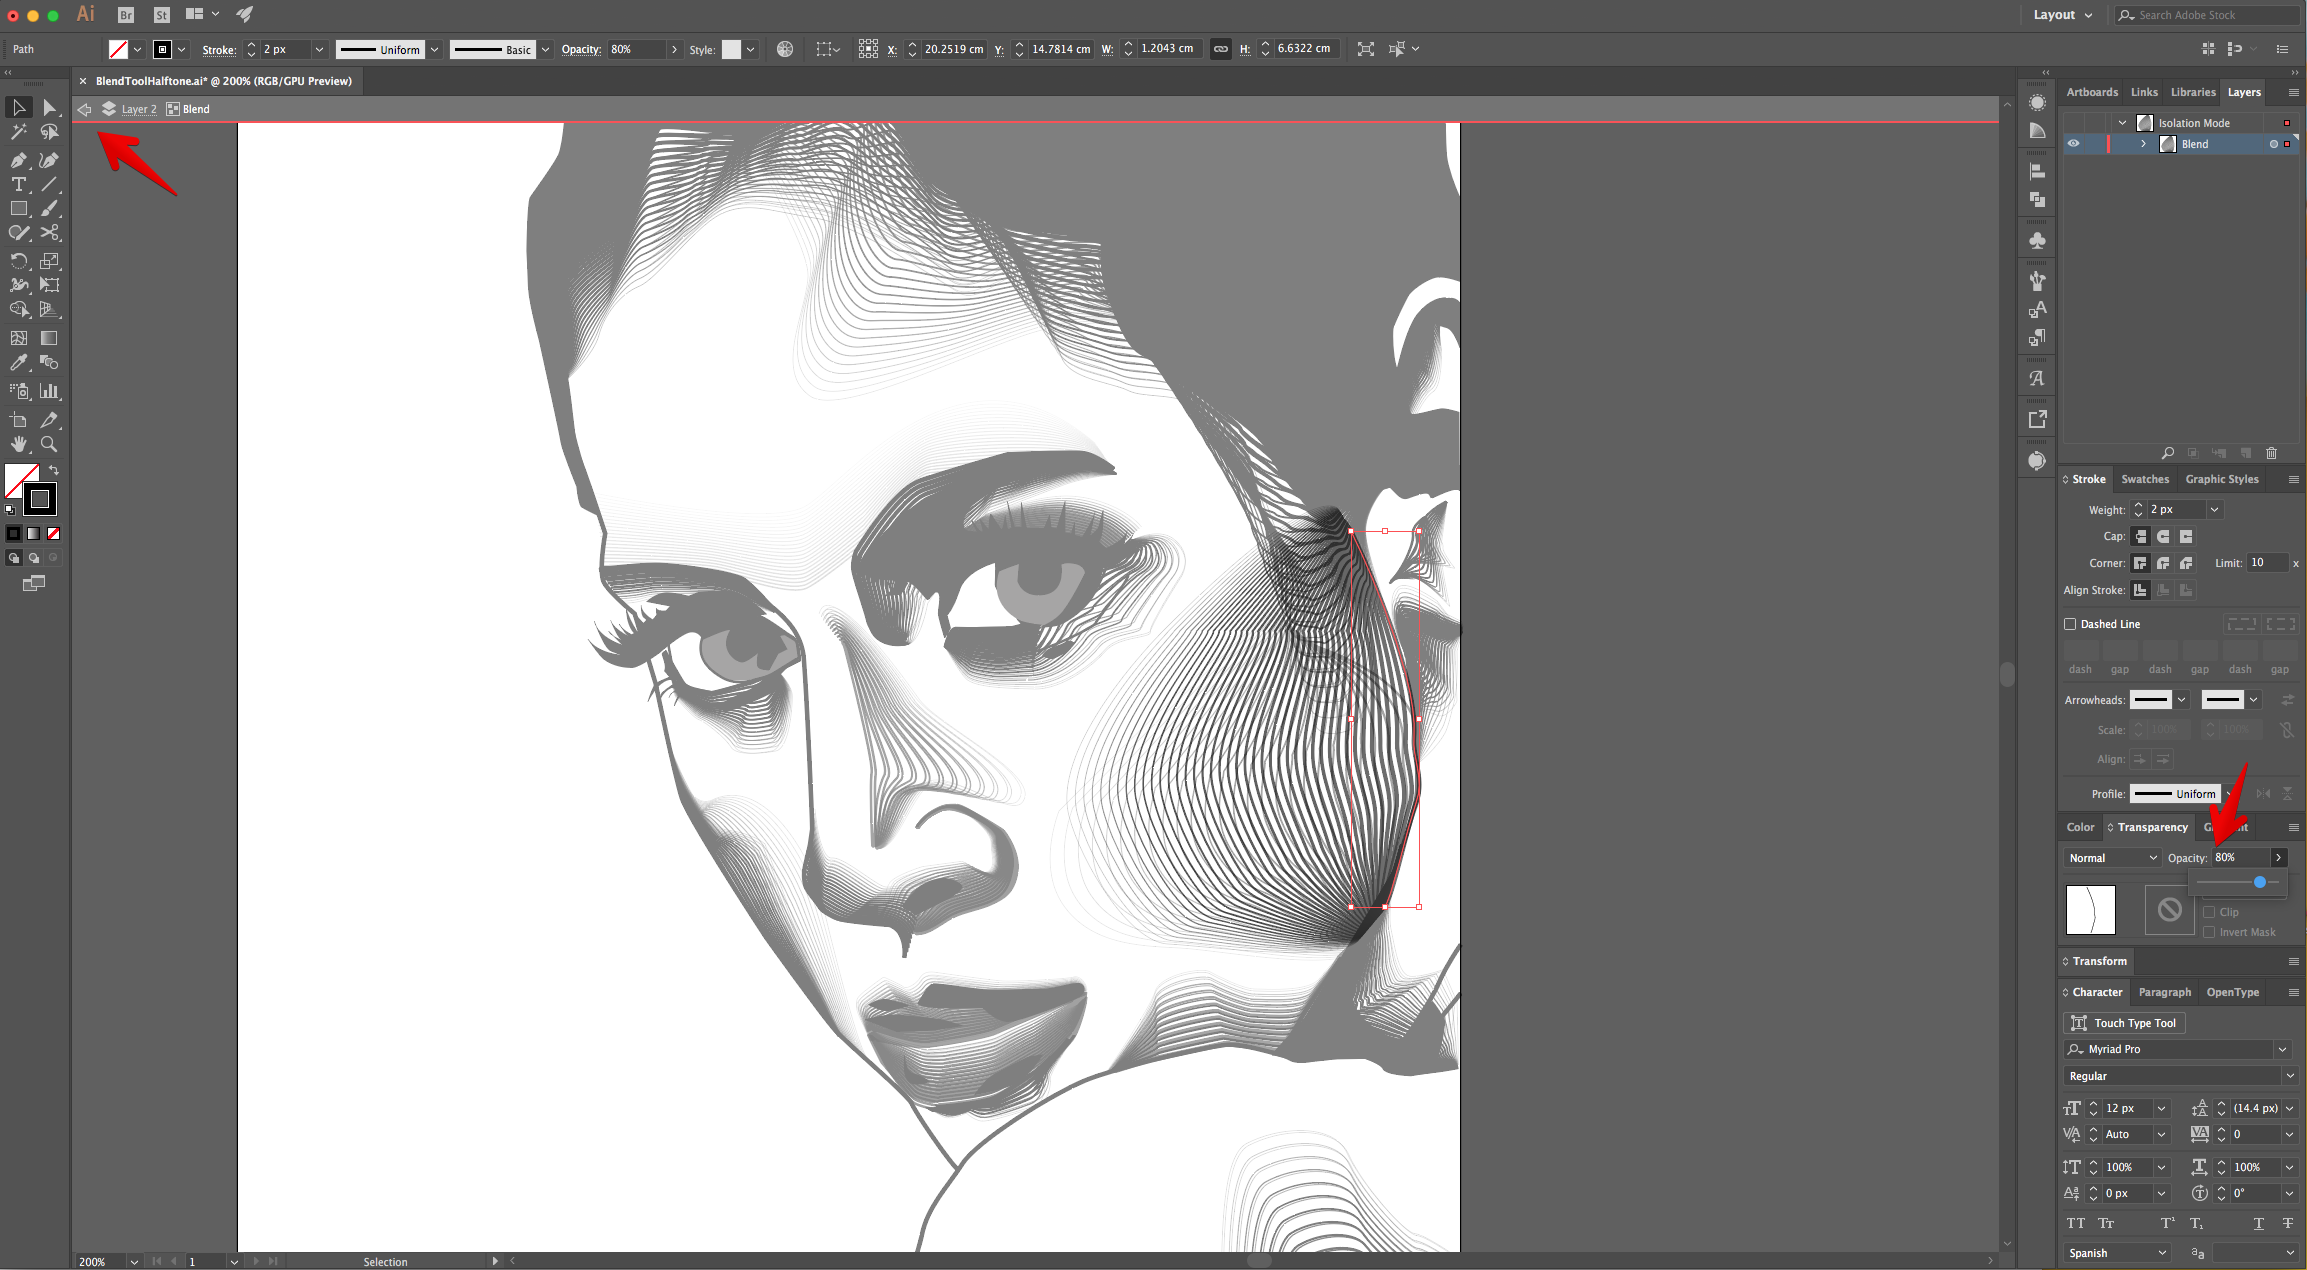
20 - You can add more Blends, change the “Opacity” of just one of the Paths by clicking many times on top of it to enter “Isolation Mode”.
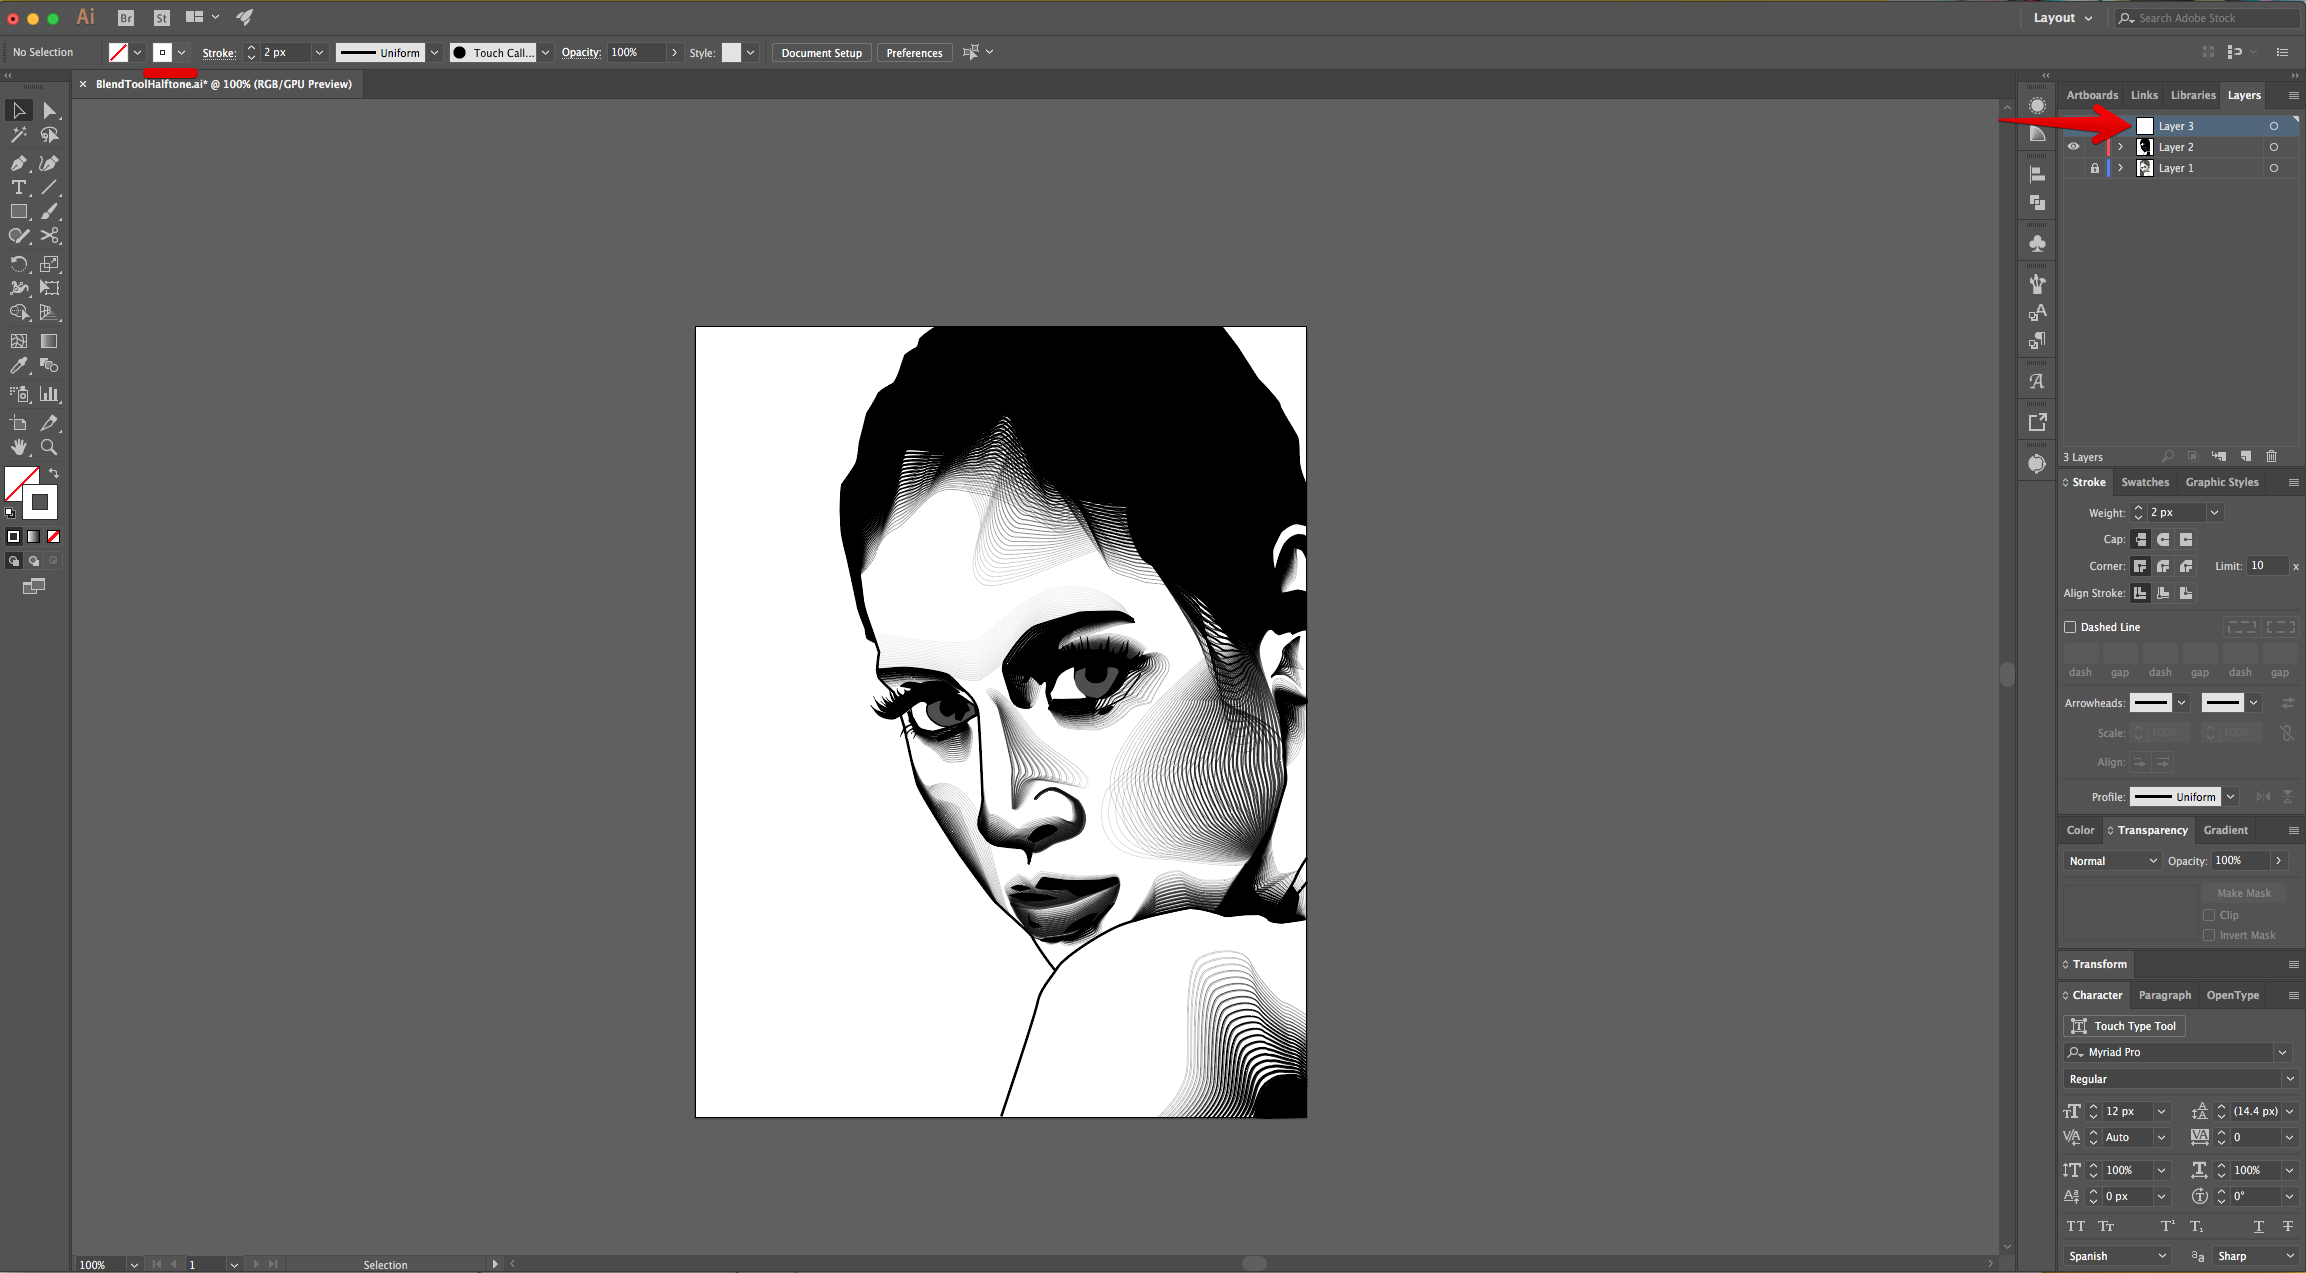
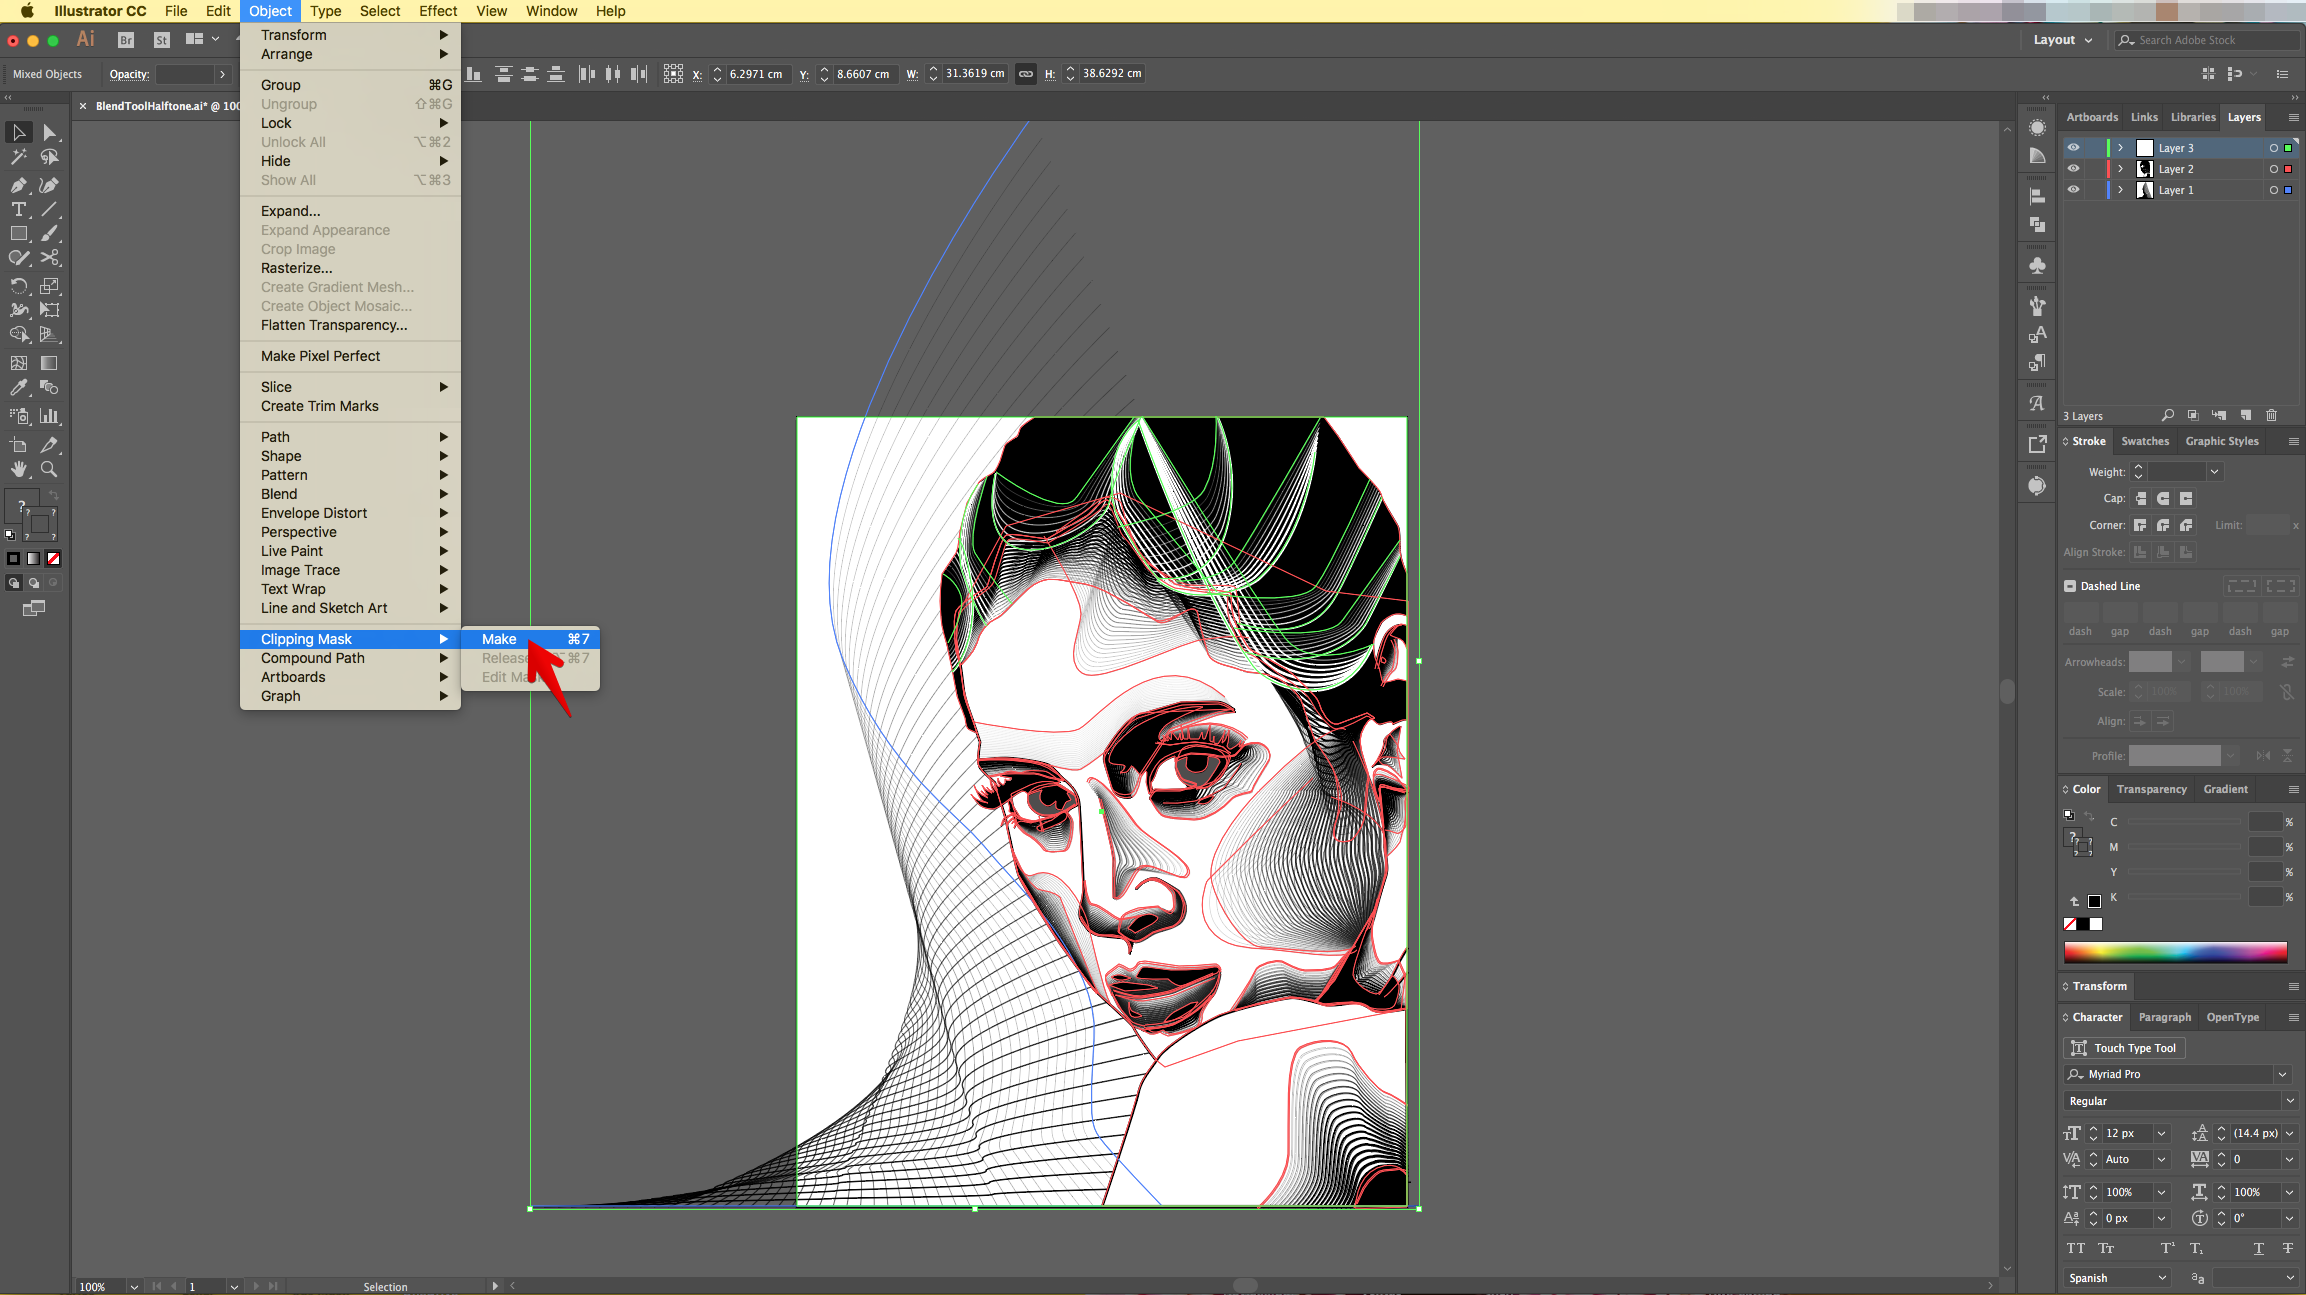
21 - Select “Layer 3” to work with, change the “Stroke” color to White and add some Highlight Blends.
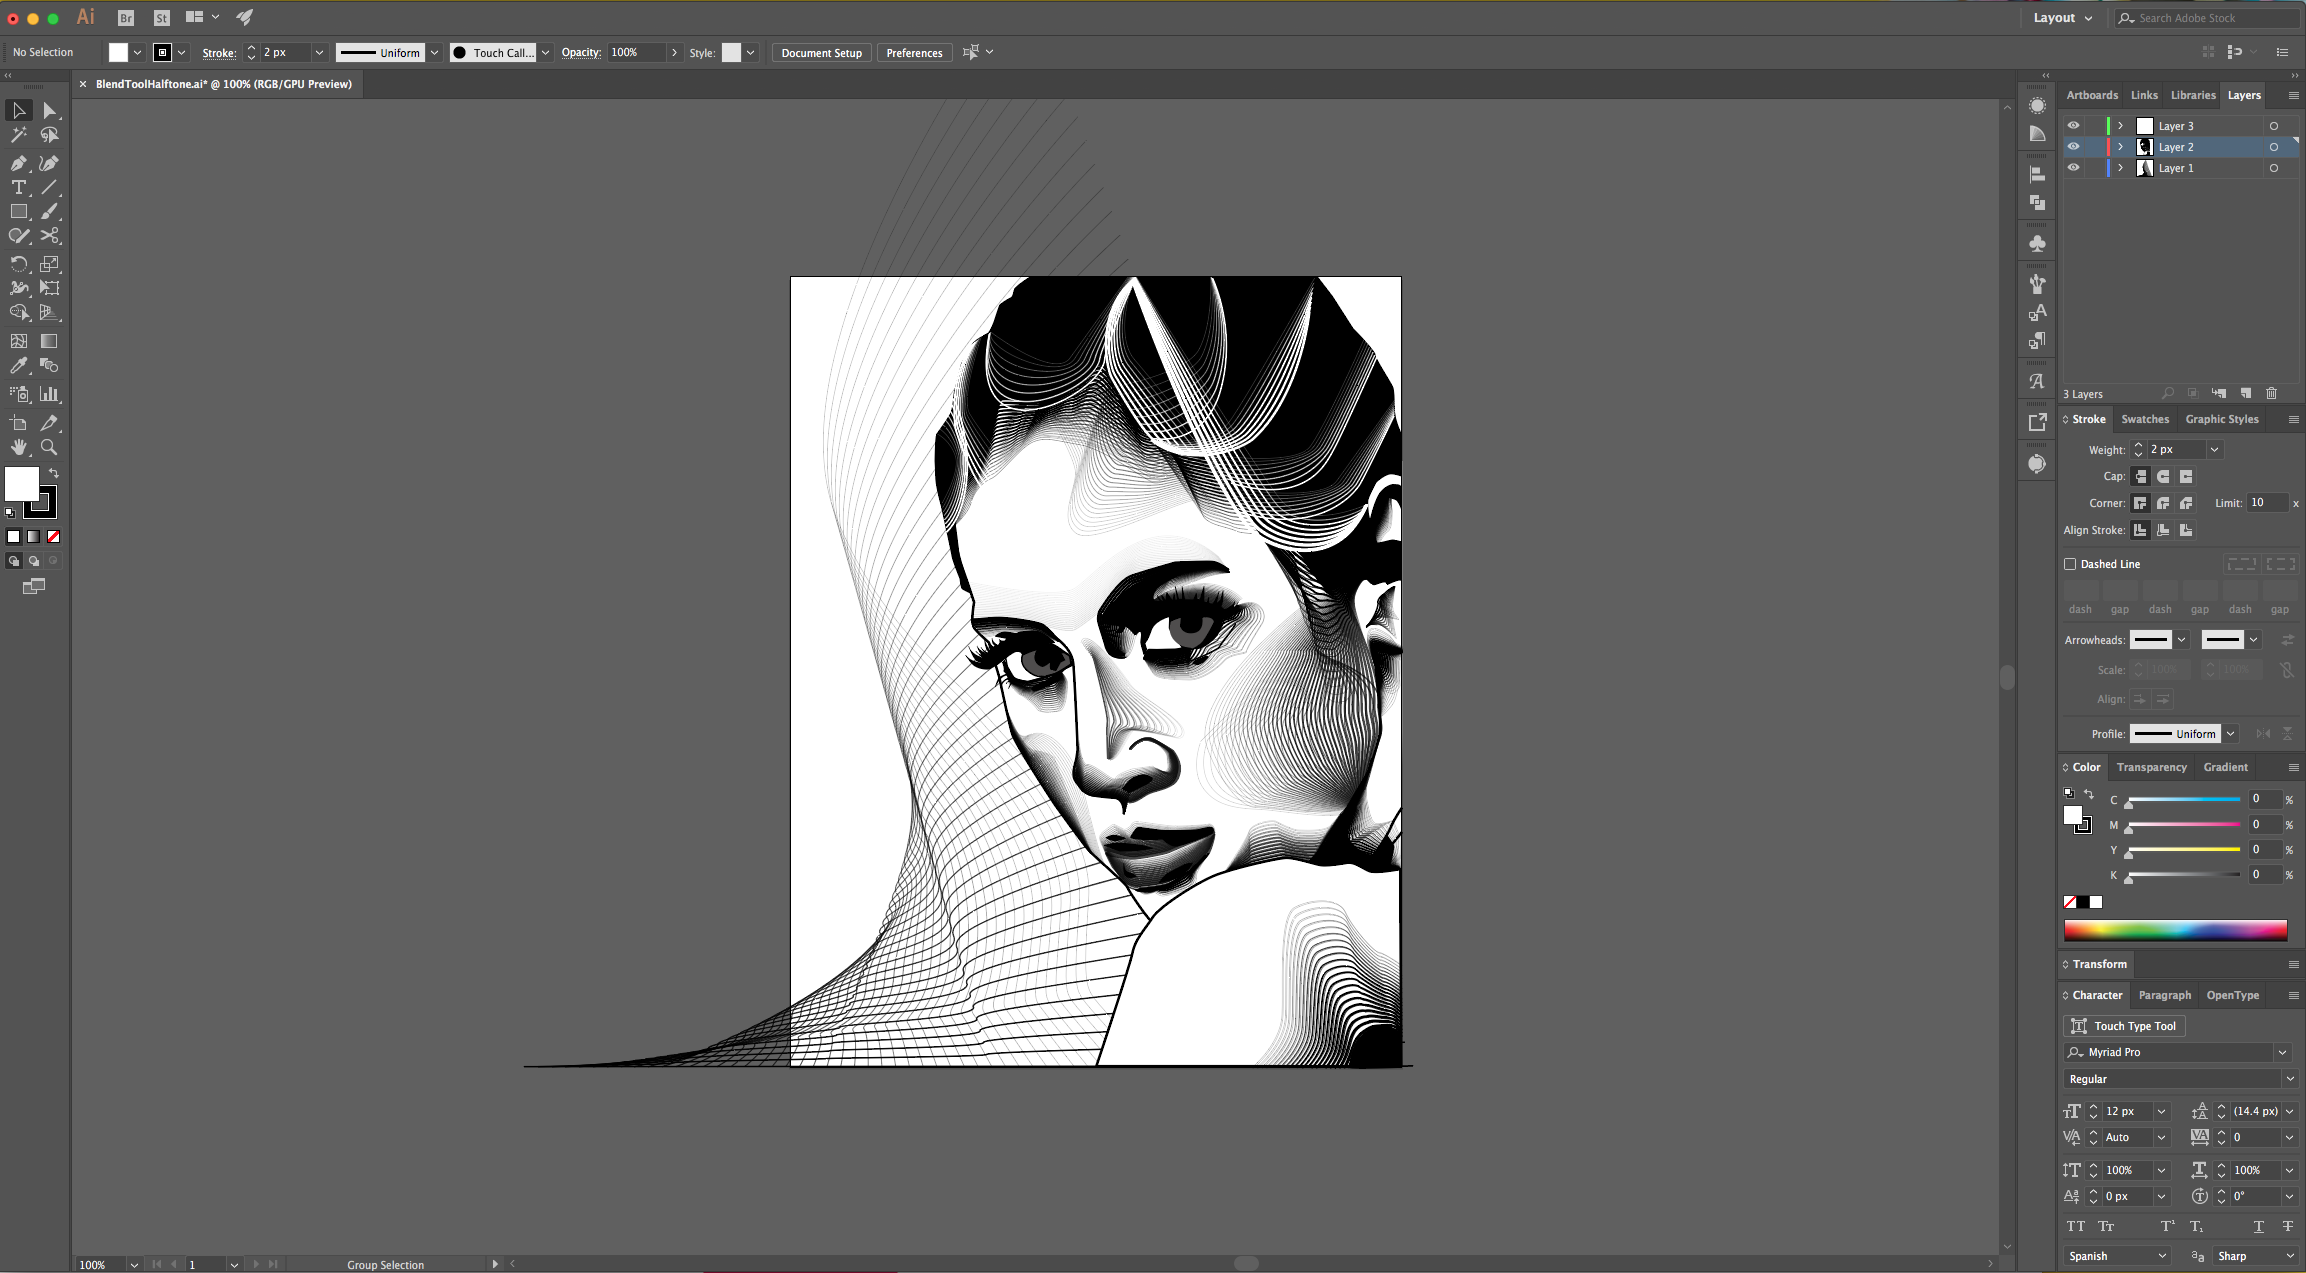
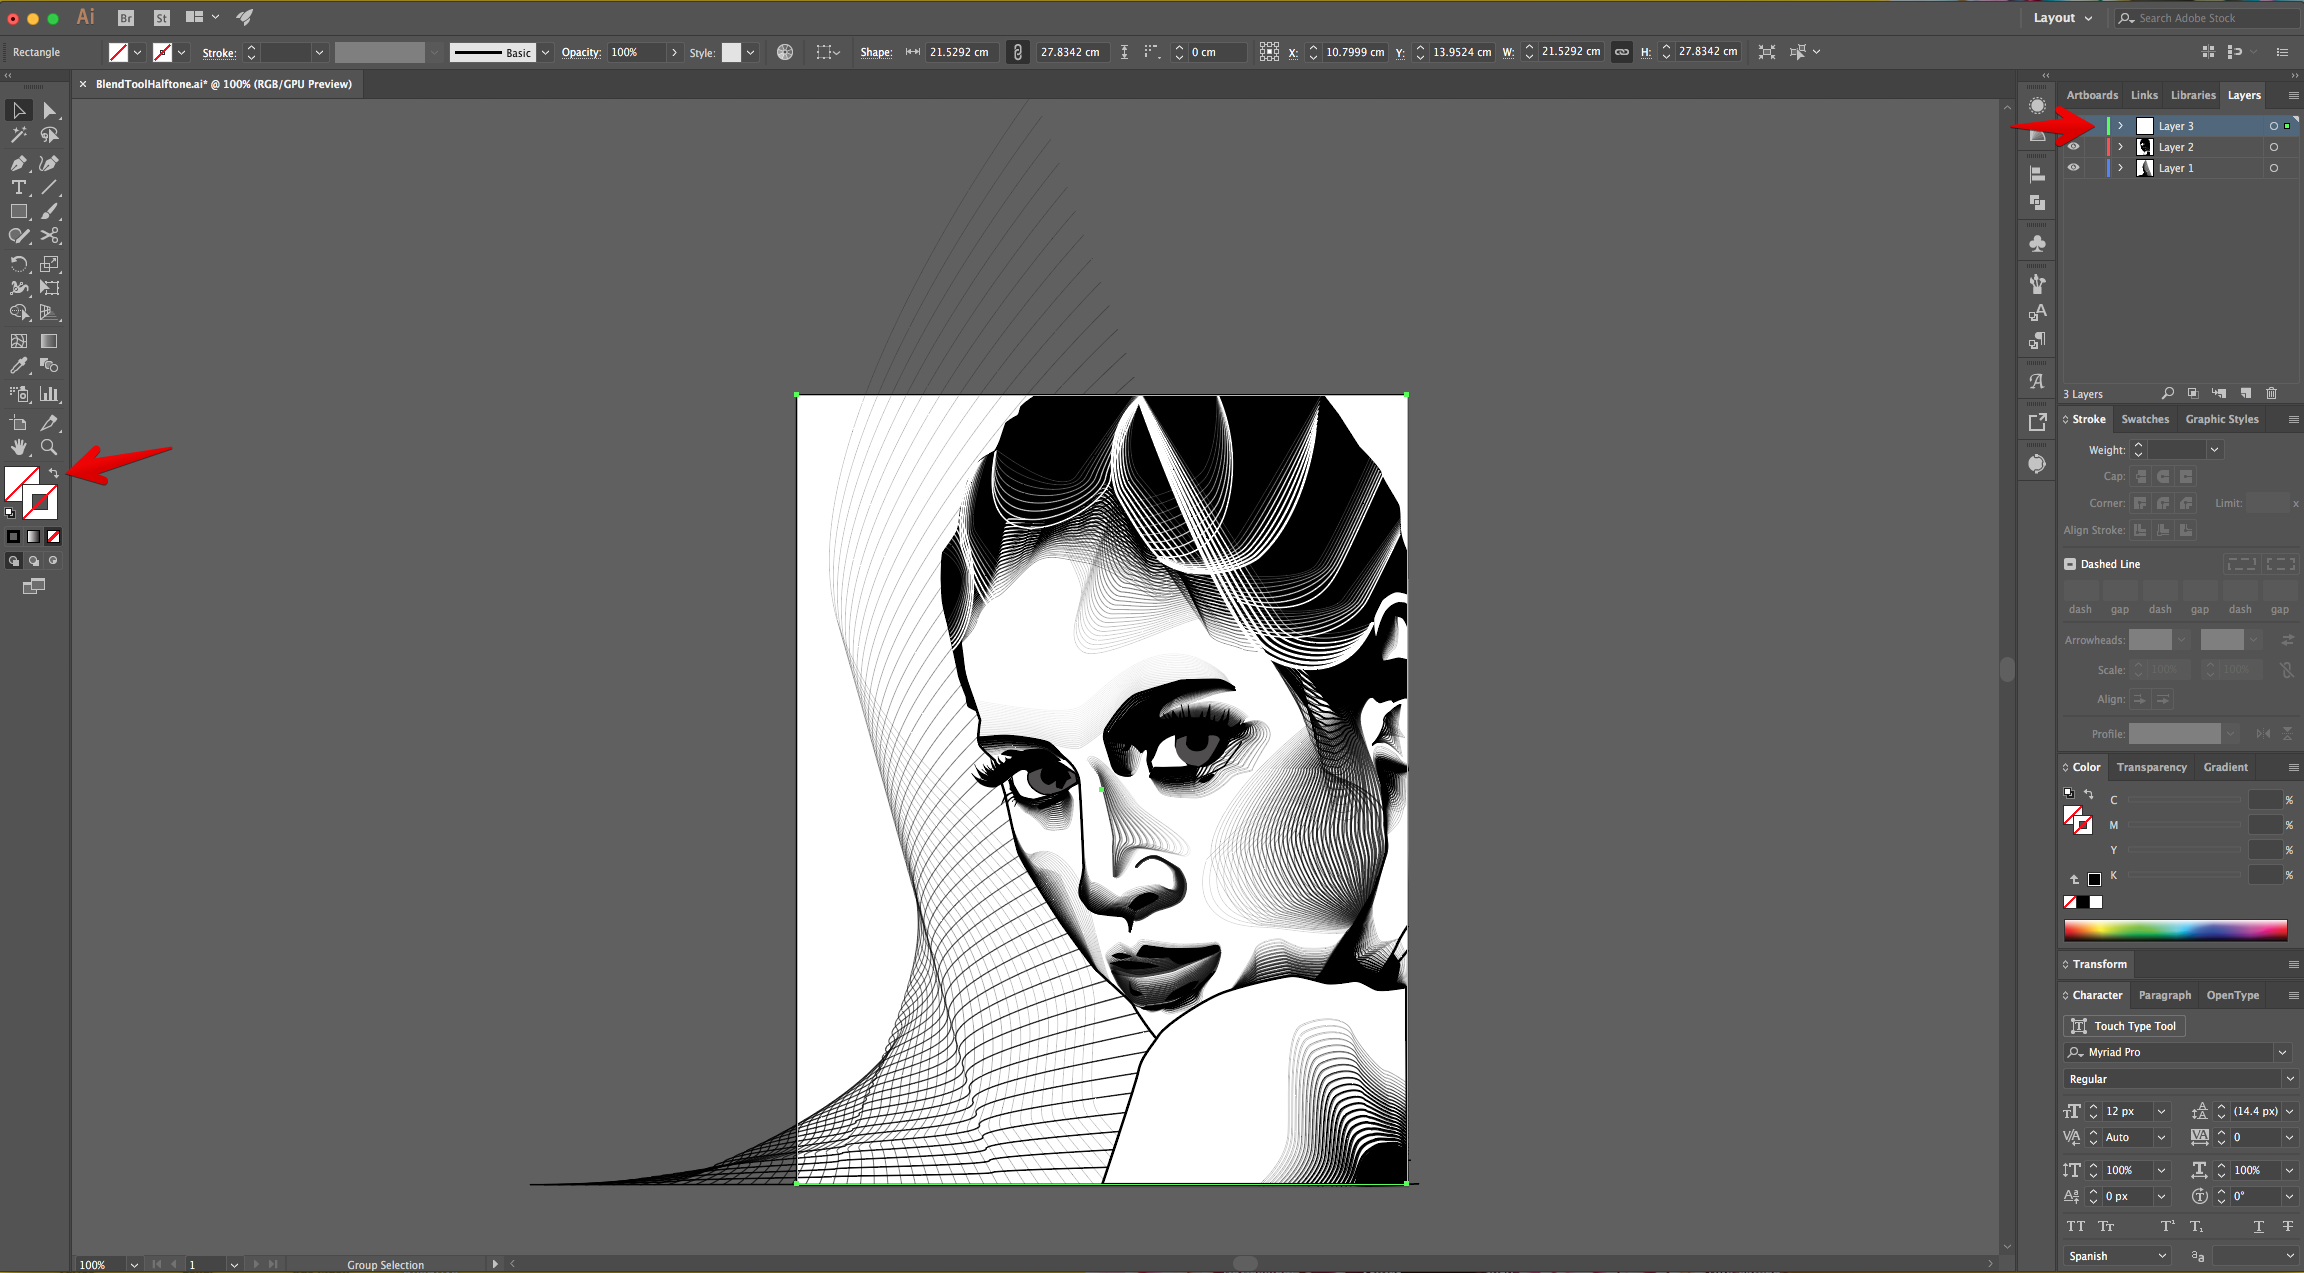
22 - Add some of them to the “Background”. You can “Delete” the reference image and make the Layer visible again to use it. Finally, create a “Rectangle” that cover the entire Canvas, make sure it has “No Fill and Stroke” and that is placed on Top of everything (Layer 3). Select everything and go to Object > Clipping Mask > Make (Command/Control + 7) to hide the unwanted portions of the Paths.
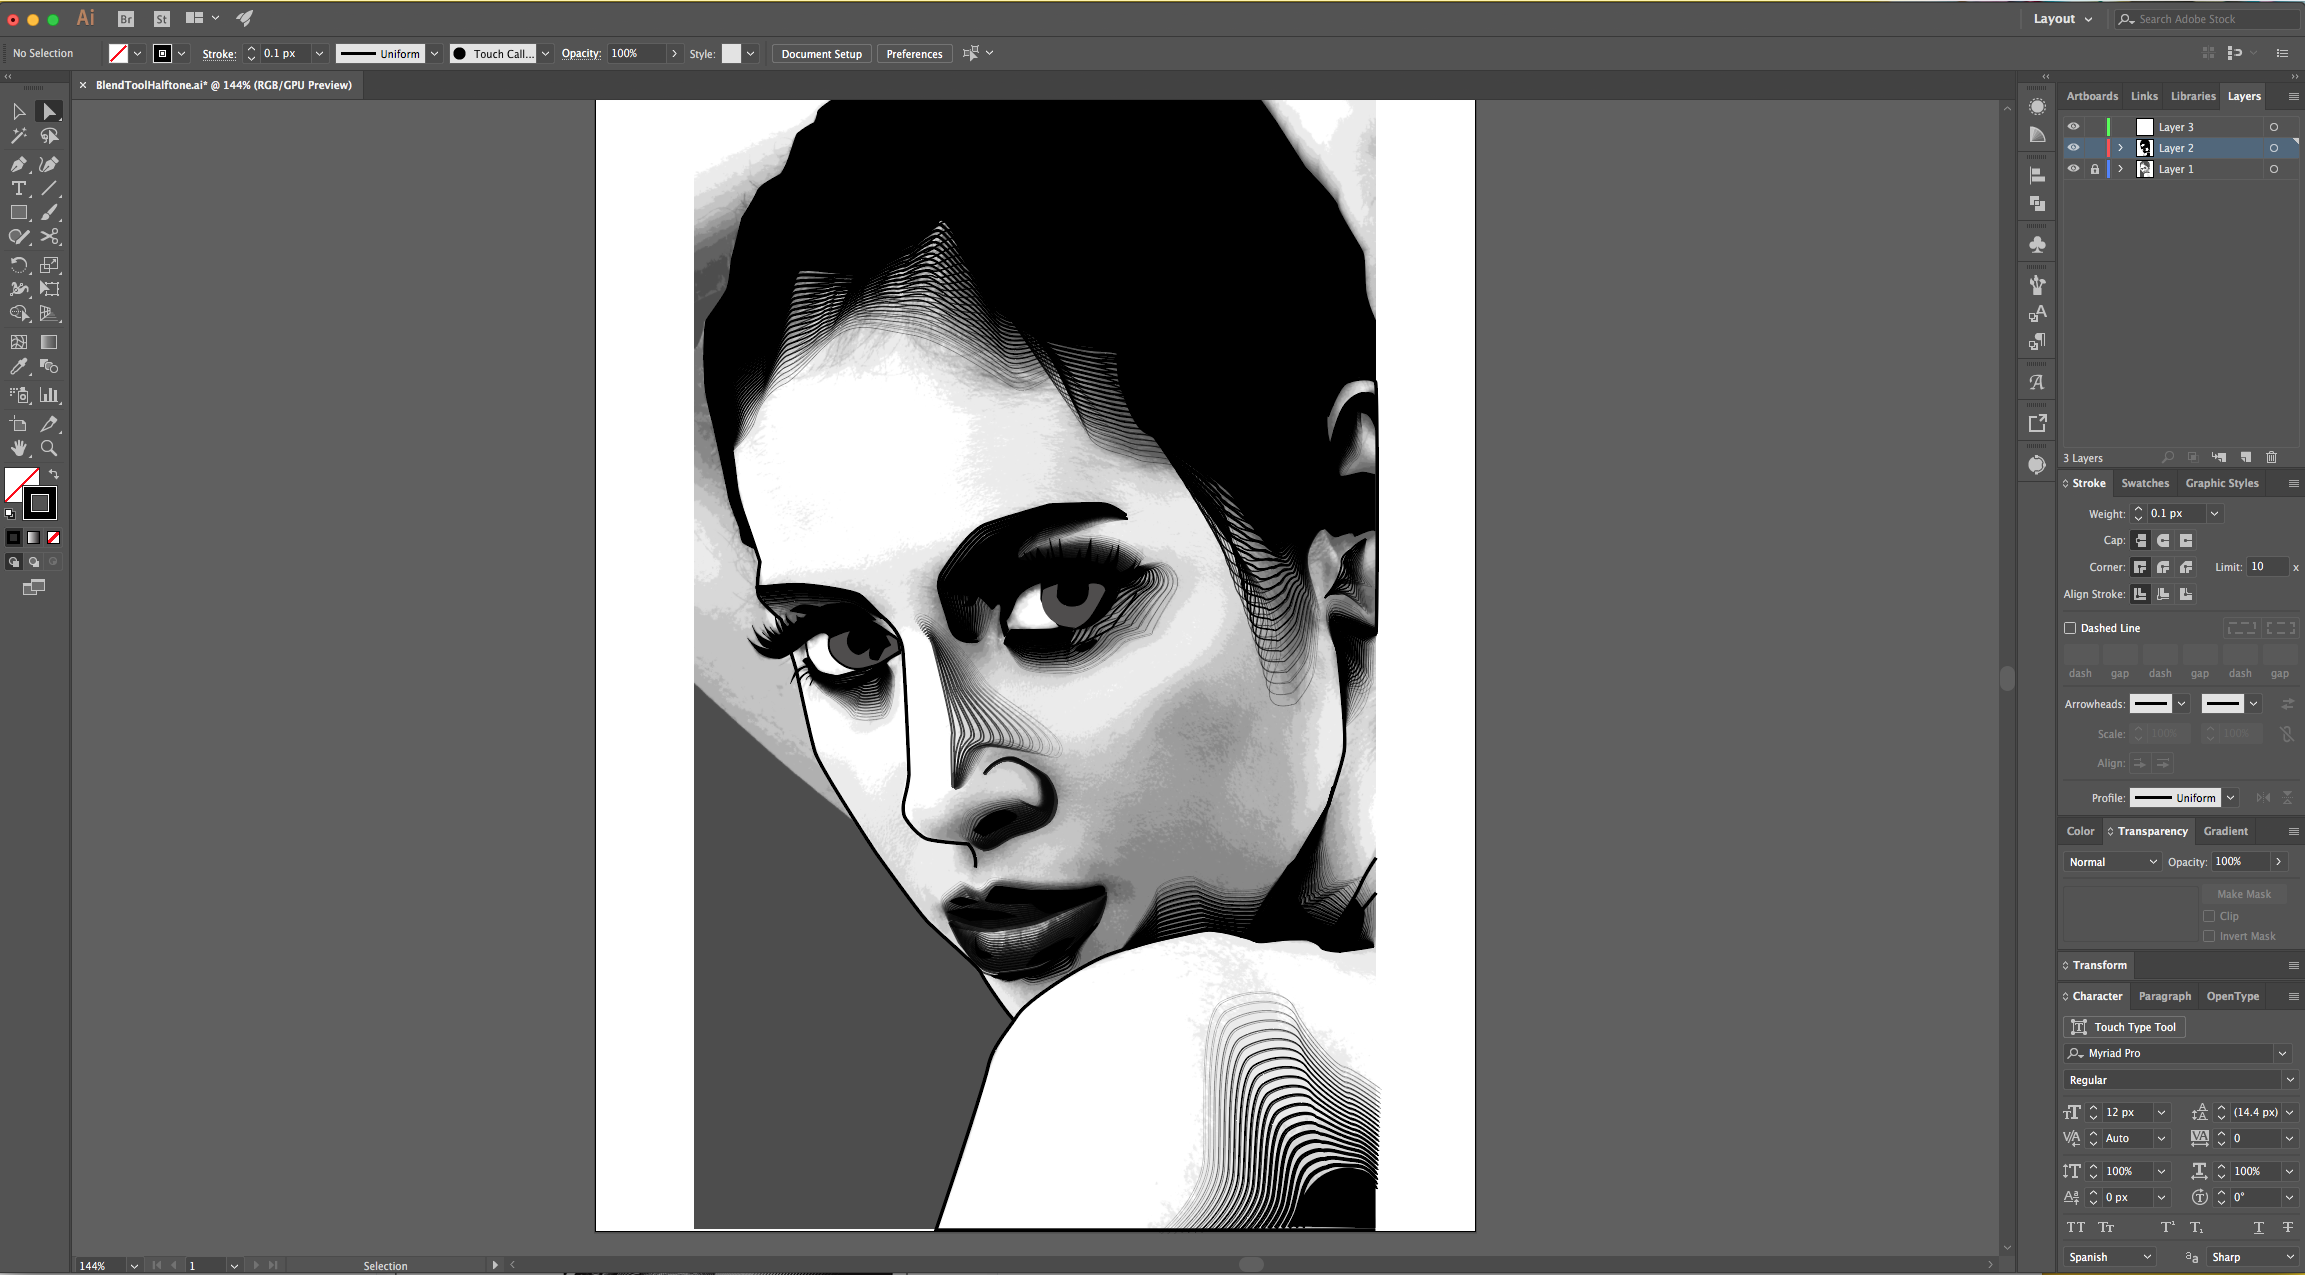
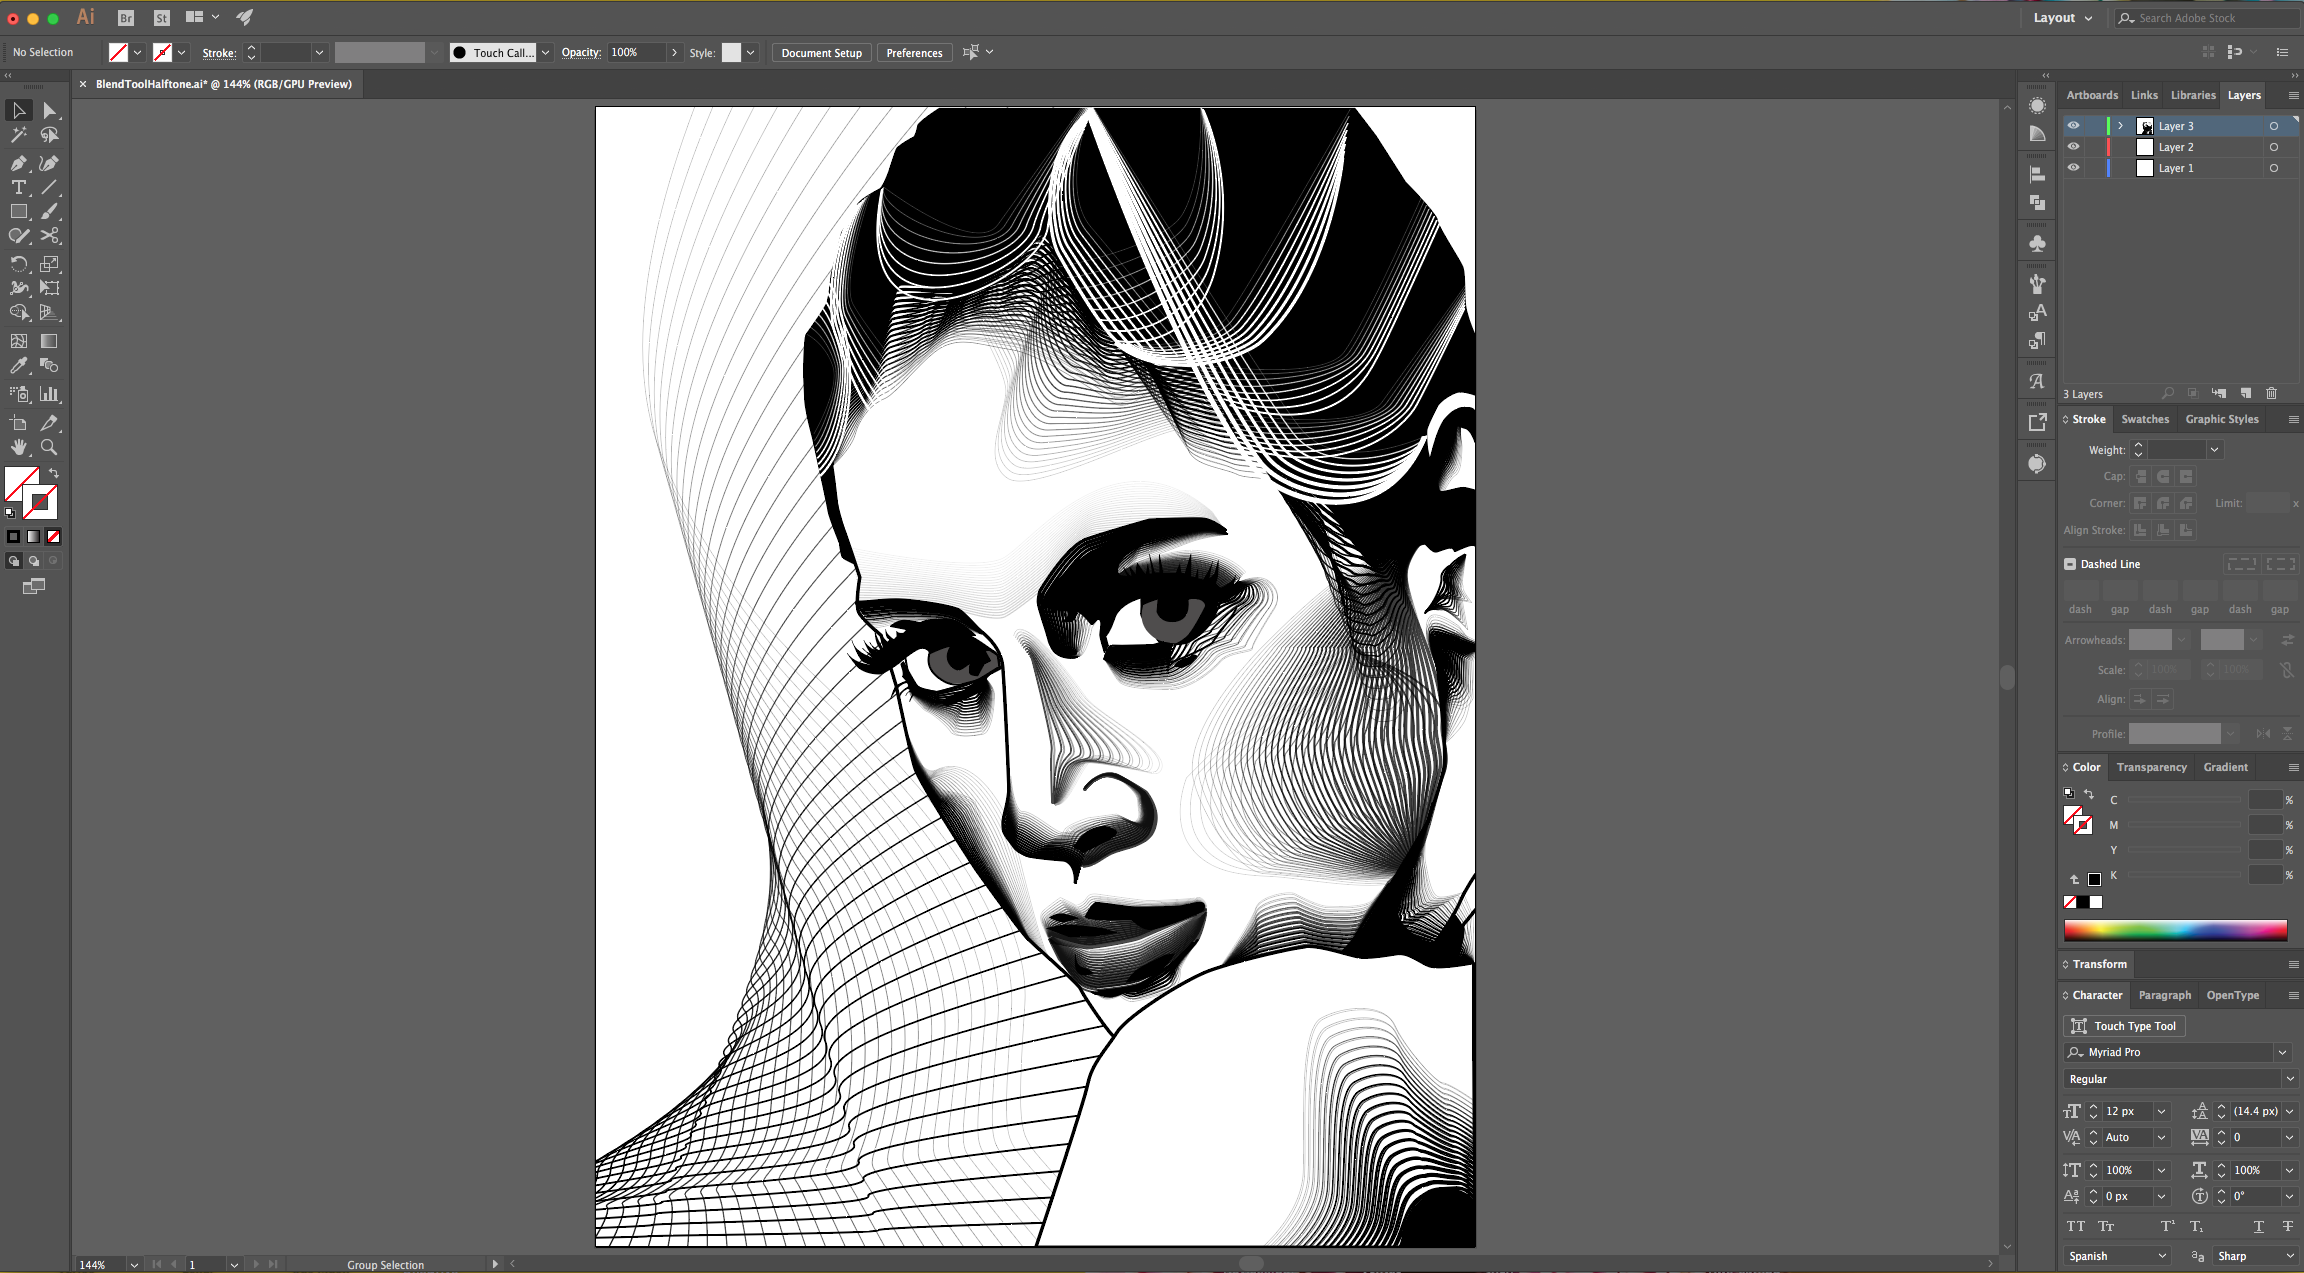
23 - Check out your Artwork!
1 - In Photoshop, open the image you chose to work with.
2 - Go to Image > Adjustments > Gradient Map and choose the “Foreground to Background Gradient” (Black to White) from the options and click “OK”.
3 - Go to Image > Adjustments > Posterize and use a value of 10 Levels. This will bring out the light source that creates dark shadows and visible halftones and makes it easier to identity where our shading will be created.
4 - Go to File > Save as (Shift + Command/Control + S), name it Grayscale and choose JPG as “Format”. Choose “Maximum Quality” and “Baseline (Standard)” and click “OK”.
5 - In “Illustrator” open the “Grayscale.jpg” file you just saved. You may need to adjust the document’s settings.
6 - In the “Transparency Panel” lower the “Opacity” of the image to 70%.
7 - Lock the Layer by clicking the small “Padlock” on the left side of its Thumbnail (Layers Panel) and then create two “New Layers”.
8 - Select the “Second Layer” to work on and choose the “Pen Tool” (P) with a Black “Fill” and “No Stroke”.
9 - Start creating Shapes outlining the “Shadows” of the subject. Click again on the “Anchor Point” after a curved path to get a straight line (or use the “Covert Selected Anchor Point” options in the Top Menu. You may need to Reverse Fill and Stroke colors to get a better view of your image.
10 - Now, to create the outlines and shading areas of the major face features and body shape, use a 2 px “Stroke” and “No Fill”. Reduce the Stroke weight to 1 px to do some of the internal detailed outlines of your subject. You don’t need to close all the Paths.
11 - Select one of the one shading paths you created, make sure that the line that is near the border of the “Shadows” is a 2 px Stroke and select the other side (inside the subject) and change the “Strike” weight to 0.1 px . Select both (“Shift” key), then “Copy” (Command/Control + C) and “Paste in Front (Command/Control + F).
12 - Select the Top-most instances of the paths and go to Object > Blend > Make, then Object > Blend > Blend Options and use “Specified Steps” and a value of 20.
13 - Select the second instance of the path, change the “Stroke” weight of the thicker one to 1 px and repeat the “Blend”. To help you select the paths and to achieve a “Halftone” effect, move the first “Blended Path” to a side and Up or Down.
14 - Use the “Direct Selection Tool” (A) to select some “Anchor Points” in your paths and correct some shapes that may not be looking right.
15 - If you created a closed Shape and you need to divide it, use the “Scissors Tool” (C).
16 - Then keep creating Blends of the different shaded areas you created. You can use the “Blend Tool” (B) and click on the “Anchor Points” you want to use as Start and End points. You can also play around with the number of Steps used in the Blend. Use the “Direct Selection Tool” (A) to fix “End Points” that need it.
17 - You may need to arrange the placement of the different Paths. Select the first black filled “Shadows” you created, right-click on top and choose Arrange > Bring to Front. You can also add some Grey and White filled paths to cover the areas that should be filled with those colors.
18 - Keep adding Blended Shadows and sometimes lower their “Opacity” in the “Transparency Panel”. Keep going until you create all the blends.
19 - Turn Off the bottom Layer visibility by clicking on the Small Eye icon on the left side of its Thumbnail to see your Artwork. Reposition it if needed.
20 - You can add more Blends, change the “Opacity” of just one of the Paths by clicking many times on top of it to enter “Isolation Mode”.
21 - Select “Layer 3” to work with, change the “Stroke” color to White and add some Highlight Blends.
22 - Add some of them to the “Background”. You can “Delete” the reference image and make the Layer visible again to use it. Finally, create a “Rectangle” that cover the entire Canvas, make sure it has “No Fill and Stroke” and that is placed on Top of everything (Layer 3). Select everything and go to Object > Clipping Mask > Make (Command/Control + 7) to hide the unwanted portions of the Paths.
23 - Check out your Artwork!
by @lornacane


