
How to Remove Objects from Images with Content Aware Fill in Photoshop
Discover how to move or remove objects in Photoshop using the Content Aware Fill.
With the Content-Aware tools in Photoshop, you can easily move or remove objects from photos. You can even remove people from almost any background, including complex ones. The software will analyze the image to find the best options to replace the selected area. You also have control in fine-tuning the result. This comes in handy in cases where fine-tuning is needed to fit your creative needs.
You can also explore the content-aware feature in the Patch tool and the Spot Healing brush.
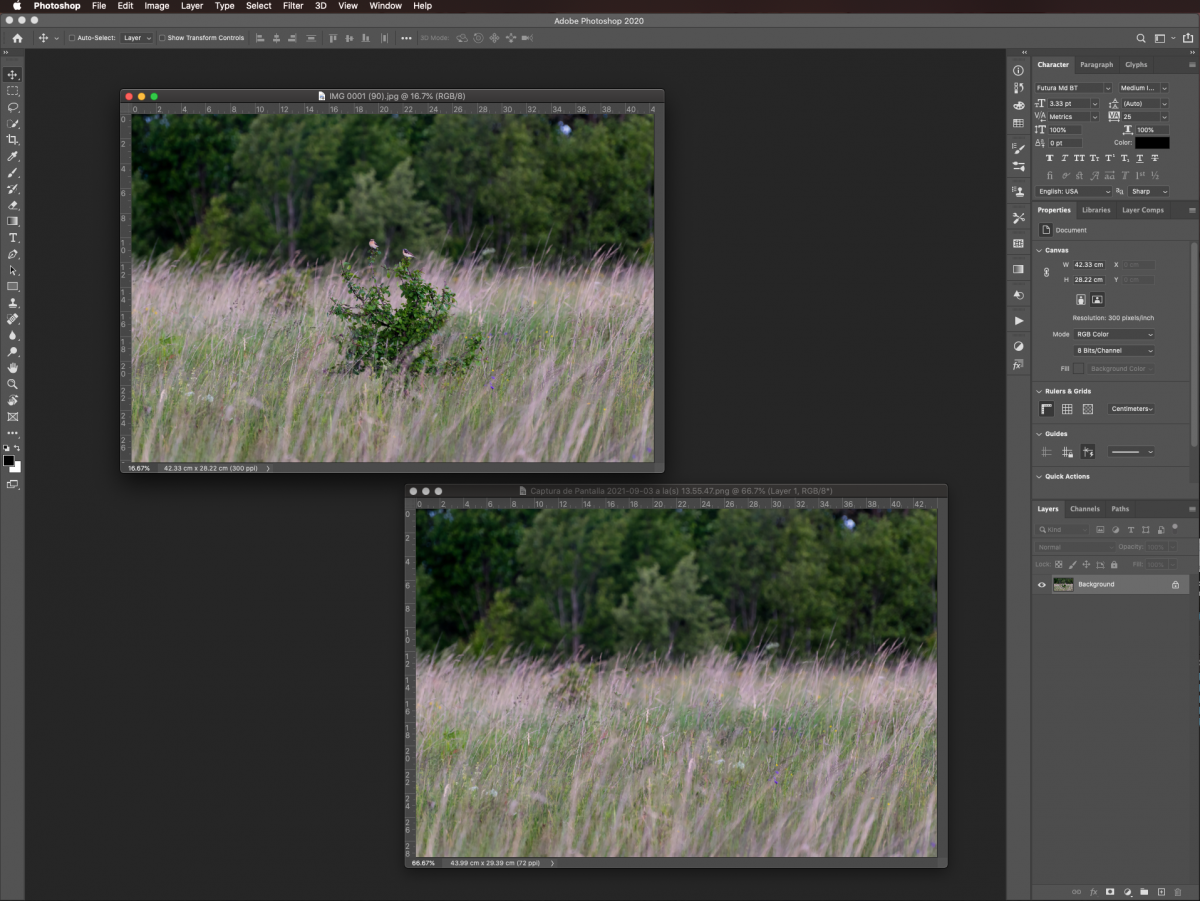
In our example, we are using a lighthouse photo and a photo of birds in a tree. We have a great selection of photos for commercial use if you would like to use other photos.
The Content-Aware Fill can be used to remove objects from photos.You may want to use this feature when there are distracting elements you want to erase.
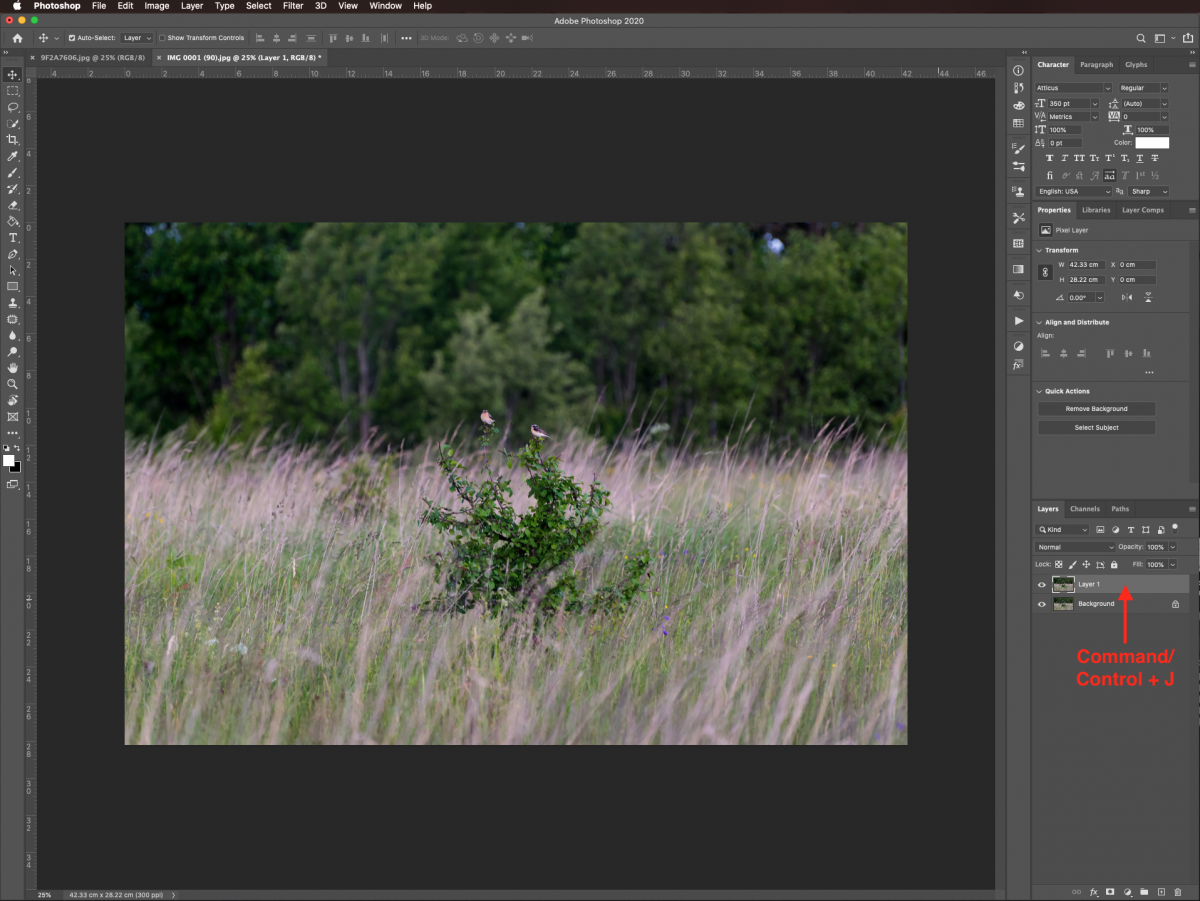
In this step, we will be duplicating the image and then selecting the areas we want to remove. It is always good practice to duplicate the original version of your image. This is just in case something goes wrong and you need to revert back to the original.
In Photoshop, open your chosen image and duplicate it (Command/Control + J).
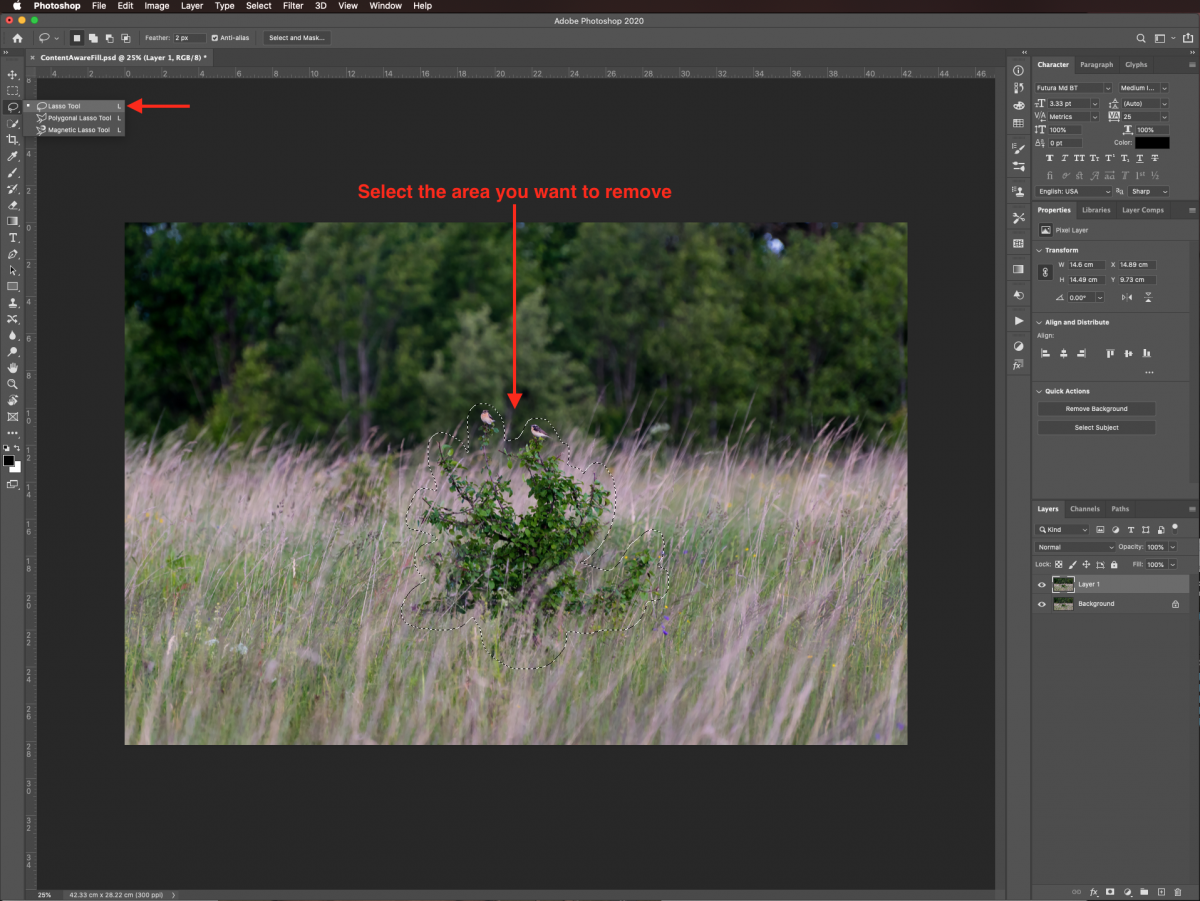
Choose the selection tool you prefer. Then select the portion of the image you wish to remove. We chose to use the Lasso Tool to make our selection.
The Content-Aware fill provides many options to remove objects from photos. To remove the selected area, go to Edit > Content Aware Fill. This will open the Content-Aware Fill workspace.
In this workspace, you can use the live preview to refine the sampling area. You can also adjust the settings to fit your needs.
On the left side, you will find some tools. You can use either the Sampling Brush, Lasso, or the Polygonal Lasso tools to modify your selection. The Sampling Brush tool will let you add to or subtract from the sampling area.
On the top portion of the Content-Aware Fill panel, you can adjust some of the sampling area behaviors. You can change the color and opacity of the sampling area overlay. The panel is located on the right side of your workspace.
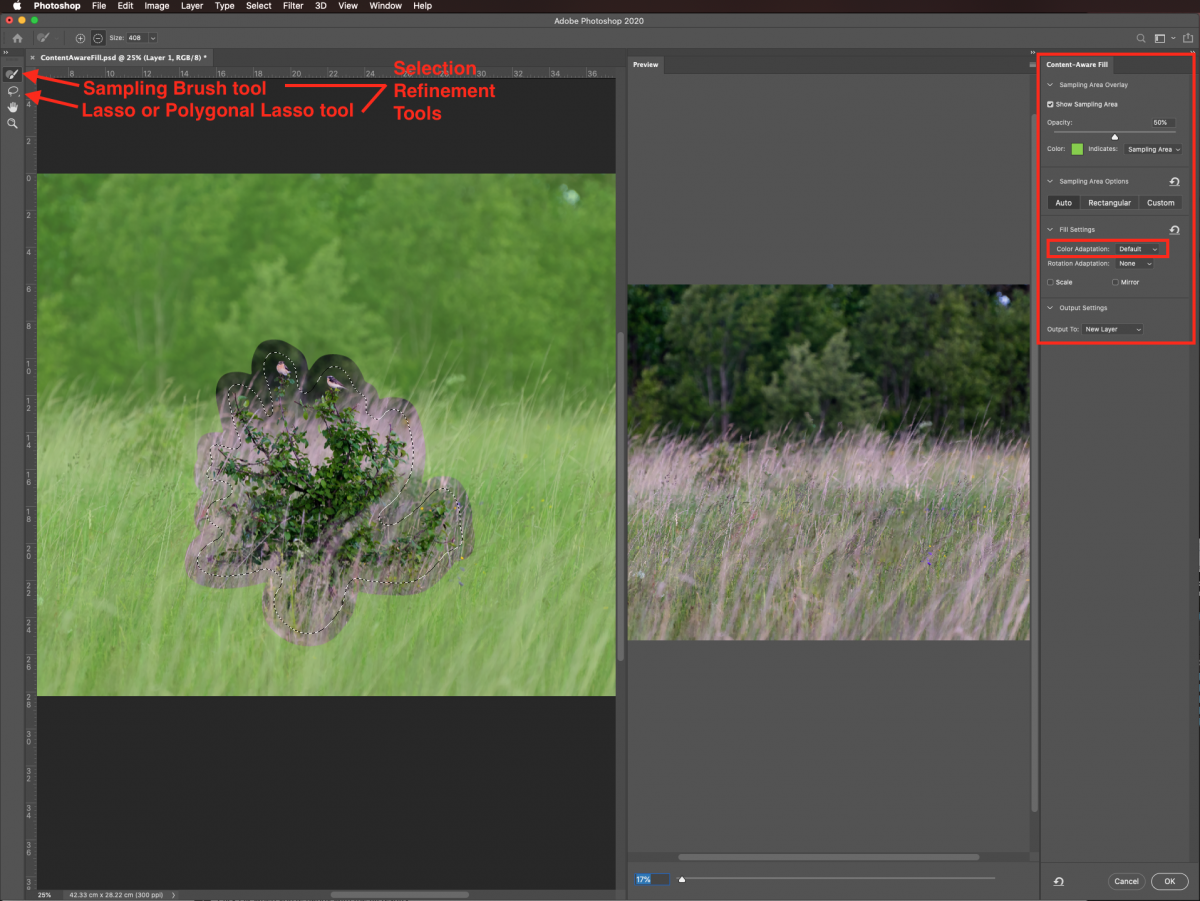
Right beneath that you will find the Sampling Area Options. Here you can determine the sampling area. With Auto, you will use content similar to the surrounding fill area. With Rectangular, you will use a rectangular region around the fill area. With Custom, you will manually define the sampling area.
Finally, the Fill Settings let you adjust the Color and Rotation Adaptation. The first one (Color) allows contrast and brightness to adapt for better matching. It will apply gradual color and texture changes to the fill.
The second one (Rotation), will help when filling content with rotated or curved patterns.
Finally, check the Scale box. It will allow resizing for filling content with repeating patterns of different sizes or content under perspective. While doing this with the Mirror box, it will flip your images horizontally.

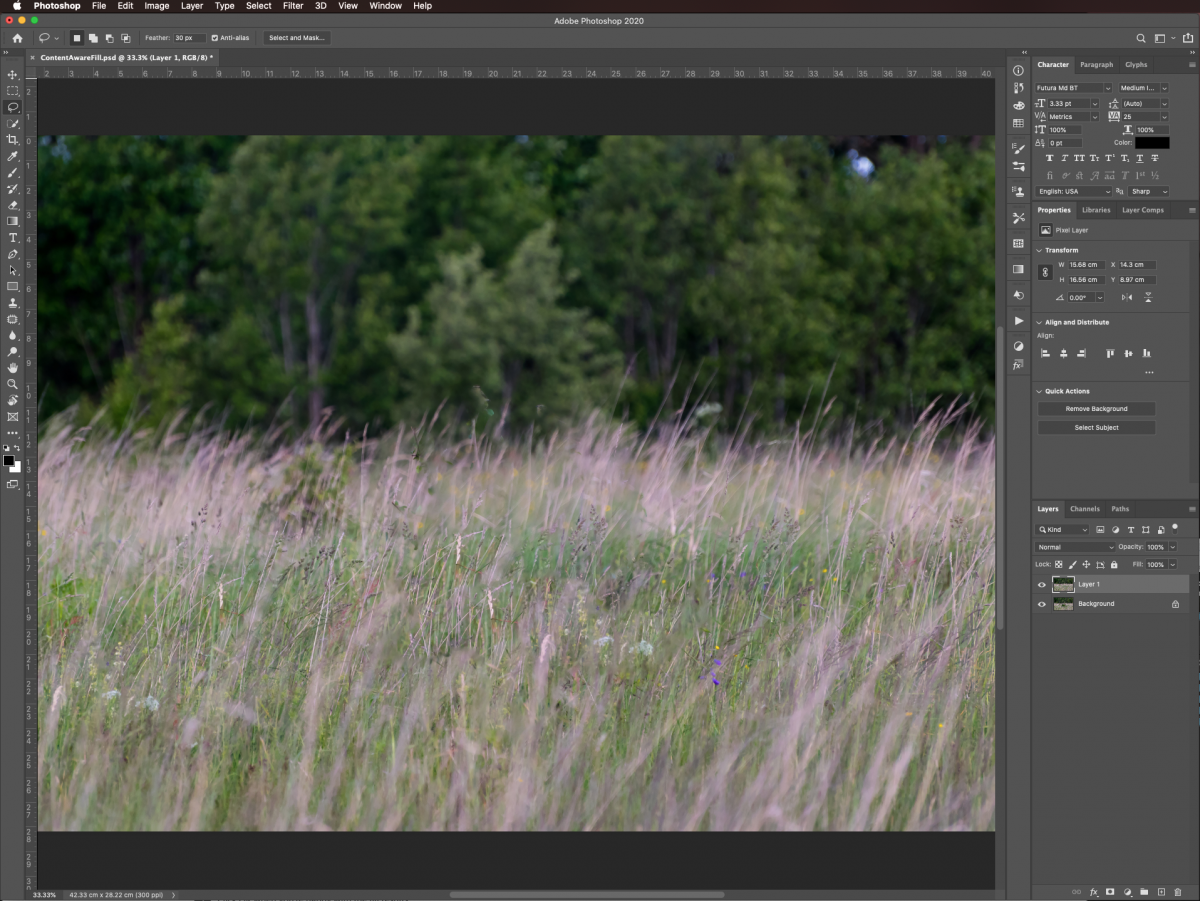
Experiment with the various settings. Then choose the Output method of your preference before clicking Ok to commit the changes. Here is our resulting image with the settings we chose.
If your image is simple, you can try to apply the Content-Aware fill directly. Go to Edit > Fill (Shift + F5).
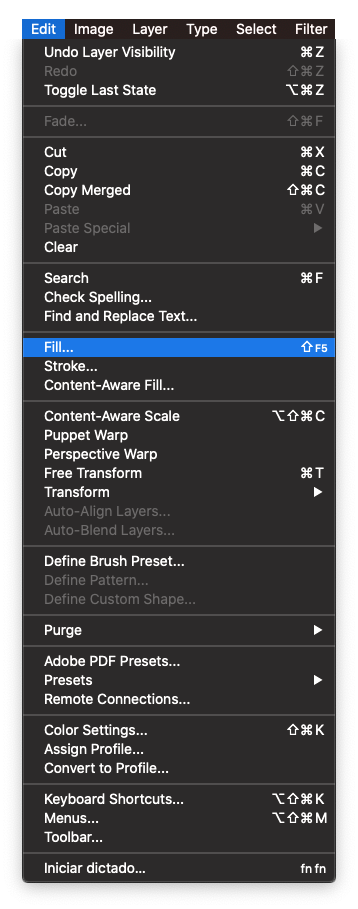
Then, choose Content Aware from the options on the Fill pop-up window. Next, click Ok.
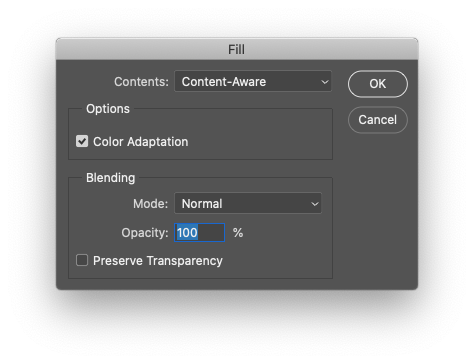
This option will apply the default settings.

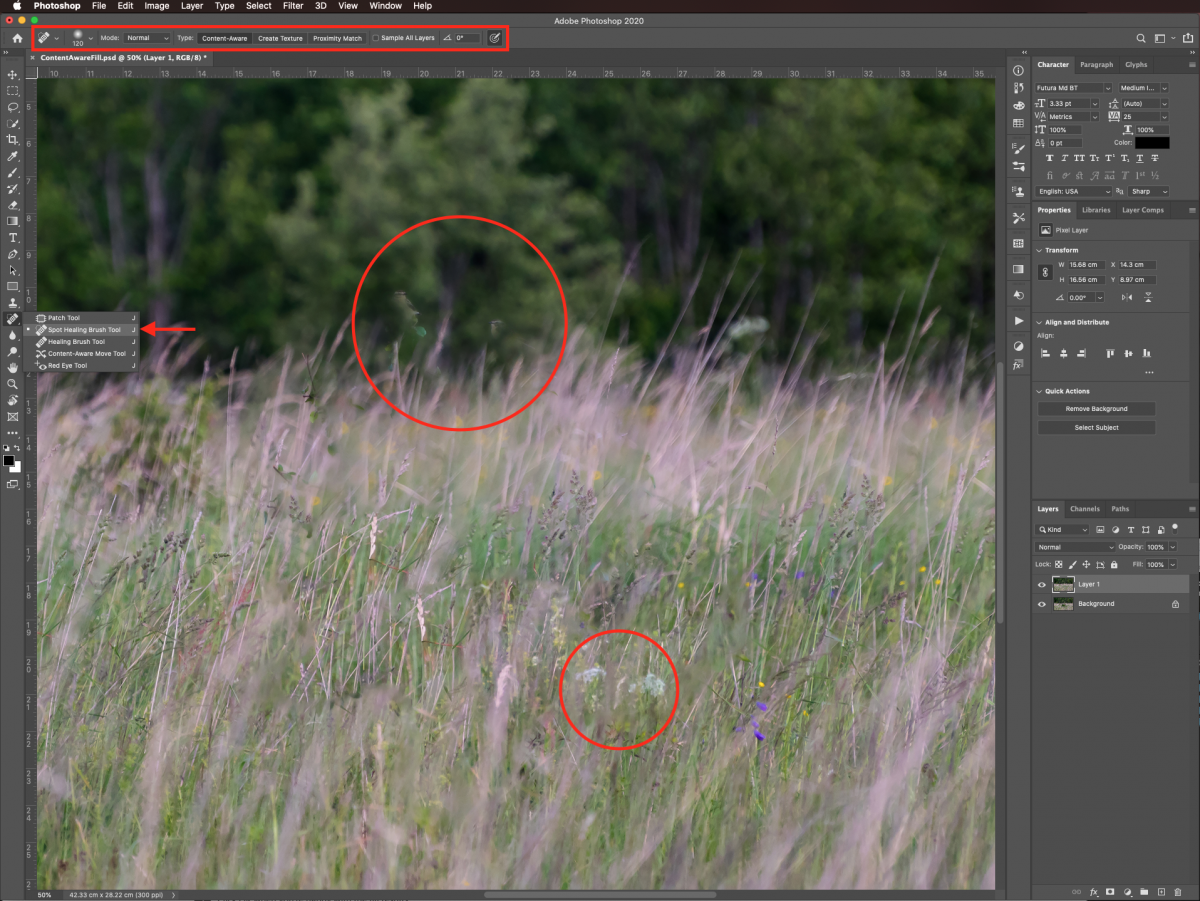
If the photo requires a more complex way of removing an object, you can use the Spot Healing brush (J).
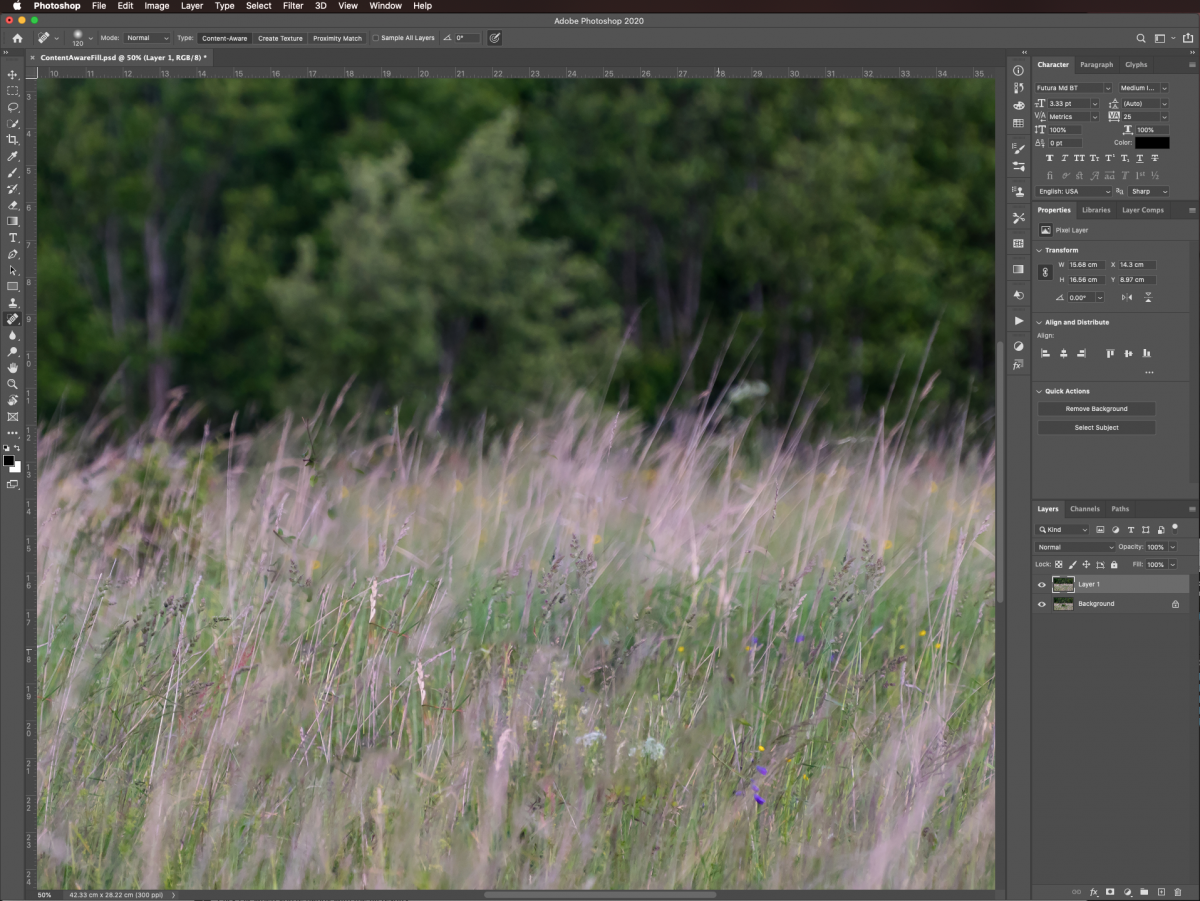
The image below is the final result after adding the adjustments and touch ups.
For a better comparison, the images below show the before and after.
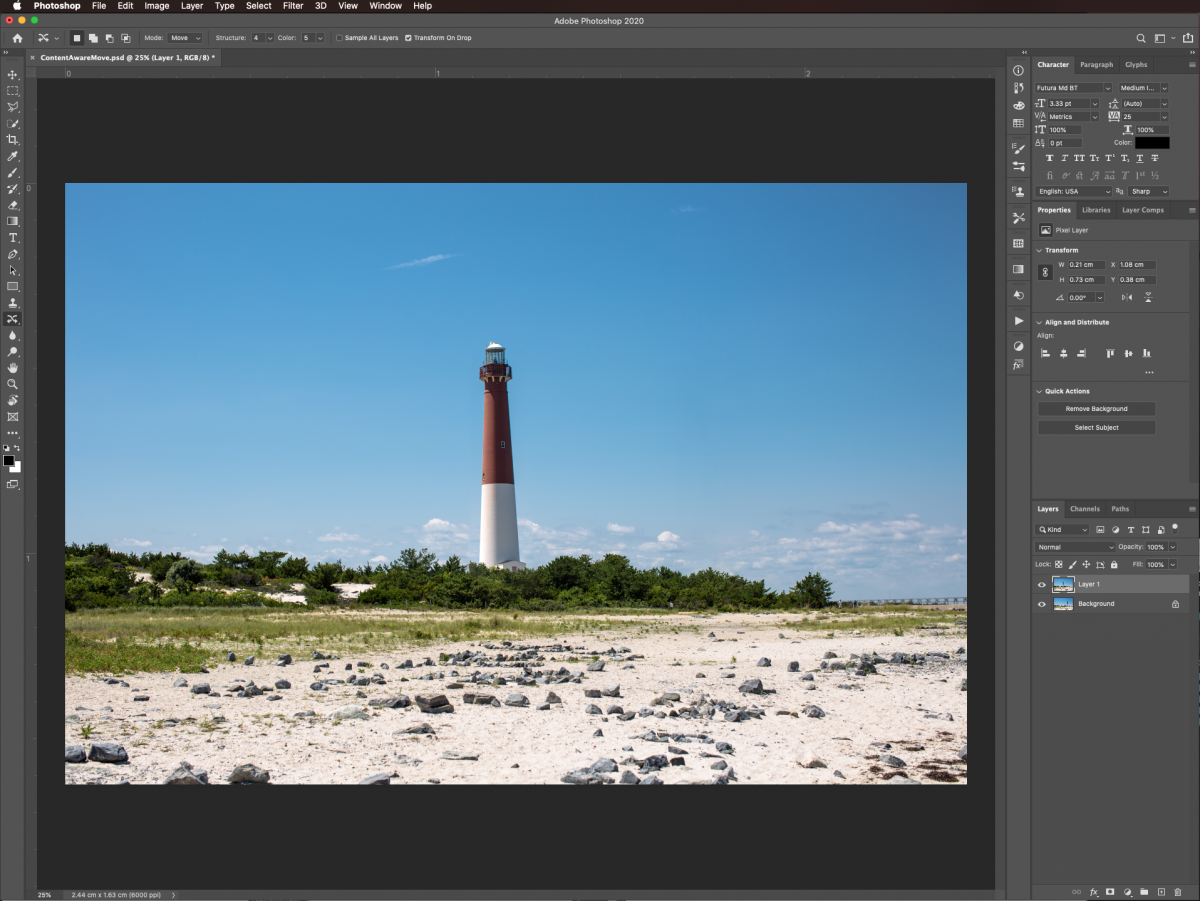
The Content-Aware Move Tool allows you to select an area and move it around. This is very helpful when moving an element of one photo to another.
As before, create a duplicate of your original layer. Then, use the Polygonal Lasso tool (L) to make a selection loosely around it. Leave some space between the edges.
Select the Content-Aware Move tool to move your subject. You need to adjust the values on the options bar to fit your needs.

Here’s a brief description of what each option does:
The Move mode changes the location of the selected object, while Extend expands or contracts your selection.
Structure specifies how closely the patch should match the current texture. A higher value will result in a stronger match. A lower value, instead, will make a weaker one.
Color specifies how the colors will be blended. A value of 0 will disable this feature. Instead, a value of 10 will apply the maximum amount of blend.
Enabling Sample All Layers will let you use information from every existing layer to create the fill. It also lets you select your target layer from the Layers panel.
With Transform on Drop, you can also scale your selection using the handles.
We used the Move mode with a value of 4 for the Structure and a value of 5 for Color. We also enabled the Transform on Drop feature.
Once you are happy with the placement, click Enter or the check mark on the top menu.
If you still notice some portions that need fixing, use the Spot Healing Brush (J) or the Clone Stamp tool (S) to do it.
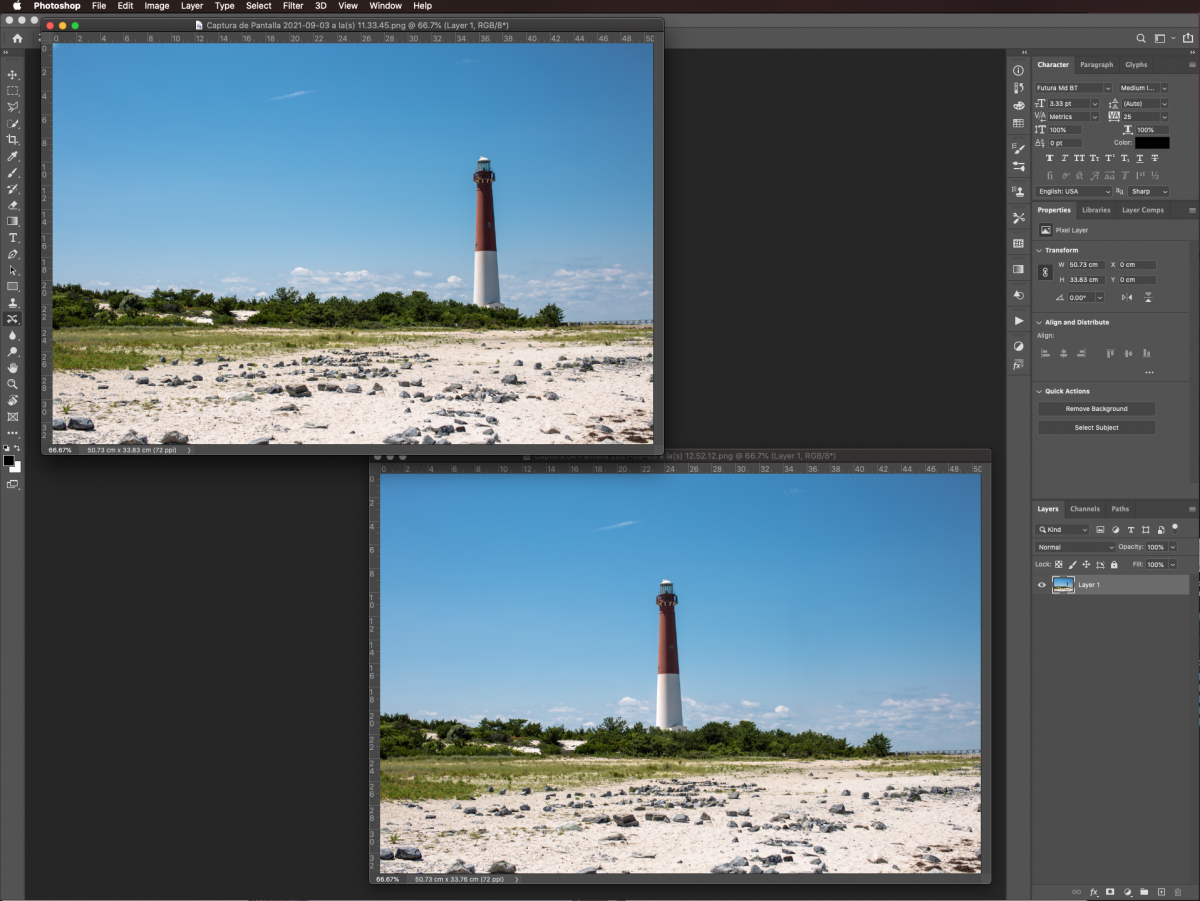
Here is the result after using the Content-Aware move tool.
Check out the comparison below of the before and after.
Well done on learning how to use Content-Aware tools to remove objects from photos.
To learn more about Photoshop, check out our guides on how to make a peeling sticker effect, and how to flip an image.
You can also explore the content-aware feature in the Patch tool and the Spot Healing brush.
In our example, we are using a lighthouse photo and a photo of birds in a tree. We have a great selection of photos for commercial use if you would like to use other photos.
Remove Objects from Photos Using the Content-Aware Fill
The Content-Aware Fill can be used to remove objects from photos.You may want to use this feature when there are distracting elements you want to erase.
Step 1 - Duplicate image and select areas to erase
In this step, we will be duplicating the image and then selecting the areas we want to remove. It is always good practice to duplicate the original version of your image. This is just in case something goes wrong and you need to revert back to the original.
In Photoshop, open your chosen image and duplicate it (Command/Control + J).
Choose the selection tool you prefer. Then select the portion of the image you wish to remove. We chose to use the Lasso Tool to make our selection.
Step 2 - Content-Aware Fill options
The Content-Aware fill provides many options to remove objects from photos. To remove the selected area, go to Edit > Content Aware Fill. This will open the Content-Aware Fill workspace.
In this workspace, you can use the live preview to refine the sampling area. You can also adjust the settings to fit your needs.
On the left side, you will find some tools. You can use either the Sampling Brush, Lasso, or the Polygonal Lasso tools to modify your selection. The Sampling Brush tool will let you add to or subtract from the sampling area.
On the top portion of the Content-Aware Fill panel, you can adjust some of the sampling area behaviors. You can change the color and opacity of the sampling area overlay. The panel is located on the right side of your workspace.
Right beneath that you will find the Sampling Area Options. Here you can determine the sampling area. With Auto, you will use content similar to the surrounding fill area. With Rectangular, you will use a rectangular region around the fill area. With Custom, you will manually define the sampling area.
Finally, the Fill Settings let you adjust the Color and Rotation Adaptation. The first one (Color) allows contrast and brightness to adapt for better matching. It will apply gradual color and texture changes to the fill.
The second one (Rotation), will help when filling content with rotated or curved patterns.
Finally, check the Scale box. It will allow resizing for filling content with repeating patterns of different sizes or content under perspective. While doing this with the Mirror box, it will flip your images horizontally.
Experiment with the various settings. Then choose the Output method of your preference before clicking Ok to commit the changes. Here is our resulting image with the settings we chose.
Step 3 - Use Content-Aware fill on simple images
If your image is simple, you can try to apply the Content-Aware fill directly. Go to Edit > Fill (Shift + F5).
Then, choose Content Aware from the options on the Fill pop-up window. Next, click Ok.
This option will apply the default settings.
If the photo requires a more complex way of removing an object, you can use the Spot Healing brush (J).
The image below is the final result after adding the adjustments and touch ups.
For a better comparison, the images below show the before and after.
Move Selected Objects with the Content-Aware Move Tool
The Content-Aware Move Tool allows you to select an area and move it around. This is very helpful when moving an element of one photo to another.
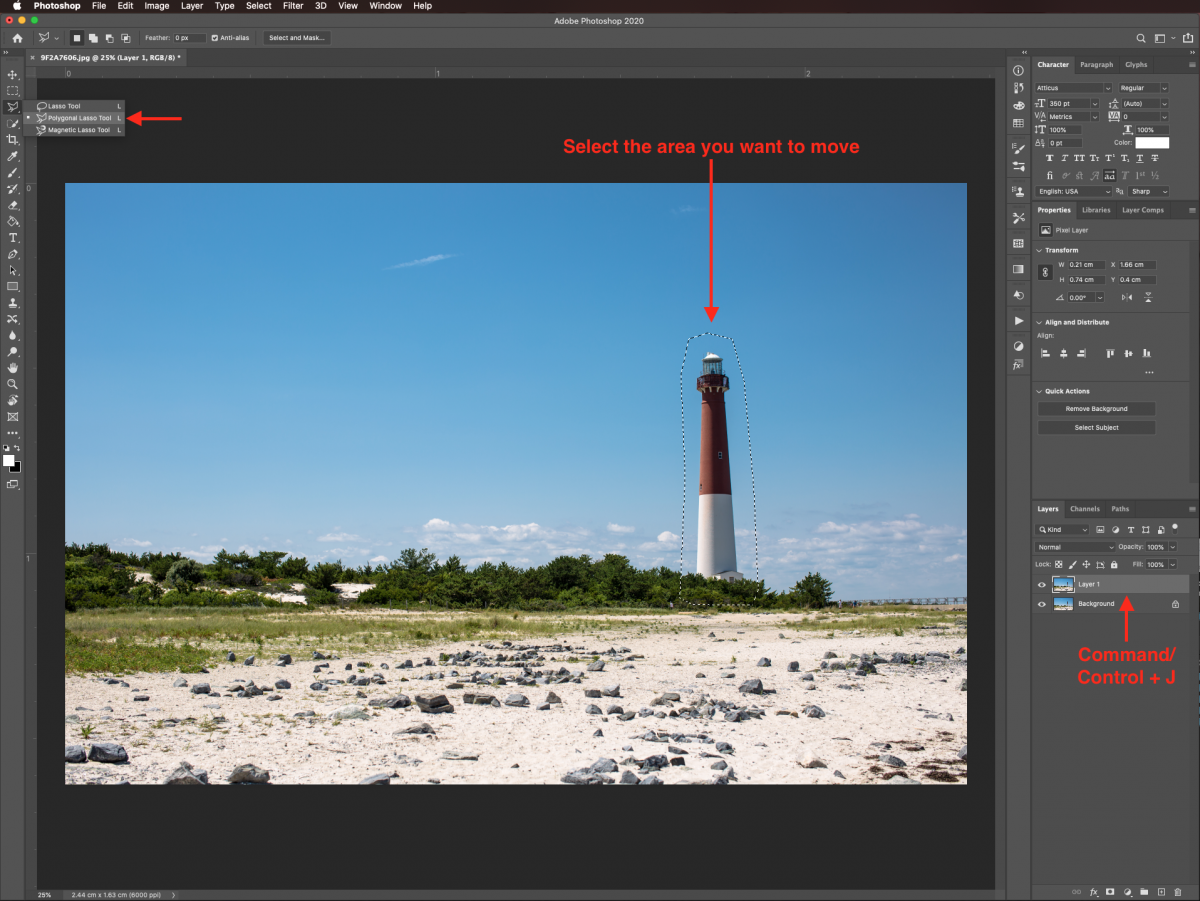
Step 1 - Select the area you want to move
As before, create a duplicate of your original layer. Then, use the Polygonal Lasso tool (L) to make a selection loosely around it. Leave some space between the edges.
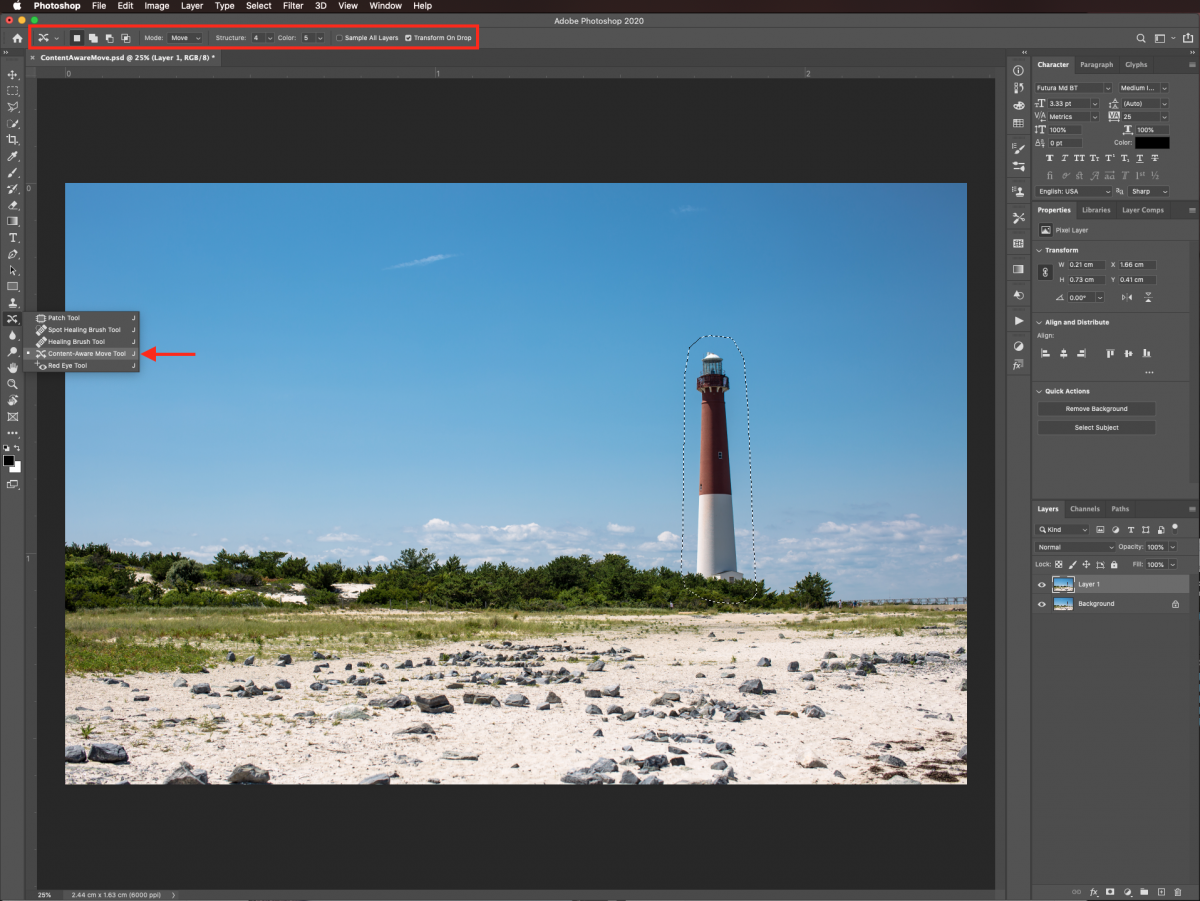
Step 2 - Use Content Aware Move Tool
Select the Content-Aware Move tool to move your subject. You need to adjust the values on the options bar to fit your needs.
Here’s a brief description of what each option does:
The Move mode changes the location of the selected object, while Extend expands or contracts your selection.
Structure specifies how closely the patch should match the current texture. A higher value will result in a stronger match. A lower value, instead, will make a weaker one.
Color specifies how the colors will be blended. A value of 0 will disable this feature. Instead, a value of 10 will apply the maximum amount of blend.
Enabling Sample All Layers will let you use information from every existing layer to create the fill. It also lets you select your target layer from the Layers panel.
With Transform on Drop, you can also scale your selection using the handles.
We used the Move mode with a value of 4 for the Structure and a value of 5 for Color. We also enabled the Transform on Drop feature.
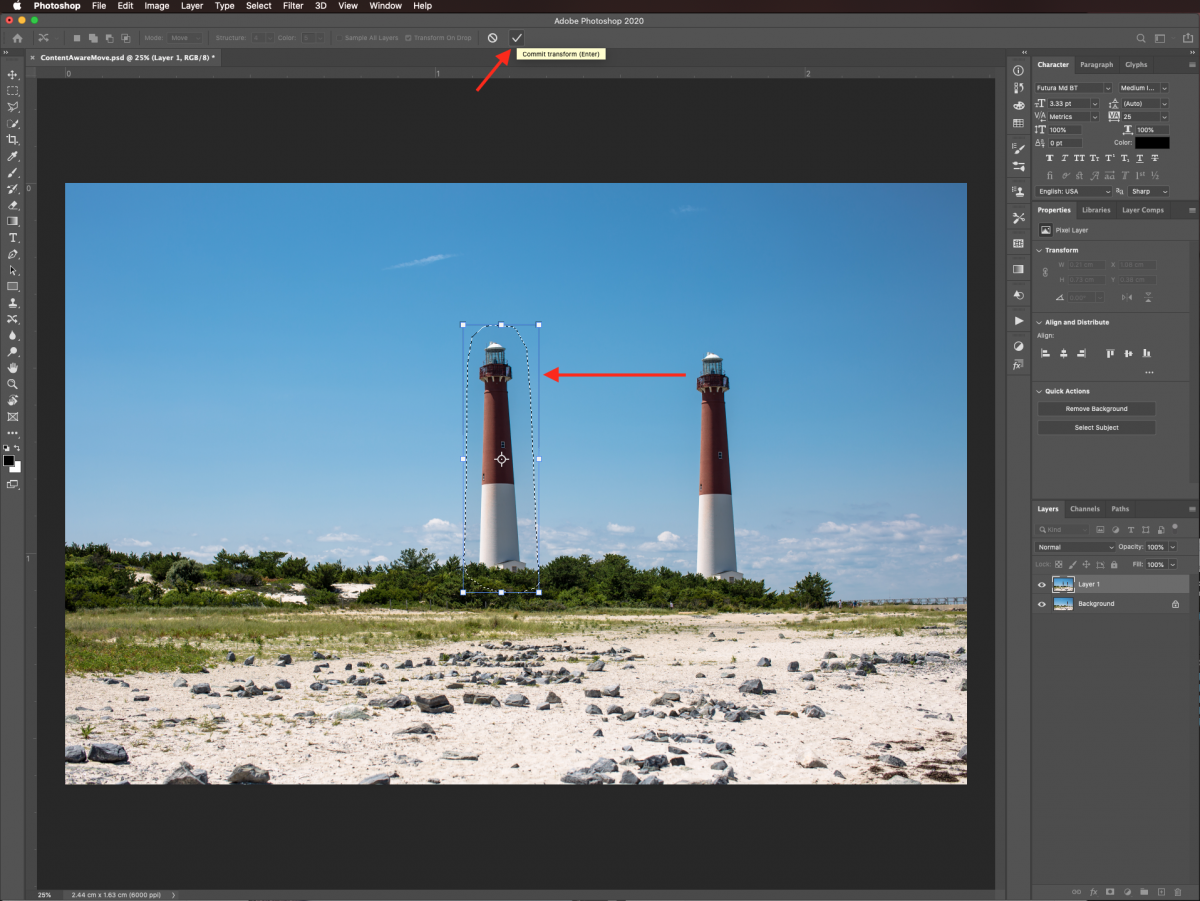
Once you are happy with the placement, click Enter or the check mark on the top menu.
If you still notice some portions that need fixing, use the Spot Healing Brush (J) or the Clone Stamp tool (S) to do it.
Here is the result after using the Content-Aware move tool.
Check out the comparison below of the before and after.
Well done on learning how to use Content-Aware tools to remove objects from photos.
To learn more about Photoshop, check out our guides on how to make a peeling sticker effect, and how to flip an image.


