
Creating a foil tattoo in cricut design space with the foil quill
Create a foil tattoo with Silhouette Studio and the Foil Quill with this step by step tutorial.
1- Open cricut design space and create a new project.
4-Click on browse.
5- Save your design. I am using Split Mandala 2 by Karen J - Graphic Design.
6- Select your saved design and insert image to your design space.
7- Select your design.
8- Select the line type drop down box and select draw.
9- Add anything else you need to your design. and also convert to draw.
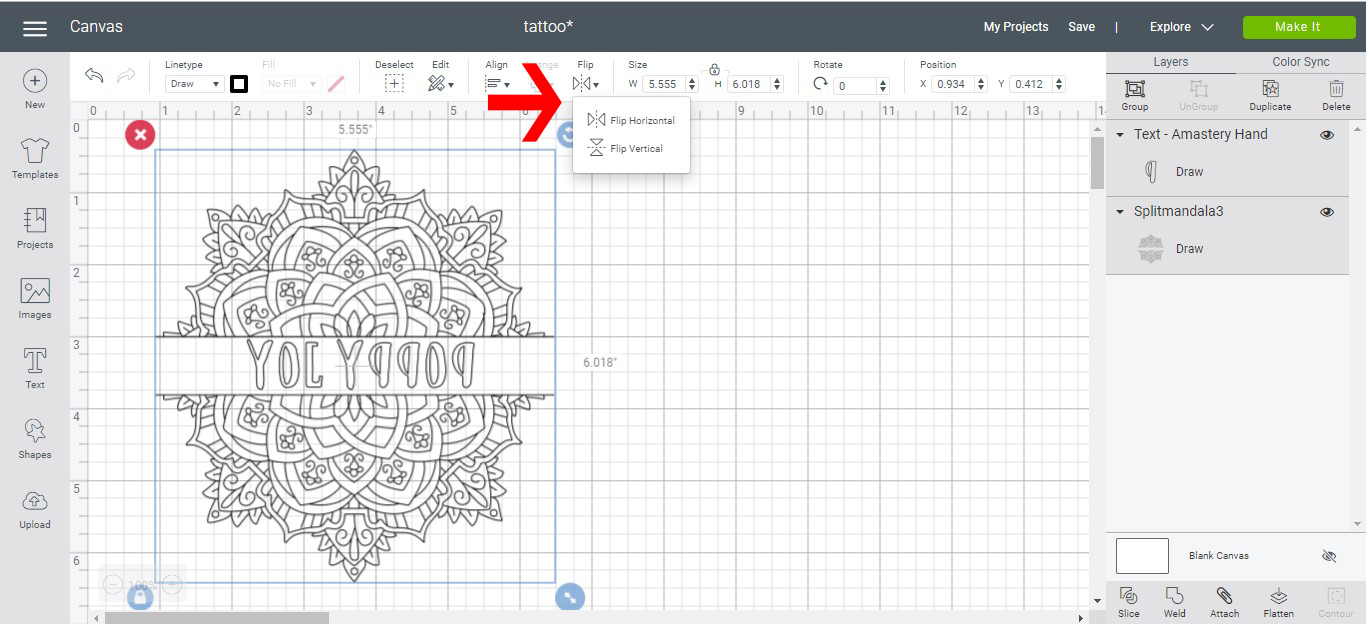
10- As we are creating a tattoo, you will need to flip your design. Click on Flip and then flip horizontal. Make sure you group everything and attach so the design will stay together in the cut screen.
11- Adjust your positioning on the mat and click continue.
12- Adjust your dial to custom. With tattoo paper you need to ensure that you do not use any setting except the one for tattoo paper. it will not foil correctly.
13- Browse all materials.
14- Search for tattoo.
15- Find the correct setting and select it.
16- Set up your foil quill and click Go. Once you have foiled your tattoo paper, follow the instructions on how to apply it to your skin. Remember when using foil and tattoo paper the color of your tattoo will be the back side of your foil.

2- Select the upload icon.

3- Click on the upload image.

4-Click on browse.

5- Save your design. I am using Split Mandala 2 by Karen J - Graphic Design.

6- Select your saved design and insert image to your design space.

7- Select your design.

8- Select the line type drop down box and select draw.

9- Add anything else you need to your design. and also convert to draw.

10- As we are creating a tattoo, you will need to flip your design. Click on Flip and then flip horizontal. Make sure you group everything and attach so the design will stay together in the cut screen.
11- Adjust your positioning on the mat and click continue.

12- Adjust your dial to custom. With tattoo paper you need to ensure that you do not use any setting except the one for tattoo paper. it will not foil correctly.

13- Browse all materials.

14- Search for tattoo.

15- Find the correct setting and select it.

16- Set up your foil quill and click Go. Once you have foiled your tattoo paper, follow the instructions on how to apply it to your skin. Remember when using foil and tattoo paper the color of your tattoo will be the back side of your foil.


