Using a Jpeg with the foil quill in cricut design space
1- Open cricut design space. Click on new project.
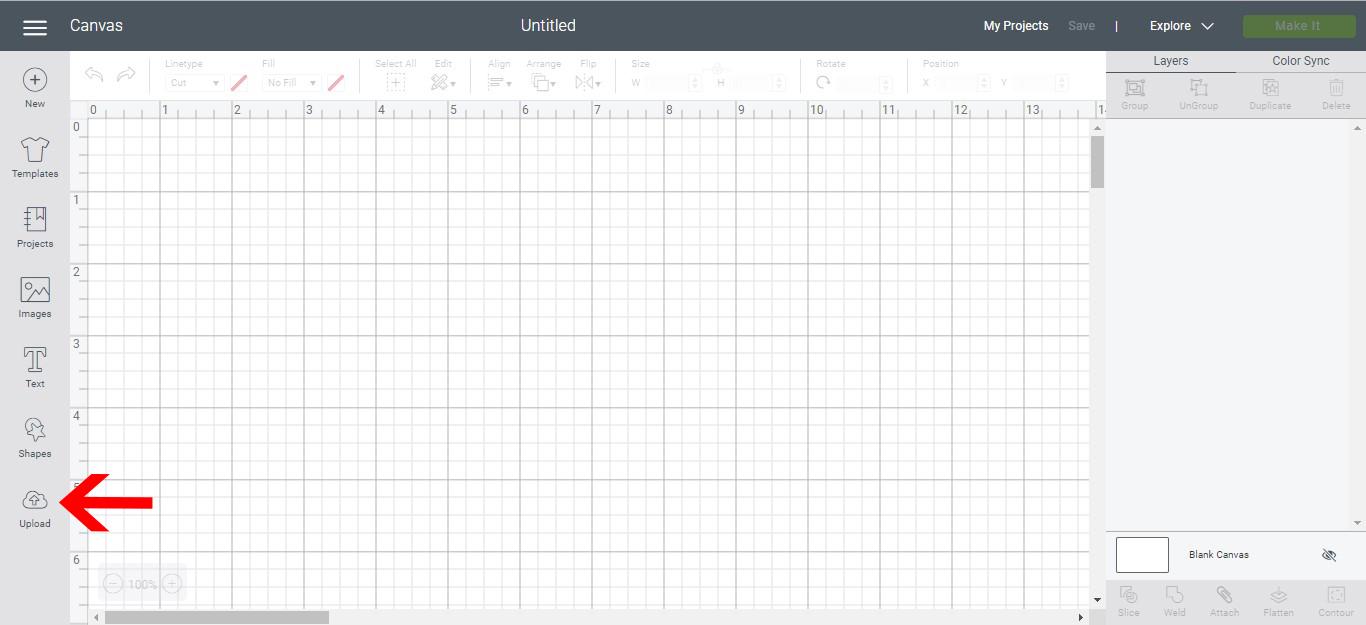
2- Click on the upload icon.
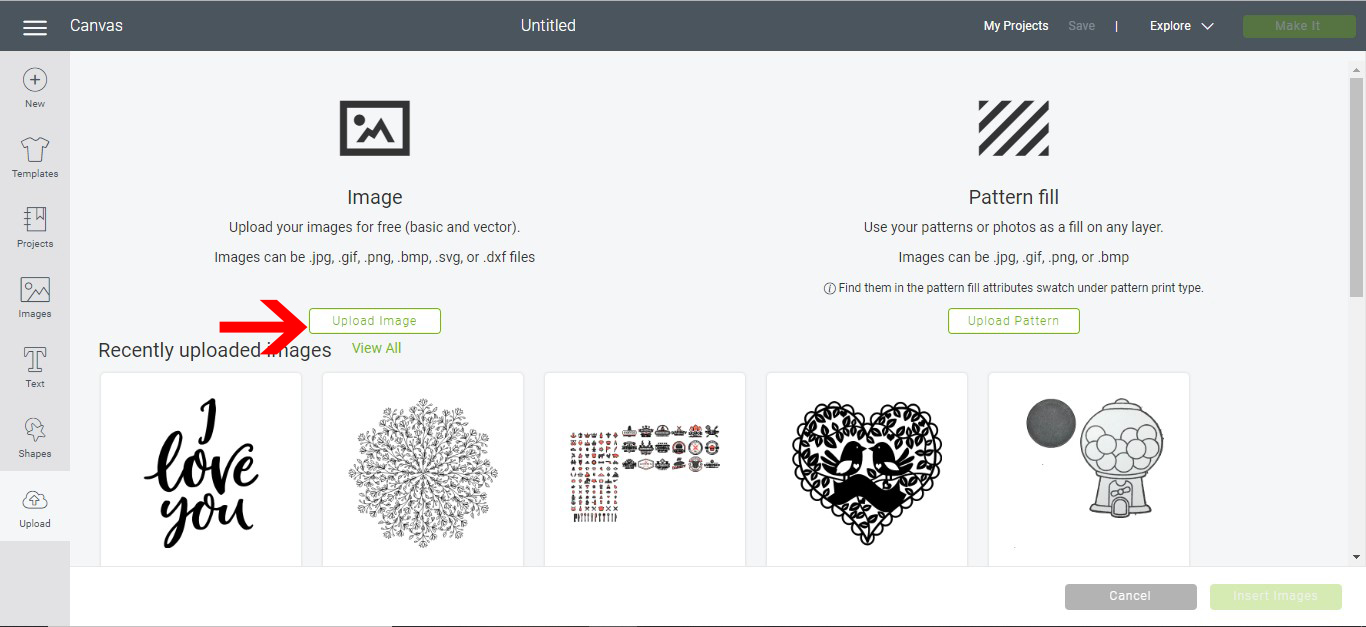
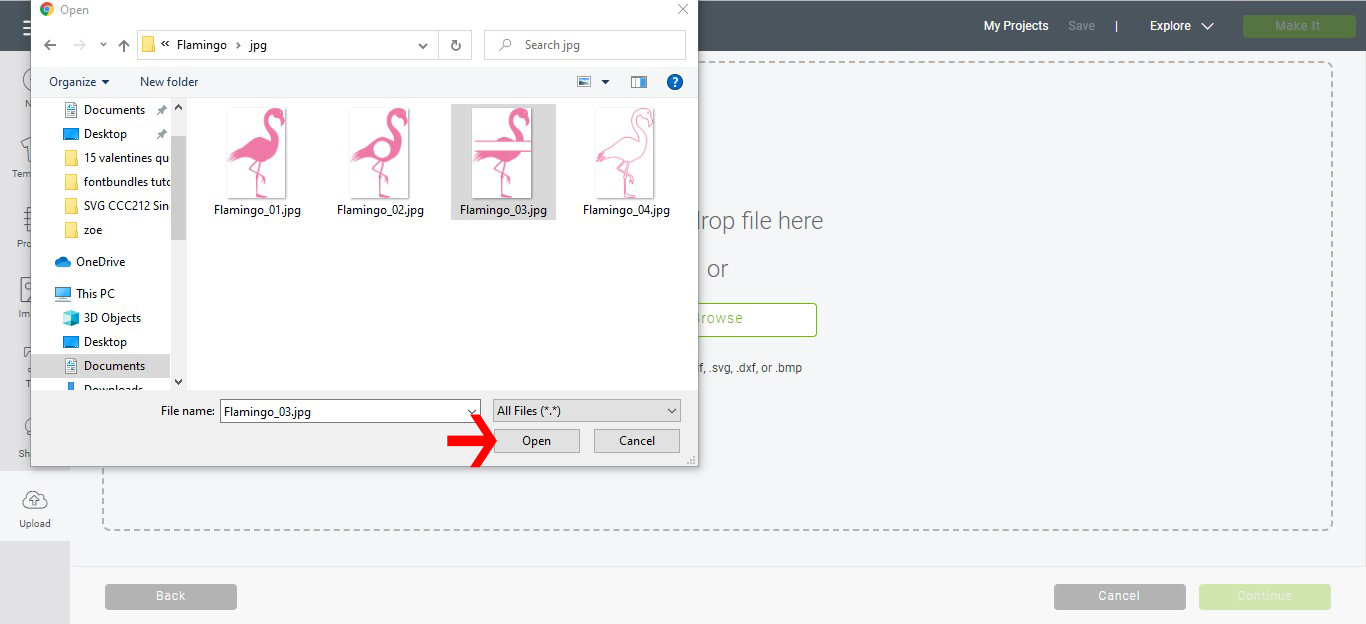
3- Click on the upload image icon.
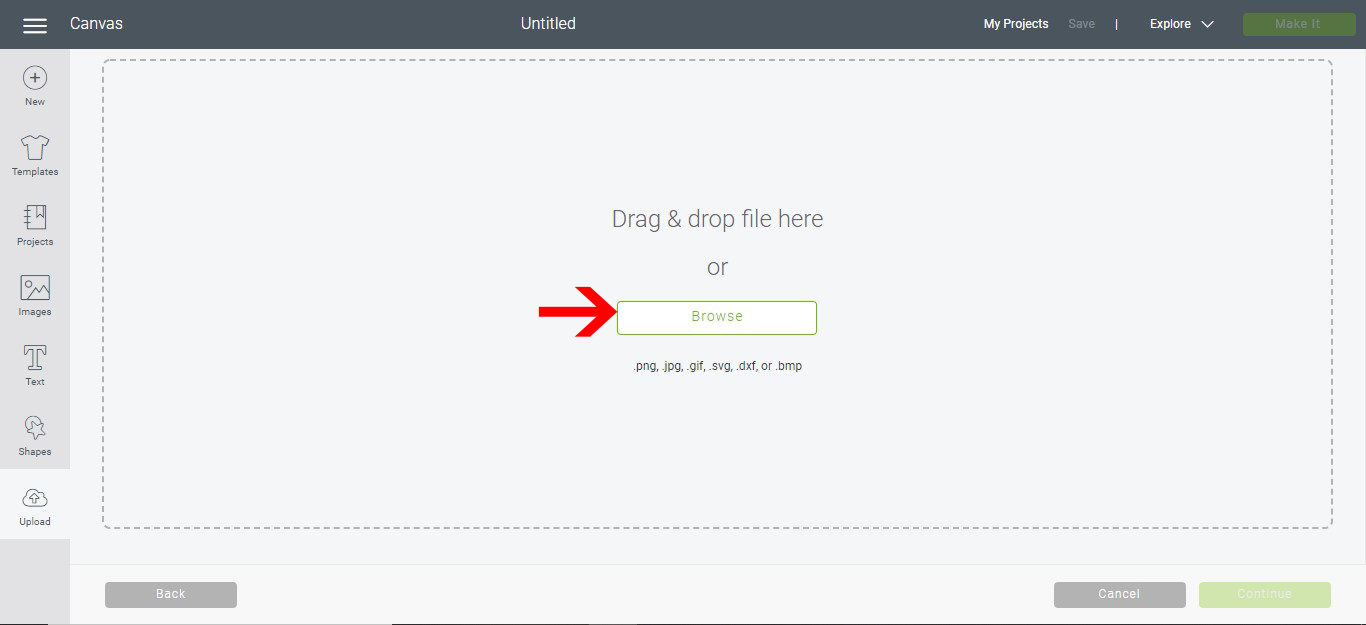
4- Click on browse.
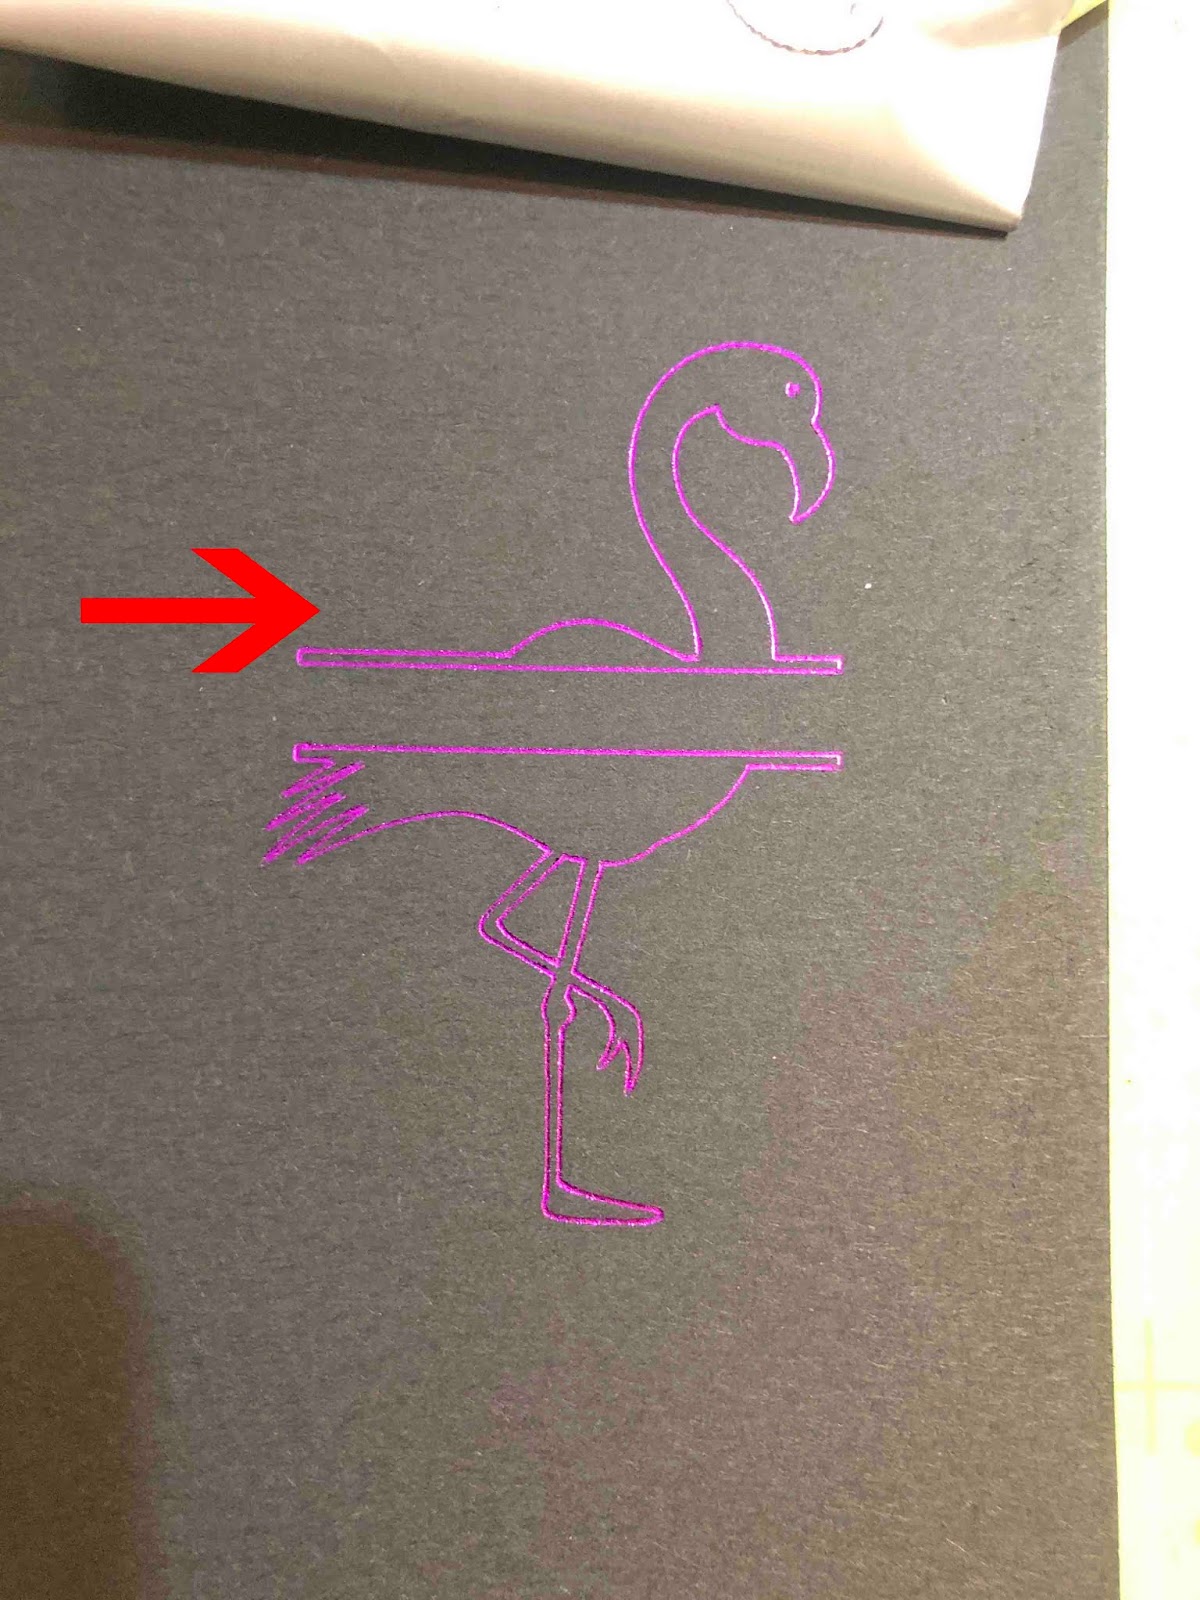
5- Find your jpeg file. I am using Flamingo monogram SVG file from designbundles.net
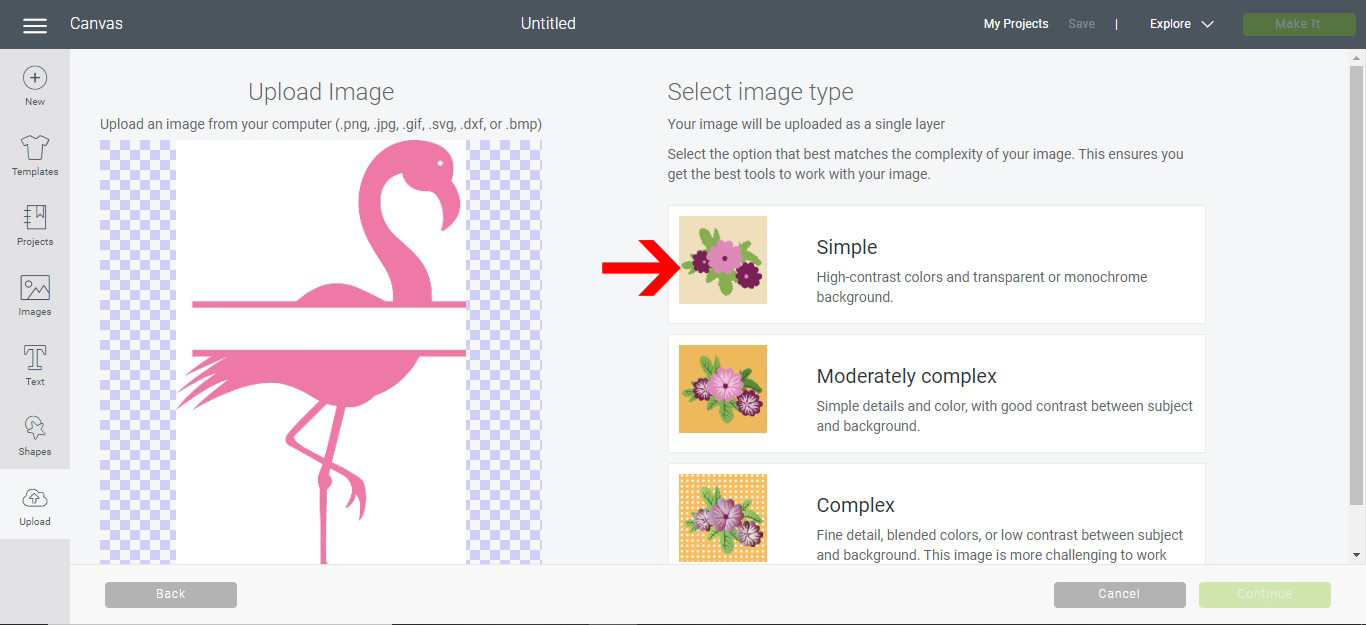
6- As this is a simple file we will click on simple edit type. If the design has more colours or details you can select the complex option.
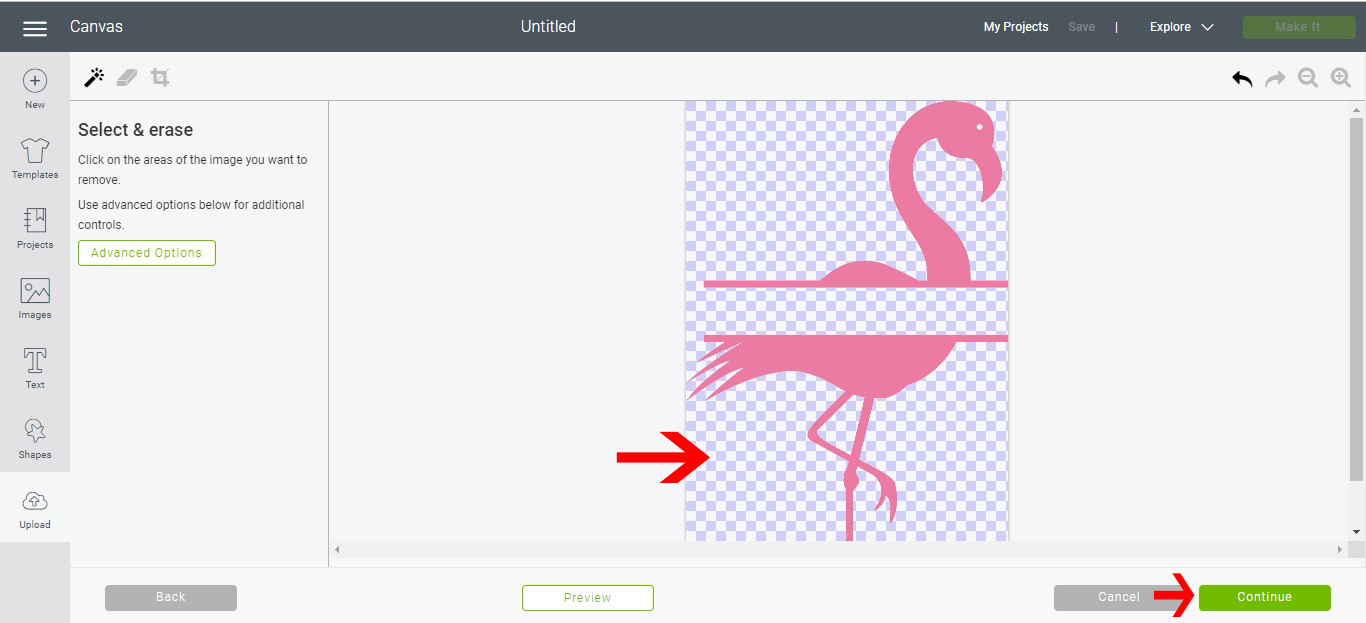
7- We now need to remove the parts of the Jpeg that we do not want draw lines on. Parts like the background of the image needs to be removed. Click on the magic wand.
8- Using the magic wand click on the parts of the design you do not want.(like the background) The checkerboard will show were the design is removed.
Once you are happy, click on continue.
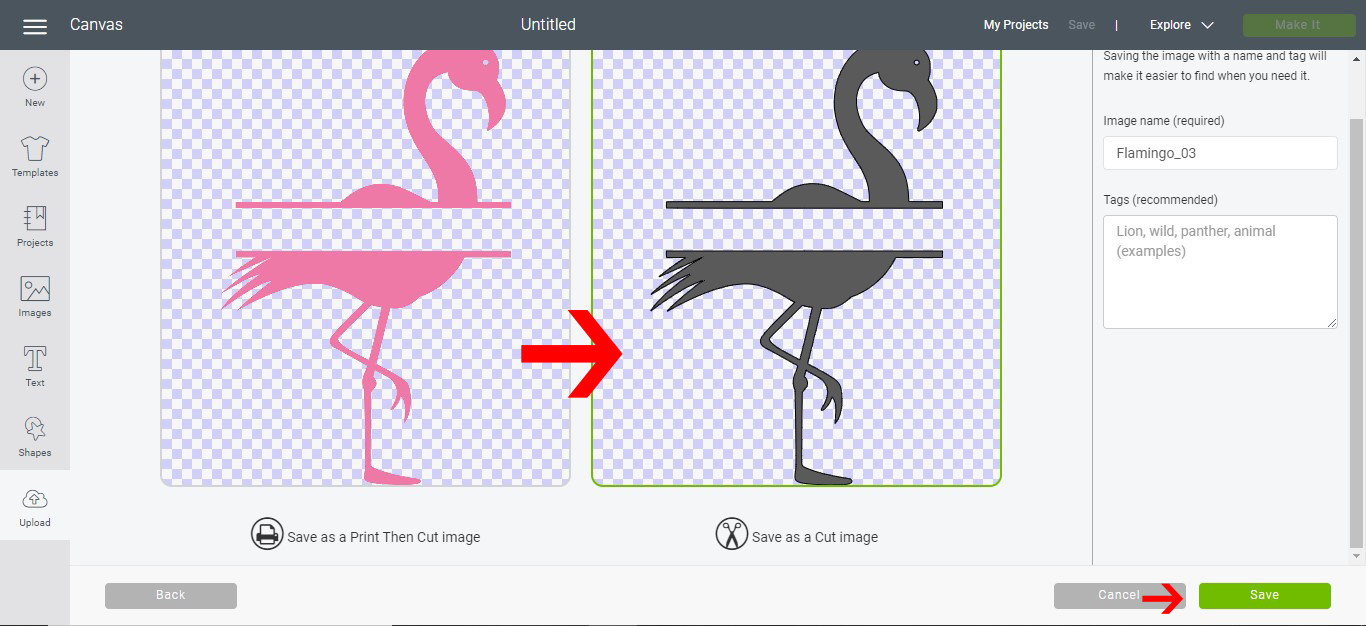
9- You now have the option to do a print and cut or just a cut file. As we want to foil the design, click onto the cut file. you can now rename the file and add tags to use a reference in the future. Click save.
10- Select your saved design and insert it.
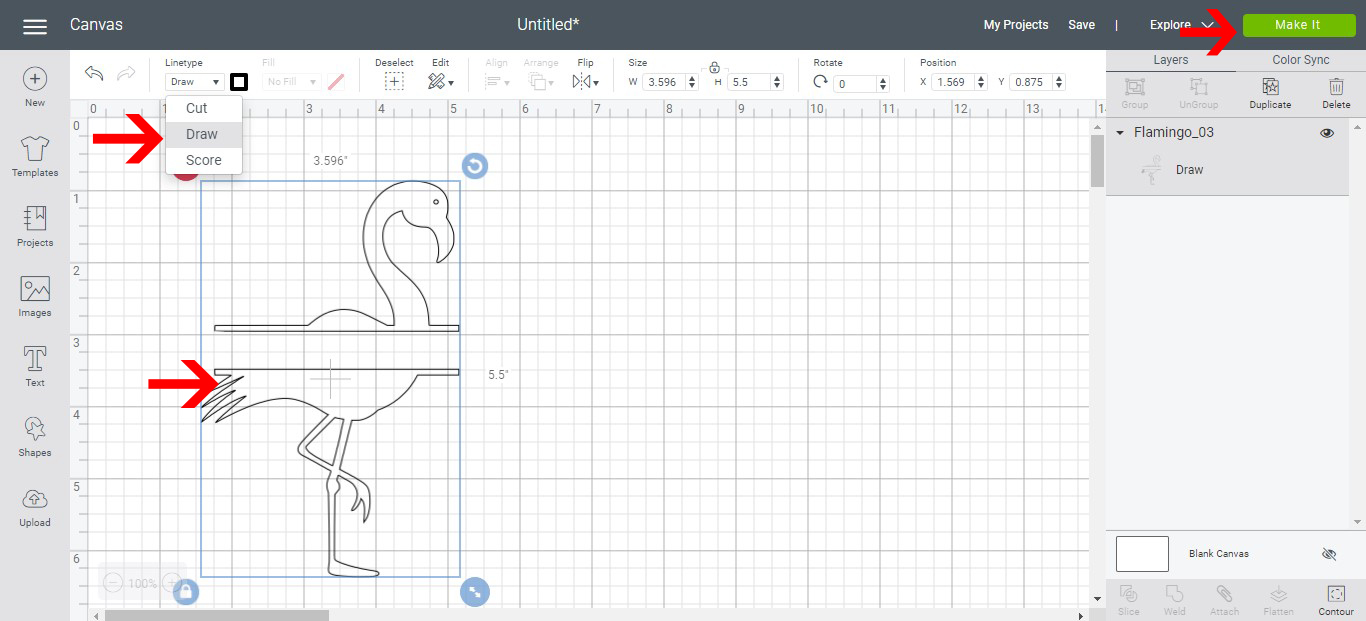
11- The image is now on the design space. With the image selected, click on the line type drop down box.
12- Change the design from cut to draw. Click on make it.
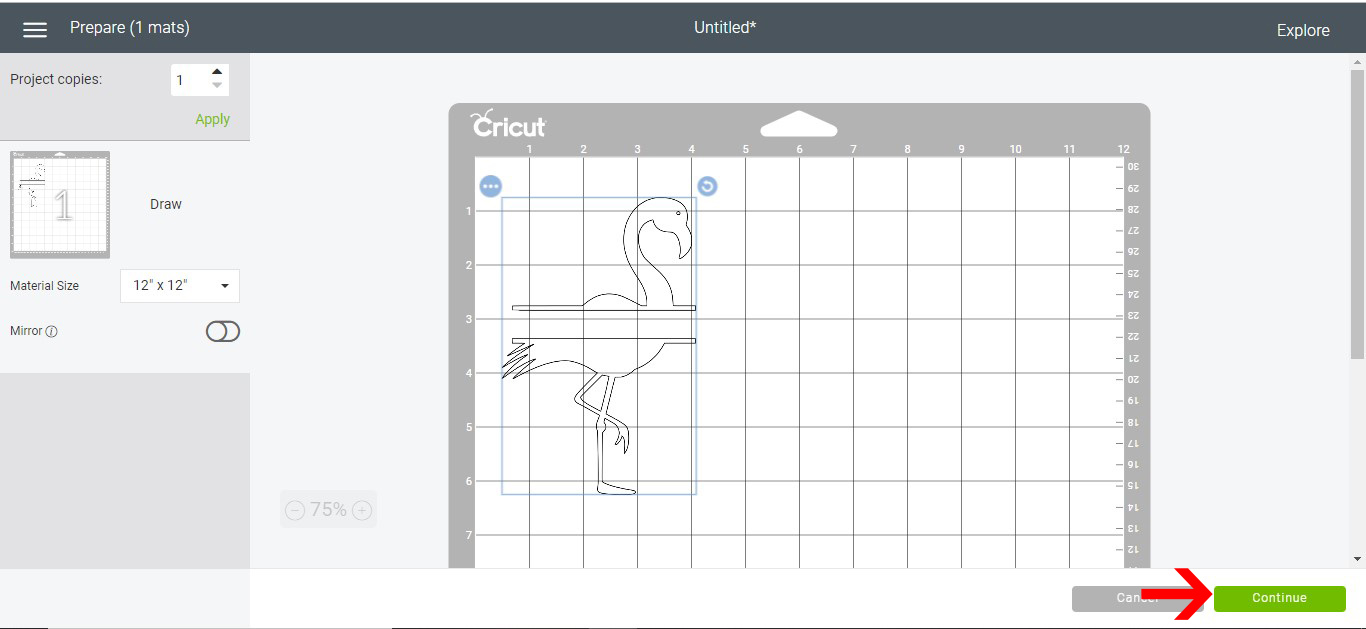
13- Click continue.
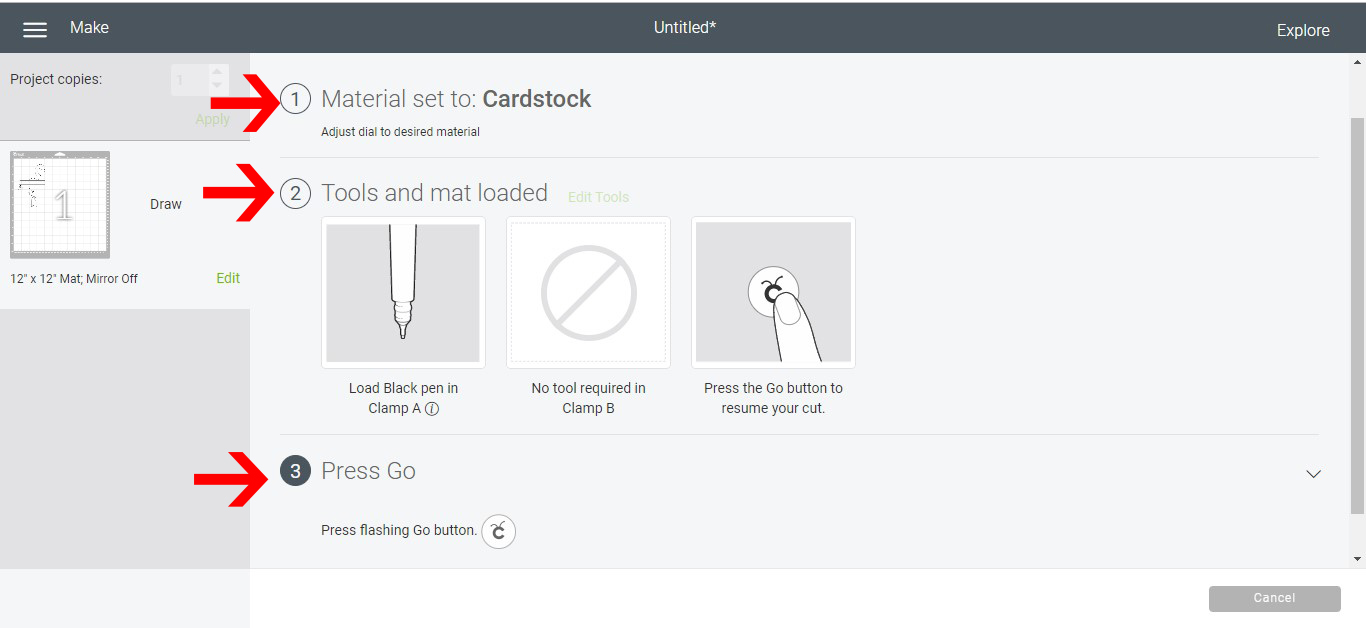
14- You can now select the media type, insert the foil quill in the A bracket and then once the mat is loaded click on the cut button.
15- Using the dial on your cricut, select your media.
16- Press start. Your design will start to be foiled.
17- Your design is now foiled.

2- Click on the upload icon.
3- Click on the upload image icon.
4- Click on browse.
5- Find your jpeg file. I am using Flamingo monogram SVG file from designbundles.net
6- As this is a simple file we will click on simple edit type. If the design has more colours or details you can select the complex option.
7- We now need to remove the parts of the Jpeg that we do not want draw lines on. Parts like the background of the image needs to be removed. Click on the magic wand.

8- Using the magic wand click on the parts of the design you do not want.(like the background) The checkerboard will show were the design is removed.
Once you are happy, click on continue.
9- You now have the option to do a print and cut or just a cut file. As we want to foil the design, click onto the cut file. you can now rename the file and add tags to use a reference in the future. Click save.
10- Select your saved design and insert it.

11- The image is now on the design space. With the image selected, click on the line type drop down box.

12- Change the design from cut to draw. Click on make it.
13- Click continue.
14- You can now select the media type, insert the foil quill in the A bracket and then once the mat is loaded click on the cut button.
15- Using the dial on your cricut, select your media.
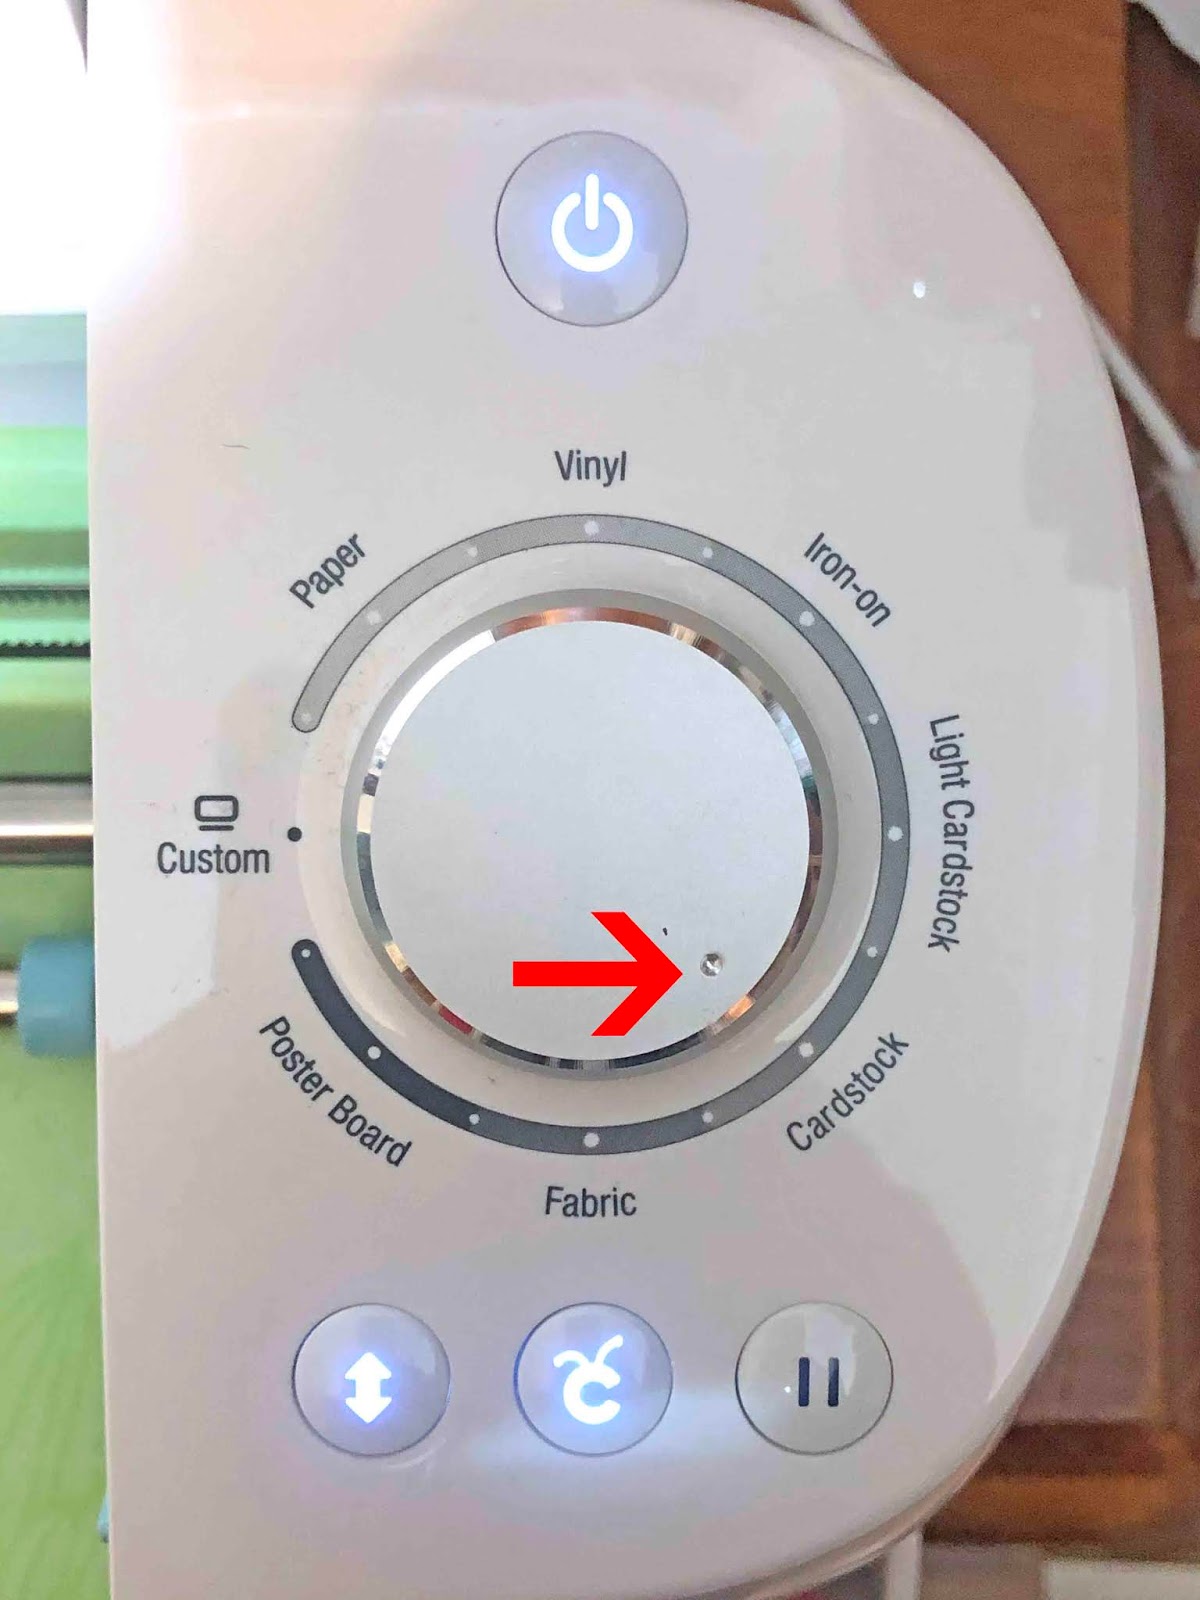
16- Press start. Your design will start to be foiled.

17- Your design is now foiled.