Creating an Offset to Foil Using Inkscape and Cricut Design Space
1- Open inkscape. click on the text tool.
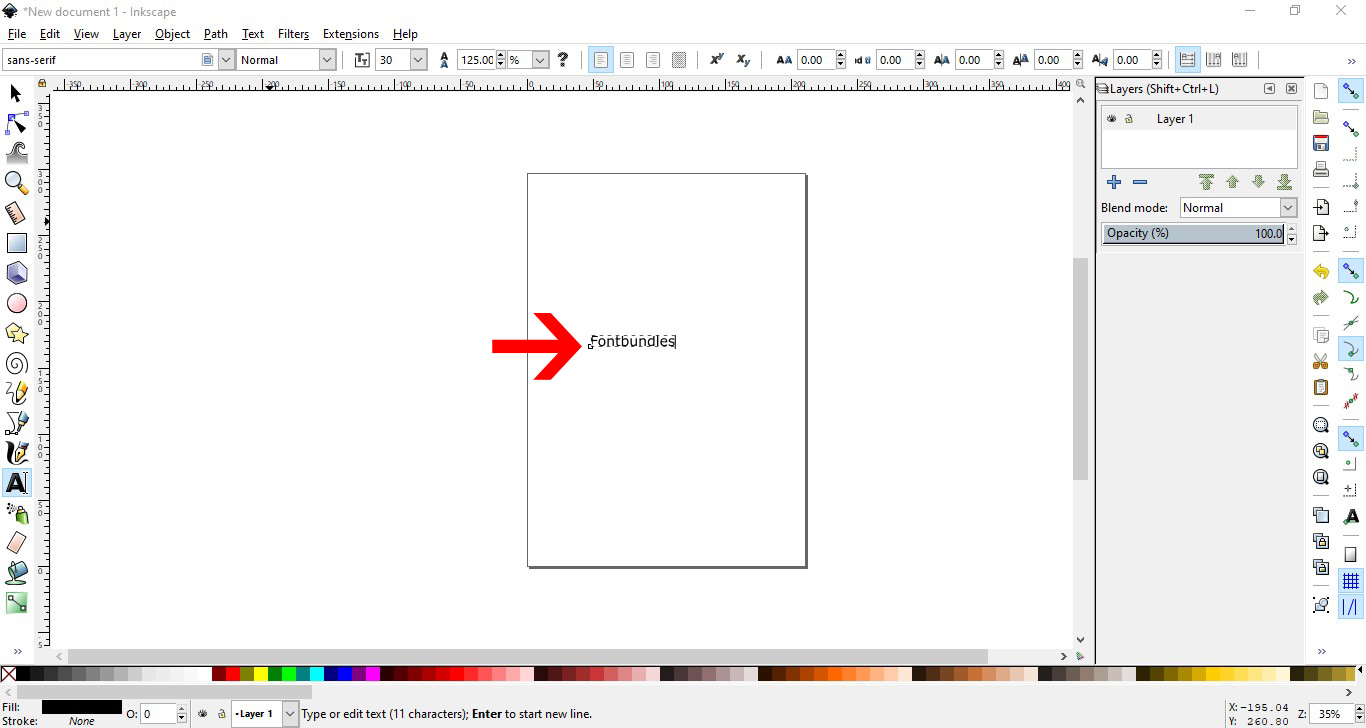
2- Type text.
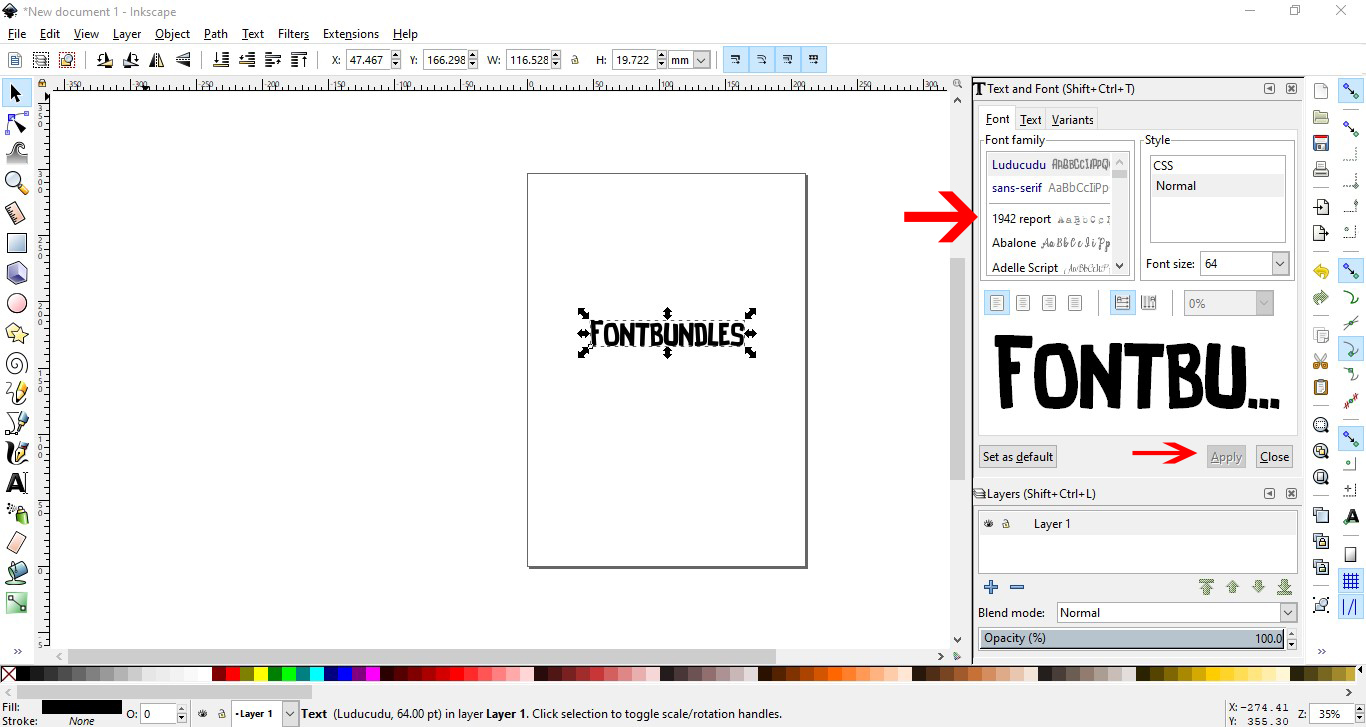
3- In the text and font panel select your font and size. I am using Luucudu from fontbundles.net Apply the font and size.
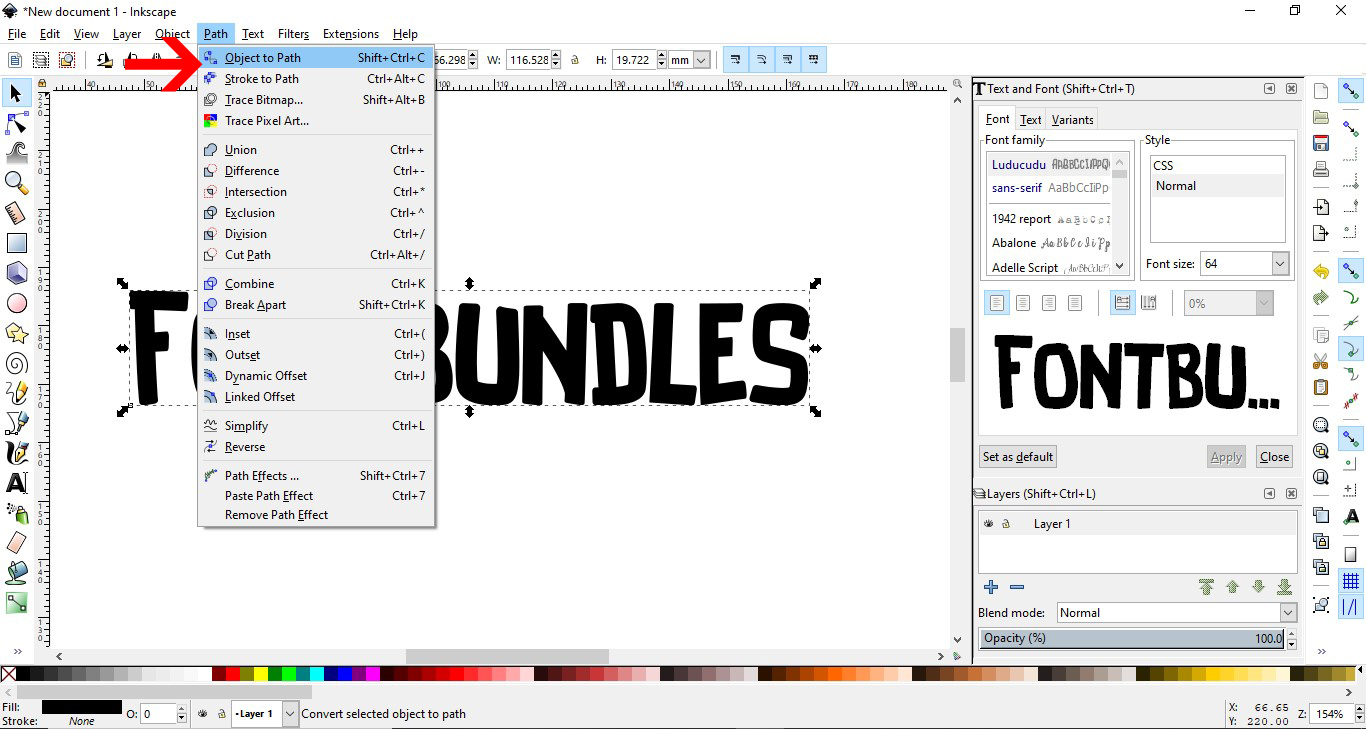
4- With the text selected, click Path- Object to path.
5- Next go to Object - ungroup.
6- The text is now individual letters. Select them all and go to path- union. This will weld any overlapping text.
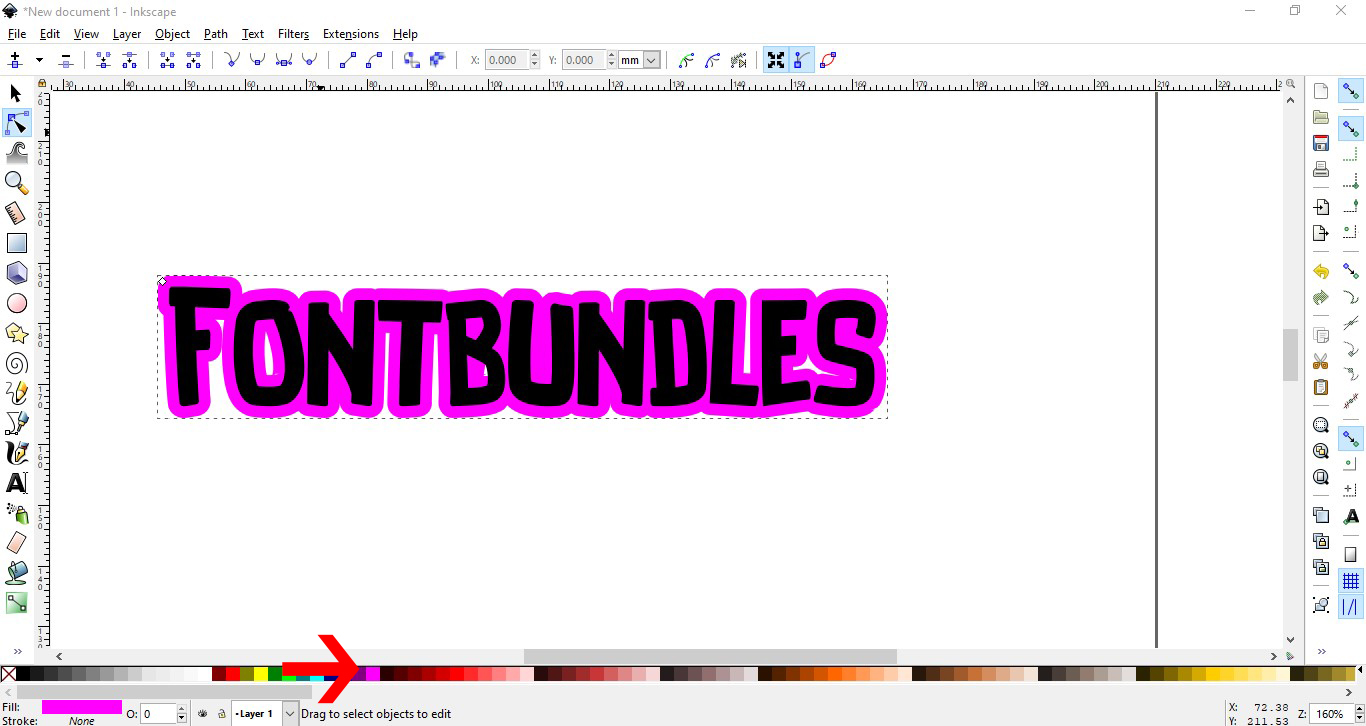
7- With the text still selected, go to Path - linked offset.
8- You will see a little node at the top left of your text. This will create the offset. Drag the node to the width of the offset you want.
9- Your offset is created.
10- Click on the color palette and change the color of the offset so you can see it.
11- With both selected, click on object - group.
12- Go to file - save as.
13- Save as a SVG file.
14- Open cricut design space. Click on the upload icon.
15- Click on upload image.
16- Name and save your file.
17- Select your saved file and upload to your design space.
18- Your design will appear . Select it.
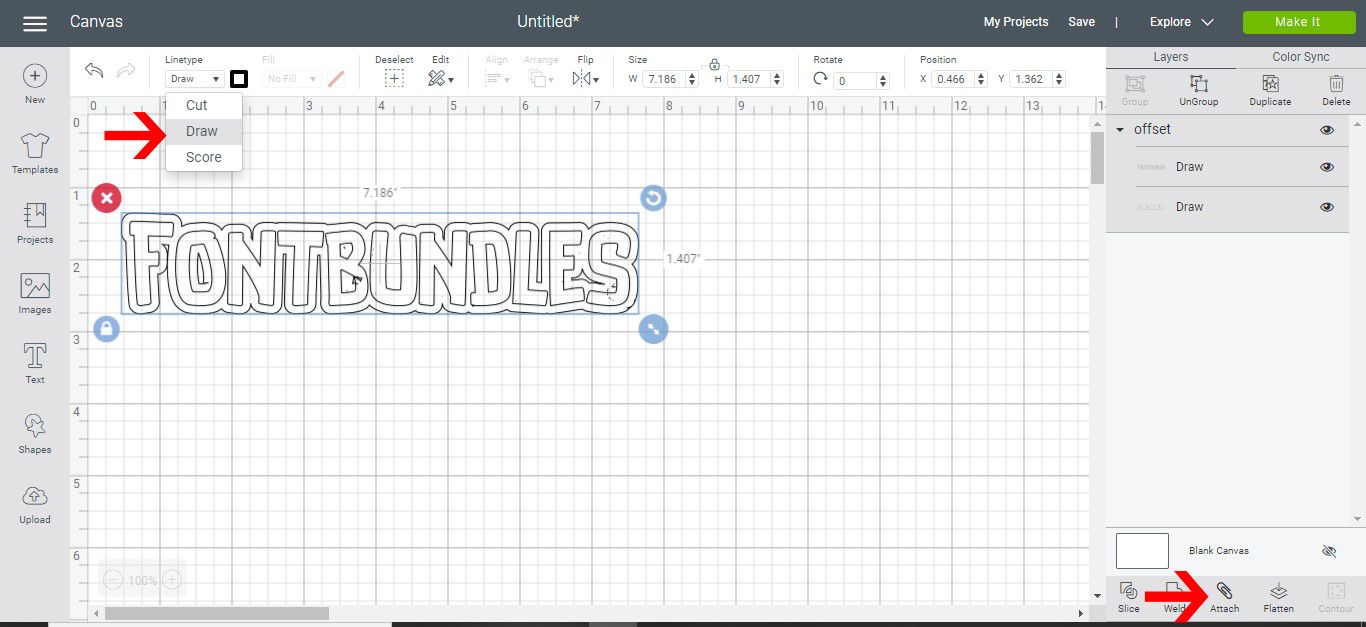
19- Go to line type and change to draw. Next click on attach so the offset and text stay together when you go to the cut screen. Click make it.
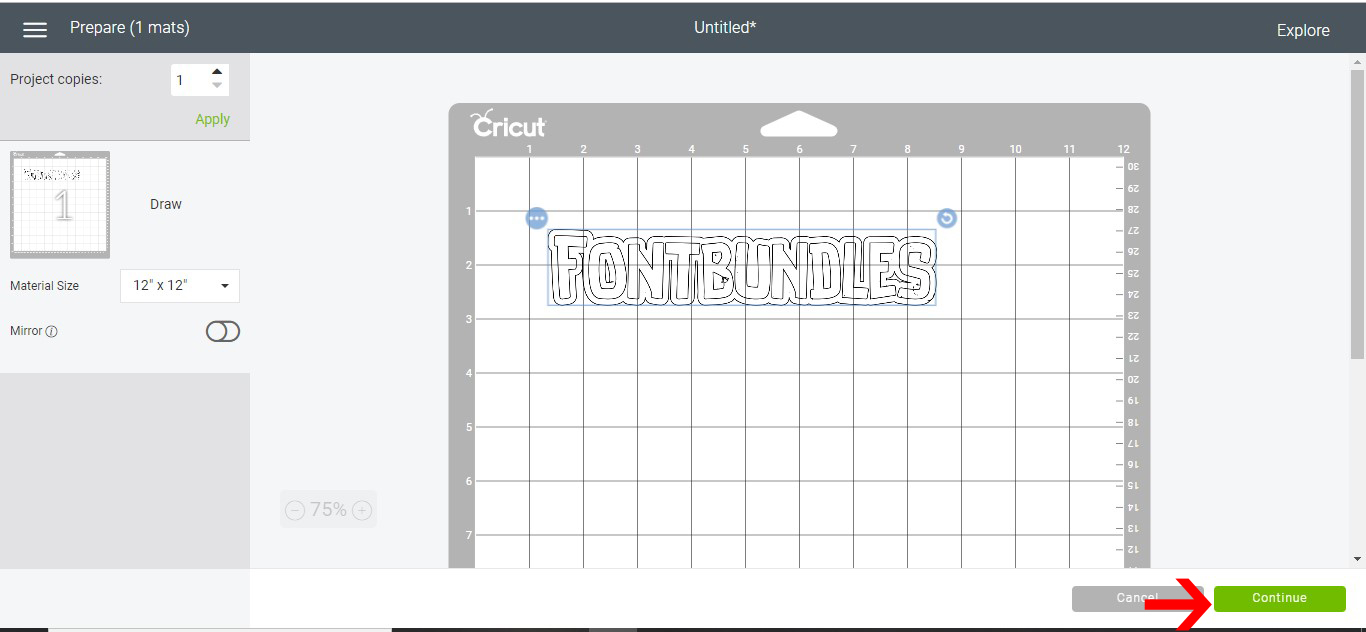
20- Position the text on your cut mat.
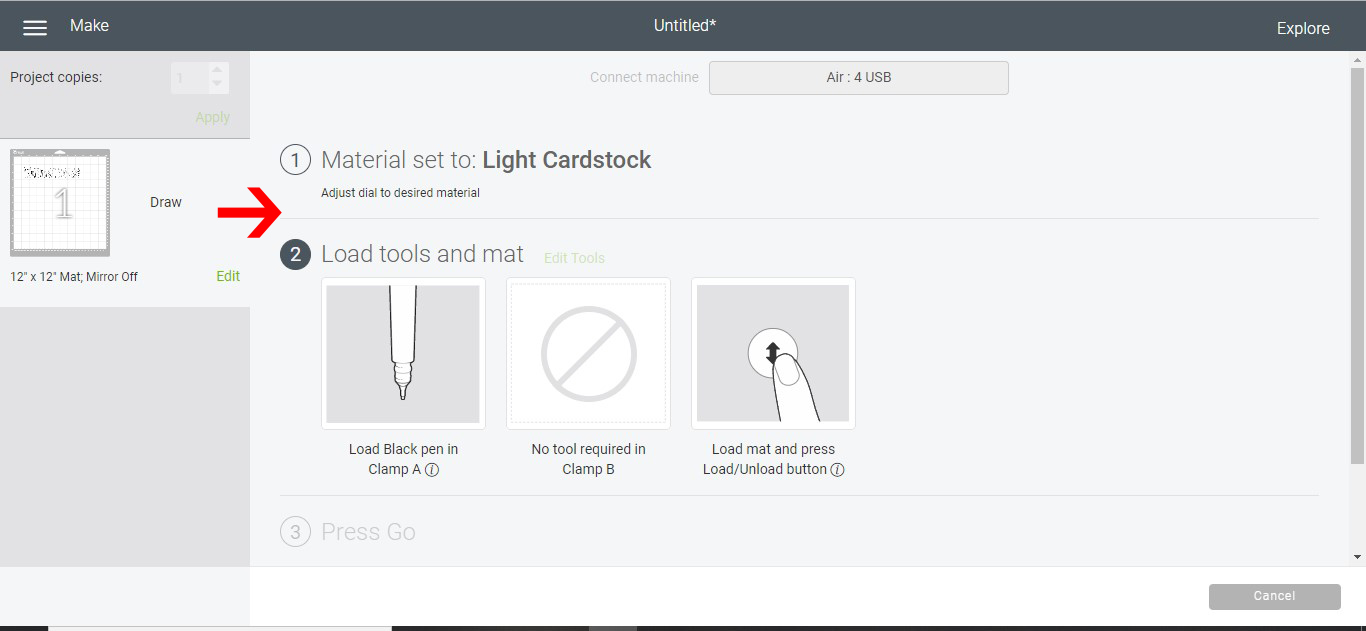
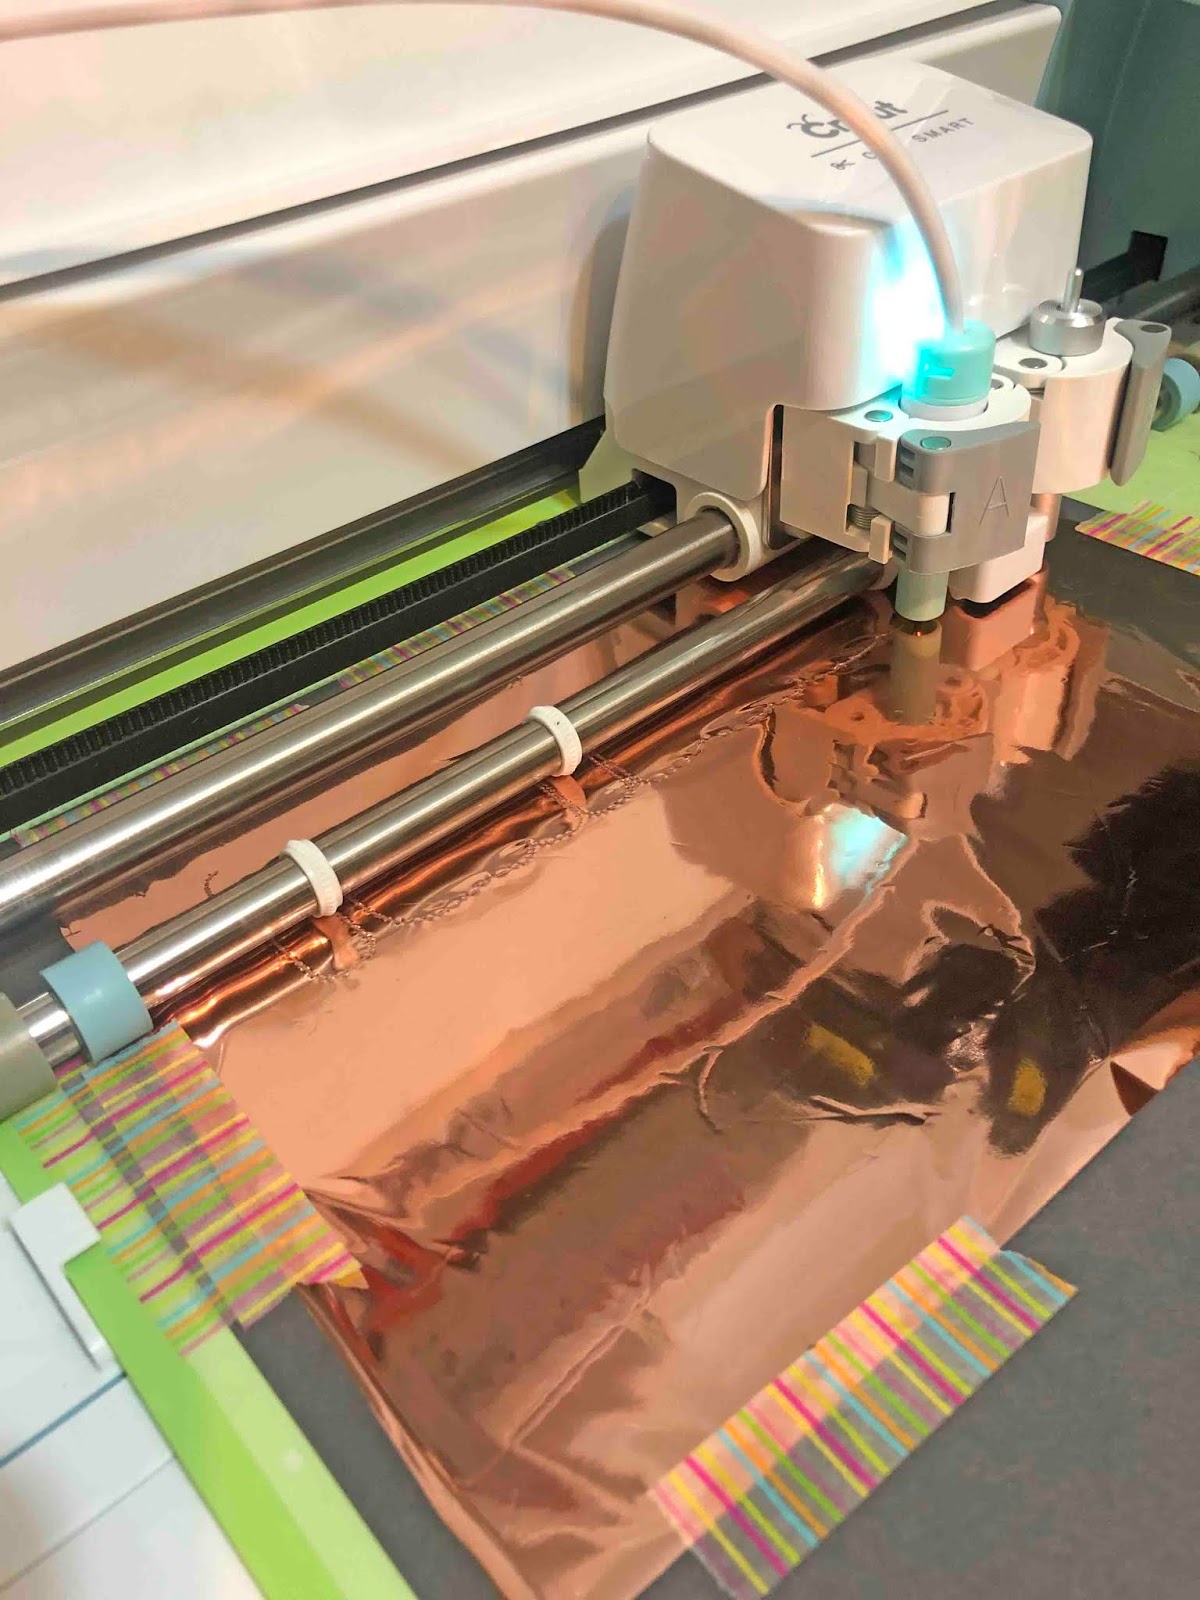
21- Select the material you are using on the dial and then ensure that the foil quill is placed in clamp A. Click go.
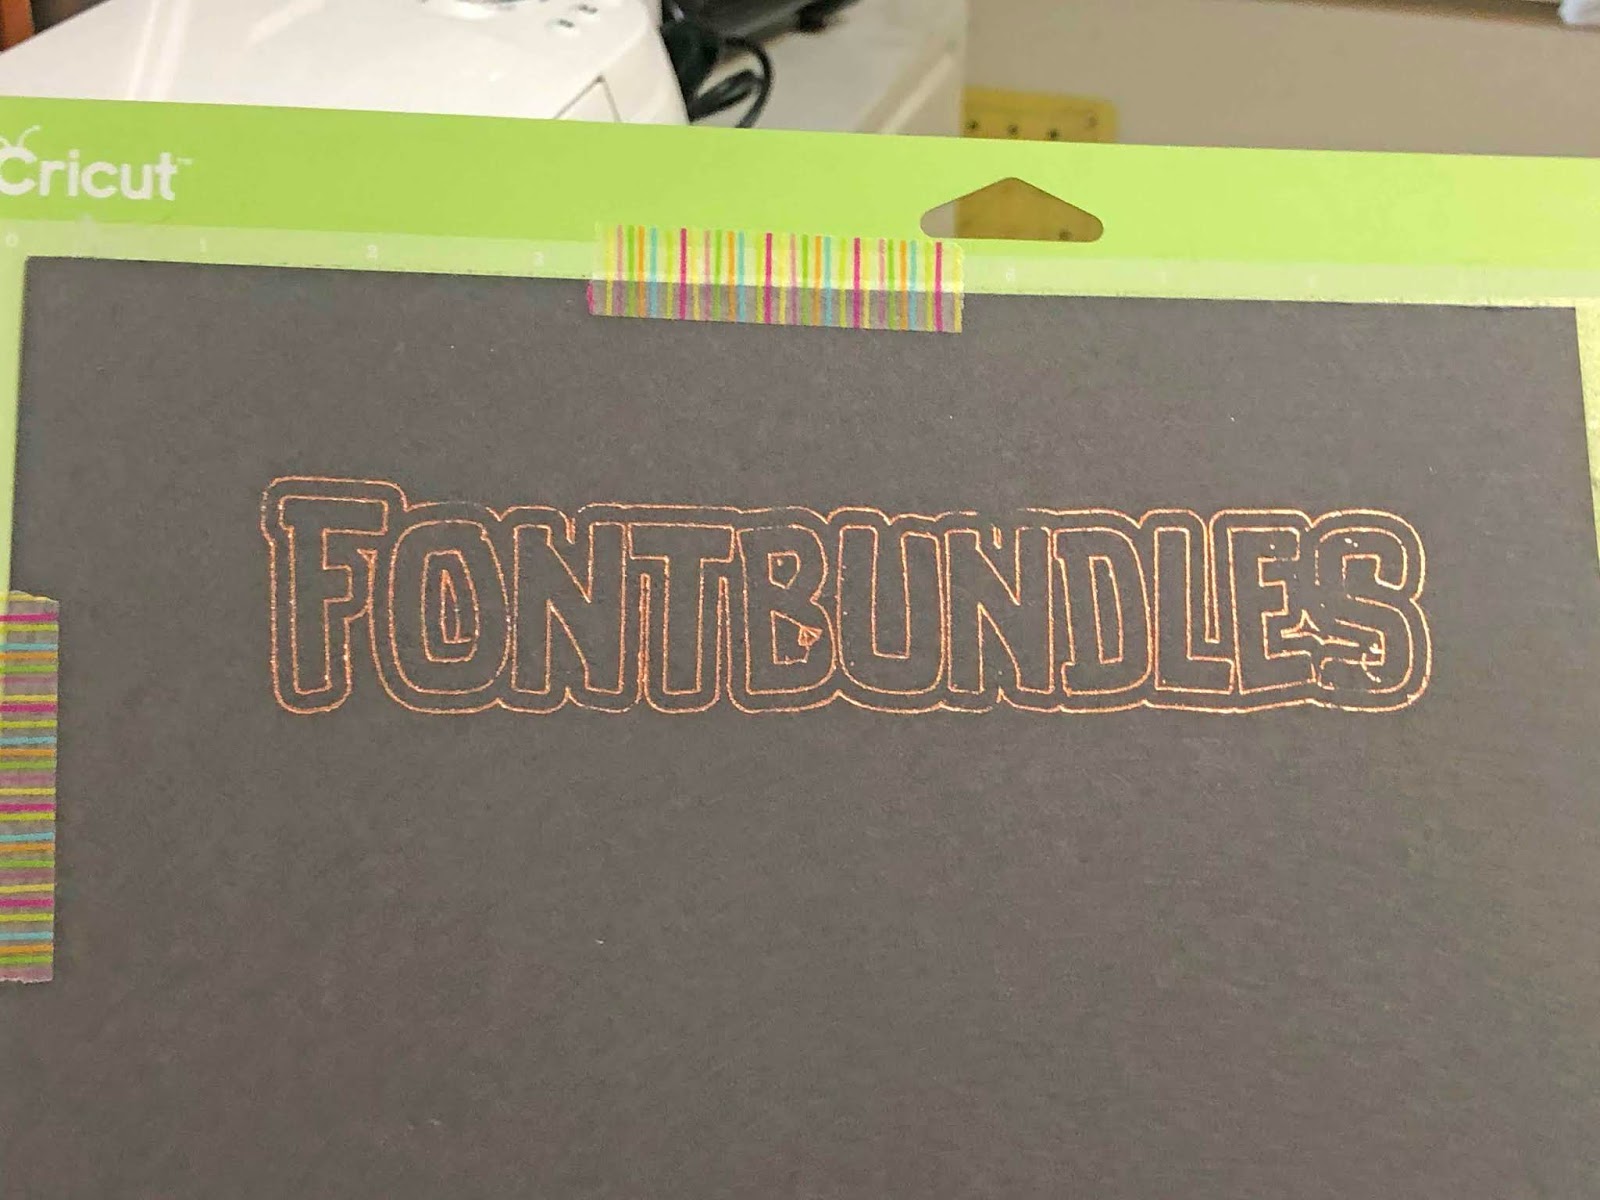
22- Your offset will start to foil.
23- The finished offset will be foiled. You can adjust the width of the foiled offset in inkscape to your desired needs. Especially if you are trying to make a very thin font thicker this is a great way to do this.

2- Type text.
3- In the text and font panel select your font and size. I am using Luucudu from fontbundles.net Apply the font and size.
4- With the text selected, click Path- Object to path.
5- Next go to Object - ungroup.
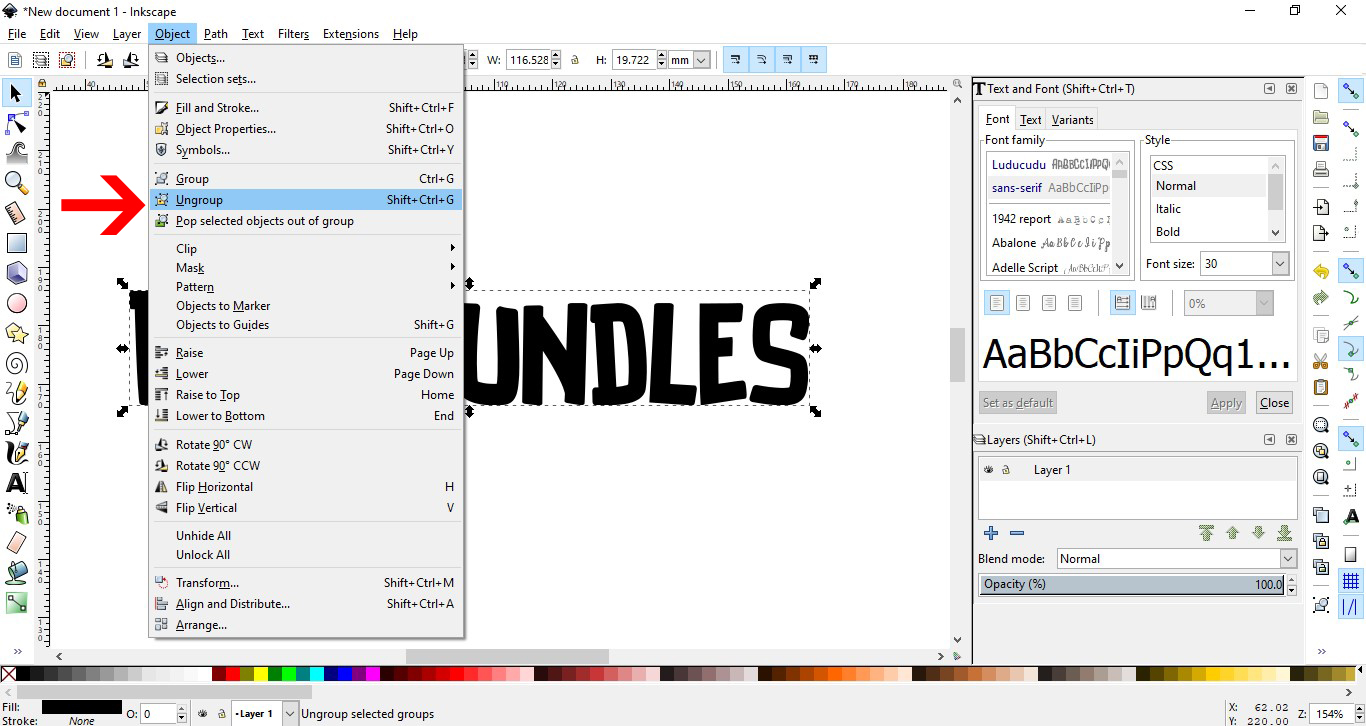
6- The text is now individual letters. Select them all and go to path- union. This will weld any overlapping text.

7- With the text still selected, go to Path - linked offset.

8- You will see a little node at the top left of your text. This will create the offset. Drag the node to the width of the offset you want.

9- Your offset is created.

10- Click on the color palette and change the color of the offset so you can see it.
11- With both selected, click on object - group.

12- Go to file - save as.

13- Save as a SVG file.

14- Open cricut design space. Click on the upload icon.
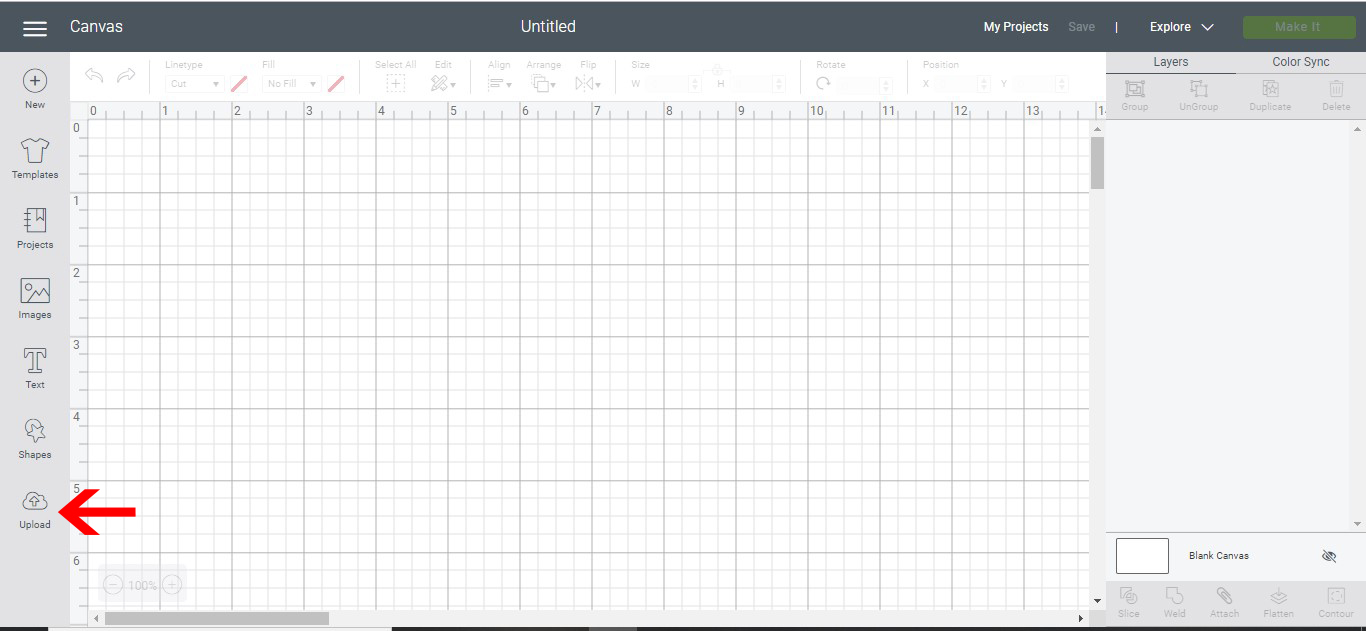
15- Click on upload image.
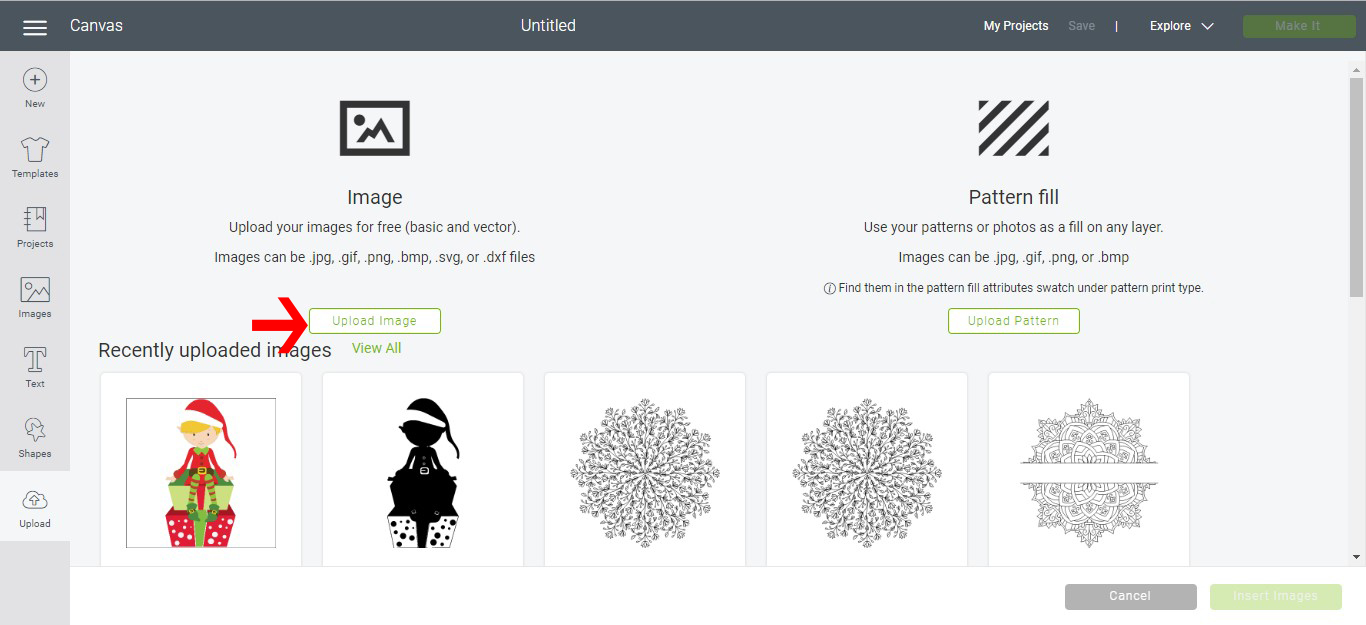
16- Name and save your file.
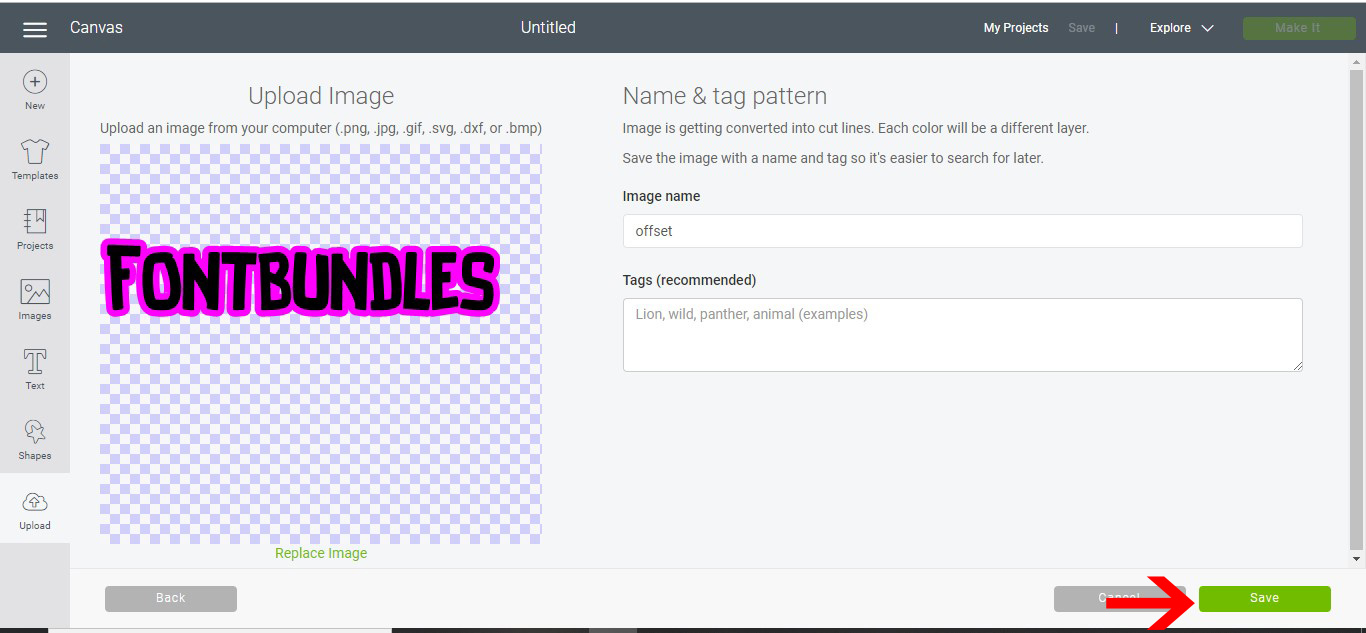
17- Select your saved file and upload to your design space.

18- Your design will appear . Select it.

19- Go to line type and change to draw. Next click on attach so the offset and text stay together when you go to the cut screen. Click make it.
20- Position the text on your cut mat.
21- Select the material you are using on the dial and then ensure that the foil quill is placed in clamp A. Click go.
22- Your offset will start to foil.
23- The finished offset will be foiled. You can adjust the width of the foiled offset in inkscape to your desired needs. Especially if you are trying to make a very thin font thicker this is a great way to do this.