
Dripping Paint Text Effect Photoshop
For this tutorial, we are using the Blowbrush Font and an image to use as the background colors for your text. We will also use some Paint Photoshop brushes, you can find many free ones online. To install them, just double-click on the file.
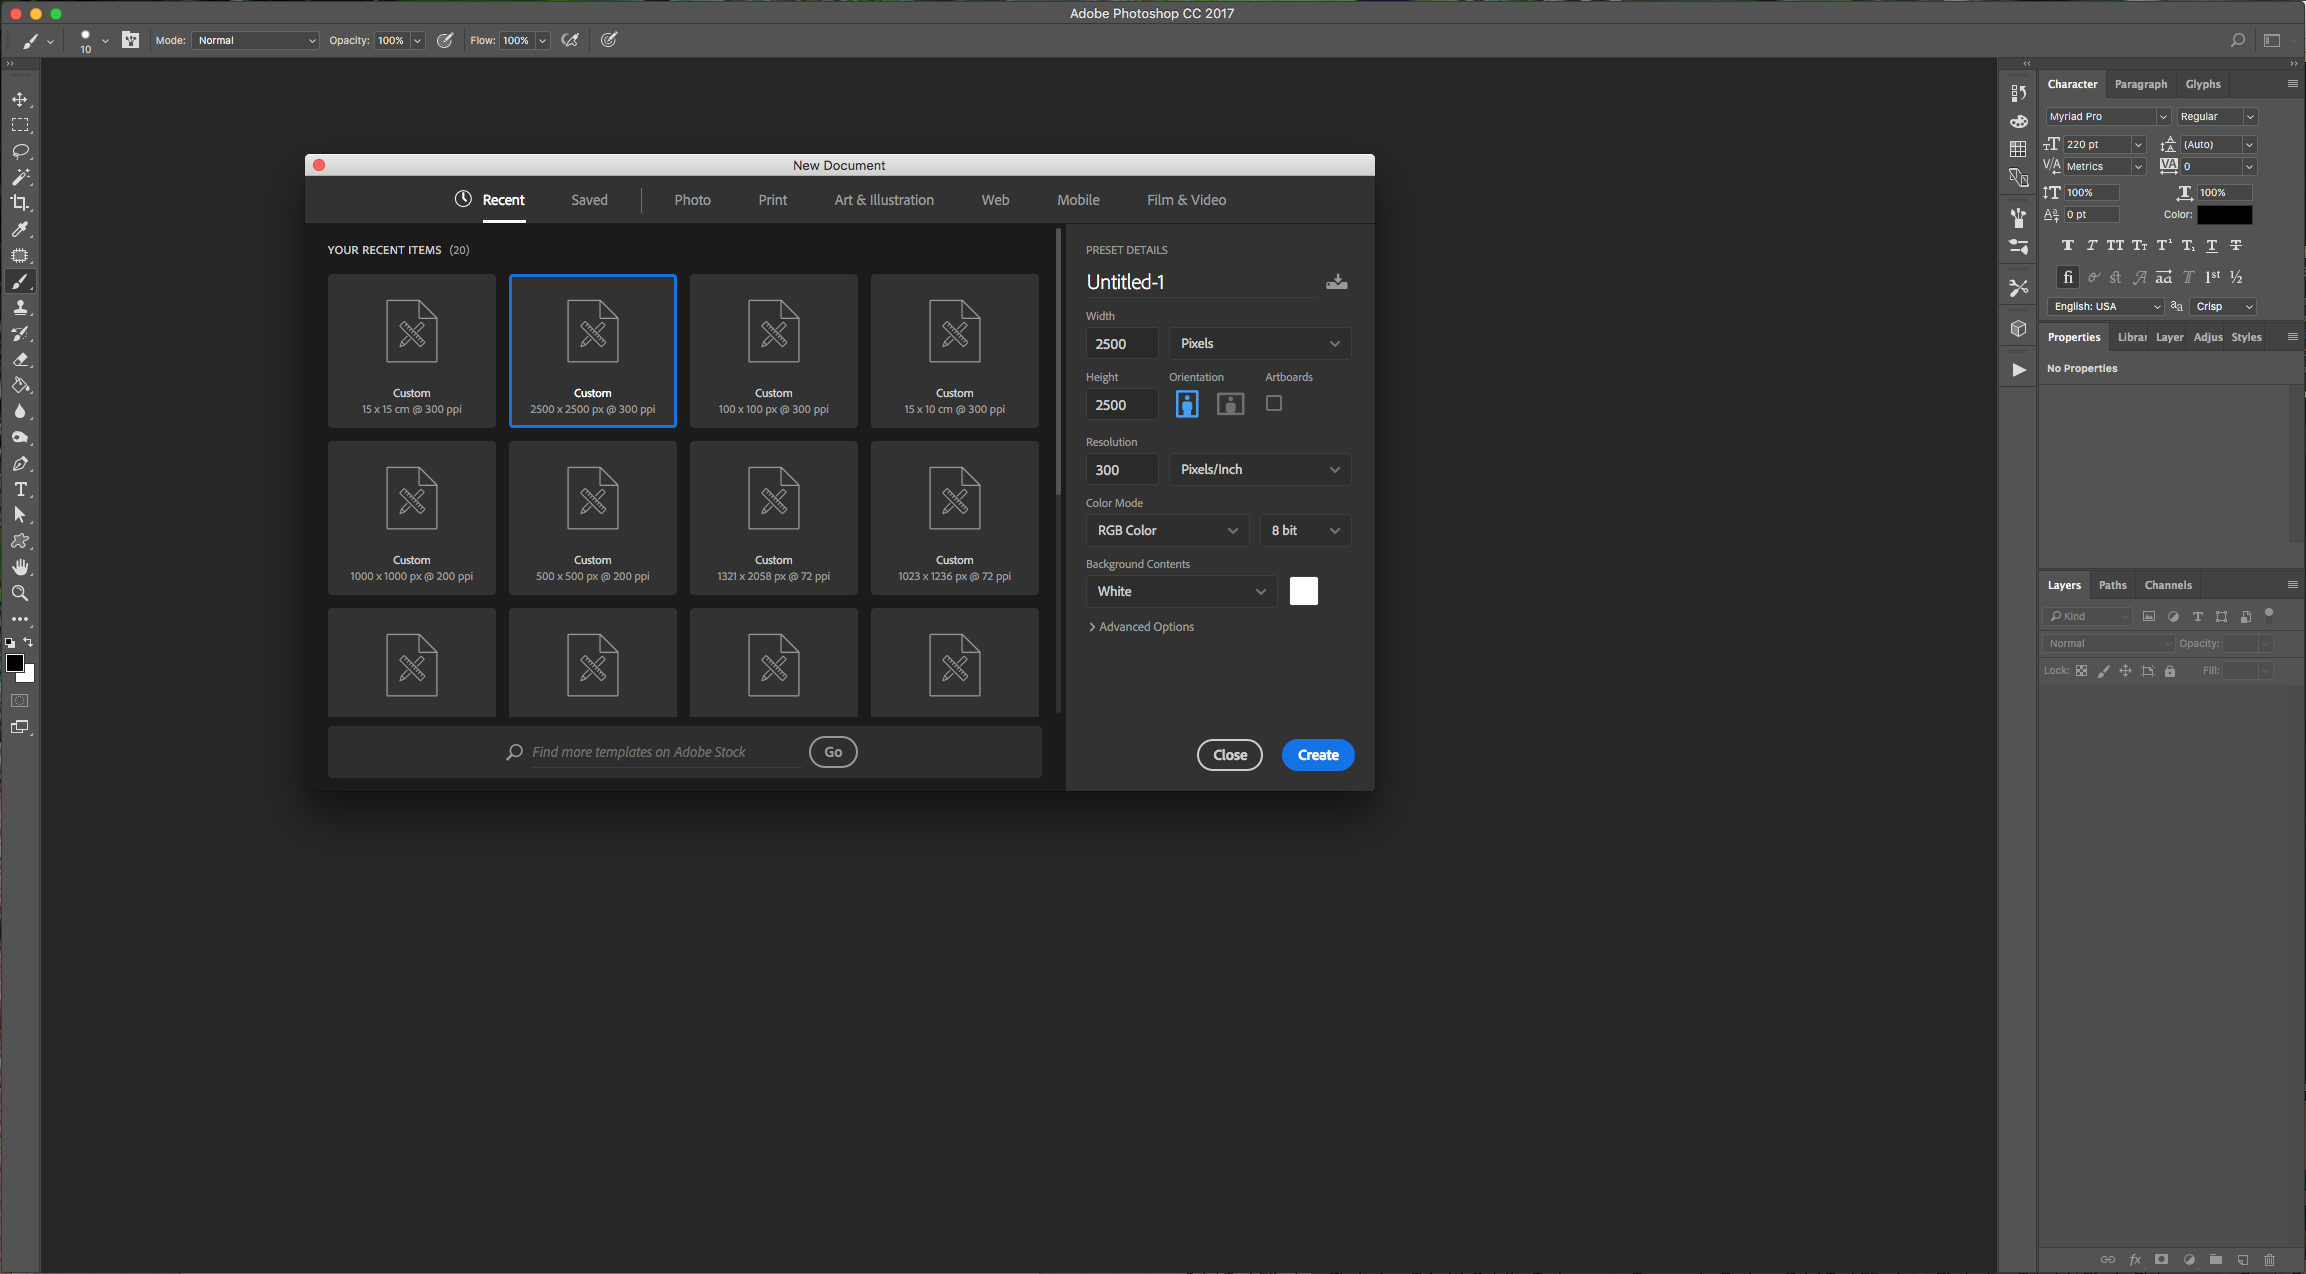
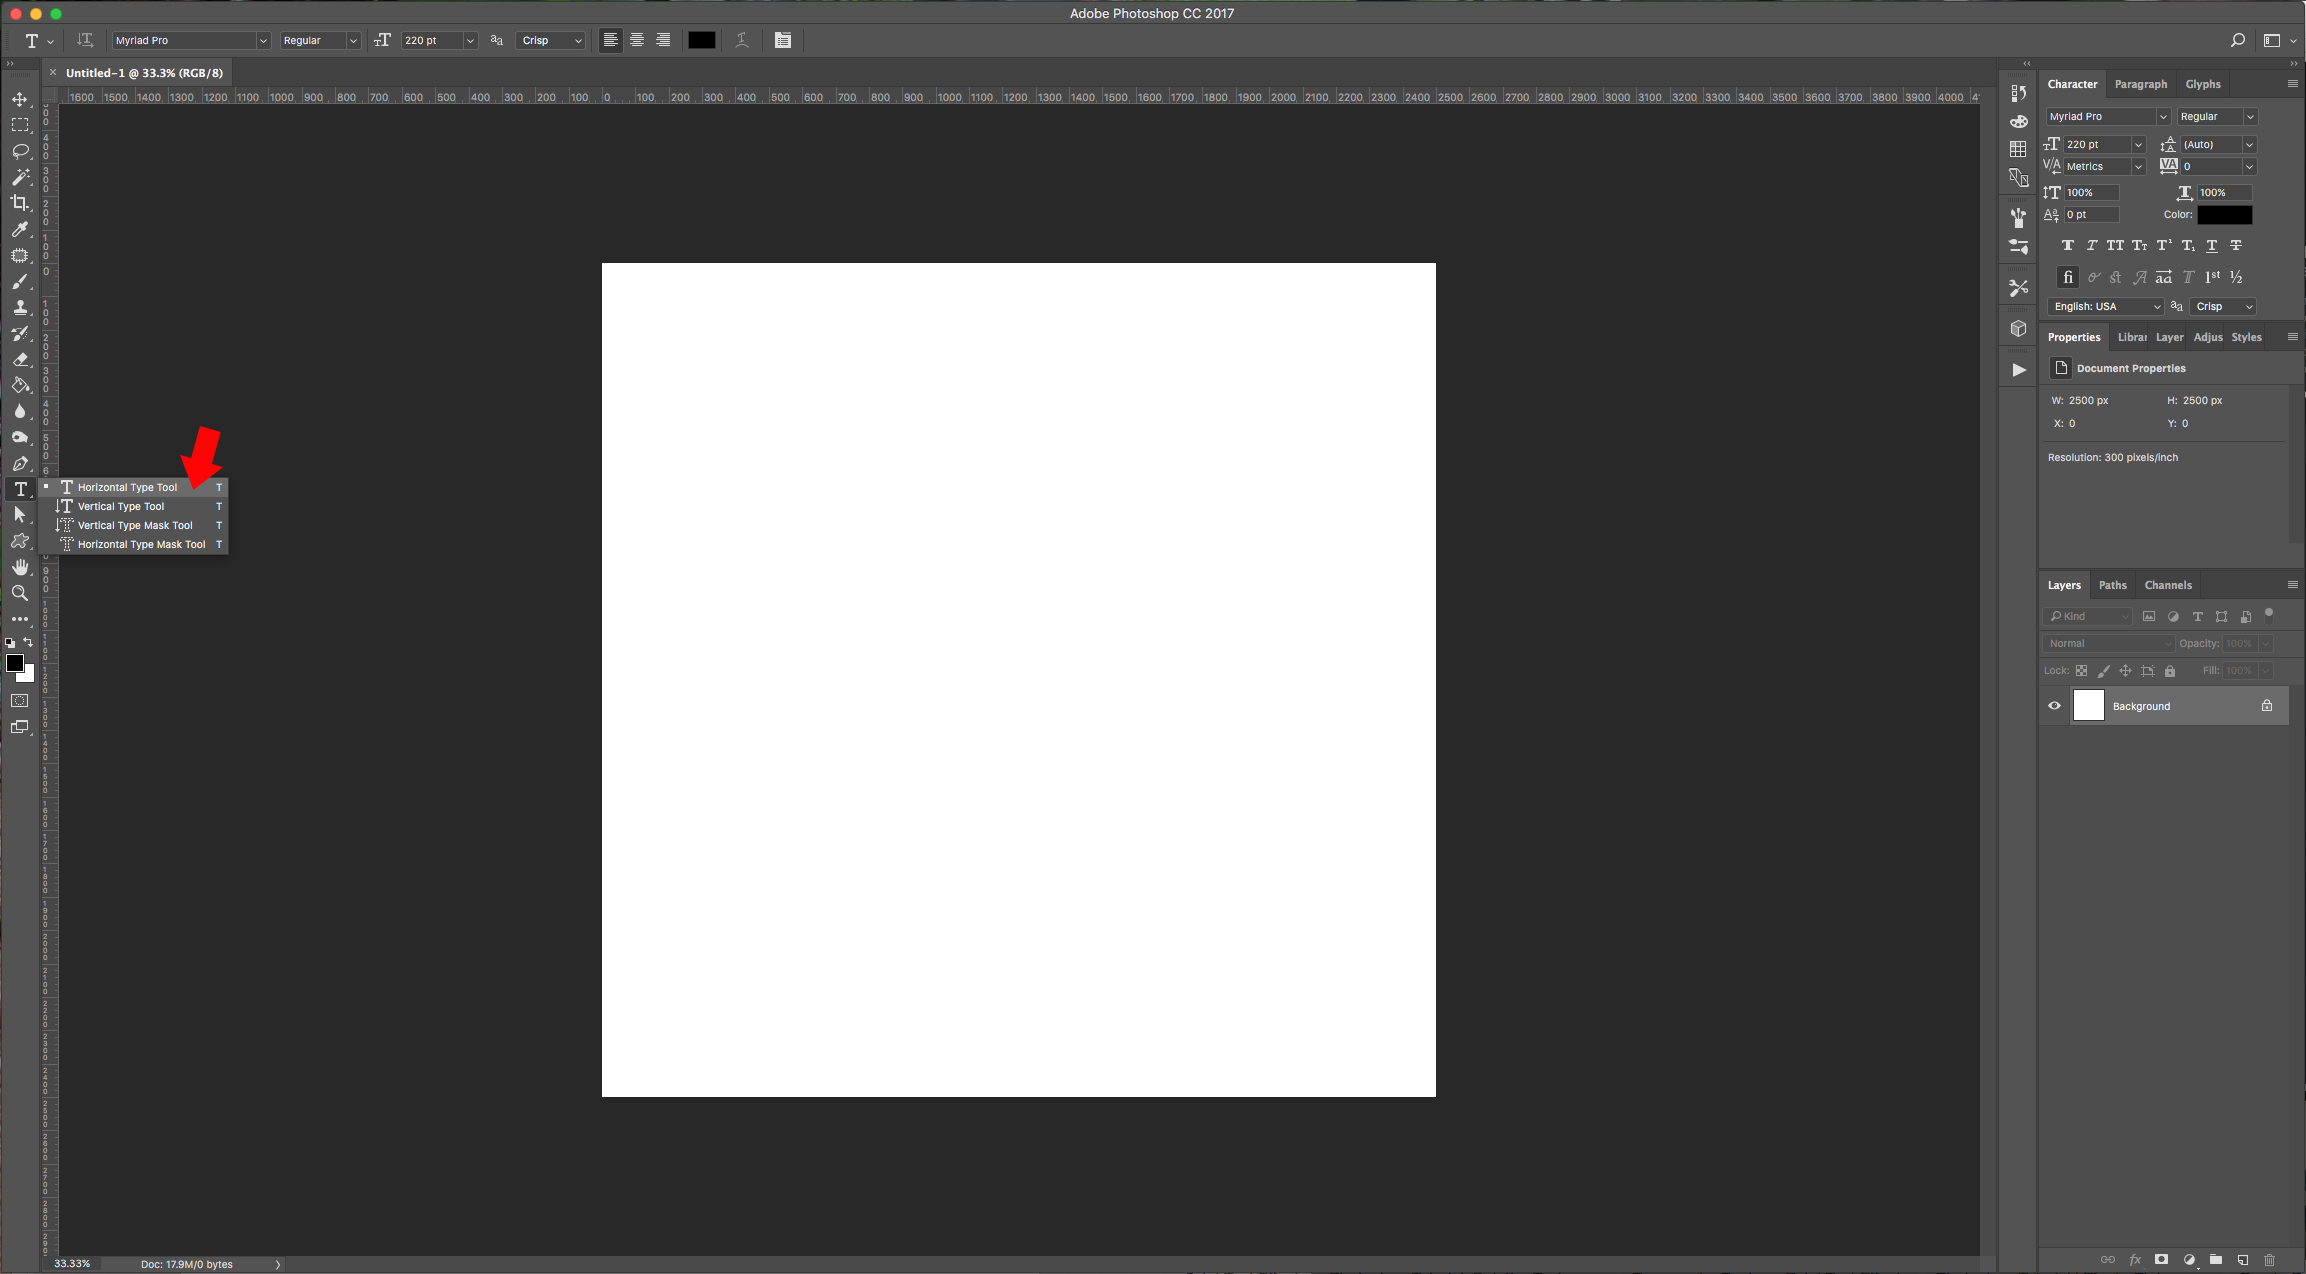
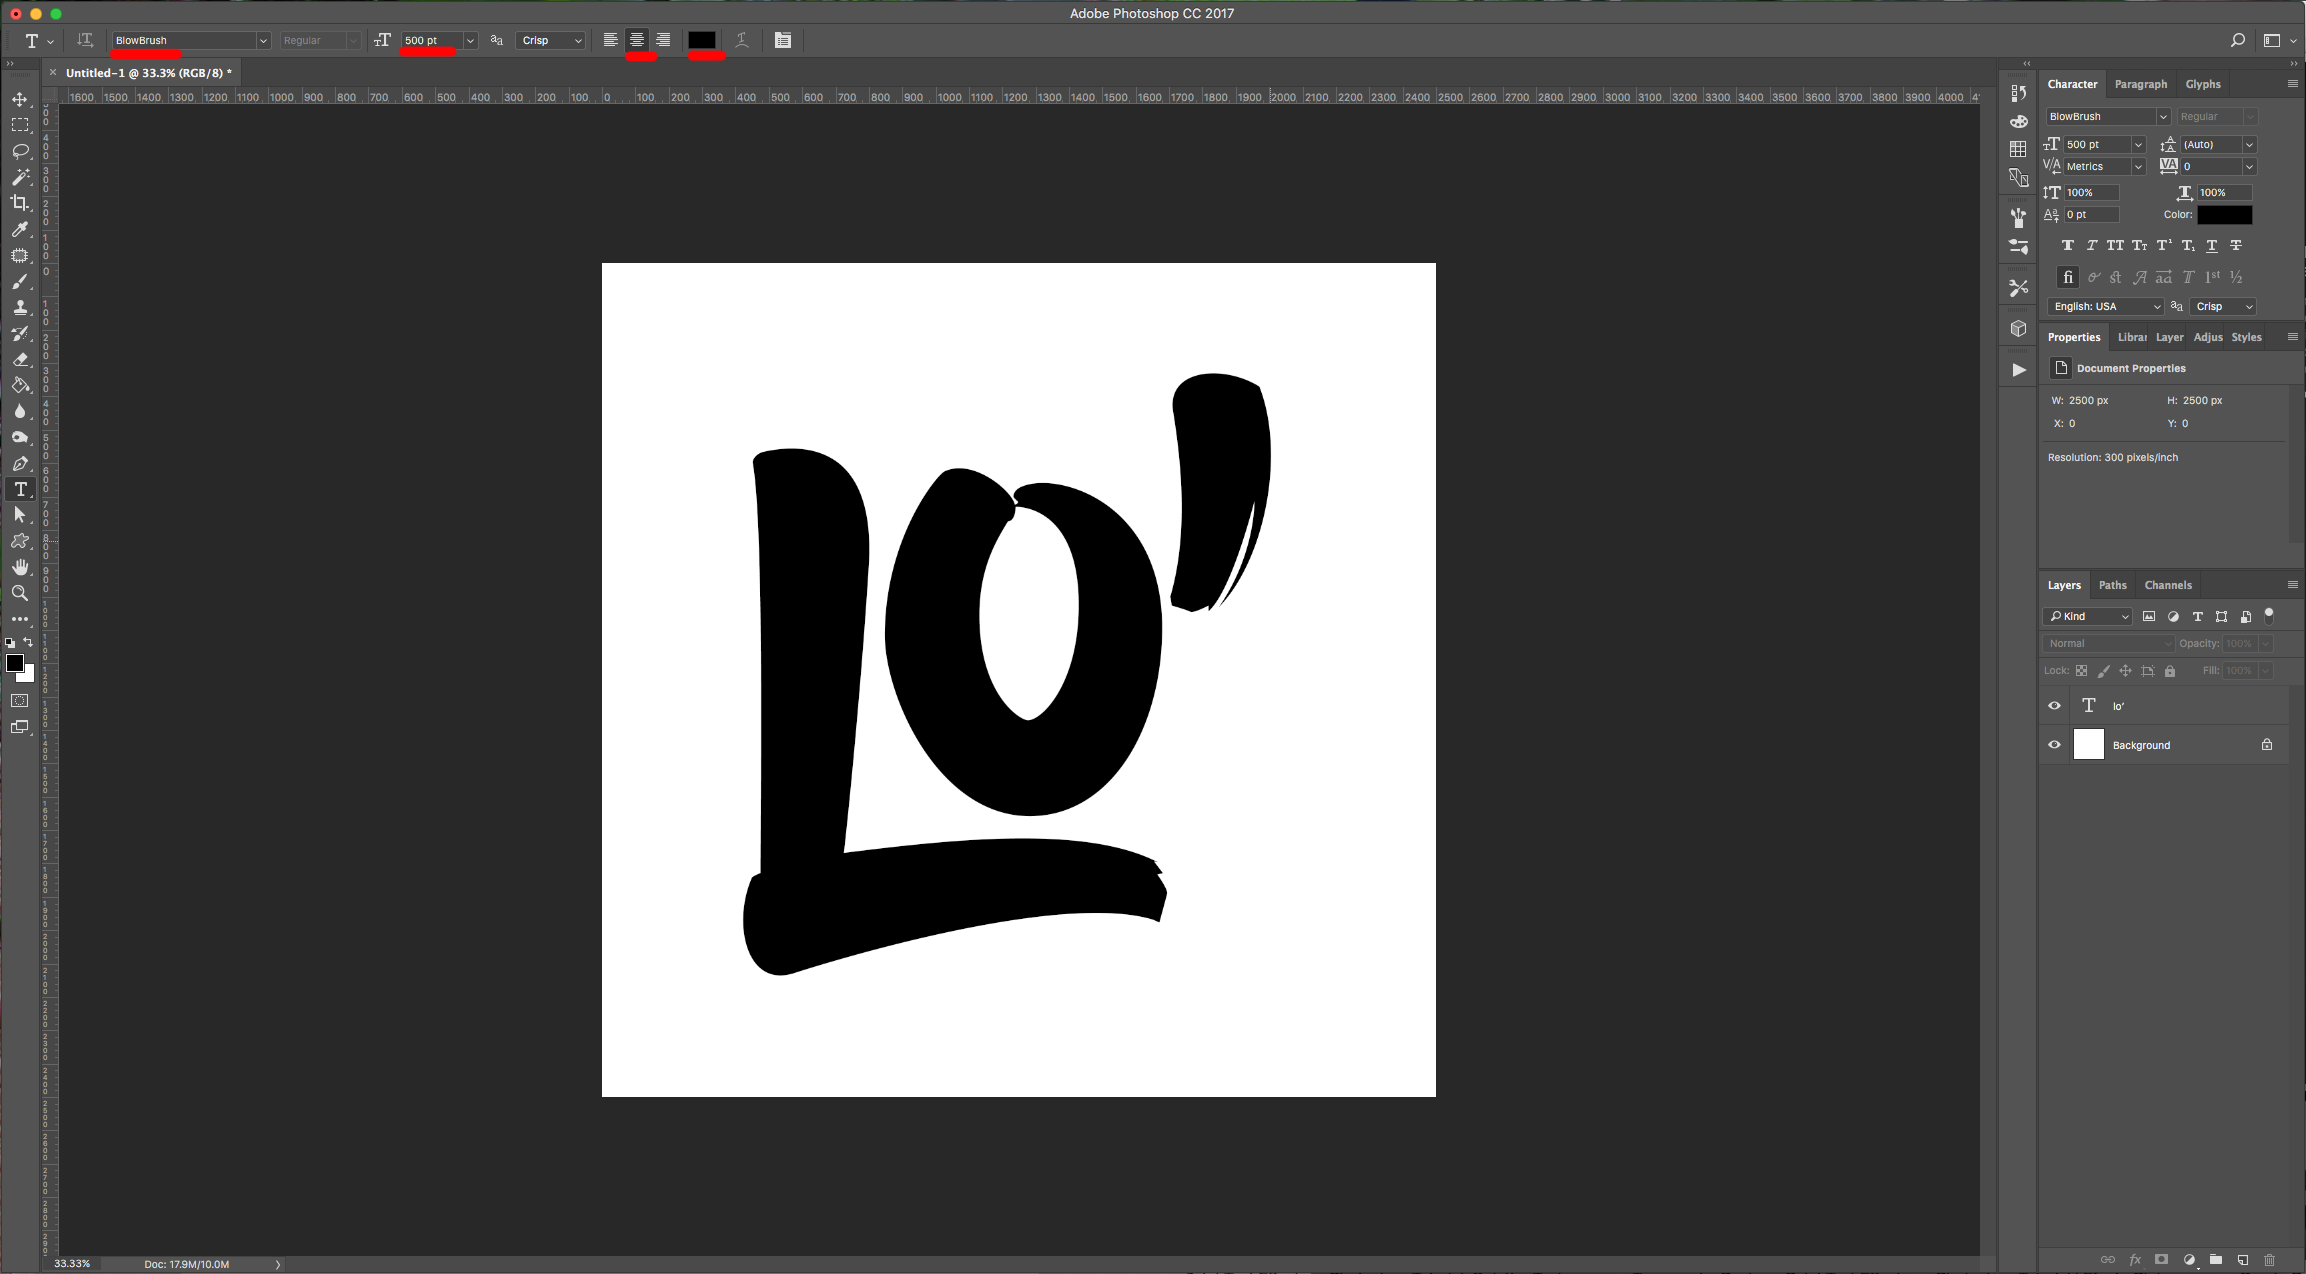
1 - In Photoshop, create a New Document. Select the “Type Tool” (T), choose your font (we used Blowbrush), size and for now, use black as “Fill” color.
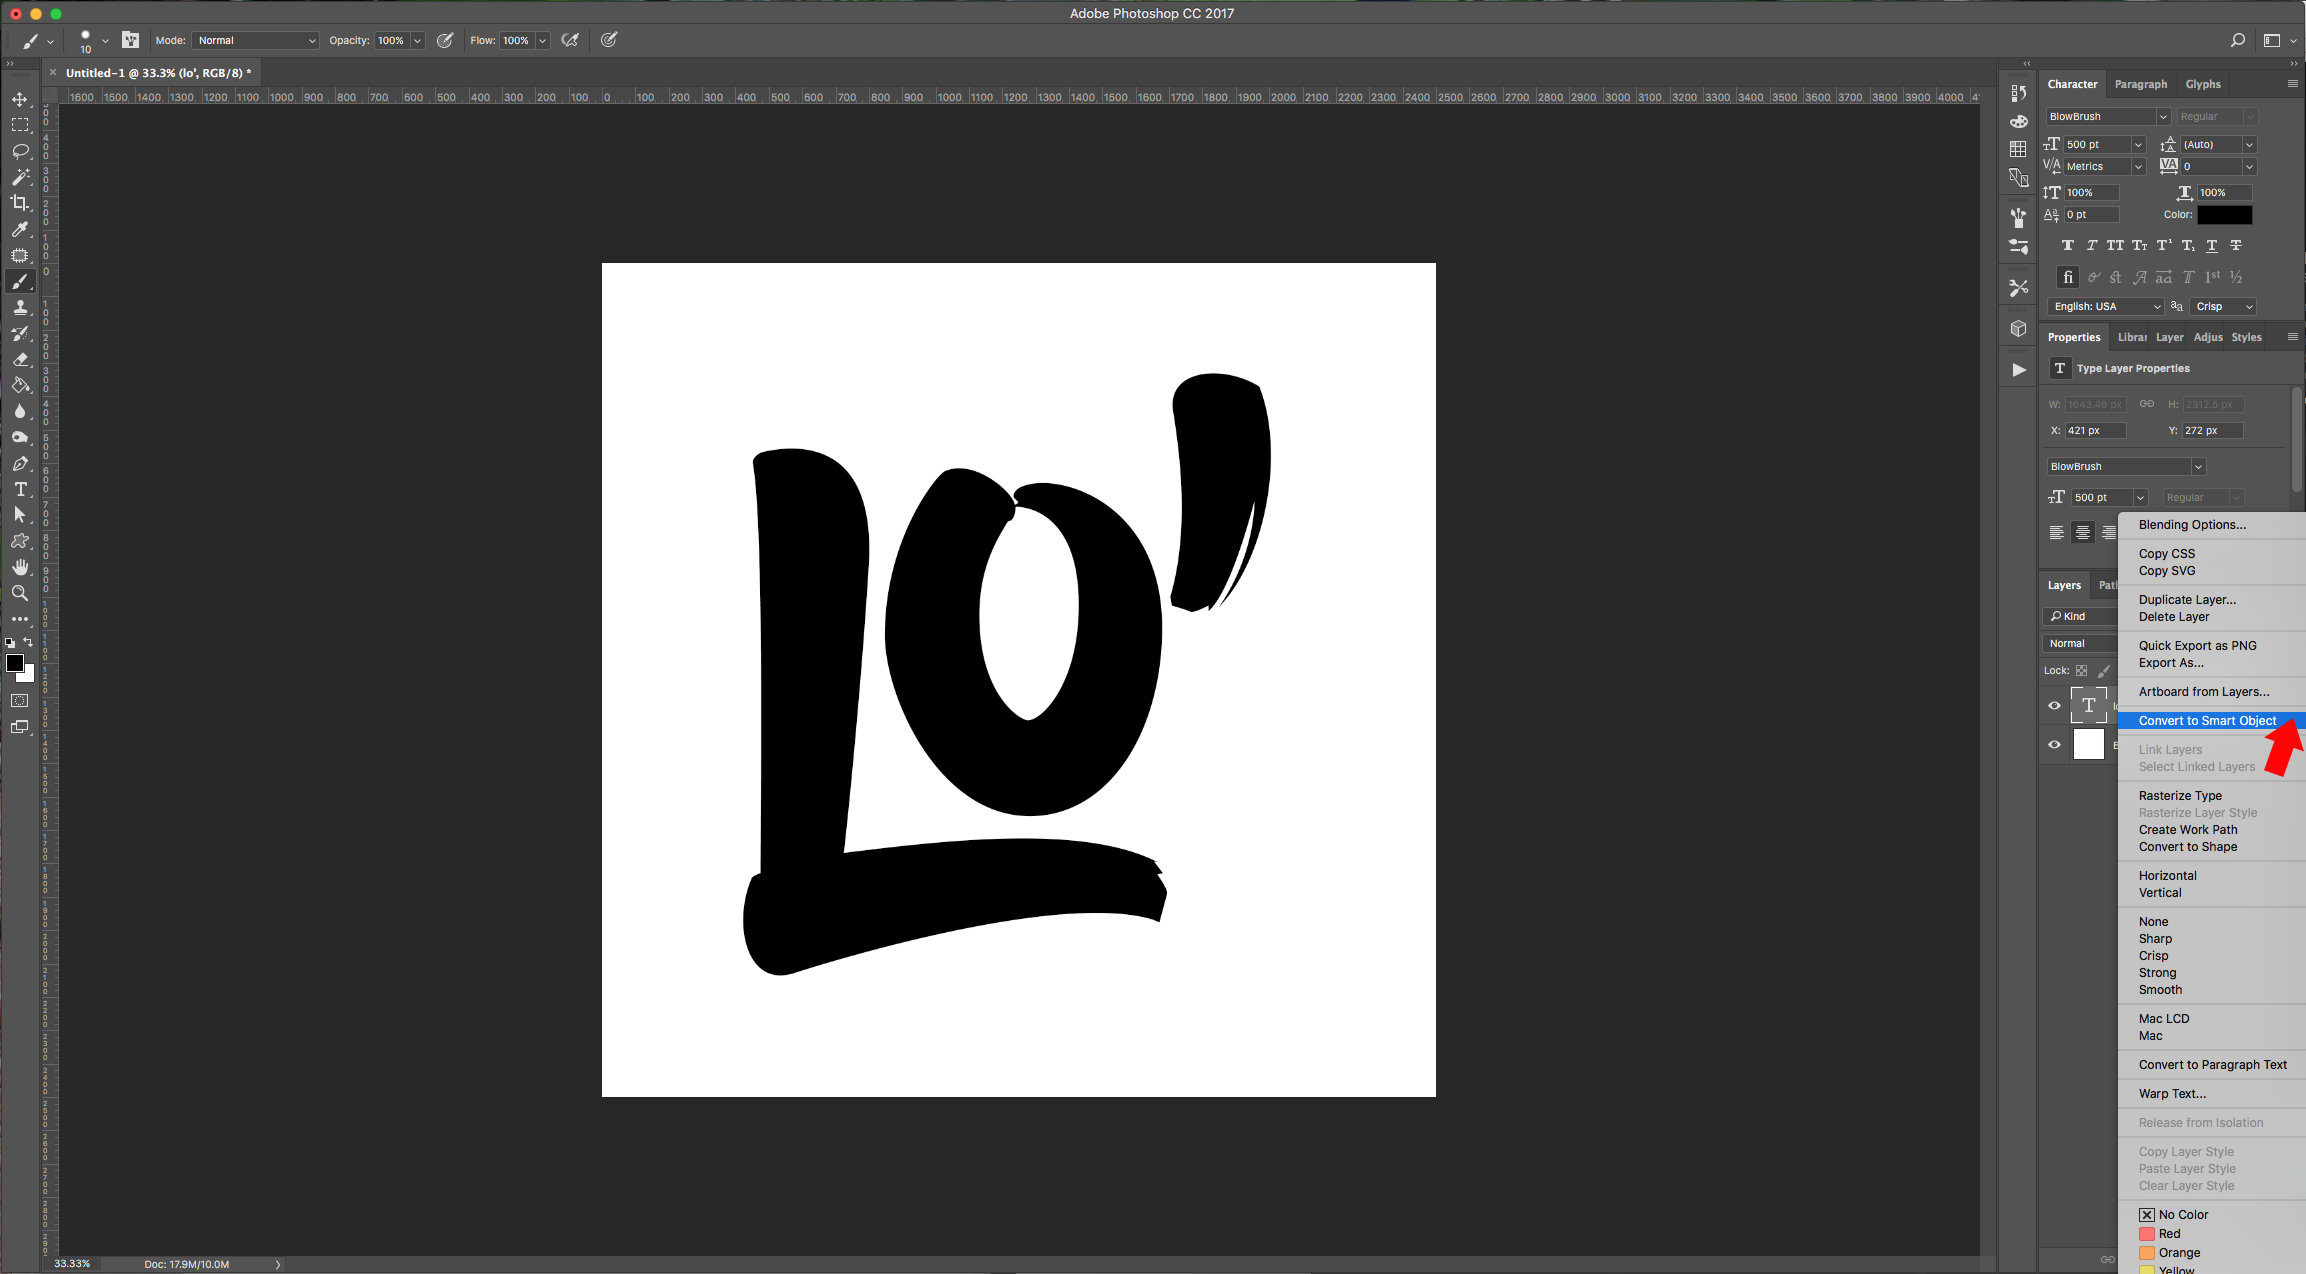
2 - Right-click on your text layer and convert it to a “Smart Object”.
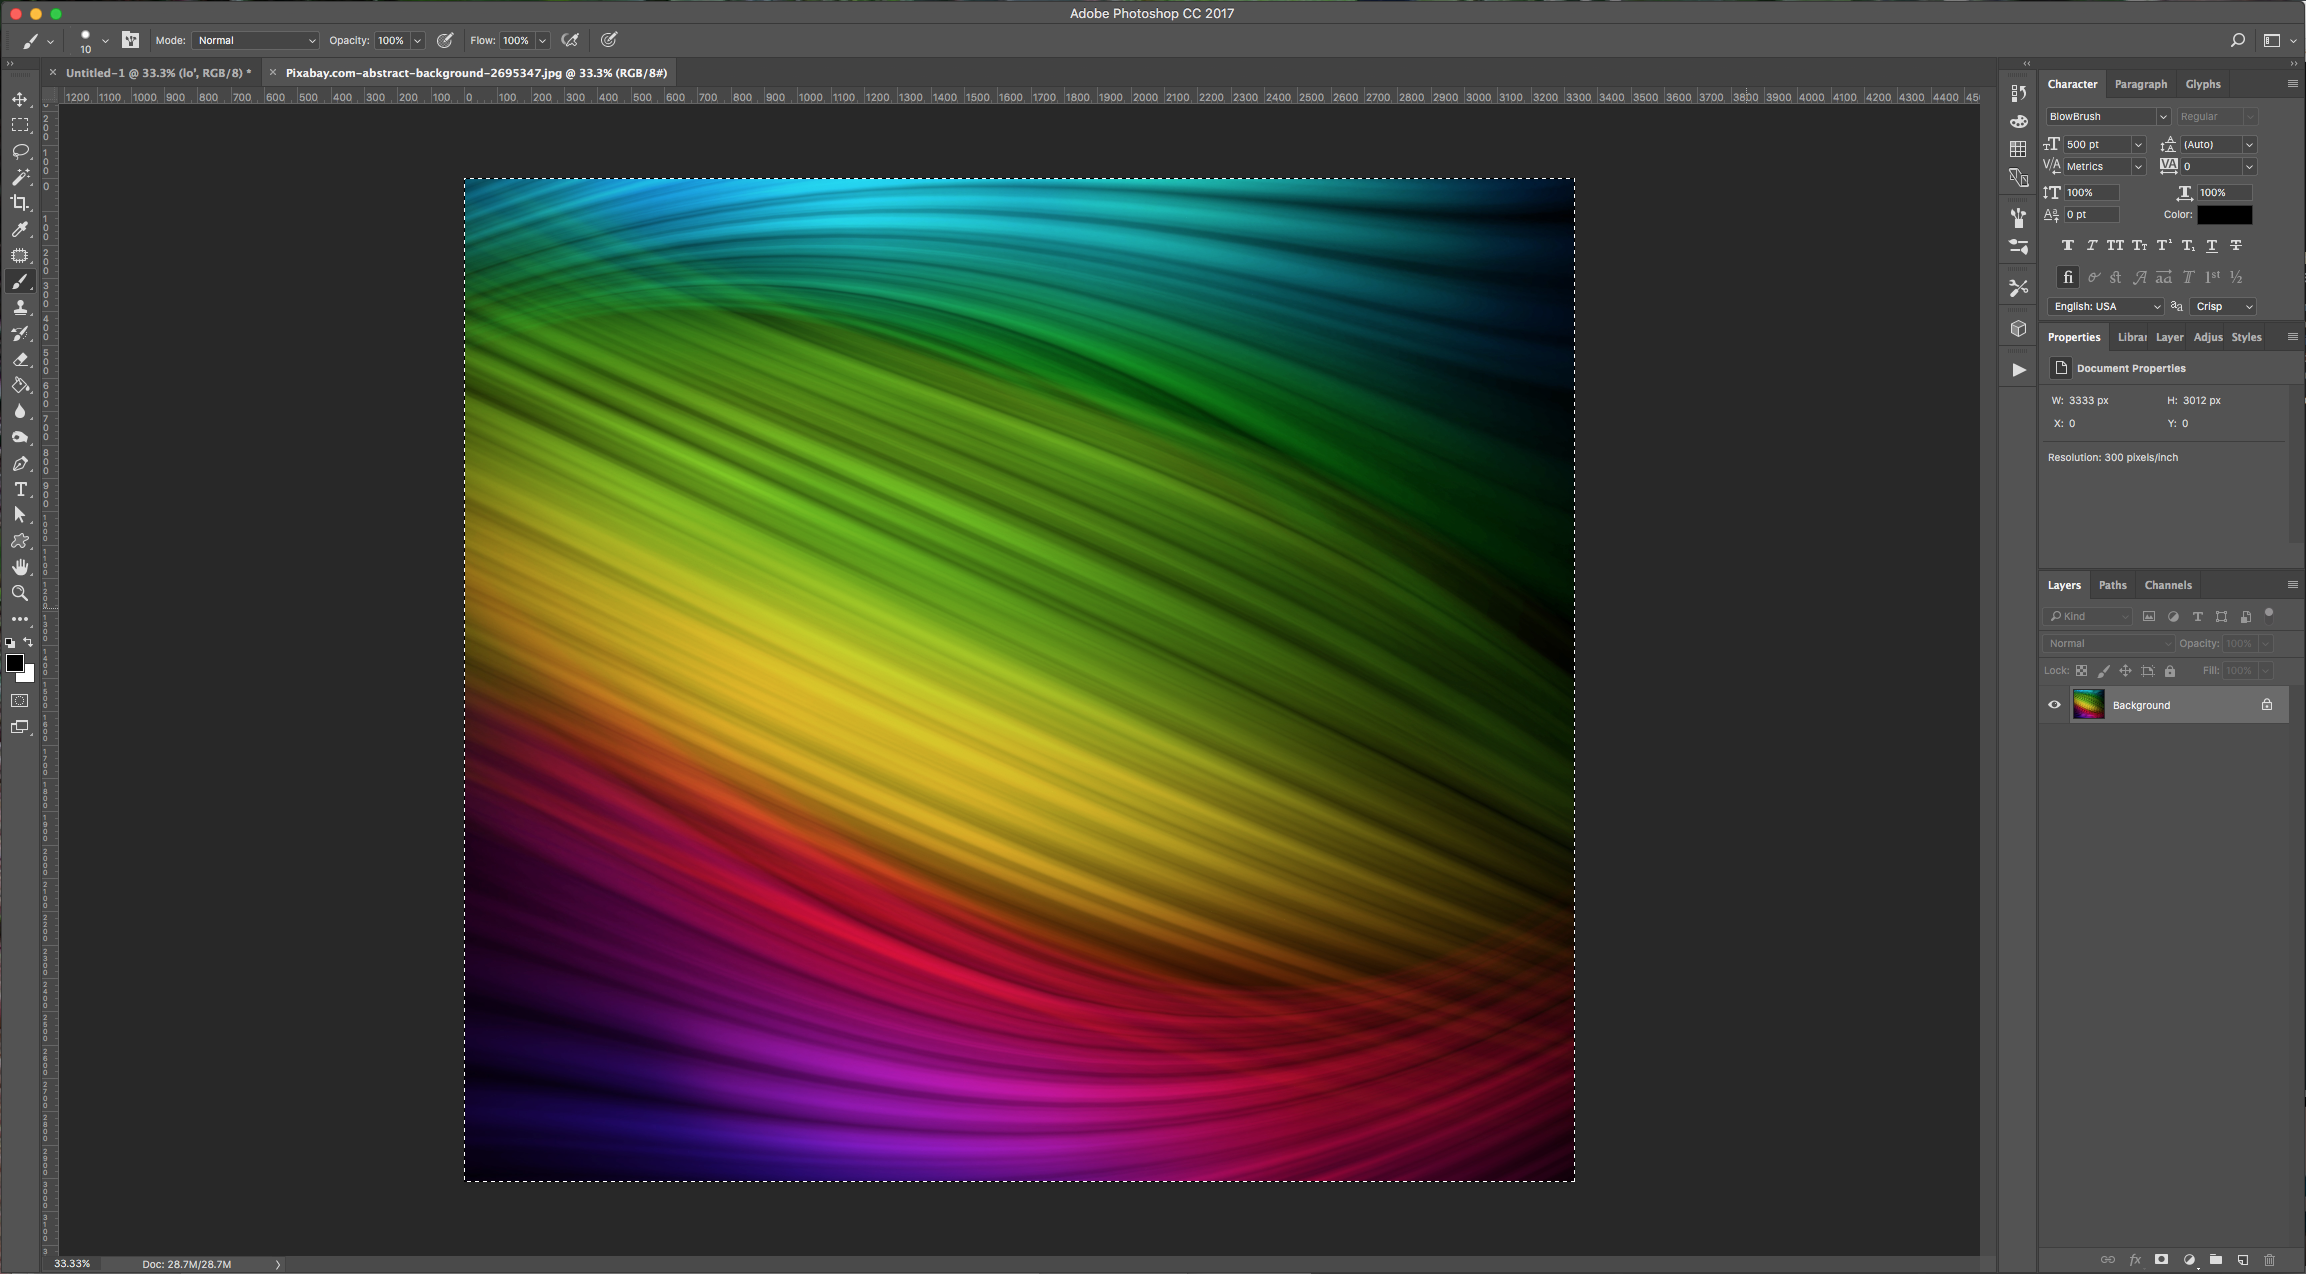
3 - Open the image you want to use to color your text, select it (Command/Control + A), Copy (Command/Control + C) and then Paste (Command/Control + V) into your document.
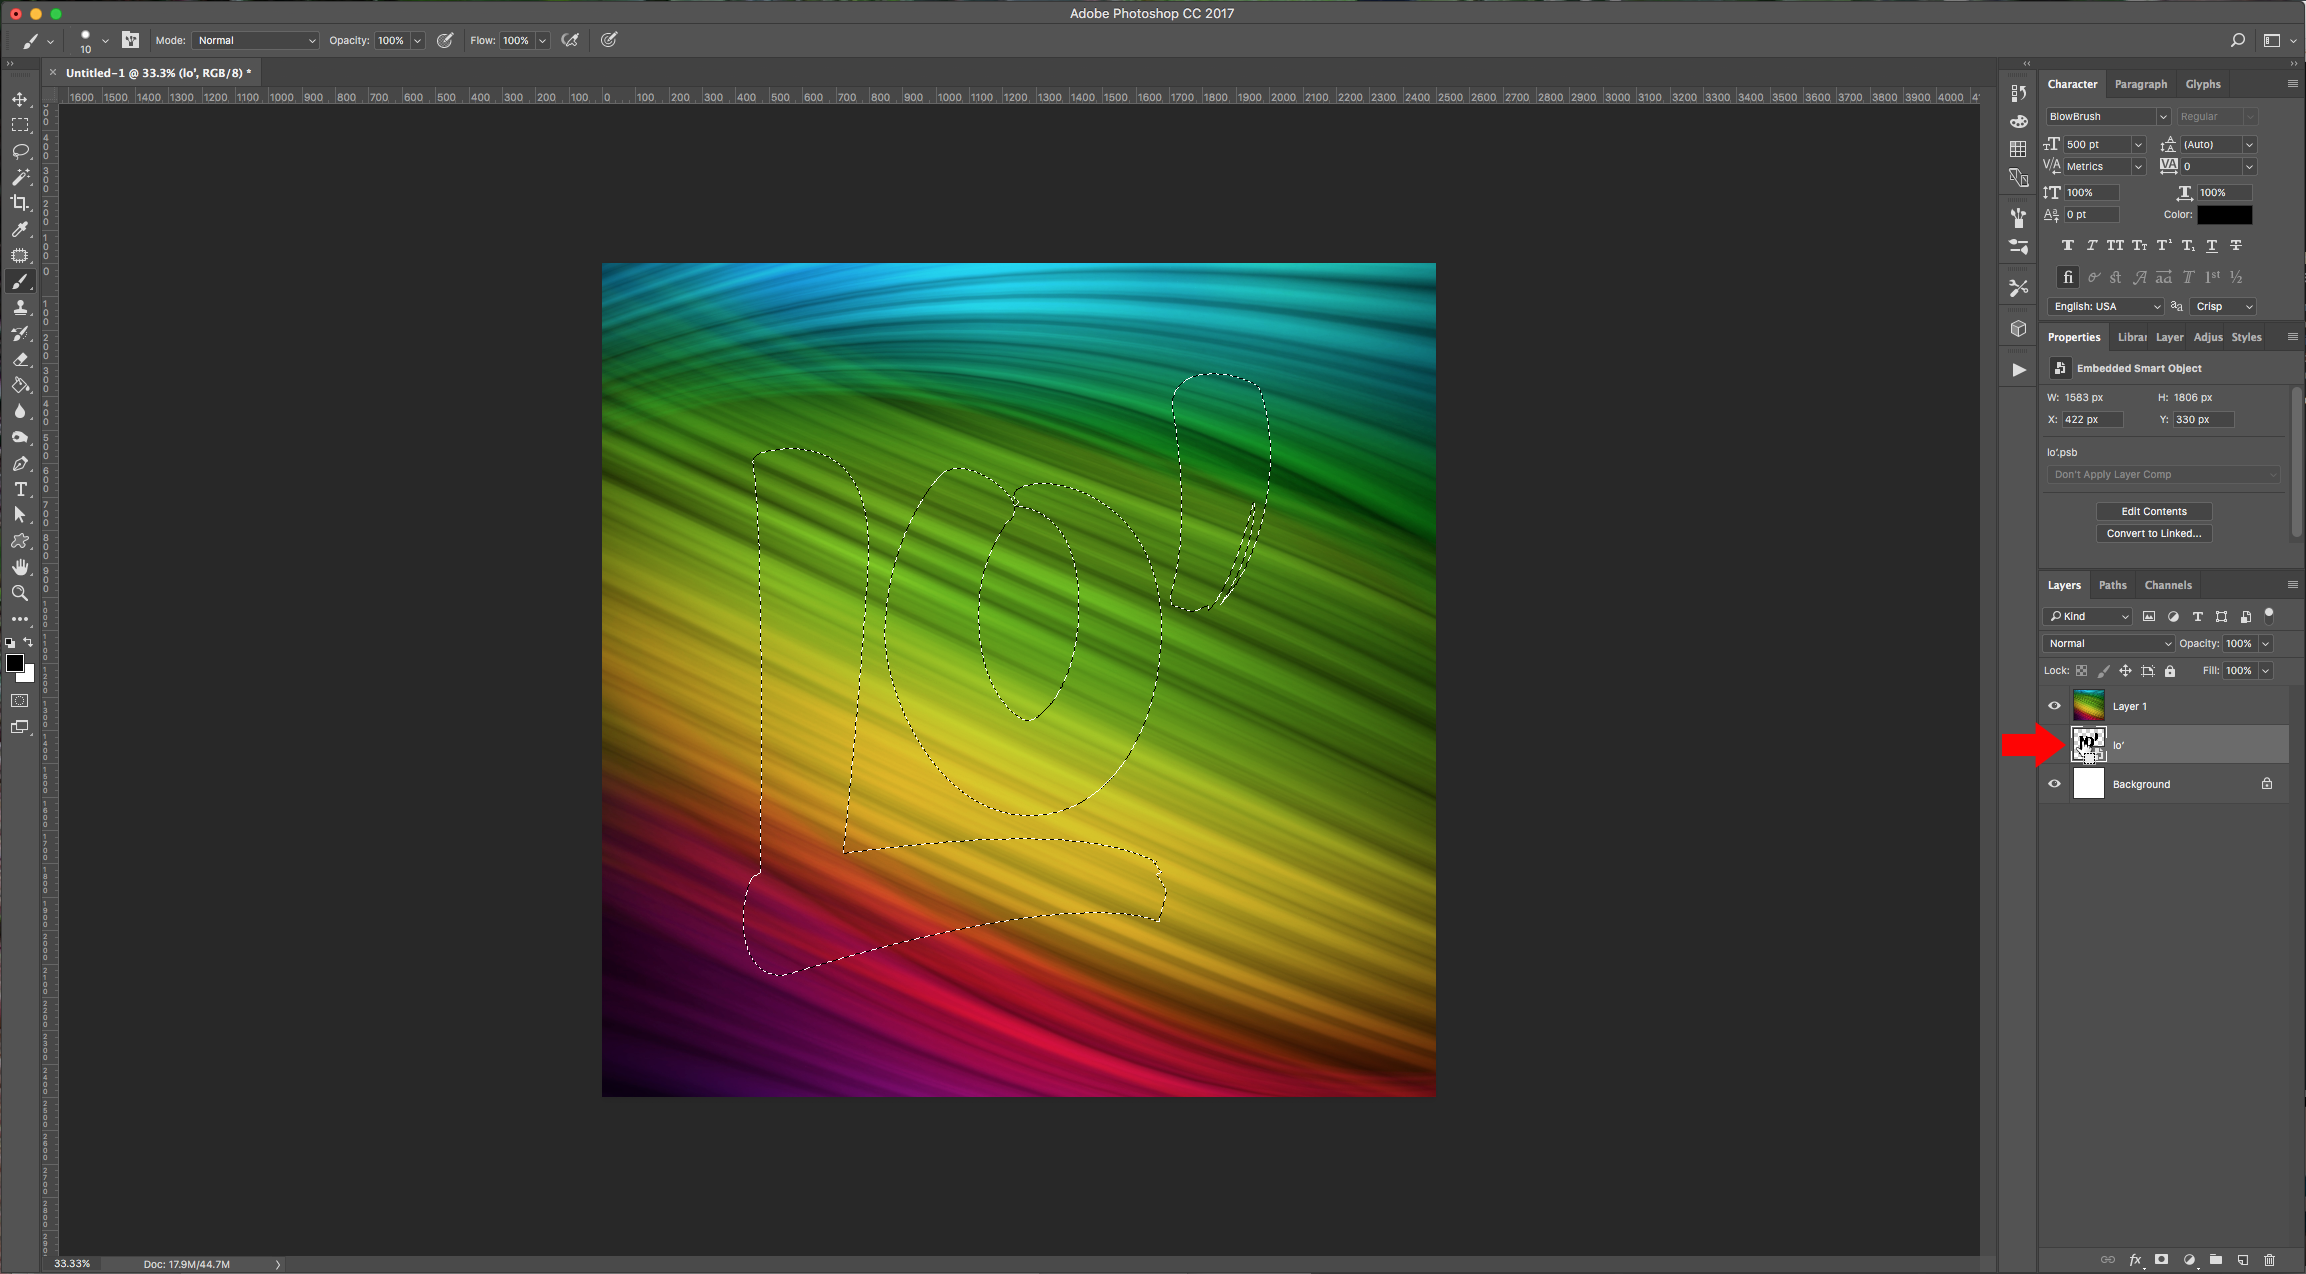
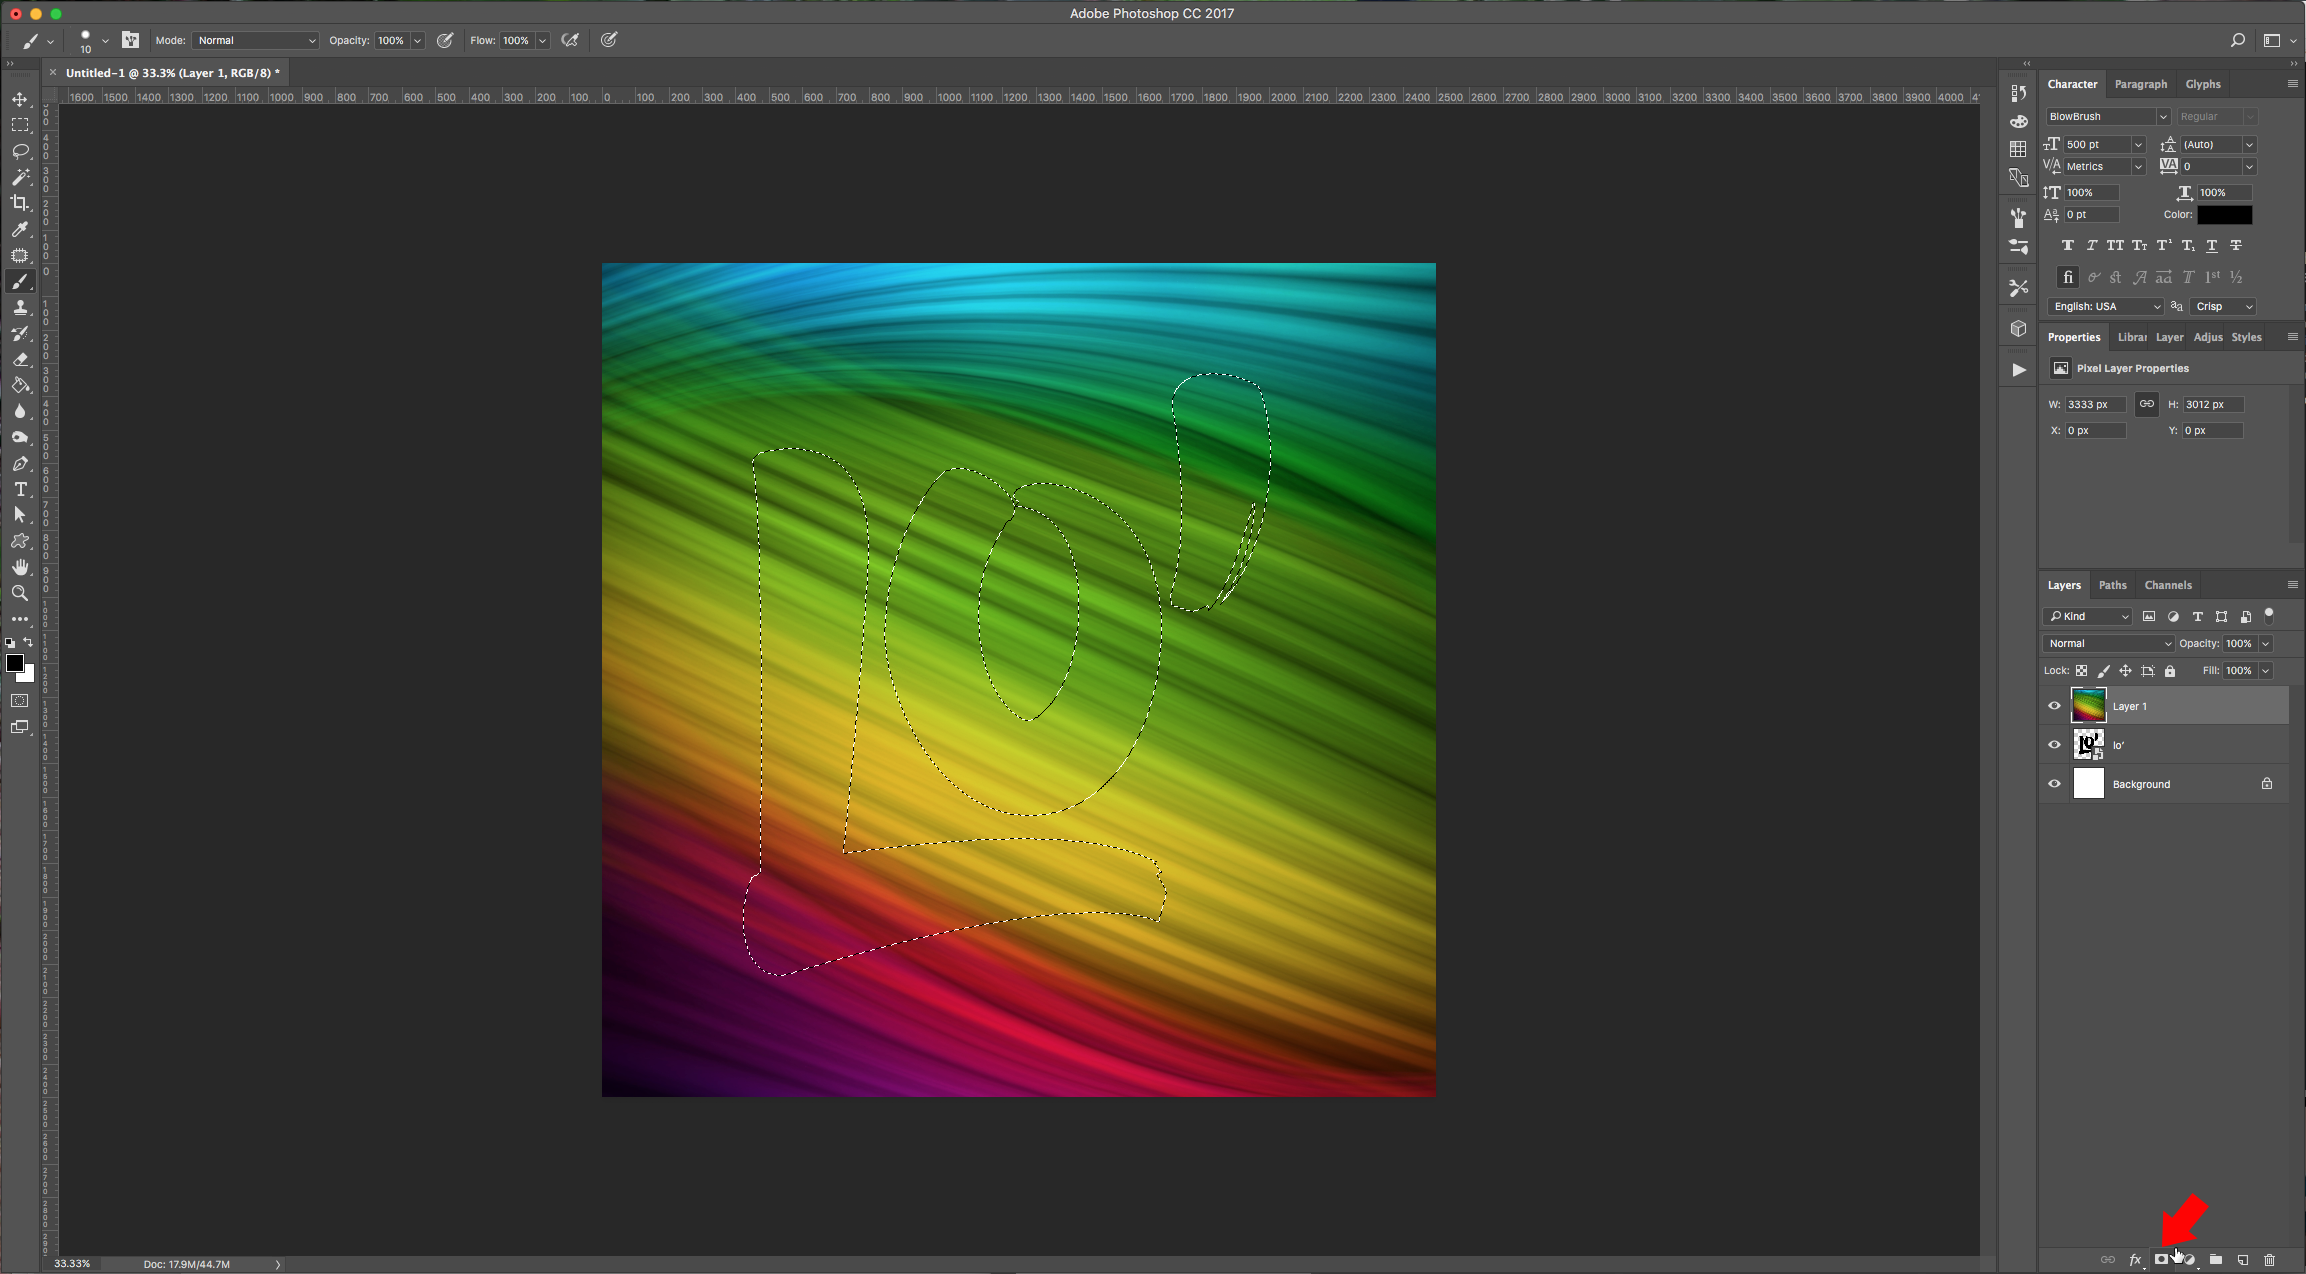
4 - Click on your text layer thumbnail while holding the “Command/Control” key to make a selection of your text, then select the new layer and click the “Create Layer Mask” button at the bottom of the “Layers” menu.
5 - Hide your text layer by clicking on the small eye icon to the left of your layer thumbnail and then un-link the mask from the image layer by clicking on the chain icon between the image and mask thumbnails.


6 - Select the image thumbnail and choose your “Move Tool” (V). Now you can move your image around and/or Scale it, rotate it, etc. using the “Transform Tool” (Command/Control + T) to achieve a nice color combination. Now, you can link your “Layer Mask” back if you want. You can duplicate your layer (Command/Control + J) and hide it so you can use it in case you need it.


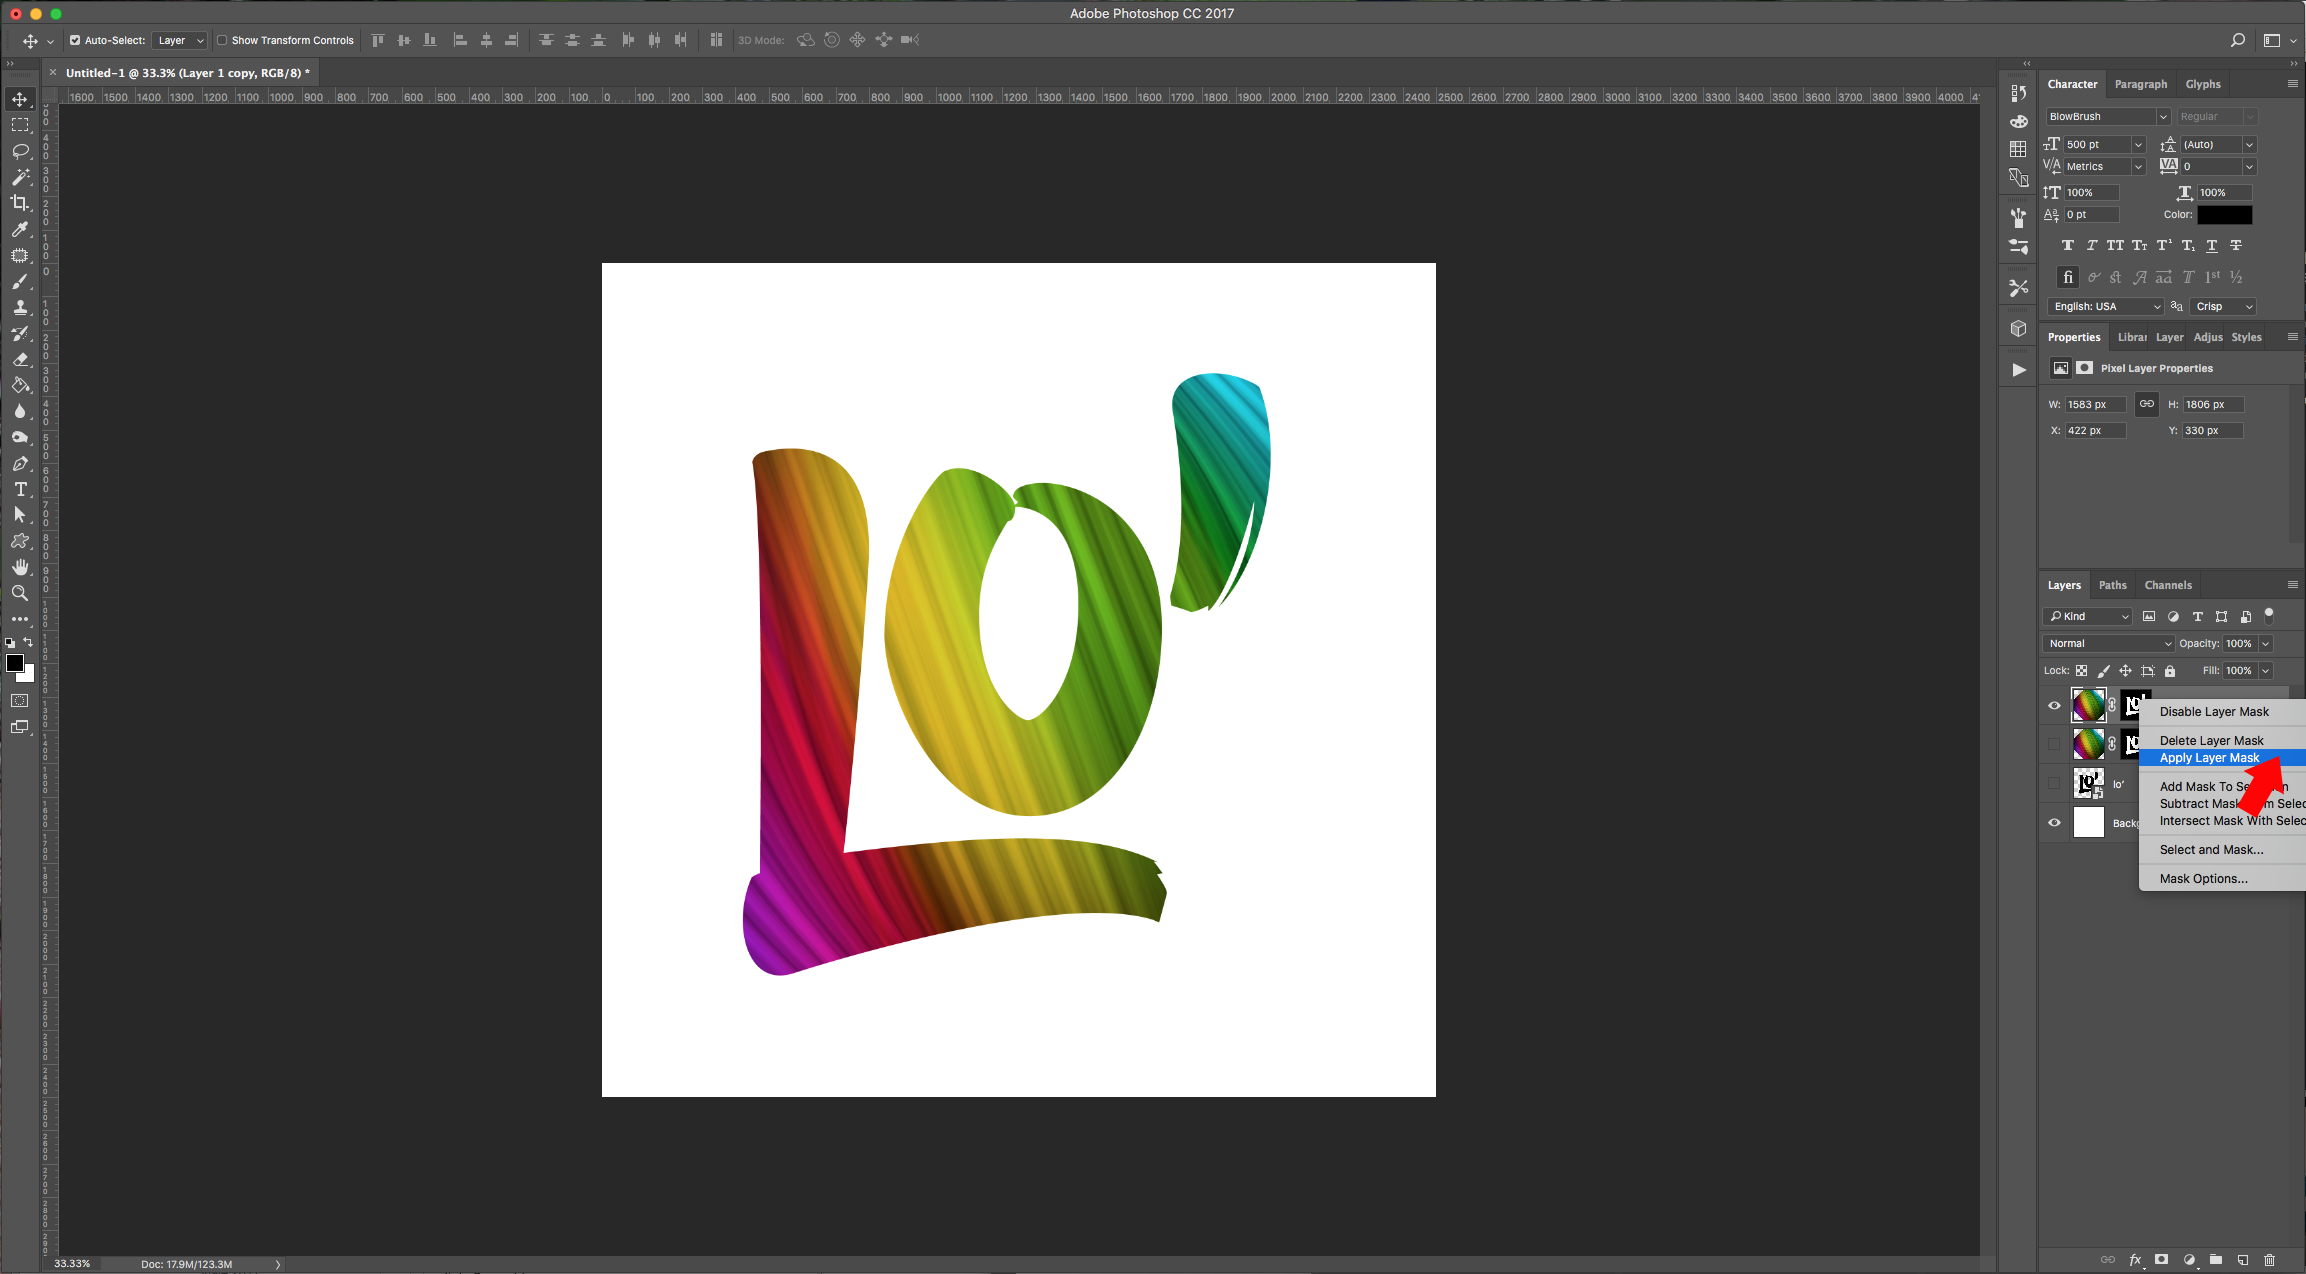
7 - Select the “Layer Mask”, right-click on it and “Apply Layer Mask”.
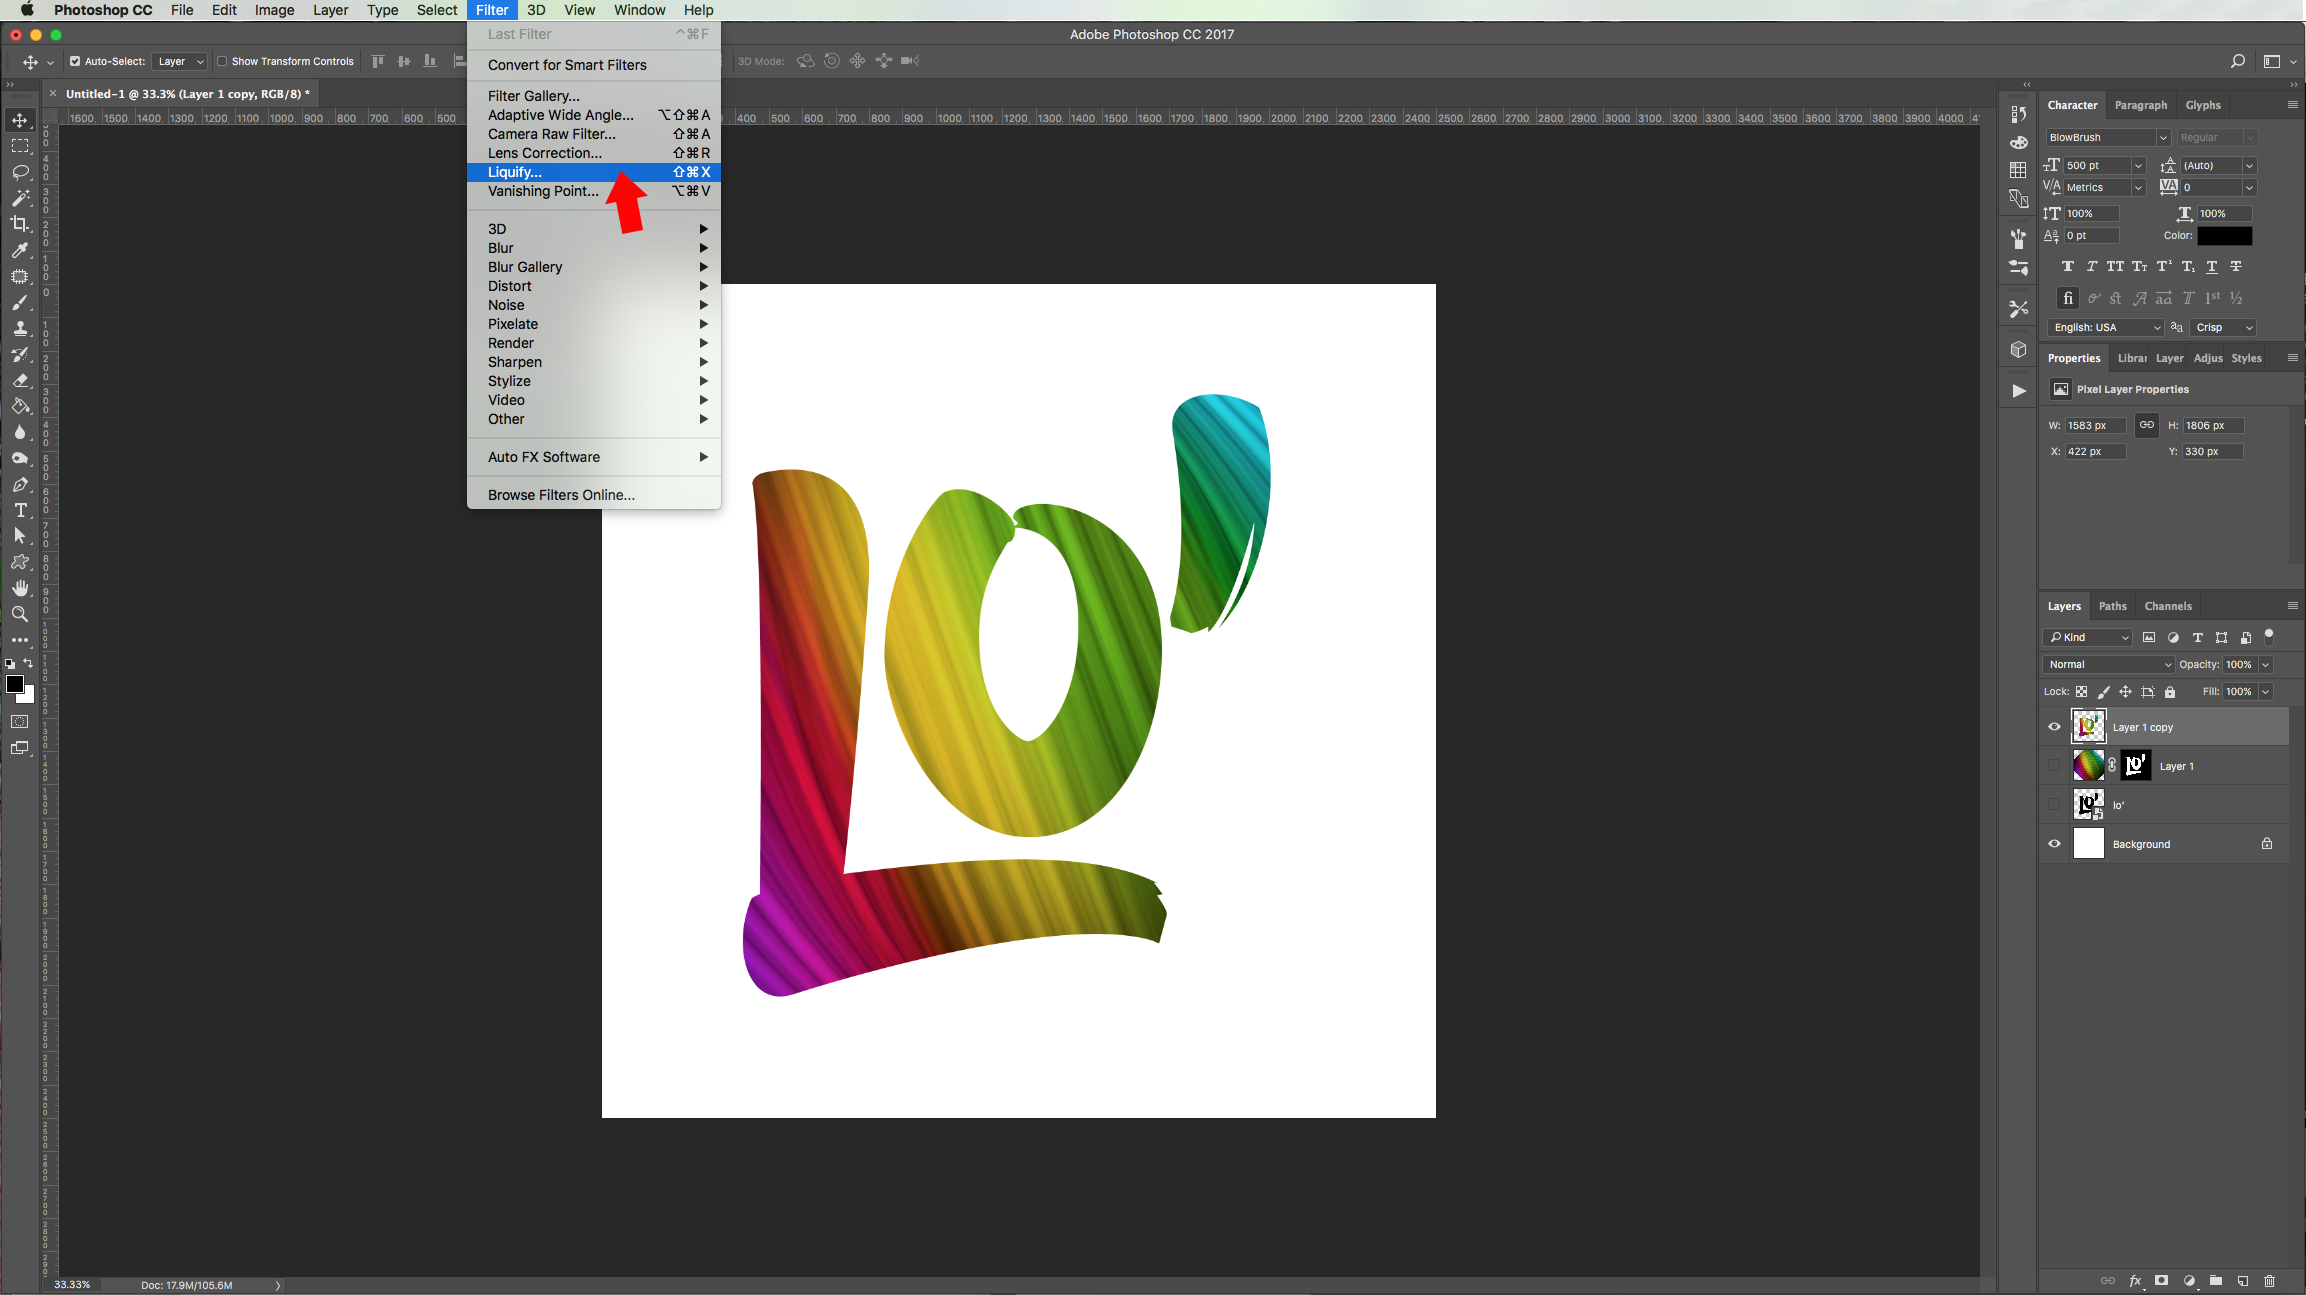
8 - Go to Filter > Liquify (Shift + Command/Control + X), and apply values similar to this:
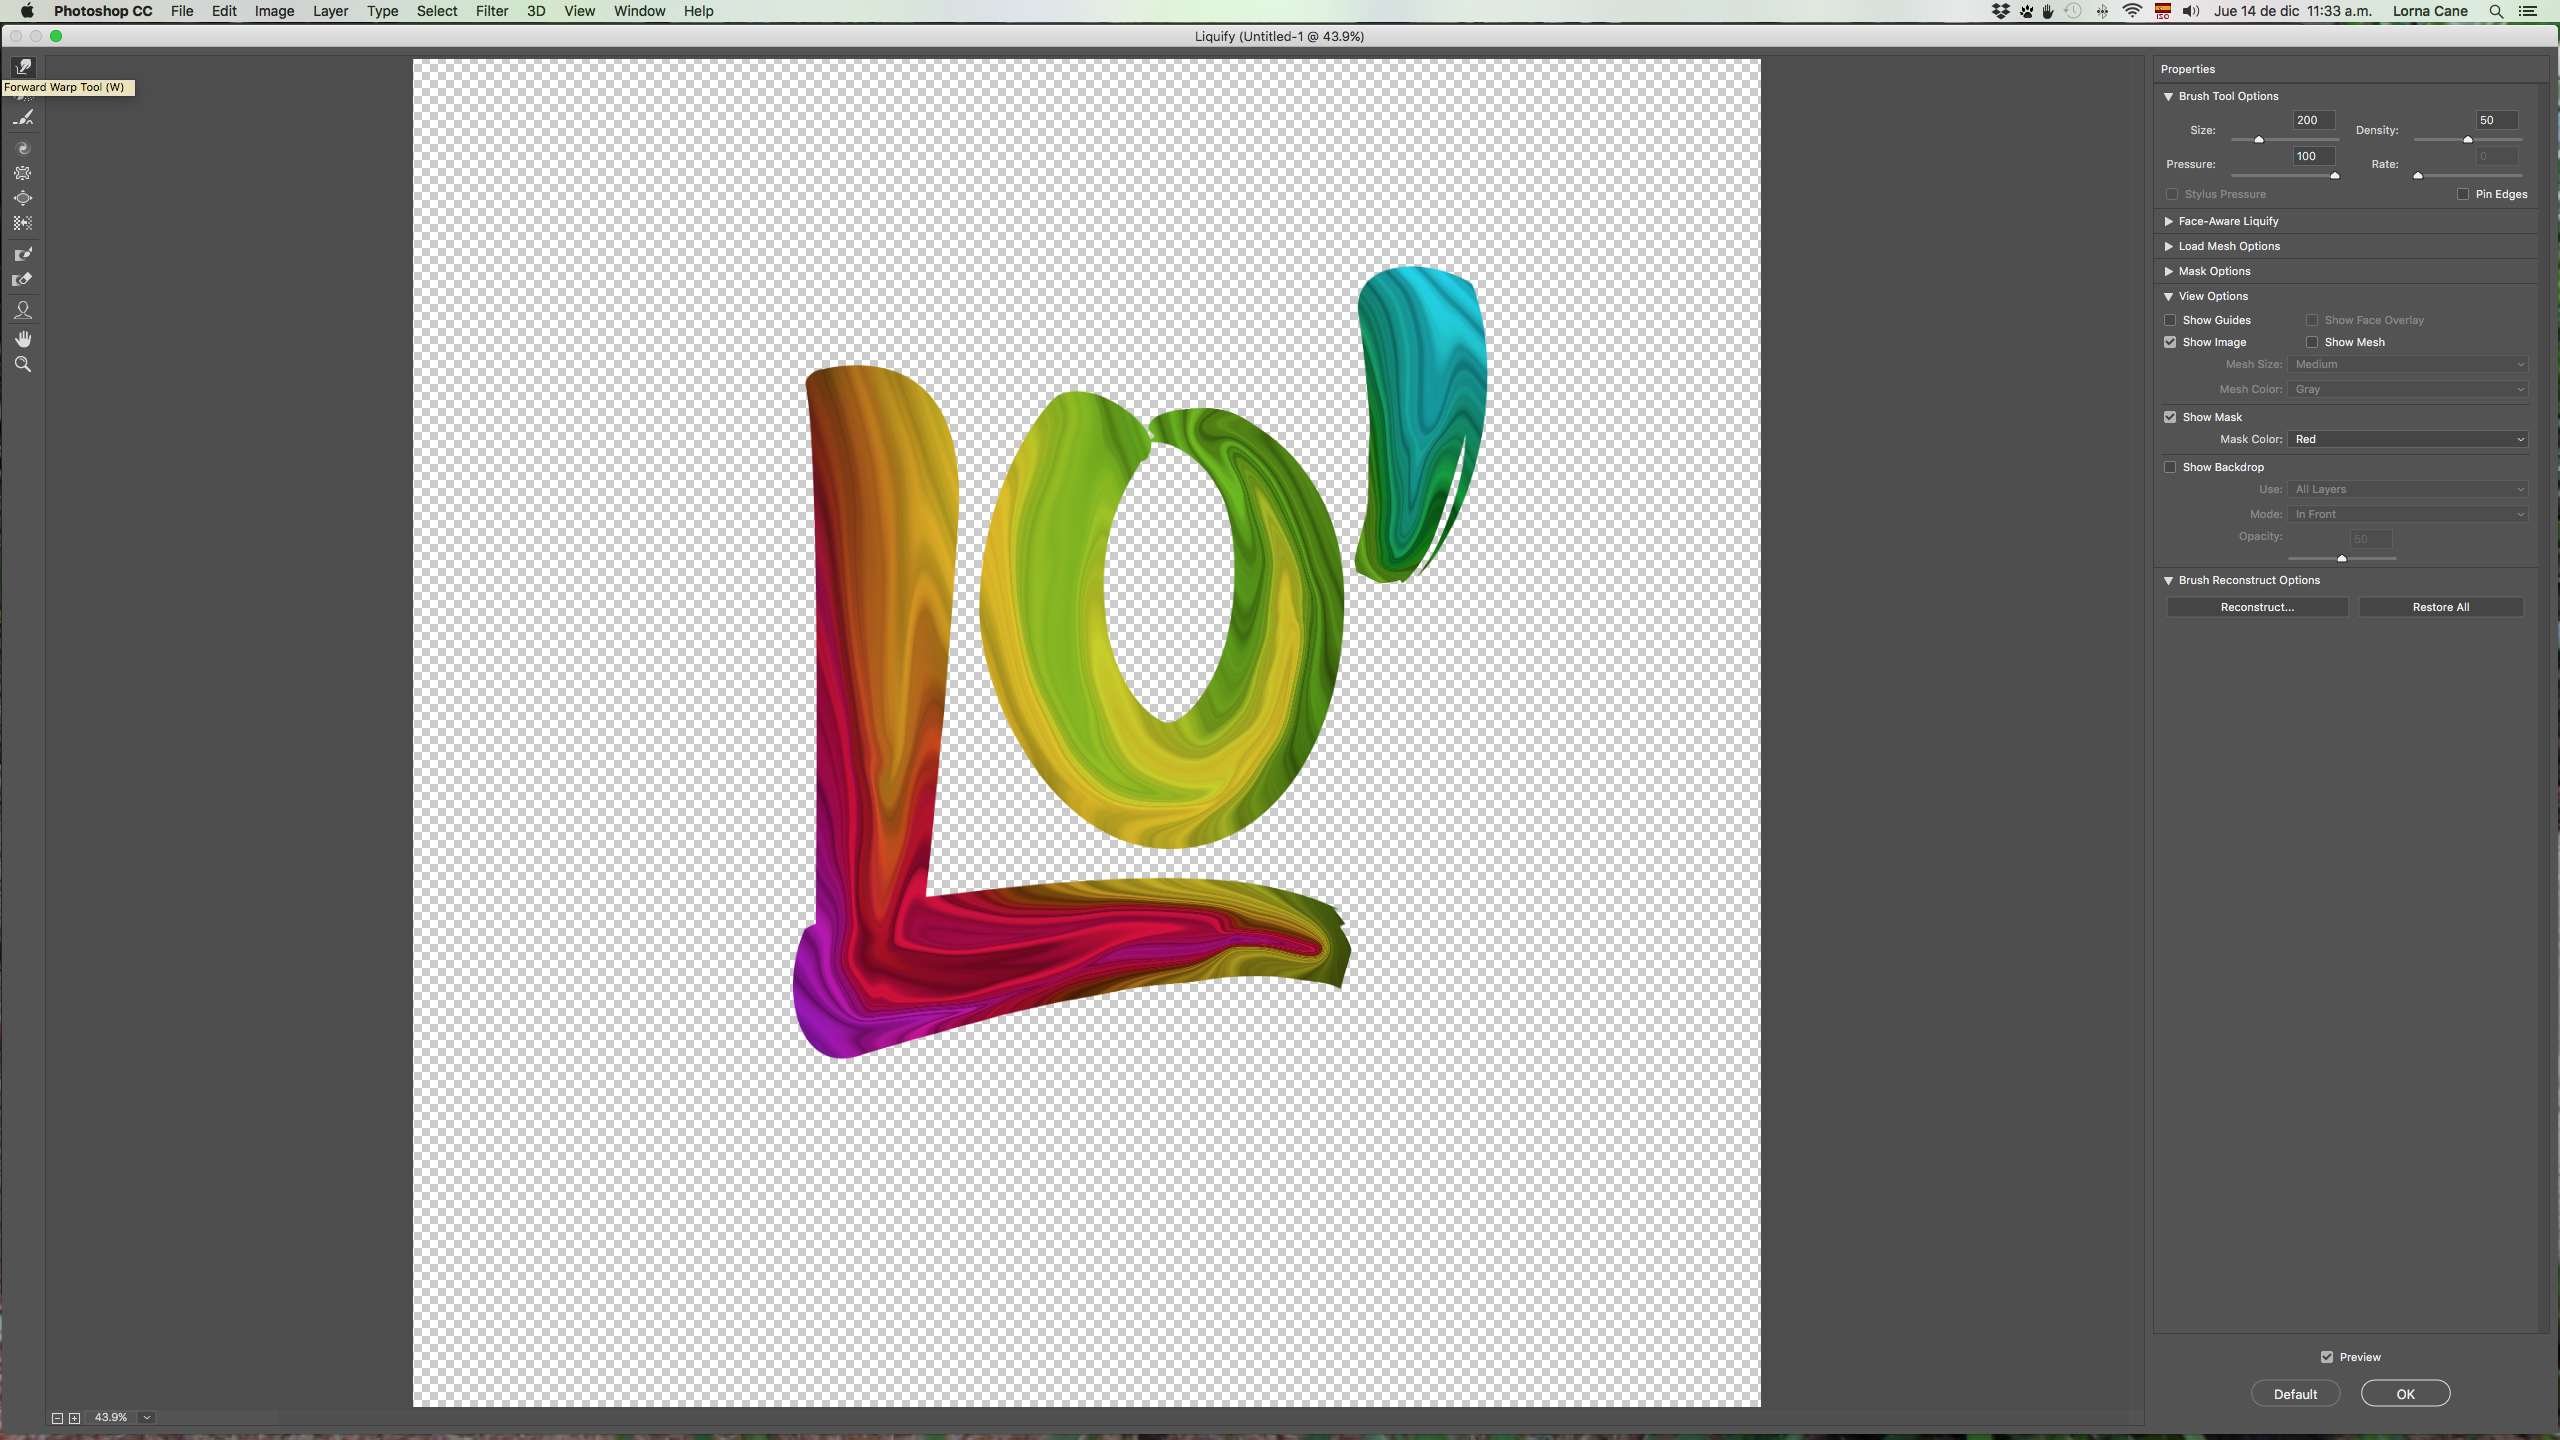
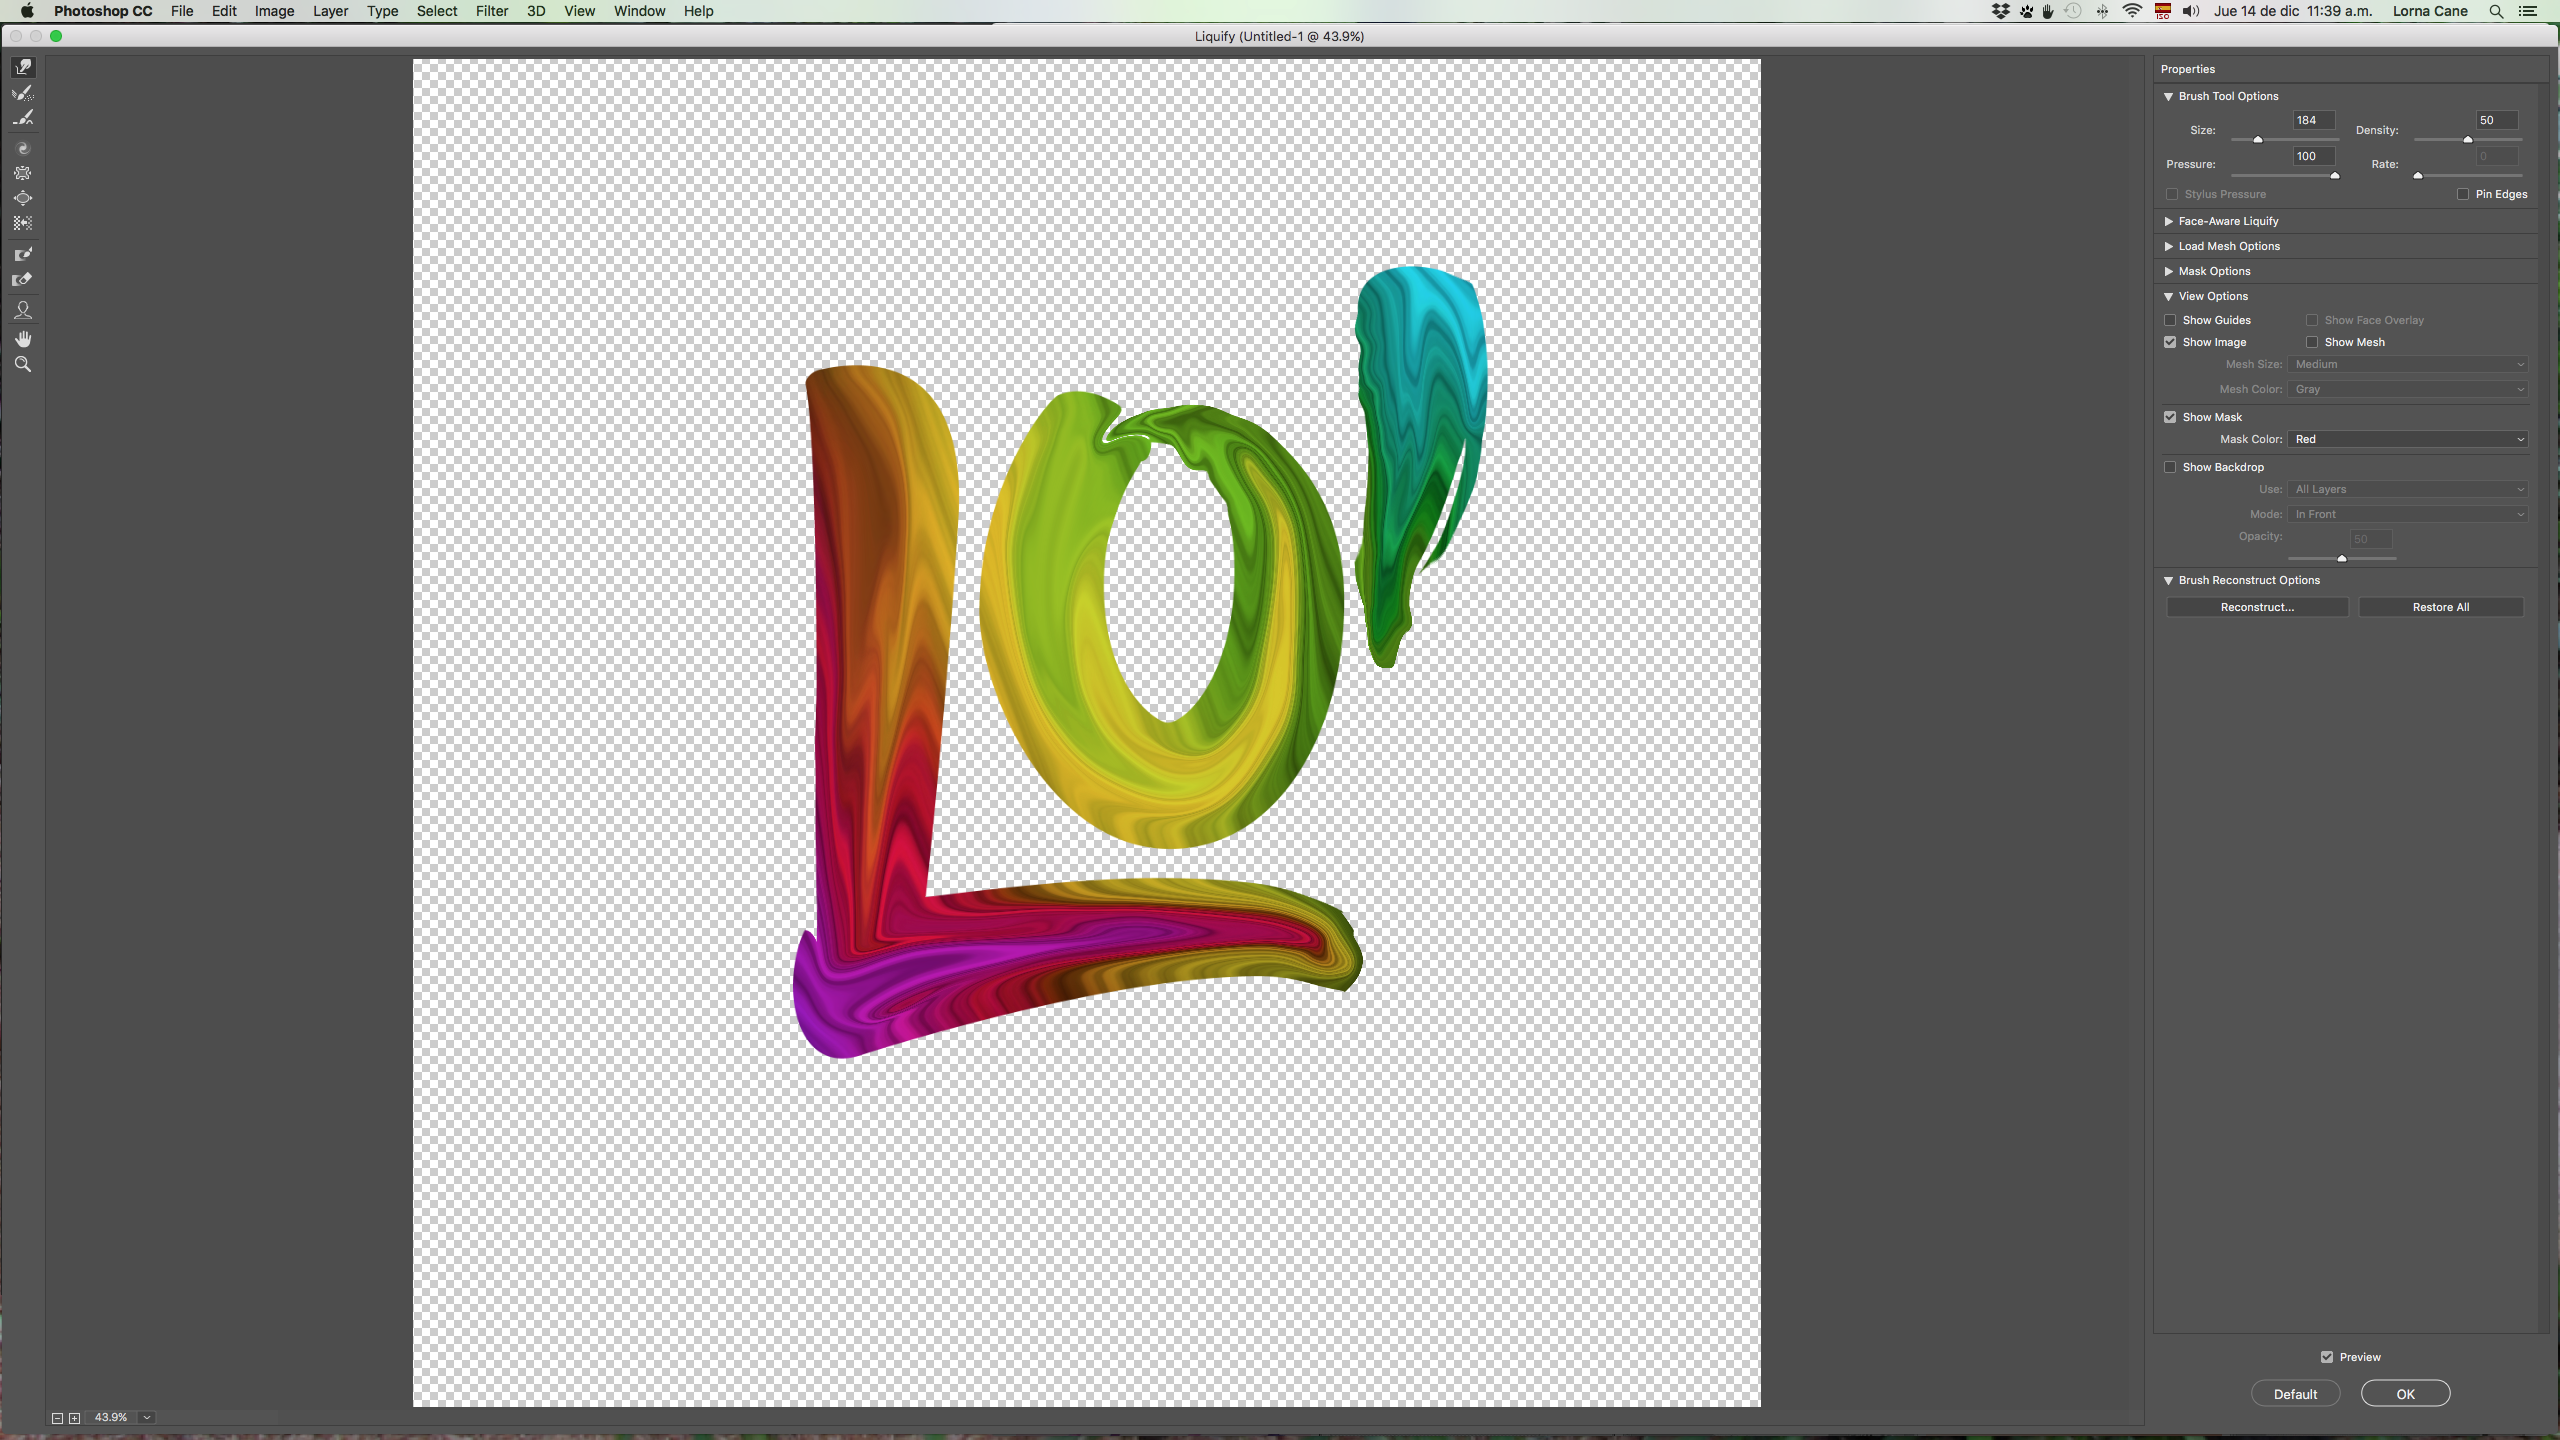
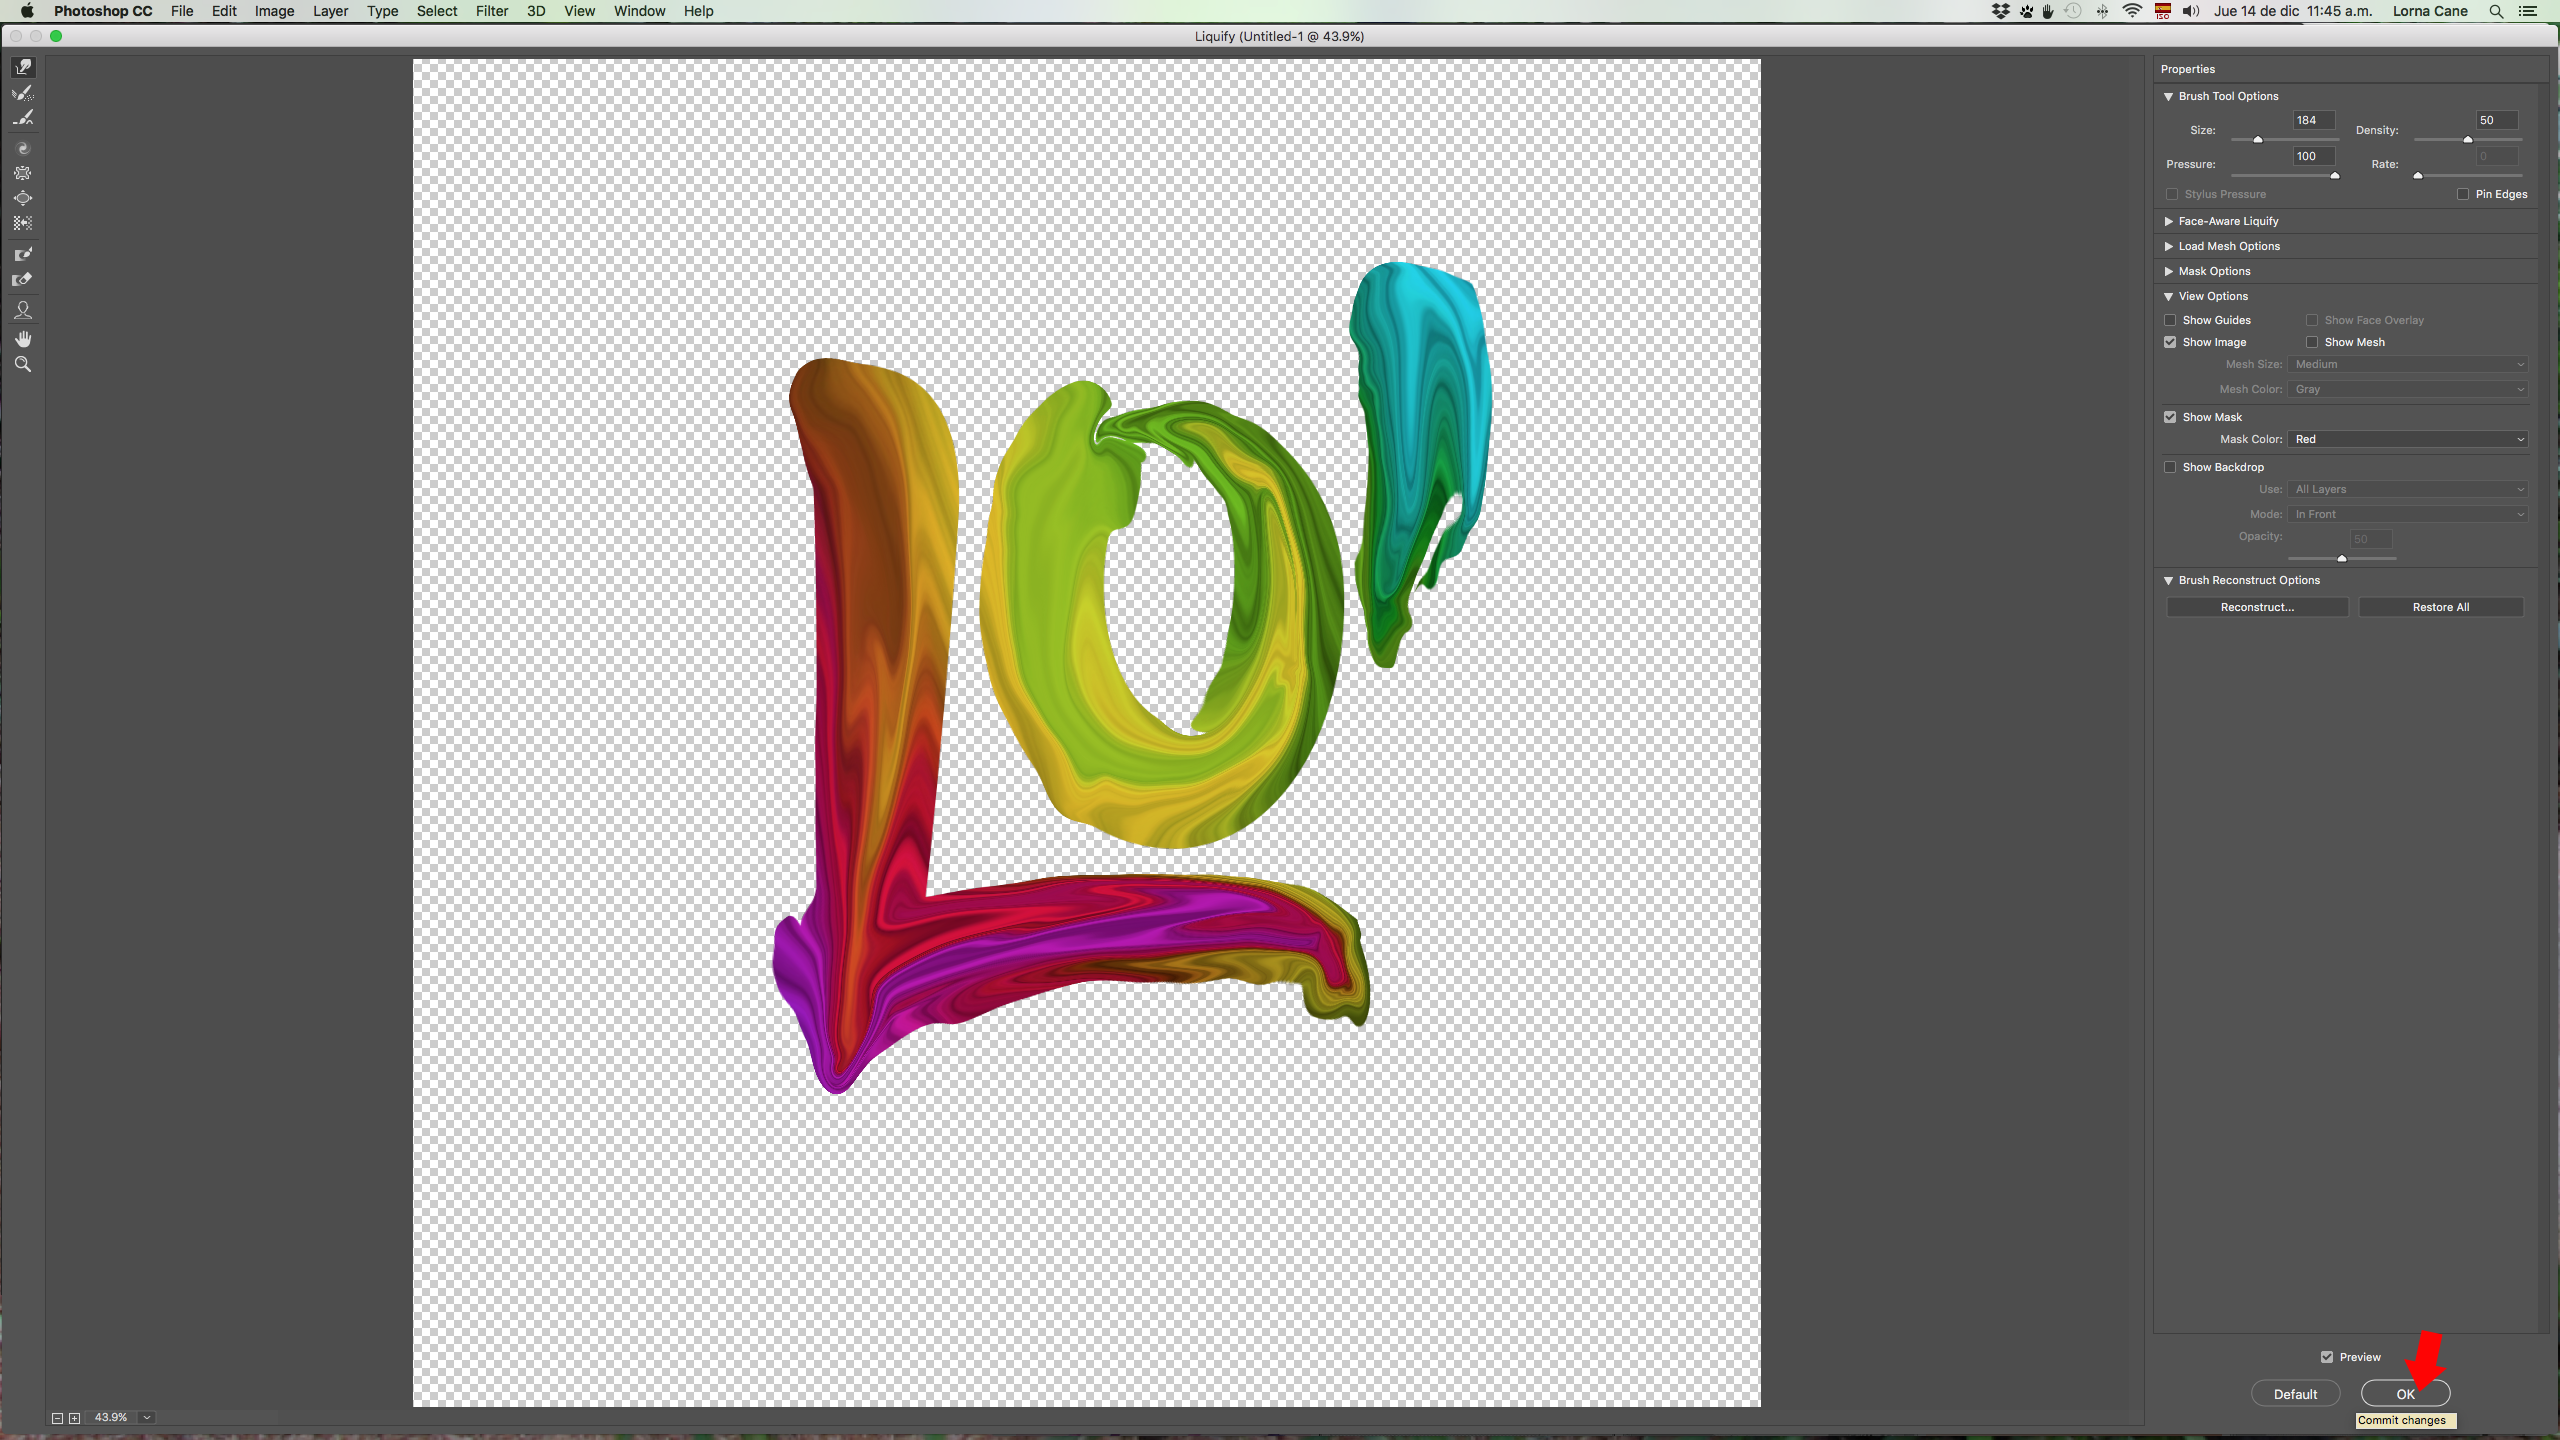
Forward Warp Tool (W): The size of the brush depends on the thickness of your letters since it needs to be of a similar one. You will need to adjust it in the different portions of the letters that have a different with. The idea is to give it a look of “Paint”. Duplicate your layer and go back to Liquify to make some “Drips” and give the idea of “Brush Strokes”.

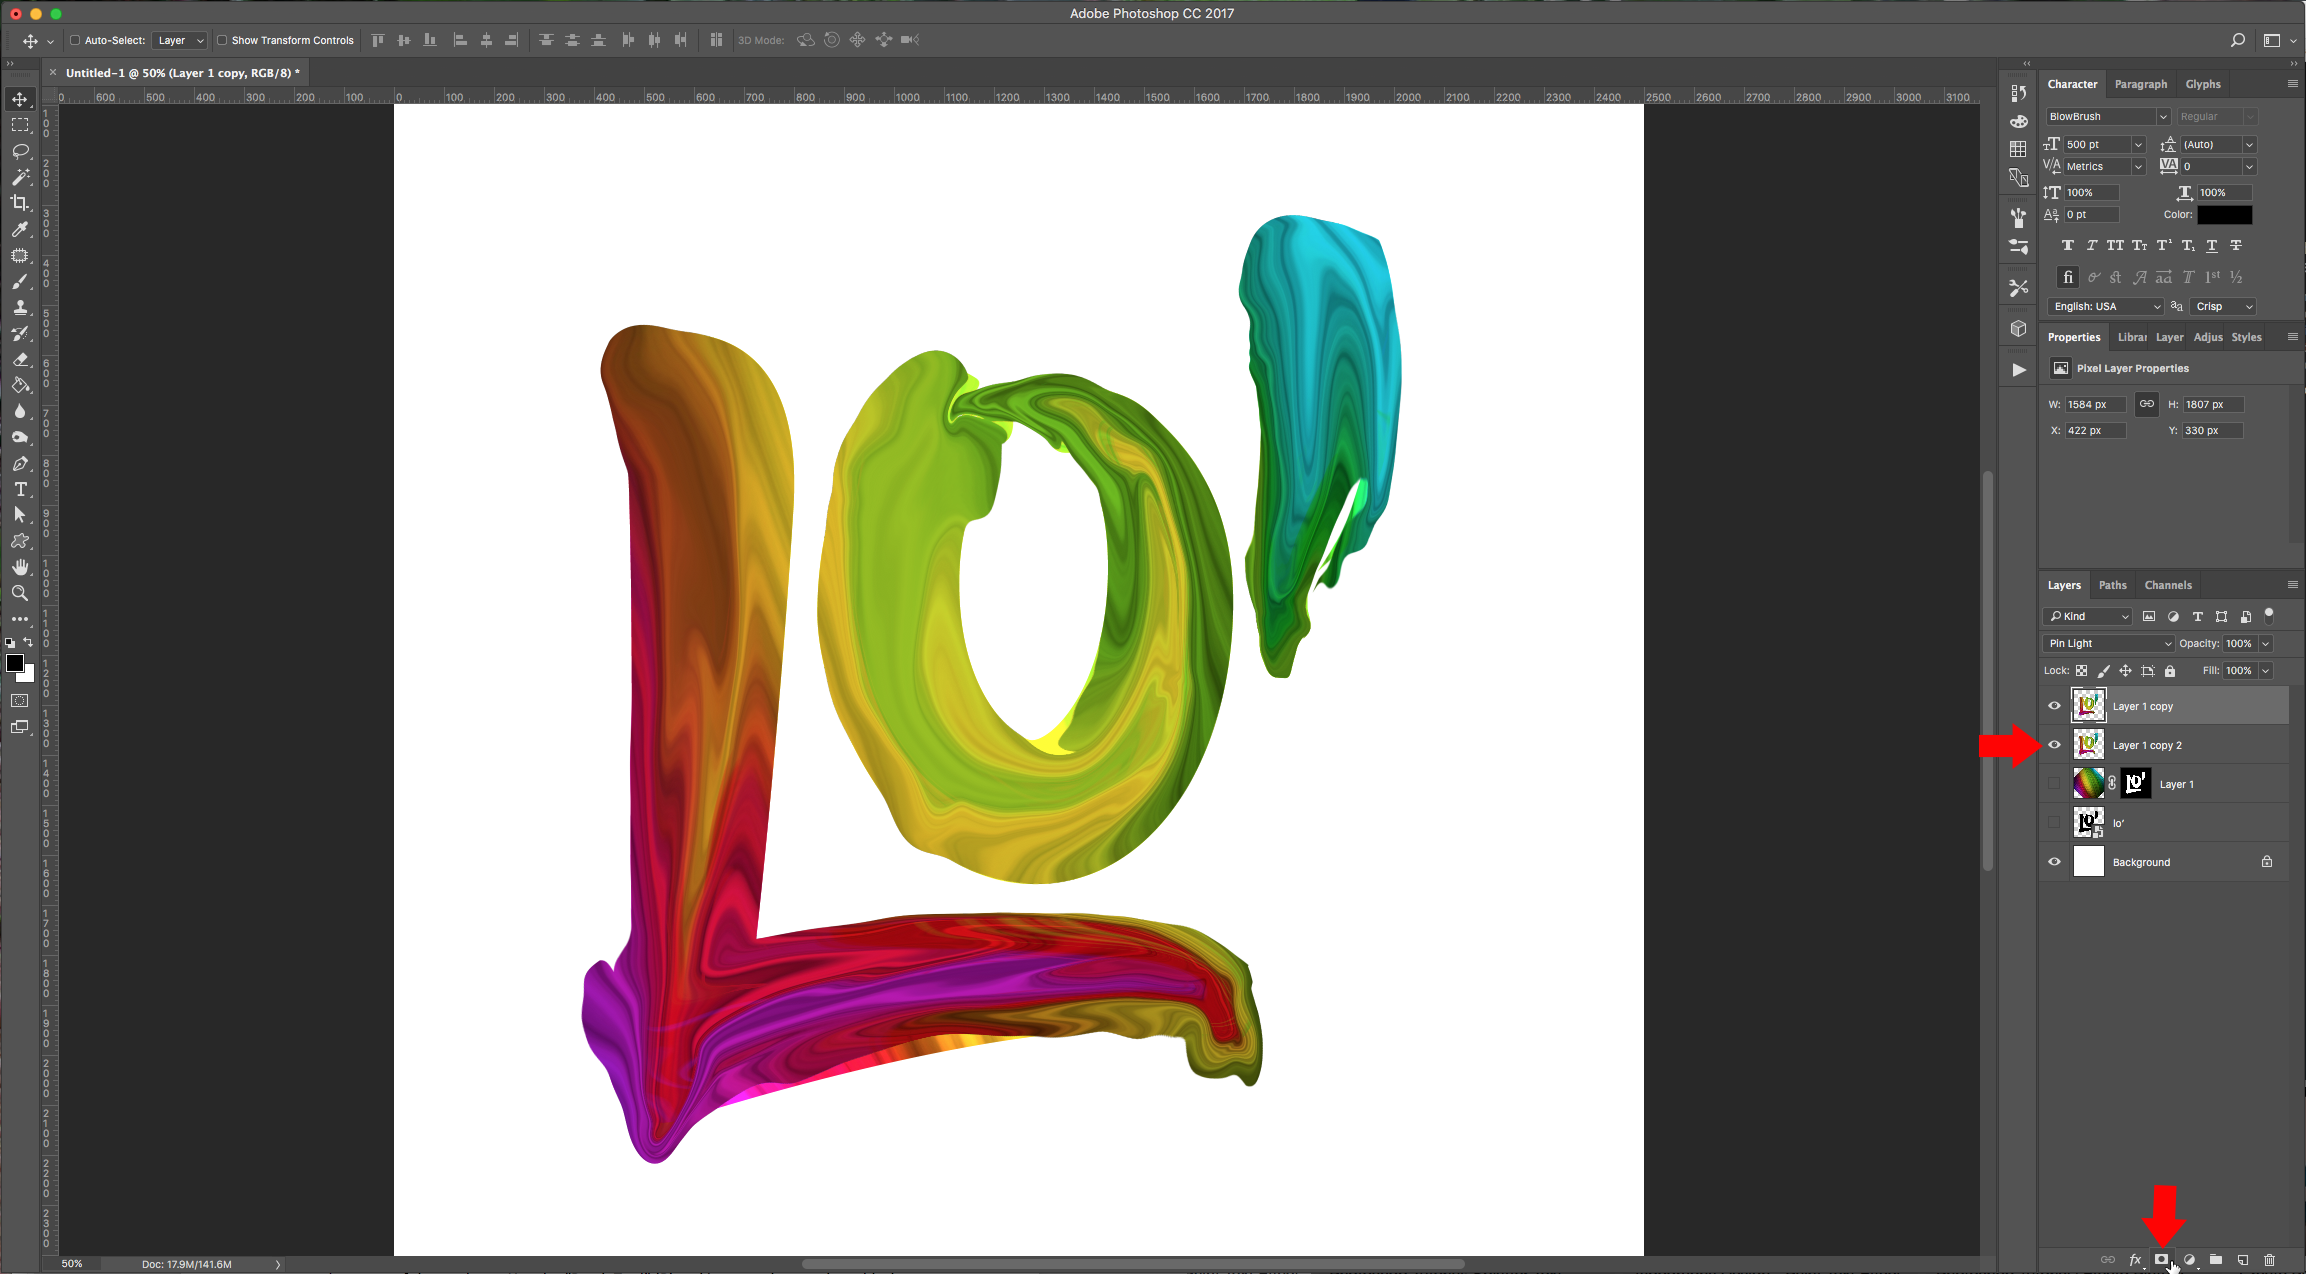
9 - Move your second layer (the one with the “Drips”) under the first one and change the “Blending Mode” of the one on top to “Pin Light”. Create a “Layer Mask2 of your top layer and “Fix” some of the overlapping paint by erasing some of the top layer. Use the “Brush Tool” (B) making sure that you have black as your “Foreground” color.
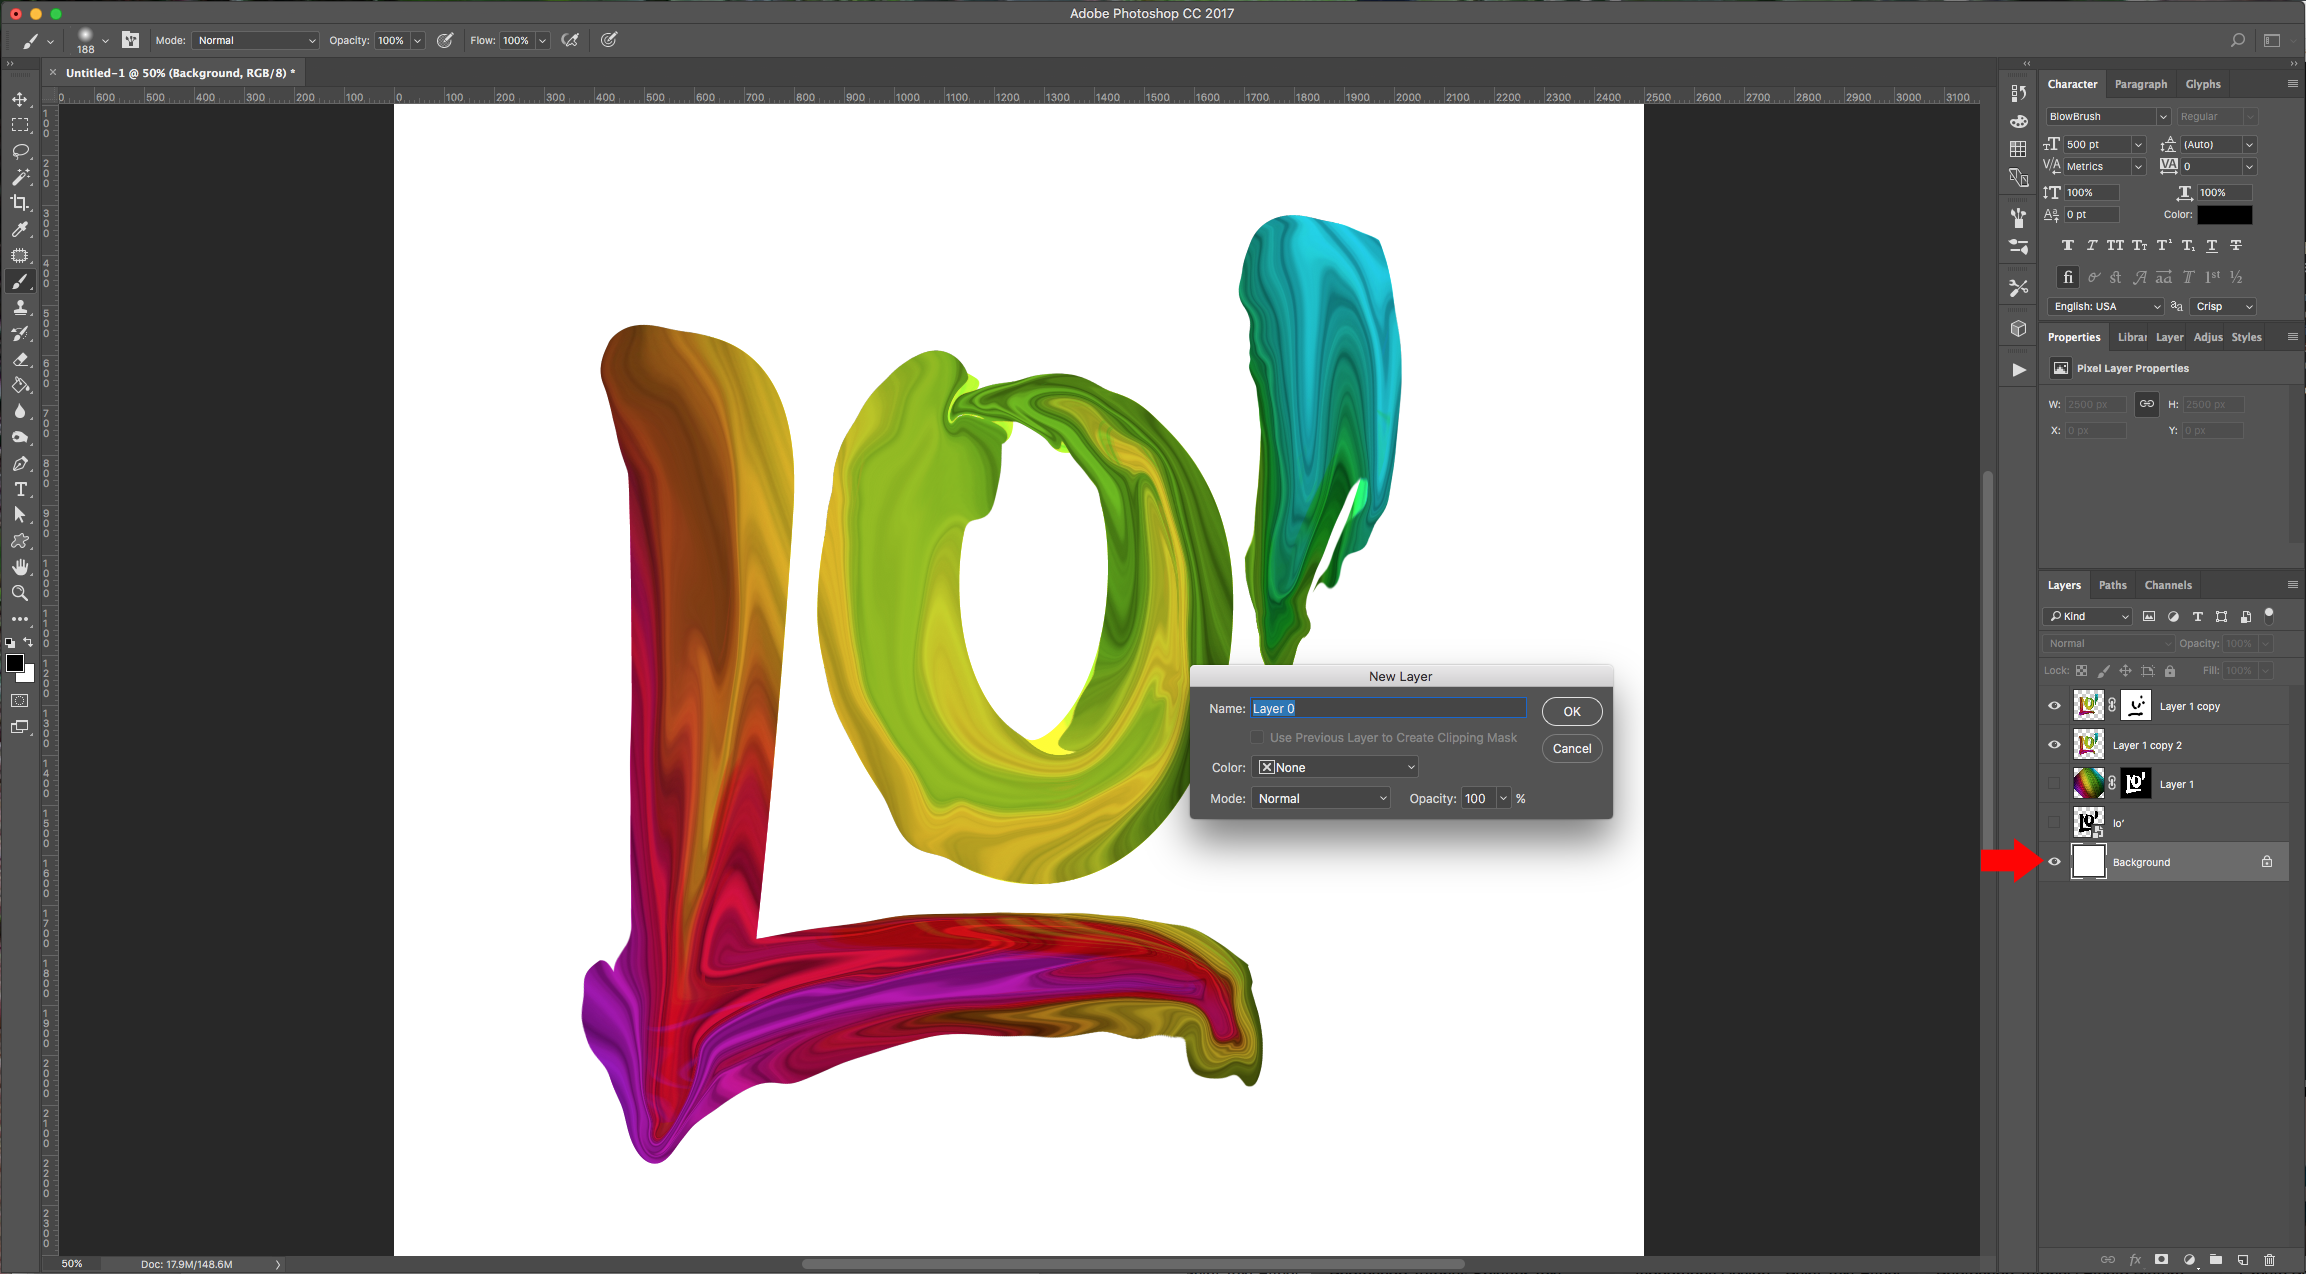
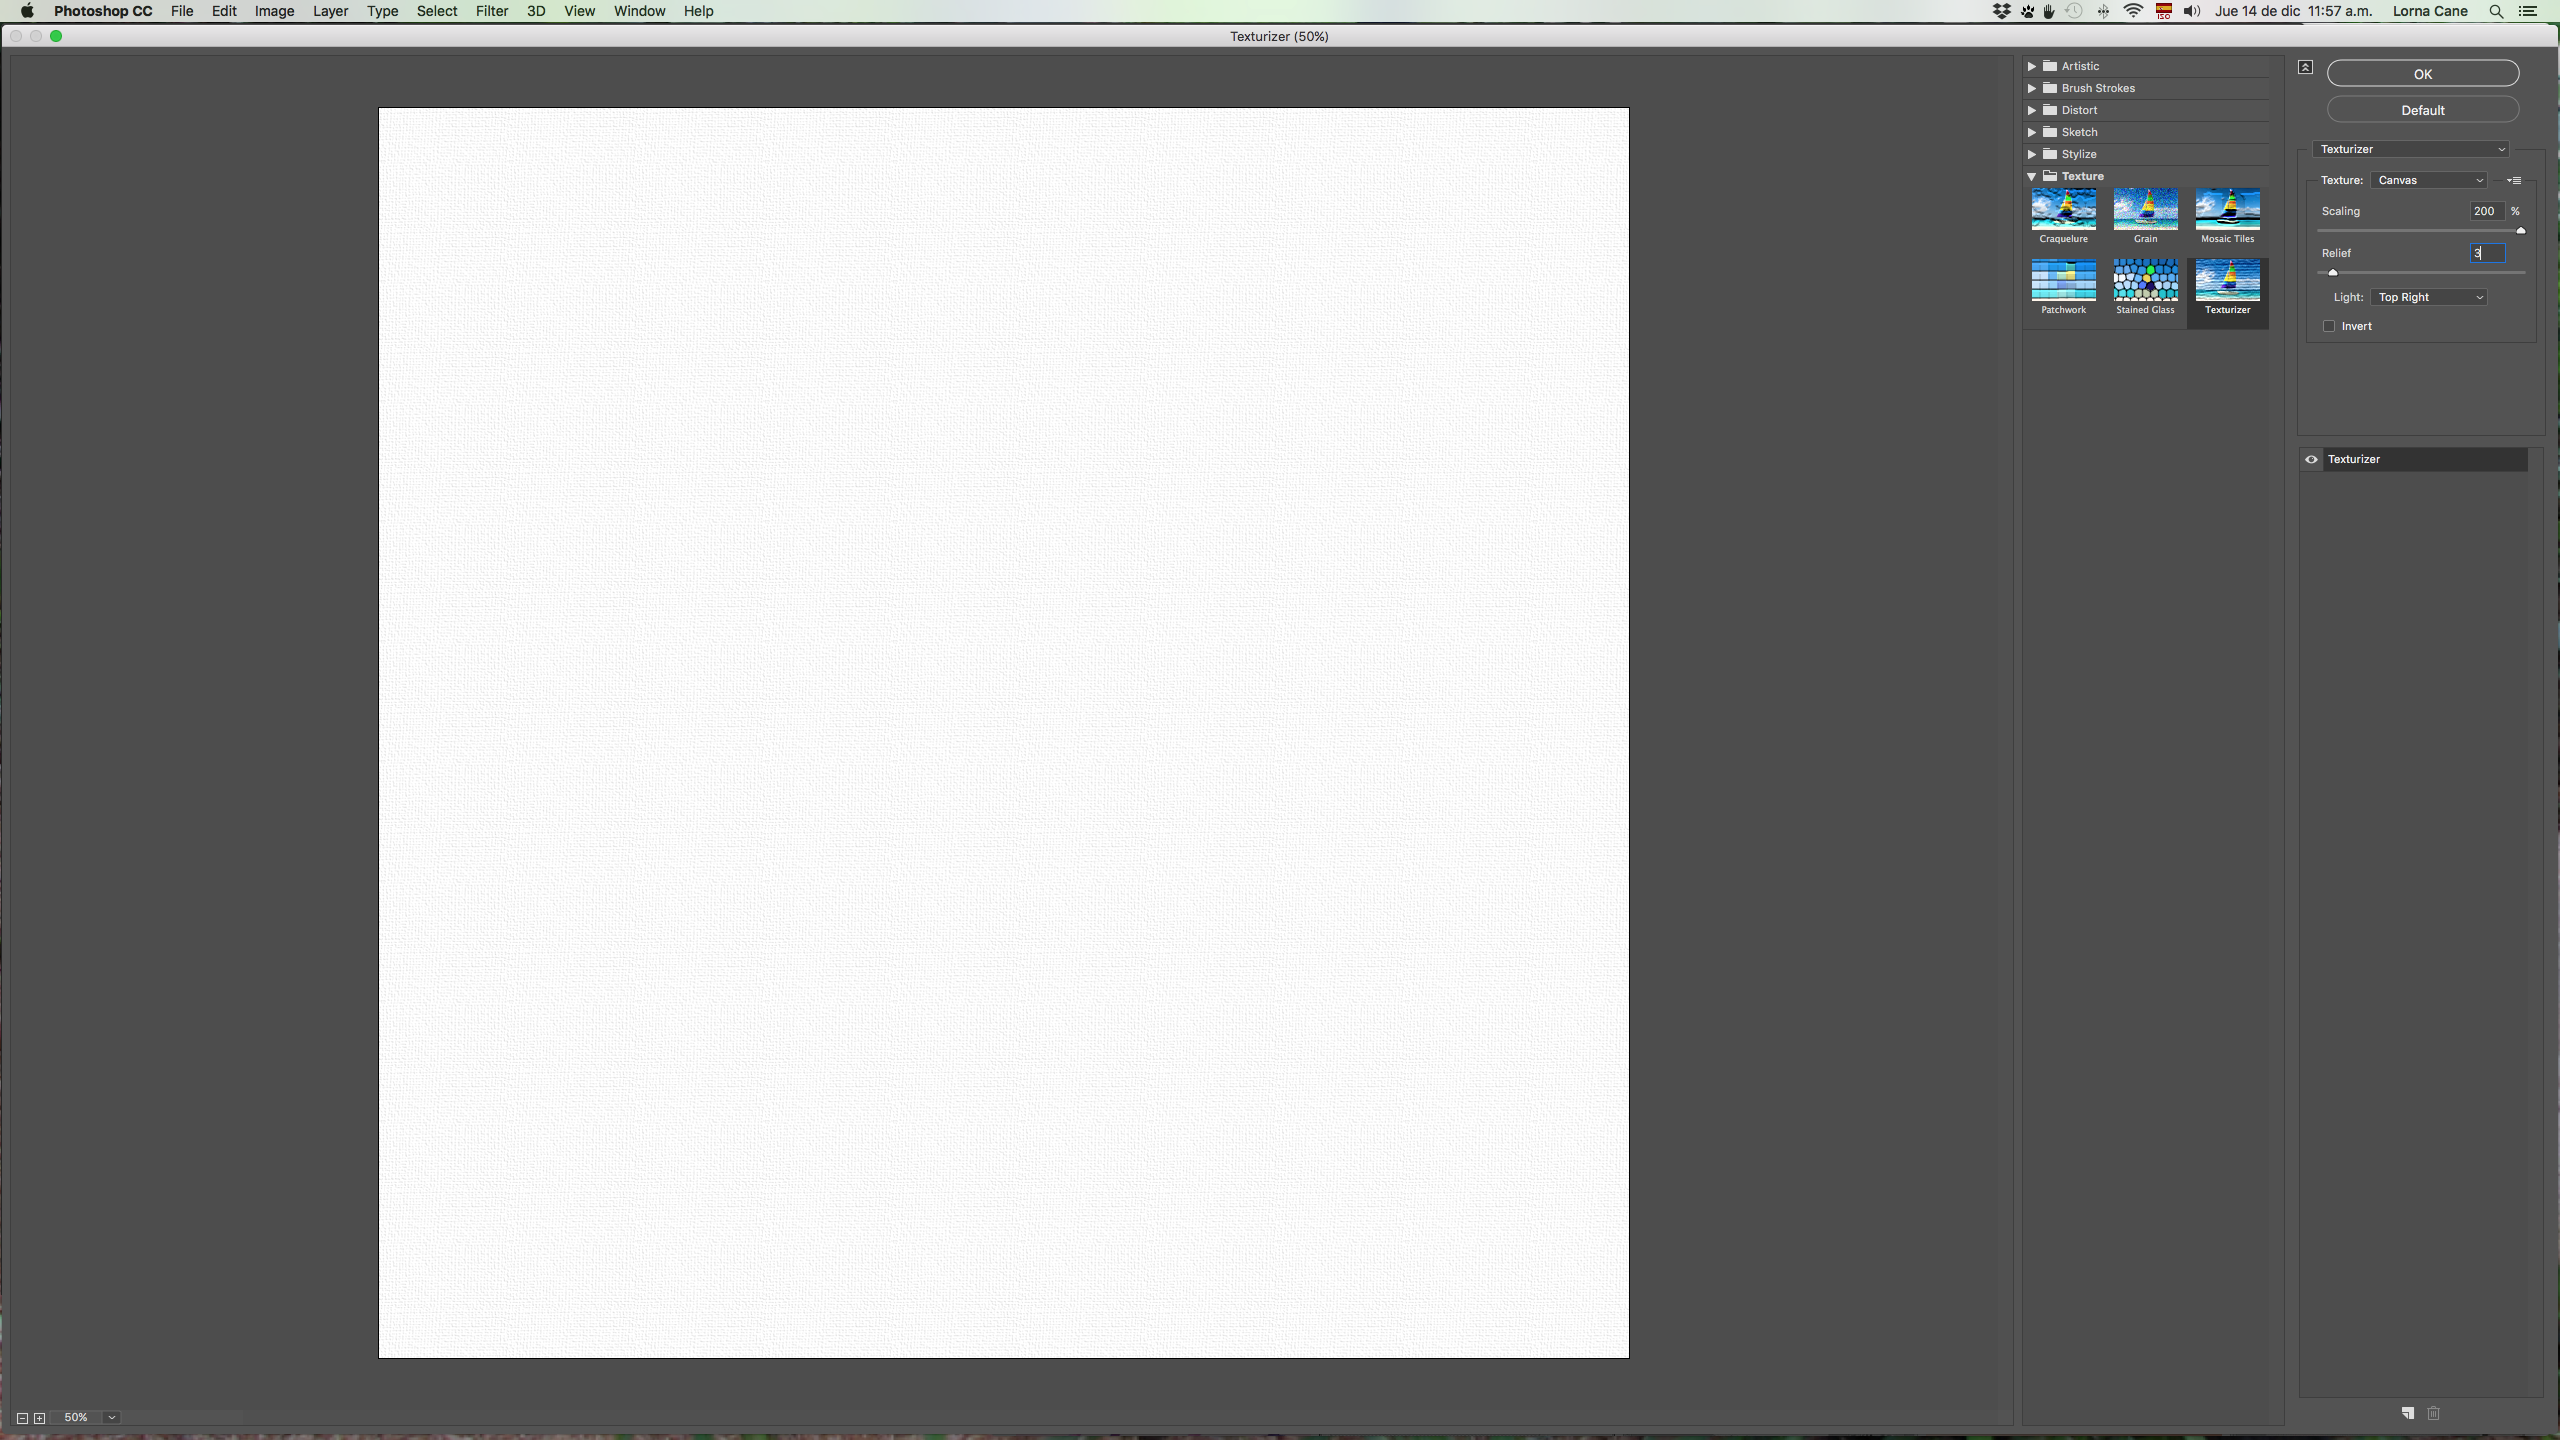
10 - Double-click on your “Background” to make it editable (a pop-up will appear, click “OK”) and go to Filter > Filter Gallery > Texturizer, and apply the following values.
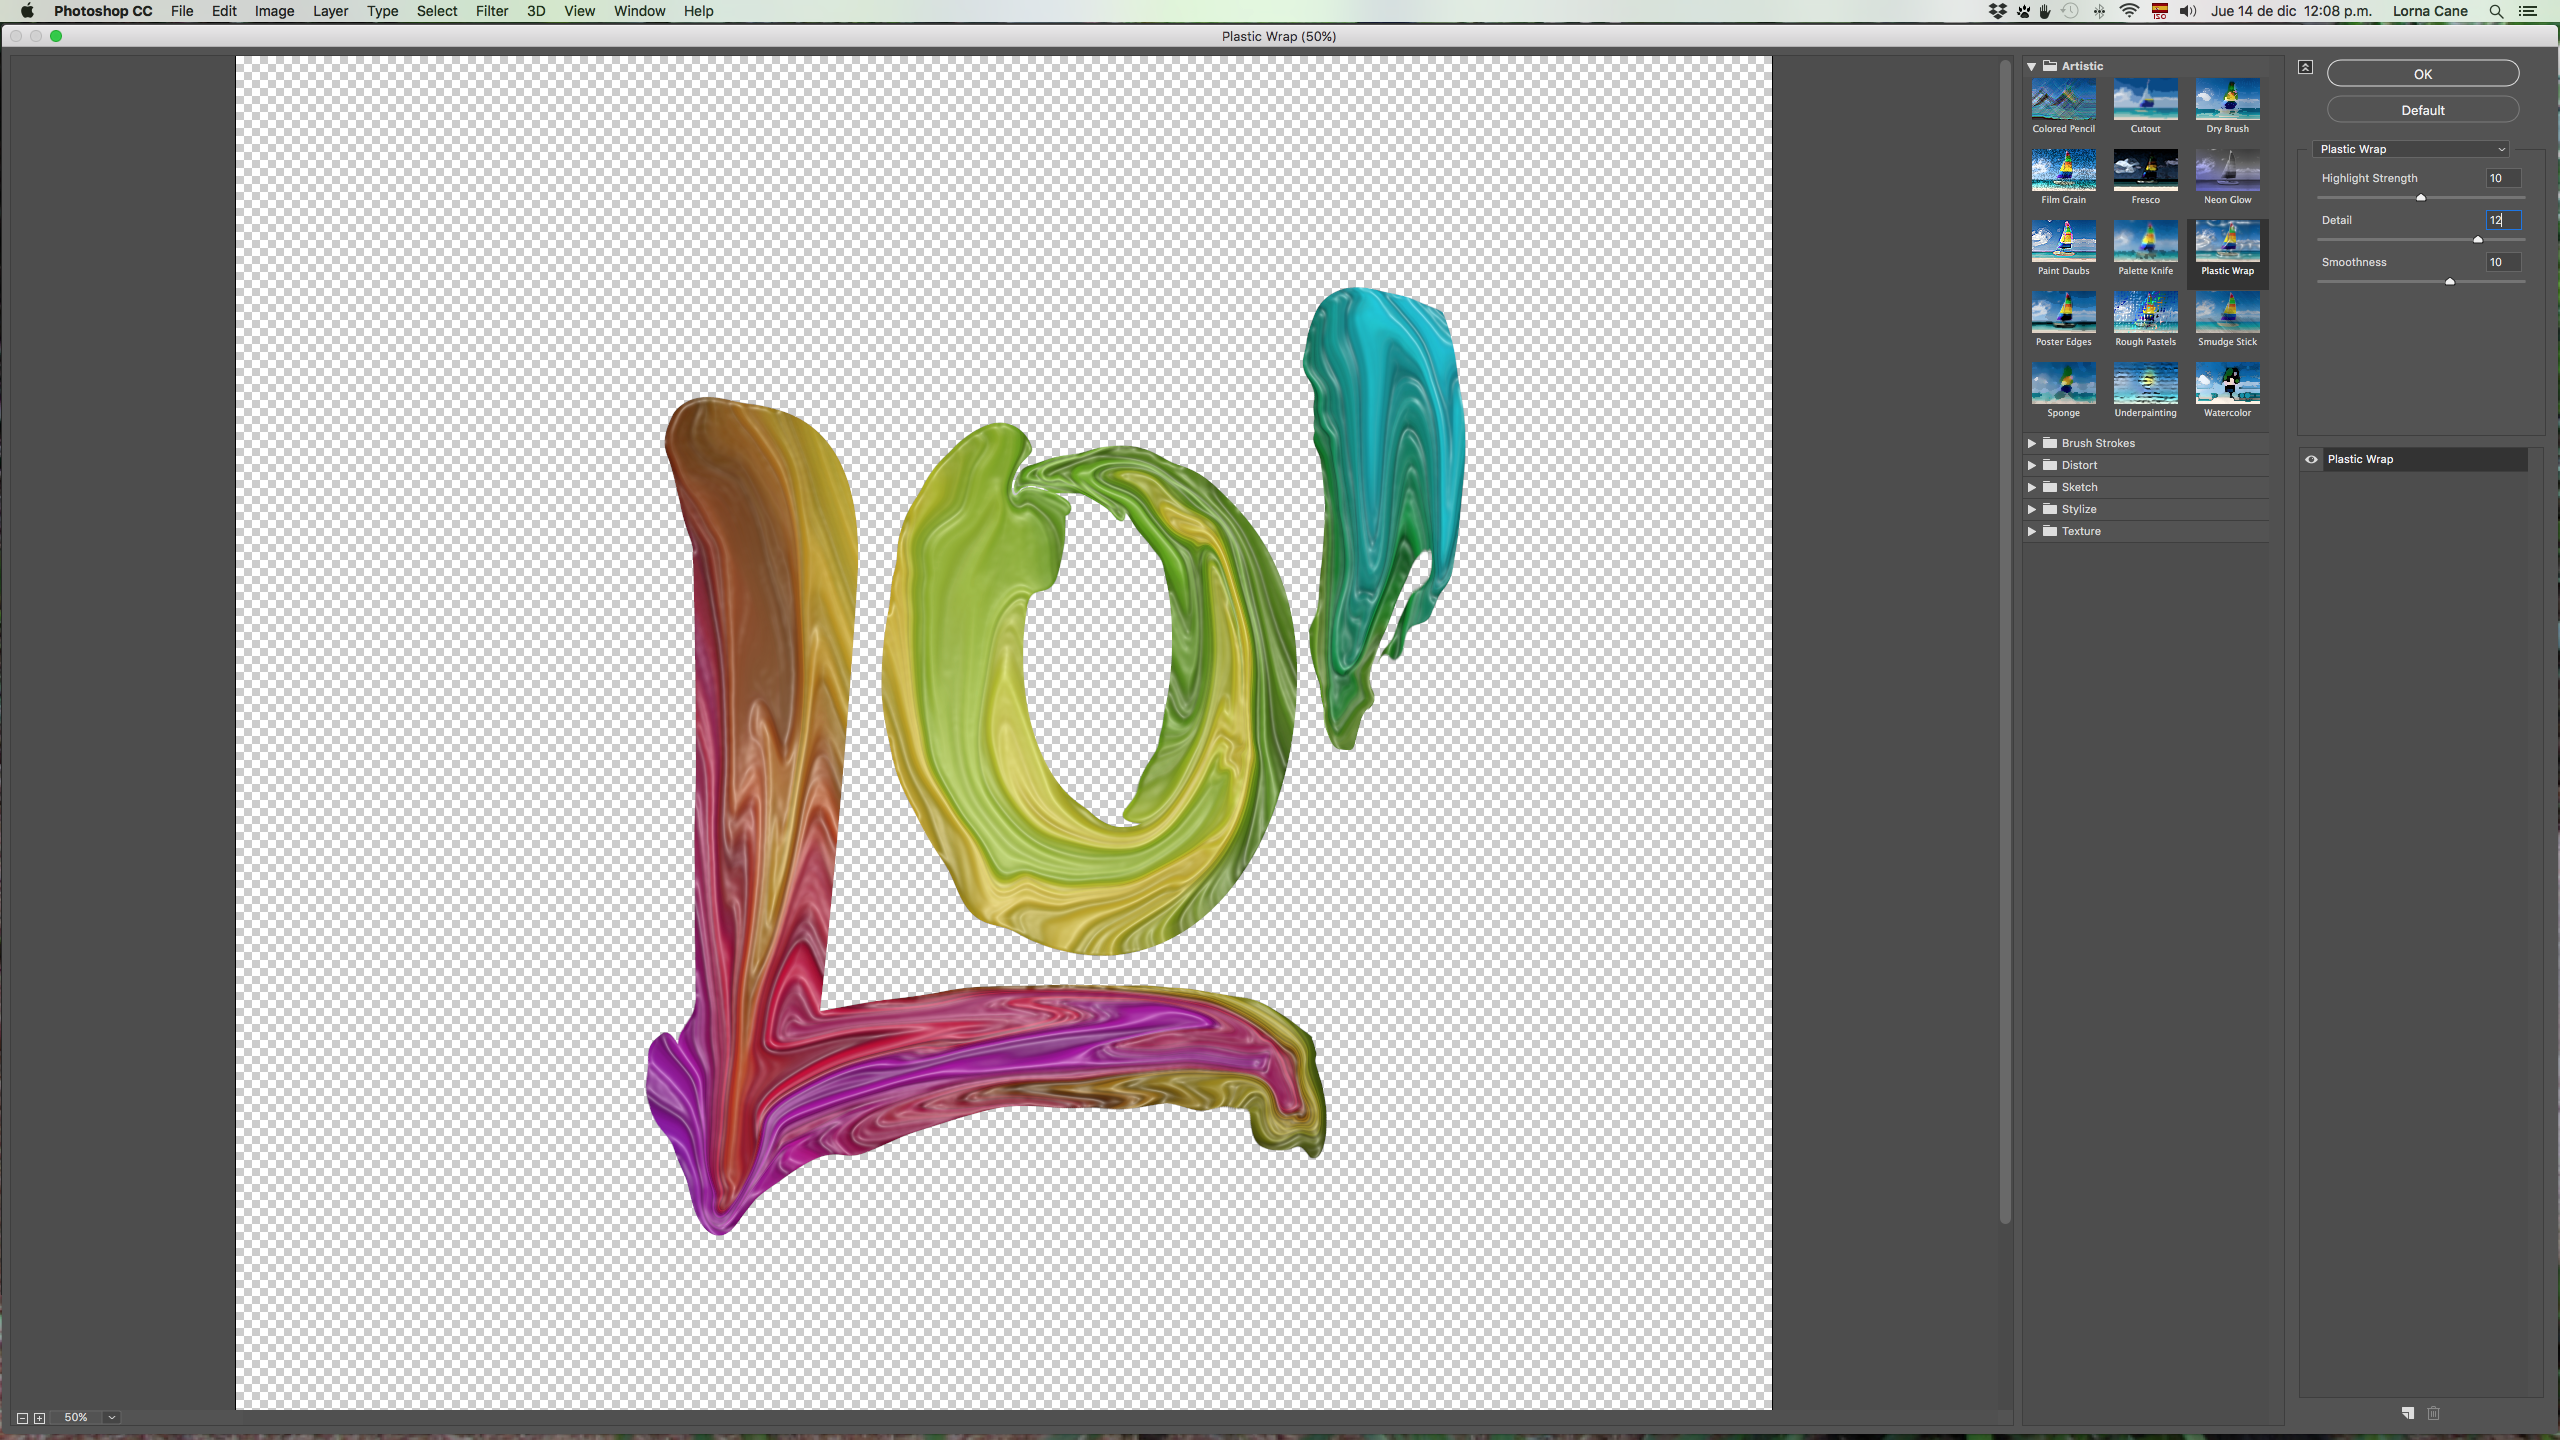
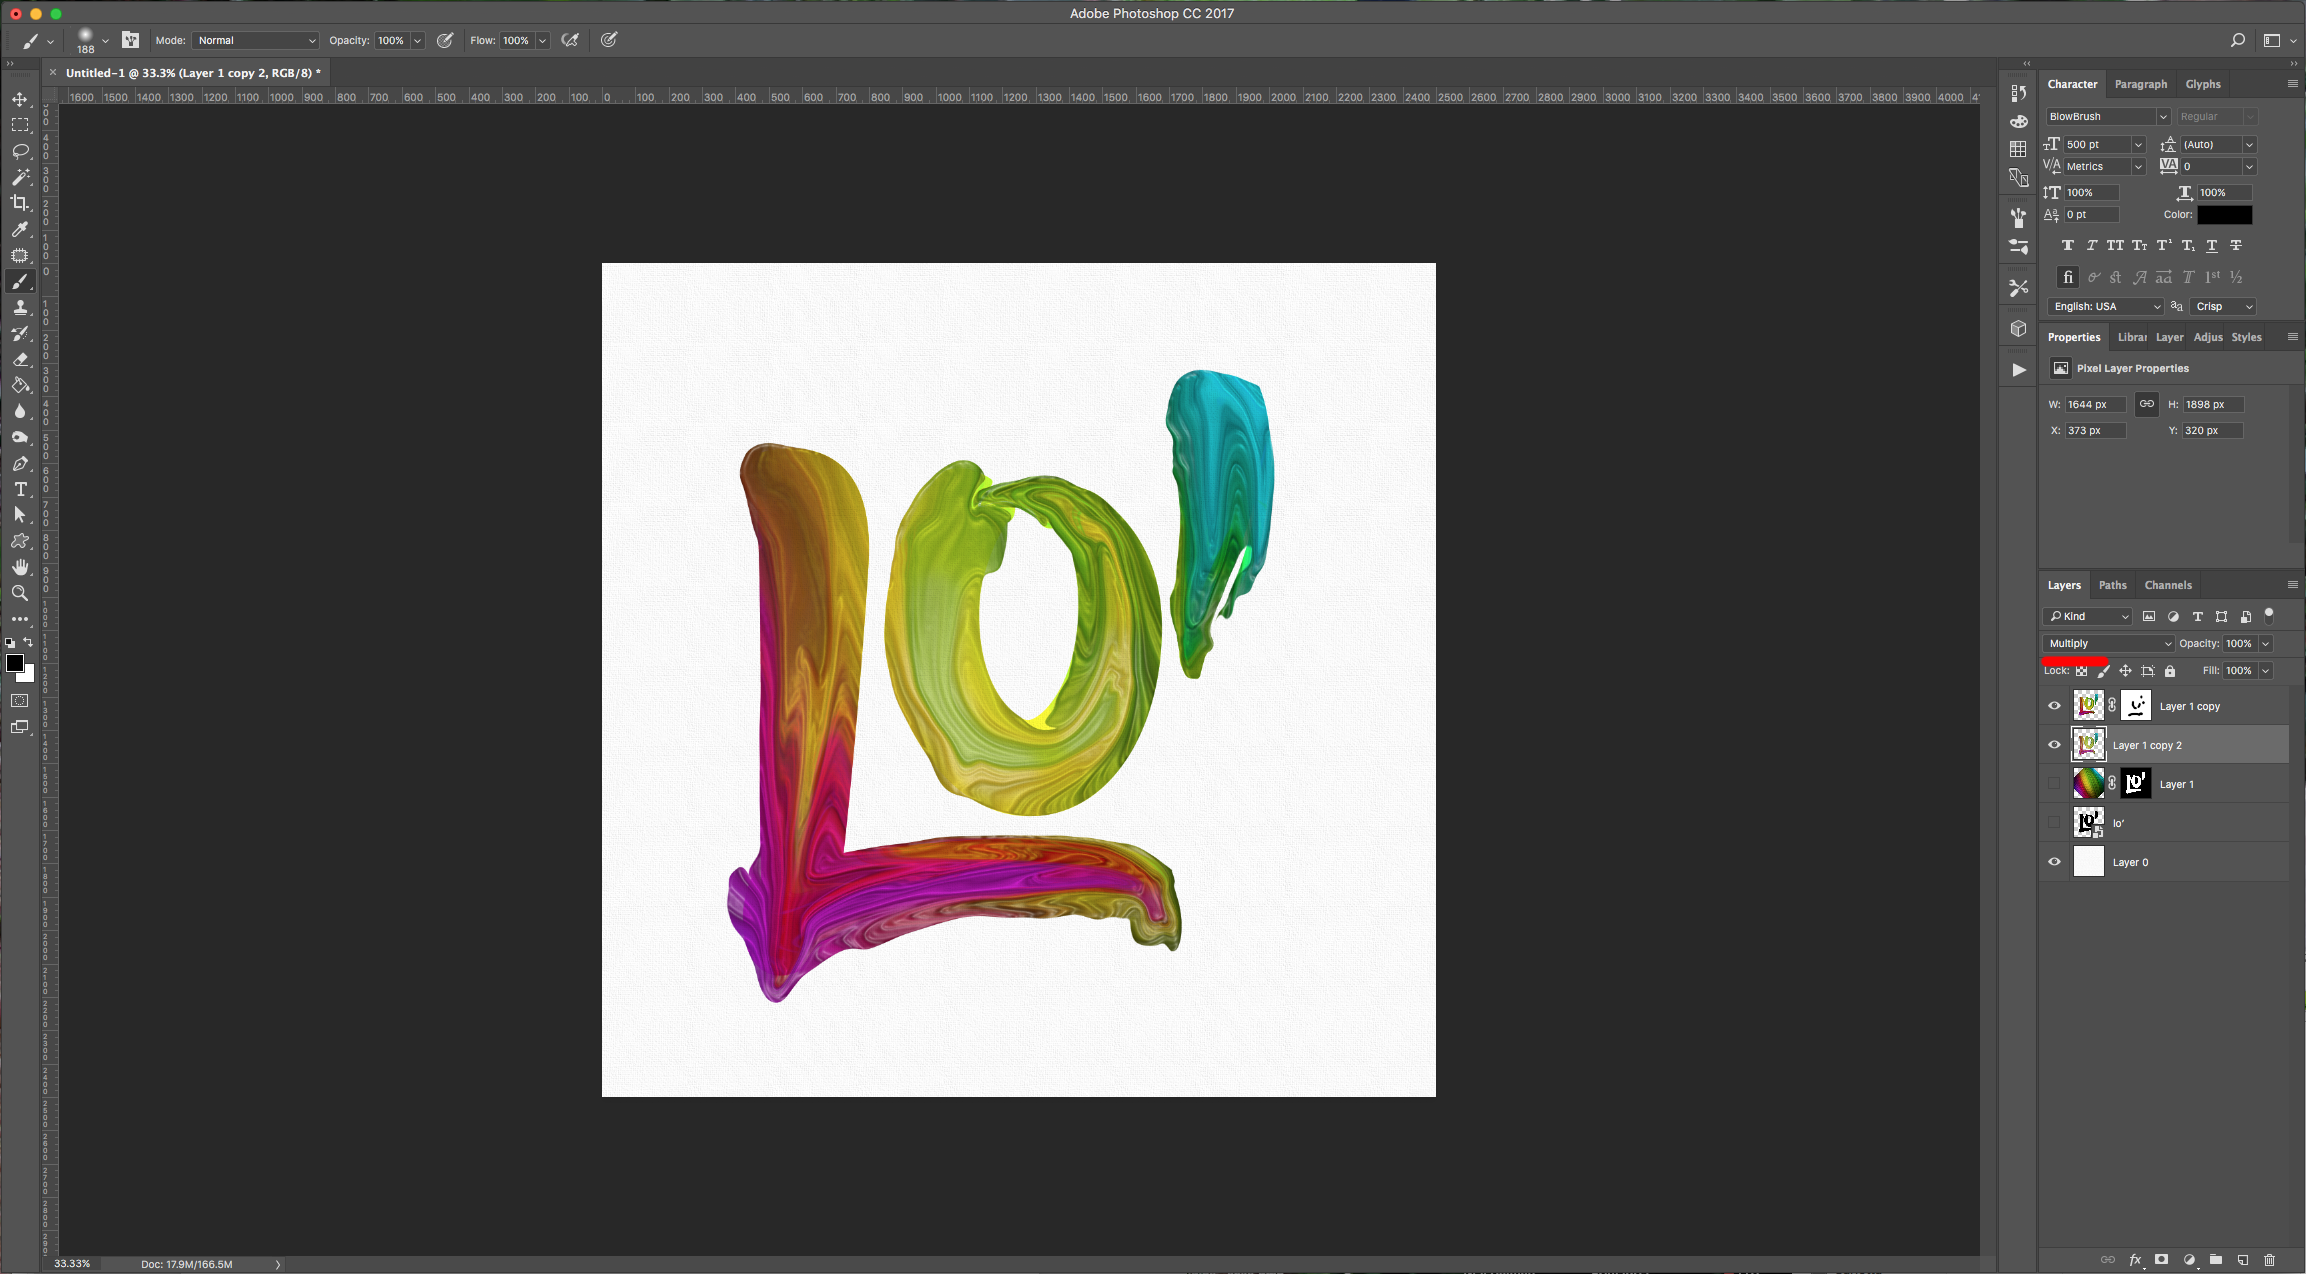
11 - Apply the following filter (Plastic Wrap) to your second layer and then turn the “Blending Mode” to “Multiply”:
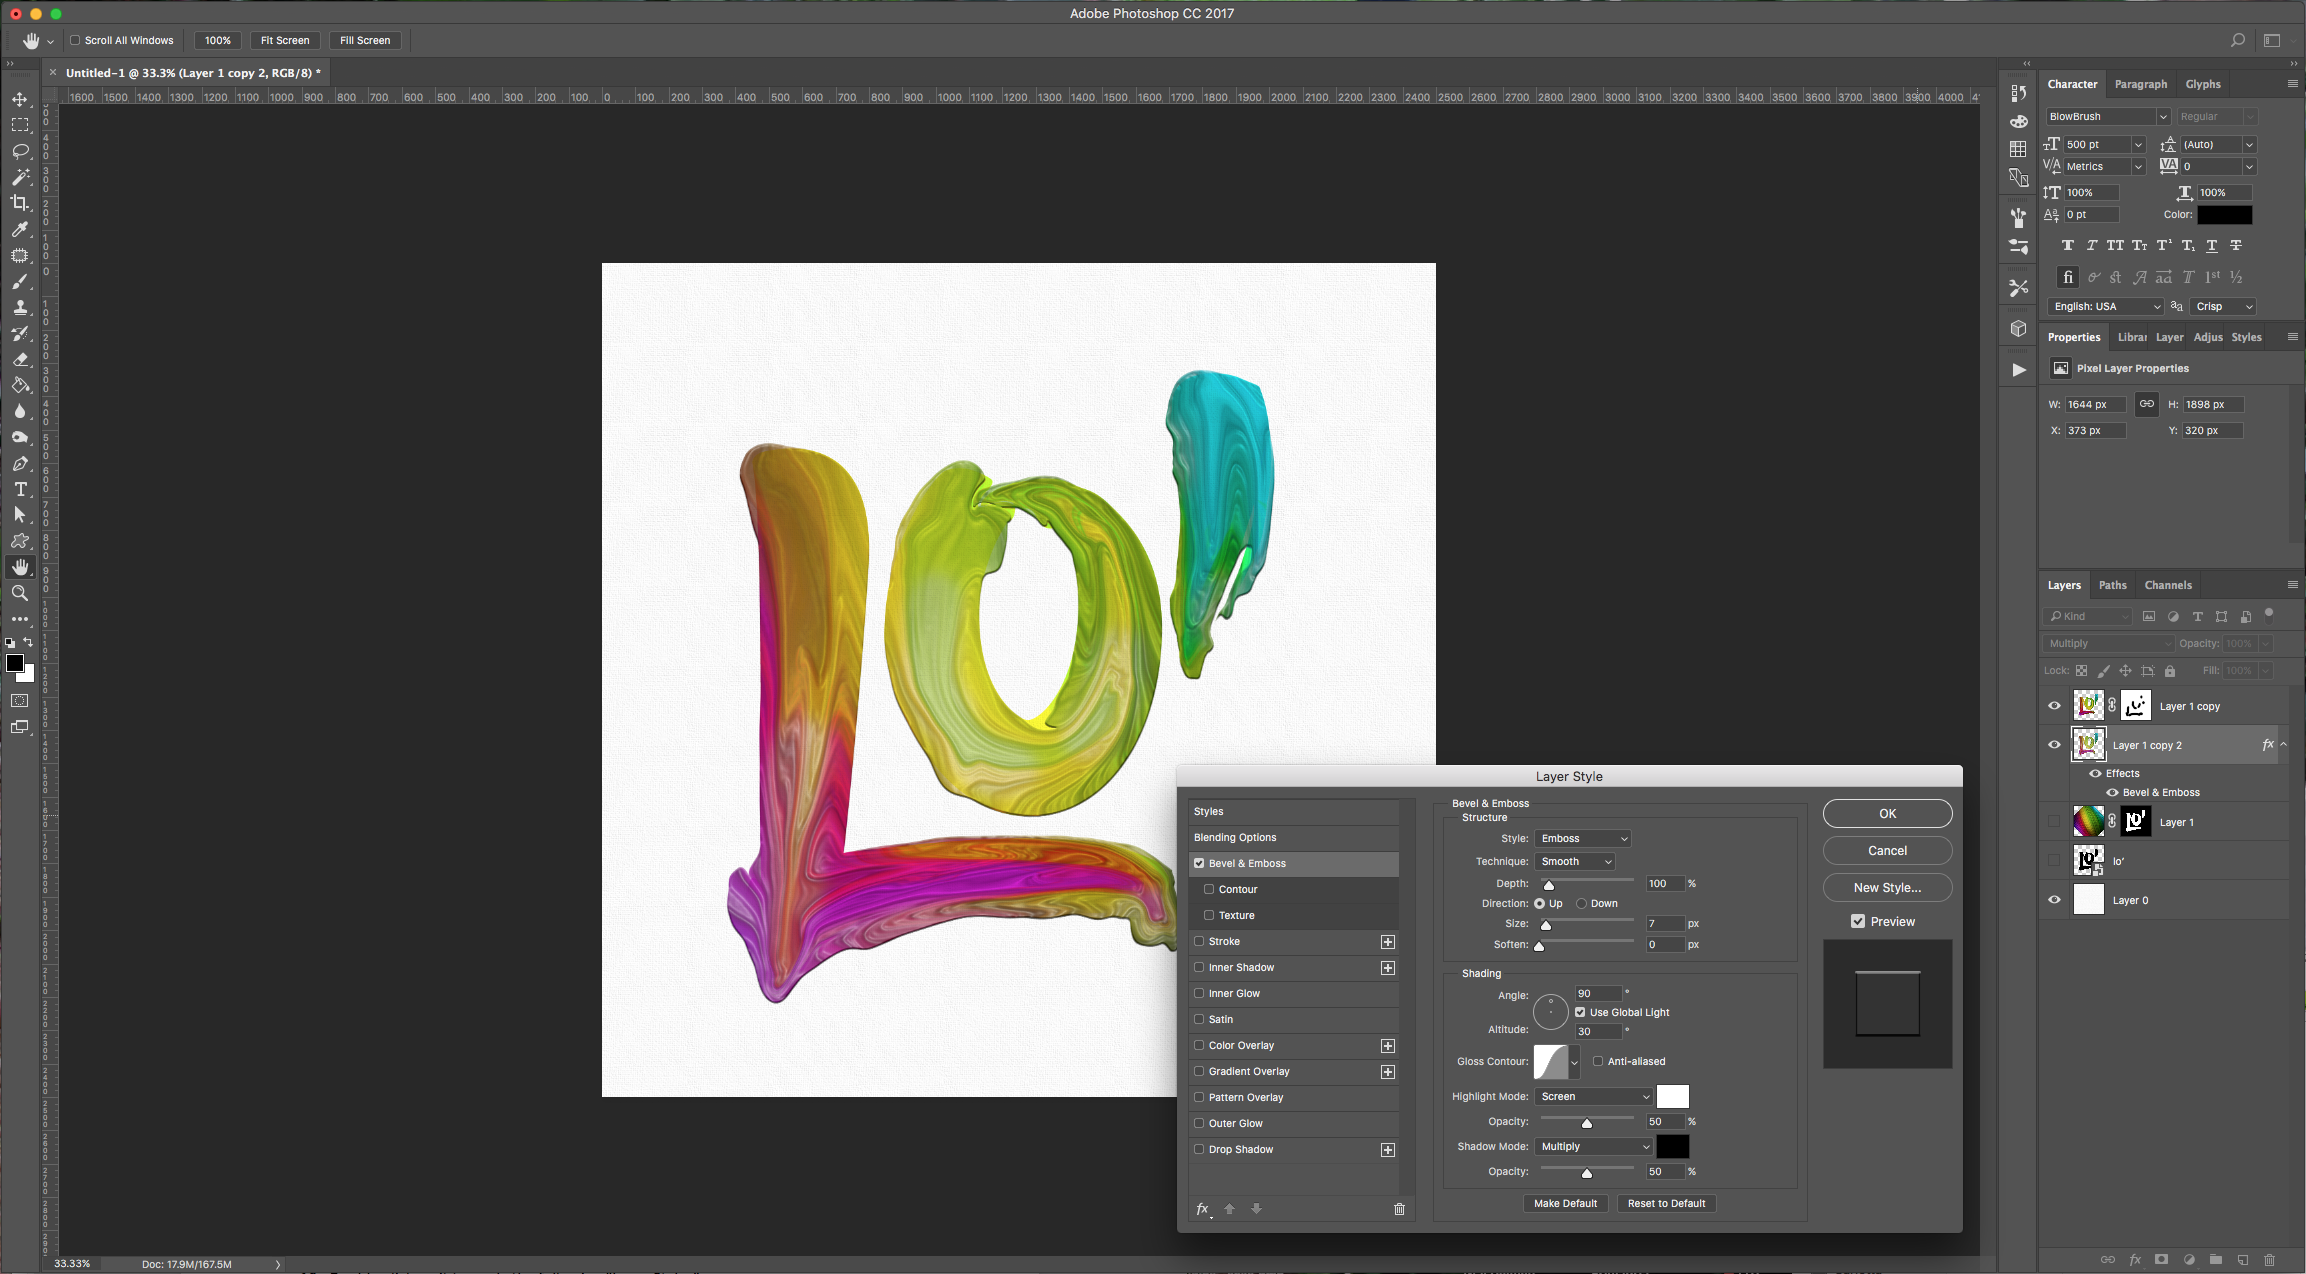
12 - Double-click on it to apply the following “Layer Styles”:
Bevel & Emboss:
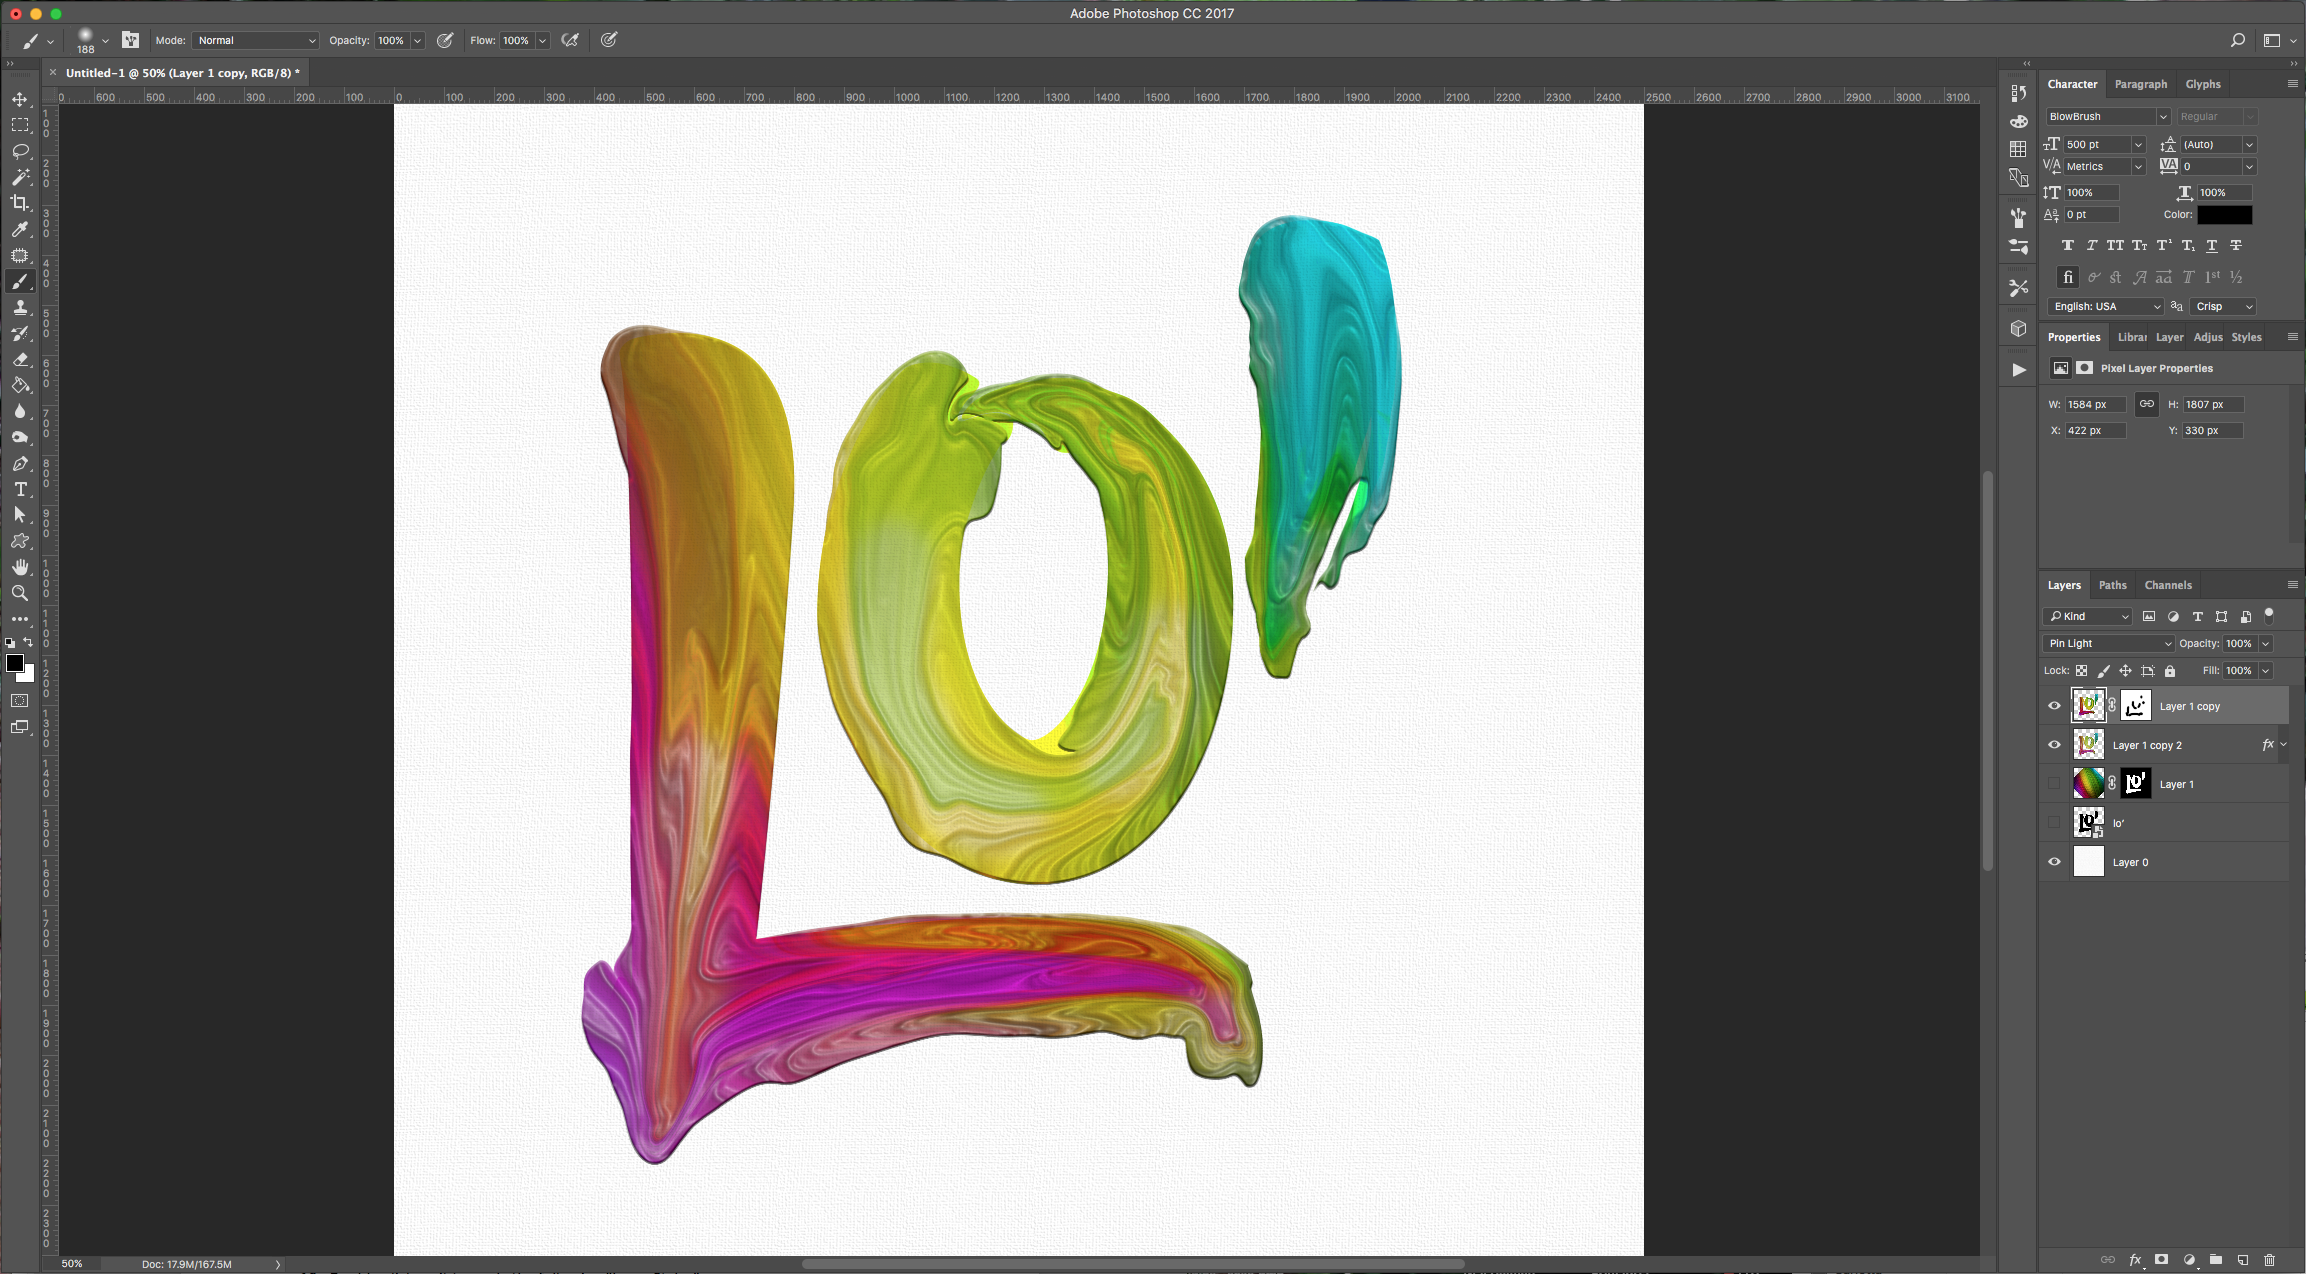
13 - Your text should look like this:
1 - In Photoshop, create a New Document. Select the “Type Tool” (T), choose your font (we used Blowbrush), size and for now, use black as “Fill” color.
2 - Right-click on your text layer and convert it to a “Smart Object”.
3 - Open the image you want to use to color your text, select it (Command/Control + A), Copy (Command/Control + C) and then Paste (Command/Control + V) into your document.
4 - Click on your text layer thumbnail while holding the “Command/Control” key to make a selection of your text, then select the new layer and click the “Create Layer Mask” button at the bottom of the “Layers” menu.
5 - Hide your text layer by clicking on the small eye icon to the left of your layer thumbnail and then un-link the mask from the image layer by clicking on the chain icon between the image and mask thumbnails.
6 - Select the image thumbnail and choose your “Move Tool” (V). Now you can move your image around and/or Scale it, rotate it, etc. using the “Transform Tool” (Command/Control + T) to achieve a nice color combination. Now, you can link your “Layer Mask” back if you want. You can duplicate your layer (Command/Control + J) and hide it so you can use it in case you need it.
7 - Select the “Layer Mask”, right-click on it and “Apply Layer Mask”.
8 - Go to Filter > Liquify (Shift + Command/Control + X), and apply values similar to this:
Forward Warp Tool (W): The size of the brush depends on the thickness of your letters since it needs to be of a similar one. You will need to adjust it in the different portions of the letters that have a different with. The idea is to give it a look of “Paint”. Duplicate your layer and go back to Liquify to make some “Drips” and give the idea of “Brush Strokes”.
9 - Move your second layer (the one with the “Drips”) under the first one and change the “Blending Mode” of the one on top to “Pin Light”. Create a “Layer Mask2 of your top layer and “Fix” some of the overlapping paint by erasing some of the top layer. Use the “Brush Tool” (B) making sure that you have black as your “Foreground” color.
10 - Double-click on your “Background” to make it editable (a pop-up will appear, click “OK”) and go to Filter > Filter Gallery > Texturizer, and apply the following values.
11 - Apply the following filter (Plastic Wrap) to your second layer and then turn the “Blending Mode” to “Multiply”:
12 - Double-click on it to apply the following “Layer Styles”:
Bevel & Emboss:
13 - Your text should look like this:


