


By Design Bundles
Cricut Tutorials4 min
Foiling on leather with cricut design space
1- Open cricut design space. Click new project.
2- Type your text.
3- Select your font. I am using Garlic Butter by Missy Meyer Fonts.
4- With the text selected, change the line type from cut to draw.
5- Click attach. Click make it.
6- Move the text to where you want it on your mat. Click continue.
7- Set your dial to custom.
8- In the set material custom screen, browse all materials.
9- Search leather. Select the type of leather you are foiling on. I am using real leather.
10- Make sure that your leather is well secured on the mat. I use painters tape to ensure no movement. Place foil on top of your leather.
11- When Foiling on thick materials like leather you need to move the hard white rollers across to one side. These rollers can leave marks on your leather and other thick materials if left in place. Take the white rollers and carefully push them across to the right.
12- Make sure you have pushed all 4 rollers aside before foiling.
13- Make sure the foil quill is loaded and click go.
14- Carefully watch your foiling as you do not have the white rollers to hold the material in place. The tape should keep it in place fine though.
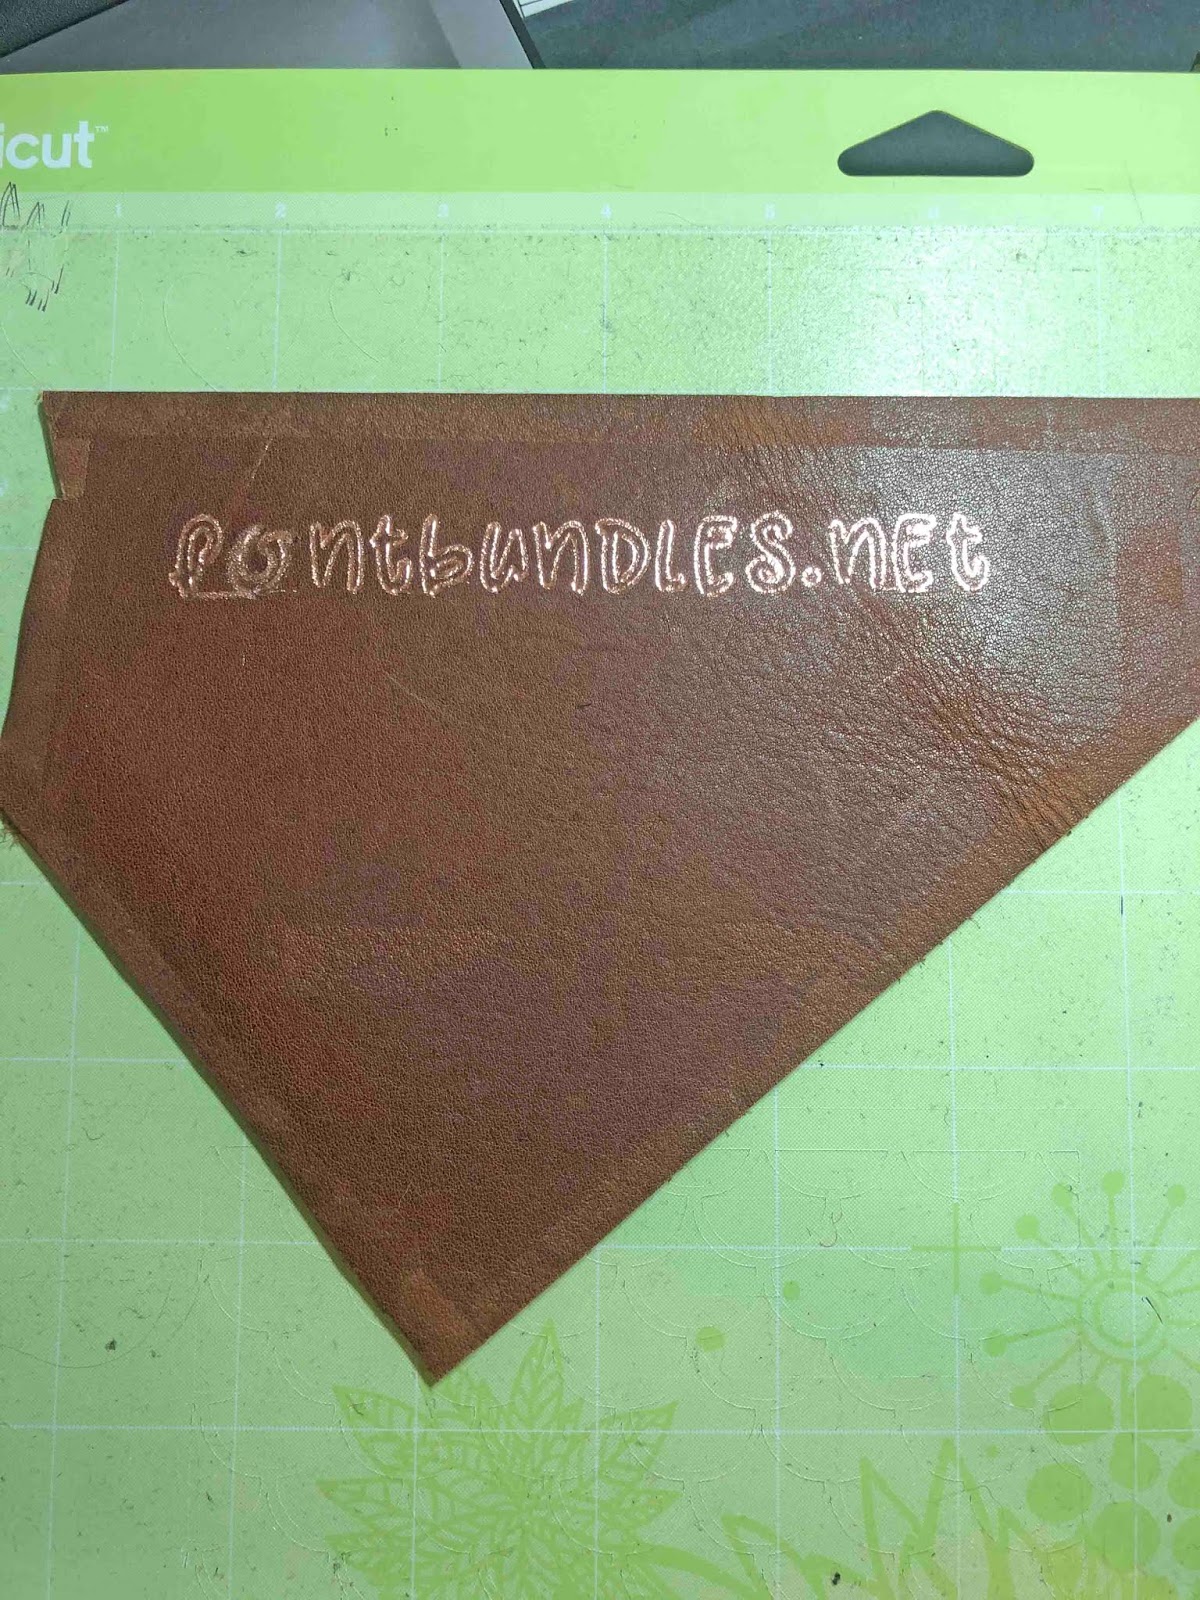
15- Your leather is foiled.
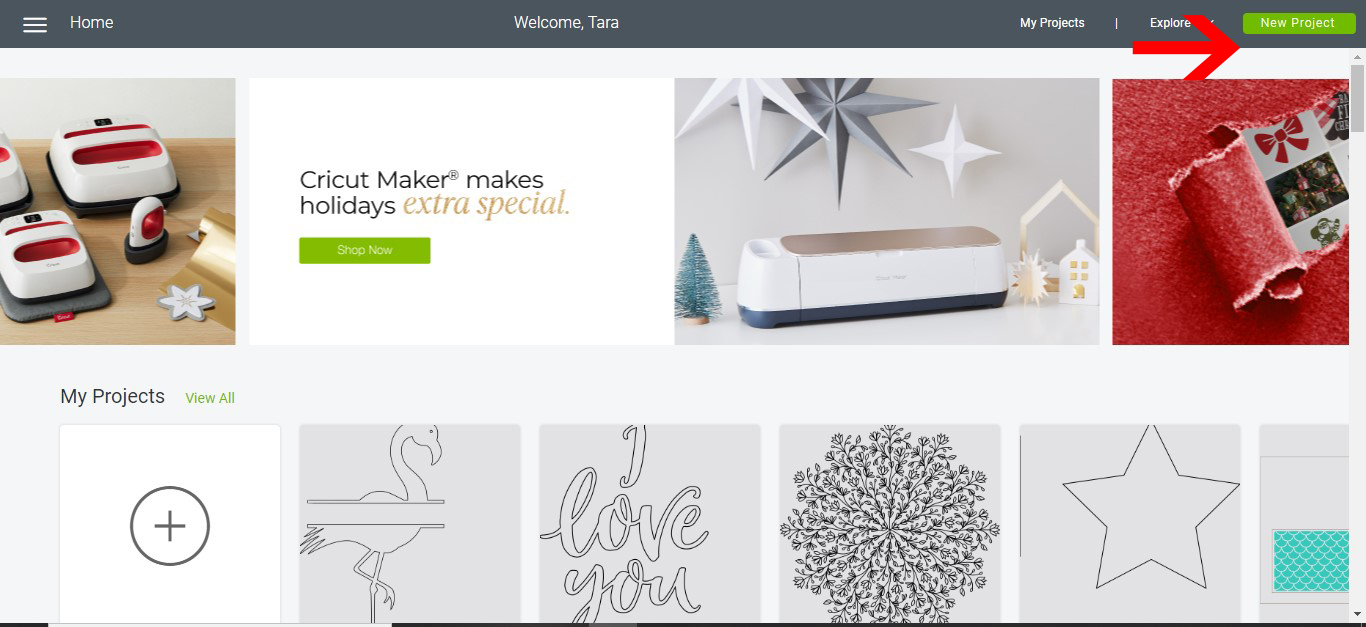
2- Type your text.
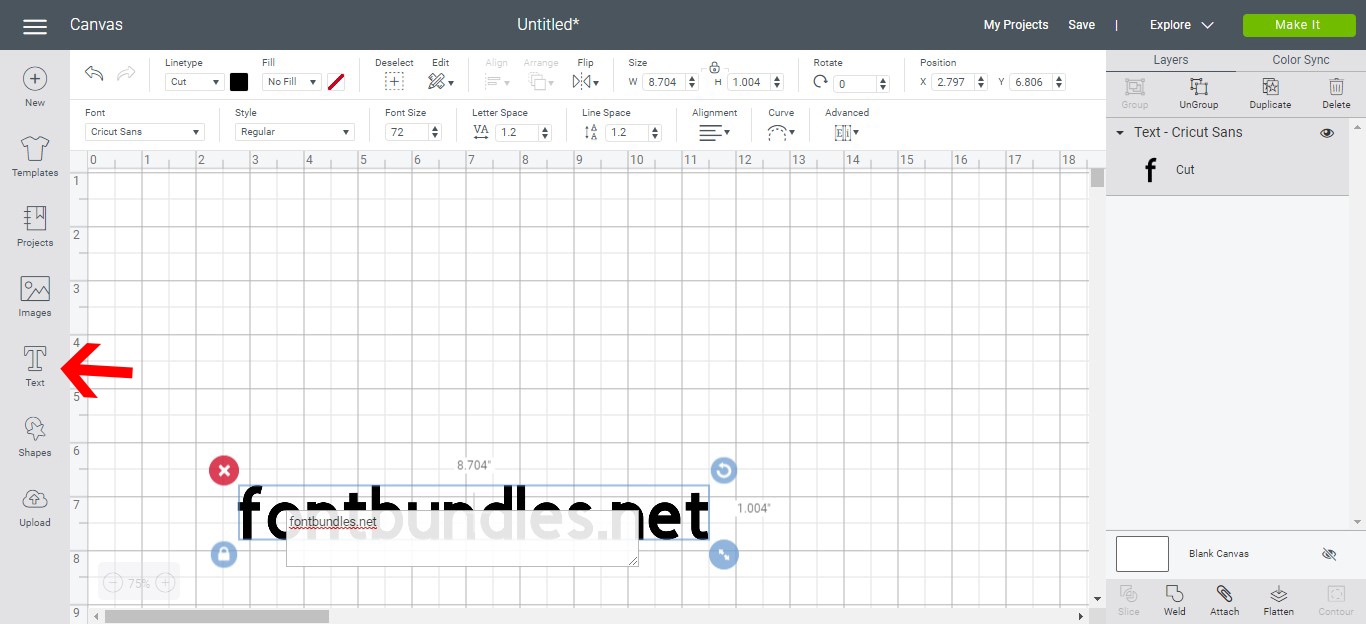
3- Select your font. I am using Garlic Butter by Missy Meyer Fonts.
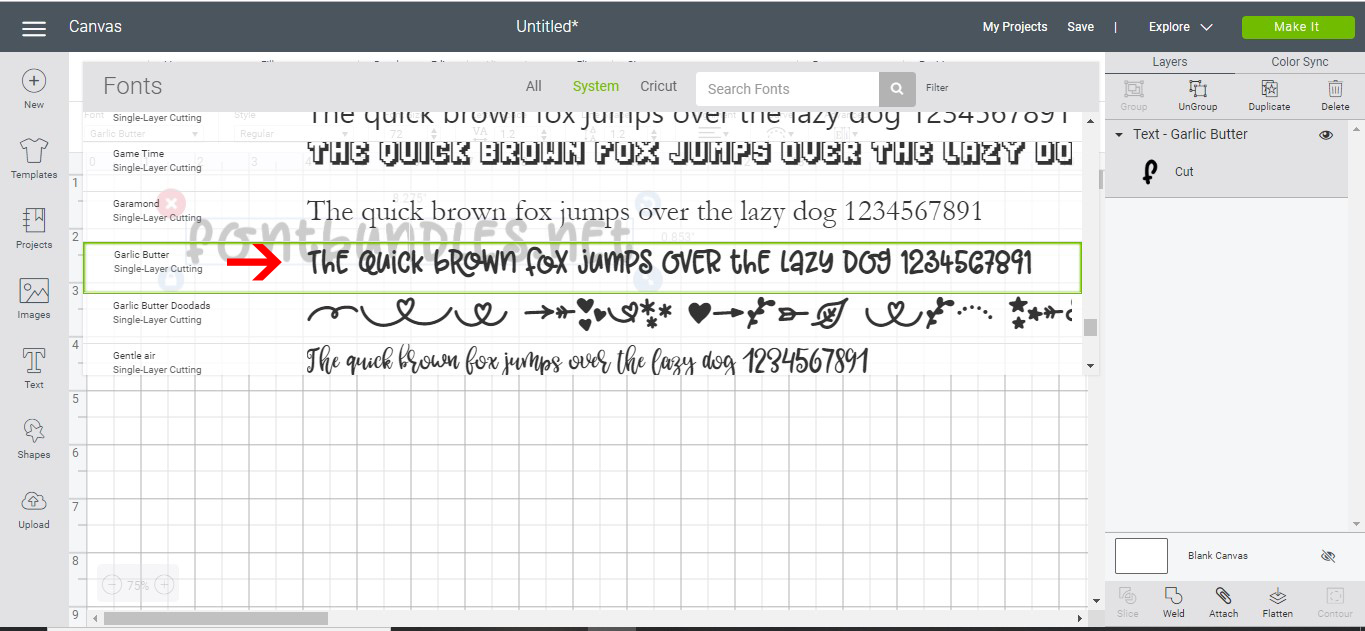
4- With the text selected, change the line type from cut to draw.

5- Click attach. Click make it.

6- Move the text to where you want it on your mat. Click continue.

7- Set your dial to custom.

8- In the set material custom screen, browse all materials.
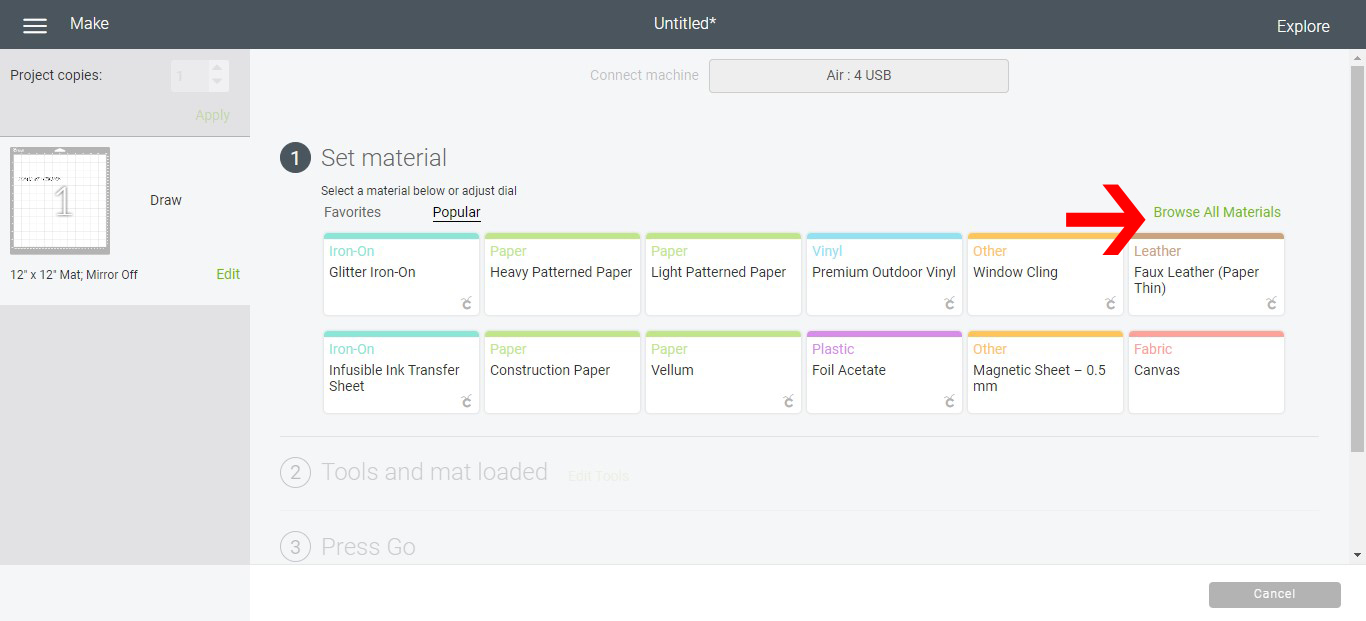
9- Search leather. Select the type of leather you are foiling on. I am using real leather.

10- Make sure that your leather is well secured on the mat. I use painters tape to ensure no movement. Place foil on top of your leather.
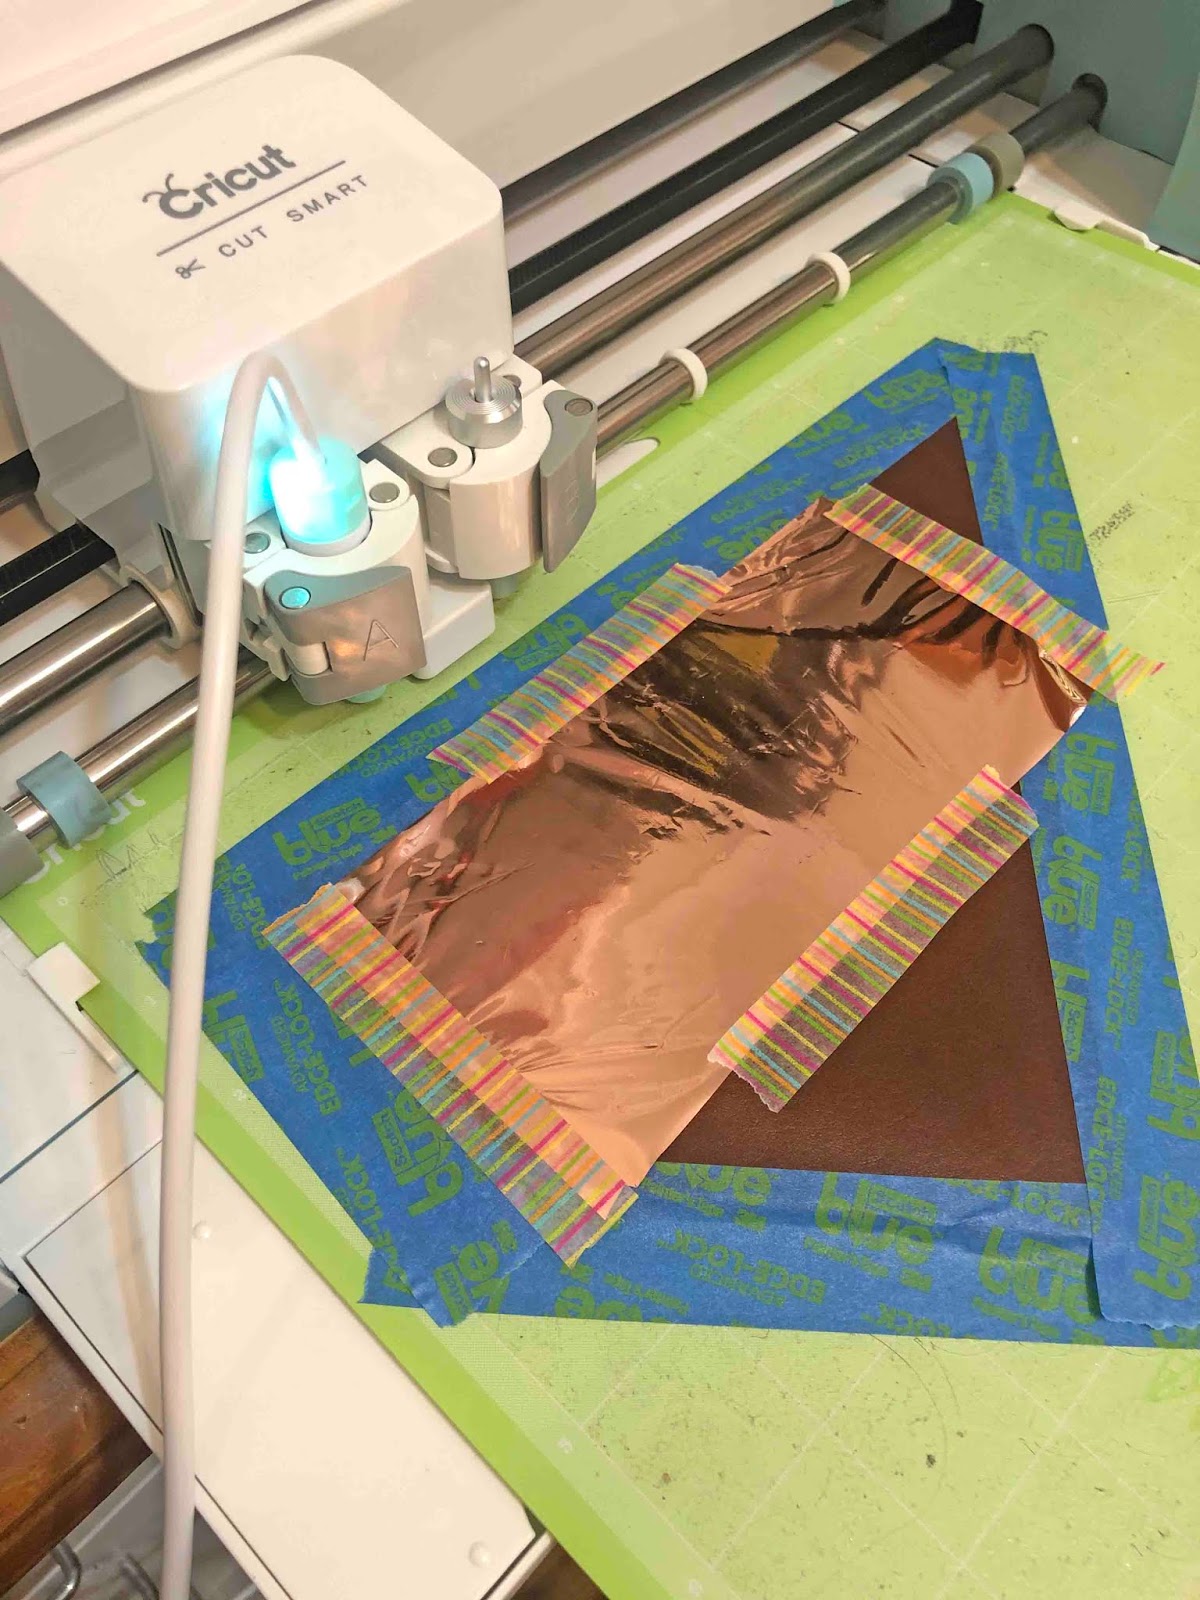
11- When Foiling on thick materials like leather you need to move the hard white rollers across to one side. These rollers can leave marks on your leather and other thick materials if left in place. Take the white rollers and carefully push them across to the right.

12- Make sure you have pushed all 4 rollers aside before foiling.

13- Make sure the foil quill is loaded and click go.

14- Carefully watch your foiling as you do not have the white rollers to hold the material in place. The tape should keep it in place fine though.

15- Your leather is foiled.
Related Tutorials
Cricut Tutorials
Foiling Accents on images in Cricut design space
Cricut Tutorials
Foiling on Vinyl with Cricut Design Space
Cricut Tutorials
How to thicken text for foiling using Inkscape and Cricut design space
Learn to thicken text for foiling using Inkscape and Cricut Design Space.
Cricut Tutorials
How to Use Font Glyphs in Cricut Design Space on iPad
Learn how to use Font Glyphs on iPad with Cricut today! Transform your text designs in a few steps.
Cricut Tutorials
How to Fill a Shape in Cricut Design Space for Foiling
Learn how to fill a shape design for foiling in Cricut Design Space.
Cricut Tutorials


