How to Create a Floral Logo in Affinity Designer
Elements created in Affinity Designer are great for Floral Logos. Logos can be created with simple shapes and the Boolean Operations. You can create just about any design you can imagine. In our tutorial we will show you how to create a simple floral logo in Affinity Designer.
In this tutorial we are using a bold handwriting font called All Things New, but you can use any clean font available on Font Bundles. Open Affinity Designer and click New Document. Adjust your page settings and click Create.
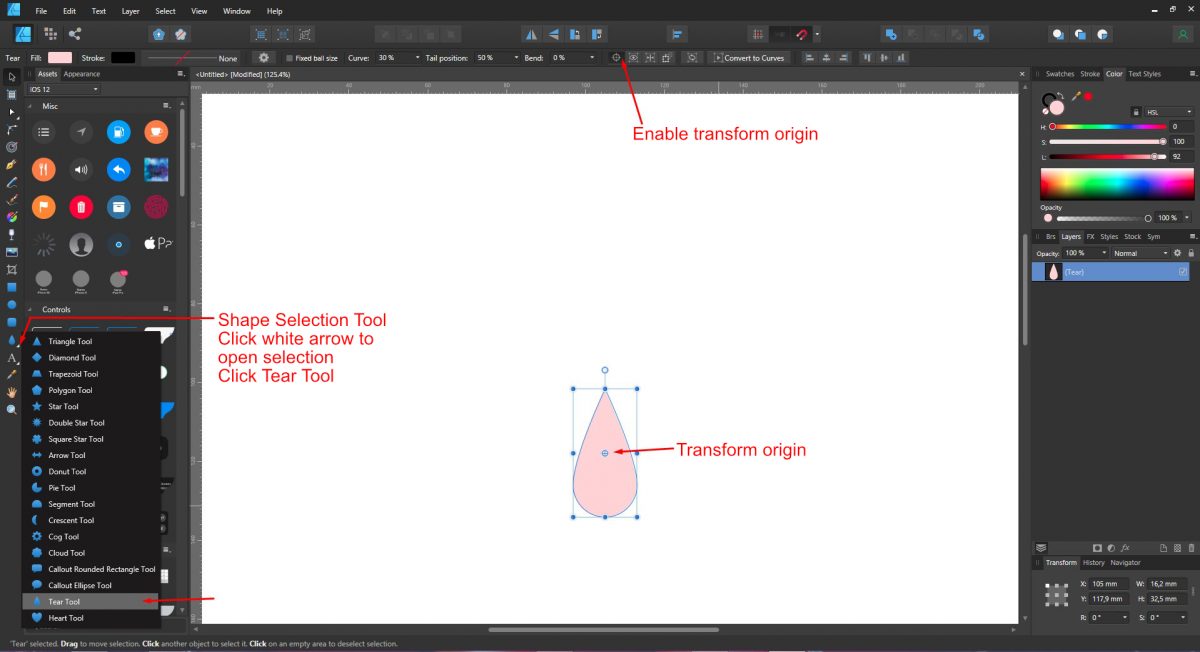
Affinity Designer has a great selection of shape tools. The Tear Tool will be used to create the flower petal. On the left side panel click on the Shape Selection tool and select the Tear Tool. Draw out the shape as shown in the image below. Adjust the size of the shape if needed.
Click on Enable transform origin at the top. This will make the origin point visible.
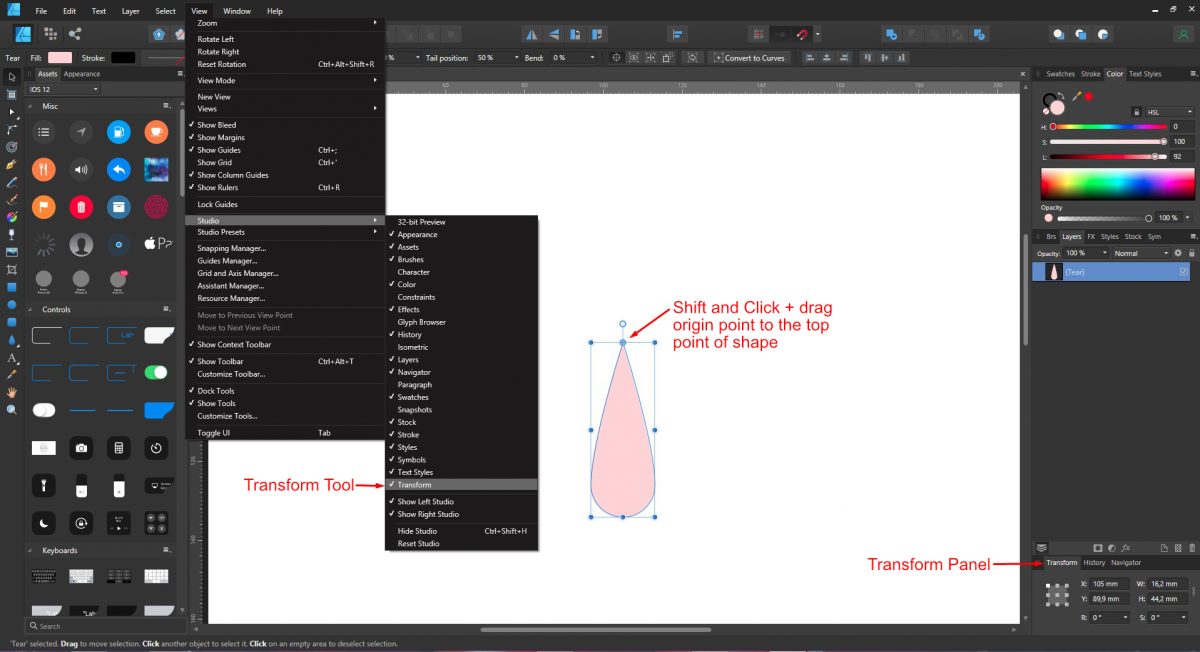
Shift and Click + drag the origin point to the top point of the shape. Press Ctrl + J to duplicate the shape. We will be using the Transform panel next. If not visible on the bottom right, click View at the top, select Studio and then Transform.
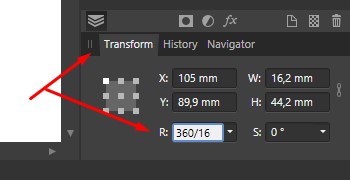
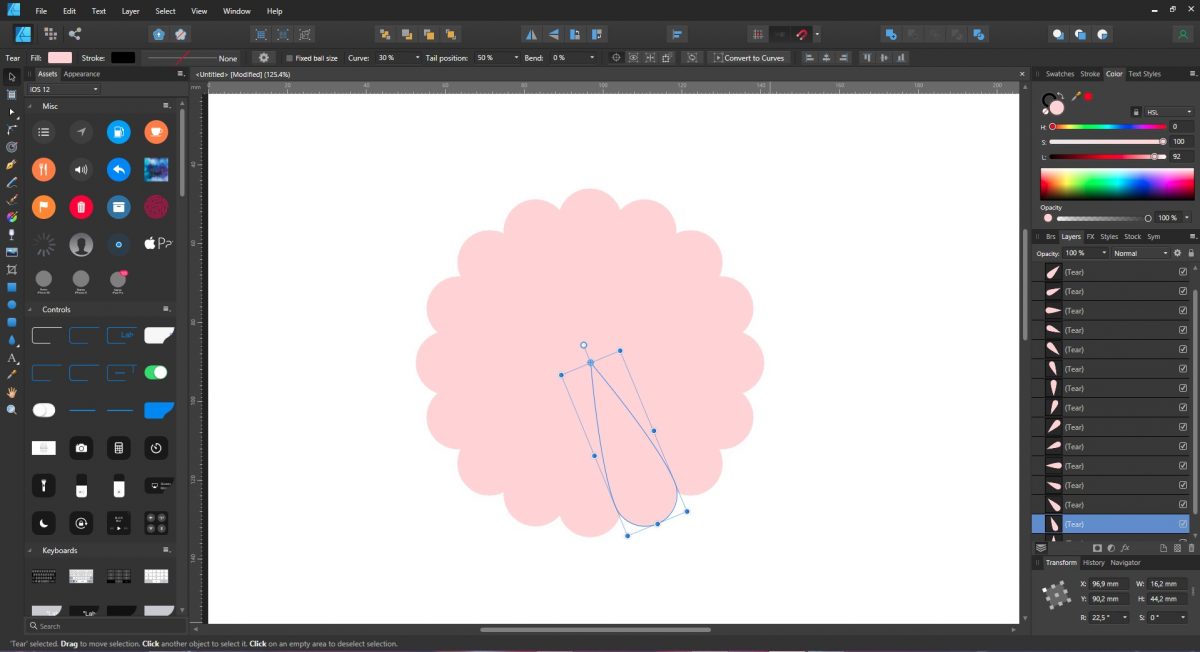
With the duplicate selected go to the Transform panel bottom right and next to R (Rotation) type in 360/16. Press Enter. There will be 16 petals around a 360° angle. The duplicate will be moved to a 22.5° angle. Press Ctrl + J another 14 more times. Affinity Designer will equally space out the petals.
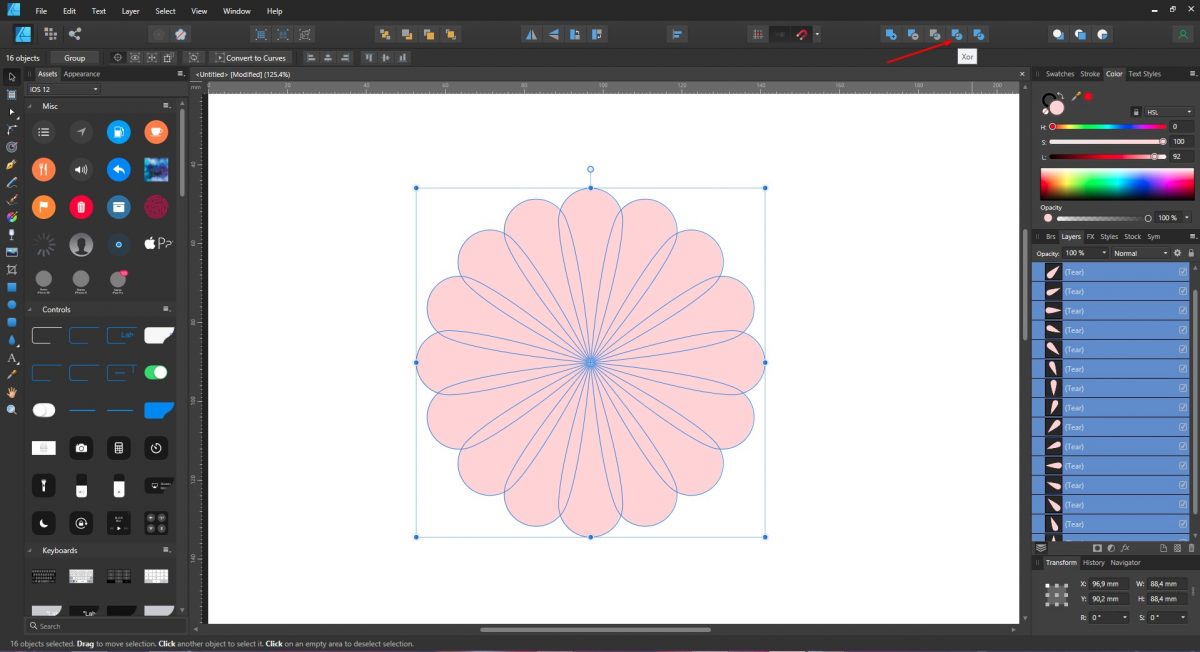
The Boolean Operations are at the top of the screen. The Xor action will cut out overlapping parts and combine as one object. Click + drag a selection box around all of the petals. At the top of the screen click Xor as shown in the image below.
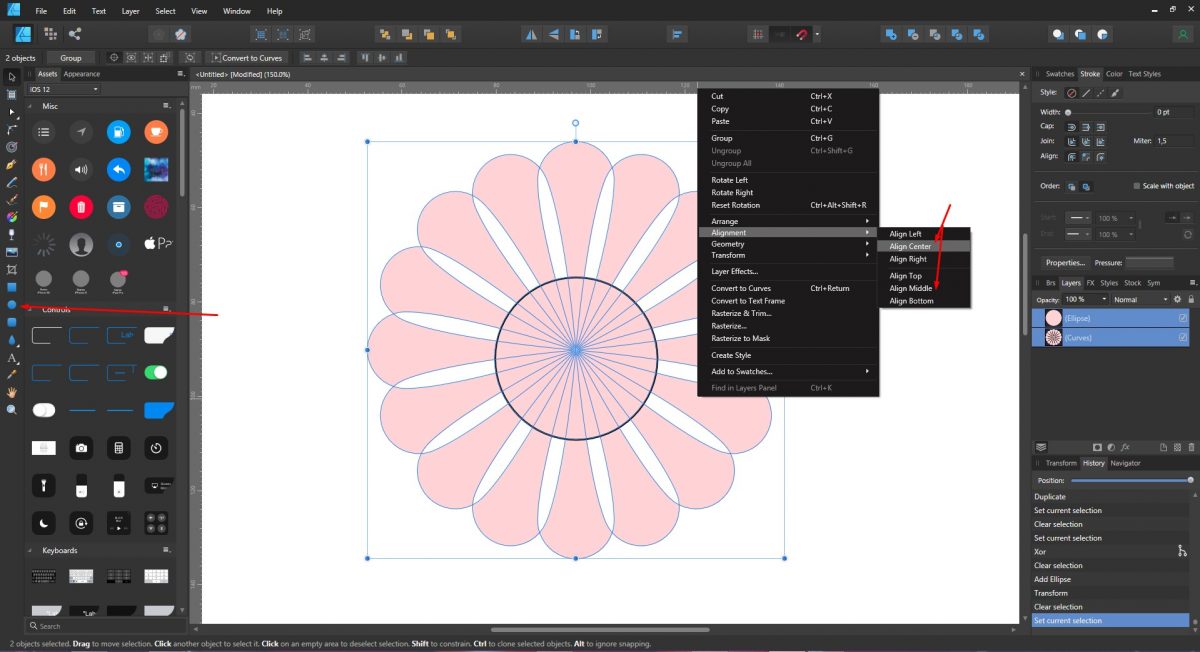
Click on the Ellipse tool on the left side panel and draw out a circle. Select both the curve shape and Ellipse. Right click and choose Alignment, and then Align Center. Right click again, Alignment and choose Align Middle.
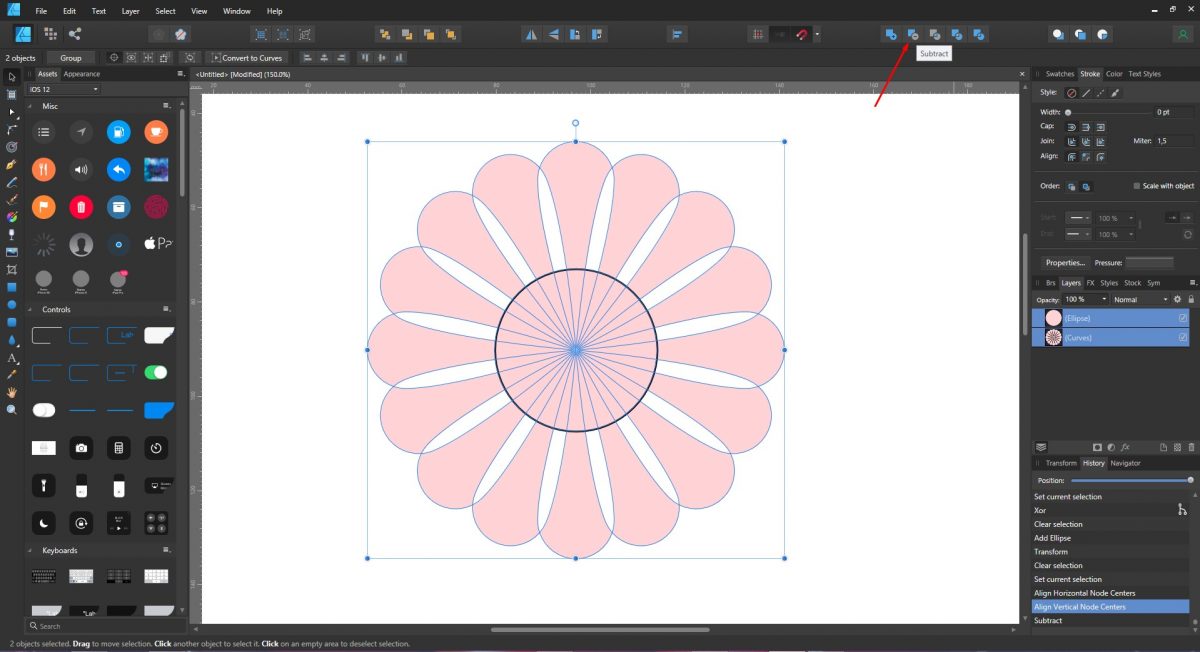
With both still selected click Subtract from the Boolean Operations at the top.
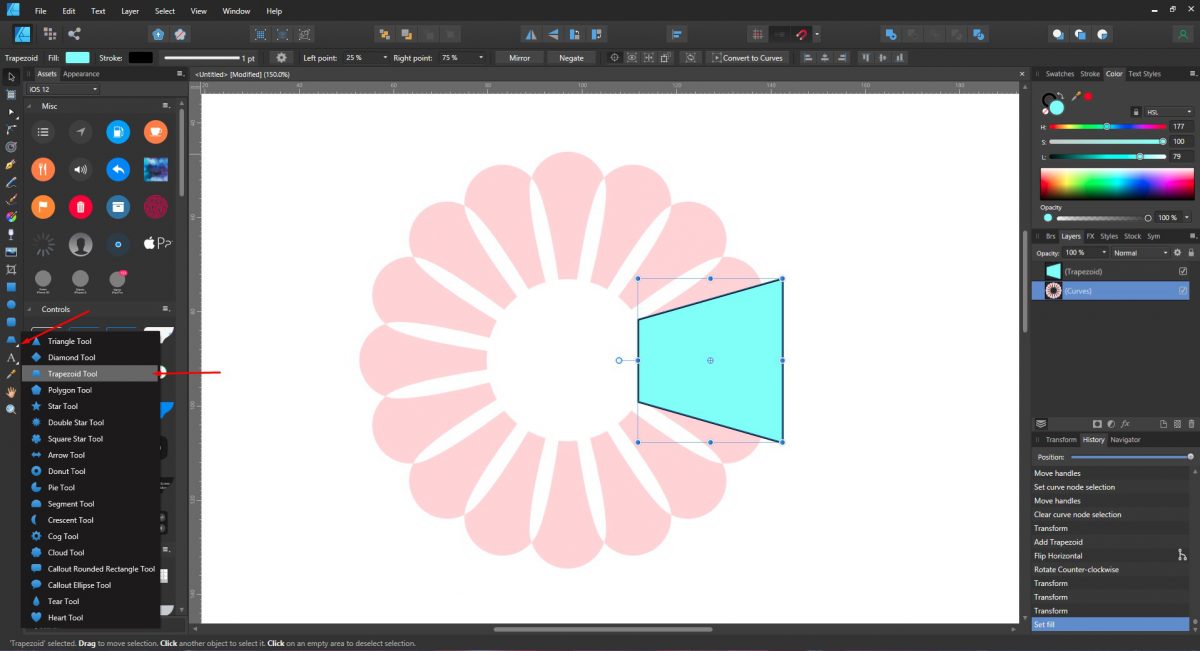
A space needs to be cut out before we can add our text. This can be done a number of ways but a quick and accurate way is with the Trapezoid Tool. Under the Shape Selection Tool panel select the Trapezoid Tool. Click + drag the shape out. Right click, select Transform and then Rotate Left. Position as seen in the image below.
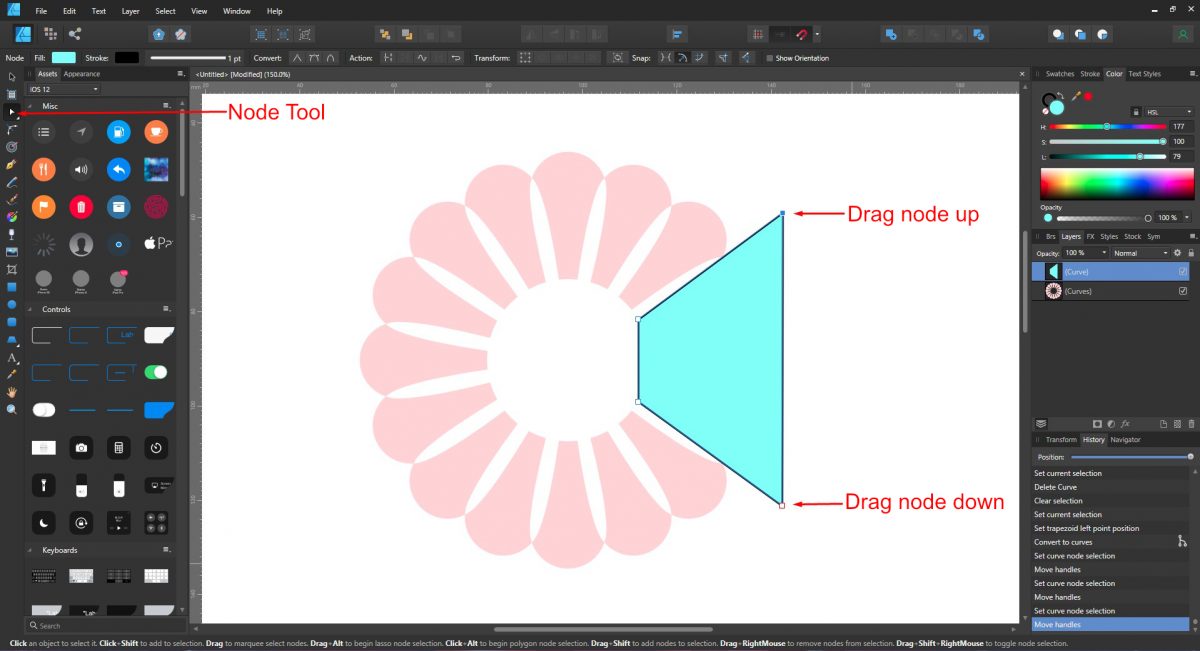
Right click the Trapezoid and select Convert to Curves. Now we can edit the Trapezoid with the Node Tool. Click the Node Tool on the left side panel. Little boxes called Nodes will appear on the corners. Click + drag the top right node up as shown in the image below. Repeat for the bottom right node.
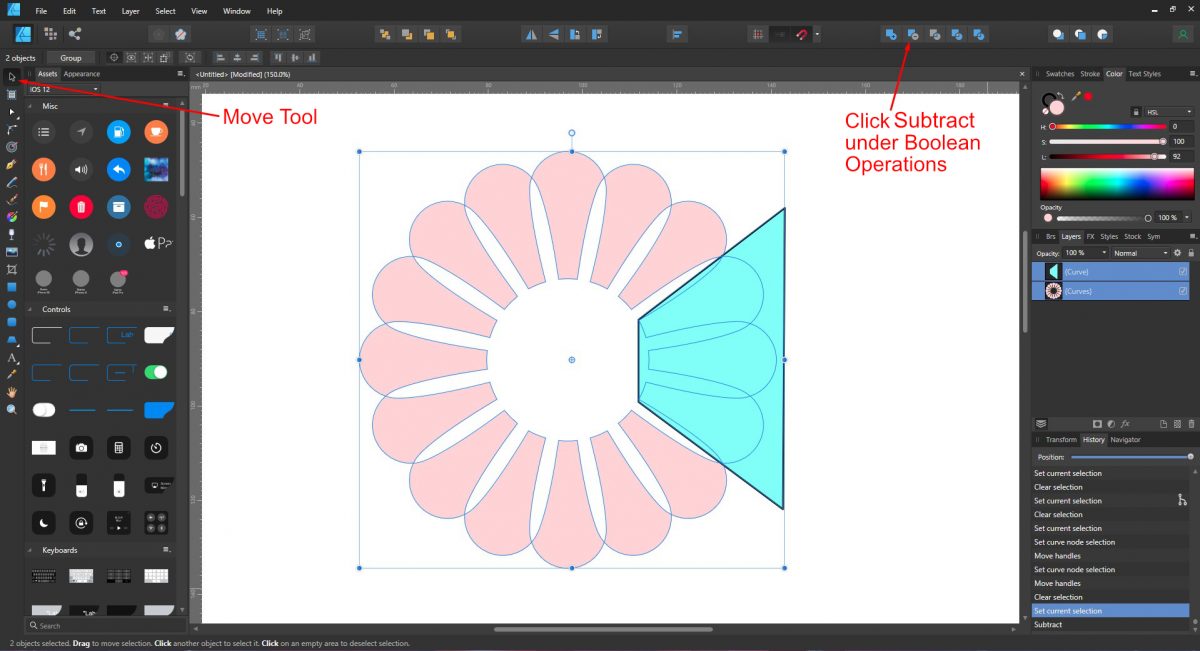
Click the Move Tool on the left side then Click + drag a selection box around both objects. Under the Boolean Operations at the top click on Subtract.
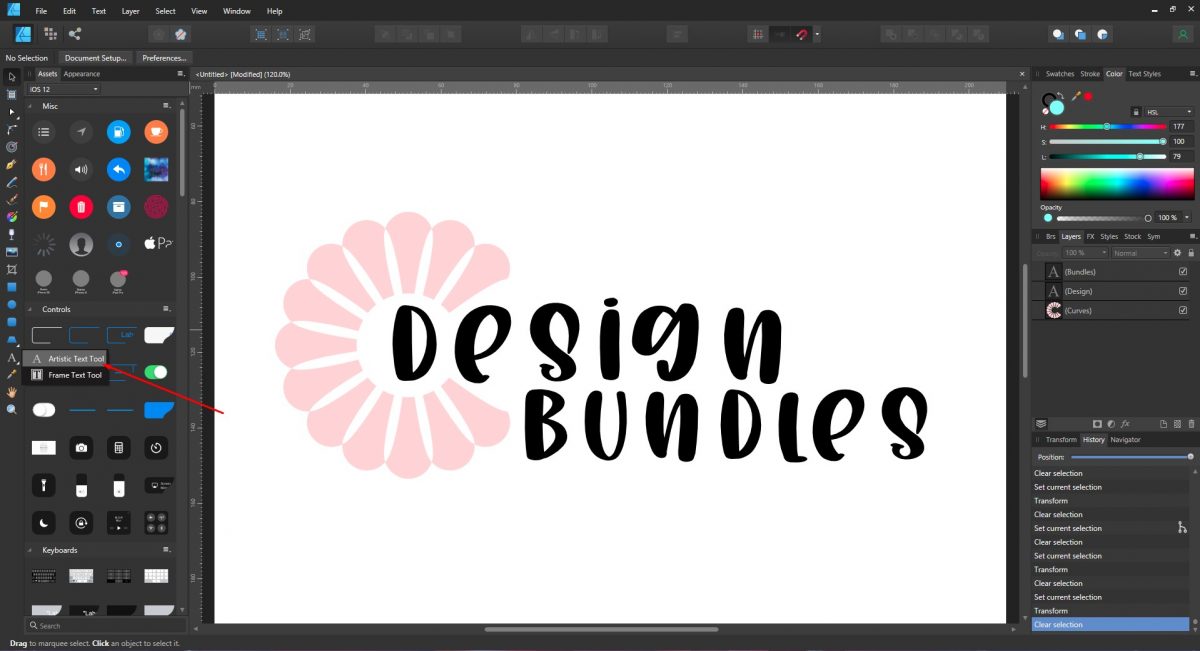
Next, type out your text using the Artistic Text Tool on the left side. We have a great tutorial on creating text with the Artistic Text Tool in Affinity Designer to get you started.
For this example the wording was split up into two text objects so they could be moved around independently. Position the text so part of it fits in the floral design.
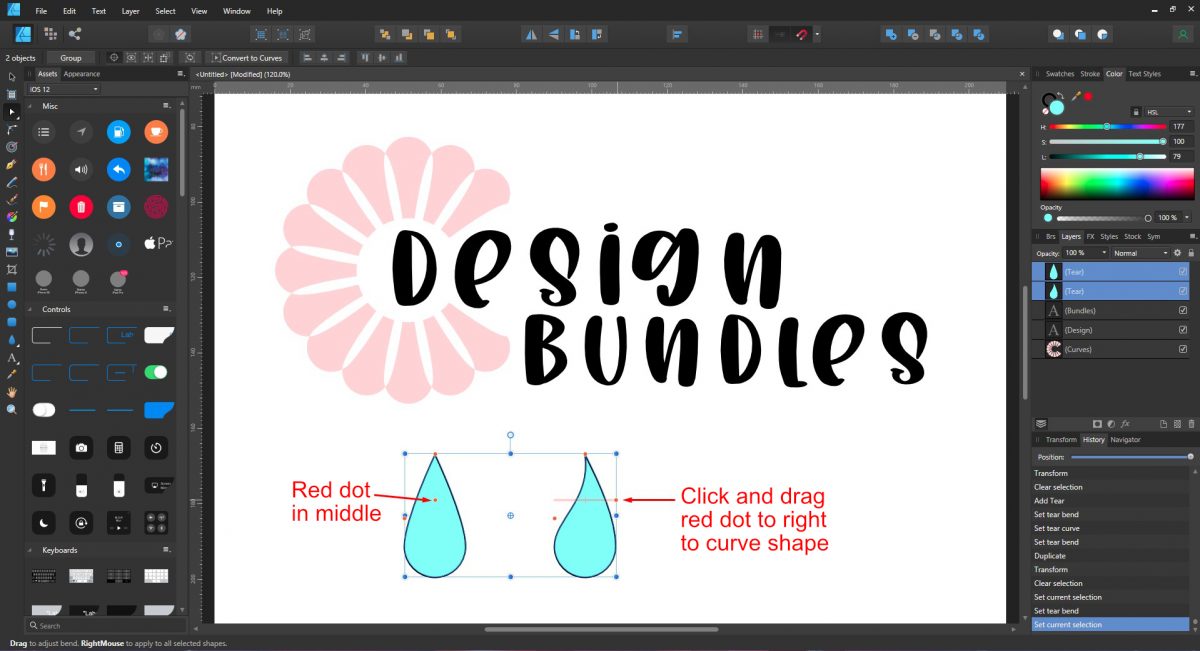
A leaf element is quick and easy to make. Select the Tear Tool and Click + drag out the shape. There are little red dots for editing the way the shape looks. Click on the red dot in the middle and drag to the right. This will curve the shape at the top.
Duplicate the curved shape and decrease the size quite a bit, especially along the sides. Place this duplicate at the bottom of the leaf element so that it's just overlapping. Right click and select Convert to Curves.
Using the Node Tool, adjust the nodes by clicking and dragging the one side inward. Select both objects and click Subtract in the Boolean Operations at the top.

Place the leaf element on the corner of the text. Duplicate and add more leaf elements as needed. The floral and leaf element can be filled with a solid color, a gradient or a design.
We have an in depth tutorial as a guide on making a gradient in Affinity Designer.
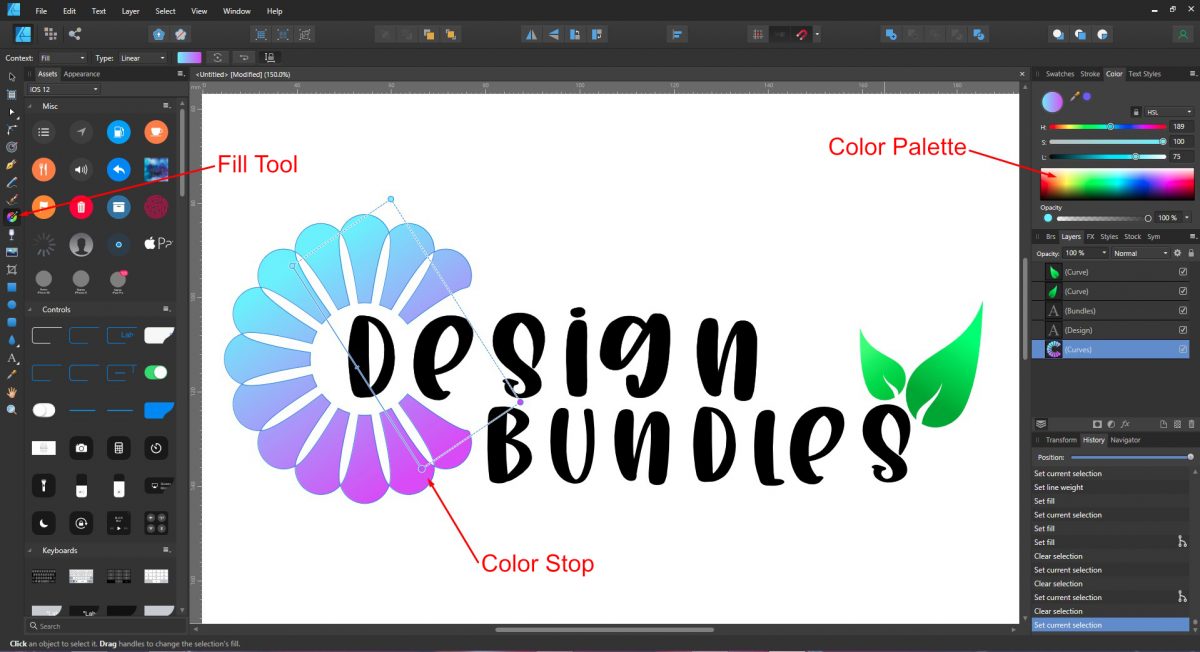
Select the Floral element and click on the Fill Tool on the left side. Click + drag out the gradient. Apply a gradient where needed and change the Color Stops using the Color Palette.
Click File then Export to save as a PNG or JPG. Under the Export options choose your file format, click Export and save your file. To save as an SVG you will need to fill all elements with solid colors. This will make it possible for other programs to read the file format.

Your logo is now complete and ready to be used in other programs. The Shape Selection Tool has a variety of ready made shapes. Explore using other shapes and gradients to create unique designs.
If you would like to learn more about Affinity Designer, check out our tutorials on using the vector crop tool, how to outline text and creating a floral logo in Illustrator.
In this tutorial we are using a bold handwriting font called All Things New, but you can use any clean font available on Font Bundles. Open Affinity Designer and click New Document. Adjust your page settings and click Create.
Step 1 - Create petals and use the Transform Panel
Affinity Designer has a great selection of shape tools. The Tear Tool will be used to create the flower petal. On the left side panel click on the Shape Selection tool and select the Tear Tool. Draw out the shape as shown in the image below. Adjust the size of the shape if needed.
Click on Enable transform origin at the top. This will make the origin point visible.
Shift and Click + drag the origin point to the top point of the shape. Press Ctrl + J to duplicate the shape. We will be using the Transform panel next. If not visible on the bottom right, click View at the top, select Studio and then Transform.
With the duplicate selected go to the Transform panel bottom right and next to R (Rotation) type in 360/16. Press Enter. There will be 16 petals around a 360° angle. The duplicate will be moved to a 22.5° angle. Press Ctrl + J another 14 more times. Affinity Designer will equally space out the petals.
Step 2 - Apply the Boolean Operation
The Boolean Operations are at the top of the screen. The Xor action will cut out overlapping parts and combine as one object. Click + drag a selection box around all of the petals. At the top of the screen click Xor as shown in the image below.
Click on the Ellipse tool on the left side panel and draw out a circle. Select both the curve shape and Ellipse. Right click and choose Alignment, and then Align Center. Right click again, Alignment and choose Align Middle.
With both still selected click Subtract from the Boolean Operations at the top.
Step 3 - Cut out a space for the text
A space needs to be cut out before we can add our text. This can be done a number of ways but a quick and accurate way is with the Trapezoid Tool. Under the Shape Selection Tool panel select the Trapezoid Tool. Click + drag the shape out. Right click, select Transform and then Rotate Left. Position as seen in the image below.
Right click the Trapezoid and select Convert to Curves. Now we can edit the Trapezoid with the Node Tool. Click the Node Tool on the left side panel. Little boxes called Nodes will appear on the corners. Click + drag the top right node up as shown in the image below. Repeat for the bottom right node.
Click the Move Tool on the left side then Click + drag a selection box around both objects. Under the Boolean Operations at the top click on Subtract.
Step 4 - Use the Artistic Text Tool
Next, type out your text using the Artistic Text Tool on the left side. We have a great tutorial on creating text with the Artistic Text Tool in Affinity Designer to get you started.
For this example the wording was split up into two text objects so they could be moved around independently. Position the text so part of it fits in the floral design.
Step 5 - Create a leaf element
A leaf element is quick and easy to make. Select the Tear Tool and Click + drag out the shape. There are little red dots for editing the way the shape looks. Click on the red dot in the middle and drag to the right. This will curve the shape at the top.
Duplicate the curved shape and decrease the size quite a bit, especially along the sides. Place this duplicate at the bottom of the leaf element so that it's just overlapping. Right click and select Convert to Curves.
Using the Node Tool, adjust the nodes by clicking and dragging the one side inward. Select both objects and click Subtract in the Boolean Operations at the top.
Step 6 - Position elements and add a gradient fill
Place the leaf element on the corner of the text. Duplicate and add more leaf elements as needed. The floral and leaf element can be filled with a solid color, a gradient or a design.
We have an in depth tutorial as a guide on making a gradient in Affinity Designer.
Select the Floral element and click on the Fill Tool on the left side. Click + drag out the gradient. Apply a gradient where needed and change the Color Stops using the Color Palette.
Click File then Export to save as a PNG or JPG. Under the Export options choose your file format, click Export and save your file. To save as an SVG you will need to fill all elements with solid colors. This will make it possible for other programs to read the file format.
Your logo is now complete and ready to be used in other programs. The Shape Selection Tool has a variety of ready made shapes. Explore using other shapes and gradients to create unique designs.
If you would like to learn more about Affinity Designer, check out our tutorials on using the vector crop tool, how to outline text and creating a floral logo in Illustrator.


