How to Create a Floral Logo in Illustrator
In this tutorial, we are going to create a floral logo with text and some floral elements to complement it. We will be using the Cottage and Farmhouse font from Denise Chandler. There are tons of great farmhouse fonts available on Font Bundles to choose from.
There are some great premade logos available on Design Bundles if you'd prefer to go that route.
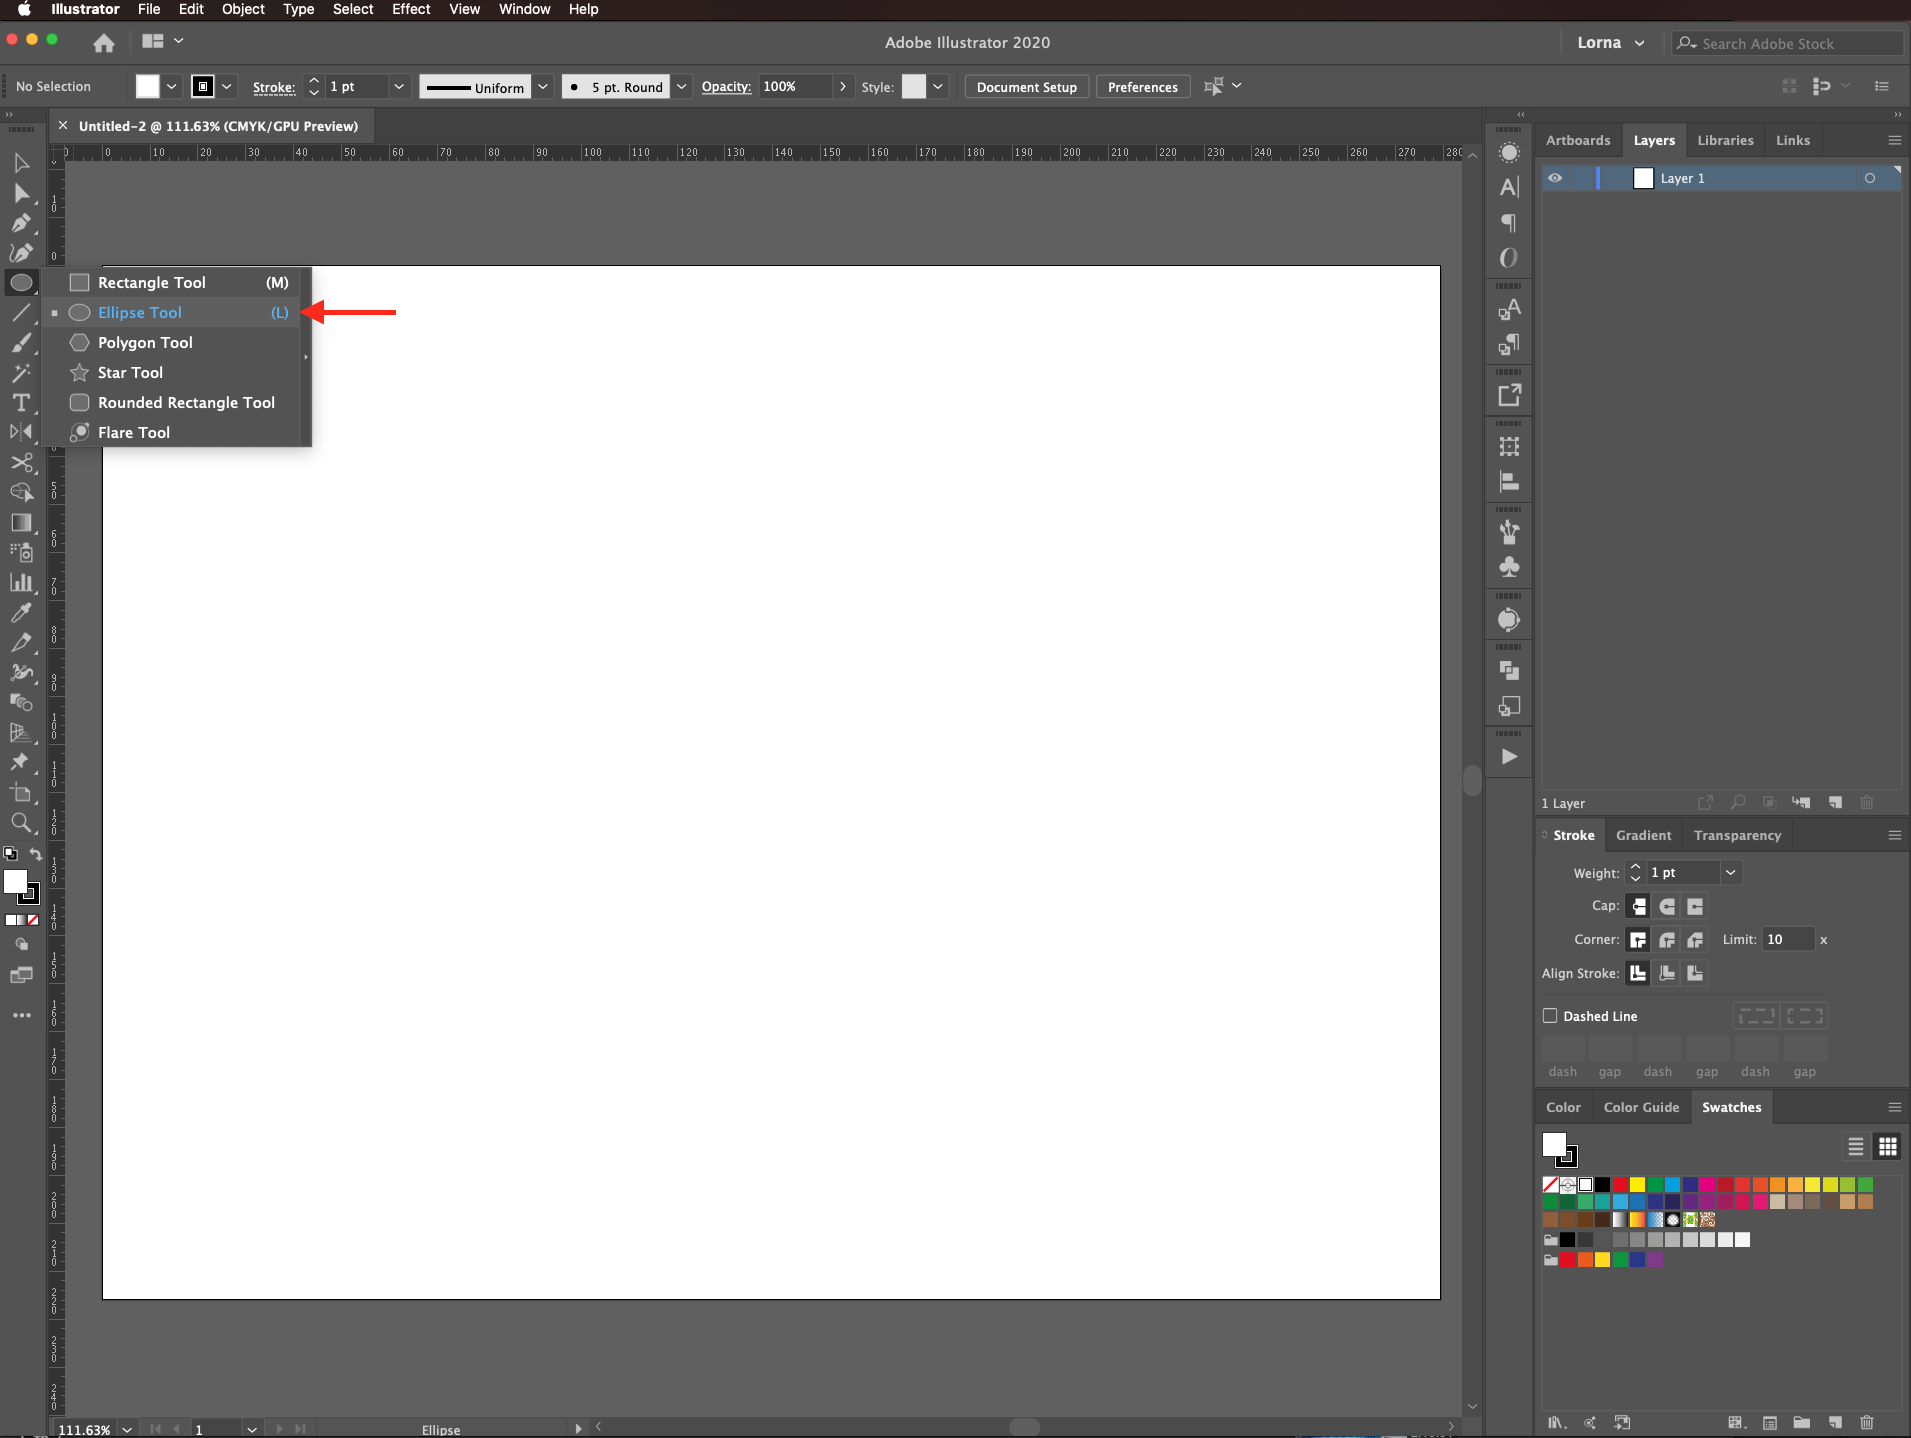
Select the ellipse tool (L).
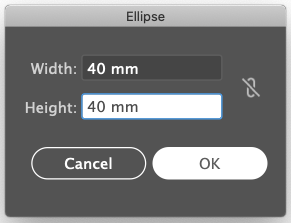
Click inside the canvas and create a 40 x 40 mm circle.
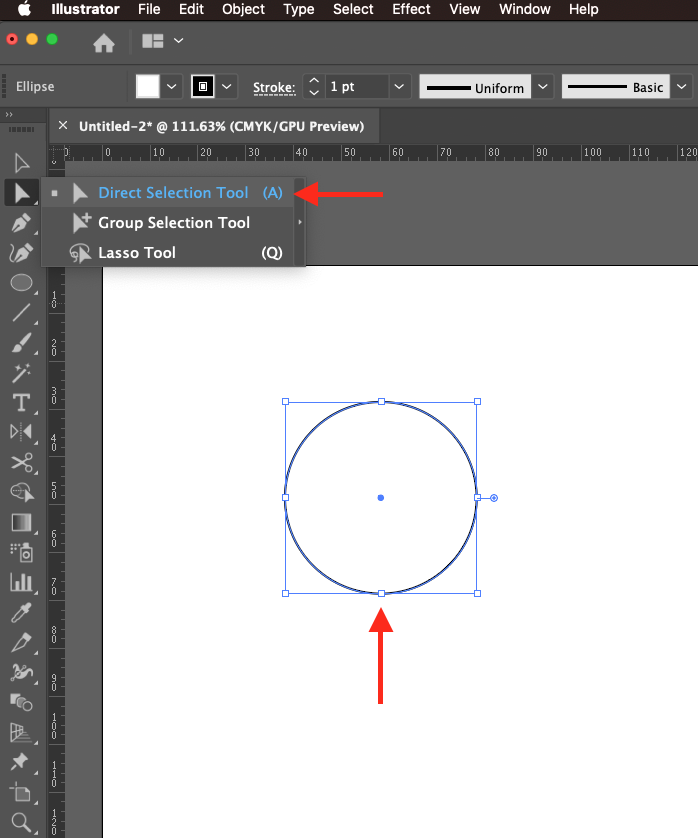
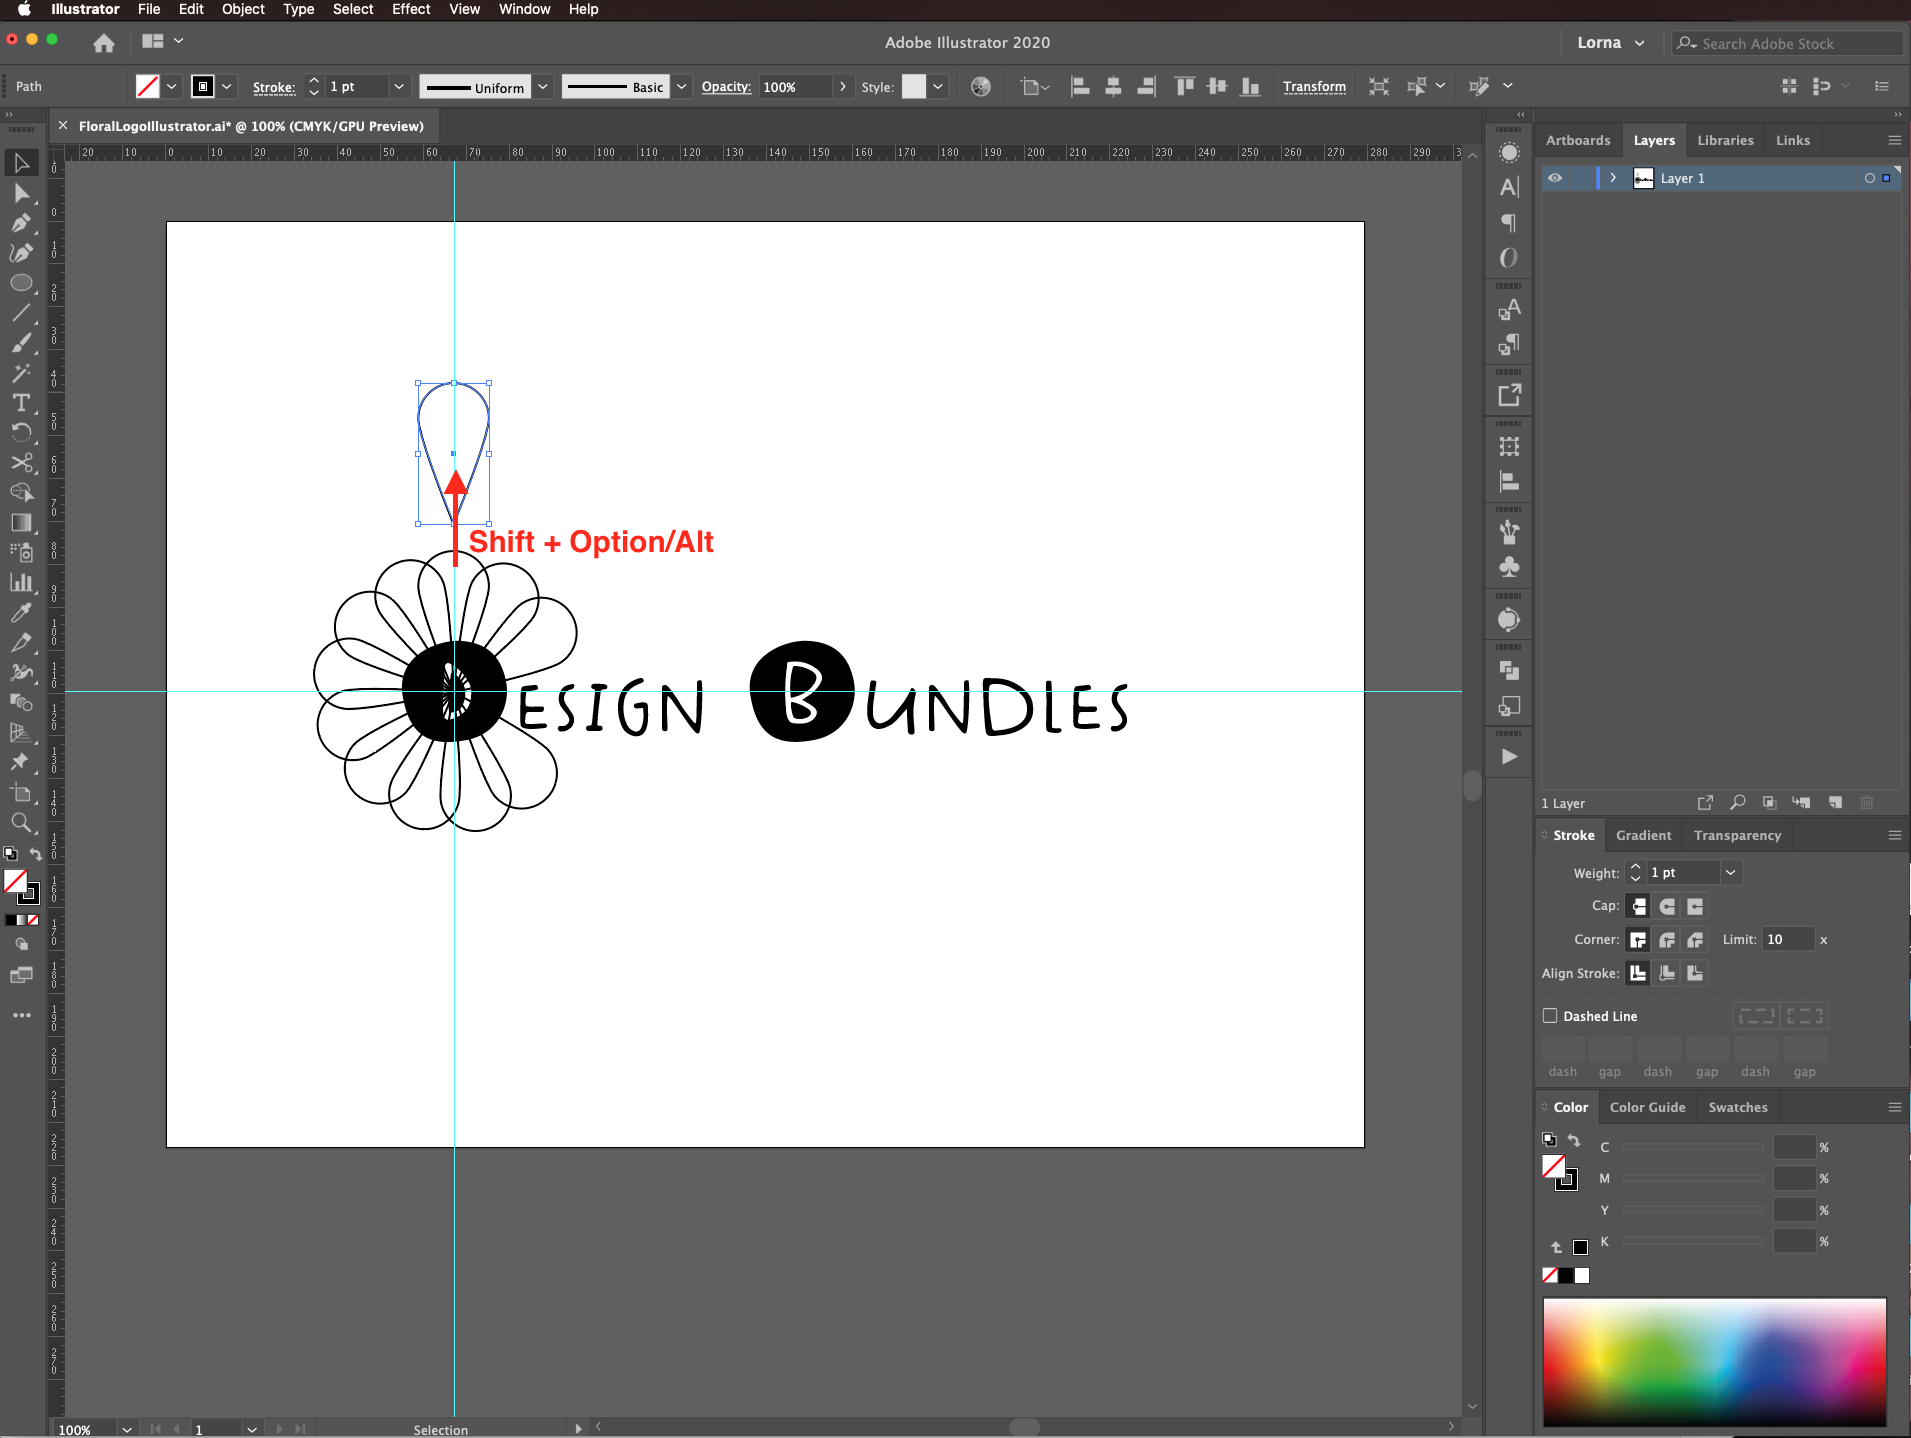
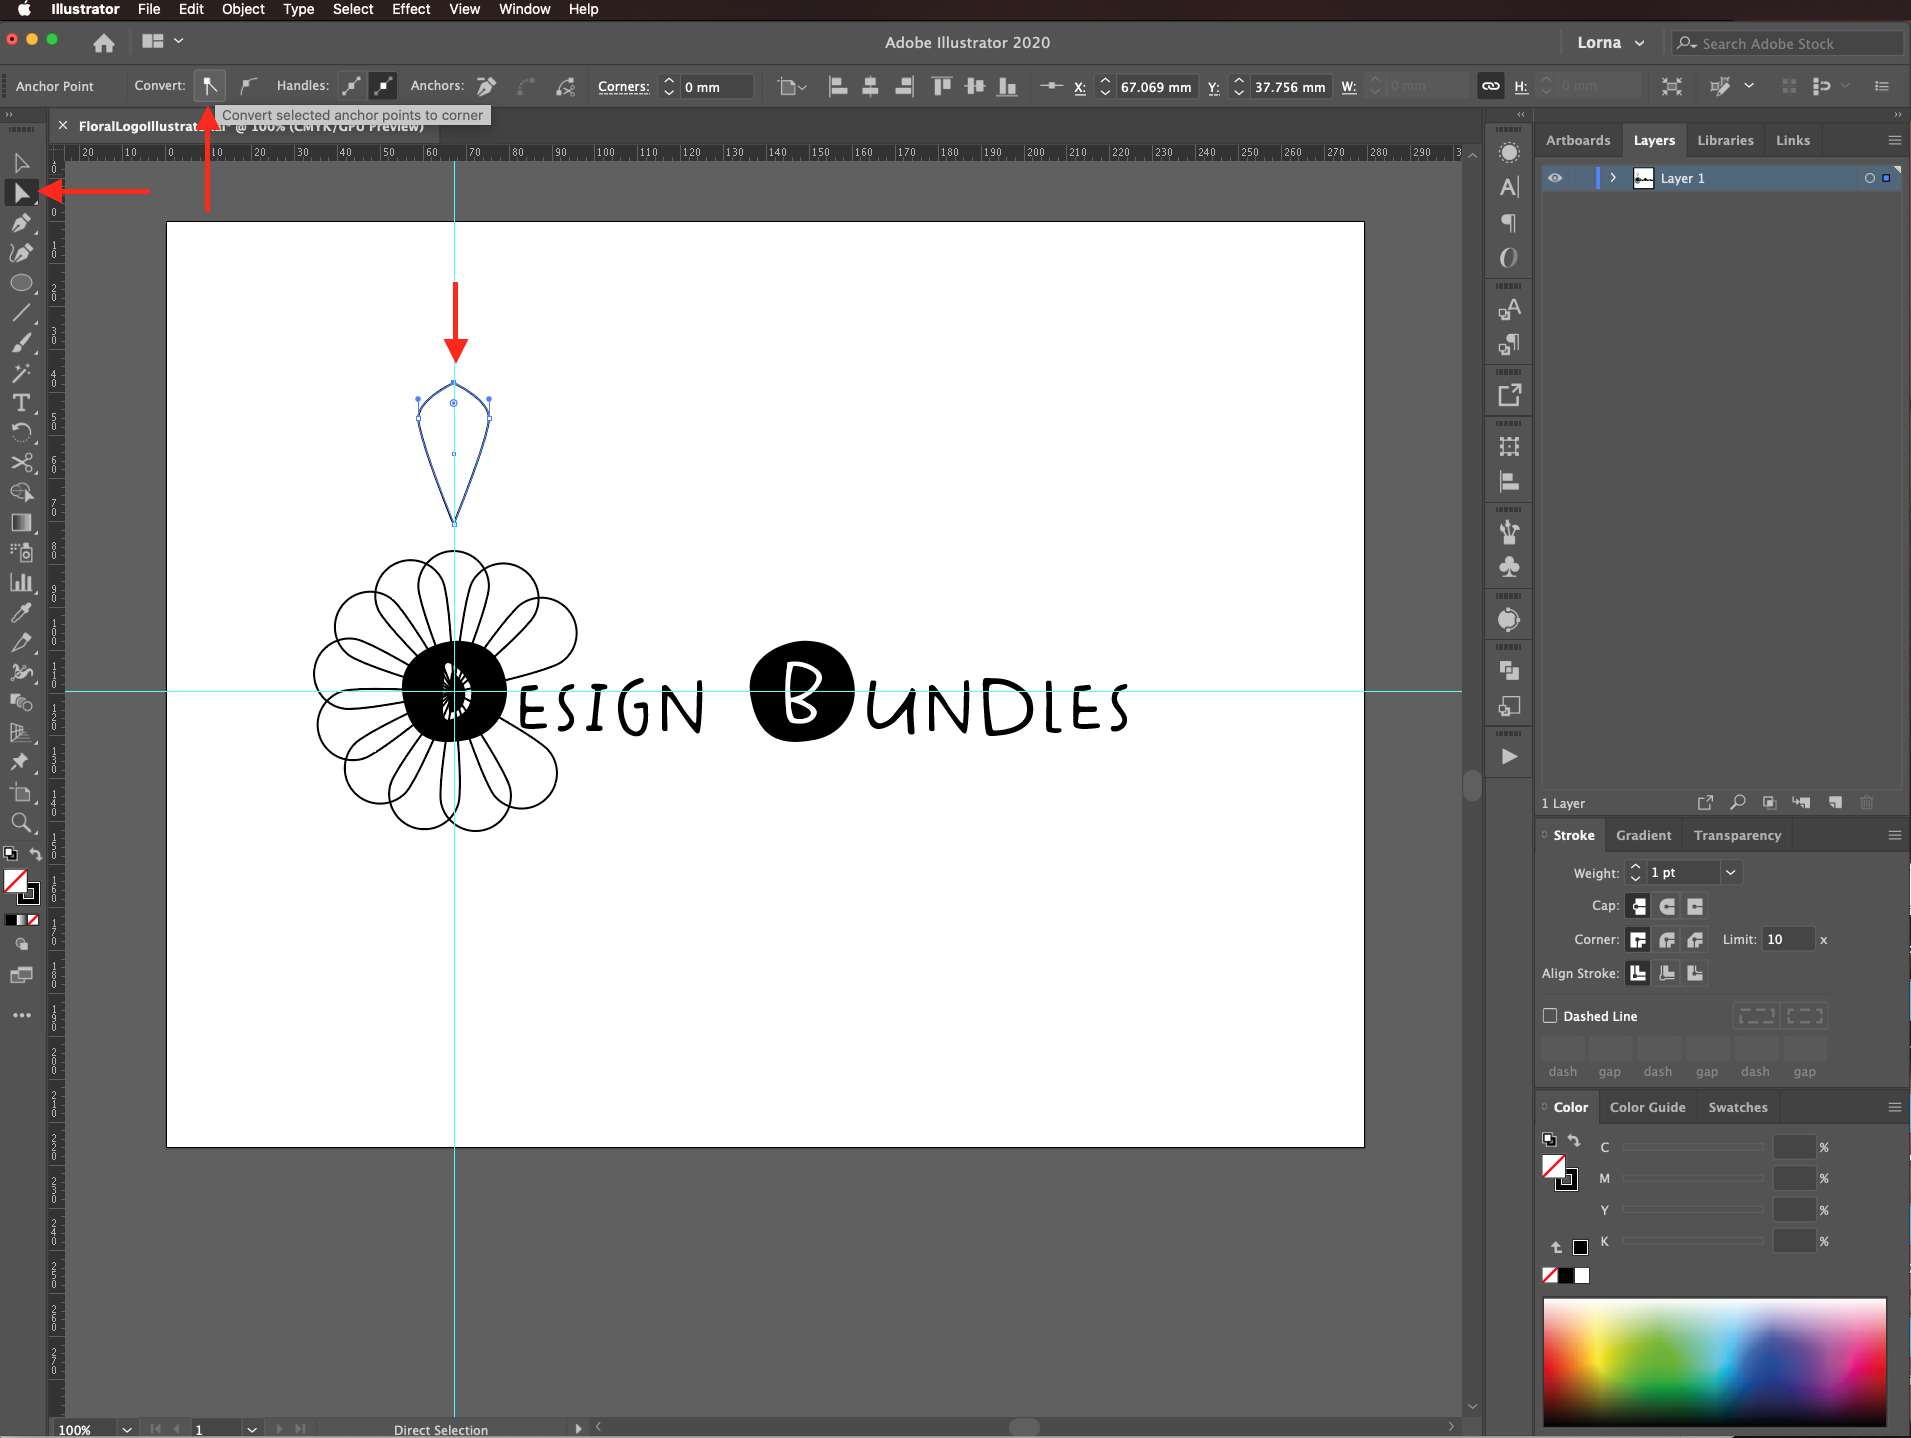
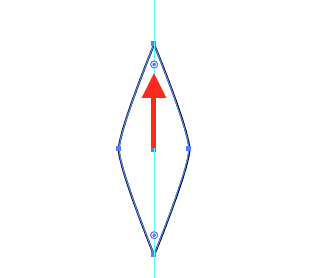
With the Direct Selection Tool (A) select the bottom anchor point.
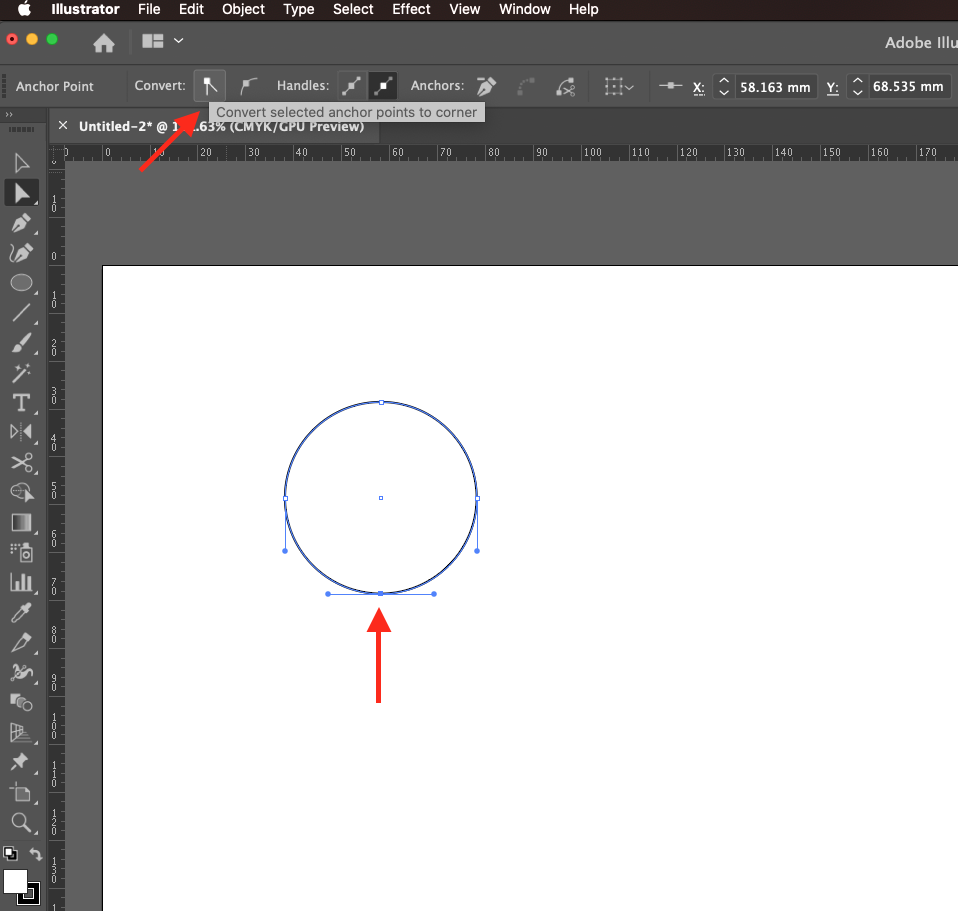
Click on convert selected anchor points to corners on the top menu.
Then, drag it down (holding the shift key) to create the petal shape.
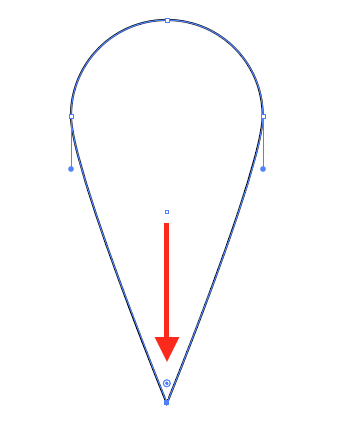
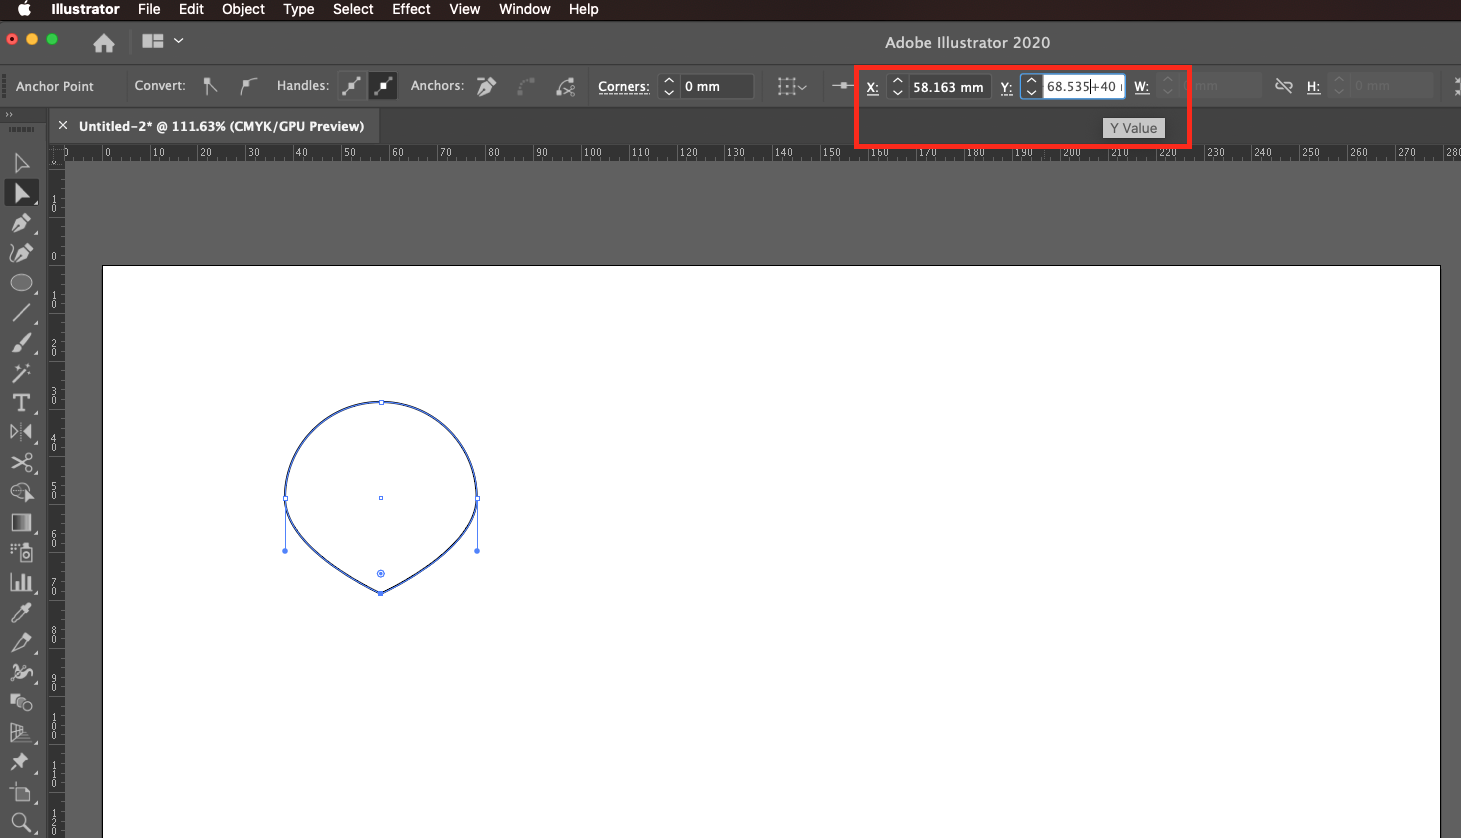
Or input a new Y value (we used + 40 and then clicked enter to add 40 mm to the current one).
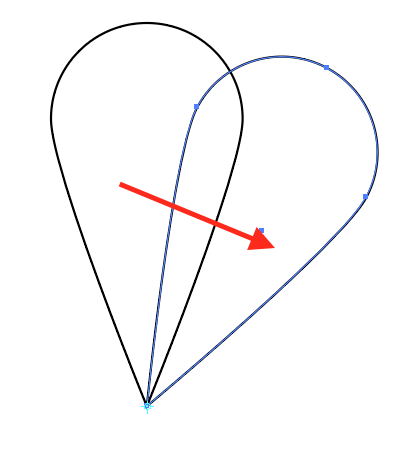
With the petal still selected, click on the rotate tool (R) in the toolbar.
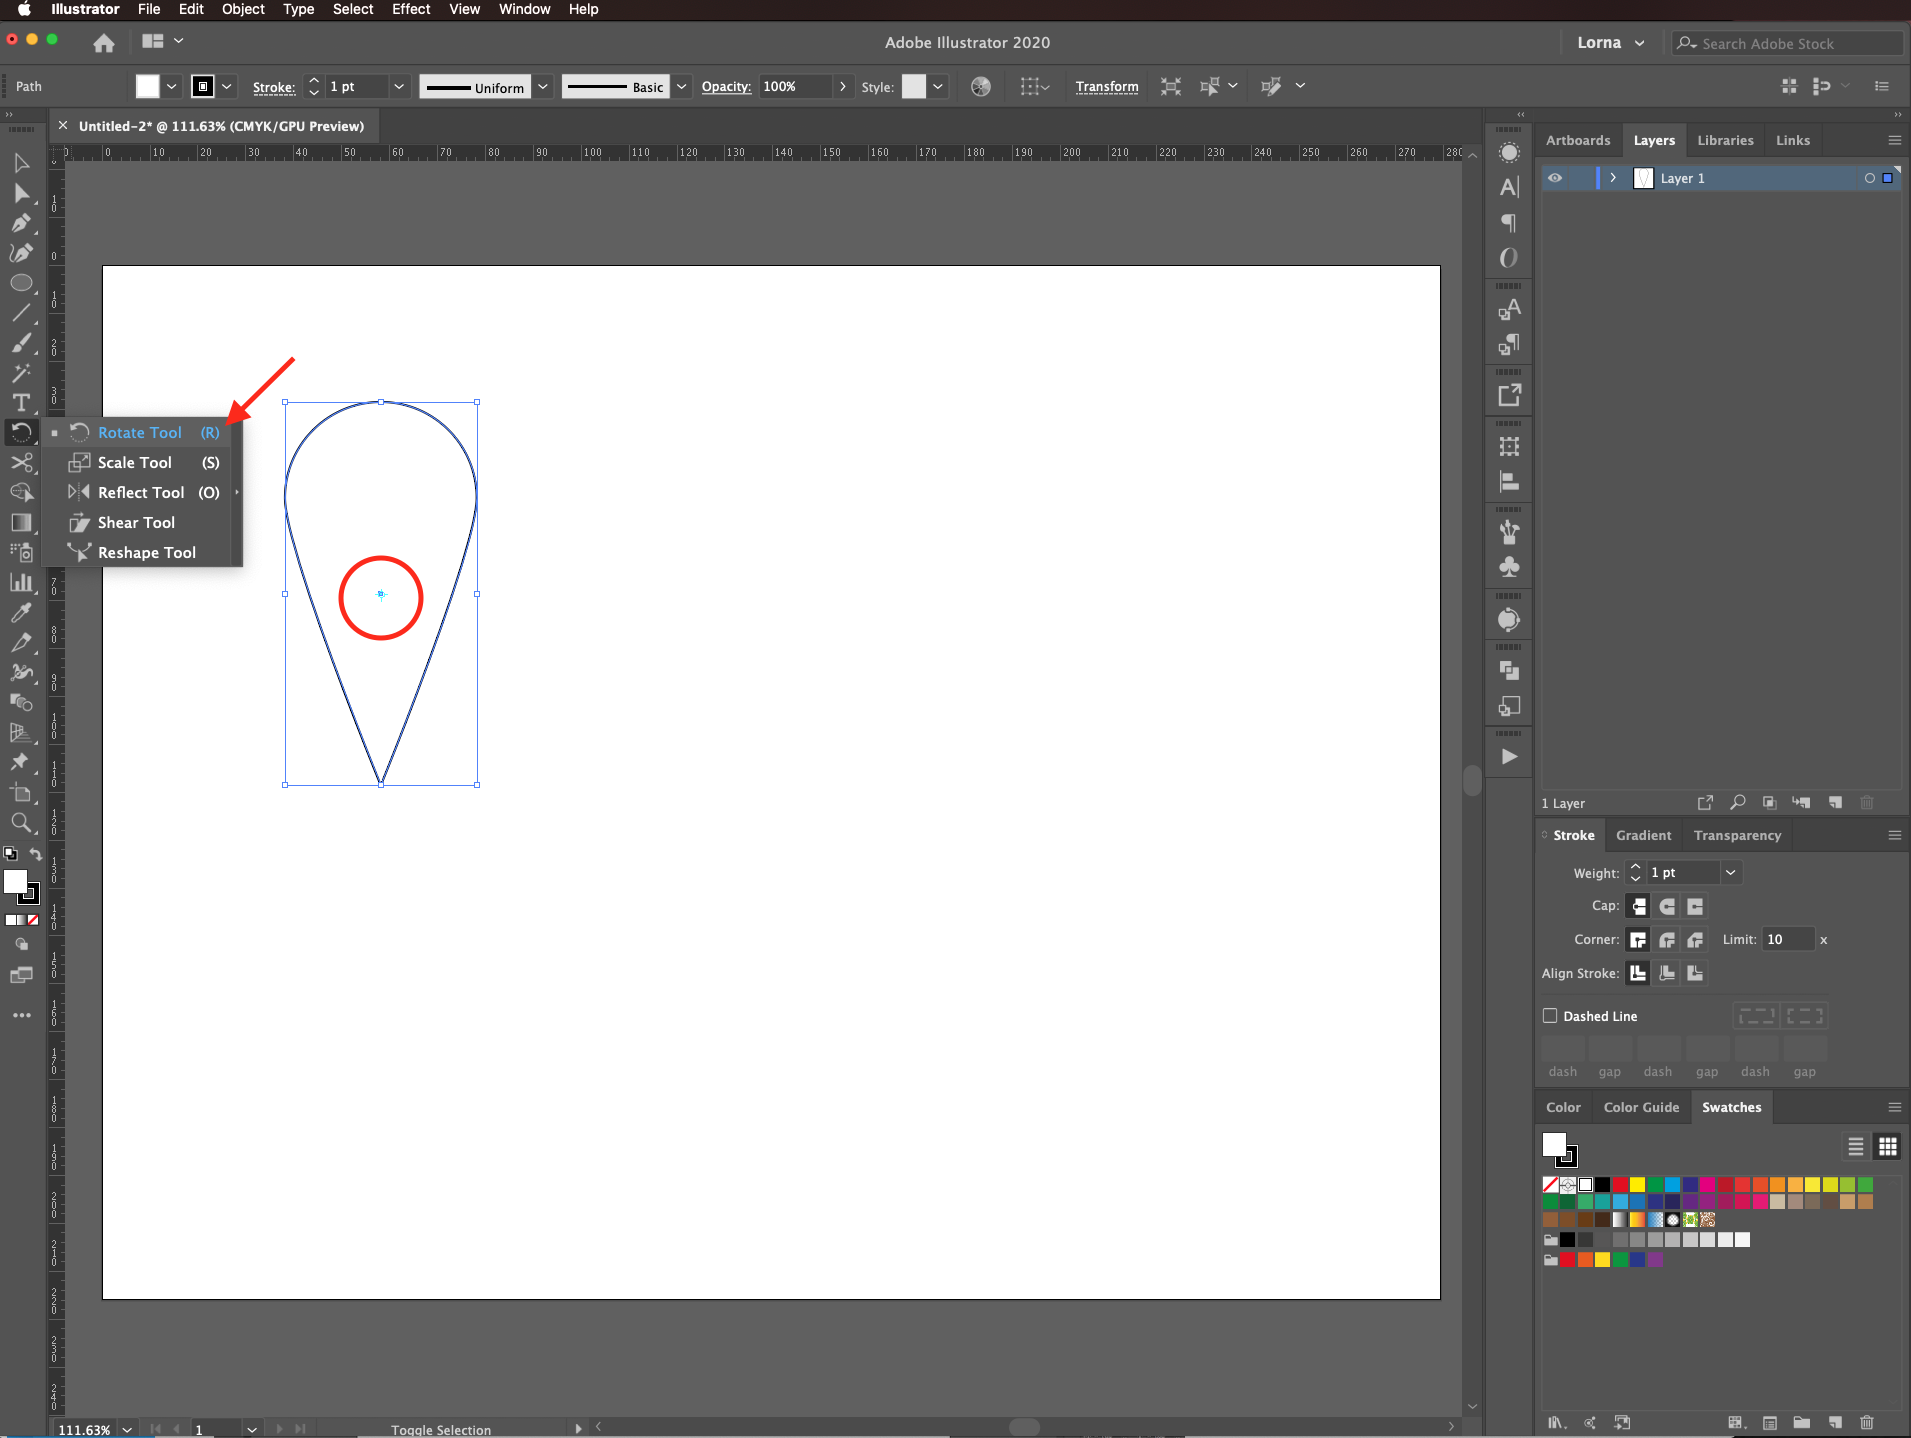
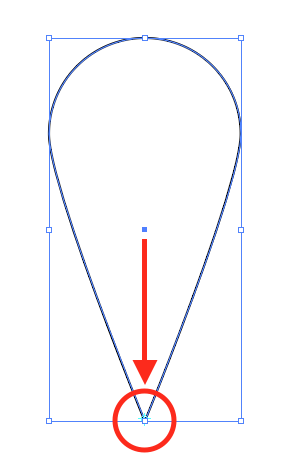
And move the rotation Center Point so it is placed on top of the bottom tip of the petal.
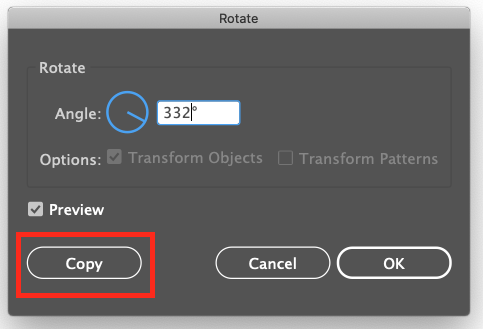
In the popup window input the angle you want to Rotate the petal (we used 332º) and make sure you click Copy instead of ok.
We decided to leave a bit of overlap between the petals.
Go to object > transform > transform again (command/control + D).
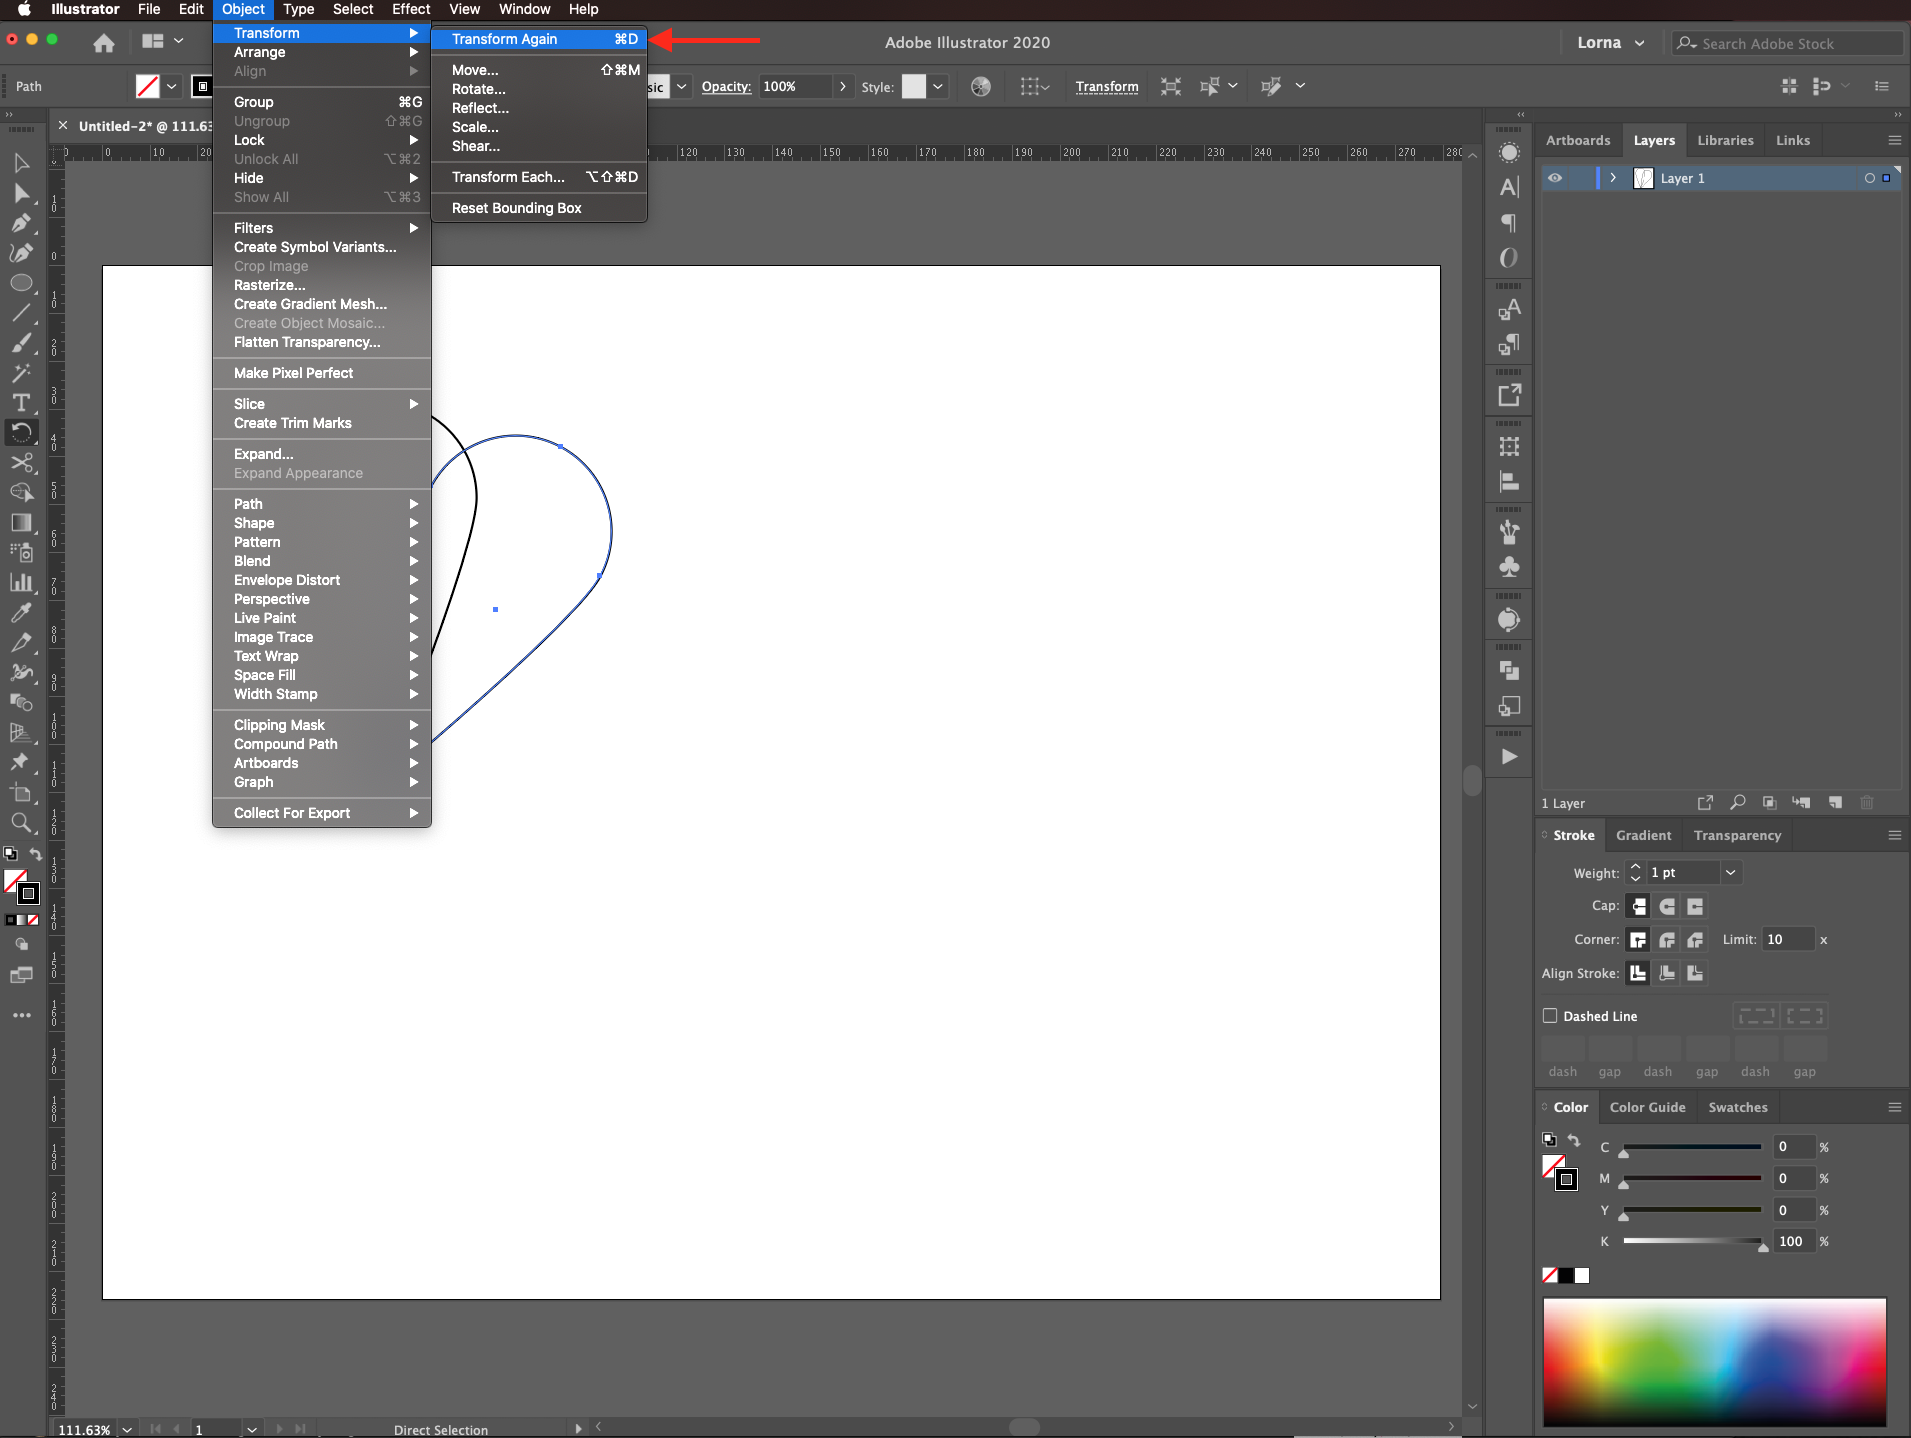
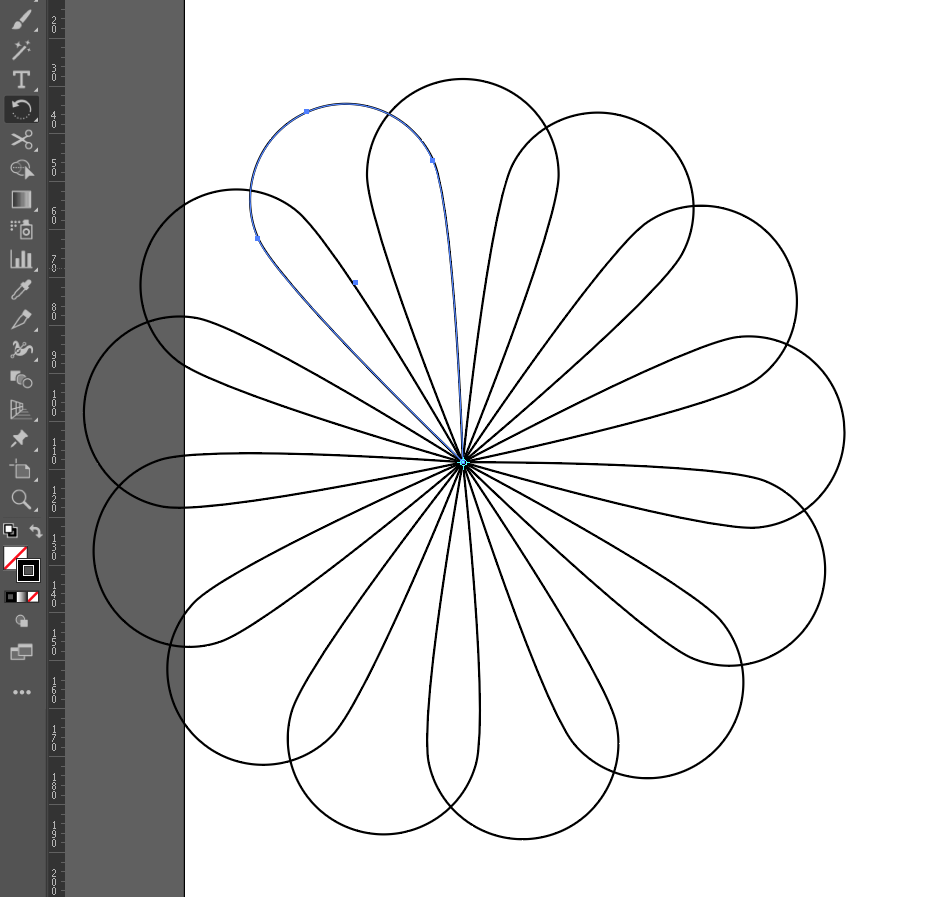
Do this as many times as needed to go all the way around and create a flower.
Select the Type Tool (T), choose your font, and type your text. We used two different versions of the same font with different sizes, one for the first letter of each word.

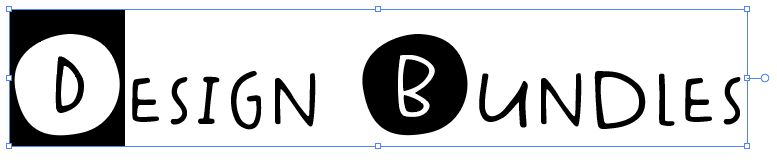
And the other for the rest of the text.

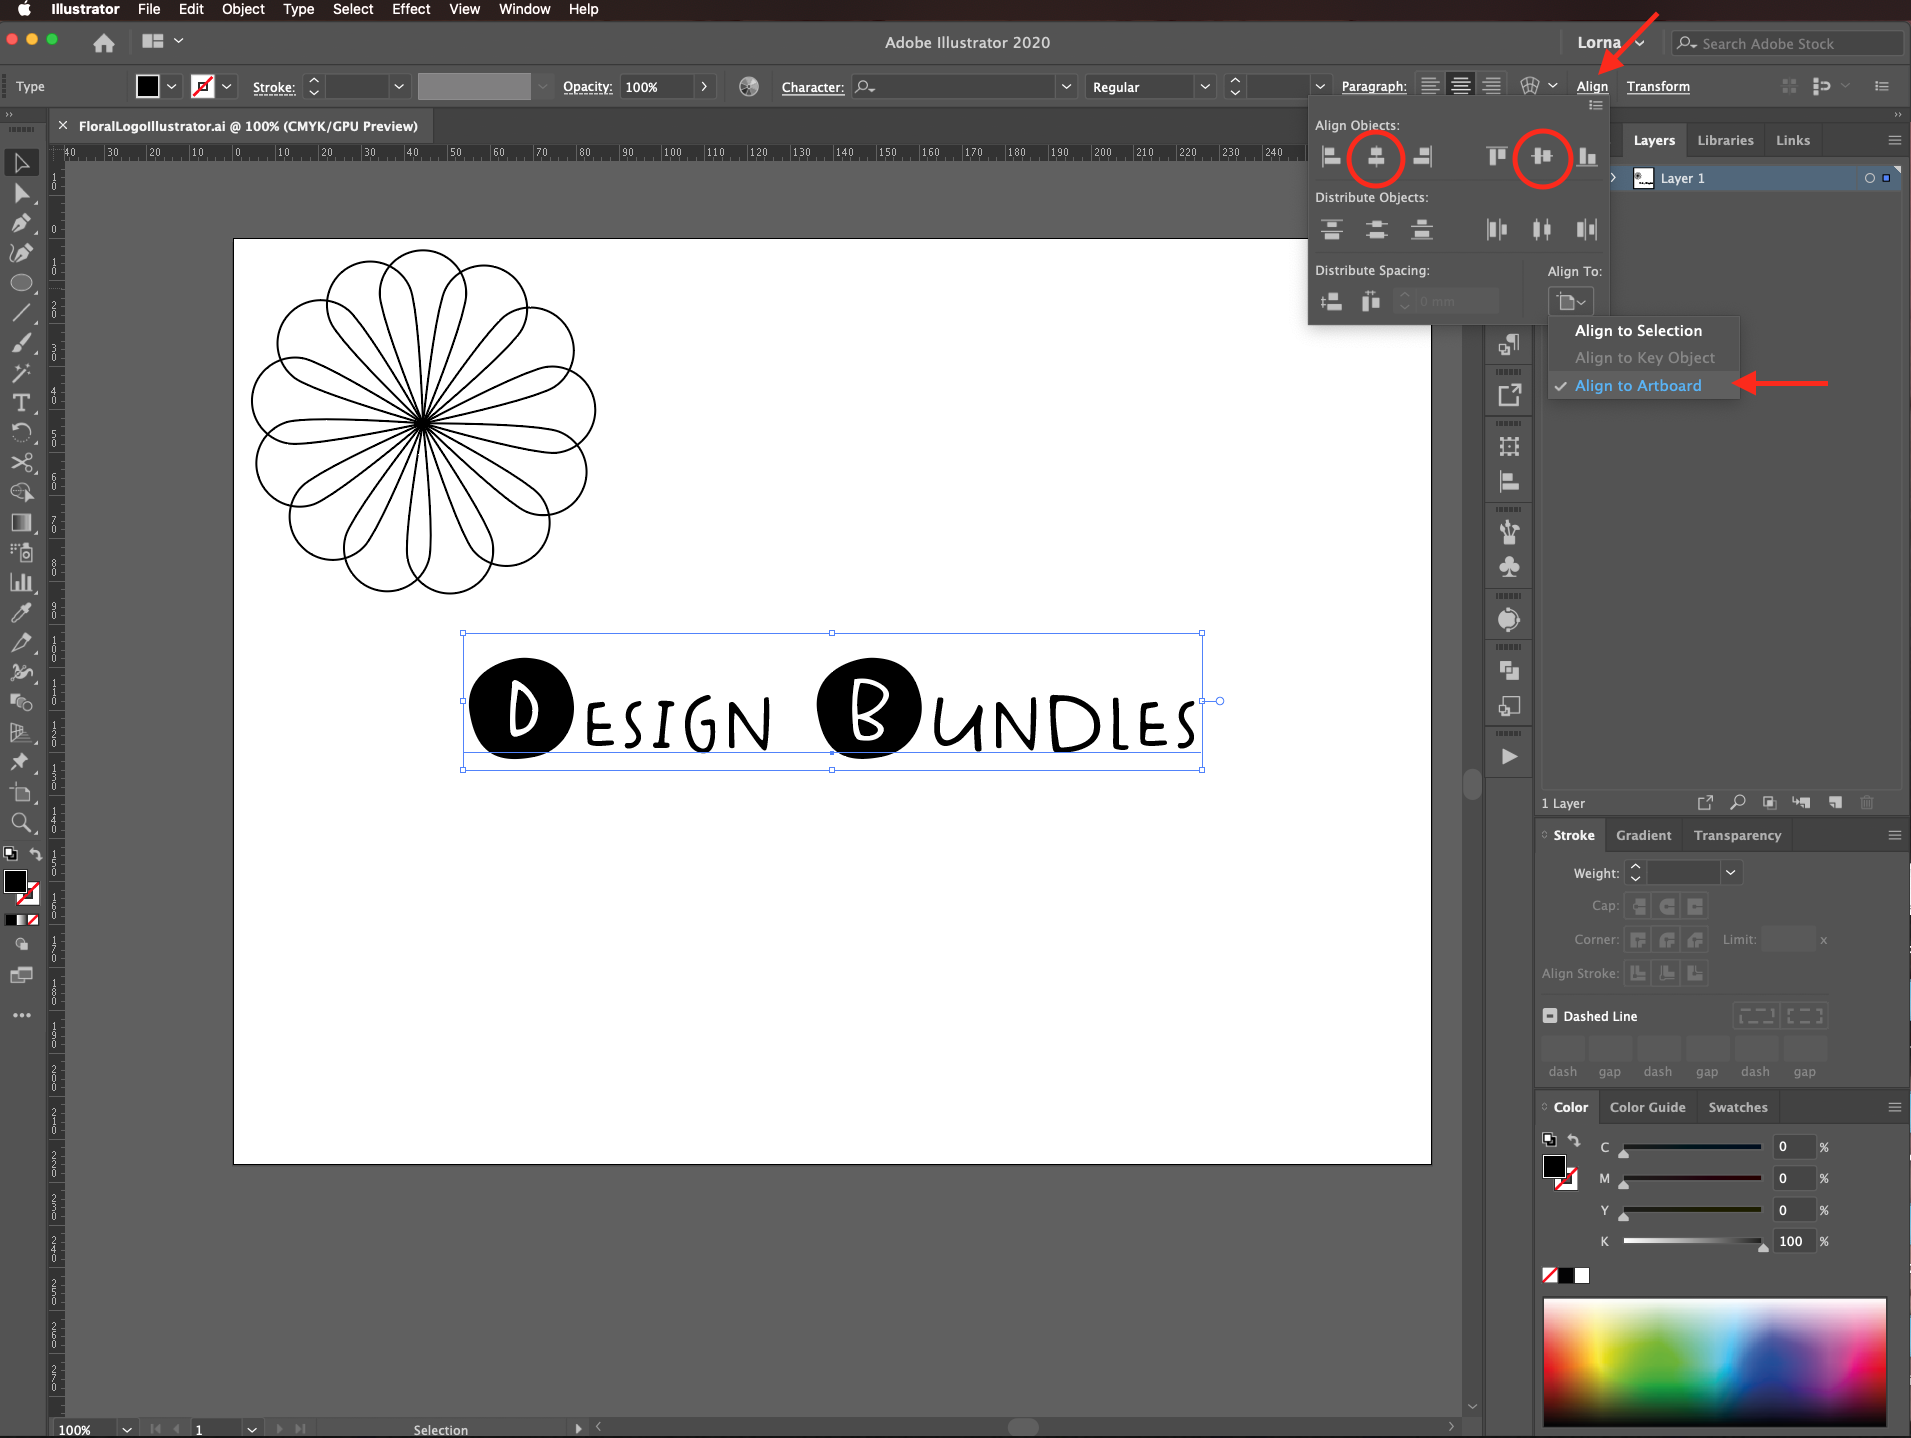
Center your text using the Align Panel making sure that Align to Artboard is selected.
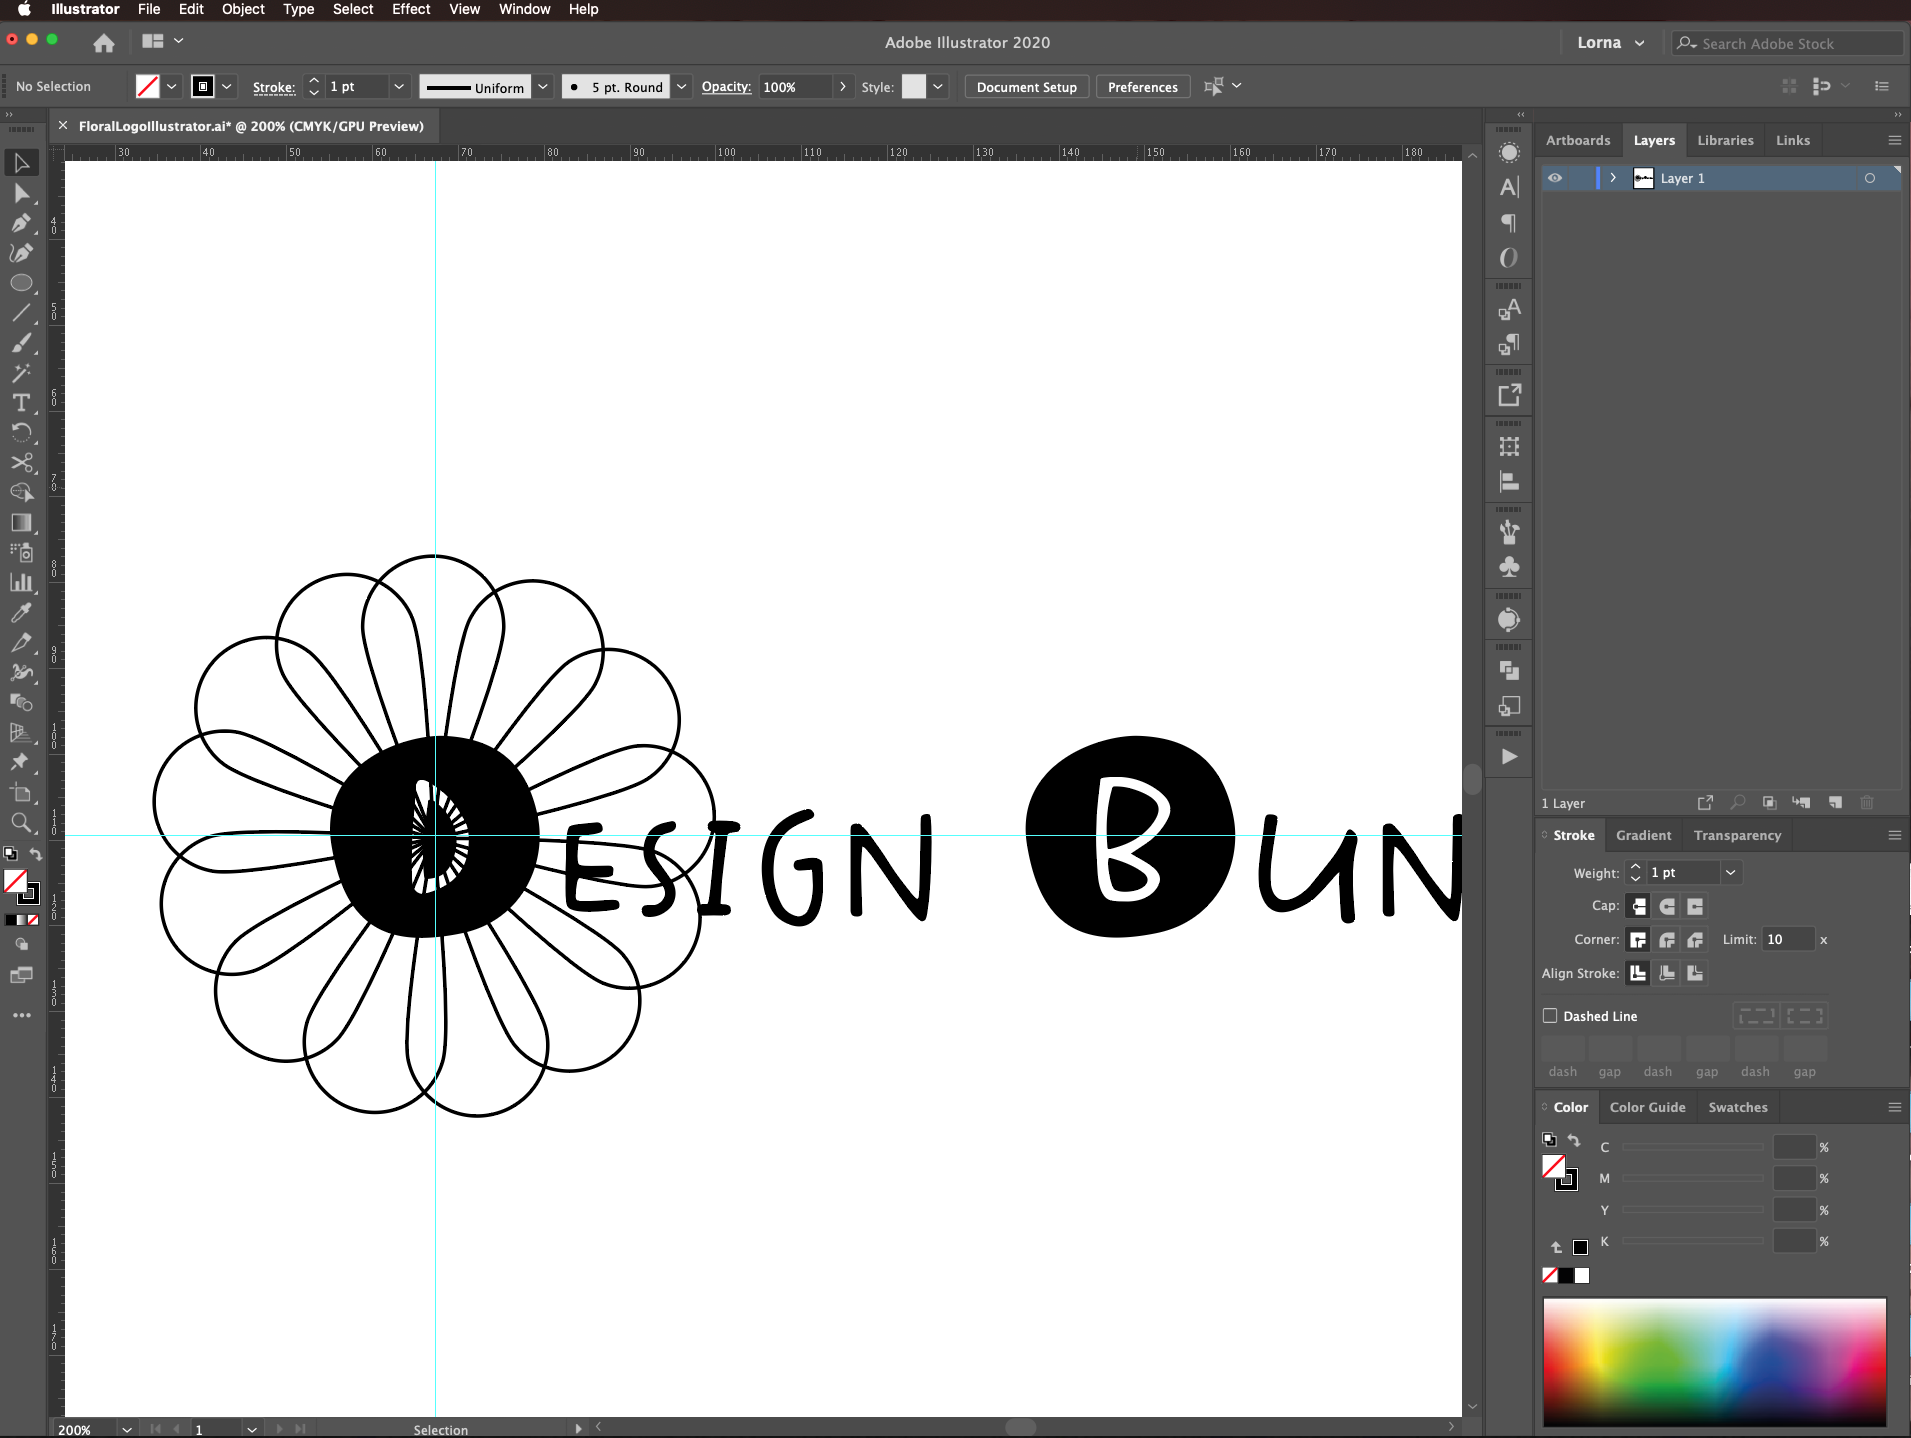
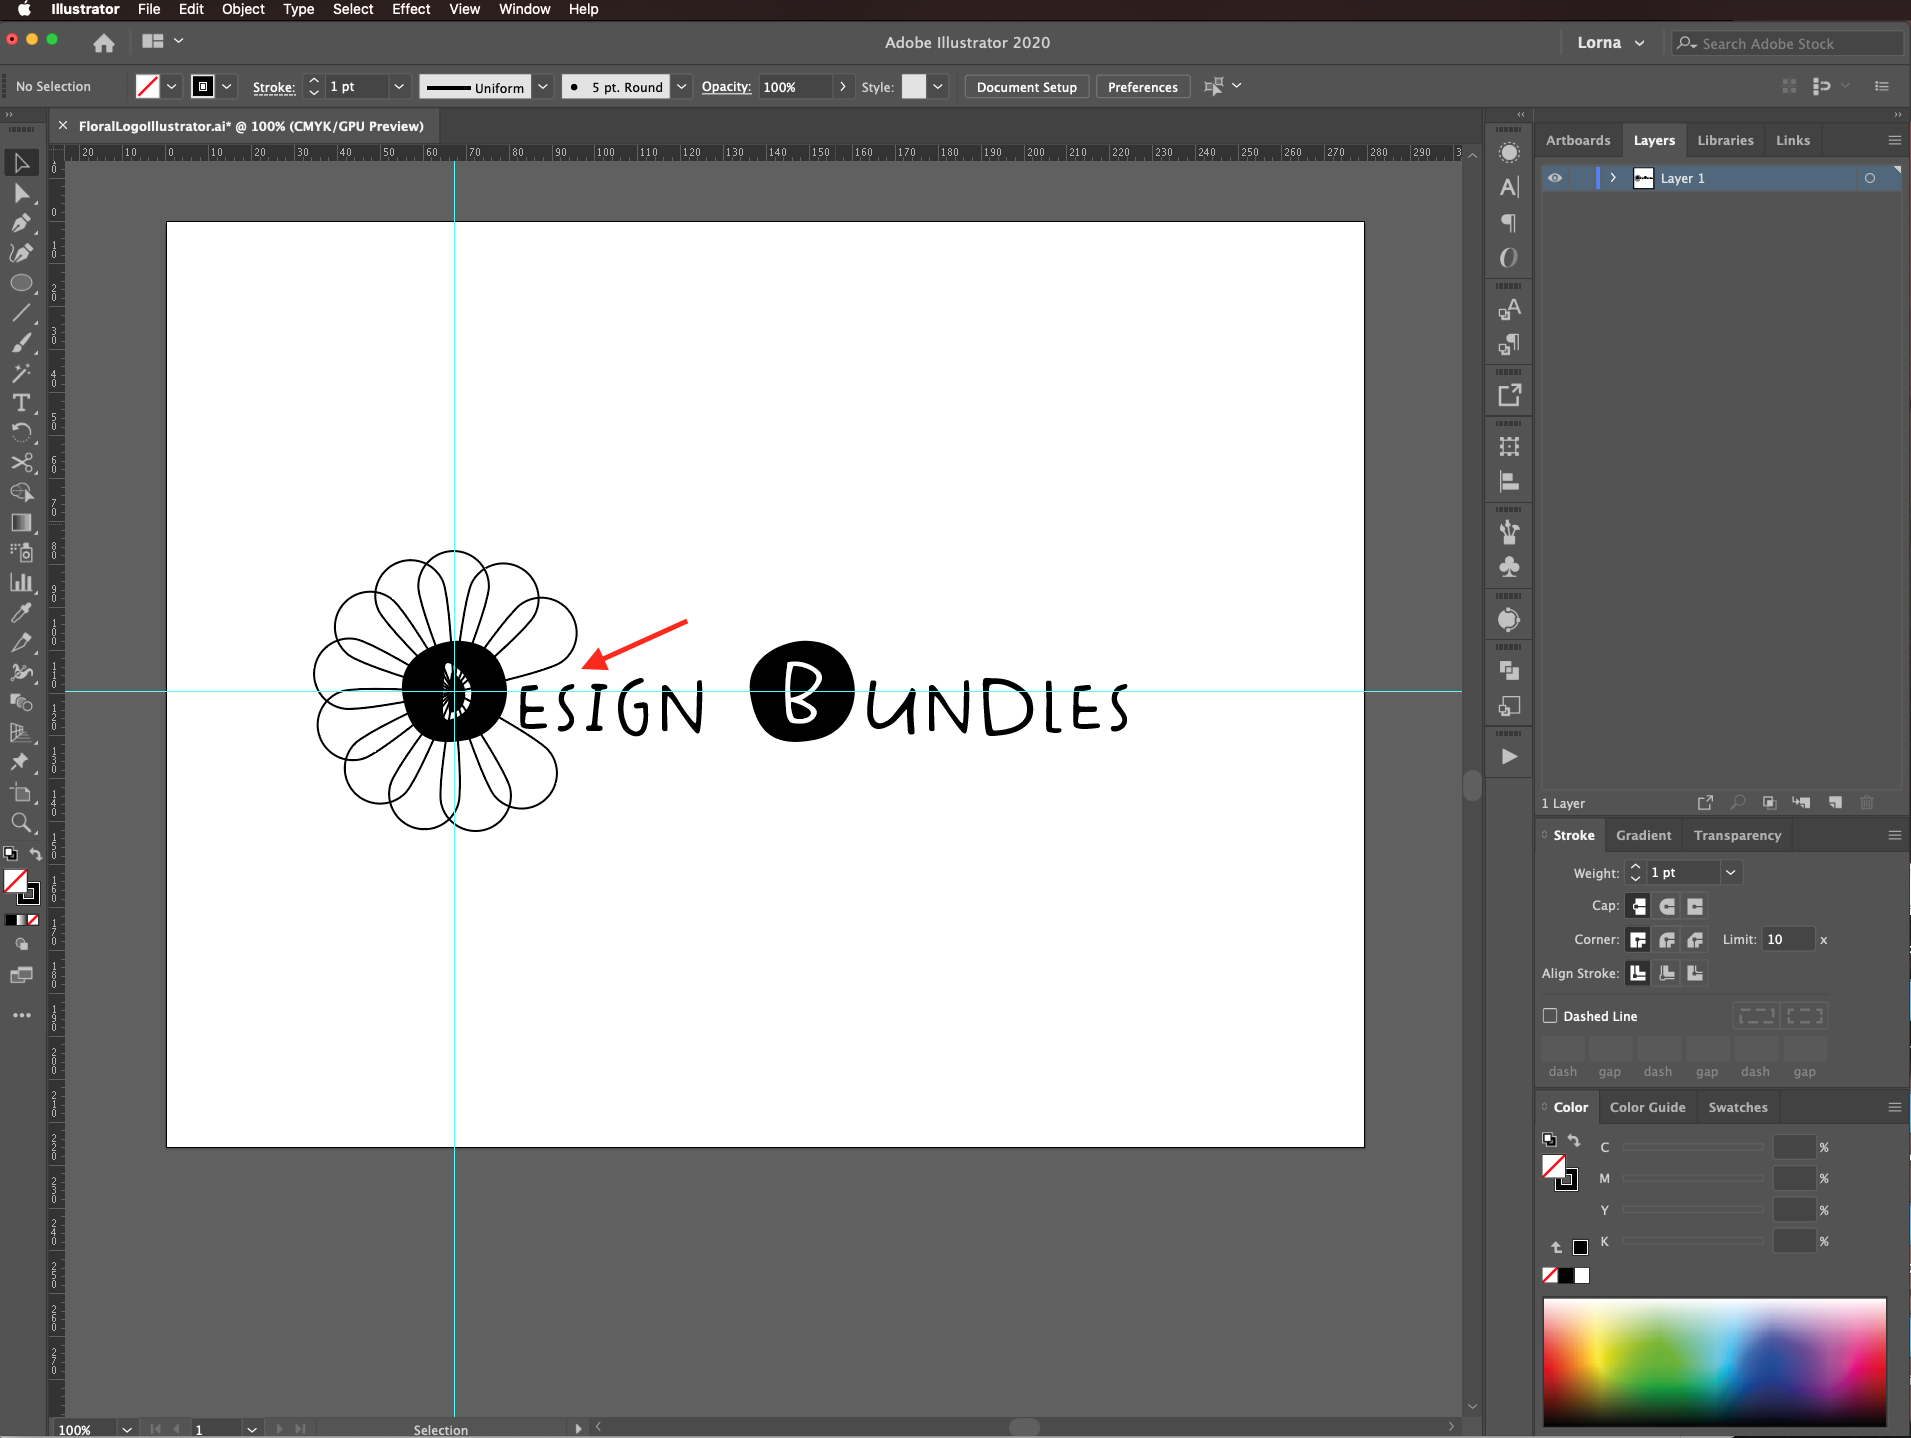
Place Guides to mark the center of the first letter and place the flower on top. You may need to resize one of them to make everything more proportionate.
Delete some of the petals to make space for the text.
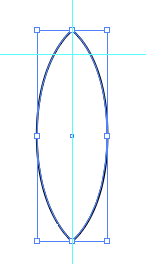
Duplicate one of the petals (select and drag while holding the shift + alt/option keys to duplicate and move in a straight line).
Select the top anchor point and convert it to a corner point.
Pull it up until the top point is at about the same distance to the center as the bottom one.
Click on one of the side anchor points.
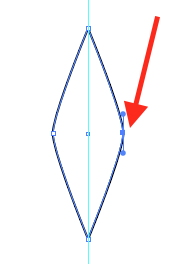
Hit S to select the Scale Tool, then pull one of the nodes up or down to round the shape a bit more. With this method, you should be able to pull both nodes at the same time.
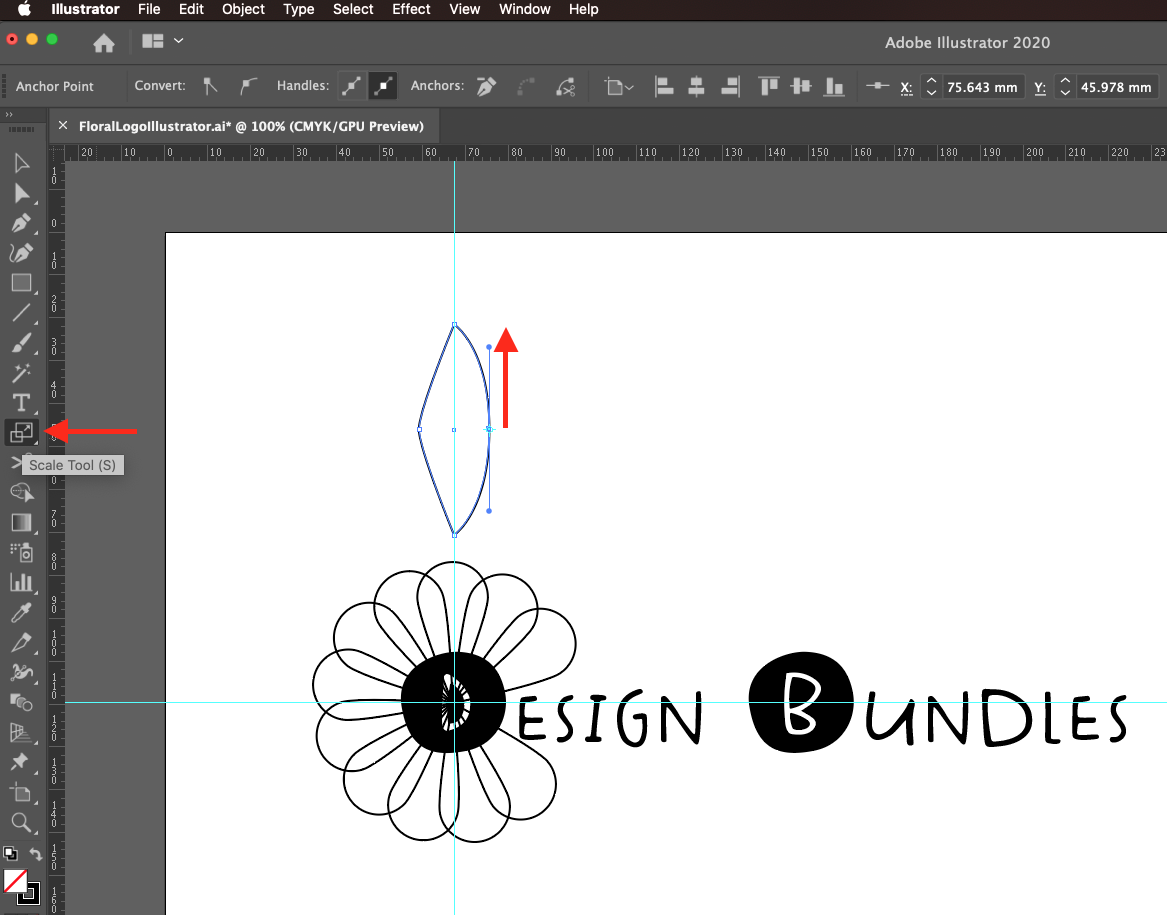
Repeat with the other side.
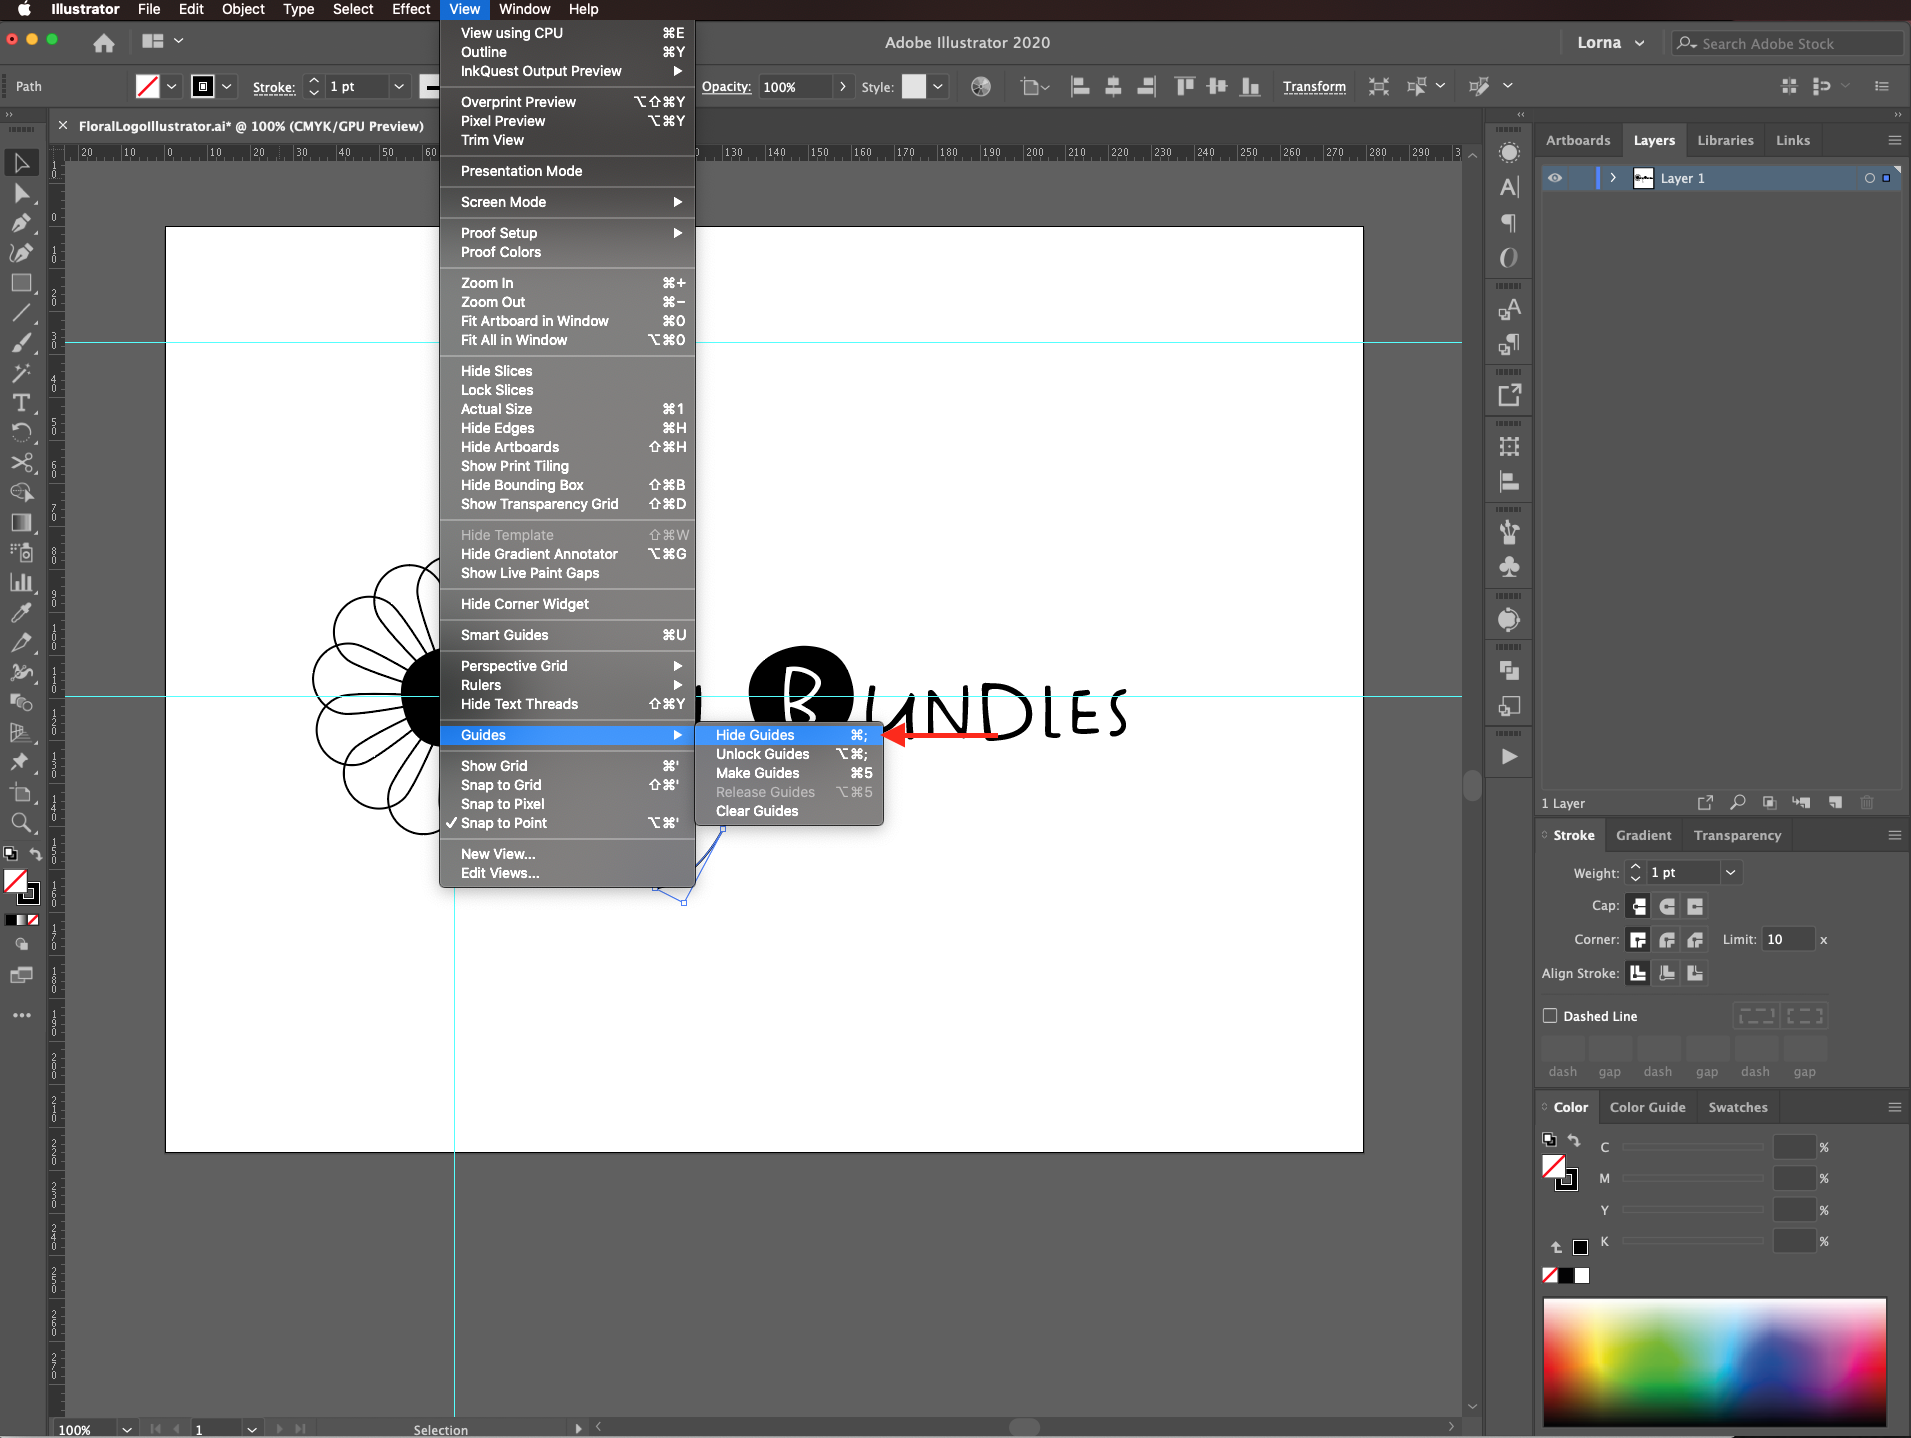
Hide the Guides if needed (command/control + ;).
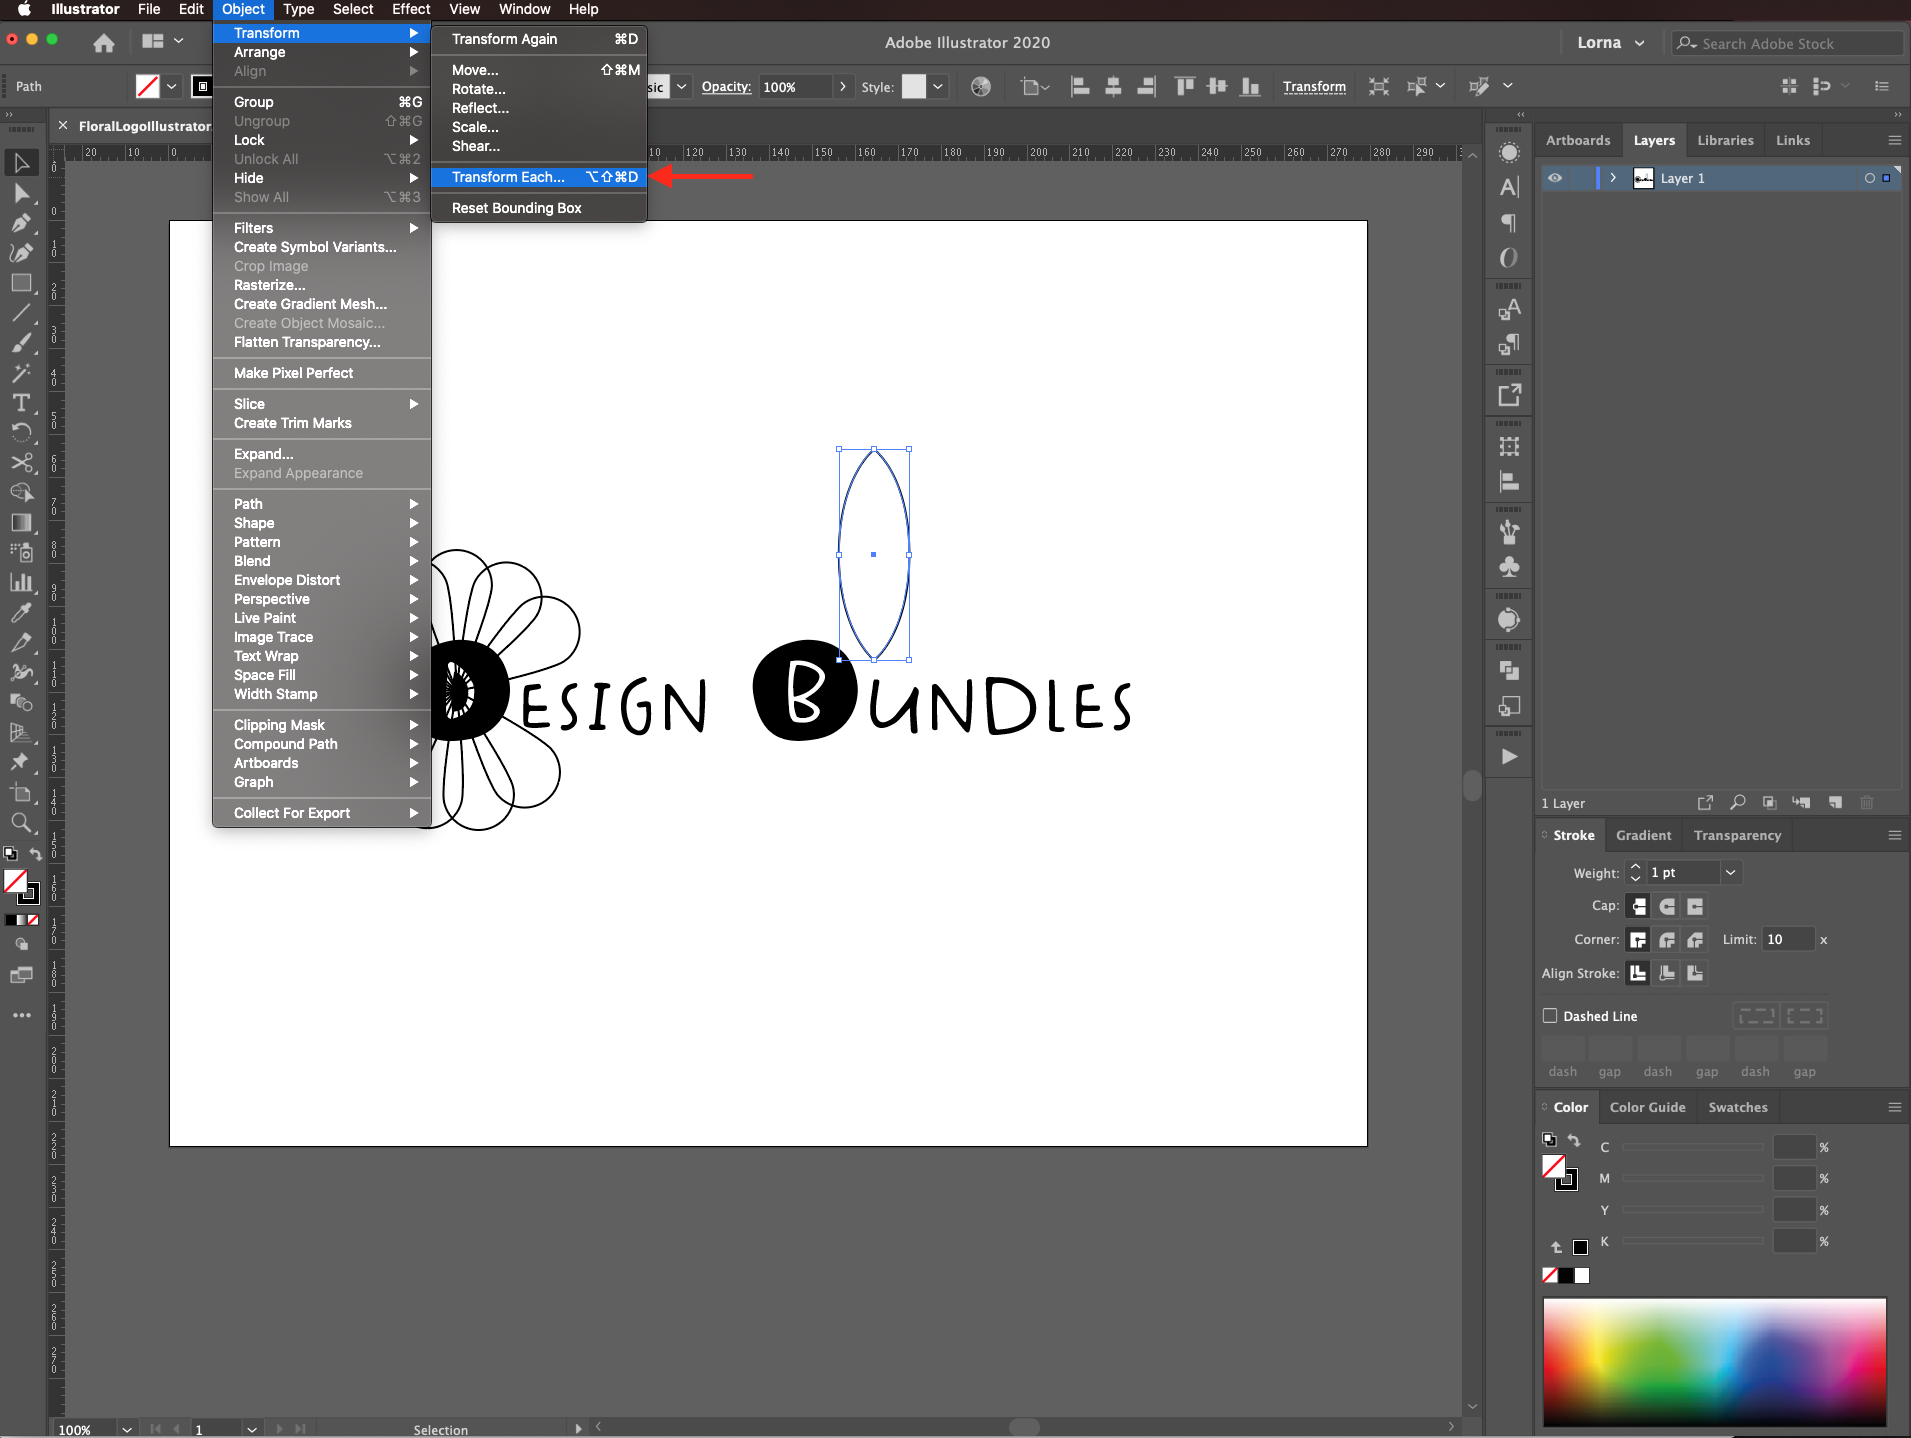
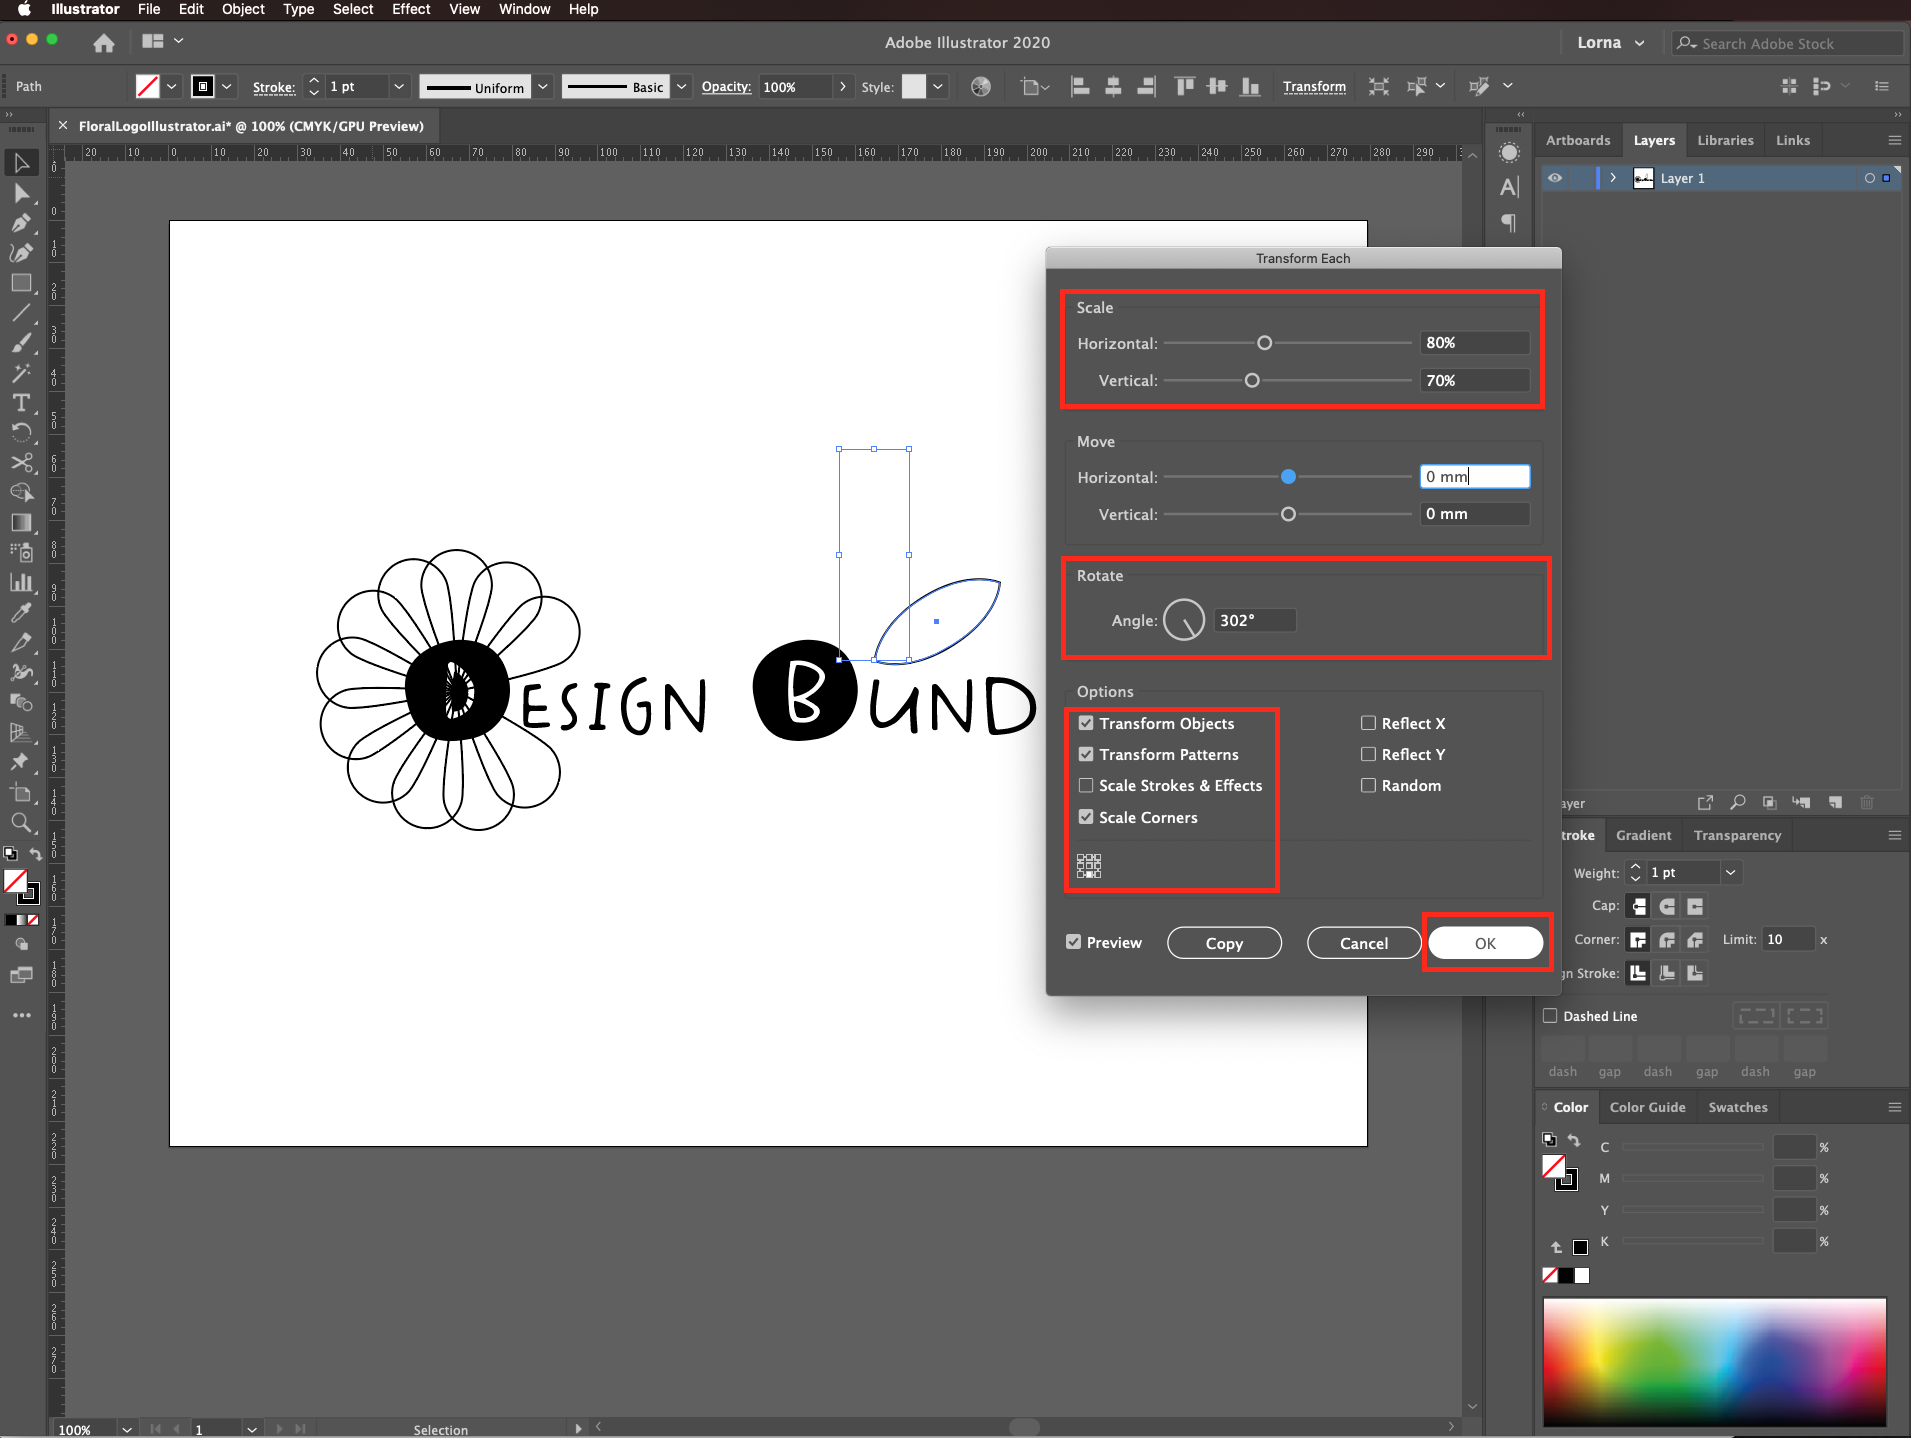
Place the leaf so its bottom tip sits roughly where you want it to be and then head to Object > Transform Each.
Adjust the horizontal and vertical scale to make the shape and shape of the leaf more proportionate. Also, change the angle and make sure that the reference point is set to the bottom center. We used an 80% horizontal scale, a 90% vertical scale, and a 302º angle.
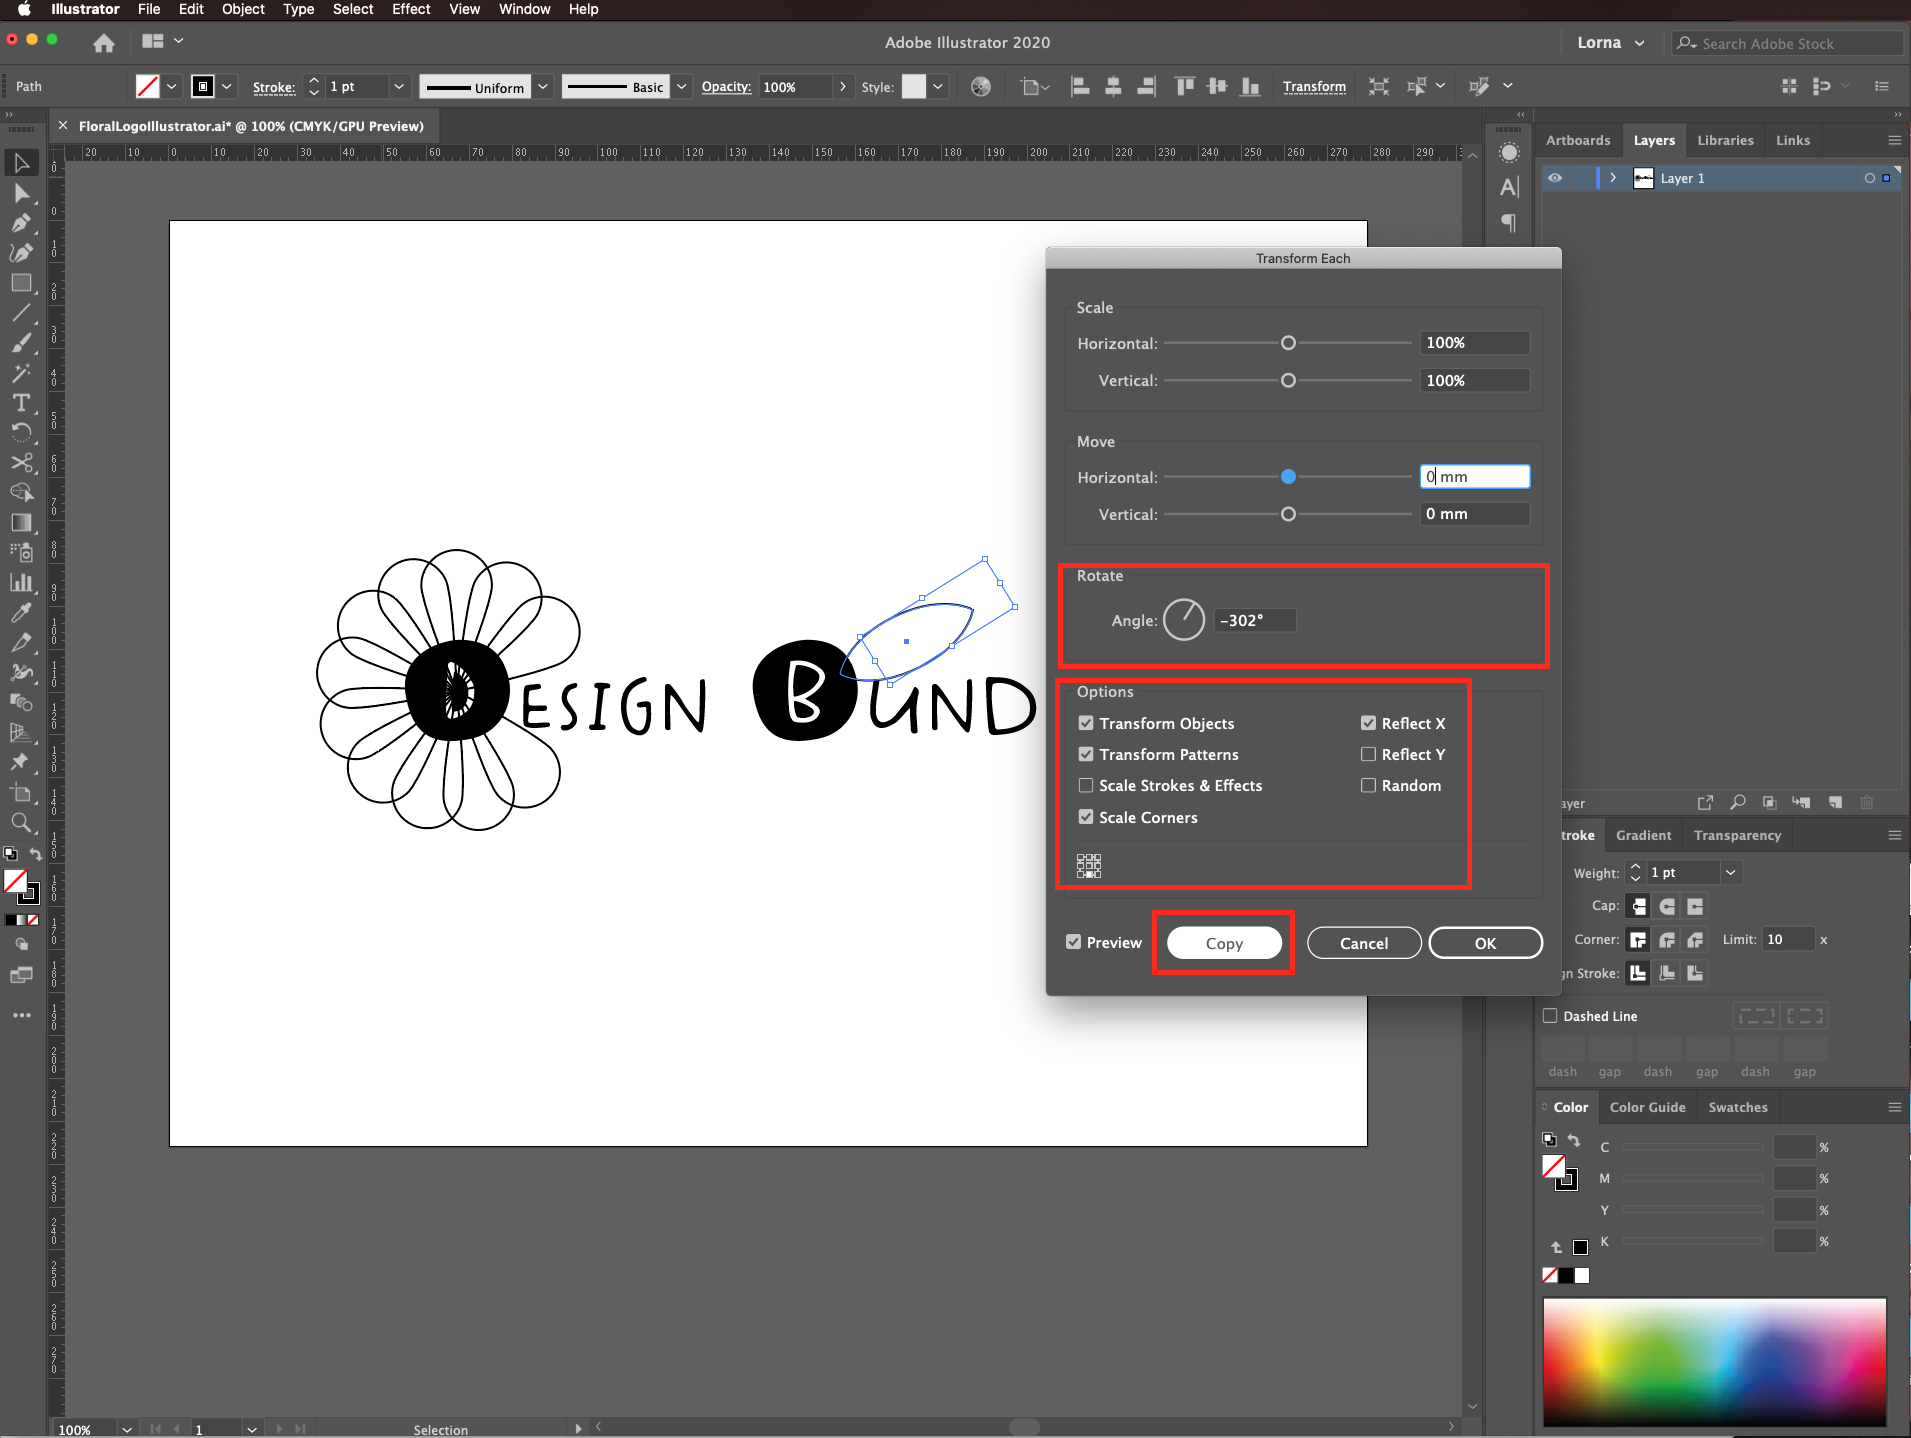
To add another leaf, enter transform each again and adjust the values to create another leaf. Again, make sure that the reference point is set to the bottom center. We used a 100% horizontal scale, a 100% vertical scale, a -302º angle and clicked the reflect x box. Click copy instead of ok.
Move the new leaf and place it where you want.

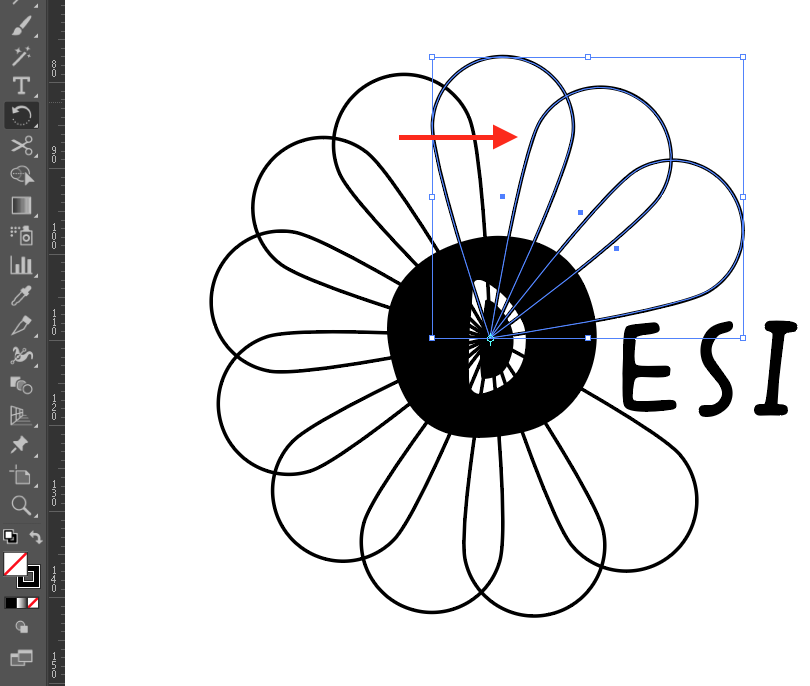
Check if the petal progression is smooth and fix any errors if needed.
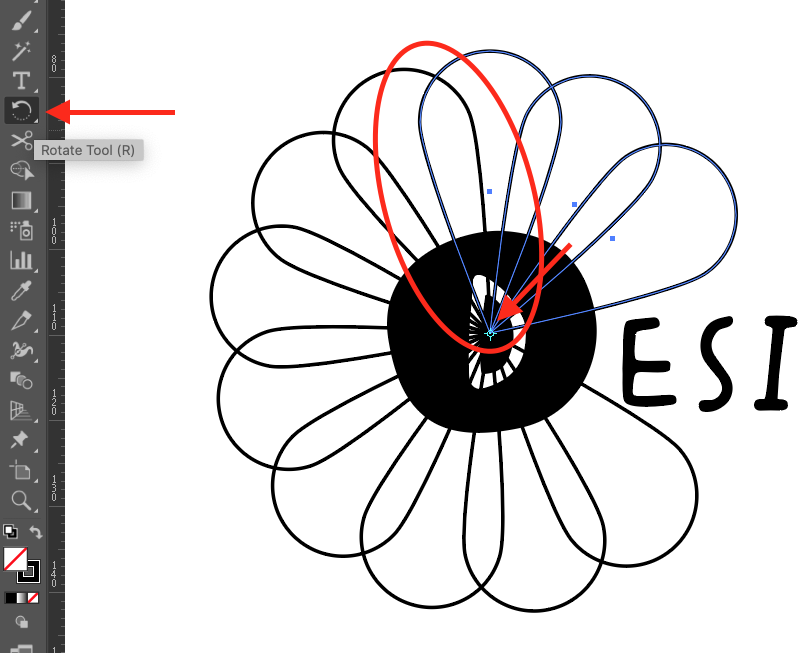
In our case, the overlapping of a couple of petals was not proportionate so we used the rotate tool to fix it.
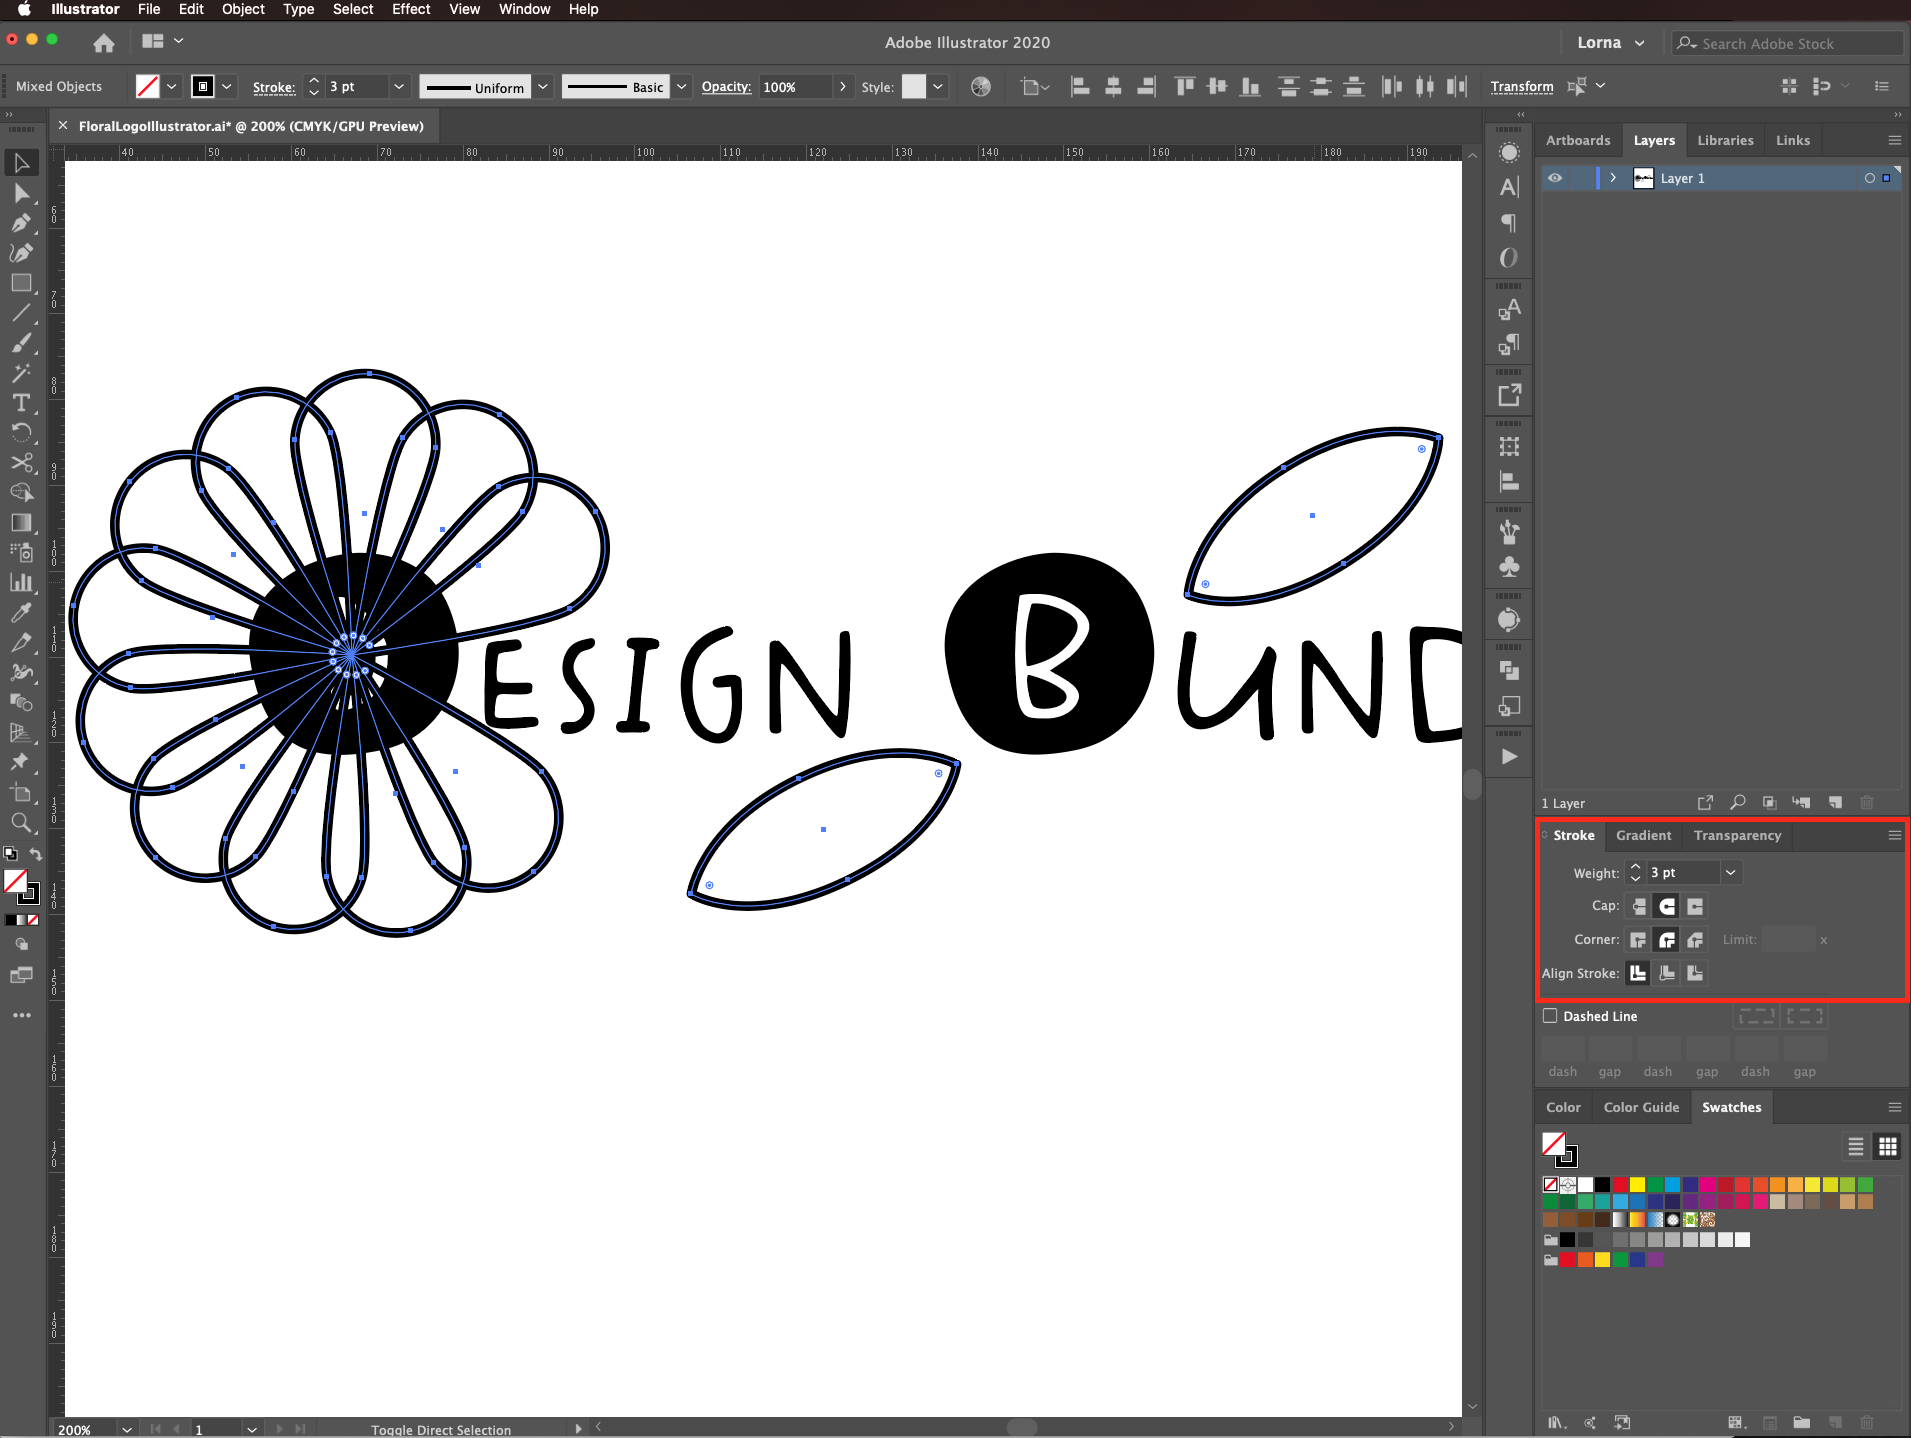
Select the petals and leaves and change the stroke weight to about 3 pt, make the caps and corners round.
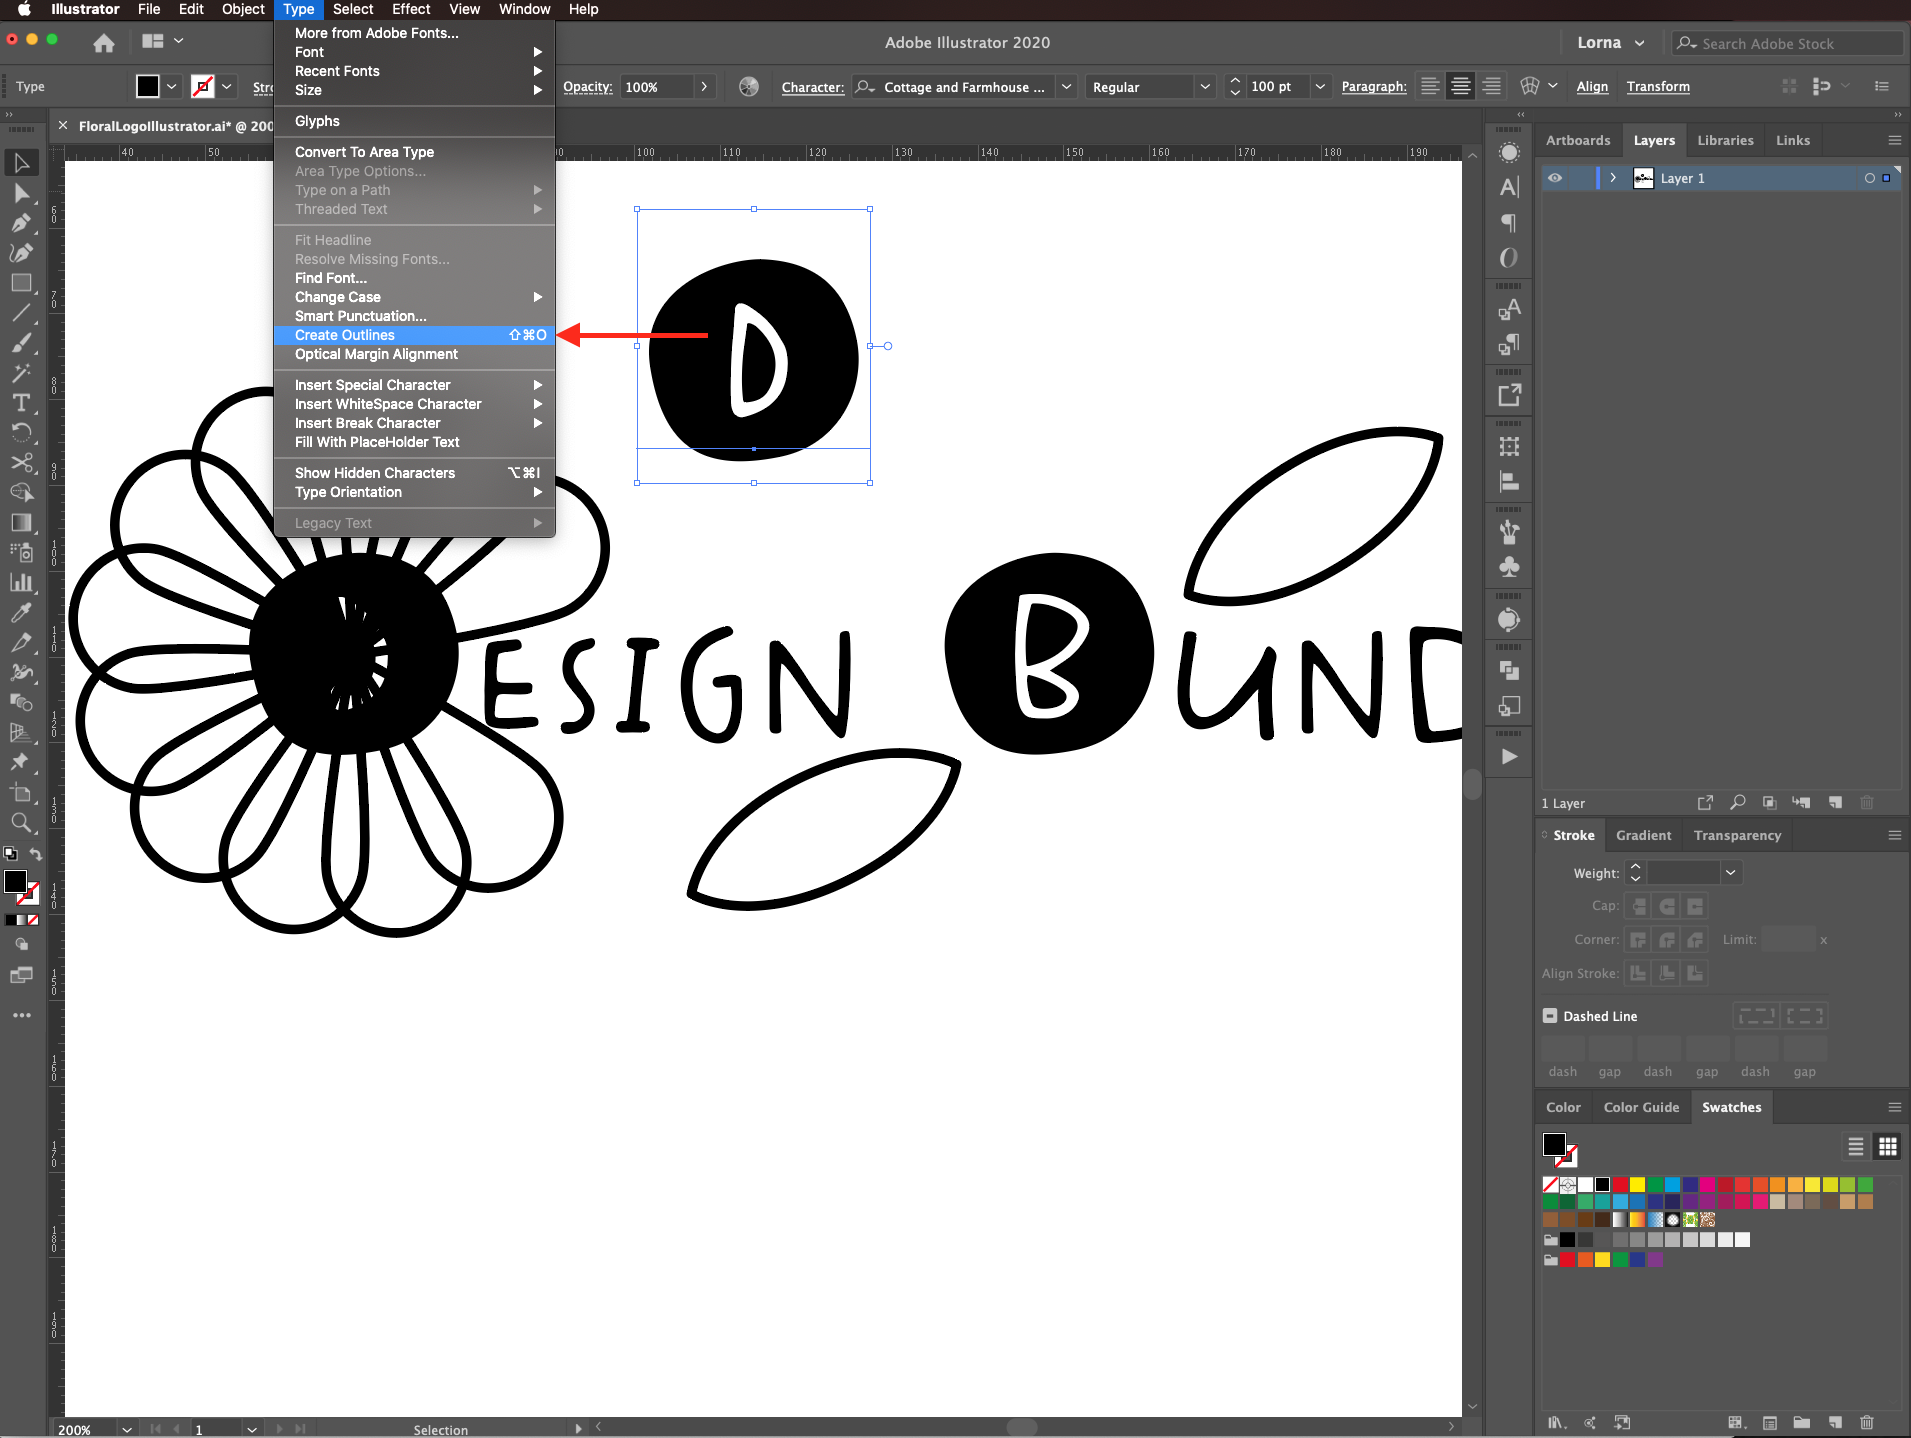
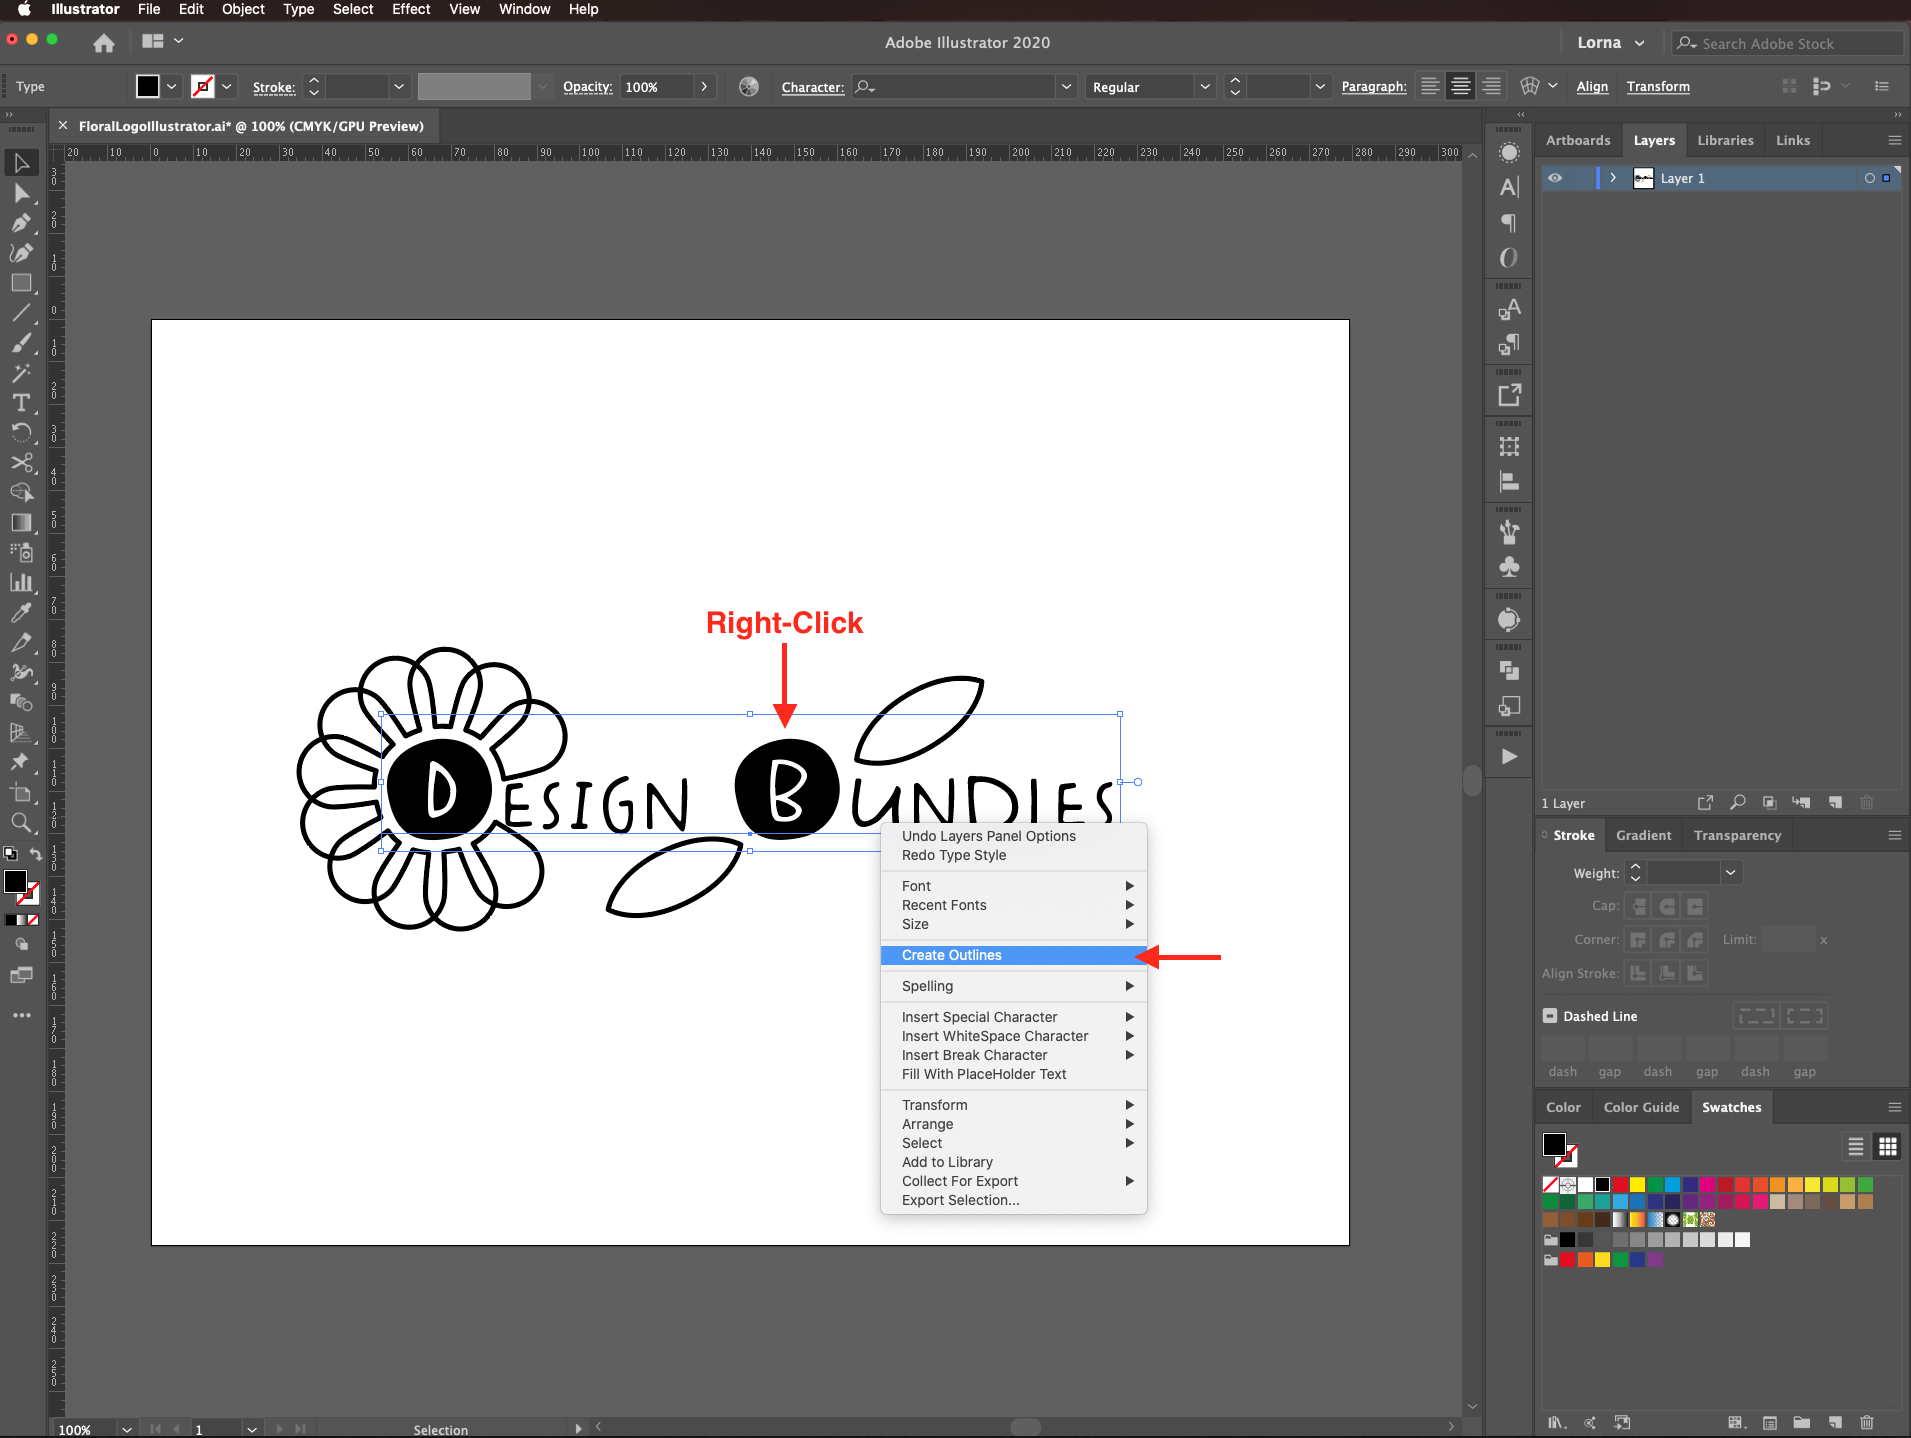
We are using the first letter as the center of the flower. To cut the petals around the center, create a duplicate of the first letter and turn the text to paths with type > create outlines (shift + command/control + O).
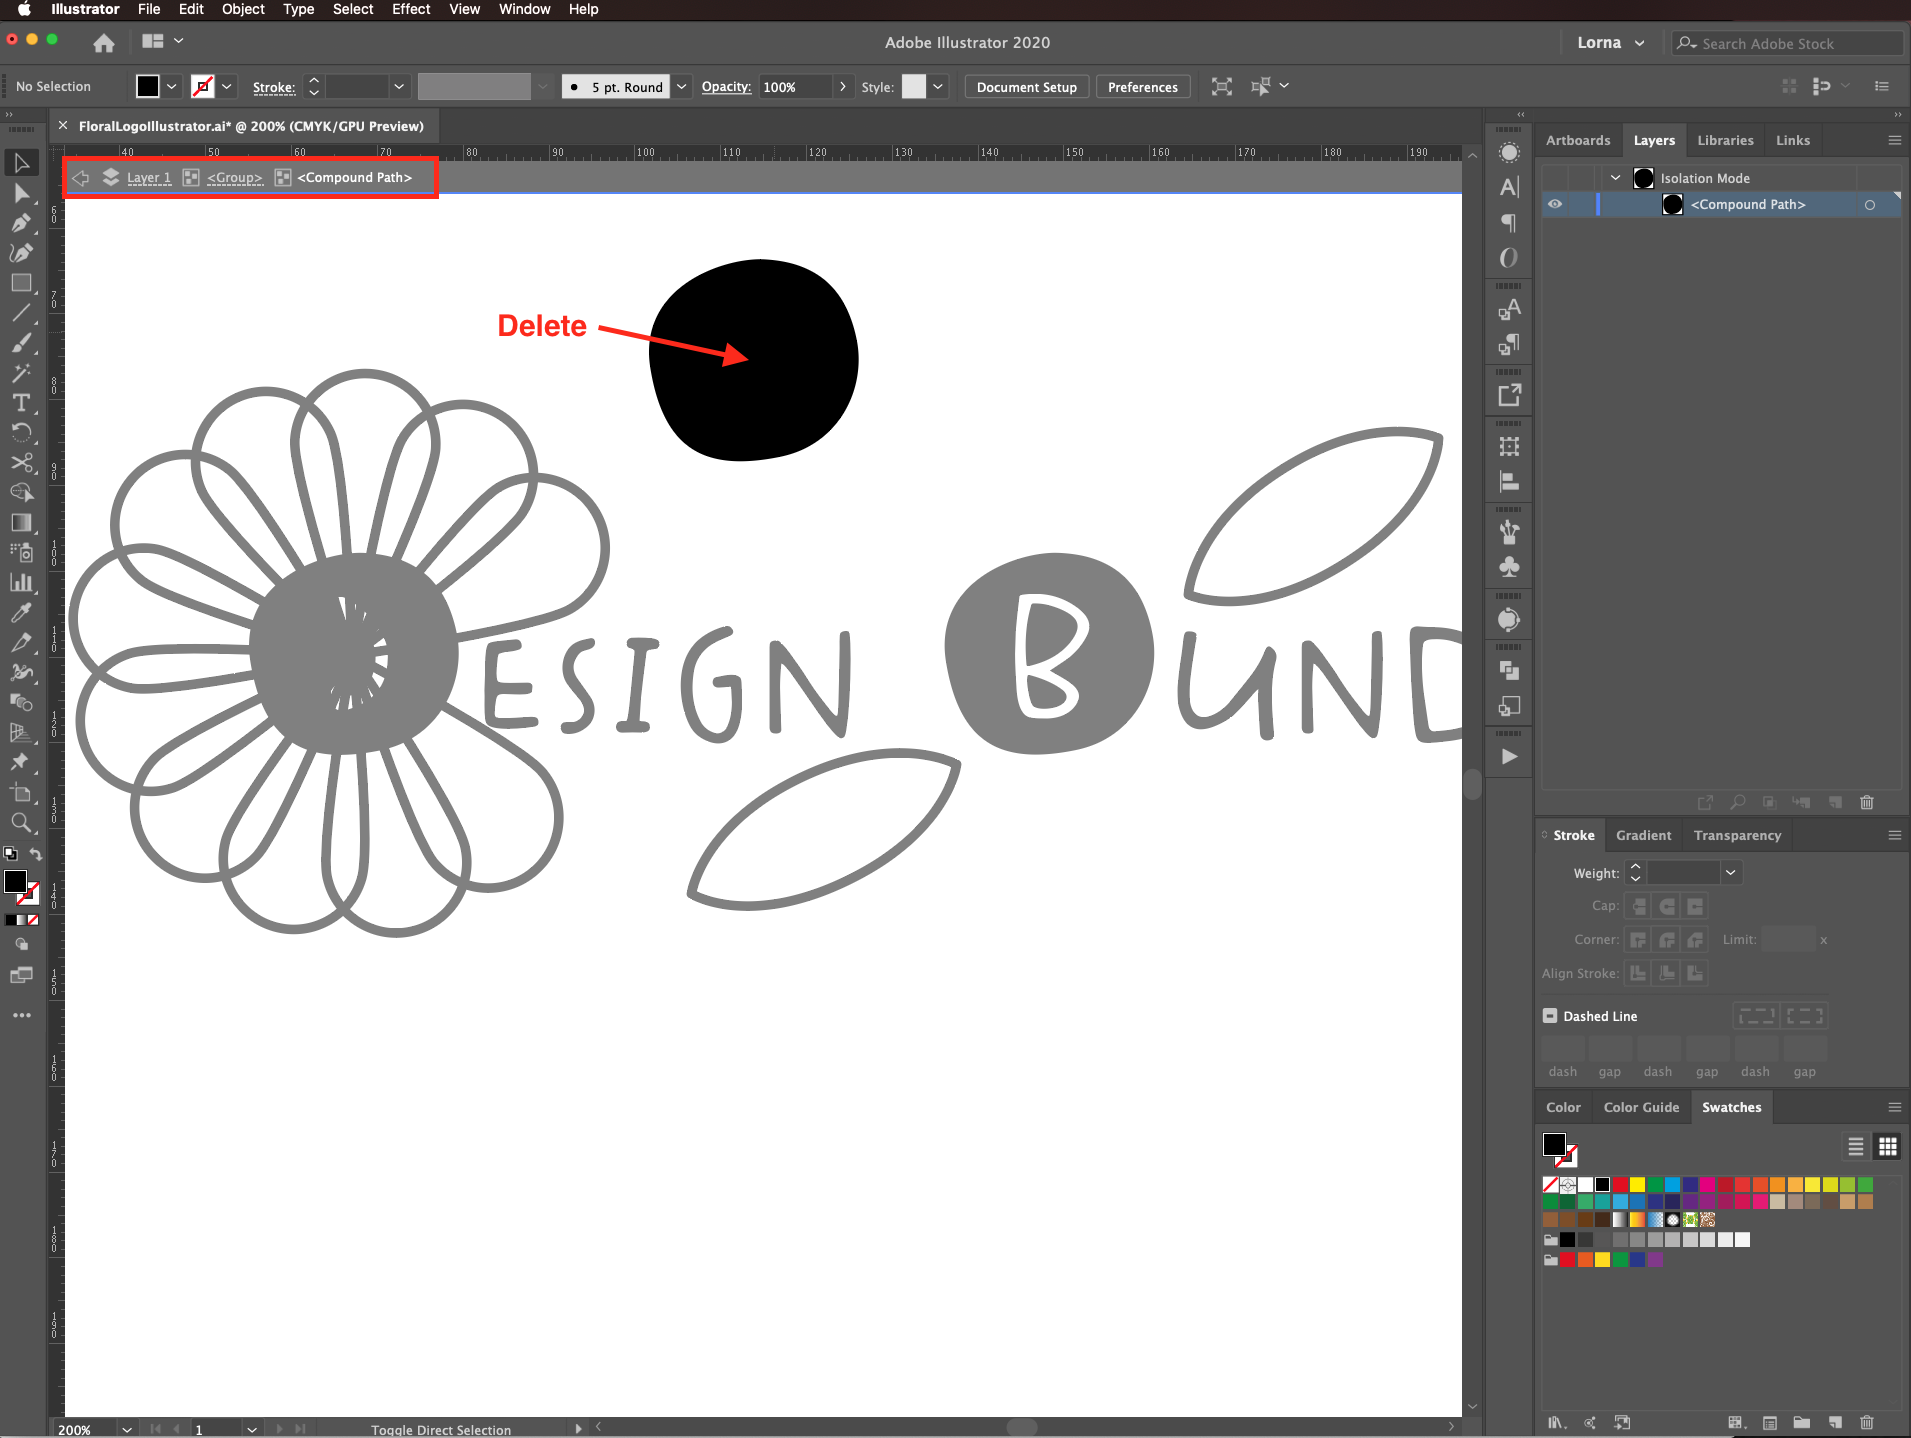
Double click on it a few times to enter Isolation Mode and delete the paths that form the letter. Once you are done, click on the left-pointing arrow on the top menu.
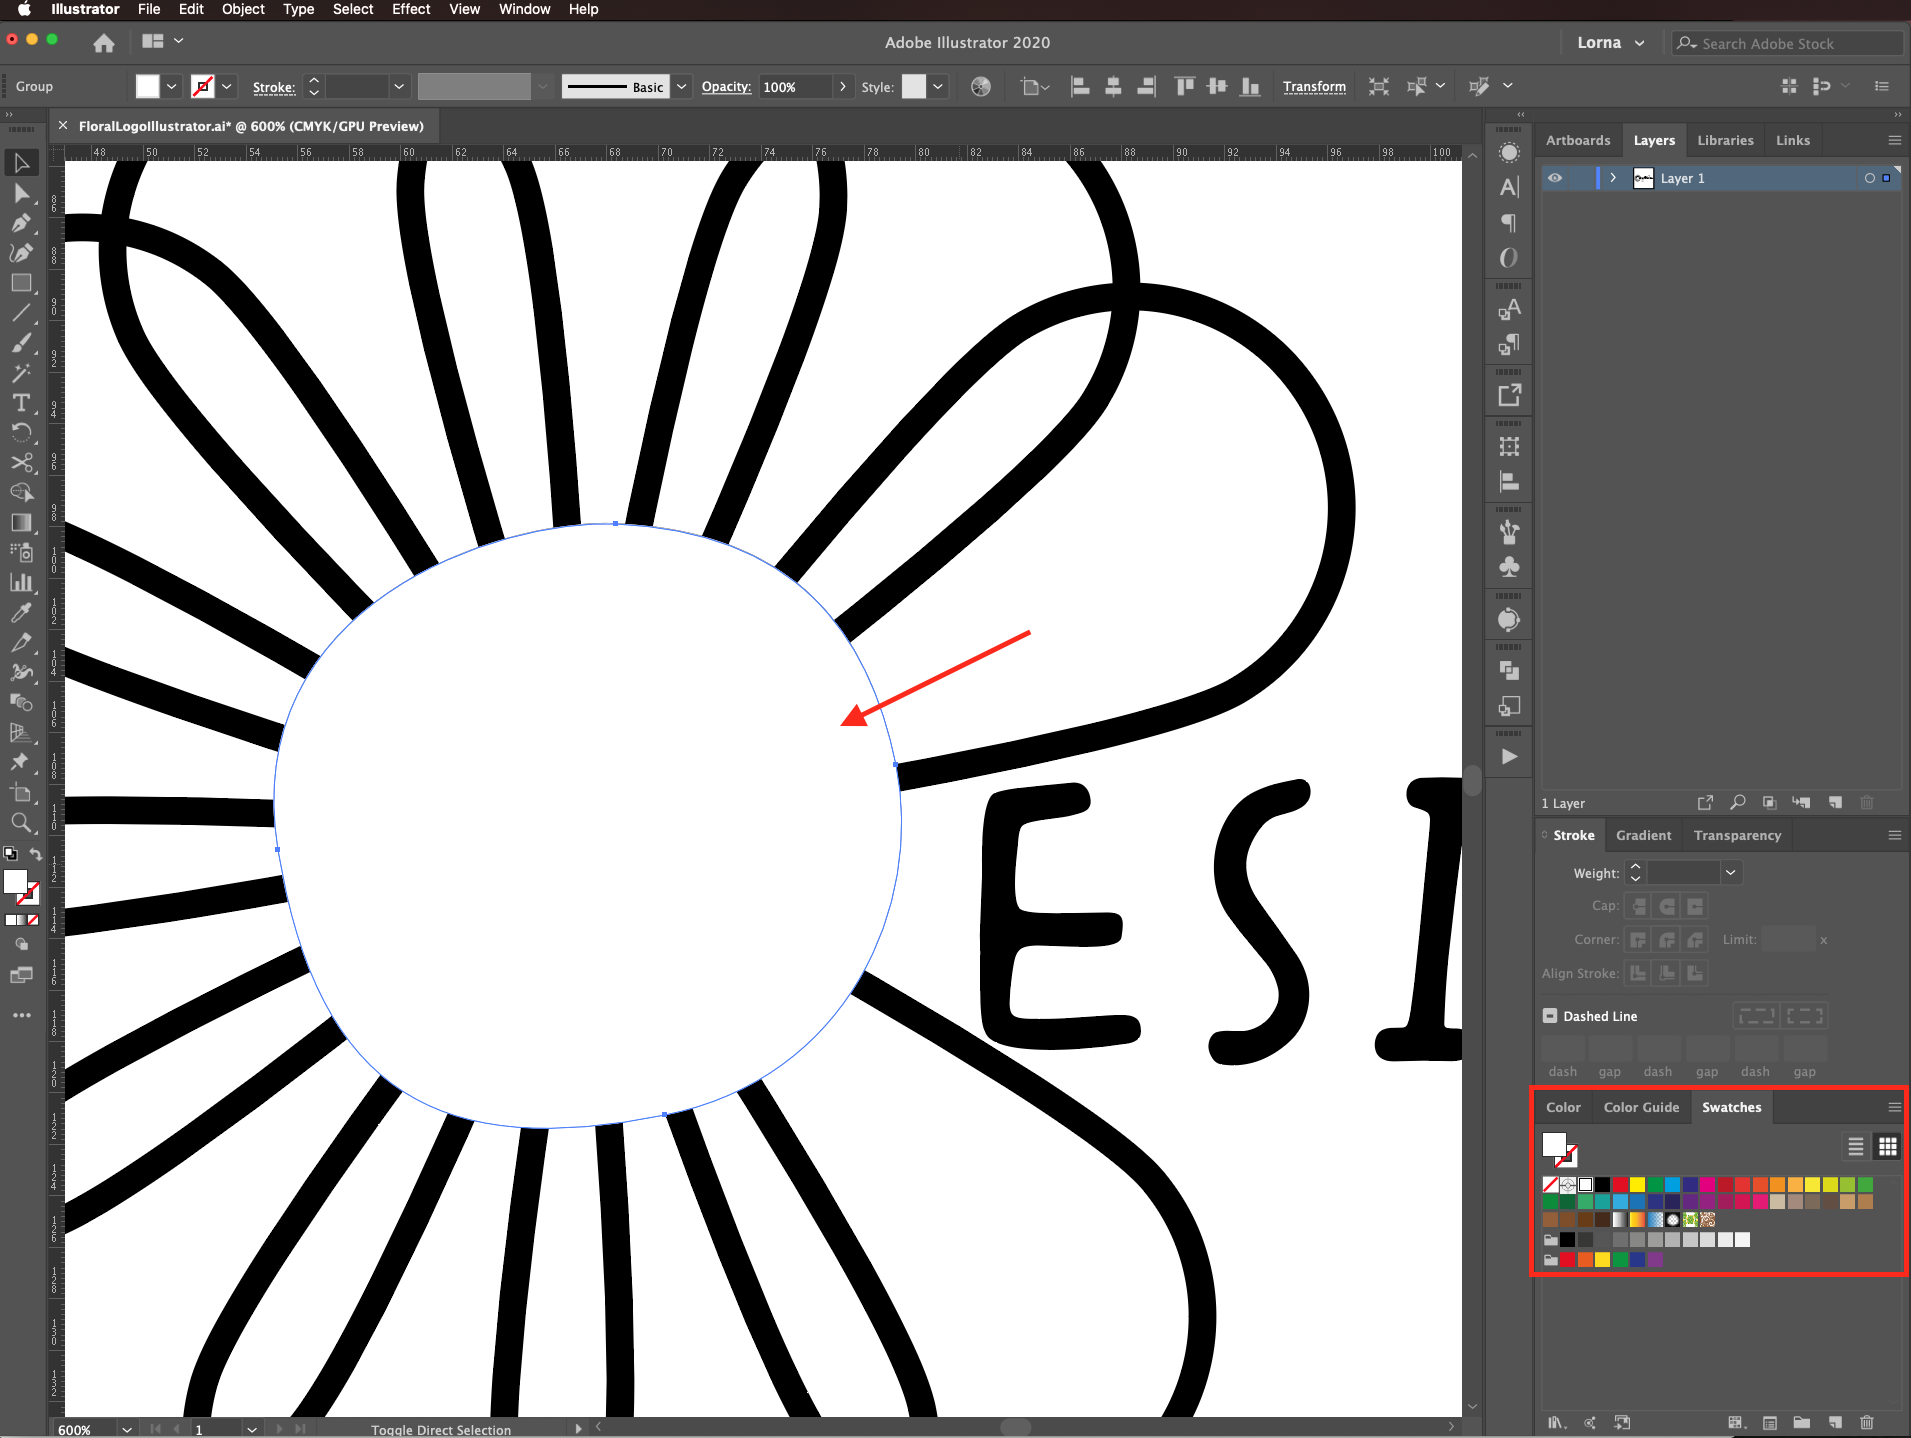
Place the path on top of the first letter of the text and change the fill color to white.
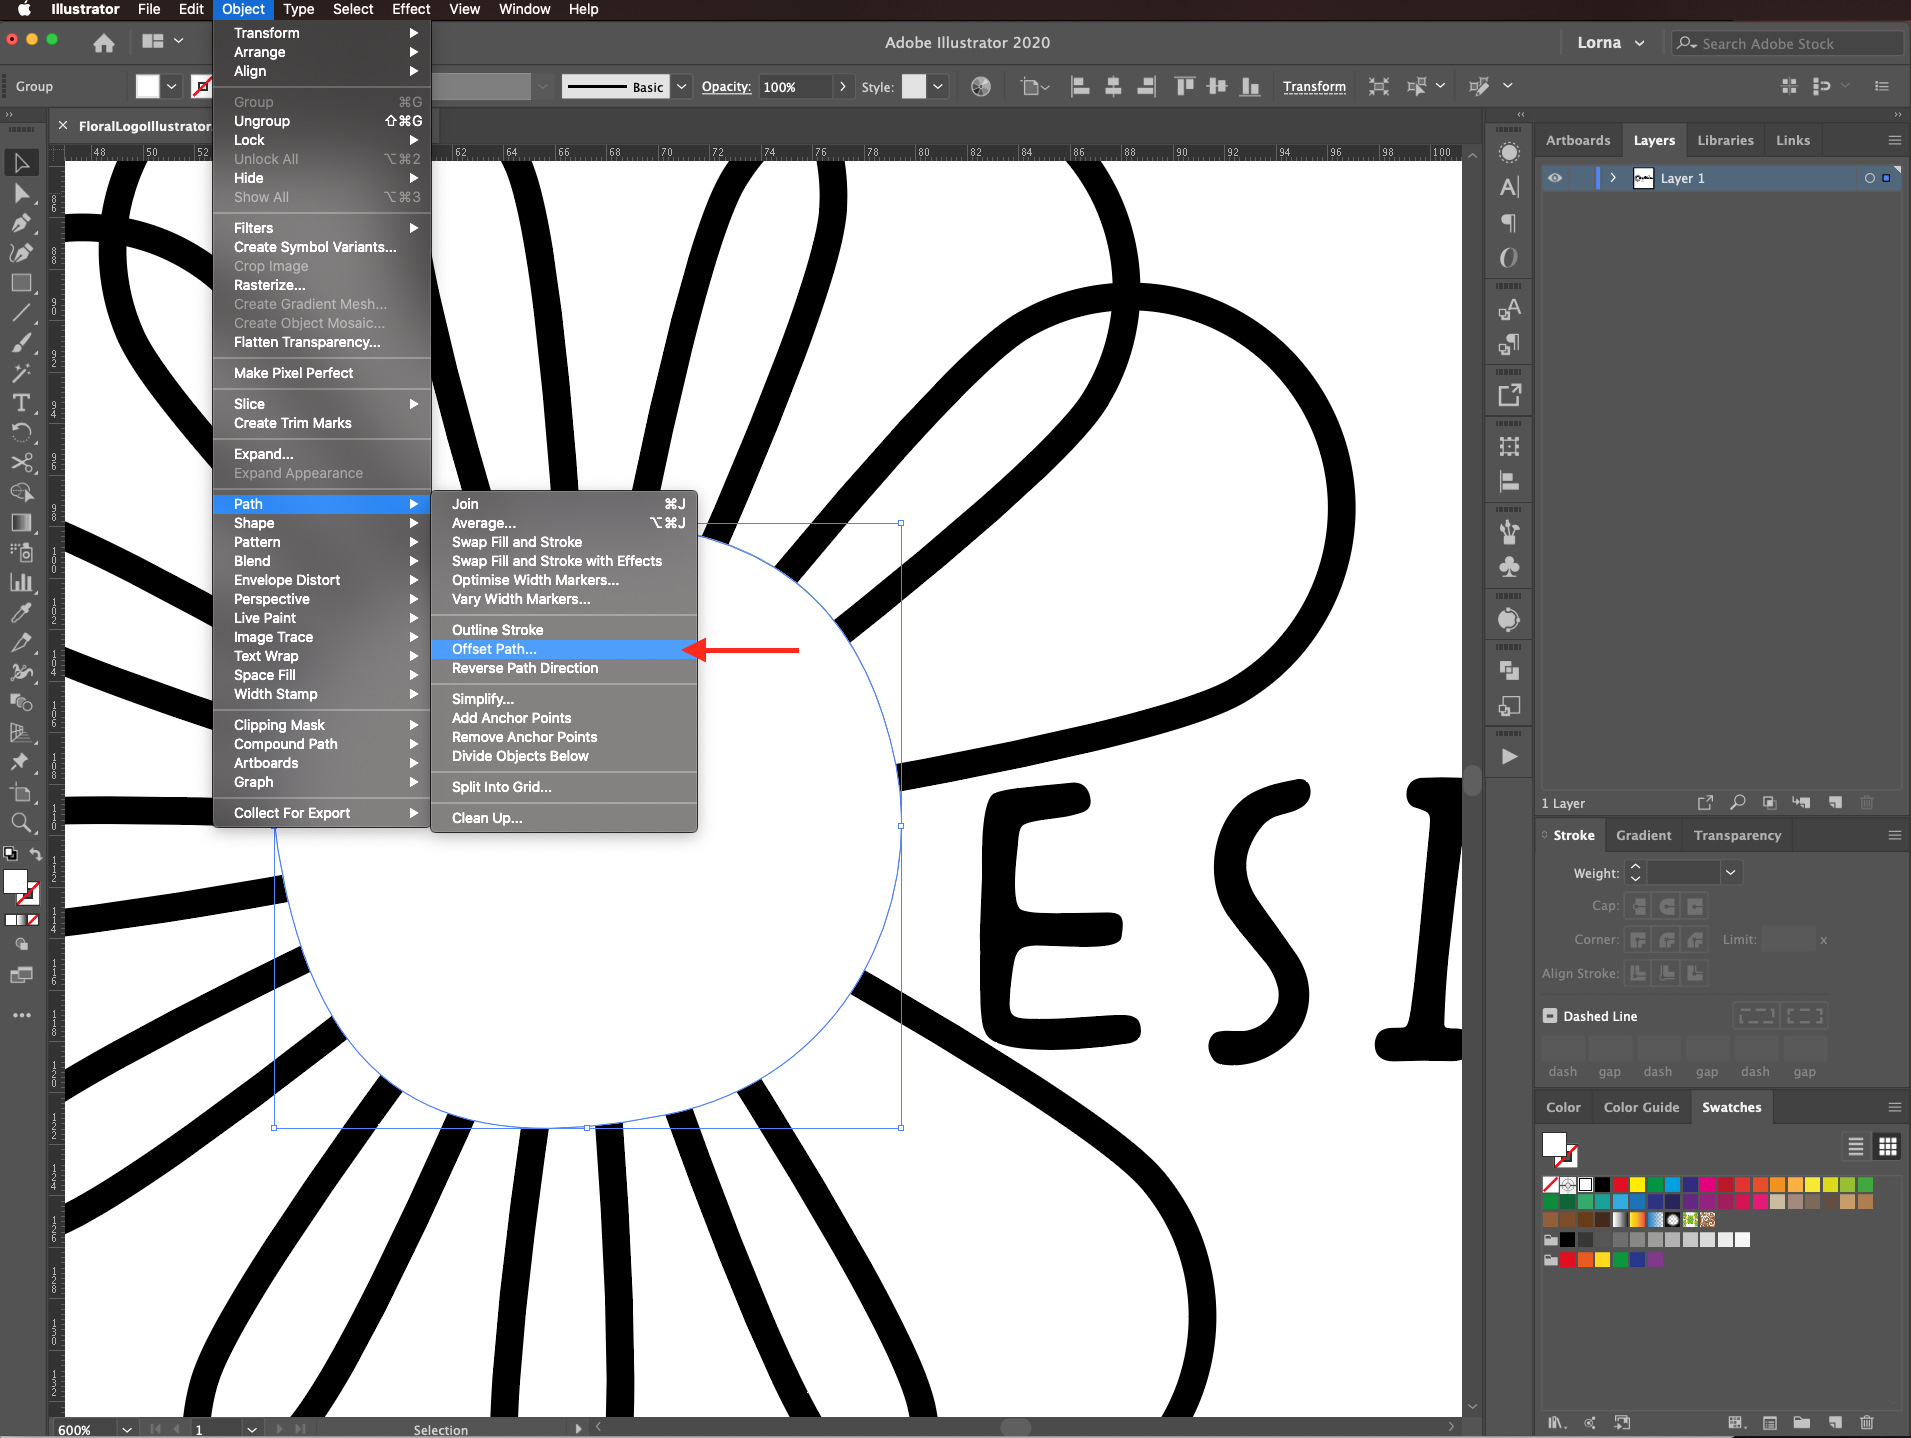
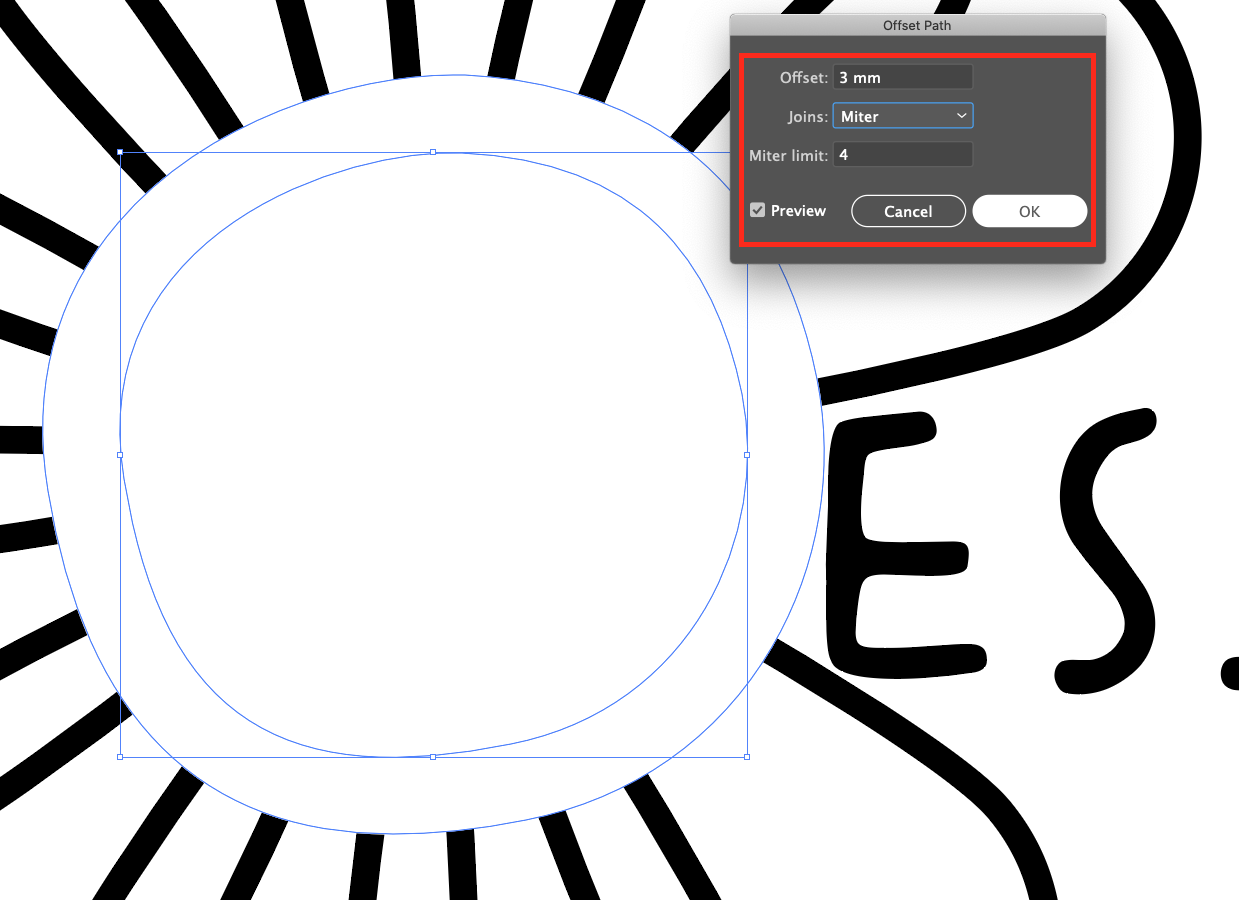
Go to path > offset path and give it a 3 mm offset.
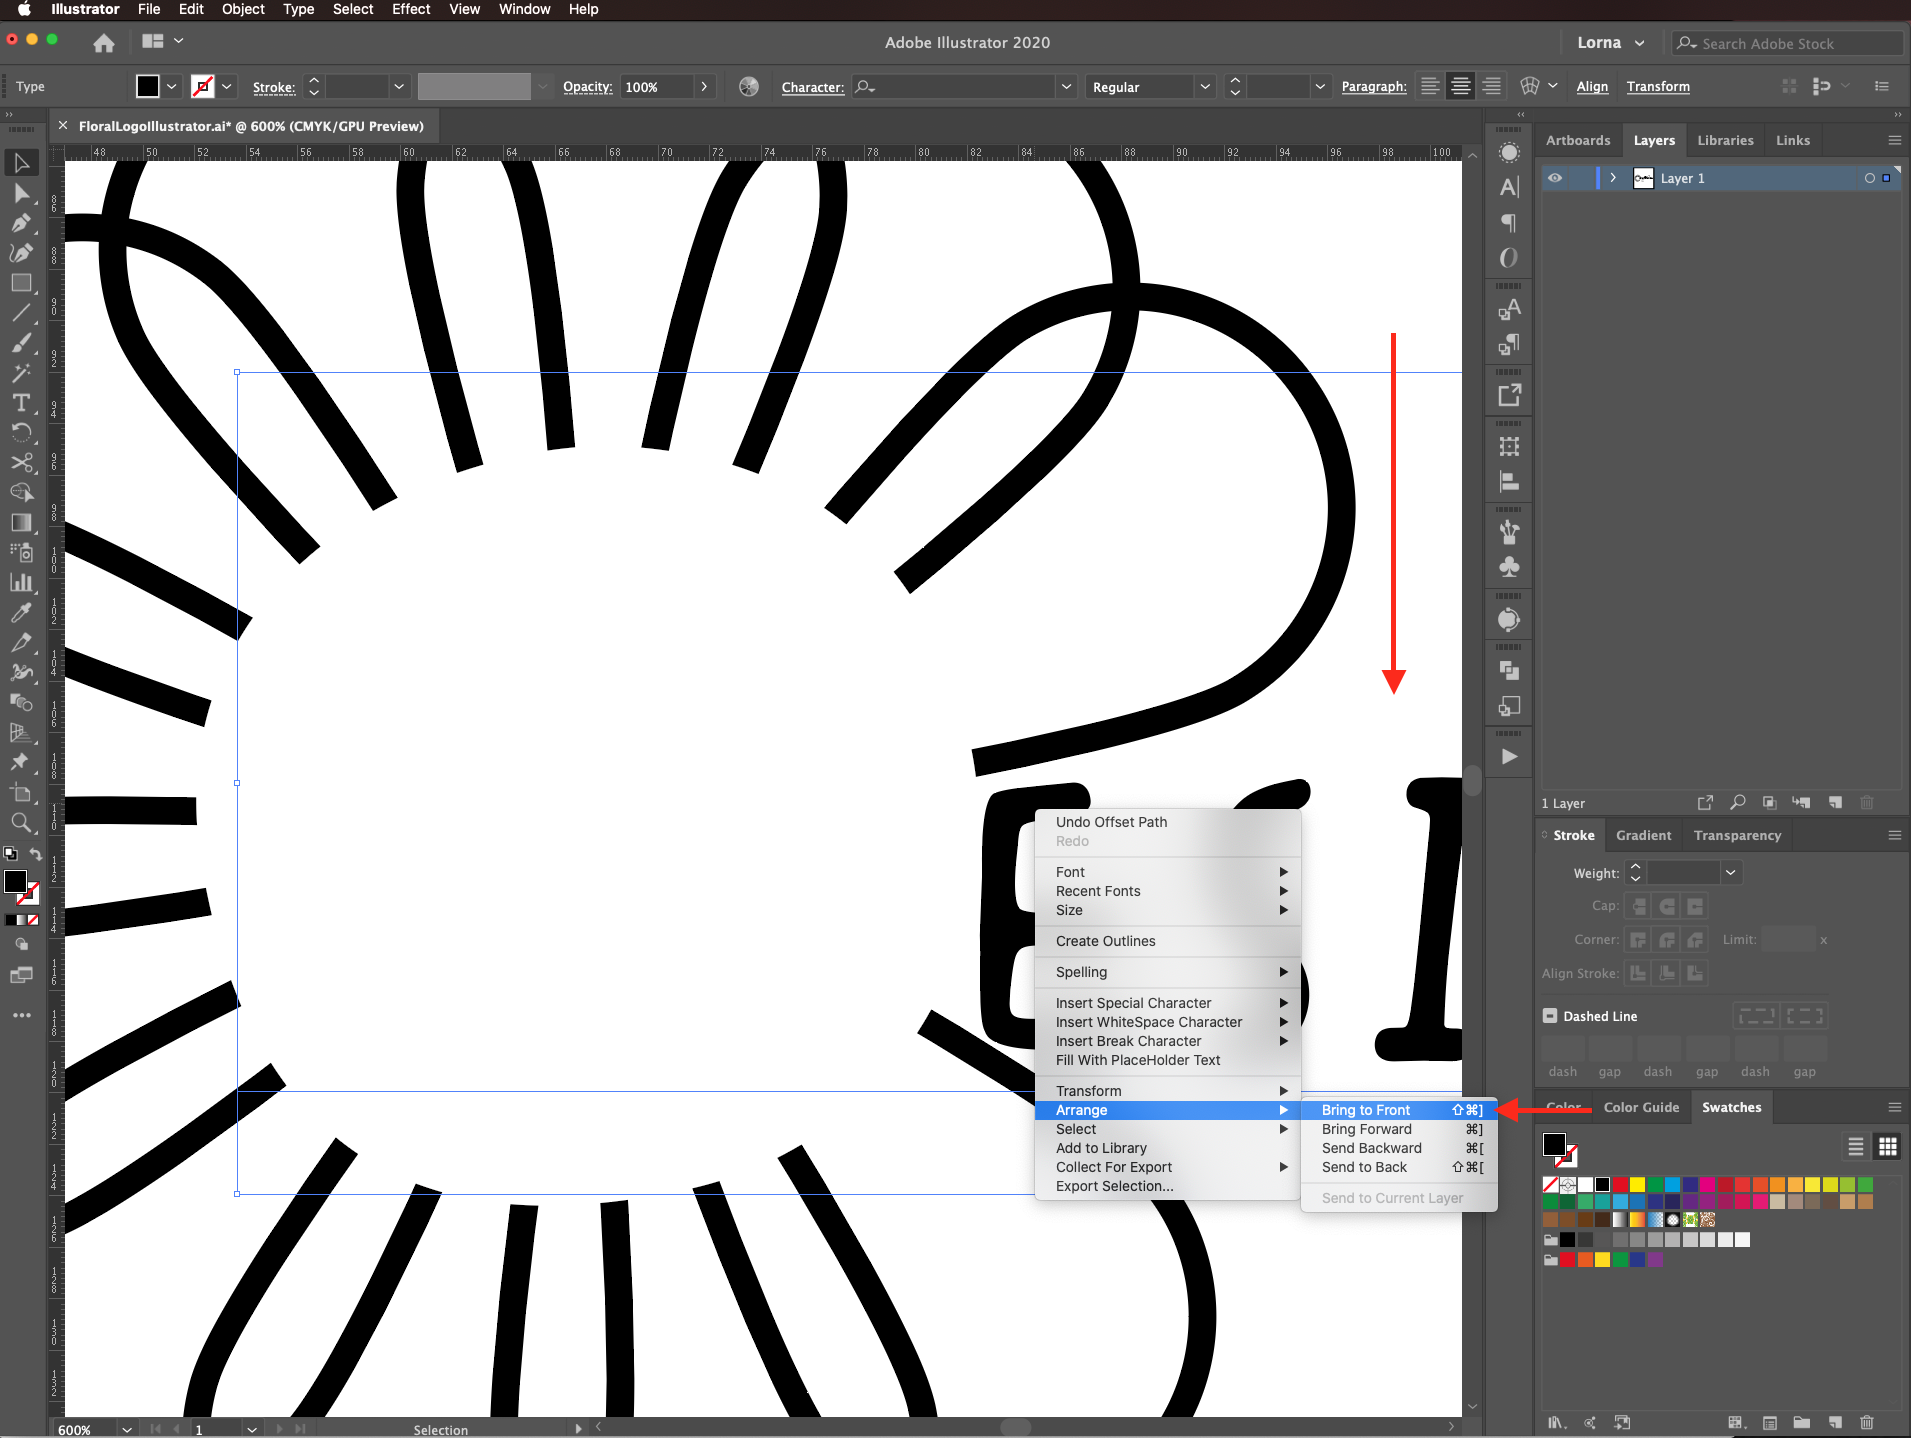
Select the text, right-click on top and choose move to front.
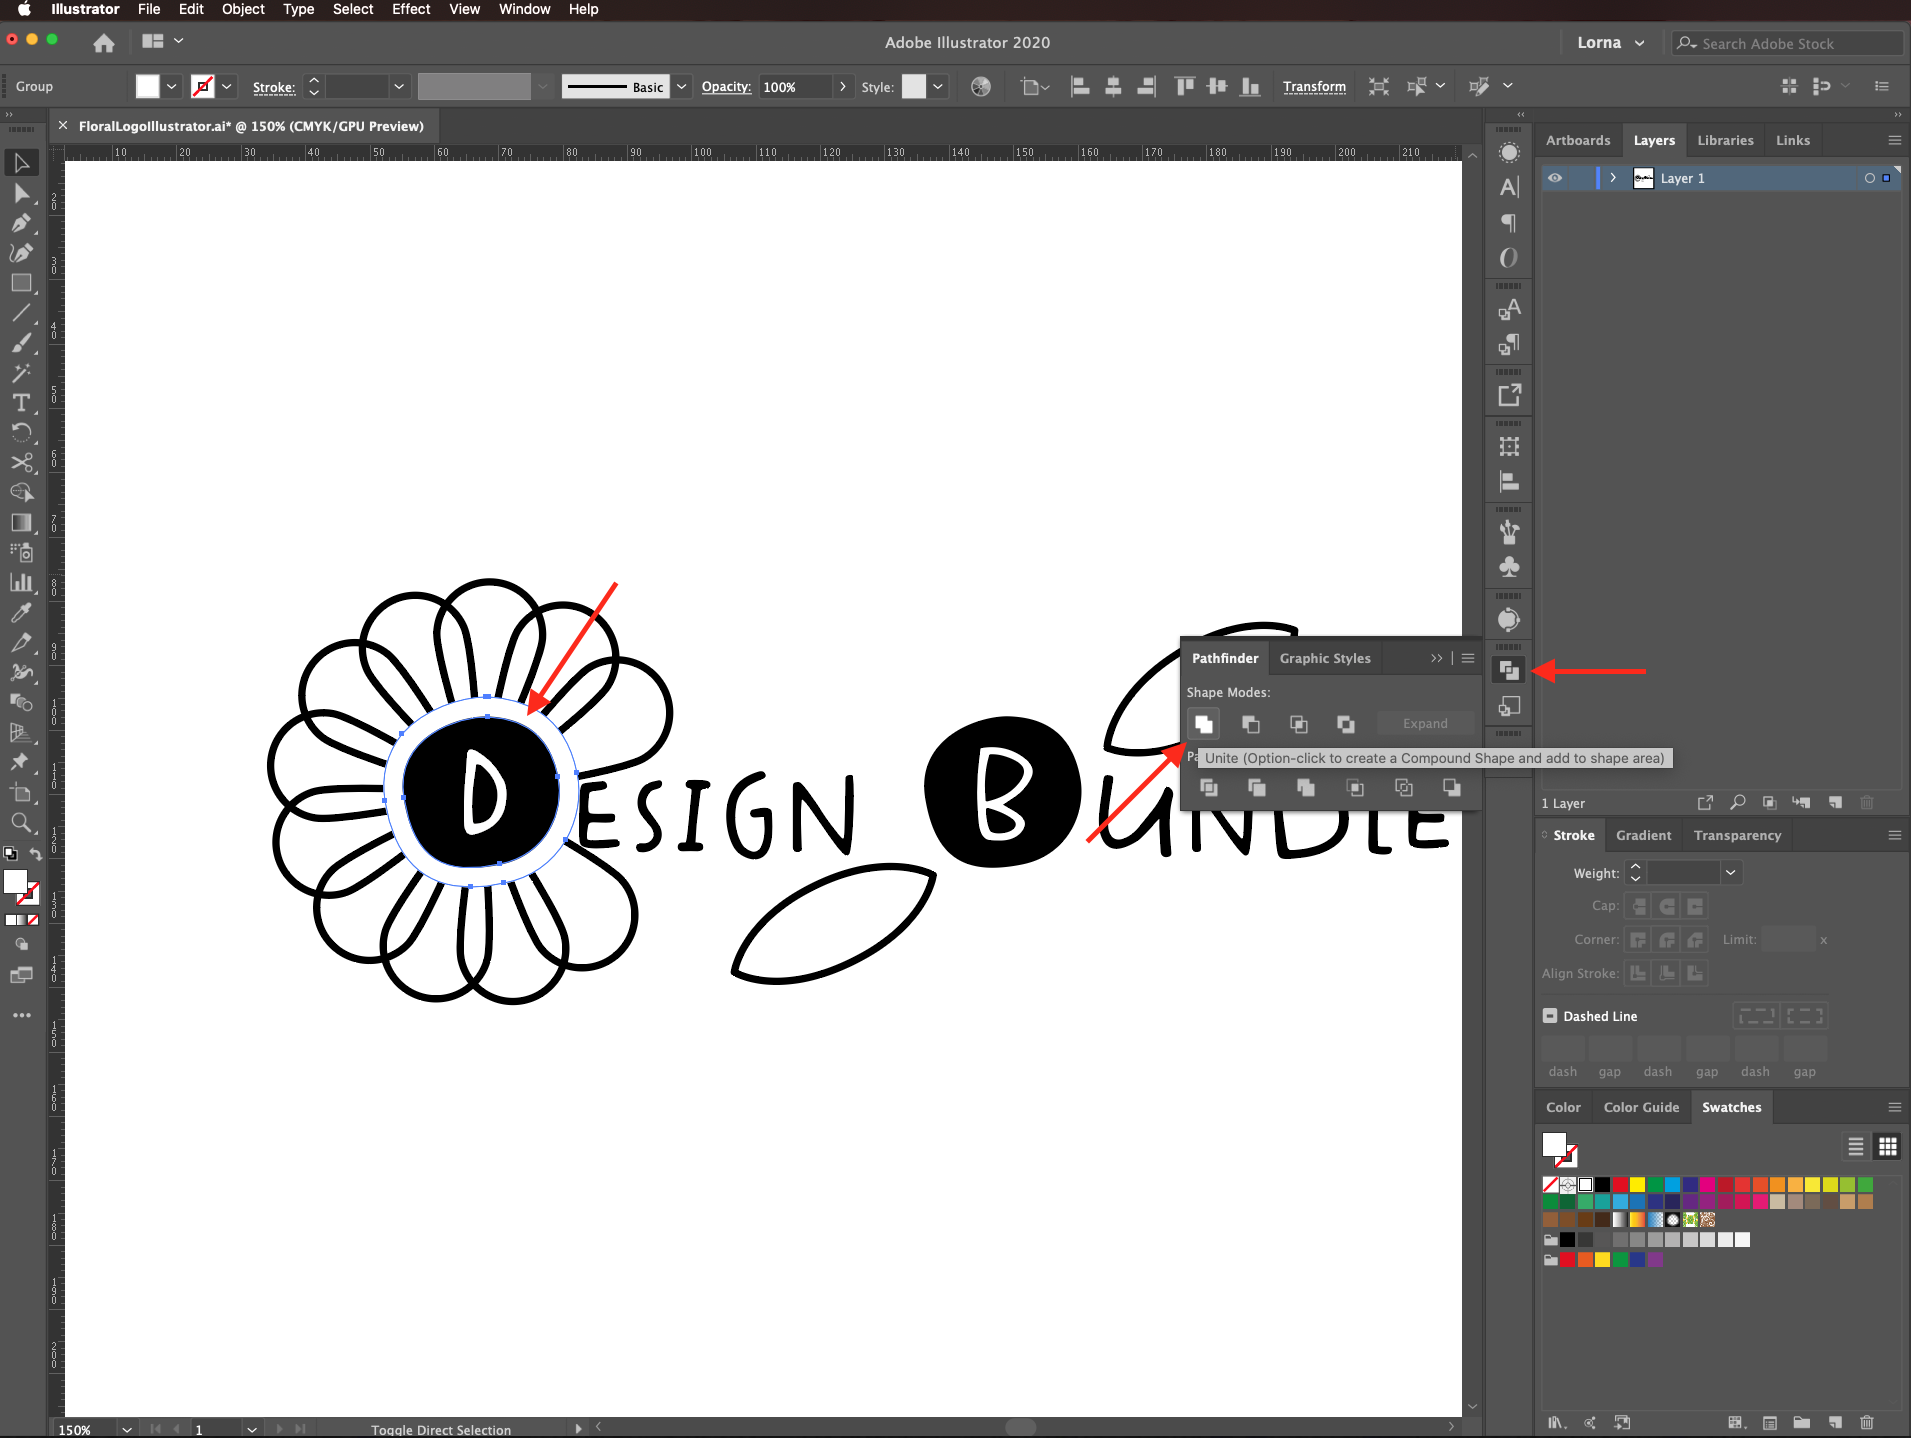
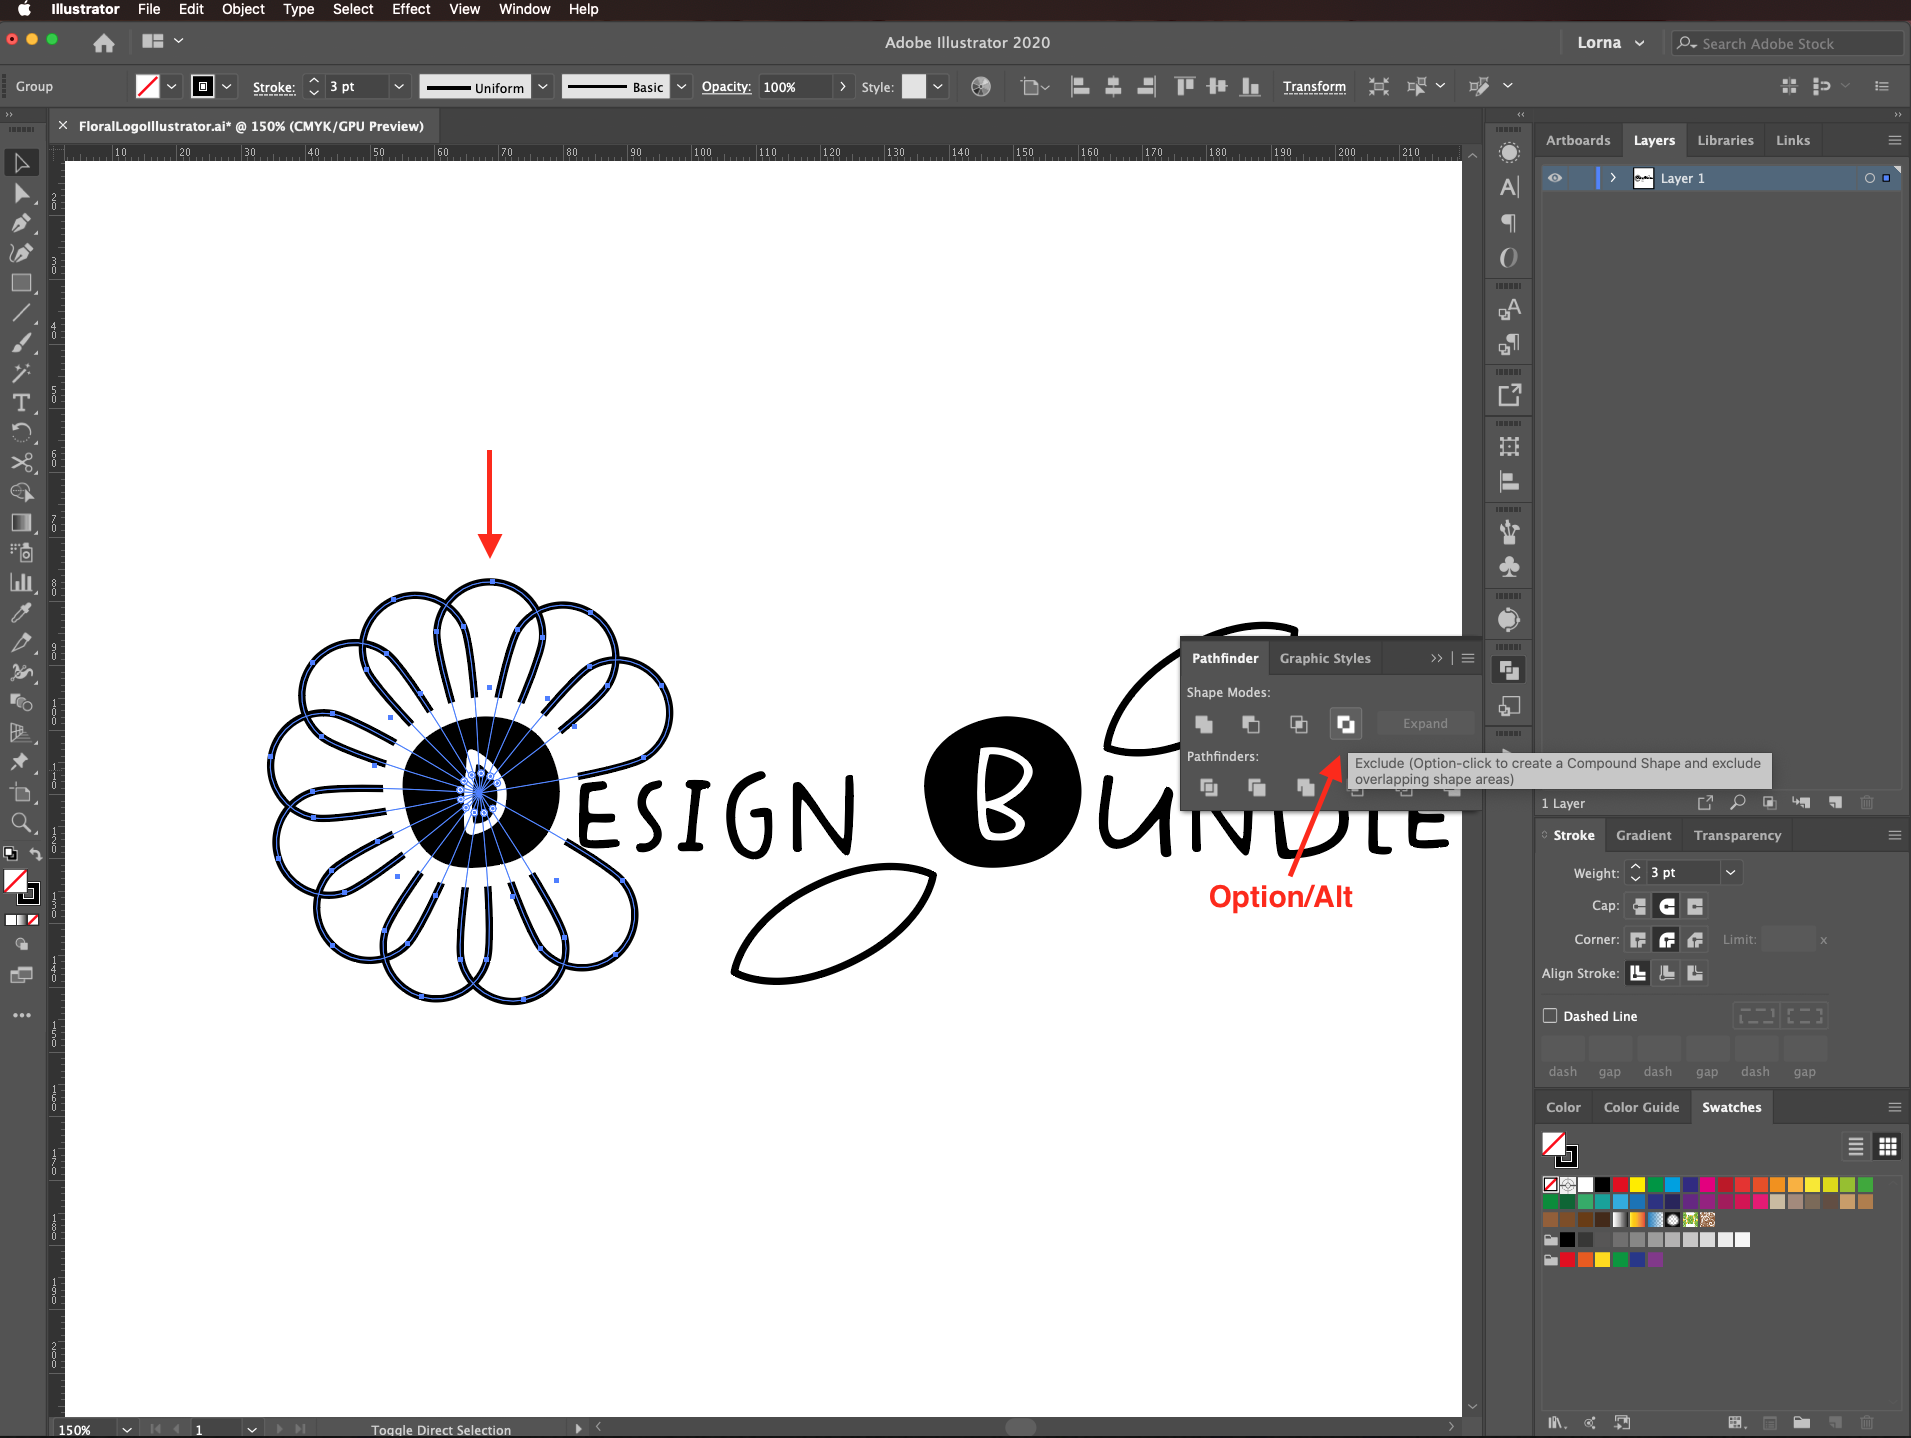
Select the flower center and click on unite in the pathfinder panel.
Then, select the flower (petals) and this time click on exclude while holding the alt/option key.
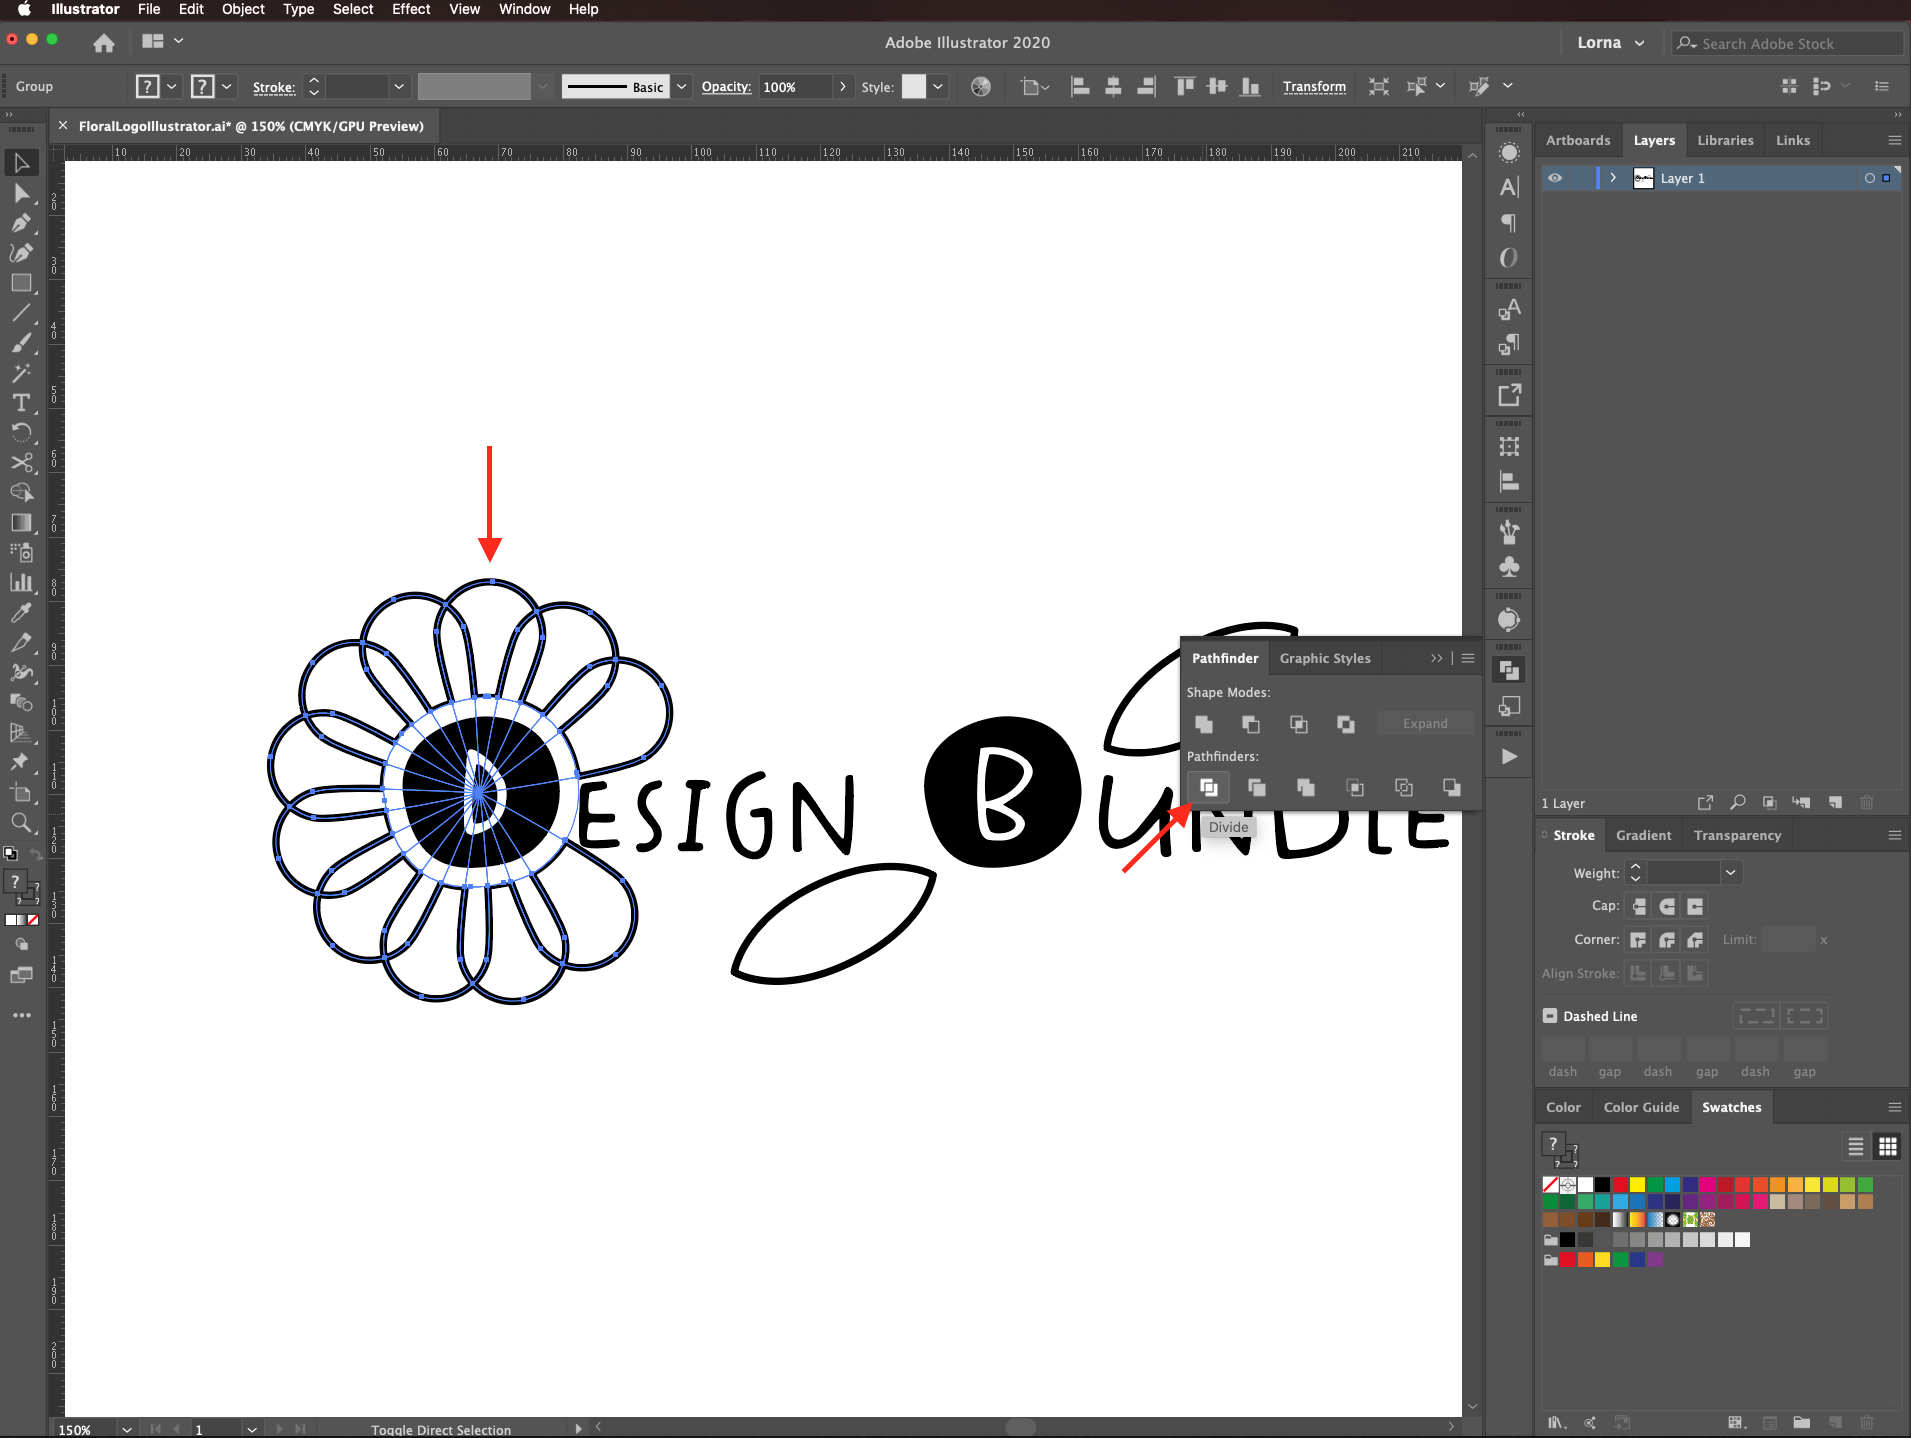
Then, click on divide.
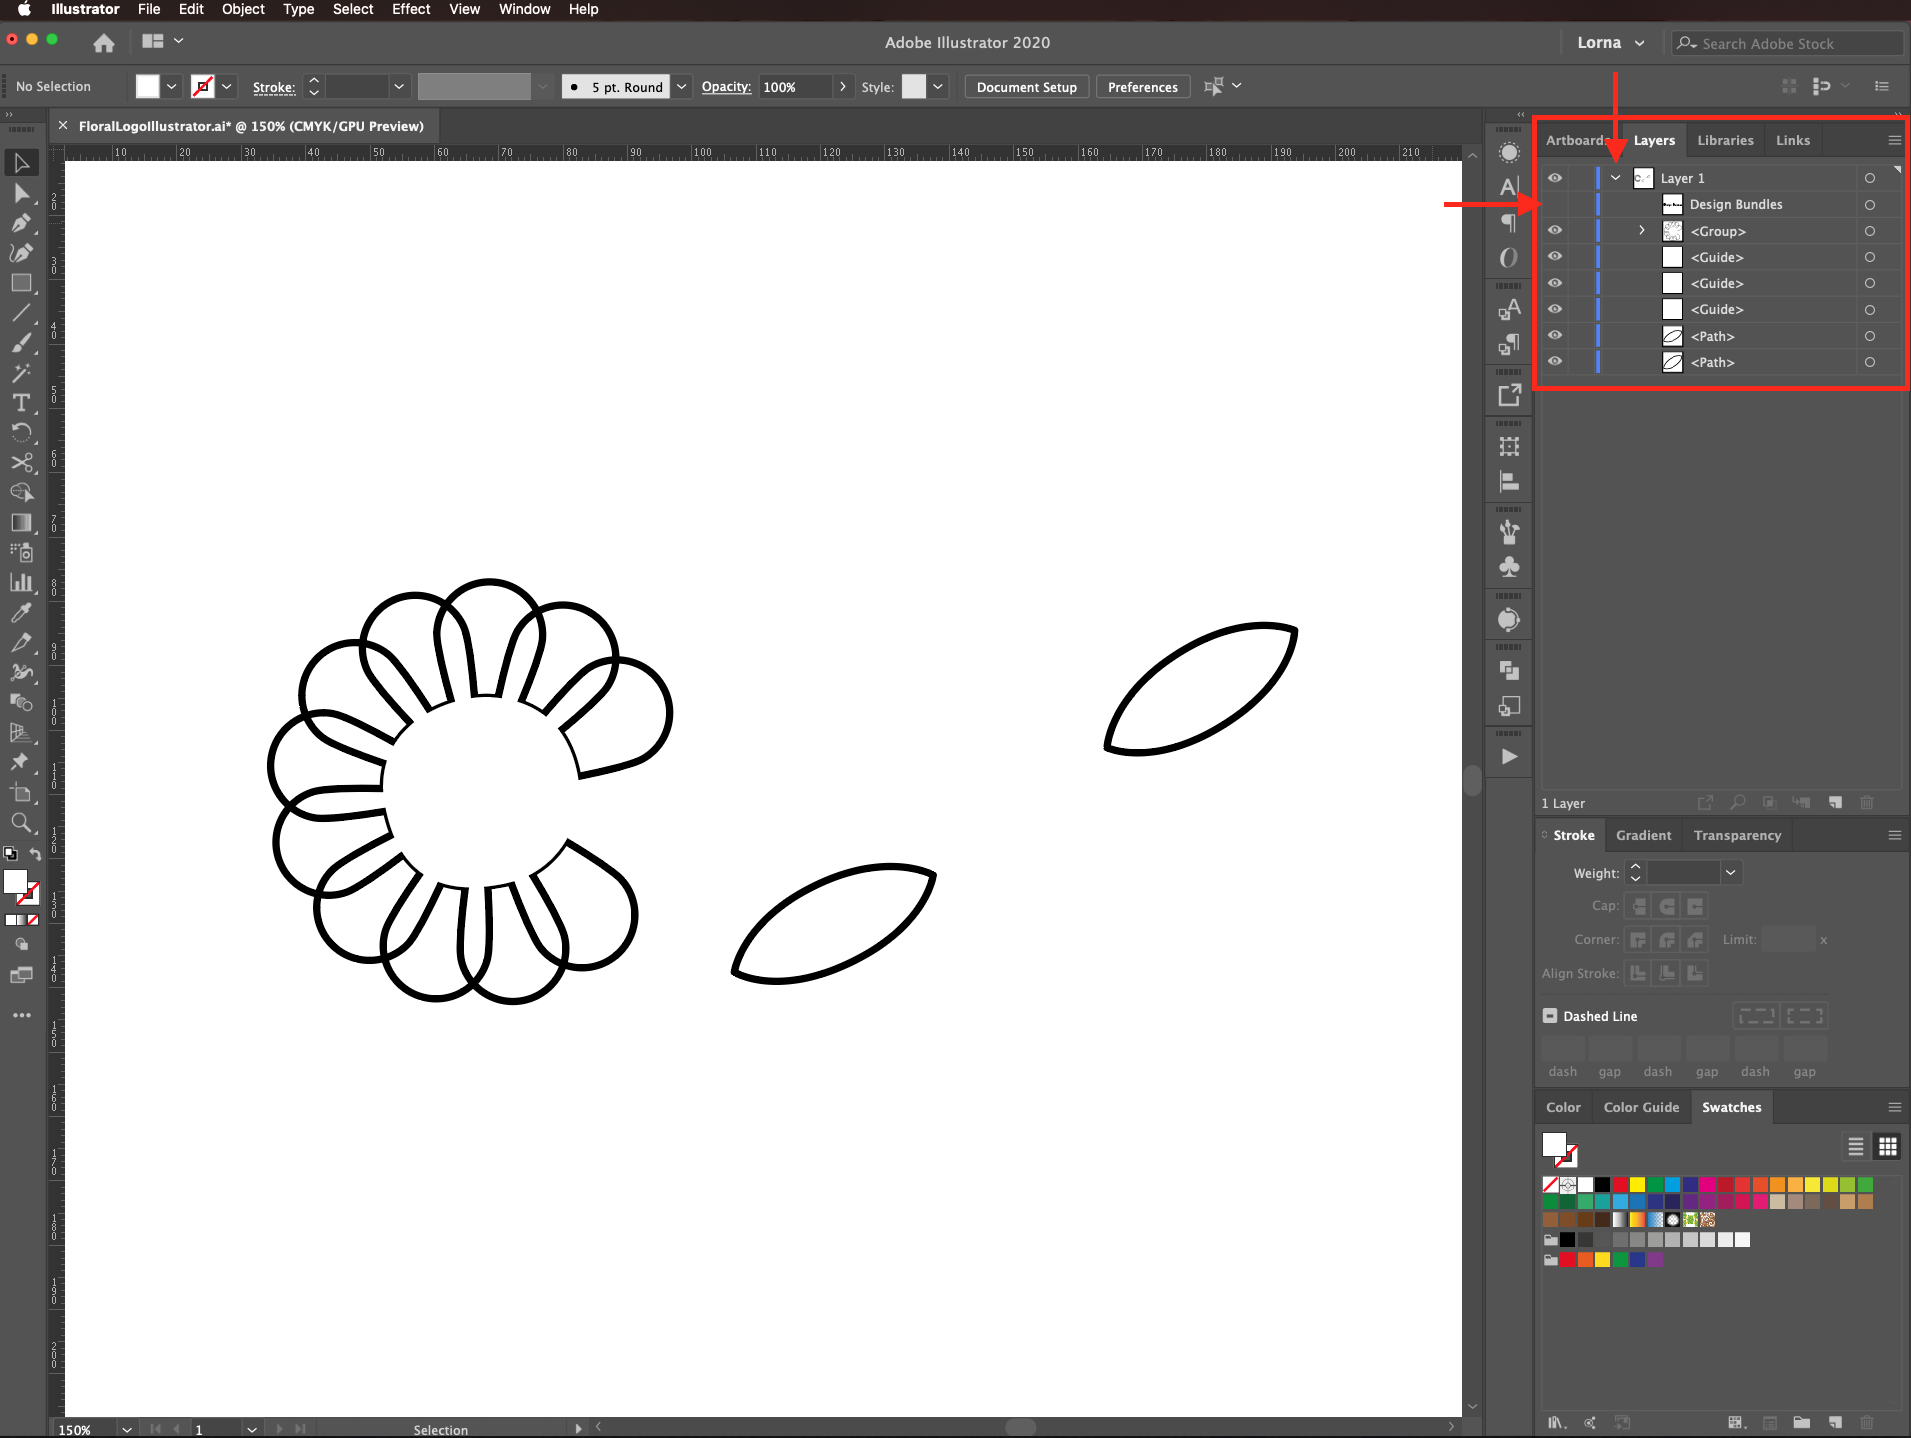
To get rid of the unwanted portions, first hide the text (expand the layer by clicking the small arrow on the left side of its thumbnail in the layers panel, and then click on the small eye near the text thumbnail).
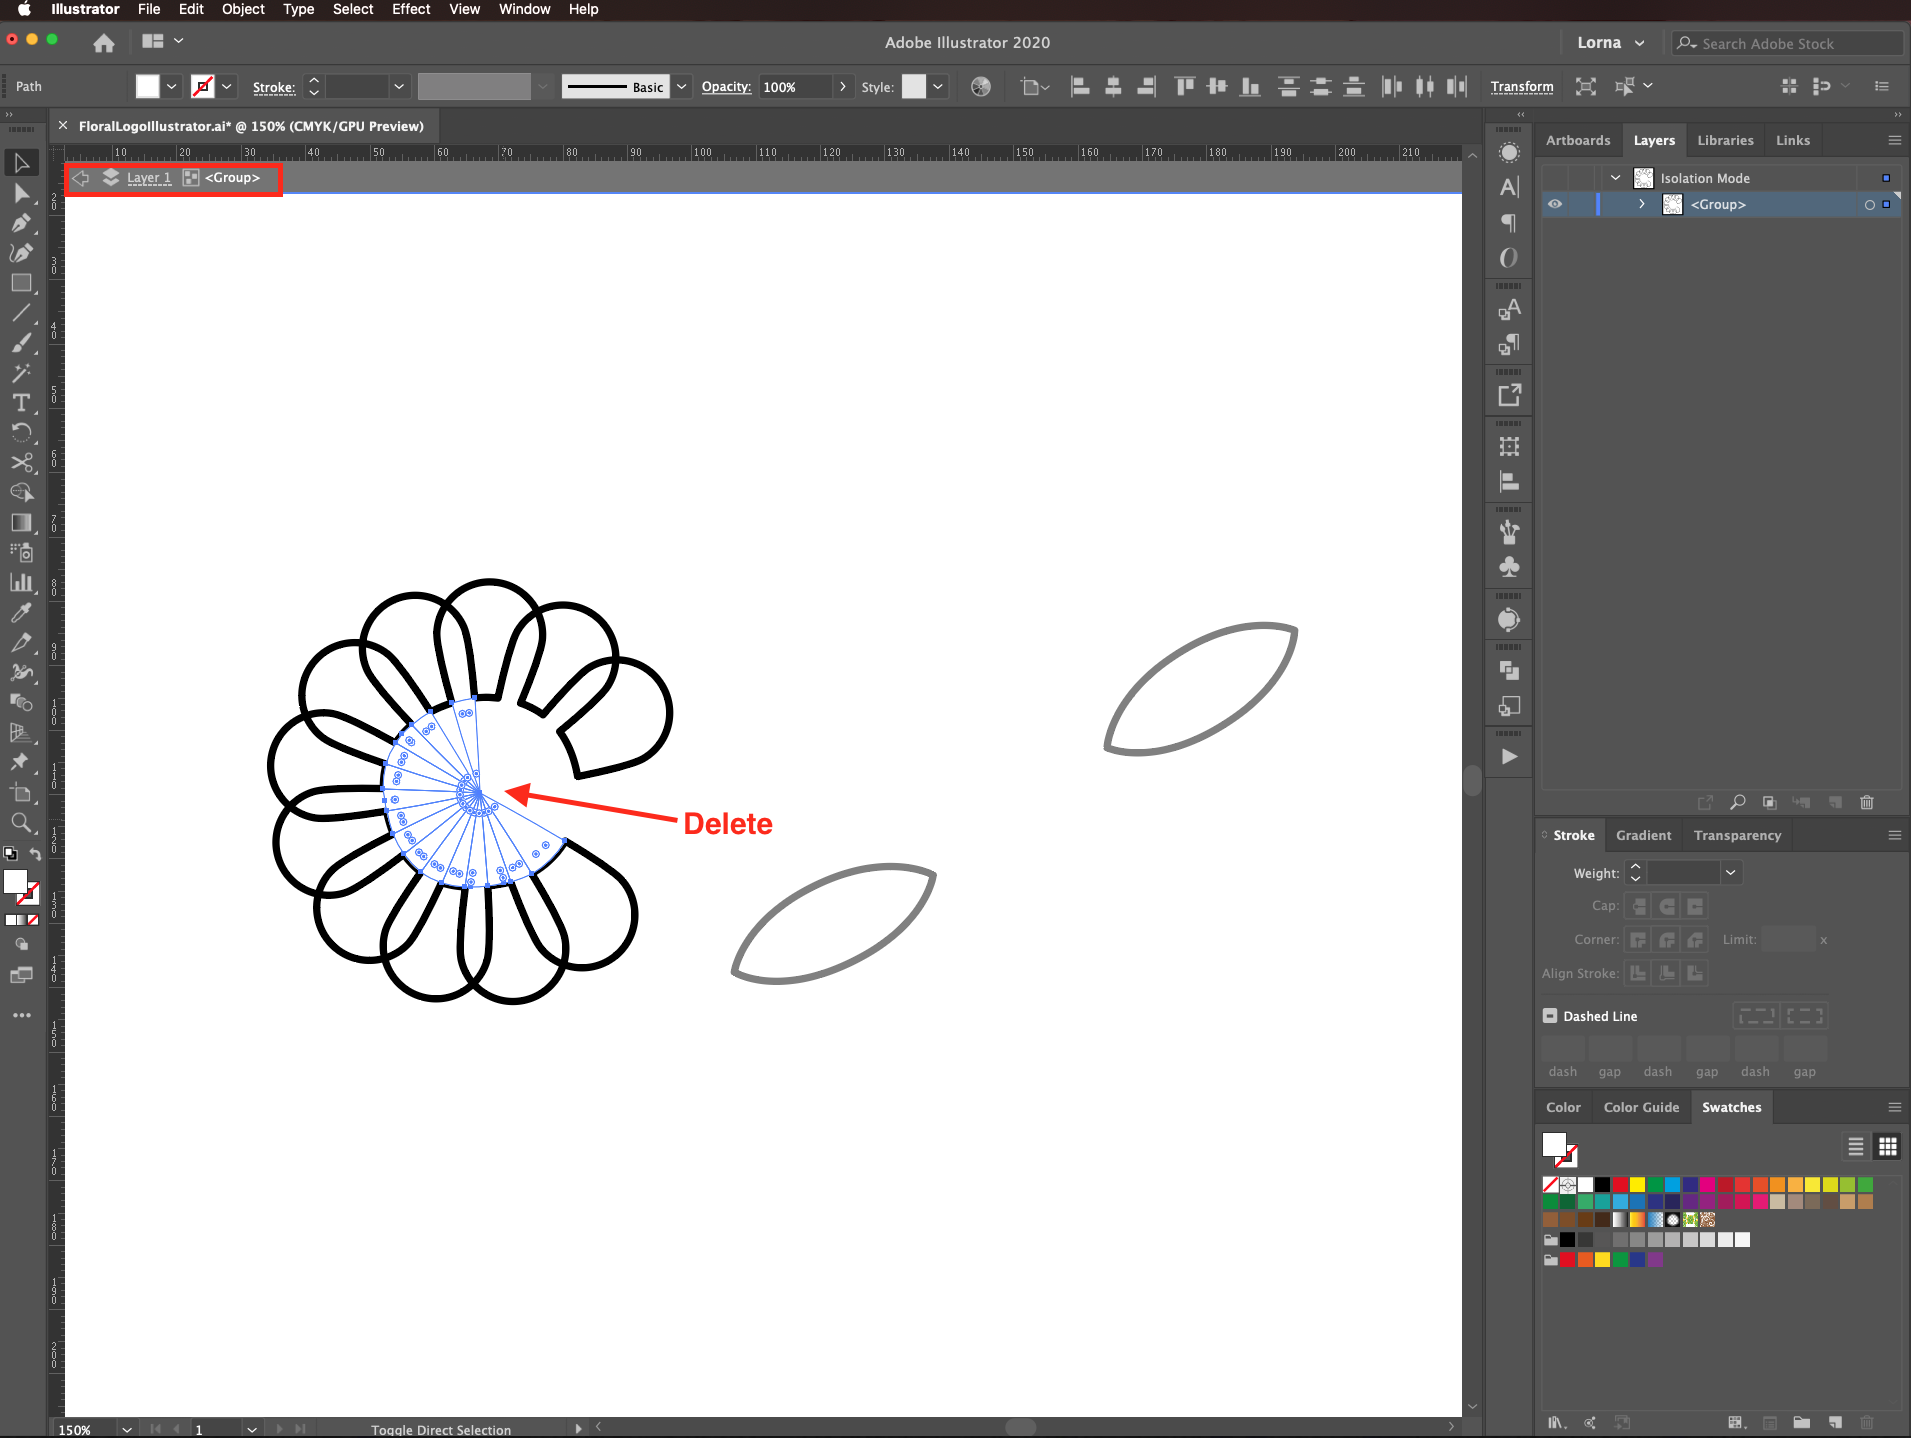
Then, double-click on the portions you want to delete to enter isolation mode and delete them. Once you are done, click on the left-pointing arrow on the top menu.
Select the text and convert it to paths (shift + command/control + O).
Adjust the placement of the text if needed.
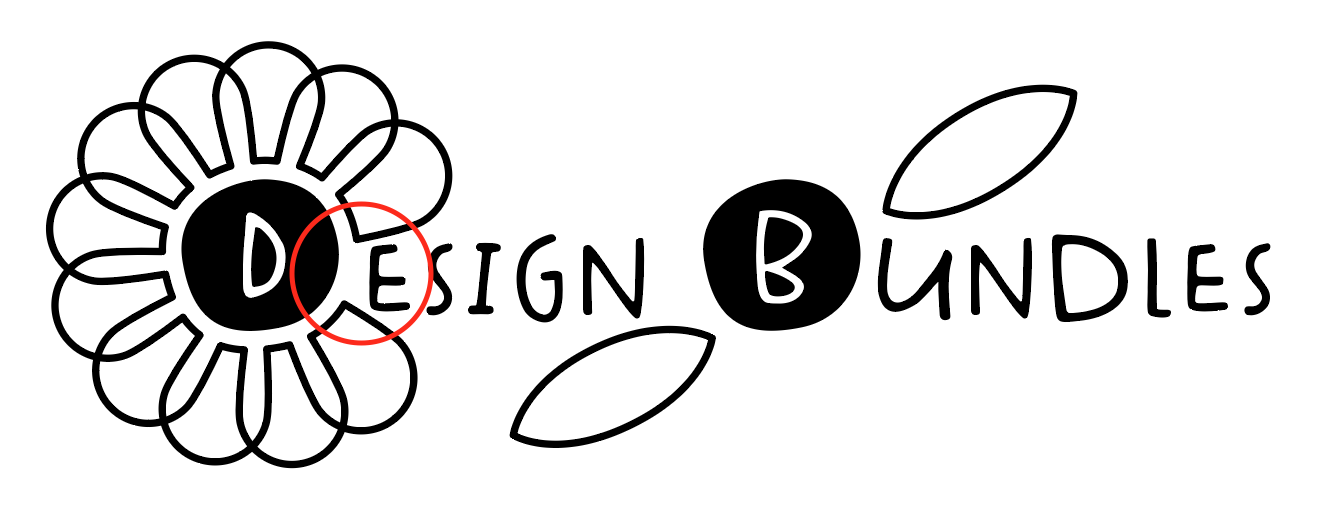
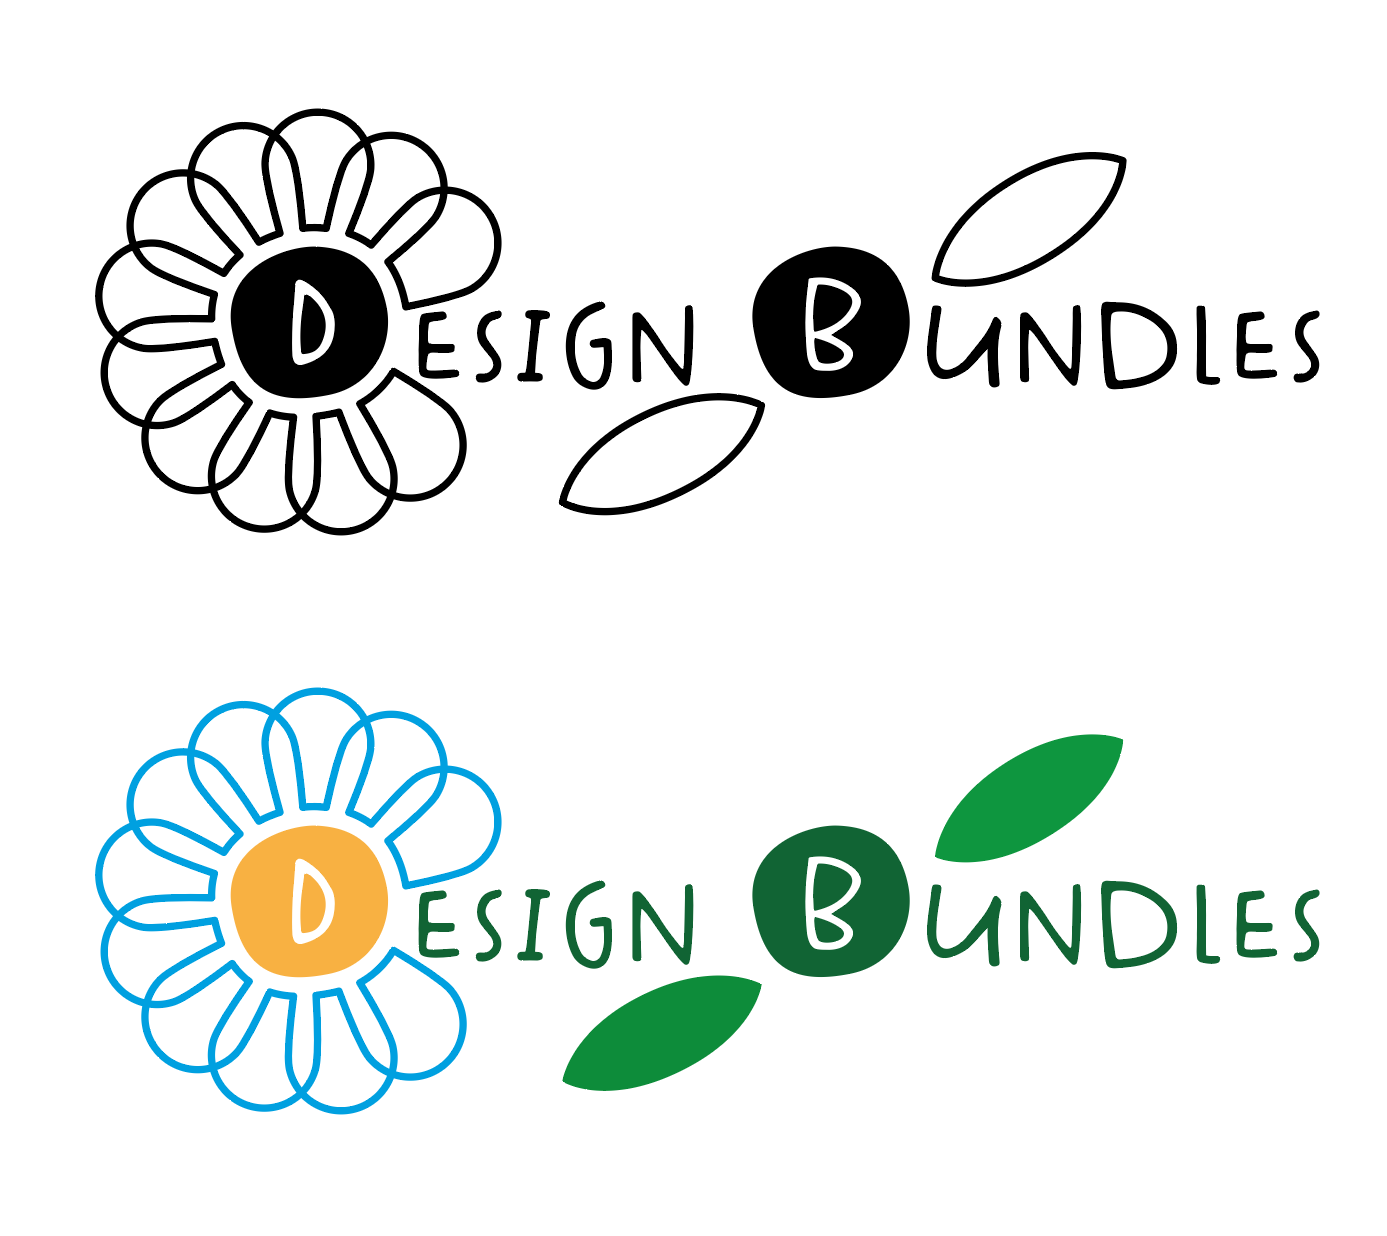
You can leave the color with just one color or add different ones to the portions of the flower.
To get a more detailed example of vector flowers you can check out our Geometric flower in Illustrator tutorial.
There are some great premade logos available on Design Bundles if you'd prefer to go that route.
Create a flower in Illustrator
Step 1- Use the Ellipse Tool to Make a Circle
Select the ellipse tool (L).
Click inside the canvas and create a 40 x 40 mm circle.
Step 2- Turn Your Circle into a Petal
With the Direct Selection Tool (A) select the bottom anchor point.
Click on convert selected anchor points to corners on the top menu.
Then, drag it down (holding the shift key) to create the petal shape.
Or input a new Y value (we used + 40 and then clicked enter to add 40 mm to the current one).
Step 3- Rotate the Petal and Create the Rest of the Flower
With the petal still selected, click on the rotate tool (R) in the toolbar.
And move the rotation Center Point so it is placed on top of the bottom tip of the petal.
In the popup window input the angle you want to Rotate the petal (we used 332º) and make sure you click Copy instead of ok.
We decided to leave a bit of overlap between the petals.
Go to object > transform > transform again (command/control + D).
Do this as many times as needed to go all the way around and create a flower.
Create your Typography
Step 4- Add the logo Text
Select the Type Tool (T), choose your font, and type your text. We used two different versions of the same font with different sizes, one for the first letter of each word.
And the other for the rest of the text.
Center your text using the Align Panel making sure that Align to Artboard is selected.
Step 5- Unite the Logo Elements (Flower and Text)
Place Guides to mark the center of the first letter and place the flower on top. You may need to resize one of them to make everything more proportionate.
Delete some of the petals to make space for the text.
Add the Details and Color
Step 6- Create the Leaf
Duplicate one of the petals (select and drag while holding the shift + alt/option keys to duplicate and move in a straight line).
Select the top anchor point and convert it to a corner point.
Pull it up until the top point is at about the same distance to the center as the bottom one.
Click on one of the side anchor points.
Hit S to select the Scale Tool, then pull one of the nodes up or down to round the shape a bit more. With this method, you should be able to pull both nodes at the same time.
Repeat with the other side.
Step 7- Duplicate and Adjust the Placement of the Leaves
Hide the Guides if needed (command/control + ;).
Place the leaf so its bottom tip sits roughly where you want it to be and then head to Object > Transform Each.
Adjust the horizontal and vertical scale to make the shape and shape of the leaf more proportionate. Also, change the angle and make sure that the reference point is set to the bottom center. We used an 80% horizontal scale, a 90% vertical scale, and a 302º angle.
To add another leaf, enter transform each again and adjust the values to create another leaf. Again, make sure that the reference point is set to the bottom center. We used a 100% horizontal scale, a 100% vertical scale, a -302º angle and clicked the reflect x box. Click copy instead of ok.
Move the new leaf and place it where you want.
Step 8- Fix the Placement of the Petals
Check if the petal progression is smooth and fix any errors if needed.
In our case, the overlapping of a couple of petals was not proportionate so we used the rotate tool to fix it.
Select the petals and leaves and change the stroke weight to about 3 pt, make the caps and corners round.
Step 9- Create the Center of the Flower
We are using the first letter as the center of the flower. To cut the petals around the center, create a duplicate of the first letter and turn the text to paths with type > create outlines (shift + command/control + O).
Double click on it a few times to enter Isolation Mode and delete the paths that form the letter. Once you are done, click on the left-pointing arrow on the top menu.
Place the path on top of the first letter of the text and change the fill color to white.
Go to path > offset path and give it a 3 mm offset.
Select the text, right-click on top and choose move to front.
Step 10- Fine Tune the Flower
Select the flower center and click on unite in the pathfinder panel.
Then, select the flower (petals) and this time click on exclude while holding the alt/option key.
Then, click on divide.
To get rid of the unwanted portions, first hide the text (expand the layer by clicking the small arrow on the left side of its thumbnail in the layers panel, and then click on the small eye near the text thumbnail).
Then, double-click on the portions you want to delete to enter isolation mode and delete them. Once you are done, click on the left-pointing arrow on the top menu.
Step 11- Fine Tune the Text
Select the text and convert it to paths (shift + command/control + O).
Adjust the placement of the text if needed.
Step 11- Add Color to your Logo
You can leave the color with just one color or add different ones to the portions of the flower.
To get a more detailed example of vector flowers you can check out our Geometric flower in Illustrator tutorial.


