
How to Create Floral Typography in Illustrator
In this tutorial, learn how to design Floral Typography in Adobe Illustrator.
In Floral Typography, you can create artwork that is fresh and interesting by combining text with floral elements. Today we will create Floral Typography in Illustrator by using the Pen Tool, clipping masks, and some effects to make it pop.
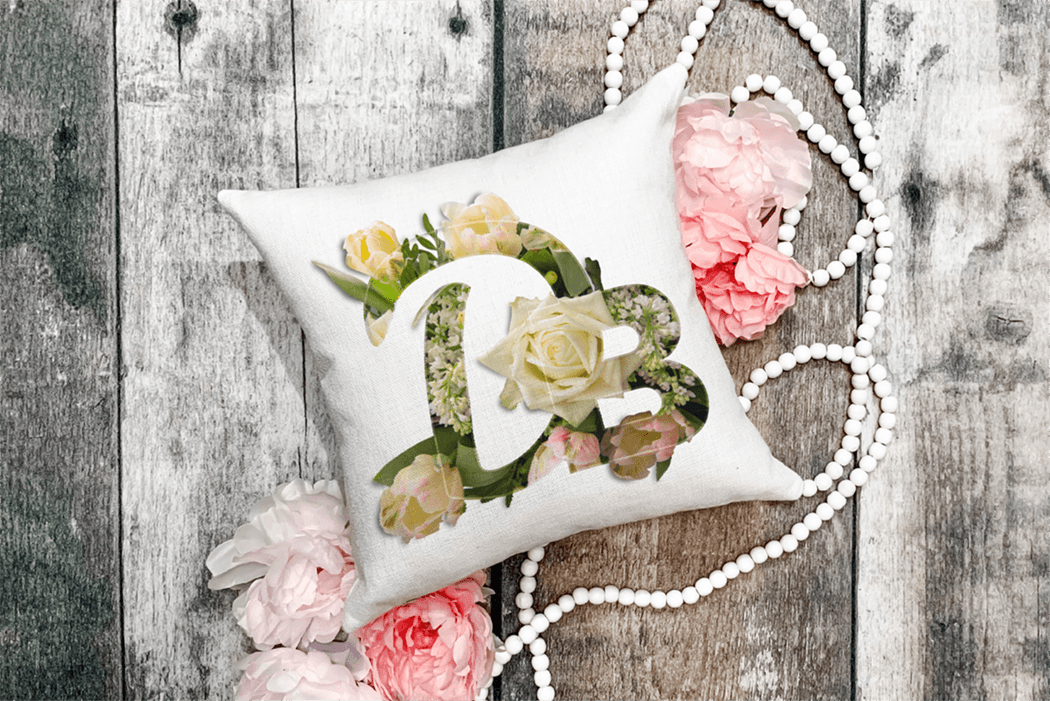
To showcase our design, we are using a pillow mockup from the Plus Hub.
In the tutorial, we will use a spring flower bouquet. If you prefer, you can even create your own flower arrangement for this technique using some flower bouquet clip-art. We are also using the Designs Bundles favicon as our text.
Table of Contents
- Place Your Image and Text Together
- Merge Your Text
- Create a Path Around Selected Floral Elements
- Merge the Flower Path and Text Together
- Add a Shadow On Top Of the Floral Elements
- Isolate the Floral Elements
- Add Some Details to Your Artwork
- Add a Shadow to the Isolate
Step 1 - Place Your Image and Text Together
Open the flower image in Illustrator. Lock the layer for now by clicking on the left side of its thumbnail in the Layers panel. This should bring out a small padlock icon.

Now add Your text in a New Layer. Create a new layer by clicking on the small icon at the bottom of the Layers panel.

Place or type your text in the new layer. Resize it to fit your needs and use white as the Fill color.

If using a font, once you are done you will need to flatten it. Do this by going to Type > Create Outlines. This will let you apply some of the needed modifications later on.
Step 2 - Merge Your Text
If your text overlaps, you need to merge it together. Select all the text, and in the Pathfinder panel choose Unite to do it.

Swap Fill and Stroke
To have a better view of your floral elements, swap the Fill and Stroke colors (X) in the Toolbar to make the stroke white and the background transparent.

Duplicate the Text Layer
Create a duplicate of the text by dragging its thumbnail to the new layer icon at the bottom of the Layers panel. You can hide the duplicate for now since we will need it later on.

Step 3 - Create a Path Around Selected Floral Elements
We need to isolate some of the floral elements that we want to “come out” from the text.
Use the Pen Tool to Create the Path
To do that, first, use the Pen tool (P) to create a path around the floral elements you want to isolate. They should be the ones that protrude from your letters.

There are some important shortcuts to keep in mind while creating your path. You can edit how smooth or sharp an anchor point is. Do this by pressing the Option/Alt key and clicking on the point.

Pressing the Command/Control key will let you adjust the handles or anchor points while creating your path without deselecting.
Press and hold the Spacebar to move anchor points around for positioning. To deselect the current path, use the shortcut Shift + Command/Control + A.
Since we will merge both paths together, you don’t need to be accurate with the areas of the path inside the letters.

Adjust Your Path
Check out the resulting path and adjust the anchor points that need it with the help of the Direct Selection tool (A).

Adjust the Corners
A selected anchor point can be changed from a sharp corner to a smooth one and vice versa. This can be done by clicking on the appropriate option on the convert path section of the top menu.

Add or Delete Anchor Points
The Add and/or Delete Anchor Point tools can be used to finish up adjusting your path and better fit the floral elements.

The path needs to follow the shape of the floral elements as precisely as possible.

Once you are done, you can swap (X) the Fill and Stroke color back again to fill the text with the white and has no stroke color.

Step 4 - Add a Shadow On Top Of the Floral Elements
Once you are done, select the newly created path and the text. Then merge them together using Unite in the Pathfinder panel.

We are going to add some depth to the composition by adding a shadow.
Create a Rectangle
First, use the Rectangle tool (R) to create a shape that covers the entire document (or at least the flowers image). Fill it with white.

Duplicate The Compound Path
Create a duplicate of the compound path you created earlier. Drag its thumbnail to the new layer icon at the bottom of the Layers panel. Hide the duplicate for now as it will be used later on.

Knock Out the Compound Path From the Rectangle
You need to knock out a hole with the floral text shape on the rectangle. Make sure that the compound path is positioned on top of the rectangle on the Layers panel. Then, select the compound path and the rectangle.

With the two of them selected head to the Pathfinder panel and choose Minus Front to subtract the shape.

Add the Drop Shadow Effect
Finally, with your path still selected head to the Appearance panel. Now, click on the Effects icon at the bottom and navigate to Stylize > Drop Shadow. Use the following values to add a slight shadow that comes from the left side of the path over the flowers.
- Mode: Normal
- Opacity: 60%
- X Offset: 2 px
- Y Offset: 2 px
- Blur: 4 px
- Color: #000000 (black)

You can check out how our shadow looks like in the image below.

The image is complete as is. But you may want to enhance it further. We prefer to add a shadow cast from the flowers protruding from the text to make the piece more realistic.
Step 5 - Isolate the Floral Elements
We are going to create a separate compound path that contains only the protruding floral elements. We want to apply a shadow under them. However, we want to avoid interfering with the shadow applied before and the overall composition.
Bring Together the Compound Path and Text
First, turn on the duplicate of the compound path created inStep 4. Create another duplicate of the text layer created inStep 2and place its thumbnail on top of the compound path.

Use Exclude to Separate Floral Elements from Text
We want to cut out the text from the compound path. This will leave only the shapes of the protruding floral elements. Go to the Pathfinder panel and choose Exclude.

Then, right-click on top and choose Ungroup from the drop-down menu.

Get Rid Of Unwanted Paths
You only need to keep the paths that outline the floral elements. Use the Delete Anchor Points tool to get rid of some of the unwanted paths.

You can also use the Eraser tool (Shift + E) on larger portions.

Keep going until you only the paths outlining the floral elements are left.

Create a Compound Path
Select all of the elements, then go to Object > Compound Path > Make (Command/Control + 8) to merge them together.

Create a Clipping Mask
Create a duplicate of the flower image from Layer 1 and place it under your new compound path. You may need to unlock the layer.
Then, select them both, right-click and choose Create Clipping Mask from the drop-down menu.

To check if the resulting clipping mask needs adjusting, you can turn off the visibility of the other paths.

Step 6 - Add Some Details to Your Artwork
We are going to remove portions of the drop shadow (applied inStep 4) that affect the edges of the rectangle. We are also going to add a stroked outline to the text to make it pop.
Remove Unwanted Shadows and Center Your Artwork
Use the Rectangle tool (R) to create a square that frames your artwork, but leaves the unwanted edges out.
Set the fill and stroke color to None. Then, select it together with the background group and make a Clipping Mask (Command/Control + 7). Center your resulting group inside your canvas if needed.

Add a Stroke to Outline the Text (Optional)
Turn on the duplicate text created in Step 2. Make sure it is positioned between the two Clip Groups. Then, change the Stroke Weight to 4 pt and give it a rounded Cap and Corners.
Then, go to the Transparency panel and change its Blending Mode to Soft Light.

Step 7 - Add a Shadow to the Isolated Floral Elements
We will add a shadow projected from the flowers and other elements. This will add more depth to the design.
Create the Shadow Base With Some Paths
Use the Pen tool (P) to create paths on the bottom left side of the floral elements to mimic the shadows. The shape doesn’t need to be exact, just close enough. Next, fill them with black.

Add a Gaussian Blur Filter
Next, we will smooth the shadows out and make them more realistic. First group your paths together (Command/Control + G). Now move the resulting group under the Clip Group that sits on top of everything.
Go to the Appearance panel, click on the Effects icon at the bottom and navigate to Blur > Gaussian. Use a radius of 20 pixels. Then, in the Transparency panel, lower the Opacity to 60%.

Adjust the Details
Some shadows may be visible where you don’t want them to be. This can be fixed using the Direct Selection tool (A). Use the tool to move the anchor points of the path to get rid of the overlapping.

Here is our final piece. We hope that this tutorial will help you to apply these techniques in future projects.

If you enjoyed this tutorial you may also enjoy our tutorials on creating a floral logo in Illustrator, making a knockout design, and creating a seamless pattern in Illustrator.


