
How to Make Floral Wreaths in Procreate
Floral wreaths are easy to draw in Procreate with Symmetry Guides, and they can be used for any occasion. Follow this tutorial to learn how to set up the canvas in Procreate for drawing a floral wreath and learn the best steps to take when drawing a floral wreath.
If you would like to make a floral wreath similar to the ones found in this tutorial, check out the Procreate Stamps Boho Vibes Set, 28 Flower Brush Stamp for Procreate, and Floral Stamps Brushes.
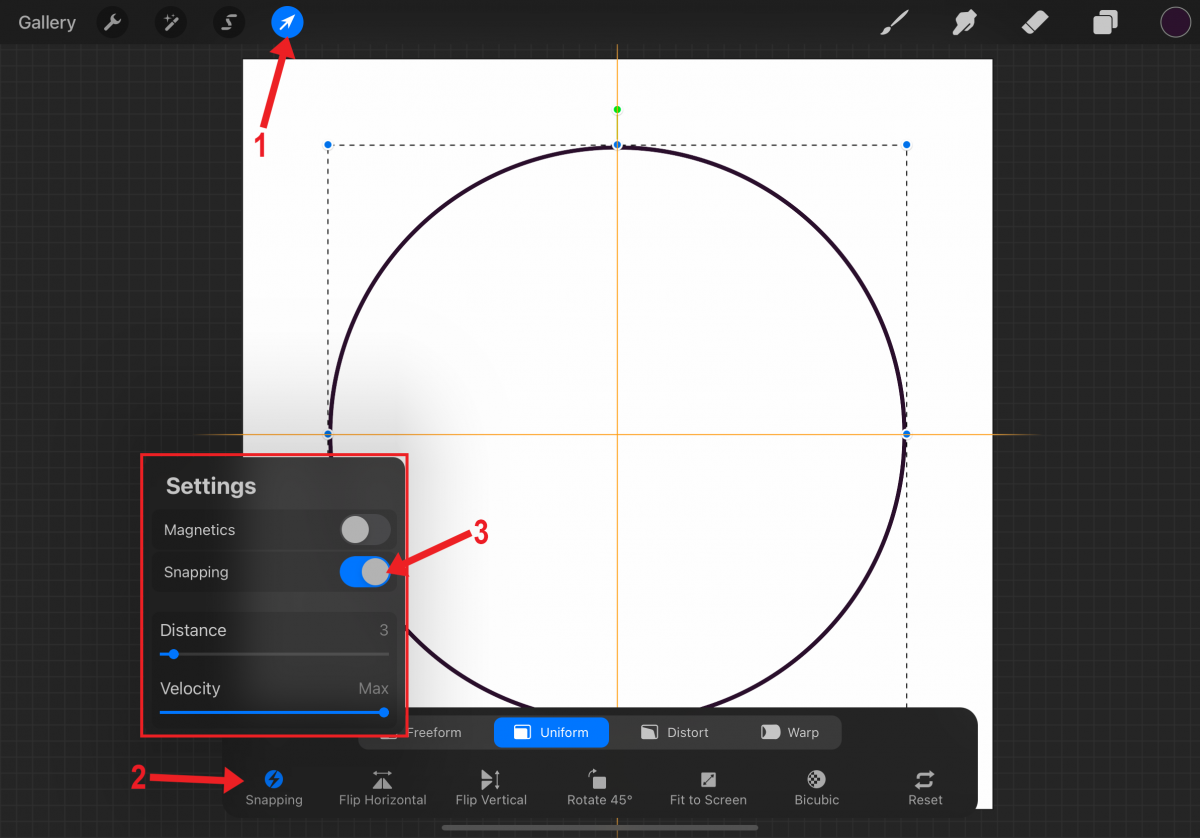
To help keep the floral wreath in a circular shape, draw a circle. Enable Transform by tapping the arrow button. With Snapping toggled on, drag the circle and center it on the canvas. The circle is centered when you see the two yellow lines.
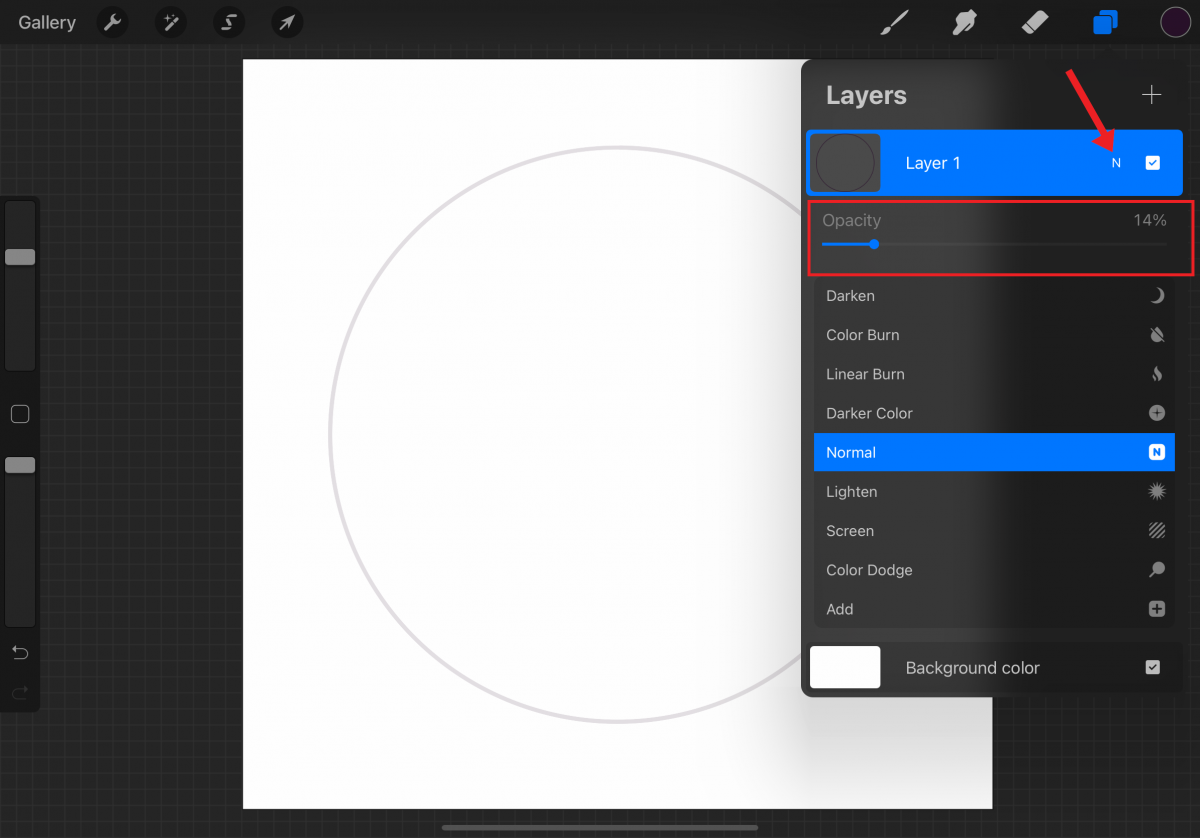
Open the Layers panel. On the circle layer (Layer 1 in image), tap the N to the right of the layer name. Lower the opacity of the circle to around 10%-15%.
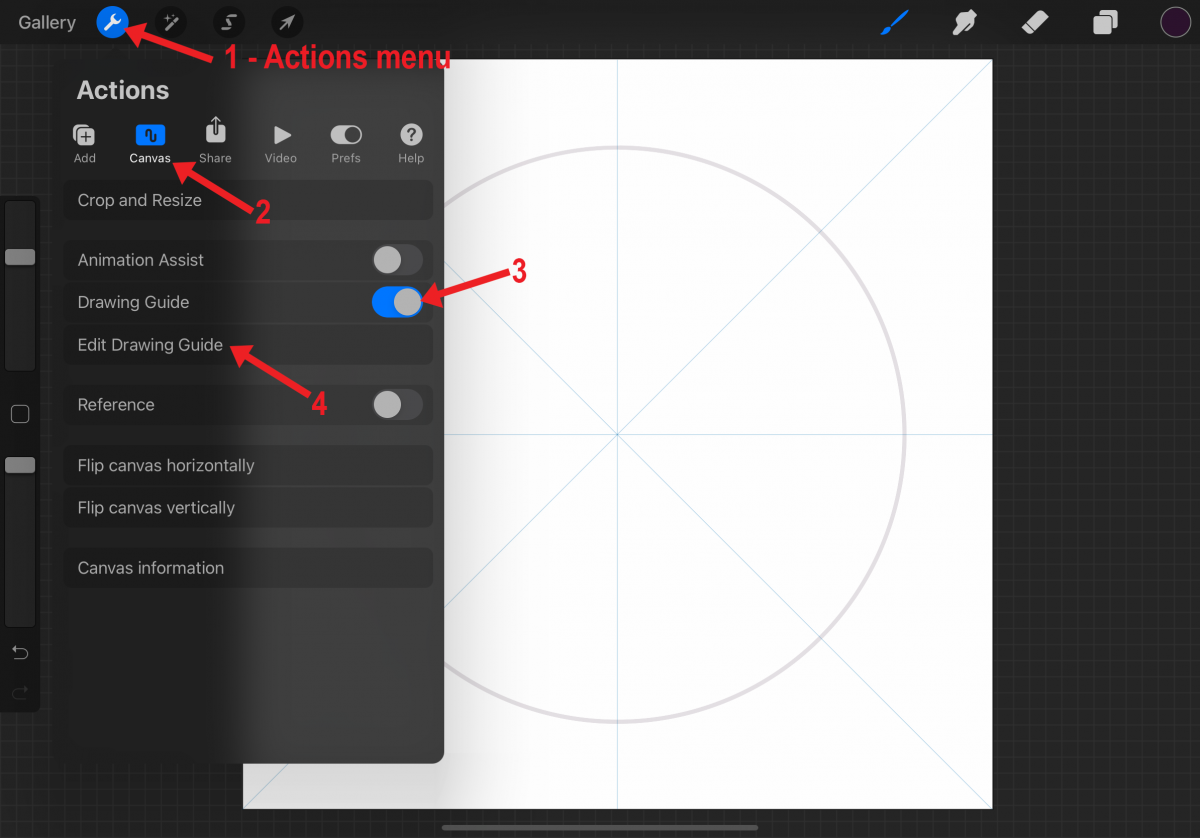
Add a new layer. Open the Actions menu in Procreate by tapping the wrench icon. In the Canvas tab, toggle the Drawing Guide on. Tap Edit Drawing Guide.
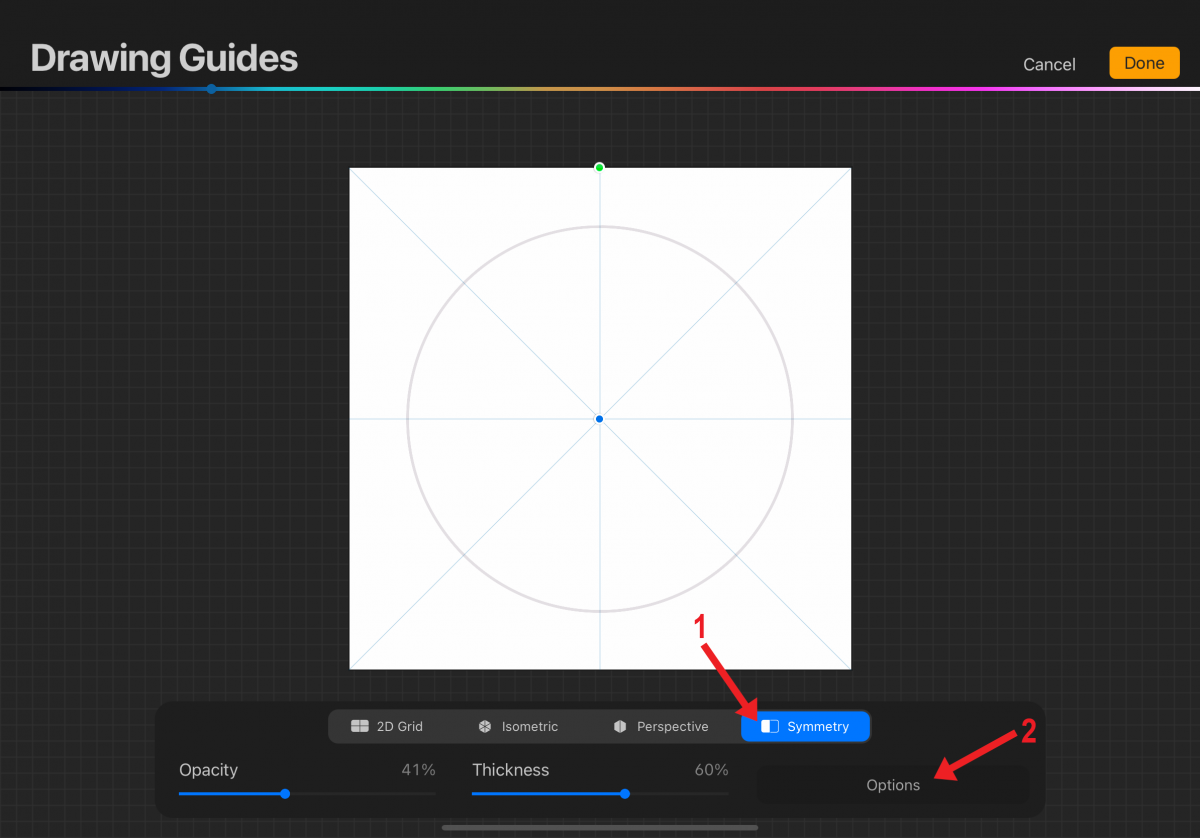
Tap Symmetry and then tap the Options button.
When making a floral wreath, any of the symmetry options will work. Rotational Symmetry is not necessary but can be very helpful. Switching back and forth while drawing the floral wreath is also an option.
Tap Radial to follow along with this tutorial. Toggle Rotational Symmetry on. Make sure Assisted Drawing is toggled on, and tap Done in the upper-right corner.
The canvas is now ready for drawing a floral wreath. When using a stamp brush or drawing leaves and flowers for the floral wreath, rotate the canvas as needed. This is especially helpful with stamp brushes as most are static in direction and do not rotate. See the following image for a better understanding.
We suggest you start with the leaves. This will be the foundation of the floral wreath.
On new layers, add flowers in varying sizes to the floral wreath.
On new layers, add fillers such as small leaves and flowers. To complete the floral wreath, rearrange layers as you see fit if there are overlapping elements.

This tutorial showed how to make a floral wreath using Radial symmetry with Rotational Symmetry. The following examples are floral wreaths made with different symmetry options.
The following floral wreath was made using Vertical symmetry without Rotational Symmetry.
Except for a few little flowers, the following wreath was made using Quadrant symmetry without Rotational Symmetry.
We have a large selection of Procreate brushes along with a handful of free Procreate brushes for you to get creative with. You can make your own unique floral wreaths!
If you would like to make a floral wreath similar to the ones found in this tutorial, check out the Procreate Stamps Boho Vibes Set, 28 Flower Brush Stamp for Procreate, and Floral Stamps Brushes.
Step 1 - Draw a Circle Guide
To help keep the floral wreath in a circular shape, draw a circle. Enable Transform by tapping the arrow button. With Snapping toggled on, drag the circle and center it on the canvas. The circle is centered when you see the two yellow lines.
Step 2 - Edit the Circle Properties
Open the Layers panel. On the circle layer (Layer 1 in image), tap the N to the right of the layer name. Lower the opacity of the circle to around 10%-15%.
Step 3 - Enable the Drawing Guide
Add a new layer. Open the Actions menu in Procreate by tapping the wrench icon. In the Canvas tab, toggle the Drawing Guide on. Tap Edit Drawing Guide.
Step 4 - Enable the Symmetry Guide
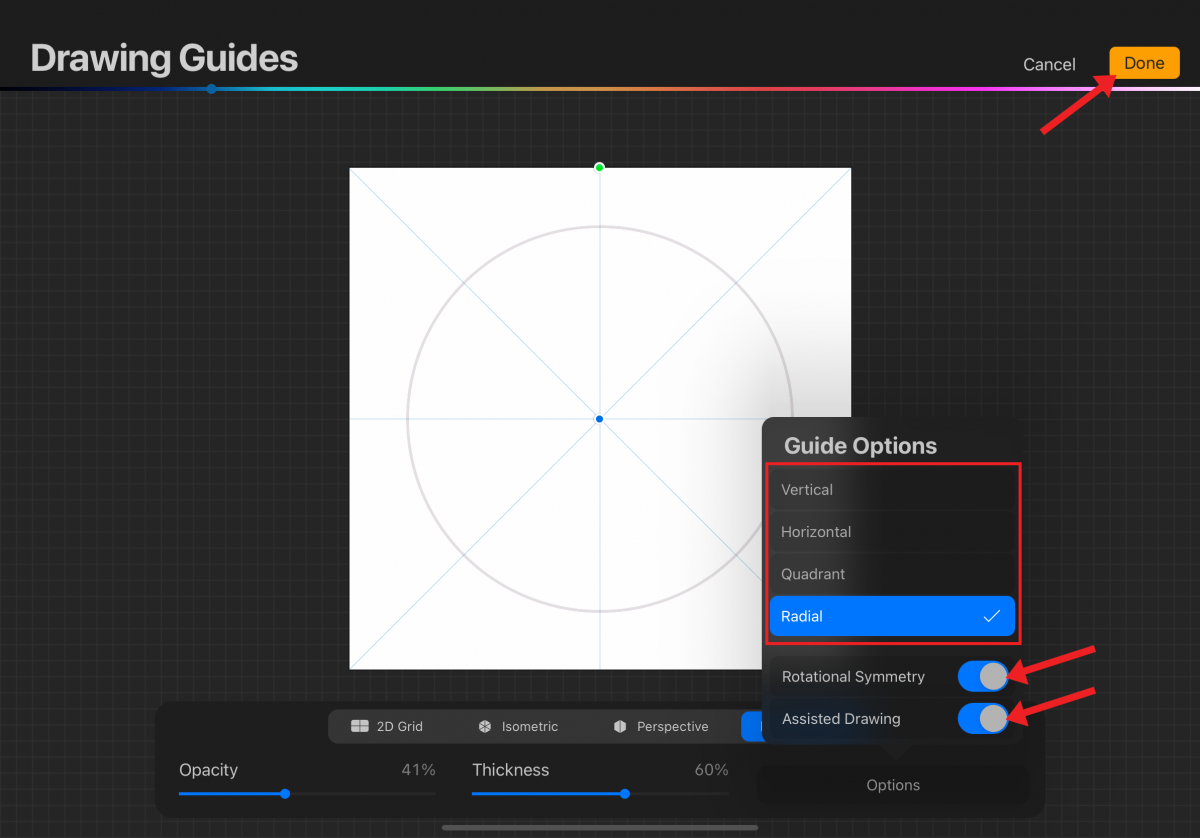
Tap Symmetry and then tap the Options button.
Step 5 - Set Up the Symmetry Guide
When making a floral wreath, any of the symmetry options will work. Rotational Symmetry is not necessary but can be very helpful. Switching back and forth while drawing the floral wreath is also an option.
Tap Radial to follow along with this tutorial. Toggle Rotational Symmetry on. Make sure Assisted Drawing is toggled on, and tap Done in the upper-right corner.
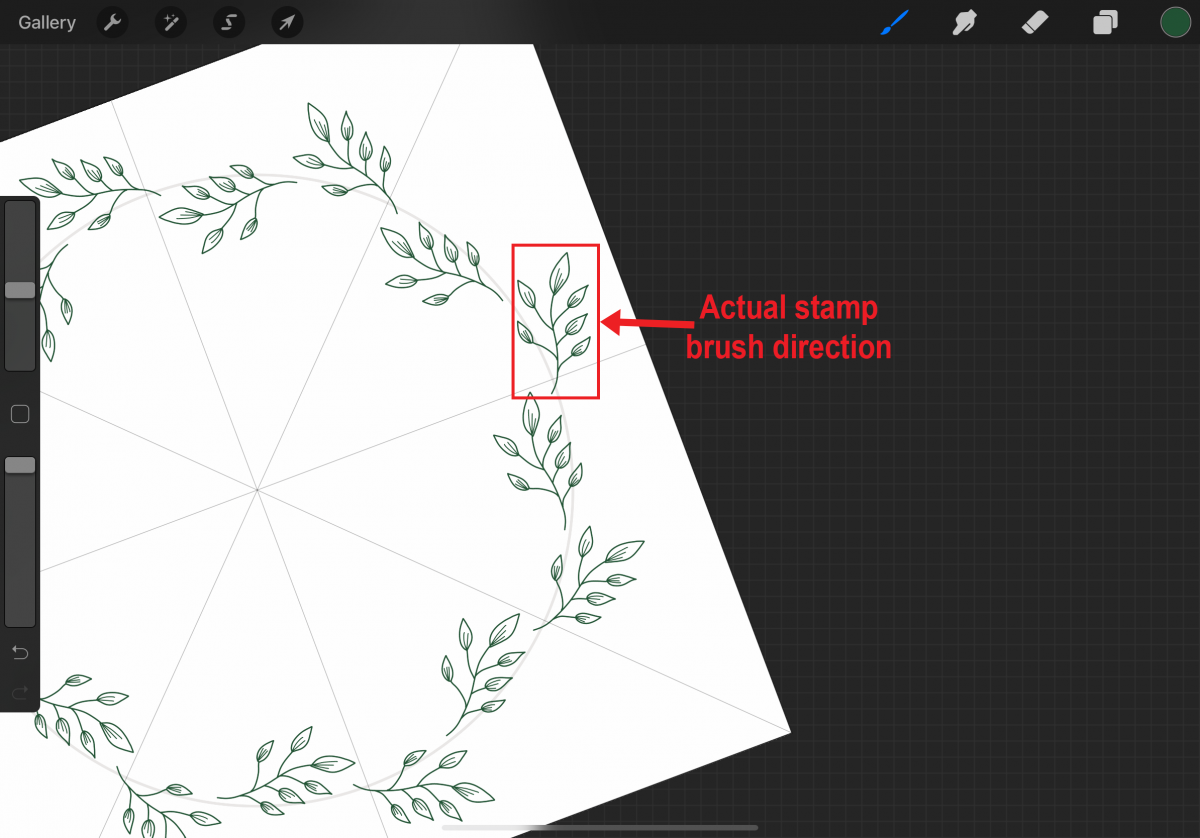
The canvas is now ready for drawing a floral wreath. When using a stamp brush or drawing leaves and flowers for the floral wreath, rotate the canvas as needed. This is especially helpful with stamp brushes as most are static in direction and do not rotate. See the following image for a better understanding.
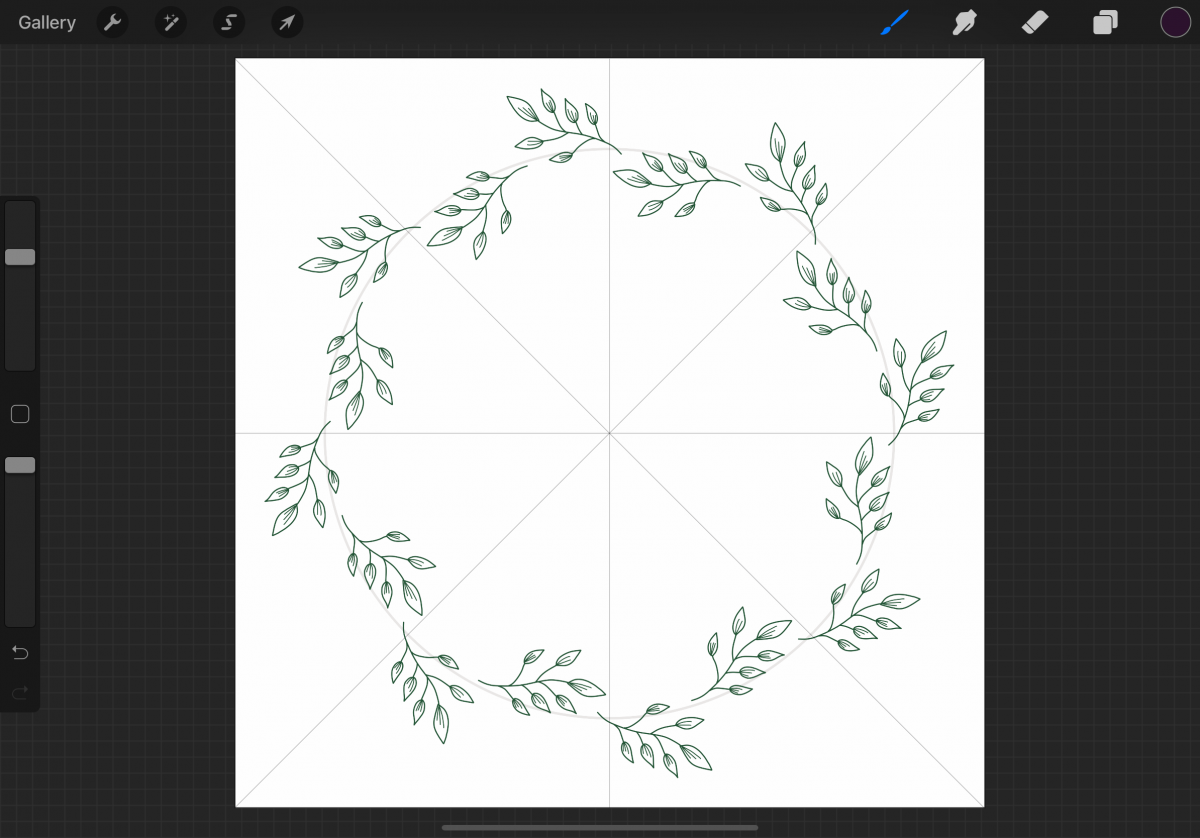
Step 6 - Start With Leaves
We suggest you start with the leaves. This will be the foundation of the floral wreath.
Step 7 - Add Flowers
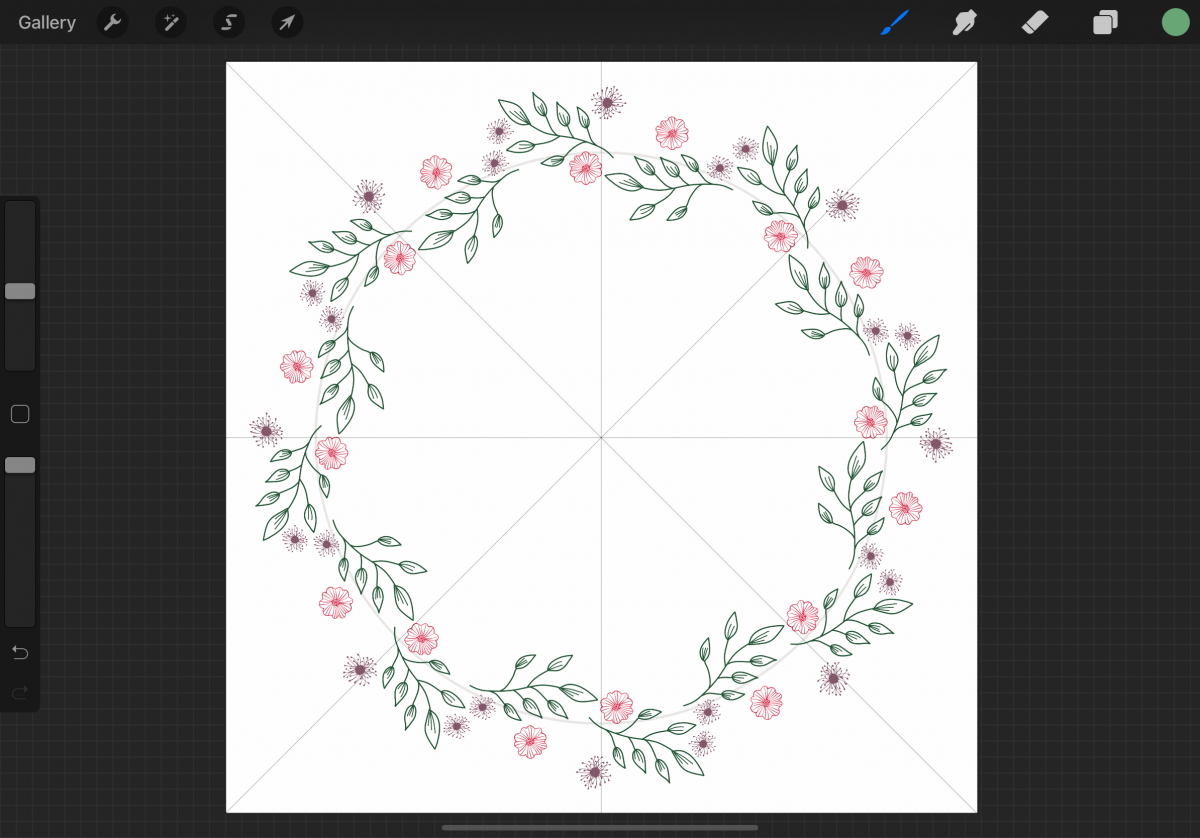
On new layers, add flowers in varying sizes to the floral wreath.
Step 8 - Fill in the Floral Wreath
On new layers, add fillers such as small leaves and flowers. To complete the floral wreath, rearrange layers as you see fit if there are overlapping elements.
Floral Wreath Examples Drawn in Procreate
This tutorial showed how to make a floral wreath using Radial symmetry with Rotational Symmetry. The following examples are floral wreaths made with different symmetry options.
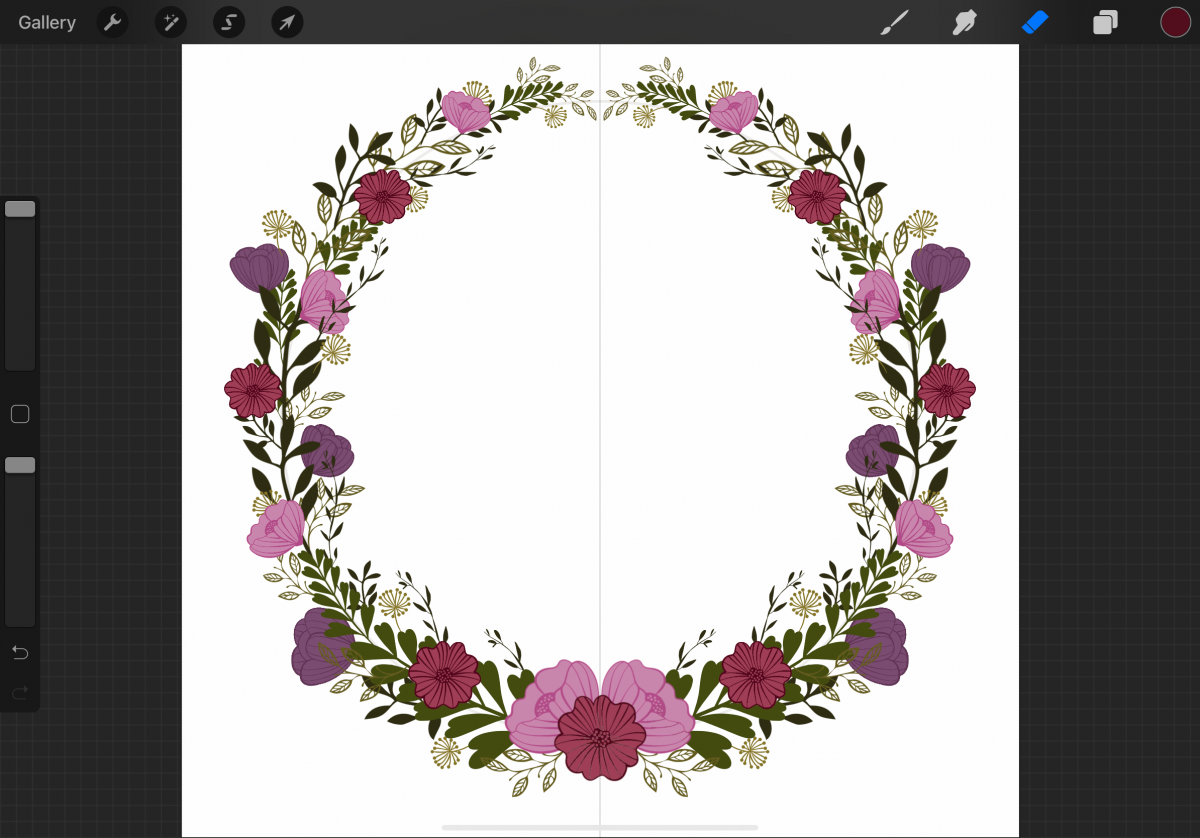
Vertical Symmetry Floral Wreath
The following floral wreath was made using Vertical symmetry without Rotational Symmetry.
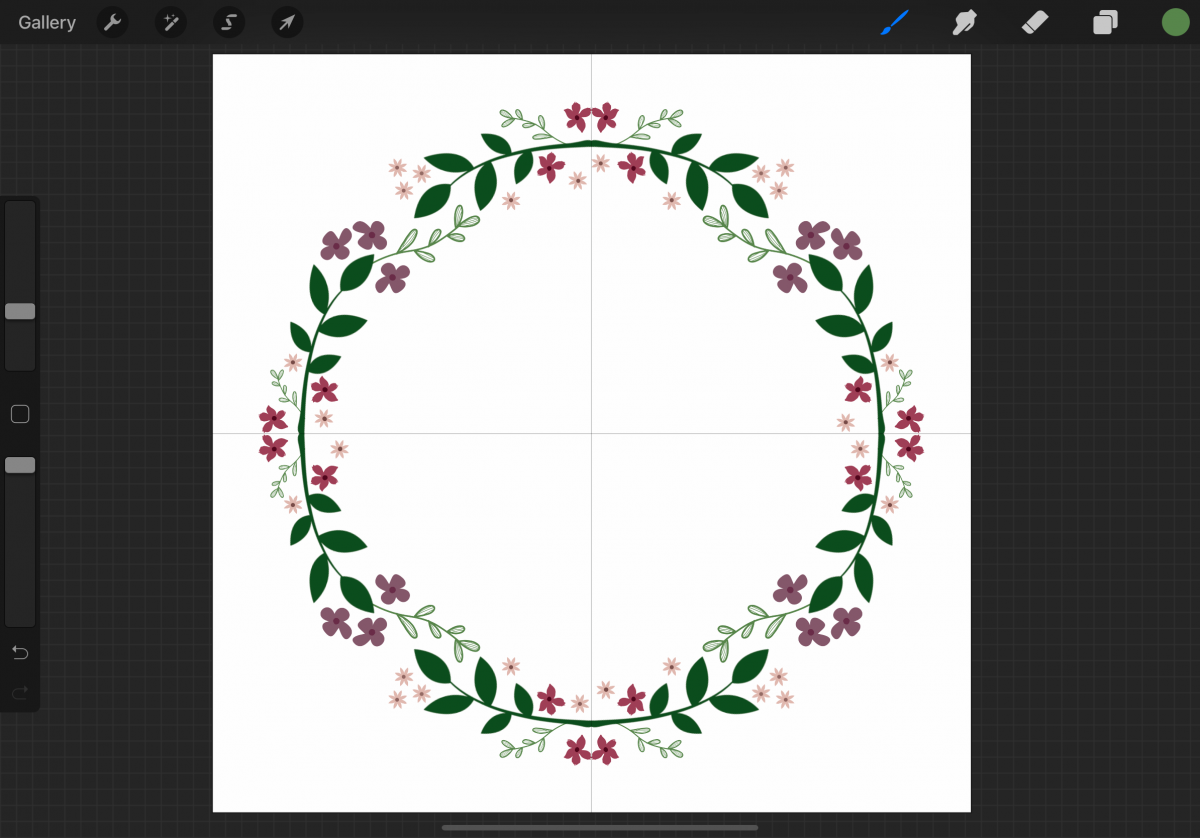
Quadrant Symmetry Floral Wreath
Except for a few little flowers, the following wreath was made using Quadrant symmetry without Rotational Symmetry.
We have a large selection of Procreate brushes along with a handful of free Procreate brushes for you to get creative with. You can make your own unique floral wreaths!


