
How to Create a Neon Text Effect in Affinity Designer
In this tutorial, we will create a Neon Effect by combining layer effects, blend modes, and a few tweaks. We will be using the TwentyOne font. Choosing a monoline font makes it easier to achieve the desired results.
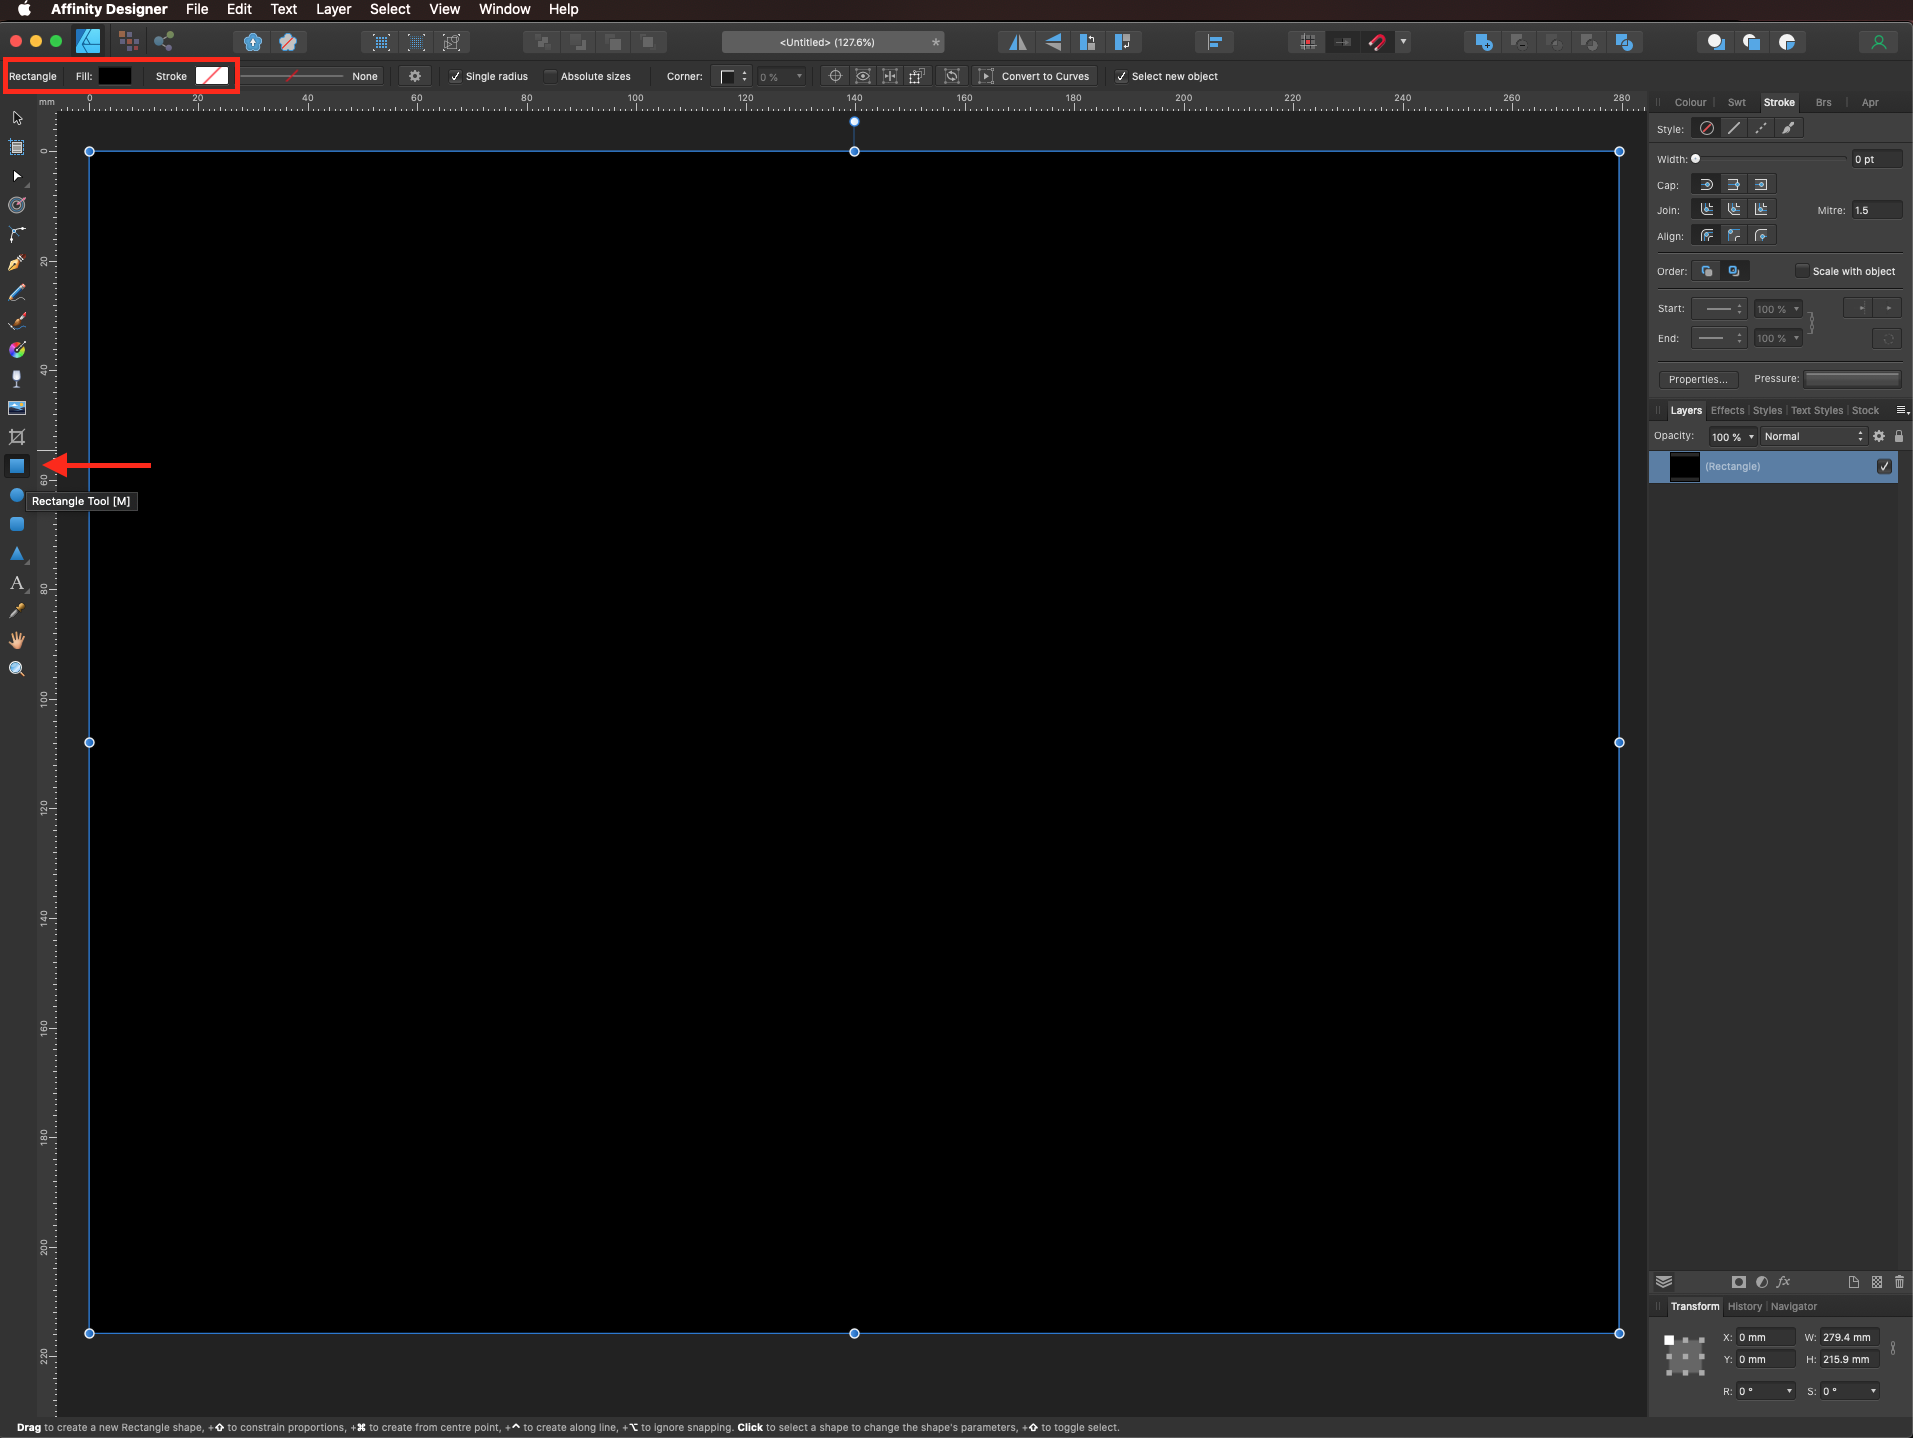
Create a New Document and use the Rectangle Tool (M) to create a rectangle that covers the entire document. Fill it with black.
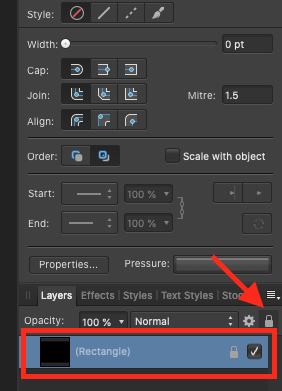
Lock the layer by selecting it and clicking on the small padlock on the top-right of the Layers panel.
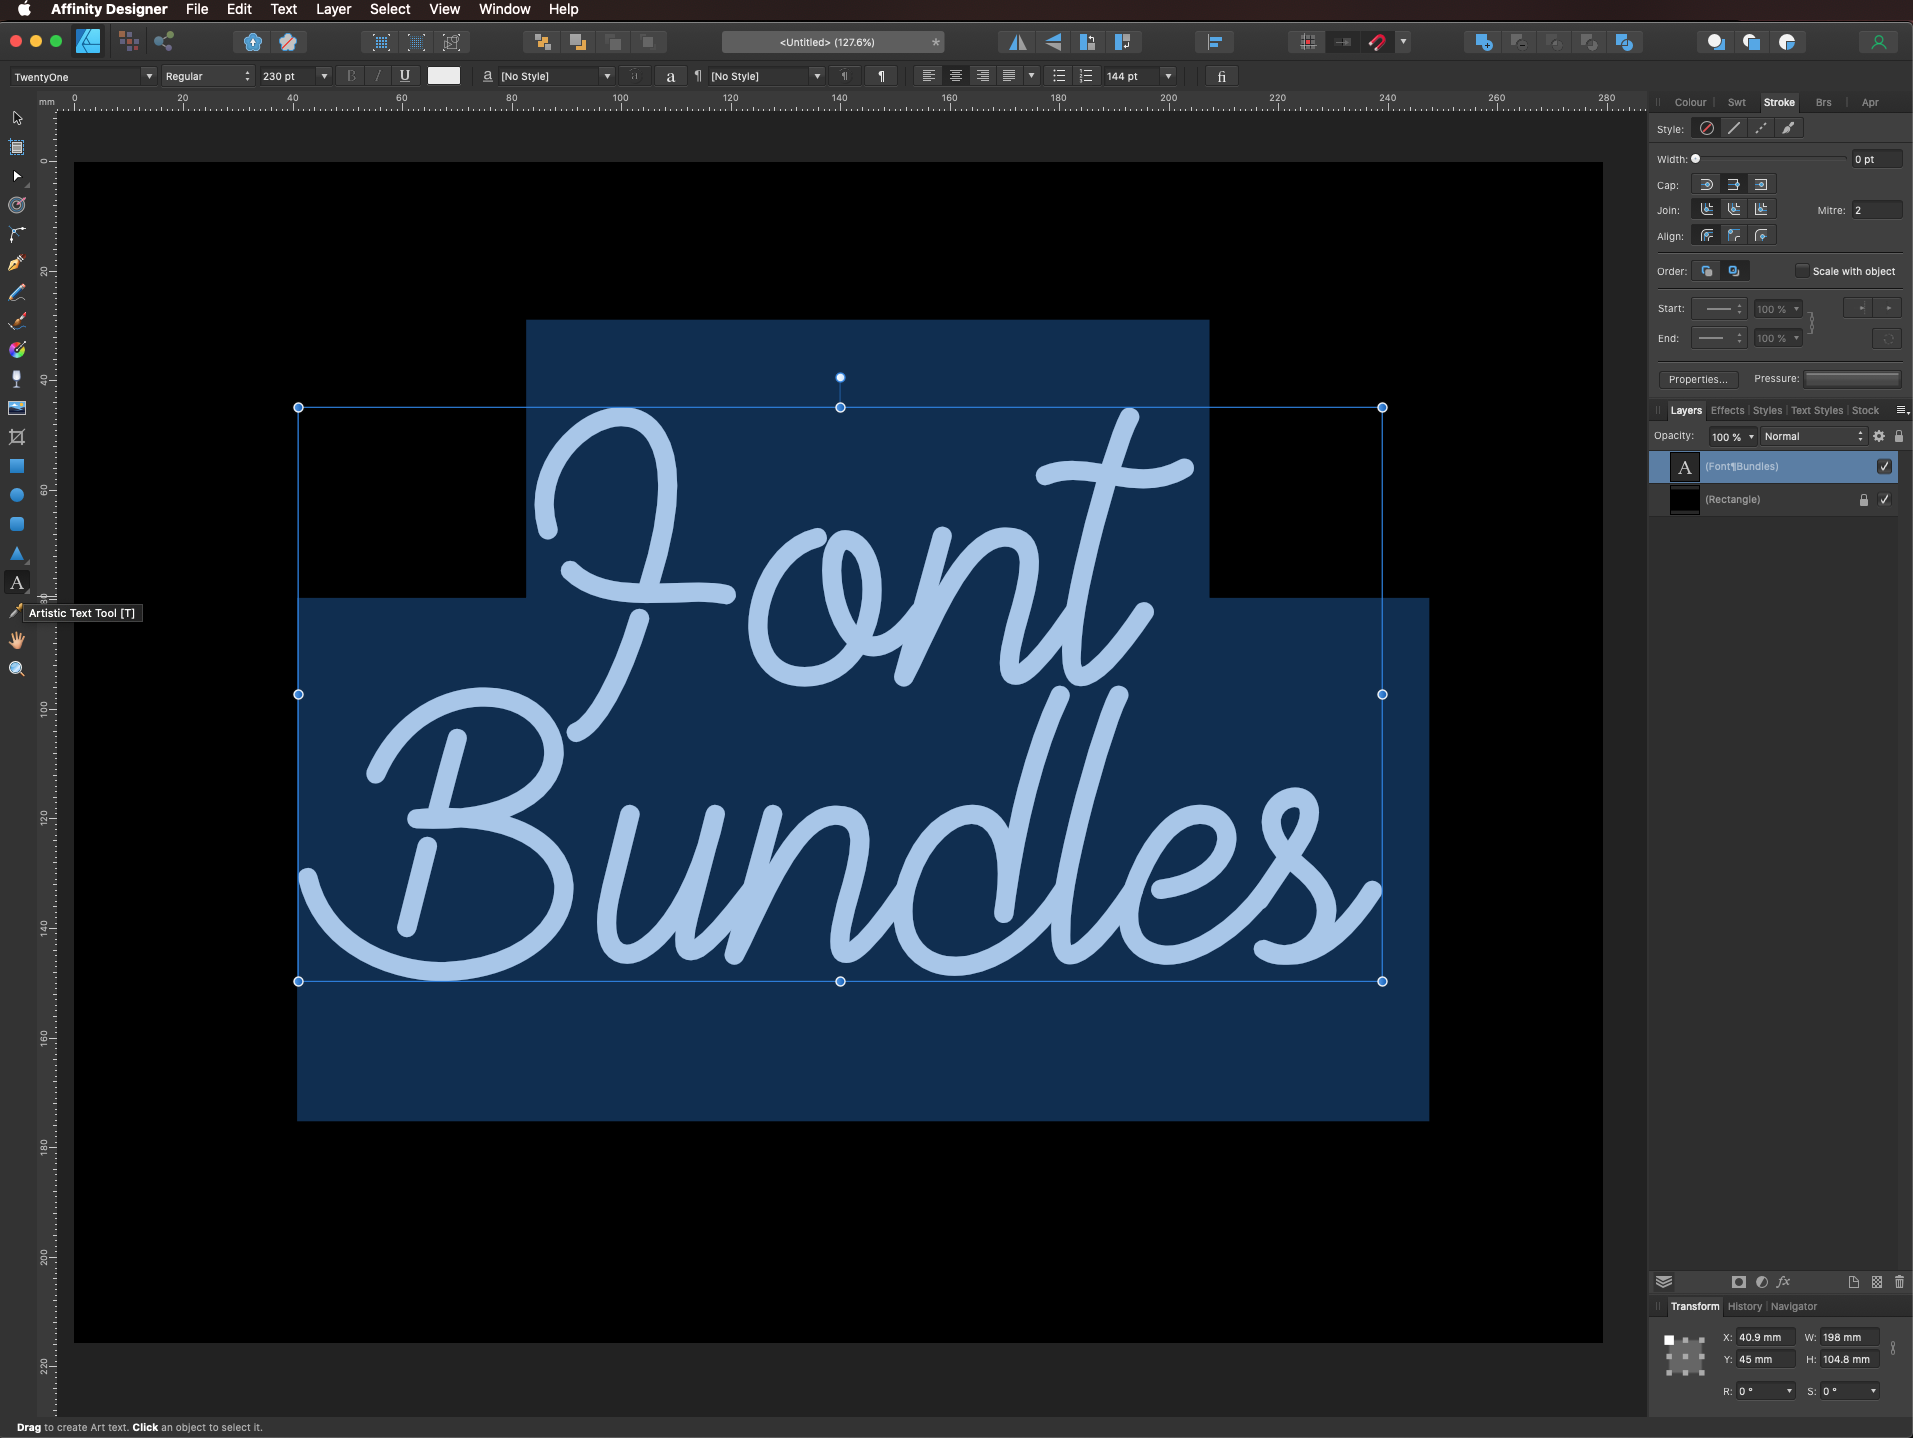
Use the Artistic Text Tool to type your text. Fill it with white and give it the size, alignment, and leading that fits your needs (ours was 230 pt, center aligned and with a 144 pt leading).
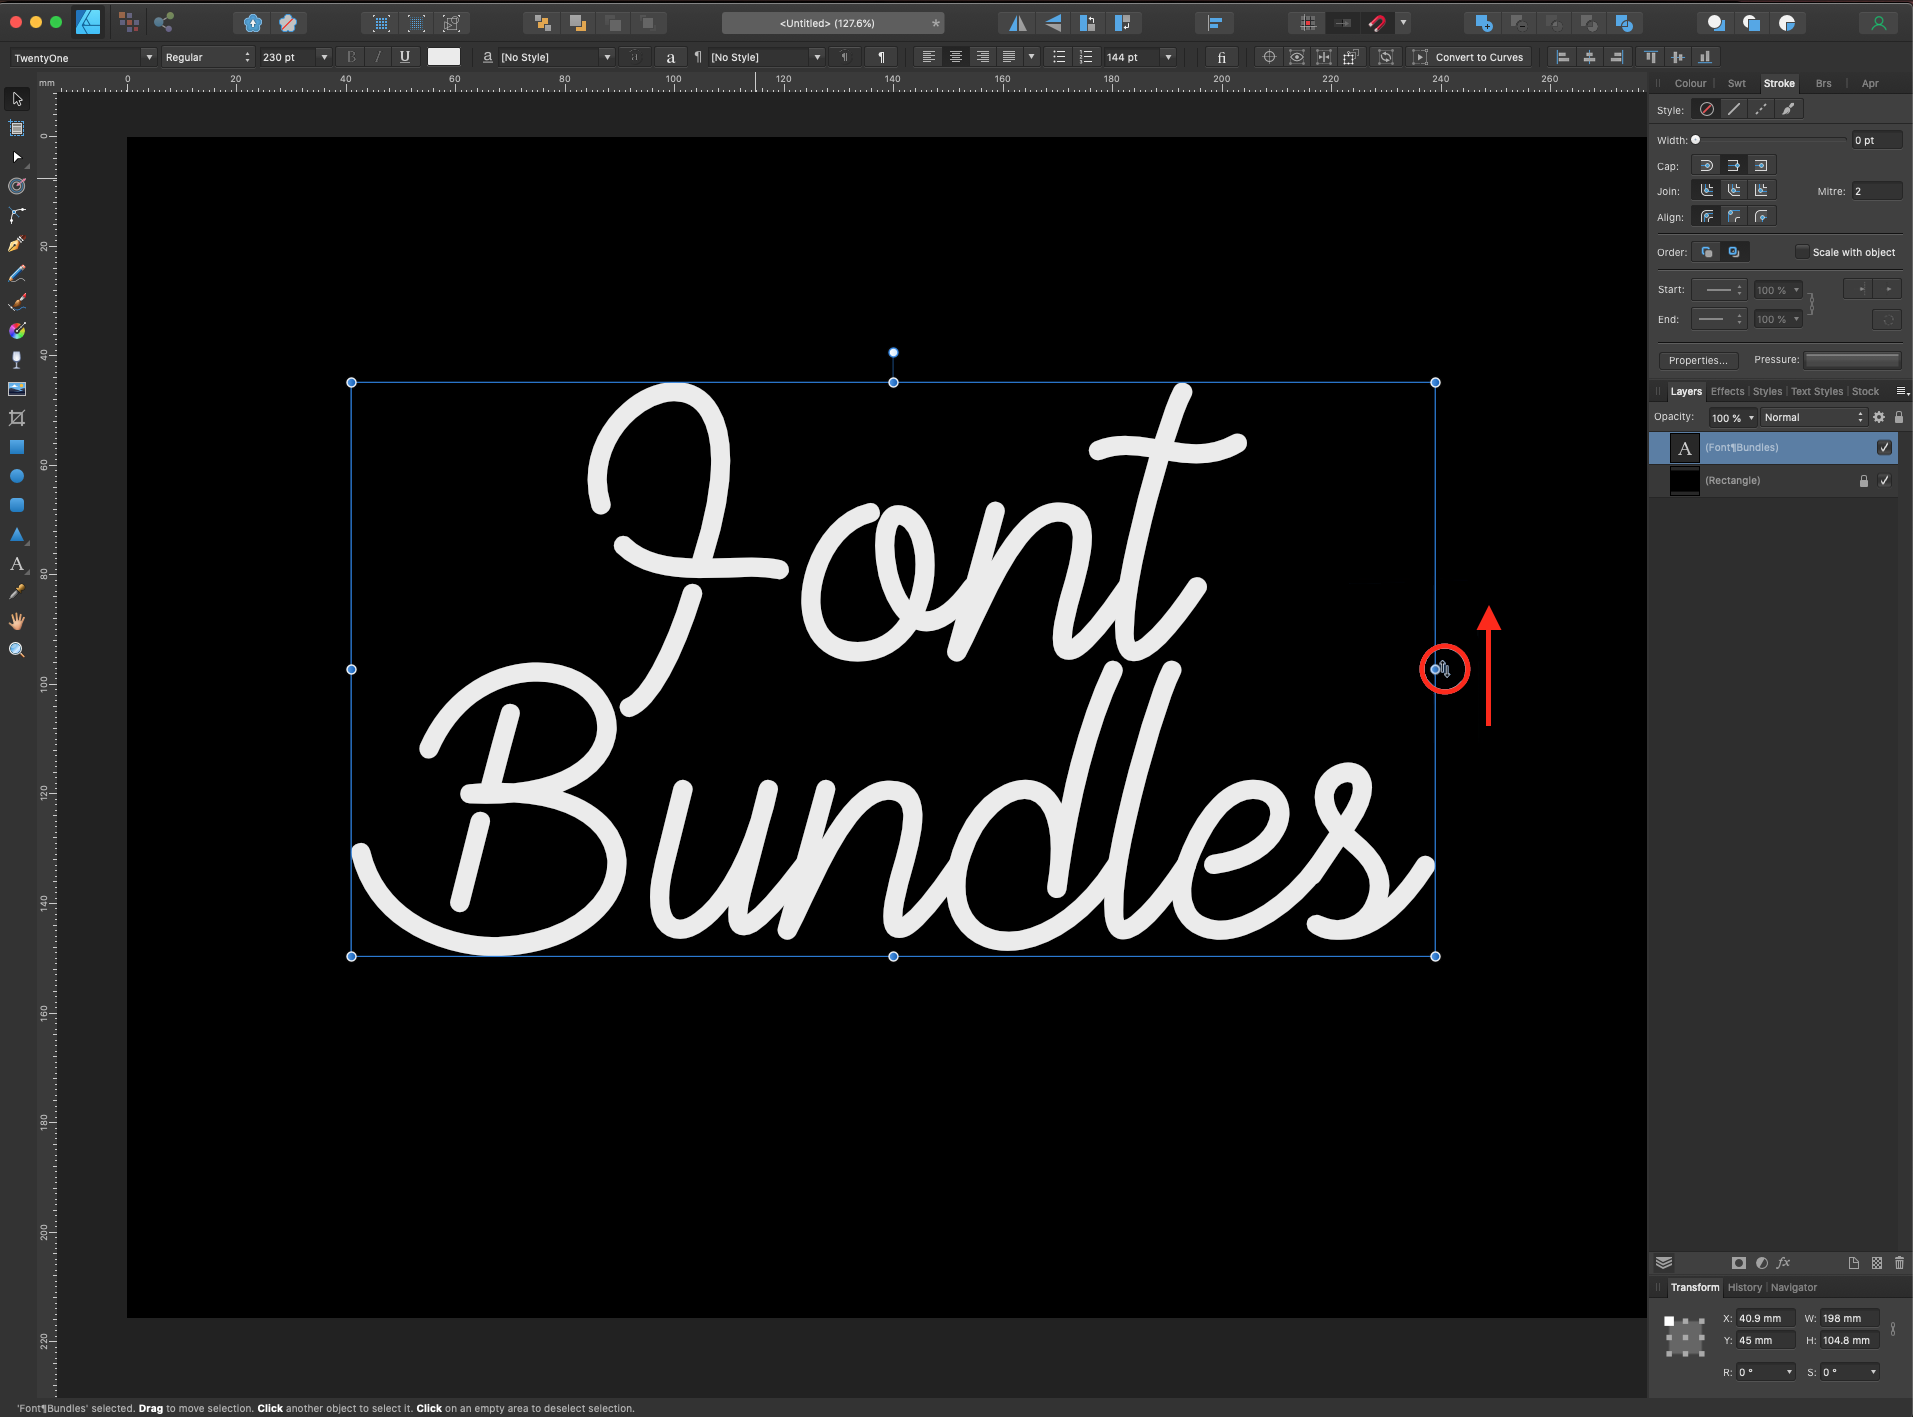
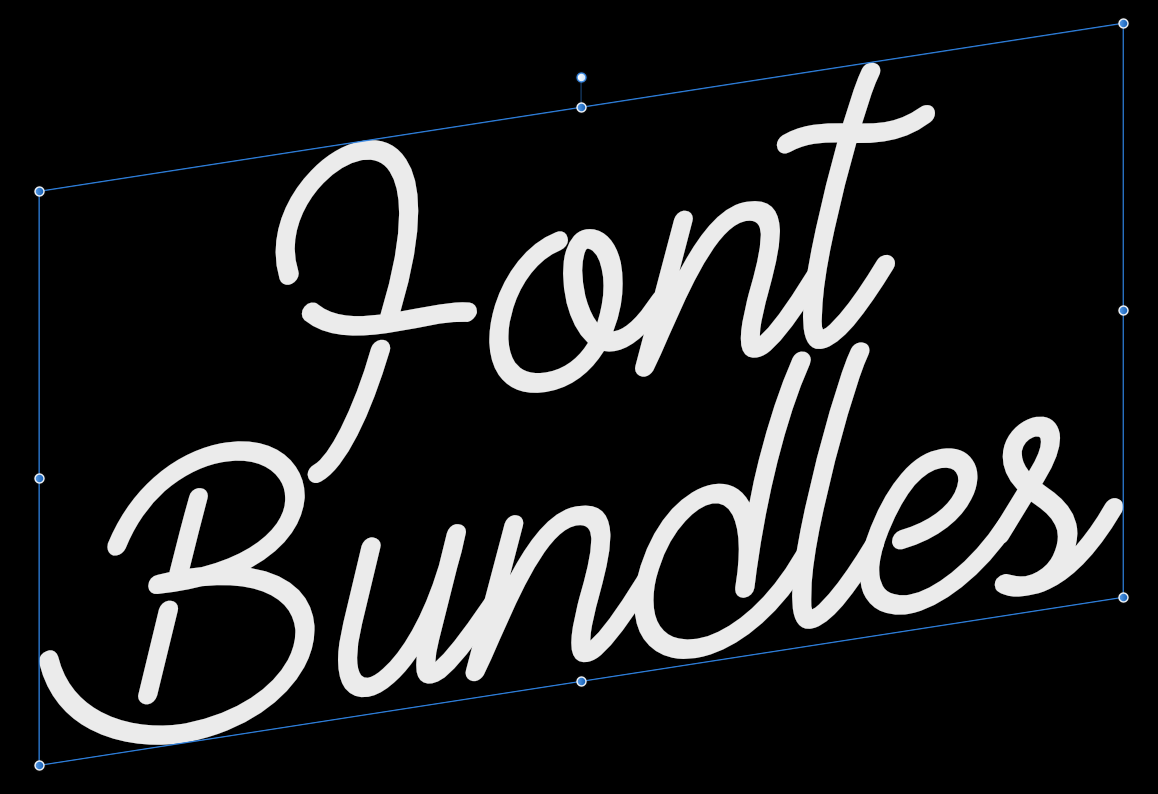
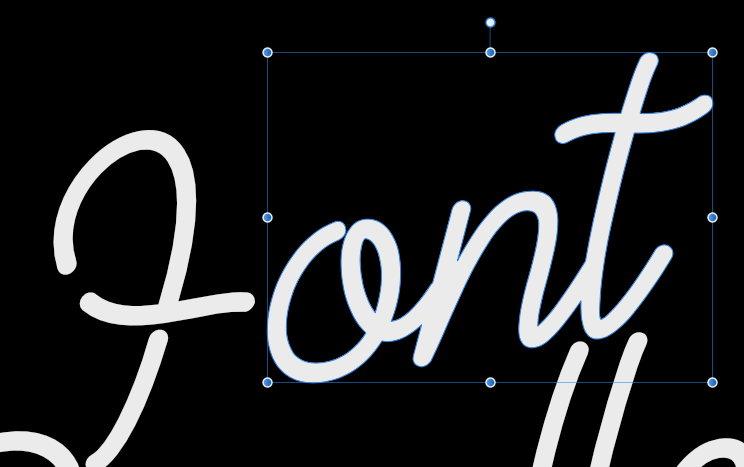
To skew the text a bit, hover your cursor on one of the round blue handles on the side of the text until you see it change into two arrows facing up and down. Then, drag it up or down to add some sheer to it.
The resulting text should be similar to this.
Center your text using center as the Align Horizontally and Vertically options in the Align panel, making sure that Align to Spread is your choice.
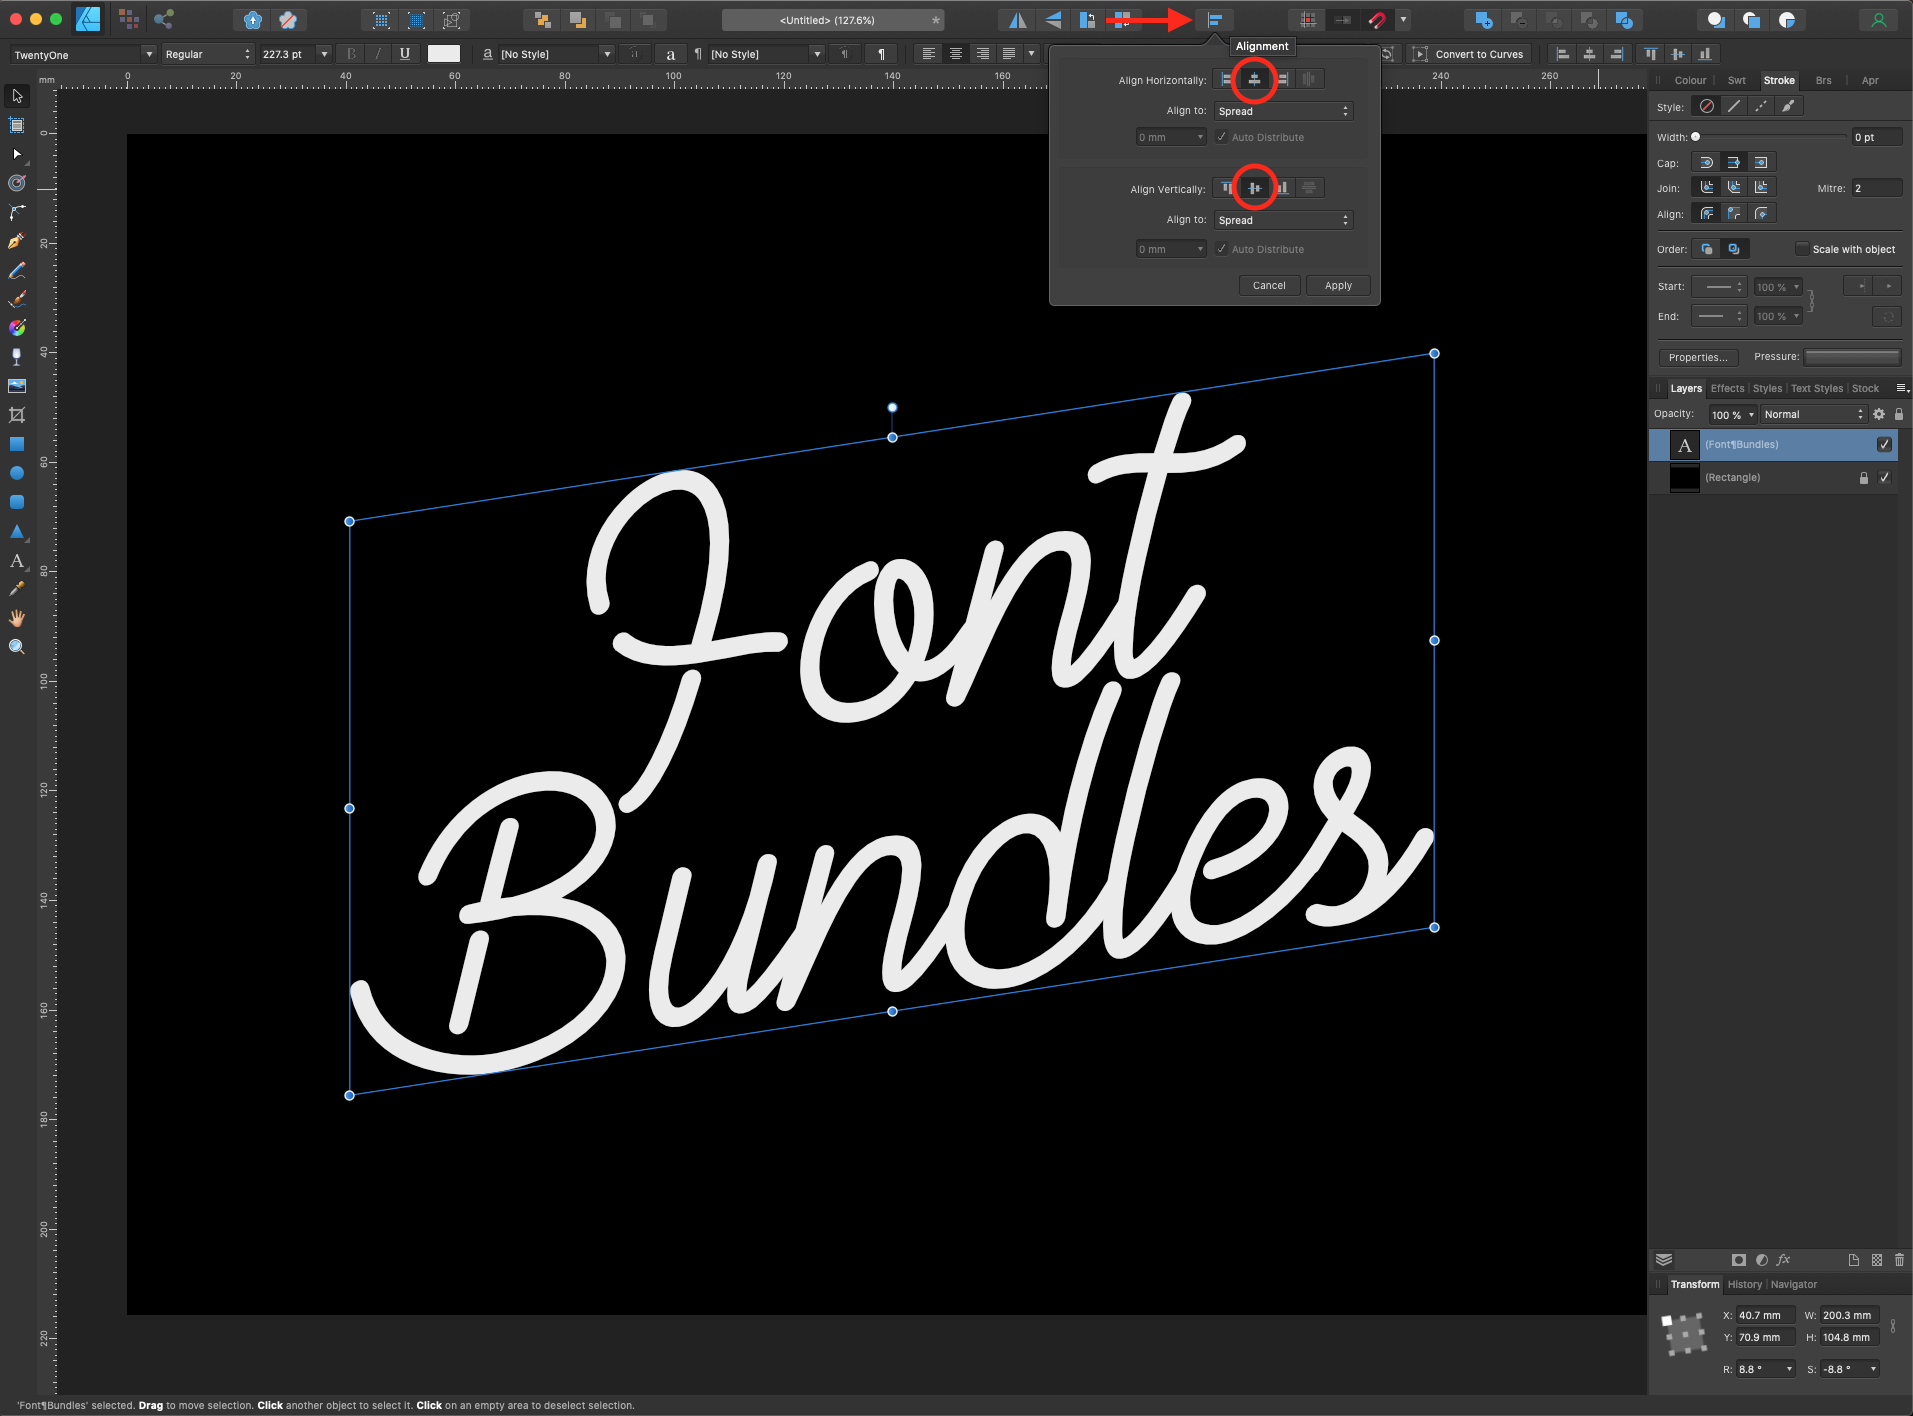
If your text has some overlapping letters you will need to convert it to curves and merge them together before applying the needed effects.
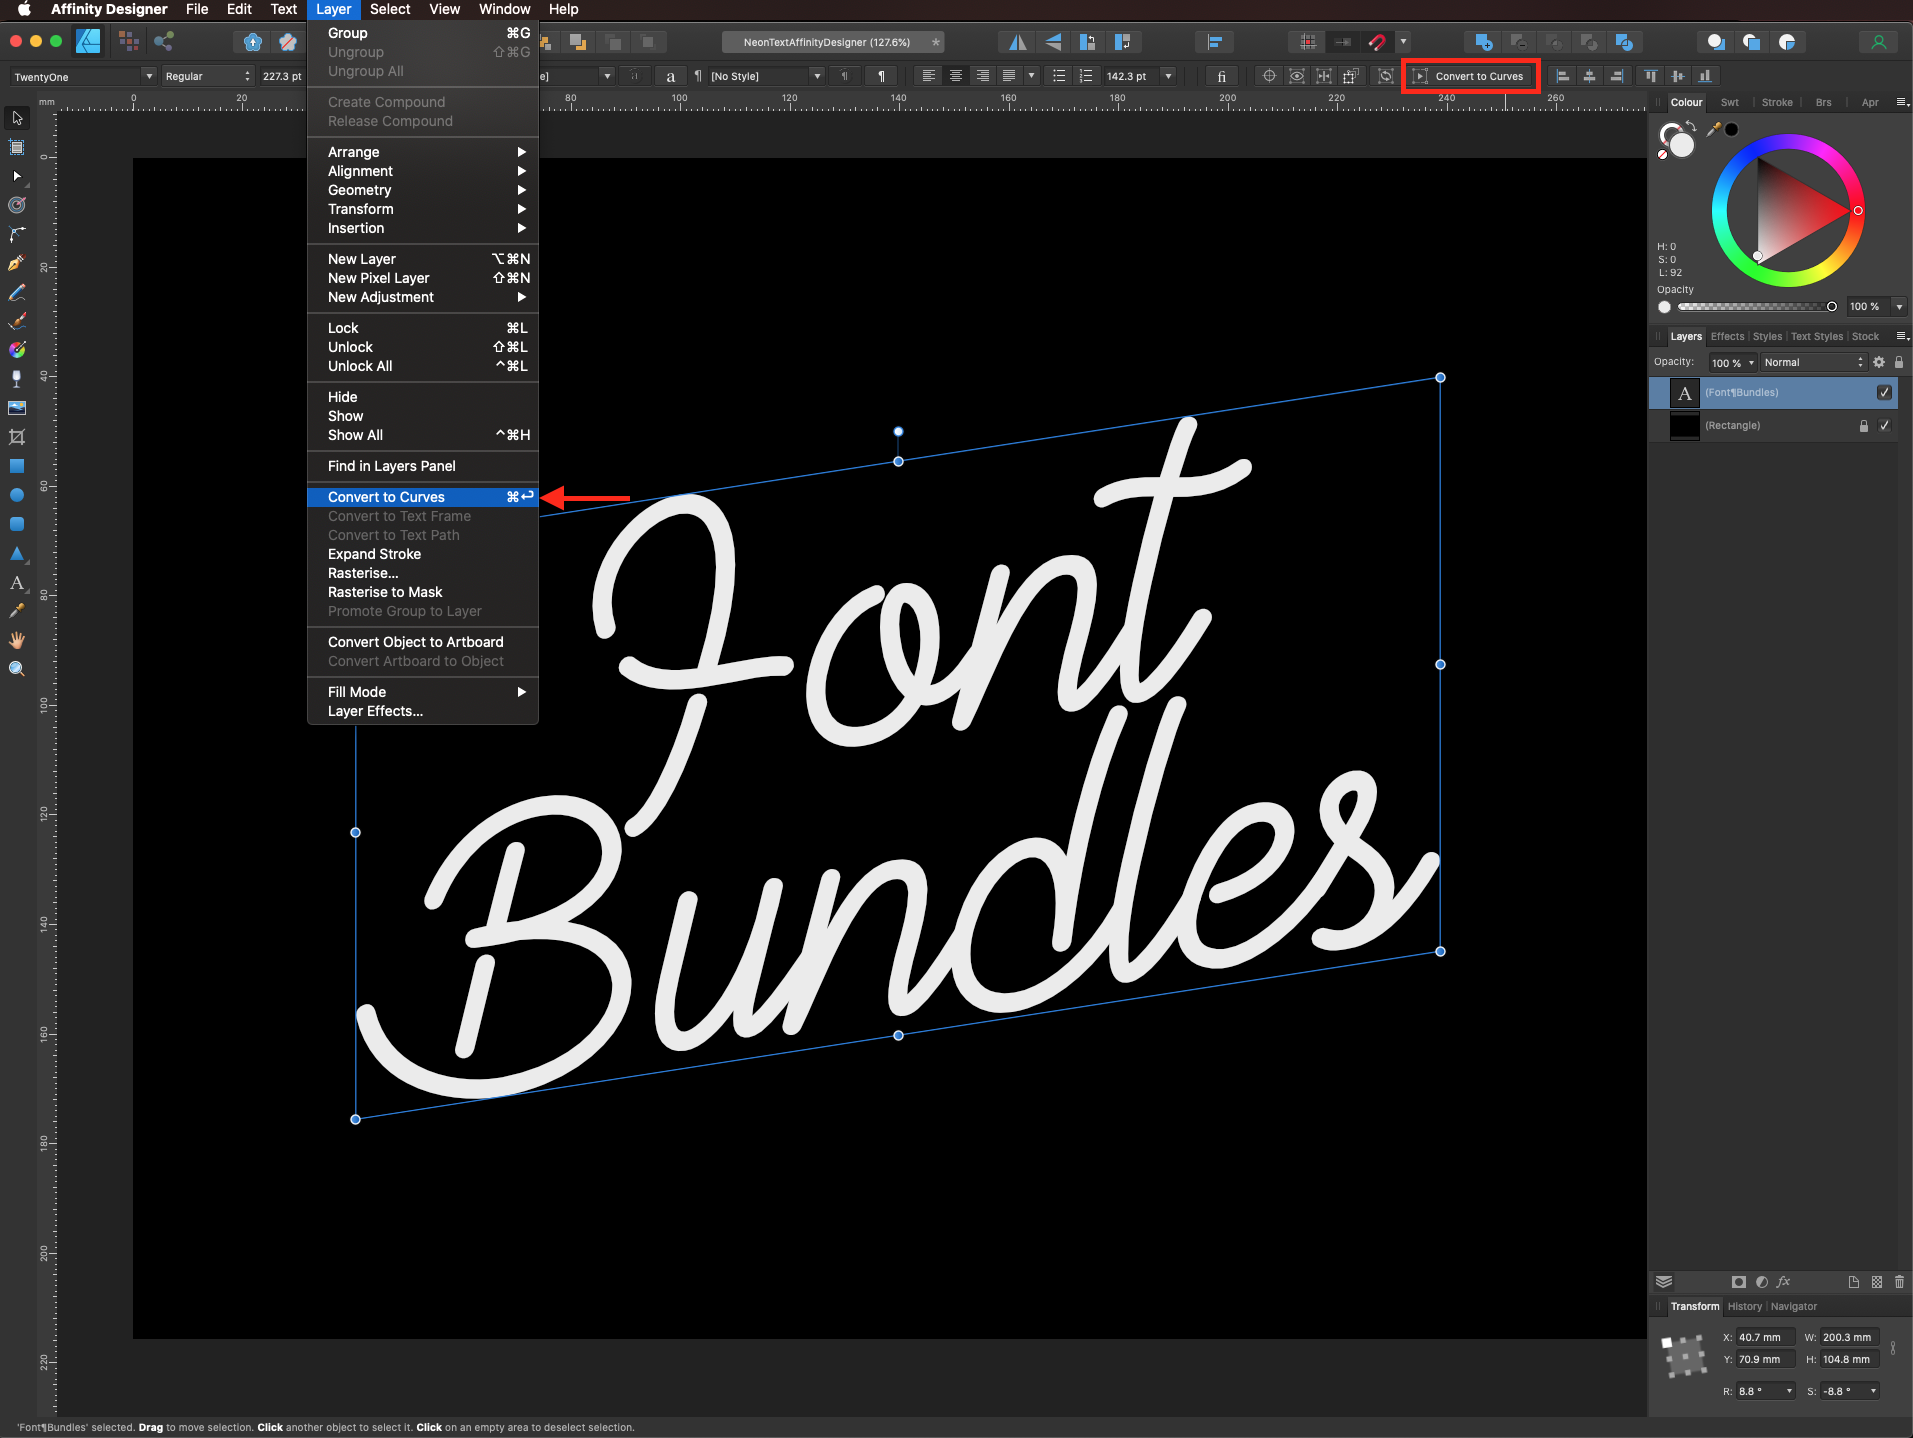
Select it and go to Layers > Convert to Curves or click the button on the Context menu to flatten it.
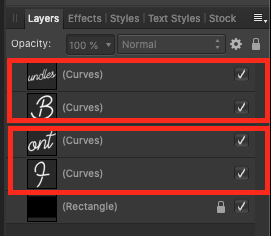
Ungroup it (Shift + Command/Control + G) and then, select the letters you want to merge and use Add in the Geometry panel.
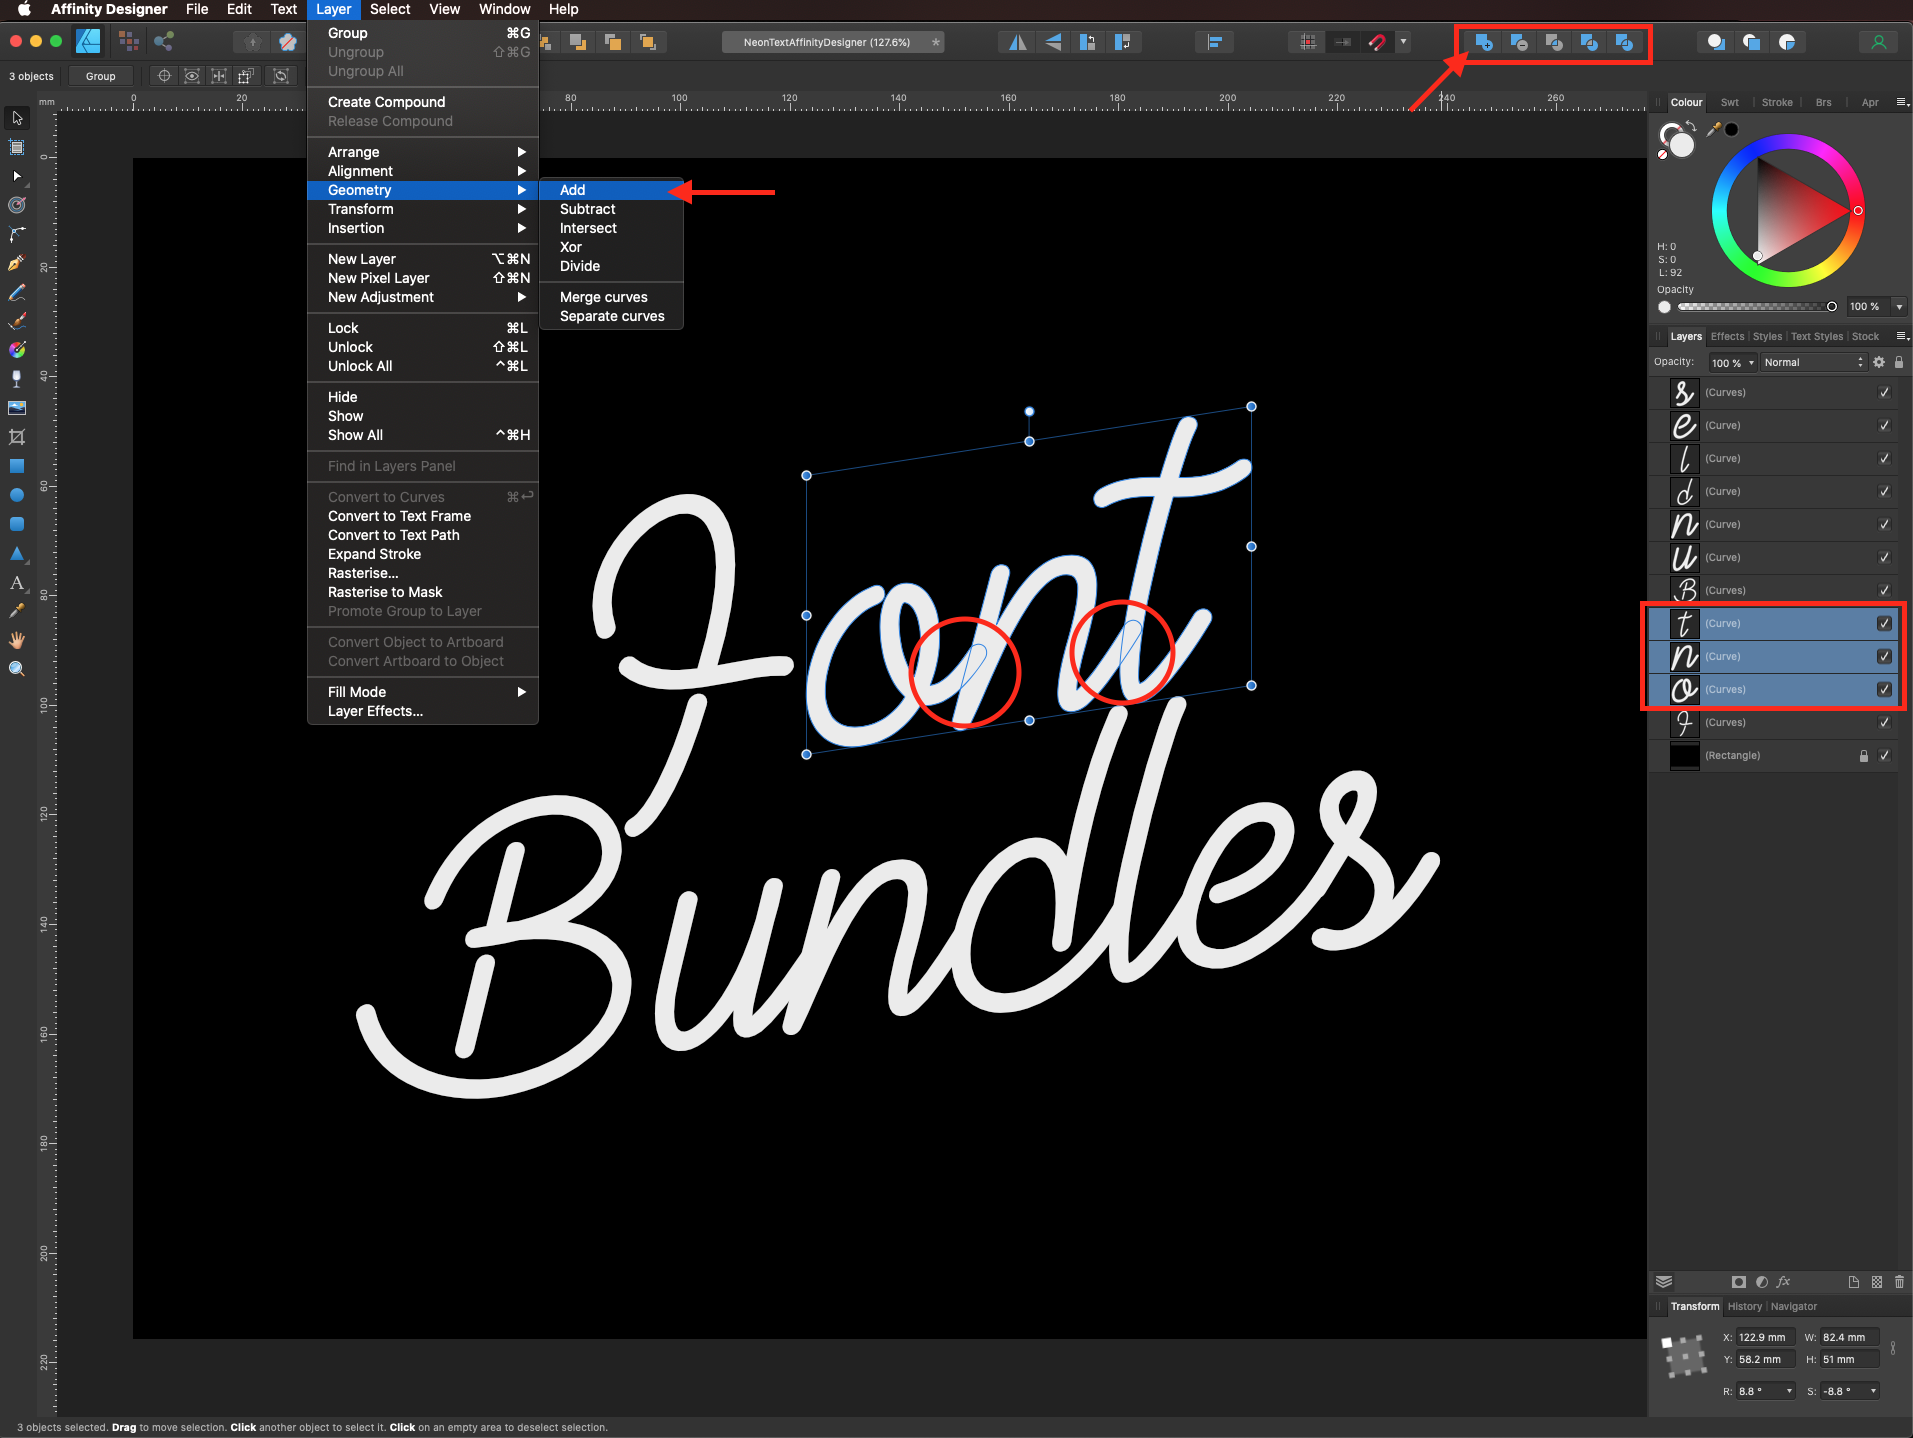
Once you merge all the overlapping letters together, do the same with the single words.
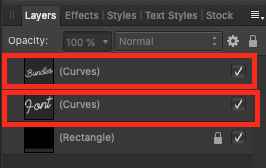
Then, group everything together again (Command/Control + G).
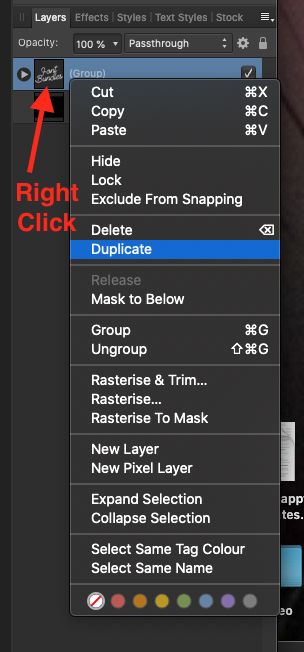
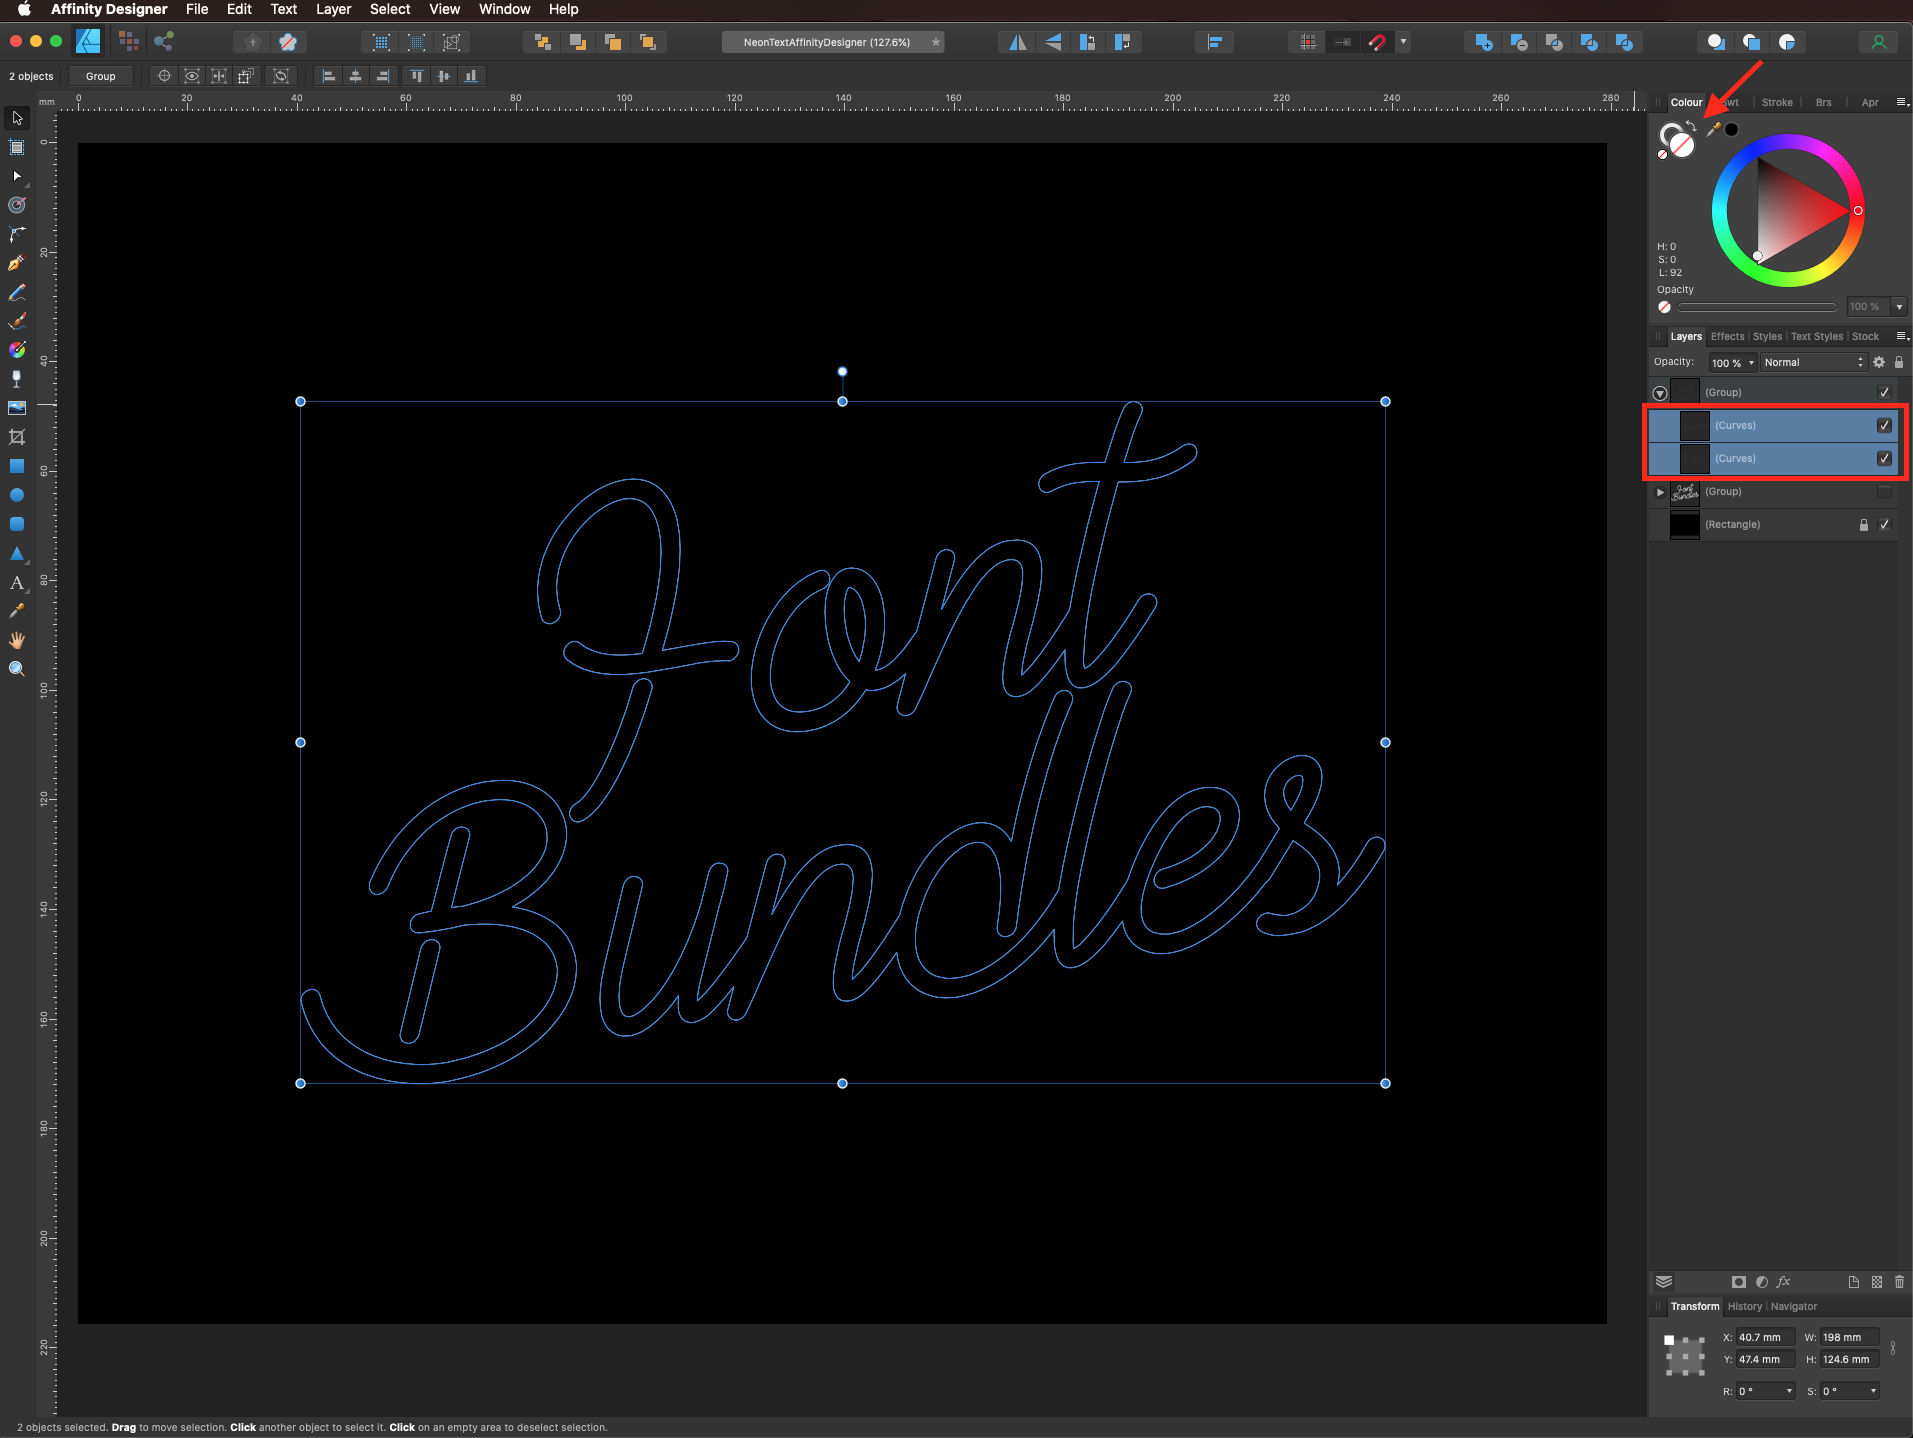
To achieve the desired neon look, we will be applying various layer effects to duplicates of the text layer. Right-click on top and choose Duplicate.
Hide the bottom text layer (uncheck the small box on the right side of the layer) and swap the fill and stroke colors (your text should now have a white stroke and no fill).
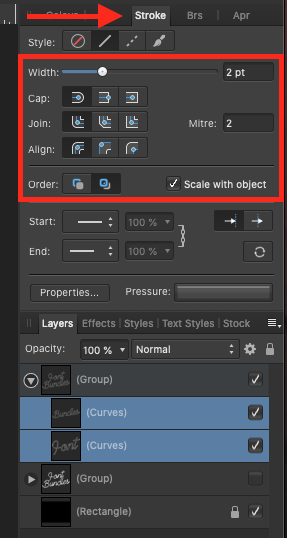
In the Stroke panel, increase the width to 2 pt (or whatever fits your needs), make sure that the cap and join are set to round, and check the Scale with object box.
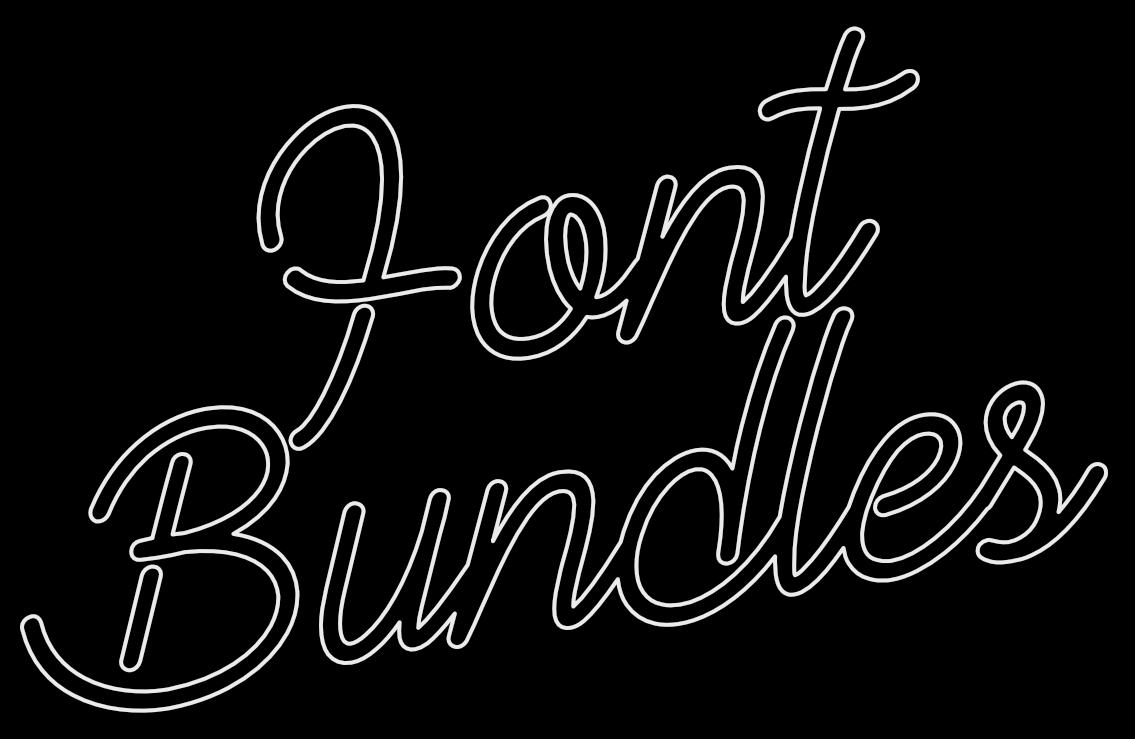
Here’s how our text looks.
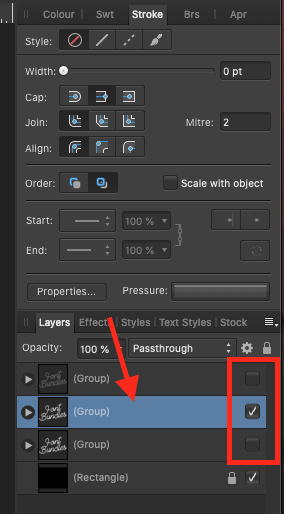
Hide the outline text layer, create another duplicate of the base text and make sure you are working with the middle layer.
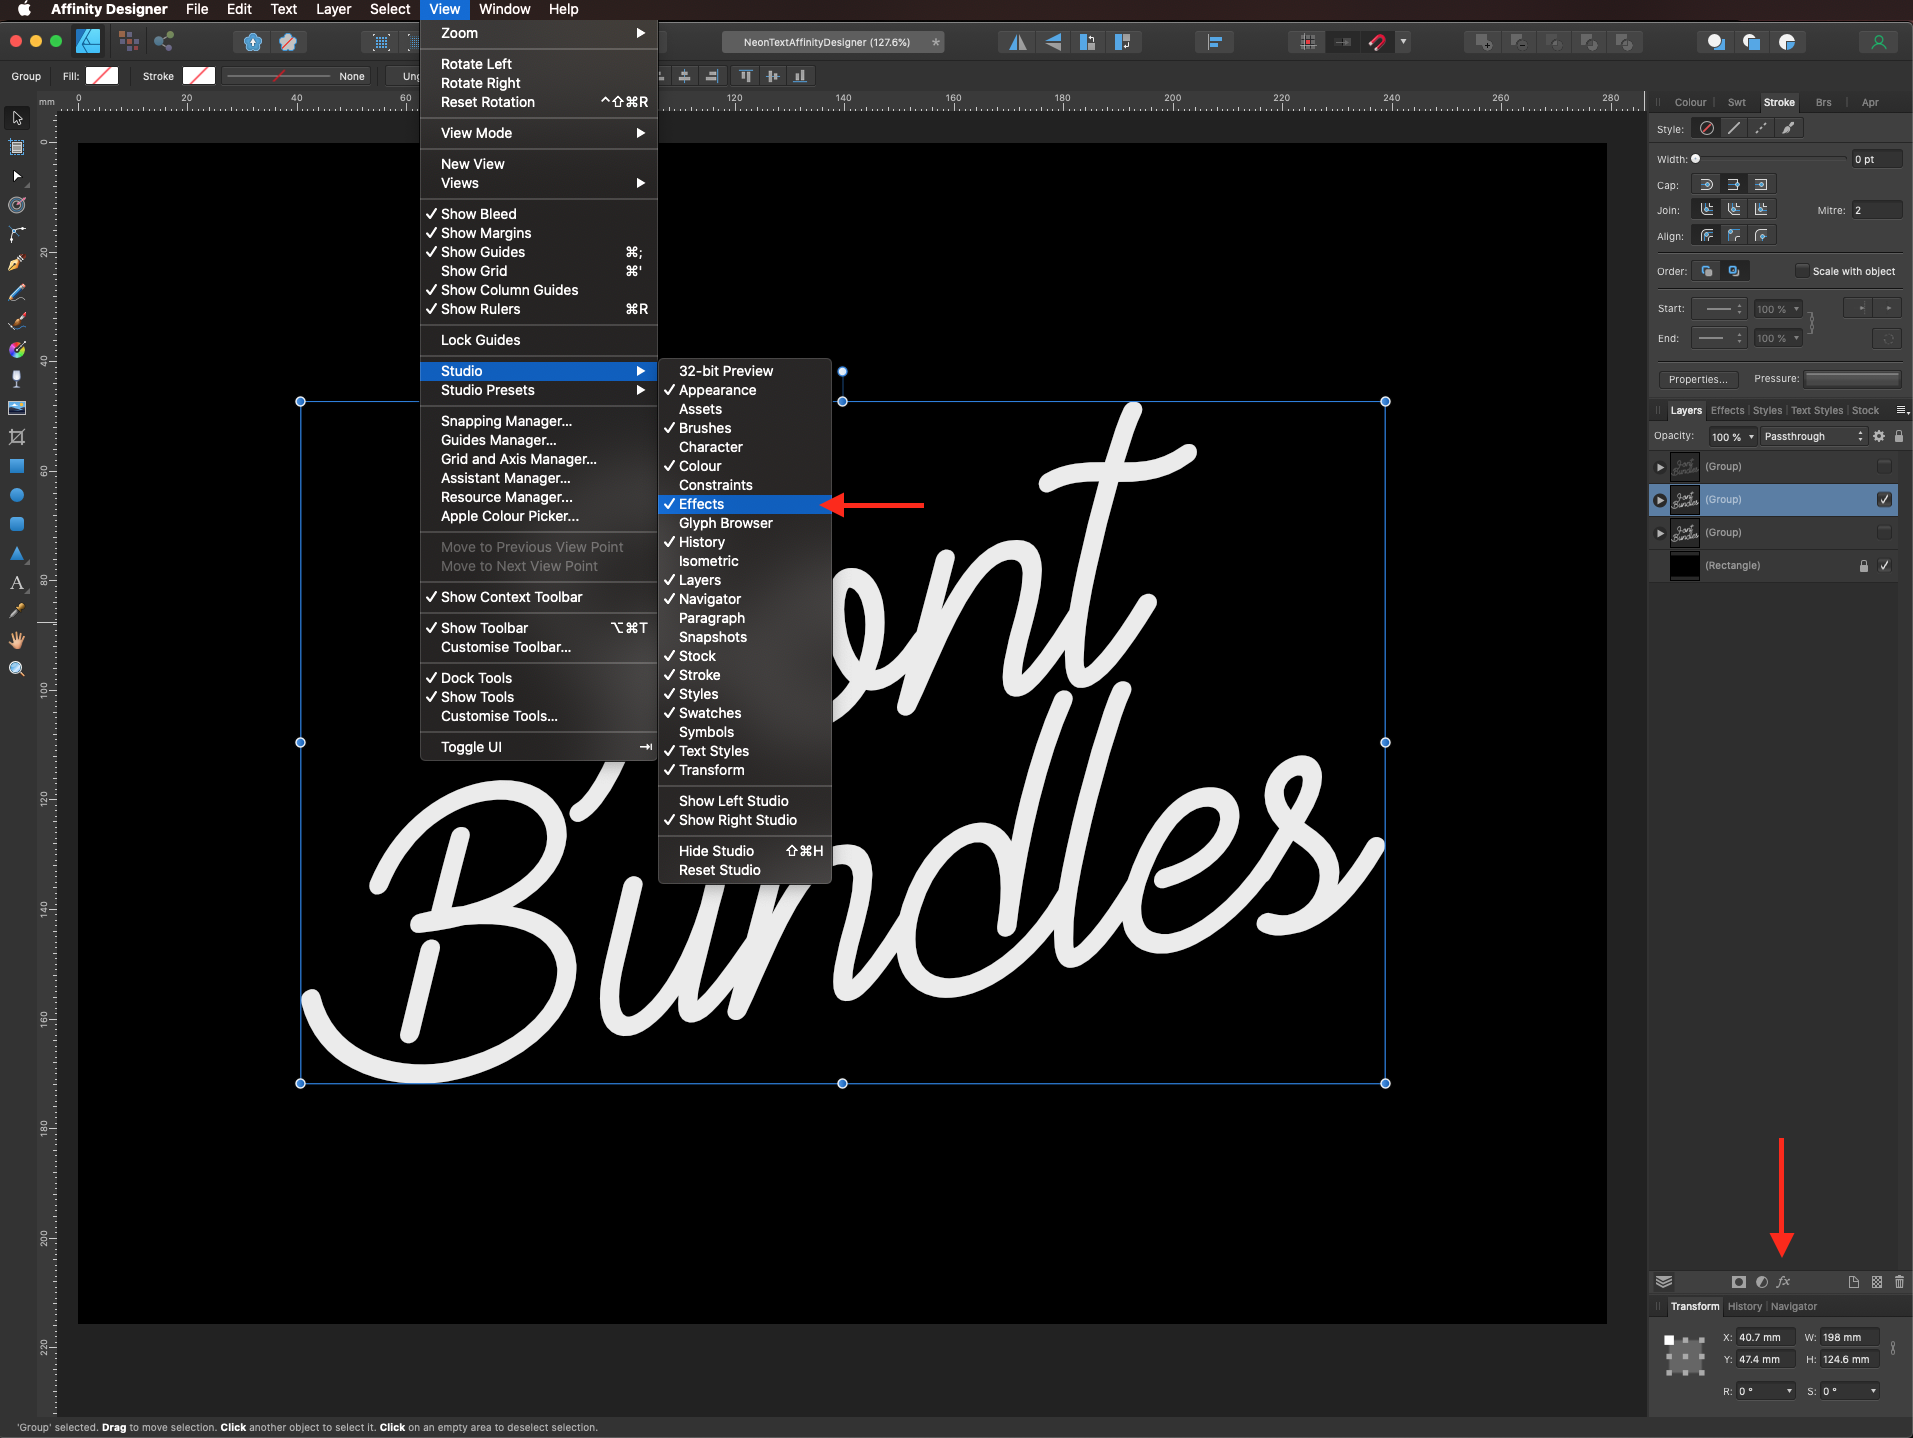
Show the contents of the layer by clicking on the arrow on the left side of the layer, select one of the words and open the Effects panel by going to View > Studio > Effects or clicking on the Layer Effects icon at the bottom of the Layers panel.
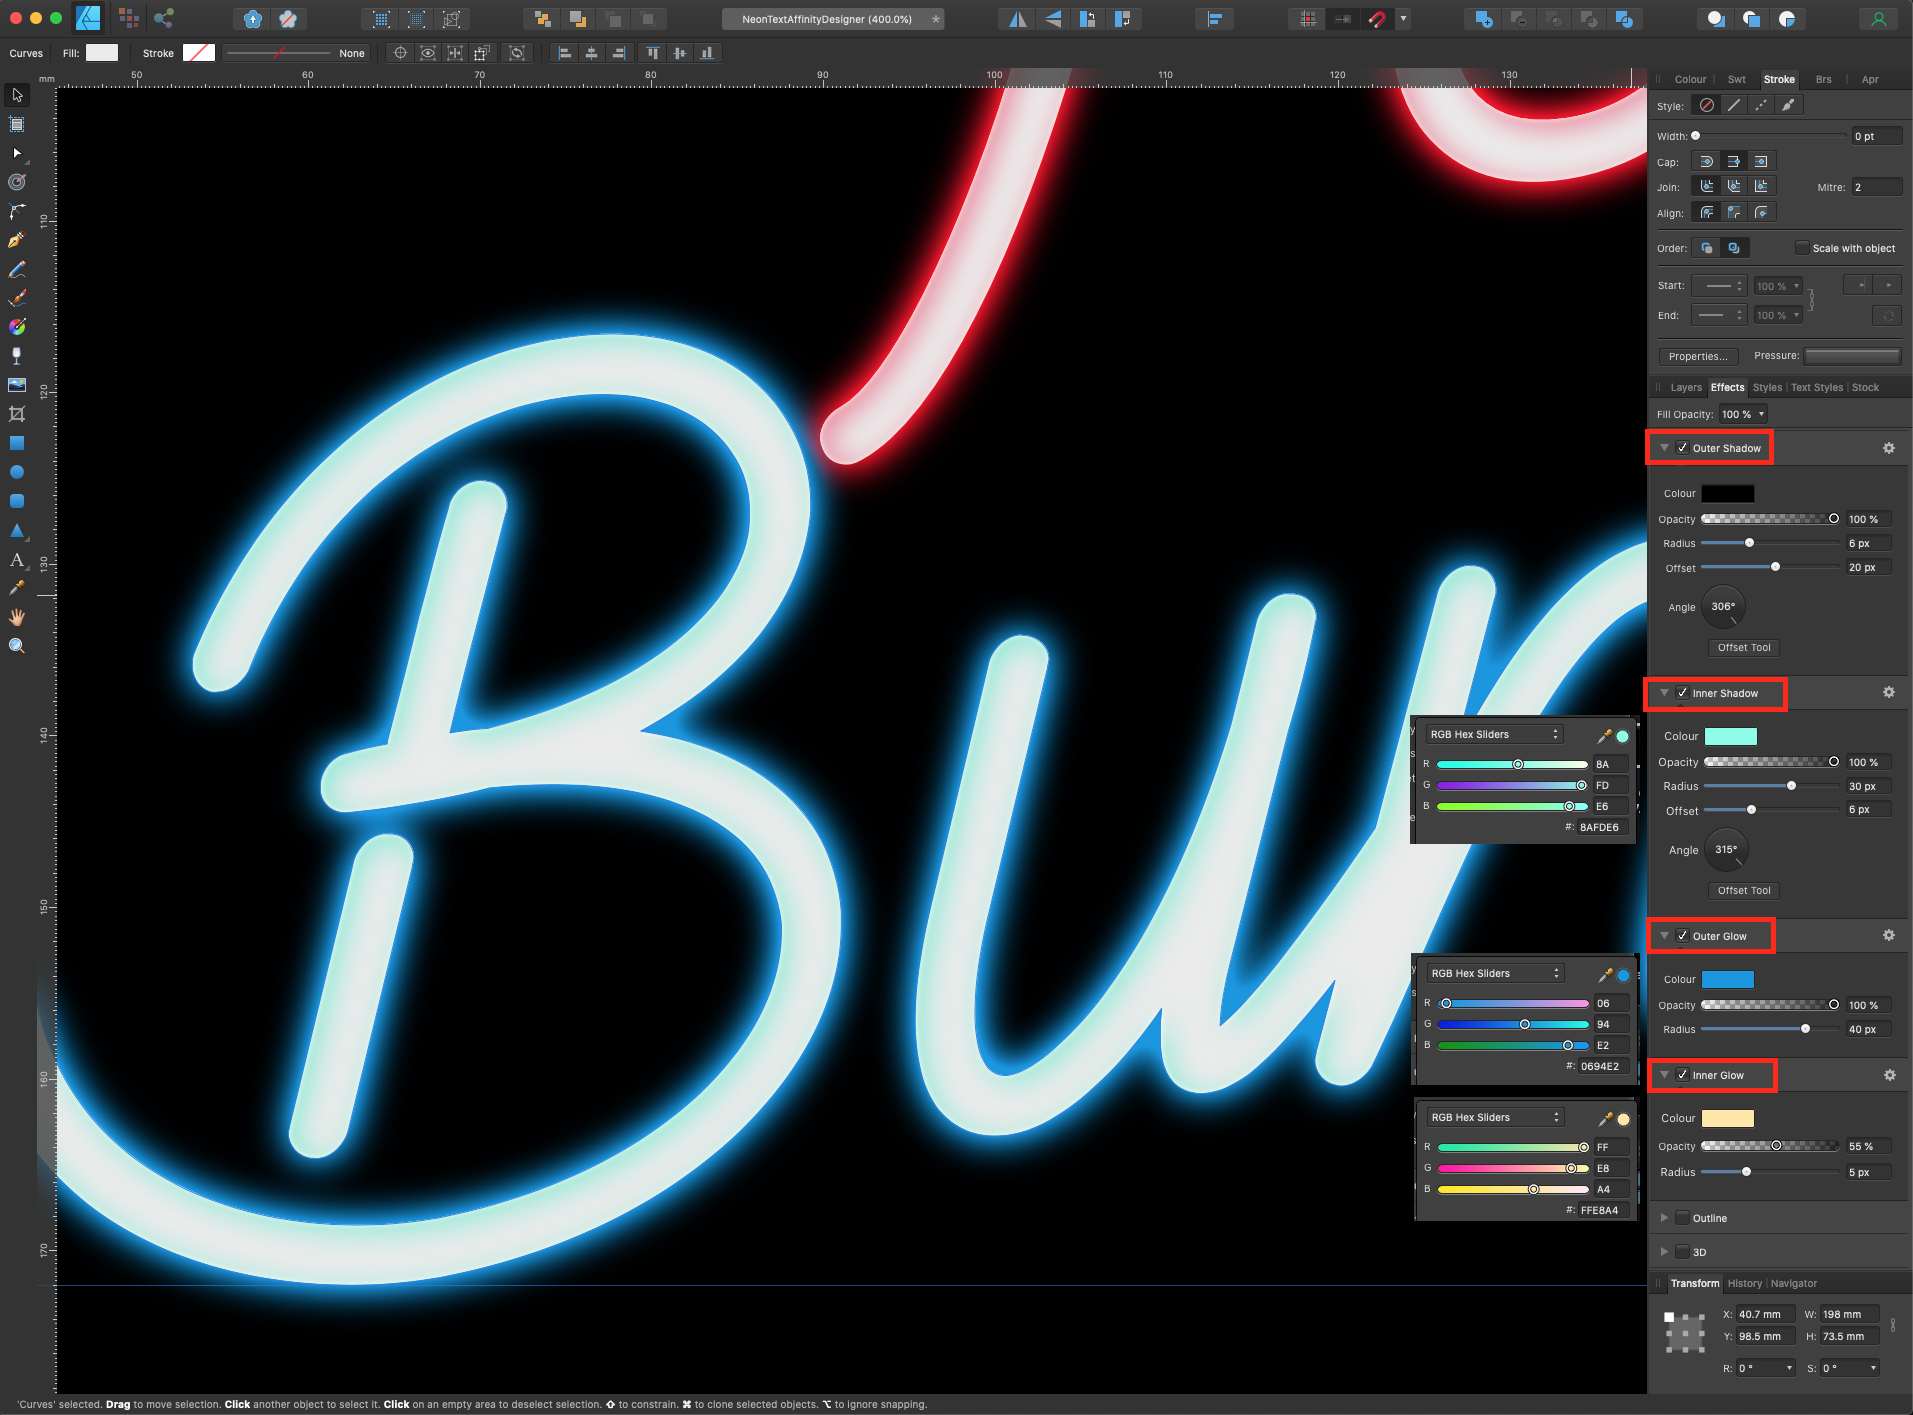
For the firts word, we used the following values for Outer Shadow (color #000000, 100% opacity, 6 px radius, 20 px offset and a 306° angle), Inner Shadow (color #8AFDE6, 100% opacity, 30 px radius, 6 px offset and a 315° angle), Outer Glow (color #0694E2, 100% opacity, 40 px radius) and Inner Glow (color #FFE8A4, 55% opacity, 5 px radius).
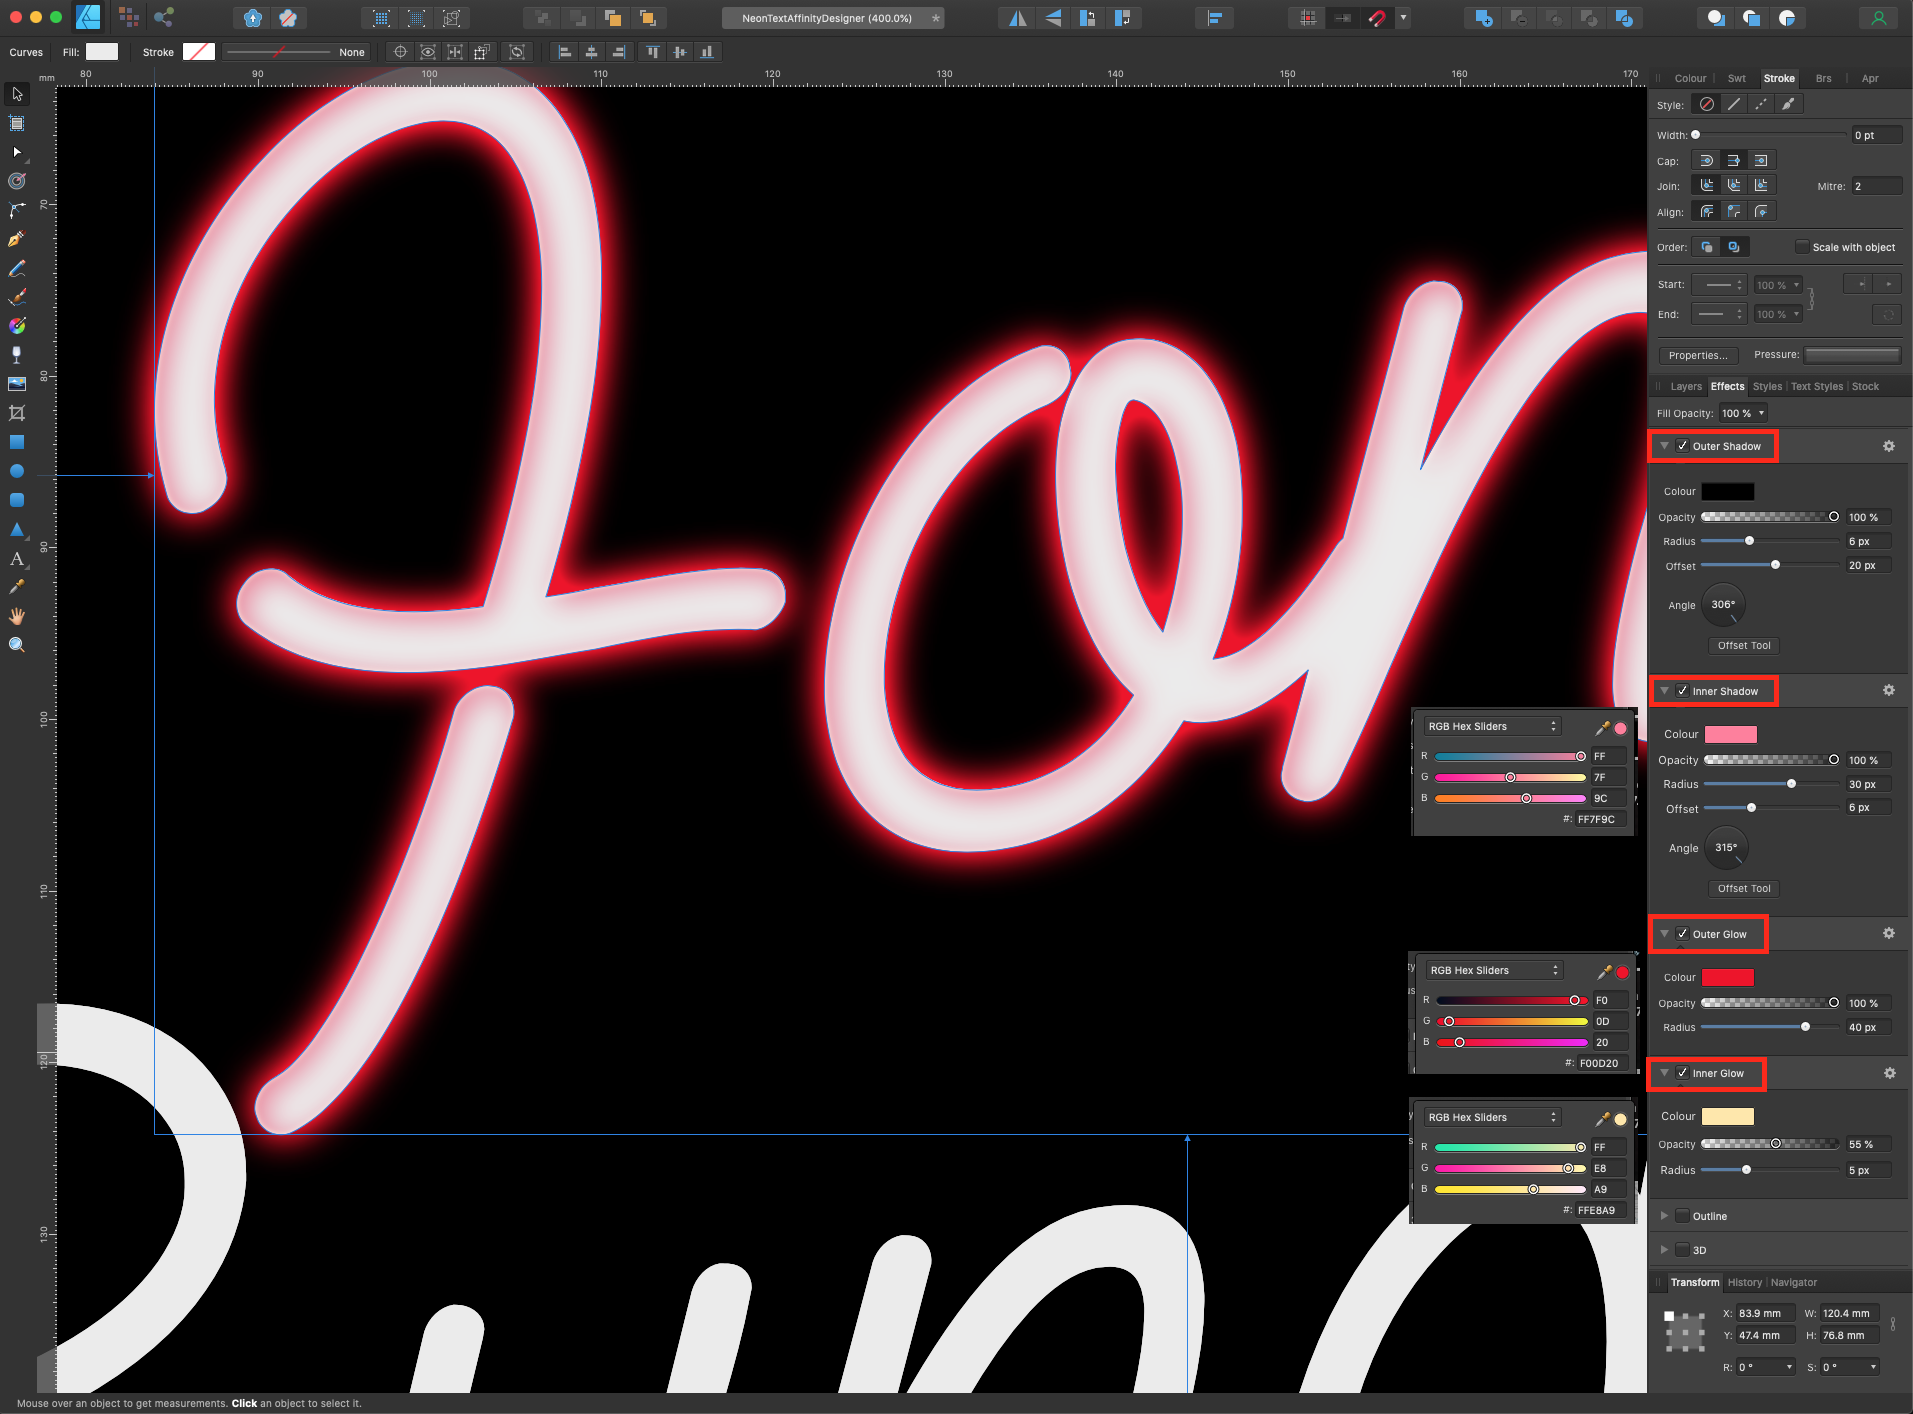
For the second word, we used the following values for Outer Shadow (color #000000, 100% opacity, 6 px radius, 20 px offset and a 306° angle), Inner Shadow (color #FF7F9C, 100% opacity, 30 px radius, 6 px offset and a 315° angle), Outer Glow (color #F00D20, 100% opacity, 40 px radius) and Inner Glow (color #FFE8A9, 55% opacity, 5 px radius).
Note: with the black background you may not notice the Outer Shadow but it will come in handy if you use a lighter color or an image.
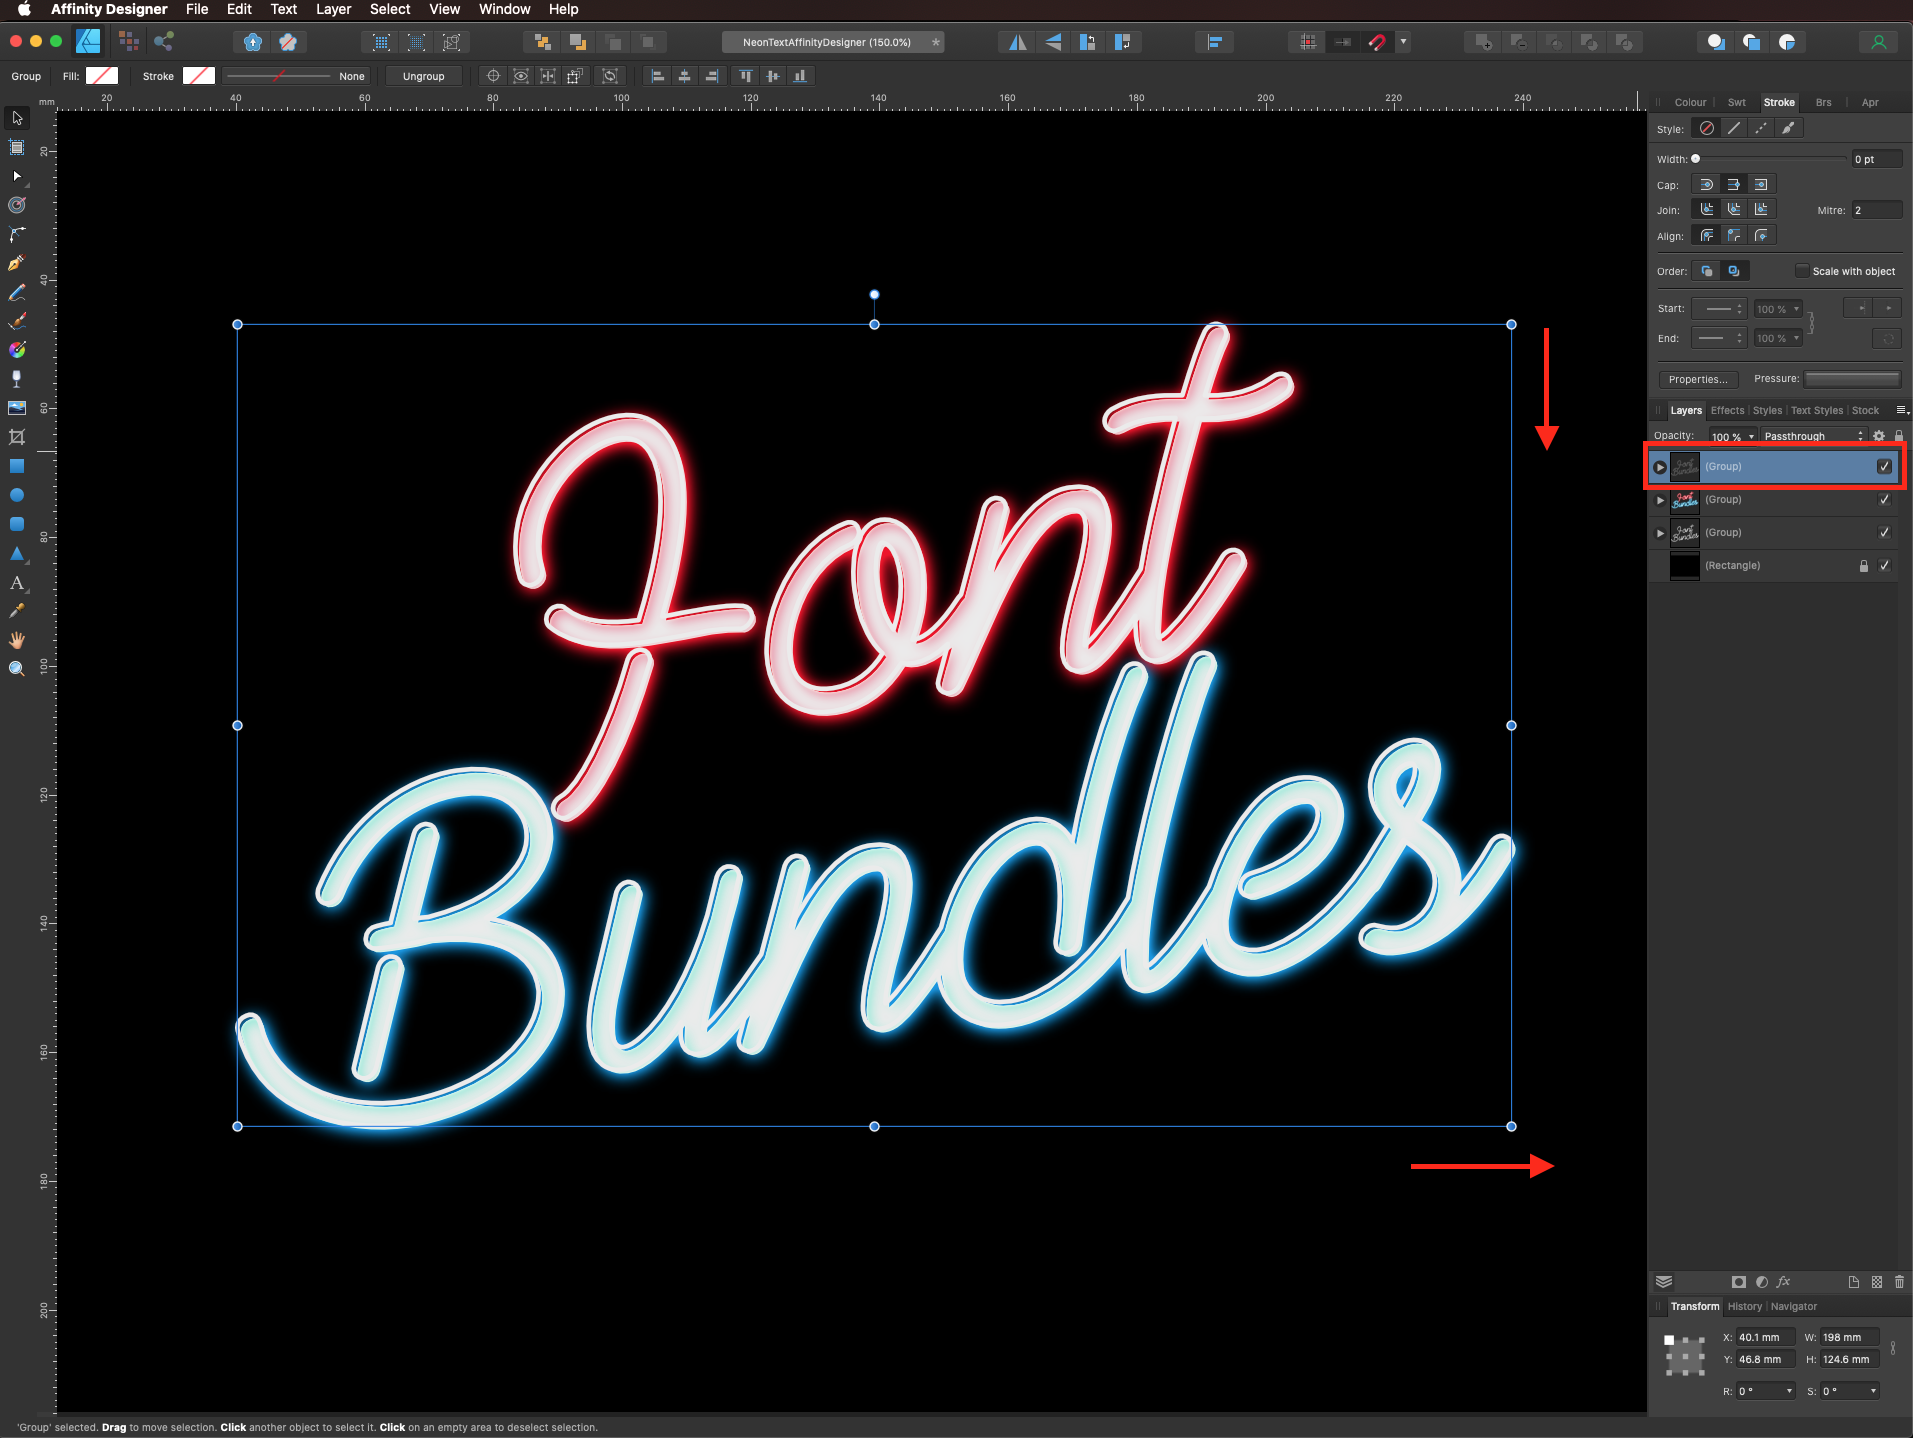
This is how our text looks like.

Back in the Layers panel, turn on the outline text layer. Using the arrow keys, move it down and right a few clicks.
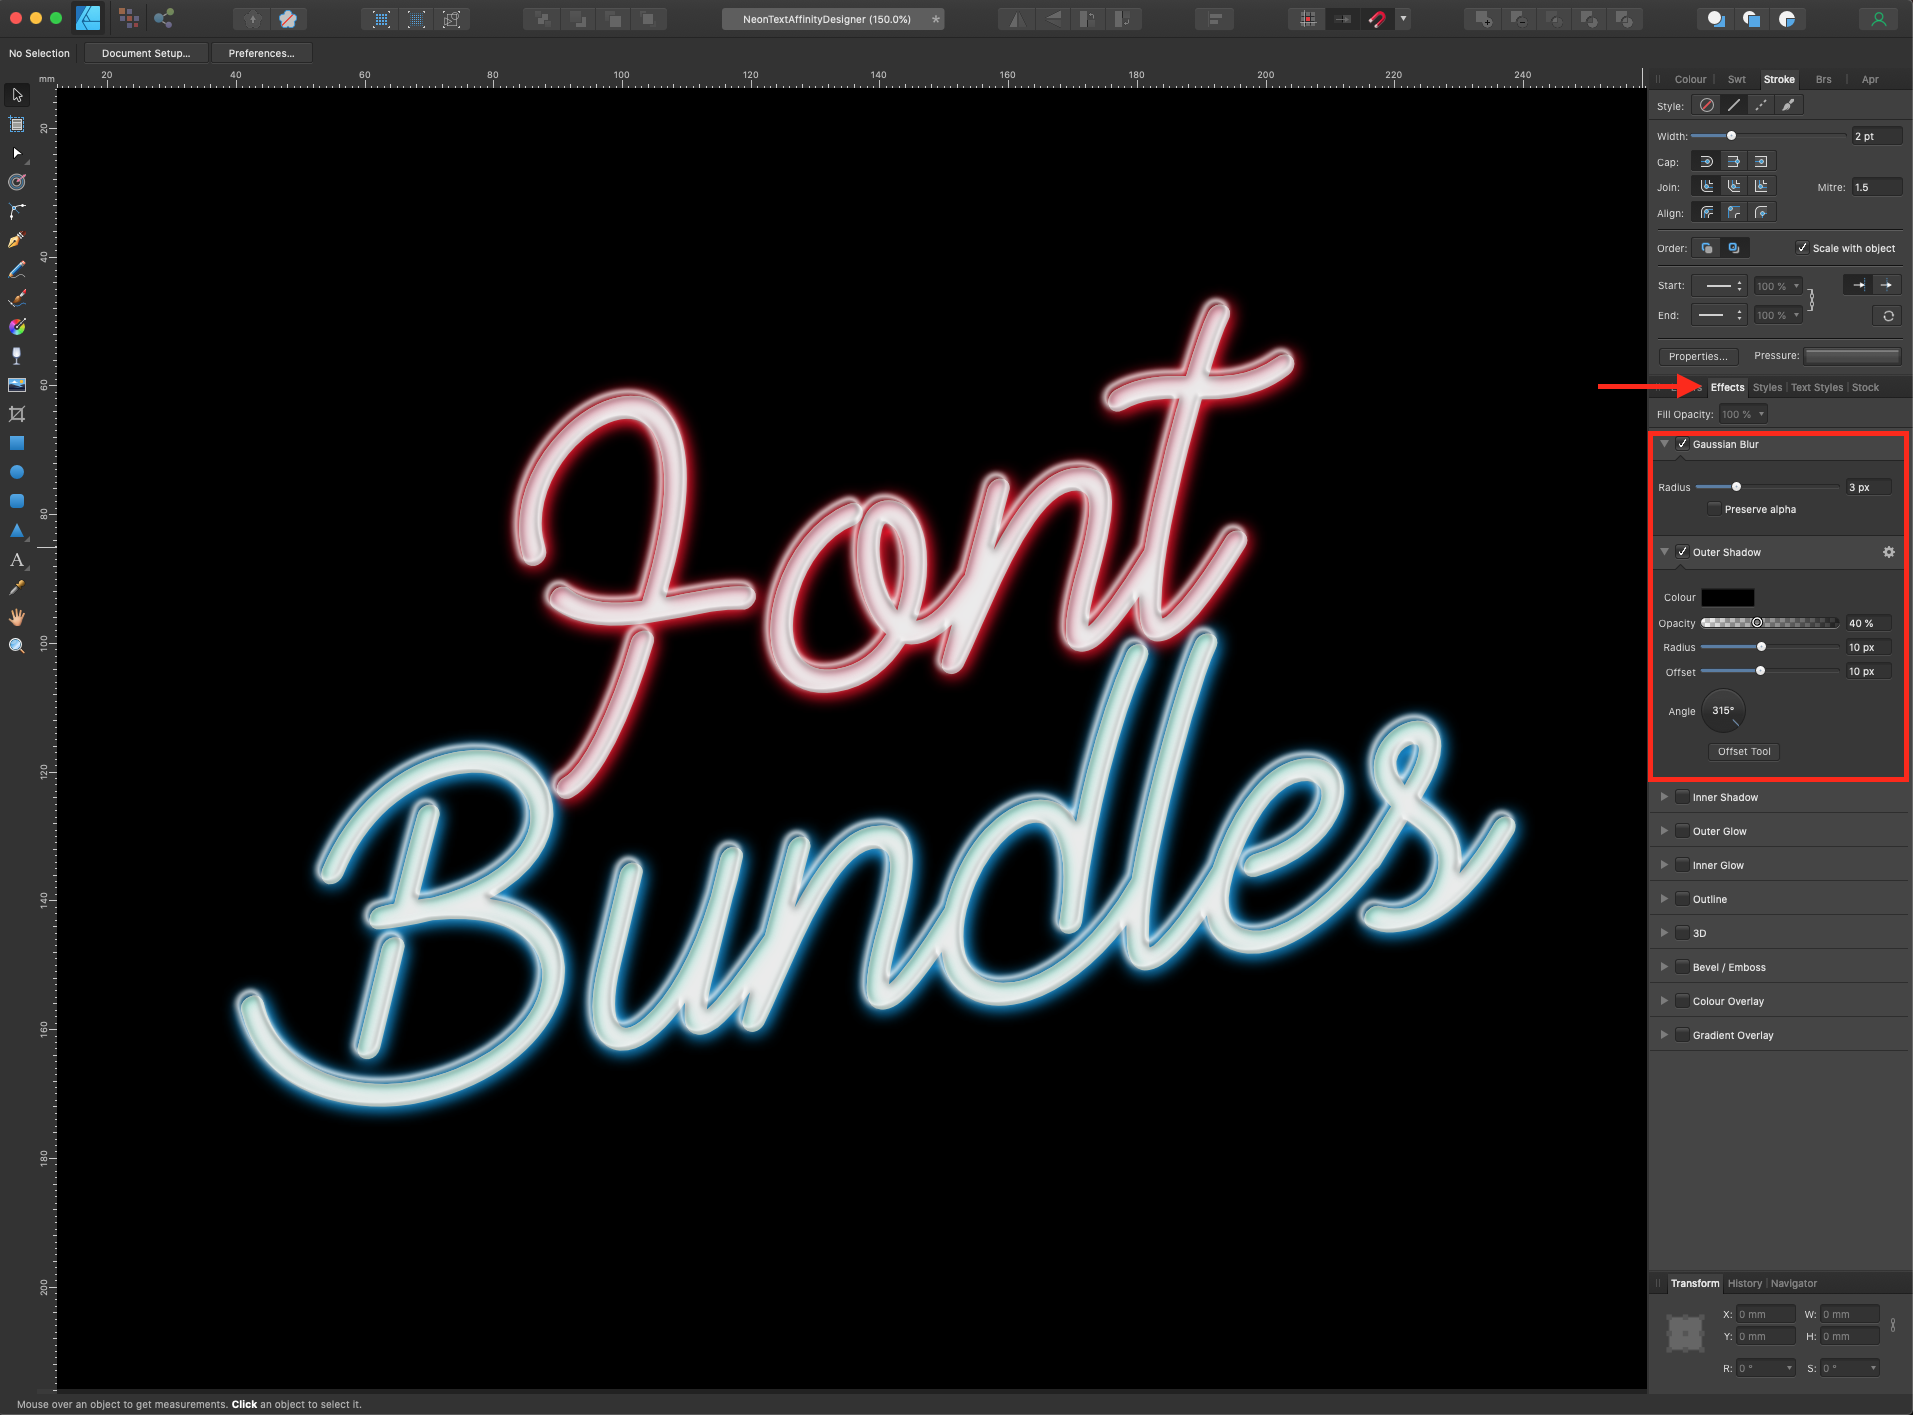
In the Effects panel apply the following: Gaussian Blur (3 px radius, Preserve alpha unchecked) and Outer Shadow (color #000000, 40% opacity, 10 px radius, 10 px offset, and a 315° angle).
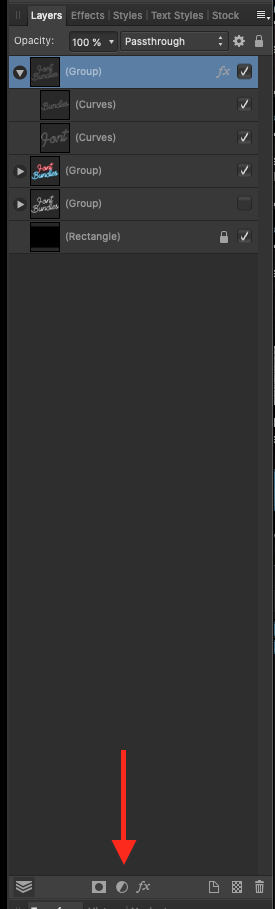
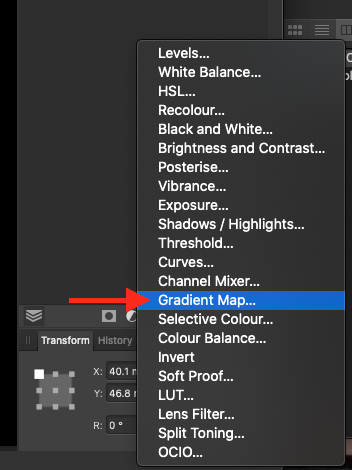
If you want to add some color to the newly added glow, you can use an Adjustments layer. Click on the small black and withe icon at the bottom of the Layers panel and choose Gradient Map.
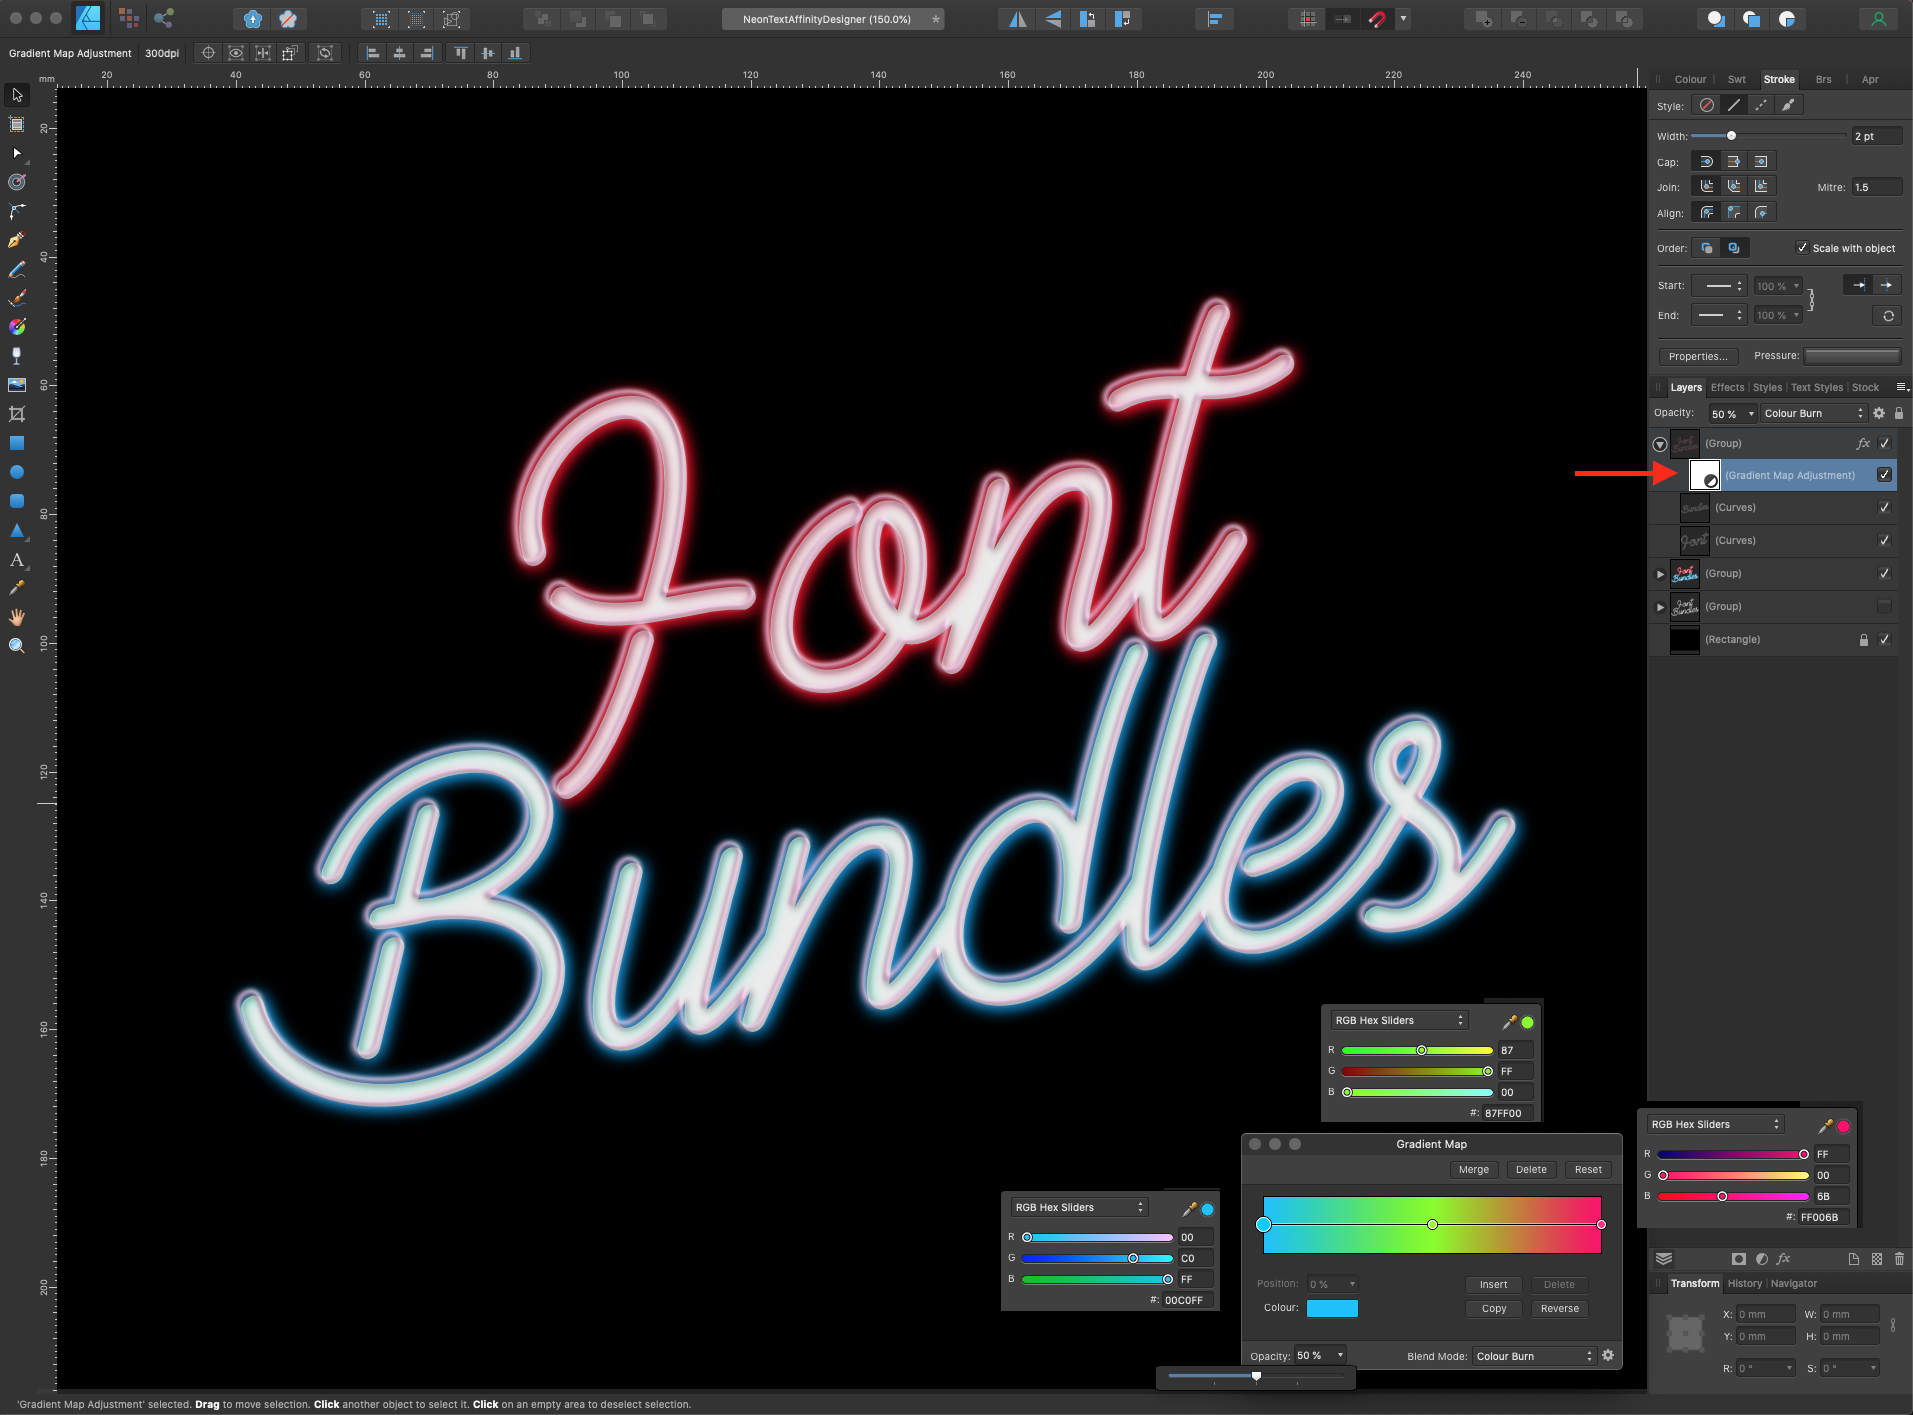
Play around with the setting until you are happy with the results. We used #00C0FF with a 0% position, #87FF00 with a 50% position and #FF006B with a 100% position, 50% opacity and Color Burn as blend mode.
You can experiment with different effects settings and other types of adjustment layers to achieve interesting variations.
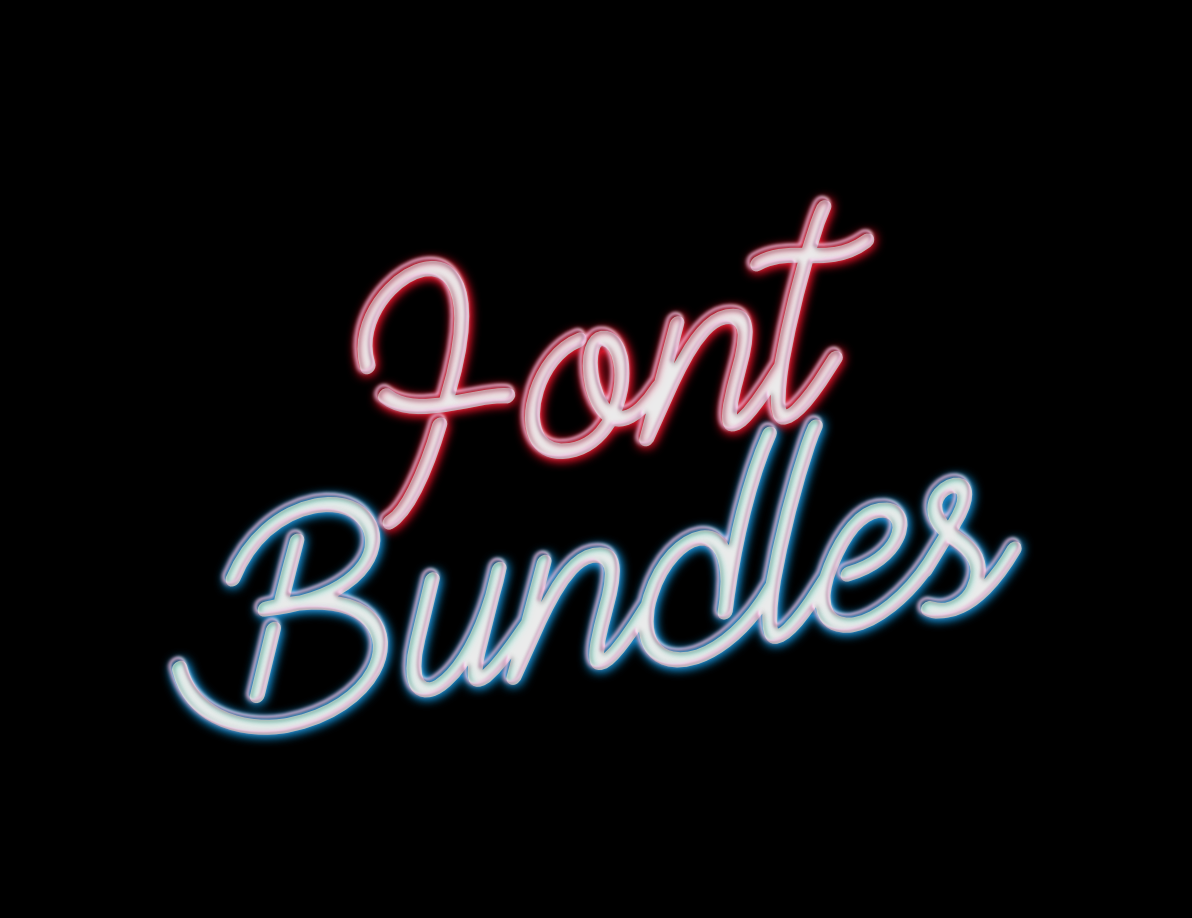
This is our final result.
You can change the background color or even replace it with an image if you want.
Here’s the text without the outline text layer.
If you liked this tutorial, make sure to check out some of our other text tutorials like how to put text in shapes, and how to type on path in Affinity Designer.
Step 1: Add the background
Create a New Document and use the Rectangle Tool (M) to create a rectangle that covers the entire document. Fill it with black.
Lock the layer by selecting it and clicking on the small padlock on the top-right of the Layers panel.
Step 2: Add the text
Use the Artistic Text Tool to type your text. Fill it with white and give it the size, alignment, and leading that fits your needs (ours was 230 pt, center aligned and with a 144 pt leading).
To skew the text a bit, hover your cursor on one of the round blue handles on the side of the text until you see it change into two arrows facing up and down. Then, drag it up or down to add some sheer to it.
The resulting text should be similar to this.
Center your text using center as the Align Horizontally and Vertically options in the Align panel, making sure that Align to Spread is your choice.
If your text has some overlapping letters you will need to convert it to curves and merge them together before applying the needed effects.
Select it and go to Layers > Convert to Curves or click the button on the Context menu to flatten it.
Ungroup it (Shift + Command/Control + G) and then, select the letters you want to merge and use Add in the Geometry panel.
Once you merge all the overlapping letters together, do the same with the single words.
Then, group everything together again (Command/Control + G).
Step 3: Add an outline text layer
To achieve the desired neon look, we will be applying various layer effects to duplicates of the text layer. Right-click on top and choose Duplicate.
Hide the bottom text layer (uncheck the small box on the right side of the layer) and swap the fill and stroke colors (your text should now have a white stroke and no fill).
In the Stroke panel, increase the width to 2 pt (or whatever fits your needs), make sure that the cap and join are set to round, and check the Scale with object box.
Here’s how our text looks.
Step 4: Apply the Neon Effect using the Effects Panel
Hide the outline text layer, create another duplicate of the base text and make sure you are working with the middle layer.
Show the contents of the layer by clicking on the arrow on the left side of the layer, select one of the words and open the Effects panel by going to View > Studio > Effects or clicking on the Layer Effects icon at the bottom of the Layers panel.
For the firts word, we used the following values for Outer Shadow (color #000000, 100% opacity, 6 px radius, 20 px offset and a 306° angle), Inner Shadow (color #8AFDE6, 100% opacity, 30 px radius, 6 px offset and a 315° angle), Outer Glow (color #0694E2, 100% opacity, 40 px radius) and Inner Glow (color #FFE8A4, 55% opacity, 5 px radius).
For the second word, we used the following values for Outer Shadow (color #000000, 100% opacity, 6 px radius, 20 px offset and a 306° angle), Inner Shadow (color #FF7F9C, 100% opacity, 30 px radius, 6 px offset and a 315° angle), Outer Glow (color #F00D20, 100% opacity, 40 px radius) and Inner Glow (color #FFE8A9, 55% opacity, 5 px radius).
Note: with the black background you may not notice the Outer Shadow but it will come in handy if you use a lighter color or an image.
This is how our text looks like.
Step 5: Add more depth with other layers
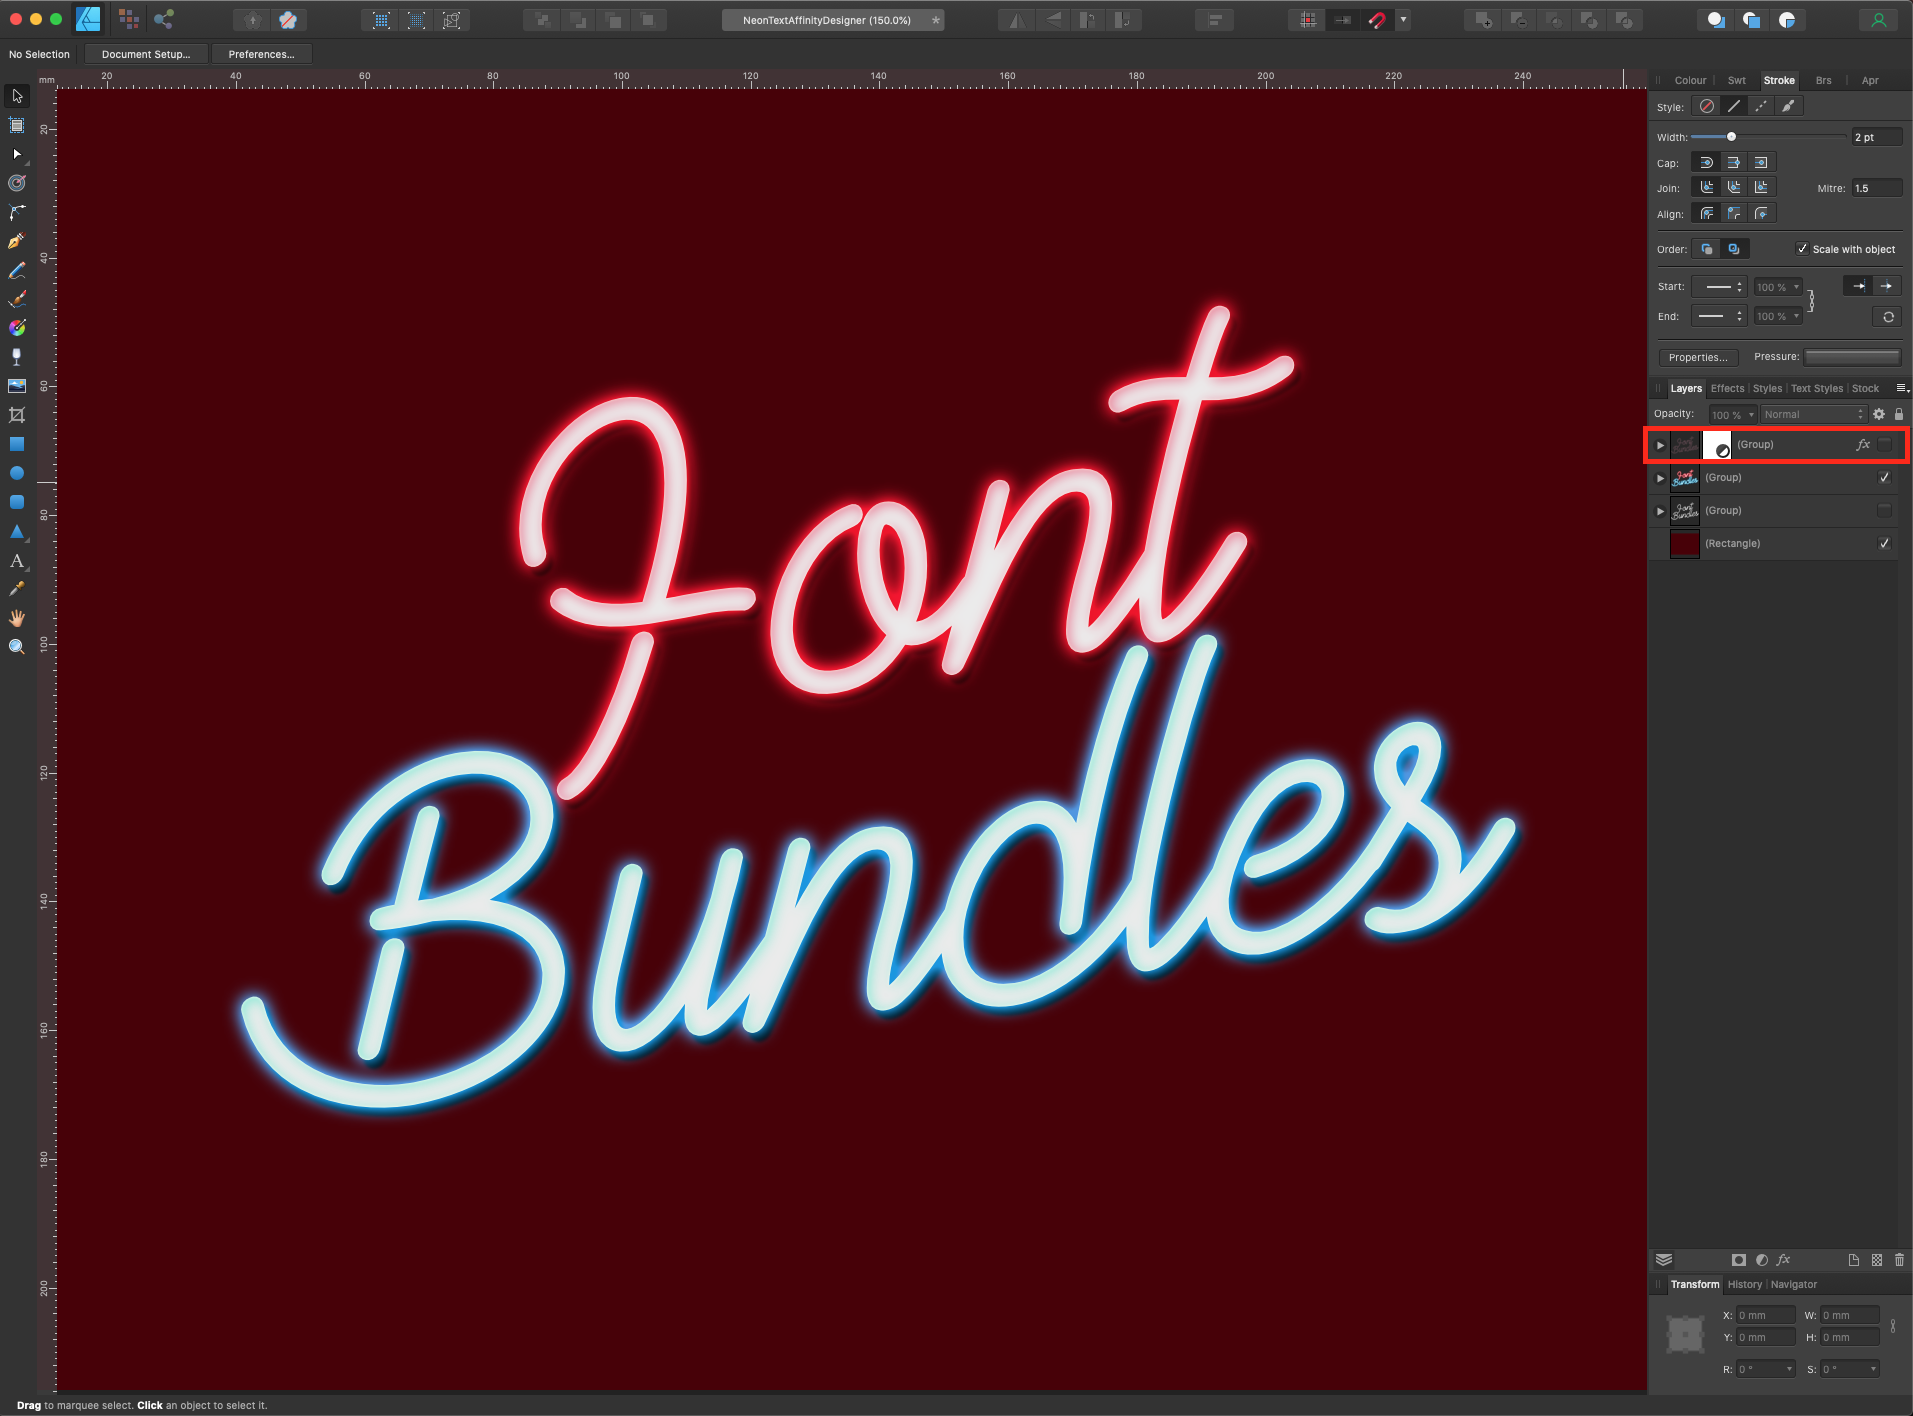
Back in the Layers panel, turn on the outline text layer. Using the arrow keys, move it down and right a few clicks.
In the Effects panel apply the following: Gaussian Blur (3 px radius, Preserve alpha unchecked) and Outer Shadow (color #000000, 40% opacity, 10 px radius, 10 px offset, and a 315° angle).
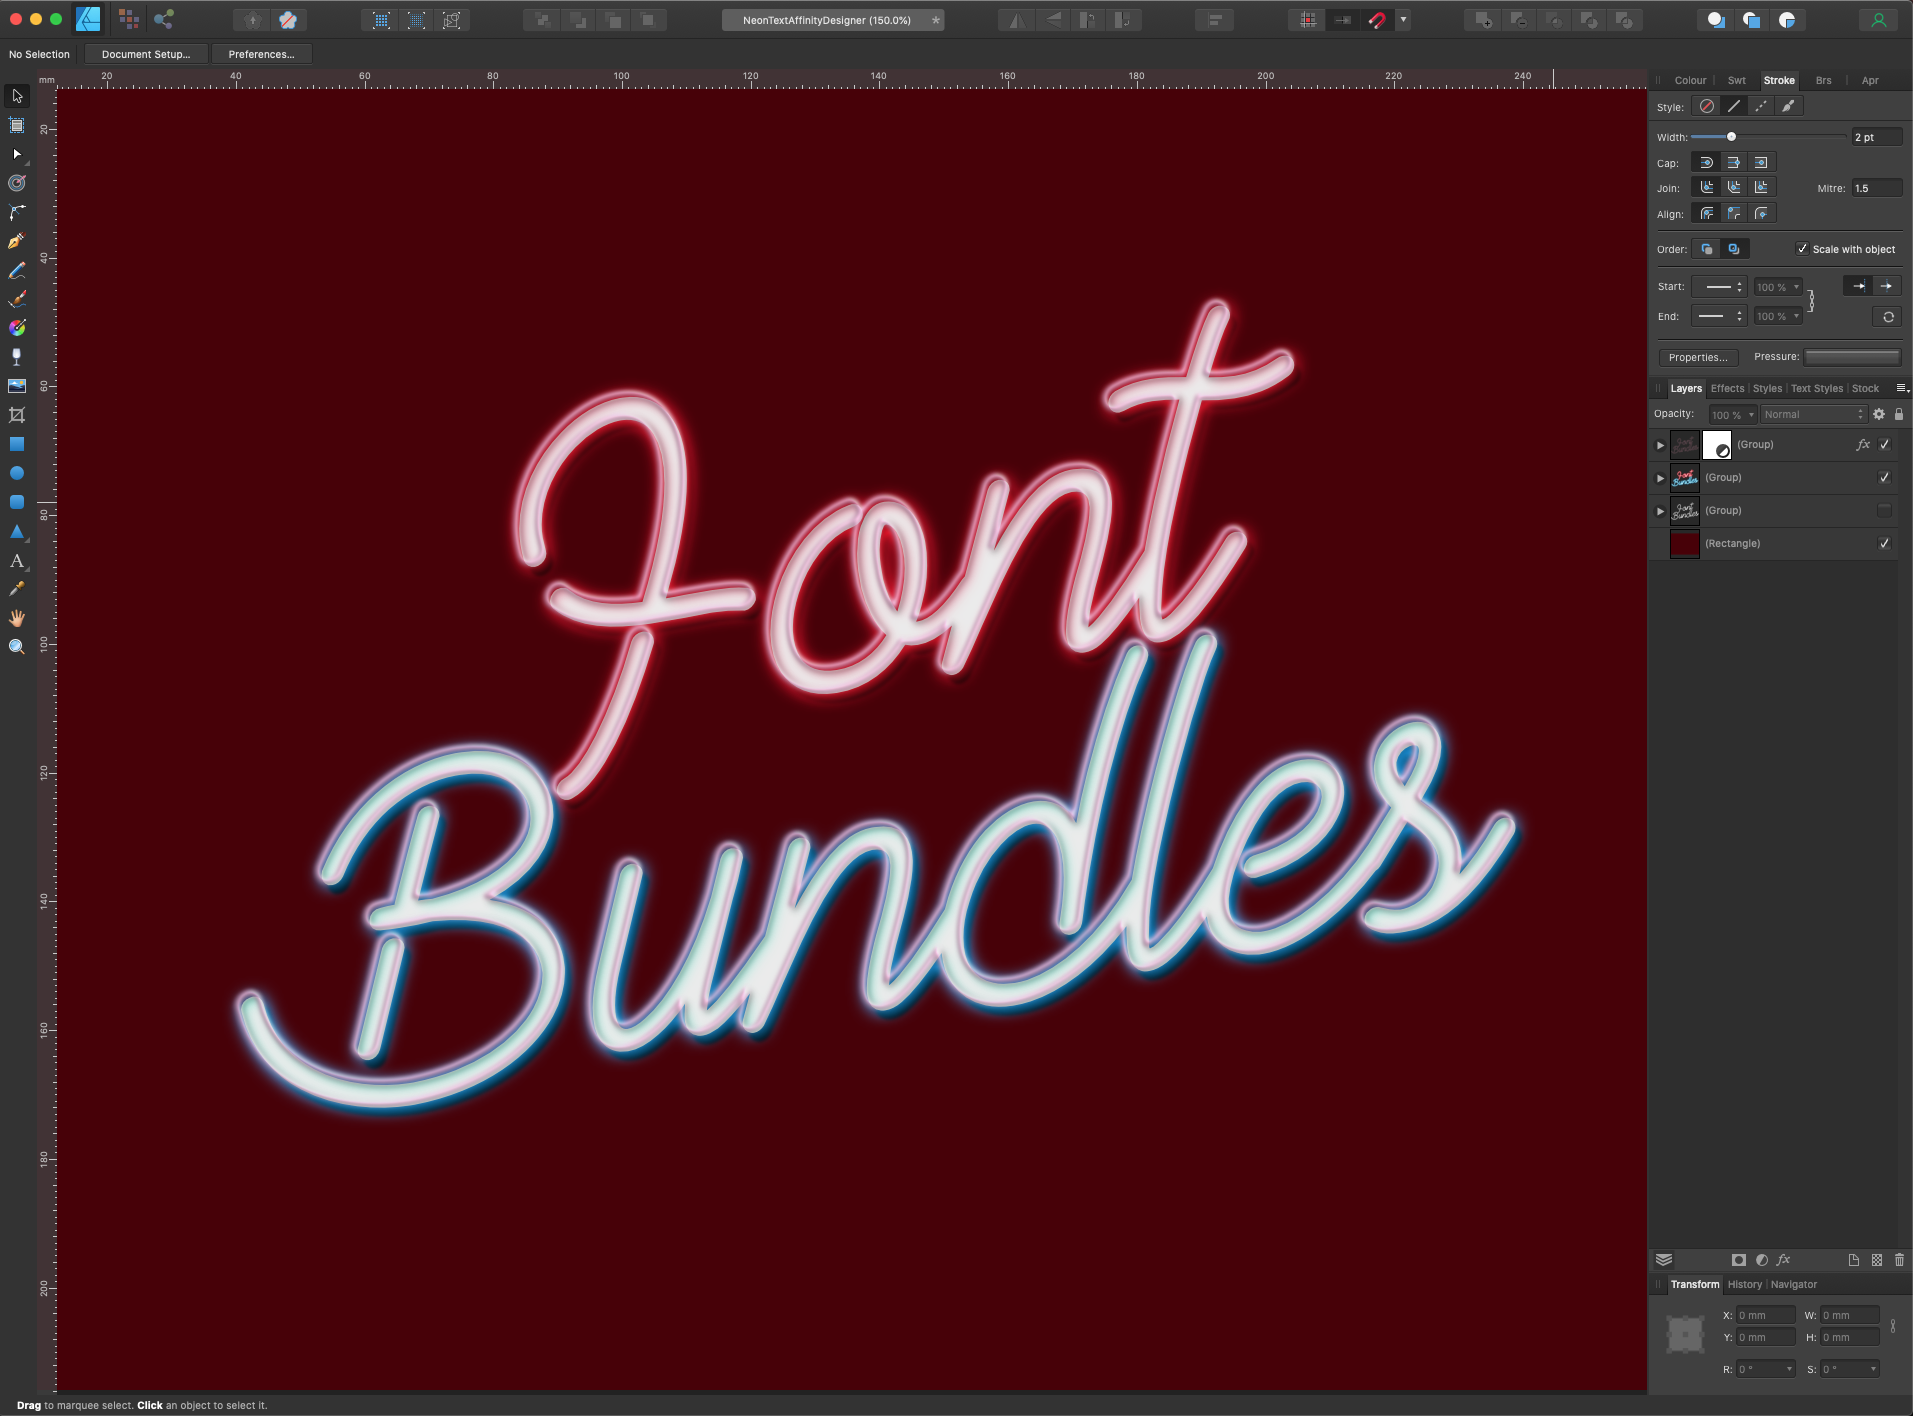
If you want to add some color to the newly added glow, you can use an Adjustments layer. Click on the small black and withe icon at the bottom of the Layers panel and choose Gradient Map.
Play around with the setting until you are happy with the results. We used #00C0FF with a 0% position, #87FF00 with a 50% position and #FF006B with a 100% position, 50% opacity and Color Burn as blend mode.
You can experiment with different effects settings and other types of adjustment layers to achieve interesting variations.
This is our final result.
You can change the background color or even replace it with an image if you want.
Here’s the text without the outline text layer.
If you liked this tutorial, make sure to check out some of our other text tutorials like how to put text in shapes, and how to type on path in Affinity Designer.


