
How to Remove Background in Procreate
Discover how to remove a background in Procreate and isolate your images in just a few steps!
Have you ever wondered how to remove a background in Procreate? Then this tutorial is just for you! Removing a background helps to make the object or subject stand out more. You may even want to use the isolated image in another project. In just a few steps you will learn how to remove the background from an image in Procreate.

We are using this butterfly background photo as our example. During the tutorial we are making use of an iPad Pencil but you can also use your finger to create a selection.
Please note: we are using the latest version of Procreate 5X. If you do not see the features mentioned below, ensure your Procreate is up-to-date.
Step 1 - Send Your Image to Procreate
Let’s begin by opening our selected image on the iPad. This can be an image you have downloaded or one from your camera roll.
We need to send this image to Procreate to be able to remove the background. To do this, tap on the Share icon top right and select Procreate from the applications.

You will see a message pop up that says “Sending to Procreate”. Once done, the photo will be added to the gallery in Procreate.

Step 2 - Create a Selection on Your Photo
Open the Procreate app on your iPad. Then, in the Procreate gallery, locate and open the photo you just imported. We need to create a selection around what we want to keep. Whatever isn’t selected will be removed. In this case, we want to keep the butterfly and remove the rest of the background.
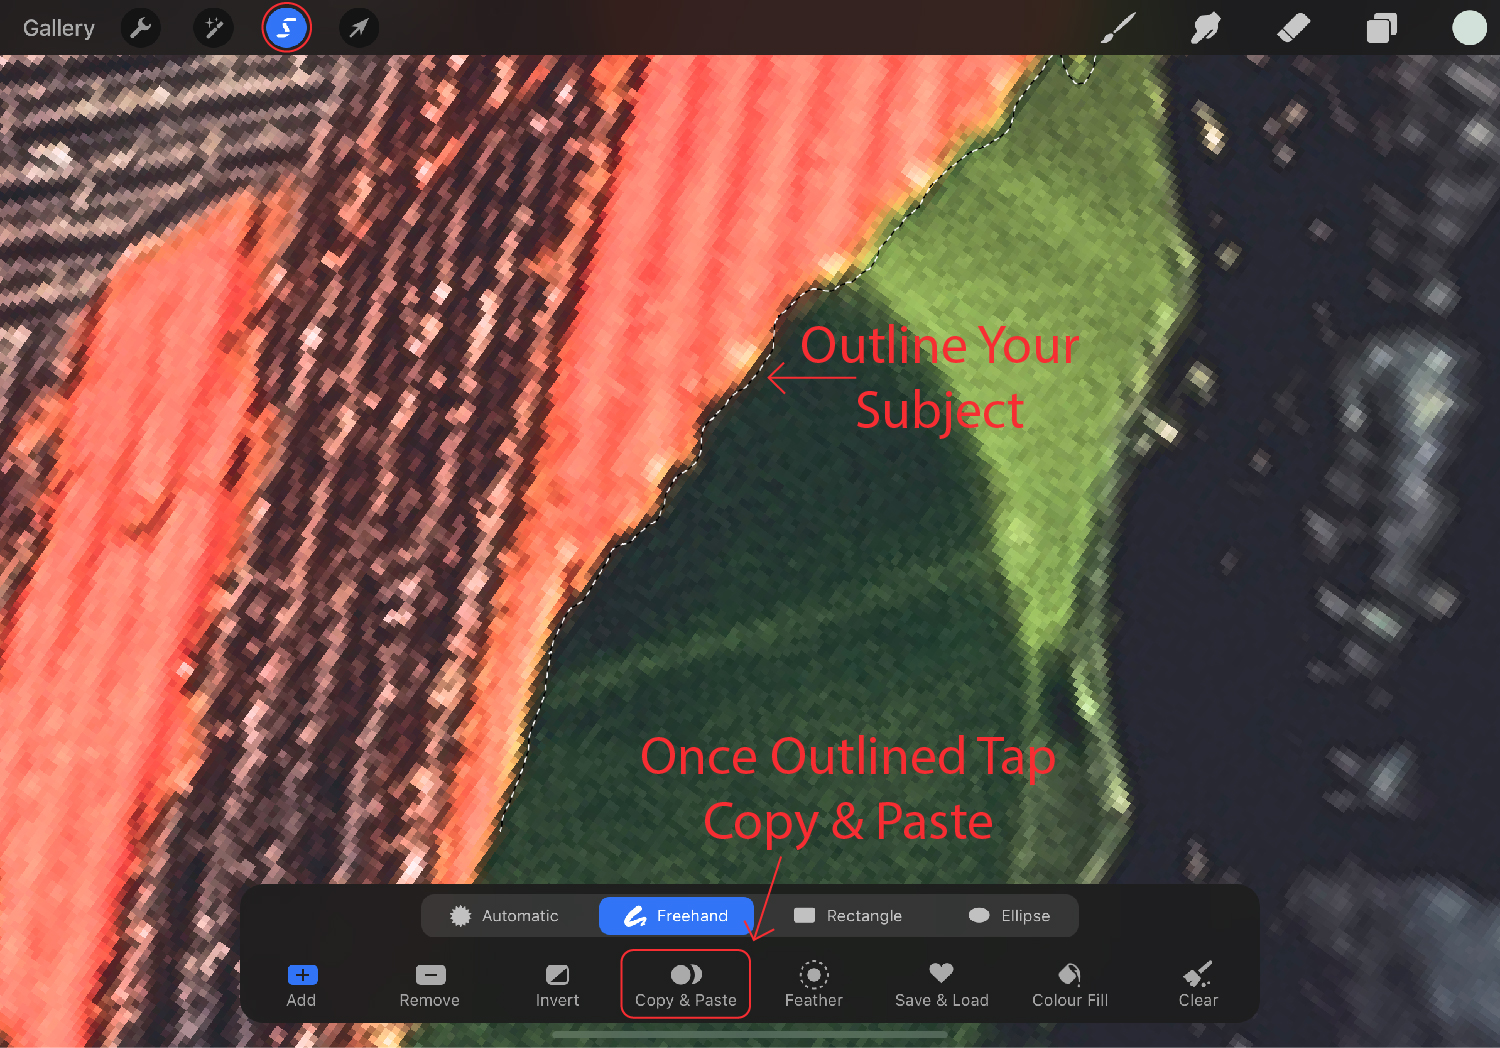
To create a selection, tap on the Selection tool (S icon) at the top of the screen. Then, in the options at the bottom, select the Freehand selection.

Freehand selection will allow us to create our own selection. This is the best option when your background is very busy. The Automatic selection doesn’t select a single subject, so we won’t be using that option.
Use your finger or Pencil and begin outlining your subject. You will see a dashed line appear while you are drawing the selection. Once you have completely outlined your selection, tap on Copy & Paste.
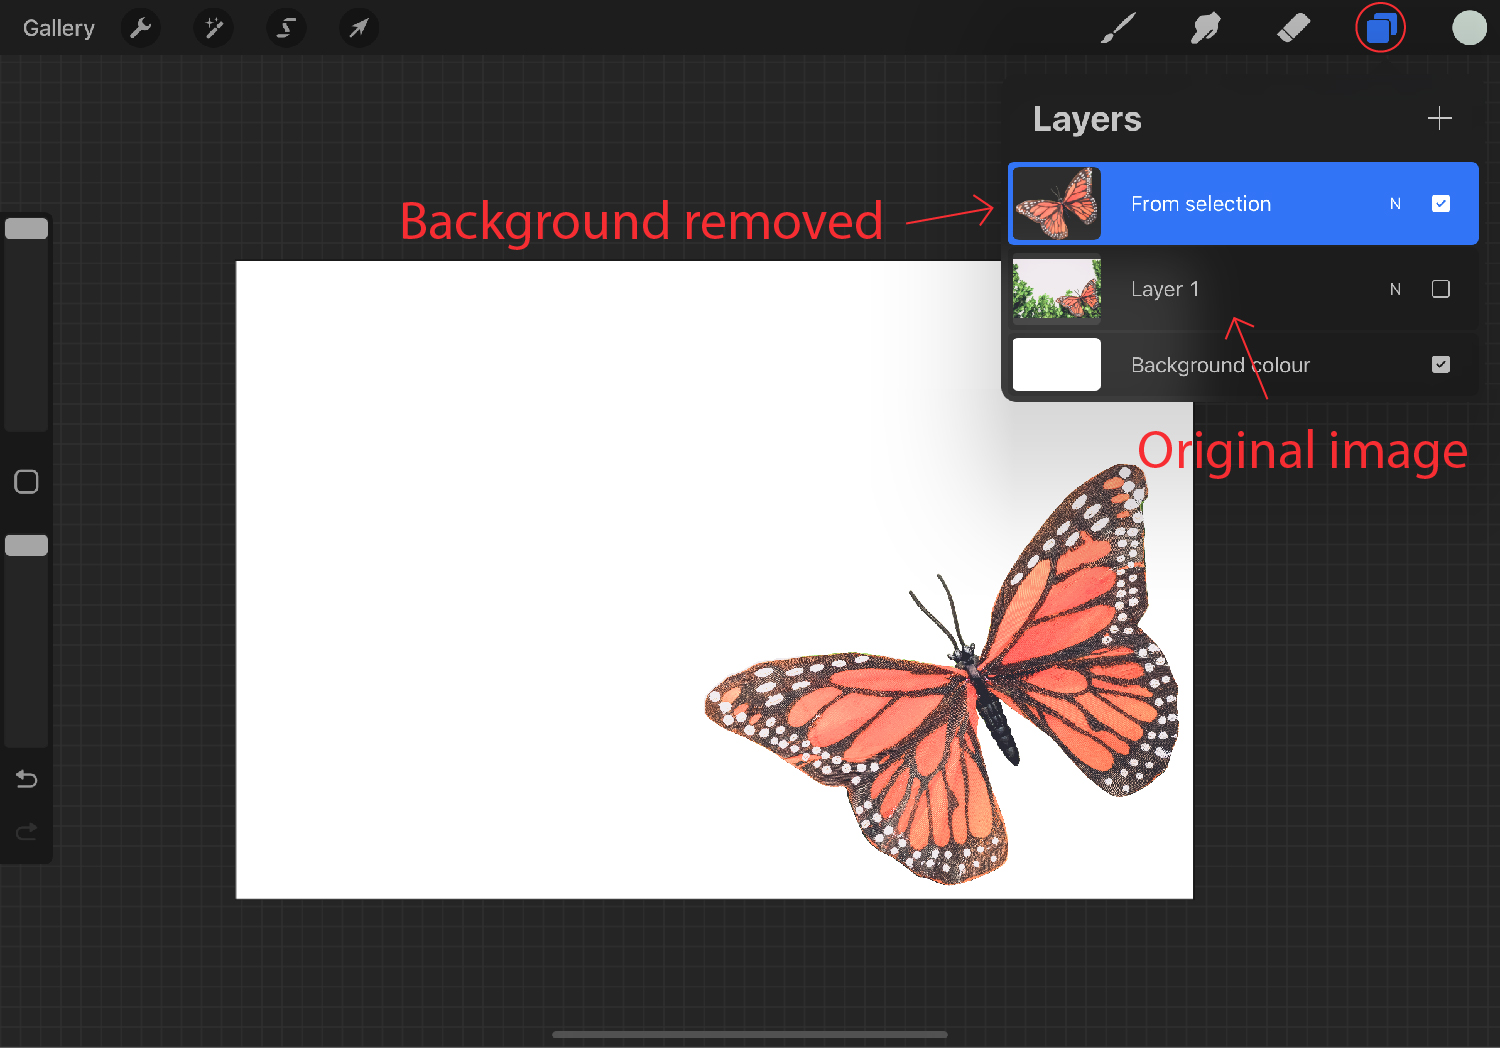
Next, we need to check if we have a clean cut where no background is showing. You can see this by going to your Layers Panel top right (stacked square icon).
In the Layers Panel you will see all of your layers including the top layer called From selection. This top layer is what we outlined with the Selection tool.
Check if the selection was successful by un-ticking the visibility box for the imported layer or Layer 1. If you need more information, we have a great tutorial on how to use Procreate layers.
Step 3 - Export Image With a Transparent Background
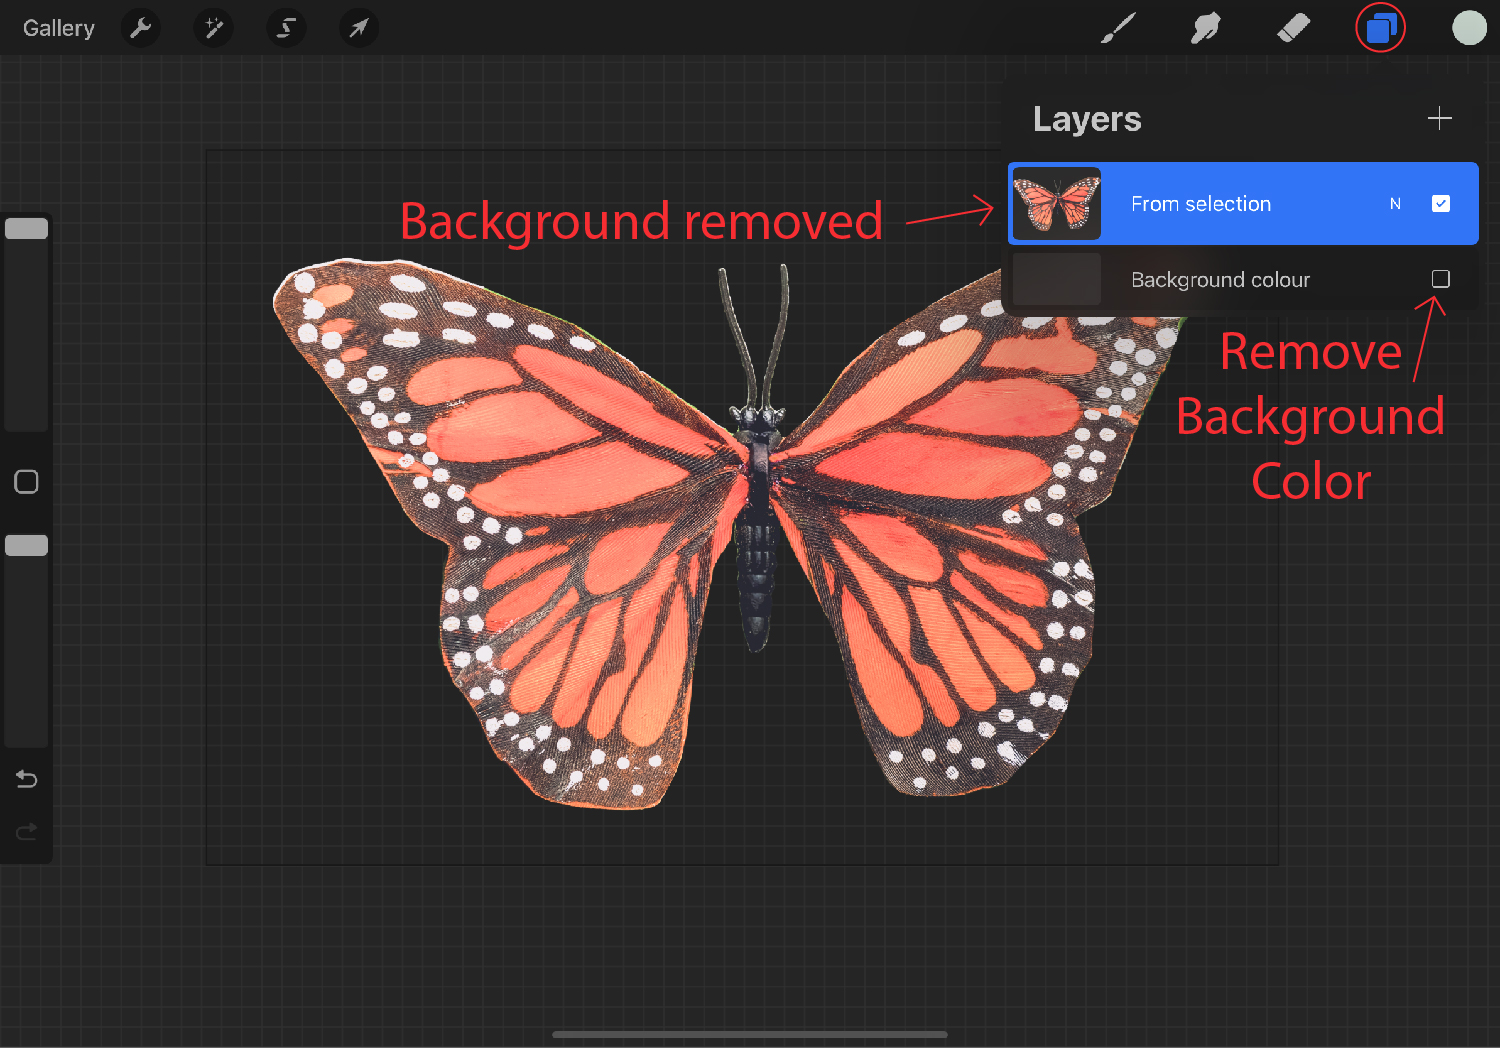
Now, let’s save our image with a transparent background. Delete the imported layer or Layer 1 by swiping to the left and selecting Delete. Next, un-tick the visibility box for the background color to turn off the background.
You should now be left with just the image selection visible.
Then, go to the Actions panel (wrench icon) and tap on Share. From the options select PNG. A transparent background will only work when saved as a PNG file format.
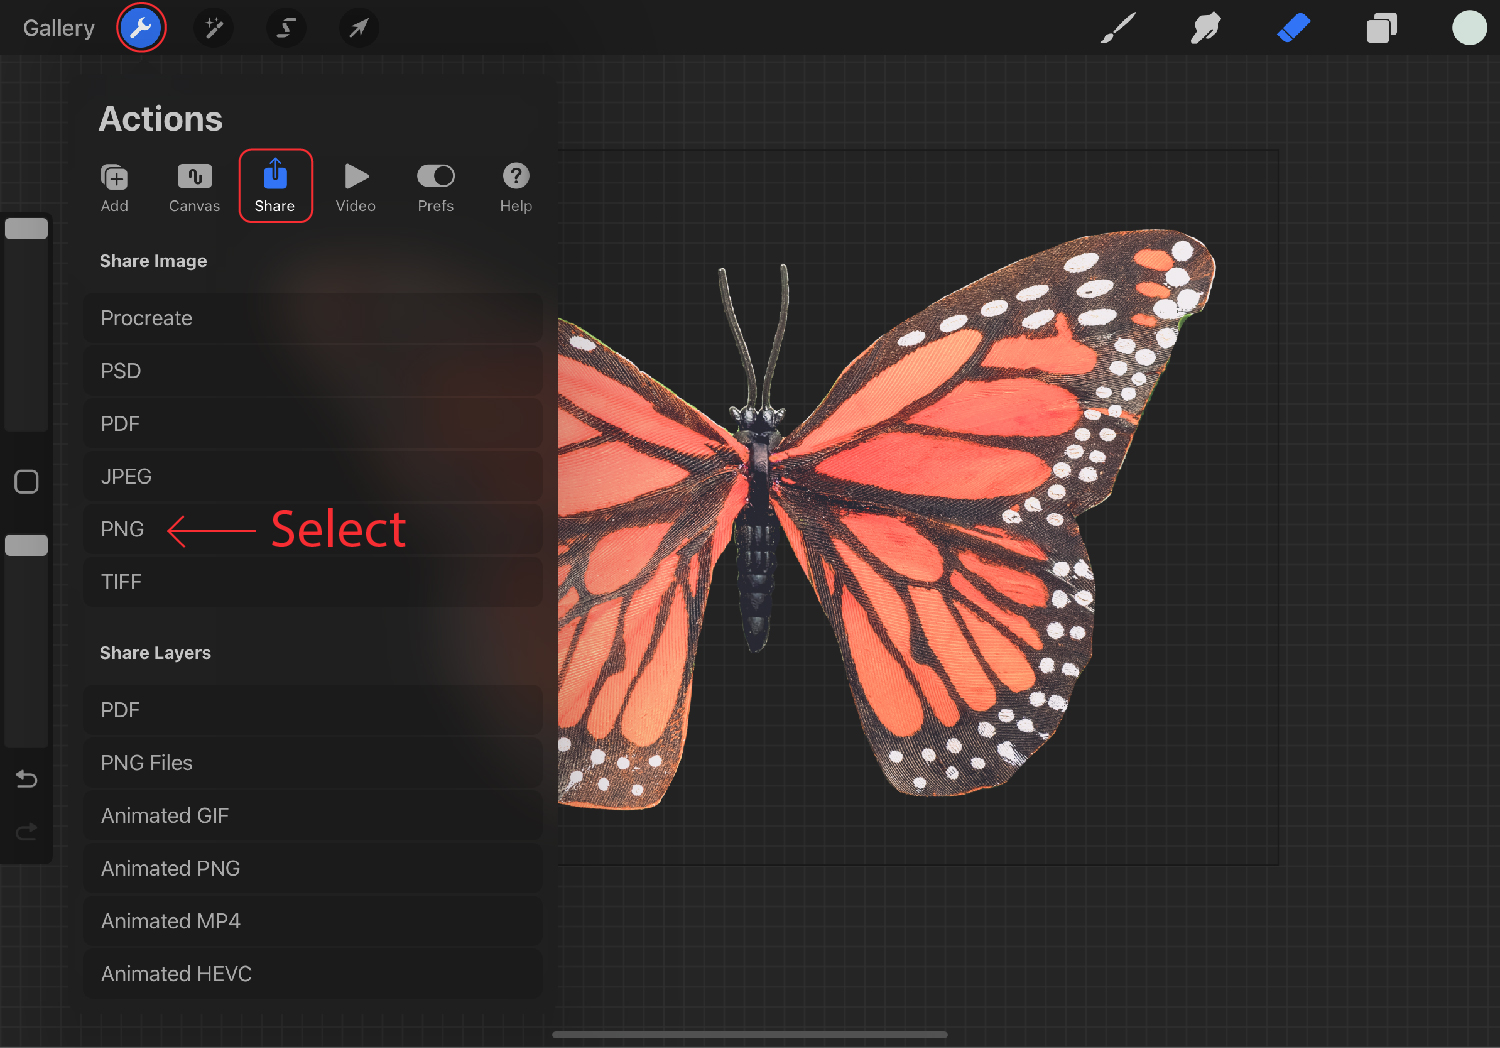
There you go, you have now learned how to remove a background in Procreate. Remember, the background color needs to be toggled off before exporting to get a transparent background. We hope you enjoyed this tutorial and learned a new trick you can use with Procreate.


