
How to Replace the Sky in Affinity Photo
Learn how to quickly replace the sky in your image in Affinity Photo with this tutorial.
If you ever needed a tutorial to replace the sky in Affinity Photo, this is it. Imagine taking a great scenic photo only to have a boring or blown out sky? In Affinity Photo, it’s actually pretty easy to replace a sky. We will be using the Selection Brush Tool and refining the selection to our needs.

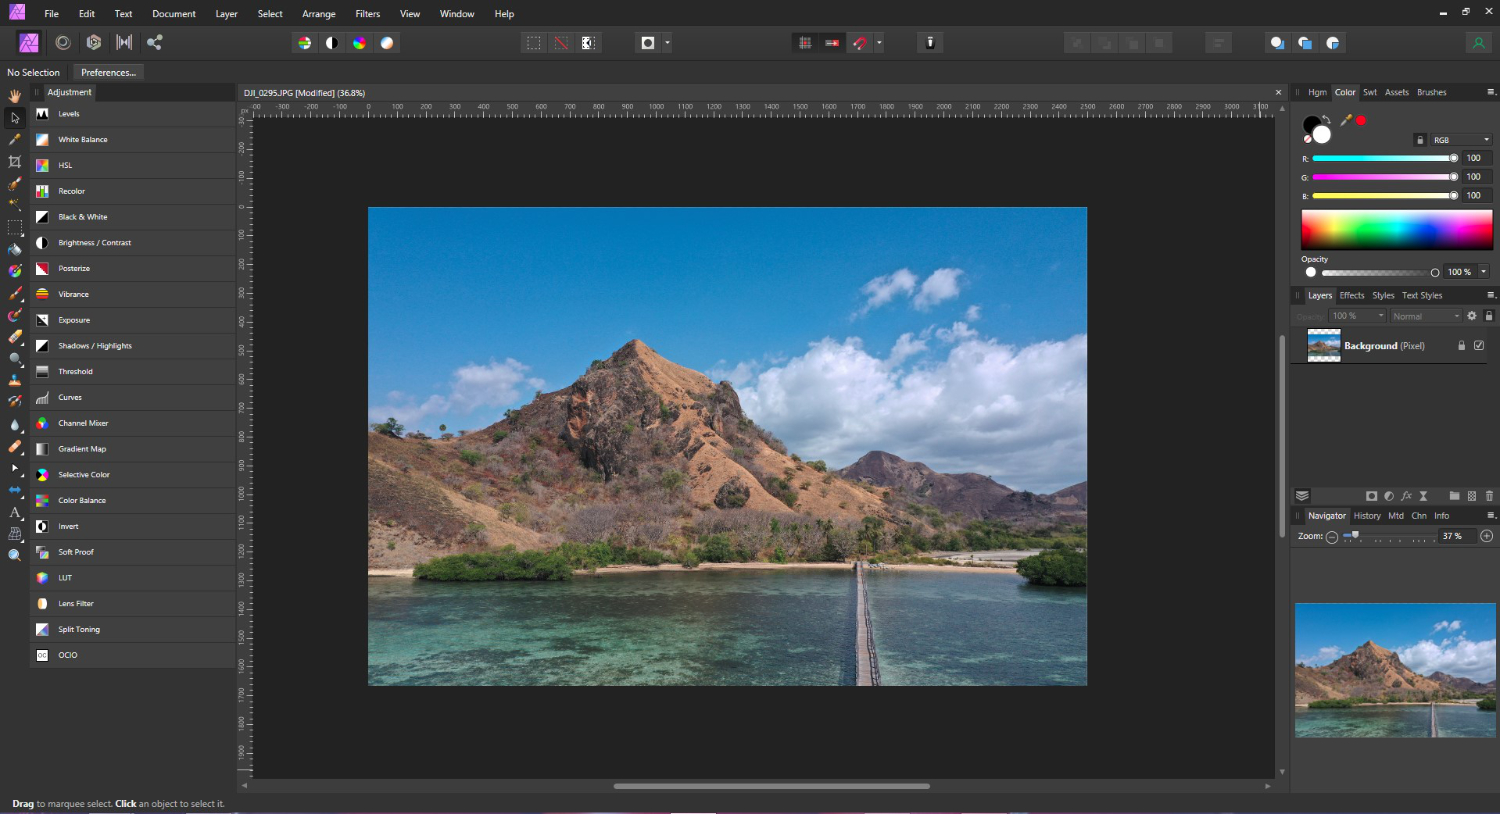
We will make use of a beautiful island photo and replace the sky with a dramatic cloud photo.
If needed, you can check out our tutorial on how to remove or change a background in Affinity Designer instead.
Step 1 - Create a Selection to Replace the Sky
In Affinity Photo, open the main photo where the background will be changed. We will be making a selection and using the refining tools for smaller details.
Use the Selection Brush Tool
On the left side toolbar, click on the Selection Brush Tool. Use your brackets [ and ] to increase or decrease the brush size. We increased our brush size to 108px.
Then, at the top toolbar, make sure that Snap to Edge is ticked. This will help snap the selection to contrasting edges. Also make certain that Add is selected top left.
Now, slowly click + drag your mouse over the foreground. In this case we selected the water and mountains. You can use the Add and Subtract buttons top left to add or remove parts of the selection. As we will be refining the selection, this doesn’t have to be perfect.

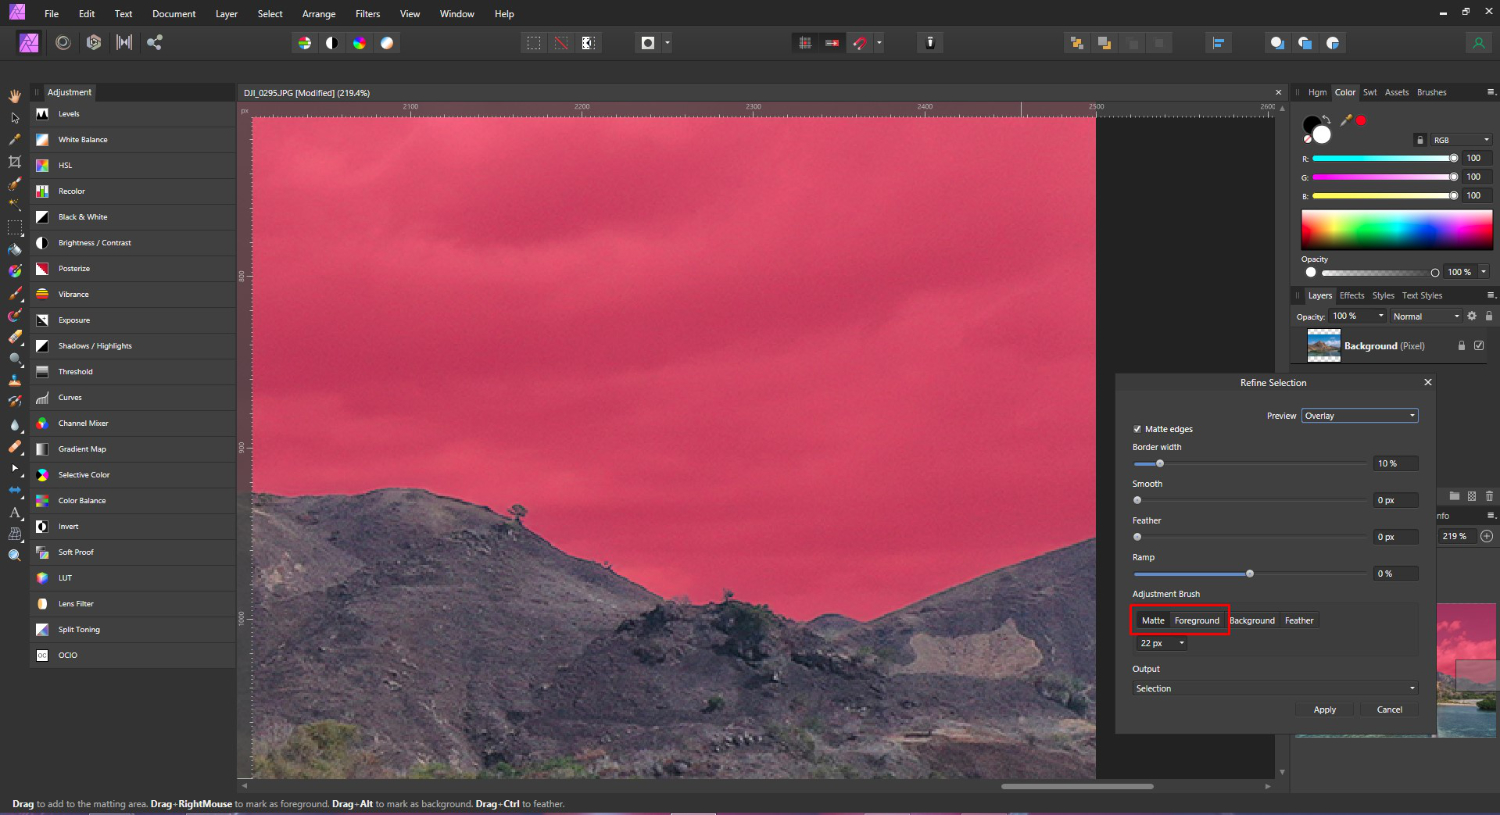
Refine the Selection
When you have made your selection, click the Refine button on the top toolbar.

Once the Refine Selection Panel is open, zoom in on the photo. As you can see, some areas were not selected such as the branches of trees. When you move your mouse over the selection, it will change into a brush. You can use the bracket keys to increase or decrease the size.

Click + drag your mouse to “paint” over an area that wasn’t completely selected. When you release your mouse button the selection will refine further to include the tree branches.Carry on to paint over areas that need to be selected. You can paint over an area more than once.

Affinity Photo’s Refine option does a really great job of selecting the finer details. If you need to remove part of the selection, click on Foreground then paint over the area.To add back to the selection, click on Matte and paint back over. You can toggle between Matte and Foreground to improve the selection as needed.
Create the Output layer
At the bottom of the Refine Selection Panel, click on the drop down menu under Output. Select New Layer. This will create a new layer with the selected area removed. We used New Layer as the Output option as this helps prevent those annoying halo issues.

Now click Apply. On the right side under the Layers panel you will see a new layer with a thumbnail preview. If you don’t see a preview, don’t worry, it is there. This is a slight issue that happens from time to time.
Step 2 - Add a New Sky Background
We can now bring in a new sky background. Using the drag and drop method, locate your sky replacement file and drag it into Affinity Photo. The photo will automatically be placed at the top layer above everything.
We need to move it down one layer. A very quick way to do this is to select the top layer then click Move Back One at the top toolbar.

Step 3 - Edit the Sky Background
There you go, you have just replaced the sky in Affinity Photo. We are not quite done yet.
The sky replacement is a bit too big and we also need to add an Adjustment layer.
Resize the Sky Background
To activate the sizing handles, click on the new sky background to select it. Now, click + drag one of the sizing handles in or out to resize the photo.
We dragged the right bottom corner handle inwards and repositioned the background.
You can reposition by selecting the move tool on the left toolbar that looks like an arrow. Then click + drag in the middle of the photo to reposition.

Add Brightness/Contrast Adjustment Layer
The new sky background photo needs a Brightness and Contrast Adjustment layer to blend in. You can click on the Adjustment options at the bottom of the Layers Panel. Then select the Brightness/Contrast Adjustment. Alternatively, go to Layer > New Adjustment Layer > Brightness/Contrast.

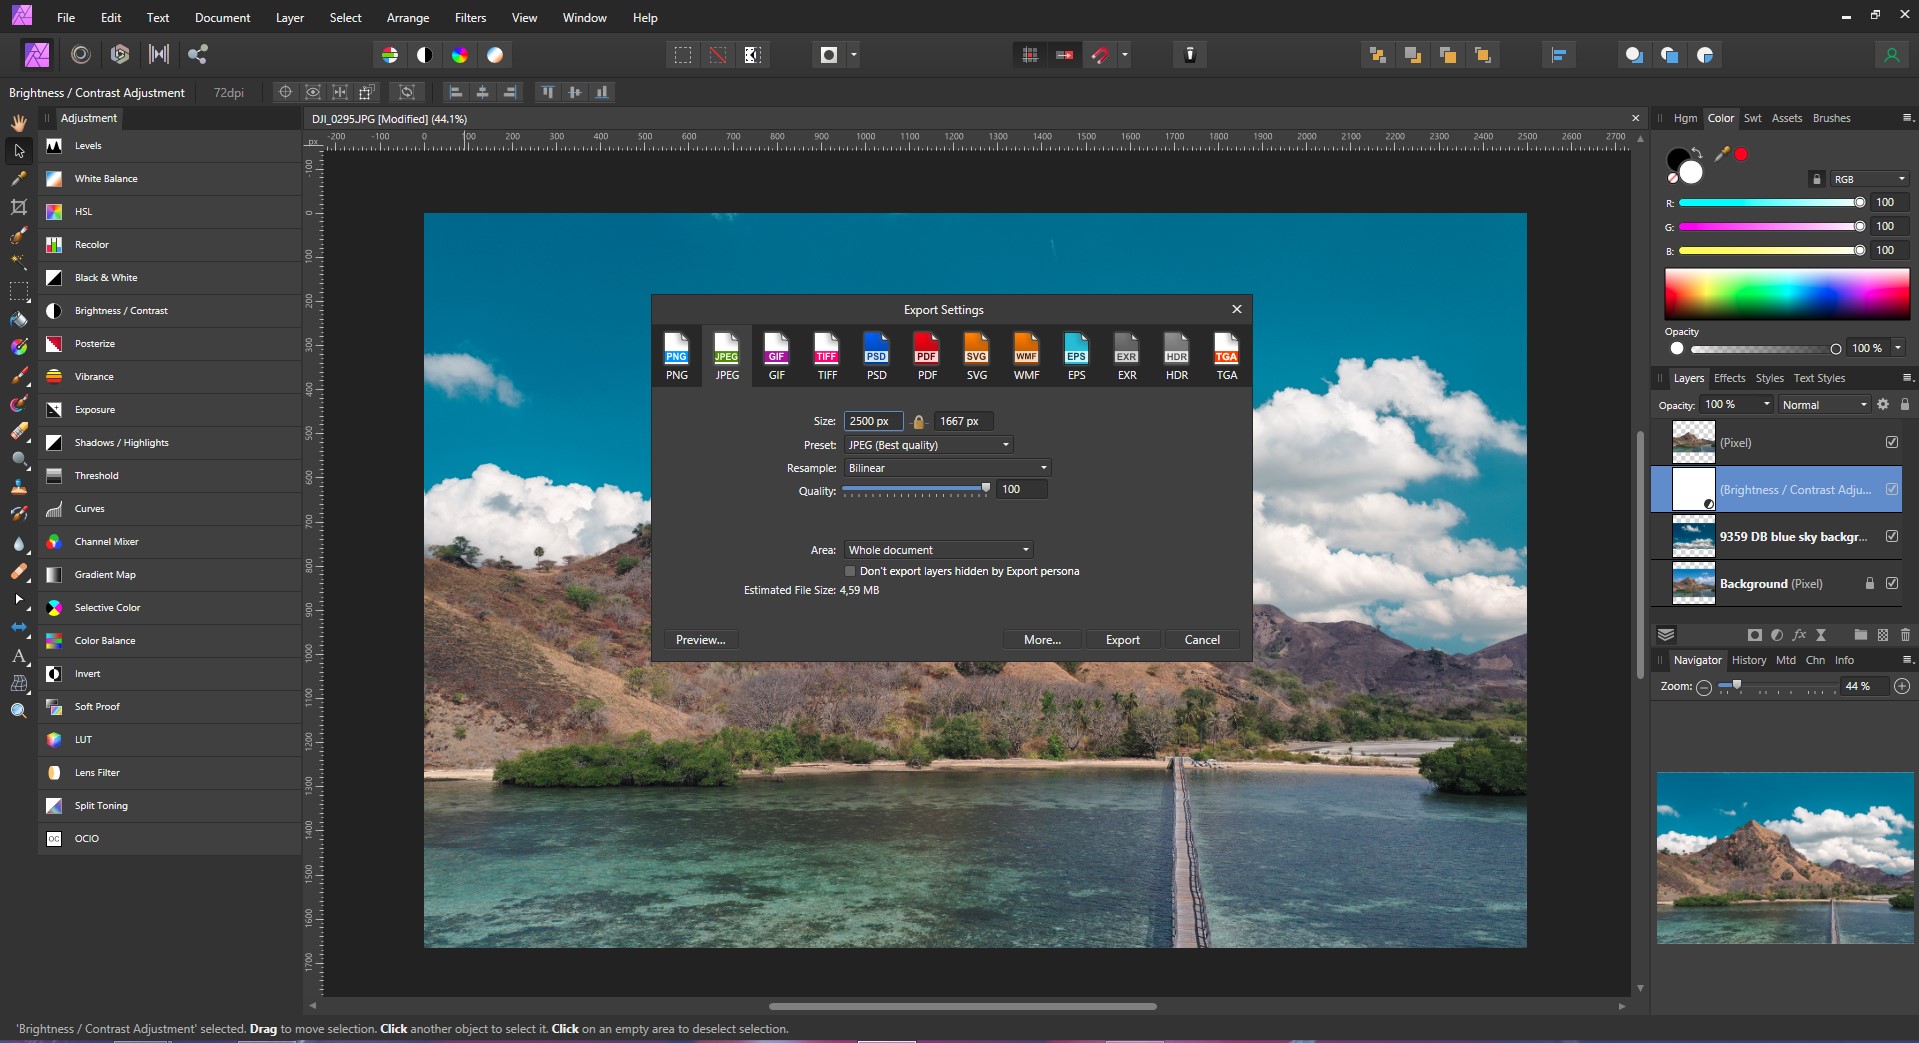
You can further edit as needed. When you are done, it’s time to export the image. Go to File > Export, then choose your export settings. We used the settings in the image below.
This is what our final image looks like.
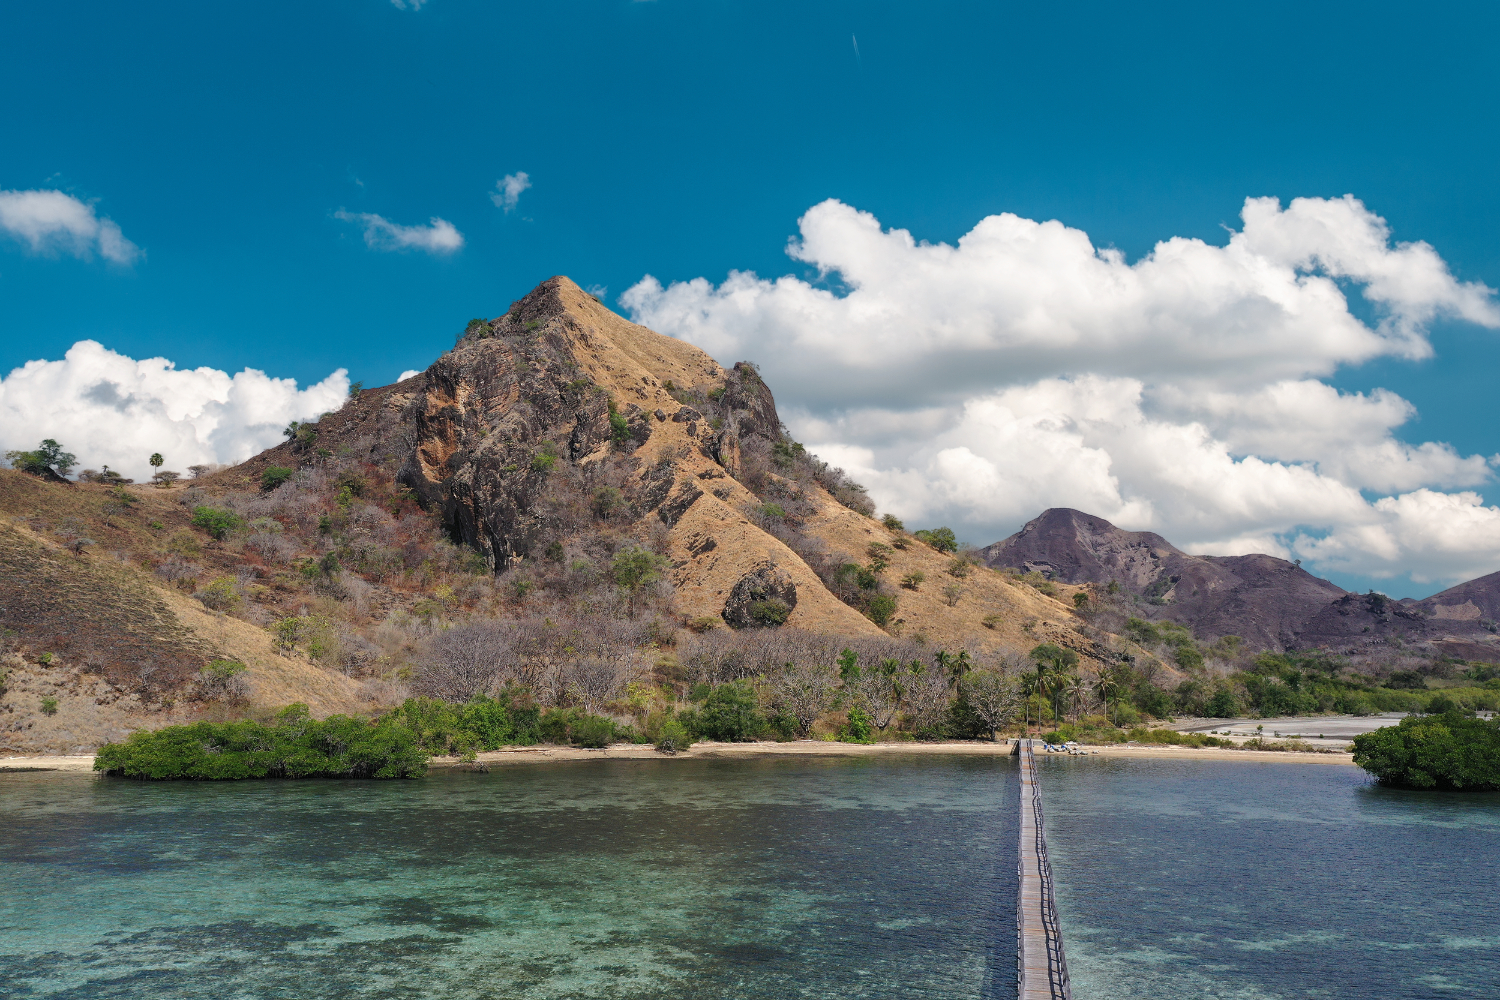
Adding a sky replacement can really enhance an already amazing photo. You can use this great compositing technique across many different kinds of photos.


