
How to Resize an Image in Affinity Photo
Learn how to resize an image four ways in Affinity Photo with this quick step by step tutorial.
Today we will explore how to resize an image in Affinity Photo. Knowing how to correctly resize an image is important in keeping quality consistent. You may want to use specific dimensions for your project or just need to optimize the file size. Follow our tutorial as we show you how to best resize an image in Affinity Photo.
You can resize your images either by scaling or resampling them. Scaling changes the amount of DPI (dots per inch) of your image, giving it a specific resolution but leaving its dimensions unaffected. Resampling instead, will either enlarge or reduce the number of pixels that are present in your image.
There are pros and cons to each method and its effectiveness will basically depend on your image and the results you want to achieve.
For this example, we will use a white rose photo, but you can choose from our great variety of stock photos.
Open the Resize Document Panel
We will show you various methods to resize your image. You first need to open the image you want to resize in Affinity Photo. Then, go to Document > Resize Document (Option/Alt + Command/Control + I).

This will open the Resize dialog. There, you can input the new width and/or height of your image (1). You can also change the units (2), the resolution or number of DPI (3), and choose the resample interpolation method (4). There will be a brief description of your settings at the bottom of the dialog window.

Now, depending on the results you want to achieve, select the method of image resizing that works better for you.
Method 1 - Scale your Image
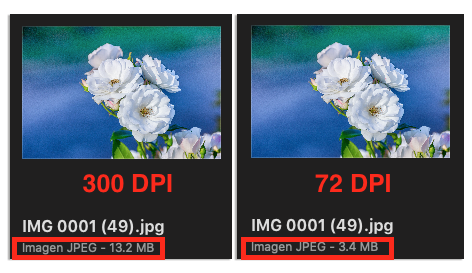
When scaling an image, we are changing its resolution or amount of DPI (dots per inch). A higher resolution is good for printing but will result in a larger file. A lower resolution instead is better suited for online usage.

Next, we will explain what happens if you uncheck the Resample box. We will also show how it affects the resizing of your images.
Resize Images without Resampling
If you uncheck the Resample box, you will be able to resize your image without resampling it. You will notice that Affinity Photo disables all the options except Units and DPI.

Now, if you change the DPI, the image will maintain the same pixel dimensions, but its actual size will change. This is because the pixels in the image have been spaced out.
Use a Workaround for Changing Measurement
There is a small workaround where you can change your image measurements without resampling. When changing the Units on the drop-down menu, the file size will change and the Size fields will also be enabled. This will allow you to input a new width or height value.
The DPI changes because Affinity Photo is spacing out the pixels in the image. The new image size is created without resampling and without creating new pixels or removing them.

Method 2 - Resample your Image
If you need to enlarge your image by adding more pixels, you will need to resample it instead. You can resample your image in two ways. Upsampling will increase the number of pixels, thus also increasing its overall pixel dimensions and its file size. Downsampling instead will decrease them.
While resampling, you can choose whether to maintain your image’s aspect ratio or not. You can also scale your image at the same time. If the lock aspect ratio box (small padlock icon) is checked, the rest of the image dimension will update automatically.

When enlarging (upsampling) an image, you are literally adding new pixels. The way Affinity Photo adds the newly created pixels is determined by the interpolation method you choose. Each one is an algorithm used to determine where to add or remove pixels.
Which one is best will depend on your type of image and whether you are upsampling or downsampling.
Nearest Neighbor, for example, can be used on images with hard edges like line art and diagrams.
Bilinear and Bicubic are general purpose algorithms. The first one is good for downsampling and the second one for upsampling.
Finally, there are two Lanczos 3 algorithms (separable and non-separable). They are good for upsampling photographs and will produce higher quality results.

Here are some examples of how each interpolation algorithm works on our image. Our original image was 2500 x 1667 px @72 DPI. We changed the Height value to 5000 px leaving the resolution intact to test them.

Method 2 Variation - Resize Images Using Pixel Art Resampling
There is another way to resample your images by using the Resize Pixel Art Document option. It allows you to upsample using other types of resampling algorithms named Pixel Art. These are often used in video games console emulators to enhance 2D pixel art graphics.
To use this option go to Document > Resize Pixel Art Document.

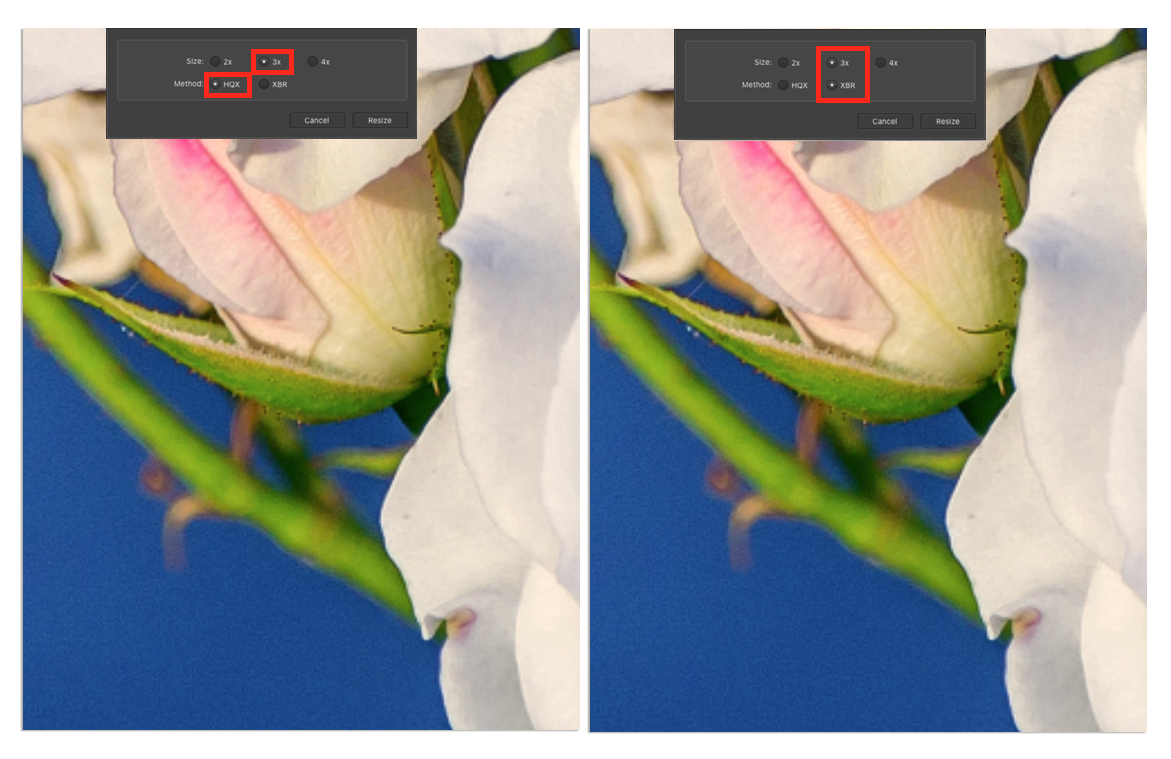
Pixel art resize has two Methods: XBR or HQX, and 3 Size enlargement choices: 2x, 3x and 4x. Once you have chosen your options, click the Resize button to apply them.

Here is an example of how each interpolation algorithm works on our image.
Method 3 - Resize Images While Exporting
If you prefer, you can resize your images during the export process. This is useful when you need to give your files a specific file format. Affinity Photo saves images in a proprietary format (.afphoto). So you will need to export them if you want to save them in any other format like jpg, tiff, png, etc.
To export your files, you can go to File > Export. Then, you can choose the format, size, resampling method, etc. from the Export dialog.

Method 4 - Resize Images in Export Persona
In the Export Persona, you can batch resize and/or create multiple versions of your images with different formats, sizes, etc.
To enter Export Persona, just click on its icon on the top left side of the top menu. Then, inside the Slices tab, select the image thumbnail. Next, click on the small arrow on its left side to show the different export options for your image.
There, you can choose the file format, settings and add more instances by clicking on the plus (+) button on the bottom left side. You can personalize each instance to fit your needs. When you are done, click the Export Slices button to save your resized files.

The last couple of options have an advantage. You will be able to create new resized, reformatted images while leaving the original one unchanged.
Well, that’s it, we covered all the different ways you can use to resize your images in Affinity Photo. Each approach may be helpful to solve different problems you may find while resizing your files.
Next, check out our other tutorials like how to replace a sky or how to blur the background in Affinity Photo.


