
How to Unweld On Cricut
How to unweld in Cricut Design Space the easy way! Tips and tricks to unweld quickly and easily
Today you'll learn how do you unweld on Cricut Design Space! You may be wondering if you can even unweld at all? We’ll hop right in and let you know that you technically can’t unweld shapes once they’ve been welded. The Unweld command doesn’t exist, but we’ll show you some tricks for reversing a weld and handling poorly welded shapes.
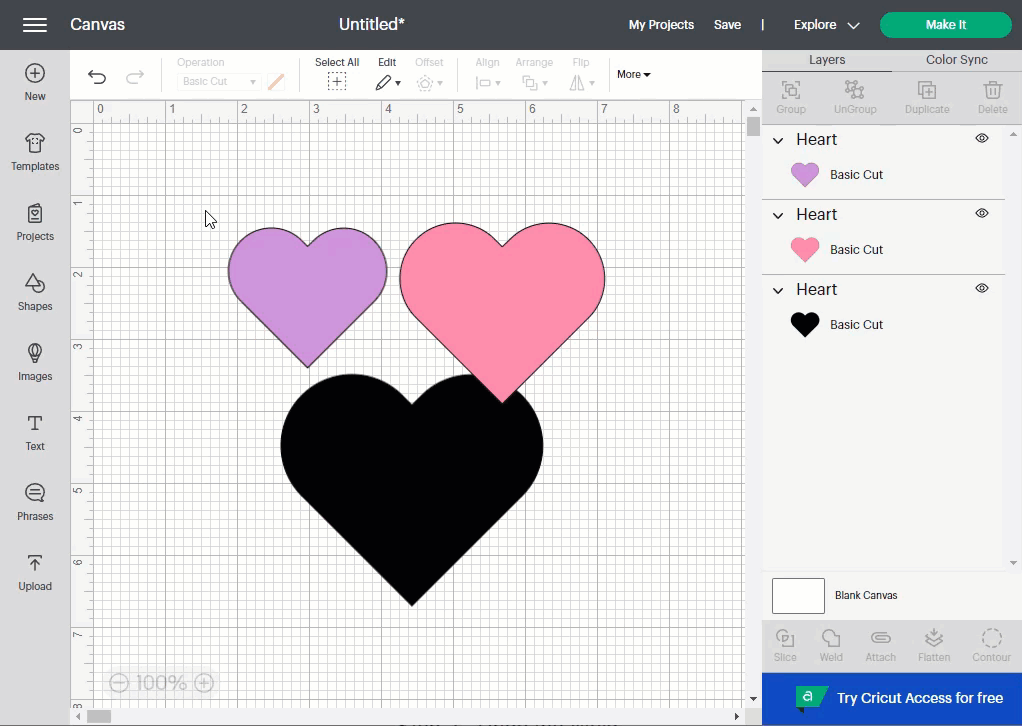
Step 1 - Weld Shapes
When you weld in Cricut, the separate shapes become a single shape that will then be cut out as one single piece. Something to note is that you can weld shapes together that are not touching.
Also, we’ll be using heart shapes, but you can weld text as well.
Note: if you need some help with uploading your images, read out our guide on uploading and tracing in Cricut Design Space.
Select the shapes you want to weld together. Then click on the Weld button at the bottom right. You’ll know the pieces have been welded when they become the same color and/or you see the new shape layer in the Layers list.
If you'd like to learn more, we have a great tutorial covering how to weld and use Cricut Design Space images with a shadow.
Step 2 - Undo the Weld
The only way you can unweld is to undo the weld. You can click the Undo button or press Control/Command + Z on your keyboard.
Because undoing a weld is the only way to unweld in Cricut Design Space, you want to undo it right away if you notice you’ve made a mistake after welding. Otherwise, it’s nearly impossible to unweld.

Step 3 - Fix Poorly Welded Shapes Using Slice
If you’ve gone too far from being able to undo the weld and part of your welded shape isn’t touching the rest when you want it to be, we’ll show you a little trick to fix it using Slice.
Cover Part of the Welded Shape With Another Shape
Use some shapes to cover the entire part that’s not touching or the other part. It’s up to you which section you cover but only cover one.

If you’re having a hard time seeing whether the entire section is covered or not, select the covering shape(s) and change the Operation to Pen.
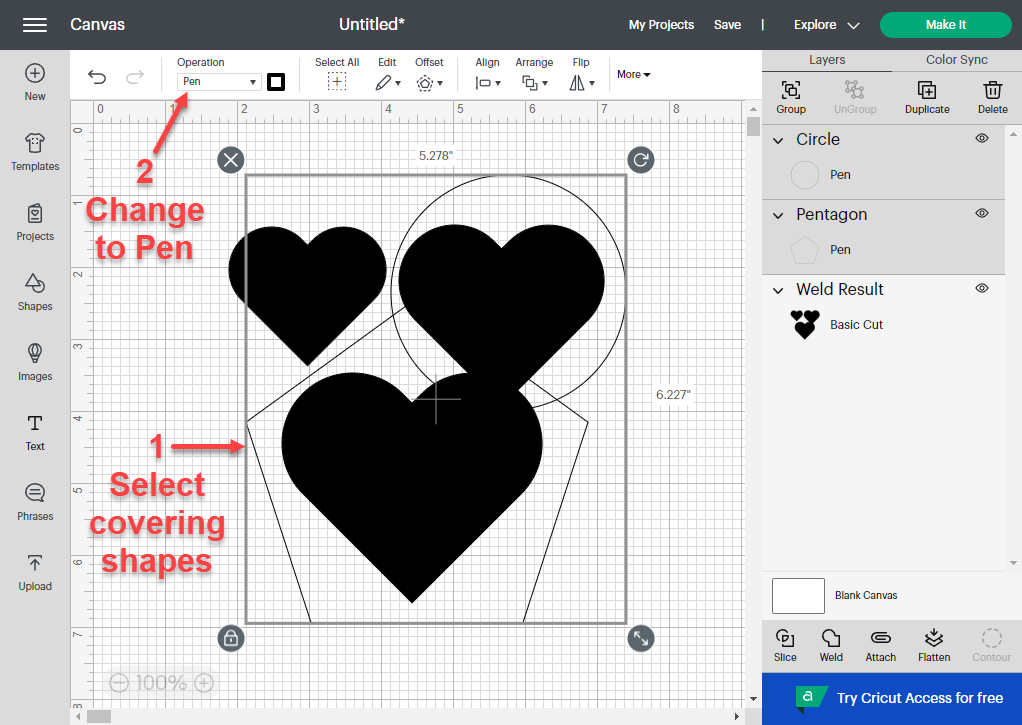
Once the entire part is covered, select the covering shape(s) and change the Operation back to Basic Cut. Then weld the covering shapes together if you’re using more than one.

Slice the Welded Shapes
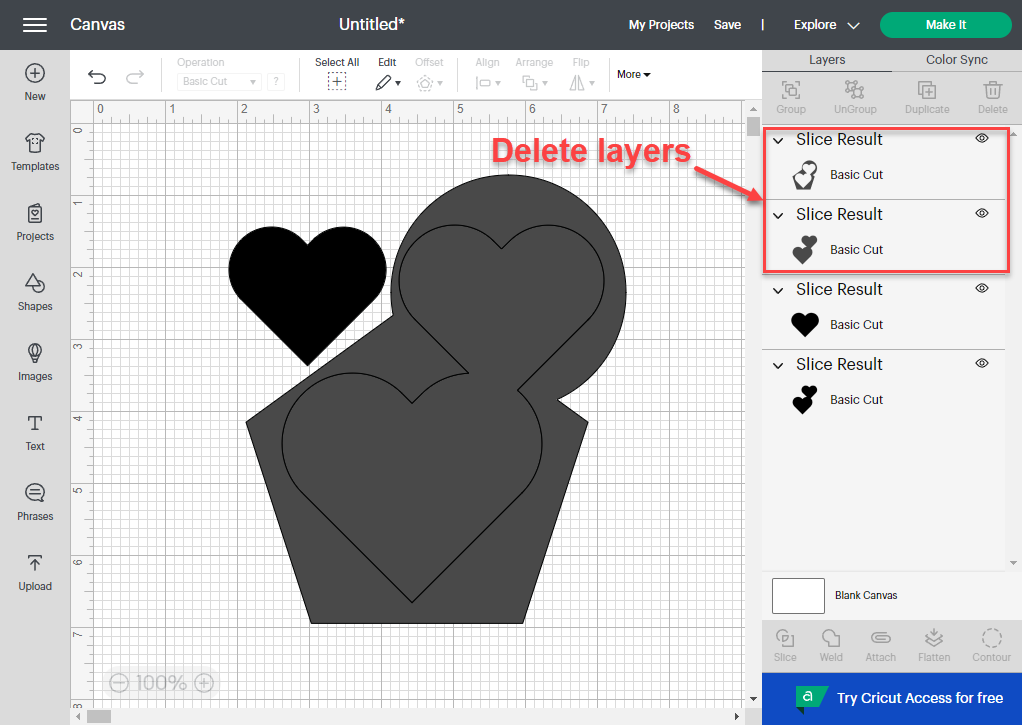
Now select your original welded shape and the covering shape. Click the Slice button in the bottom right next to Weld. Notice all the new layers in the Layers panel.

Delete Unnecessary Layers
Next, select and Delete the unnecessary layers. These would be the layers created from the covering shape.
Reposition Shapes and Weld Again
Now reposition the shapes, weld them again, and you’re done!

We hope we answered your question on how to unweld in Cricut Design Space. Keep in mind that there really isn’t a way to unweld, but you can undo the weld, and remember to use our little Slice trick when needed.


