
Cricut Design Space 3 Uploading and Tracing Features
Discover how to upload and trace an image in Cricut Design Space.
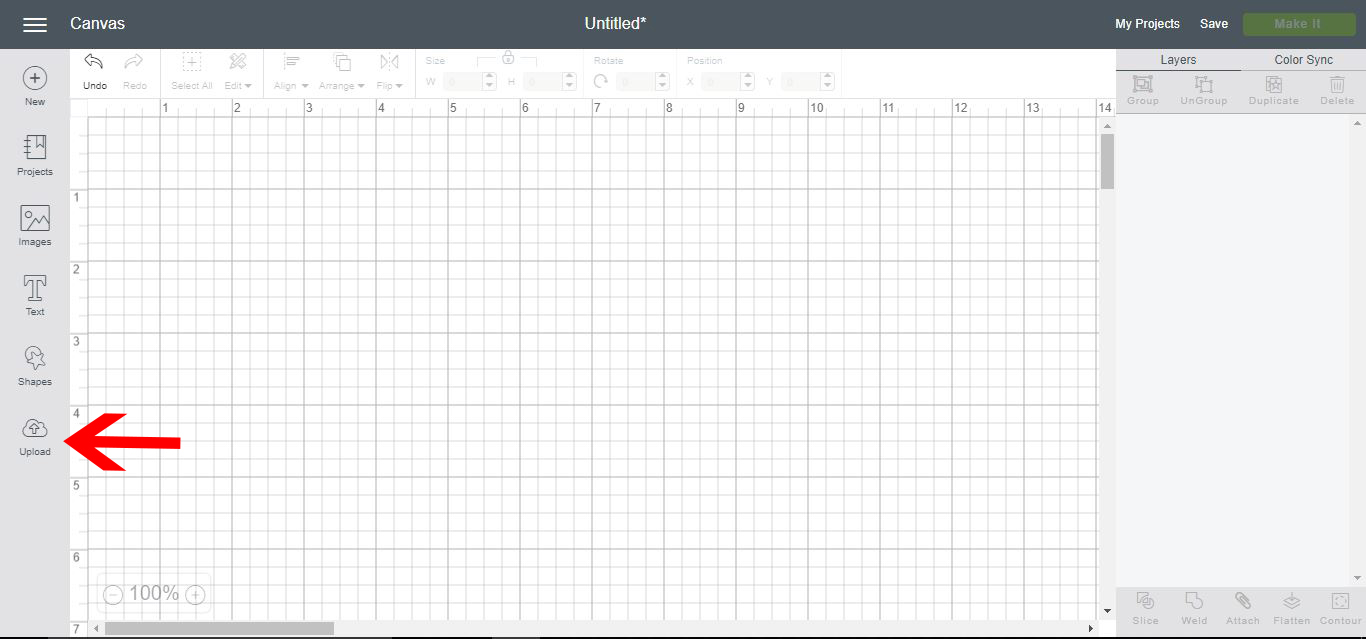
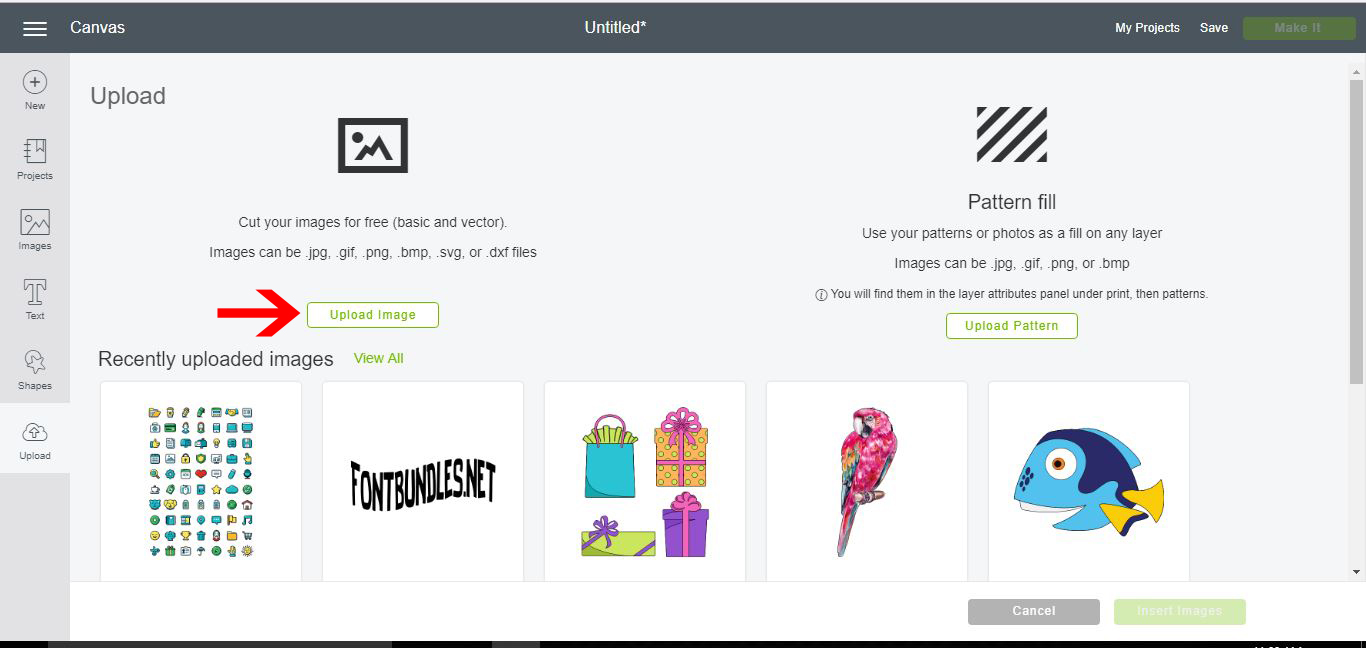
1- Open up Cricut Design Space and select the upload icon.
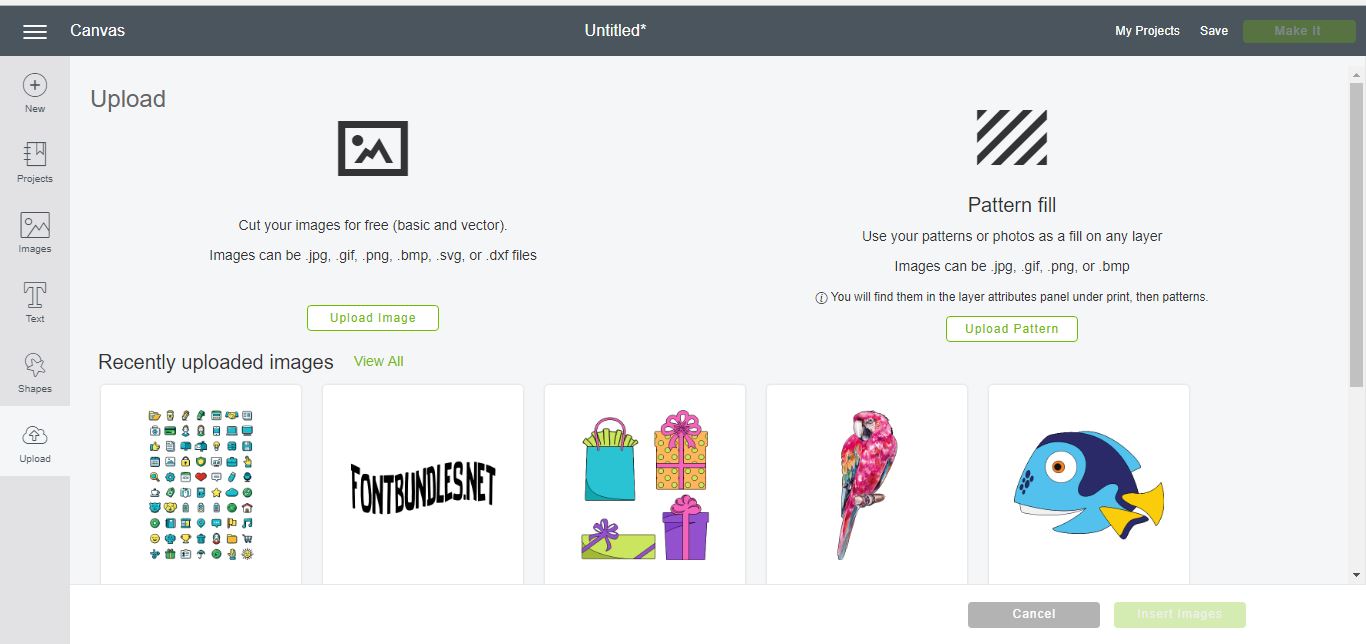
2-The first upload screen is the same as the previous version of cricut design space. Select upload pattern icon to upload a background pattern.
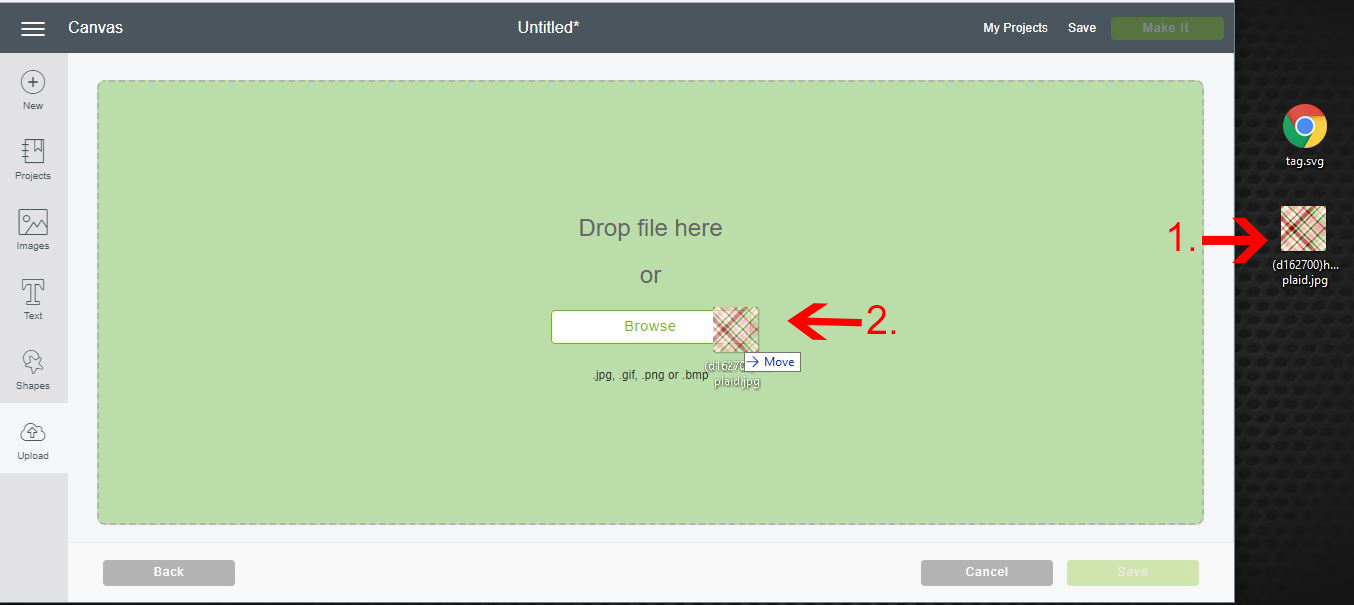
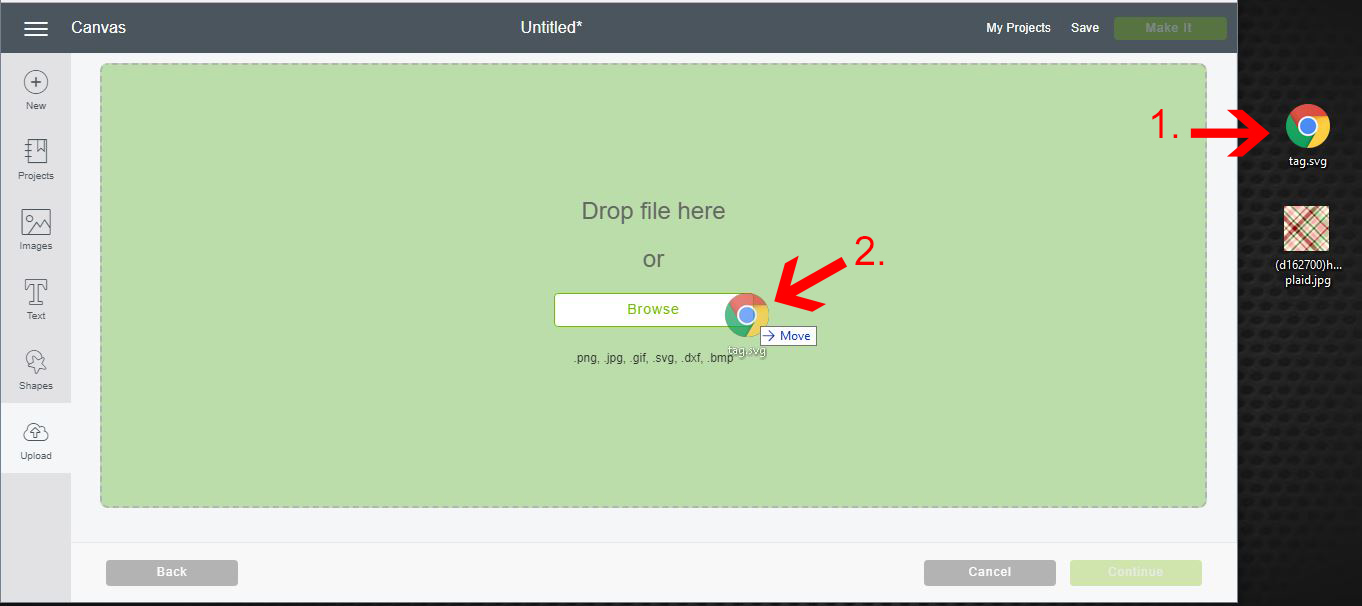
3- One of the new features in CDS3 is you can drag and drop your files from your desktop to your software. You select your pattern off your desktop (1) and drag to the browse icon on your software (2) and unclick.
4-The next pattern screen, you can tag and name your pattern. once finished click on the save icon.

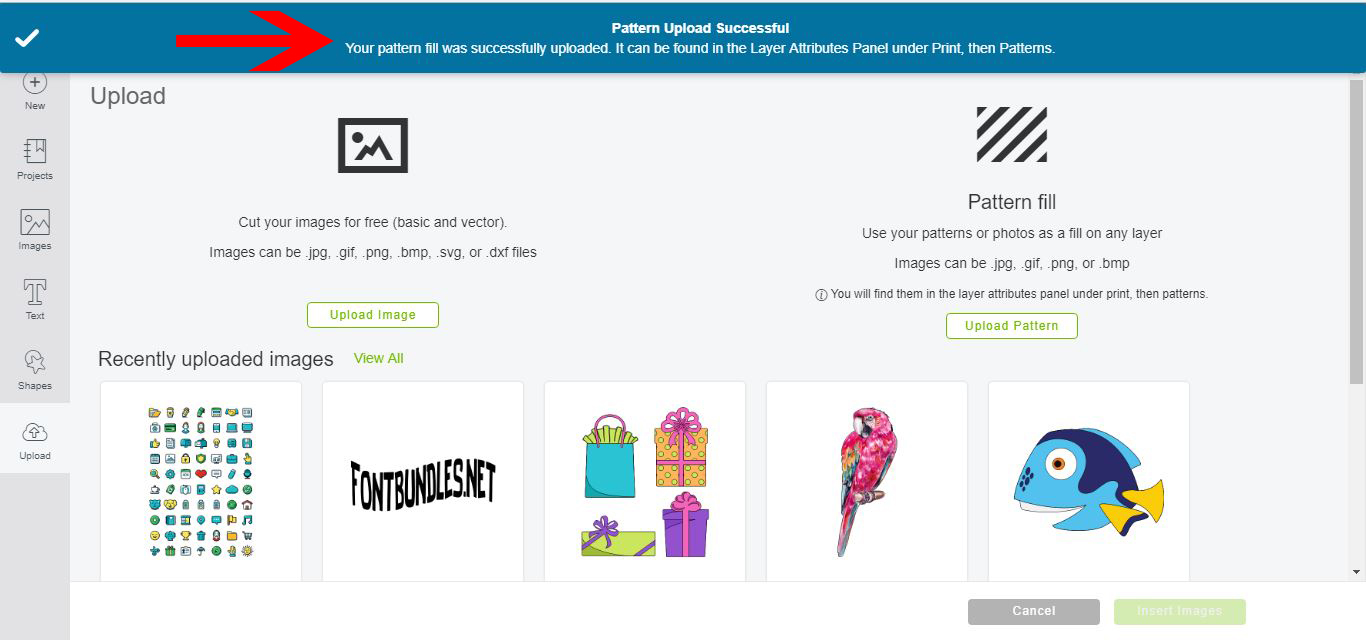
5- You will be sent back to the first upload screen and at the top of the screen there will be a confirmation that the pattern uploaded and where you can find it.
6- to upload an image or svg file you can click on the upload image icon.
7-Again as per the pattern you can now drag and drop your image or svg from the desktop (1) to your browse icon (2).
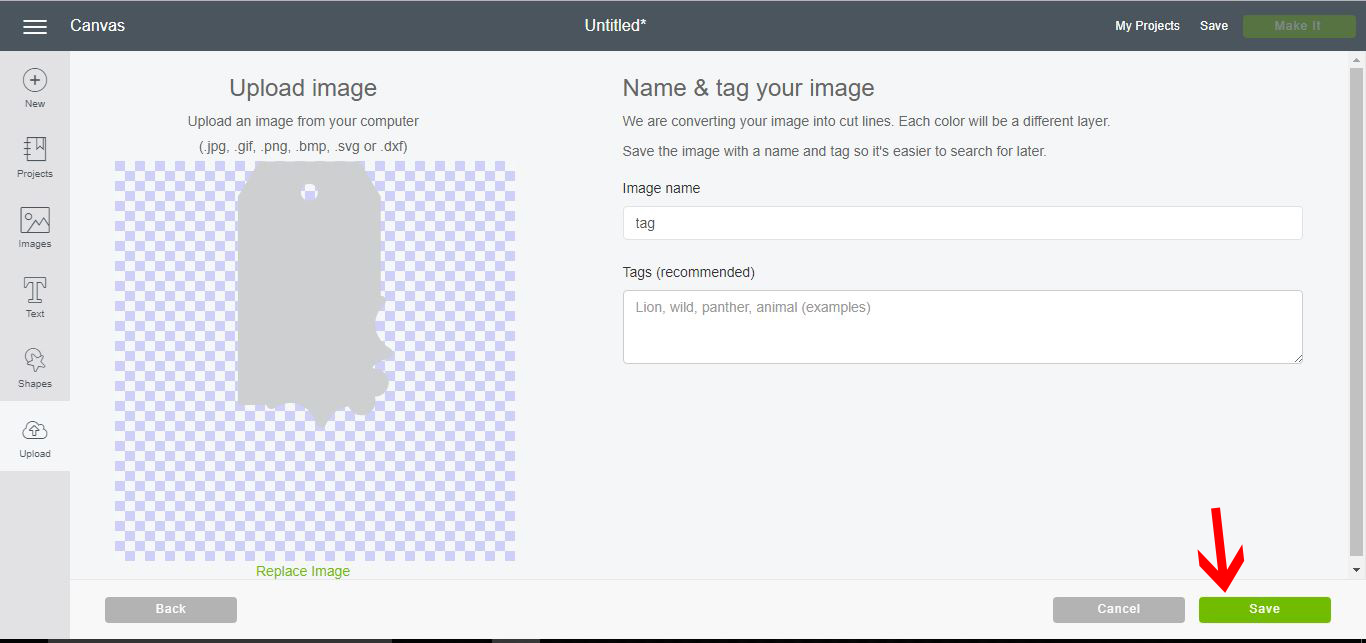
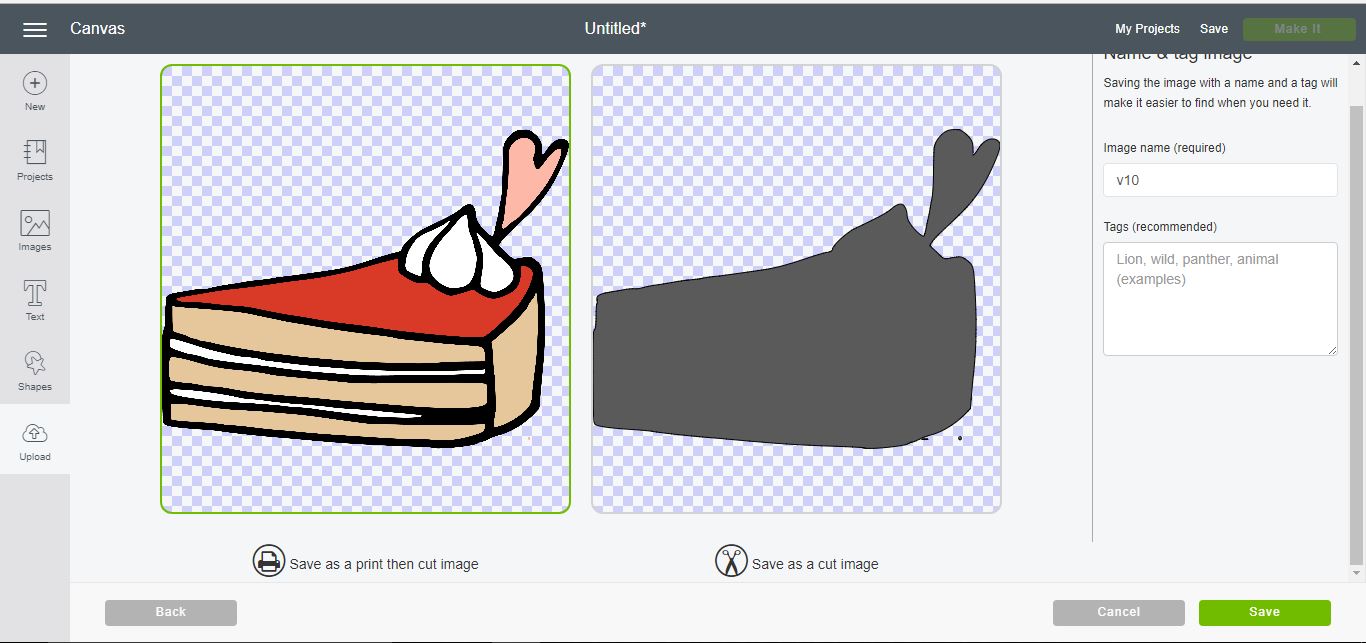
8-The image will now appear in a new window. you can name and save the image.
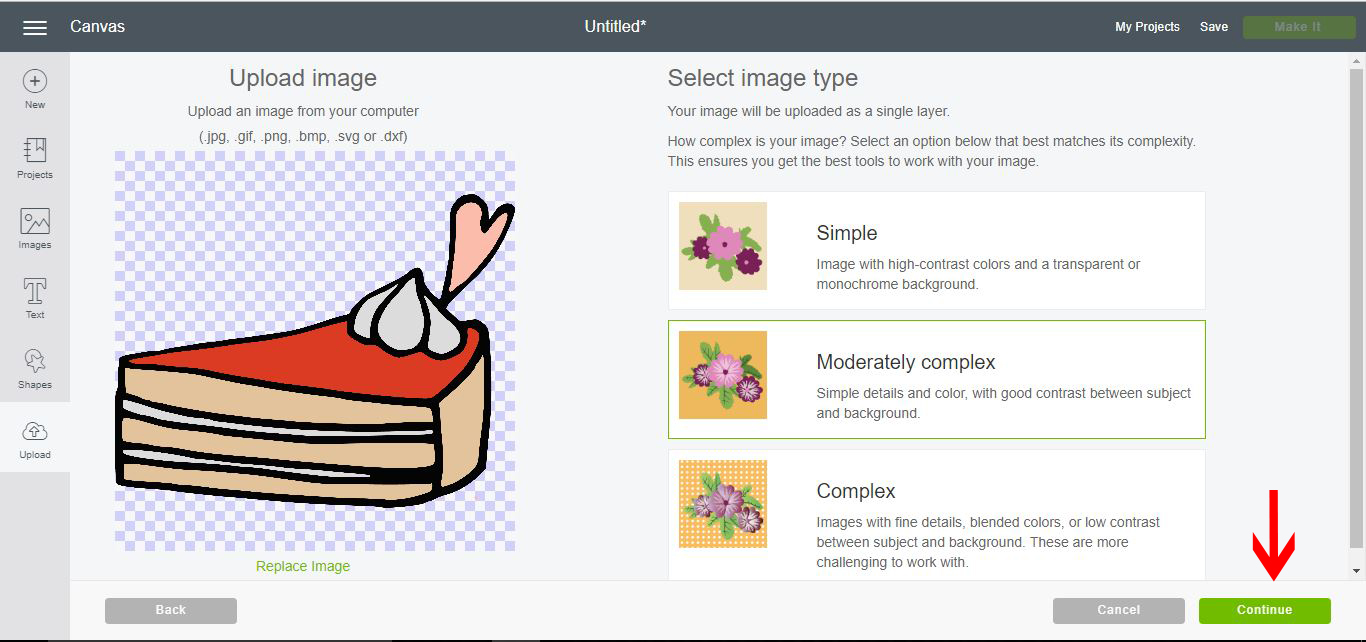
9- If the image needs to be traced you will be prompted with several options to trace. Select continue once you have selected the trace option you would like.
10- In the next screen you can adjust your image with the wand tool and eraser tool until only the part you want to be traced and cut is on the screen. When you are happy with the image click continue.

11- you will now be given a choice to print and cut or just cut. It is good to note with the new Cricut design space updates the print and cut gives you a larger print and cut space than before (now - 6.75 x 9.25 inches)
Select save.
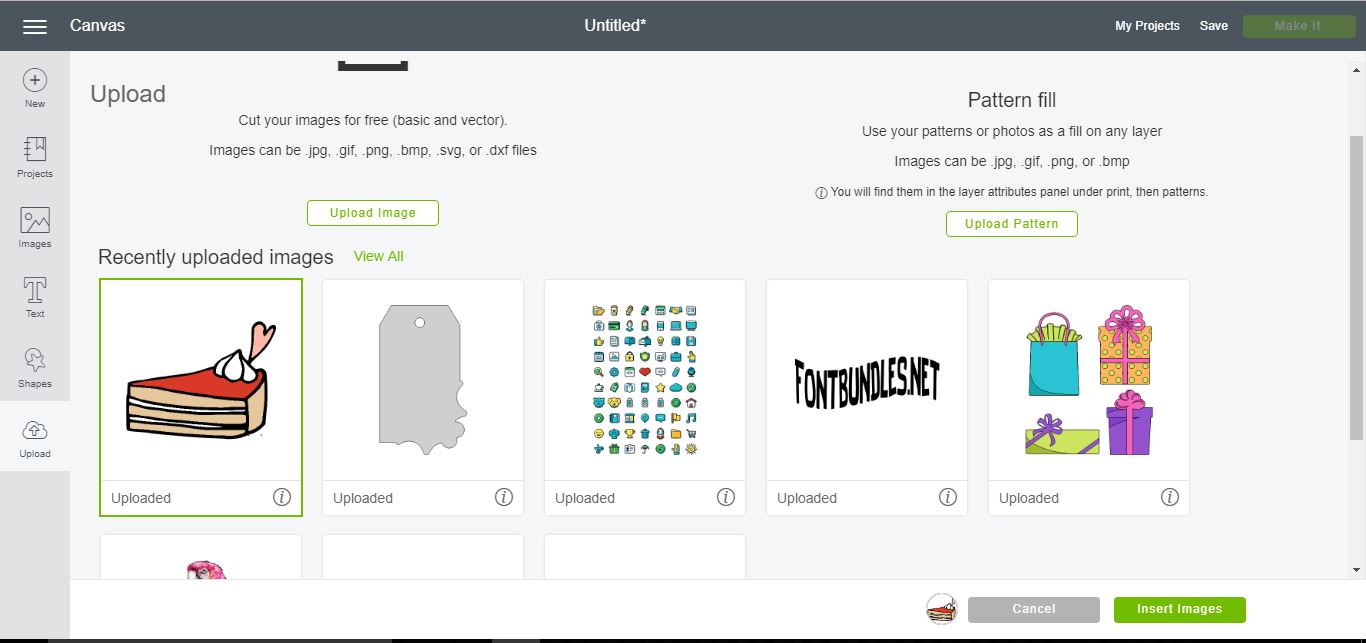
12- Your design will appear in the recently uploaded images. Select it and then insert image.
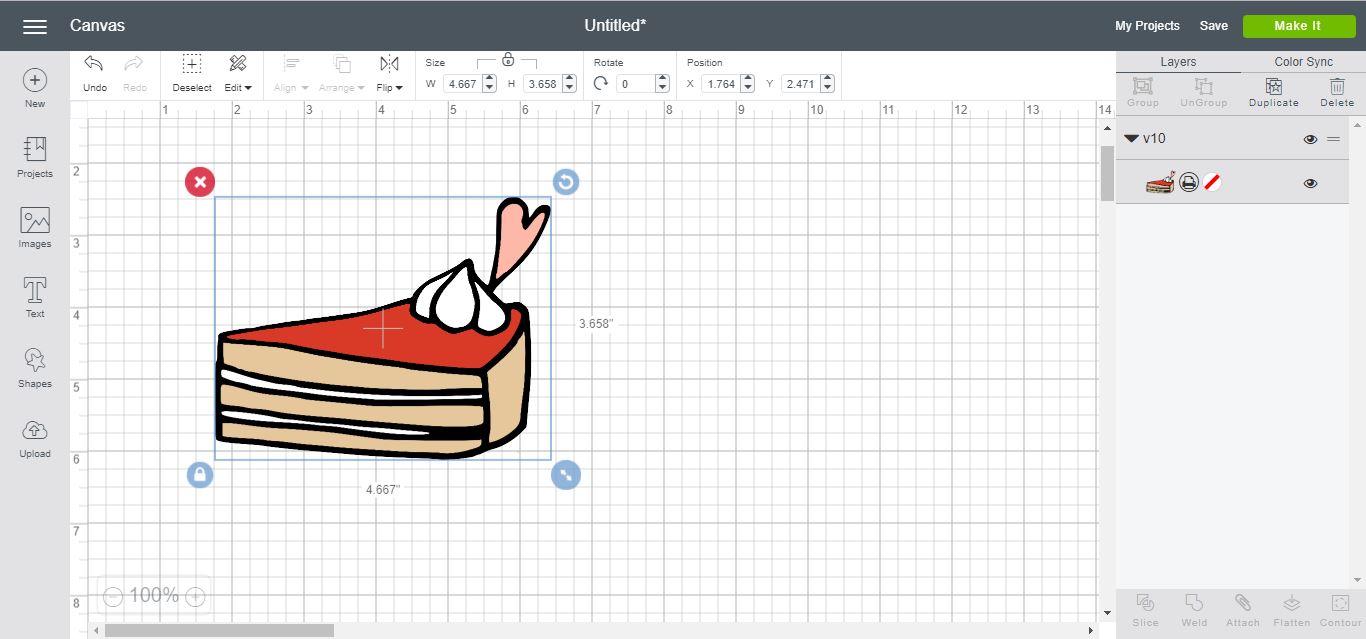
13- Your image will now appear in your design canvas.
As quick as that you have learned how to trace in Cricut Design Space. It particularly useful for PNG products that don't have a SVG file.


