- By Design Bundles
- 9 Mins
- Photoshop Tutorials
Lego Image in Photoshop
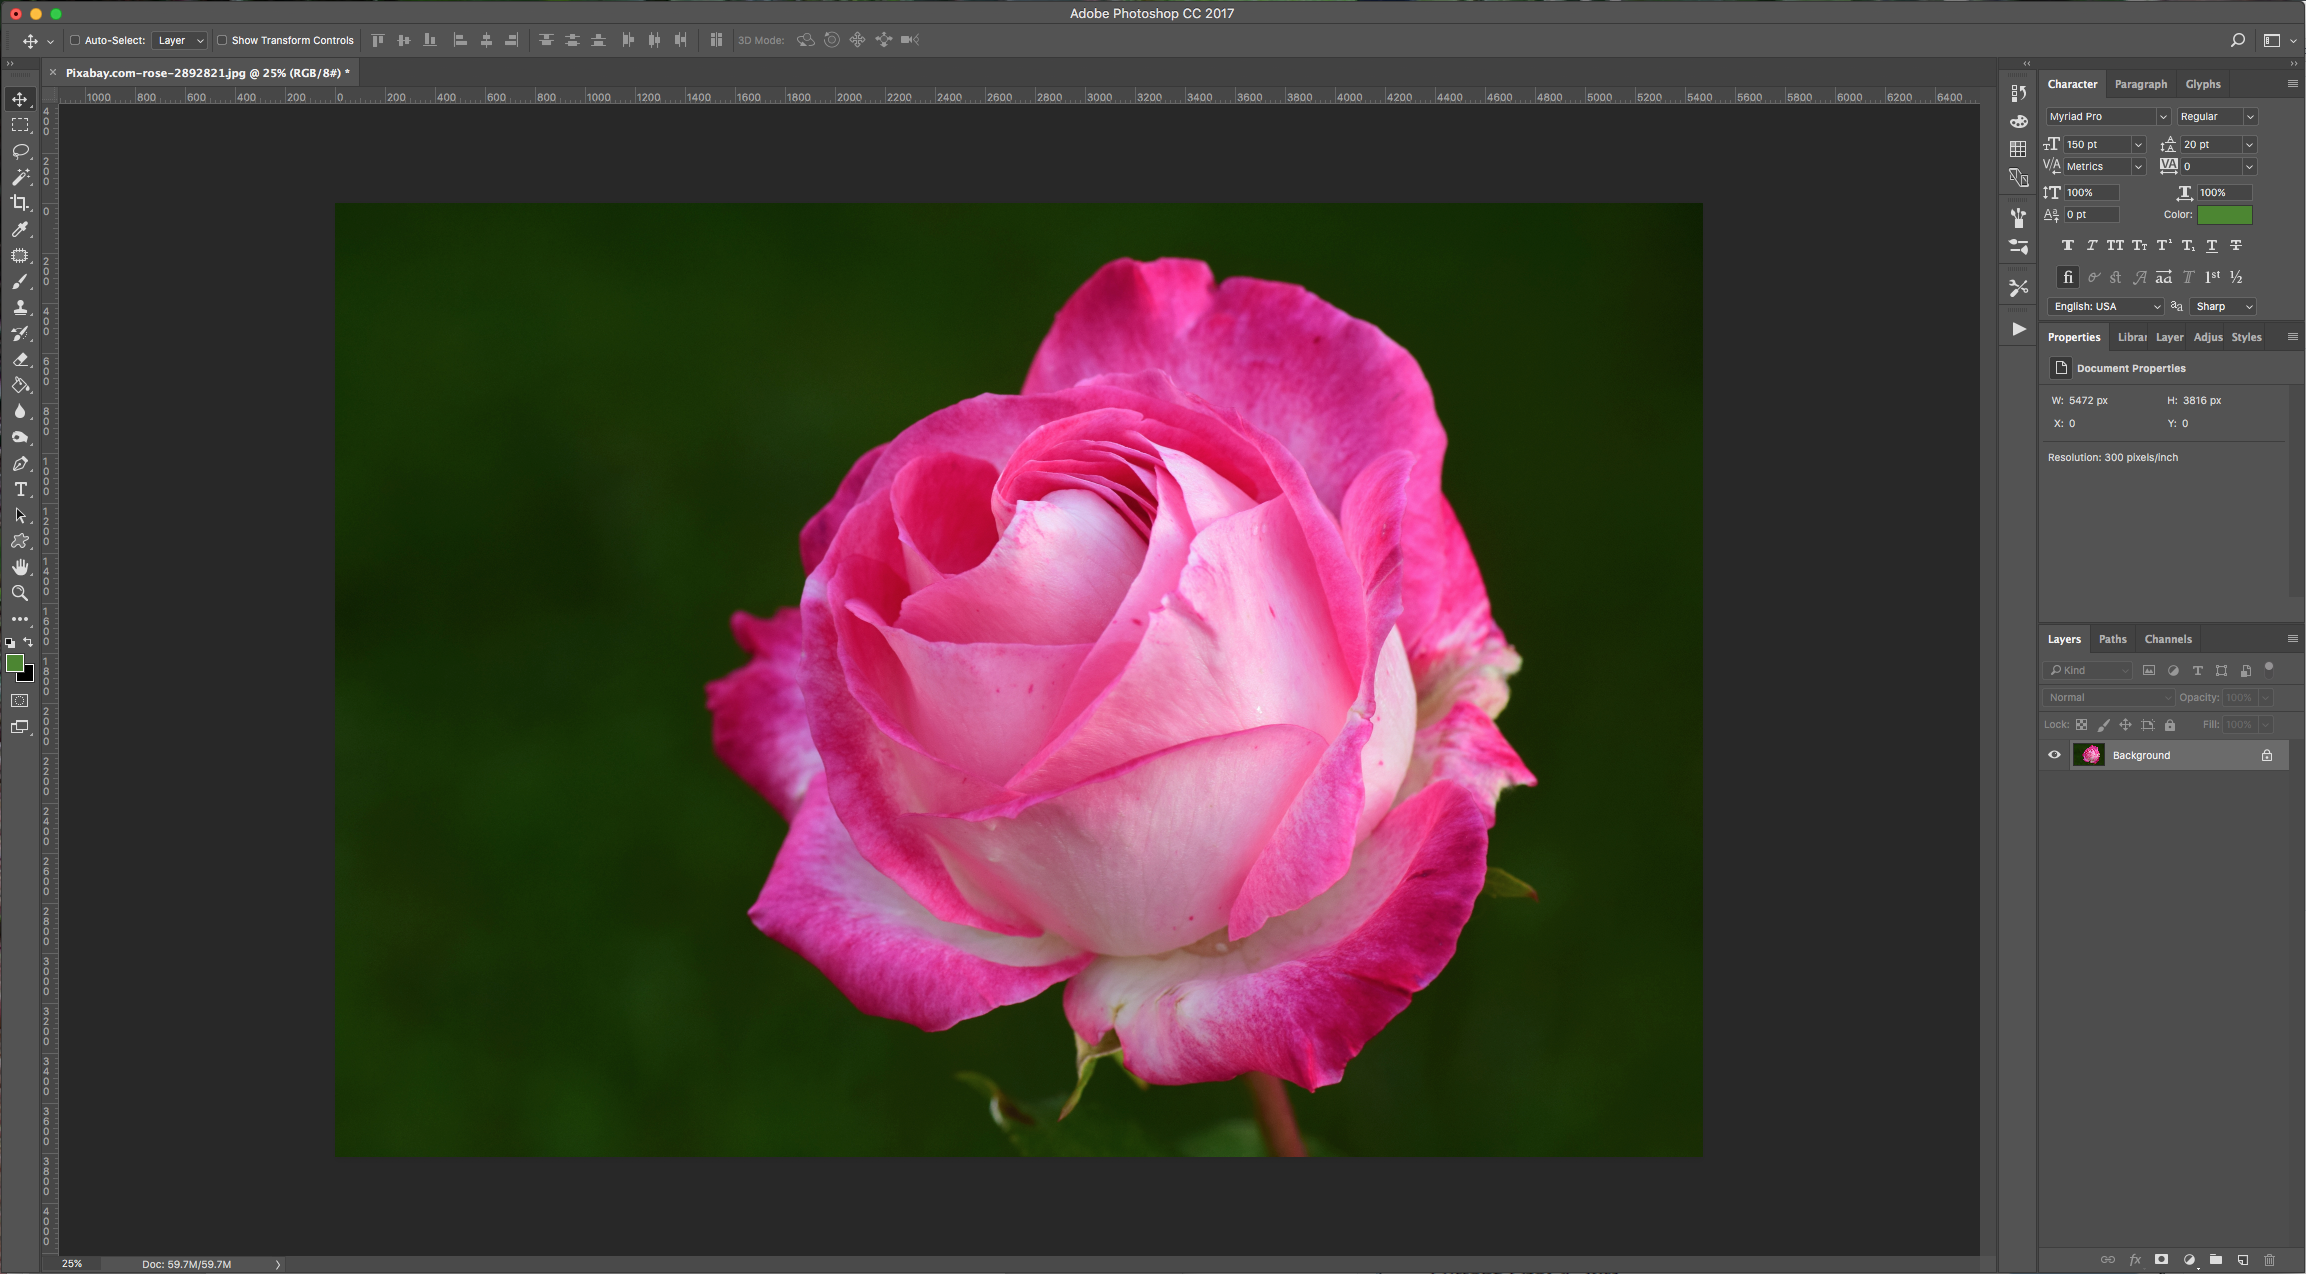
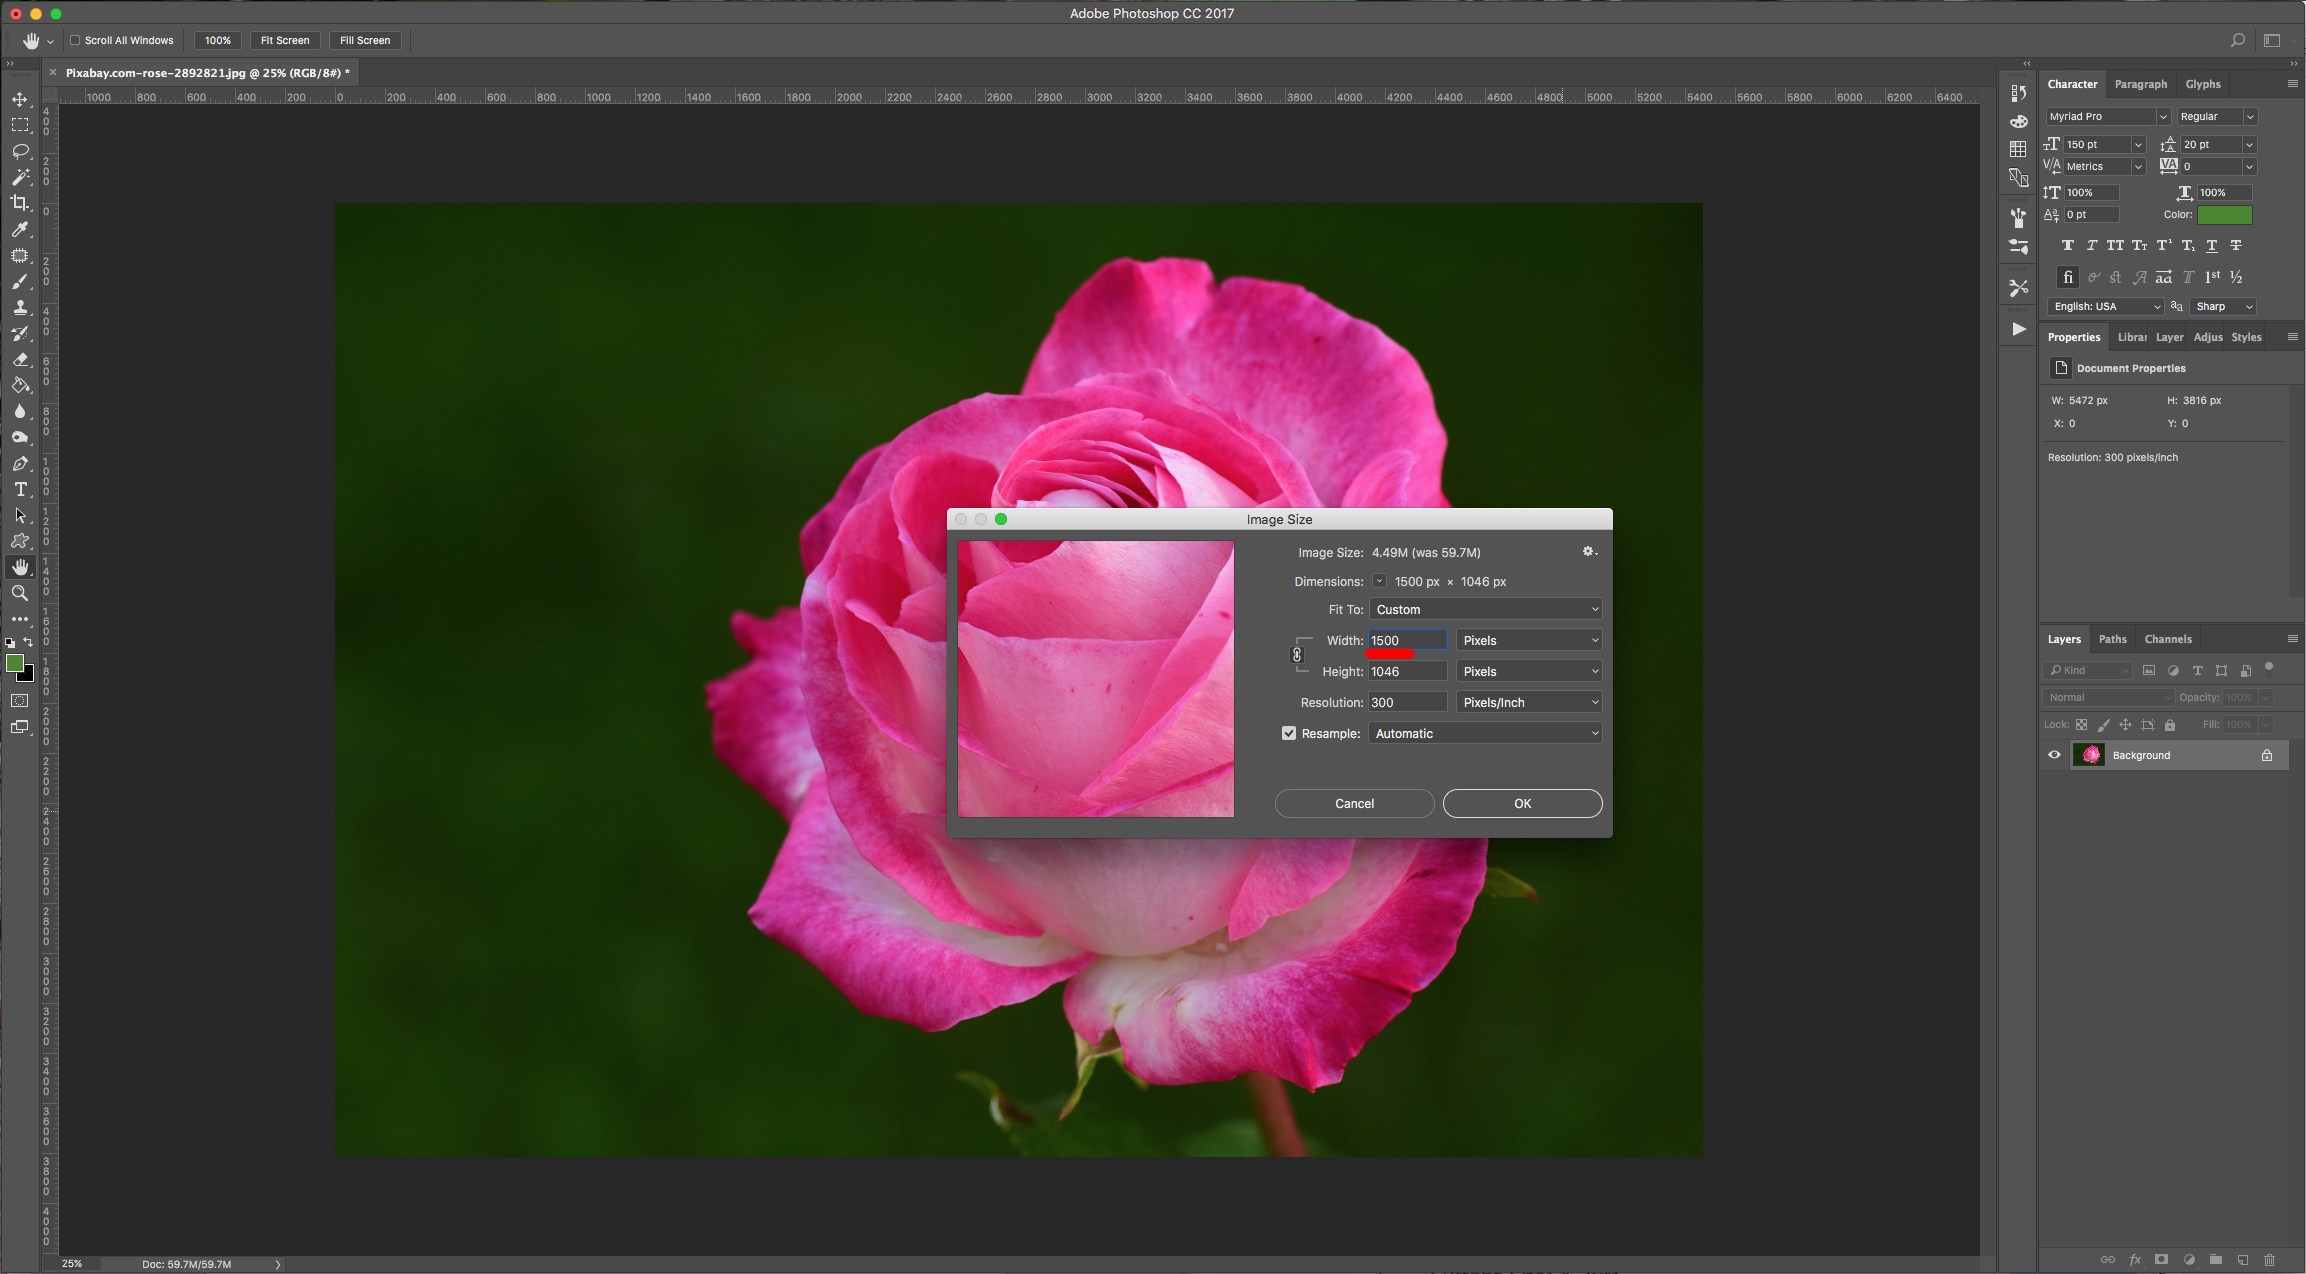
1 - Open your image. Since our pattern is 15 x 15 pixels and we are going to use a 30 pixel grid, we need our document to measure something divisible by 30. Go to Image > Image Size (Alt + Command/Control + I) and input a “Height” (or “With” depending if your image is “Portrait” or “Landscape”) value of 1500 pixels. In our case it was the “Height”.
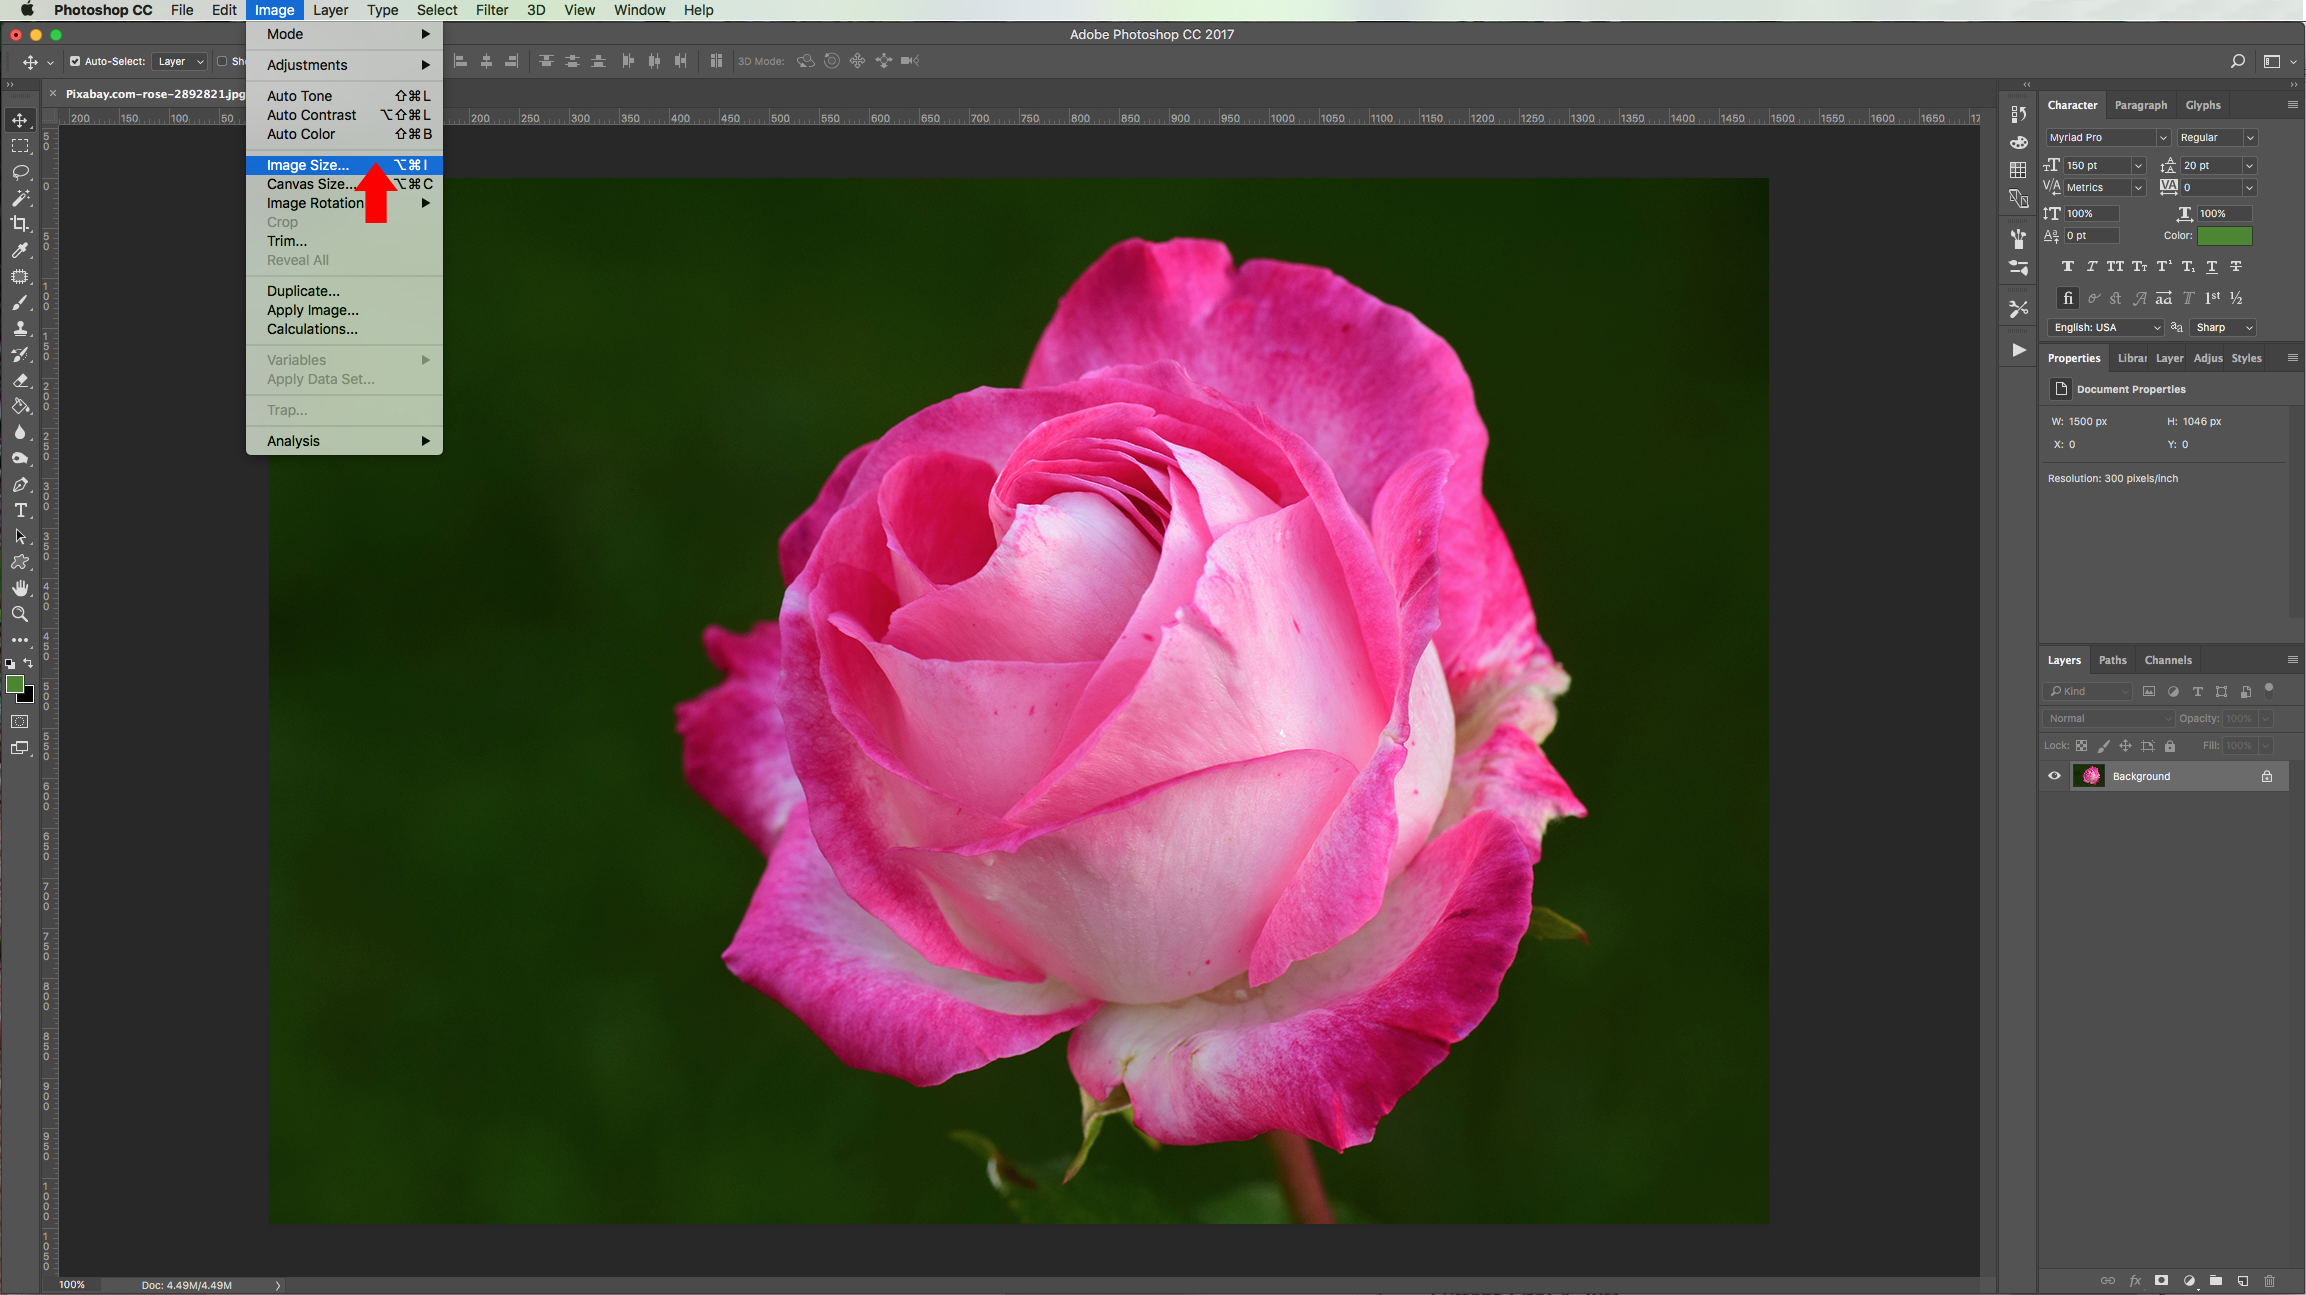
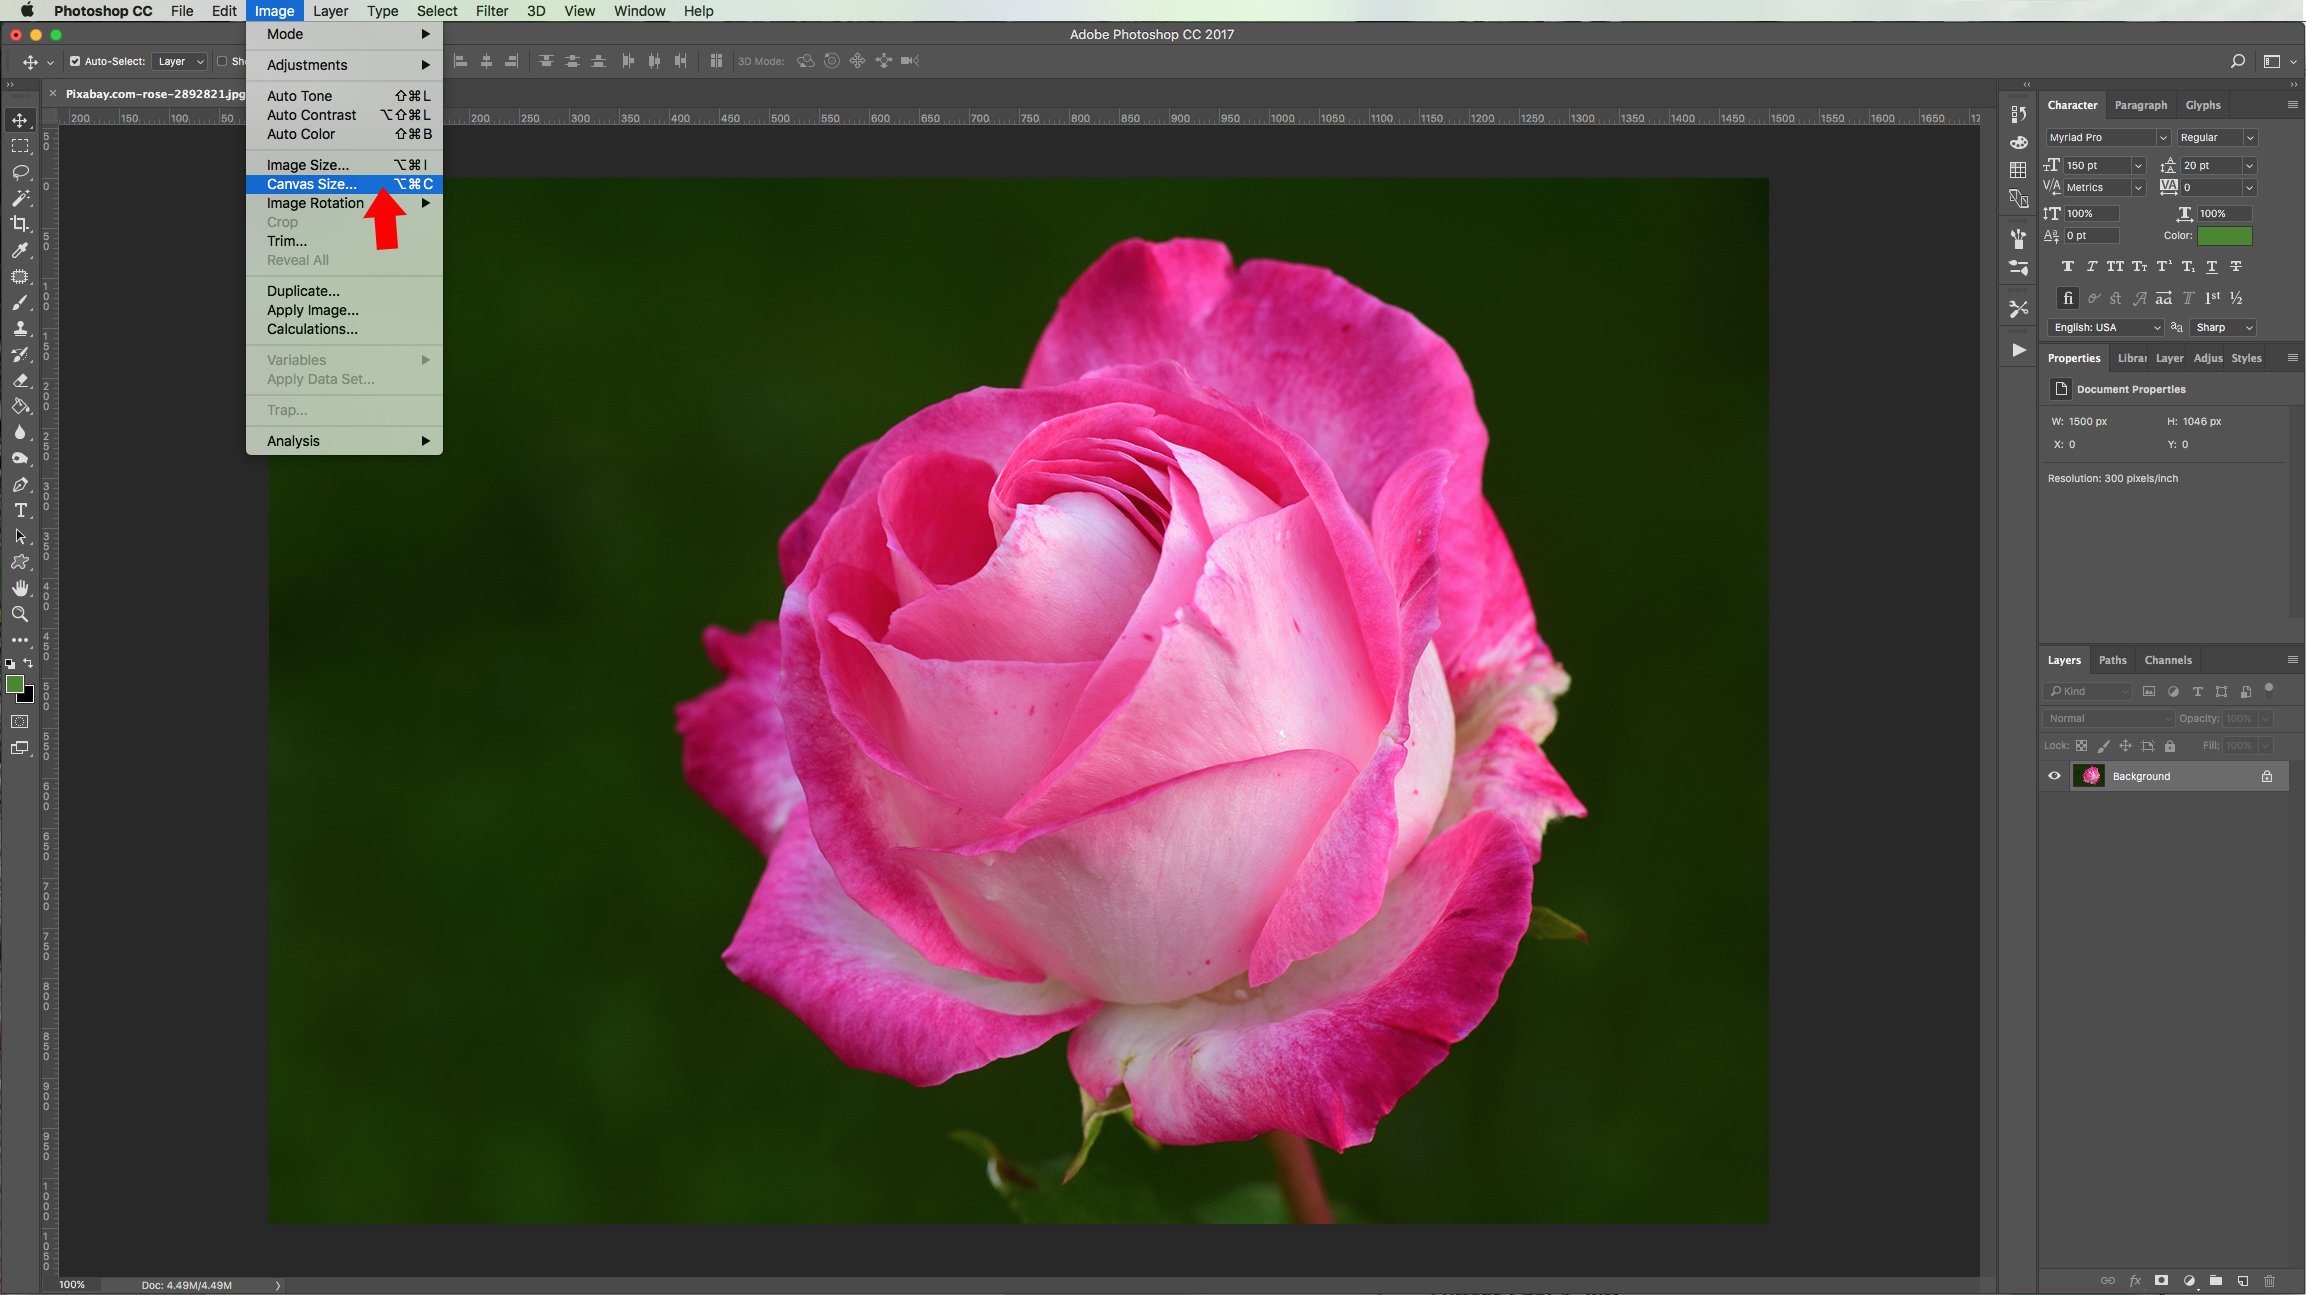
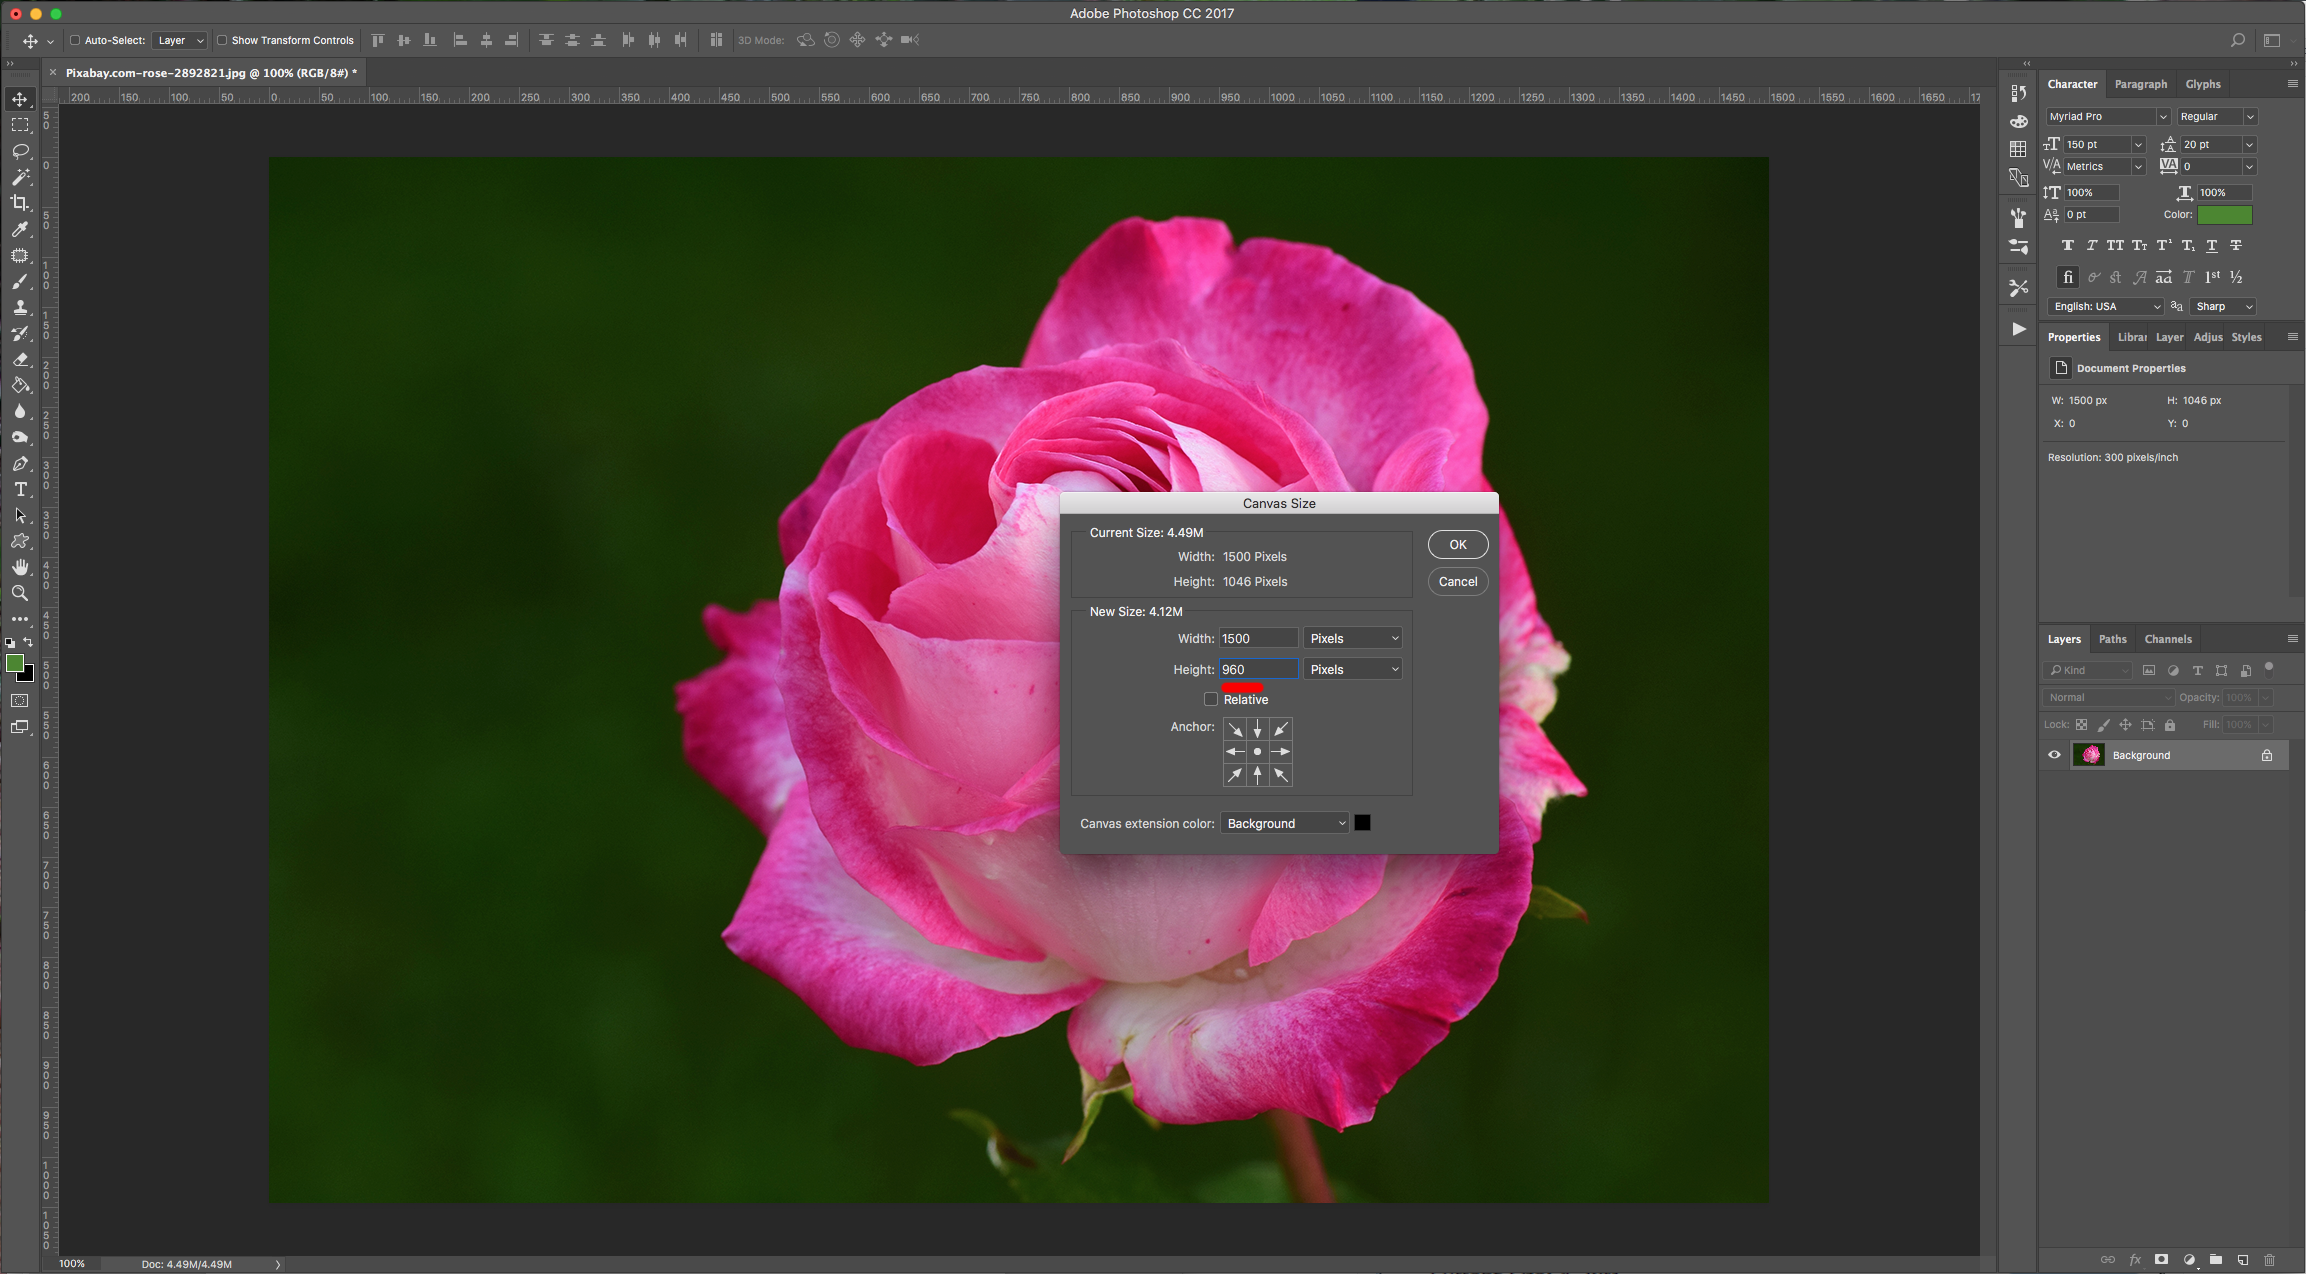
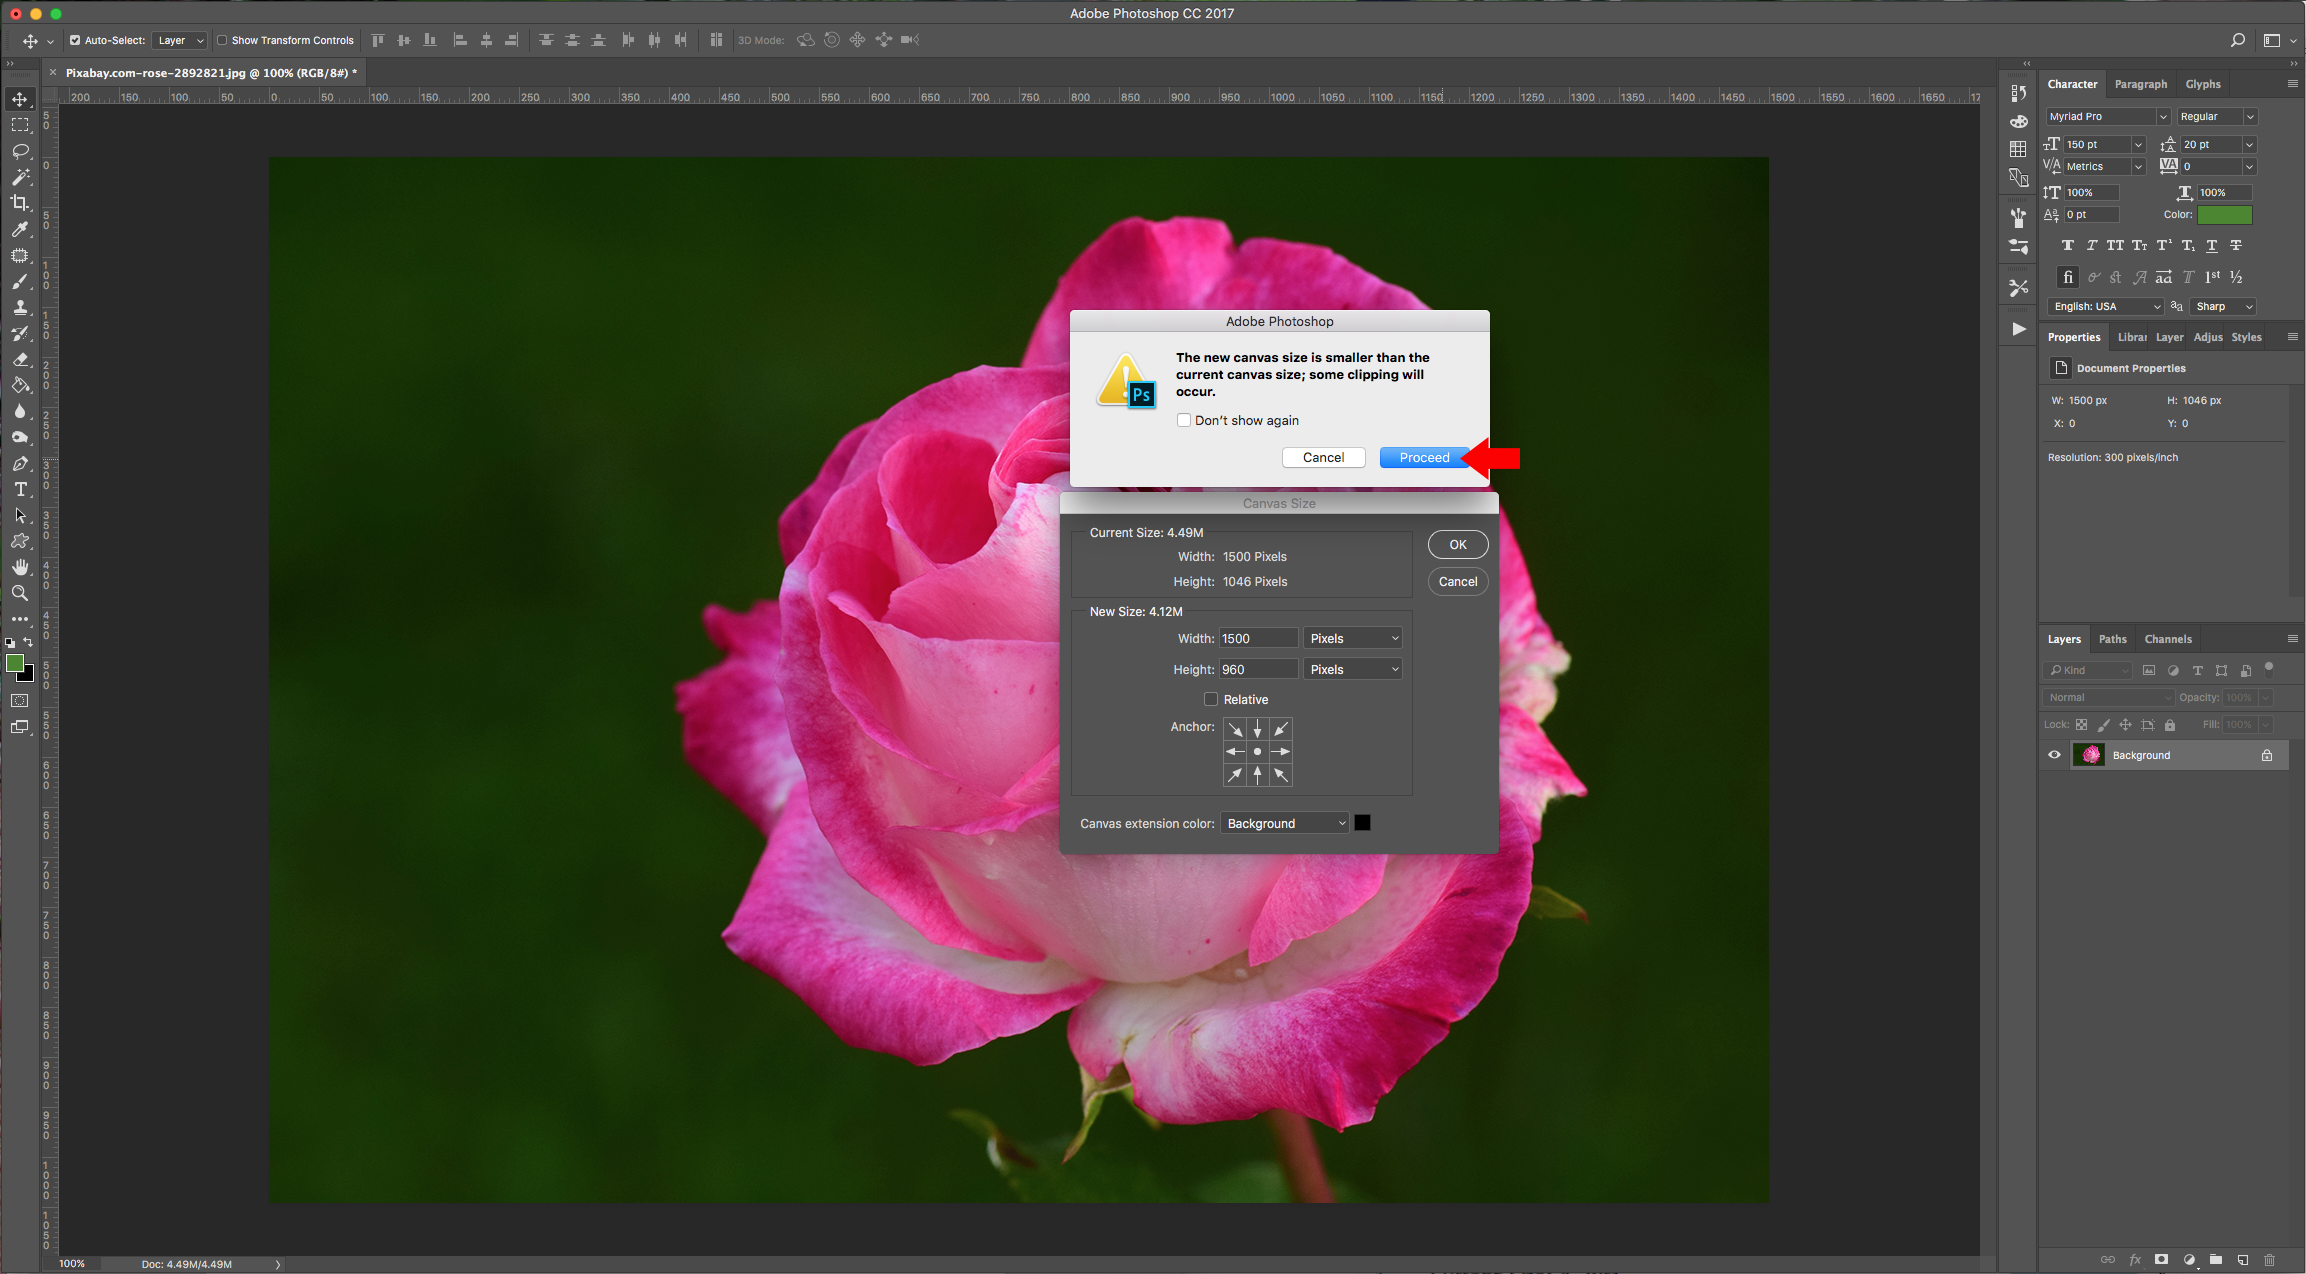
2 - Then go to Image > Canvas Size (Alt + Command/Control + C) and input a value of 960 pixels for the “With” (You may need to choose another value in case your image is not as “squared” as the one used in this tutorial. You will be prompted about clipping, click “Proceed”.
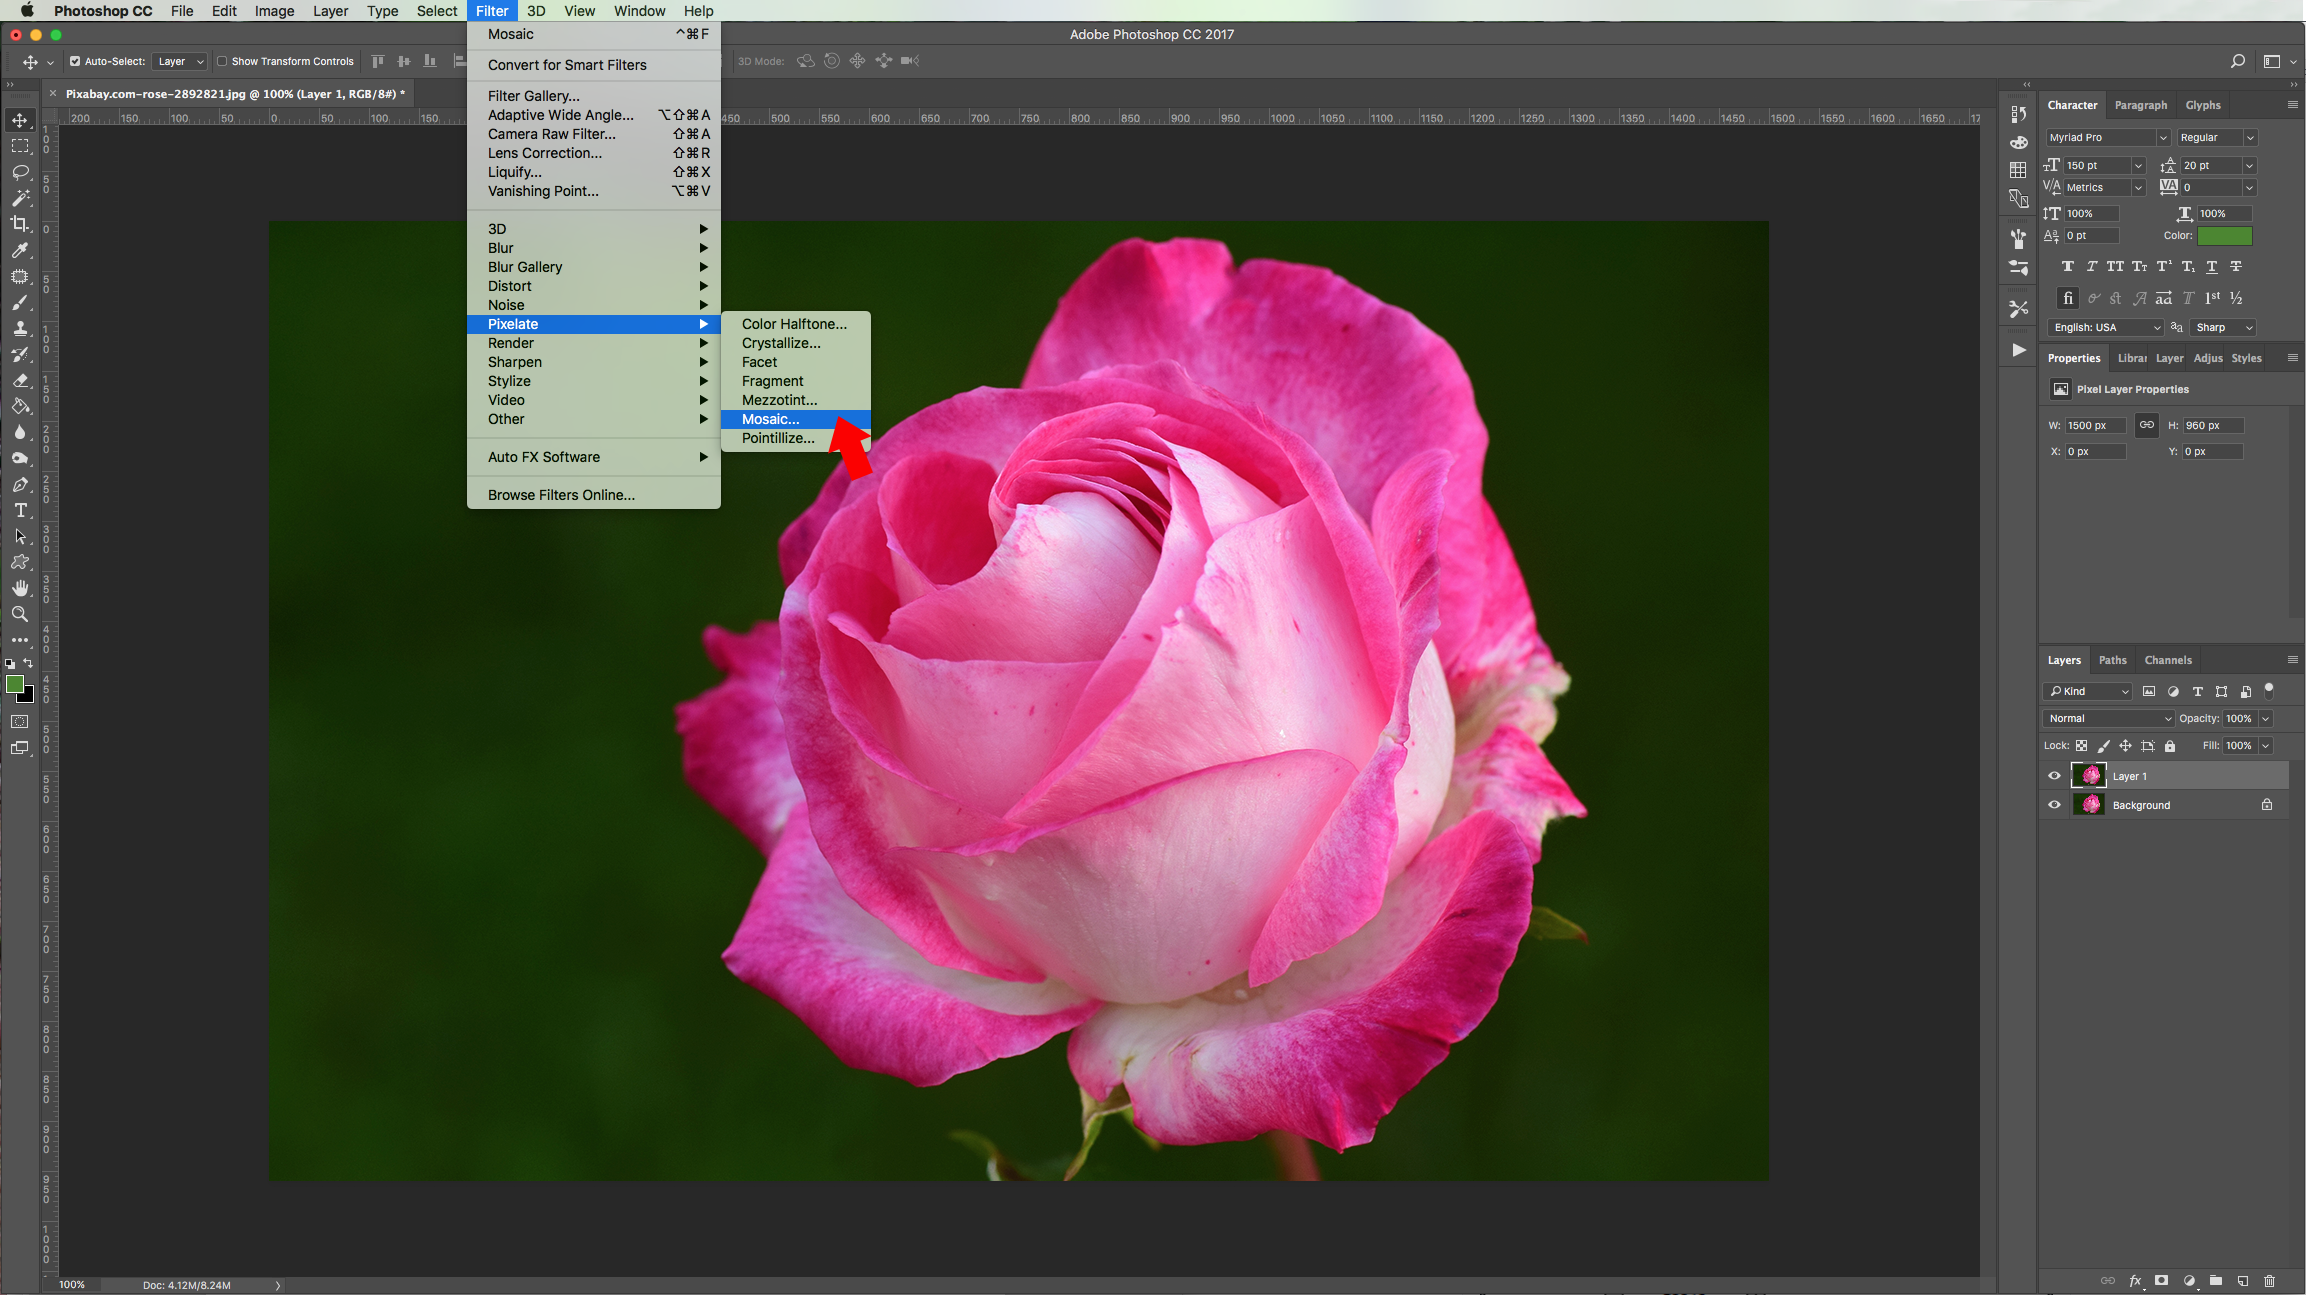
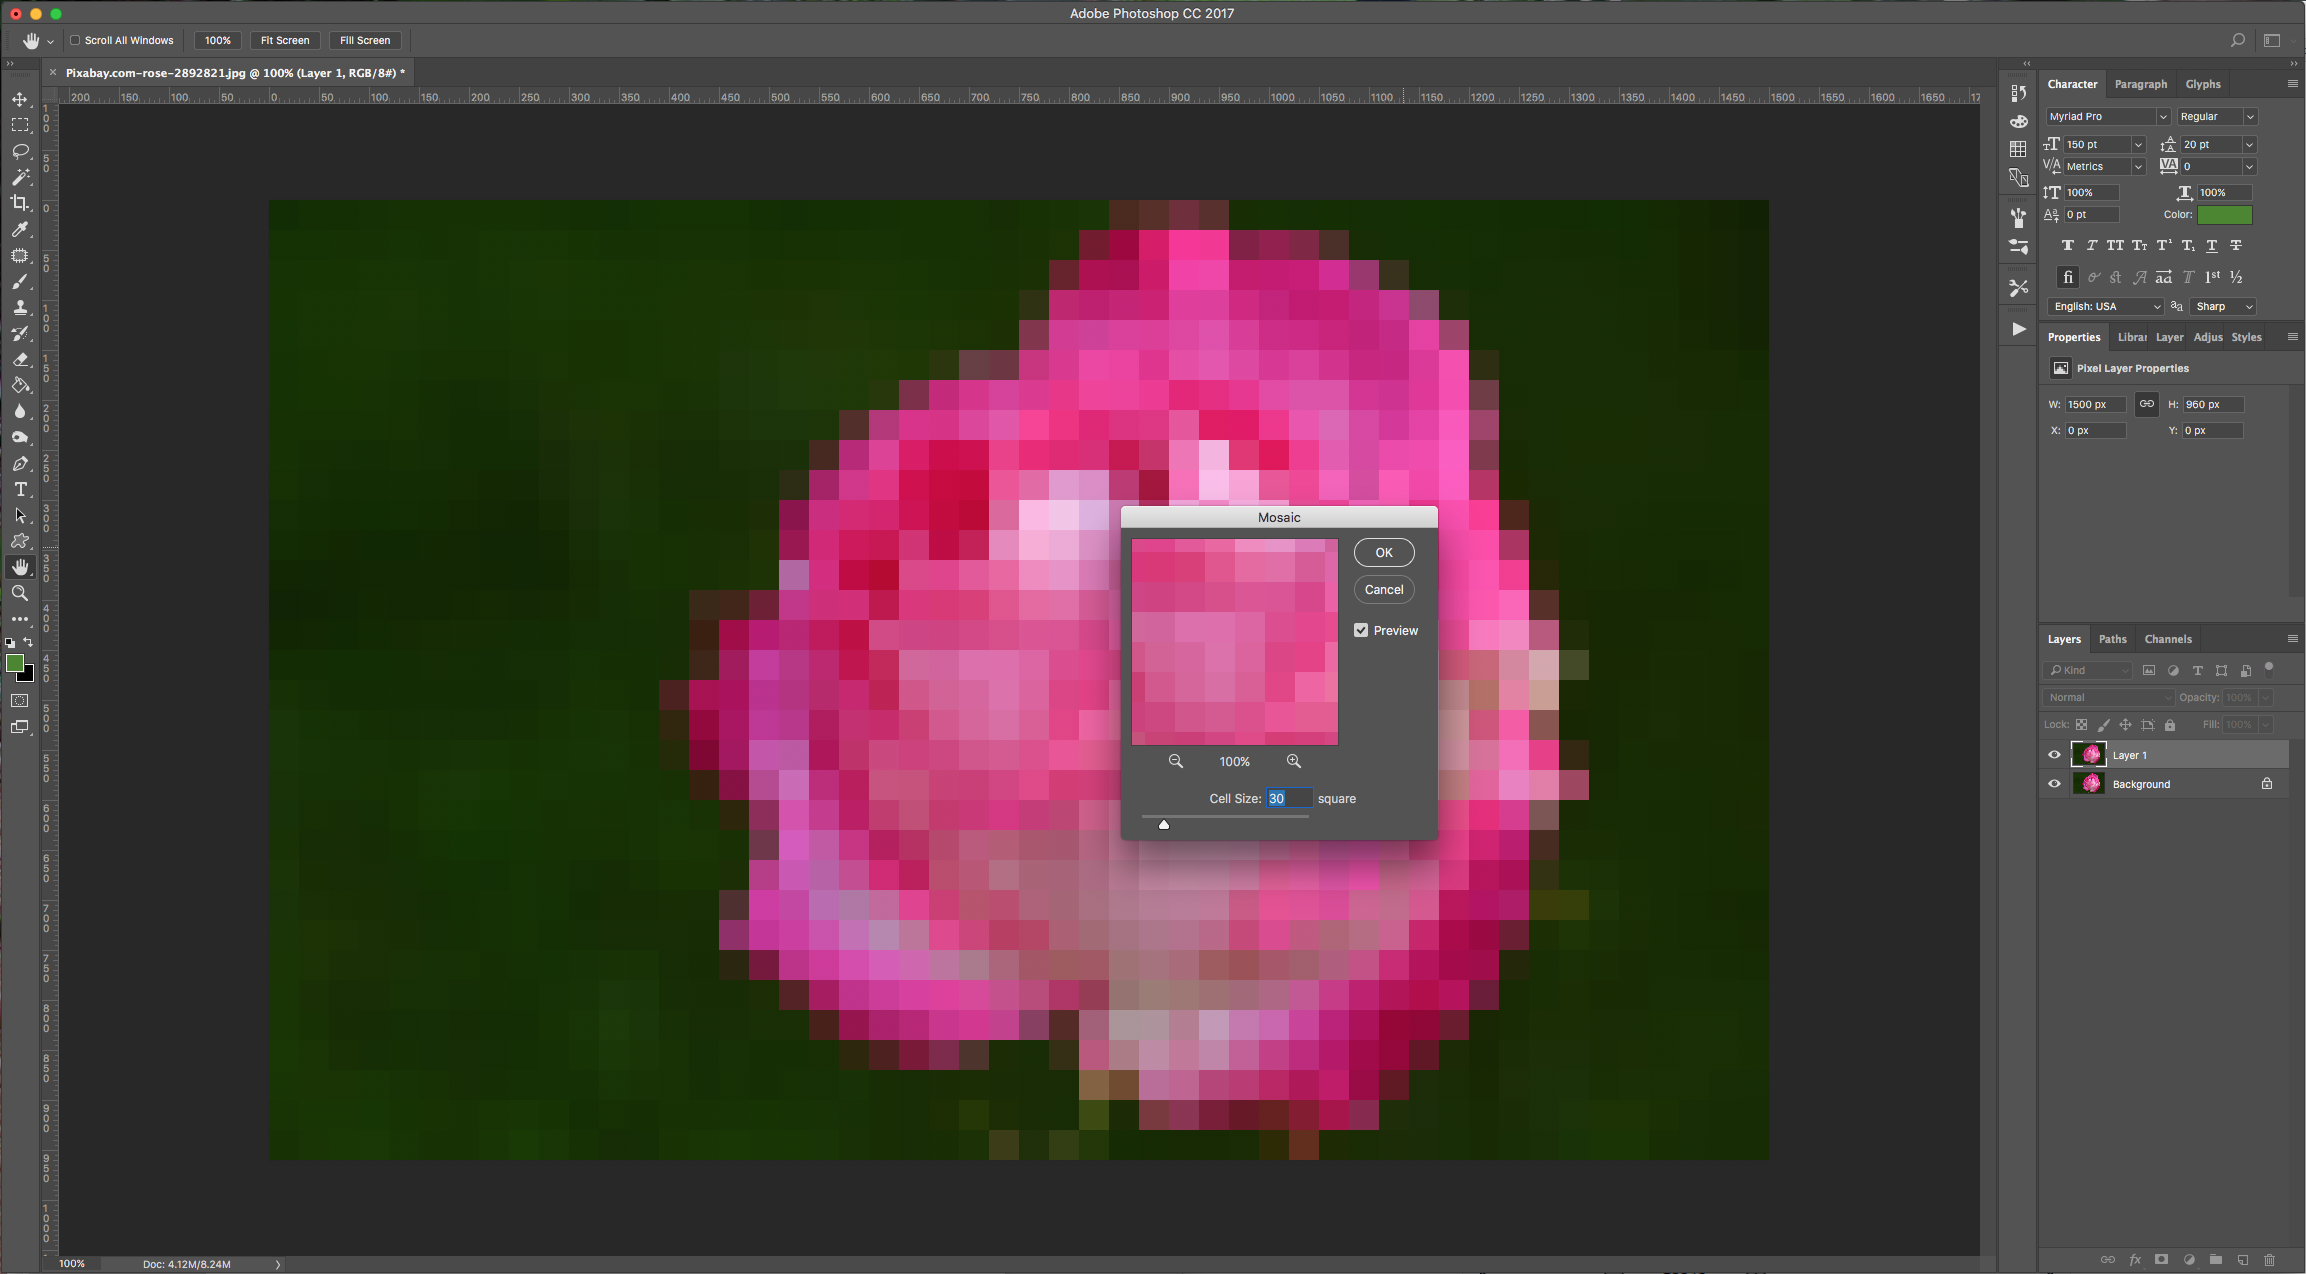
3 - Duplicate your layer (Command/Control + J) and go to Filter > Pixelate > Mosaic and use a “Cell Size” of 30 Square.
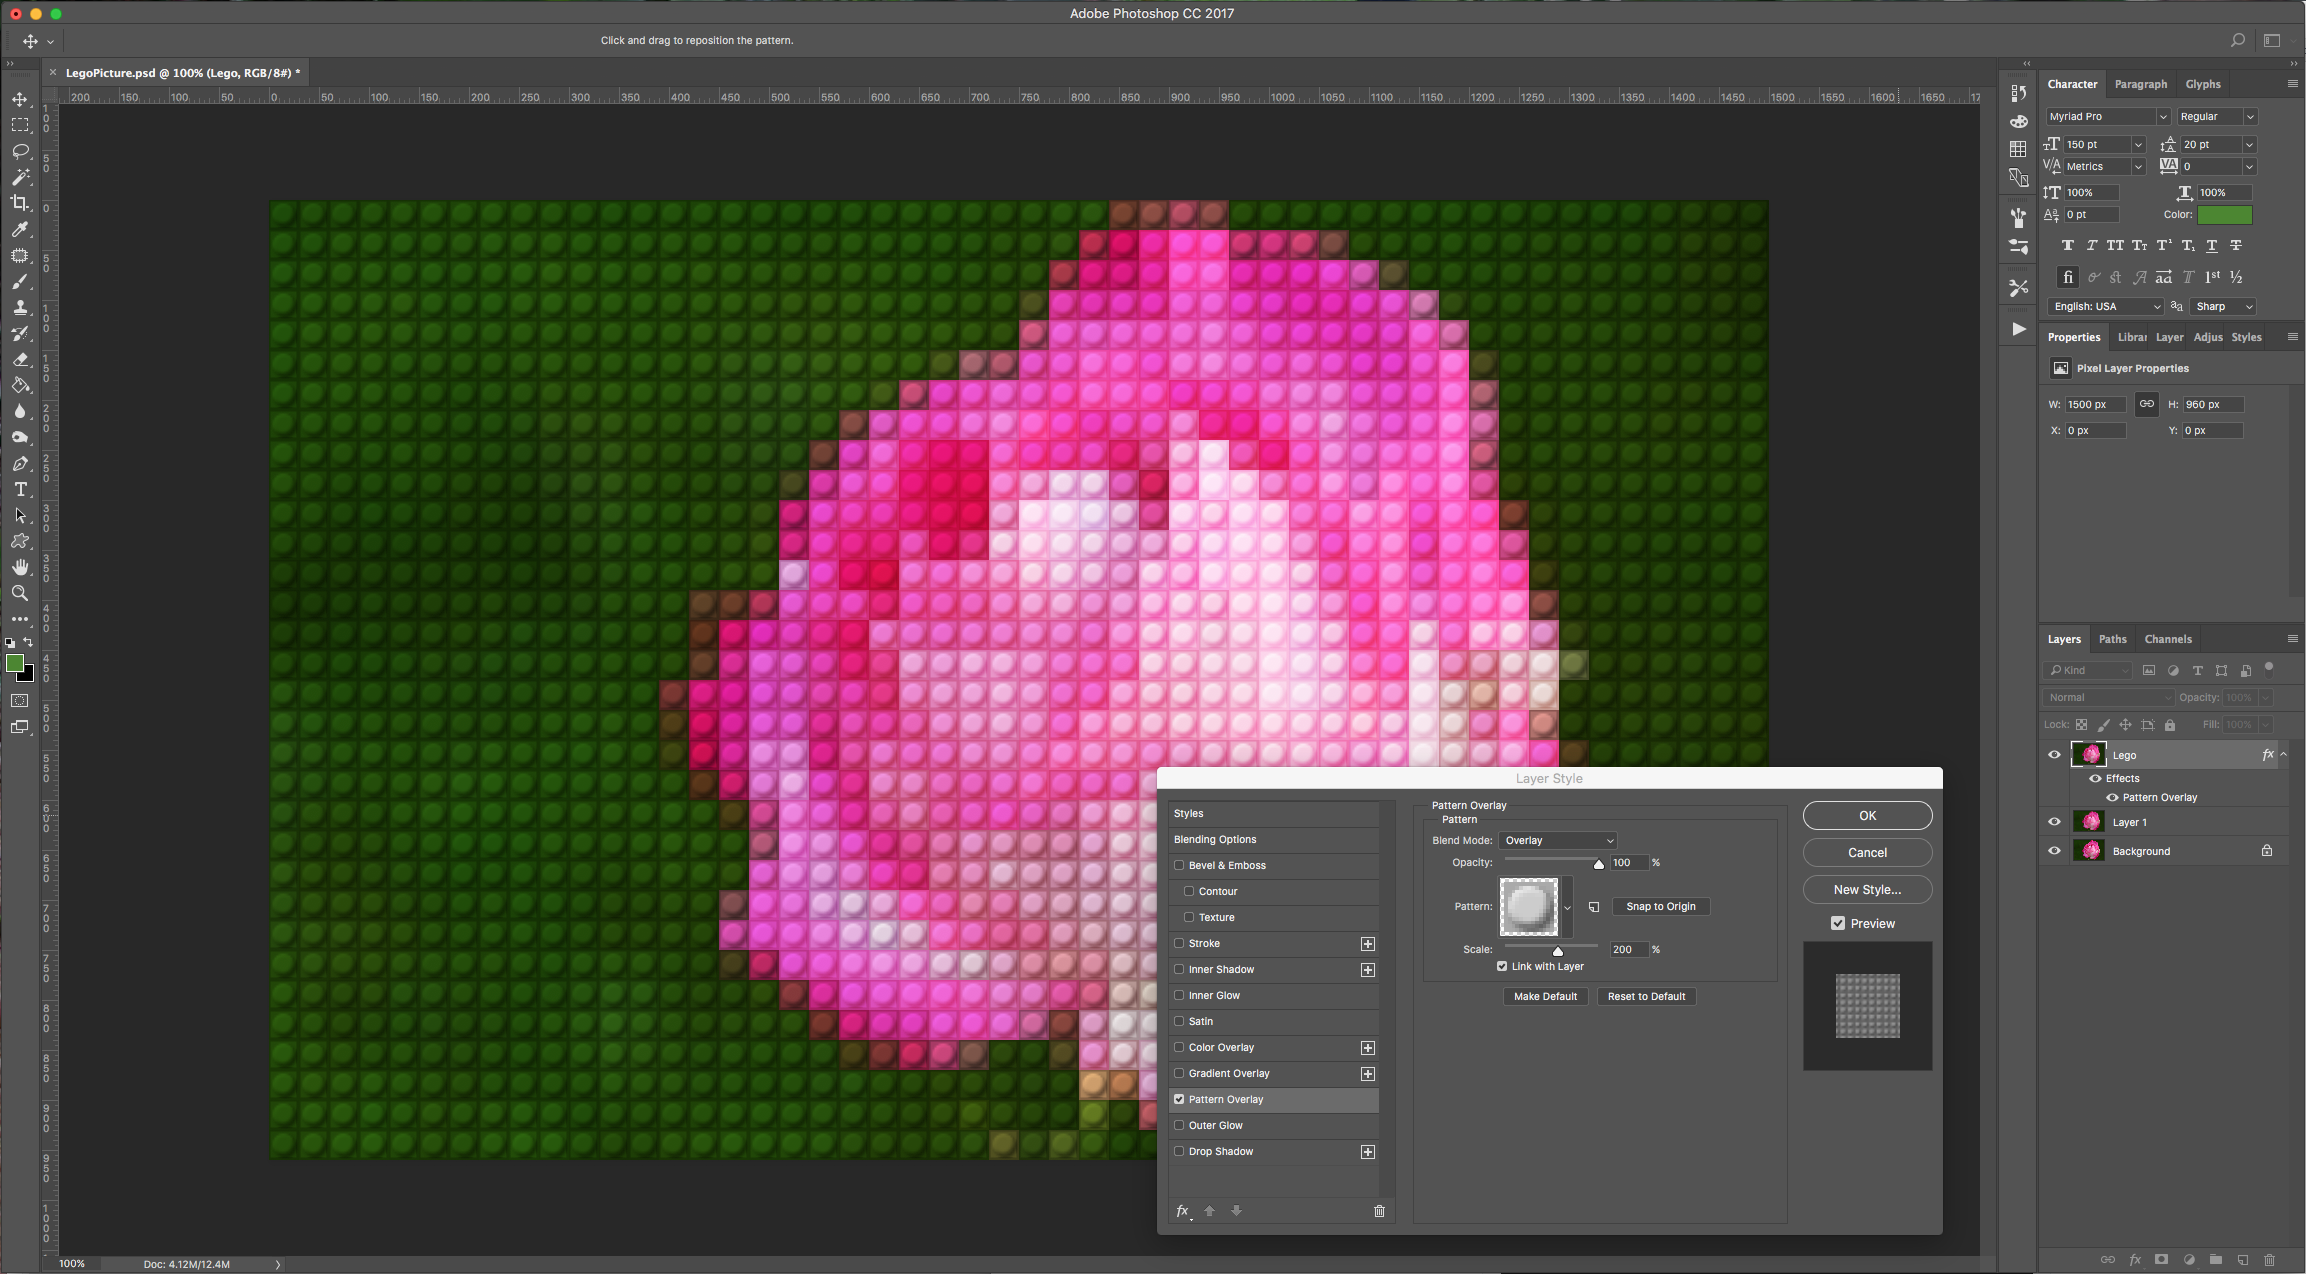
4 - Duplicate your layer (Command/Control + J), name it “Lego” double-click on it to apply the following “Layer Styles”
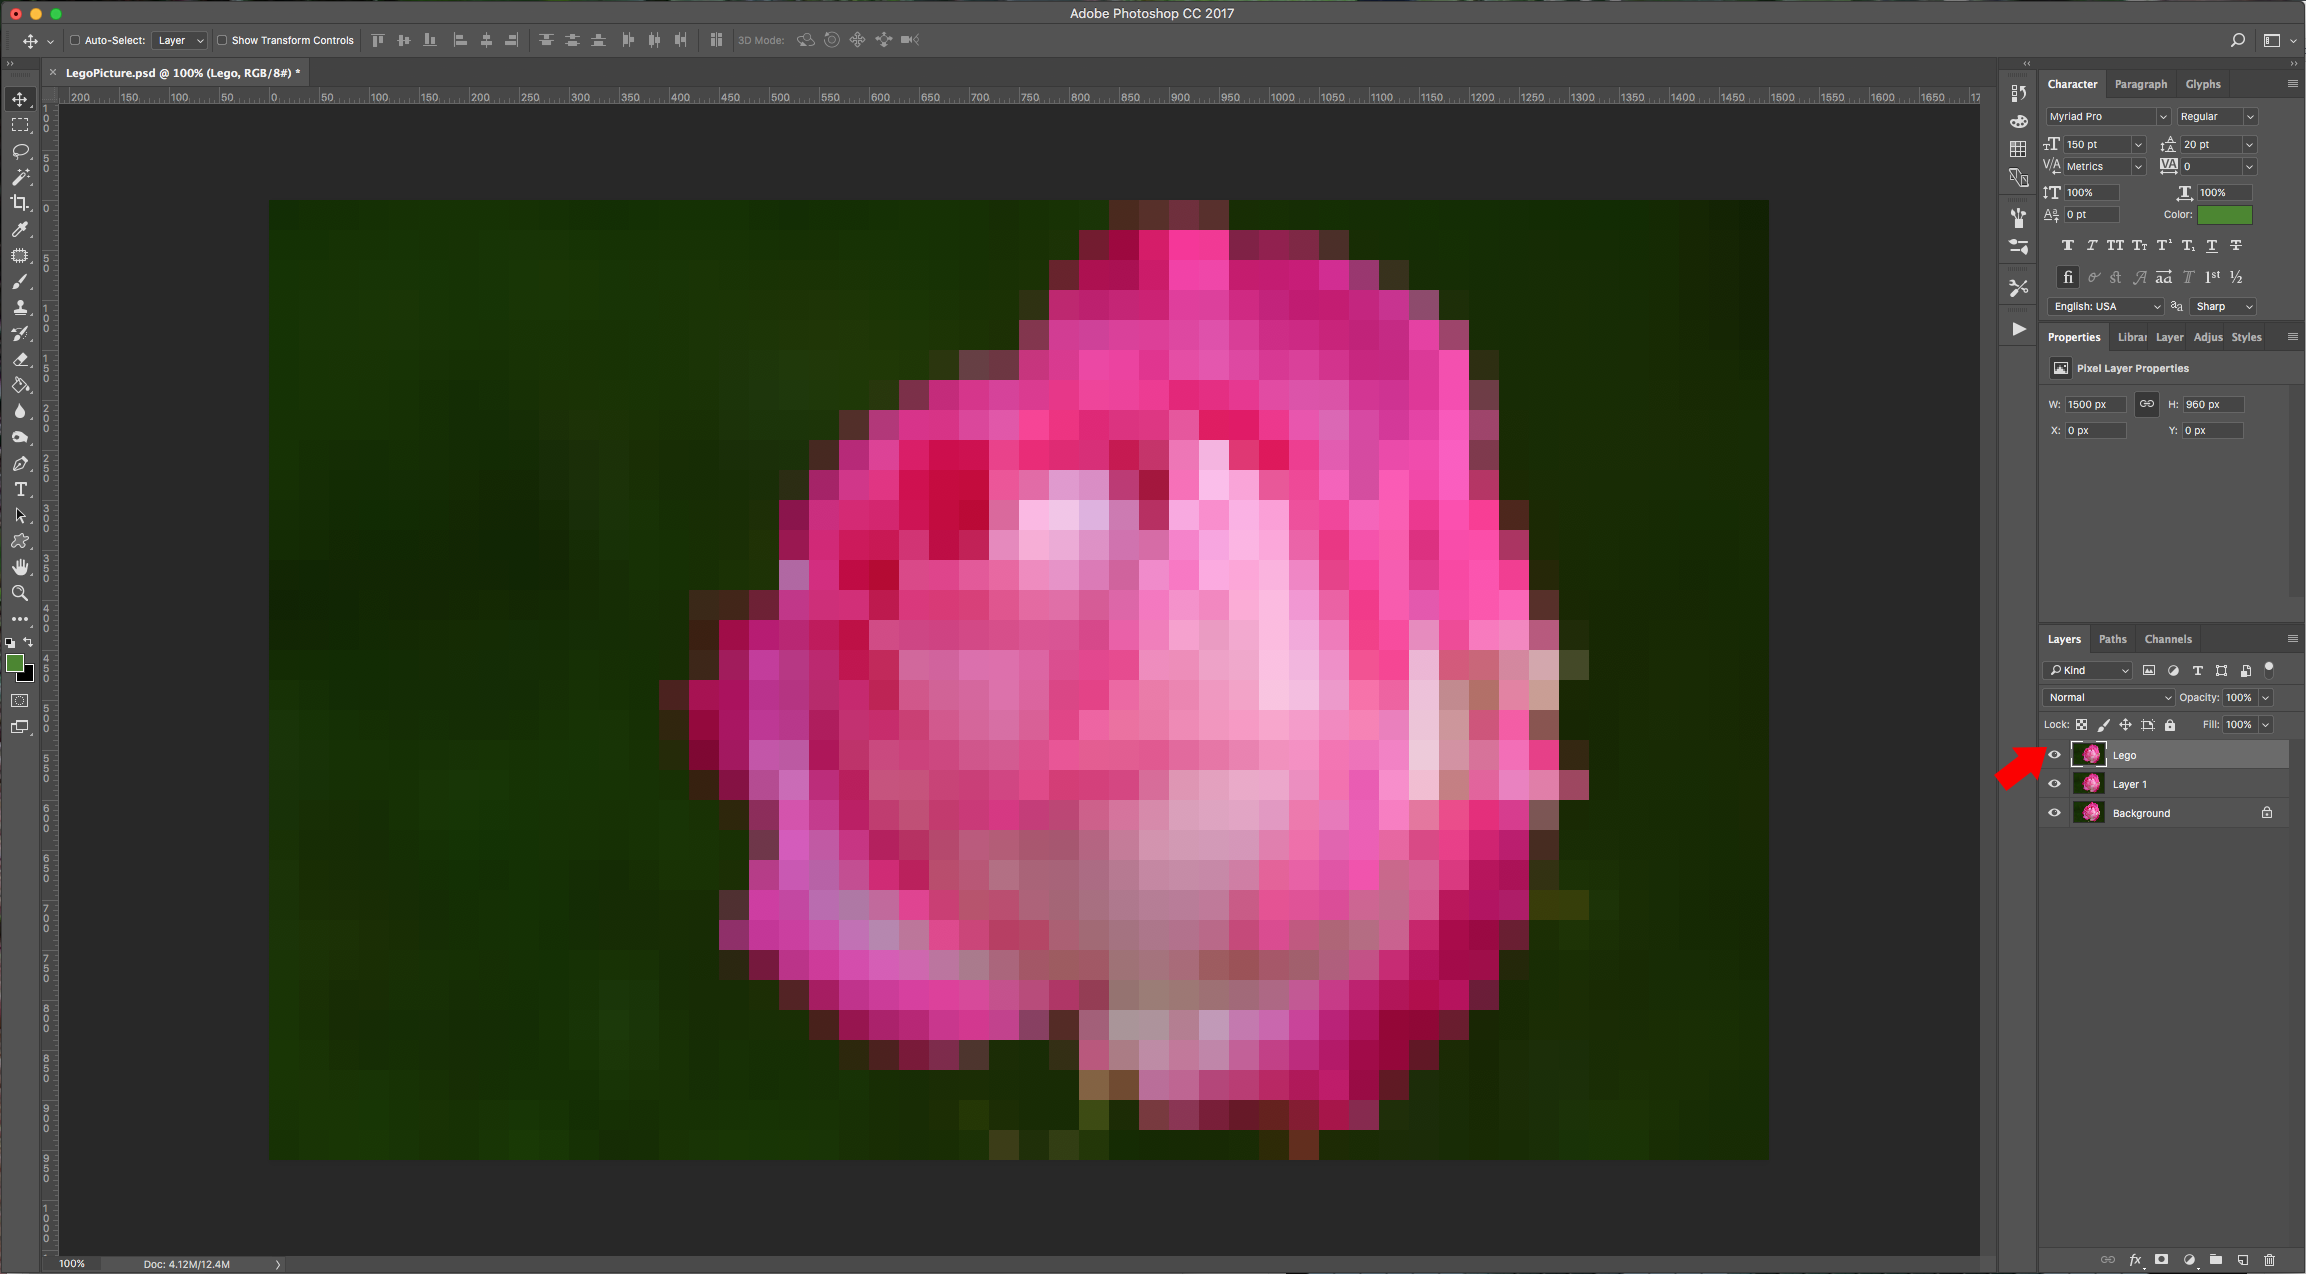
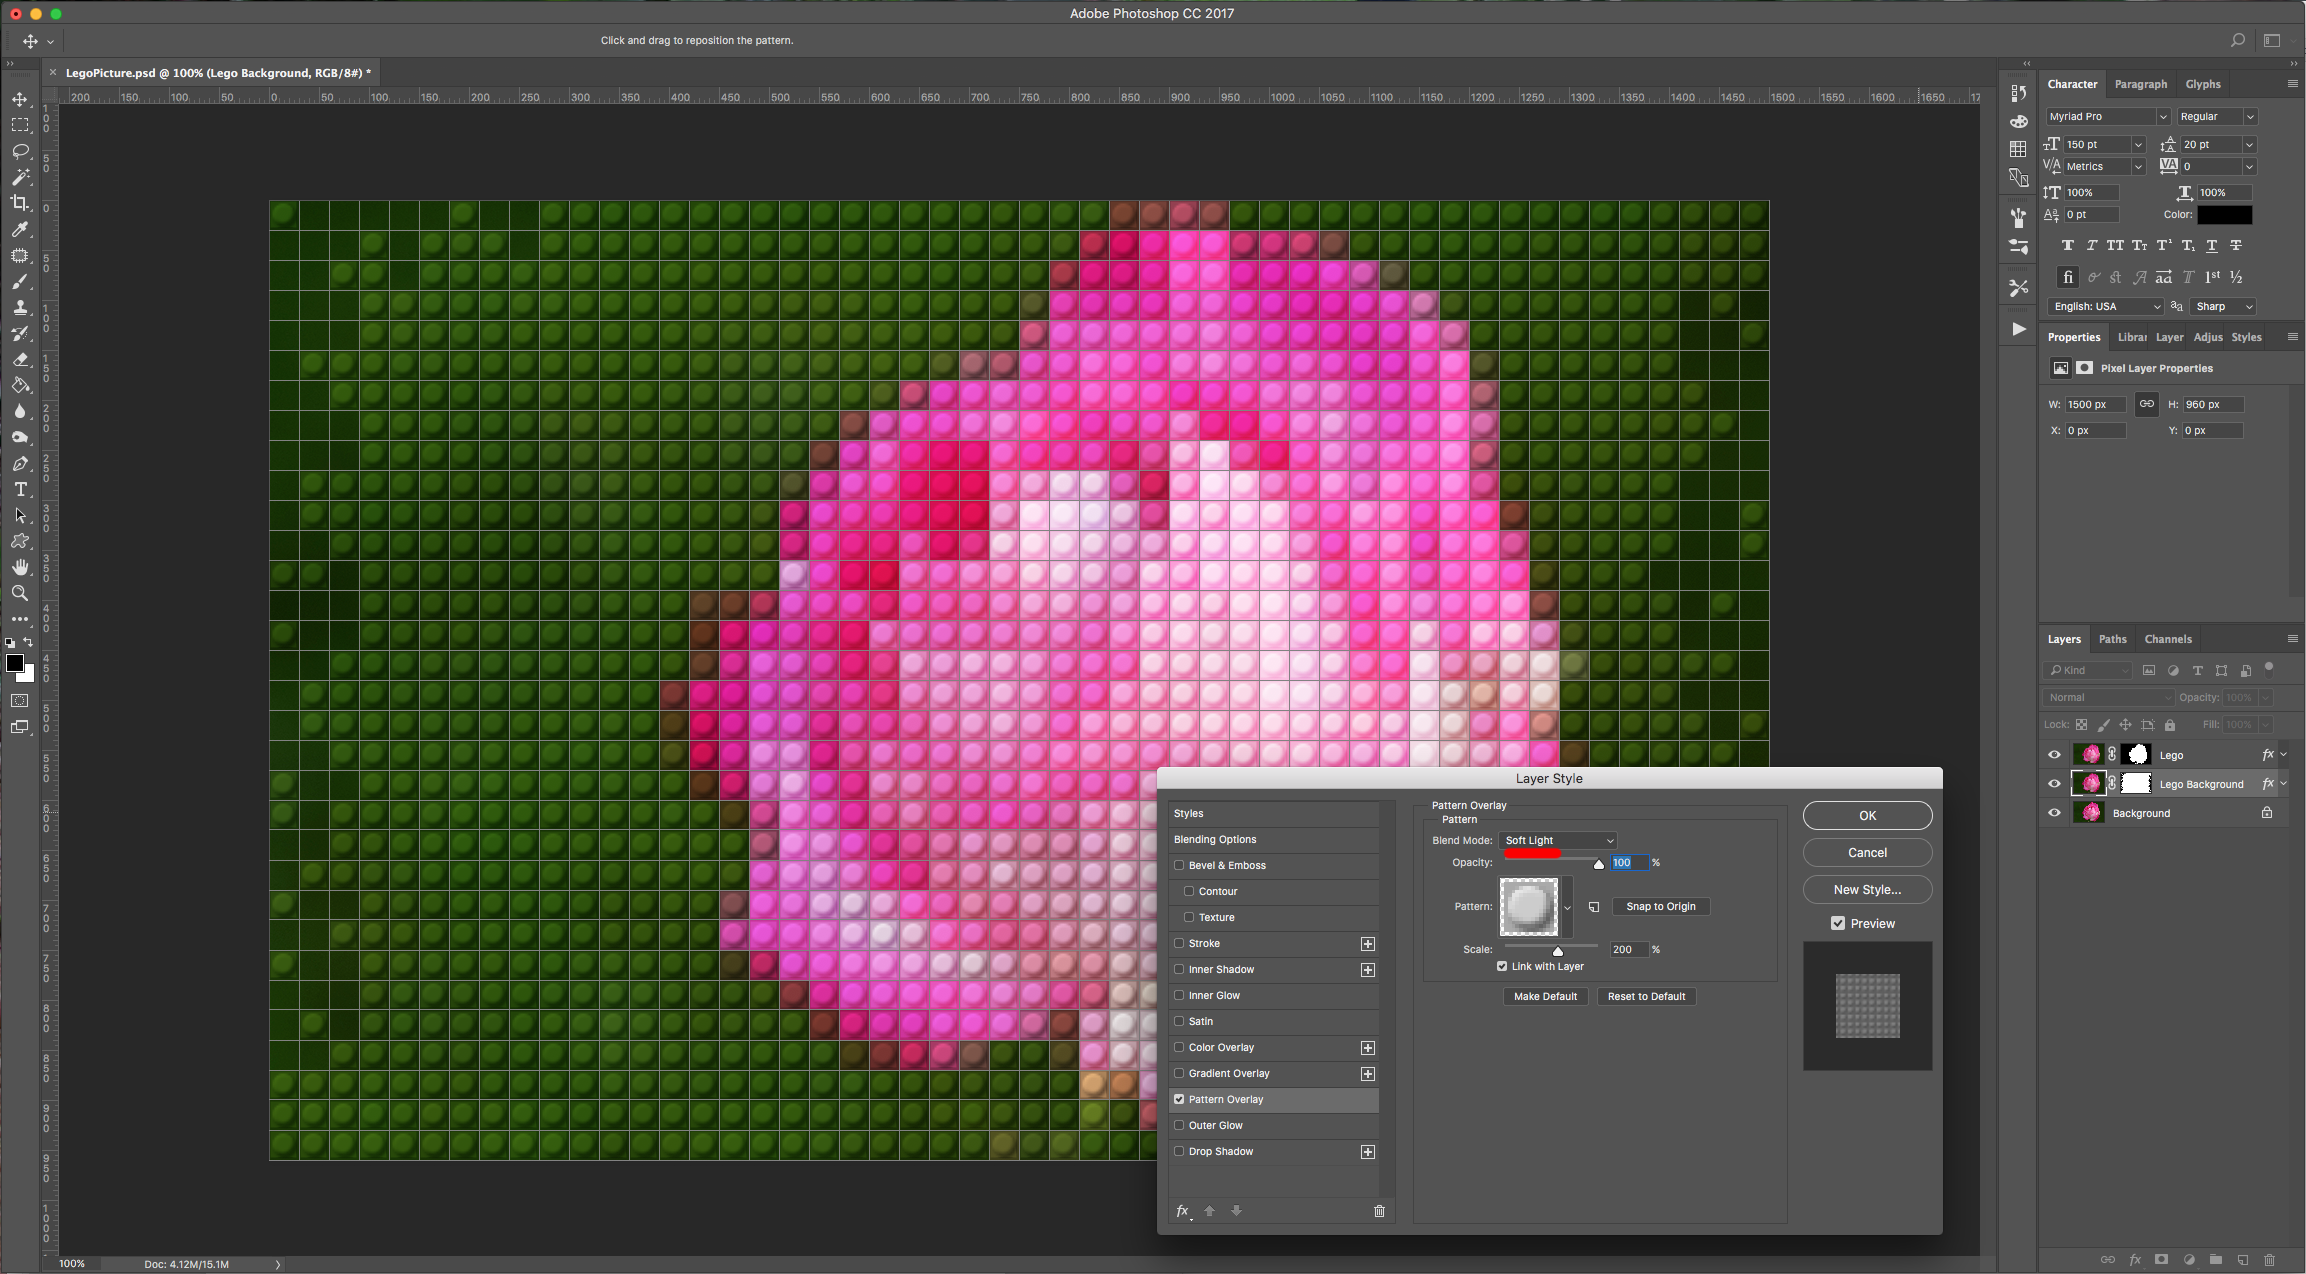
Pattern Overlay:
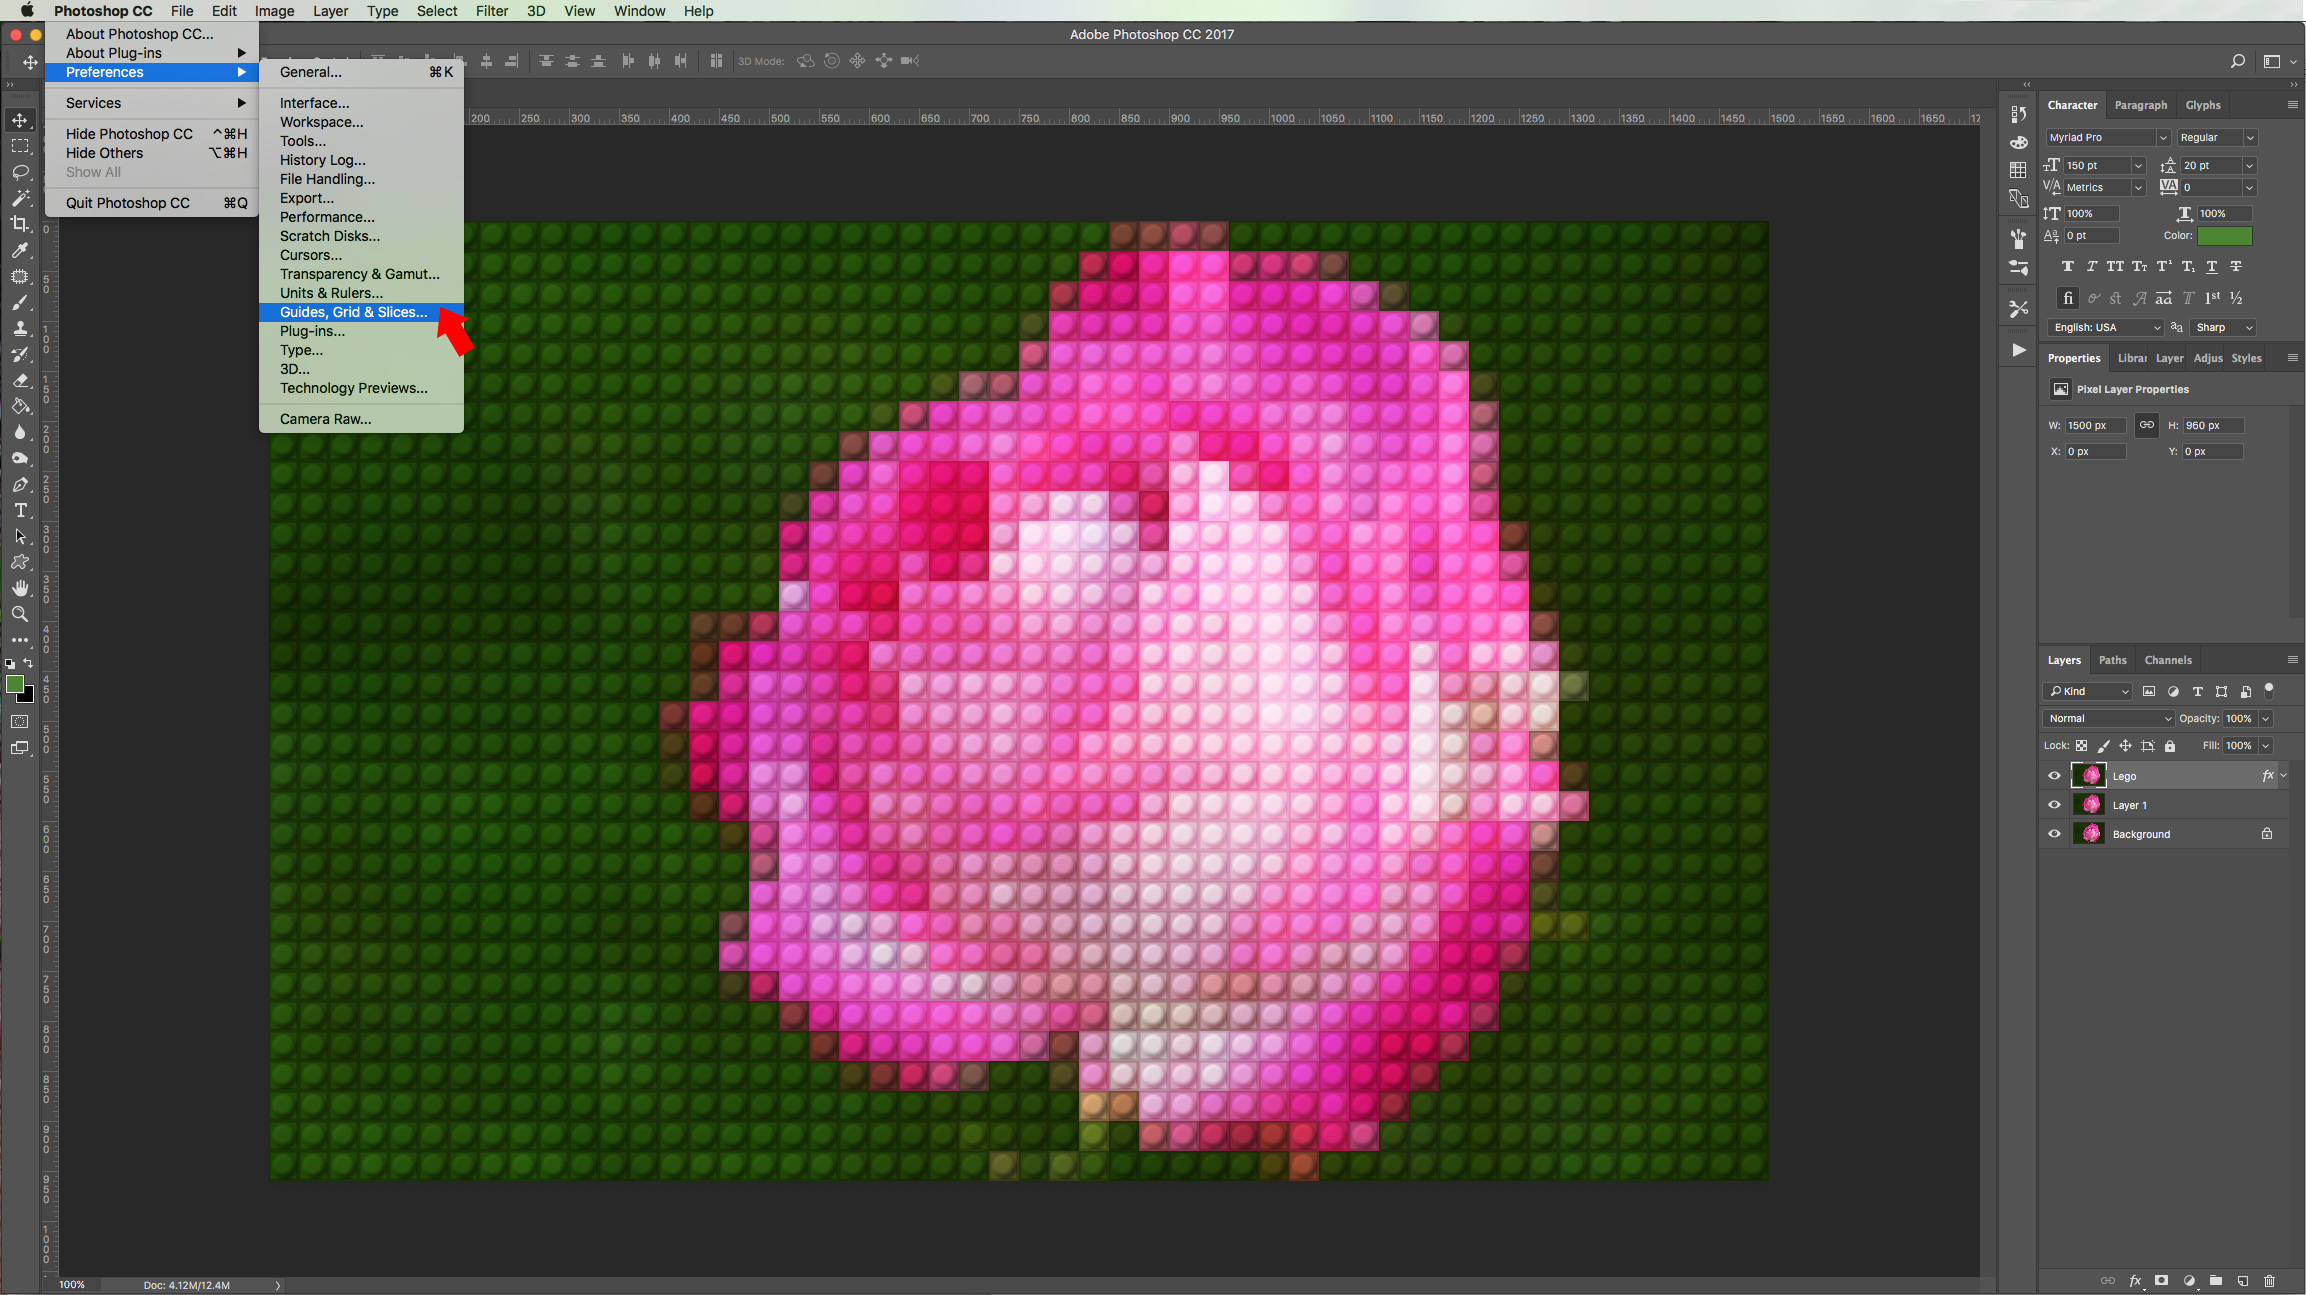
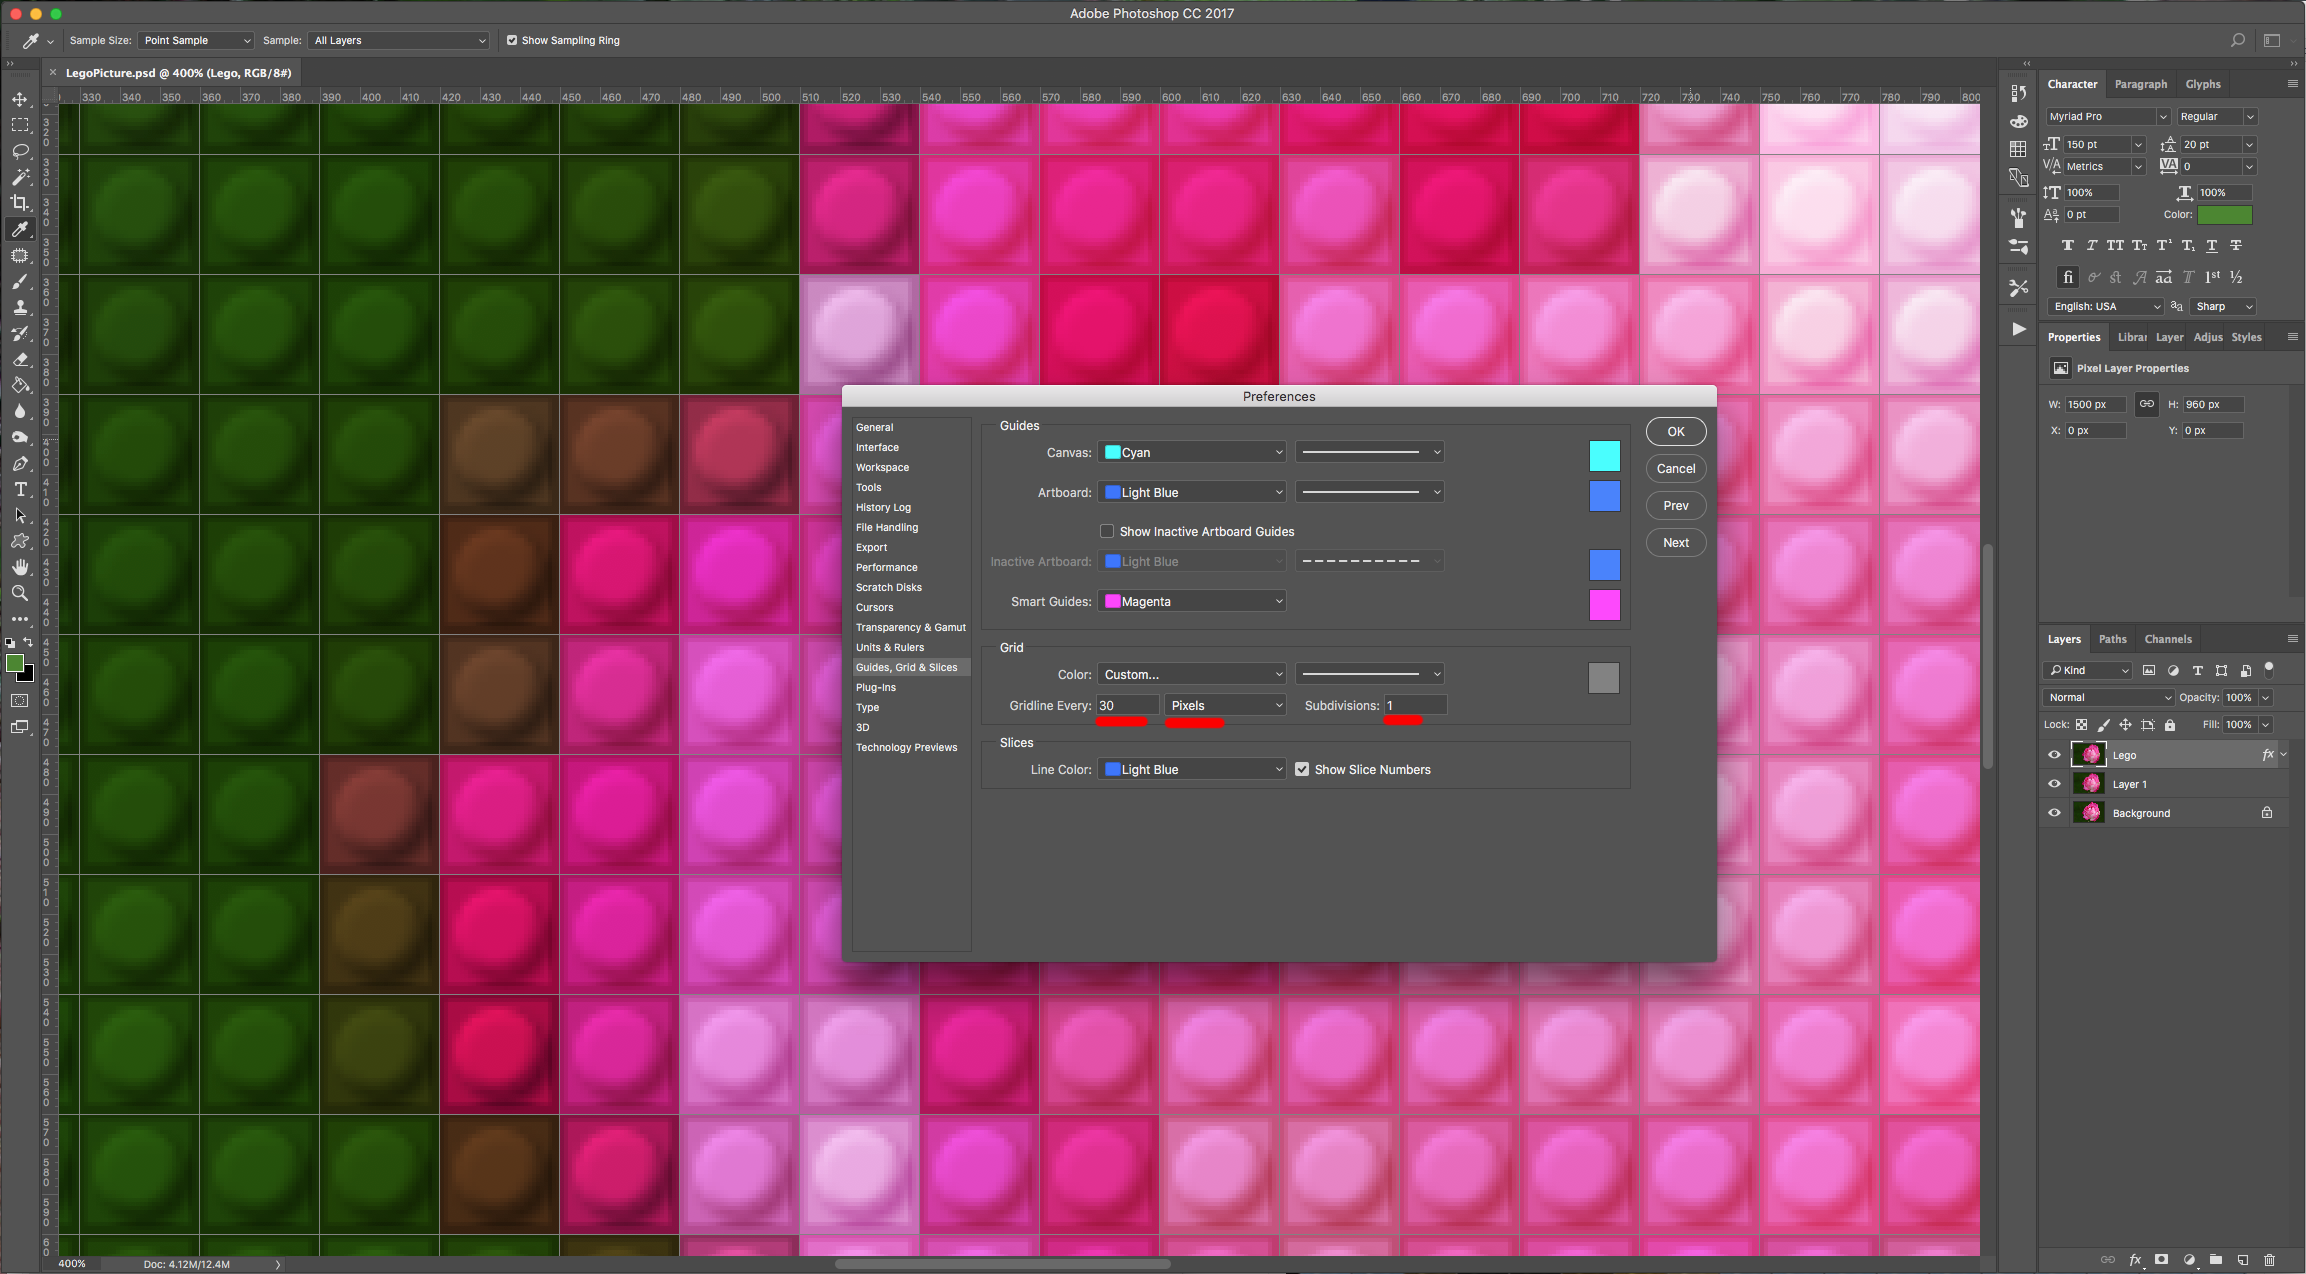
5 - Go to Photoshop CC > Preferences > Guides, Grids & Slices and in the “Grid” section change the value in “Gridline every” to 30 pixels and in “Subdivisions” use a value of 1. Then go to View > Show > Grid (Command/Control + ‘).
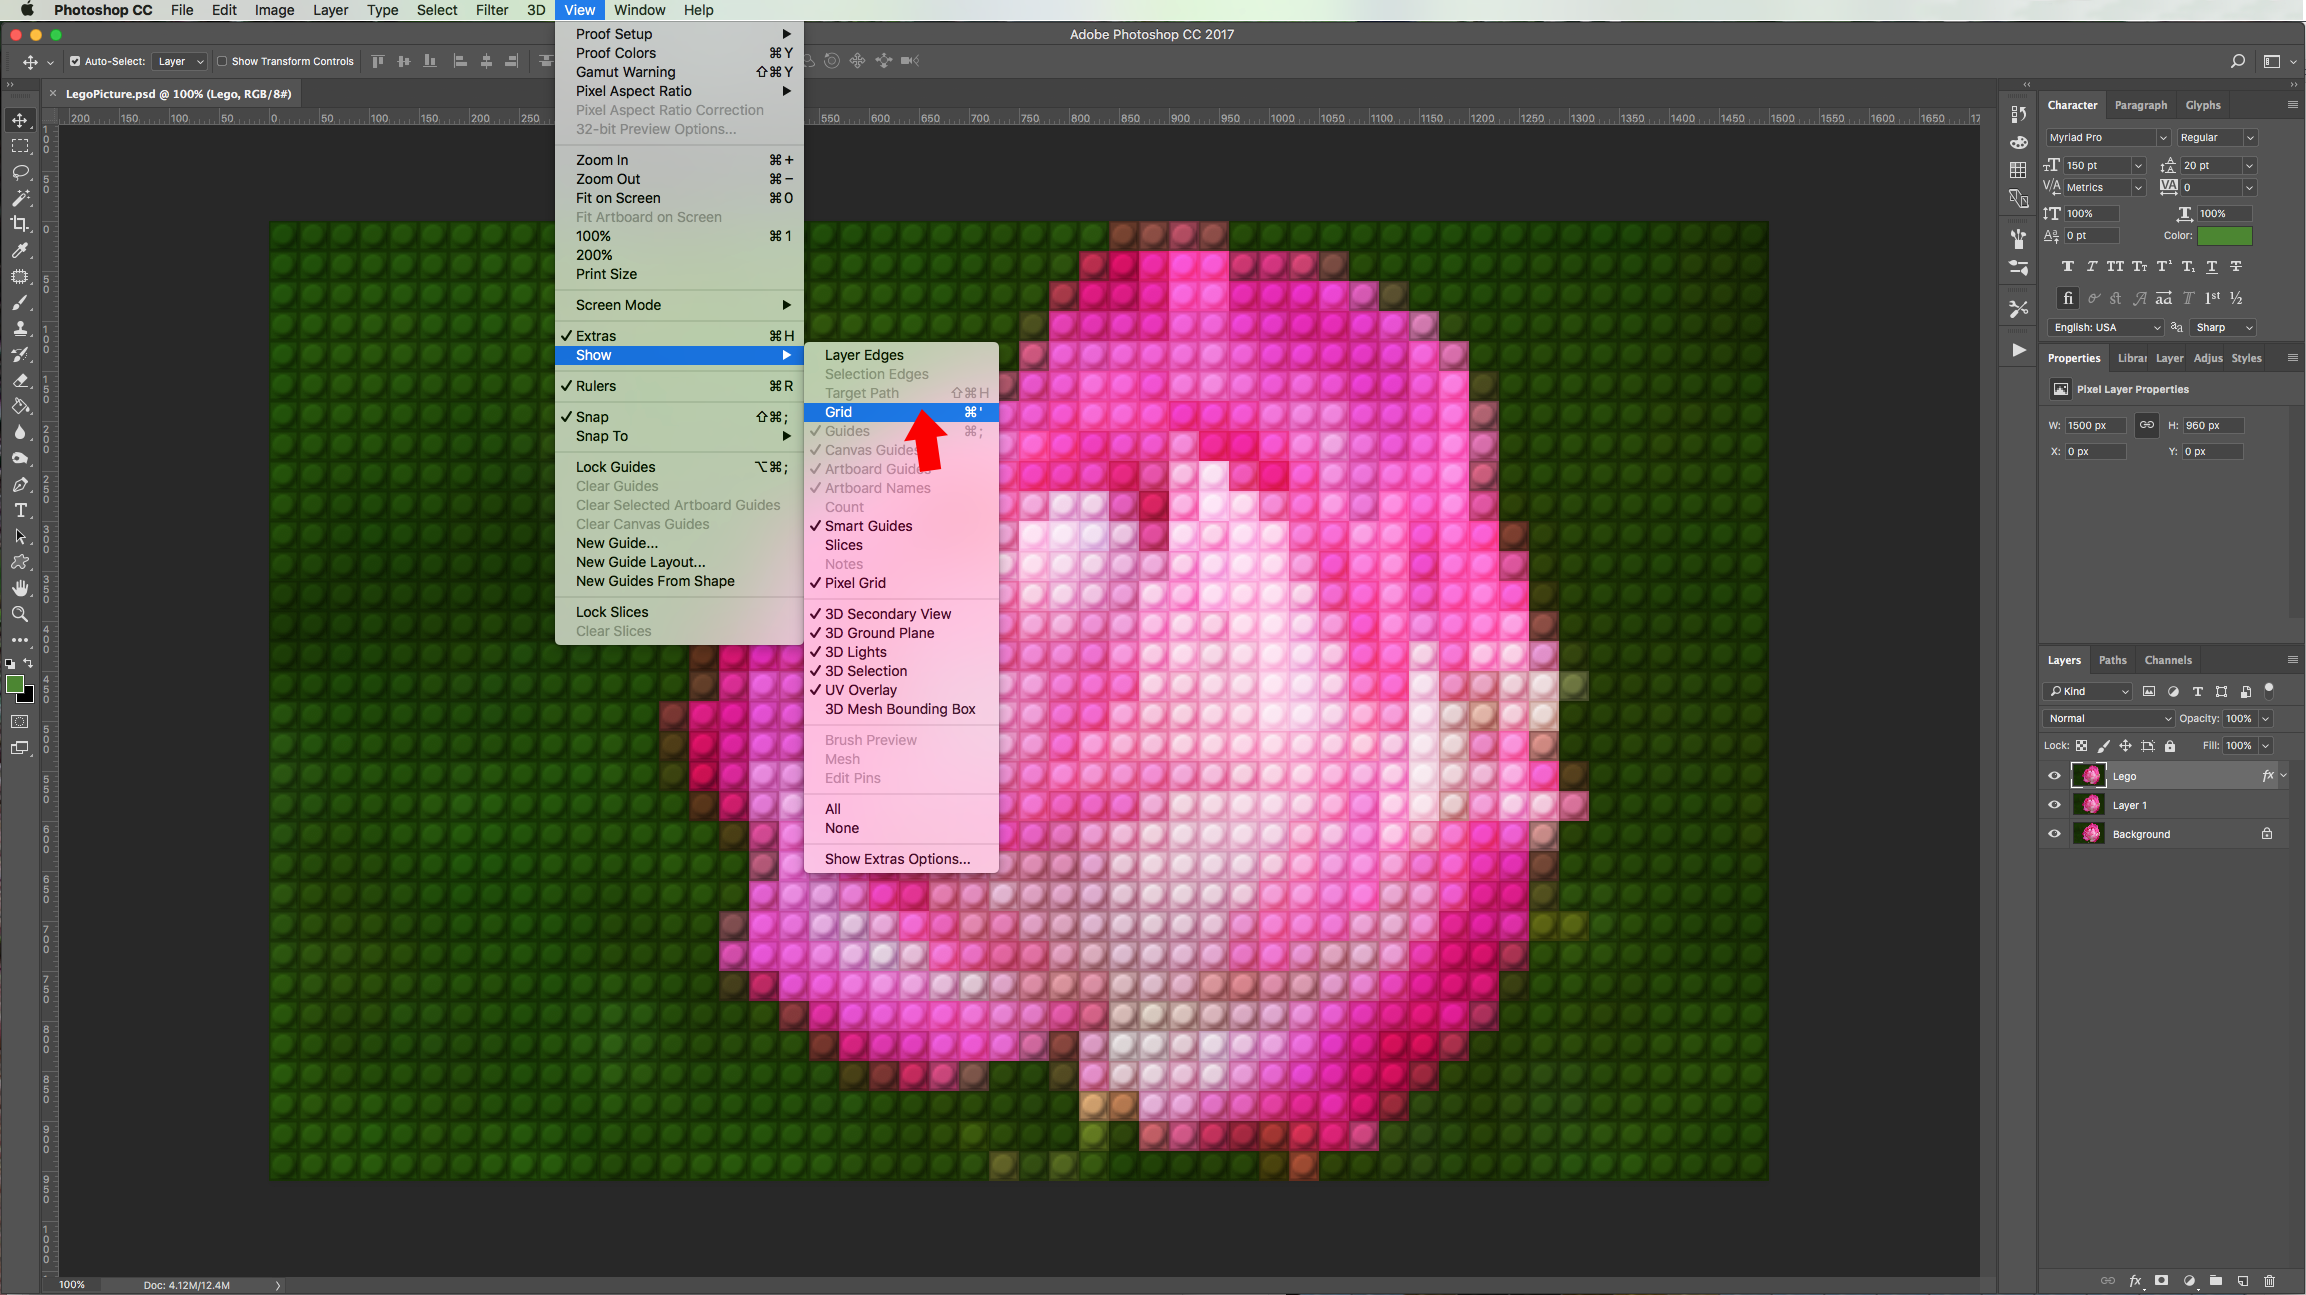
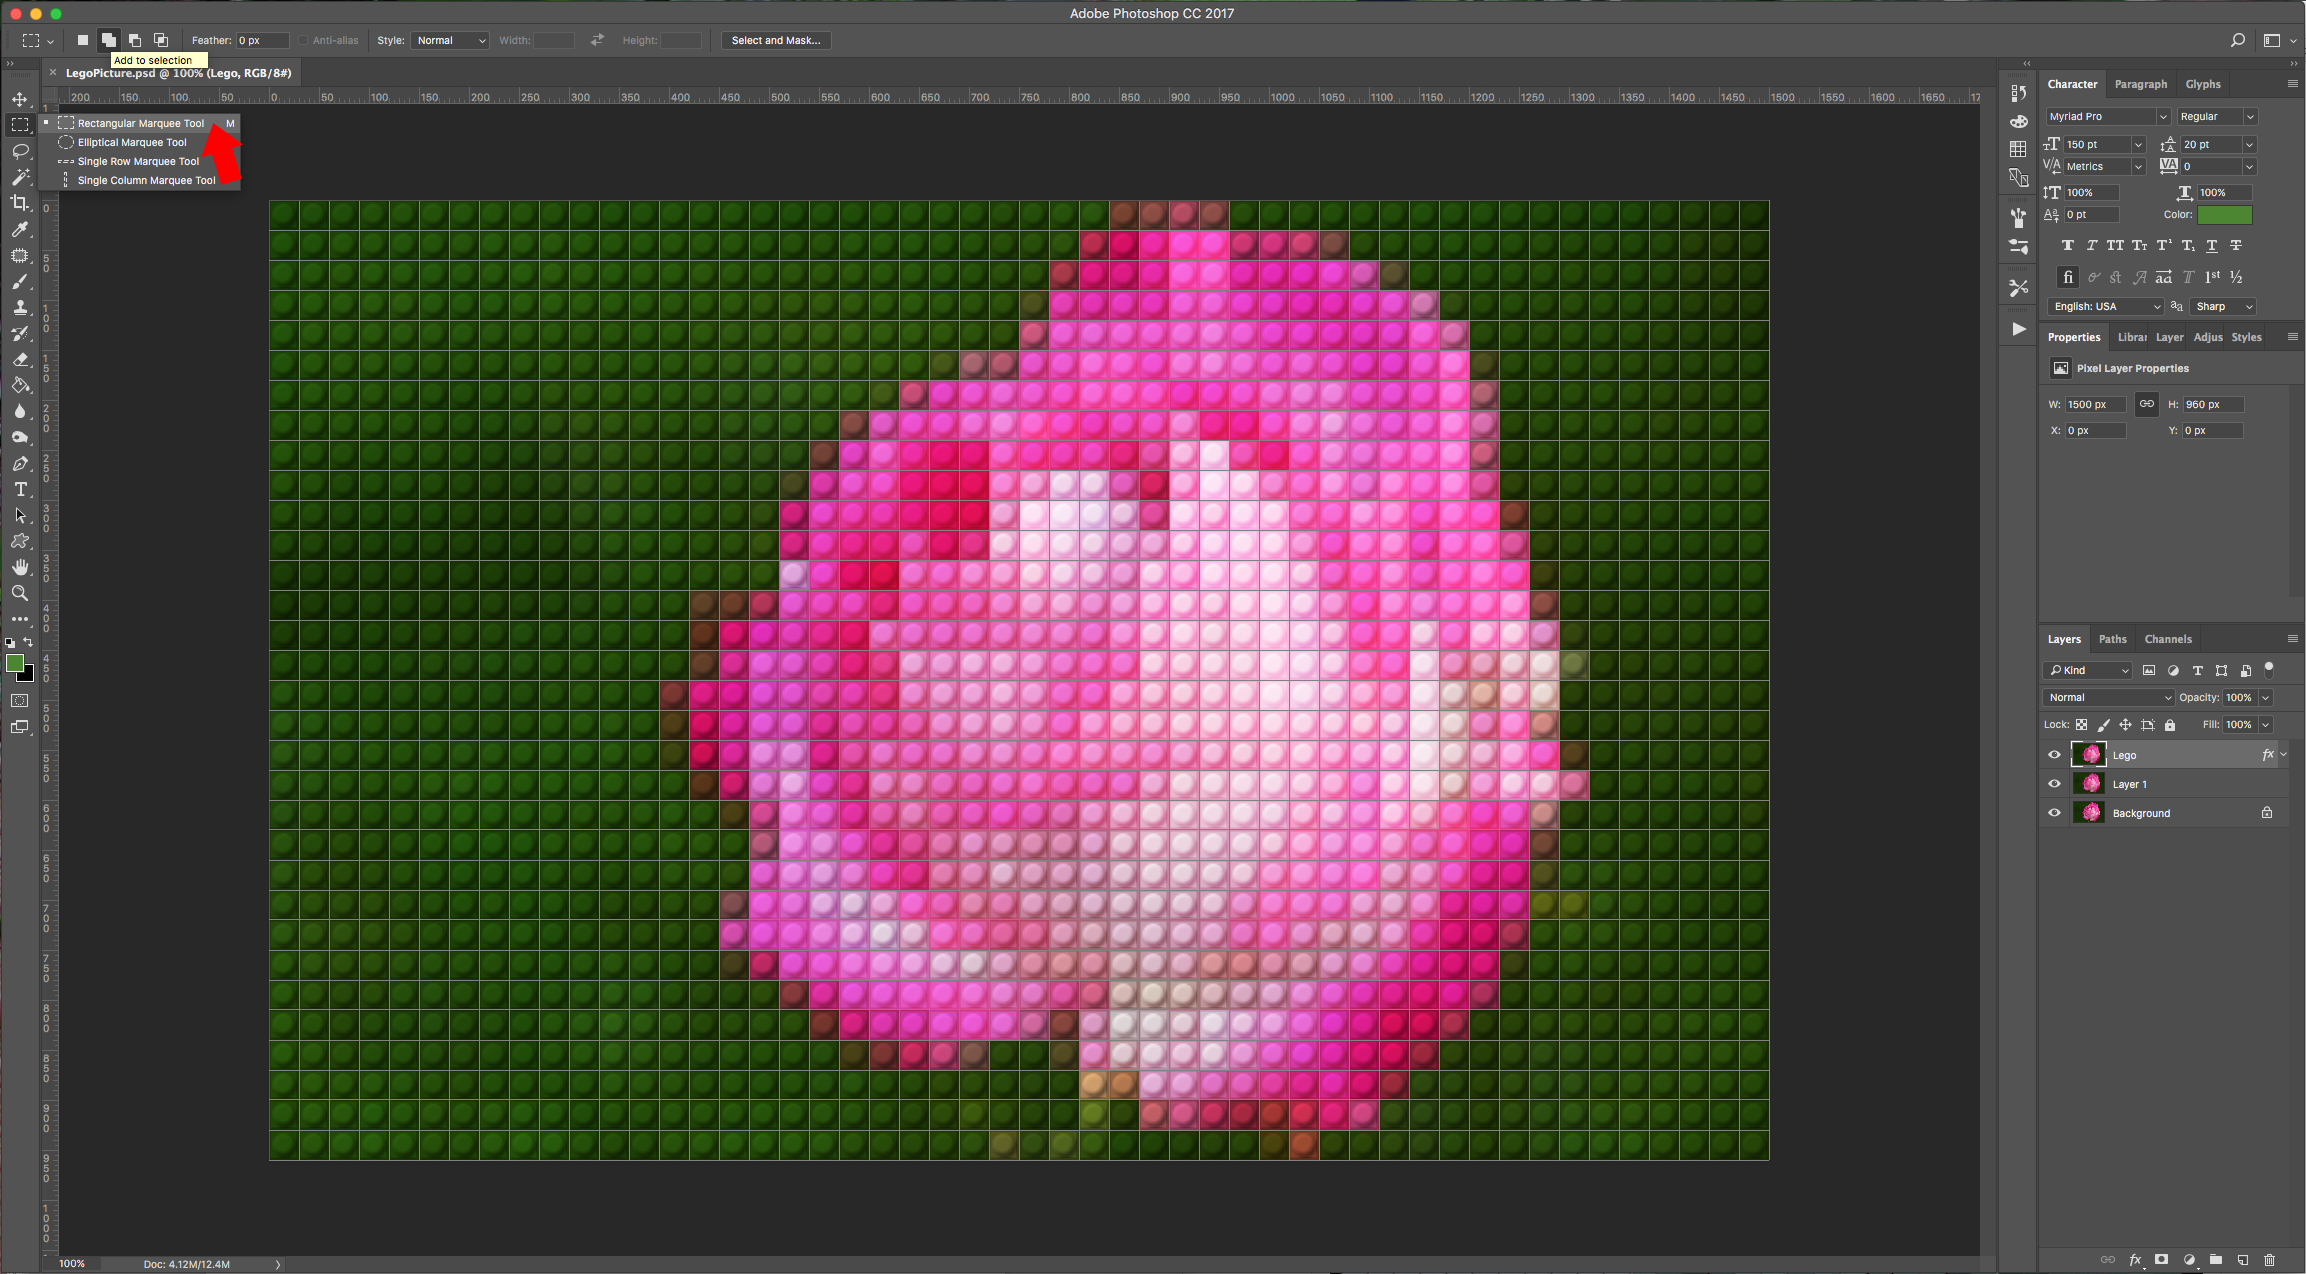
6 - Select the “Rectangular Marquee Tool” (M) and use the “Add to Selection” option in the upper menu. Create a selection around the image. Use the grid as aid to perfectly outline the blocks. You can turn off the mosaic layers to check if you need to add more to your selection.
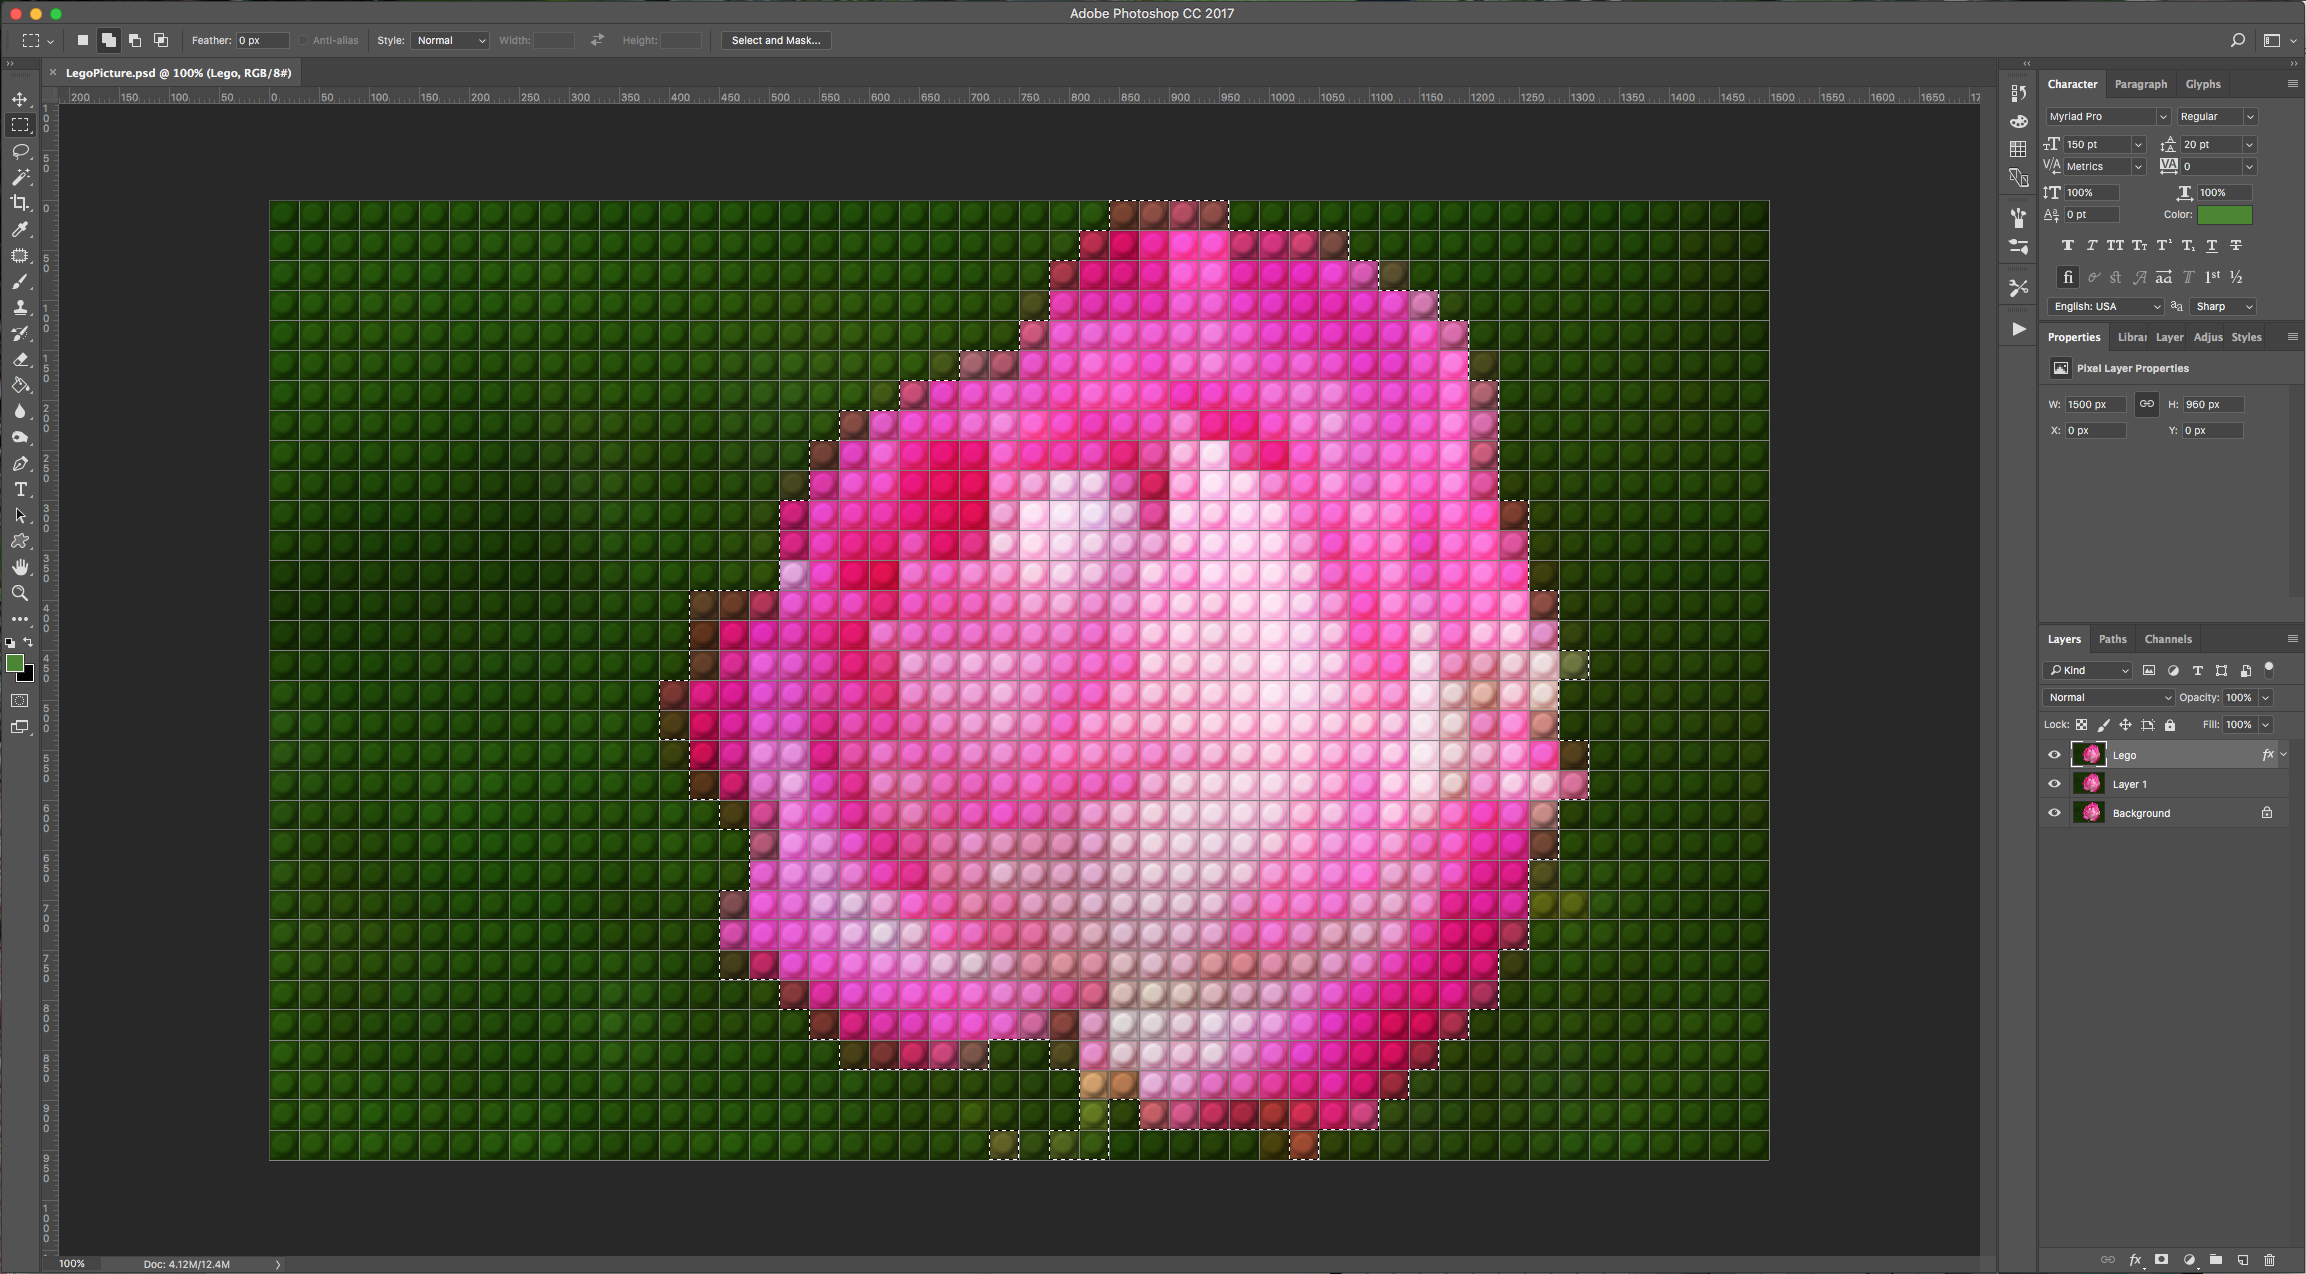
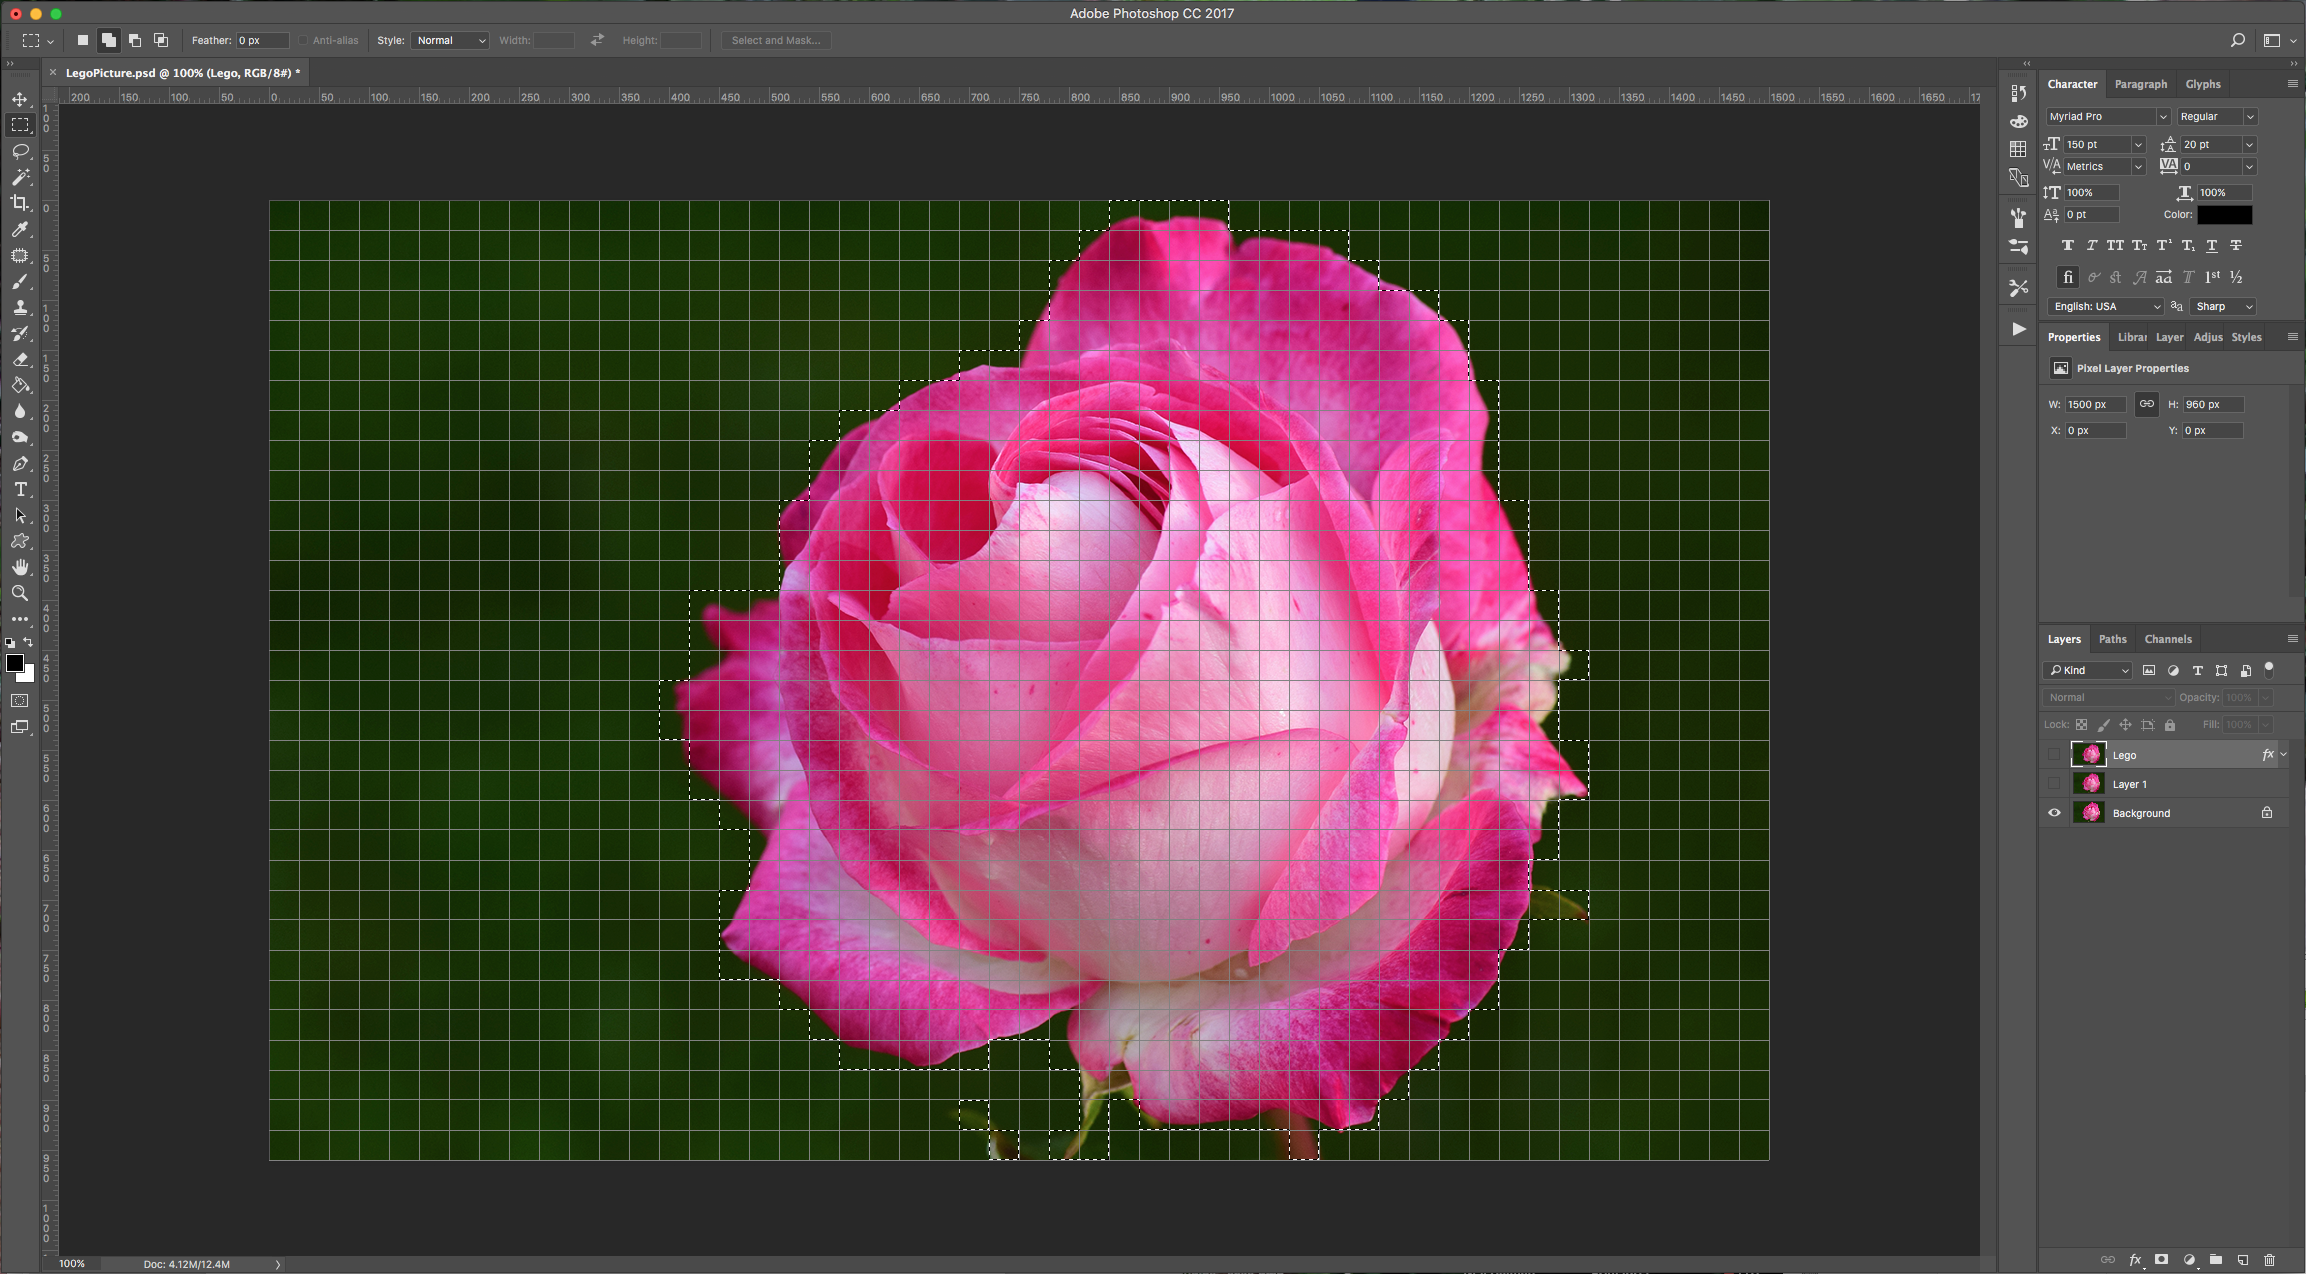
7 - Click on the “Add Layer Mask” button at the bottom of the “Layers” menu to create a mask with your selection.
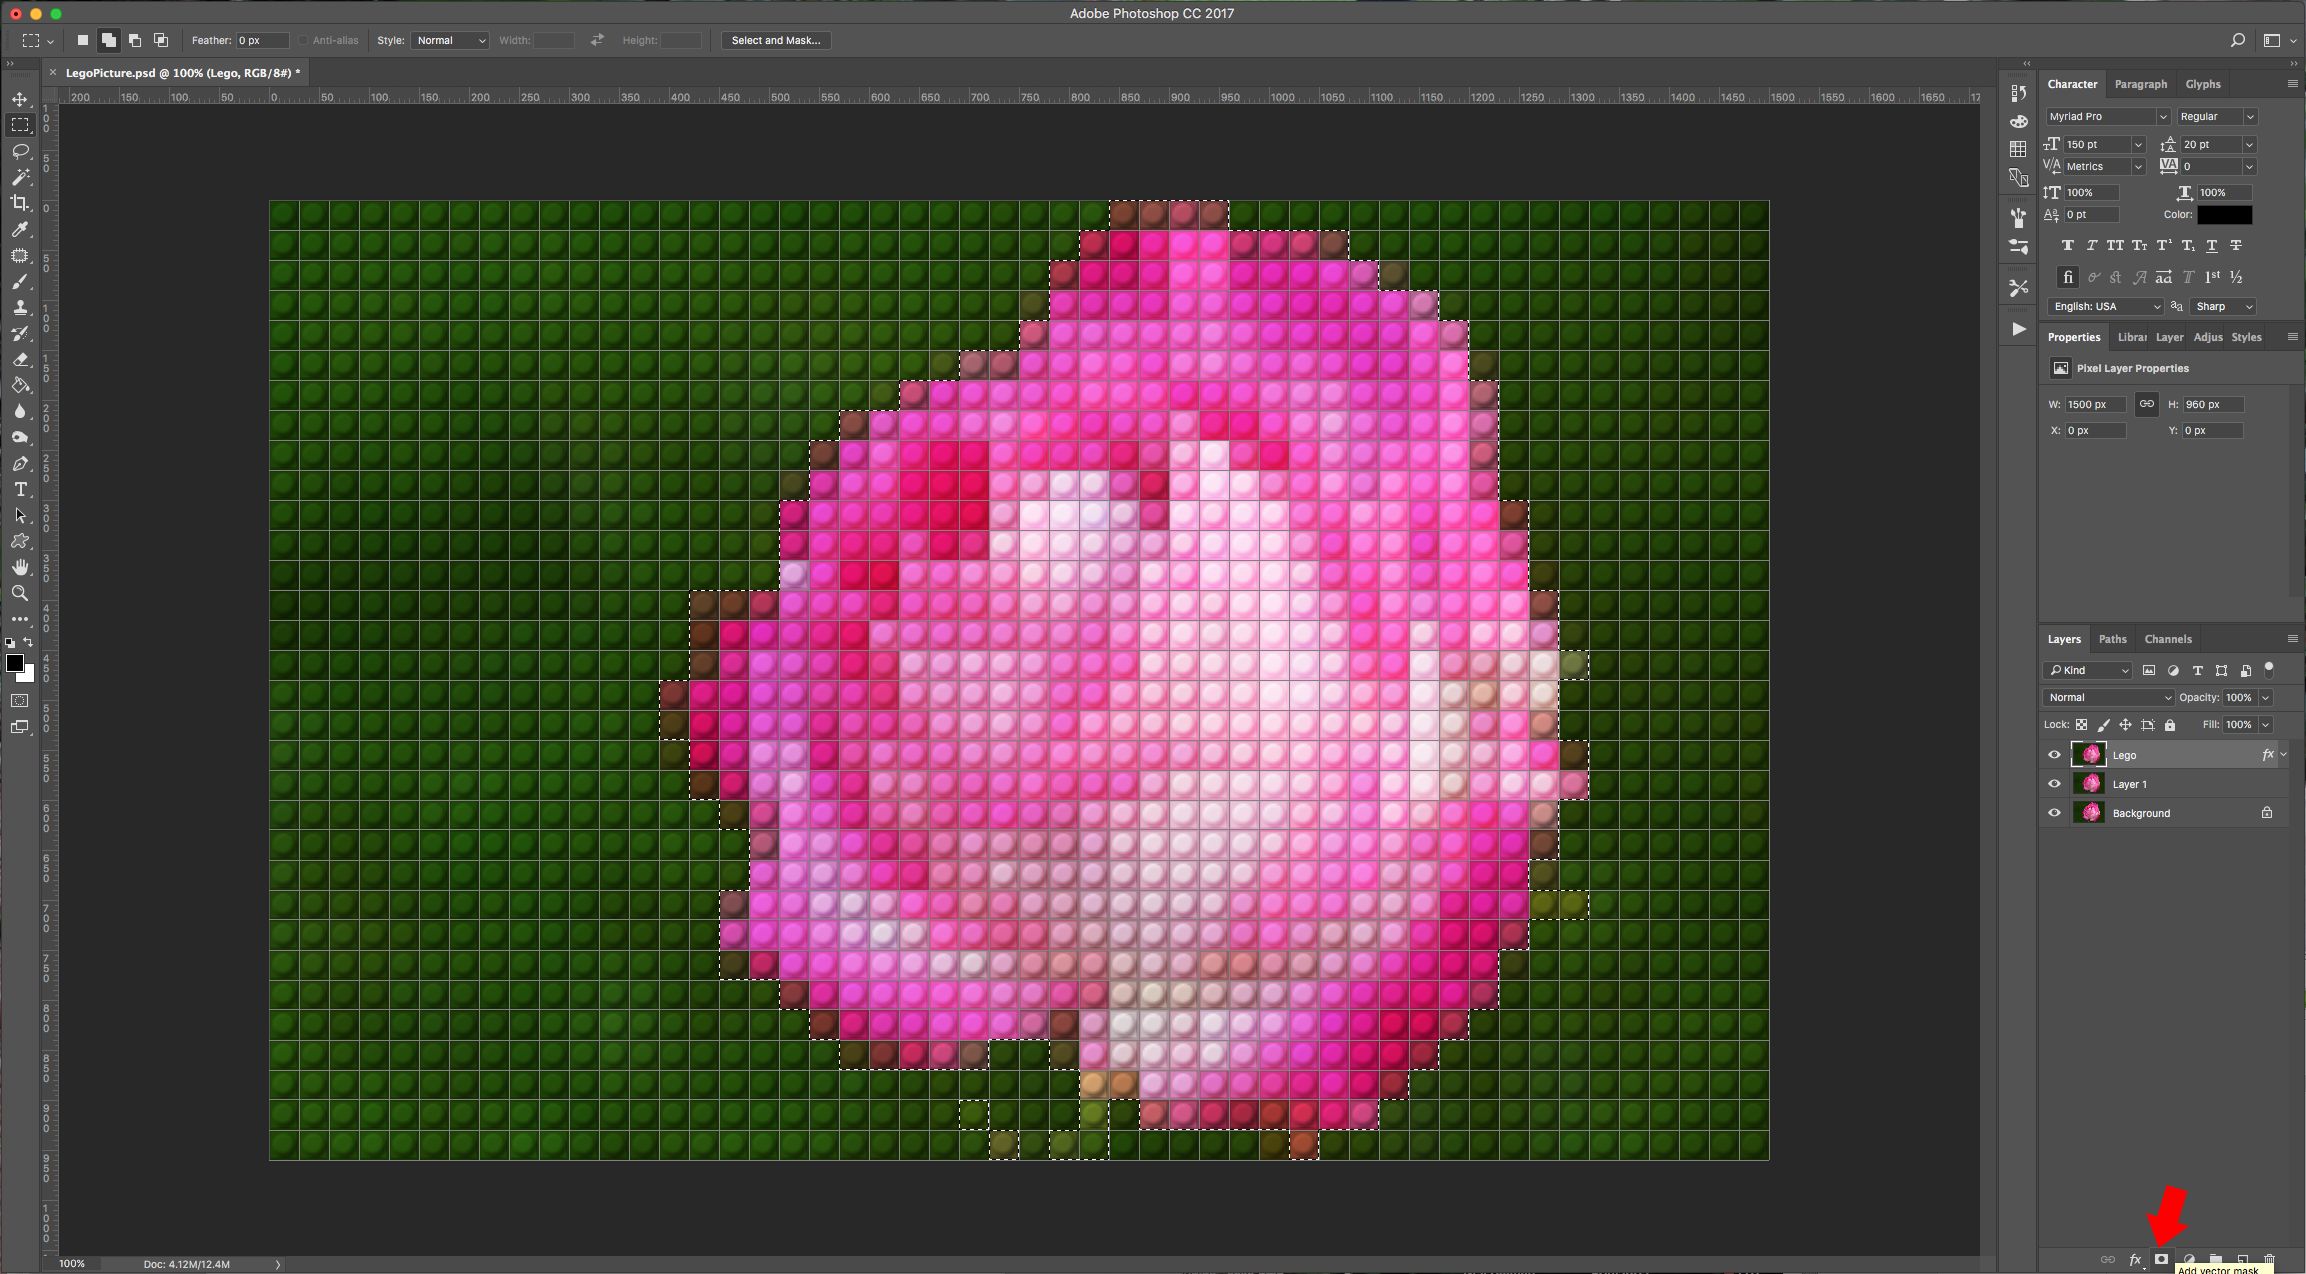
8 - Double-click on the first mosaic layer and apply the same “Pattern Overlay” settings as your “Lego” layer. You can rename the layer if you want. Again, select the “Rectangular Marquee Tool” (M) and use the “Add to Selection” option in the upper menu. In this case, select almost all your image, but leave some scattered squares to give the idea that some pieces are missing. Create a “Layer Mask” from this selection also.
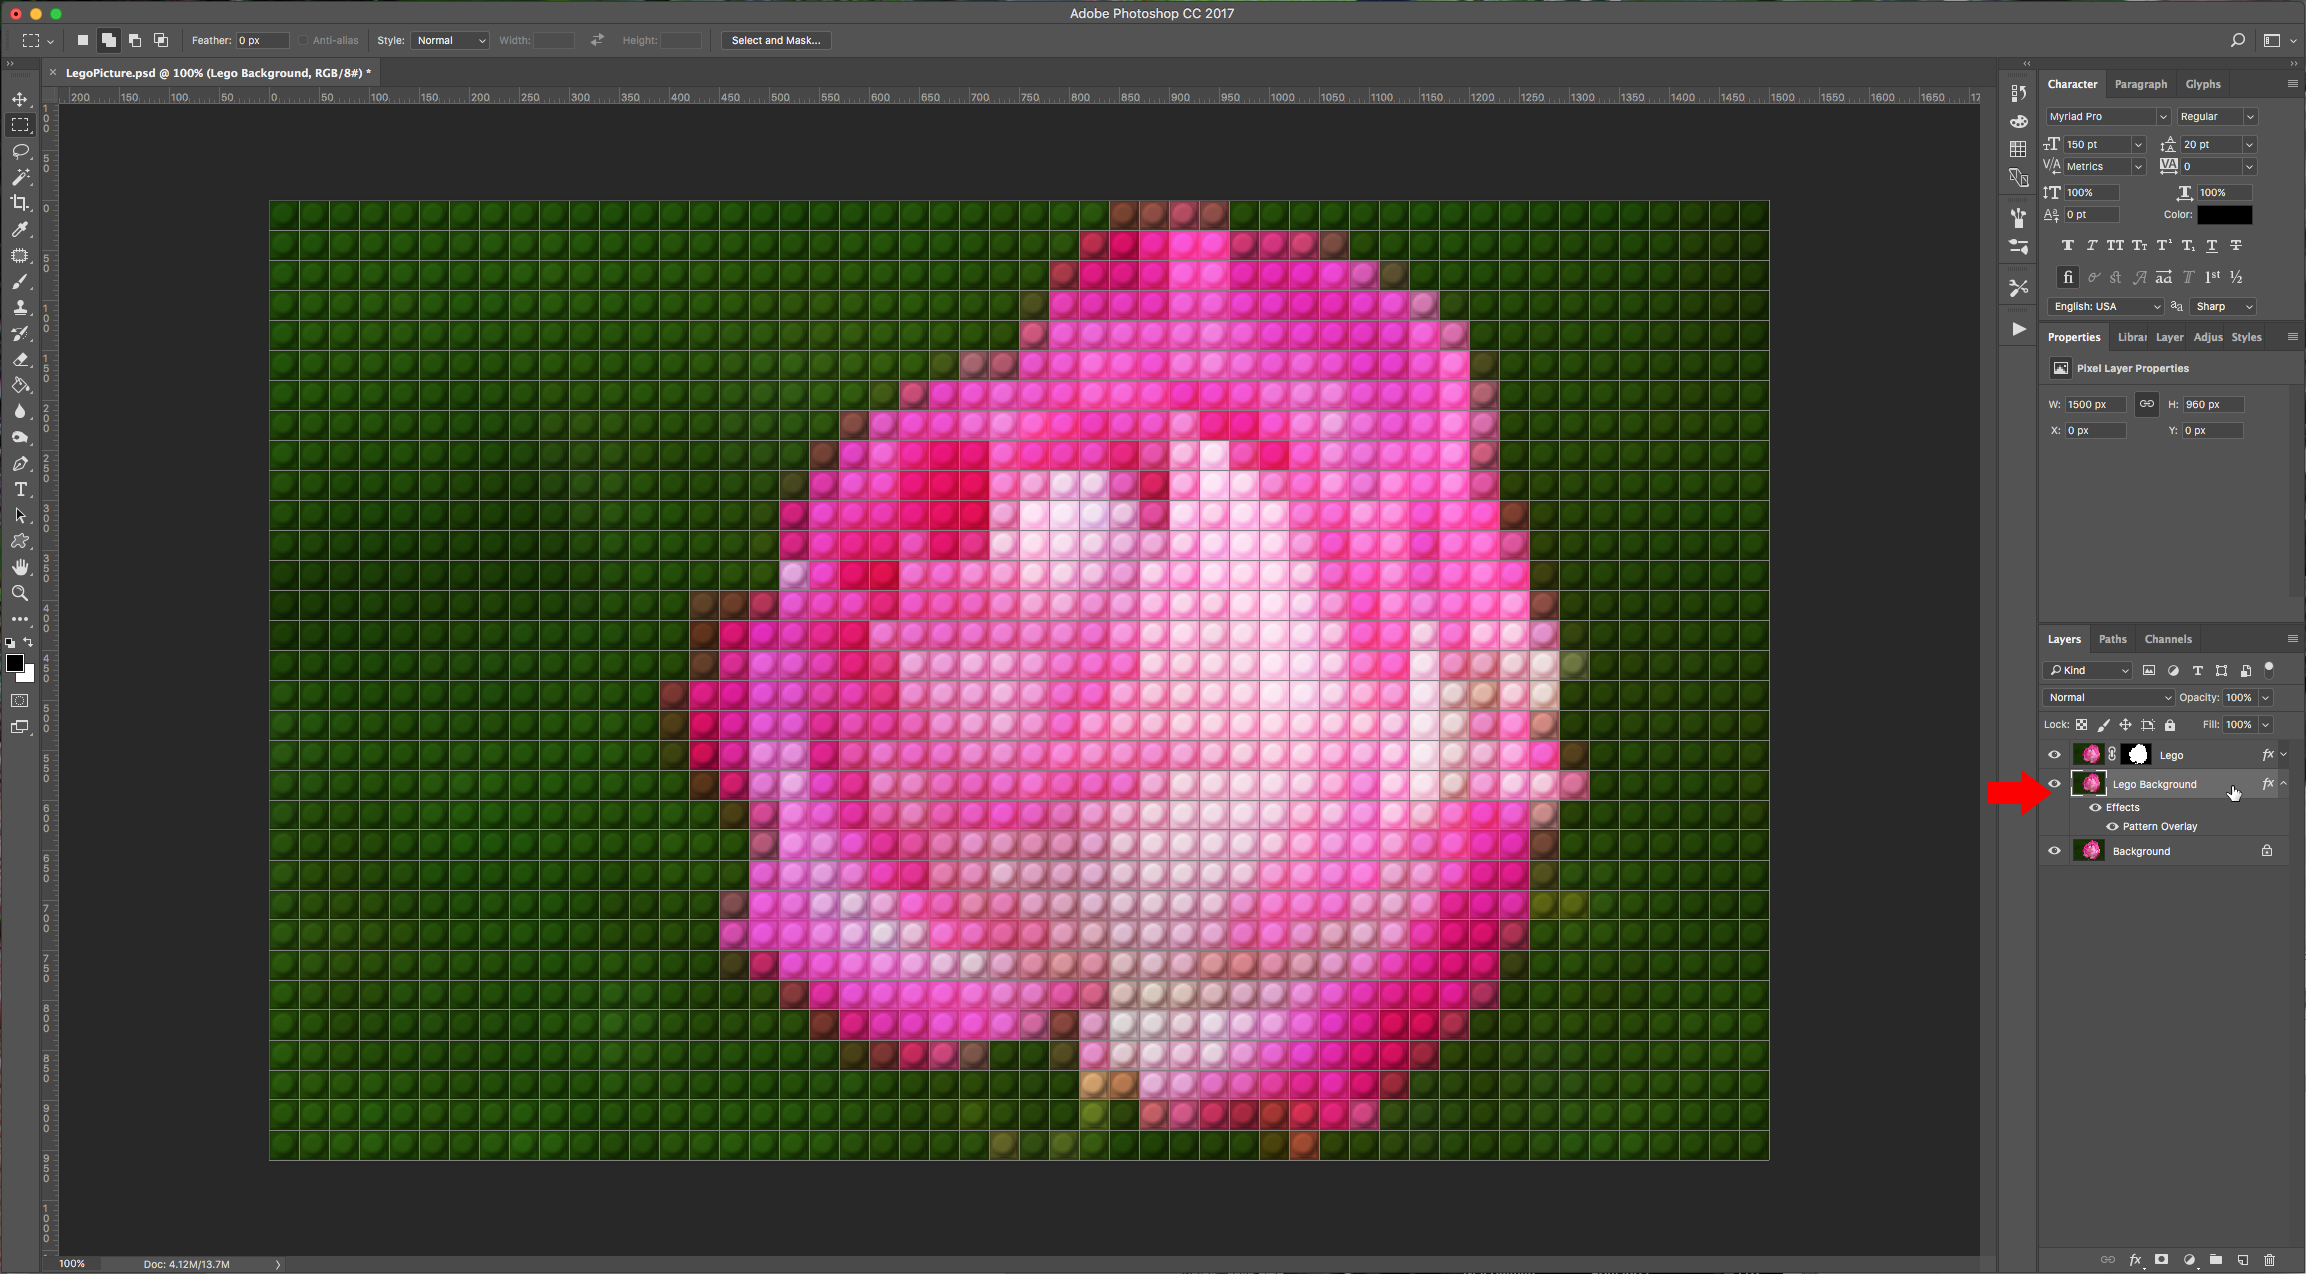
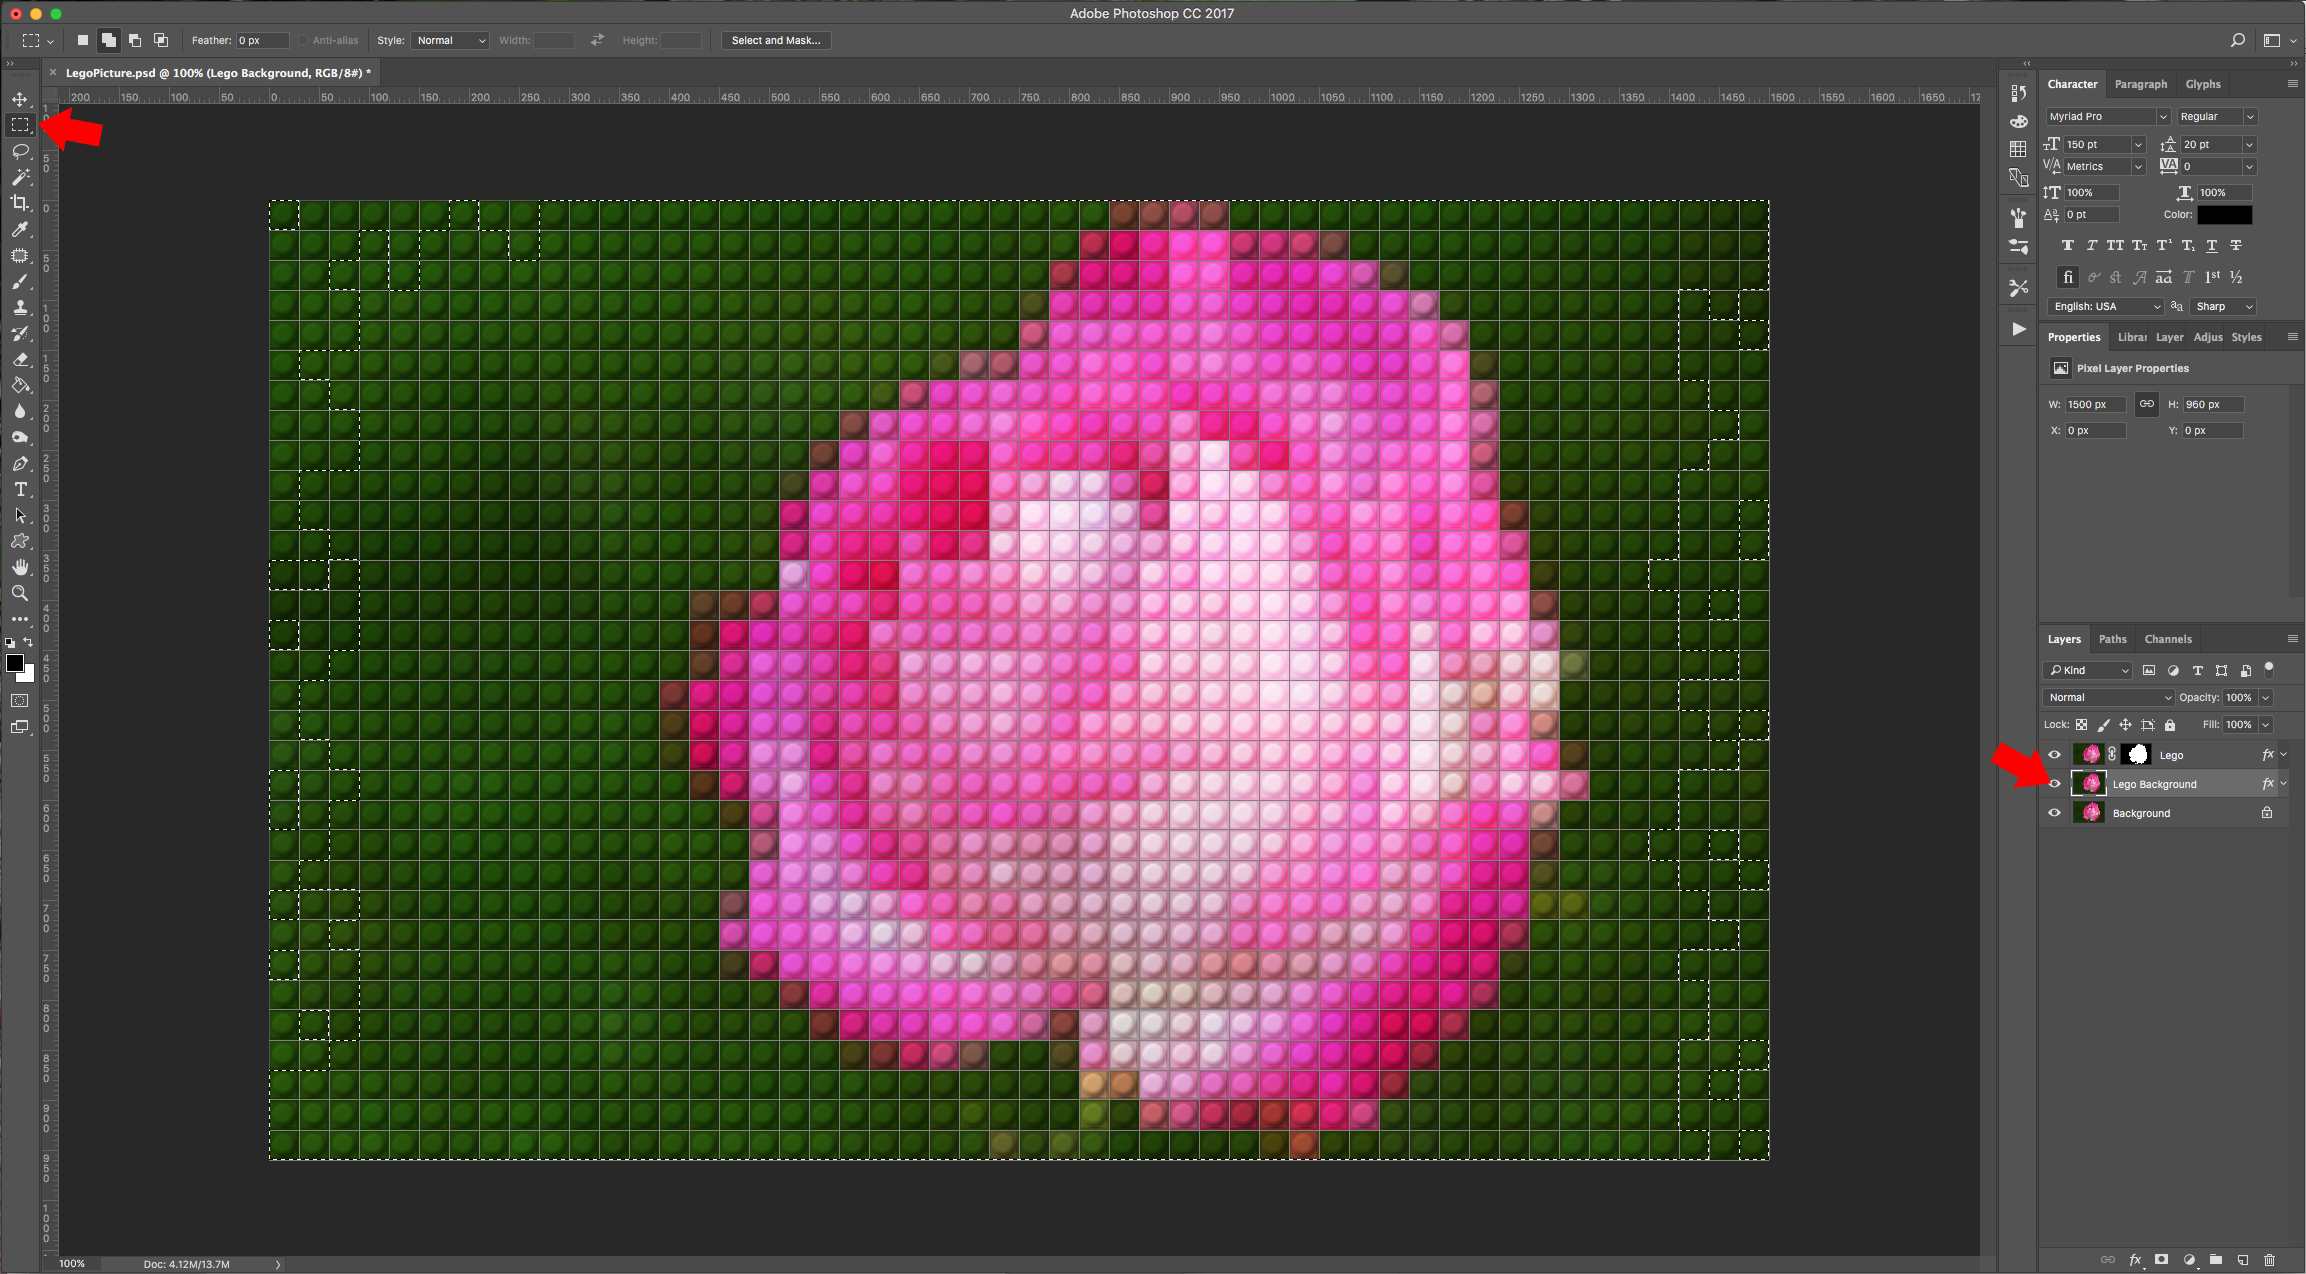
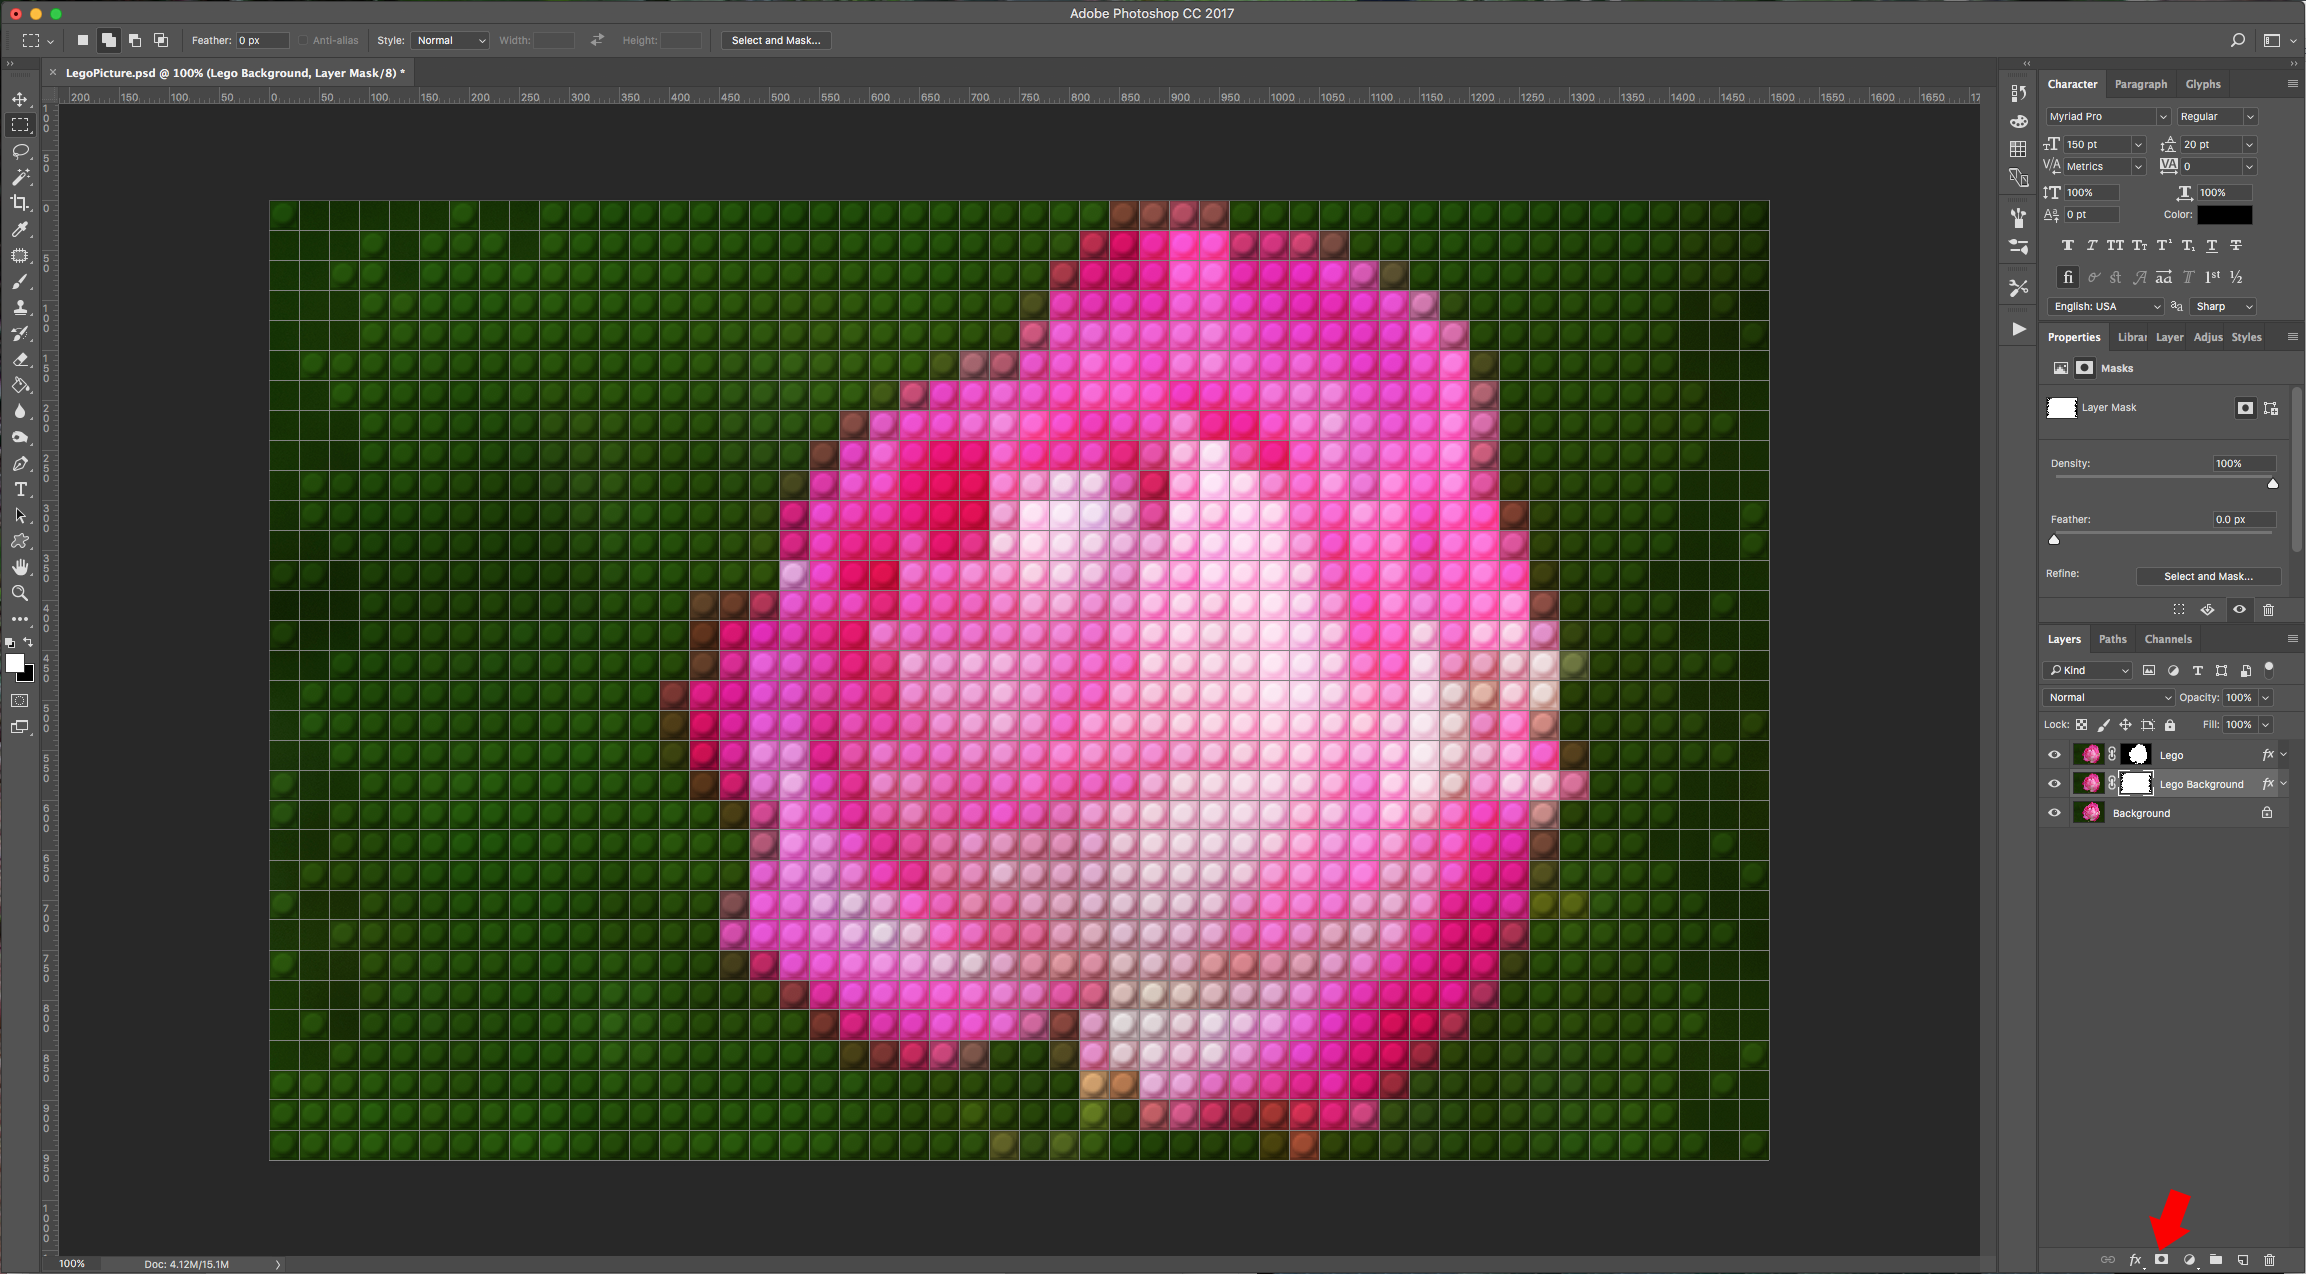
9 - Double-click on the “Lego Background” layer to invoke the “Layer Styles” window and change the “Blend Mode” to “Soft Light” to difference the layers a bit.
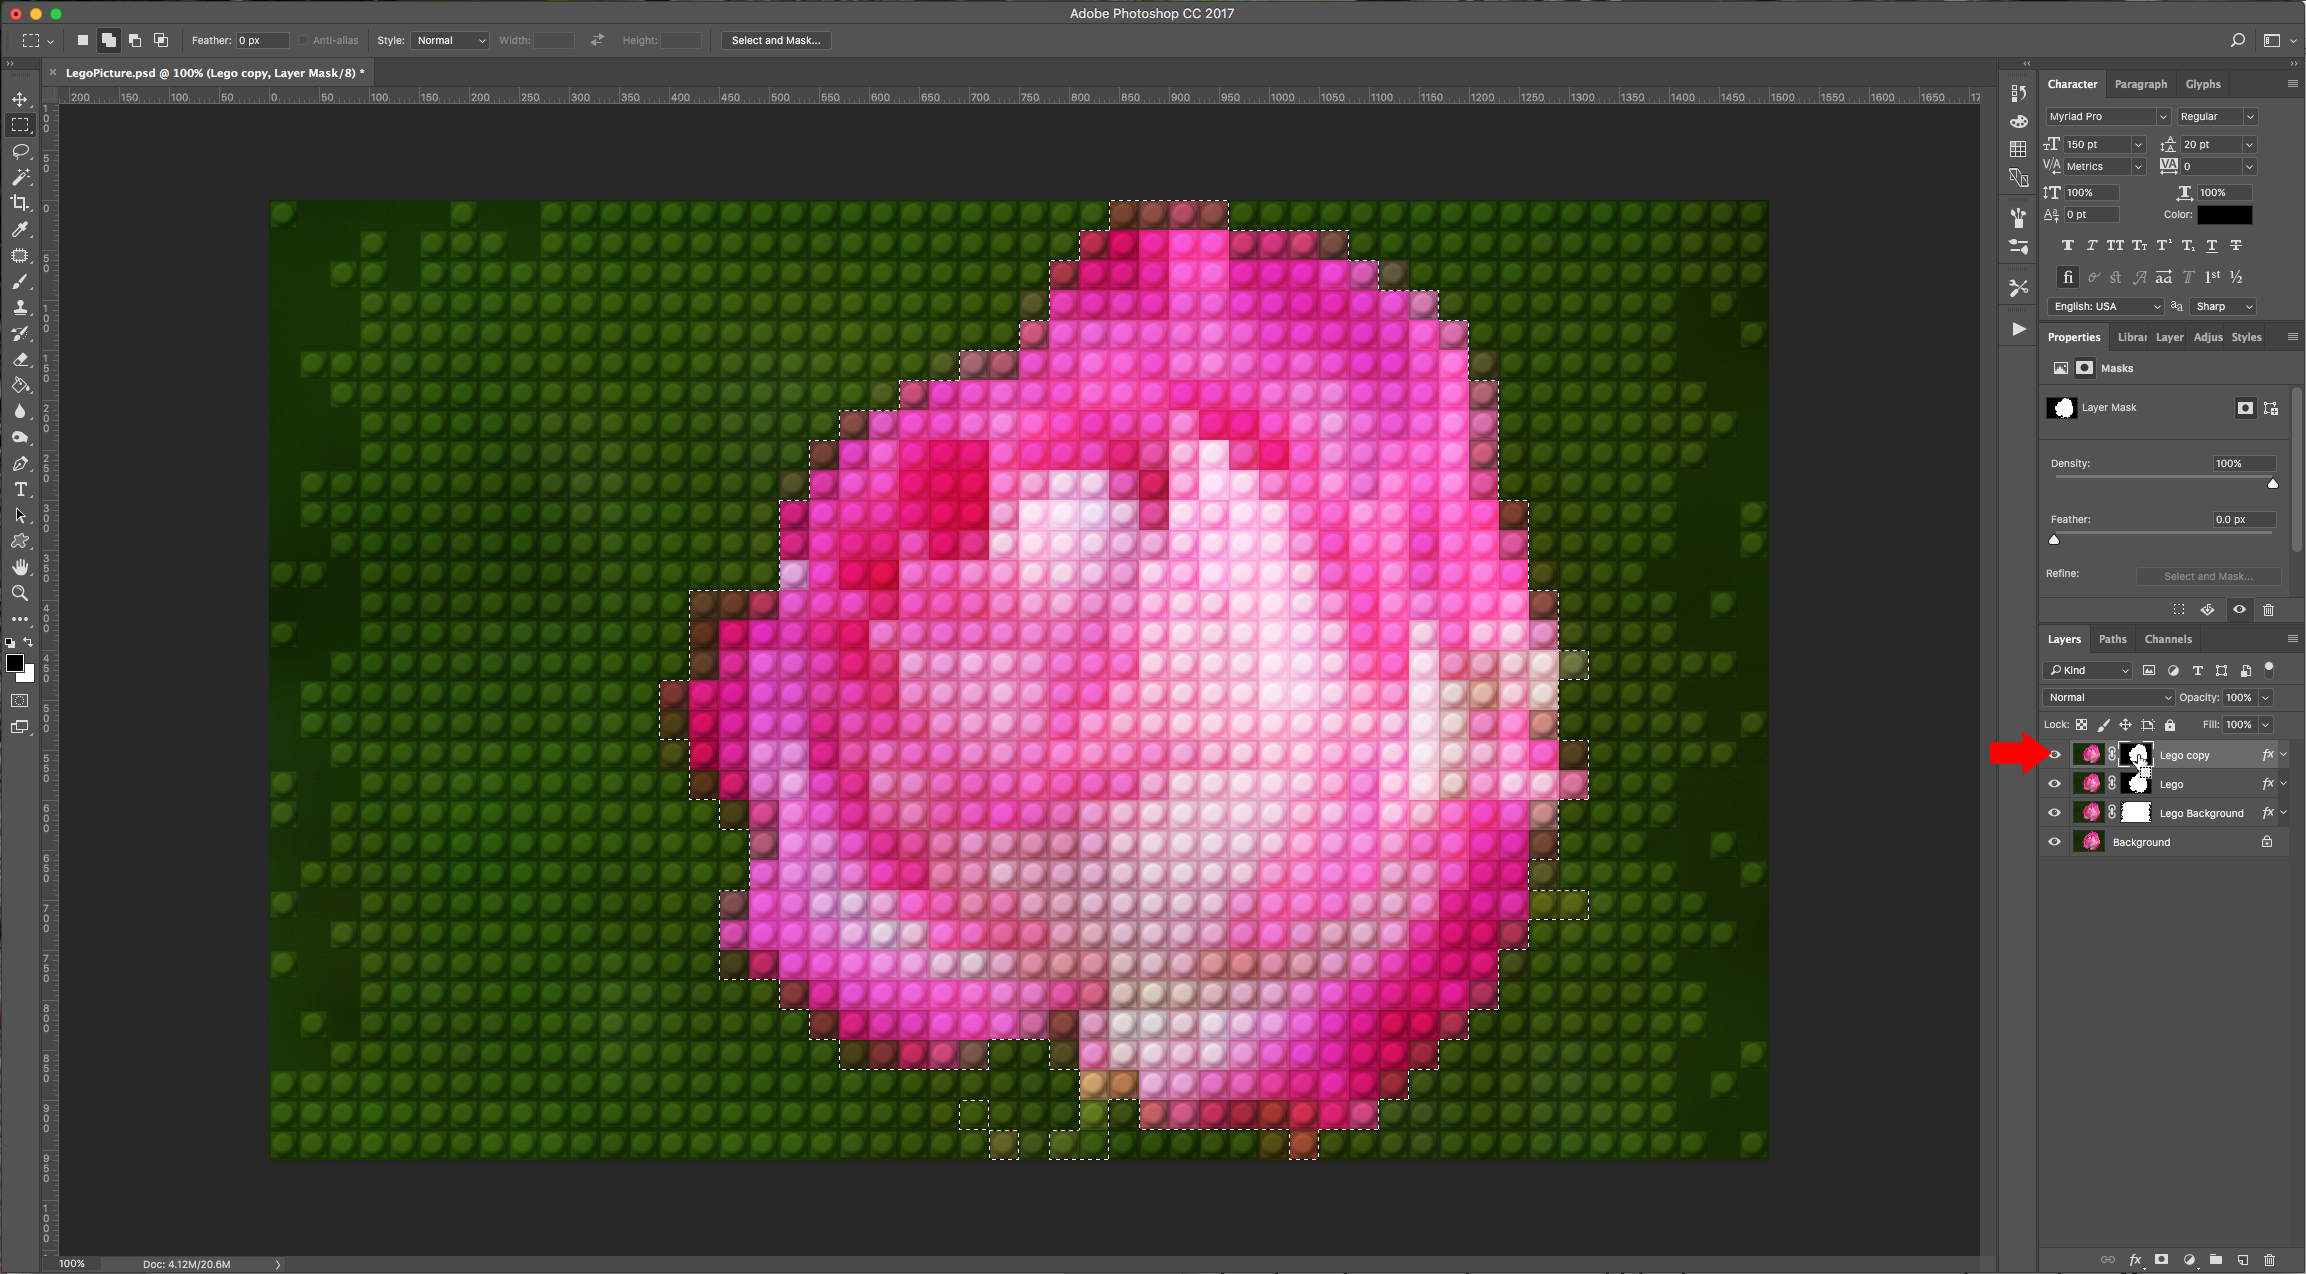
10 - Duplicate your “Lego” layer (Command/Control + J) and click on the mask thumbnail while holding the Command/Control key to load the selection. Then, with your “Rectangular Marquee Tool” (M) and the “Subtract from Selection” option this time trim the selection to only the parts of your image that give more detail.
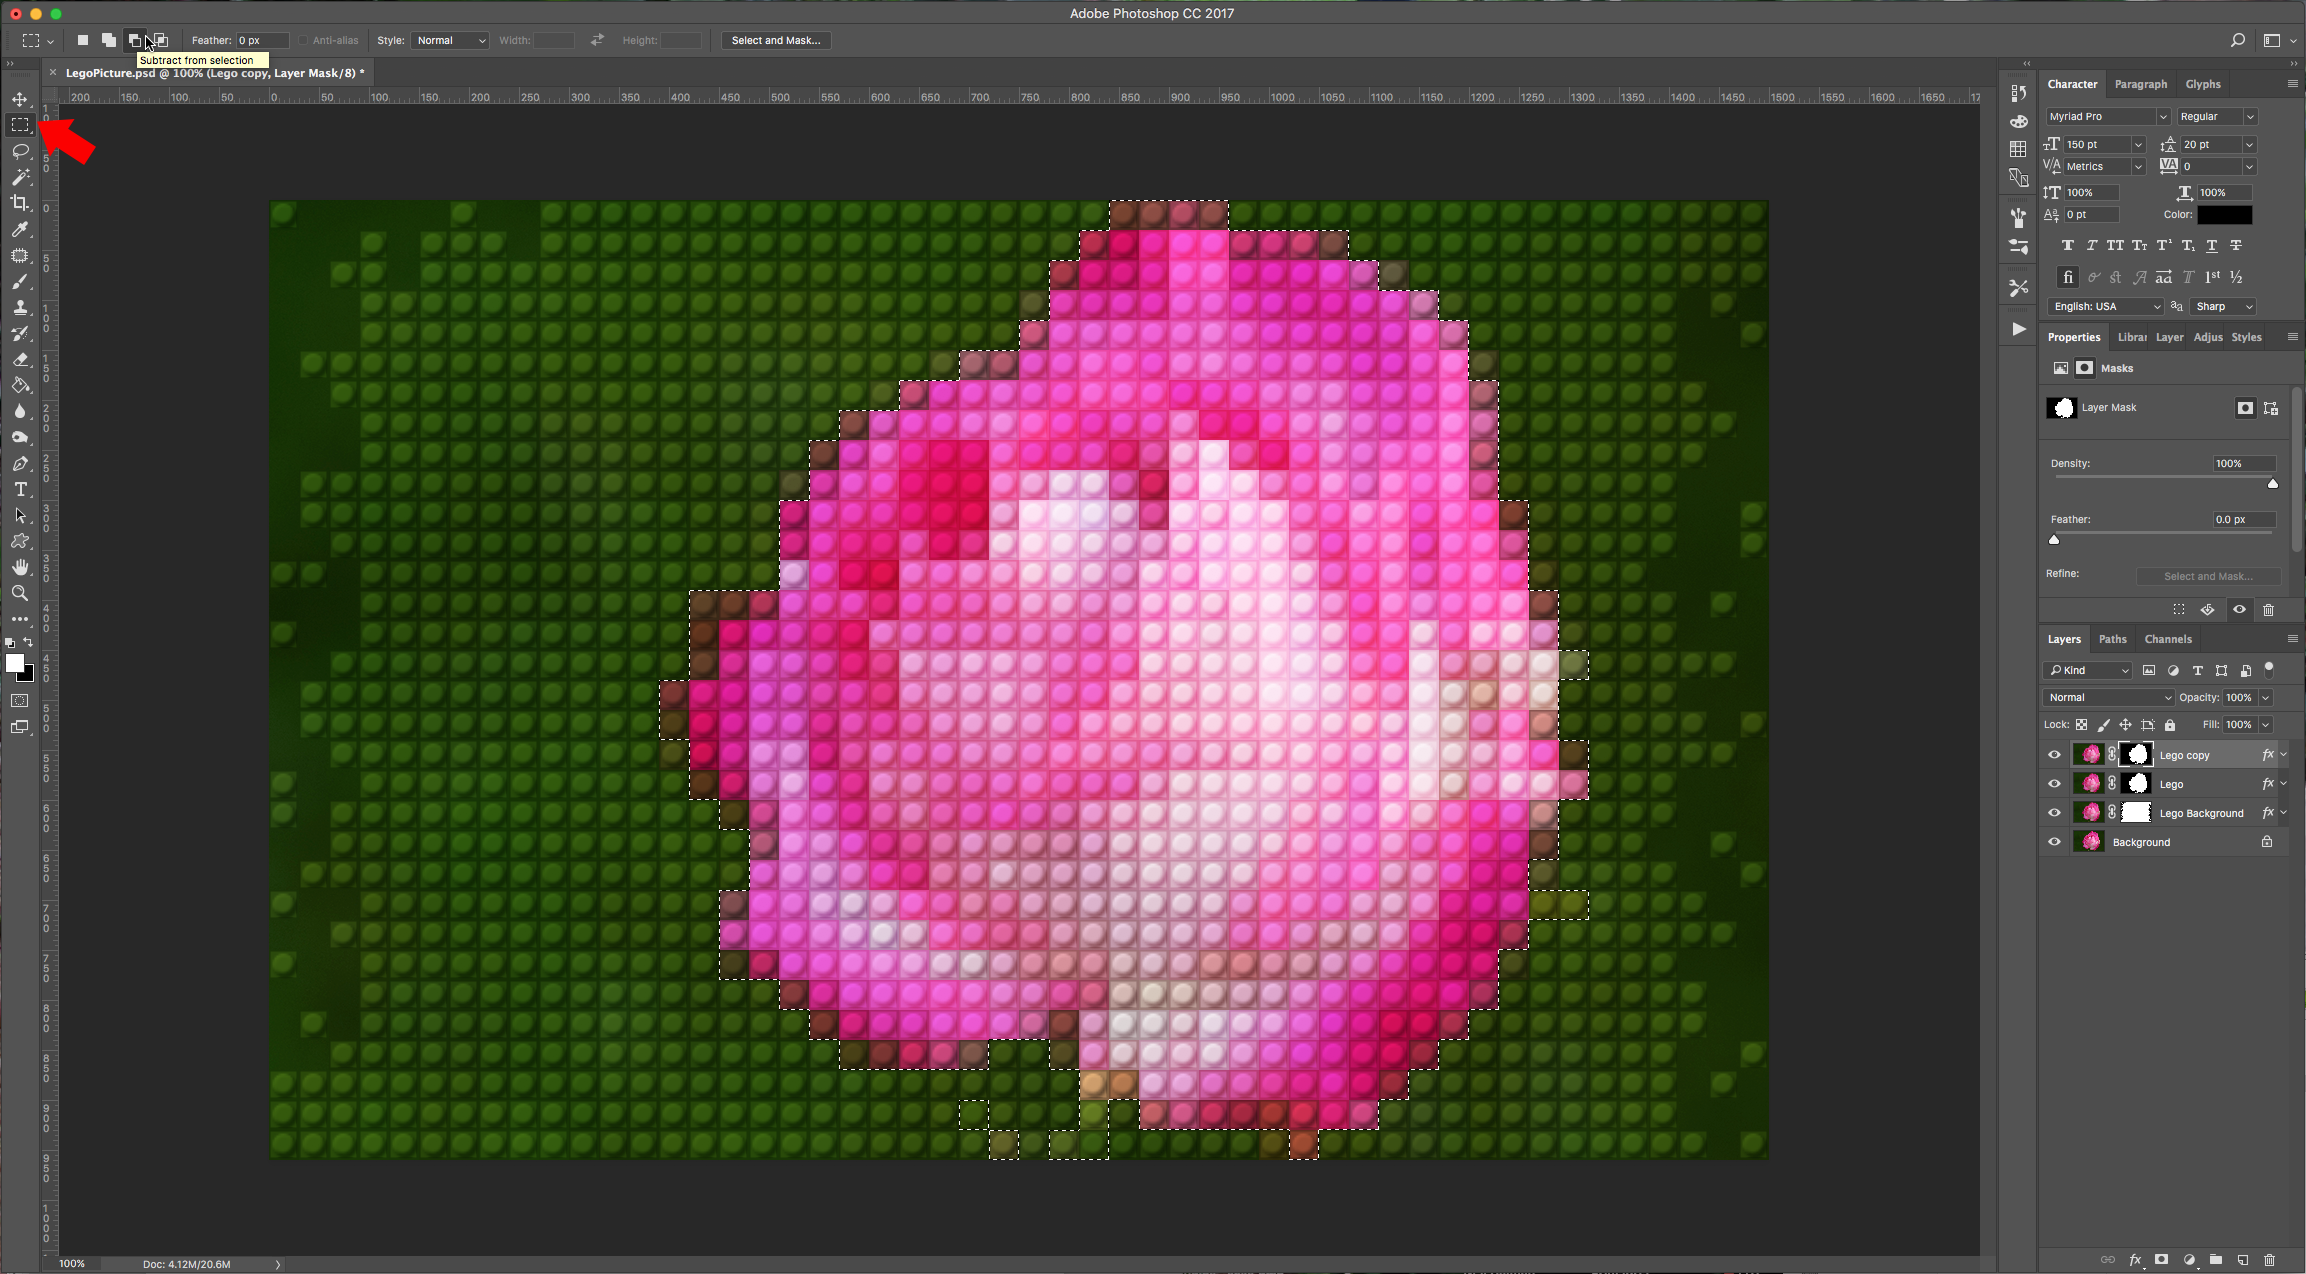
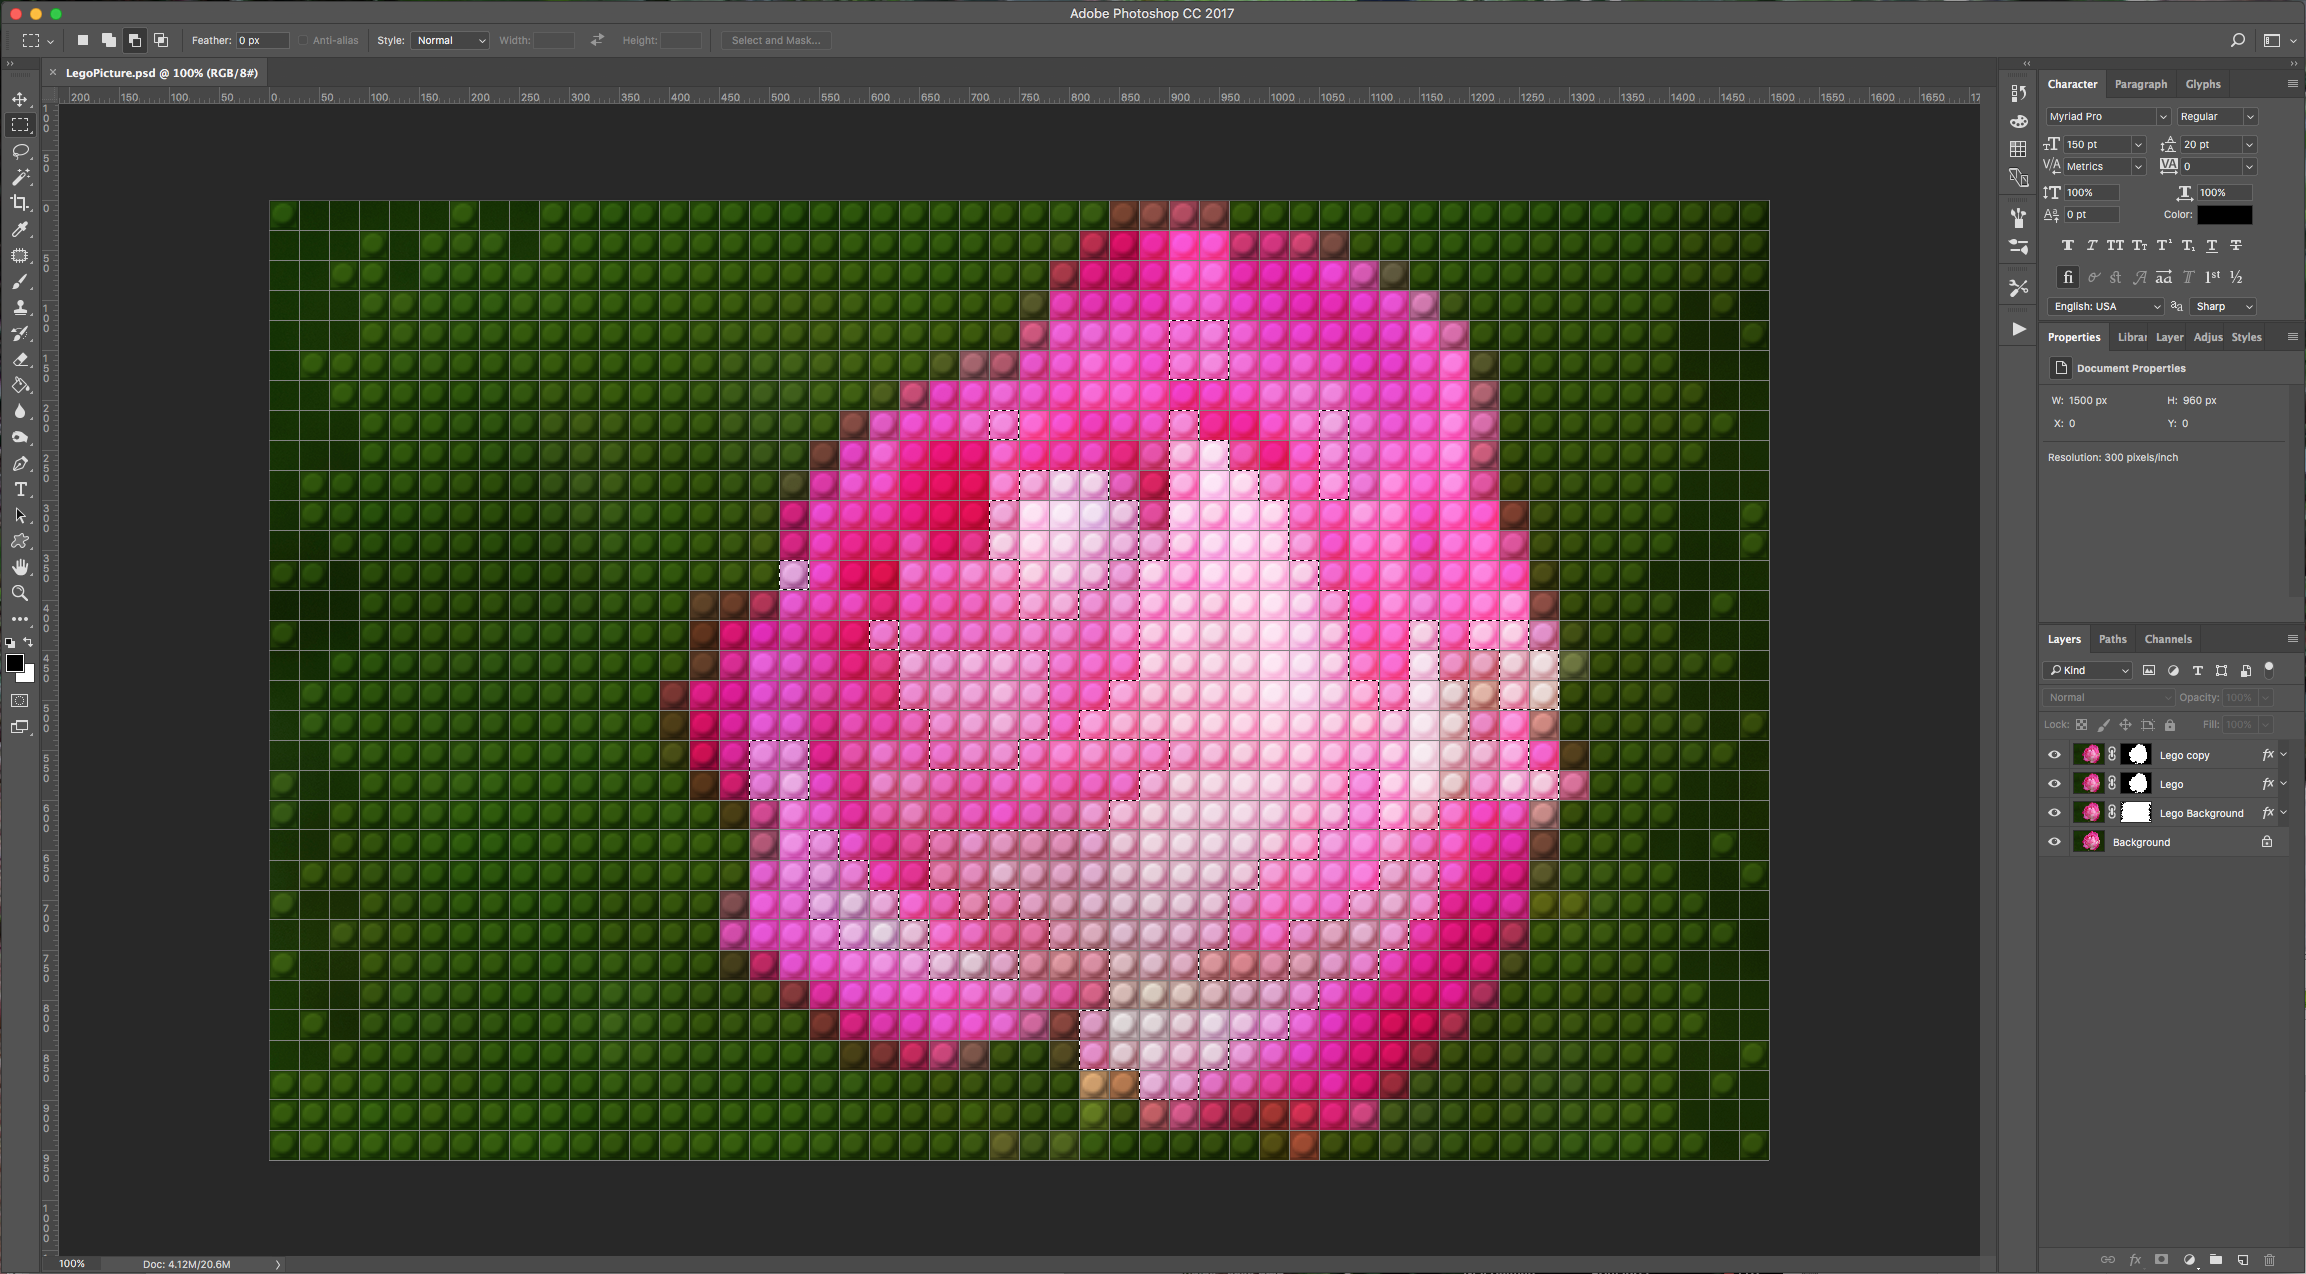
11 - Once you are happy, invert your selection (Shift Command/Control + I), select the mask thumbnail and click Shift + F5 to fill your selection. Choose “Foreground Color” for the “Contents” and make sure that black is in the foreground. You can temporarily turn off the other layers visibility to check your results.
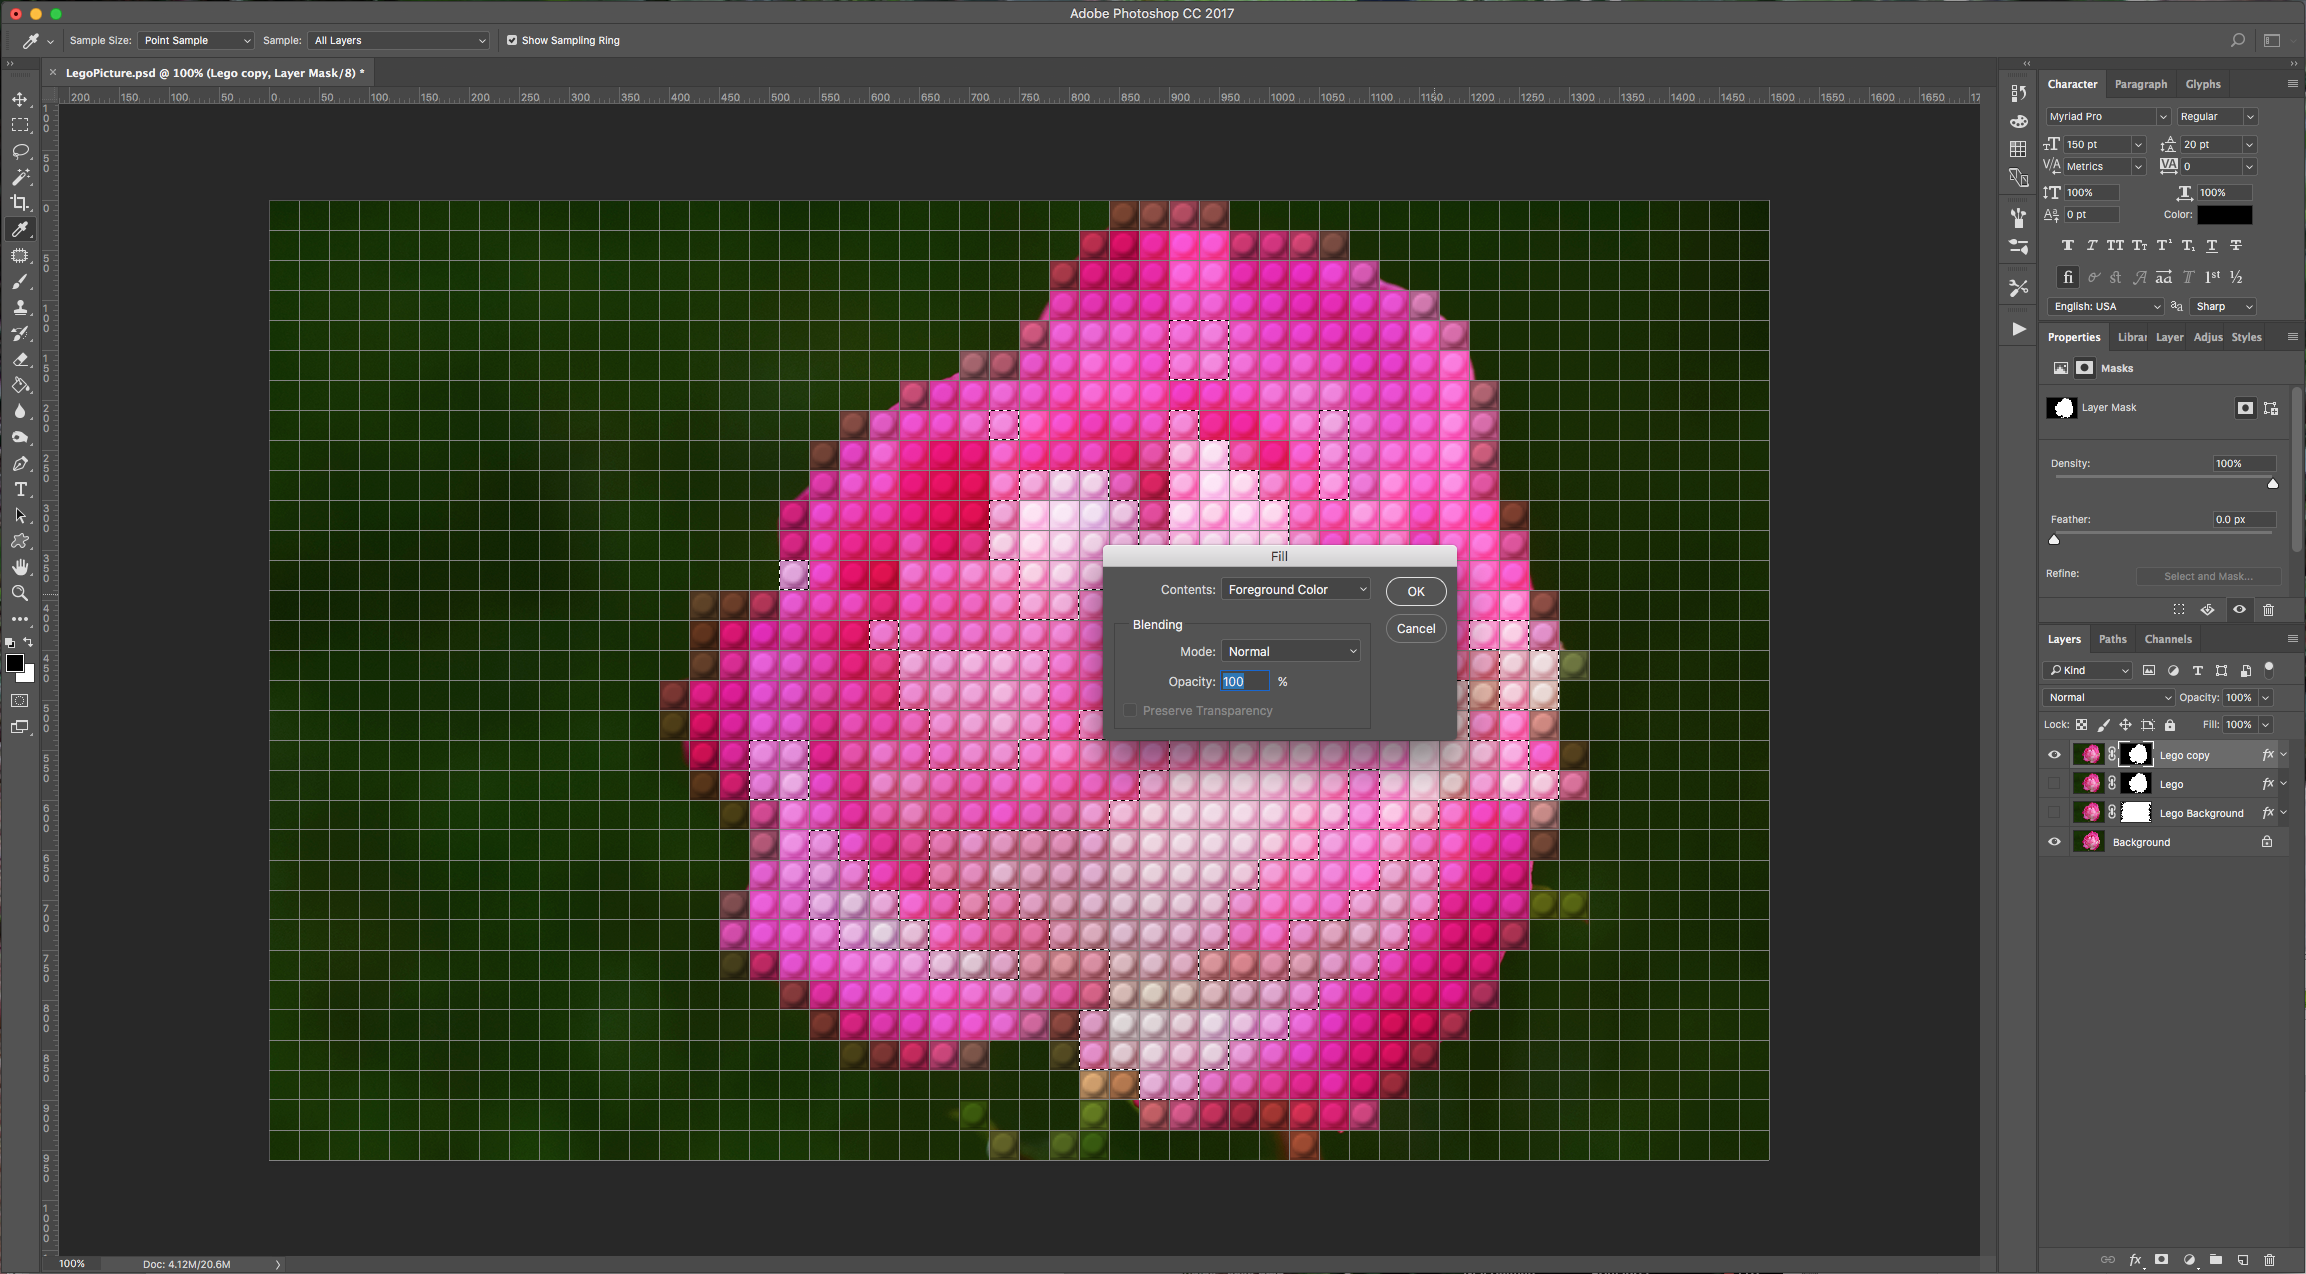
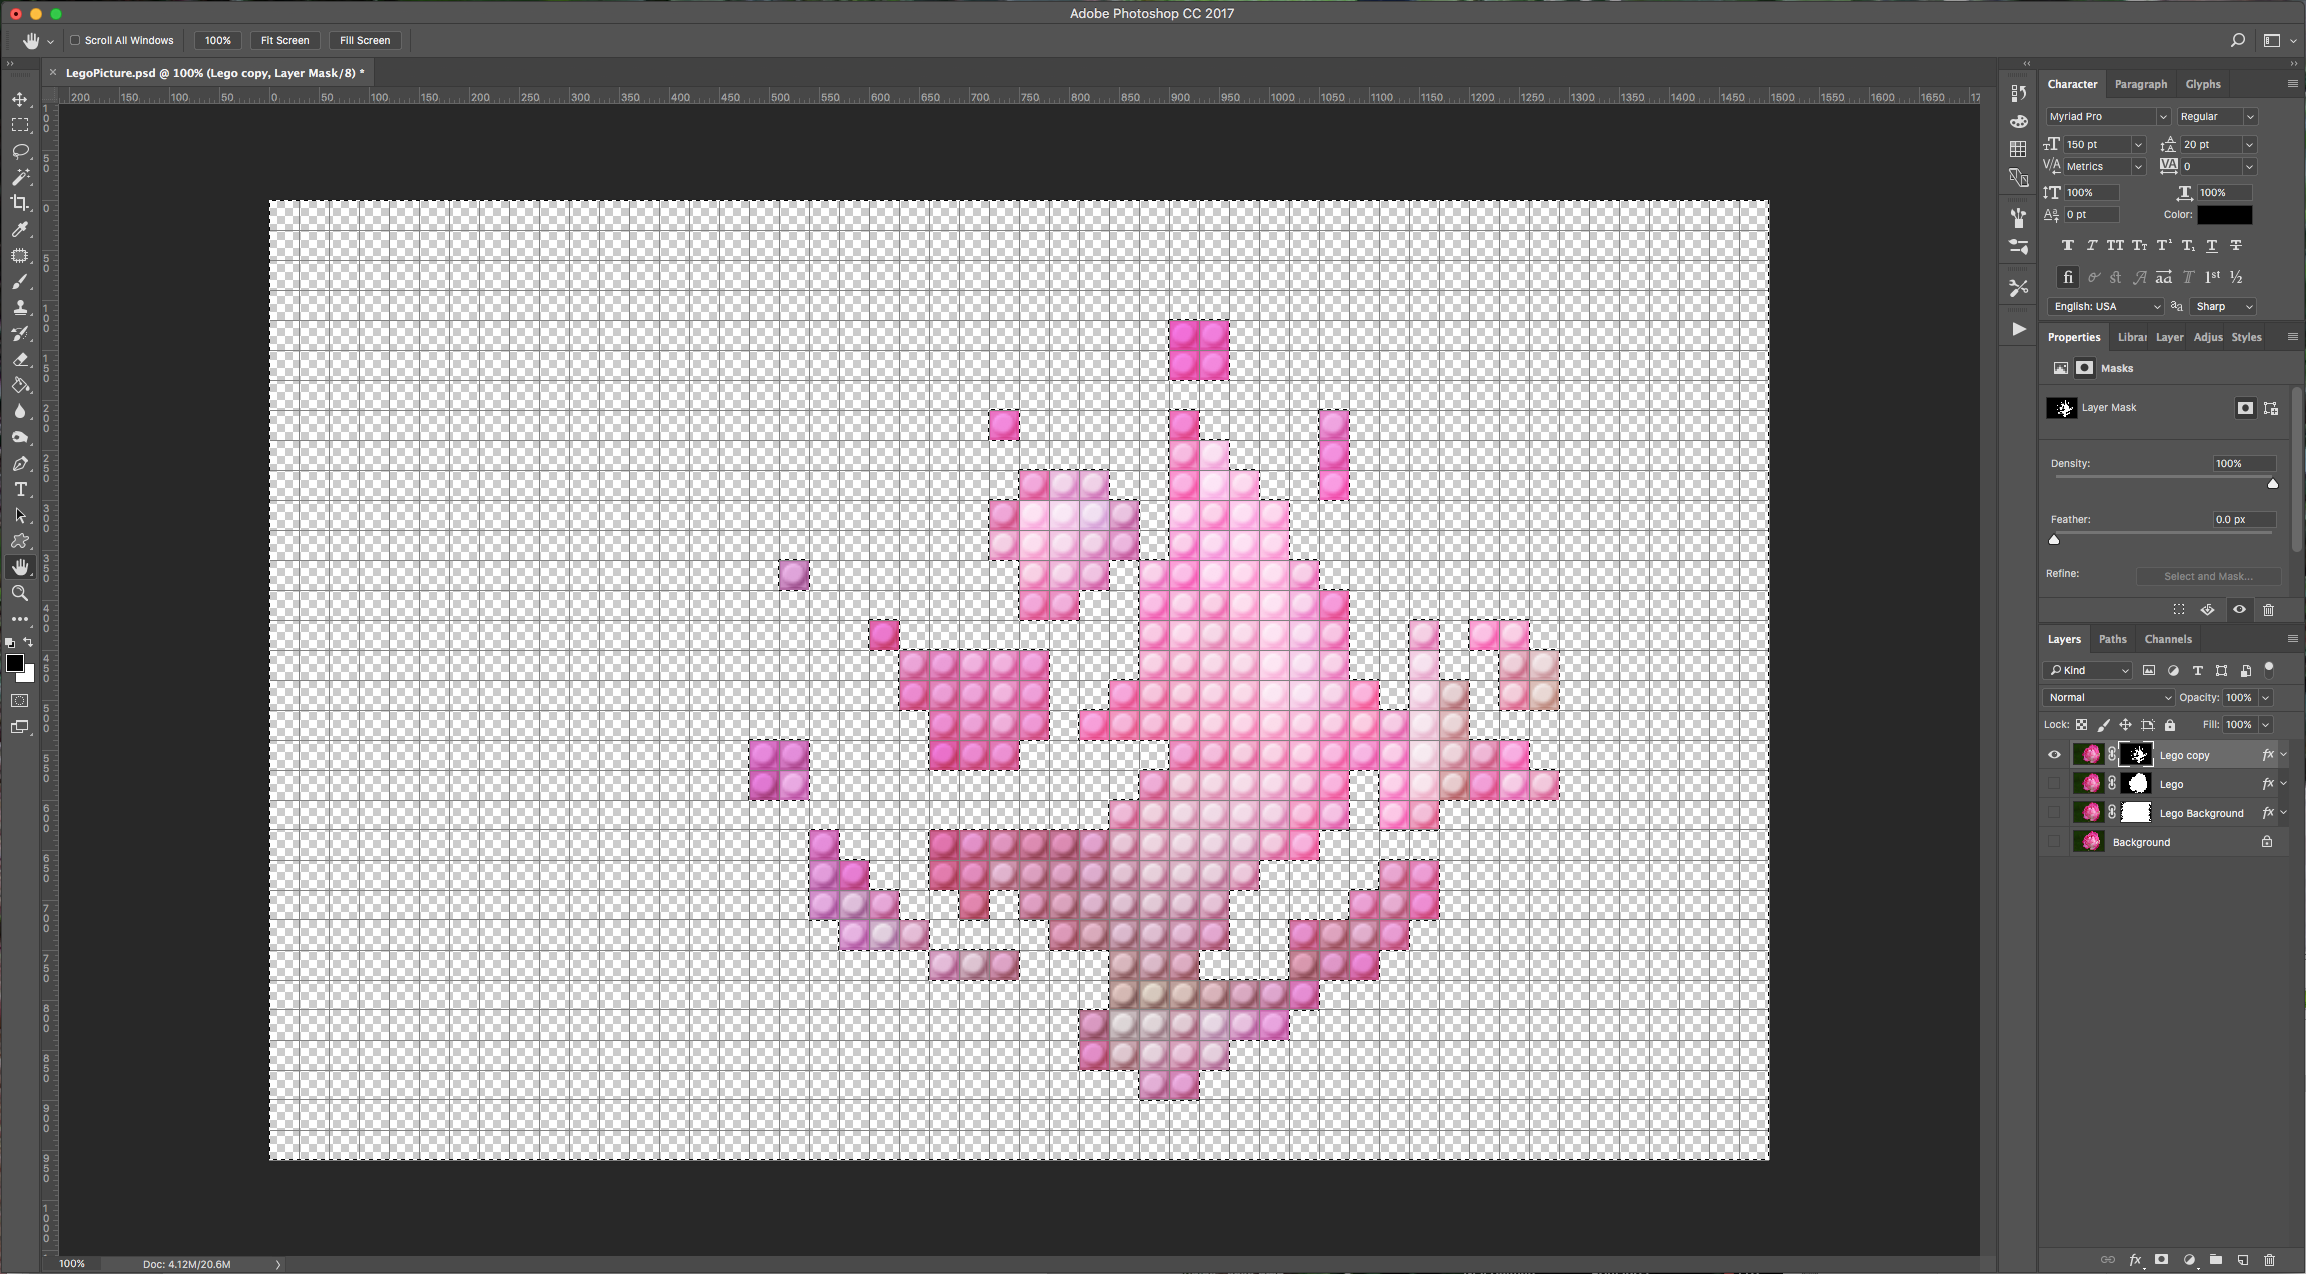
12 - Select your “Lego” layer and click on the mask thumbnail while holding the Command/Control key to load the selection. Create a New Layer (Shift + Command/Control + N), name it “Shadow 1” and place it under your “Lego” layer and fill the selection with black (Shift + F5). With your “Move Tool” (V) selected click the down arrow key 8 times and the right arrow key other 8 times.
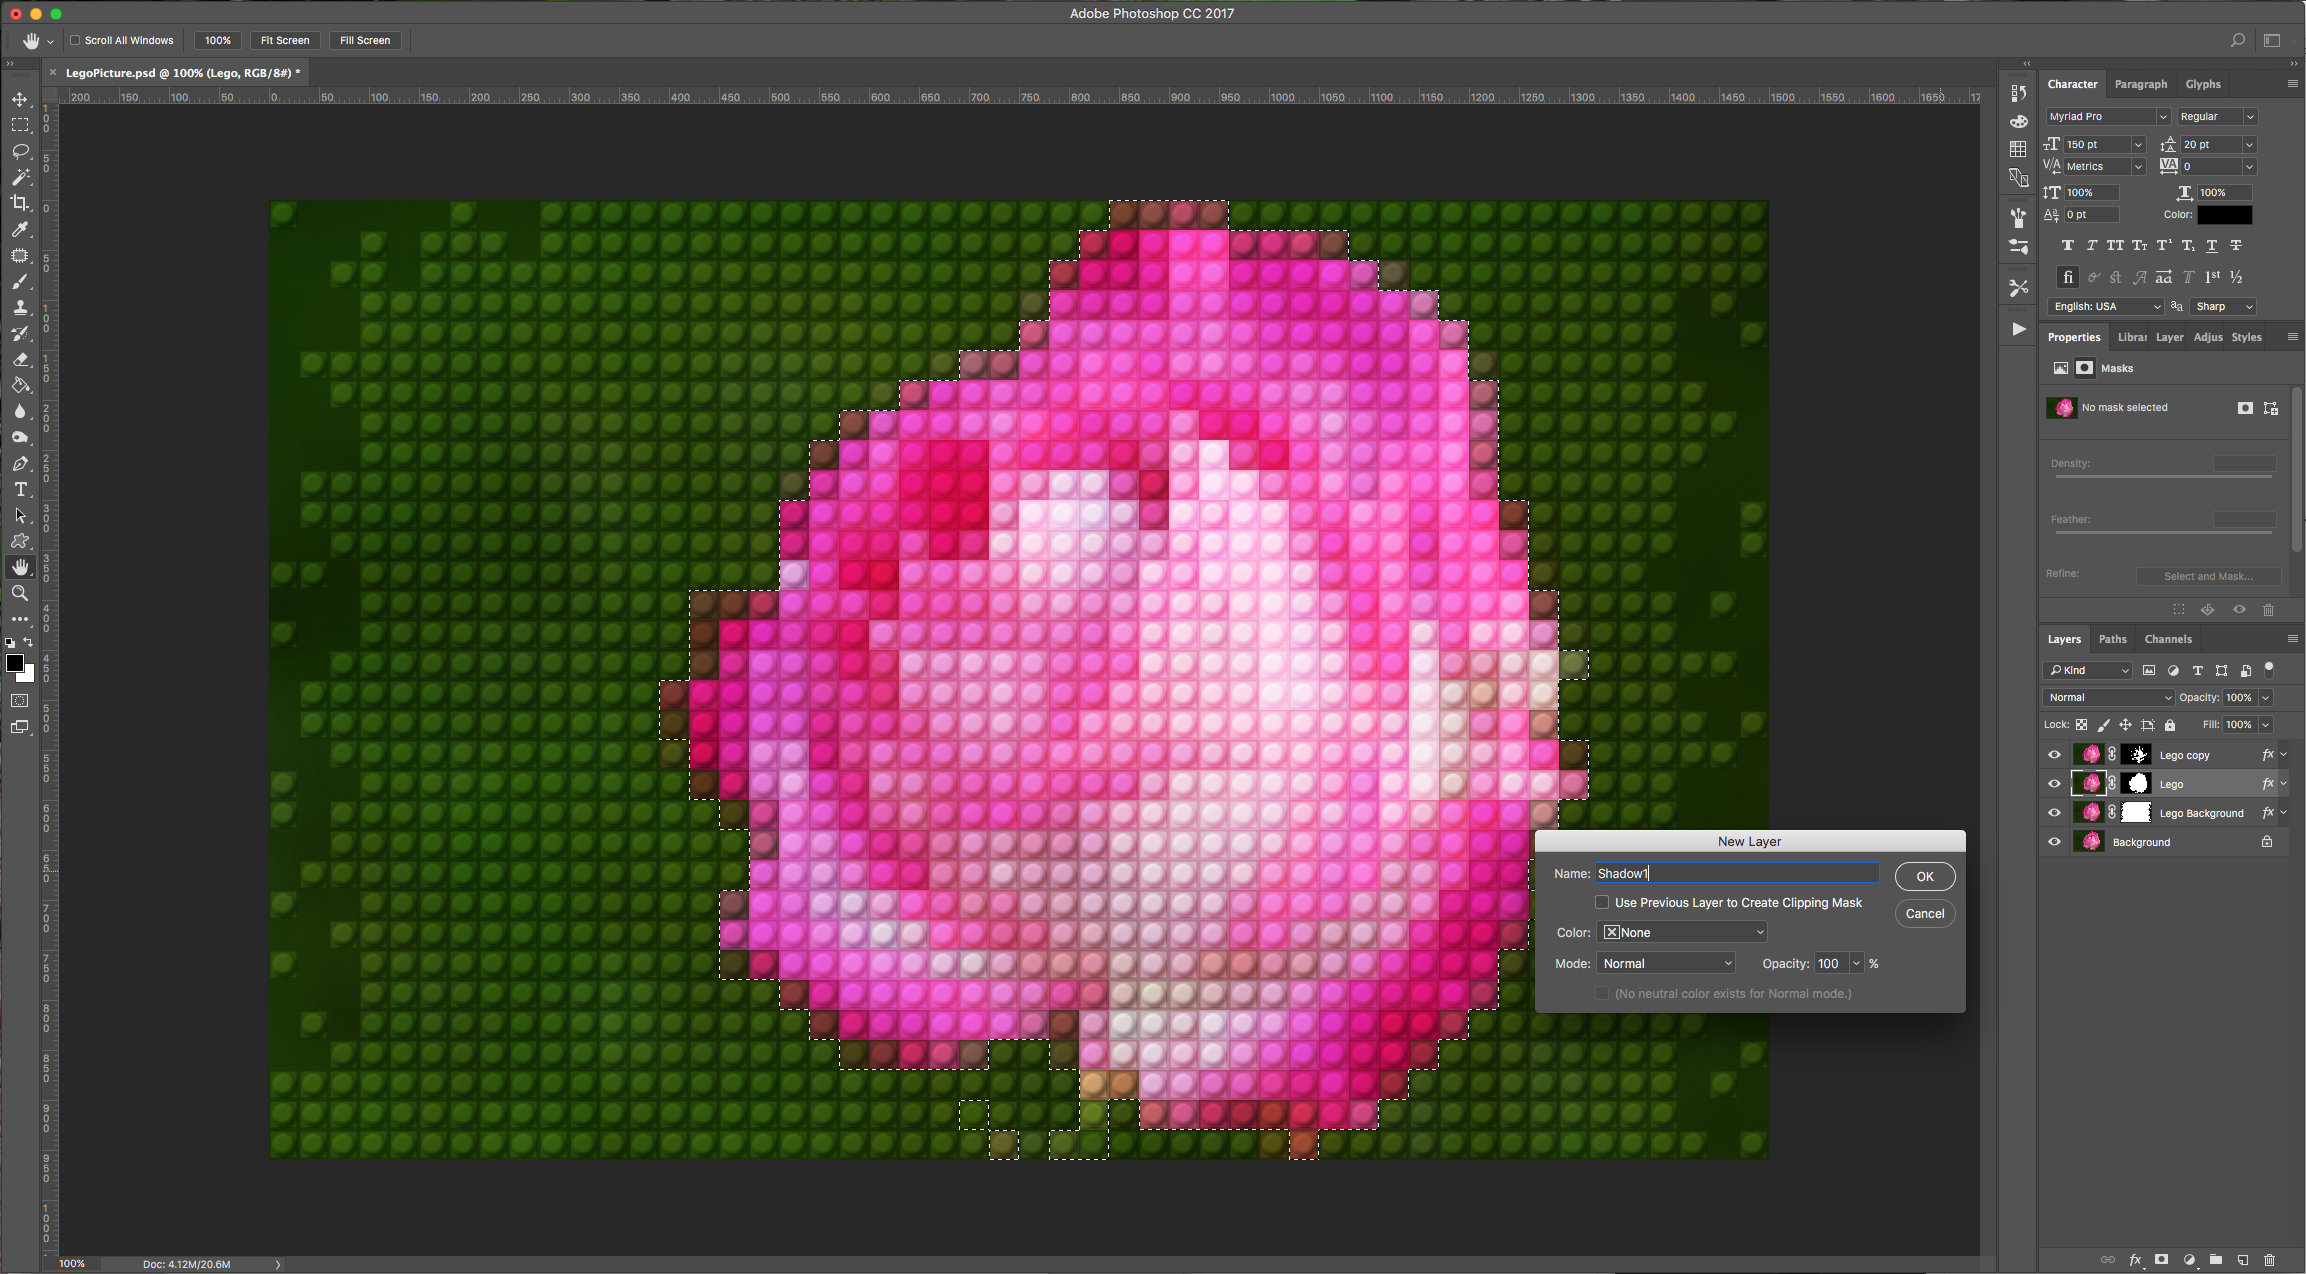
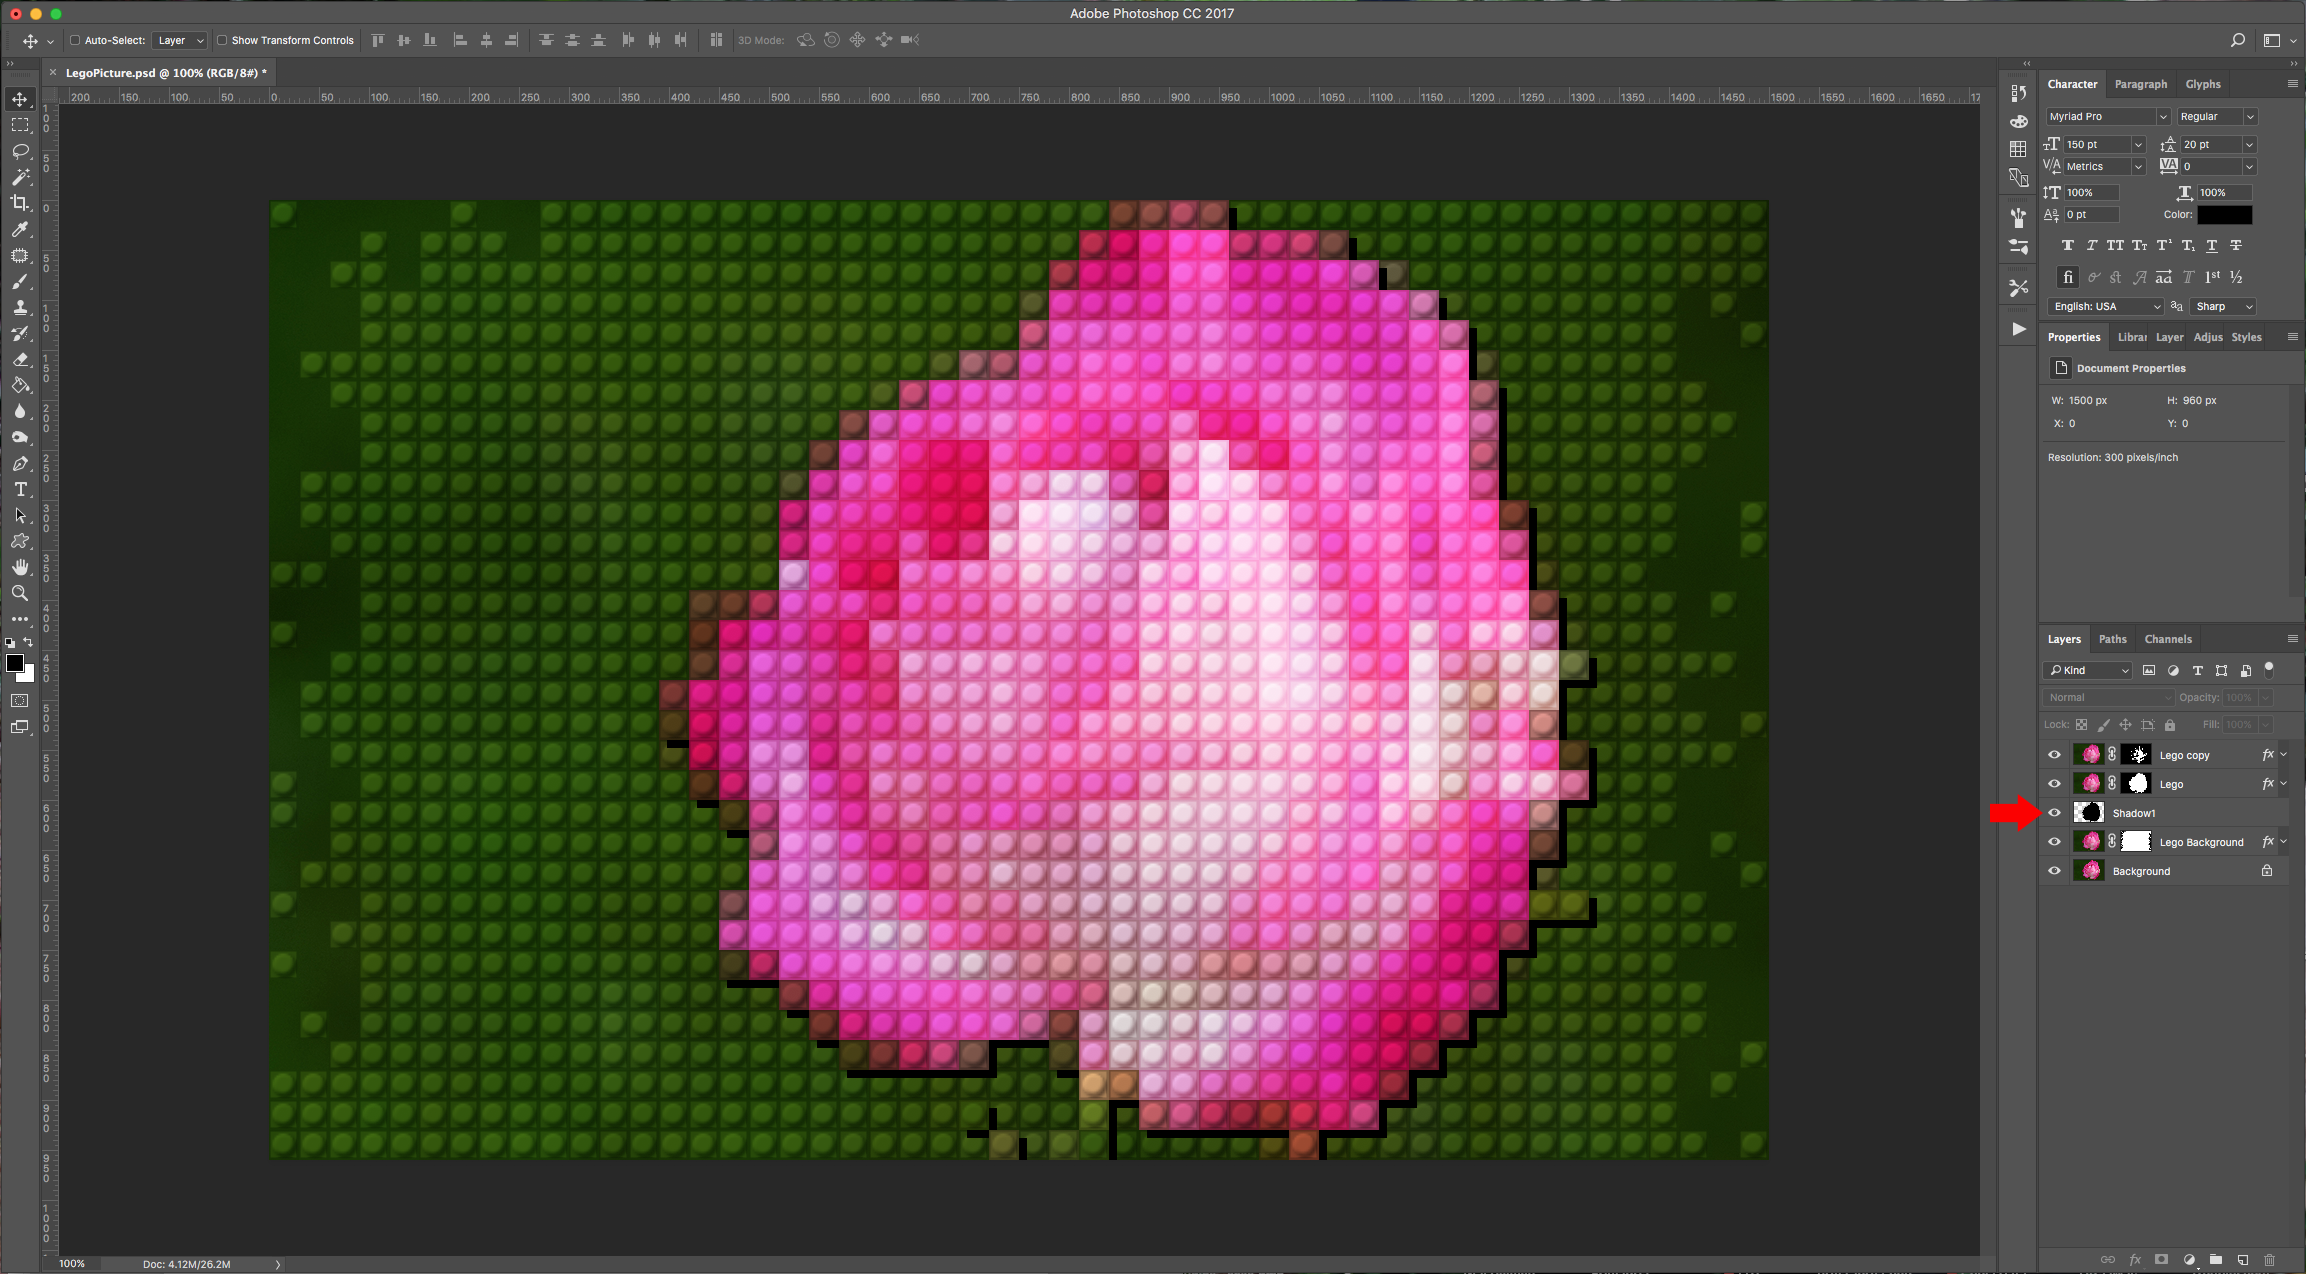
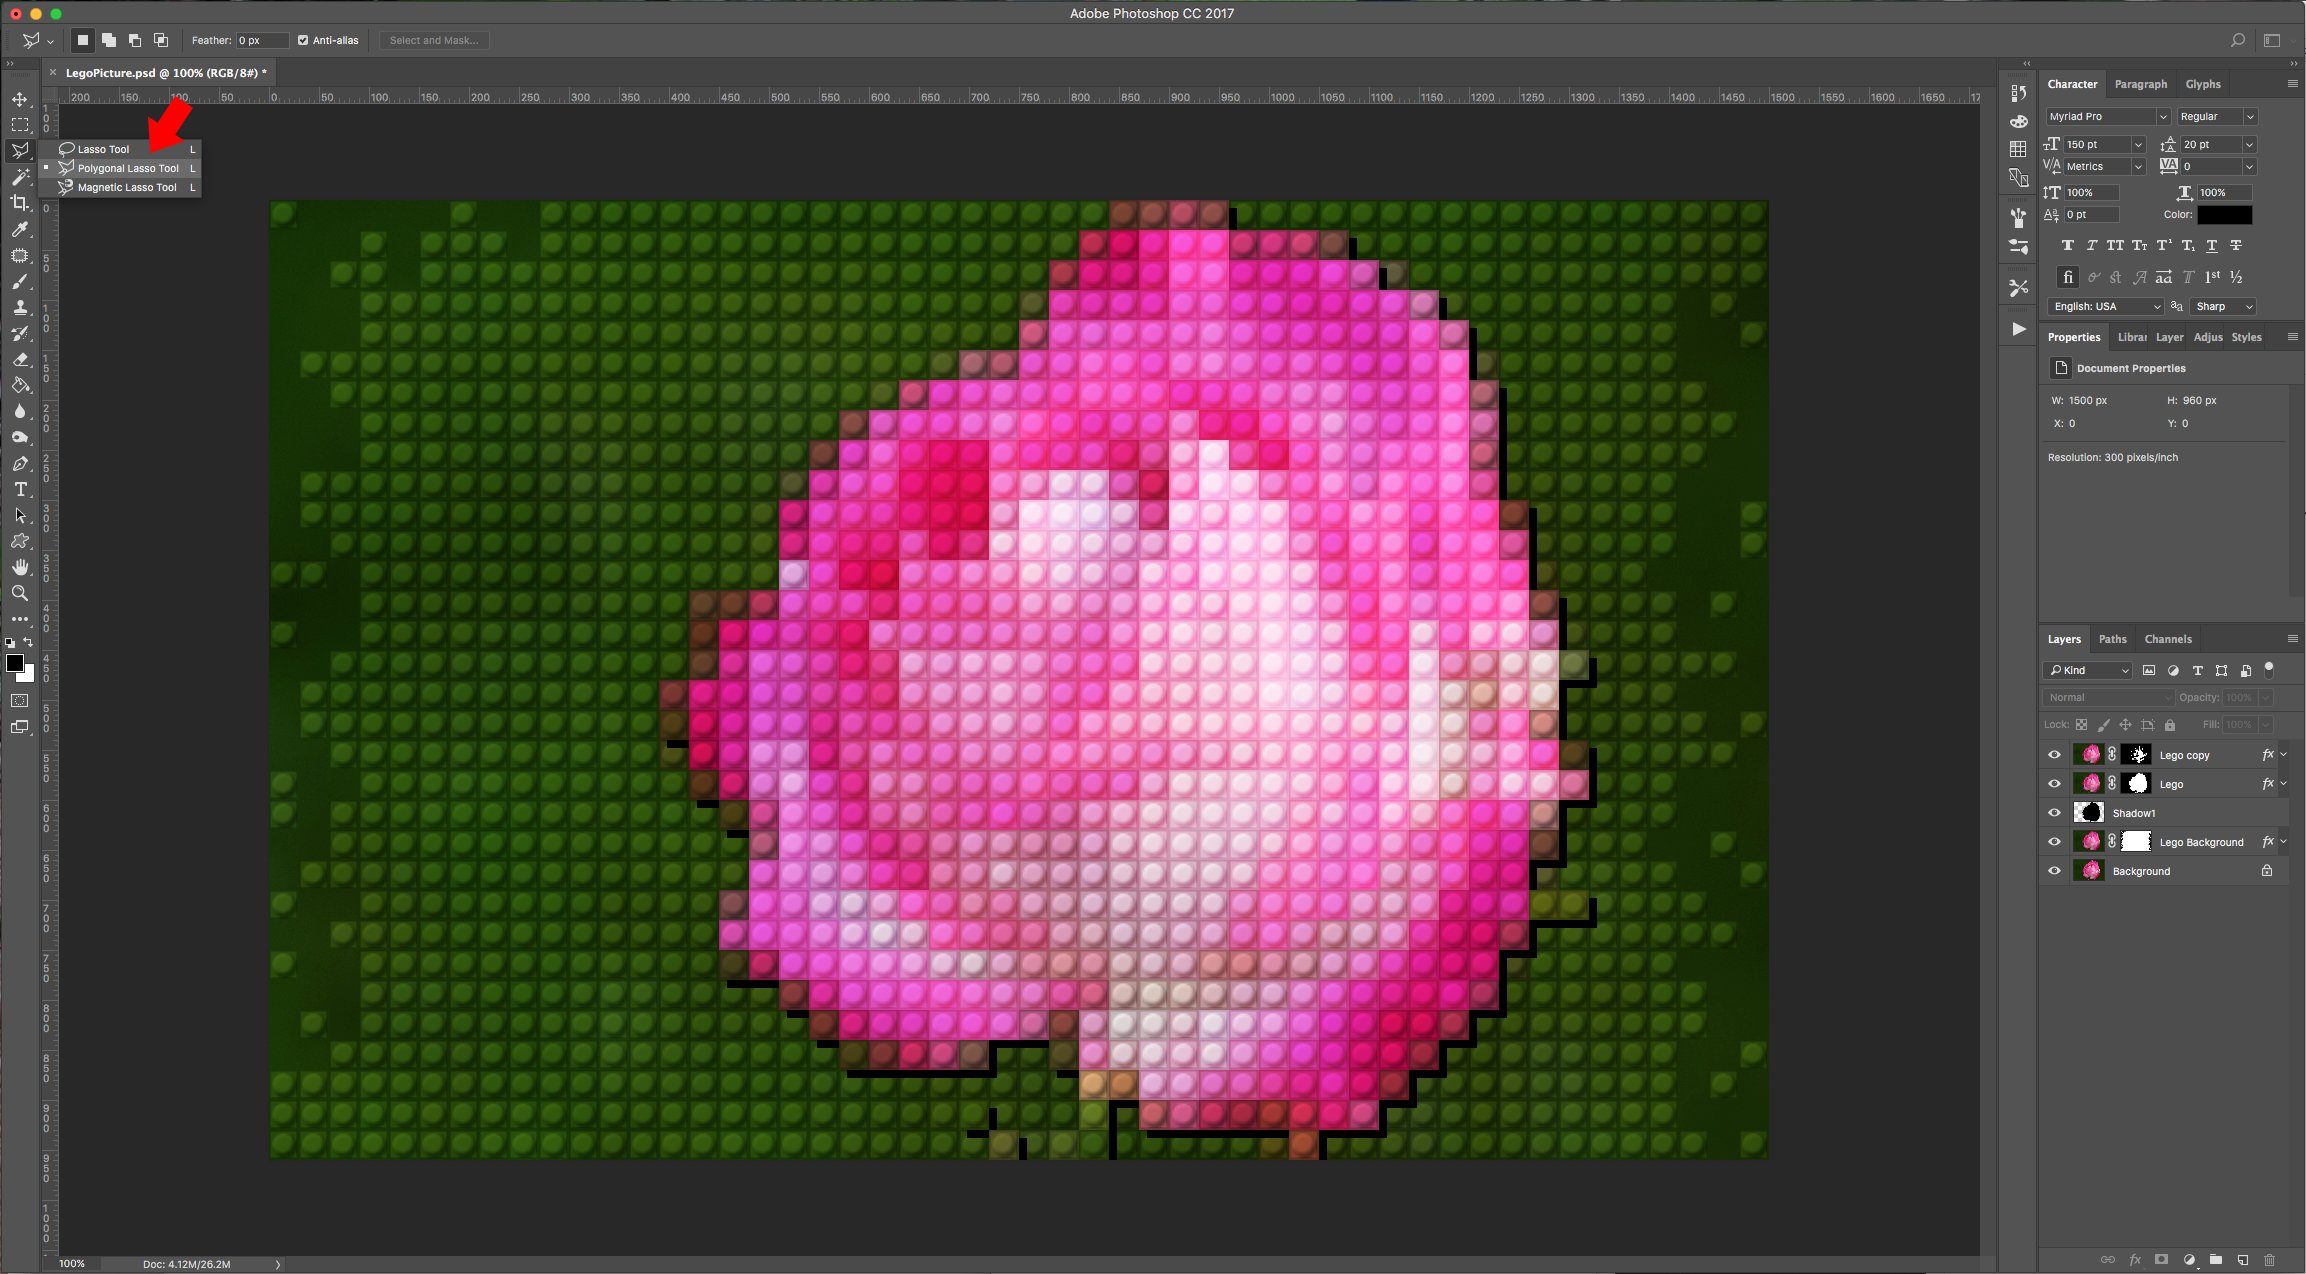
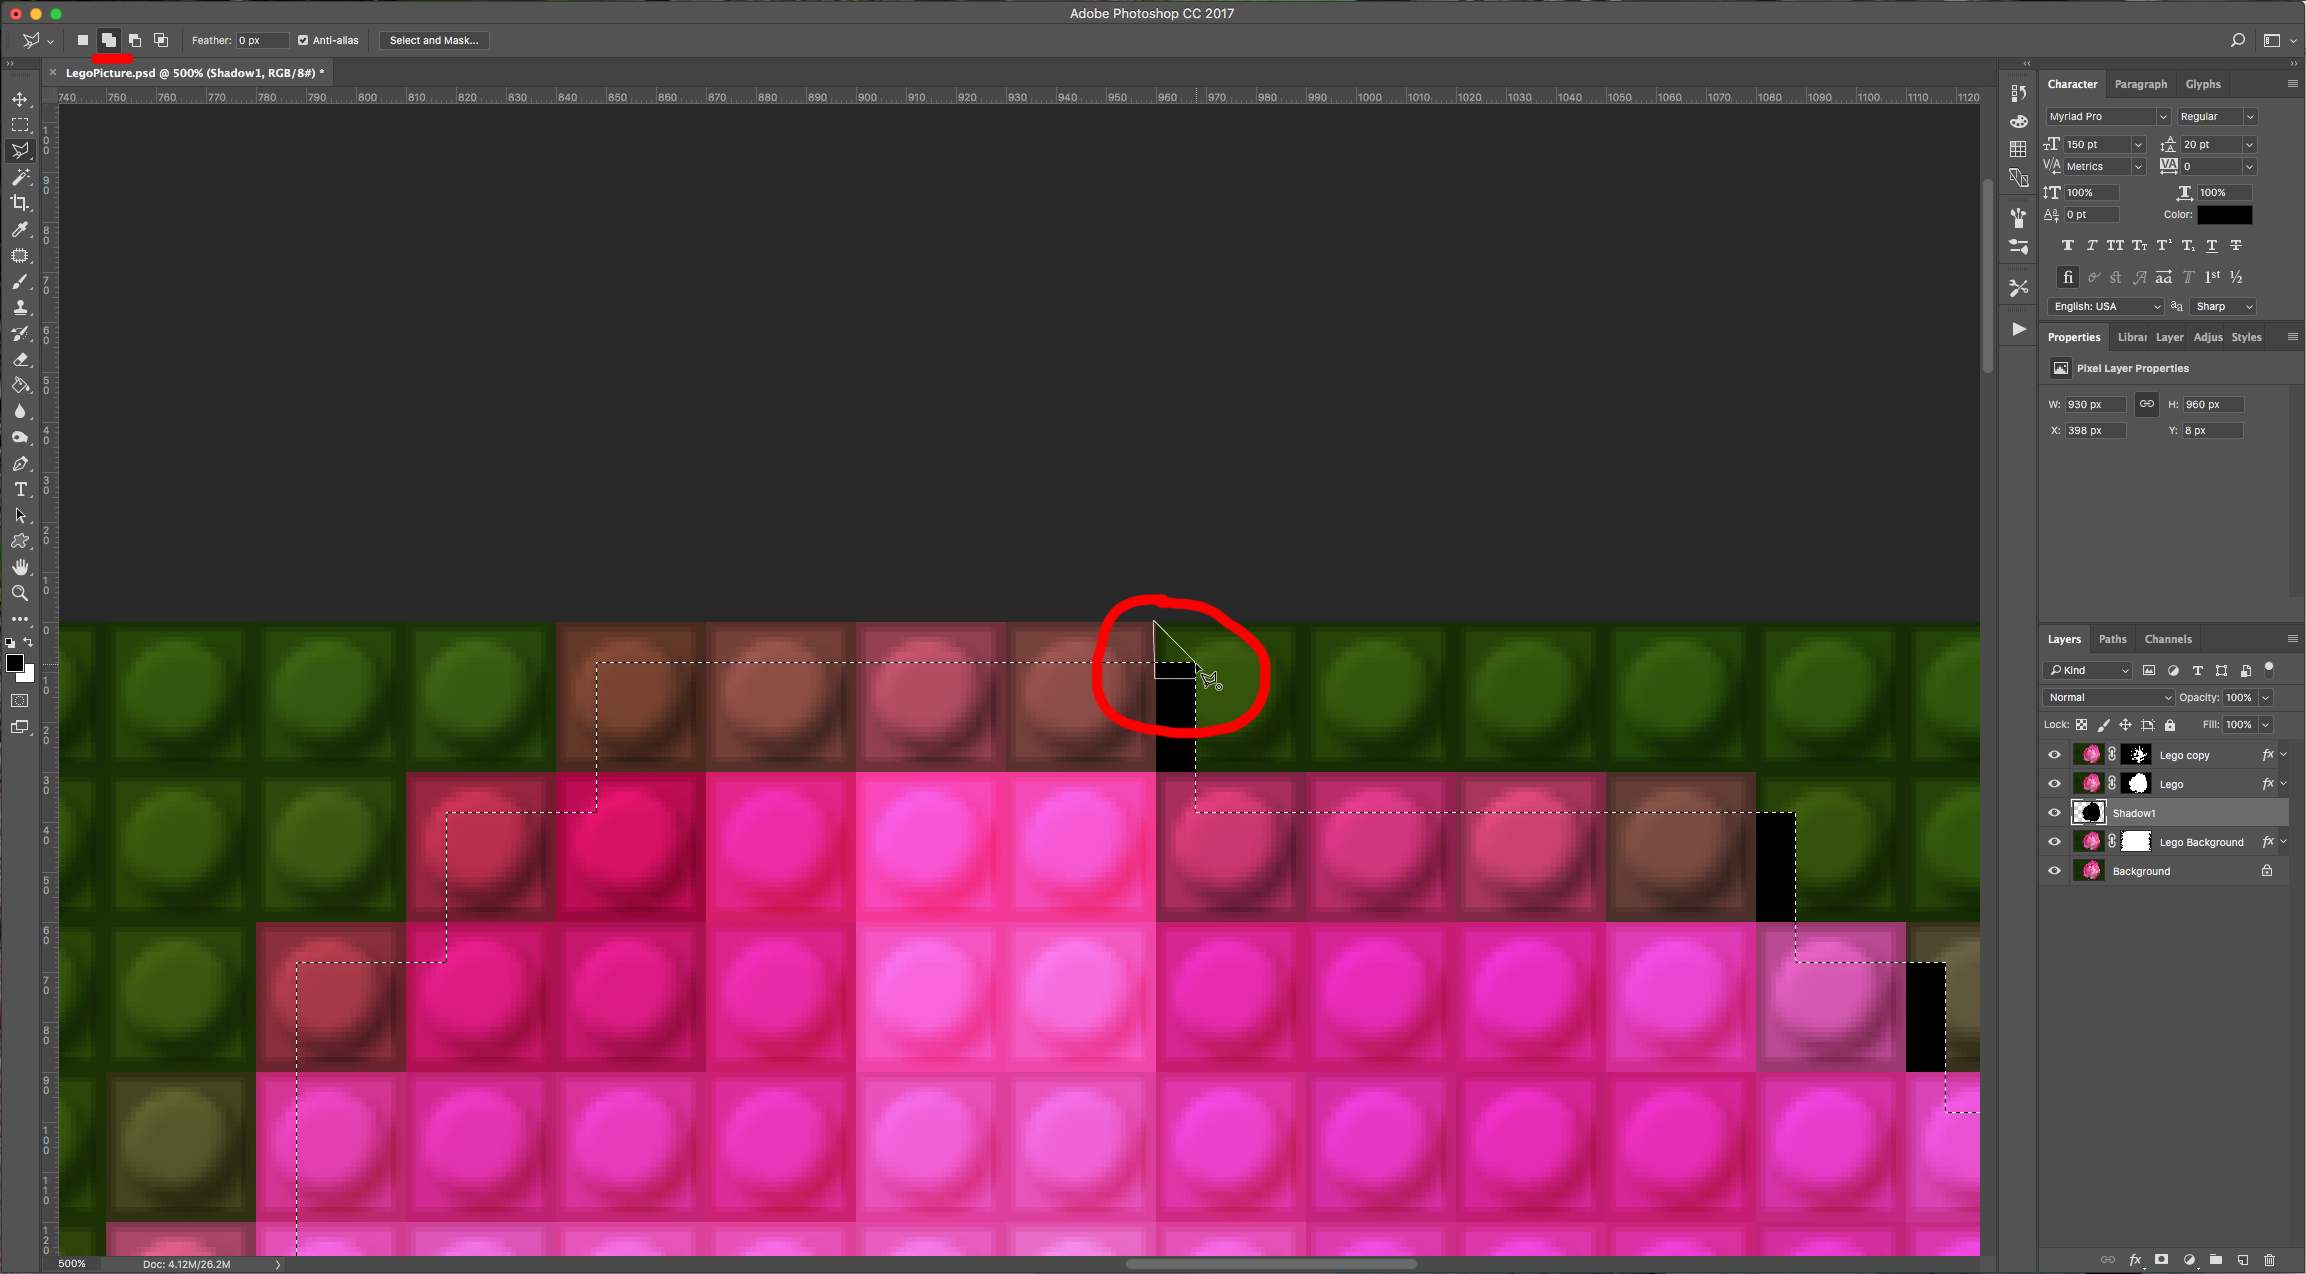
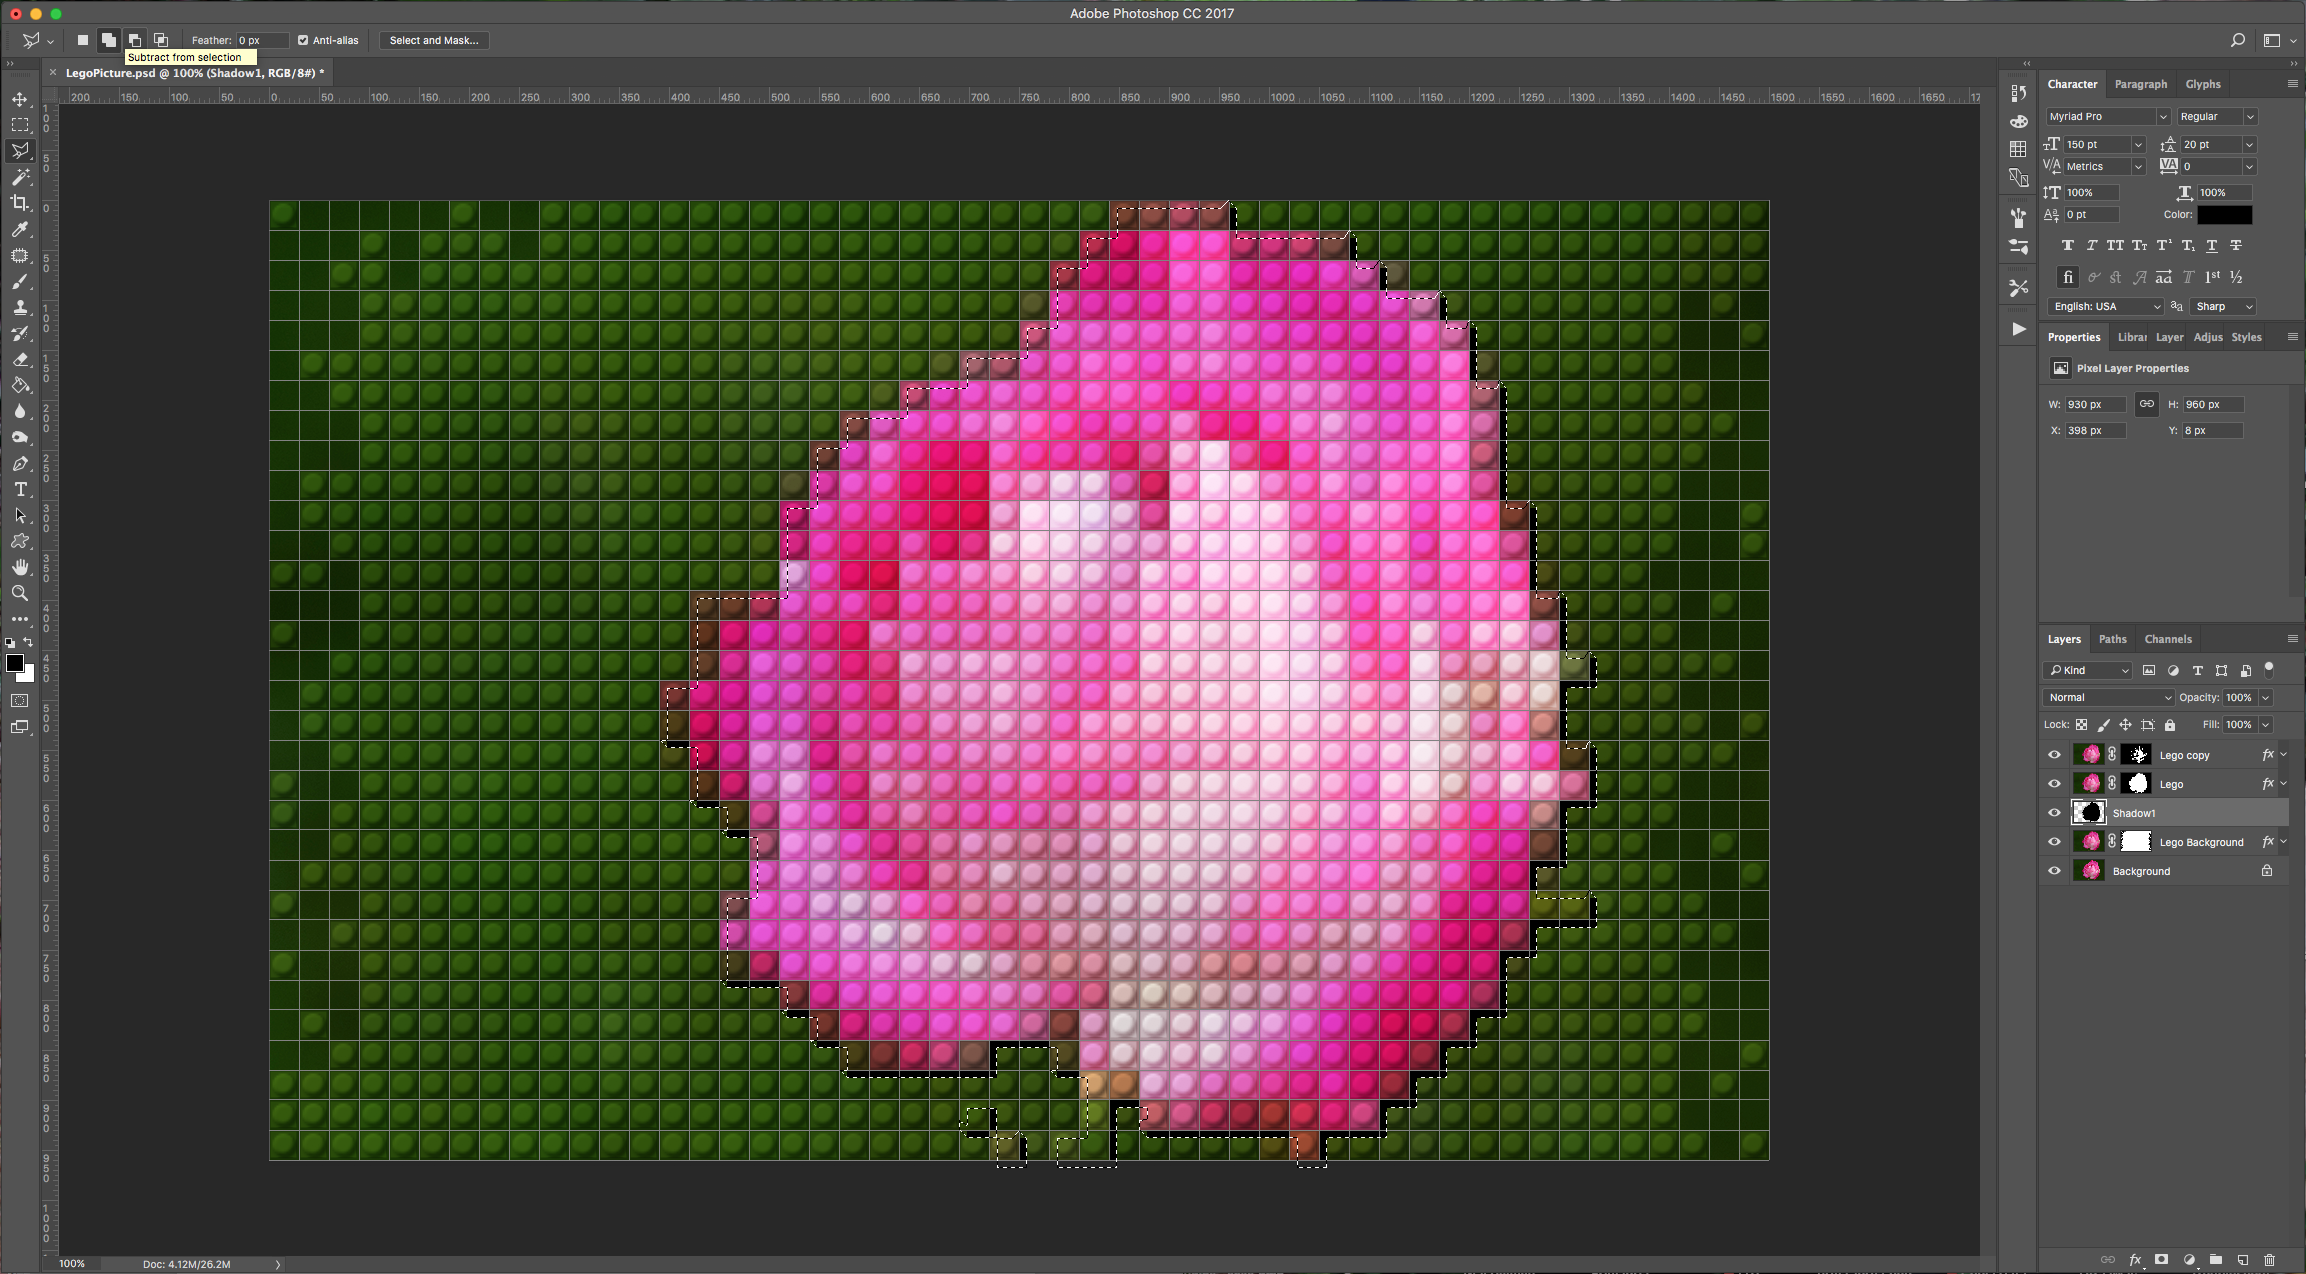
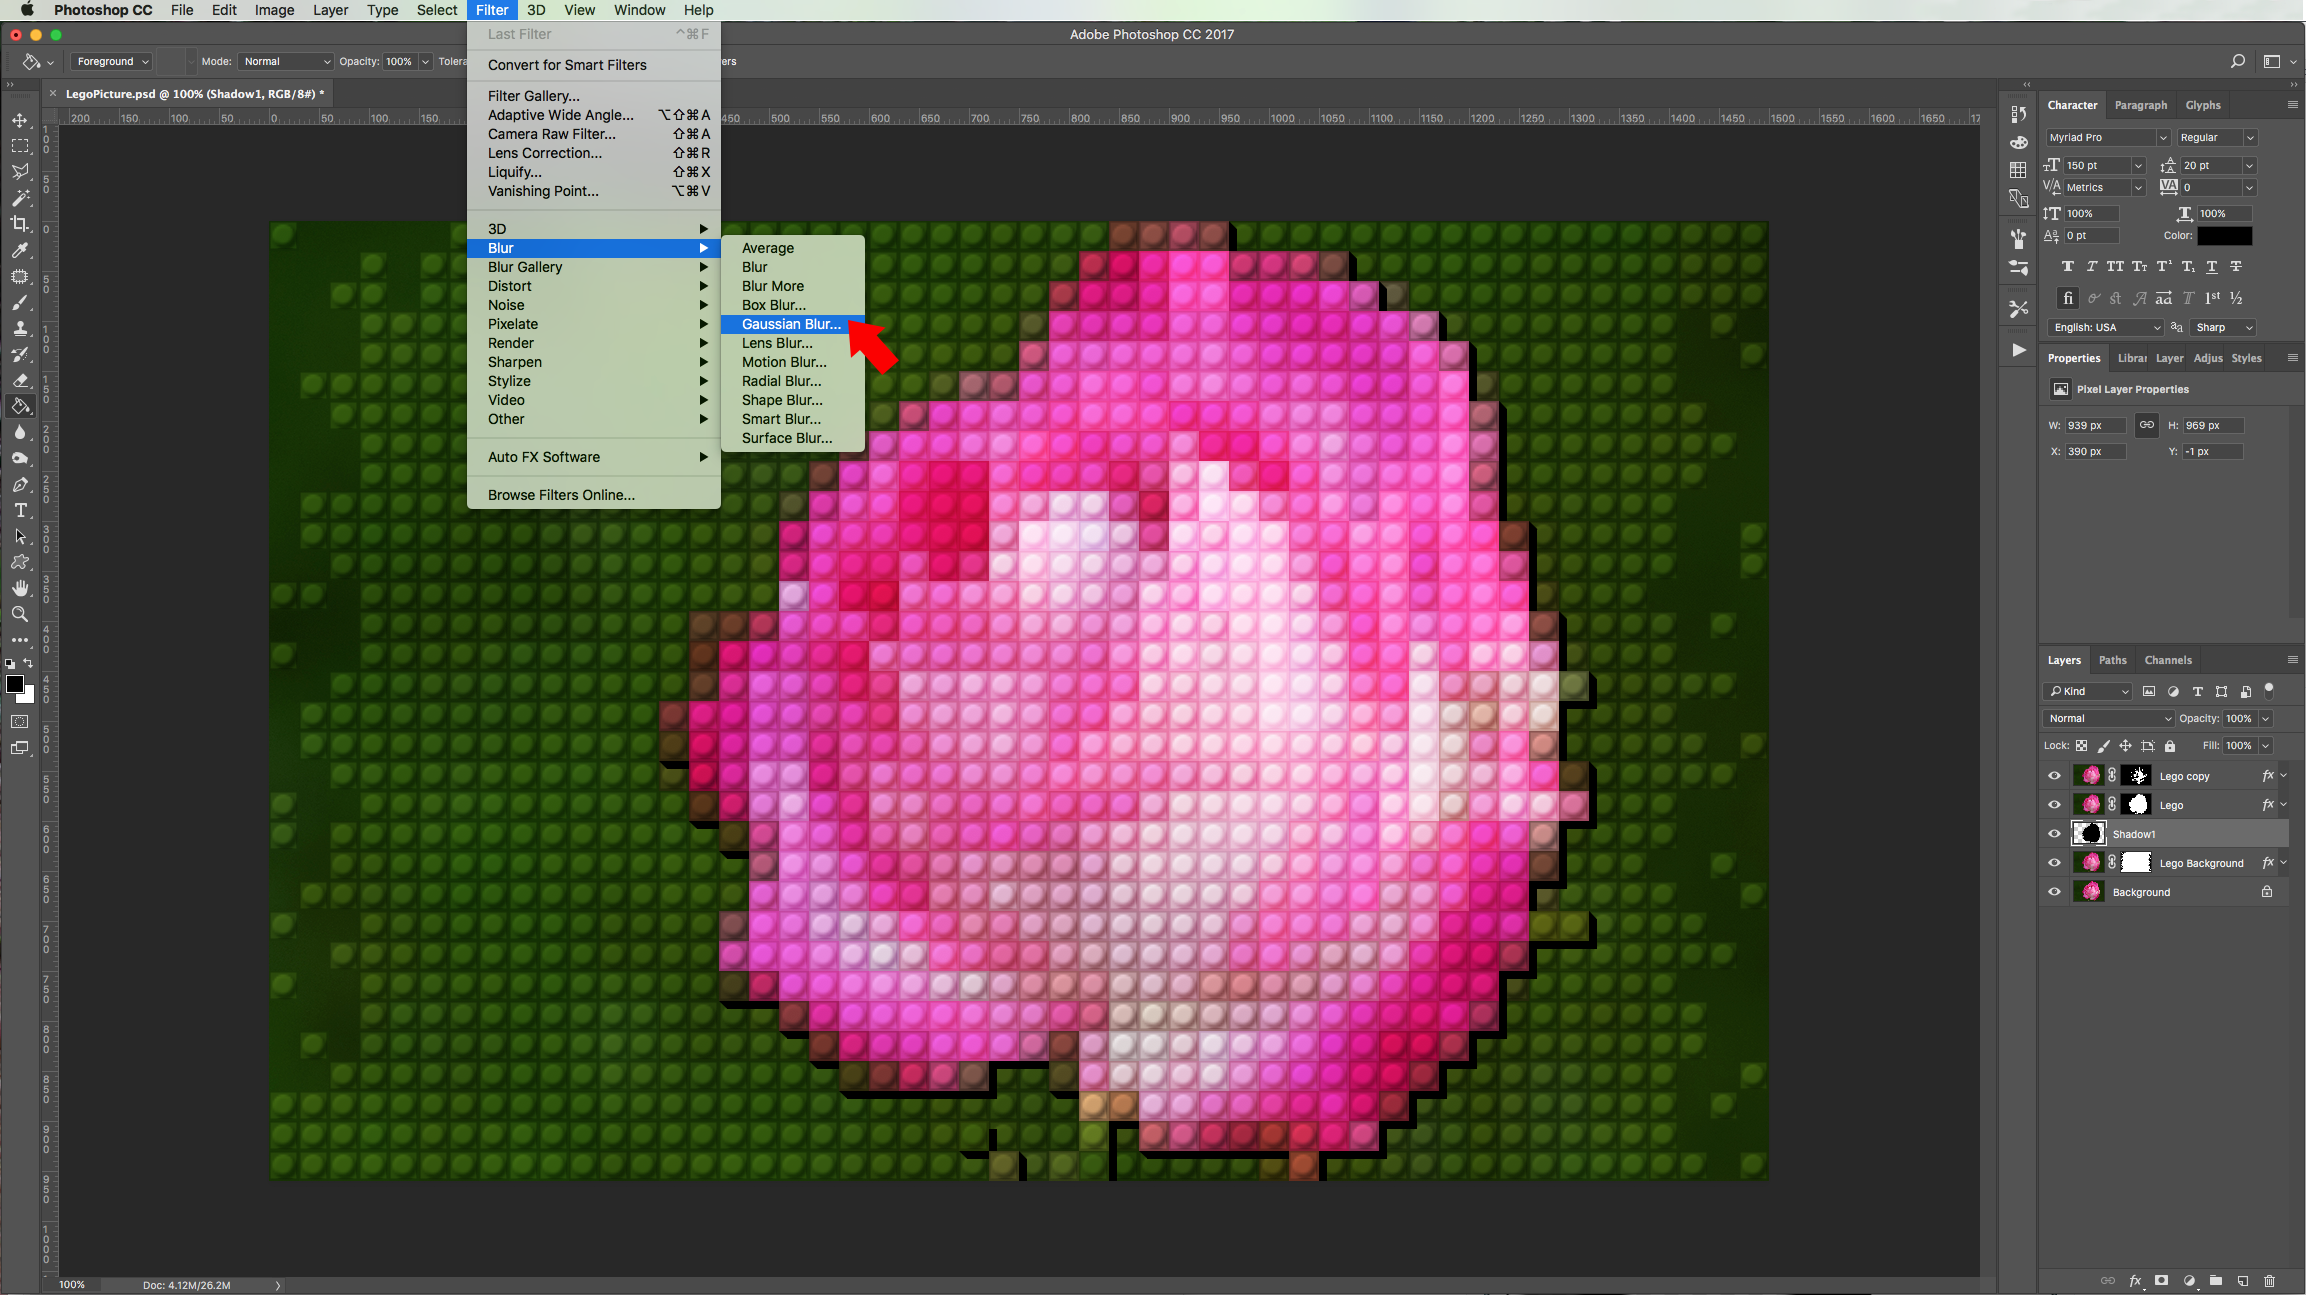
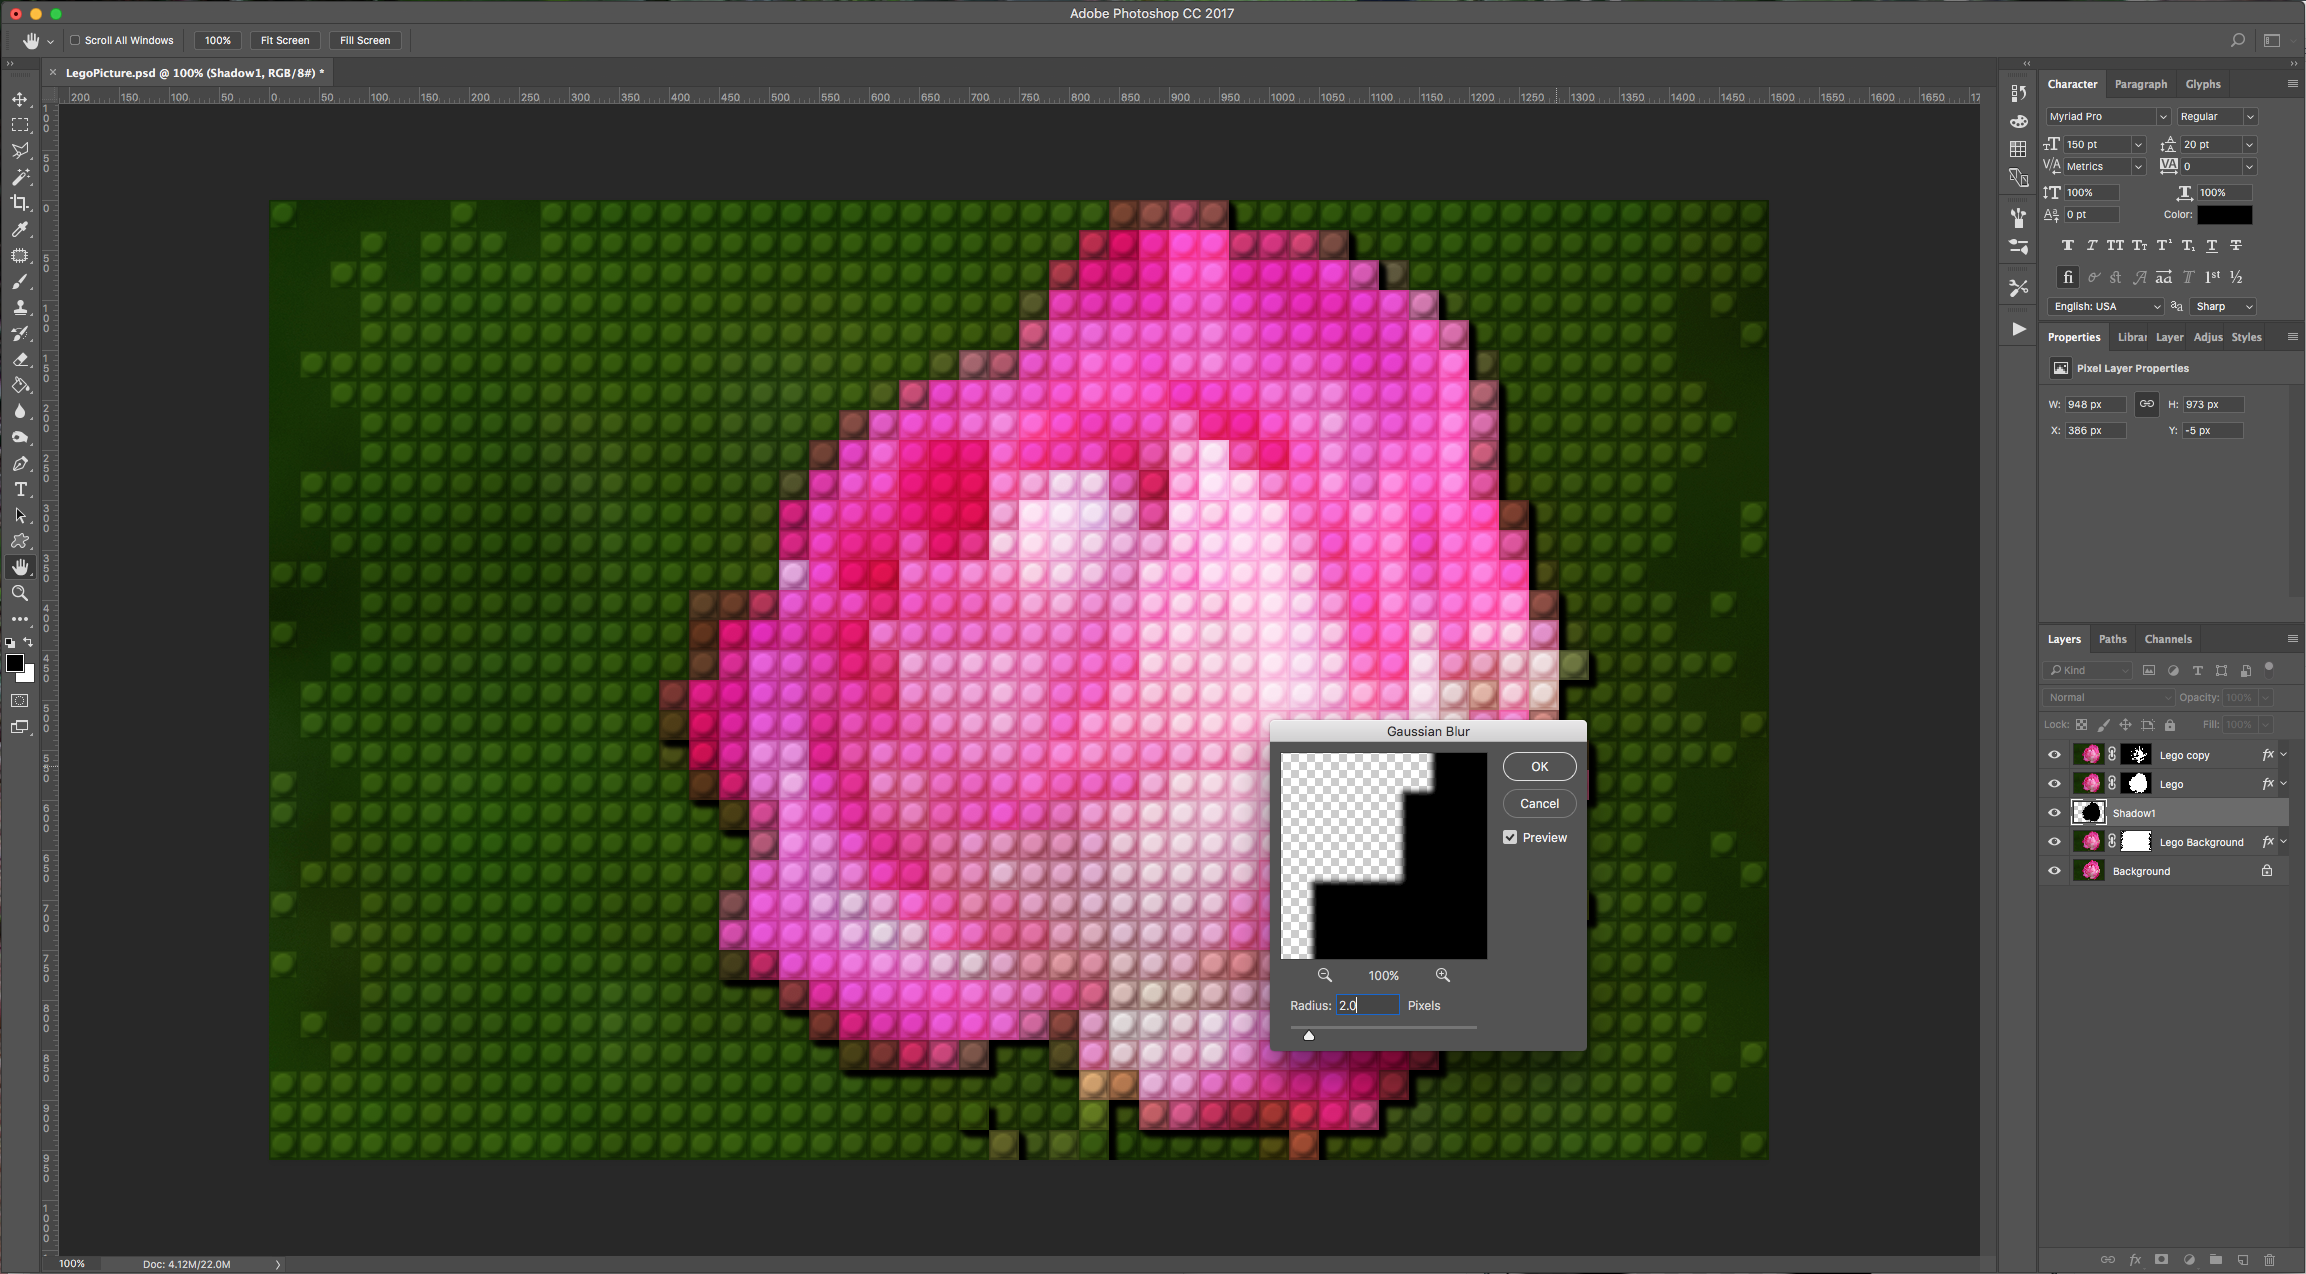
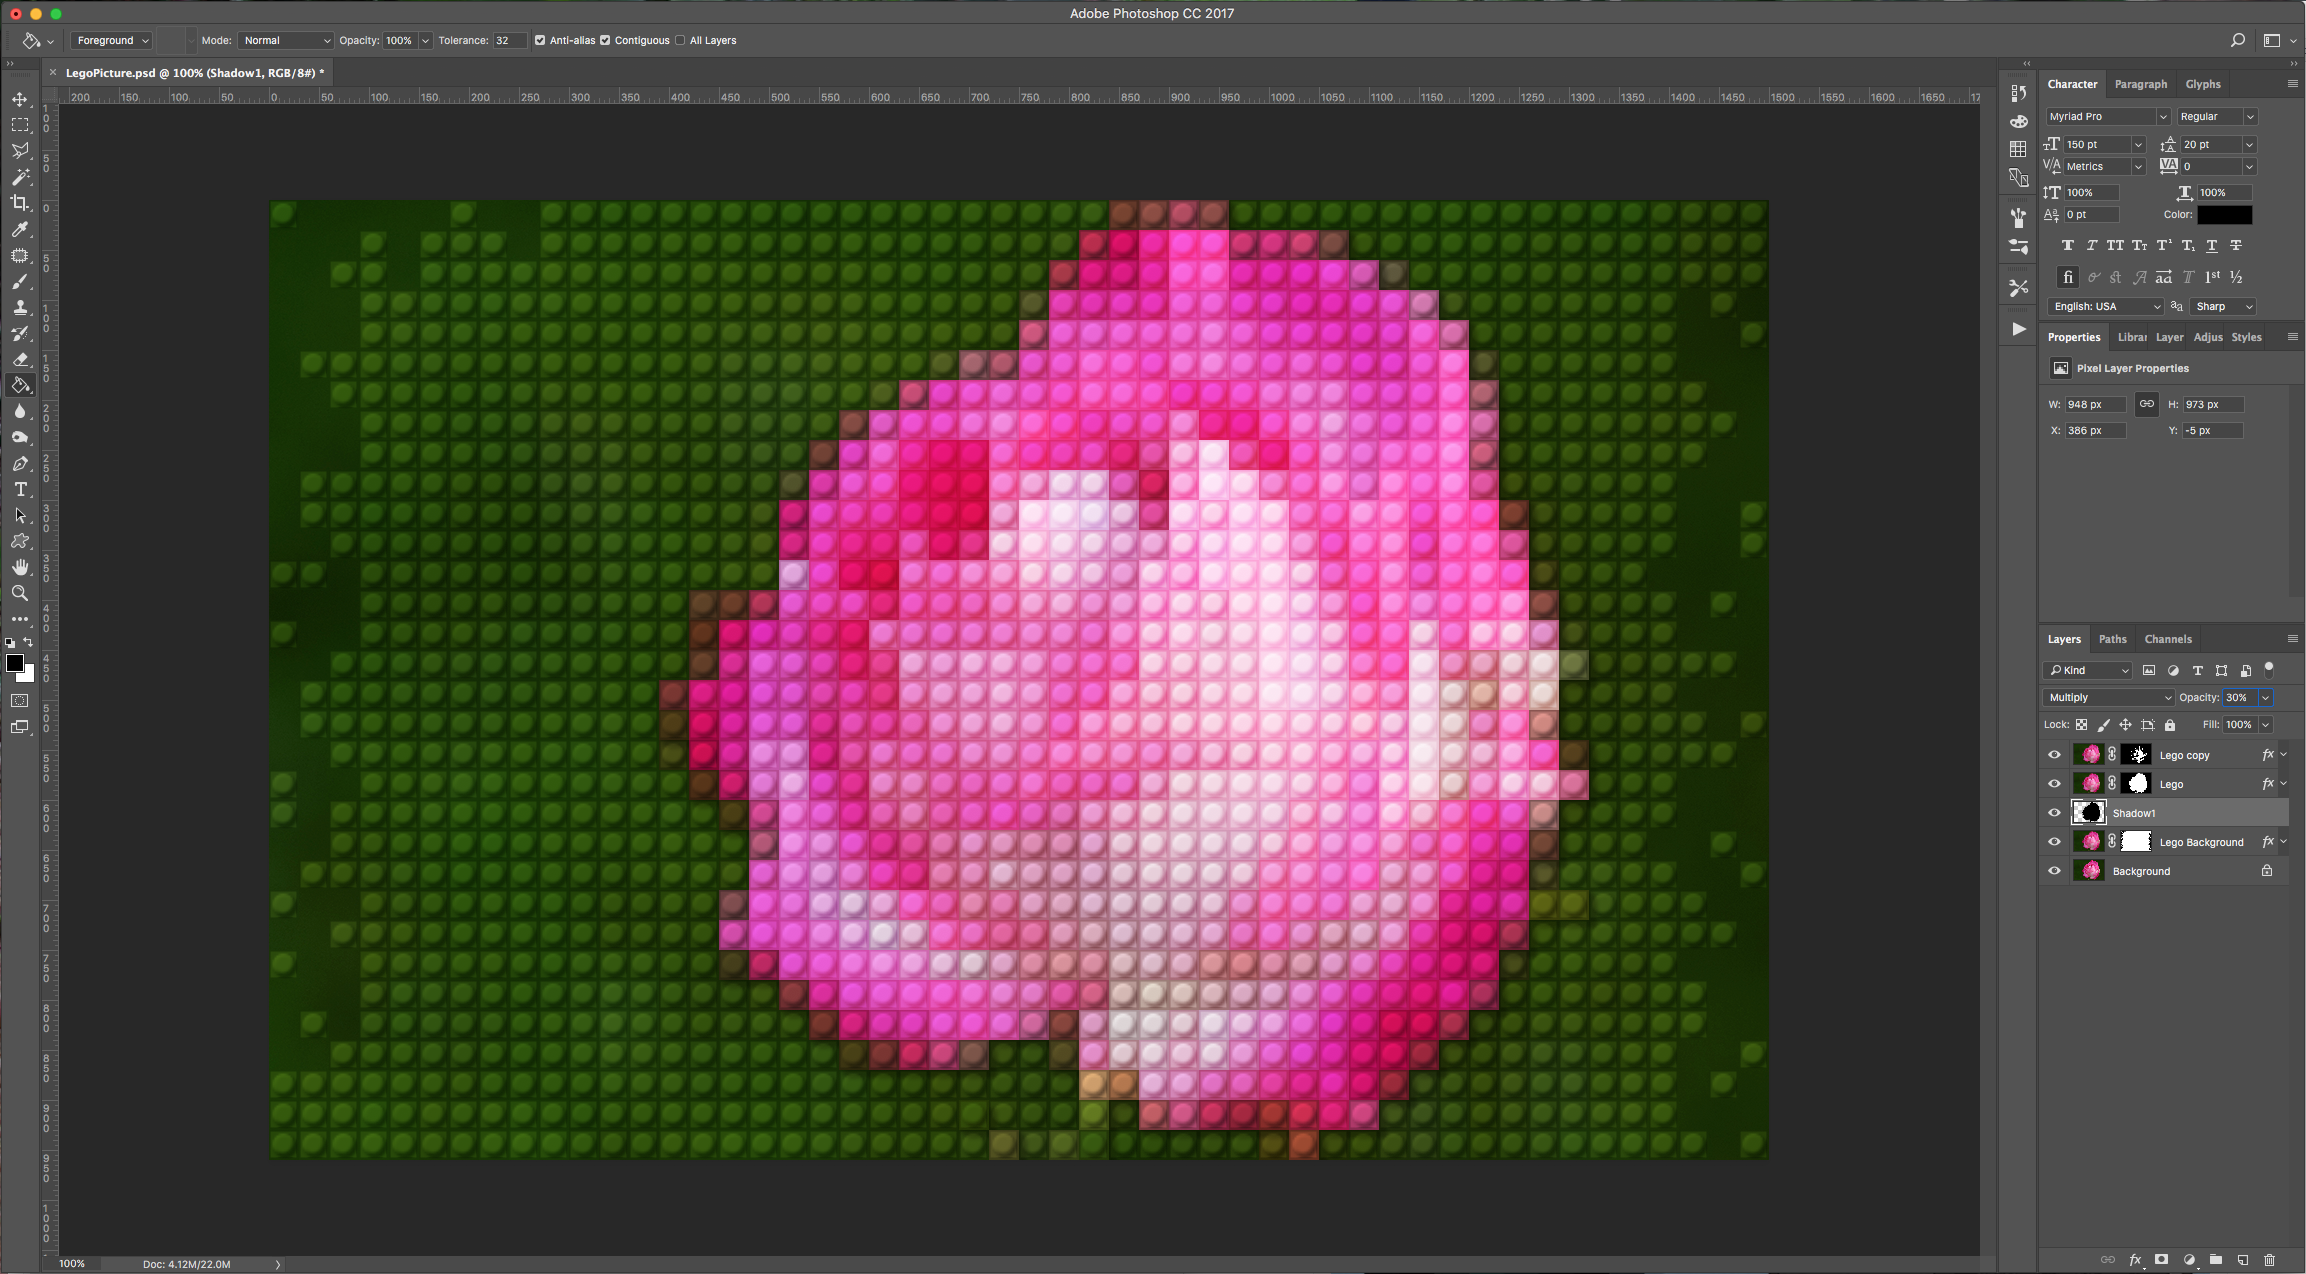
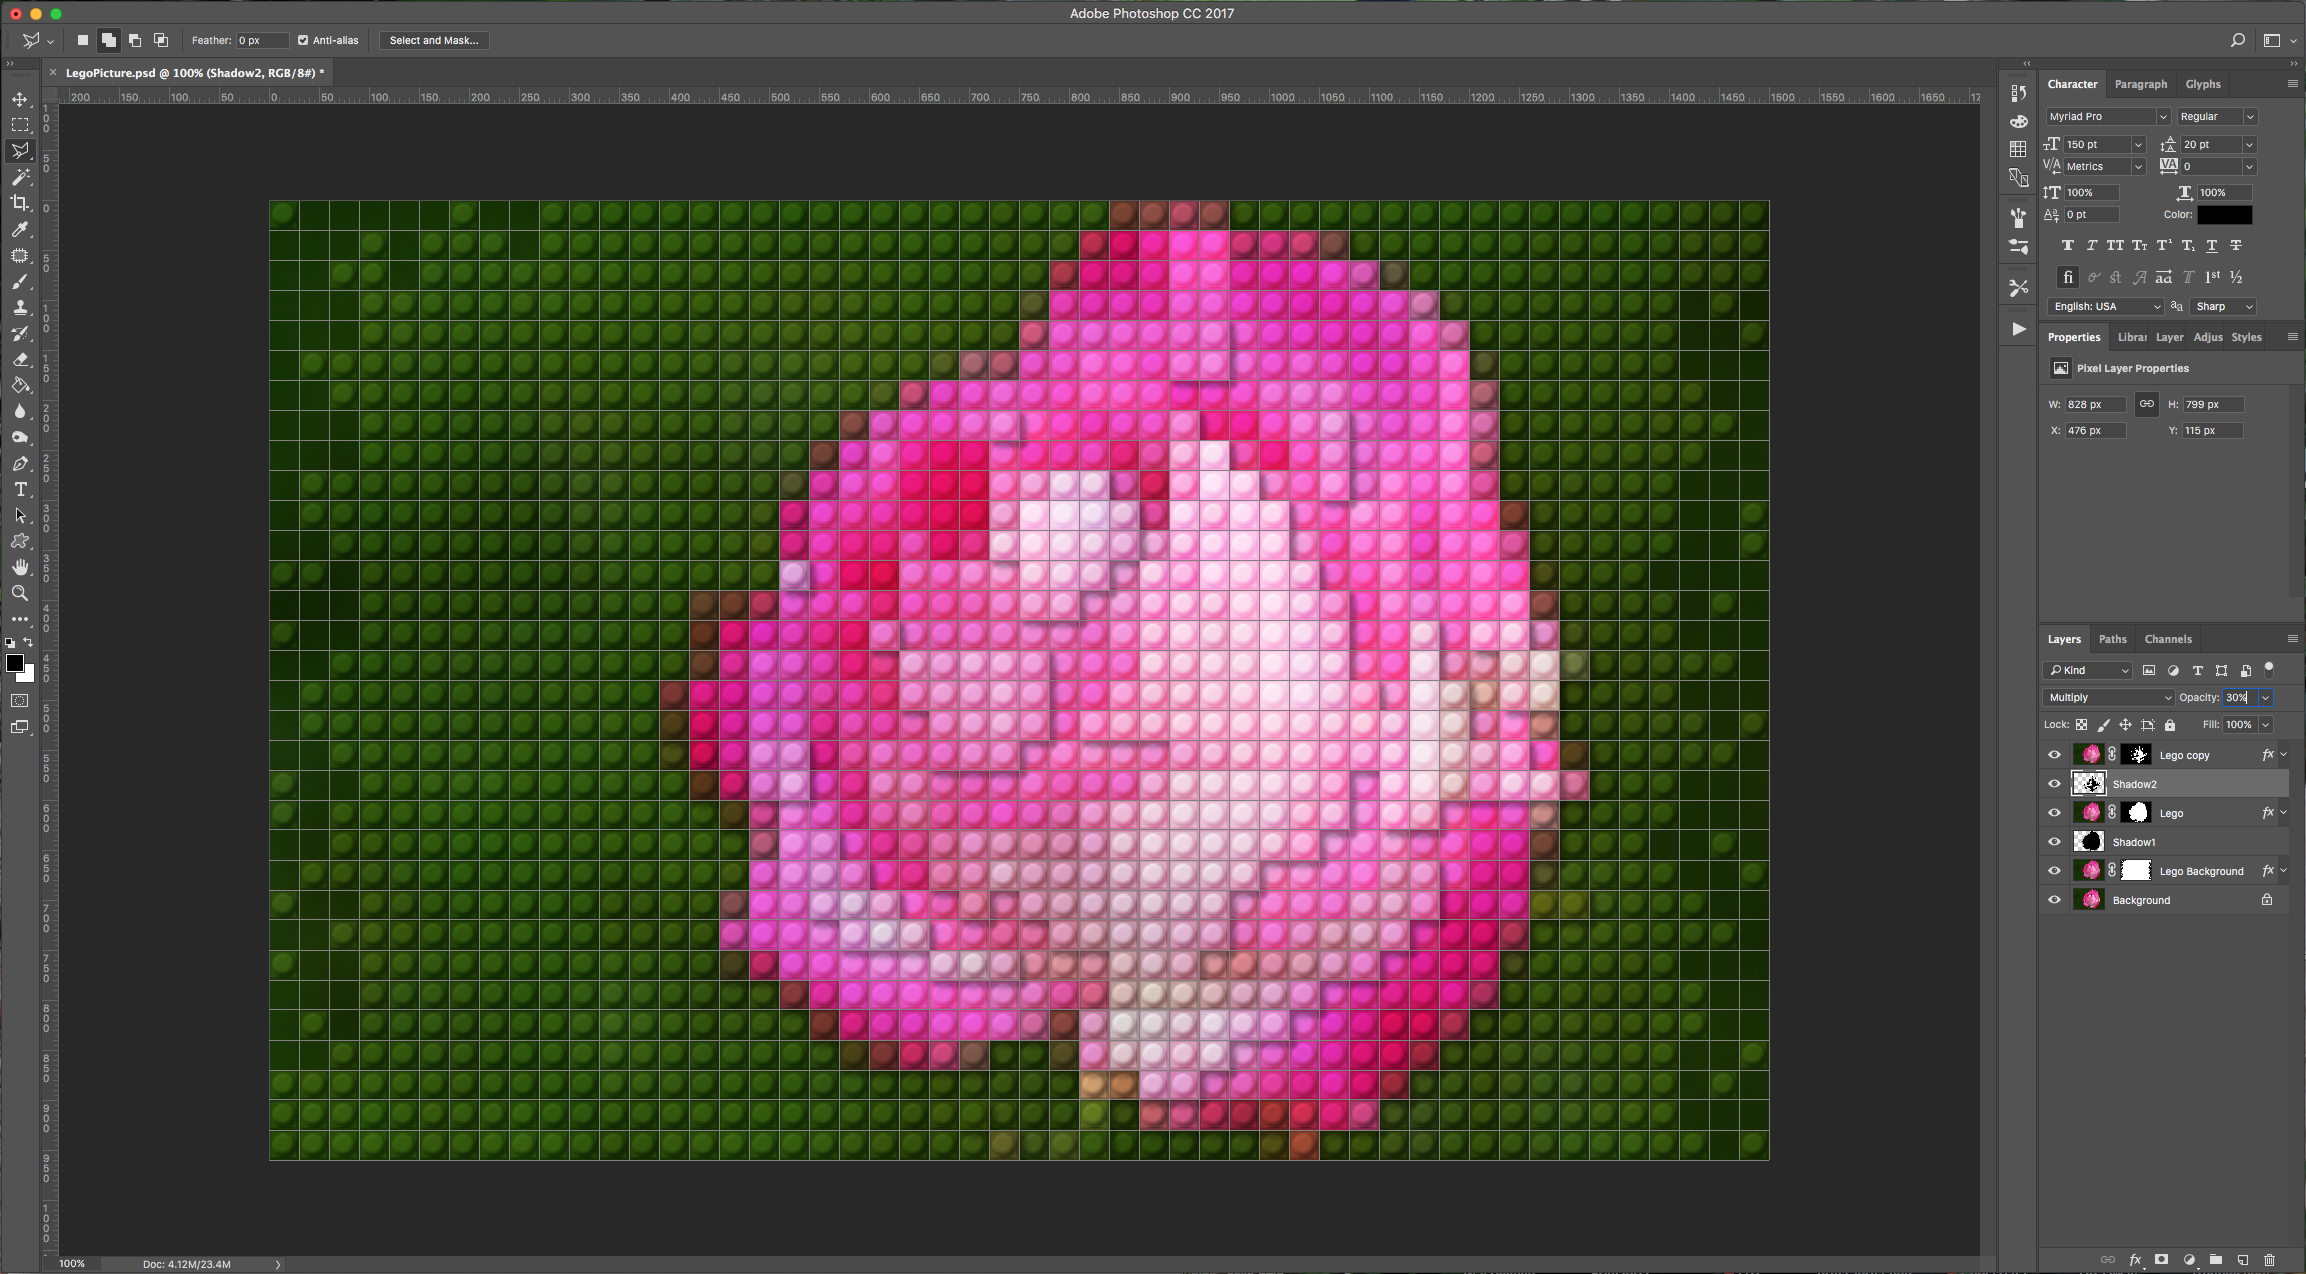
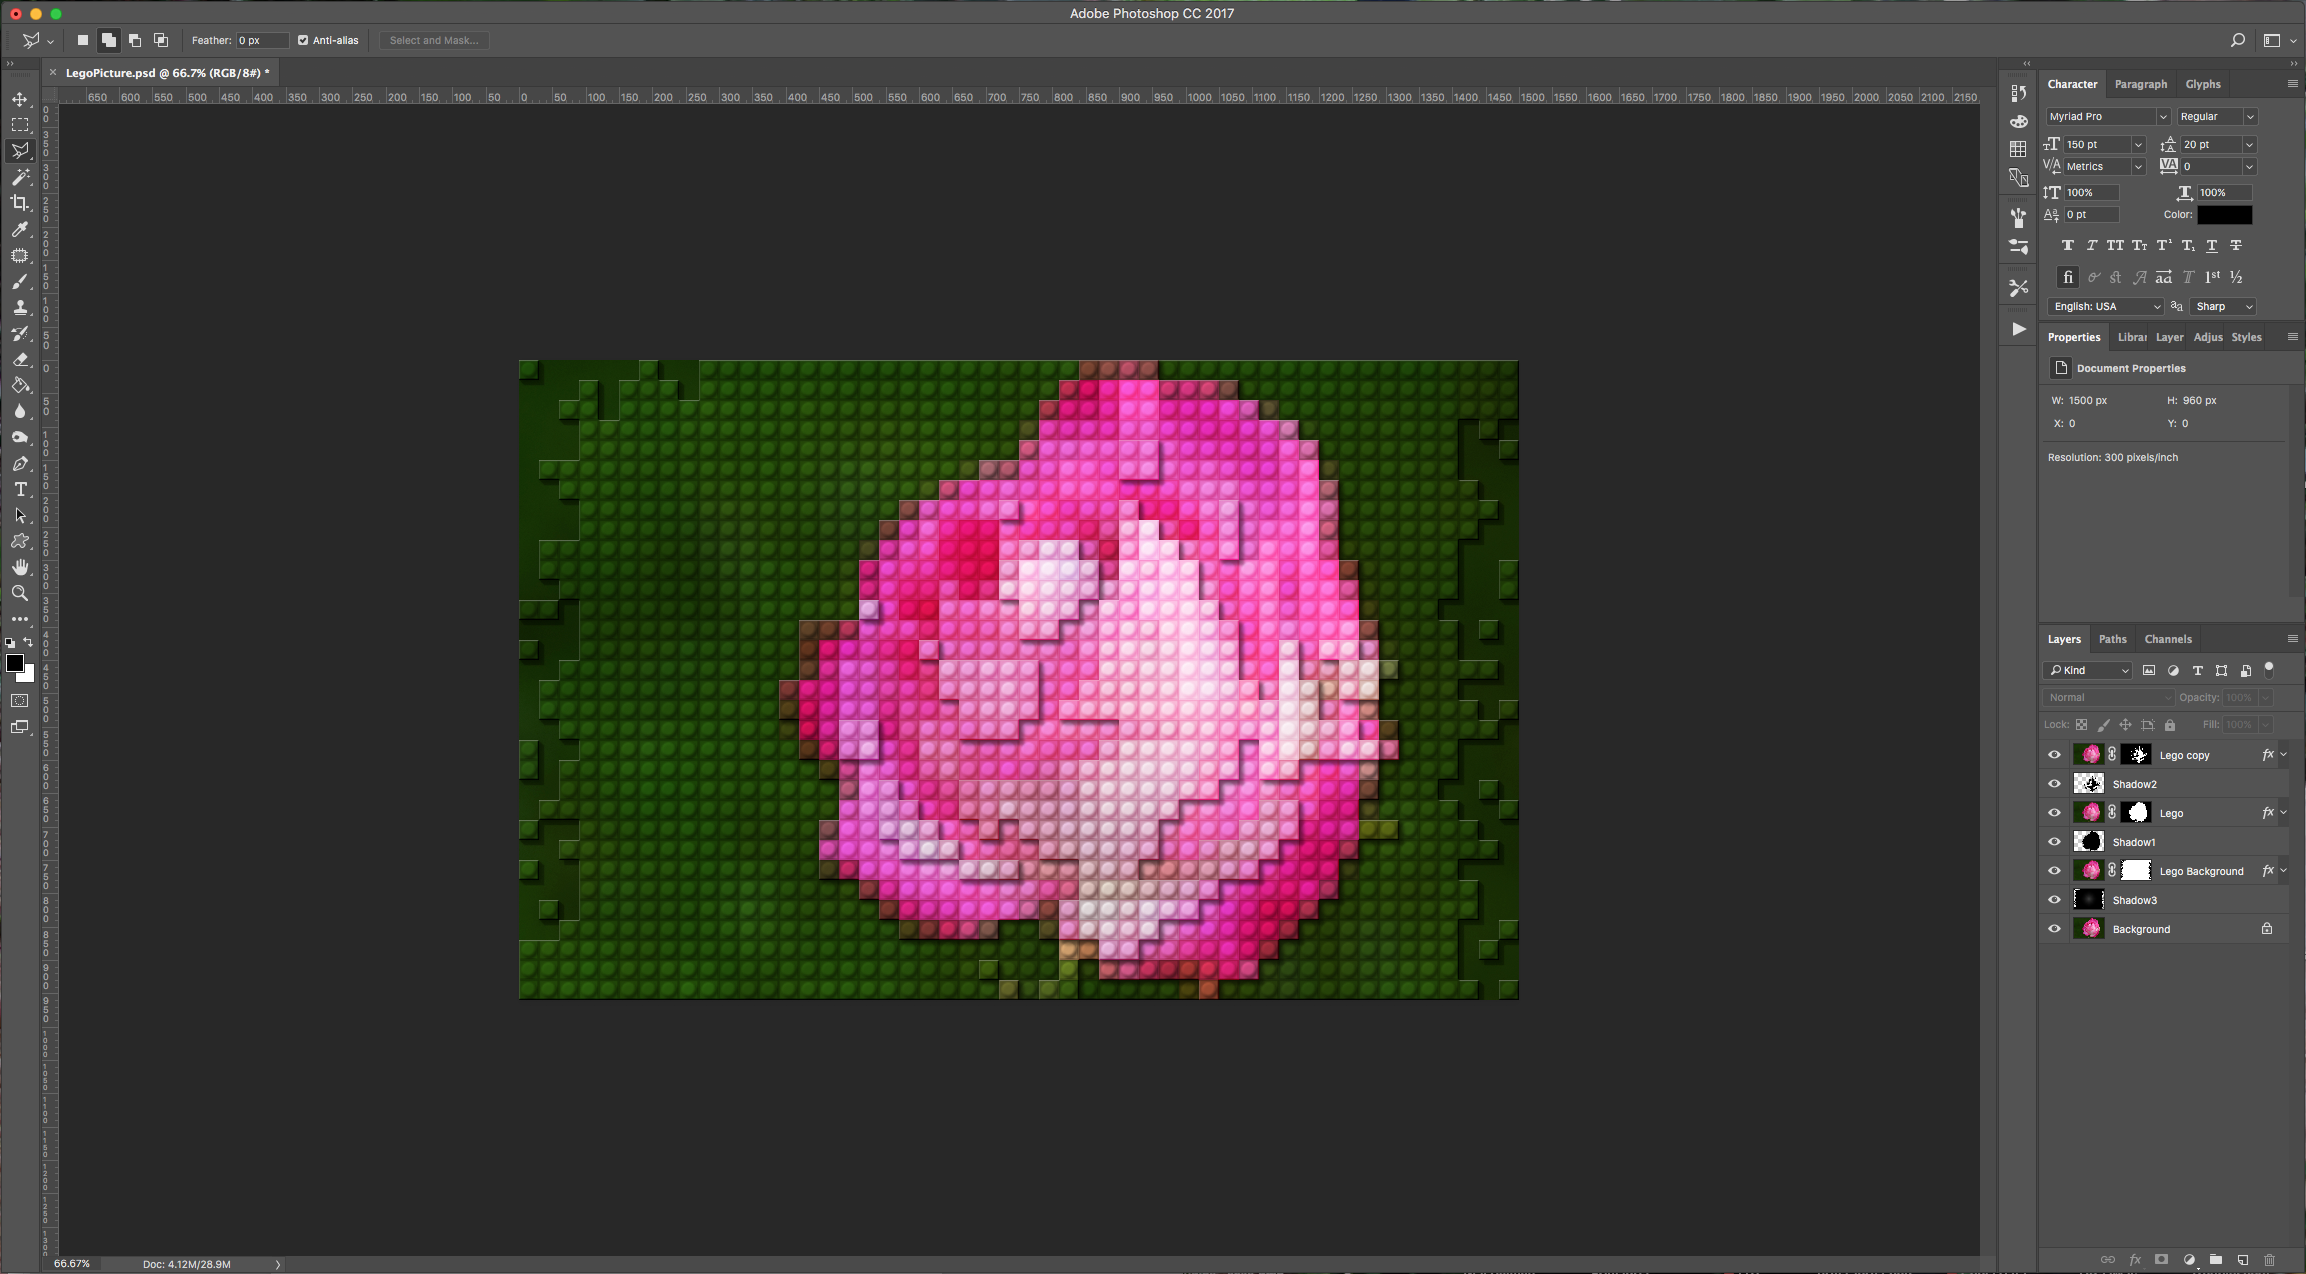
13 - Select the “Polygonal Lasso Tool” with the “Add to Selection” option and draw lines connecting the corner of the shadow to the corner of the block that would be casting the shadow. Repeat this for every visible corner. Fill the selection with black (Shift + F5). Deselect (D). Go to Filter > Blur > Gaussian Blur and set the “Radius” to 2.0 pixels. Change the layer’s “Blending Mode” to “Multiply” and the “Opacity” to 30%. Repeat this process with the “Lego copy” and “Lego Background” layers and create a shadow for them too.
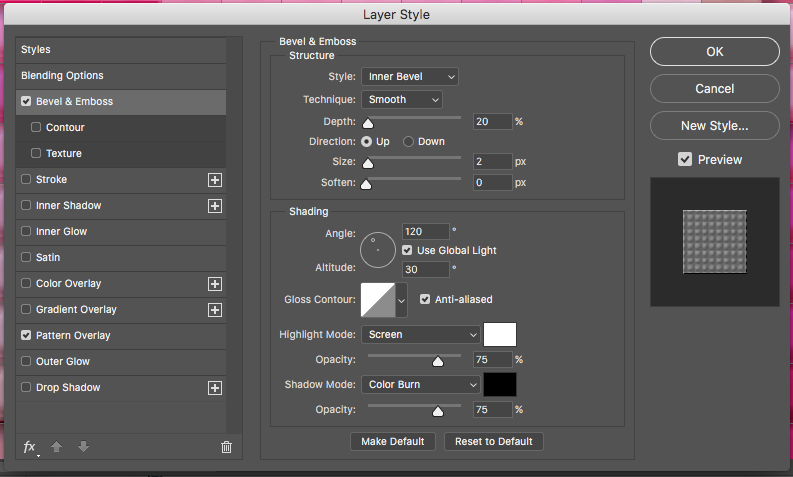
14 - Double-click on the “Lego copy” Layer and add the following “layer Styles”:
Bevel & Emboss:
Drop Shadow:
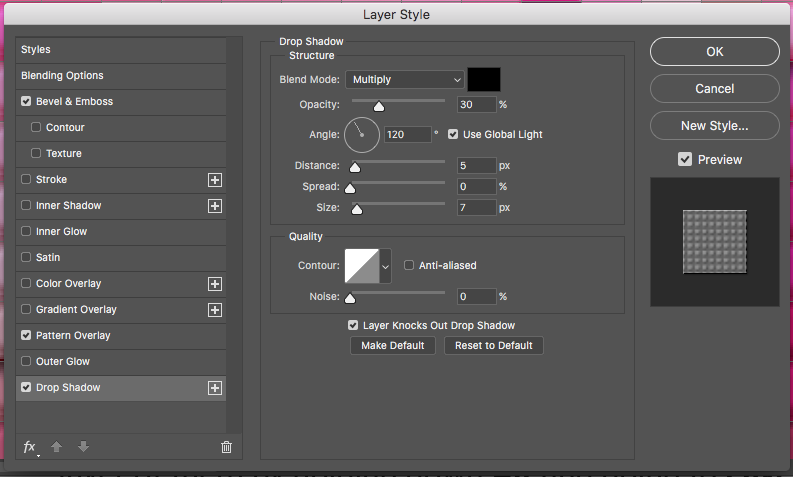
Do the same with the “Lego” and the “Lego Background” layers.
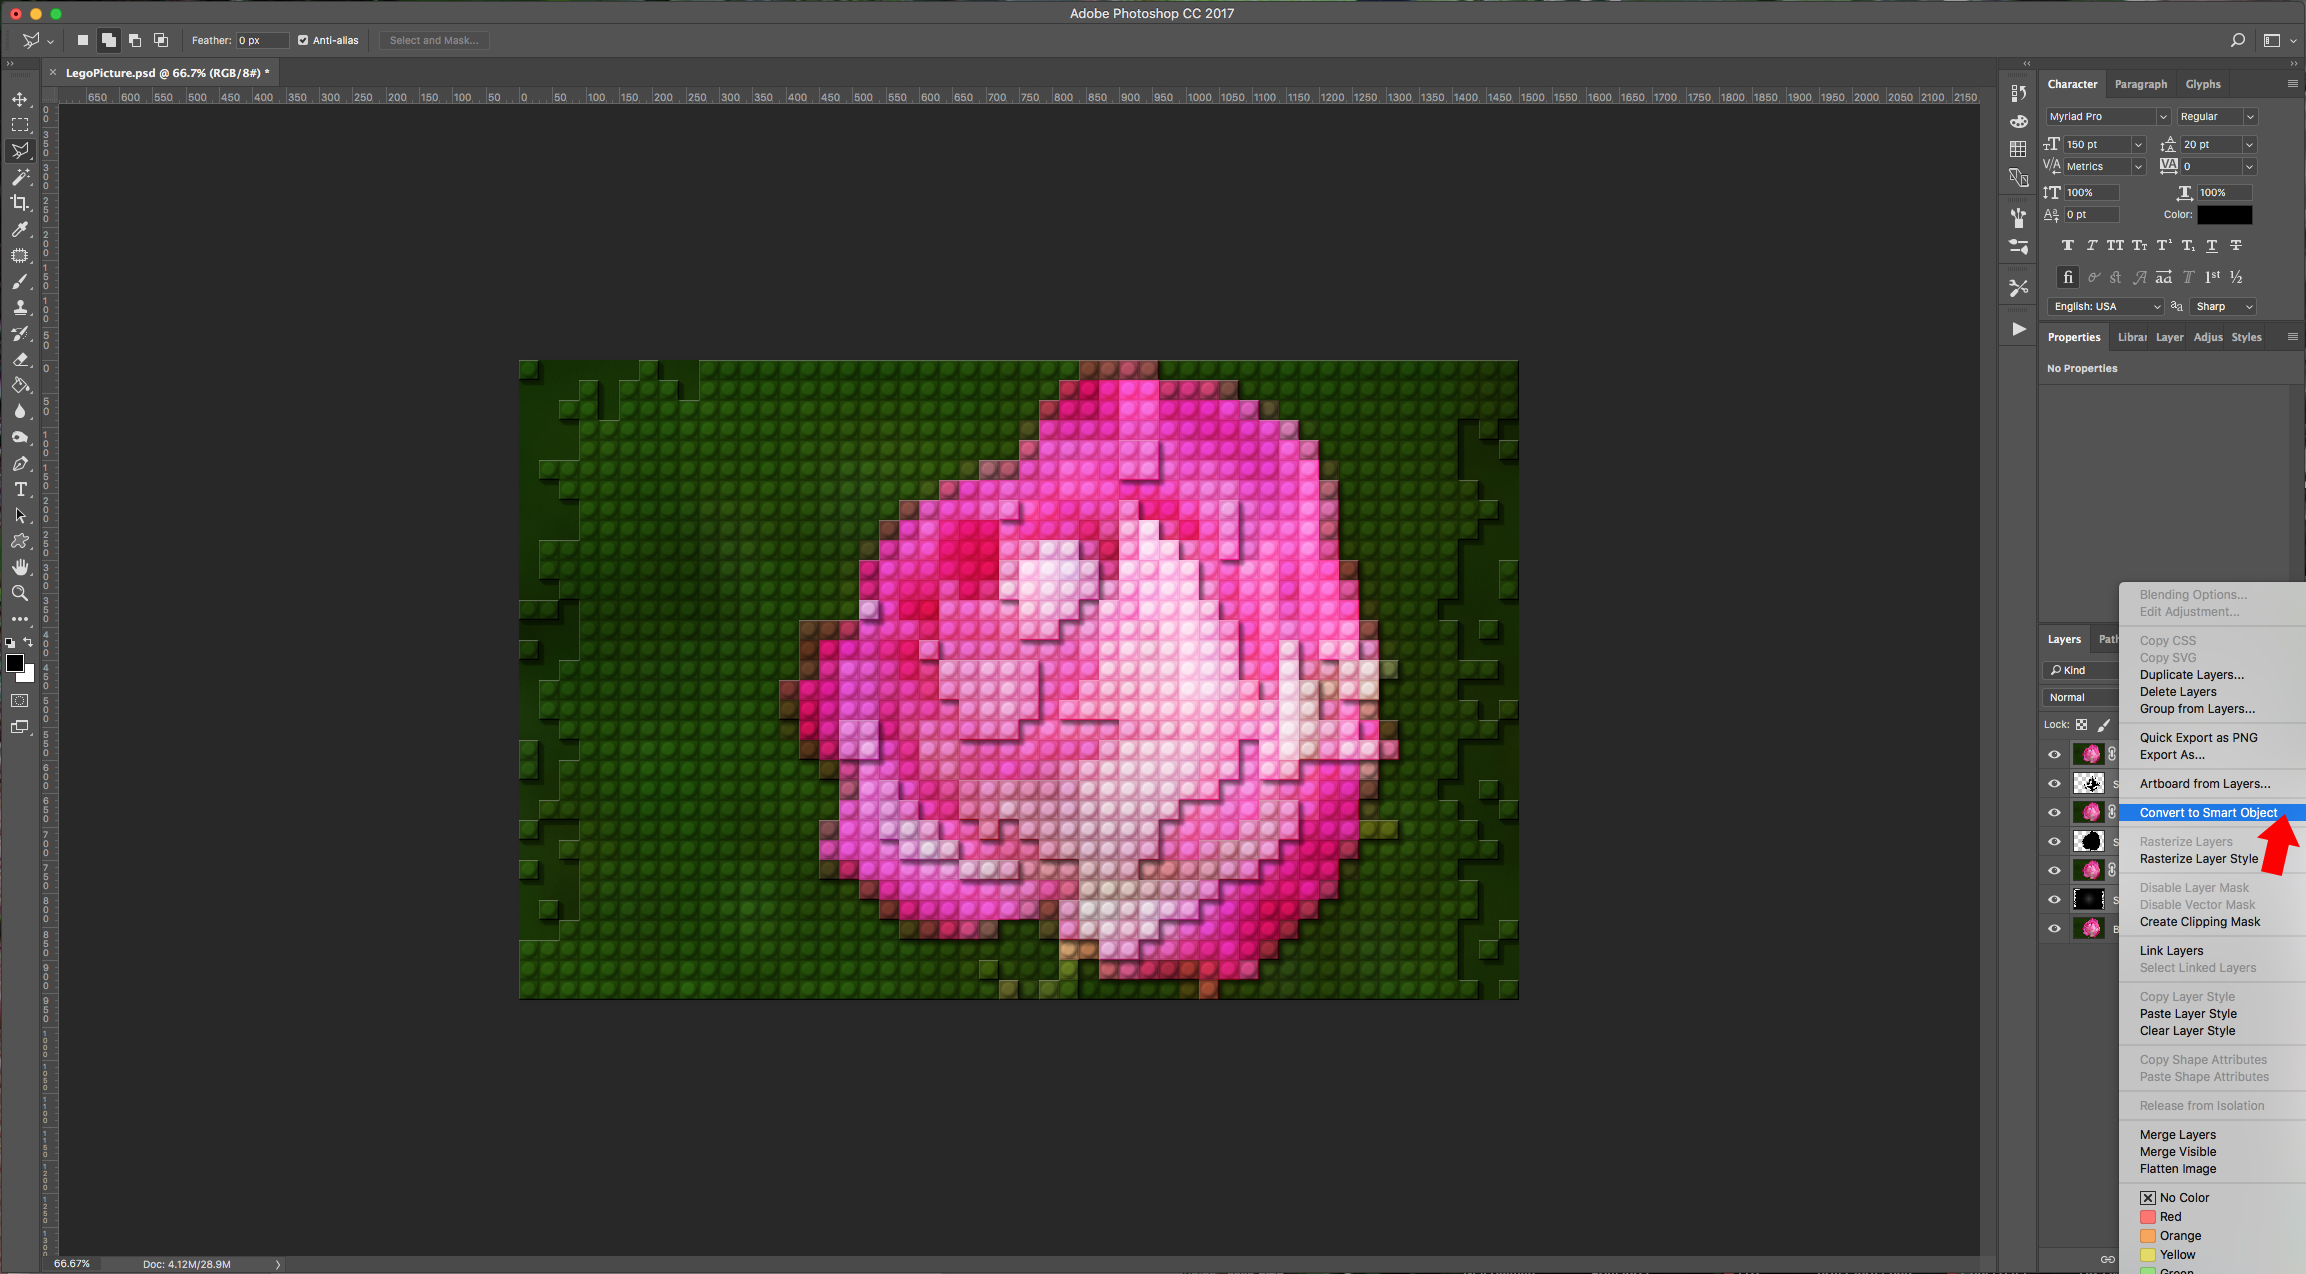
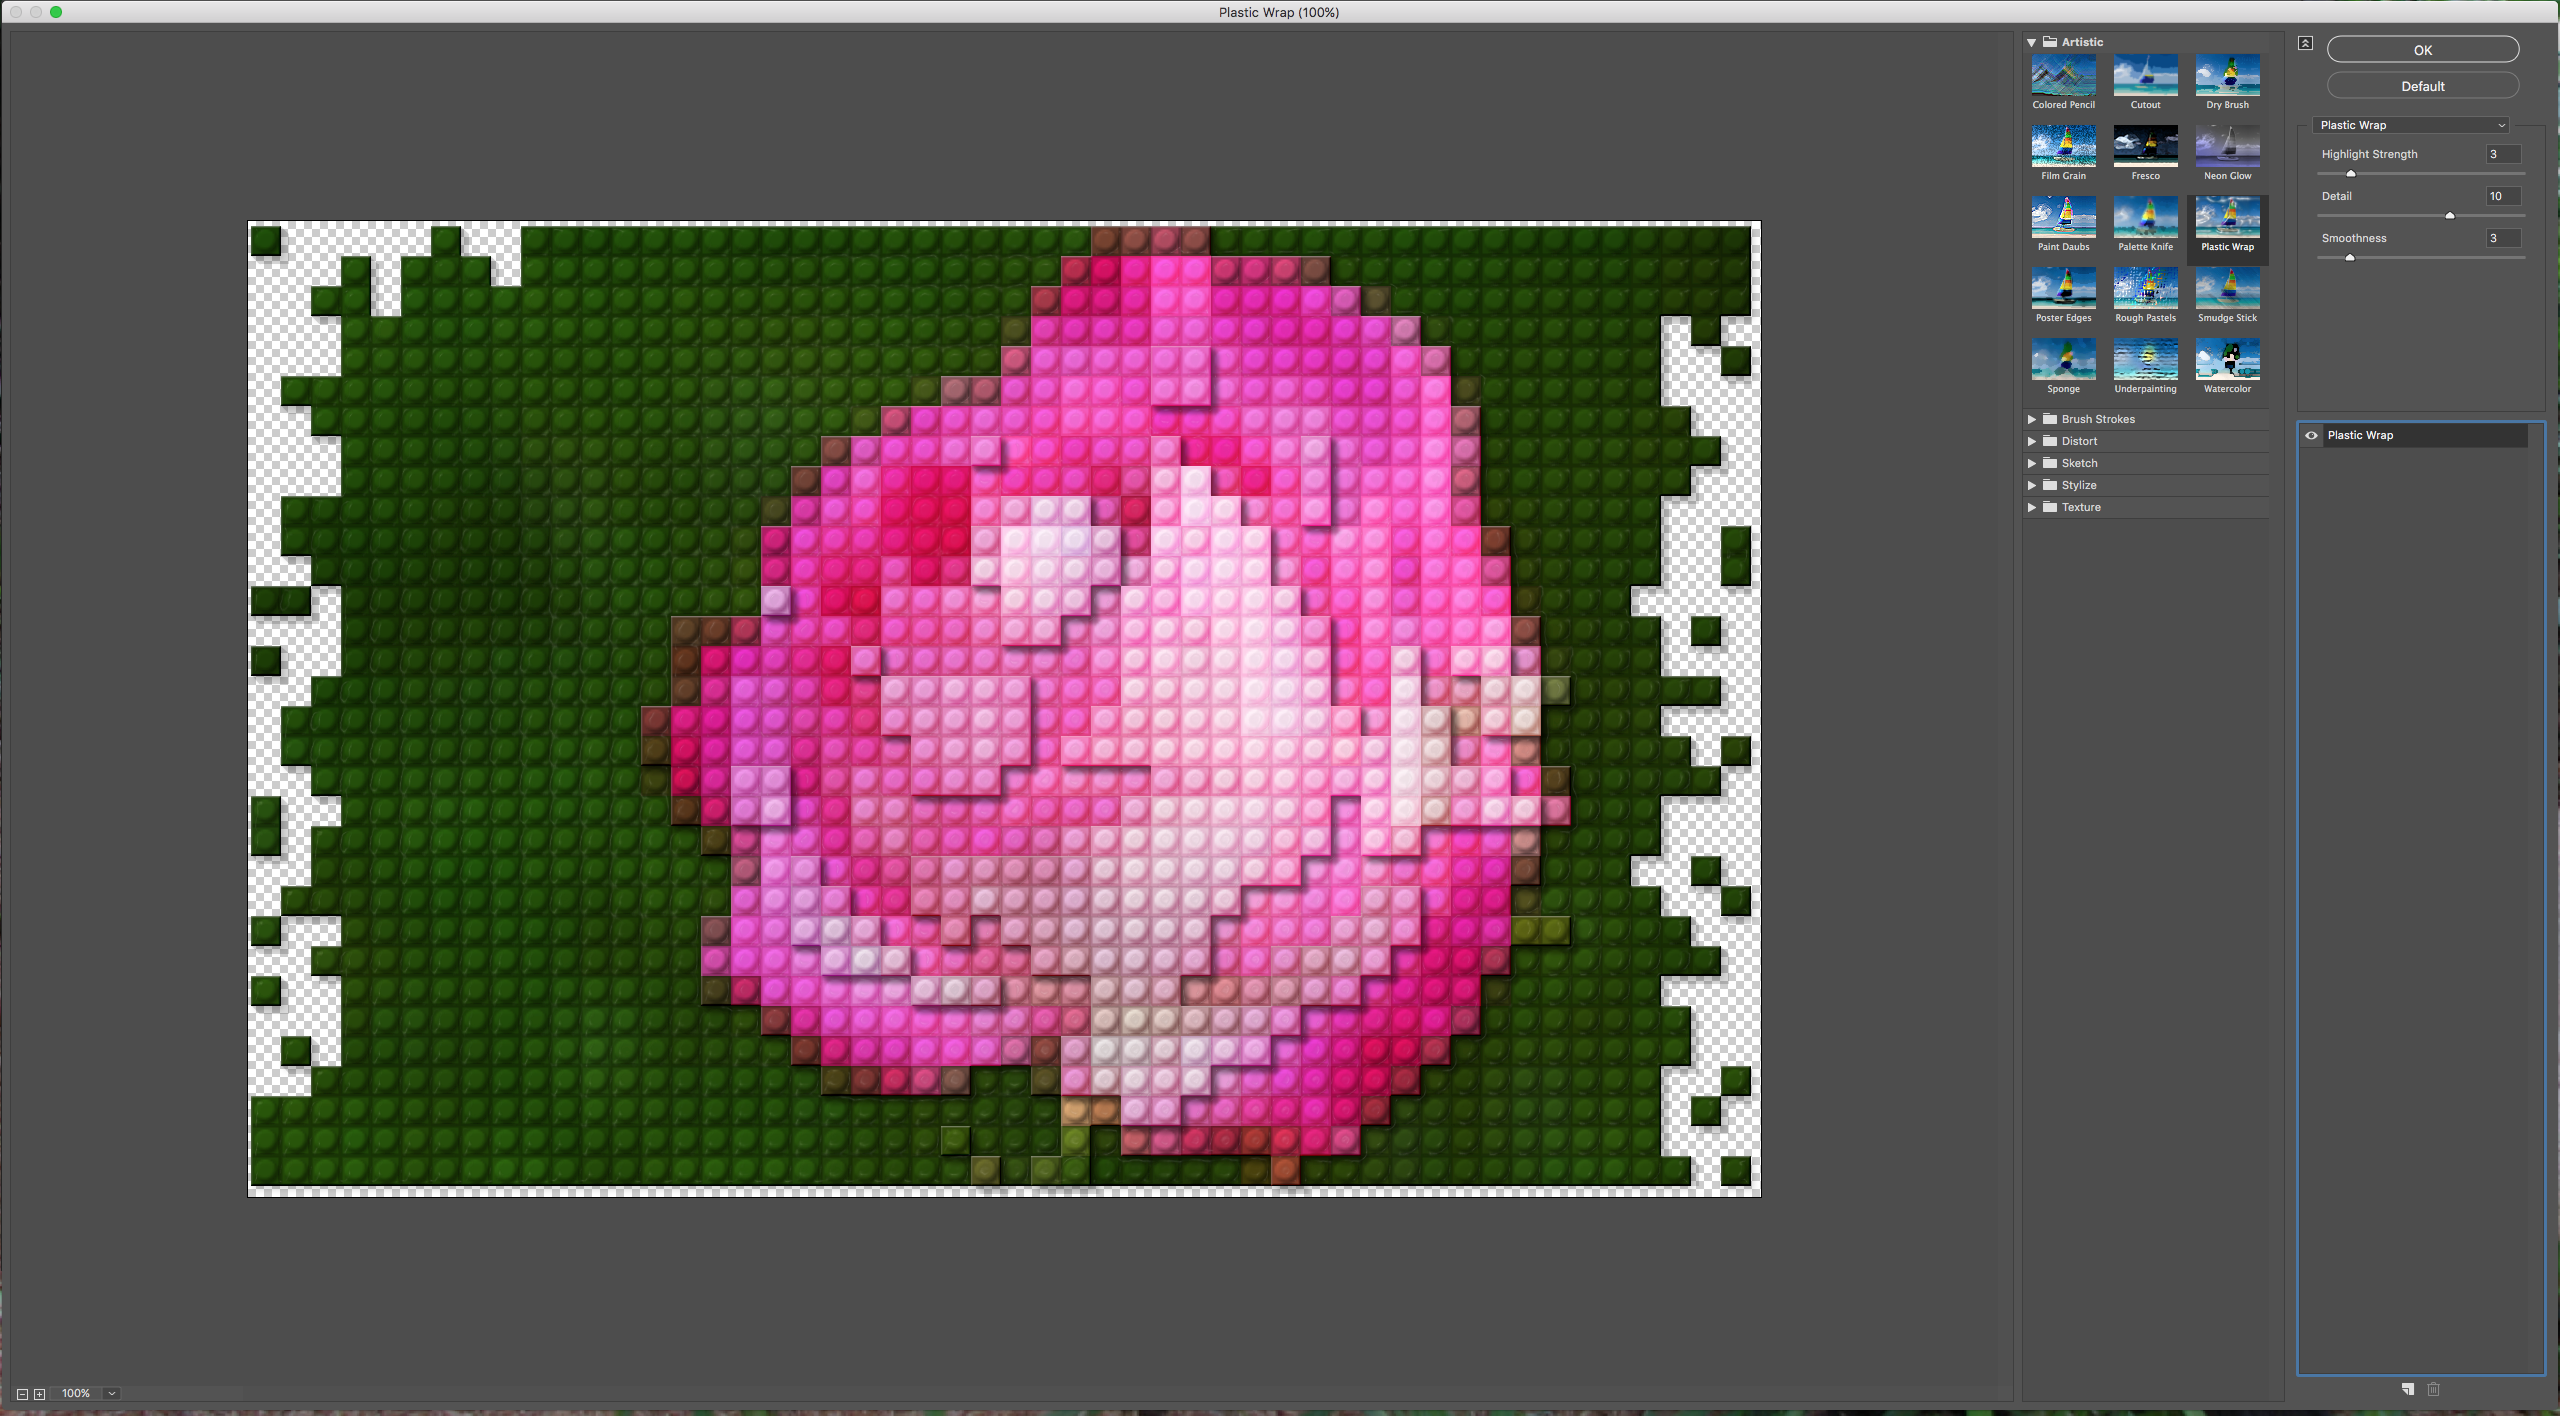
15 - Select all your layers (Excluding the “Background”) and right-click on them, then select “Create Smart Object”. Go to Filter > Filter Gallery > Artistic and choose “Plastic Wrap” with the following values:
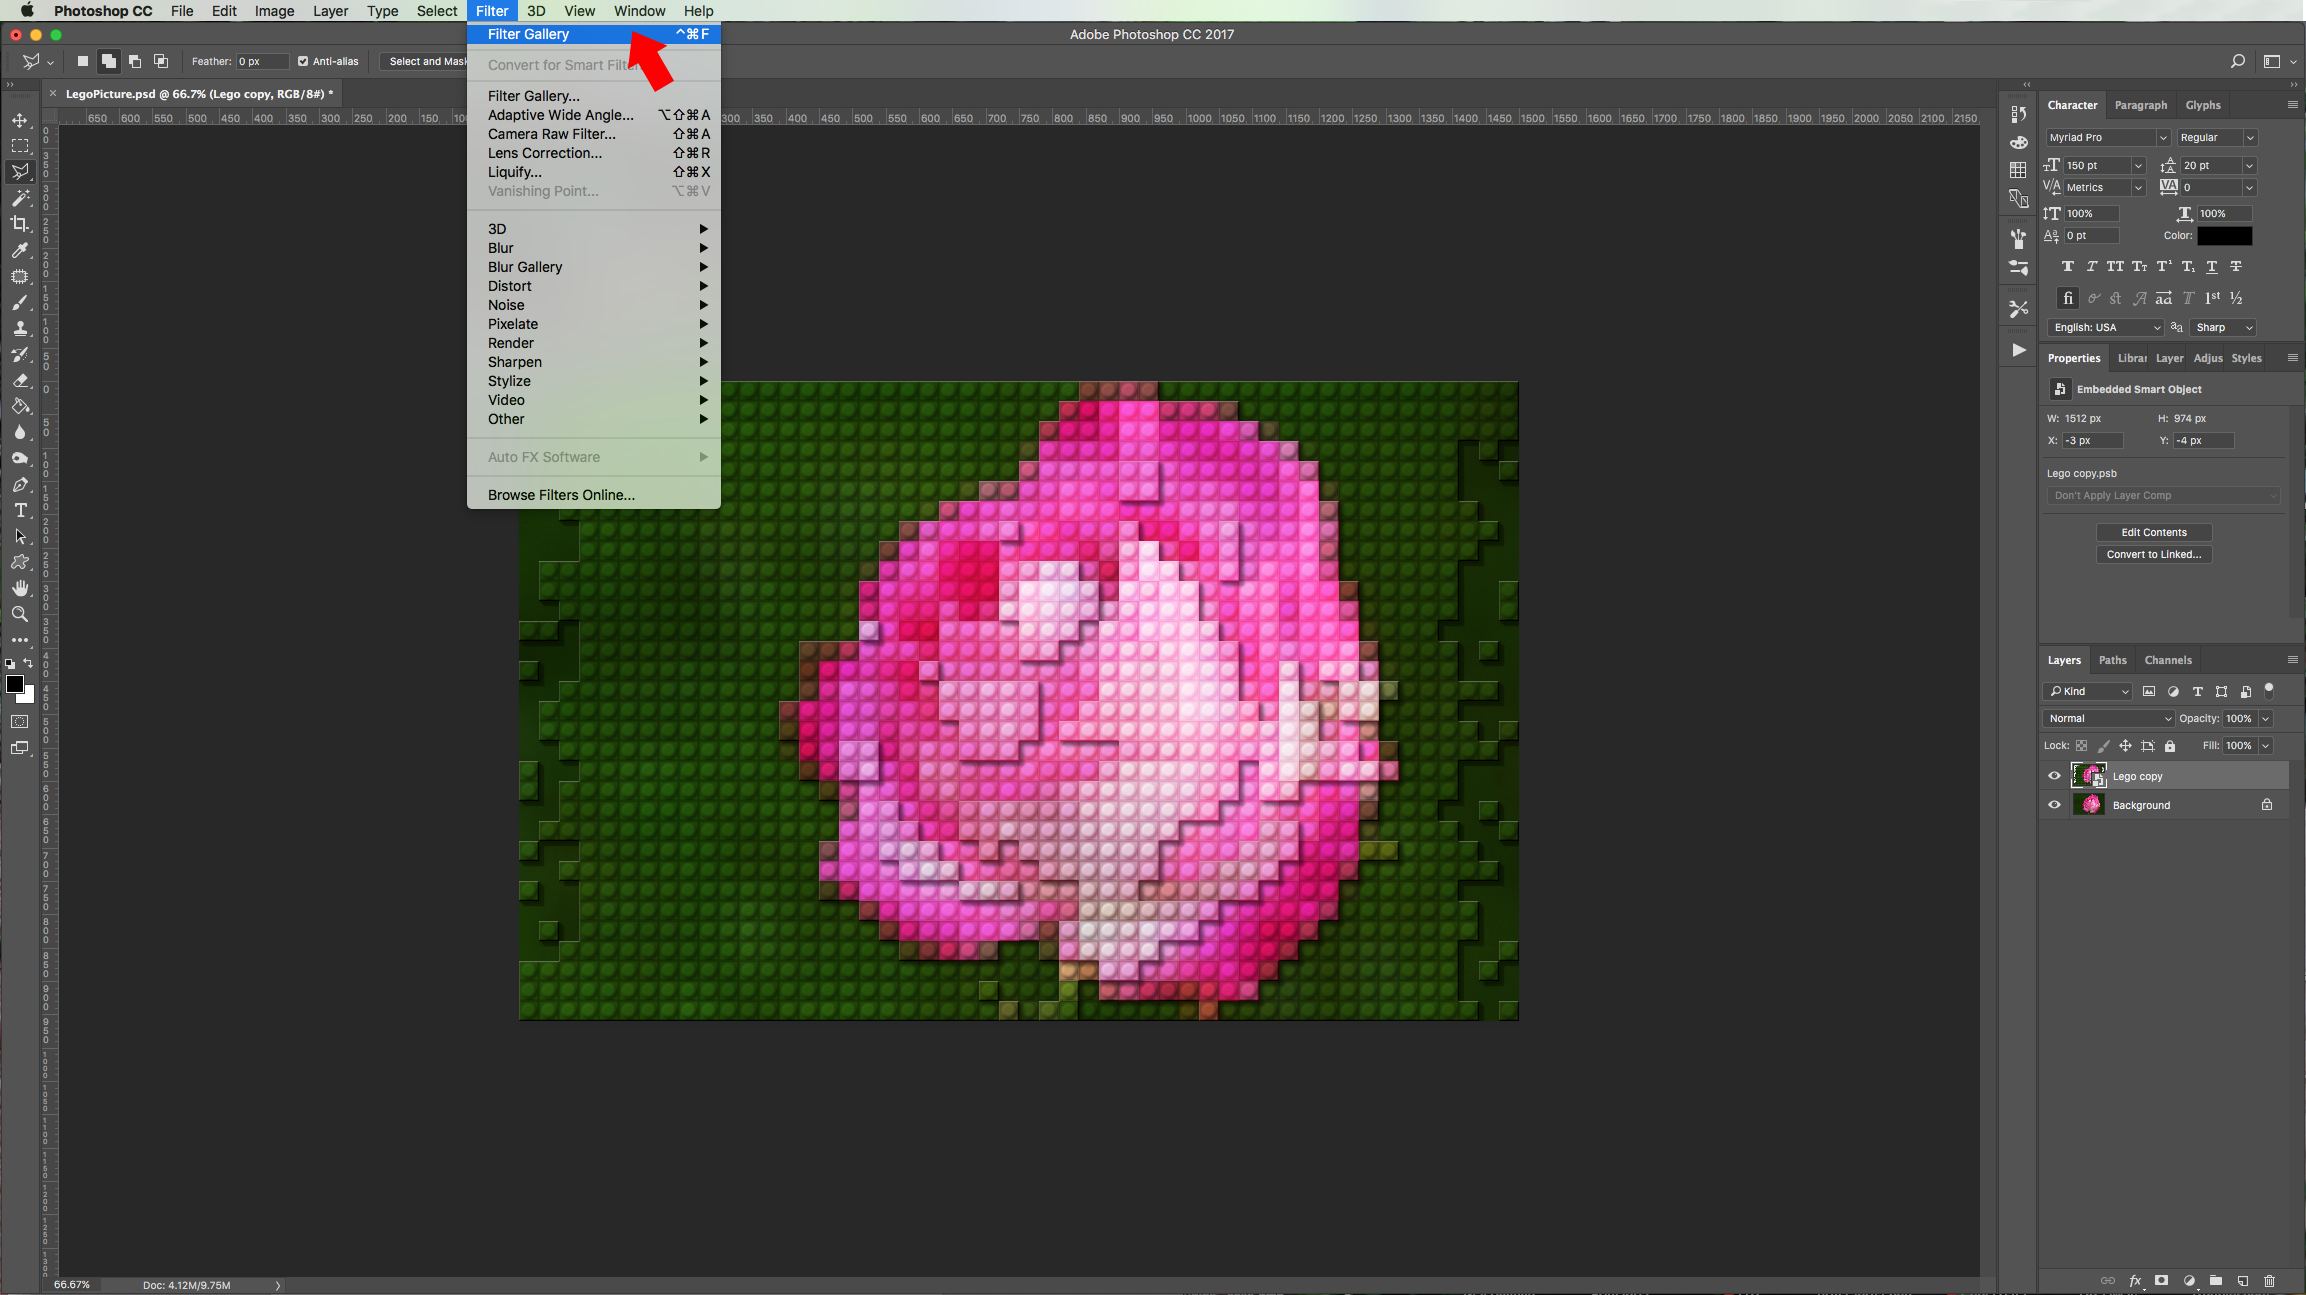
16 - Final result:
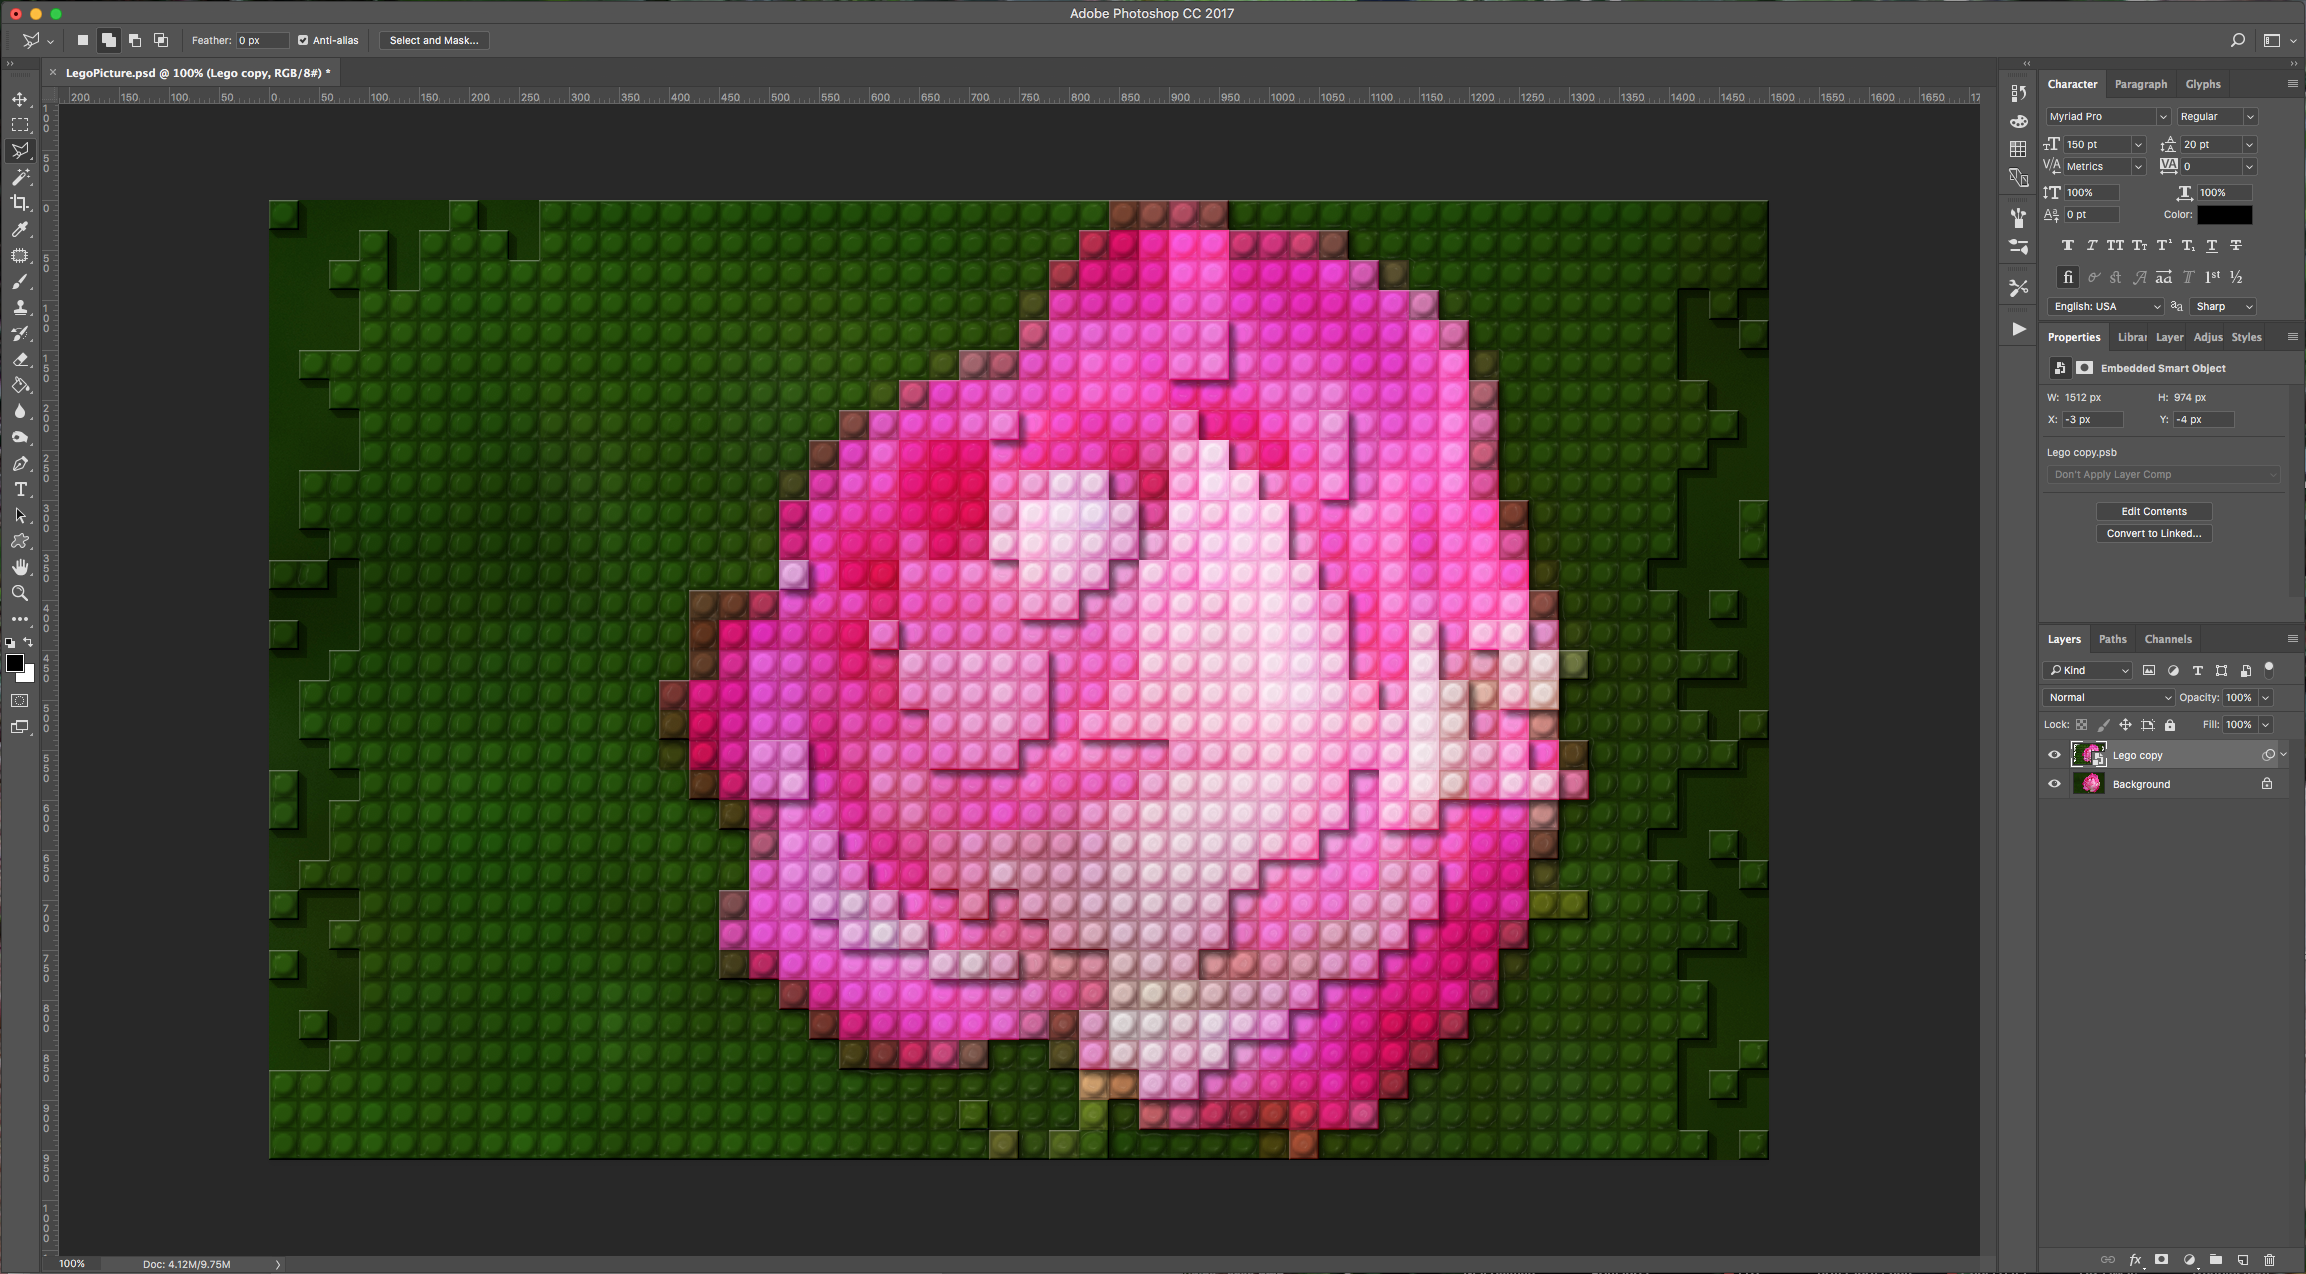
by @lornacane
6 Related Photoshop Tutorials
For this tutorial, you will need an image or portrait to work with Its better if your image is Black & White or will be easily converted into. We will cover two ways of achieving it, one only in Photoshop, and the other with “Image Trace” in Illustrator.1 - In ...
For this tutorial we need two images. One for the “Background” and the second one will be on top and almost cover the entire Canvas, except for the “Hole”(You can use the same image, but maybe turn one of the instances into Black & White to create contrast between ...
For this tutorial, we will use the image of a person with a neutral background.1 - In Photoshop, open the image you chose to work with and “Duplicate” it (Command/Control + J).2 - Go to Filter > Camera Raw Filter (Shift + Command/Control + A), zoom in a bit to see ...
Flipping an image in Photoshop is simply mirroring it. You might want to do this for many reasons like shifting the focus, creating patterns and more. It can also be useful for projects that use HTV.There are many ways to do this depending on your image and project needs. ...
1- Open Photoshop and create a new file.2- Select the type tool, select your font set the font size and select the smooth option. Type your text.3- Open your image in a new window.4- Click and drag the image onto the text window.5- Your image will ...
In this tutorial, we will learn how to bend an image in Photoshop. The result will be similar to the photo manipulations you may have seen in movies, and you can apply it to almost any landscape photo with a visible horizon.You can post the resulting artwork on your ...

 All your Font Needs


