
Bended Image in Photoshop
In this tutorial, discover how to bend an image in Adobe Photoshop.
In this tutorial, we will learn how to bend an image in Photoshop. The result will be similar to the photo manipulations you may have seen in movies, and you can apply it to almost any landscape photo with a visible horizon.
You can post the resulting artwork on your social media feeds or create some cool t-shirt designs.

We will apply the bending effect to this aerial view of boats. You can also take a look at our great variety of landscape photos to choose one that fits your needs.
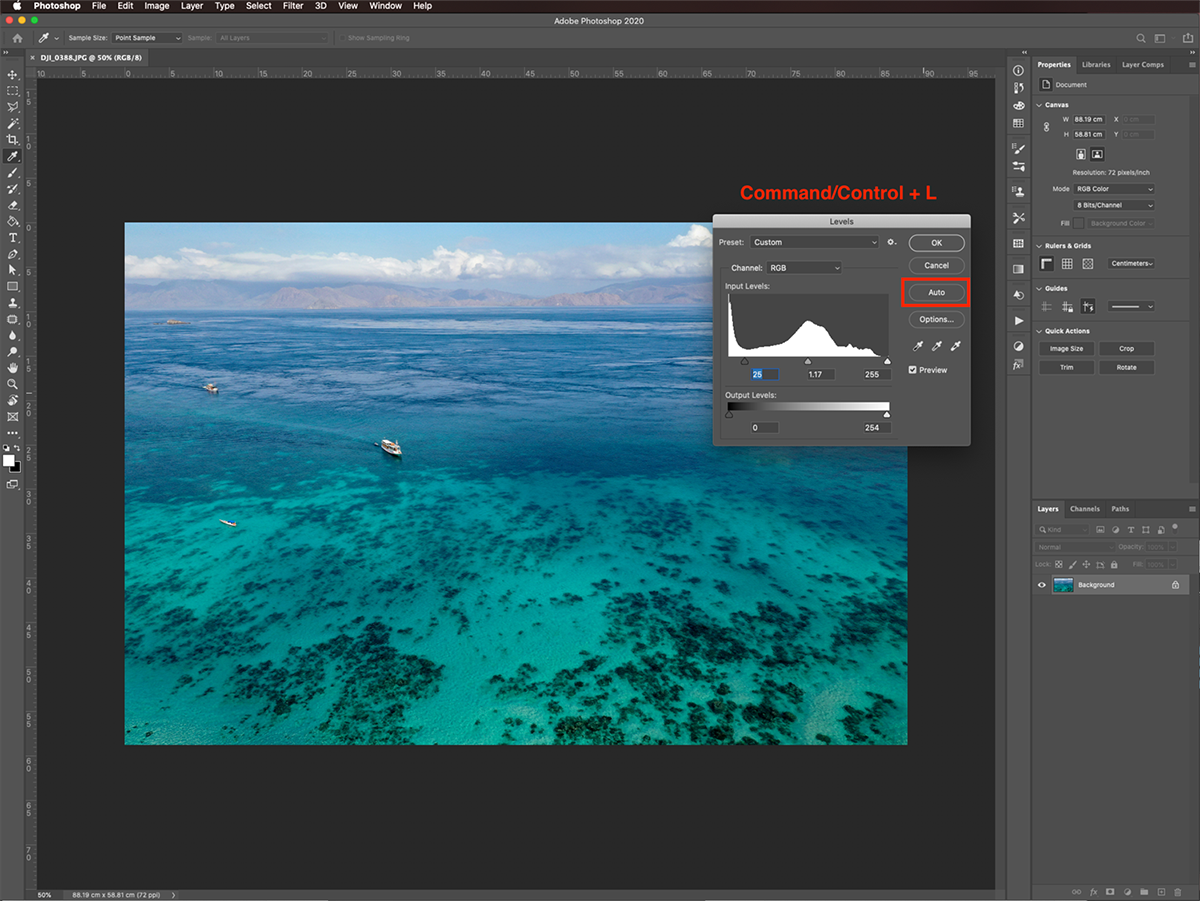
Step 1 - Adjust Your Image if Needed
In Photoshop, open the image you chose. Then, go to Image > Adjustments > Levels (Cmd/Ctrl + L) and click Auto to adjust the image if you think it is needed.
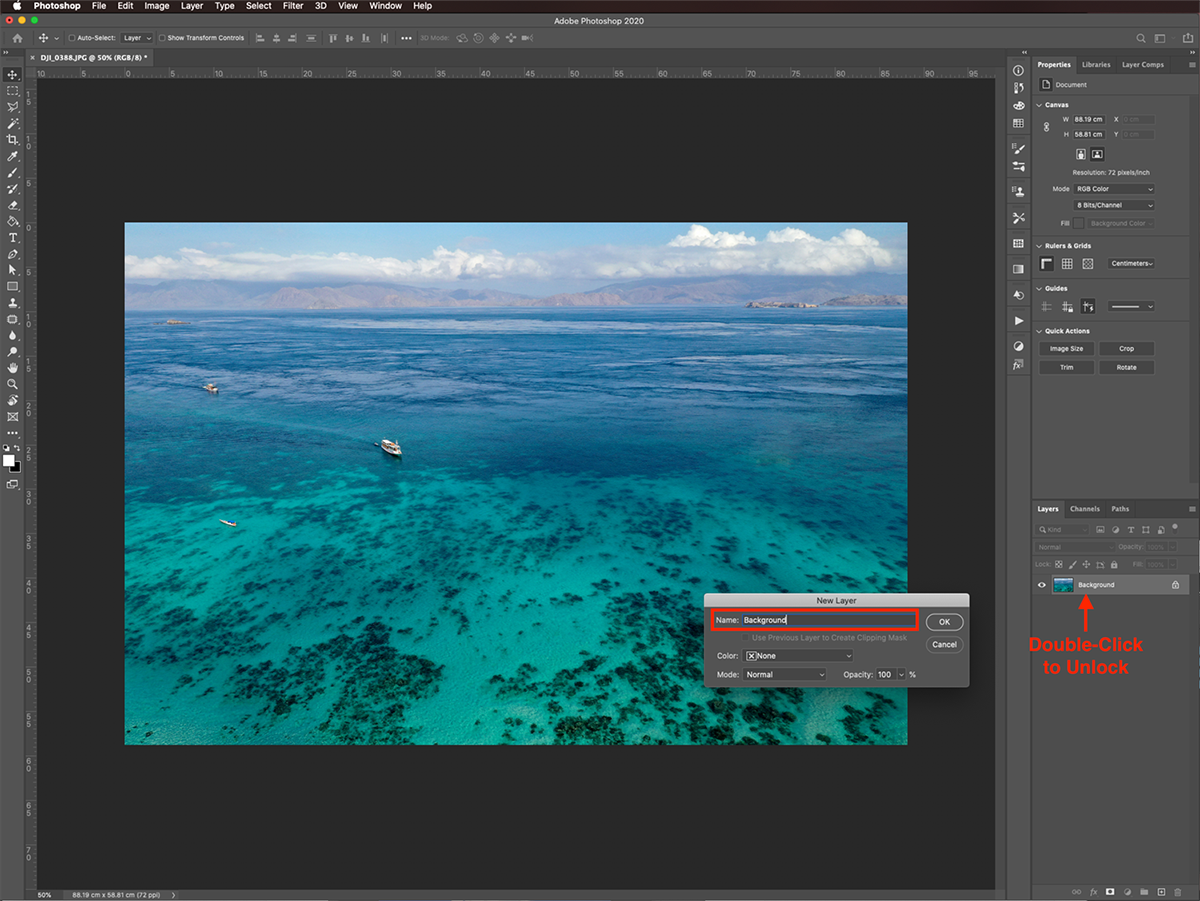
Step 2 - Unlock the Background Layer
To apply some changes, we need to unlock the background layer by double-clicking on top of its thumbnail in the Layers panel. Give the layer a name on the pop-up and click Ok.
Step 3 - Transform the Background Layer
Now, we are going to start creating the bent portion of the effect. First, enter Free Transform (Cmd/Ctrl + T), right-click on top of the image, and choose Flip Horizontal.
When you are done, click on the checkmark on the top menu or hitEnter to commit the changes.

Step 4 - Duplicate the Background Layer
Then, create a duplicate of the background layer (Cmd/Ctrl + J).
It’s a good idea to give names to each layer for identification purposes. We named ours Background and Background 1.

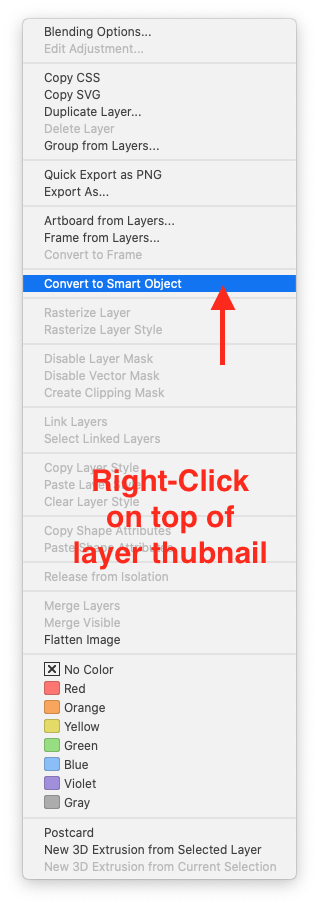
Step 5 - Turn the Duplicate into a Smart Object
Right-click on top of the background layer’s thumbnail and choose Convert to Smart Object. This will ensure that the modifications applied to it are nondestructive in case you want to go back later on.
Step 6 - Rotate and Flip the Duplicate Layer Using Free Transform
We are going to apply another flip and rotation to the bent portion of the effect and then reposition the image.
With the copy selected, enter Free Transform (Cmd/Ctrl + T), right-click on top of the image, and choose Flip Horizontal.
Then, right-click again and chooseRotate 90° Clockwise. When you are done, click on the checkmark on the top menu or hit Enter to commit the changes.

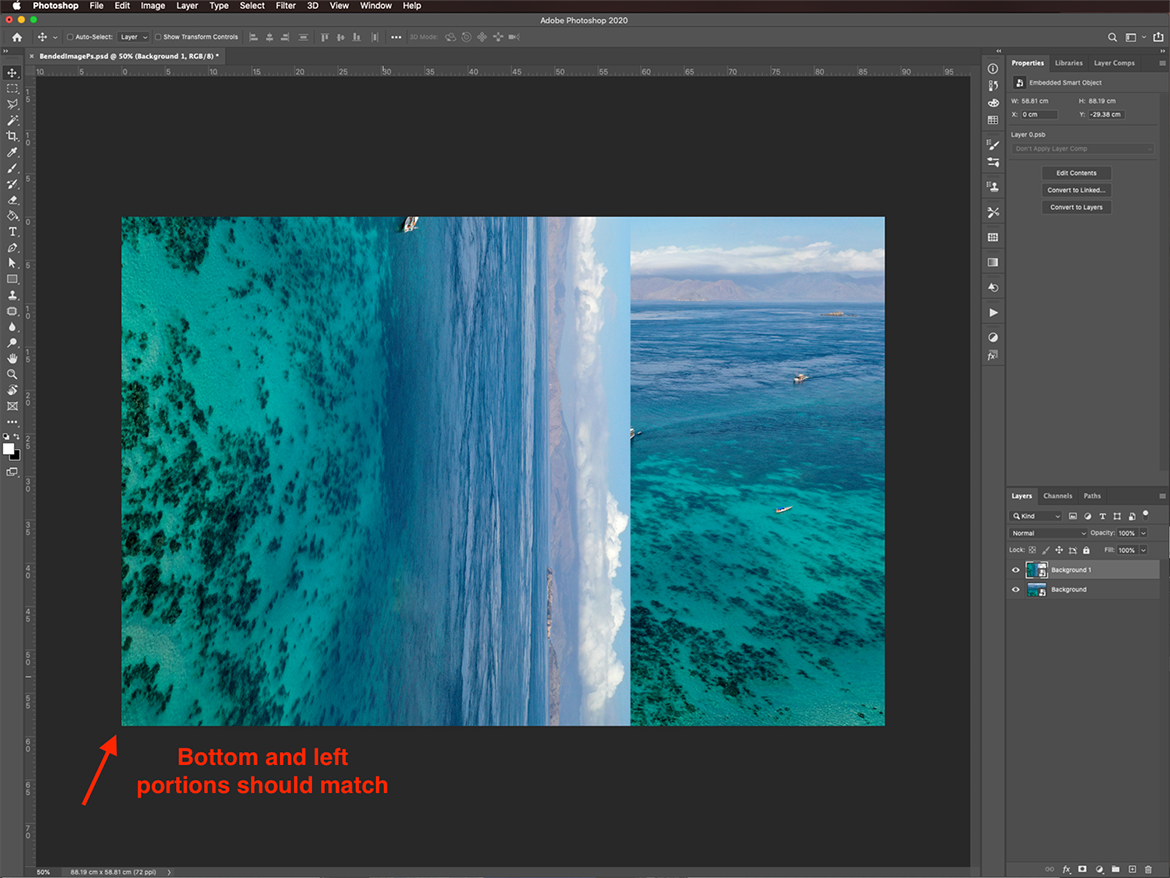
Step 7 - Reposition the Duplicate Layer
Move the bottom-left corner of the Background 1 layer so it is aligned with the one from the Background layer.
Step 8 - Make a Triangular Selection of the Duplicate Layer
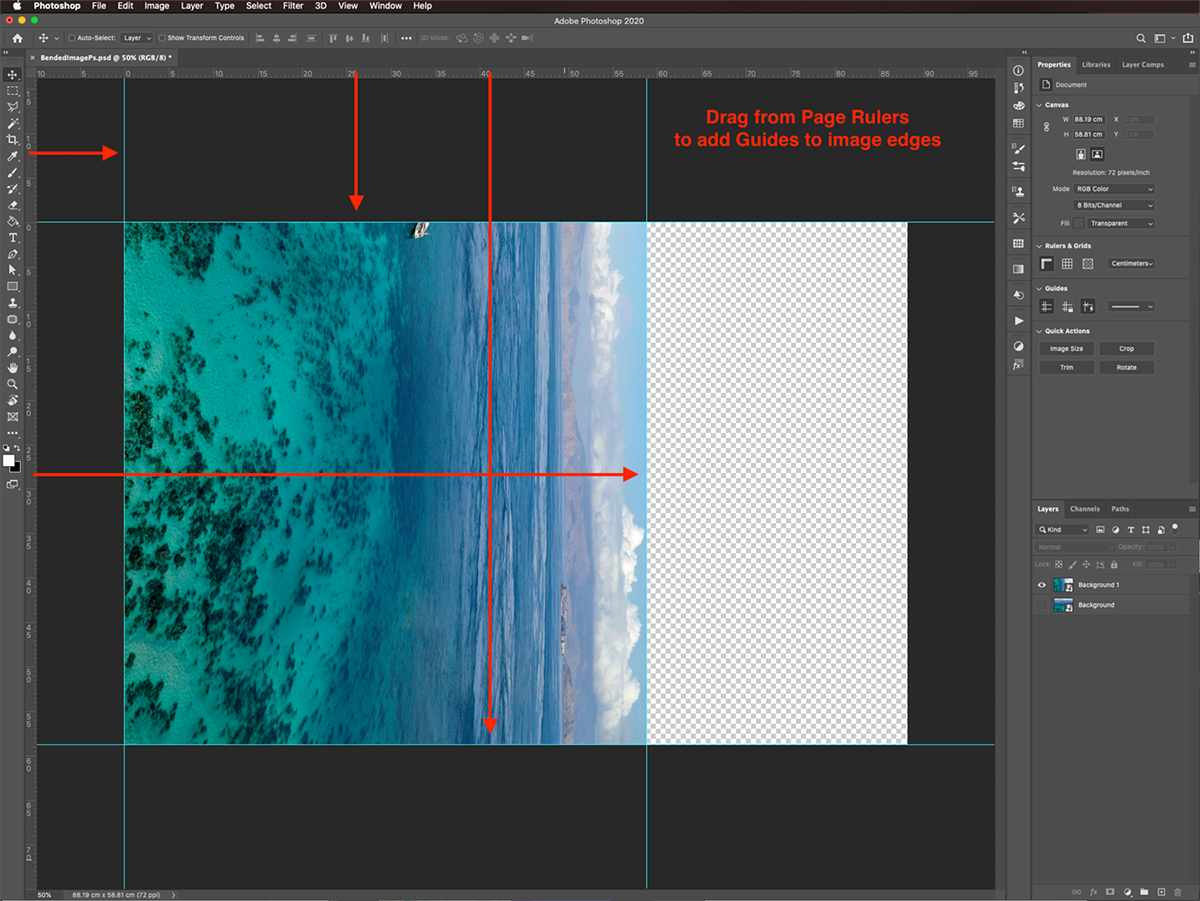
Add Guides as Reference
First, add some guides to the edges of the Background 1 layer. This will help give us reference points for creating our selection.
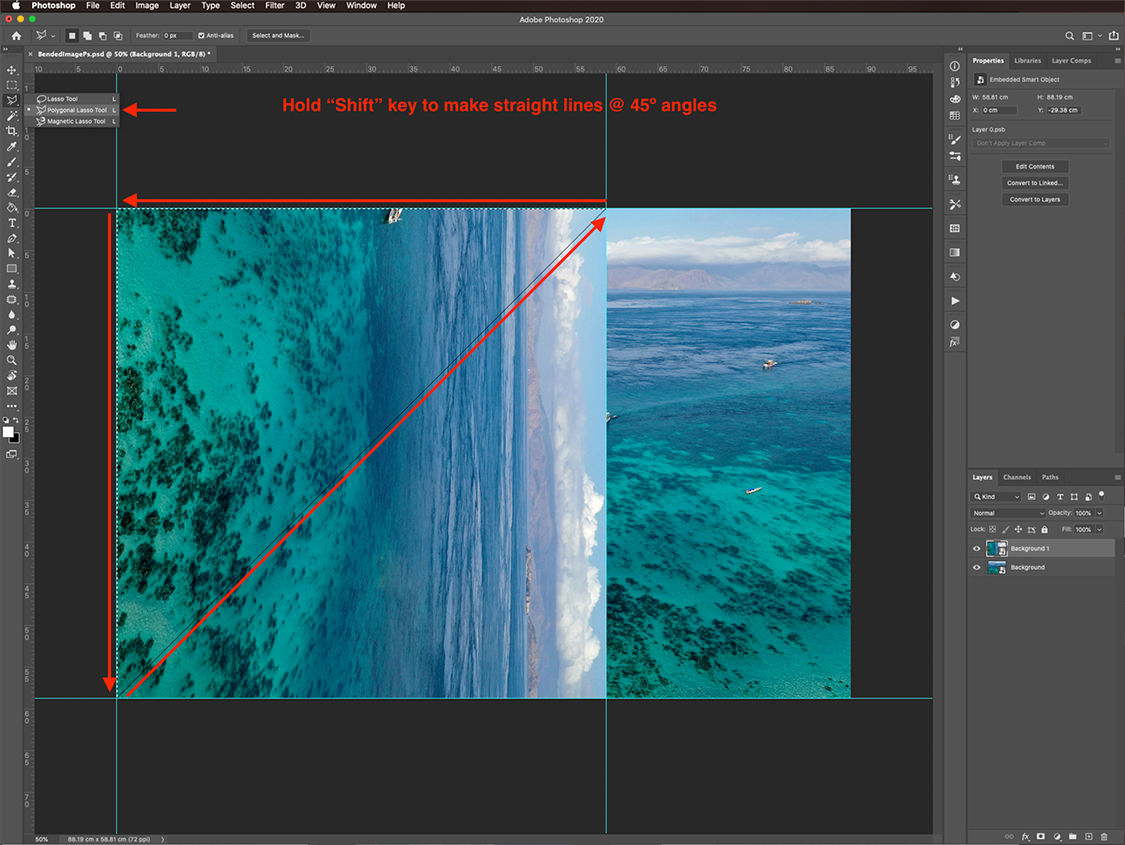
Make the Selection with the Polygonal Lasso Tool
Next, use the Polygonal LassoTool (L) to make a triangular selection covering the top left portion of the Background 1 layer (the vertical one).
Start at the top left corner, click again at the bottom left corner, then at the top right corner, and finally, back where you started to close the triangle. Hold theShift key to create straight lines at 0º, 90º, and 45º angles.
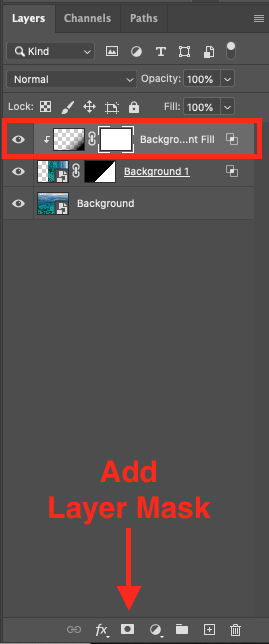
Step 9 - Create a Mask From Your Selection
Create a layer mask of your selection by clicking on the small button at the bottom of the Layers panel.
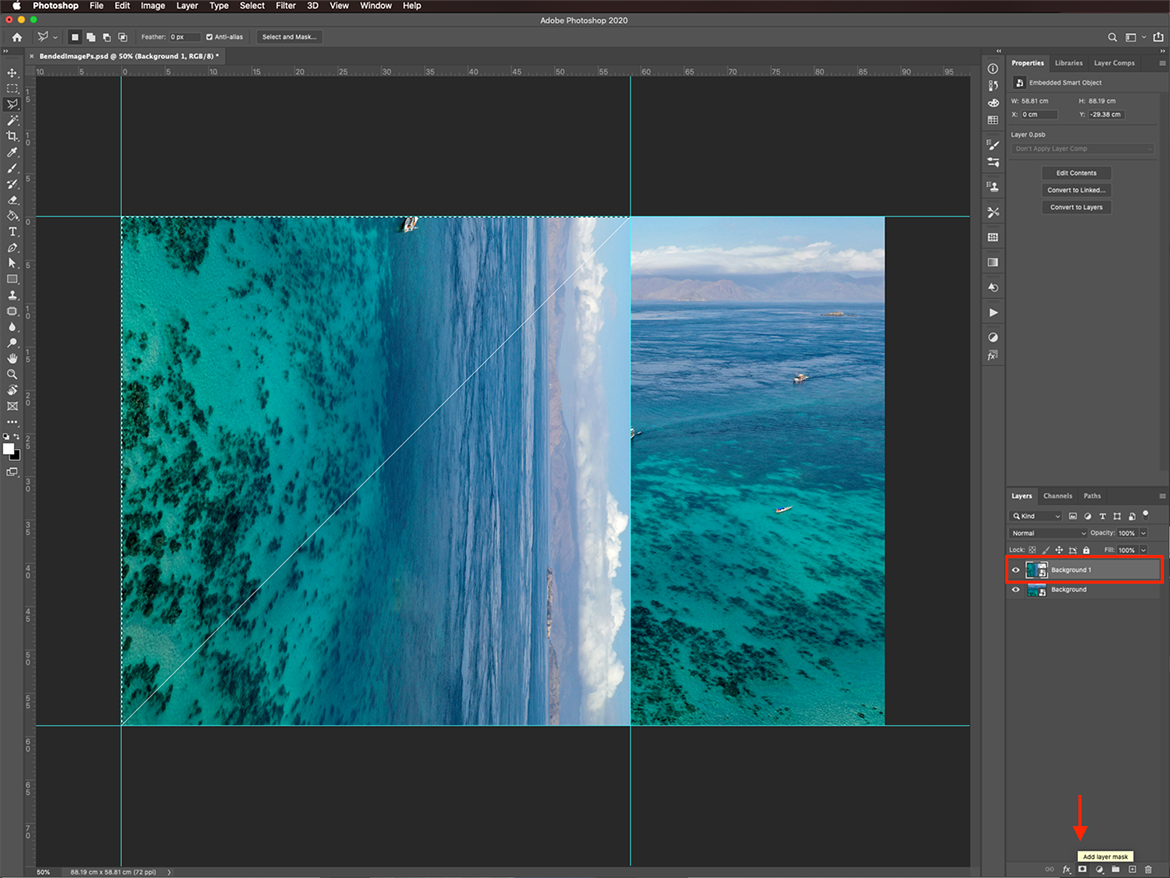
You should end up with two reflecting images that meet each other at the bottom left corner.
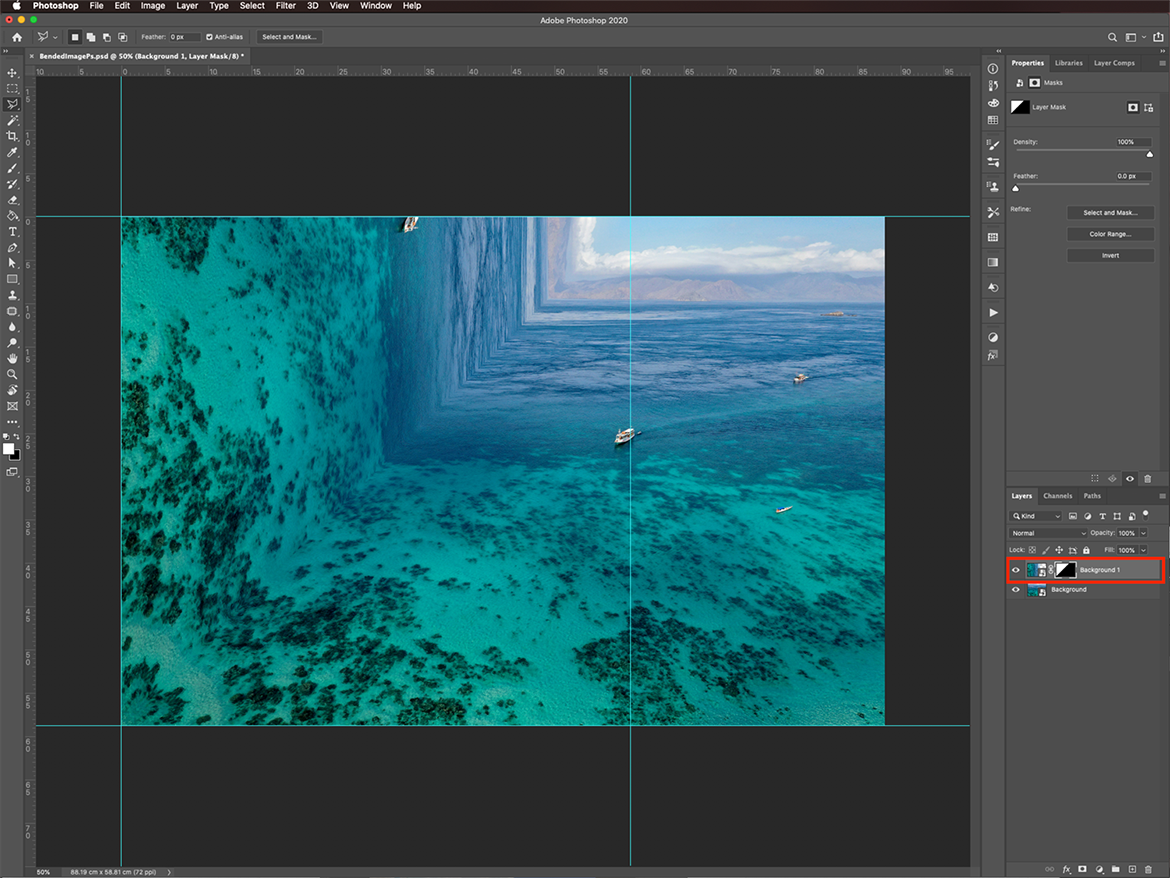
Invert the Layer Mask
Make sure that the mask thumbnail is selected, then head to the Properties panel and click Invert Mask. Now, the Background 1 image looks like it has been folded on the top right corner, and it is bent down.
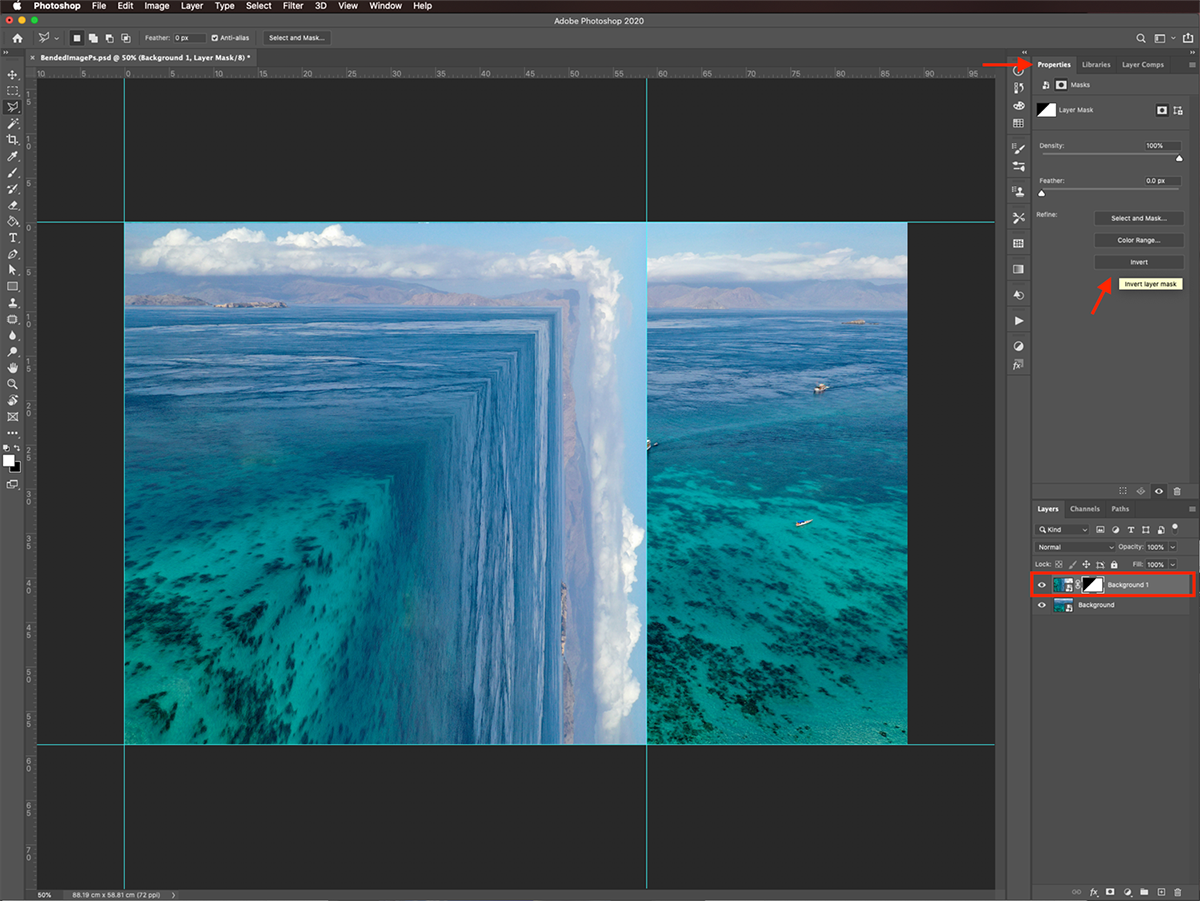
We are going to move the bent portion of the image to the correct position on the right side of the canvas. To do it properly, we need to be able to move the mask and the image independently.
Step 10 - Move the Duplicate Layer’s Mask to the Correct Position
Unlink the Mask From the Image and Enter Mask View
First, we need to move the mask, so unlink the image and mask by clicking on the small chain icon between their thumbnails.
We need to clearly see the edges of the mask. So, click on top of its thumbnail while holding the Option/Alt key to enter Mask View.

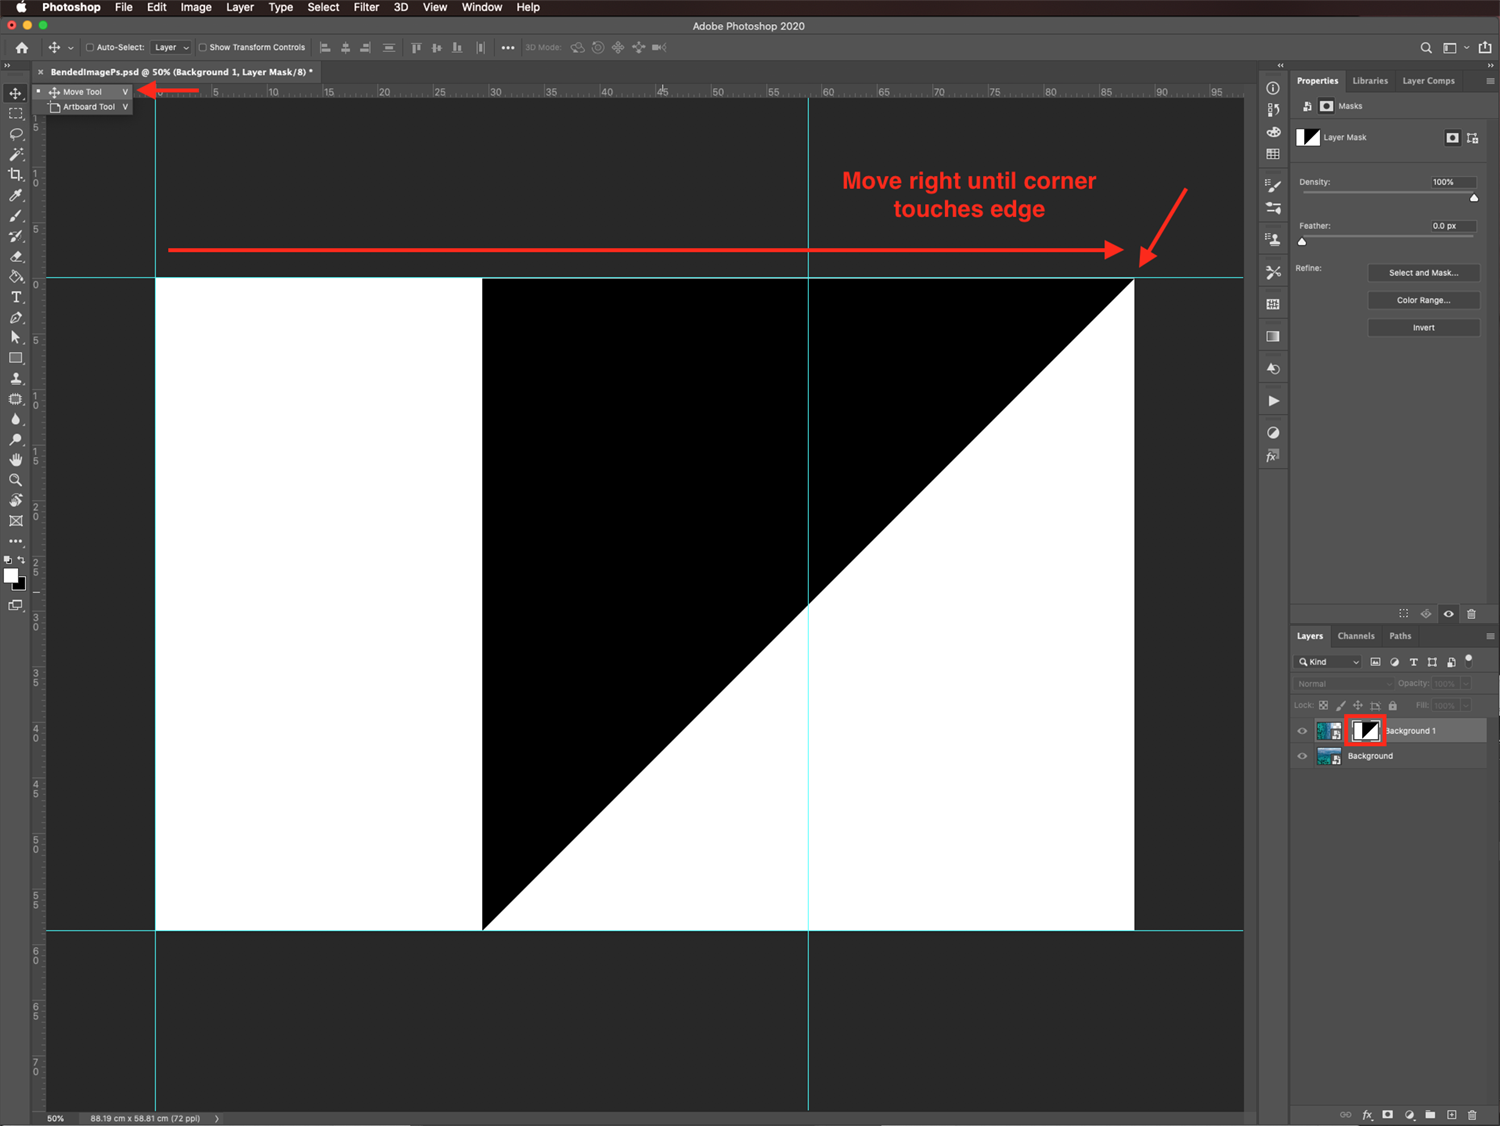
Move the Mask
Then use the Movetool (V) to drag the mask to the right until the right-most end of the triangle reaches the top right corner.
Exit Mask View
To go back to normal view, just click on top of the image thumbnail.

Move the Image
Then, select the Background 1 layer thumbnail and move it, so the top right corner is aligned with the Background layer top right corner.

Get Rid of Unwanted Lines
If you see a line where the image overlaps, use the Rectangular Marqueetool (M) to select the entire left portion of the image, ending where the gap is.
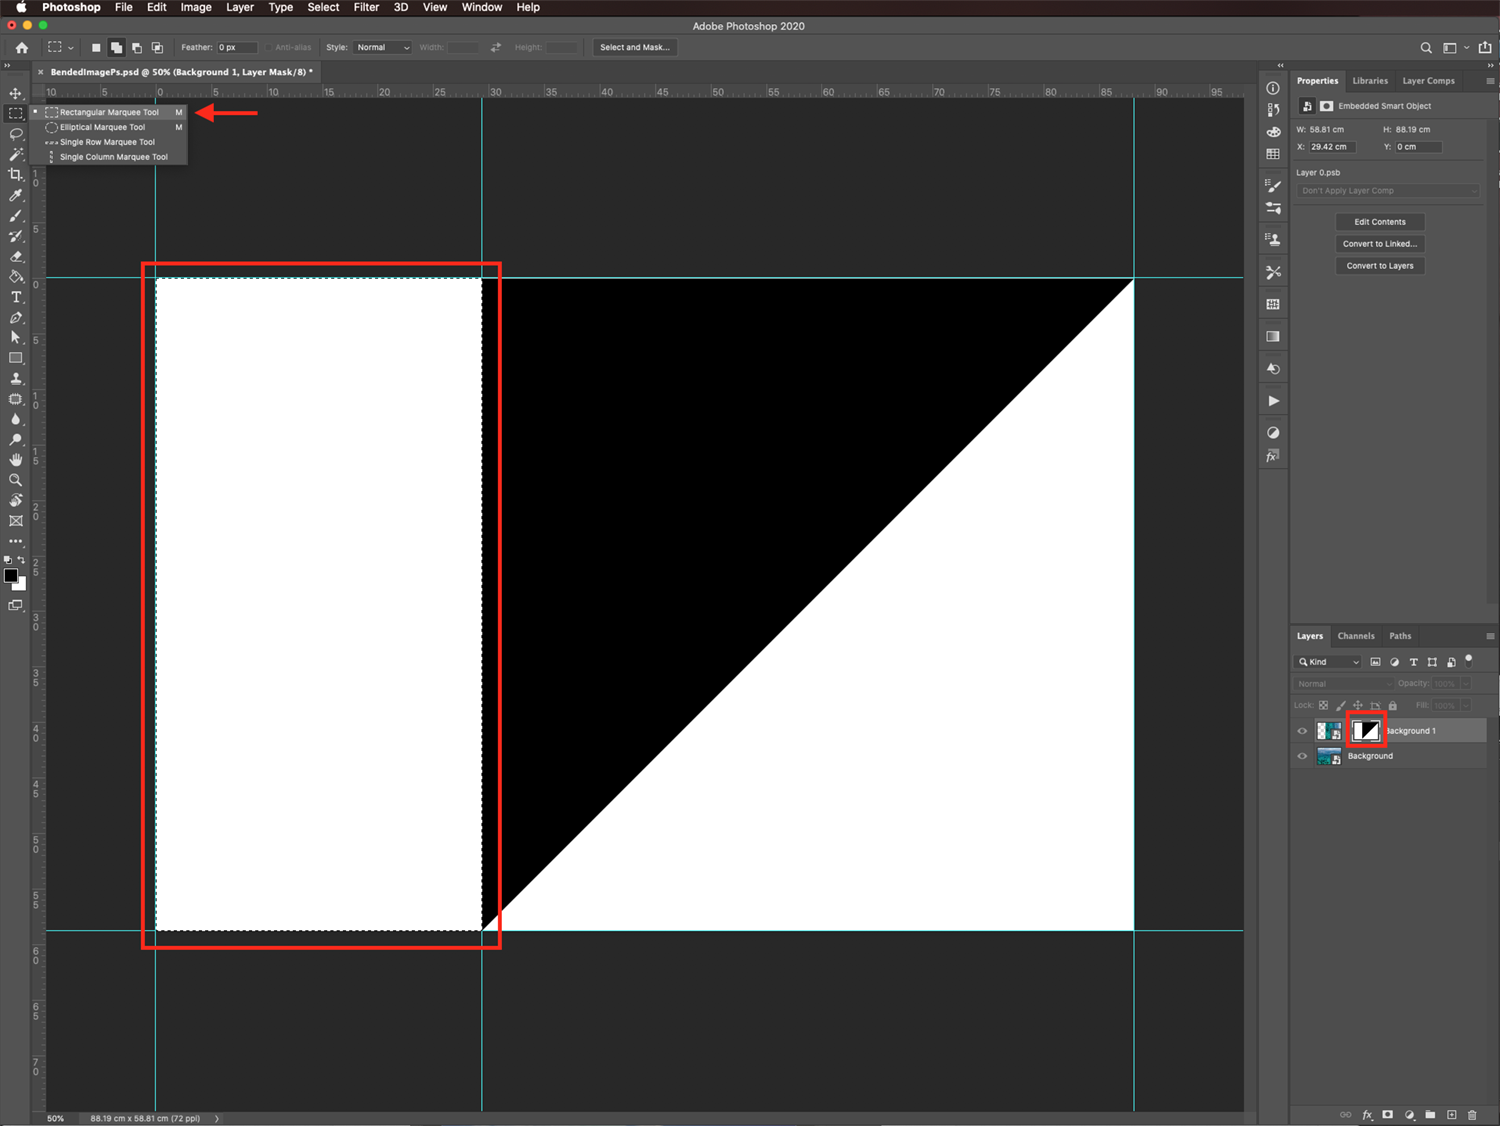
Make sure you have the Mask thumbnail selected and use the Paint Buckettool (G) to fill it with black.

Step 11 - Add a Shadow to the Edge of the Image
We are going to give more depth to the edge of the image and make the bent effect more realistic by adding a shadow.
Relink the image and mask by clicking on the small chain icon between their thumbnails again.
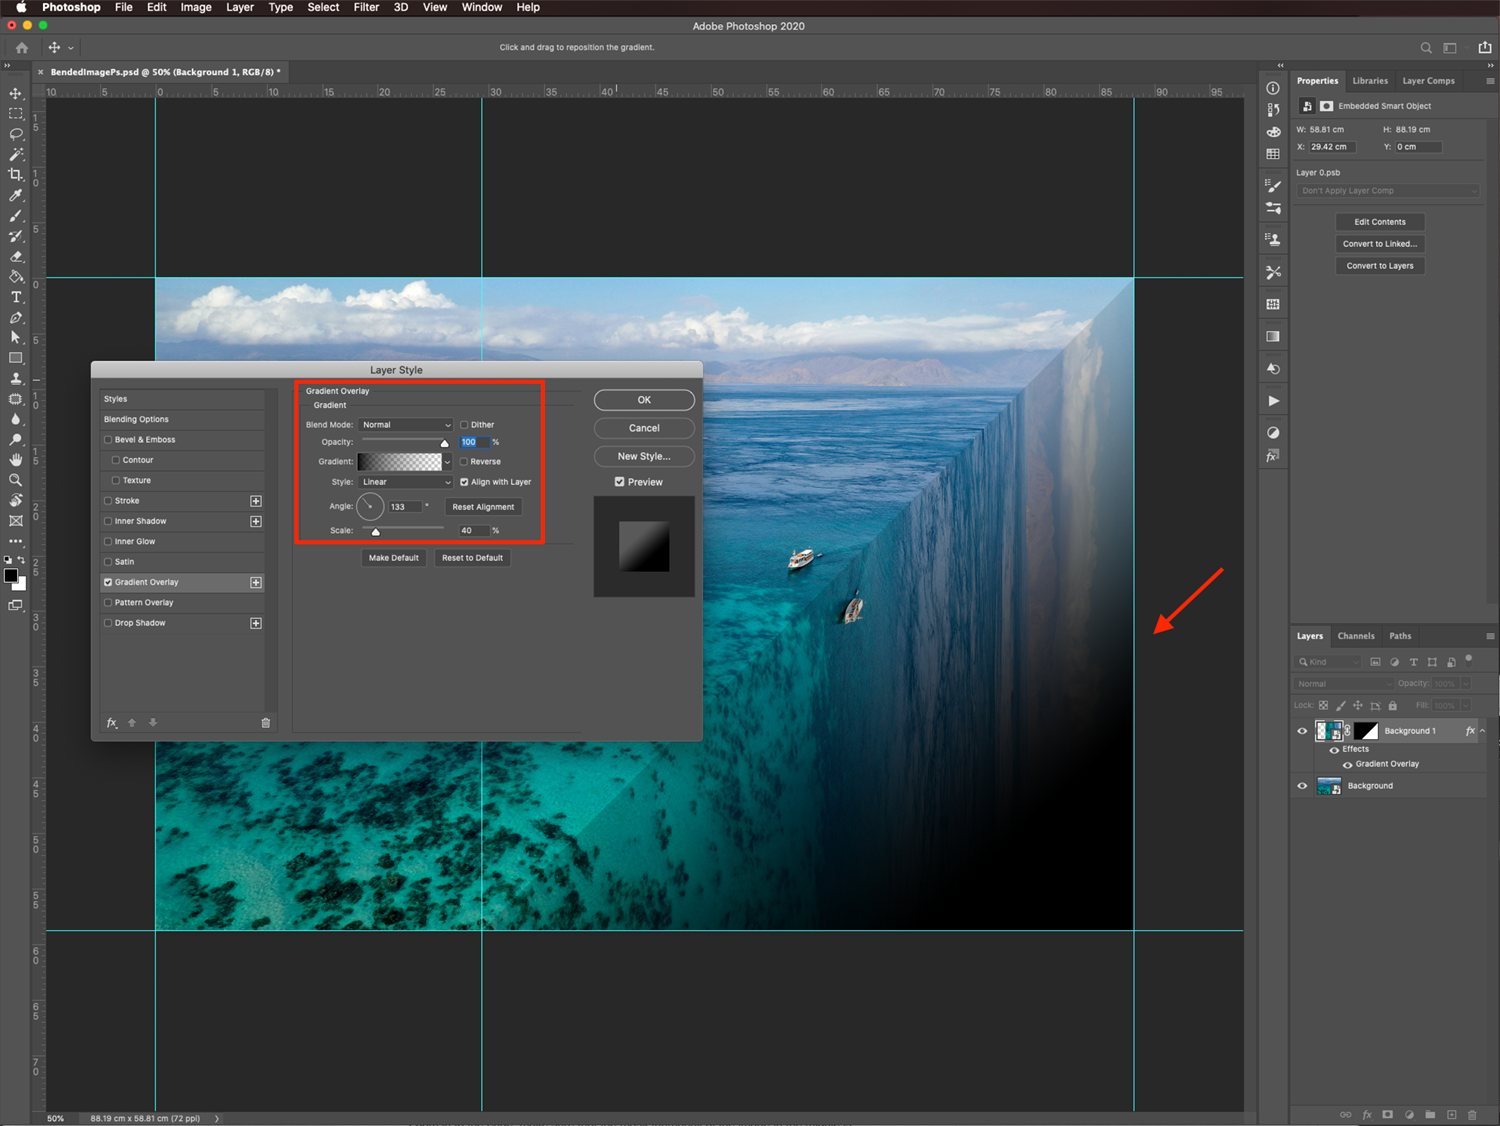
Then double-click on top of the Background 1’s thumbnail to apply the followingLayer Styles.
In theGradient Overlay tab, choose the Foreground to Transparent preset, and make sure that black is set as the Foreground color.

Then, fix the placement of the gradient, so it goes from Transparent to Black, starting from the center and finishing at the bottom. To do it, you can just click and drag on the image, adjust the angle manually on the Layers panel, or change the Angle to 133º and the Scale to 40%.
Step 12 - Add a Mask to the Layer Style
We want to adjust the shadow applied before. To do it, we are going to add a layer mask to the previously added gradient layer style and clip it to our layer.
Right-click on top of the effect thumbnail on the Layers panel and choose Create Layer.

The resulting layer should be clipped down to the Background 1 layer.
Then, create alayer mask of your linked layer by clicking on the small button at the bottom of the Layers panel.
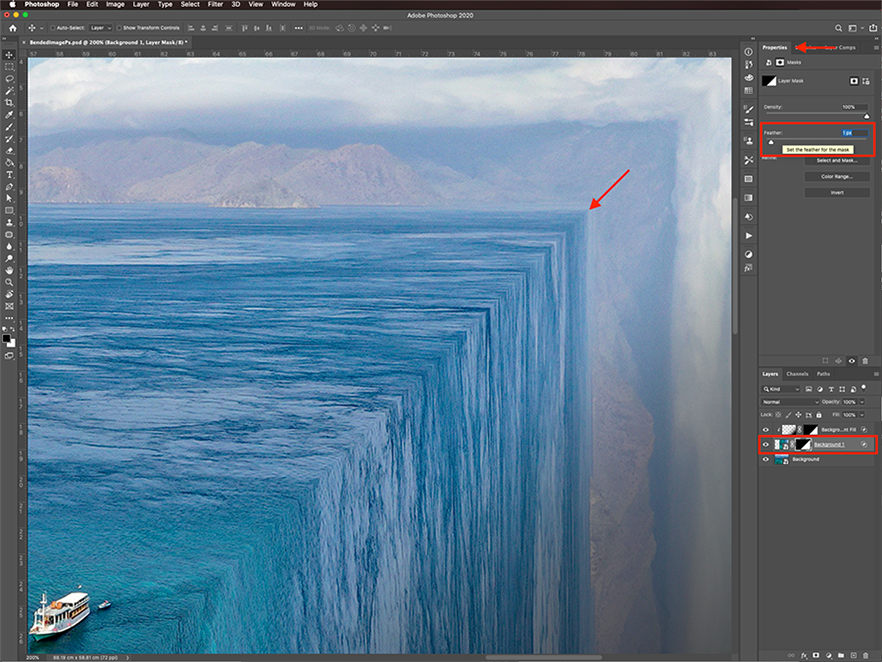
Step 13 - Soften the Edge of the Bent Image
To make the edge of the bent portion of your image less pronounced, we are going to refine the mask and then adjust the feather.
Refine the Mask of the Gradient Layer
First, use the BrushTool (B) with a large and soft brush (500 px and 0% Hardness).
Using black as theForeground color, fill the left side of the image and go a bit further from the point where the image beds down to soften the edge.

Then, lower the Opacity of the layer to about 45%.

Smooth the Feather on the Duplicate Layer
Zoom in to the edge. Make sure that the mask thumbnail of the Background 1 layer (in the middle) is selected, and in the Properties panel, change the Feather value to 1.0 px to smooth it out a bit.
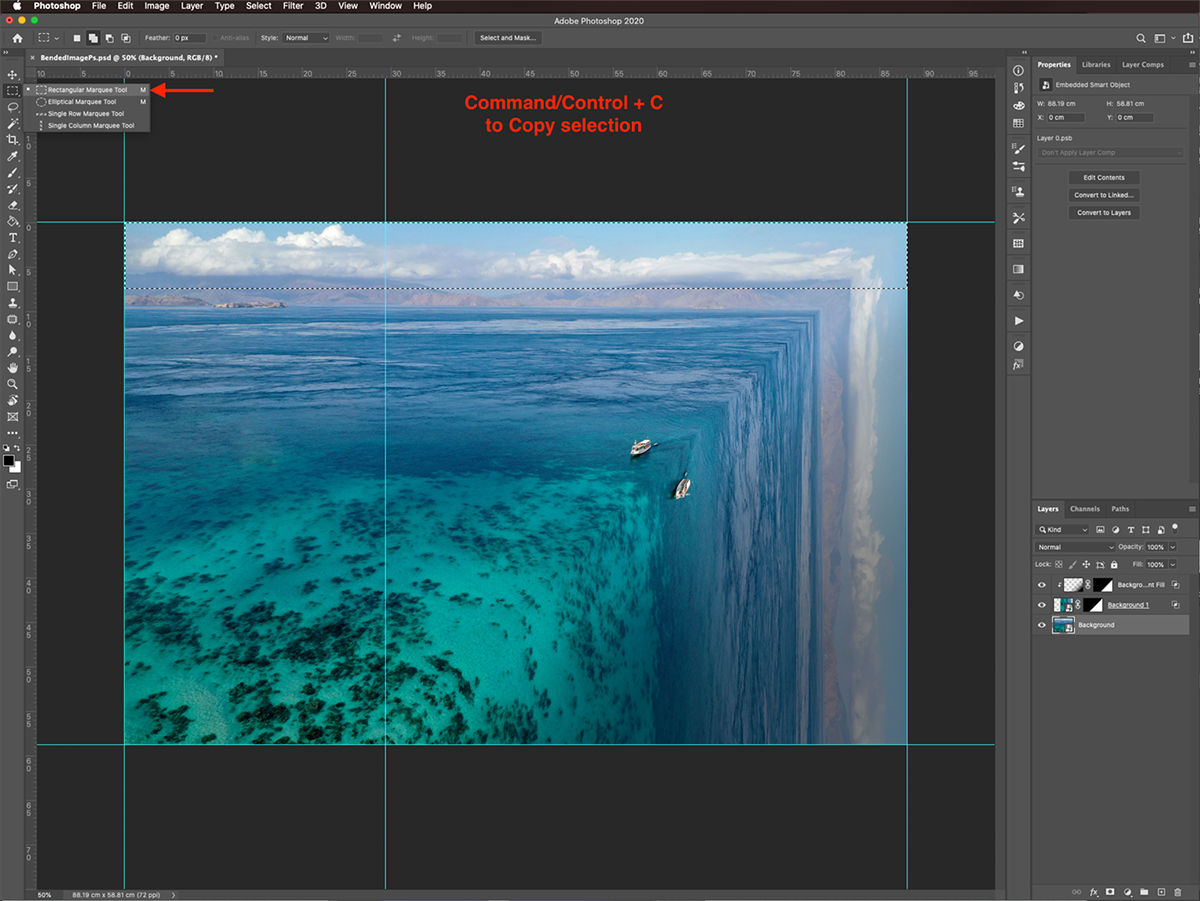
Step 14 - Fix the Sky
To fix the area of the sky where the clouds meet and bend and make the effect look more realistic, we are going to duplicate and mask a portion of the image to place on top of the edge.
Duplicate a Portion of the Sky
First, use the Rectangular Marqueetool (M) to make a selection of the top portion of the image and make a Copy (Cmd/Ctrl + C).
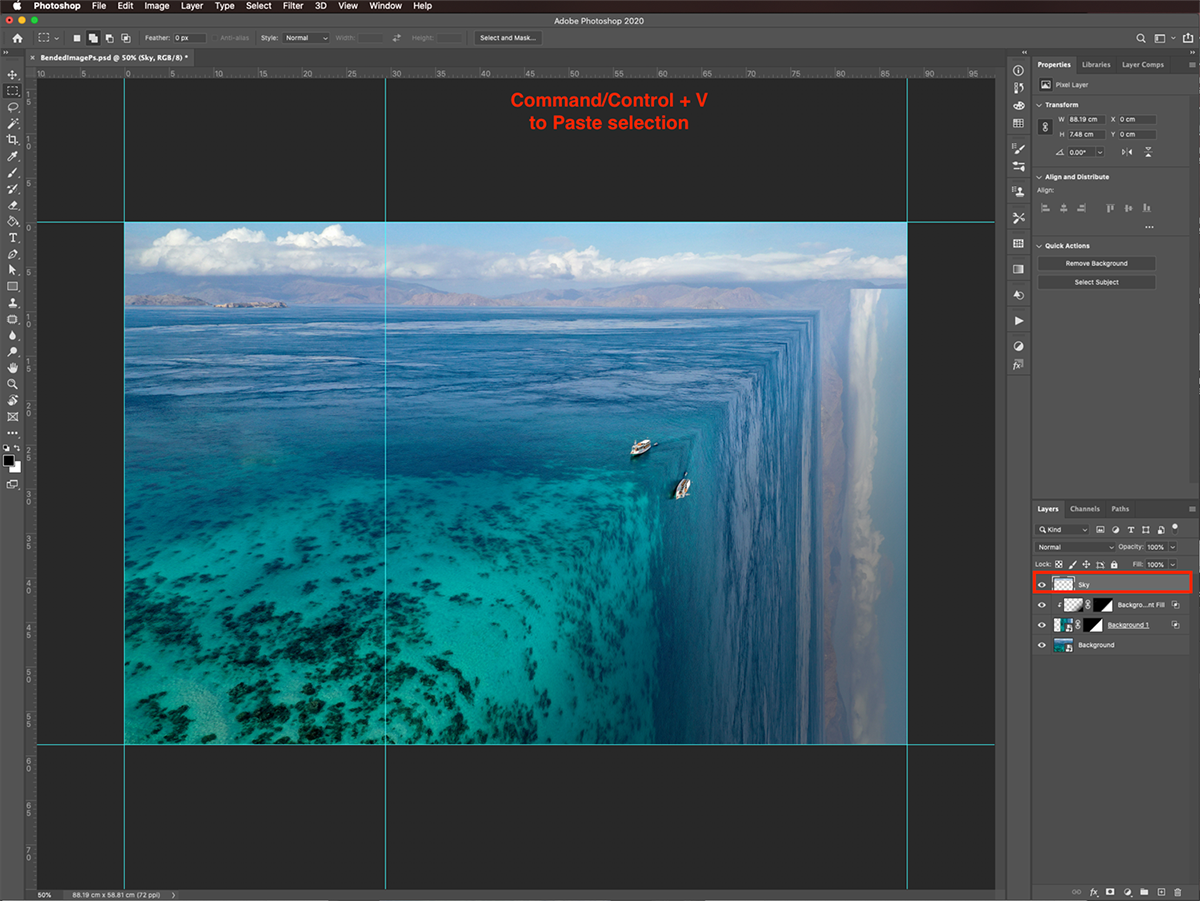
Then, Paste (Cmd/Ctrl + V) your selection making sure the copy is placed on top of everything. Name the resulting layer, Sky.
Add a Layer Mask to the Sky Duplicate
Add a layer mask by clicking on the small button at the bottom of the Layers panel and lower the Opacity to around 70% to be able to see through it. Then, move the image around until the portion of the sky on top of the corner looks good.

Erase the Unwanted Areas
Next, to get rid of the edges and unwanted portions. Make sure that the Sky layer mask thumbnail is selected and that black is the Foreground color. Then, use the BrushTool (B) with a large and soft brush (500 px and 0% Hardness) to erase all the unwanted parts.

Finally, change the Blending Mode of the Sky layer to Lighten.

Step 15 - Remove Unwanted Elements from the Image
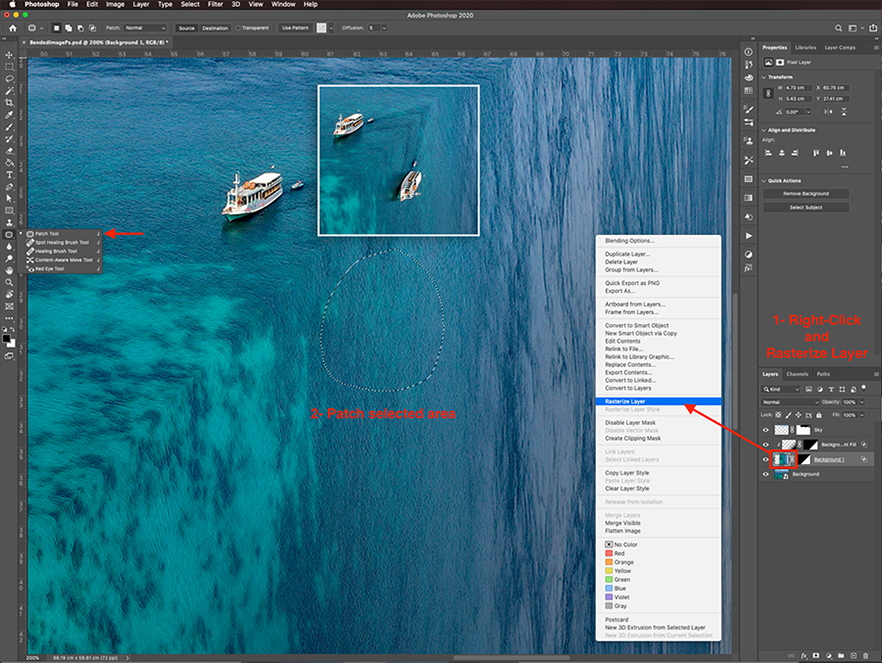
If you see that there are some elements you don’t want to appear on the bent portion of the image, you can remove them using some tools. In our case, a boat was replicated on a section of the image we didn’t want it to be, and we used the Patch Tool (J) to get rid of it.
If your layer was a Smart Object, you need to Rasterize it before using any healing tool. Just right-click on top of its thumbnail on the Layers panel and choose Rasterize.
Step 16 - Add Some Finishing Details to Your Artwork
Finally, we will add some finishing touches to our artwork, like adding some shine to the corner and making the colors more vibrant using some adjustment layers.
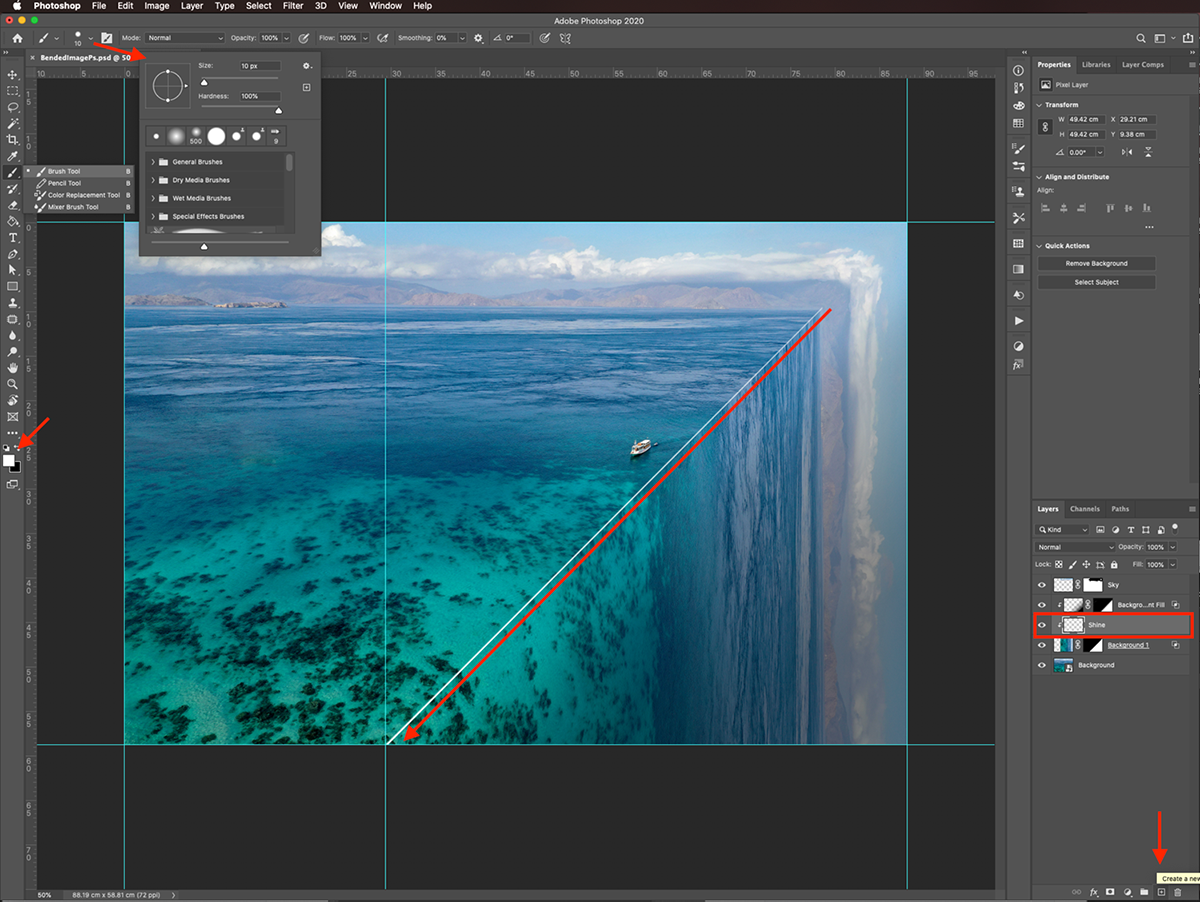
Add Light to the Bent Edge
Create a New Layer between the Background 1 layer (the vertical one) and the one created by the gradient overlay. It should be clipped, too. Name it, Shine.
Use theBrushTool (B) with a small and soft brush (30 px and 0% Hardness). Using white as the foreground color, draw a highlight on top of the diagonal line between the two images.
Change the Blending Mode to Soft Light and lower the Opacity to 70%.

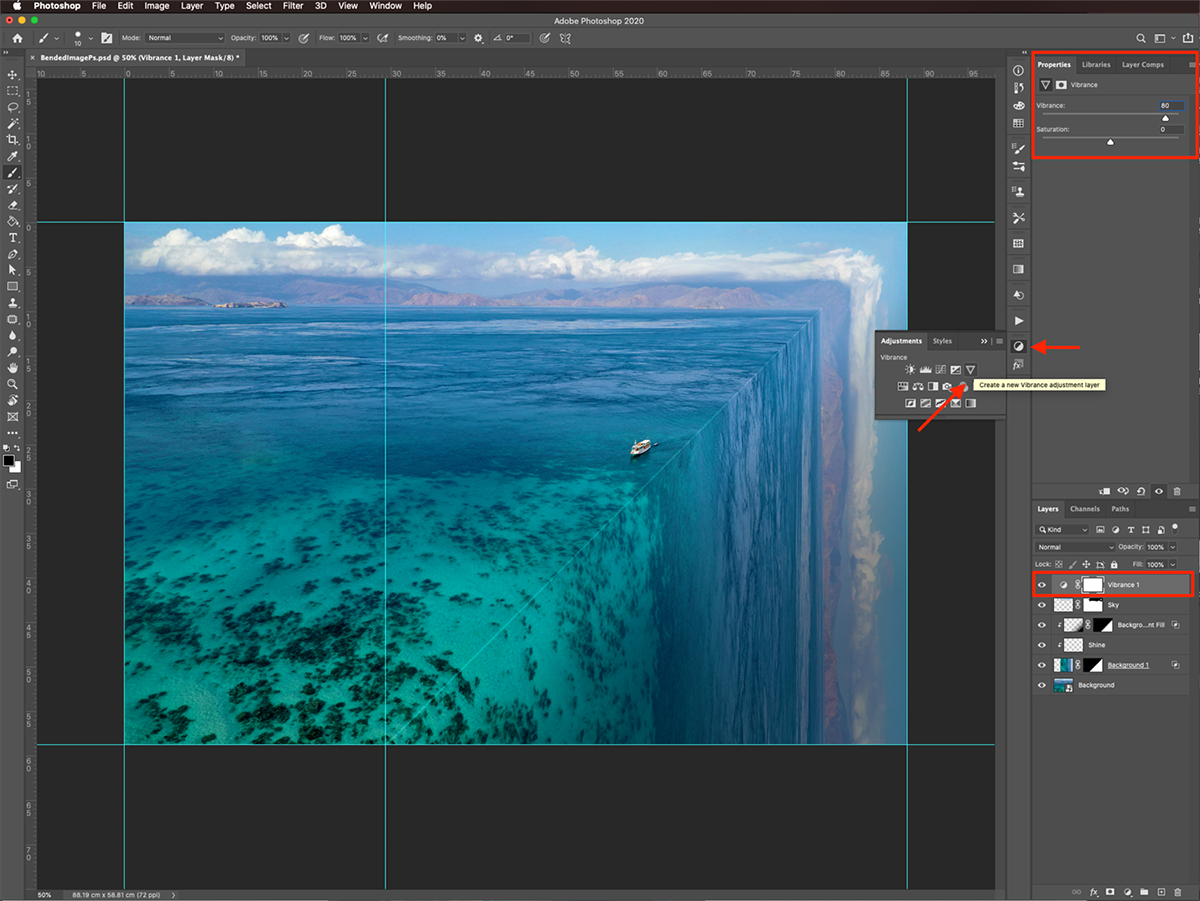
Add a Vibrance Adjustment Layer
Select the topmost layer thumbnail and head to the Adjustments panel to create a new Vibrance adjustment layer. Set the Vibrance value to 80.
Add a Color Lookup Adjustment Layer
Back in the Adjustments panel, create a new Color Lookup adjustment layer on top of everything and choose Crisp_Warm.cube as the 3DLUT File.
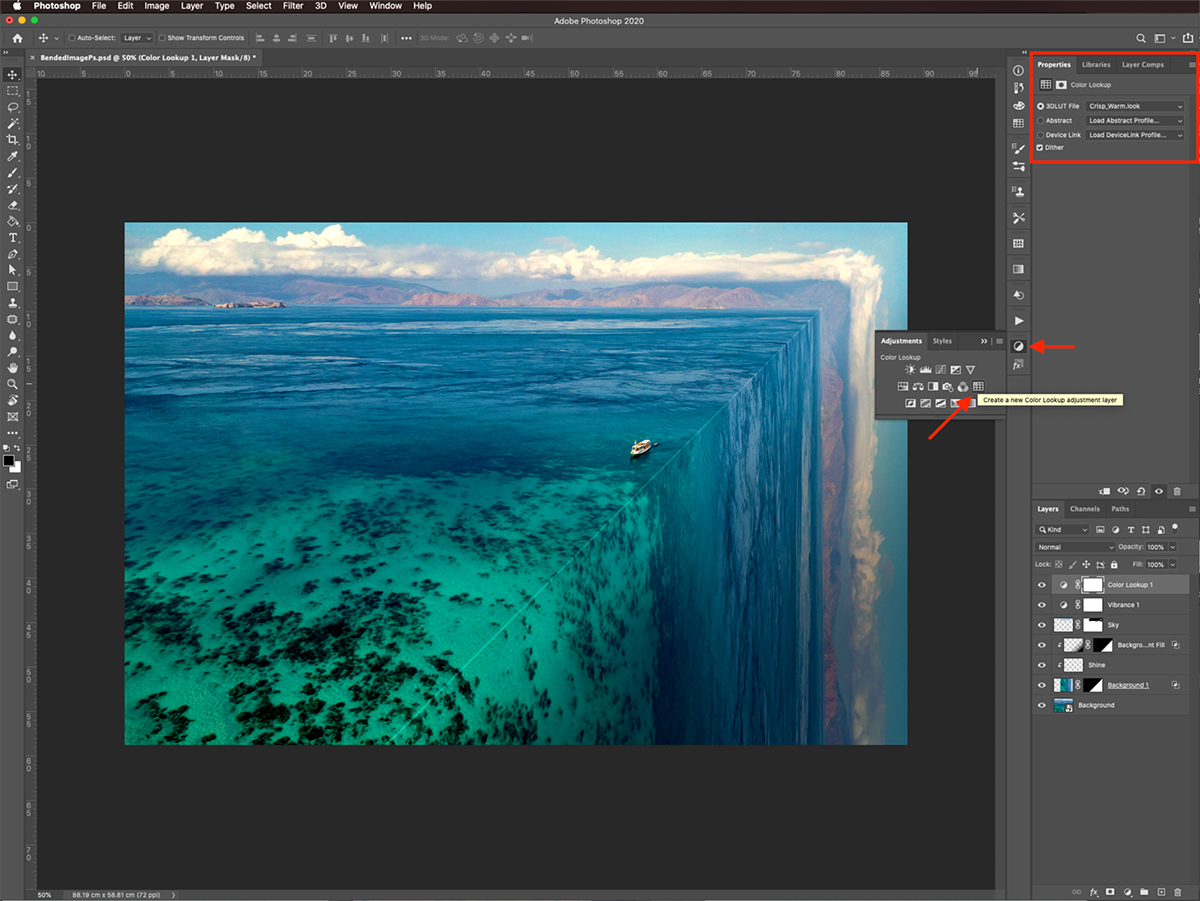
And that’s a wrap! Your artwork should be similar to this.

Take a look at the before and after images for comparison.

We hope you had fun making a bended image in Photoshop. We have more great tutorials for you to follow like using color correction and adding a smoke effect in Photoshop.


