Add image into text in Photoshop
1- Open Photoshop and create a new file.
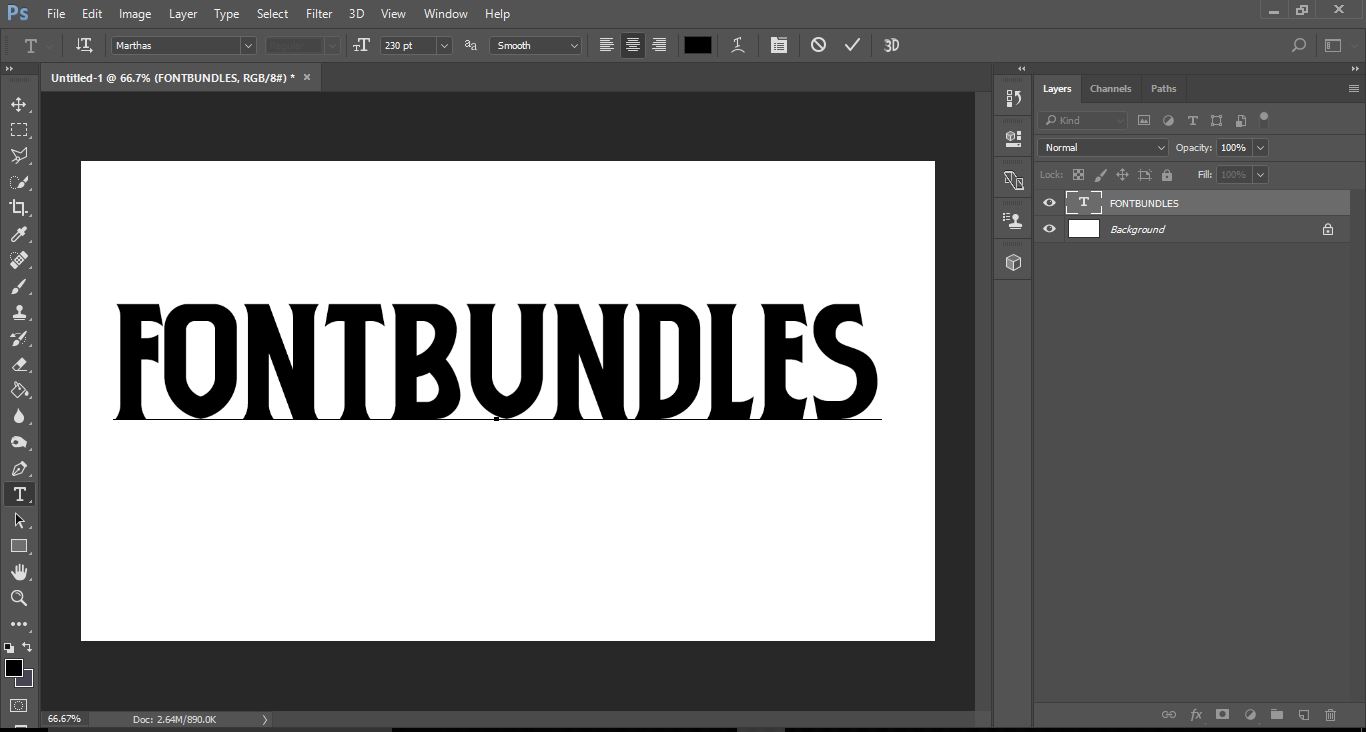
2- Select the type tool, select your font set the font size and select the smooth option. Type your text.
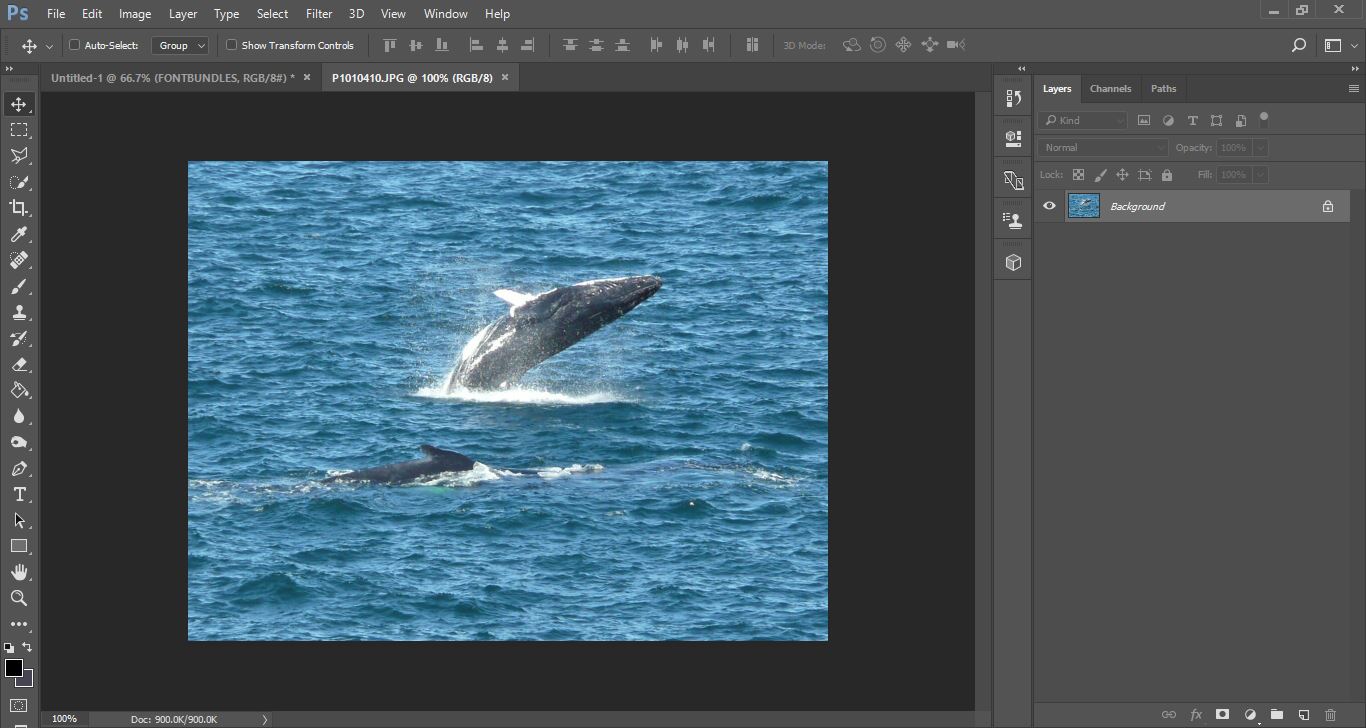
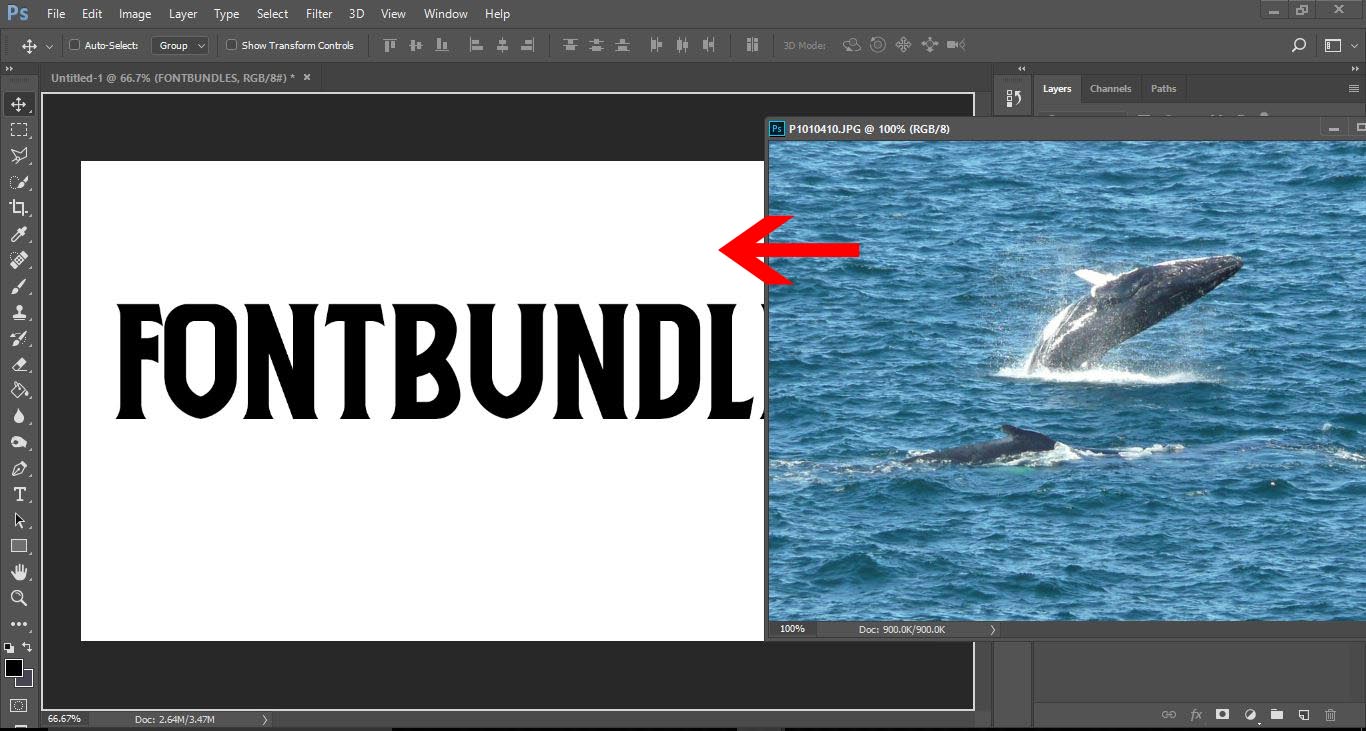
3- Open your image in a new window.
4- Click and drag the image onto the text window.
5- Your image will now be over the text.
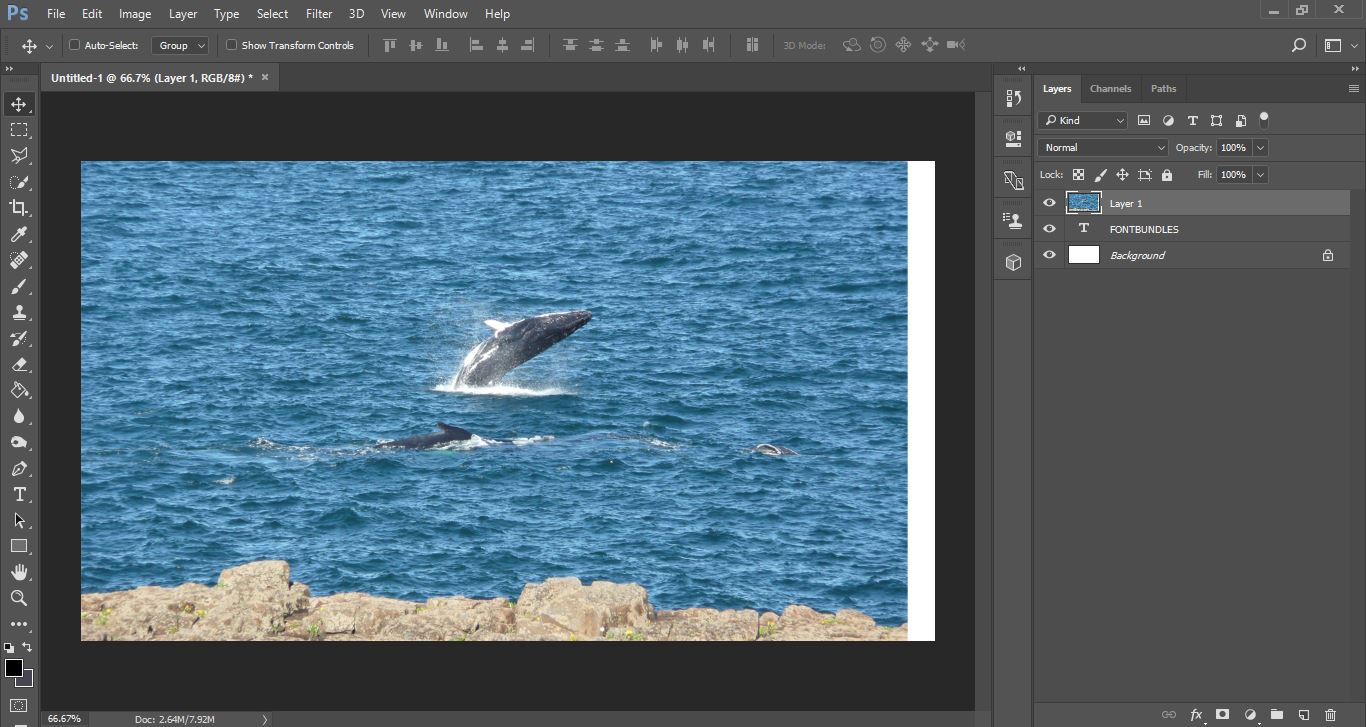
6- Select CTRL +T to select the image , then holding the shift + Alt keys, drag and resize the image over your text to fit the screen. Click enter once finished.
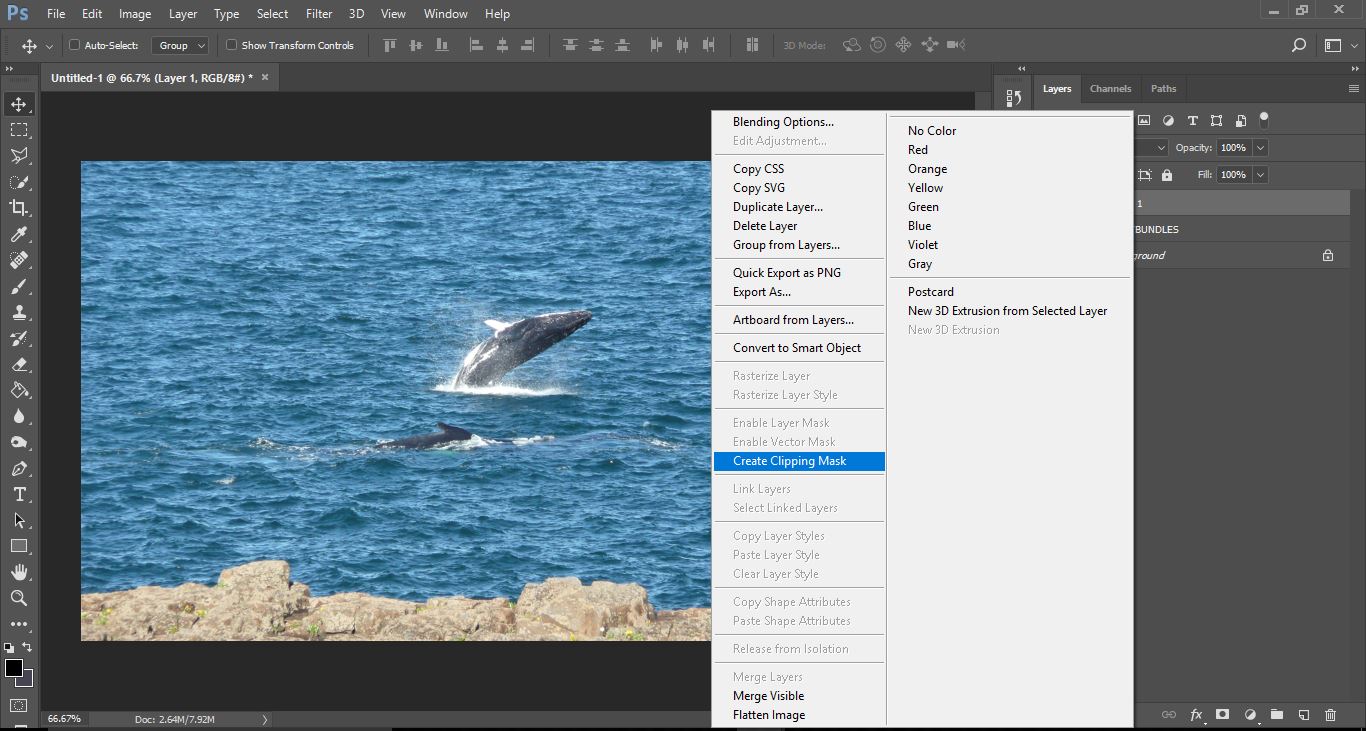
7- Right click the image layer and select Create clipping mask.
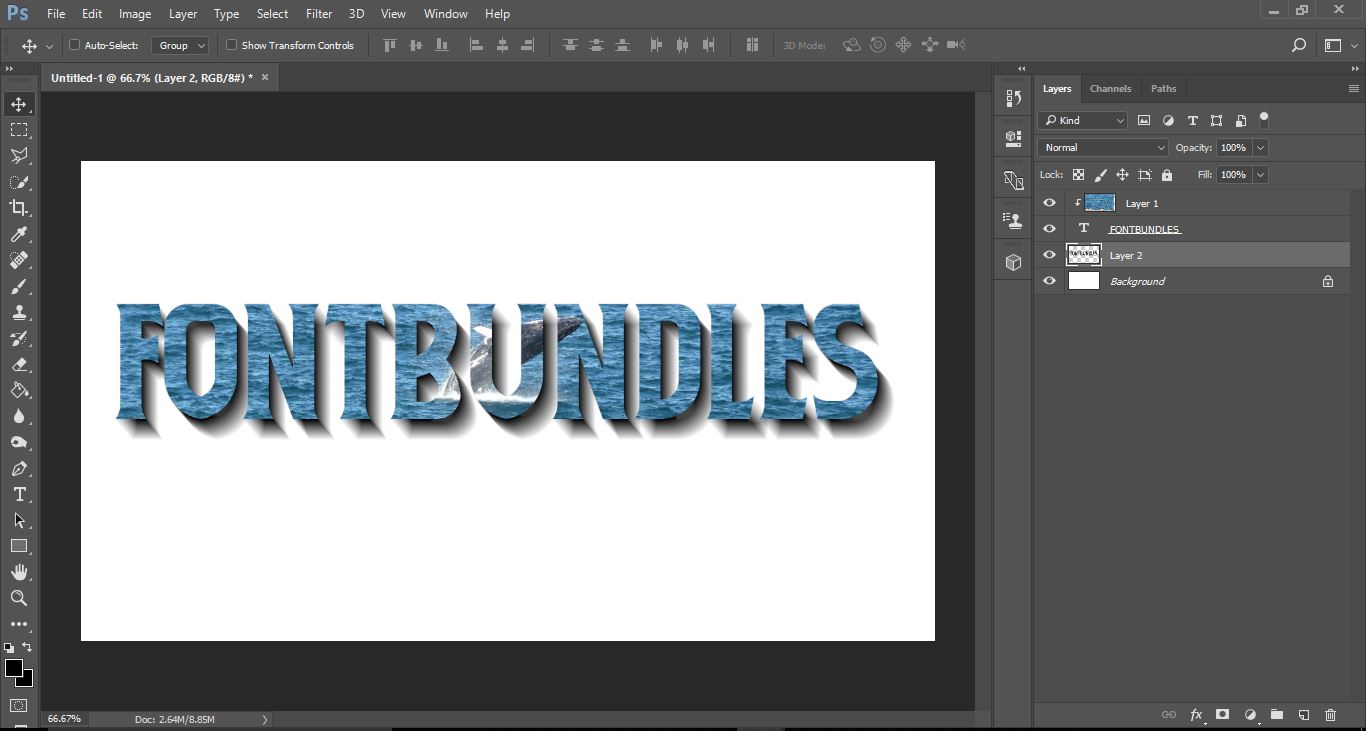
8- Using the move tool you can position the image where you want it to be in your text. Now we need to add a shadow to make the image/text pop on the page.
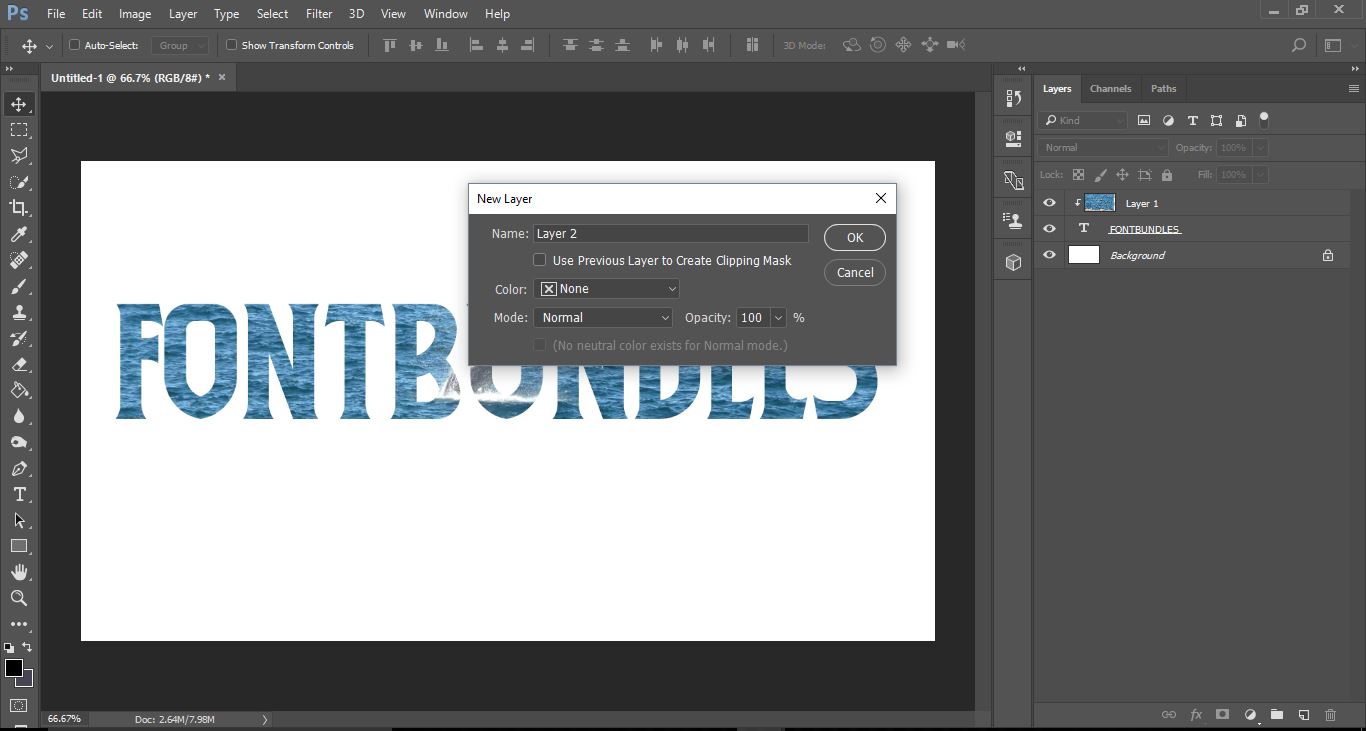
9- Create an new layer.
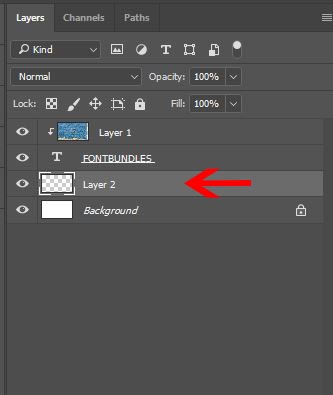
10- Click and drag your new layer below the text layer.
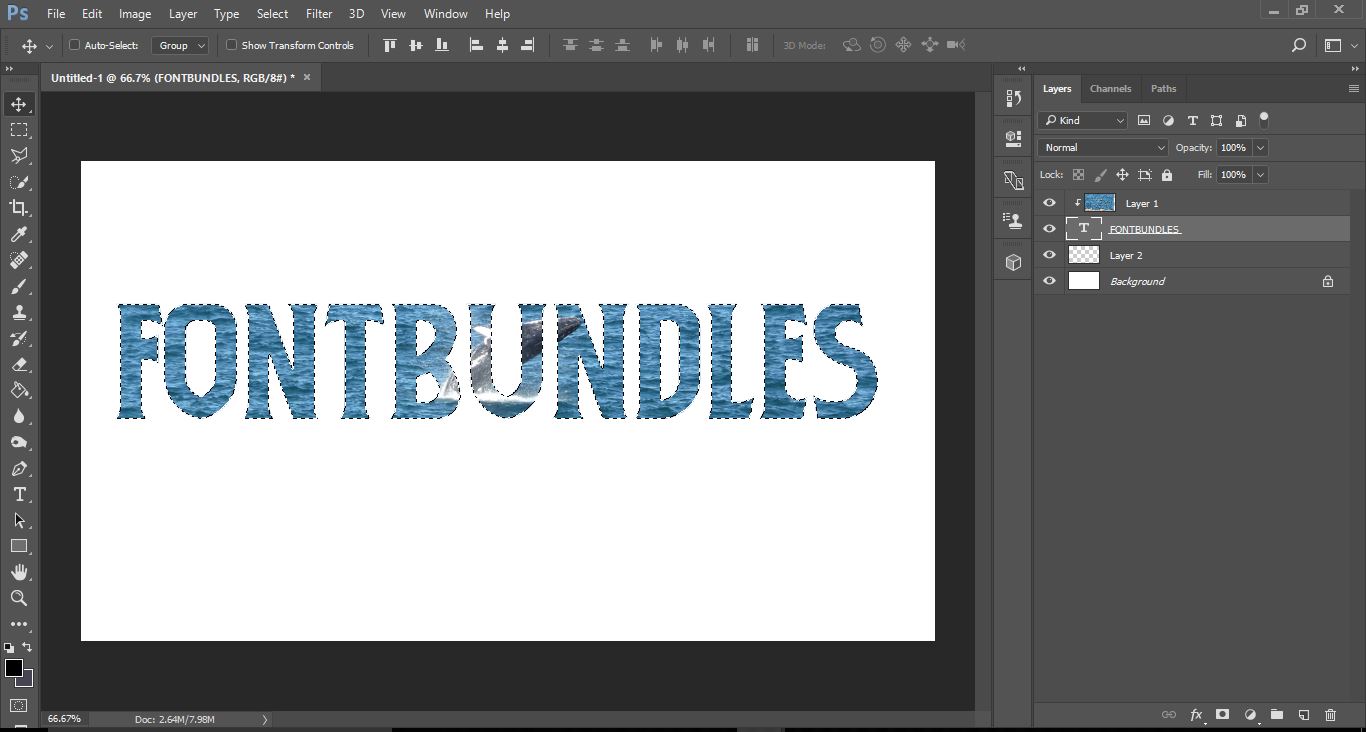
11- Select Ctrl + click on the text layer to select the text. Marching ants will appear around your text.
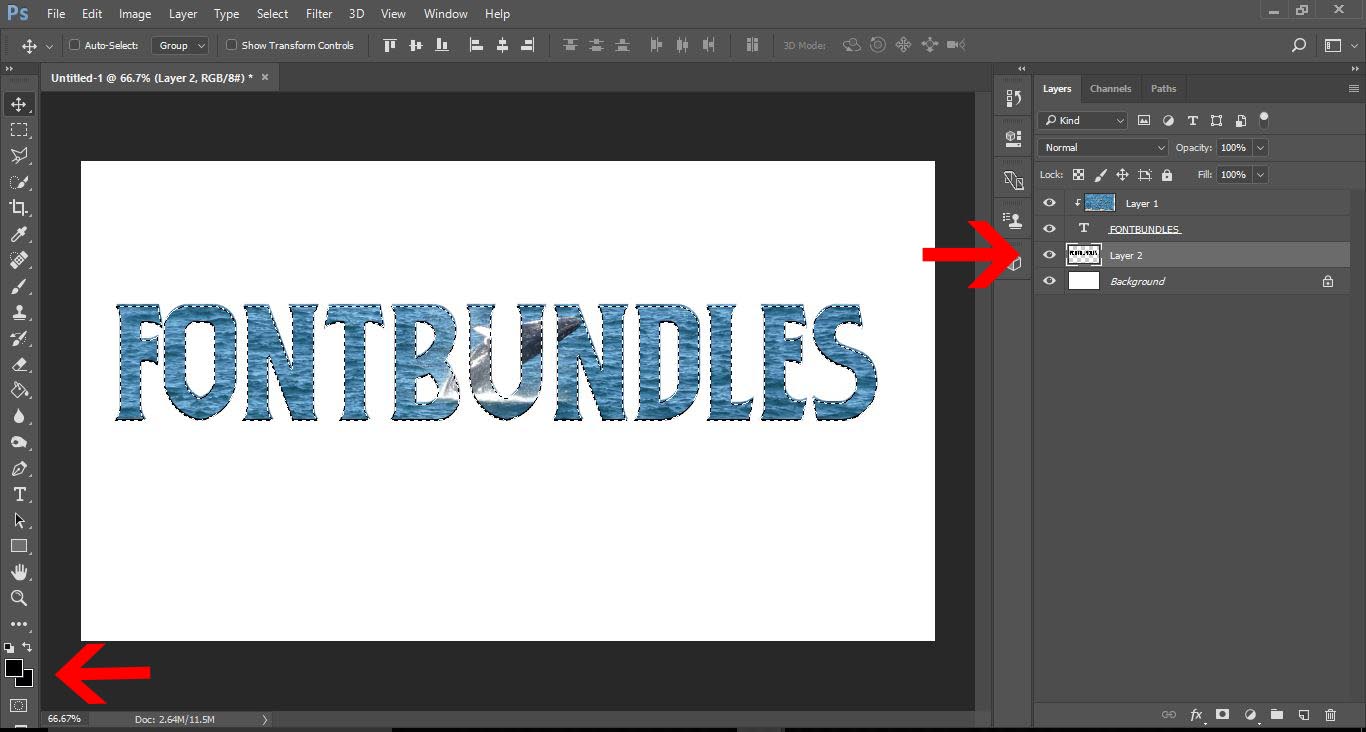
12- Click the new layer and then select the paint bucket tool. Make sure that the color is set to black.
13- Click on the move tool then drag your shadow down slightly.
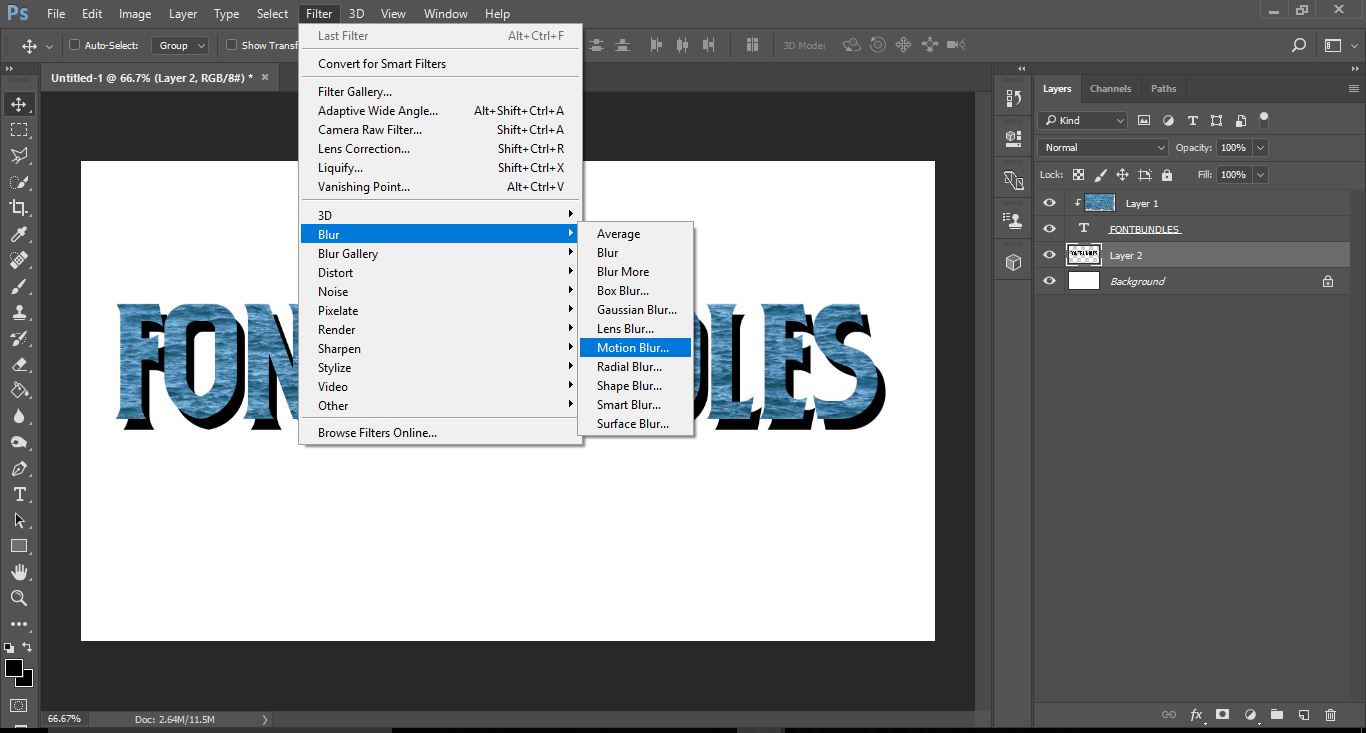
14- We now need to blur the shadow slightly. Click on Filter > Blur > motion blur.
15- Adjust the blur to your needs. I used a - 50 angle and 40 pix distance. Click OK.
16- Your shadow is now complete to make the text pop.
2- Select the type tool, select your font set the font size and select the smooth option. Type your text.
3- Open your image in a new window.
4- Click and drag the image onto the text window.
5- Your image will now be over the text.
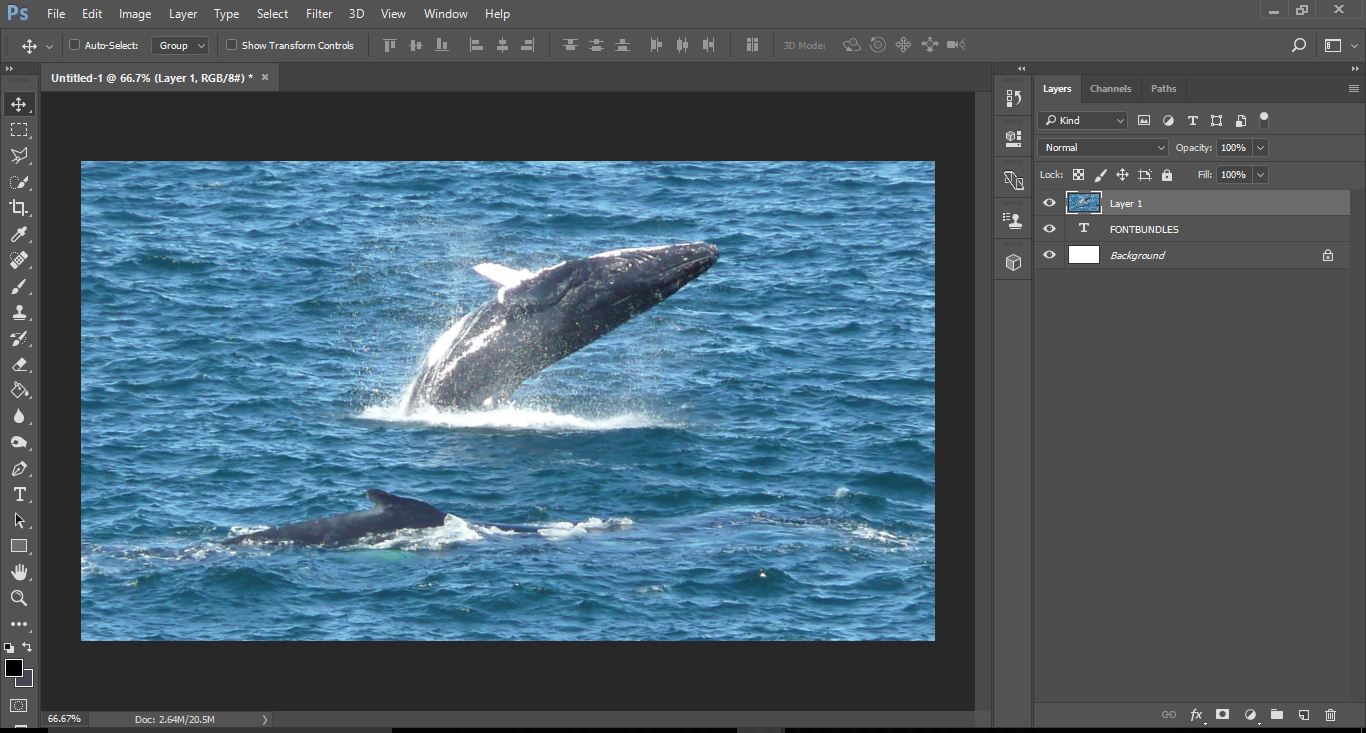
6- Select CTRL +T to select the image , then holding the shift + Alt keys, drag and resize the image over your text to fit the screen. Click enter once finished.
7- Right click the image layer and select Create clipping mask.
8- Using the move tool you can position the image where you want it to be in your text. Now we need to add a shadow to make the image/text pop on the page.

9- Create an new layer.
10- Click and drag your new layer below the text layer.
11- Select Ctrl + click on the text layer to select the text. Marching ants will appear around your text.
12- Click the new layer and then select the paint bucket tool. Make sure that the color is set to black.
13- Click on the move tool then drag your shadow down slightly.

14- We now need to blur the shadow slightly. Click on Filter > Blur > motion blur.
15- Adjust the blur to your needs. I used a - 50 angle and 40 pix distance. Click OK.

16- Your shadow is now complete to make the text pop.