- By Design Bundles
- 8 Mins
- Photoshop Tutorials
Up and Down Cut Cardboard Text in Photoshop
1 - In Photoshop, open the image you chose as “Background”.
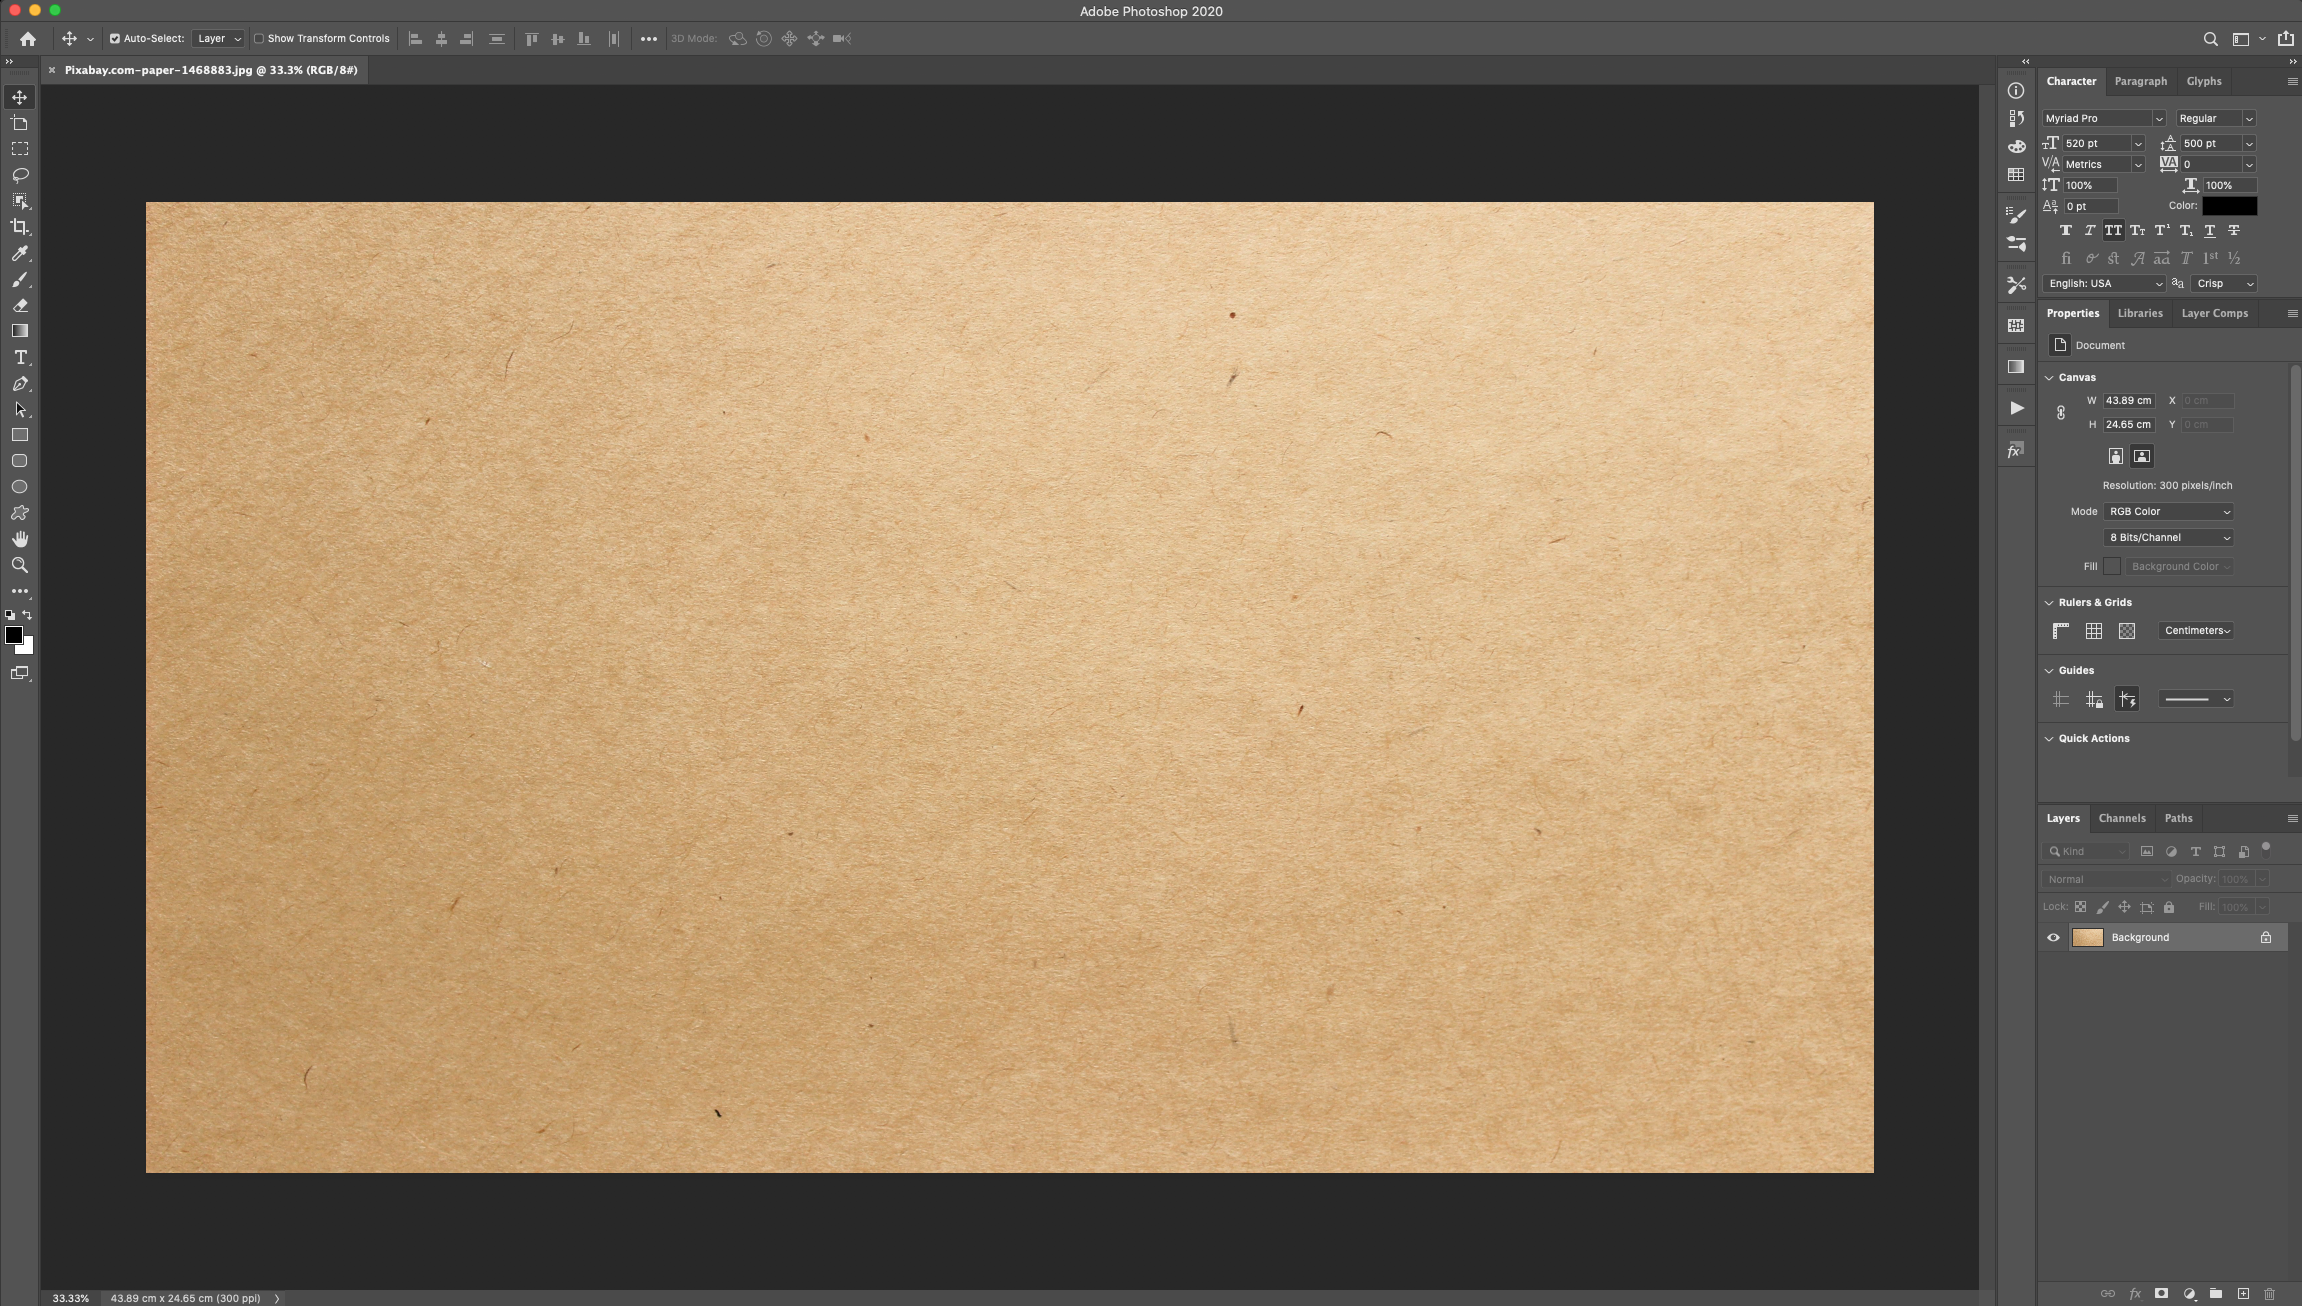
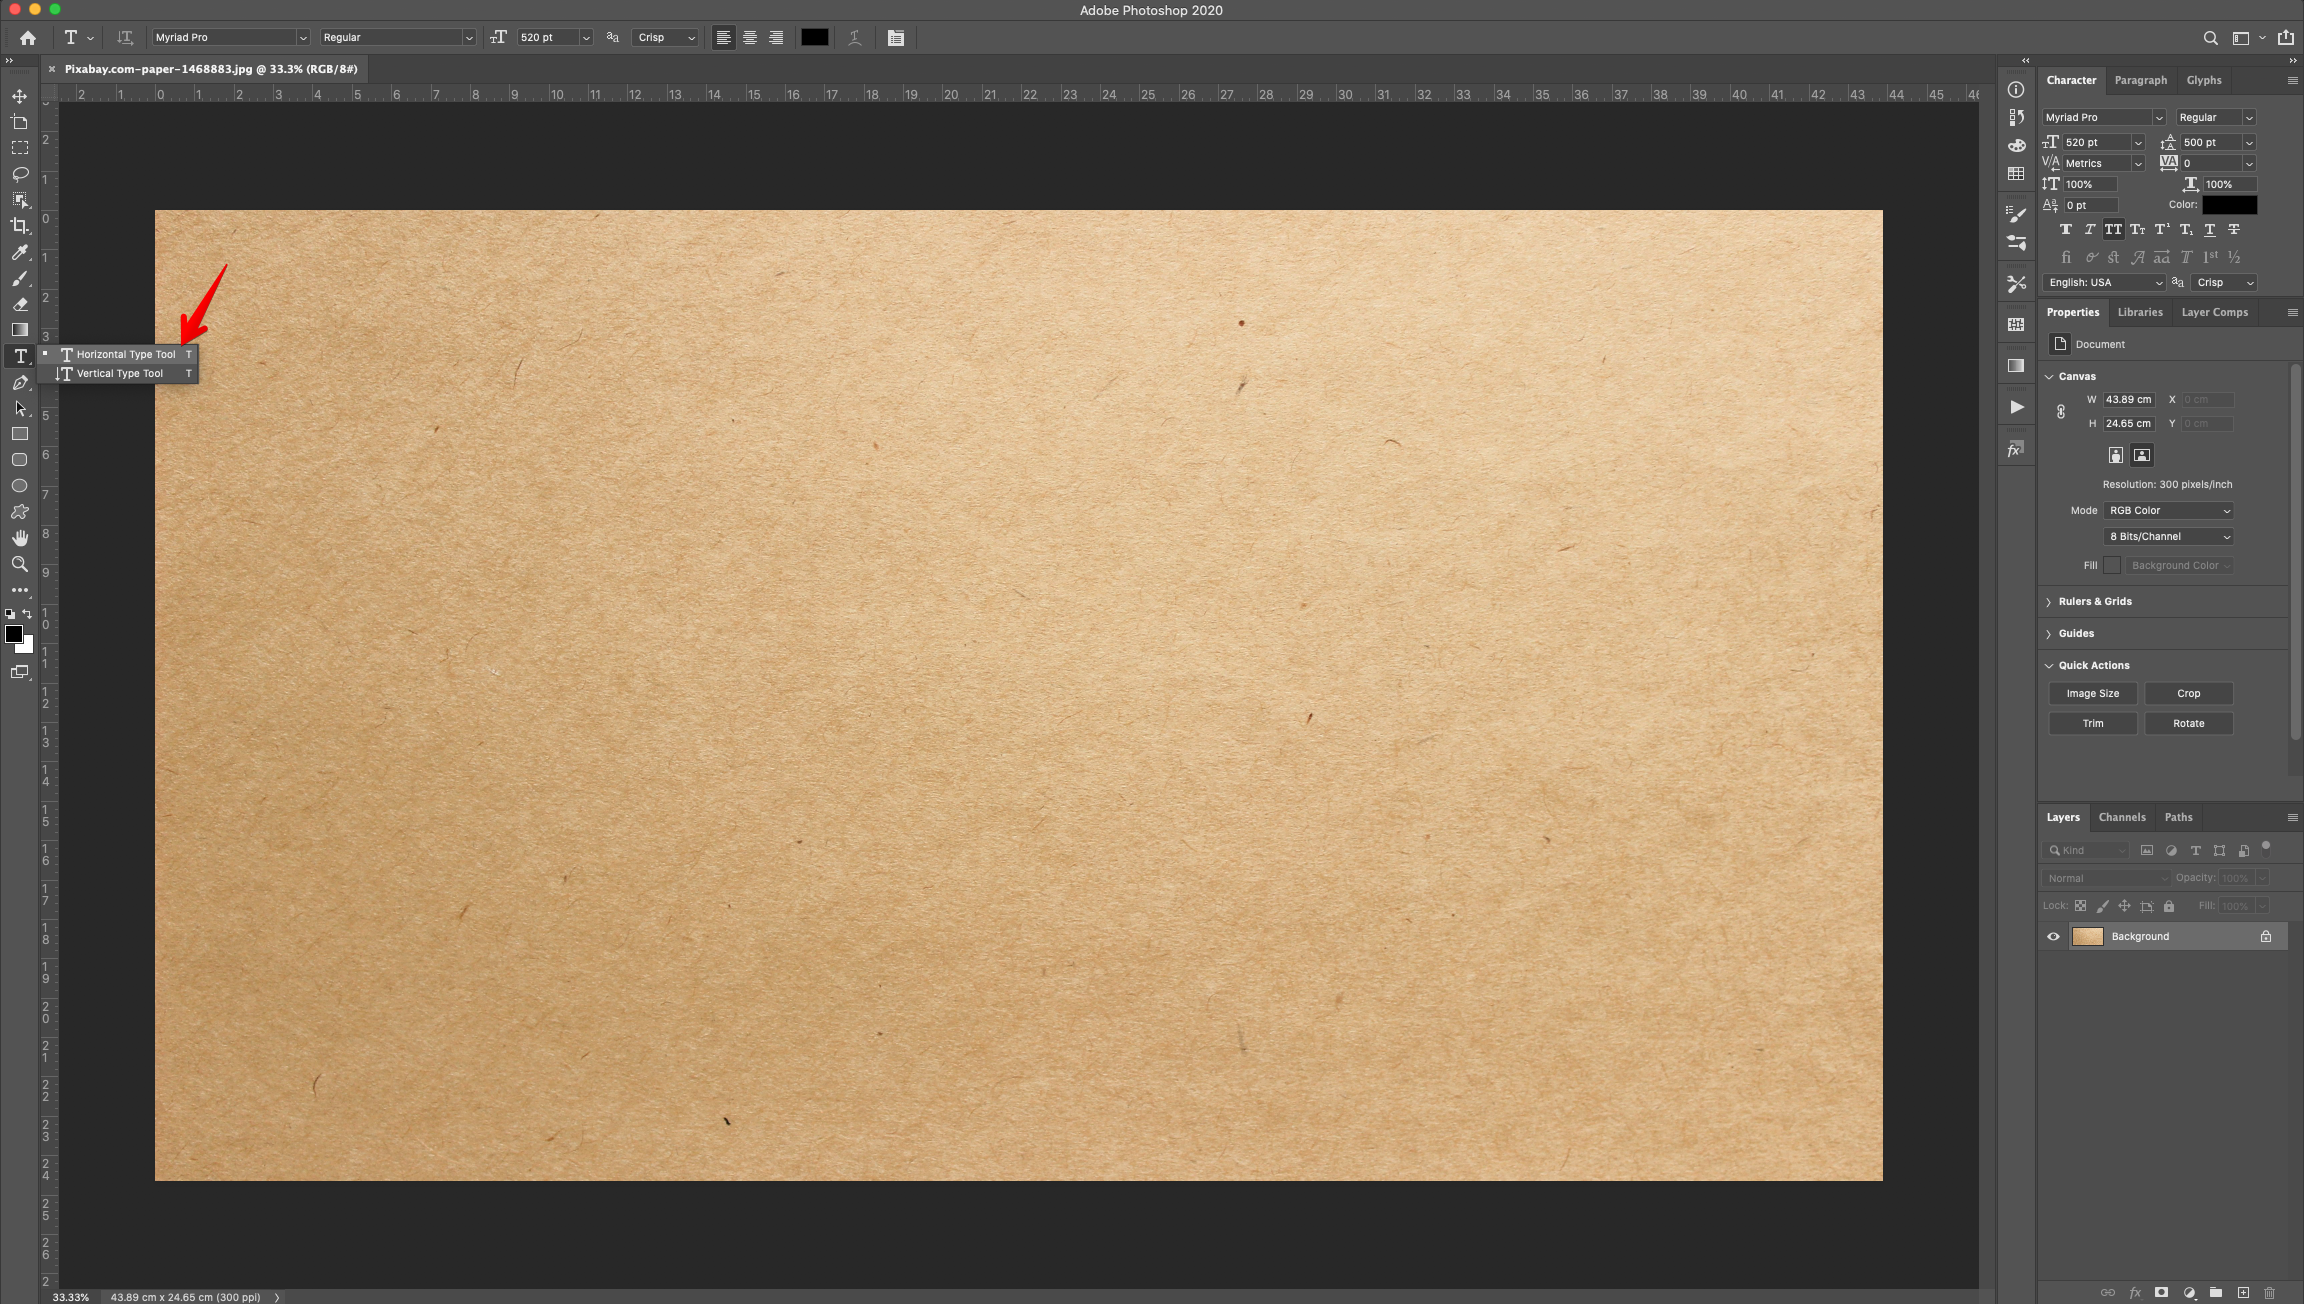
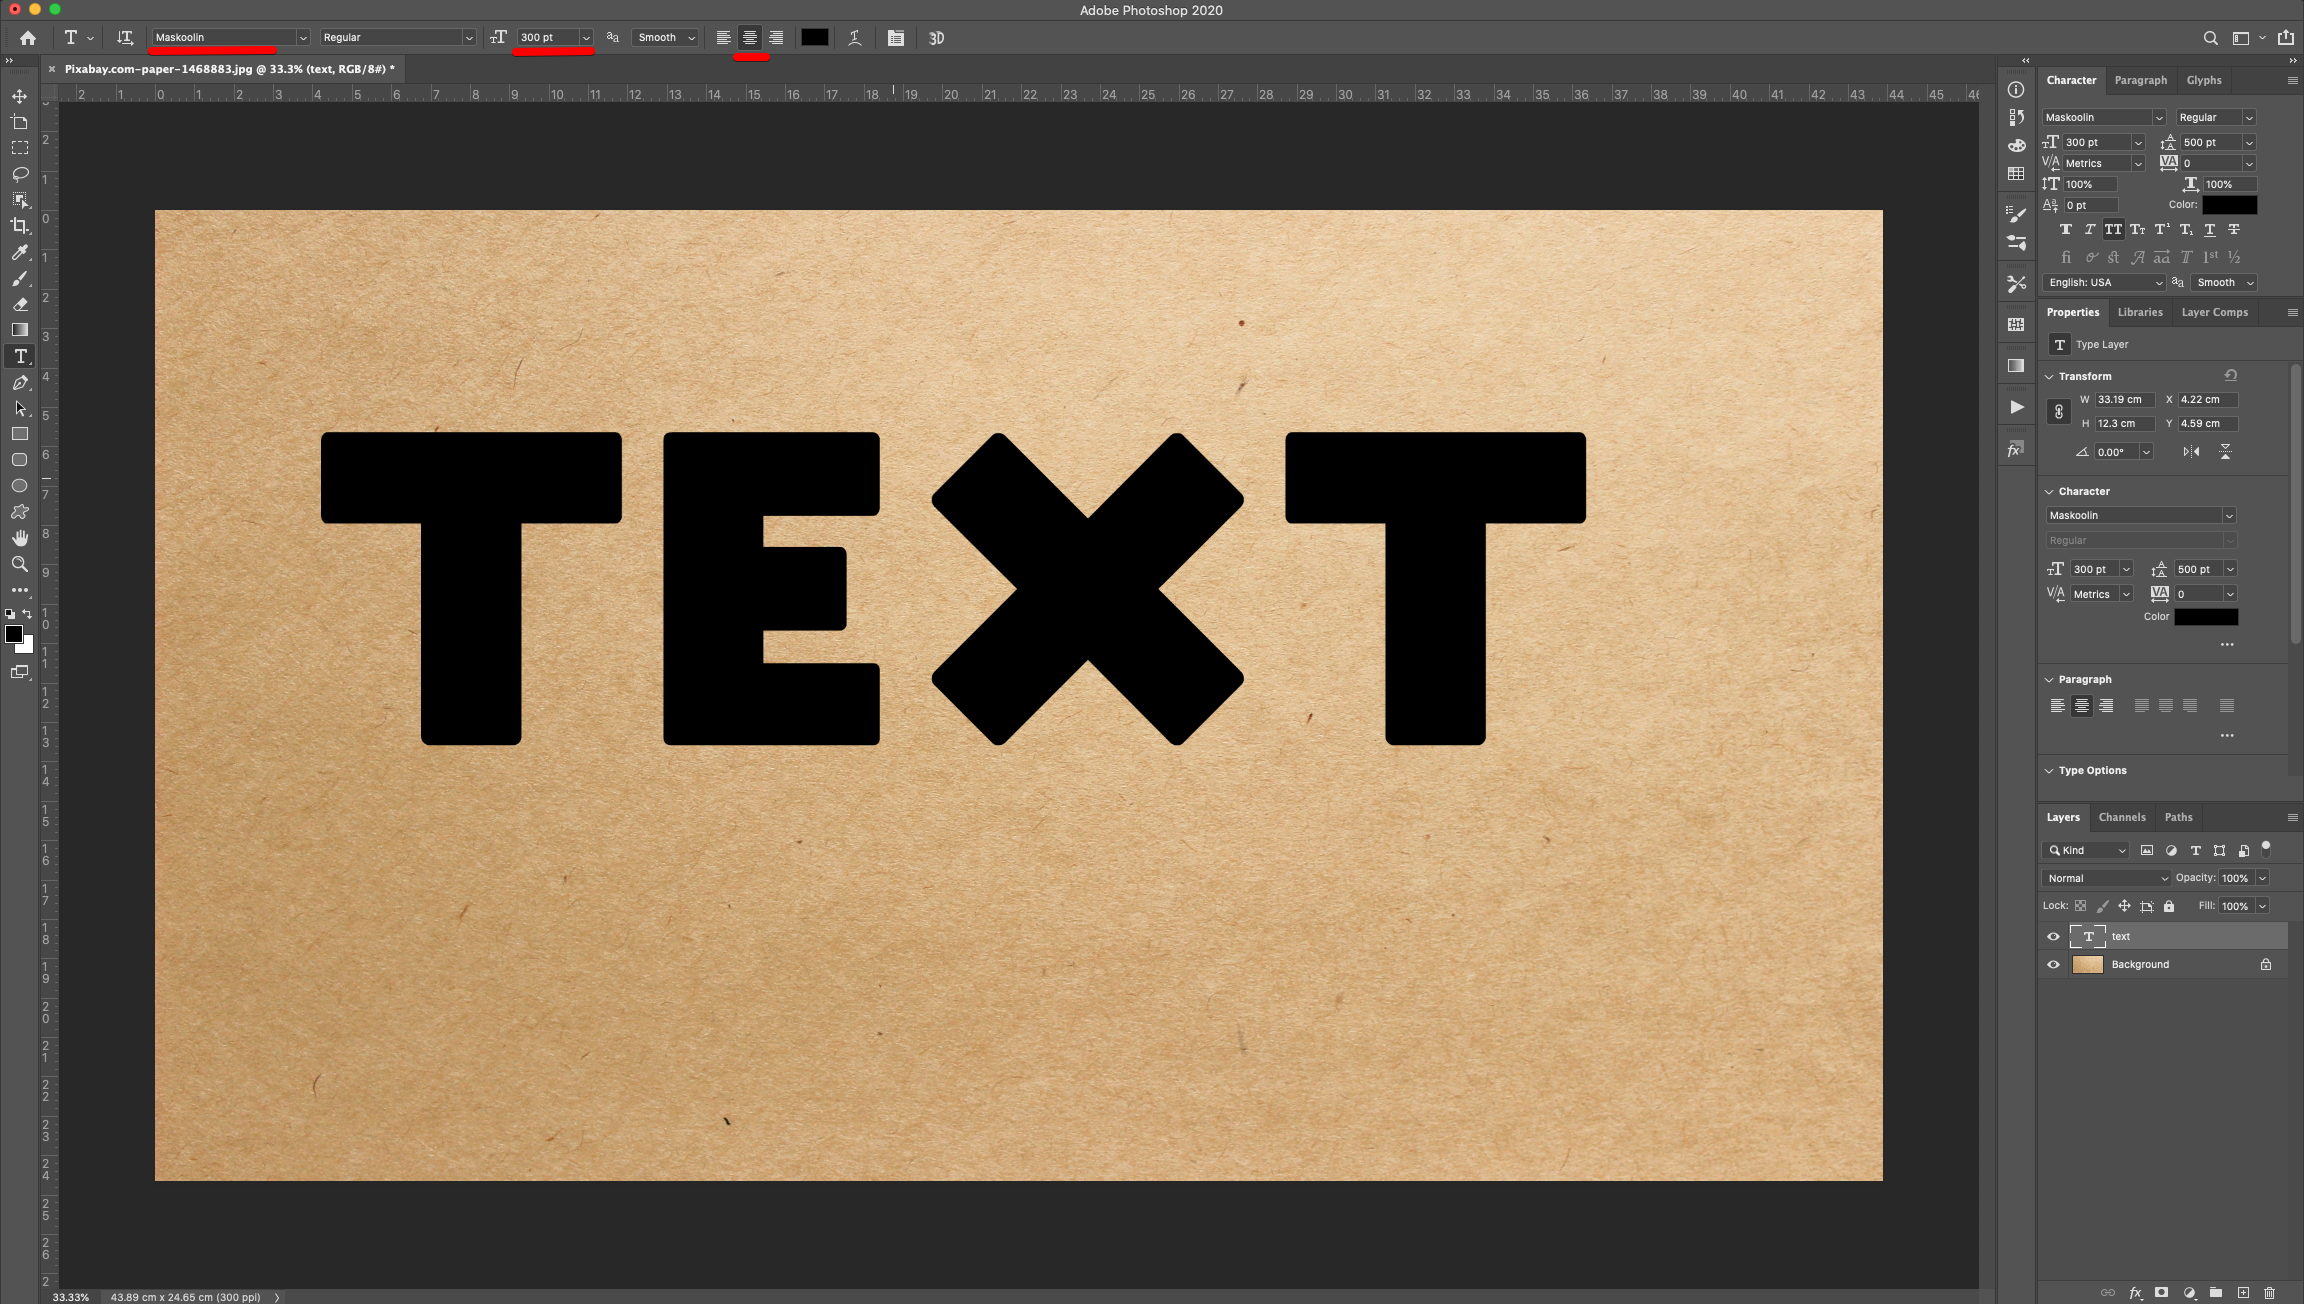
2 - Select the “Type Tool” (T), choose your font and type your text. You can use any color as “Fill” color. The size will depend on the word you are typing.
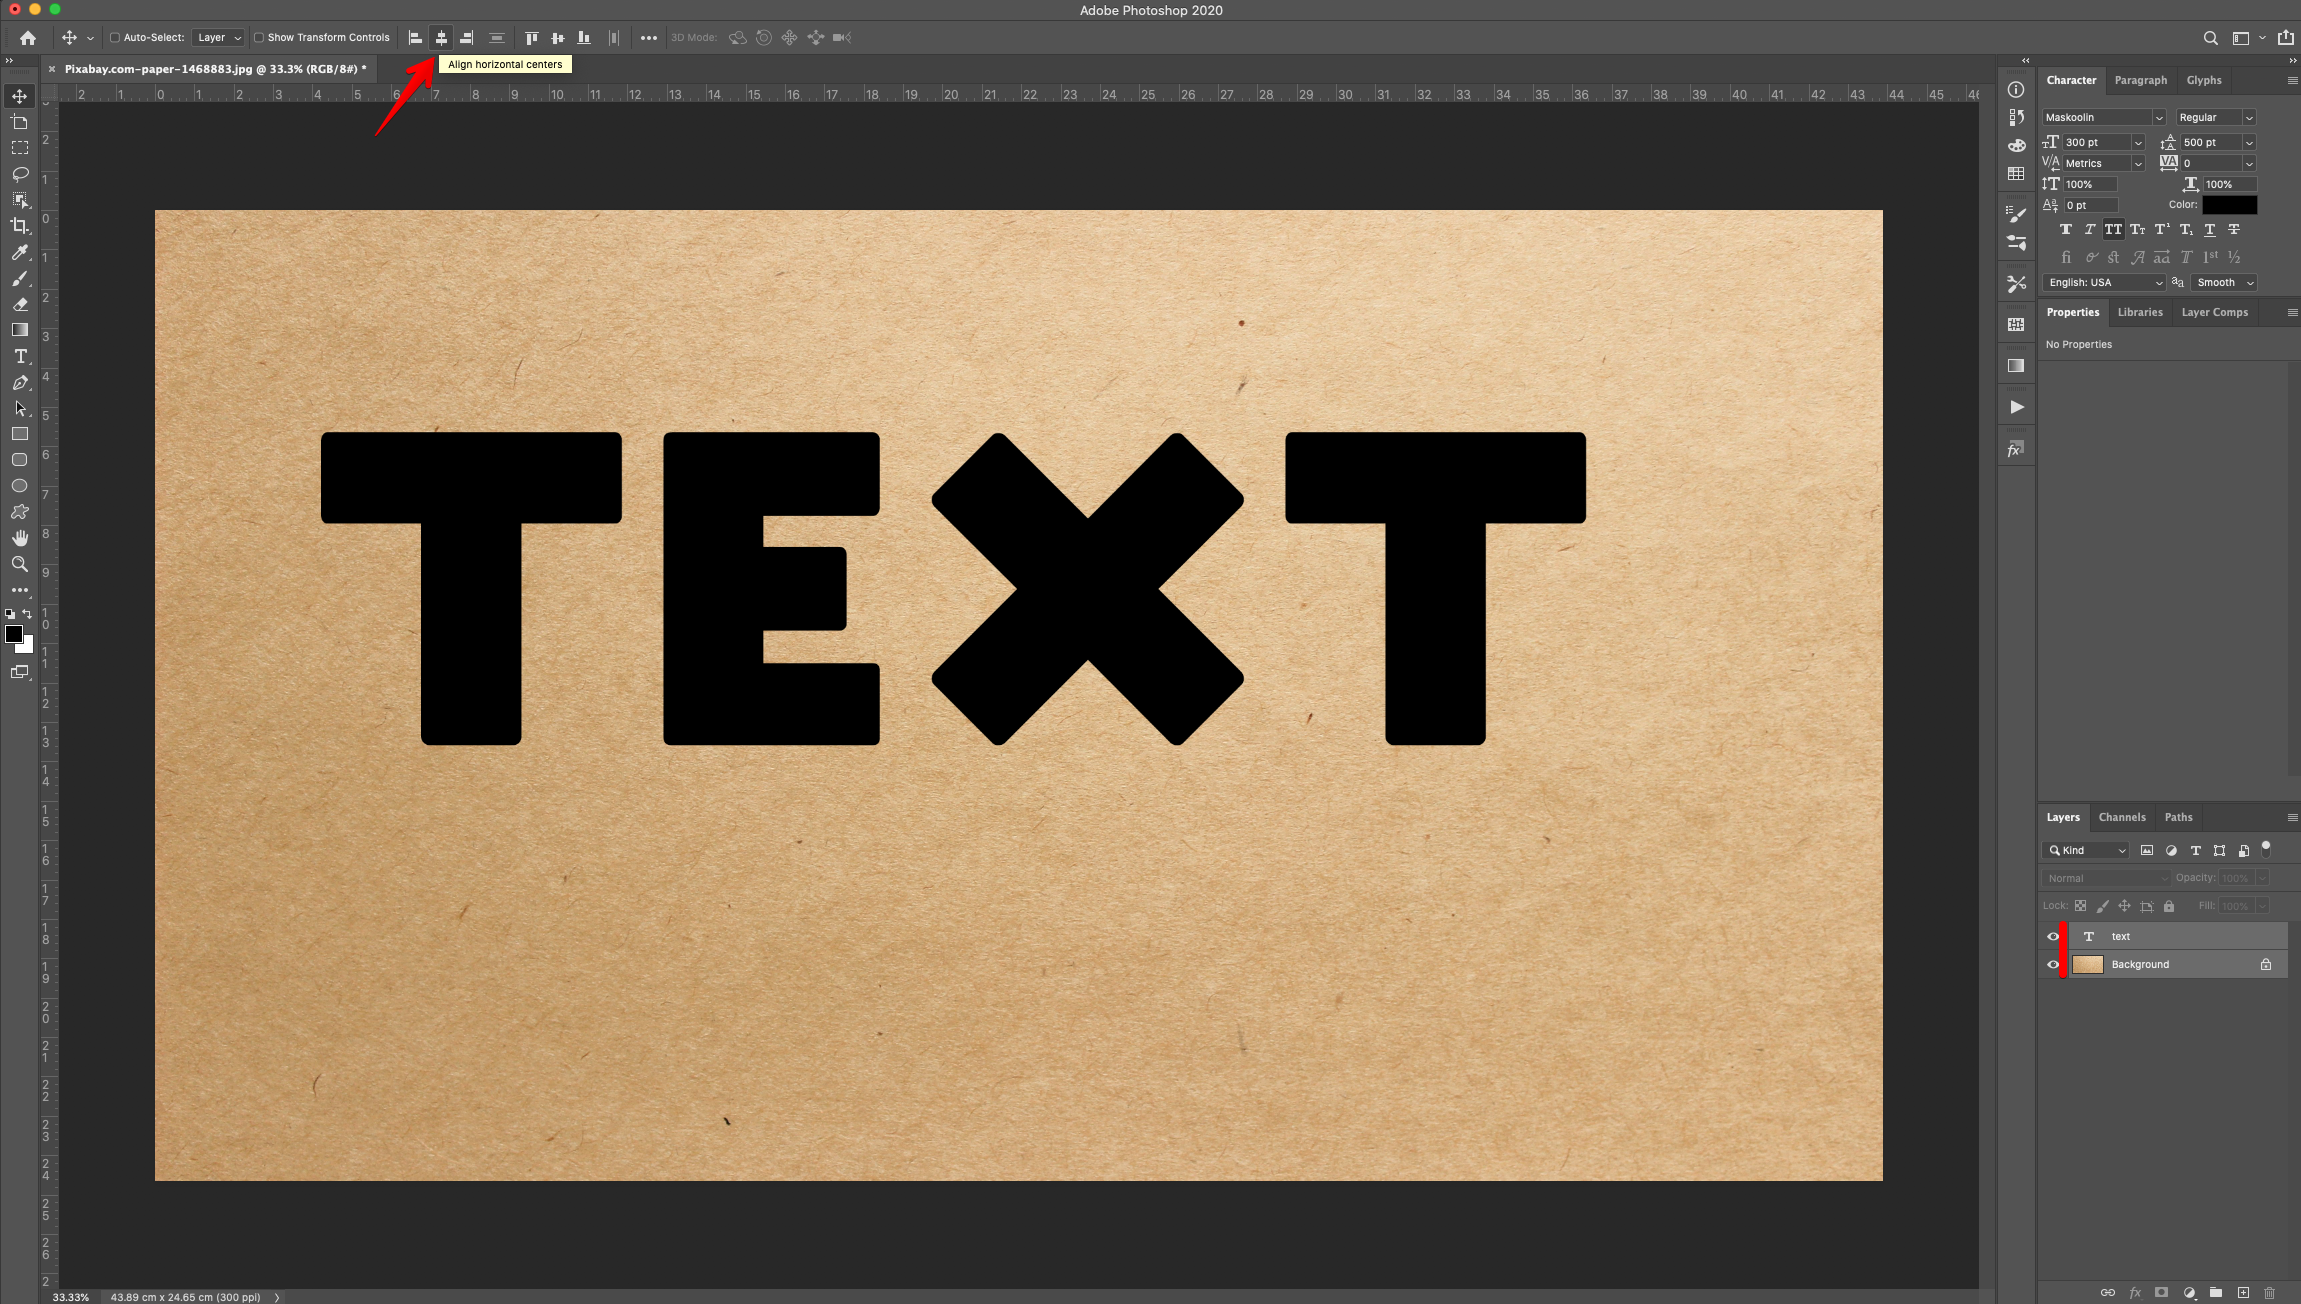
3 - Center the text by selecting both Layers (“Shift” key) and clicking the “Align Vertical and Horizontal Centers” buttons on the Top Menu.
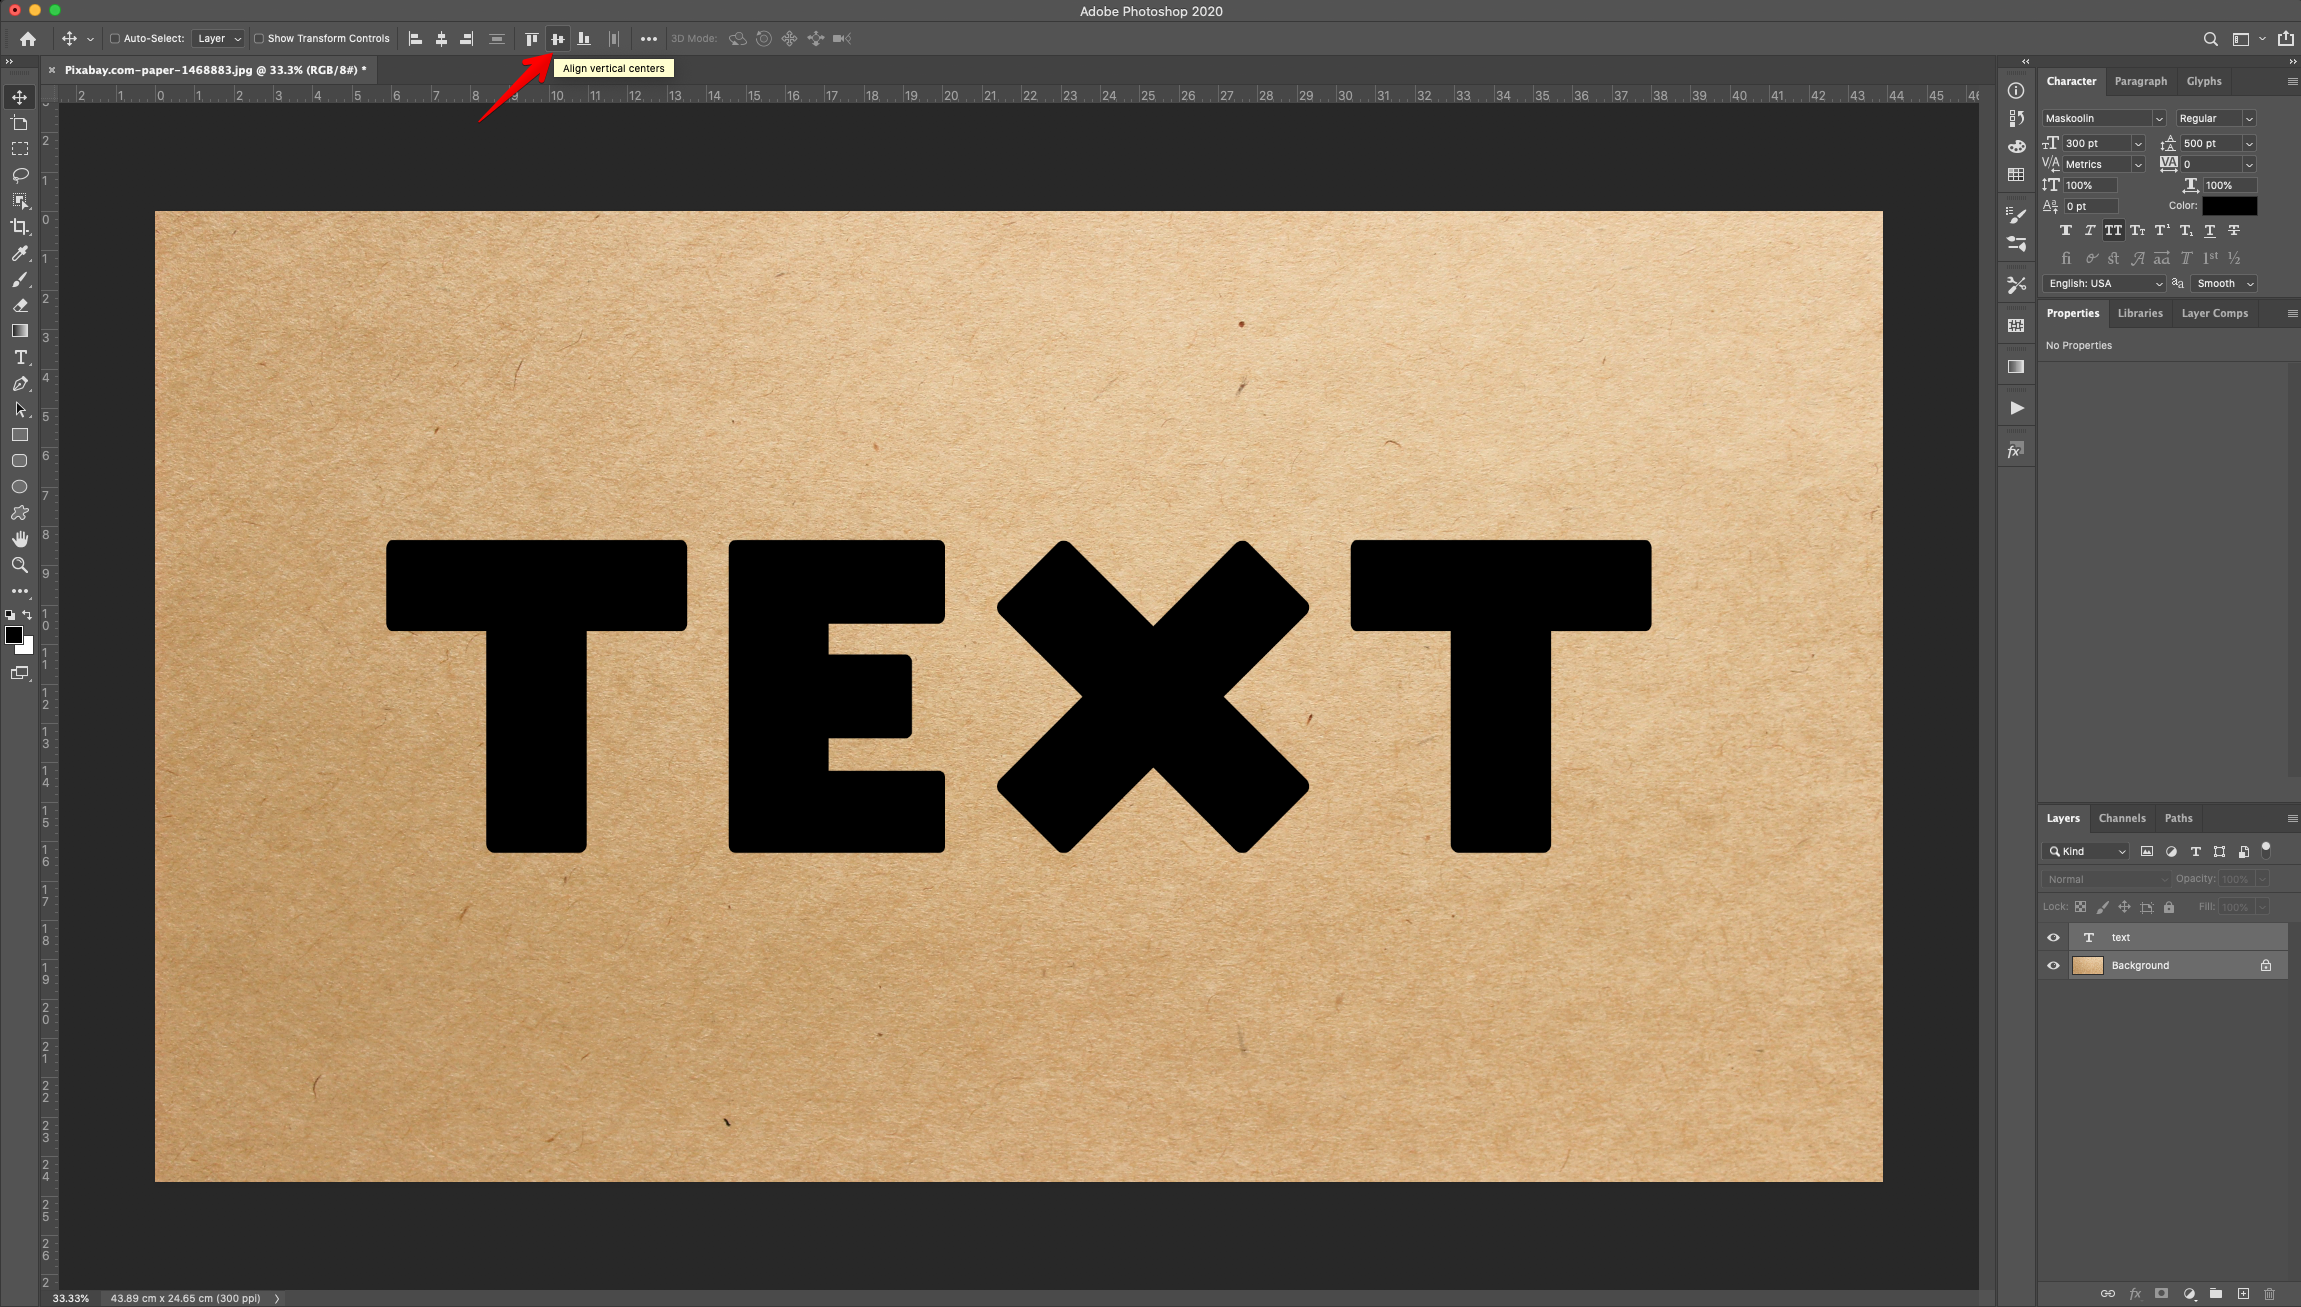
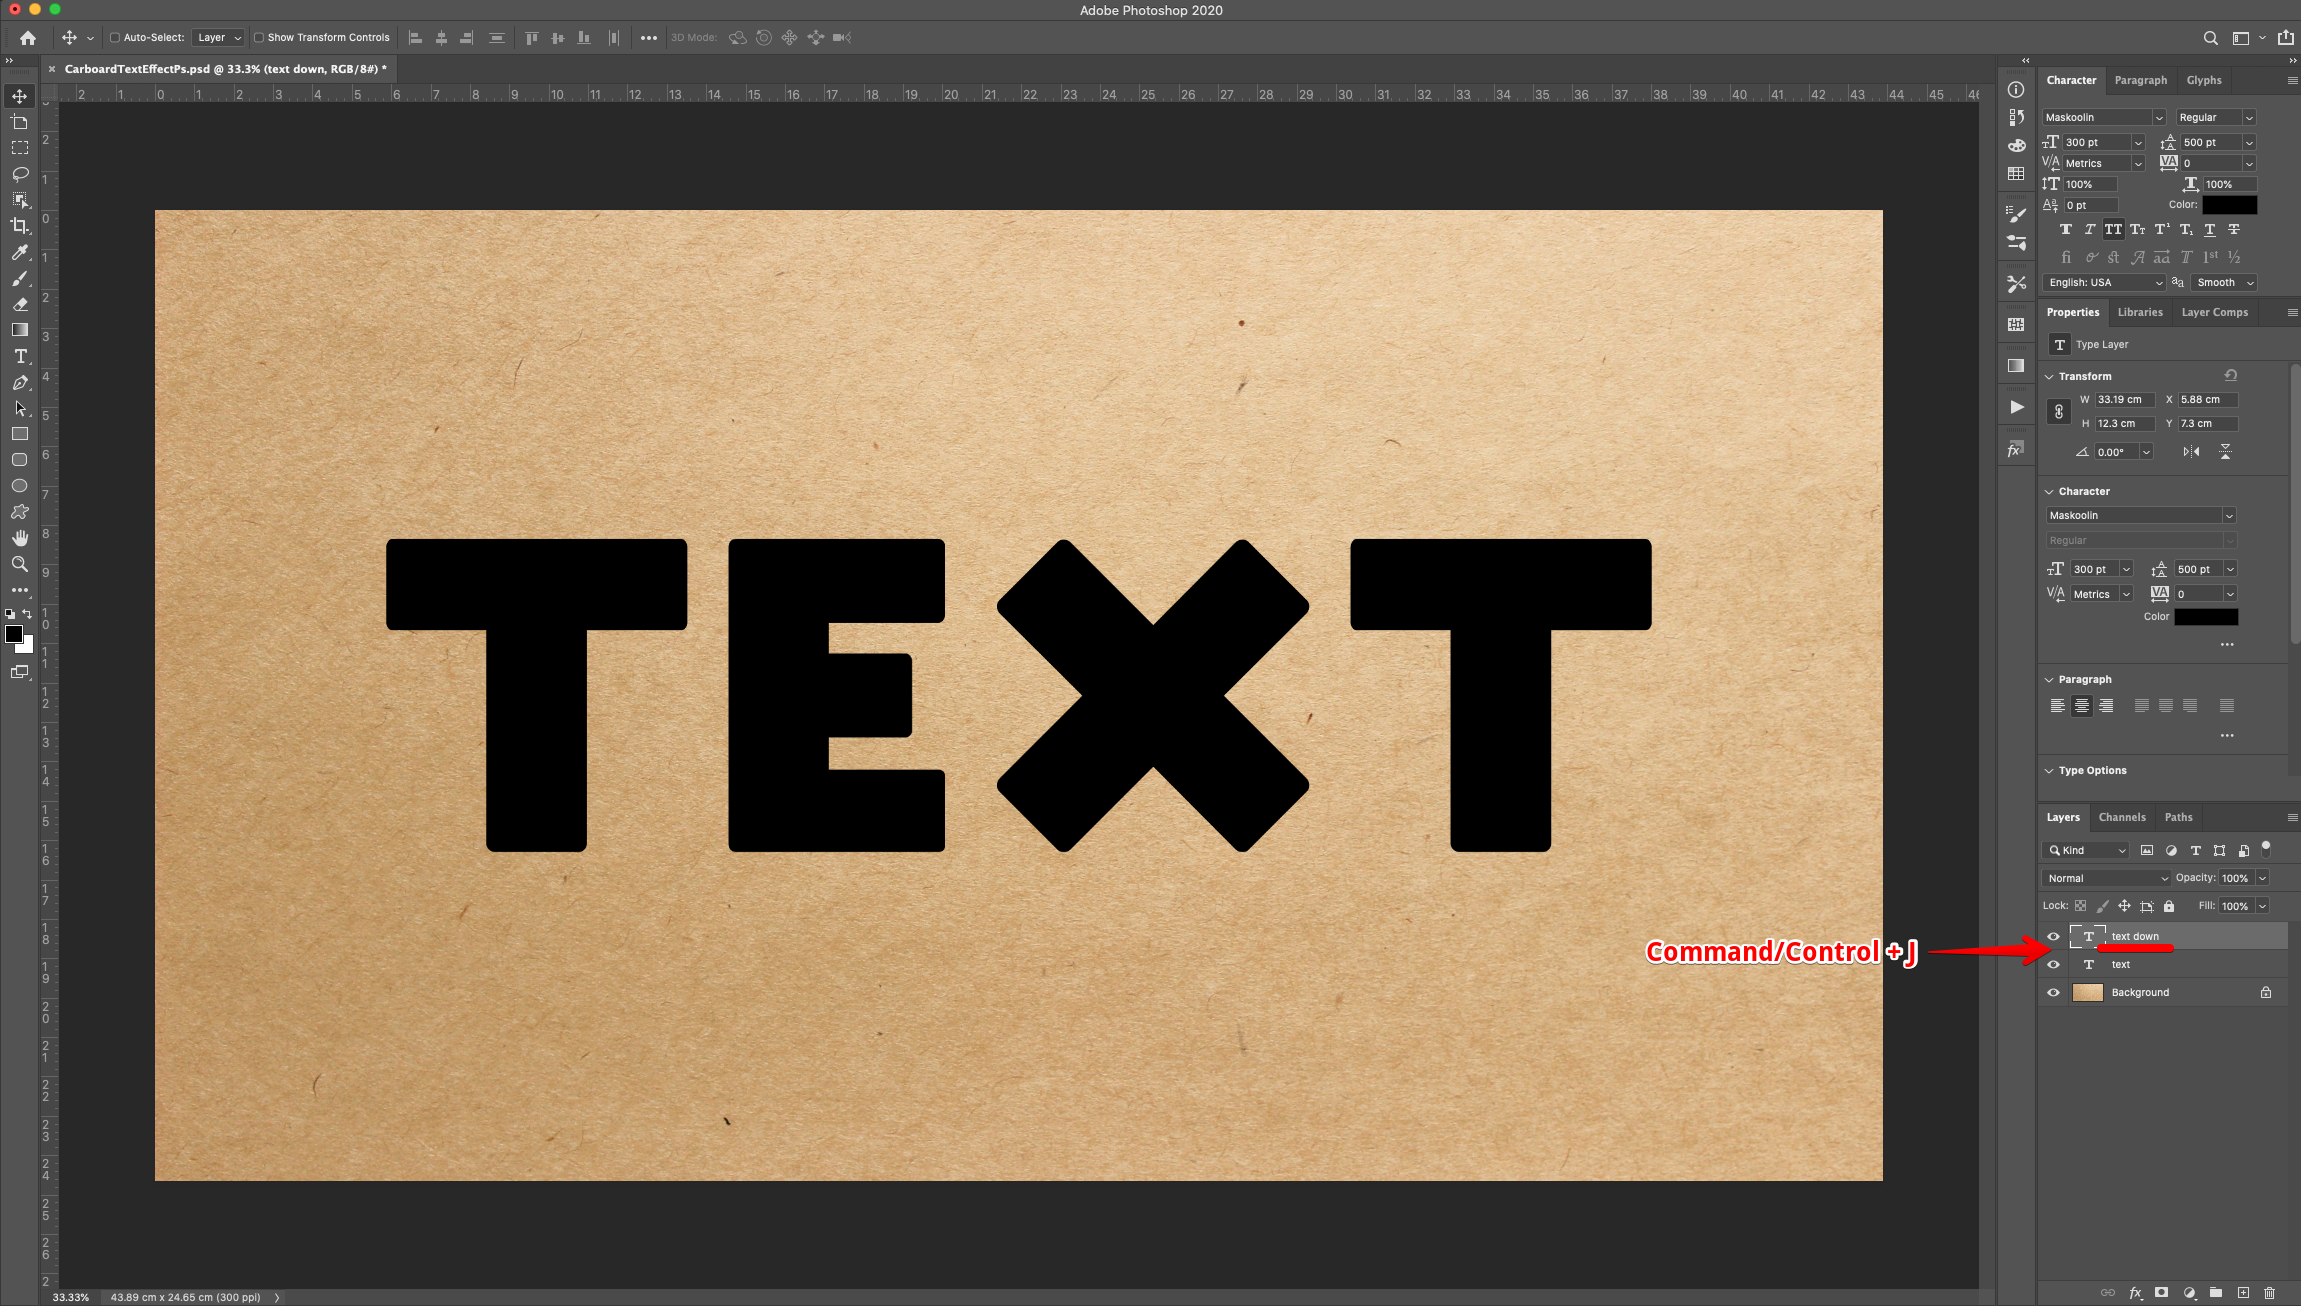
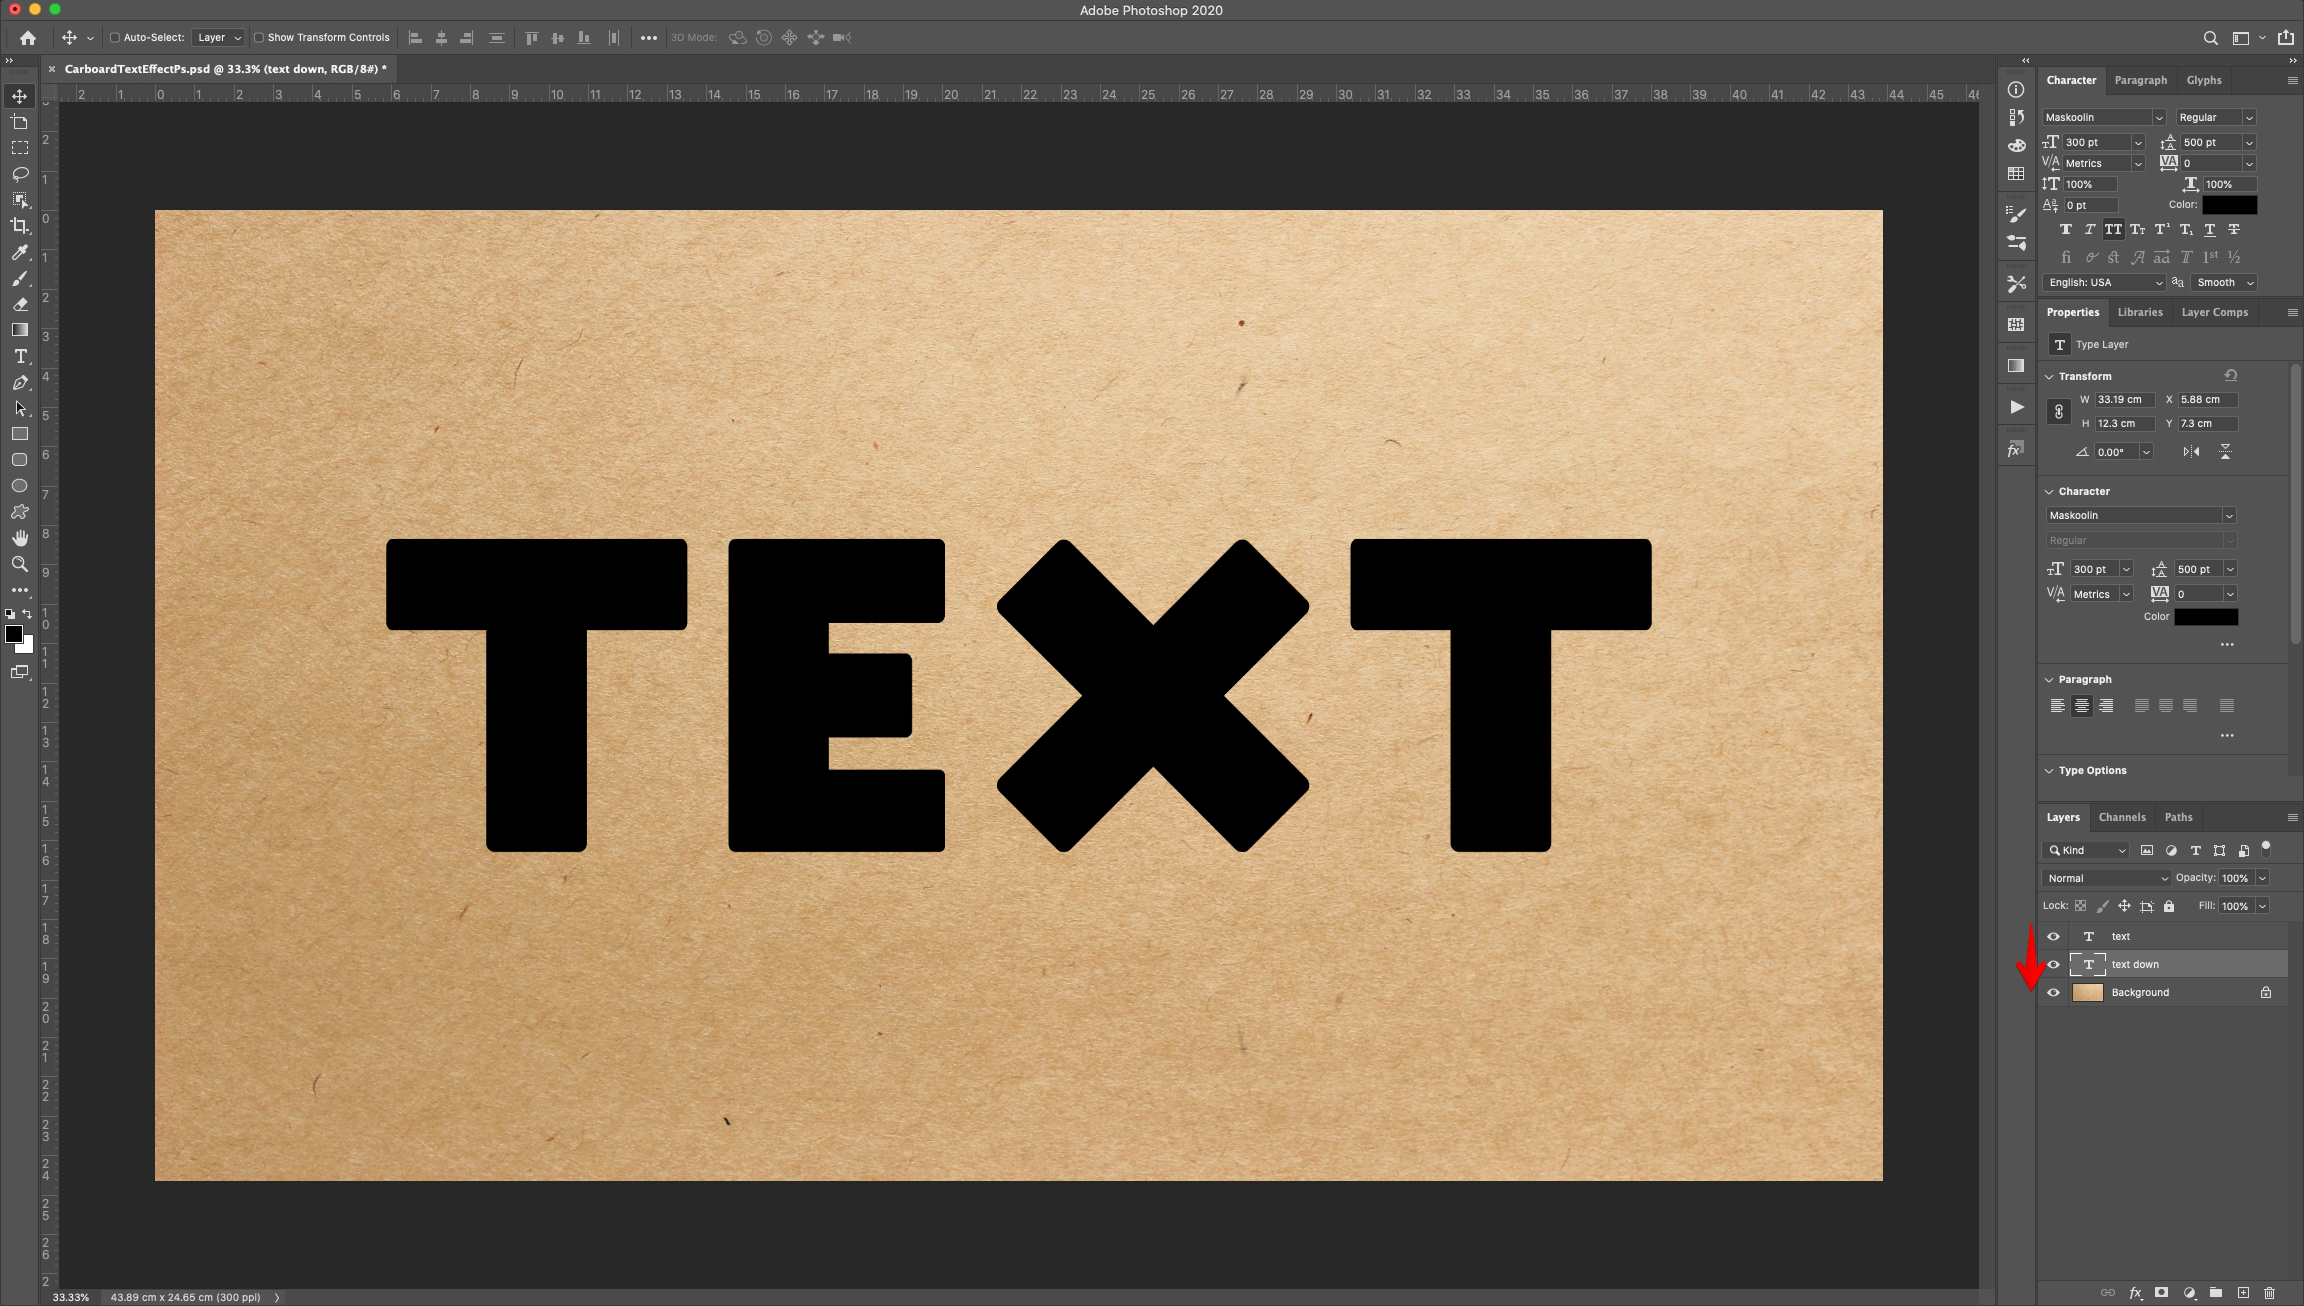
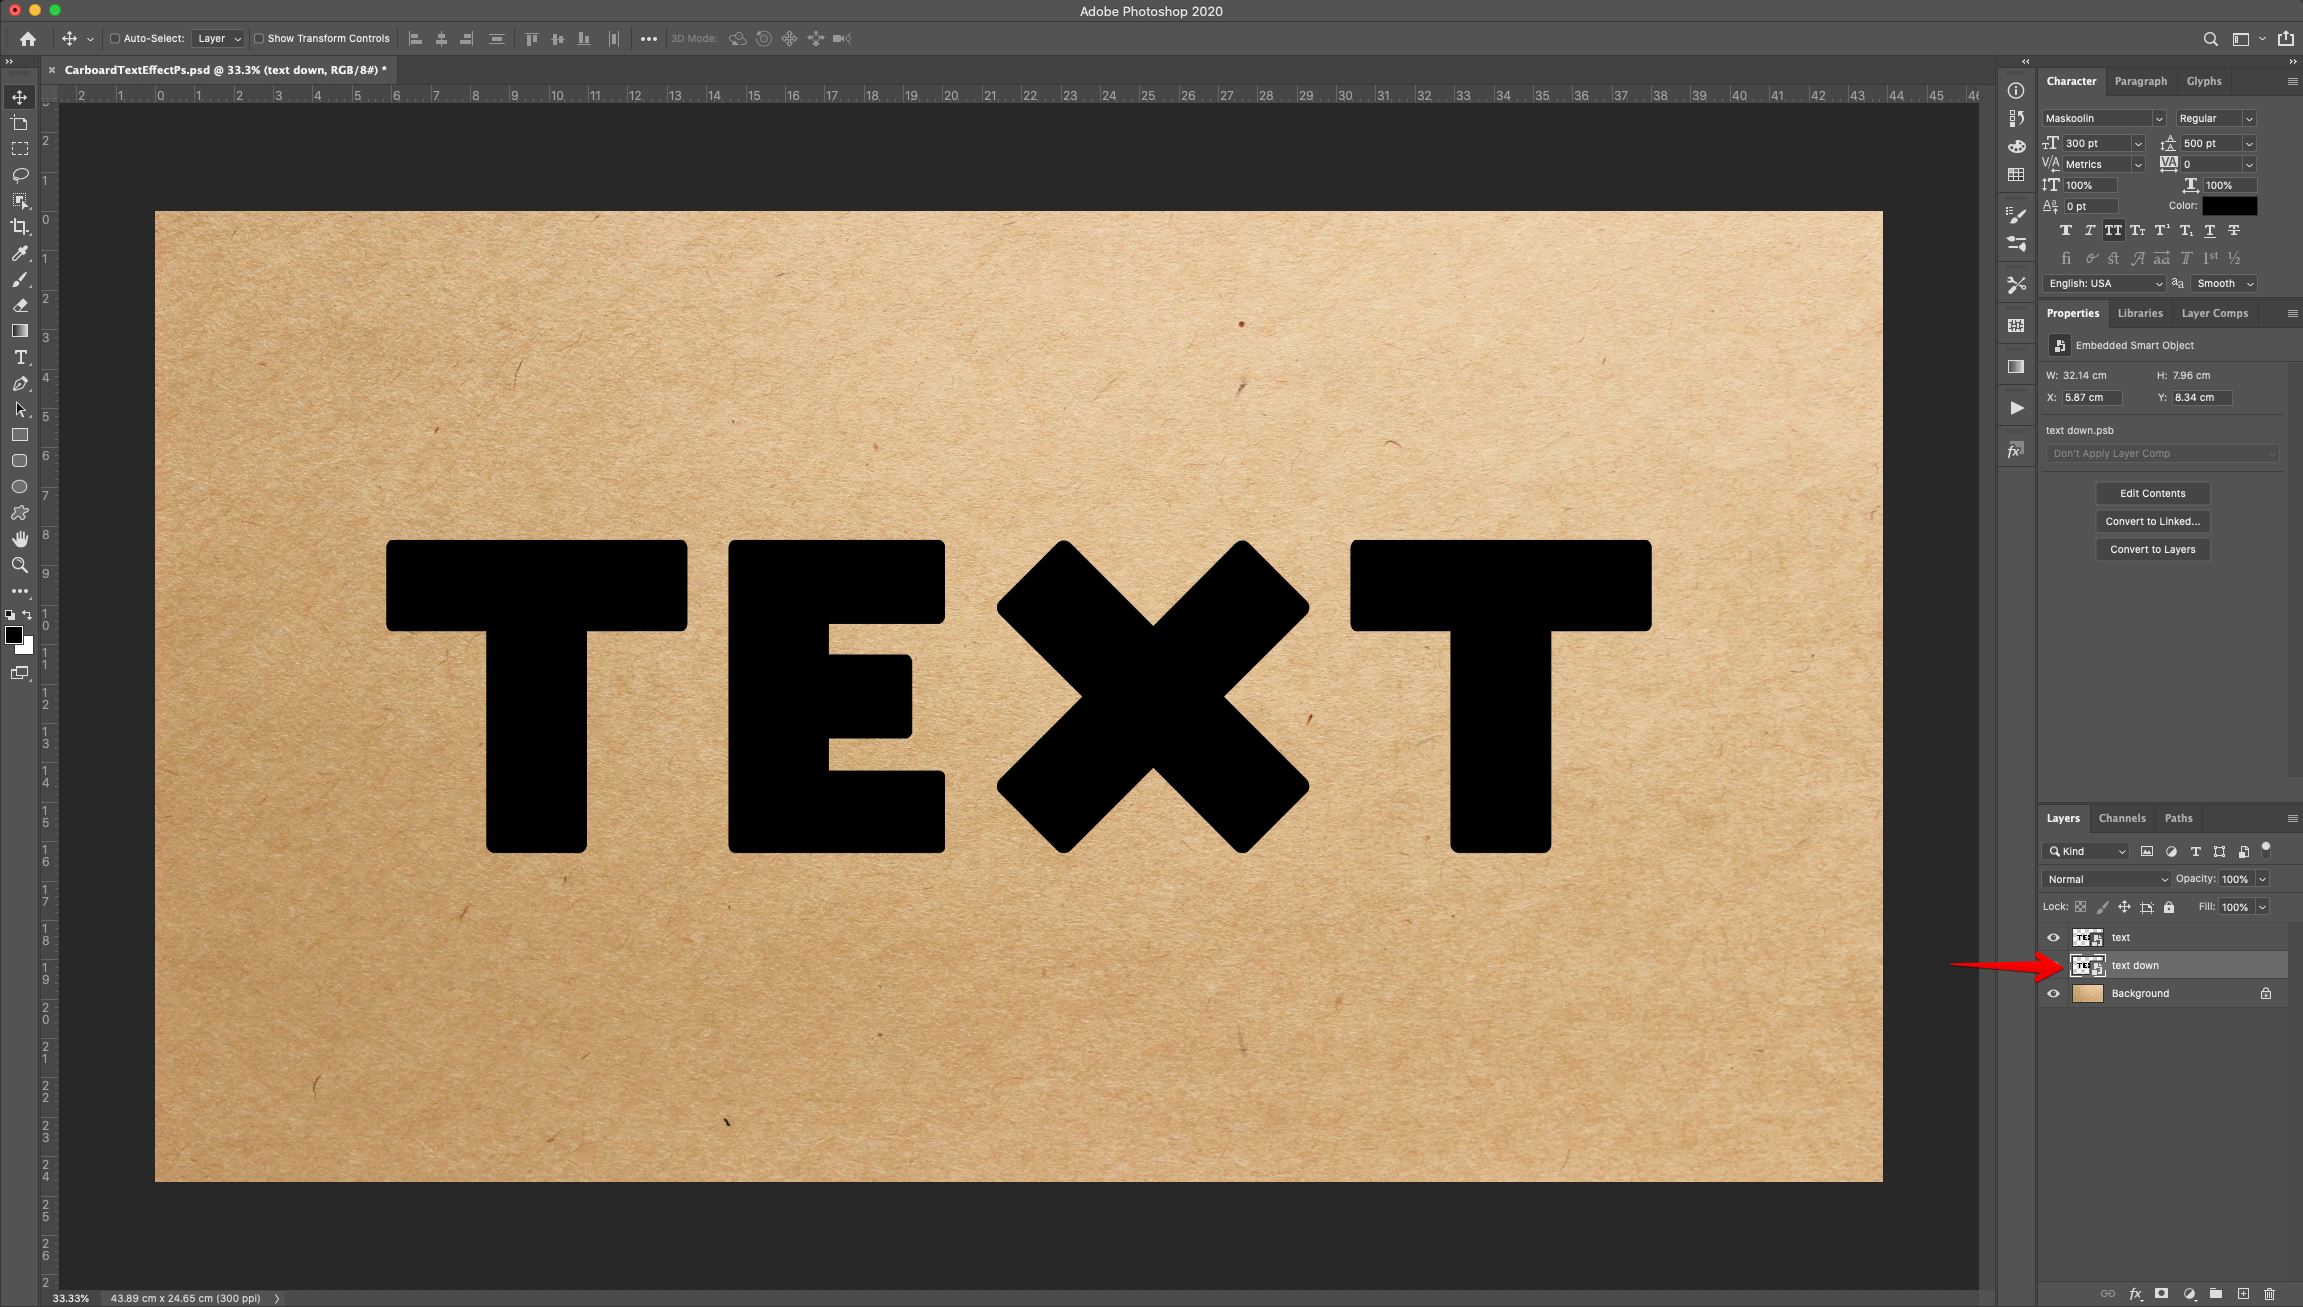
4 - Select the “Text” layer thumbnail and make a “Duplicate” (Command/Control + J). Name the Duplicate “Text Down” and place it under the original “Text”
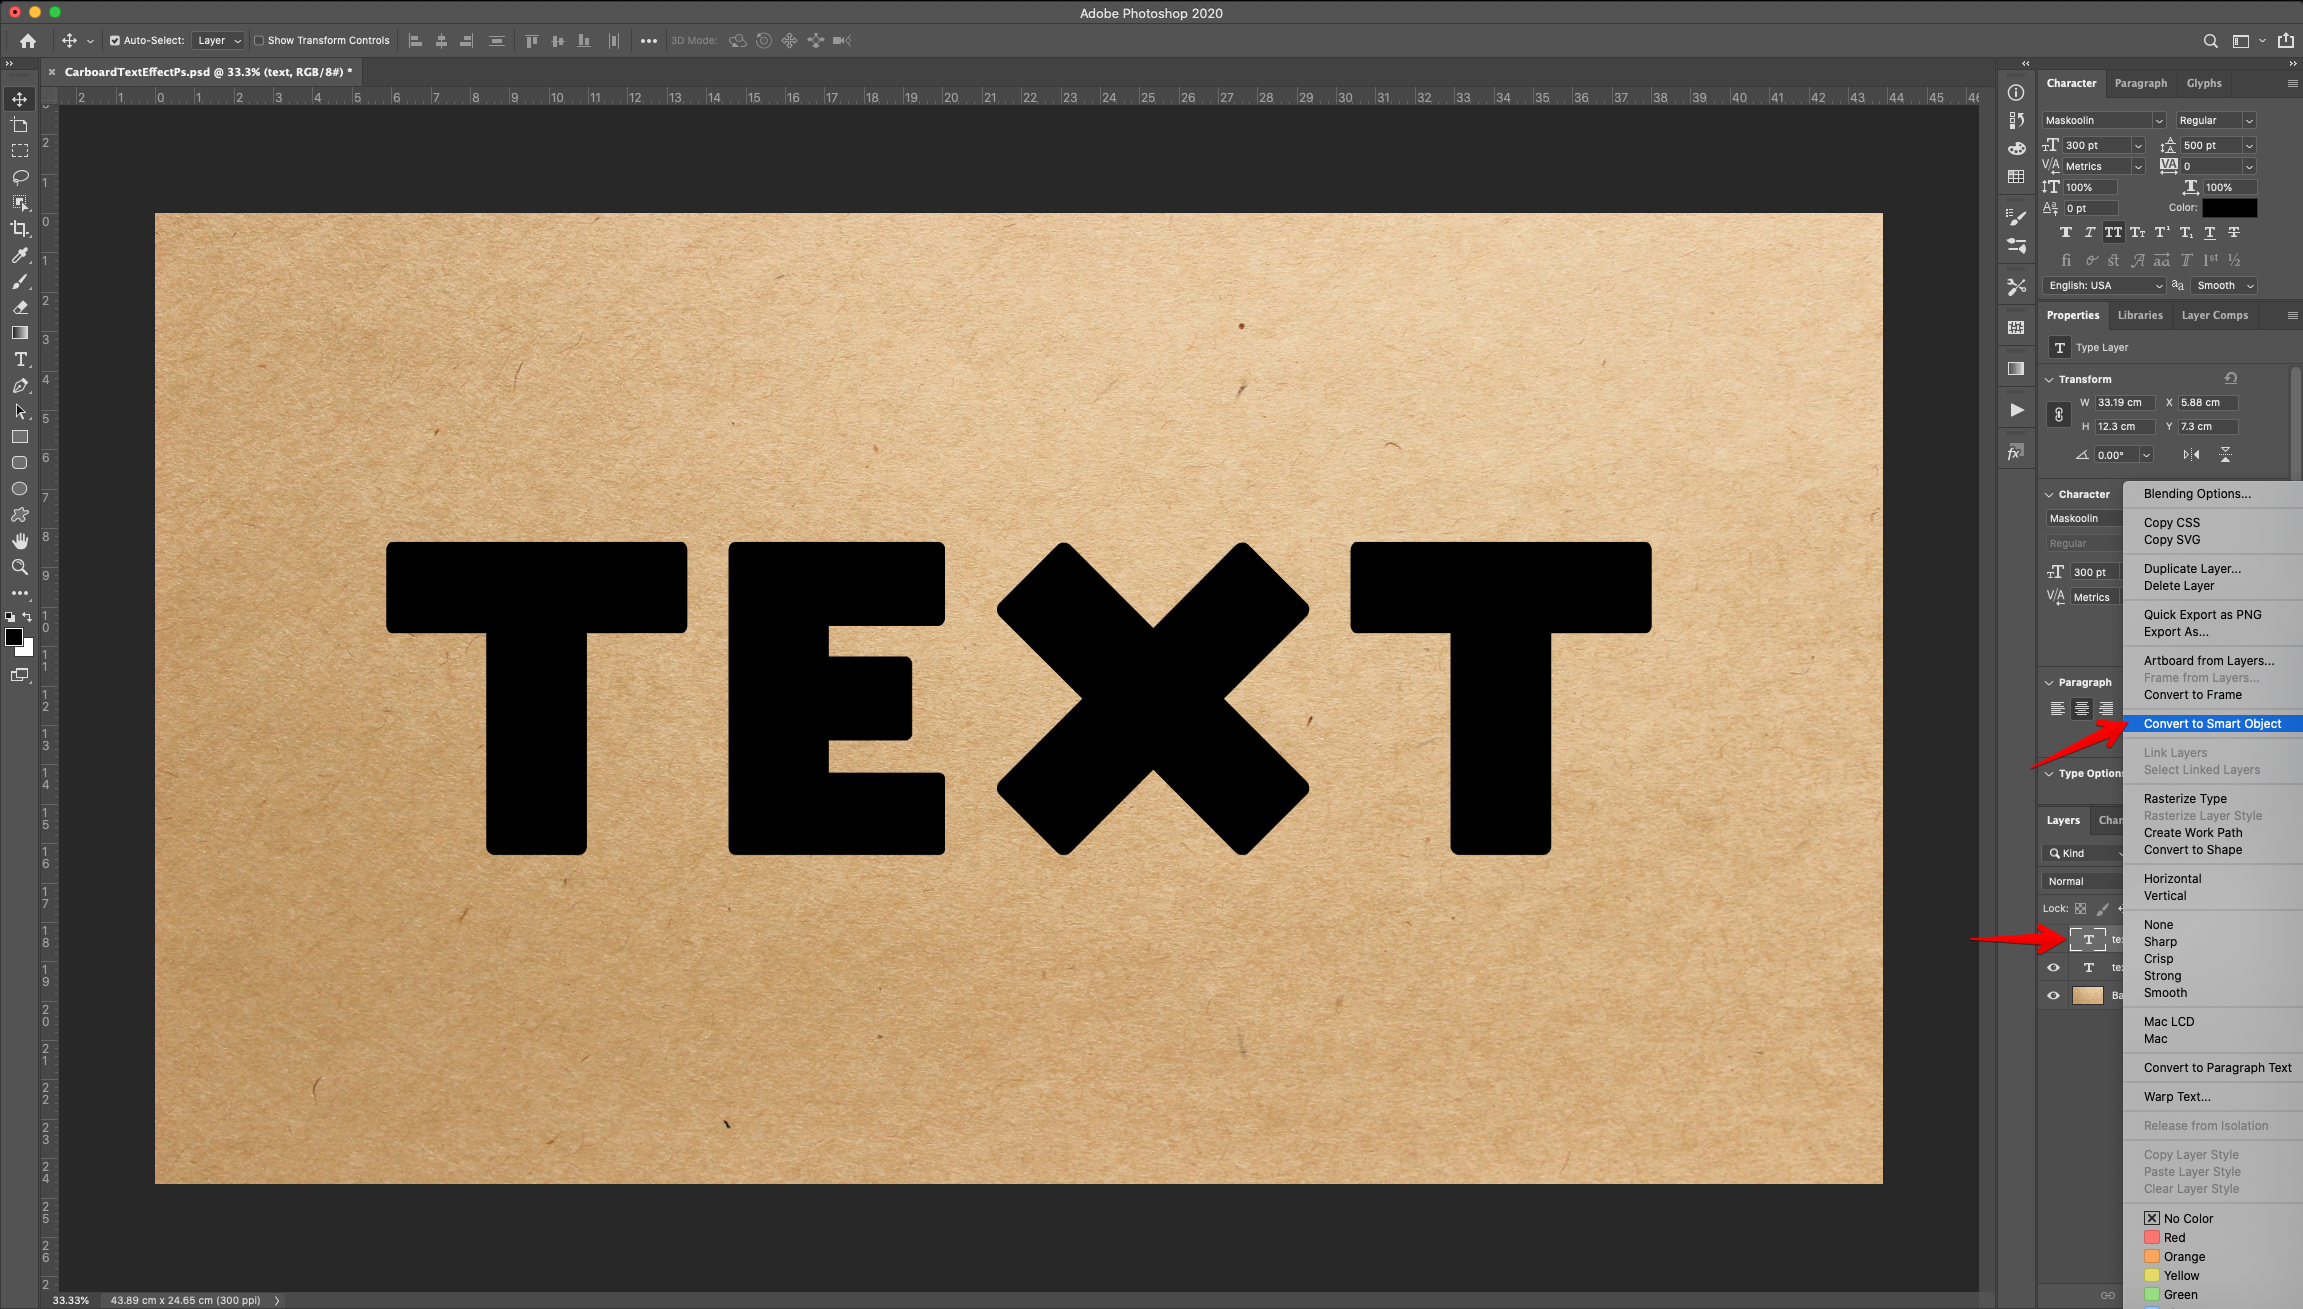
5 - Right-click on top of the “Text” Layer thumbnail and “Convert to Smart Object”. This way, you can change your text without losing the effect.
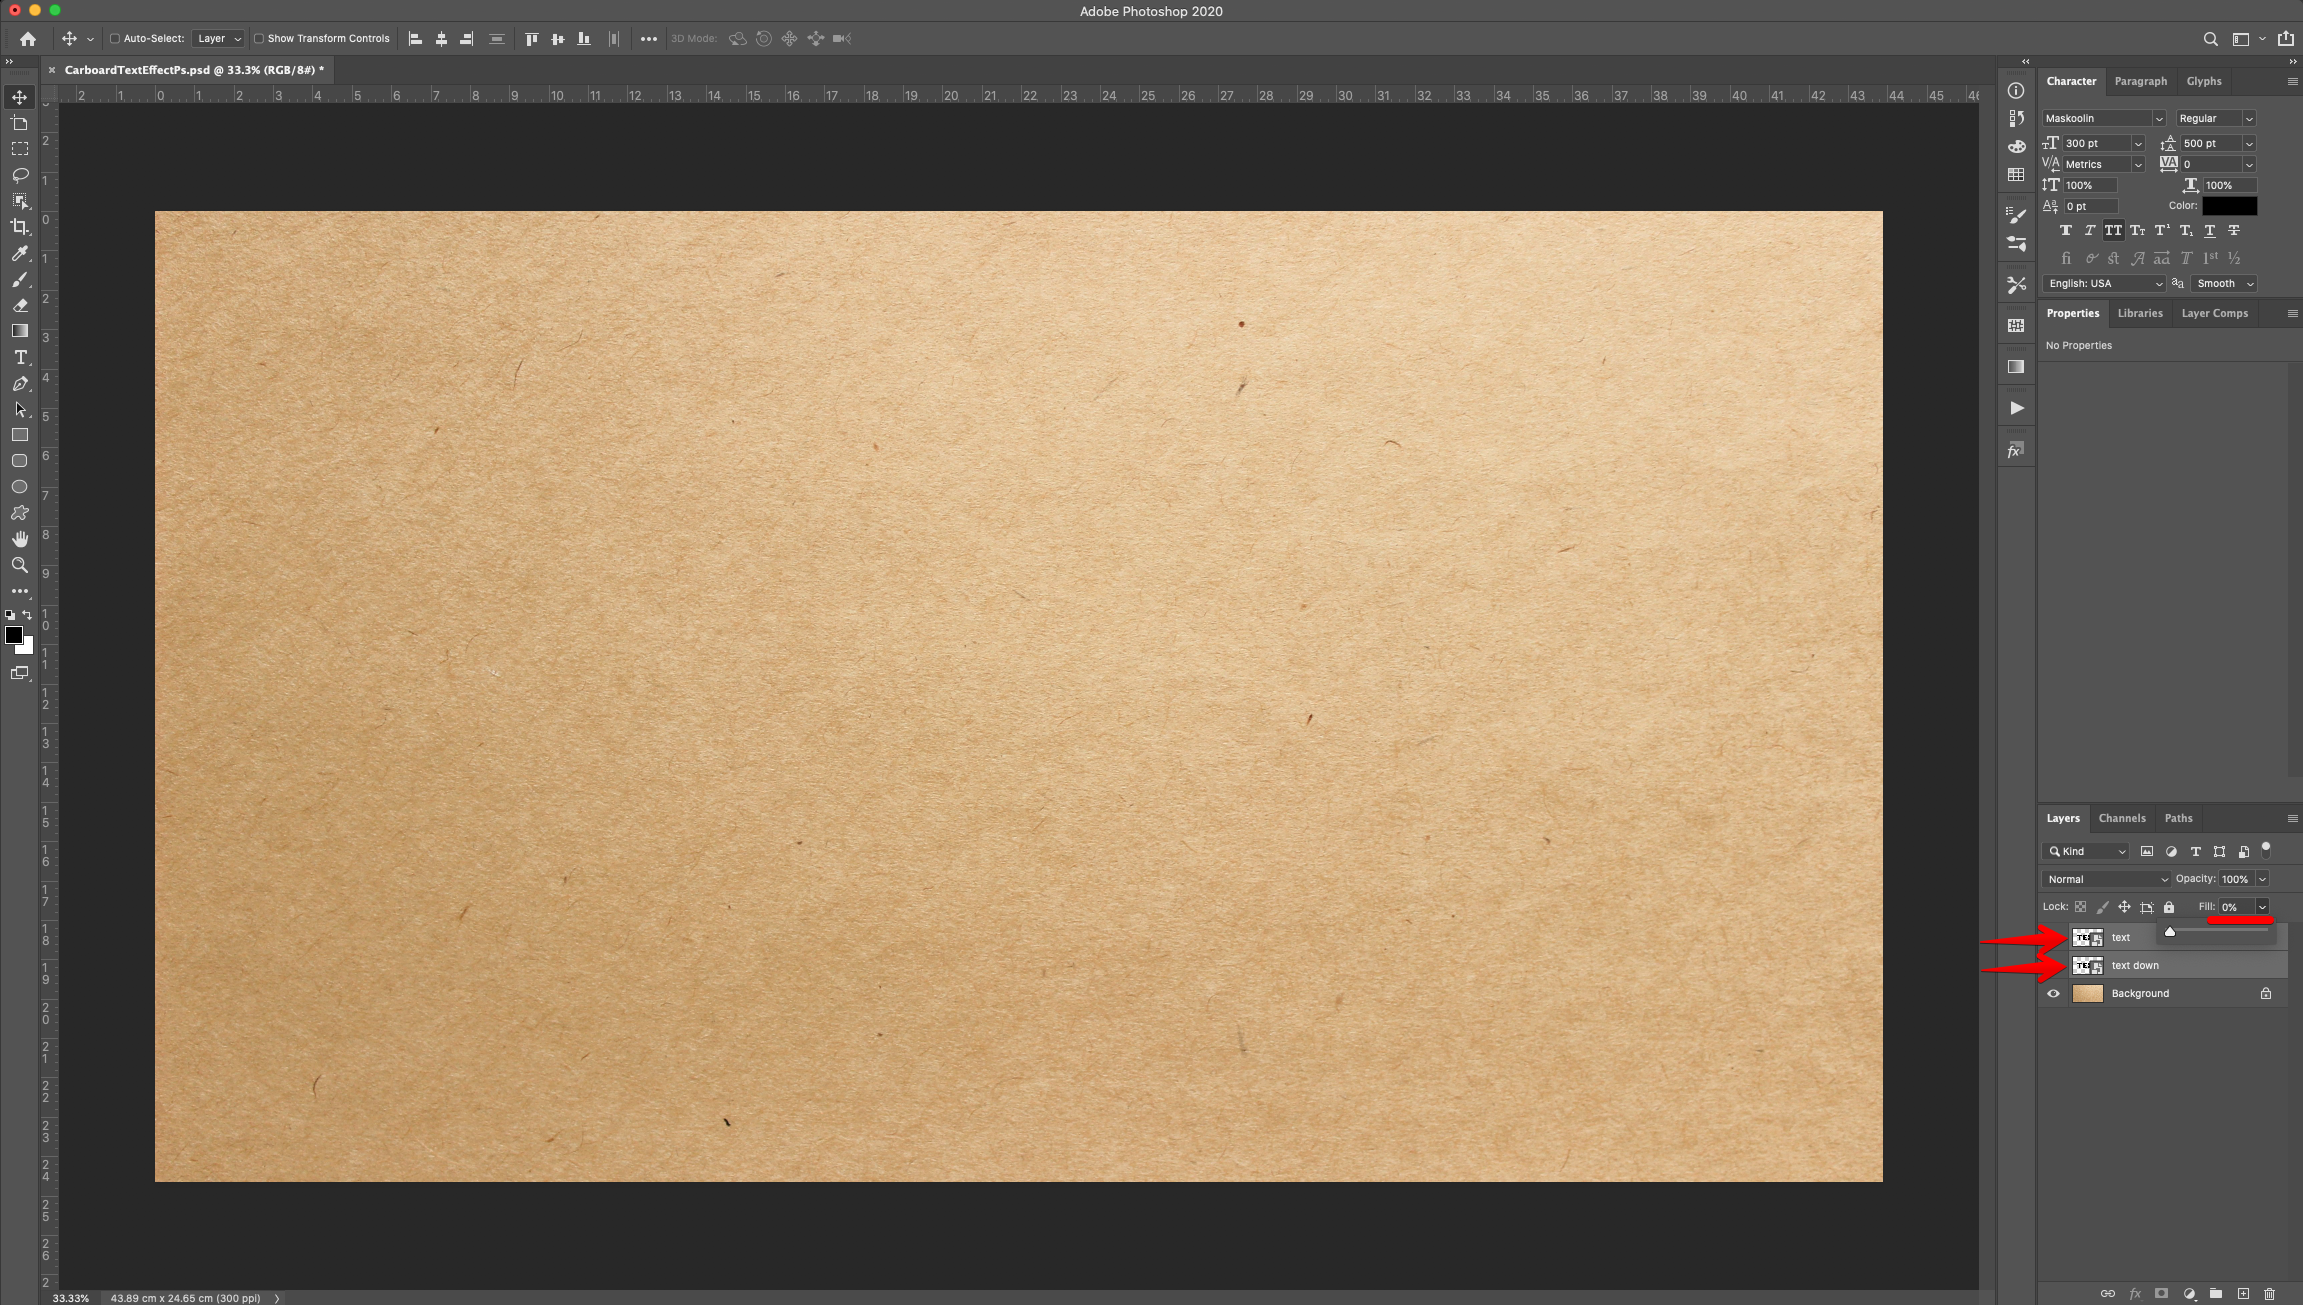
6 - Change the “Fill” of both “Text” Layers to 0%.
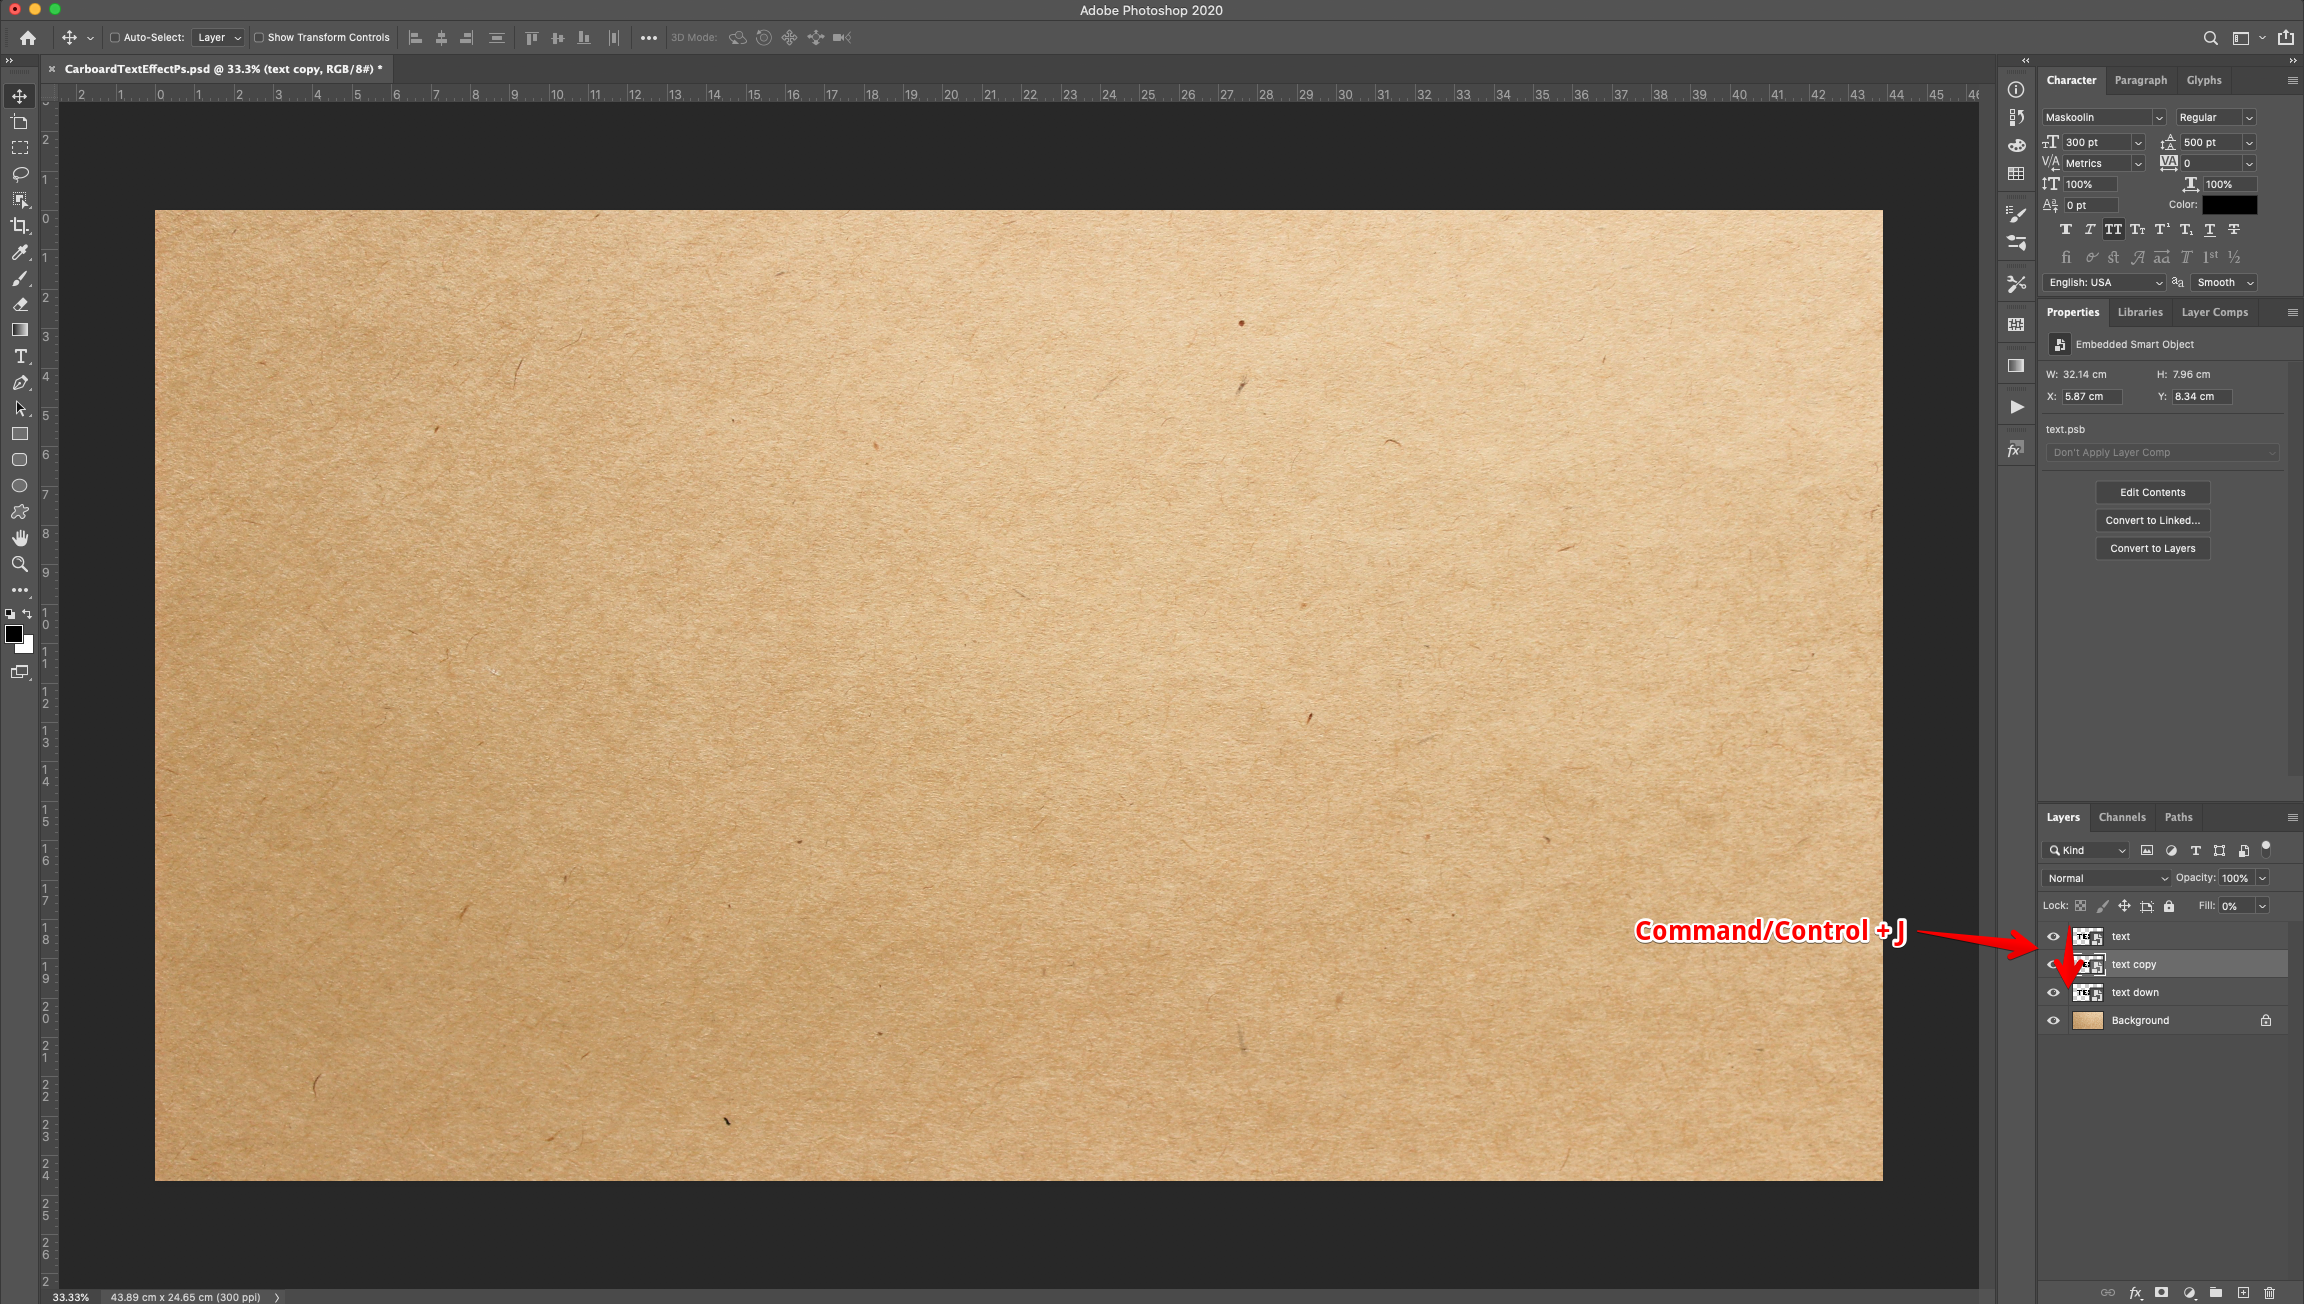
7 - Select the “Text” layer thumbnail and make four (4) more “Duplicates” (Command/Control + J). Name the Duplicate “Effect 1 to 4” and place them under the original “Text” Layer. Repeat with the “Text Down” Layer.
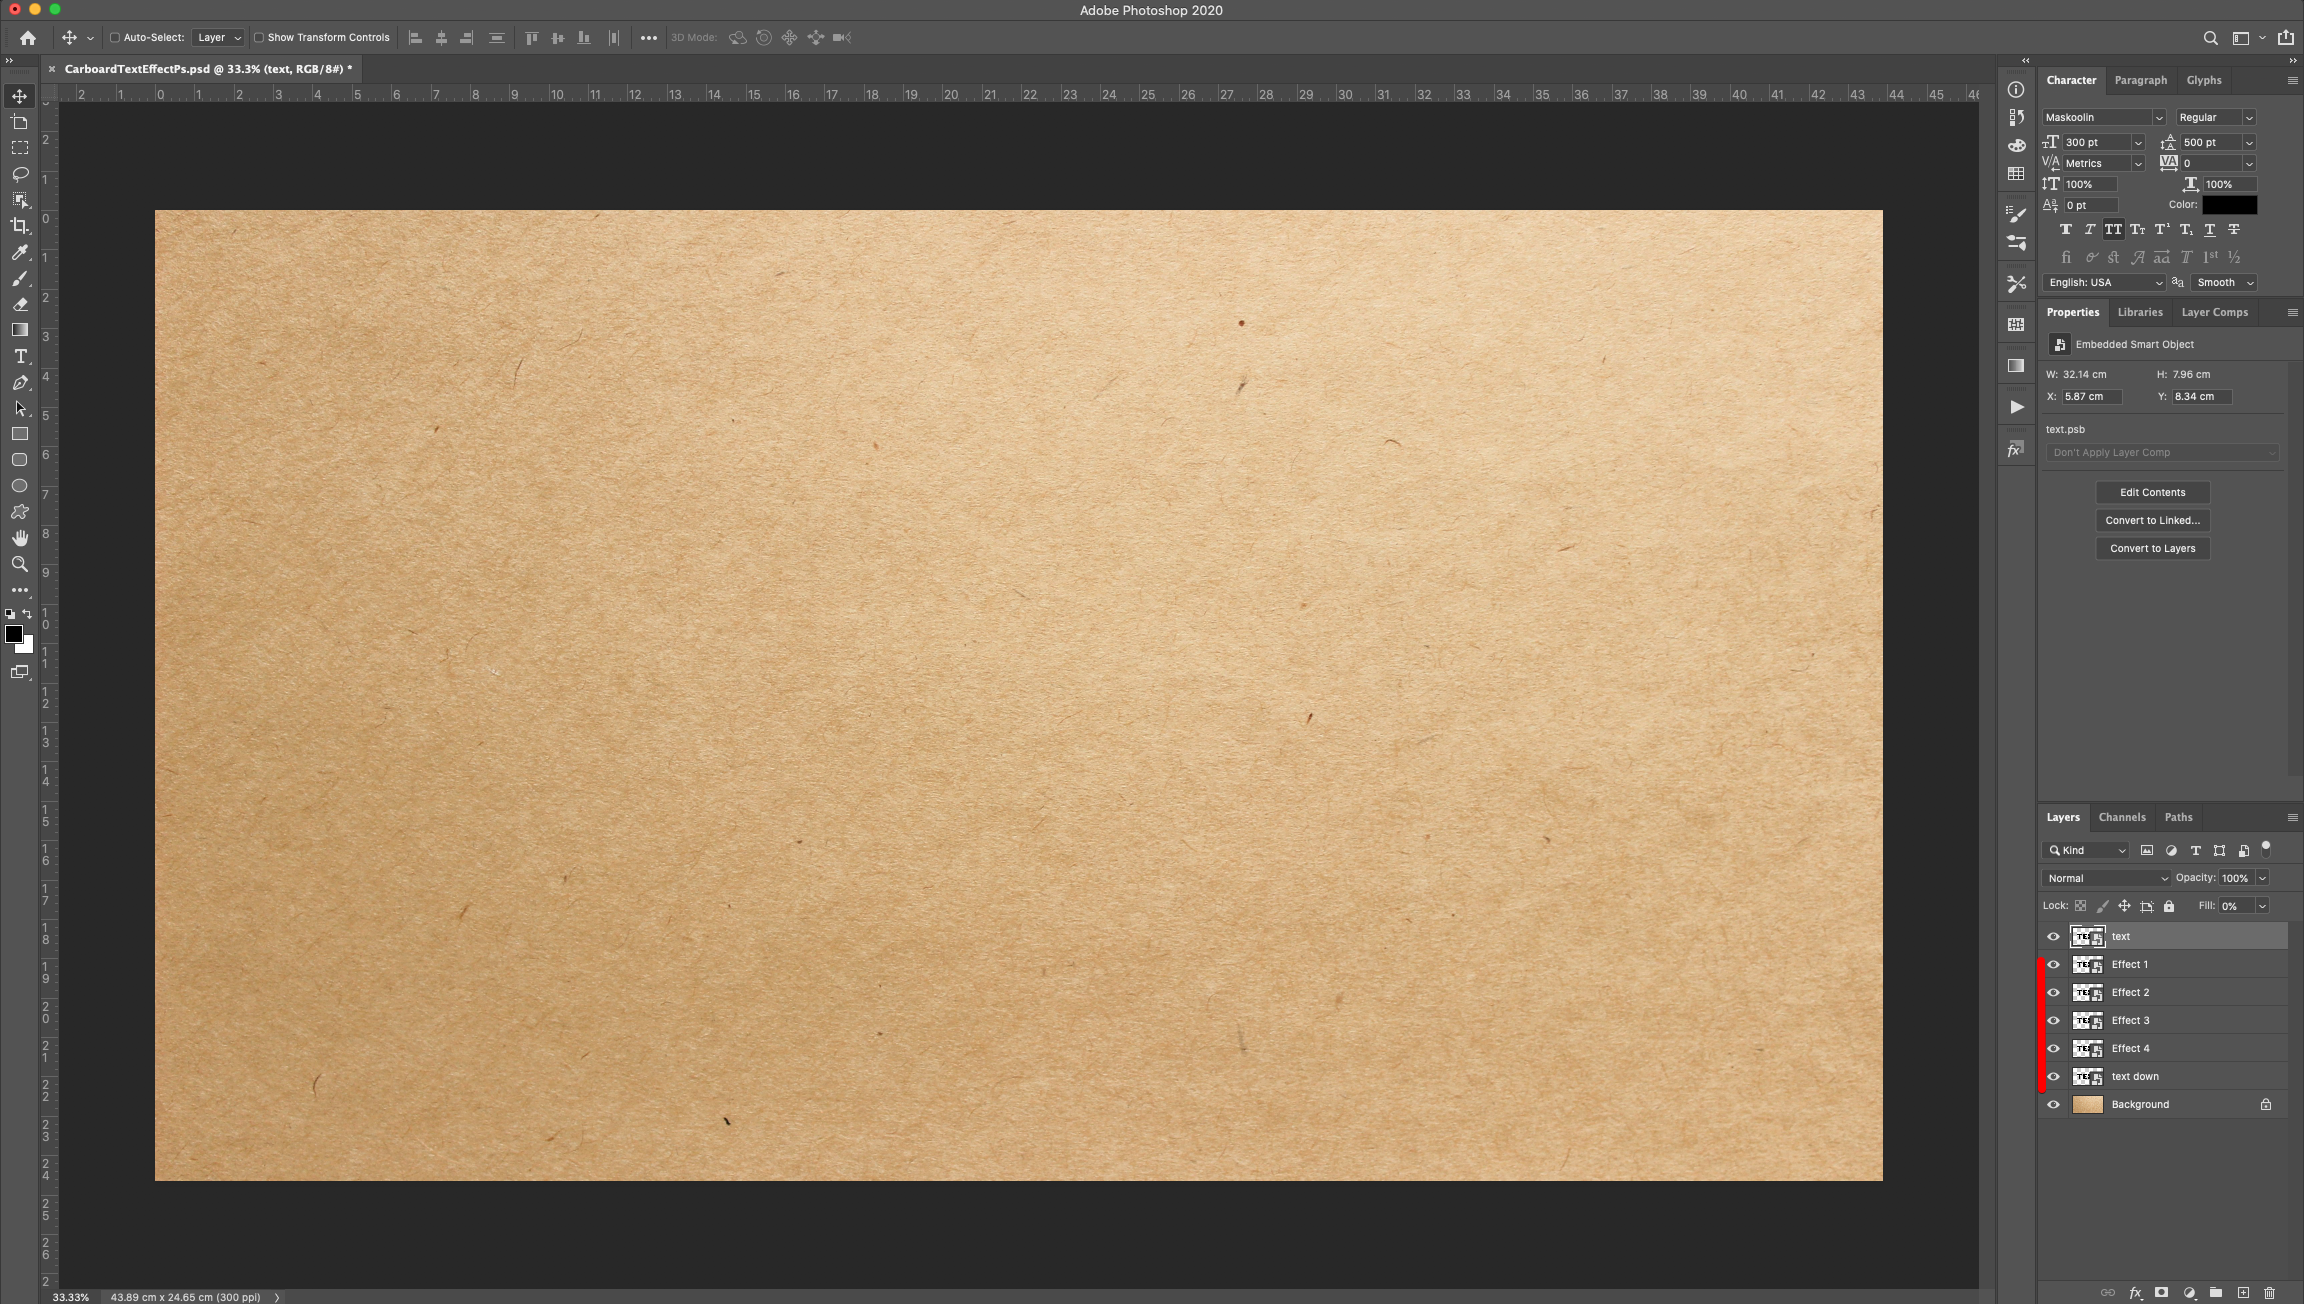
8 - Select the “Text” and its duplicate “Effect” Layers thumbnails and “Group” them together by dragging them to the Small Folder icon on the bottom of the “Layers Panel”. Name the group “Up”. Repeat with the “Text Down” Layer and its duplicate “Effect” layers. Name this group “Down”.
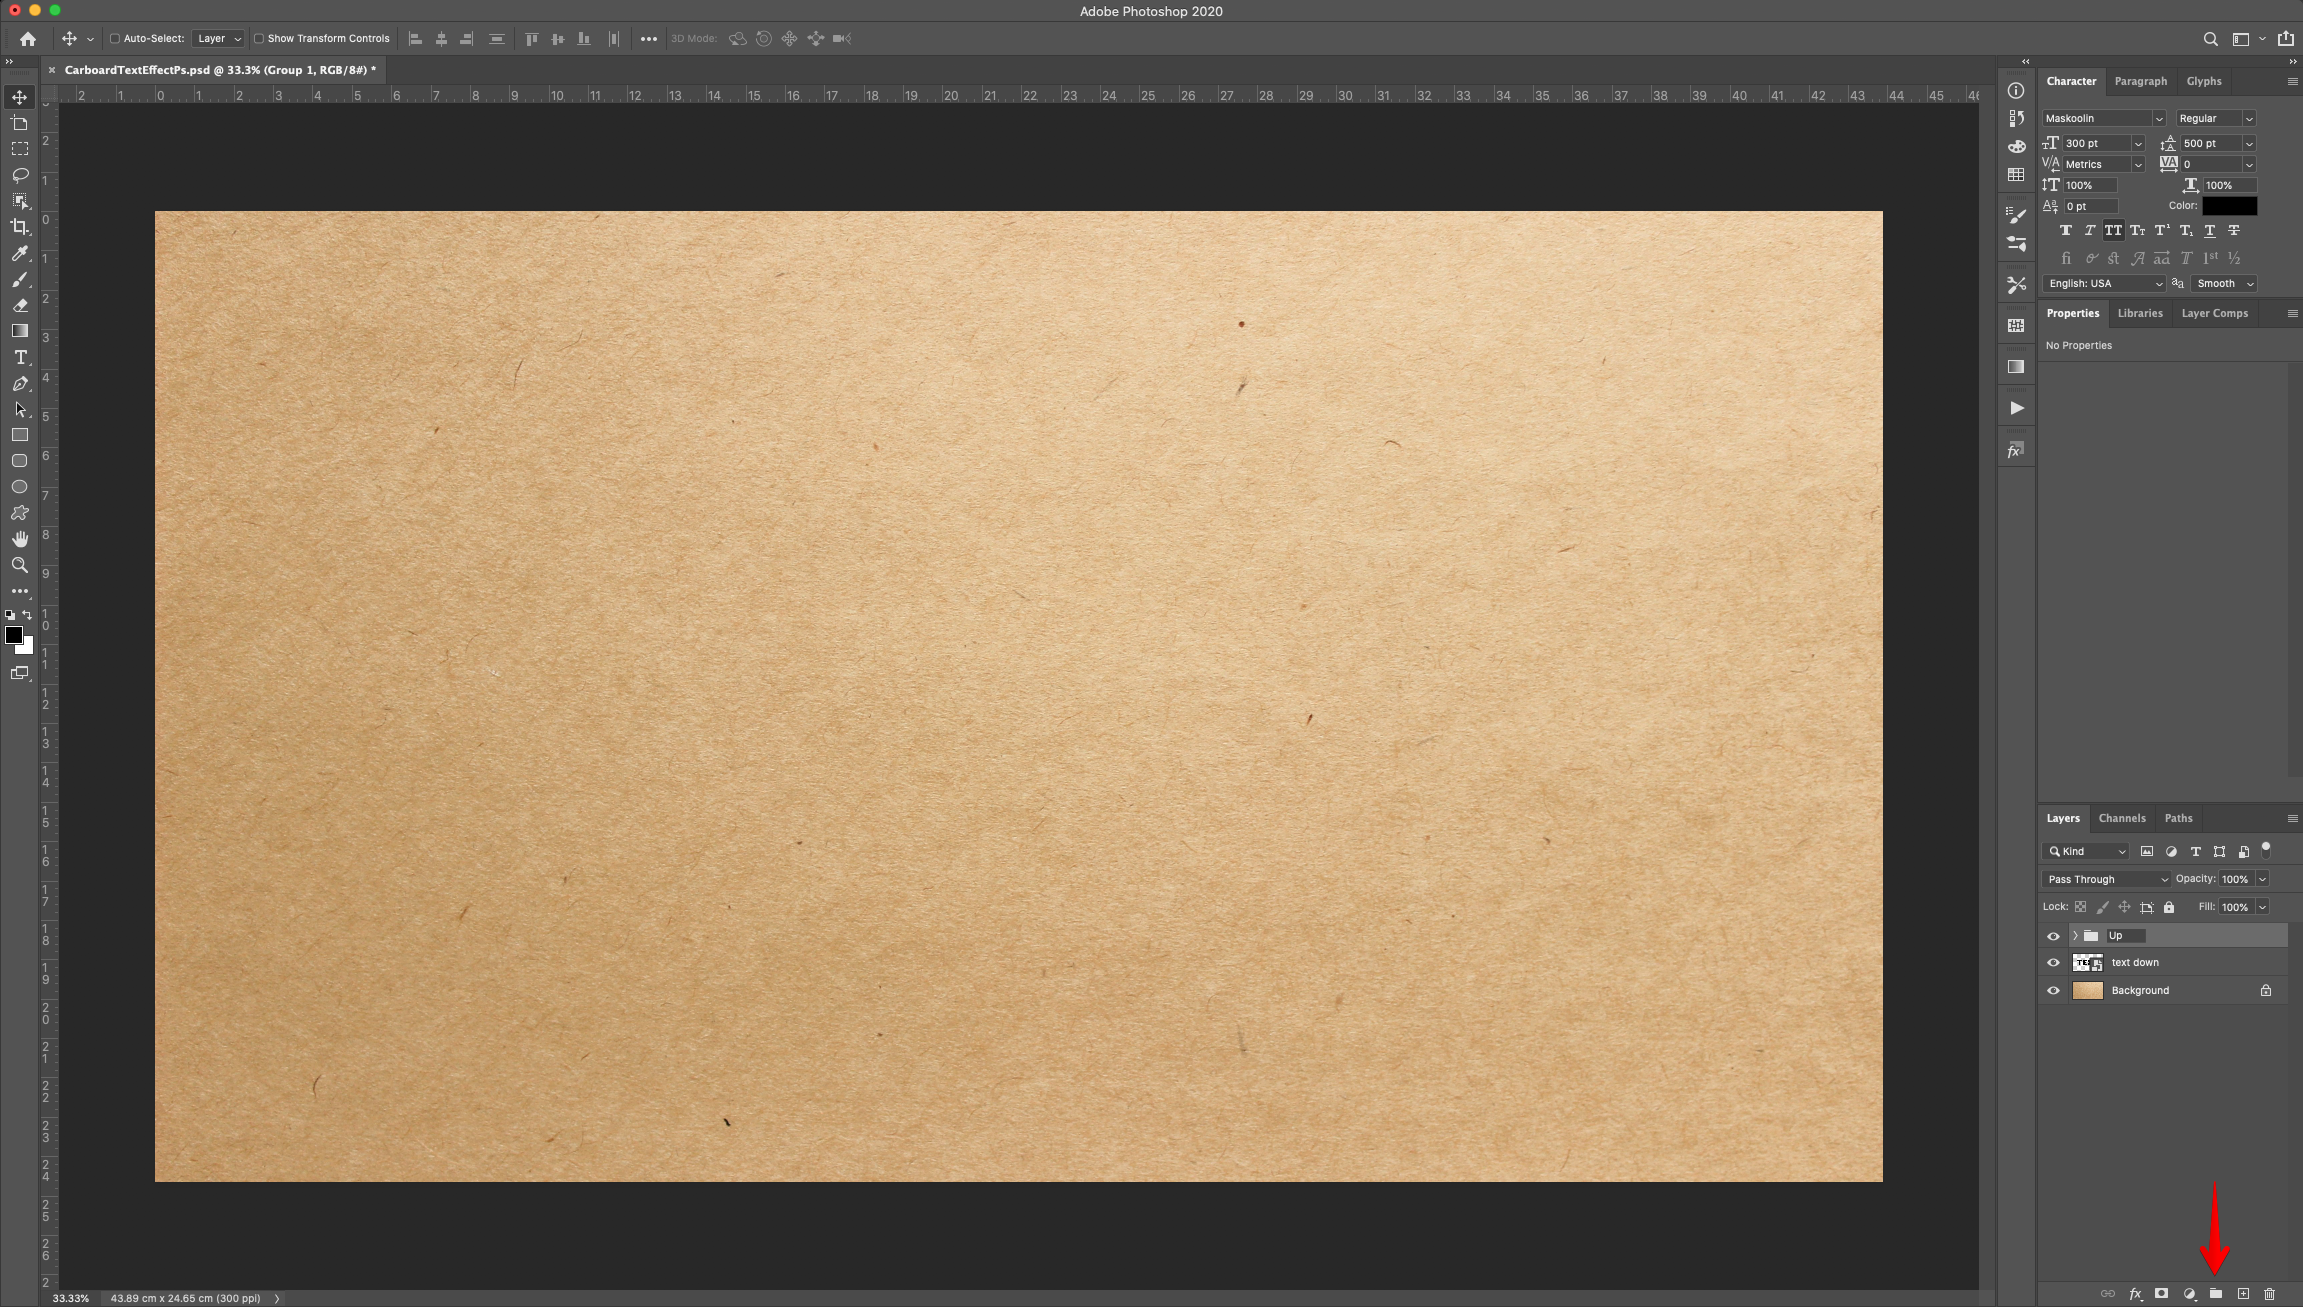
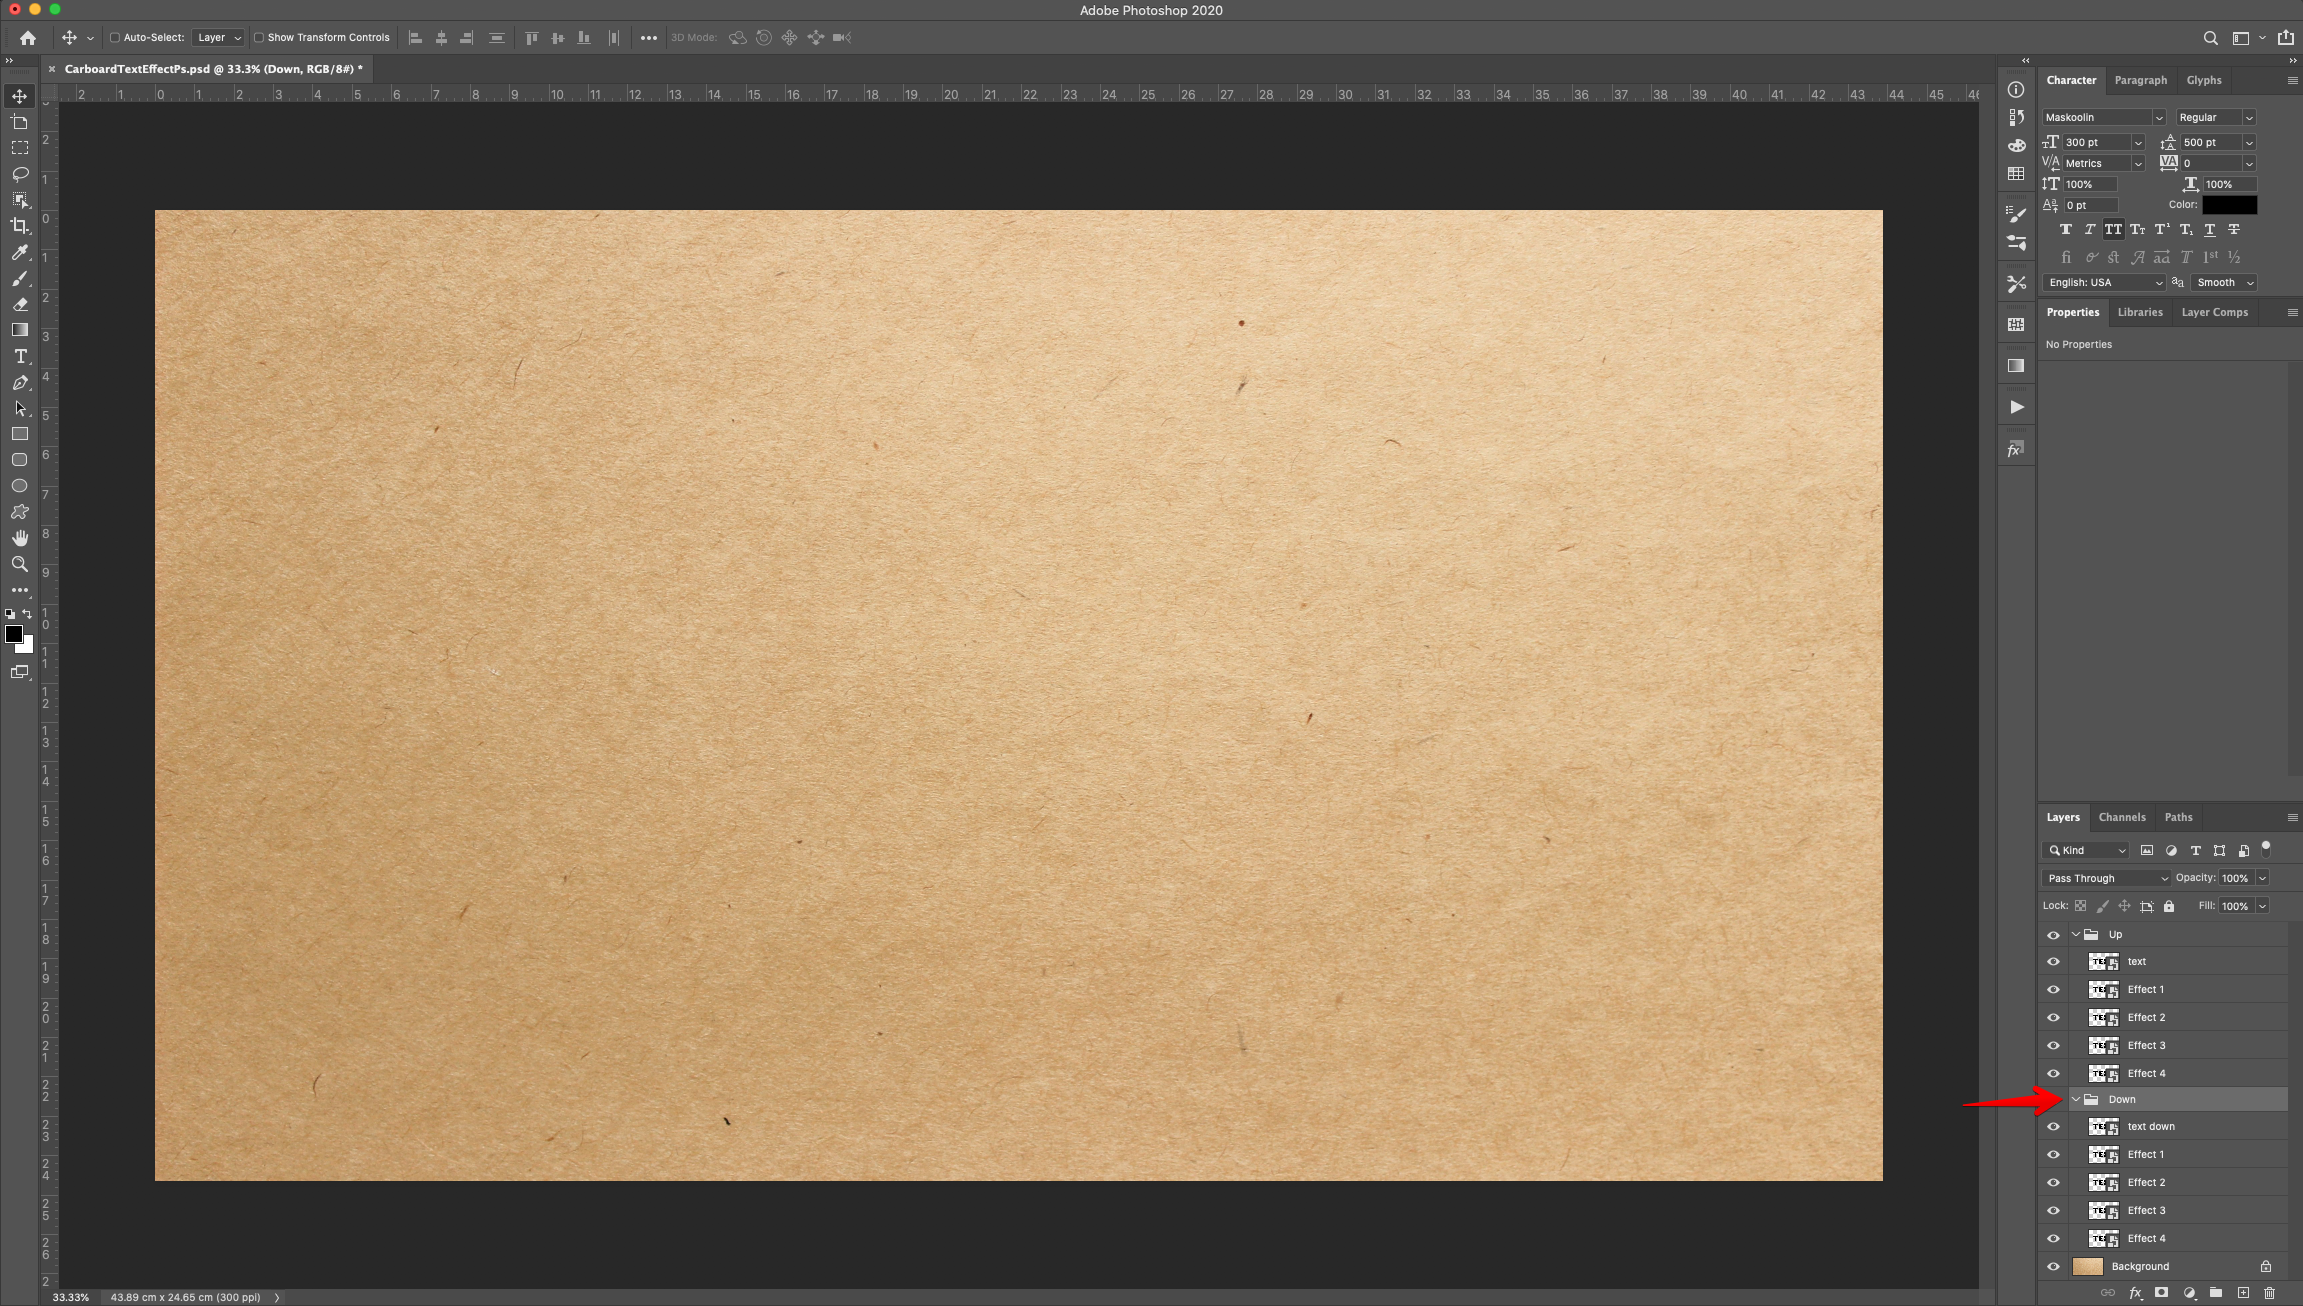
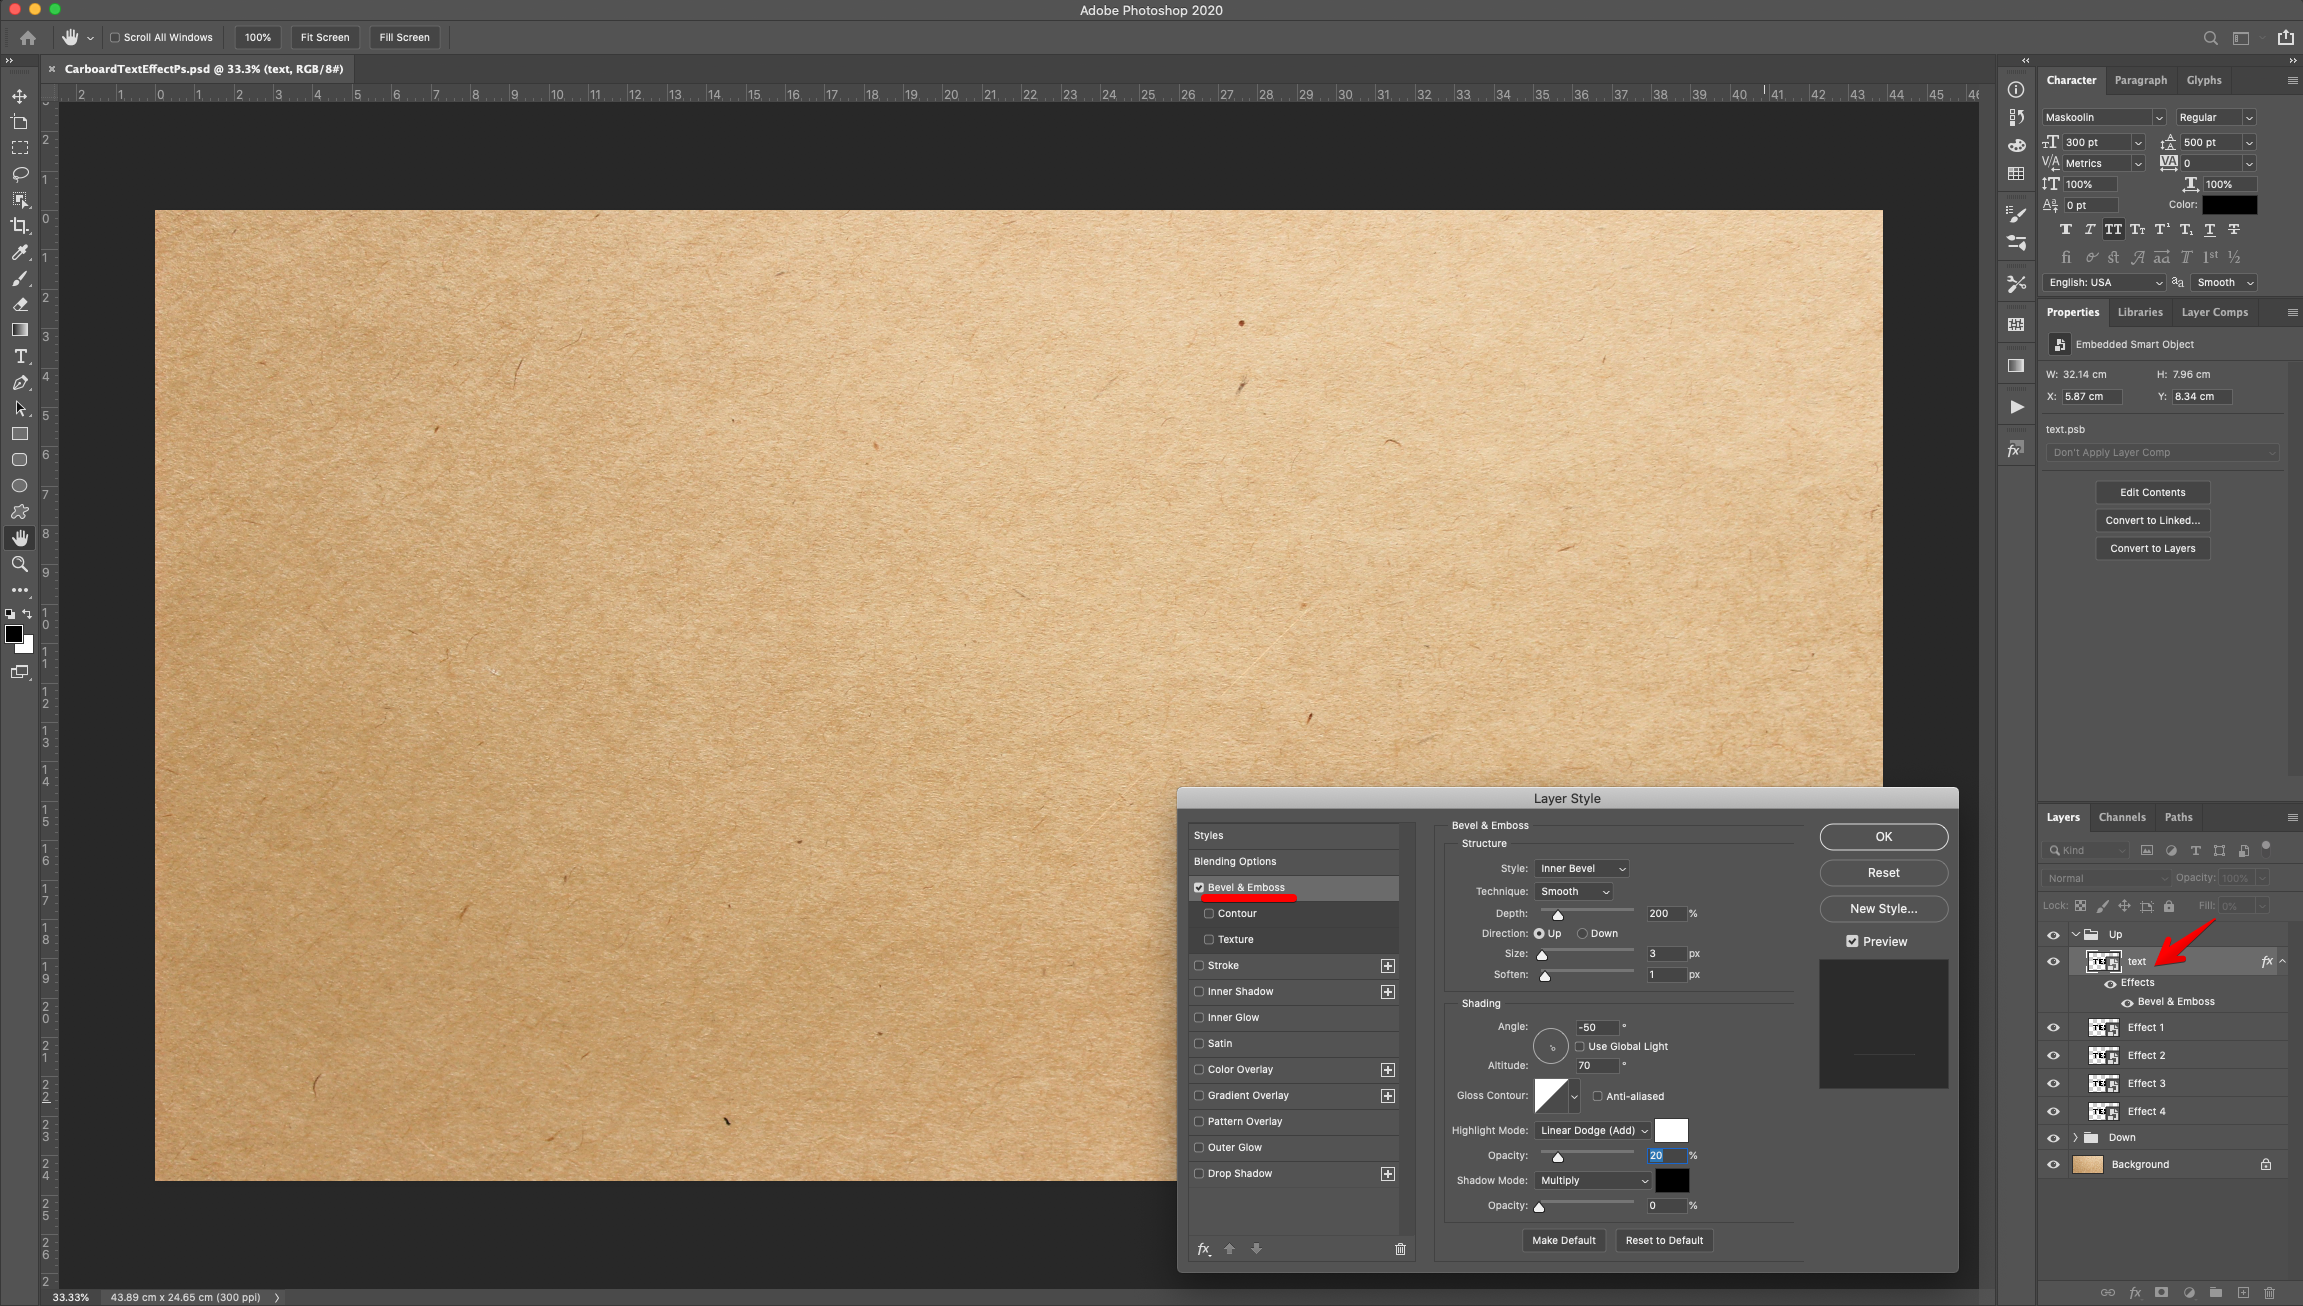
9 - Double-click on top of the “Text” layer Thumbnail (in the “Up” group) and apply the following “Layer Styles”:
Bevel & Emboss:
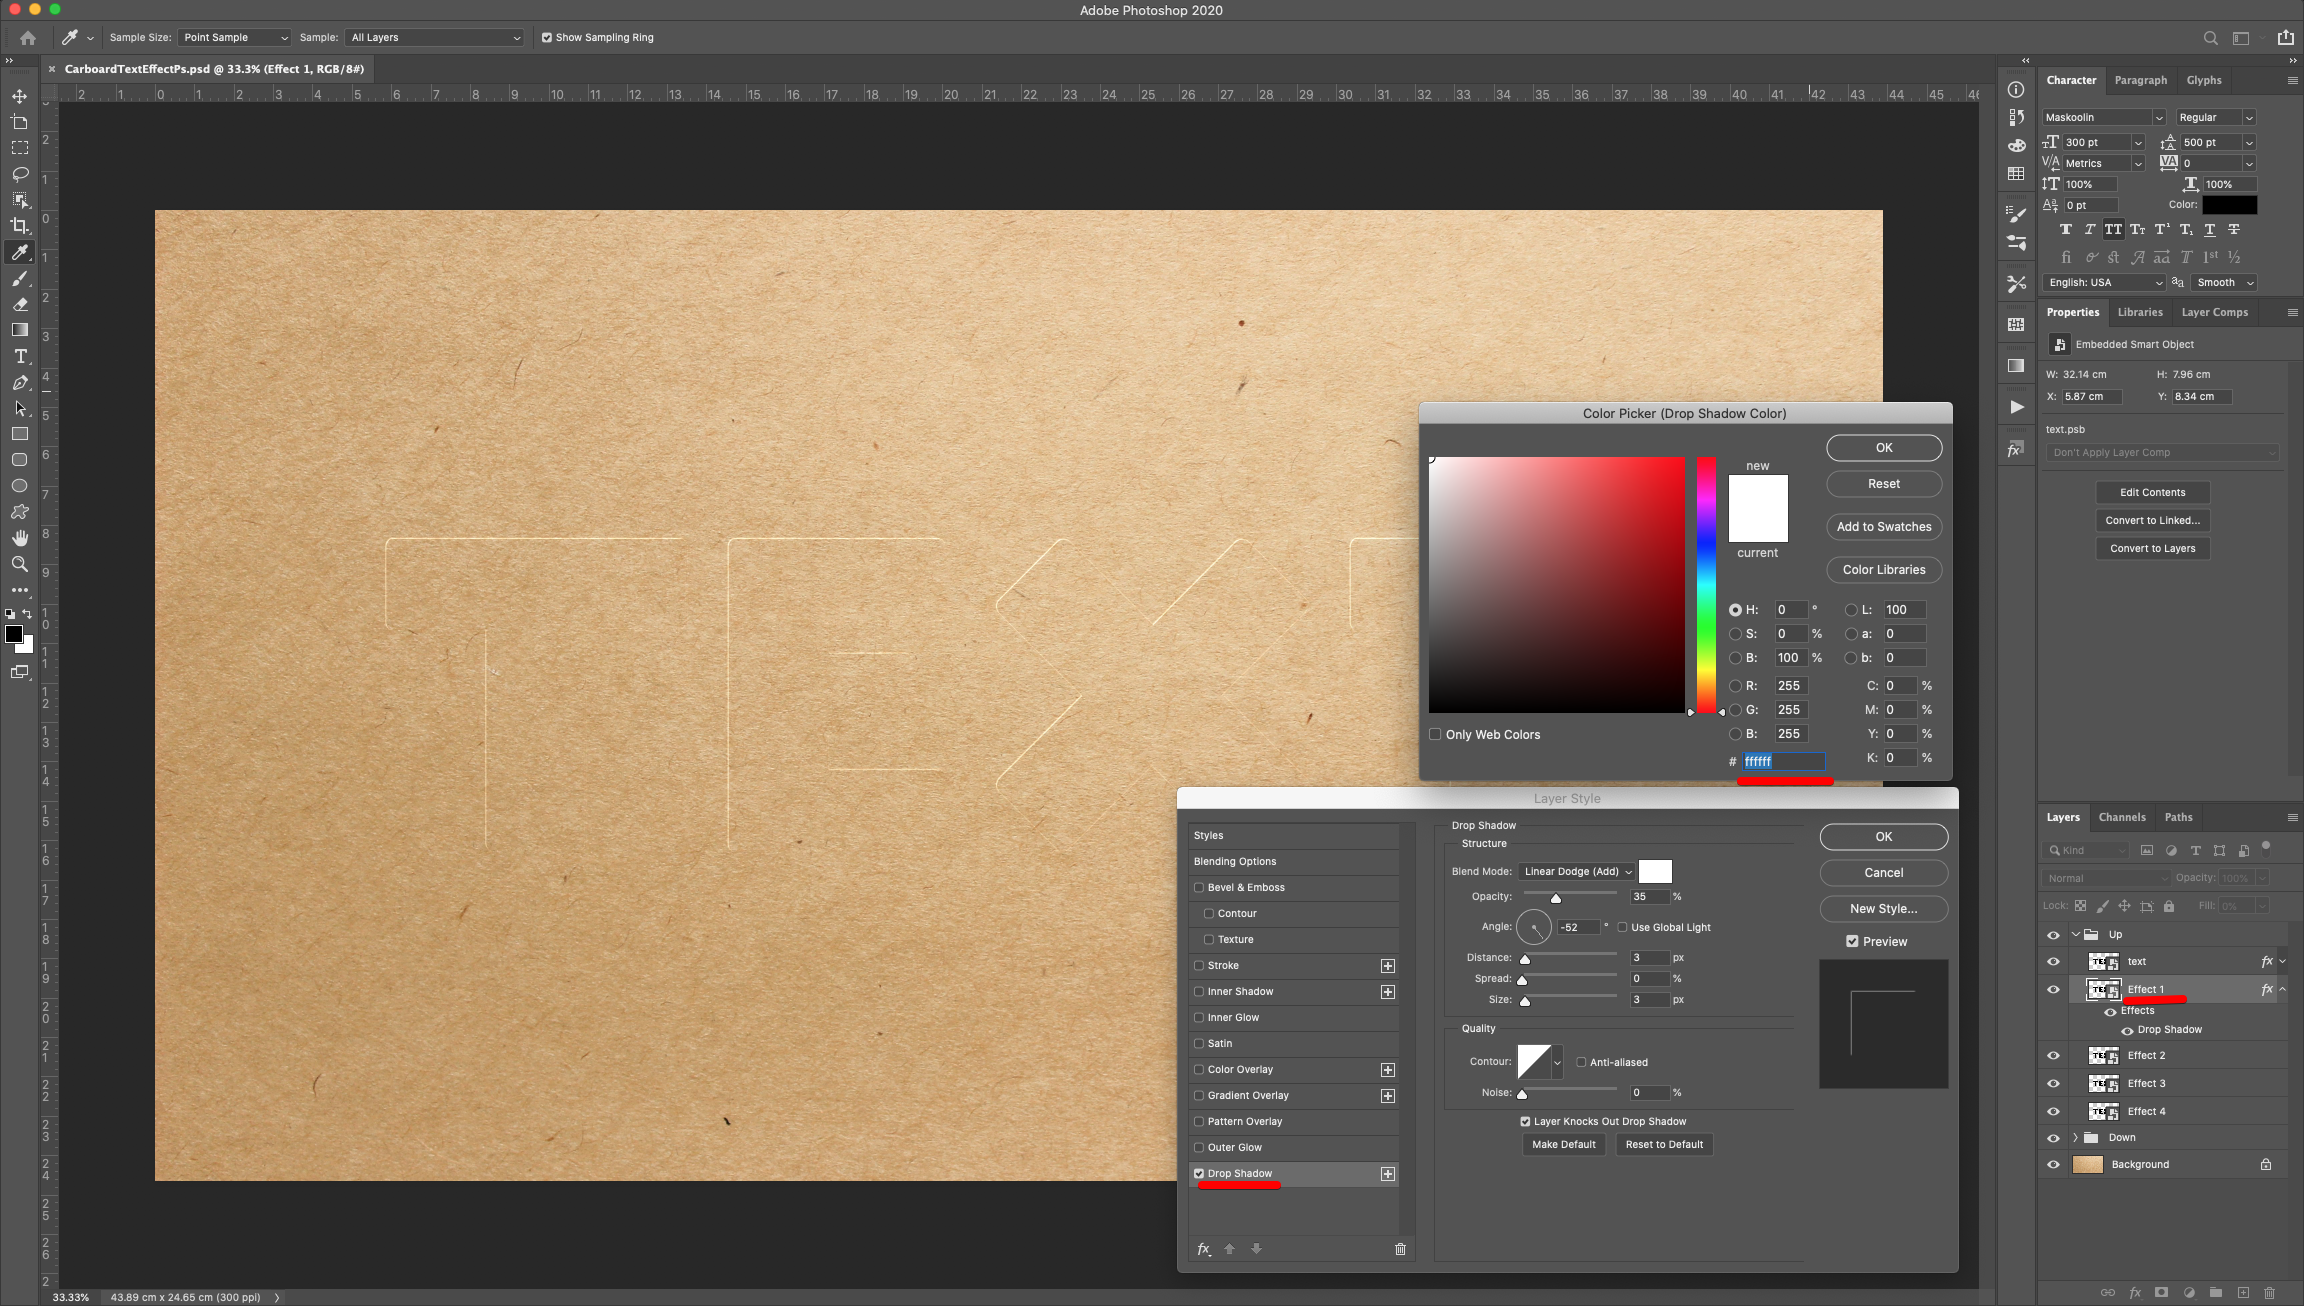
10 - Double-click on top of the “Effect 1” layer Thumbnail (in the “Up” group) and apply the following “Layer Styles”:
Drop Shadow: (#ffffff)
11 - Go to Filter > Blur > Gaussian Blur and use a “Radius” of 0.5 Pixels.
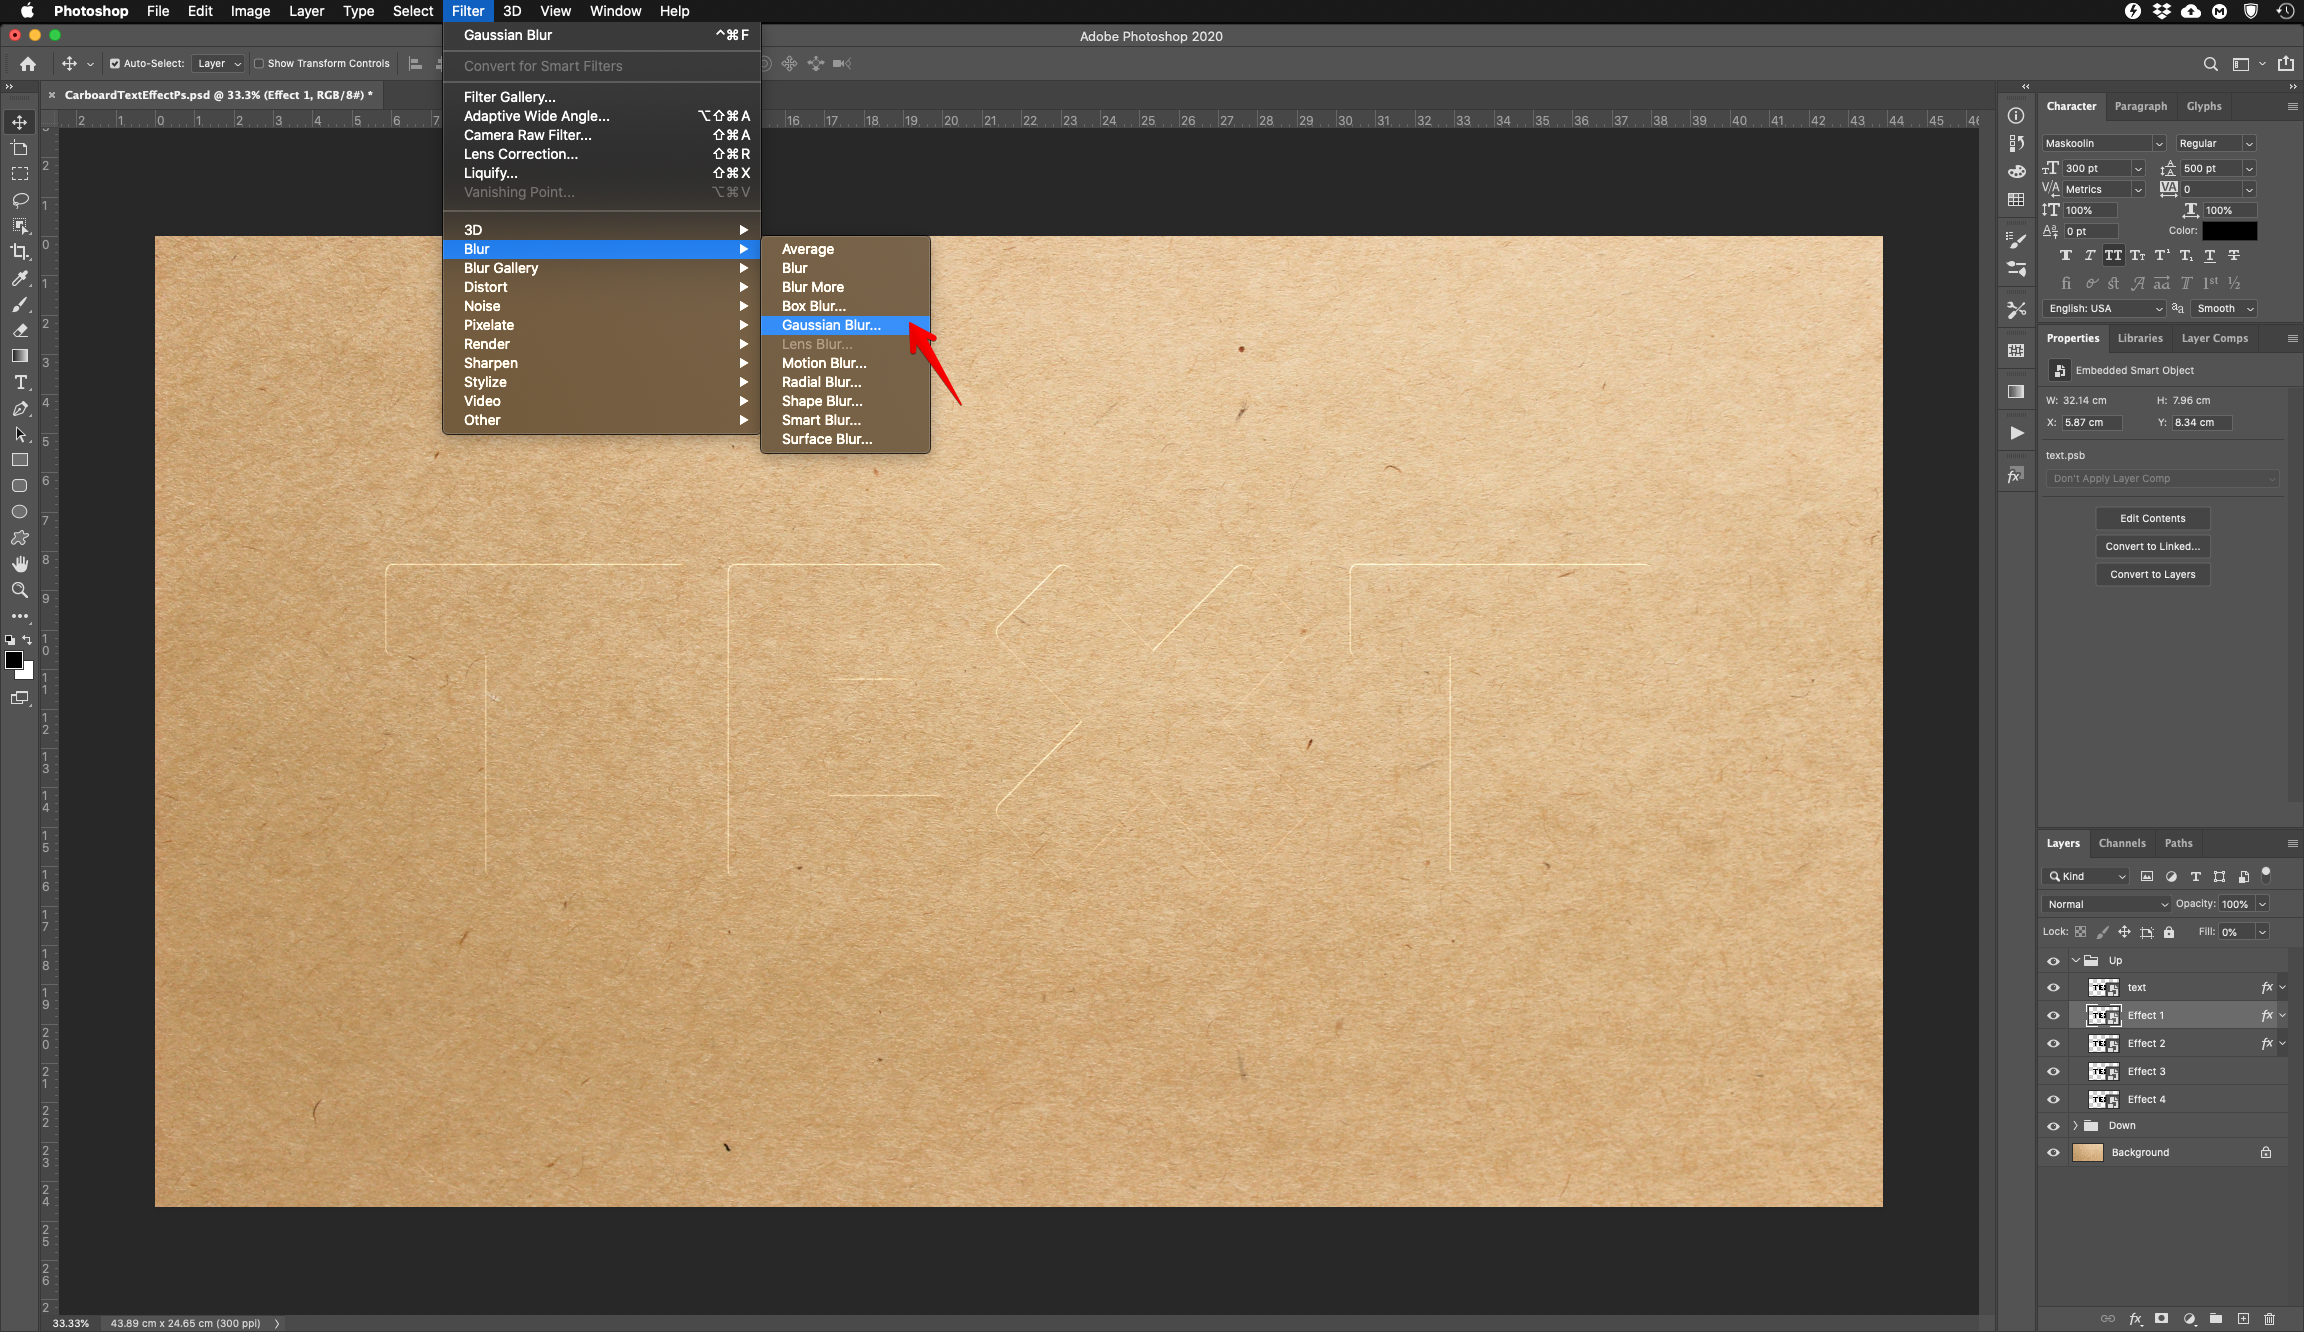
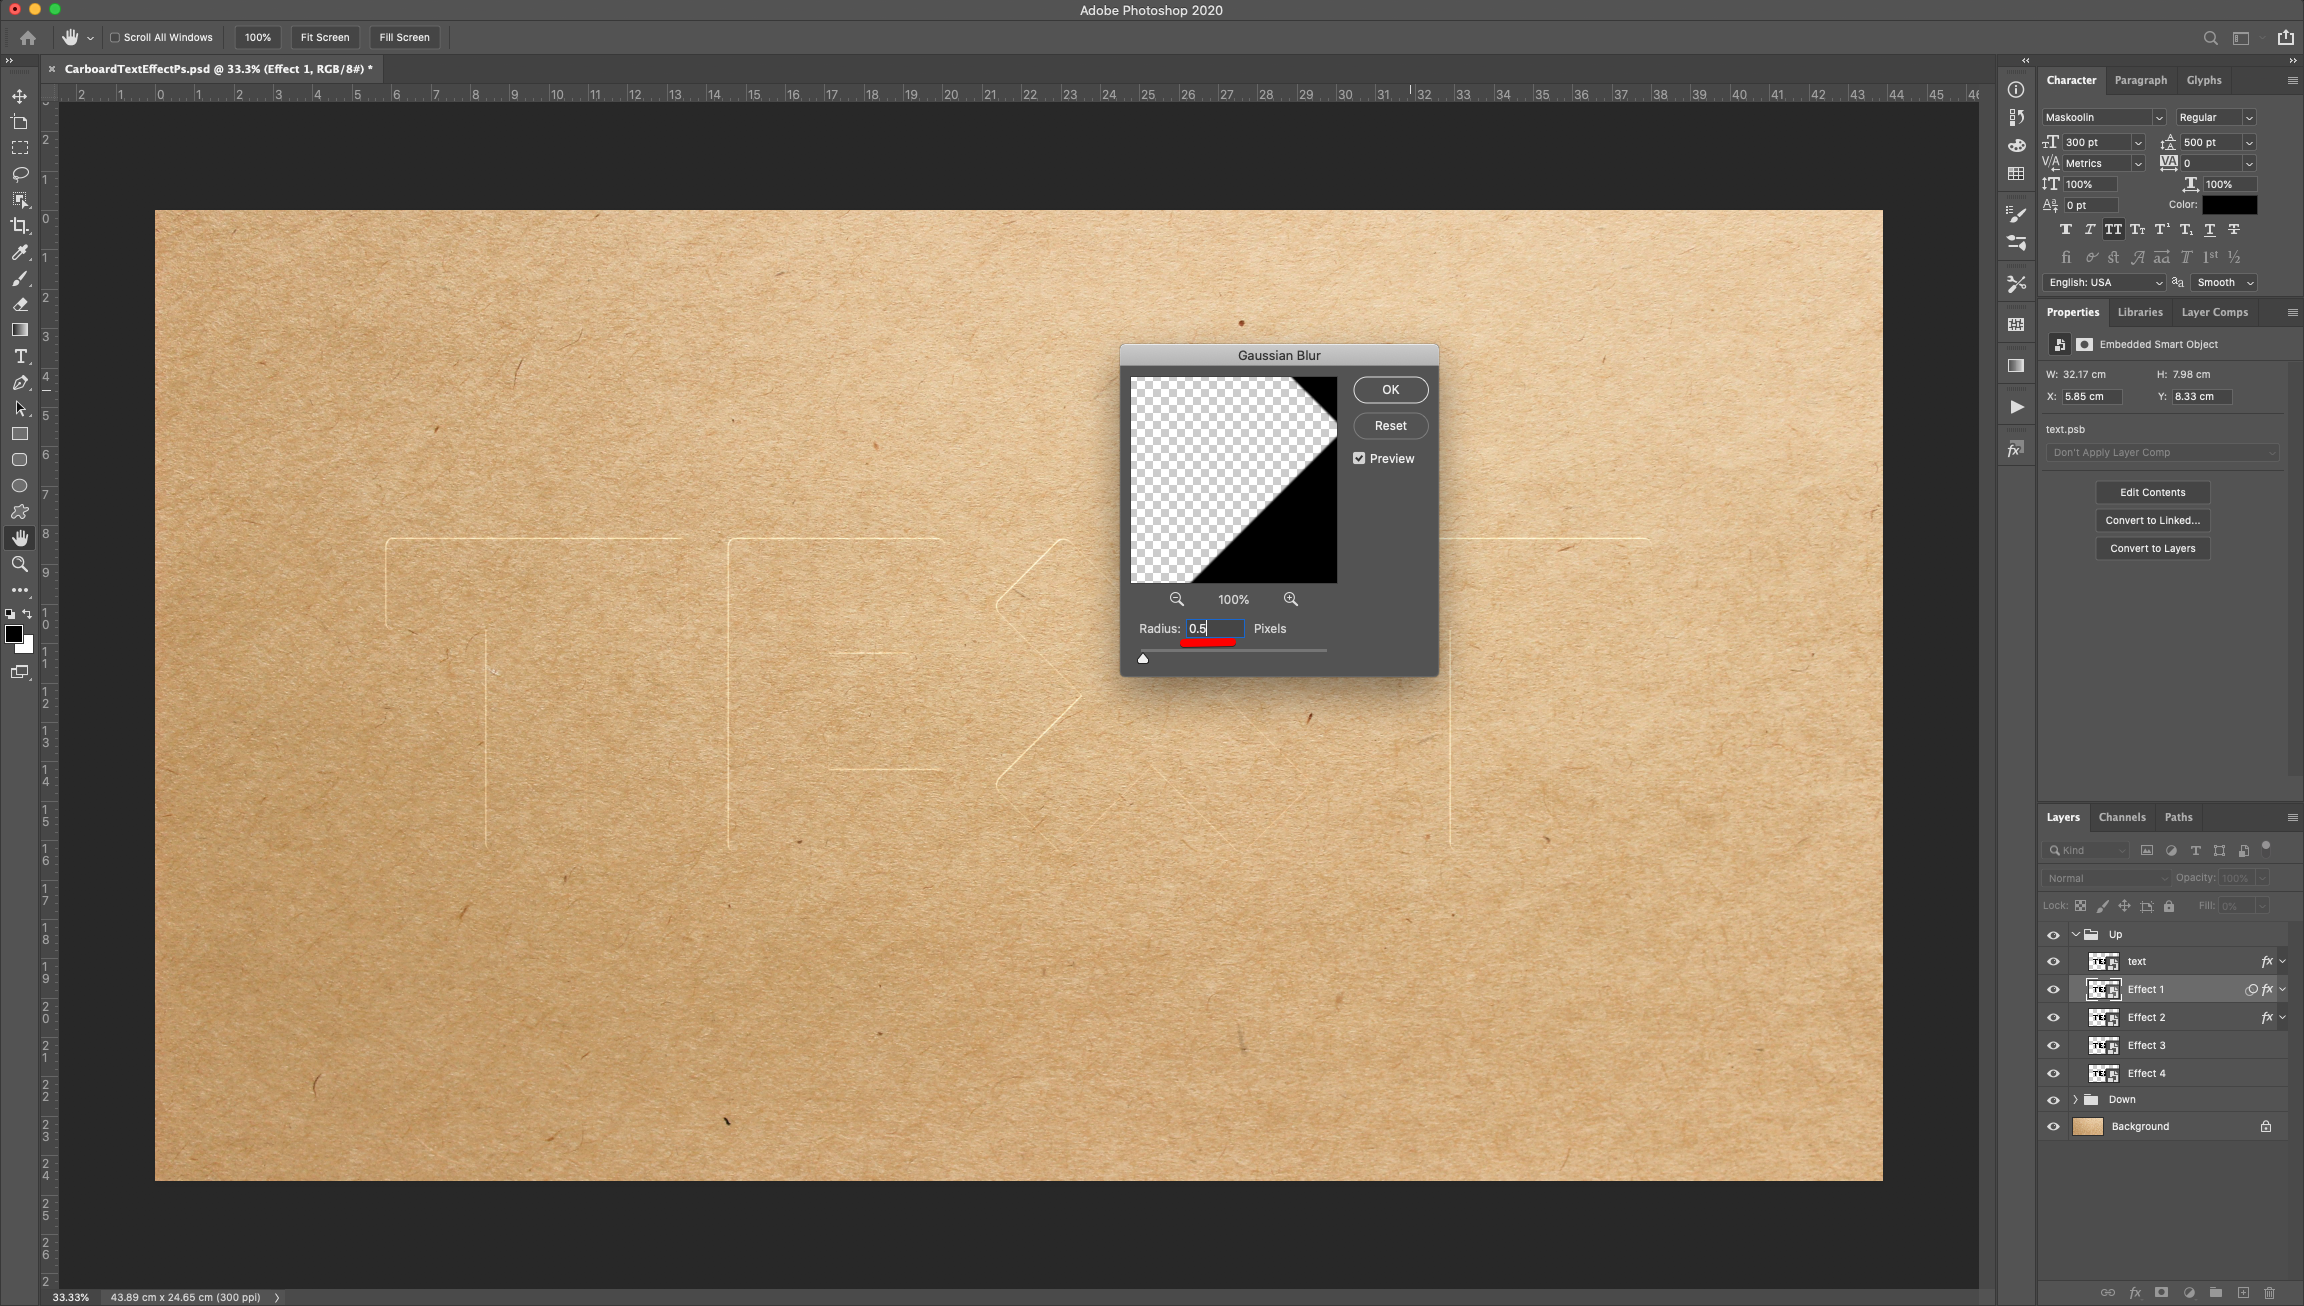
12 - Double-click on top of the “Effect 2” layer Thumbnail (in the “Up” group) and apply the following “Layer Styles”:
Drop Shadow: (#000000)
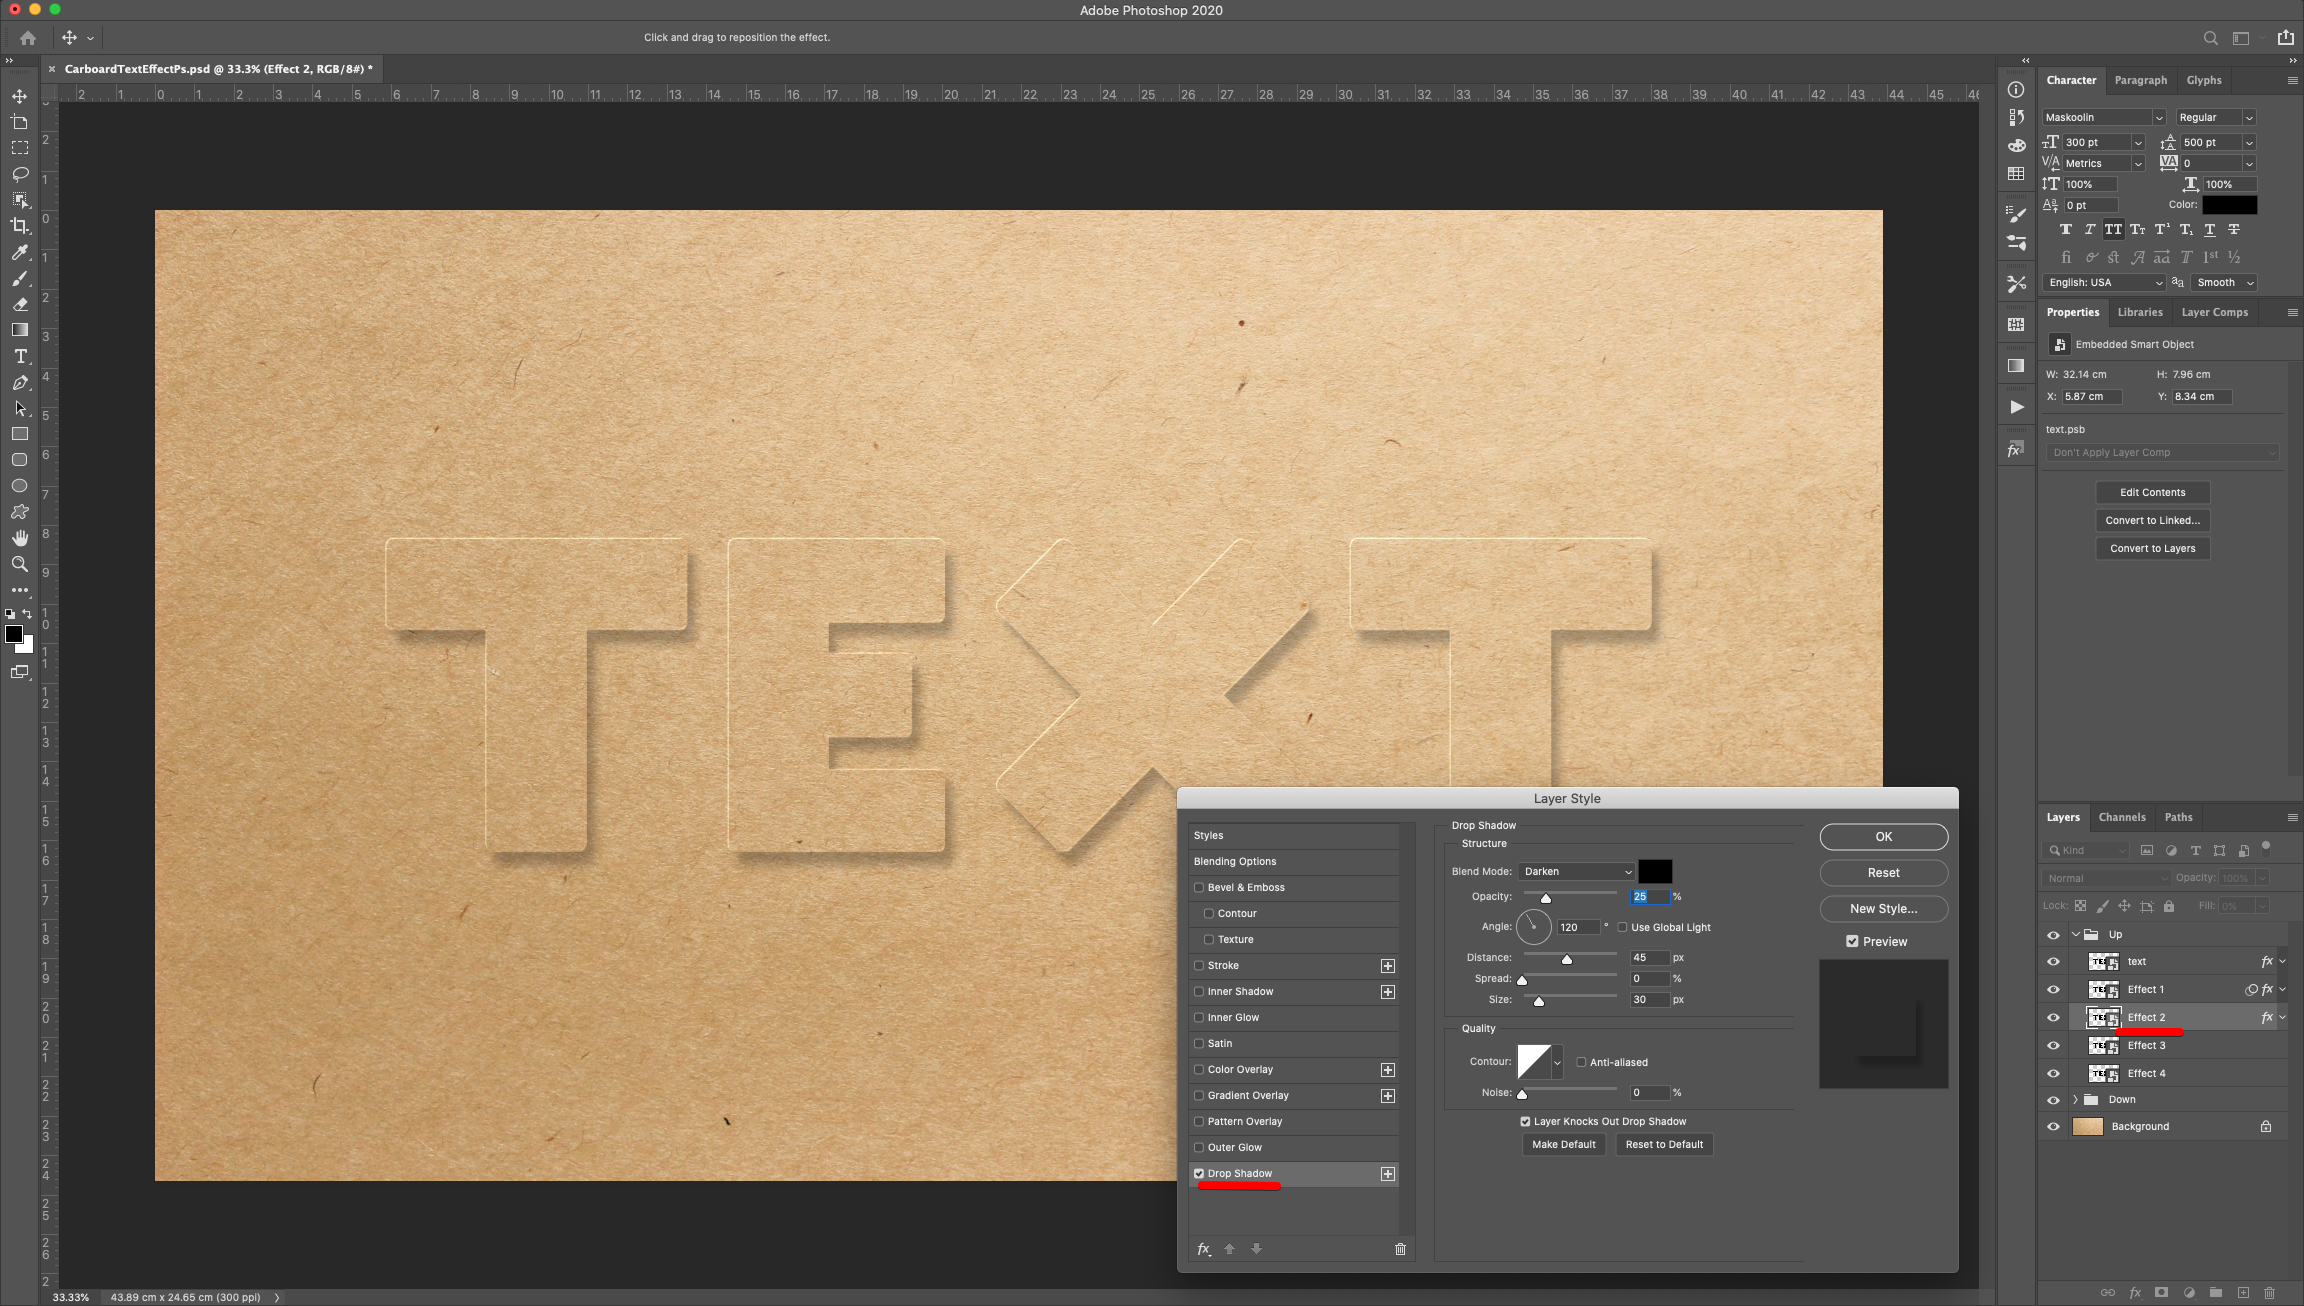
Go to Filter > Blur > Gaussian Blur and use a “Radius” of 0.5 Pixels.
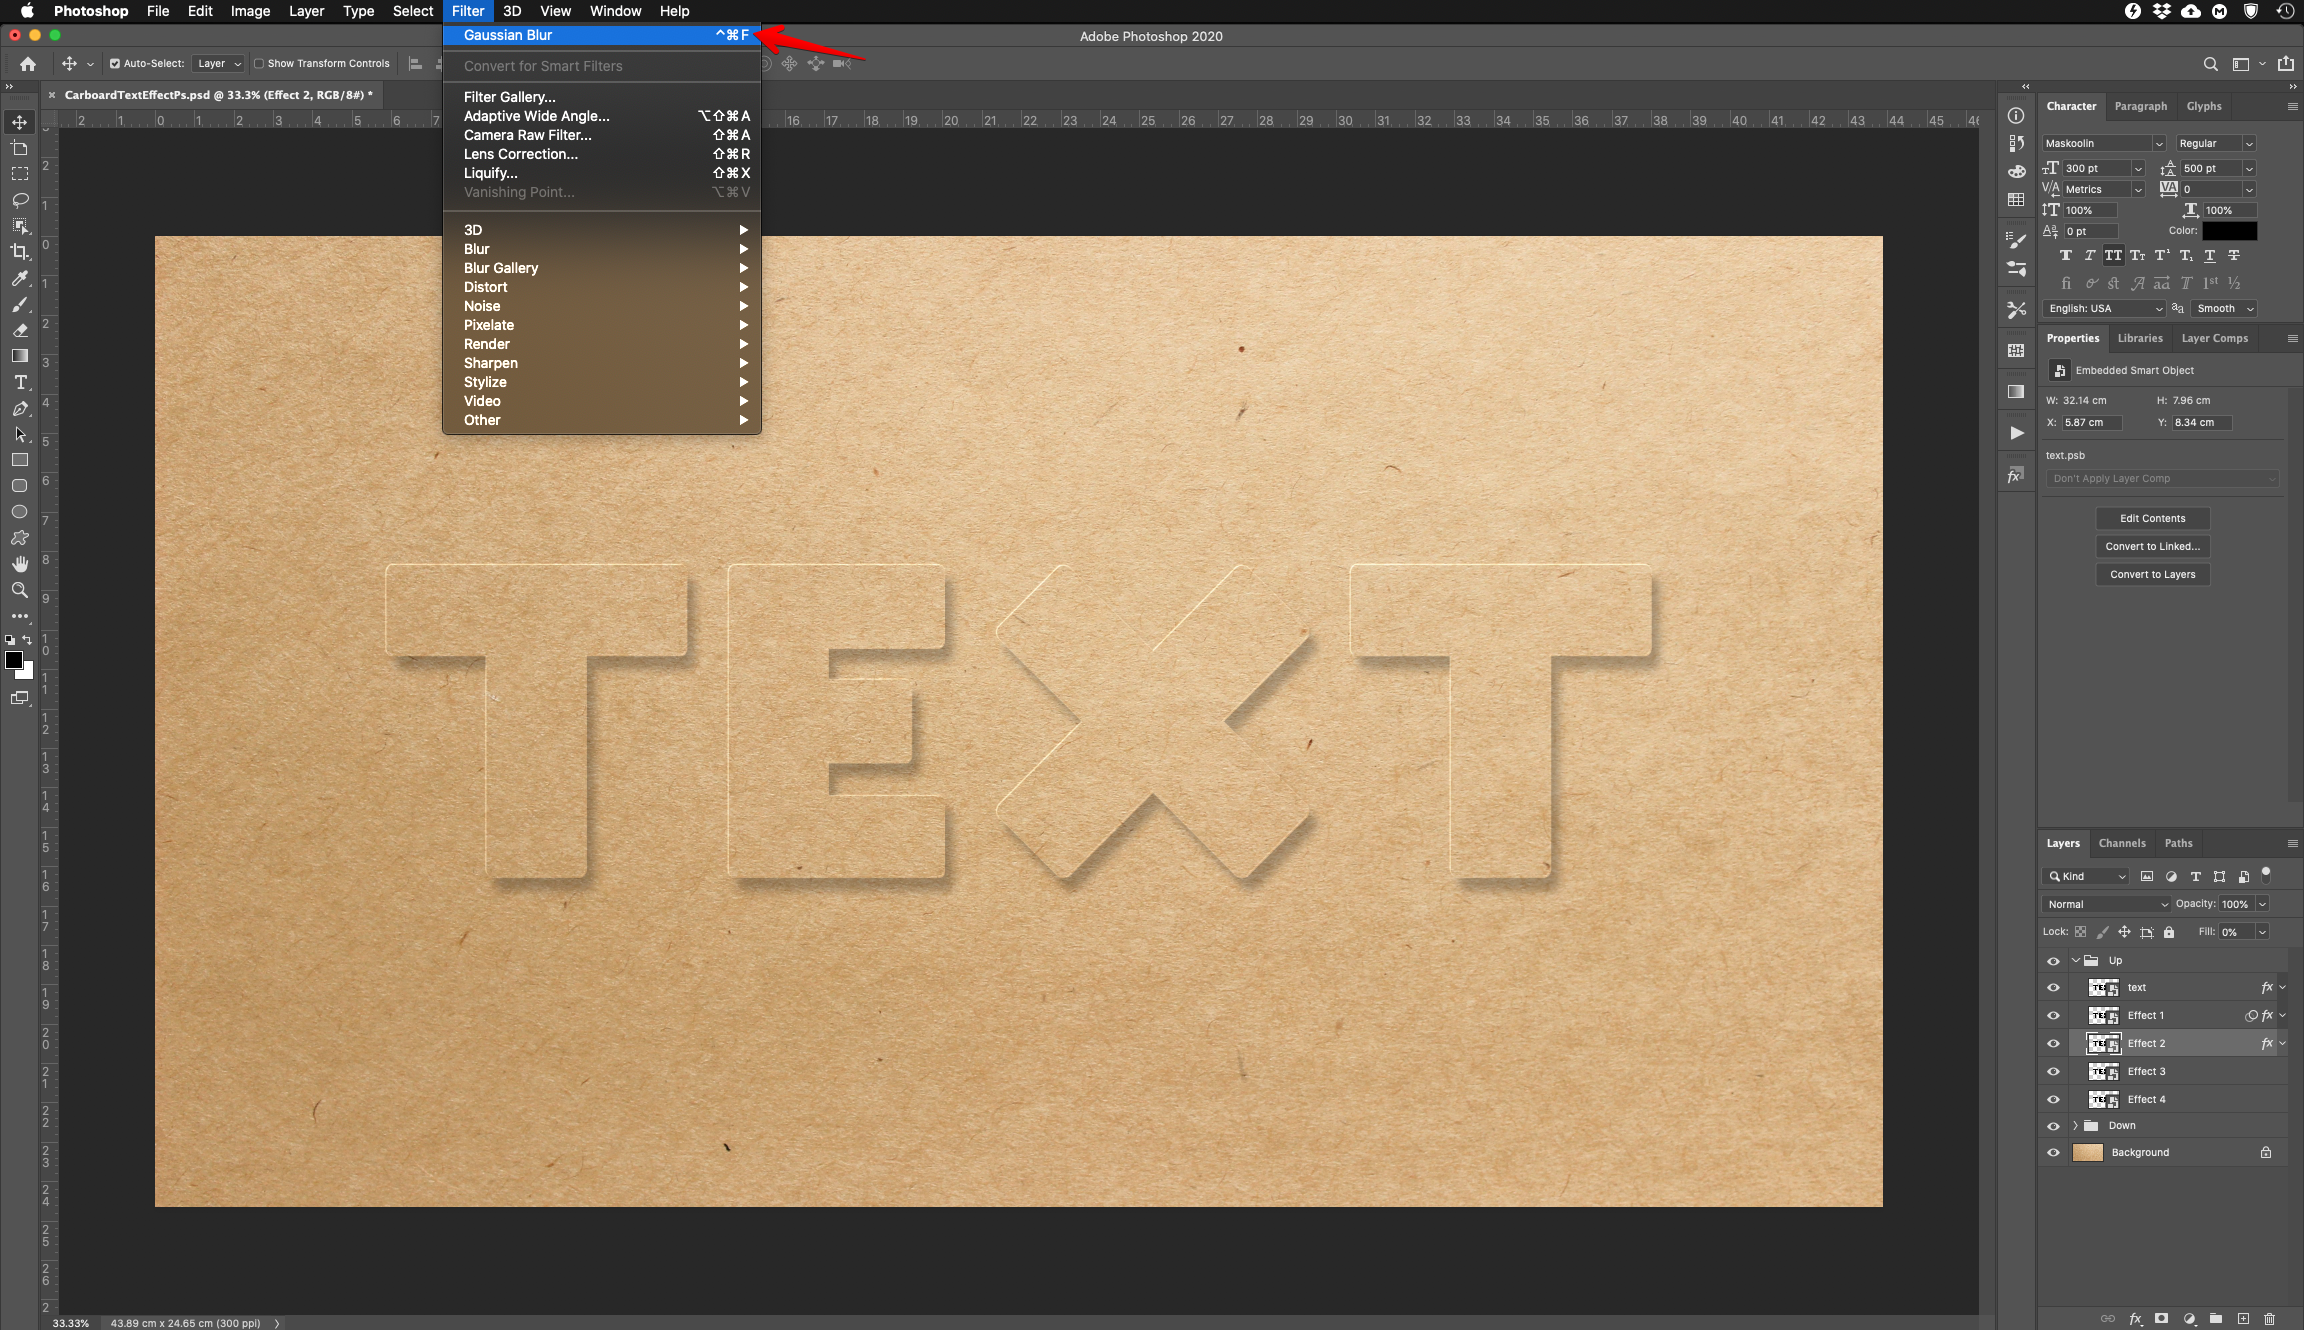
13 - Double-click on top of the “Effect 3” layer Thumbnail (in the “Up” group) and apply the following “Layer Styles”:
Bevel & Emboss:
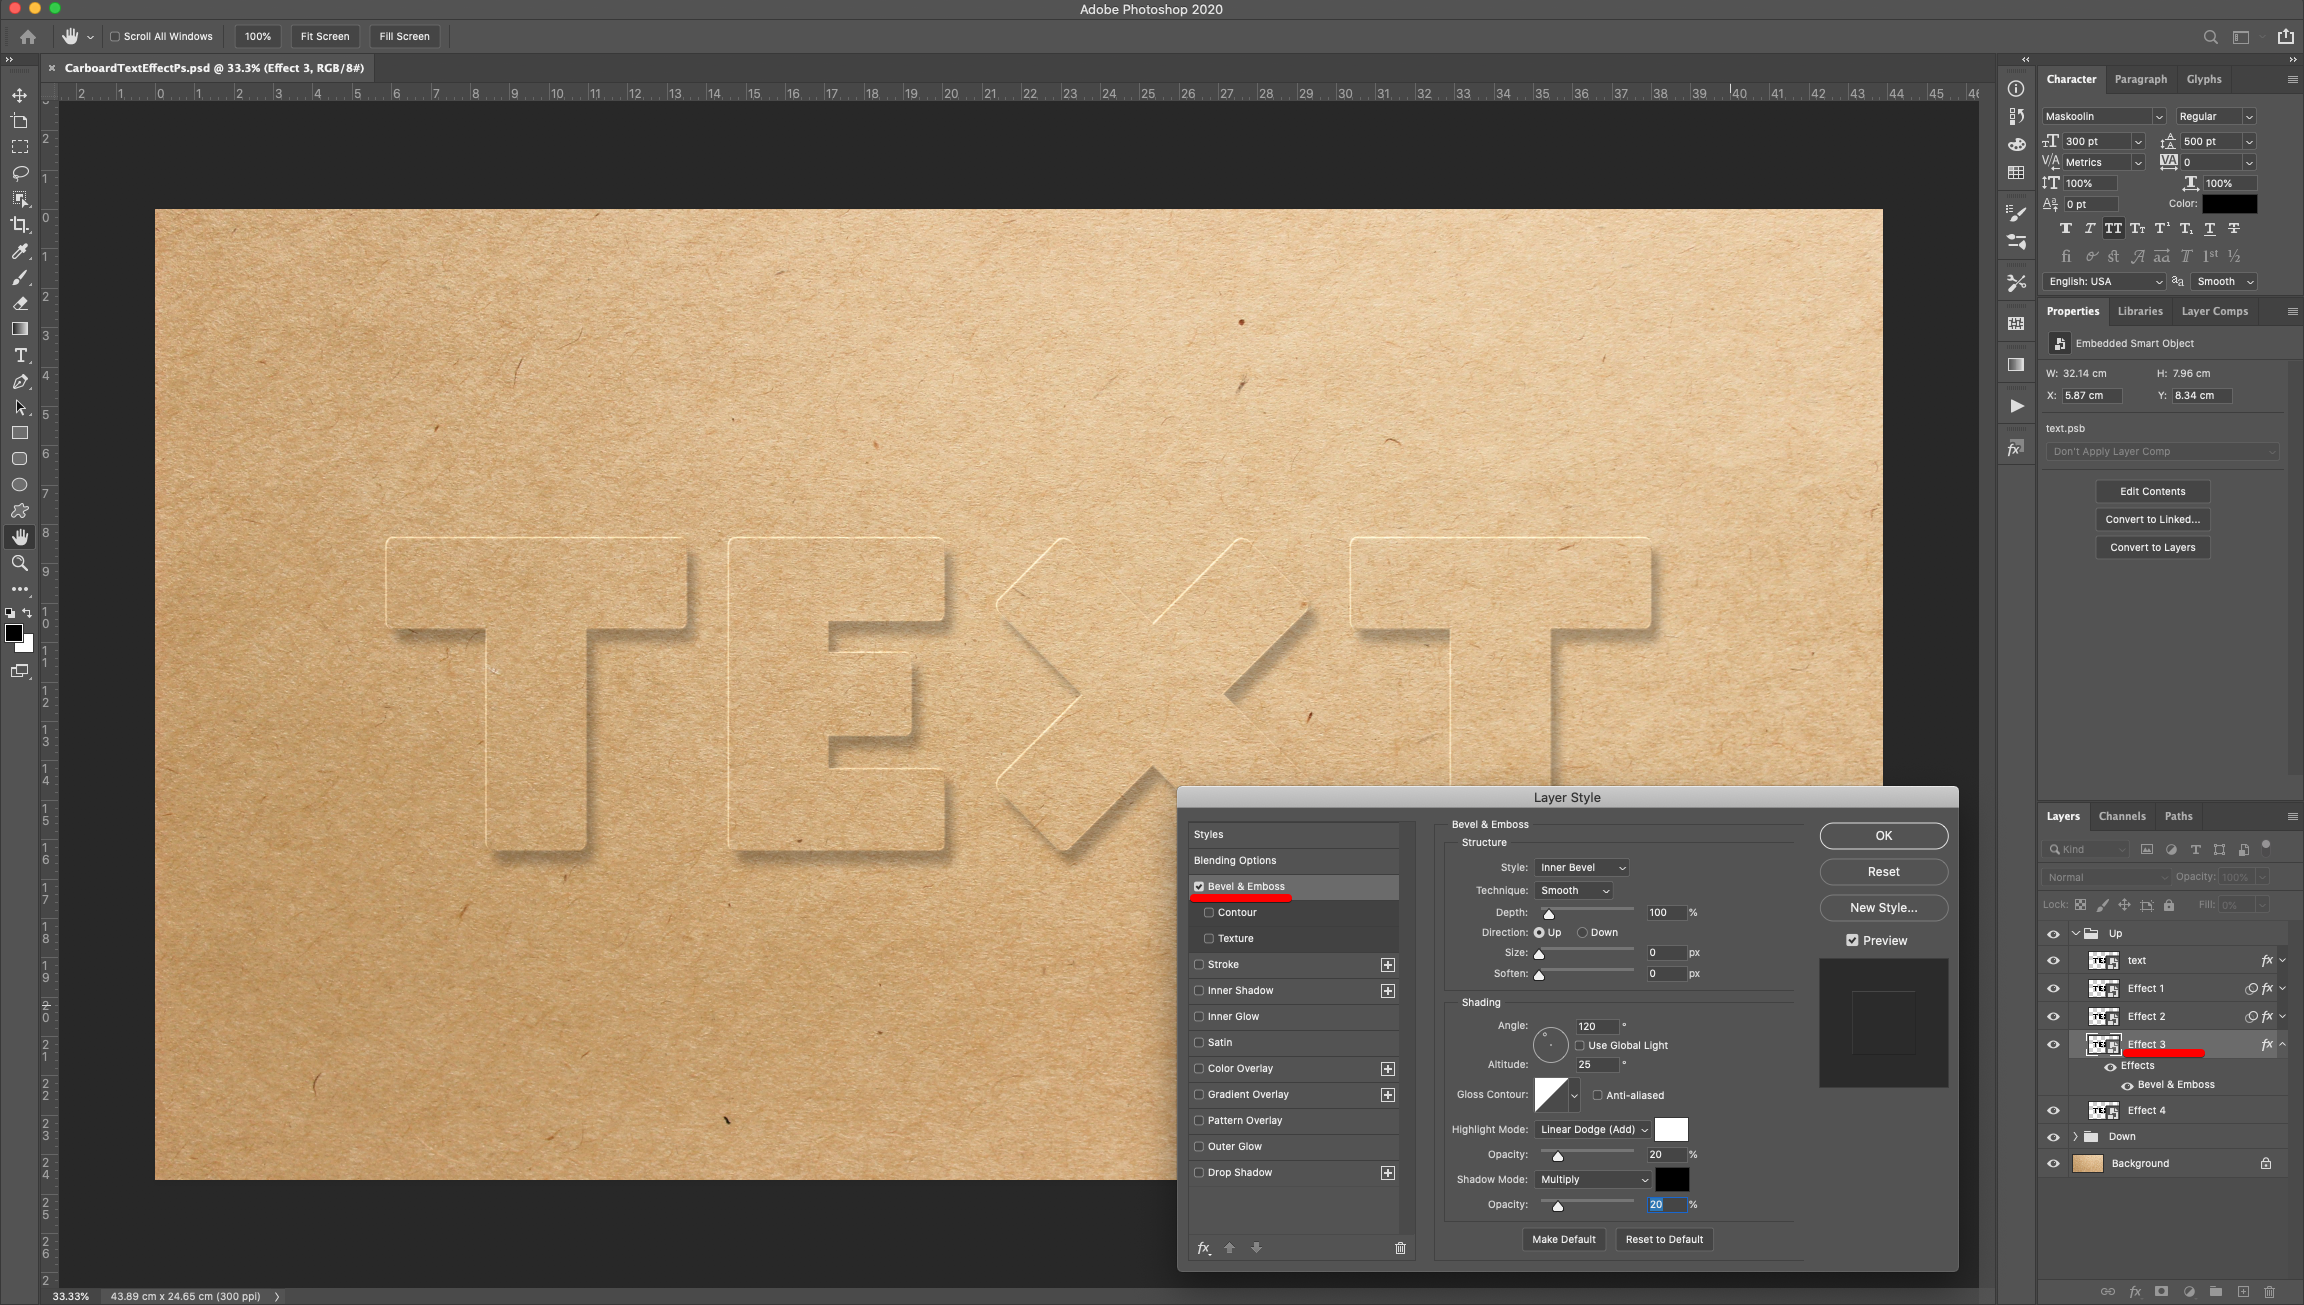
Texture: (Grey Granite)
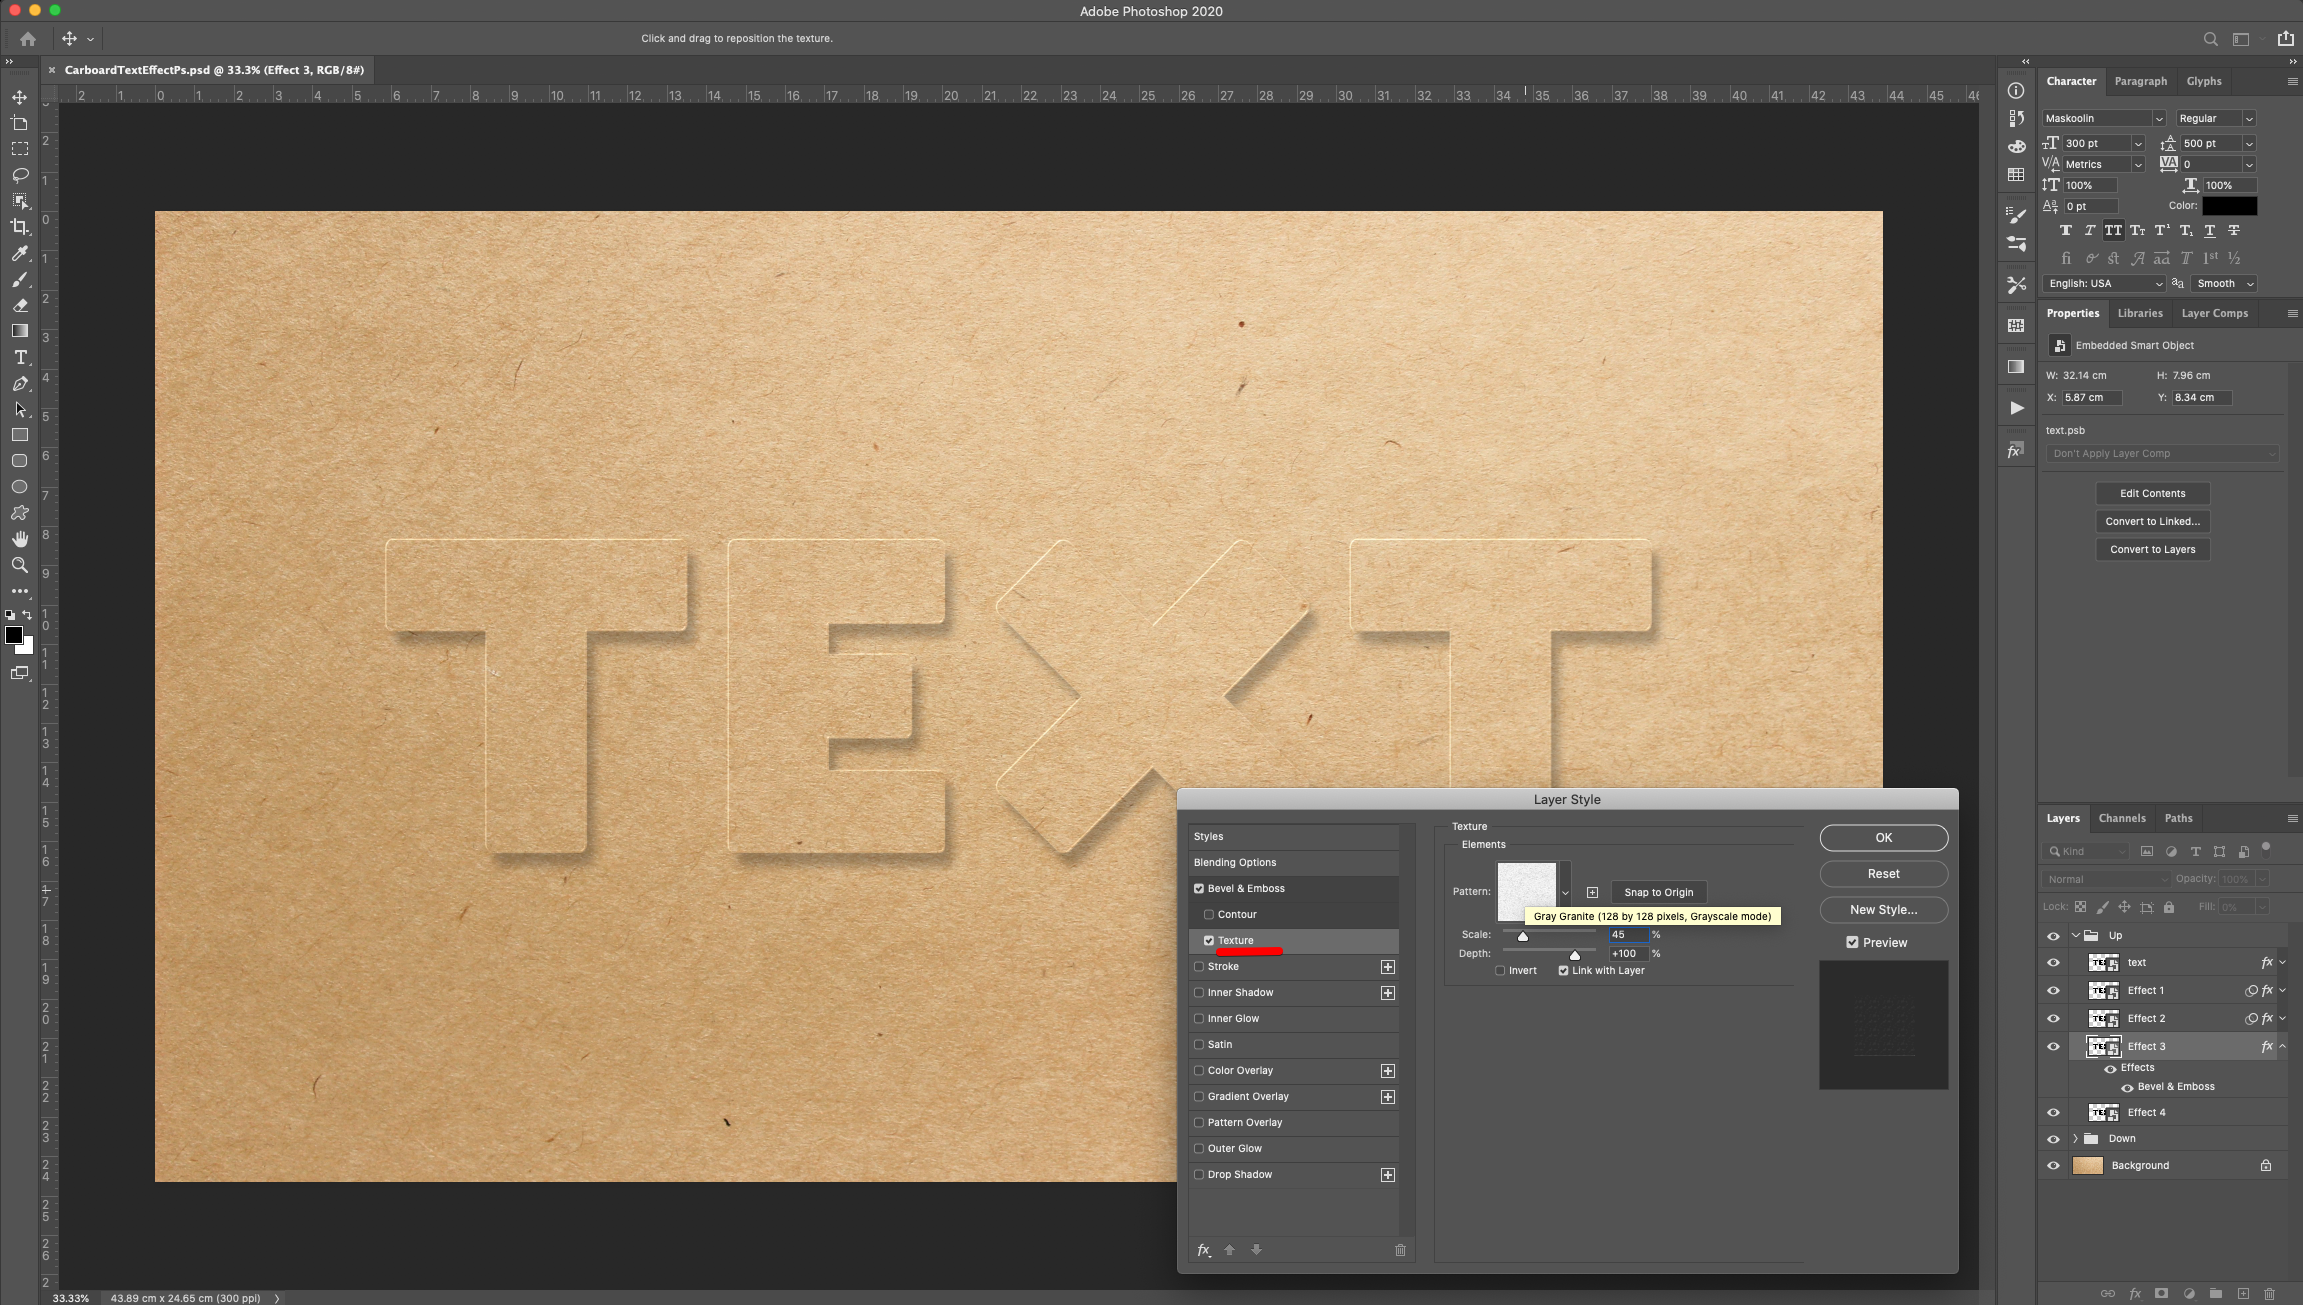
Color Overlay: (#ffffff)
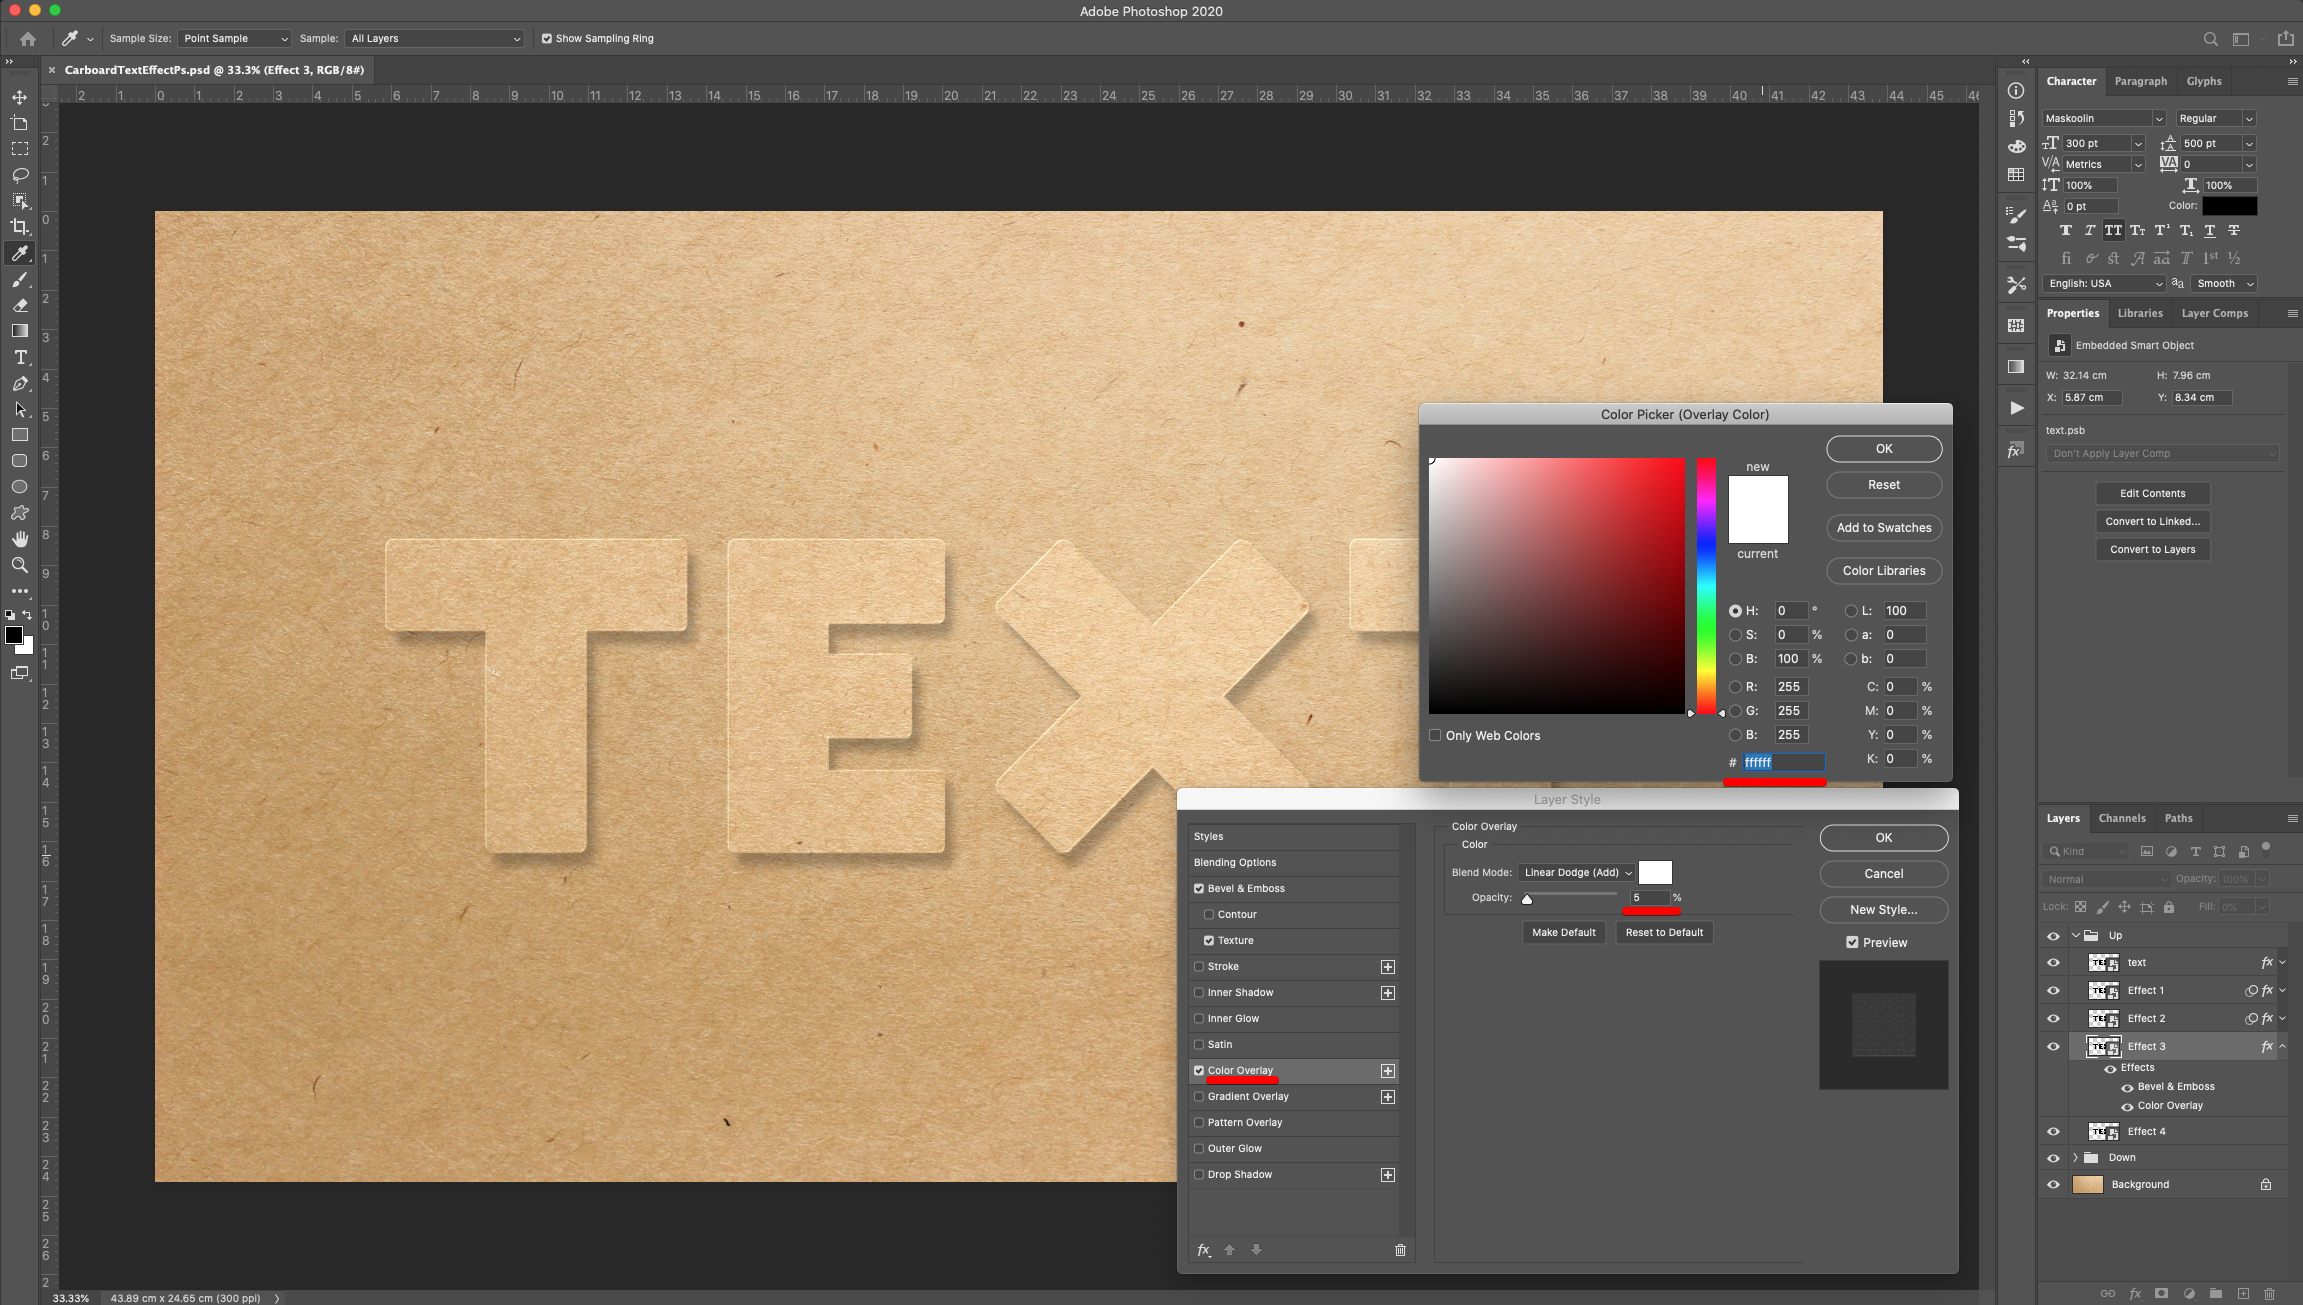
Gradient Overlay: (Foreground to Background)
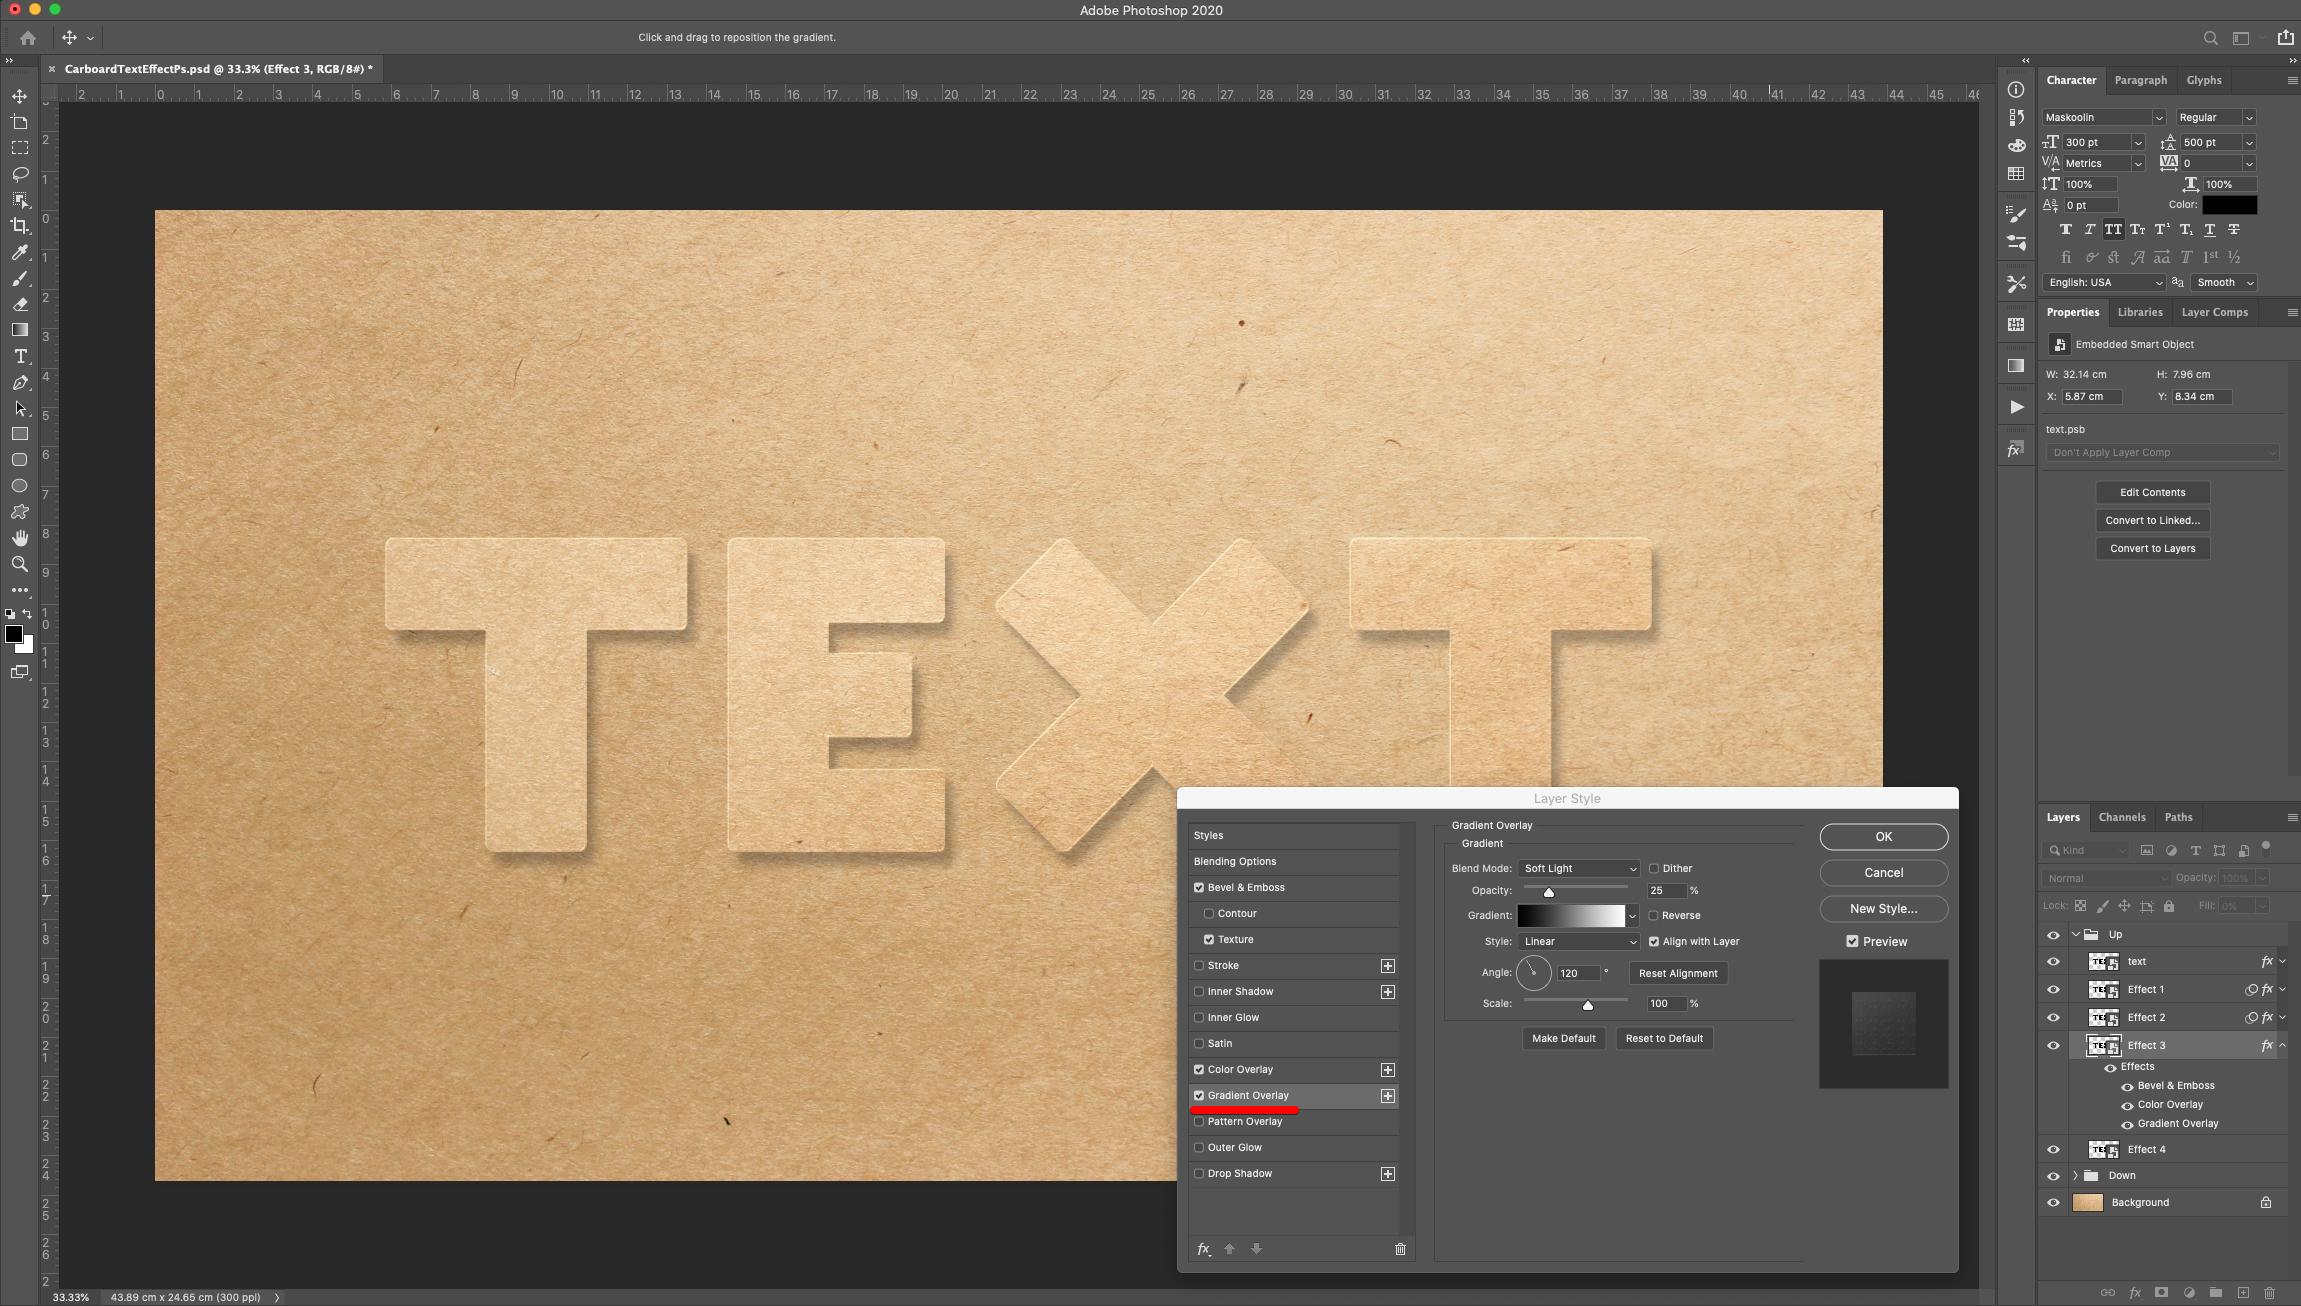
Drop Shadow:
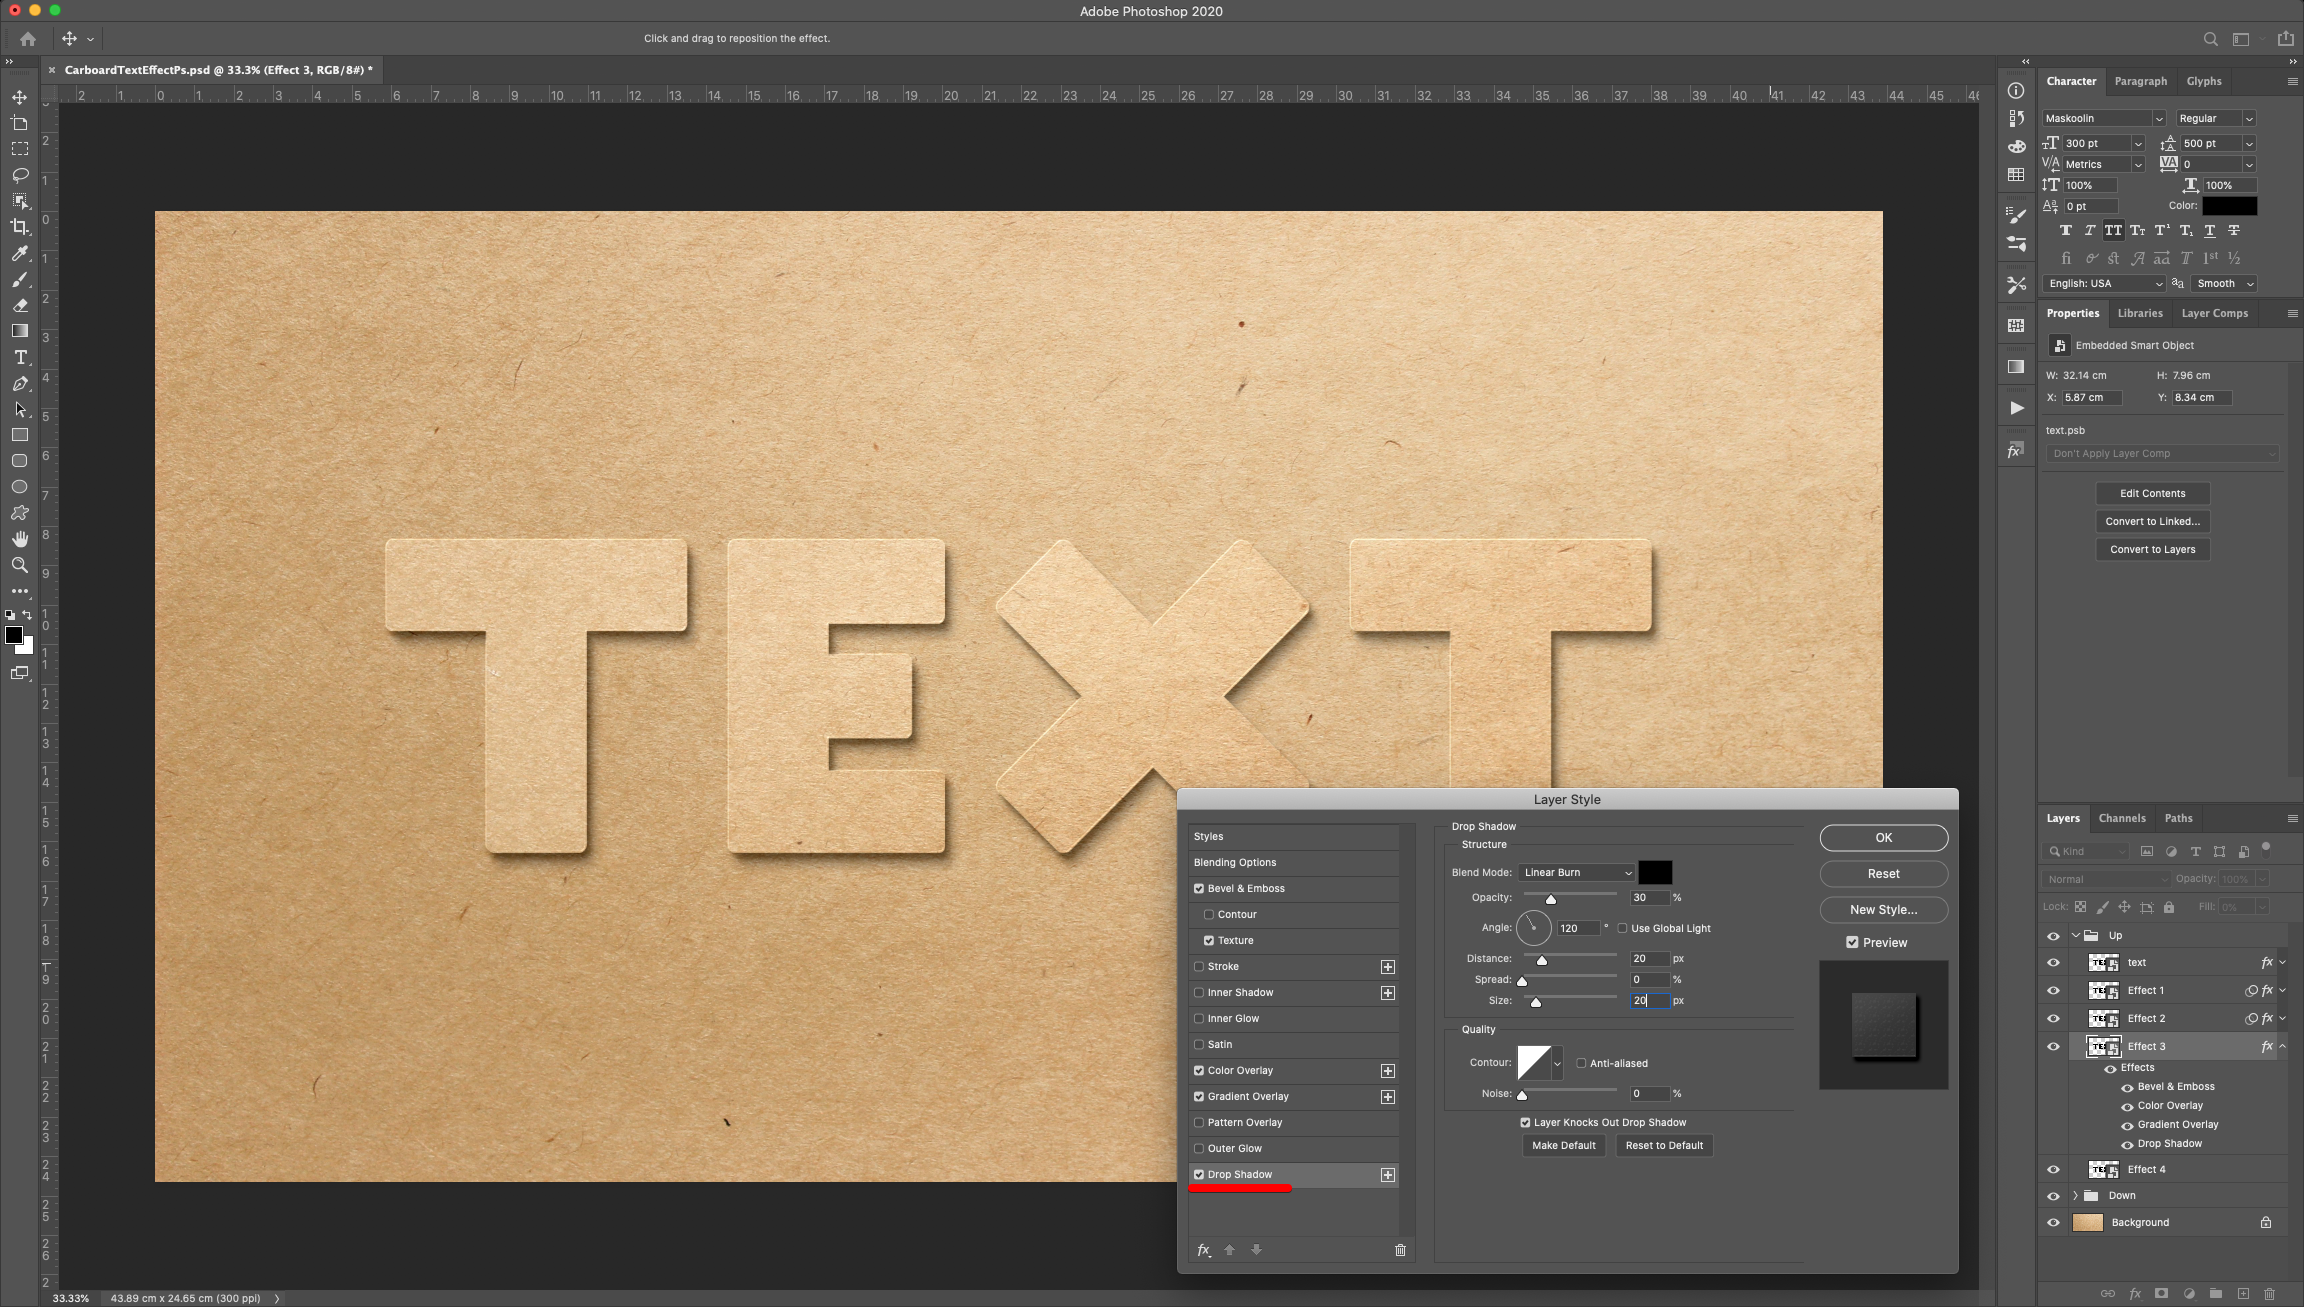
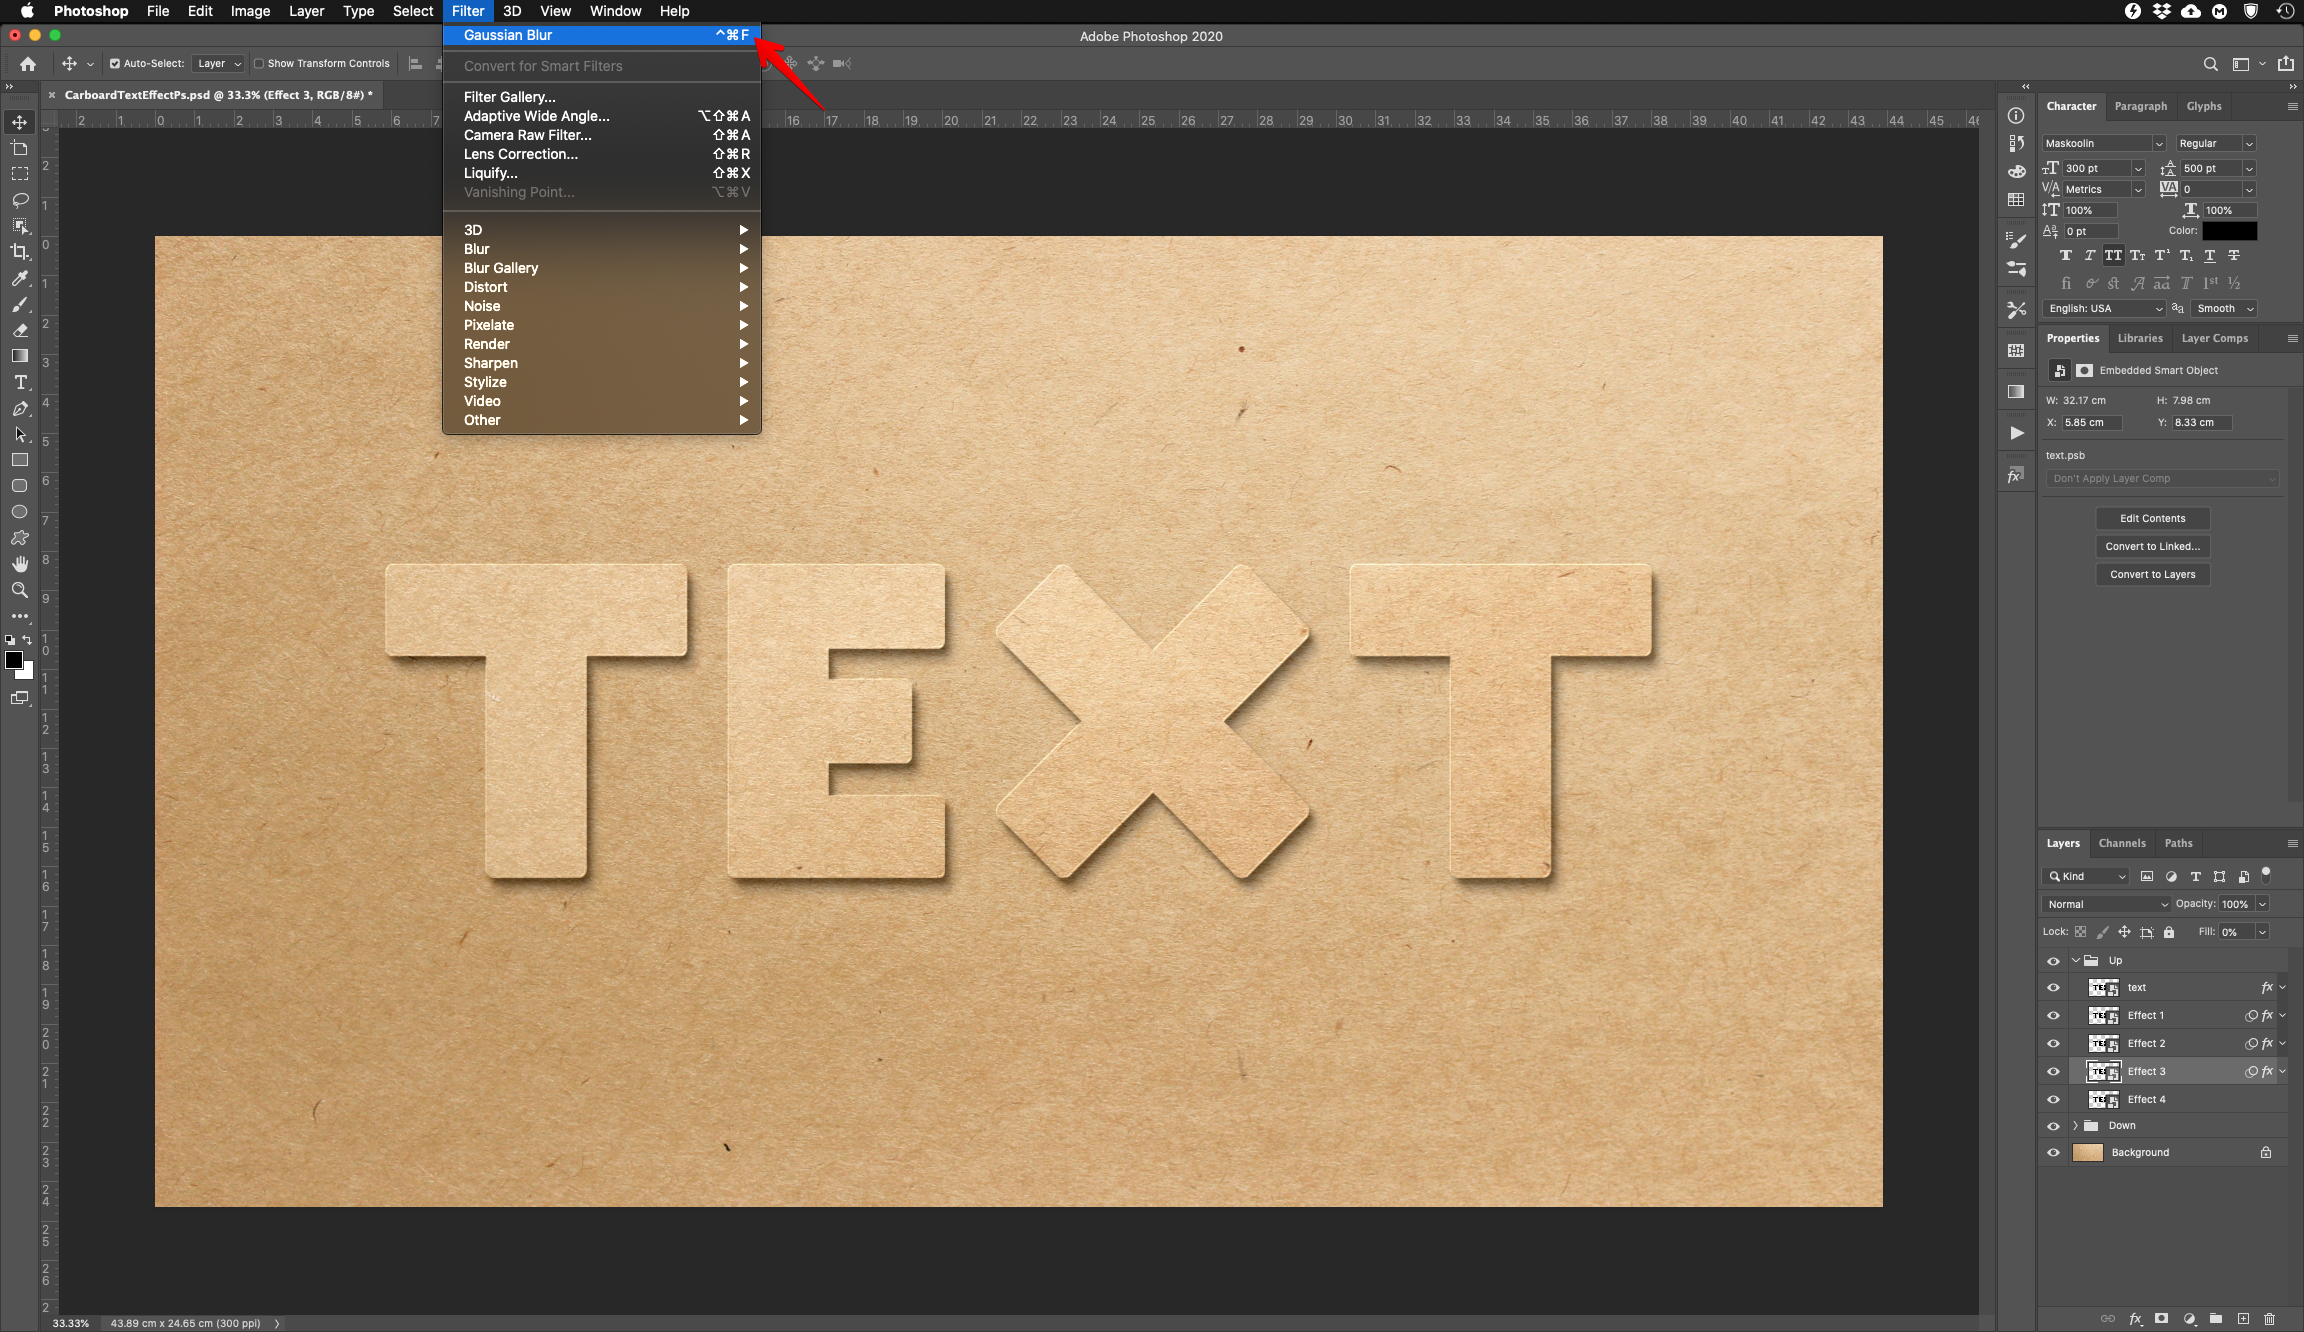
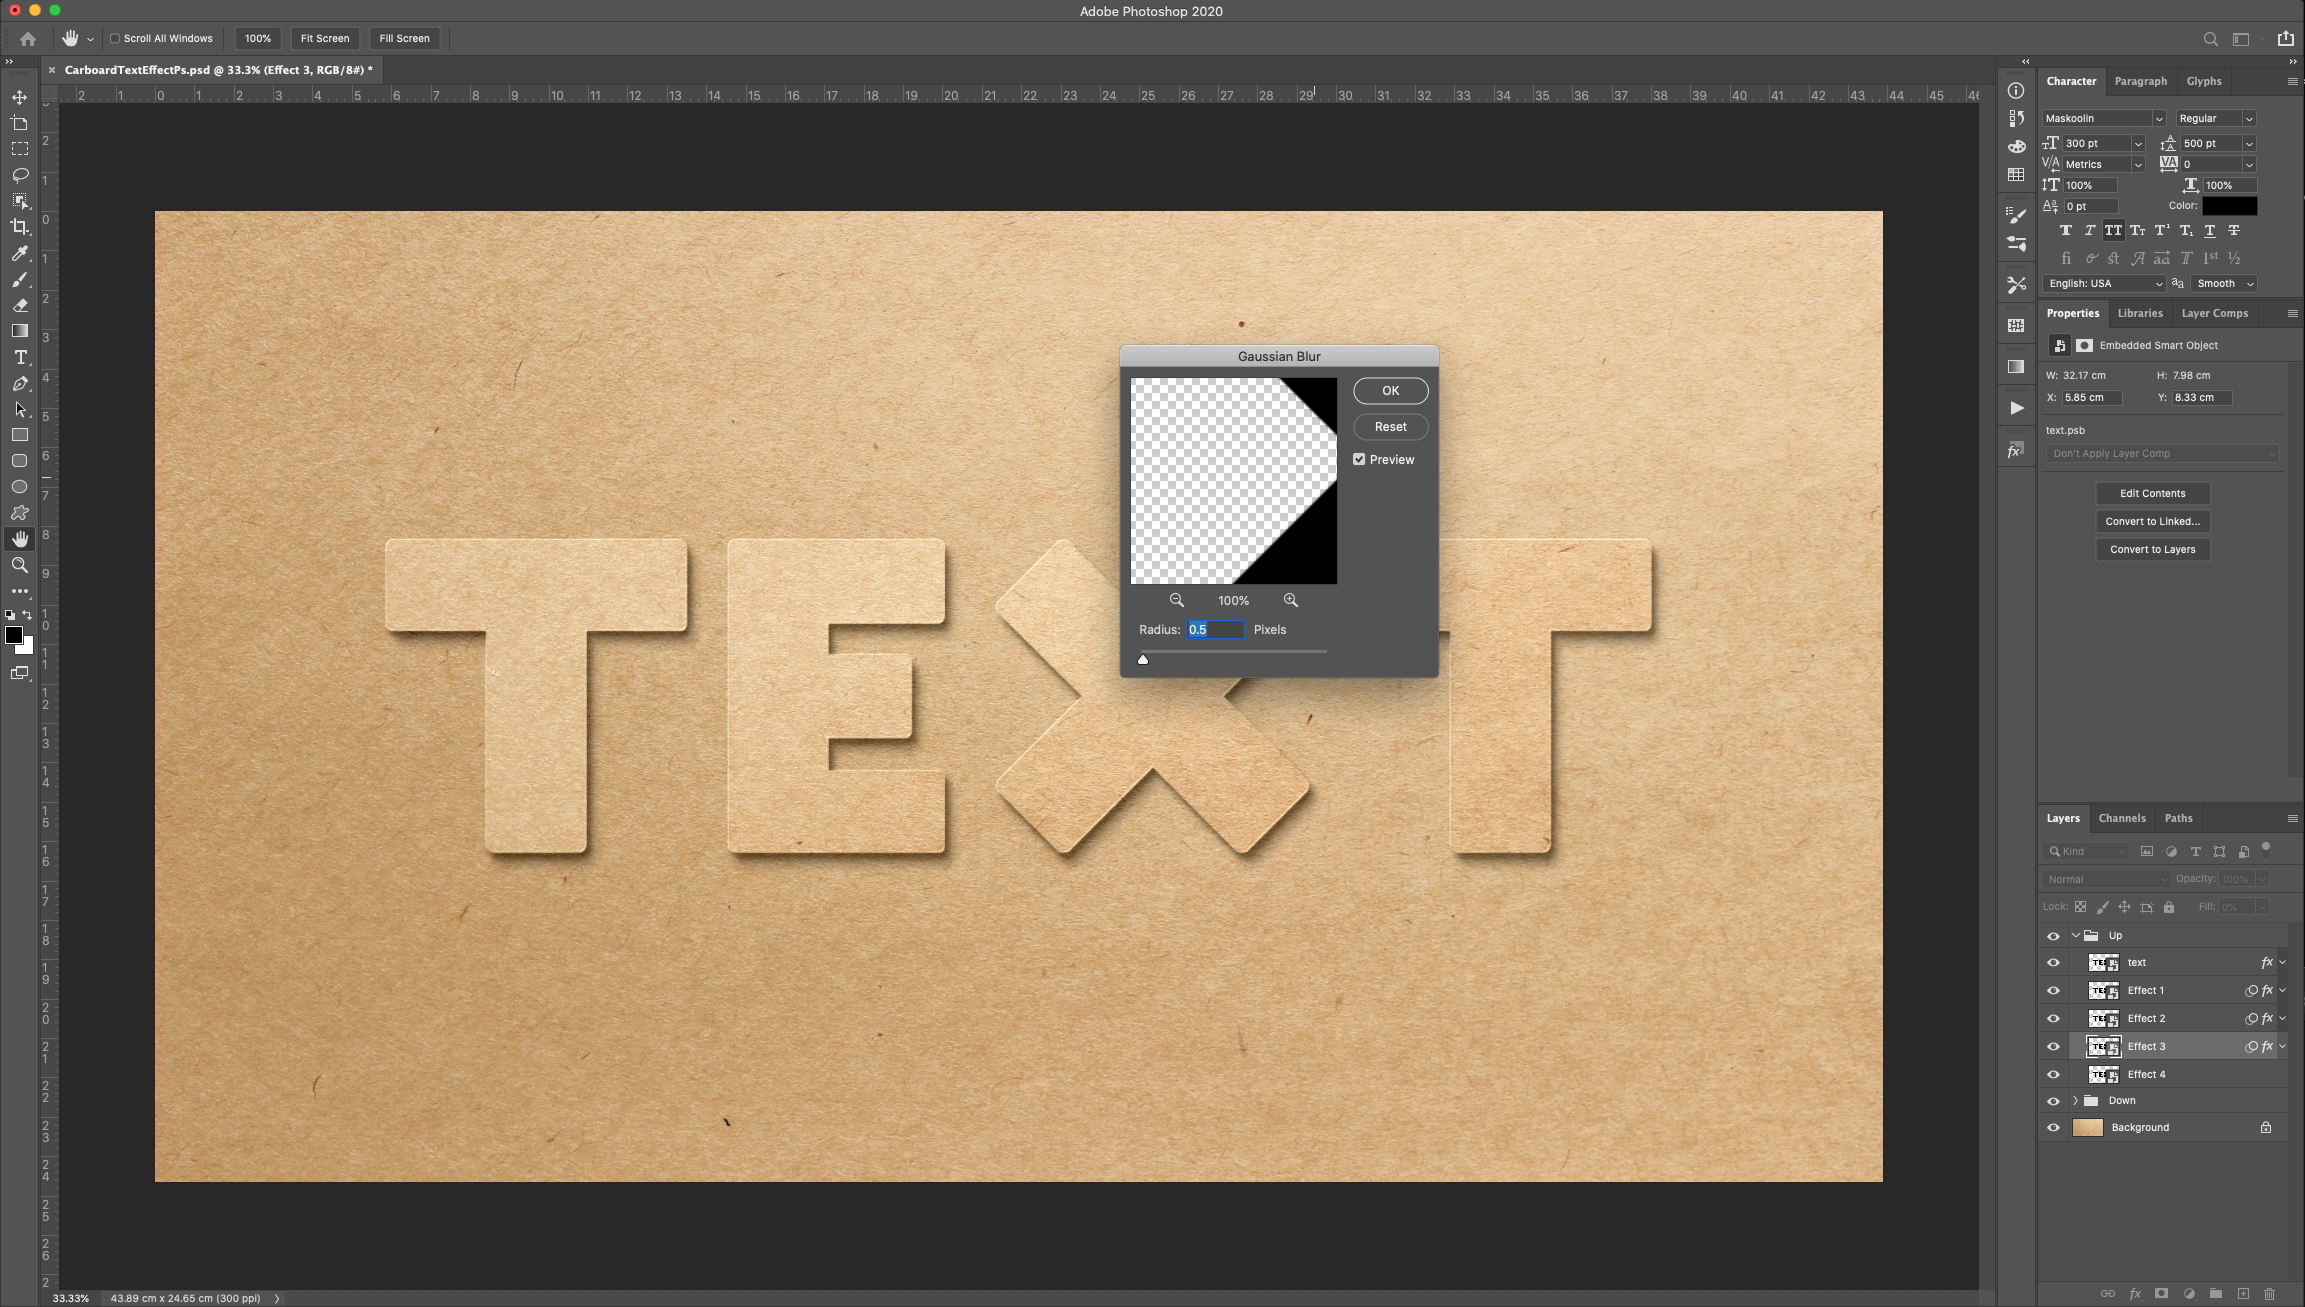
14 - Go to Filter > Blur > Gaussian Blur and use a “Radius” of 0.5 Pixels.
15 - Double-click on top of the “Effect 4” layer Thumbnail (in the “Up” group) and apply the following “Layer Styles”:
Bevel & Emboss:
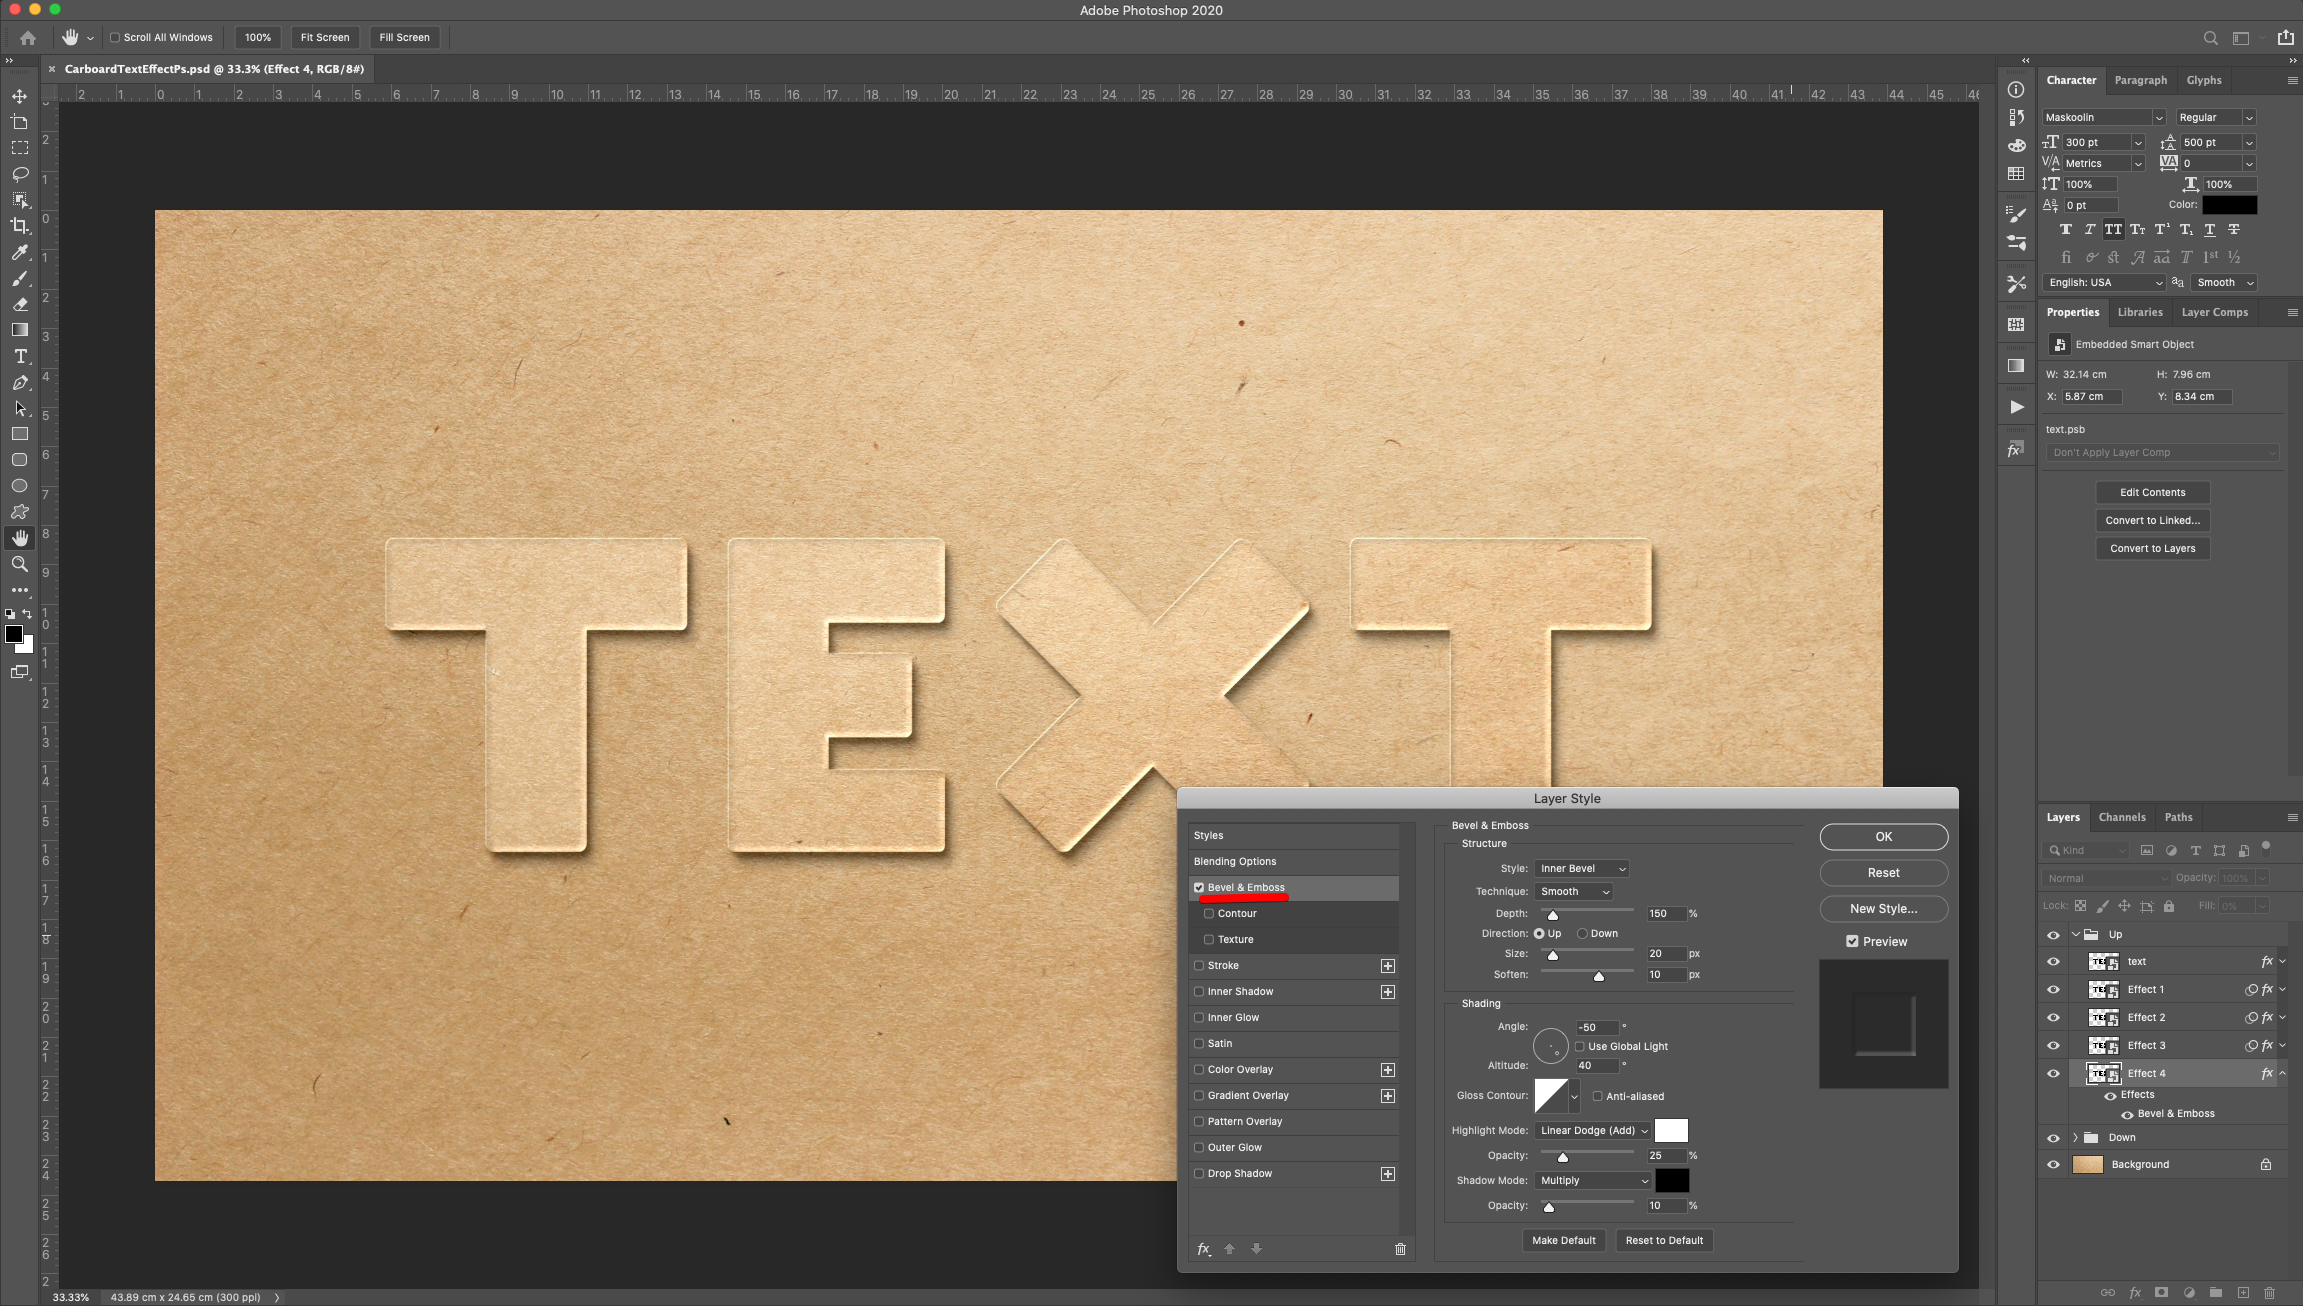
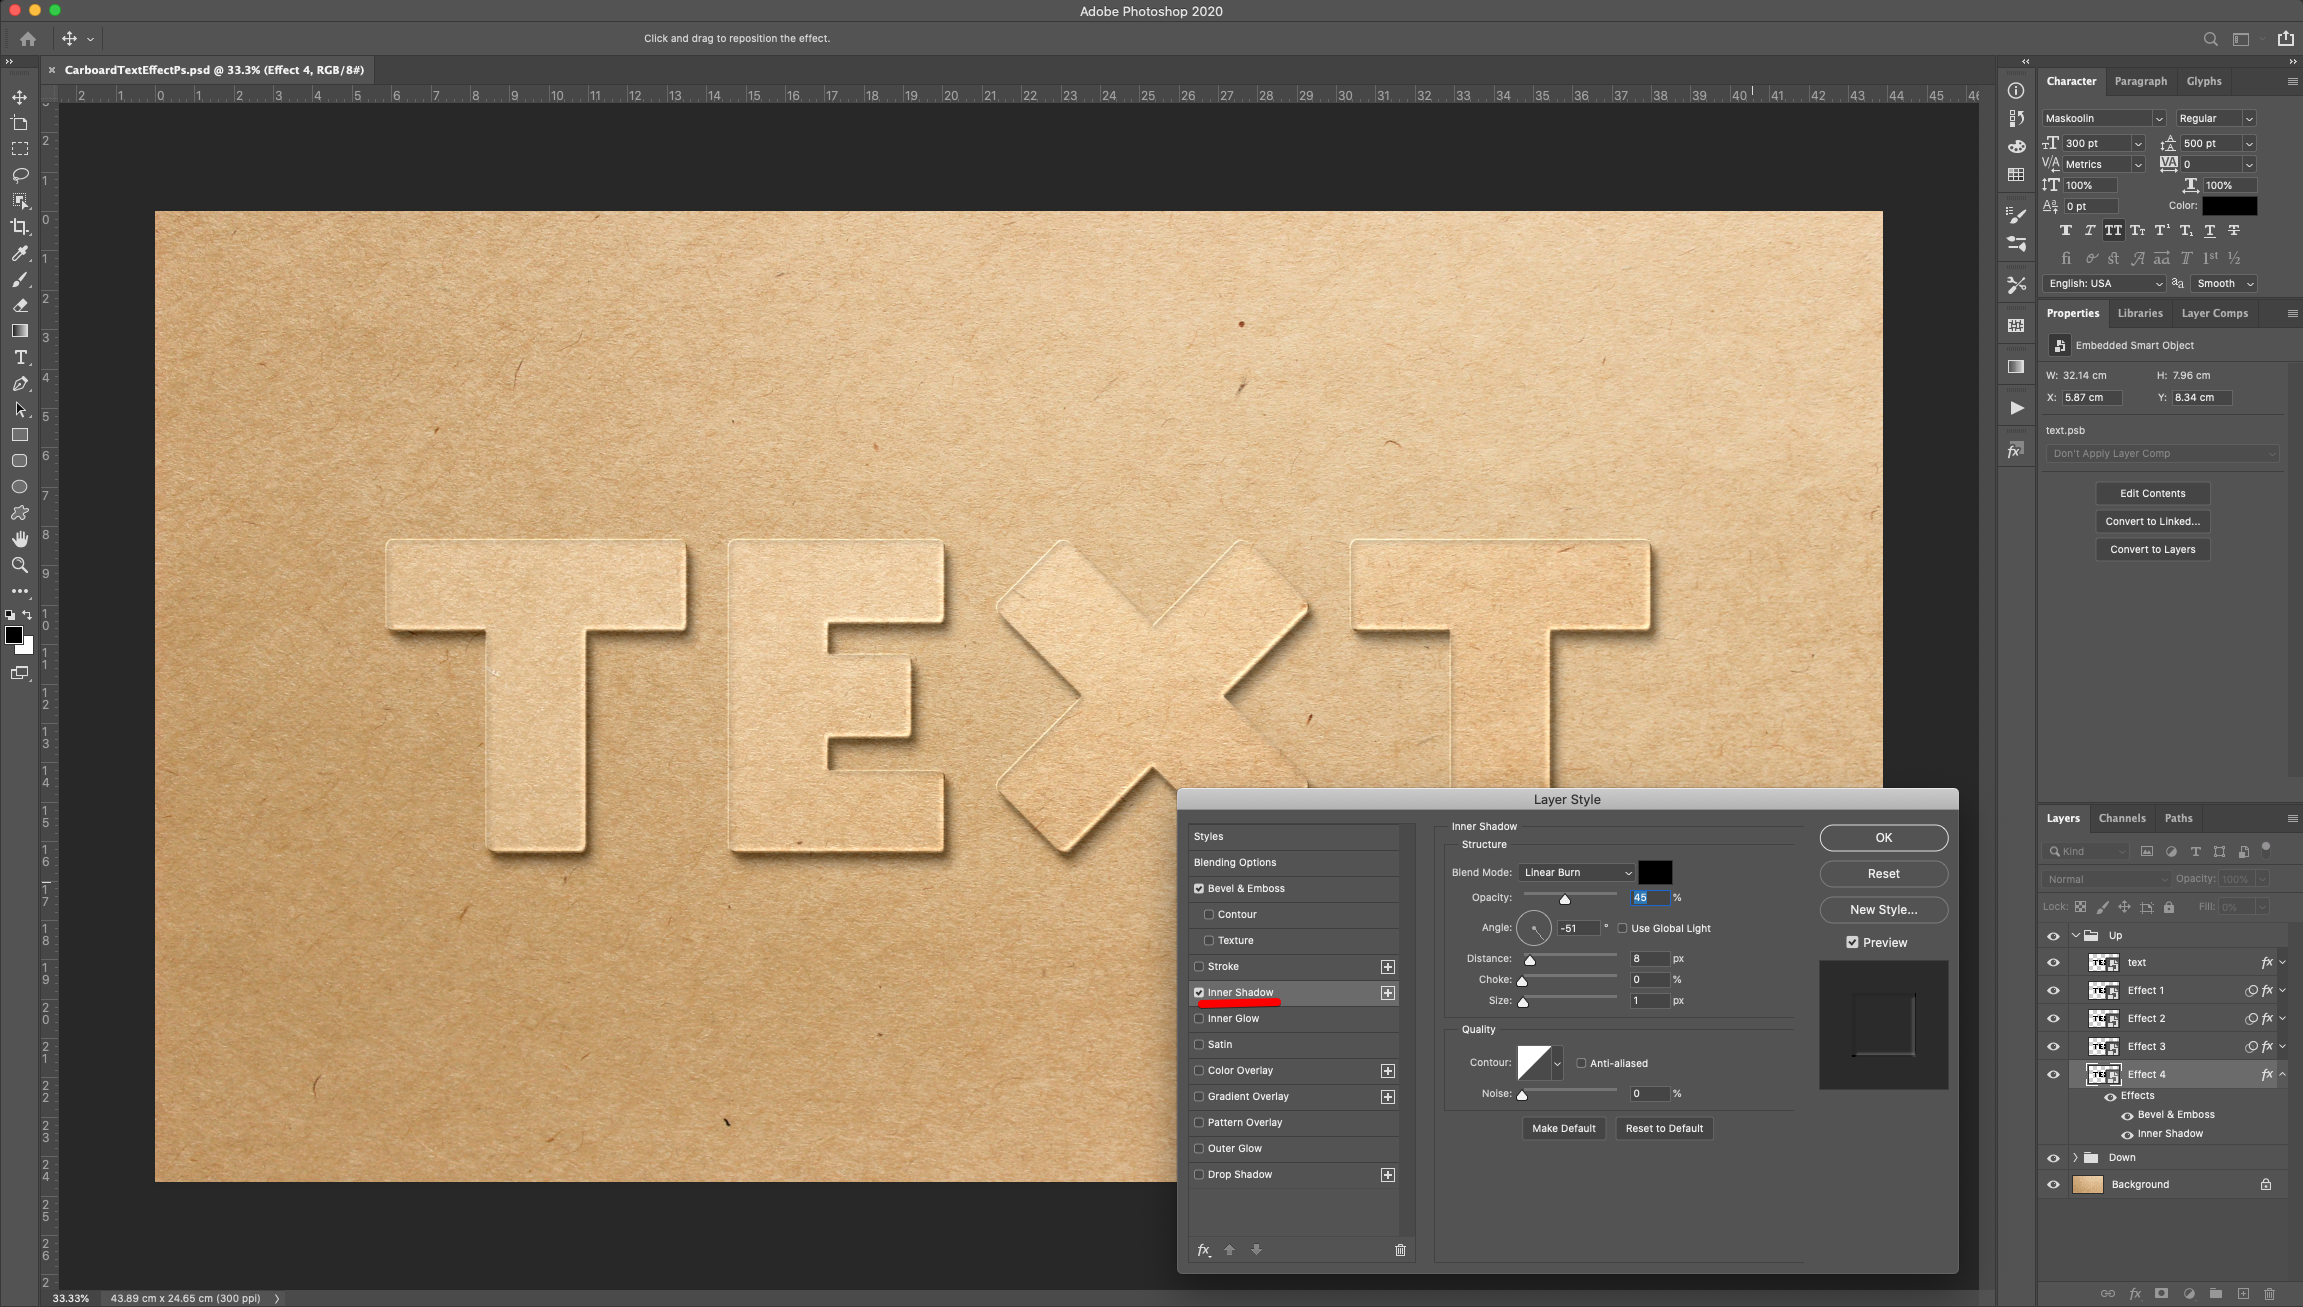
Inner Shadow:
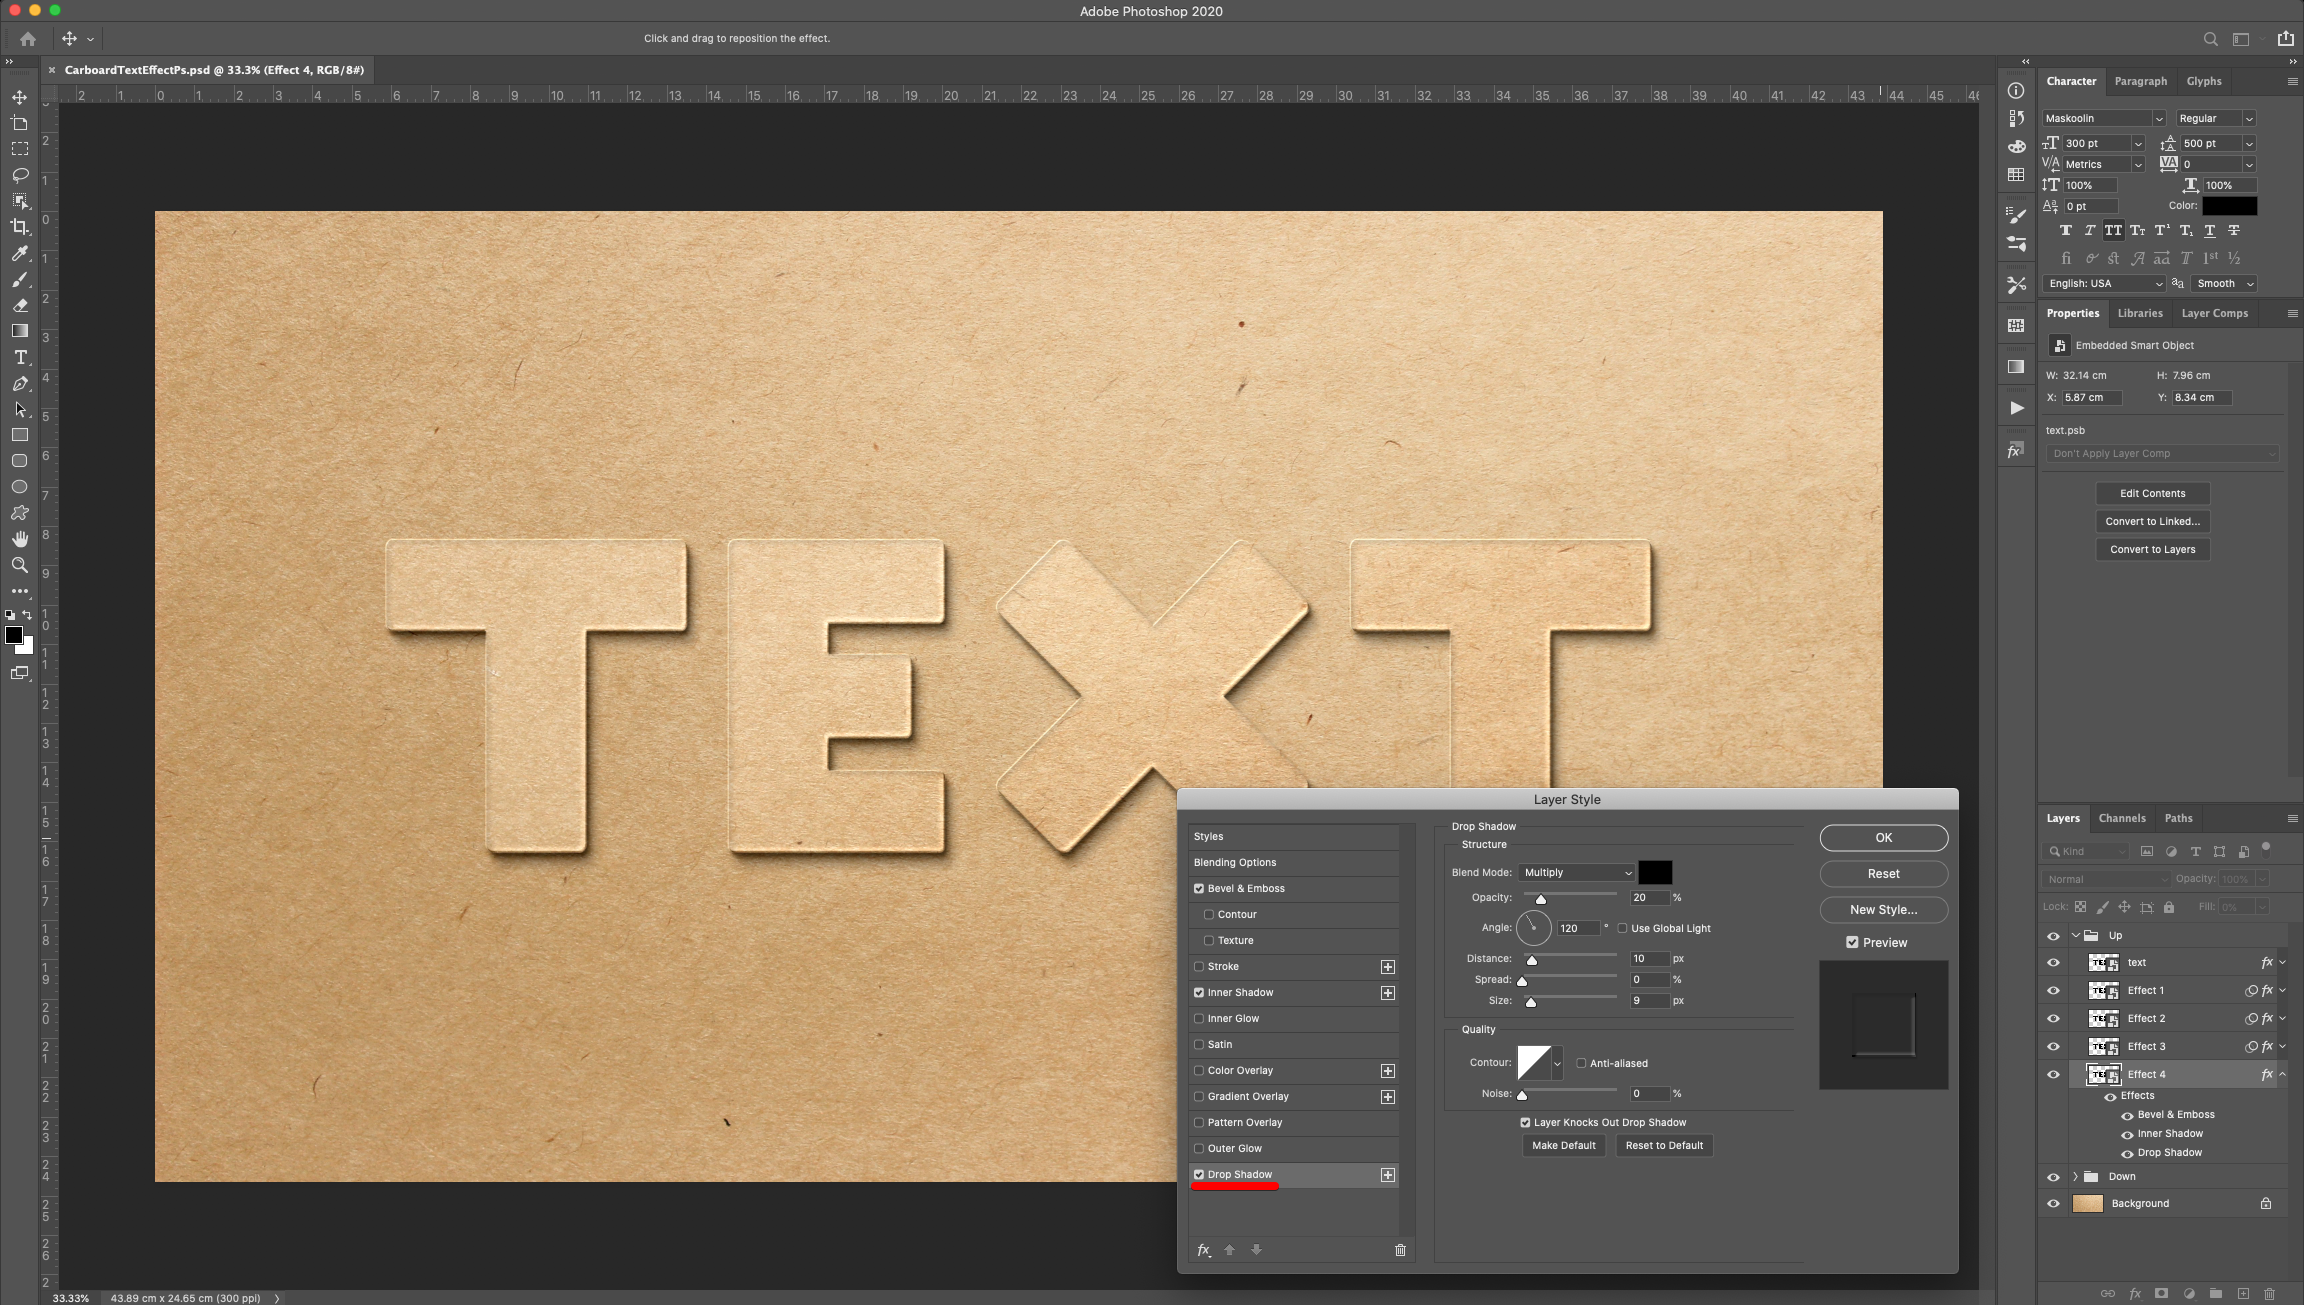
Drop Shadow:
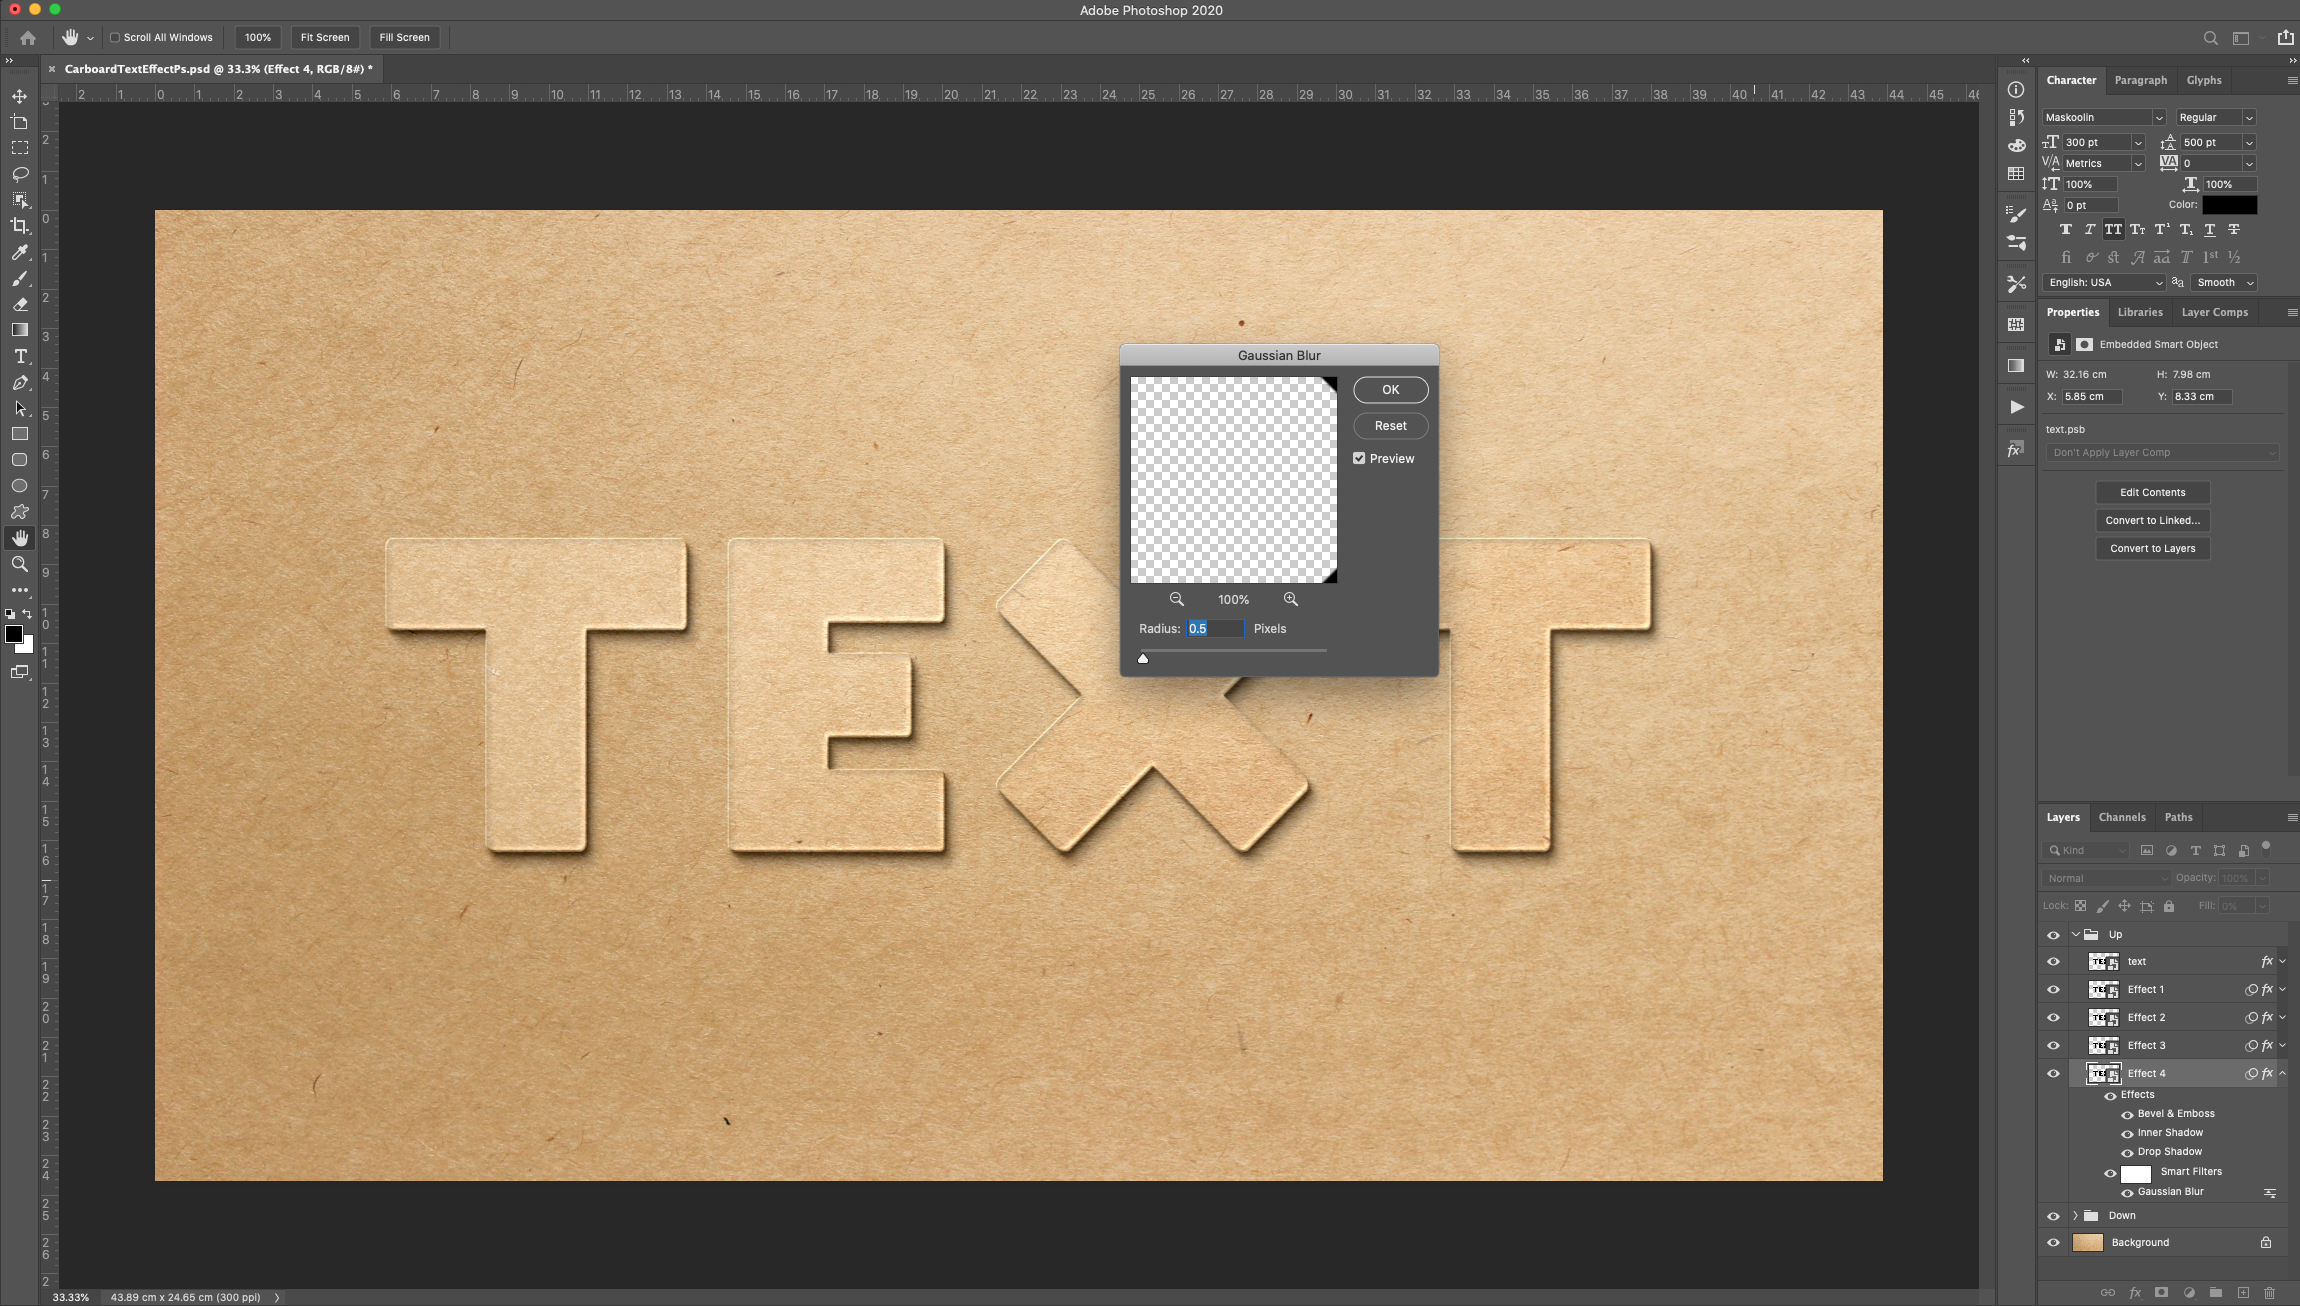
Go to Filter > Blur > Gaussian Blur and use a “Radius” of 0.5 Pixels.
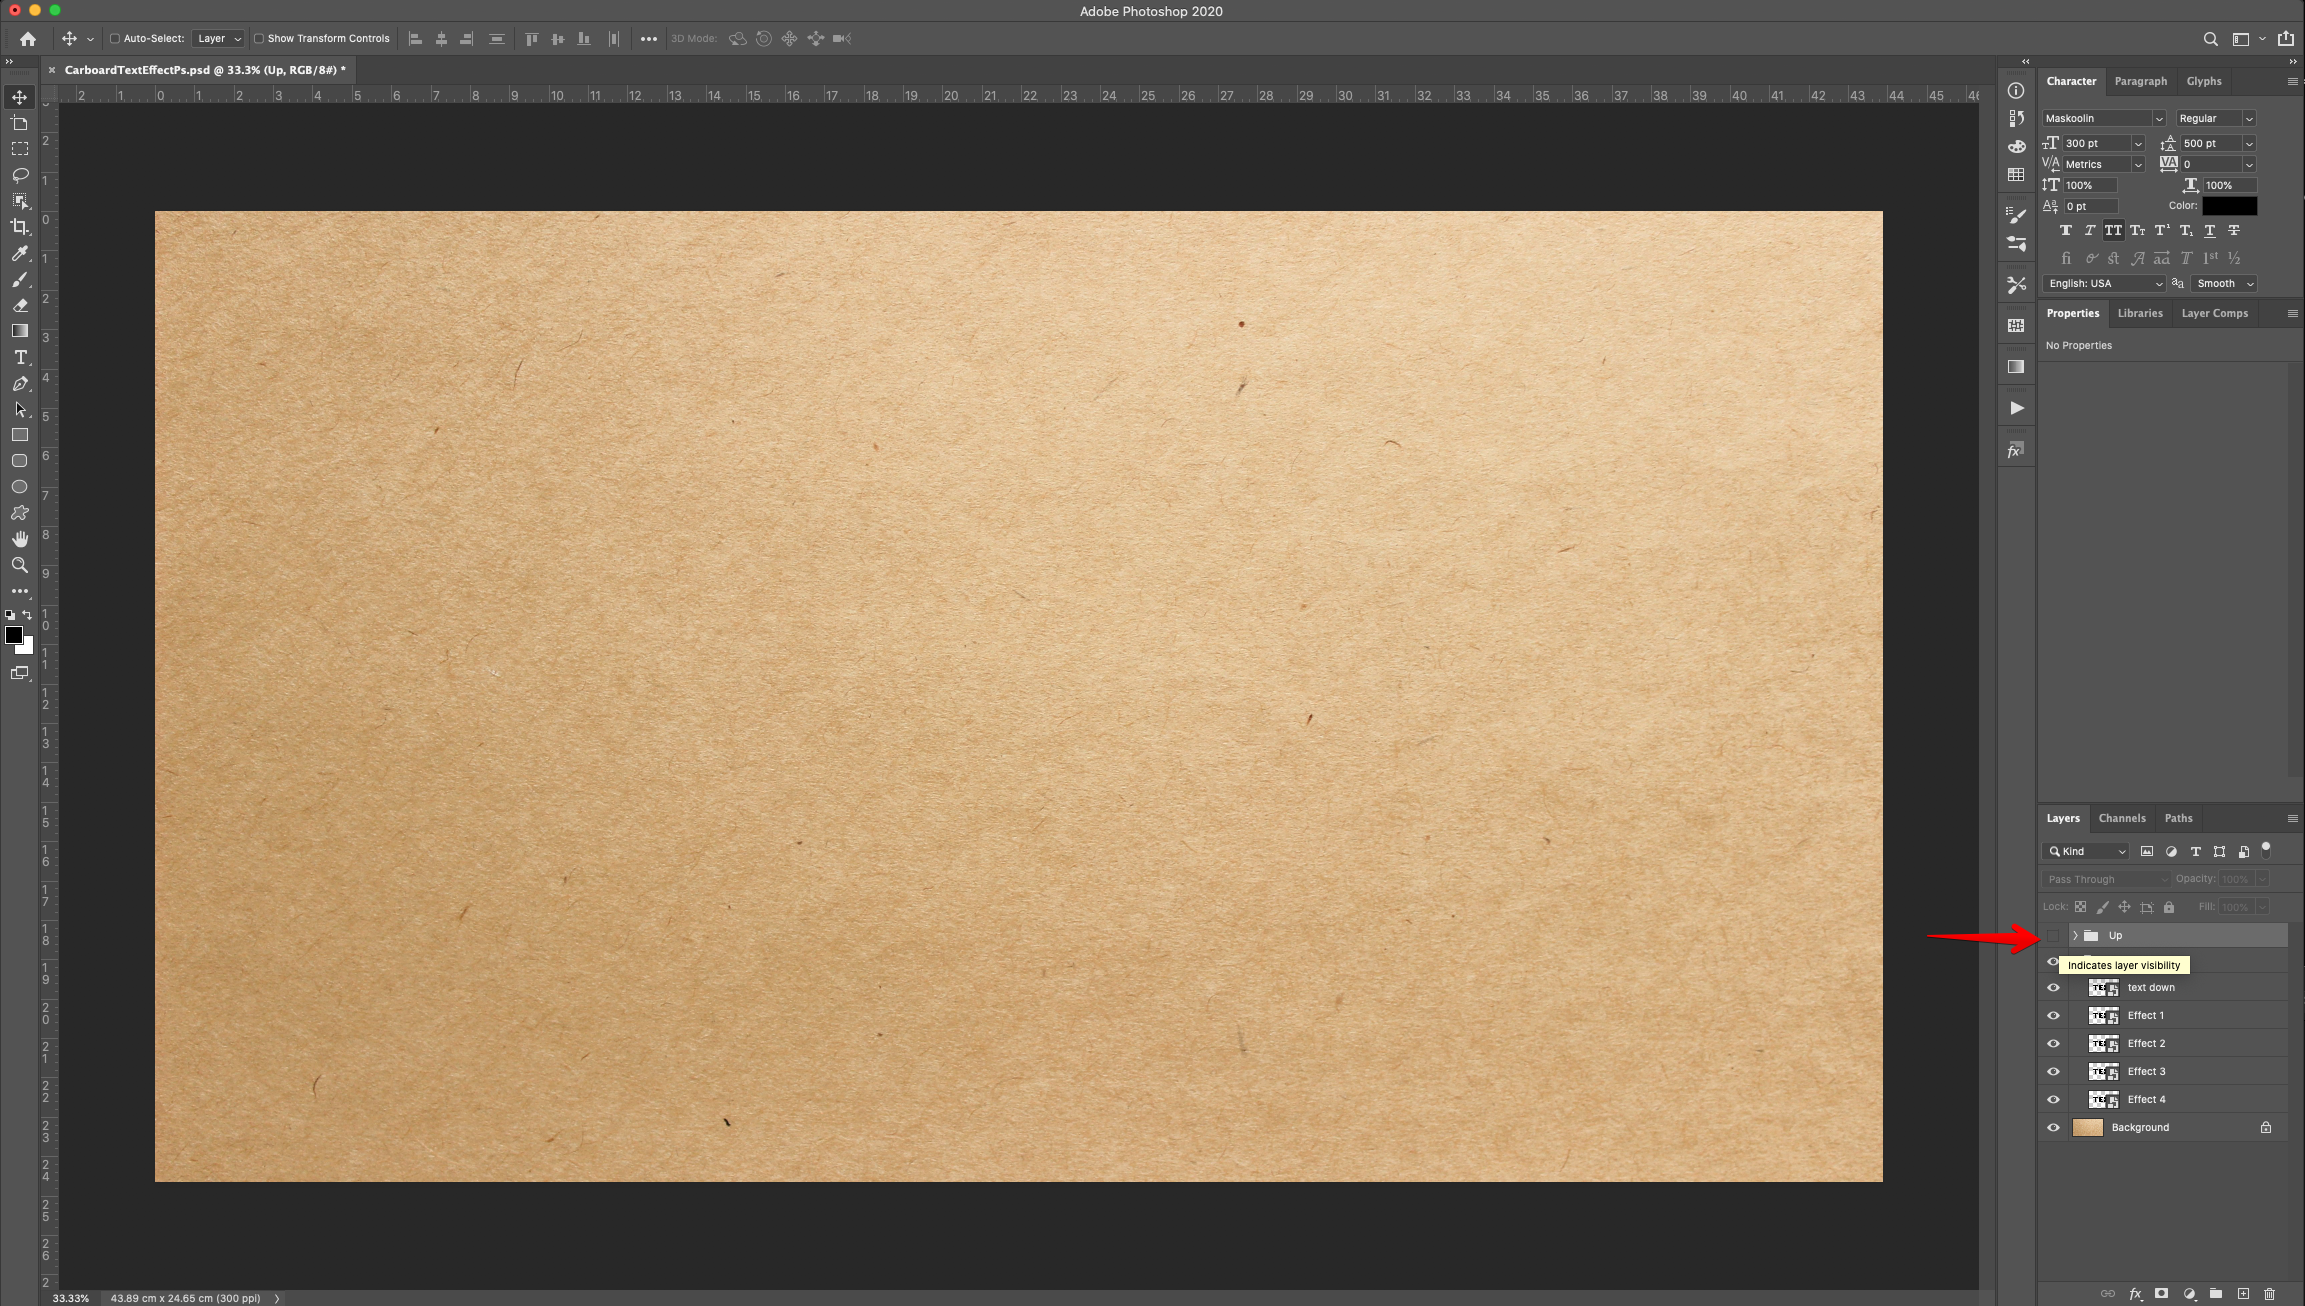
16 - “Hide” the “Up” group by clicking on the “Small Eye” icon on the left side of its thumbnail and open the “Down” group. Double-click on top of the “Text Down” layer Thumbnail (in the “Down” group) and apply the following “Layer Styles”:
Bevel & Emboss:
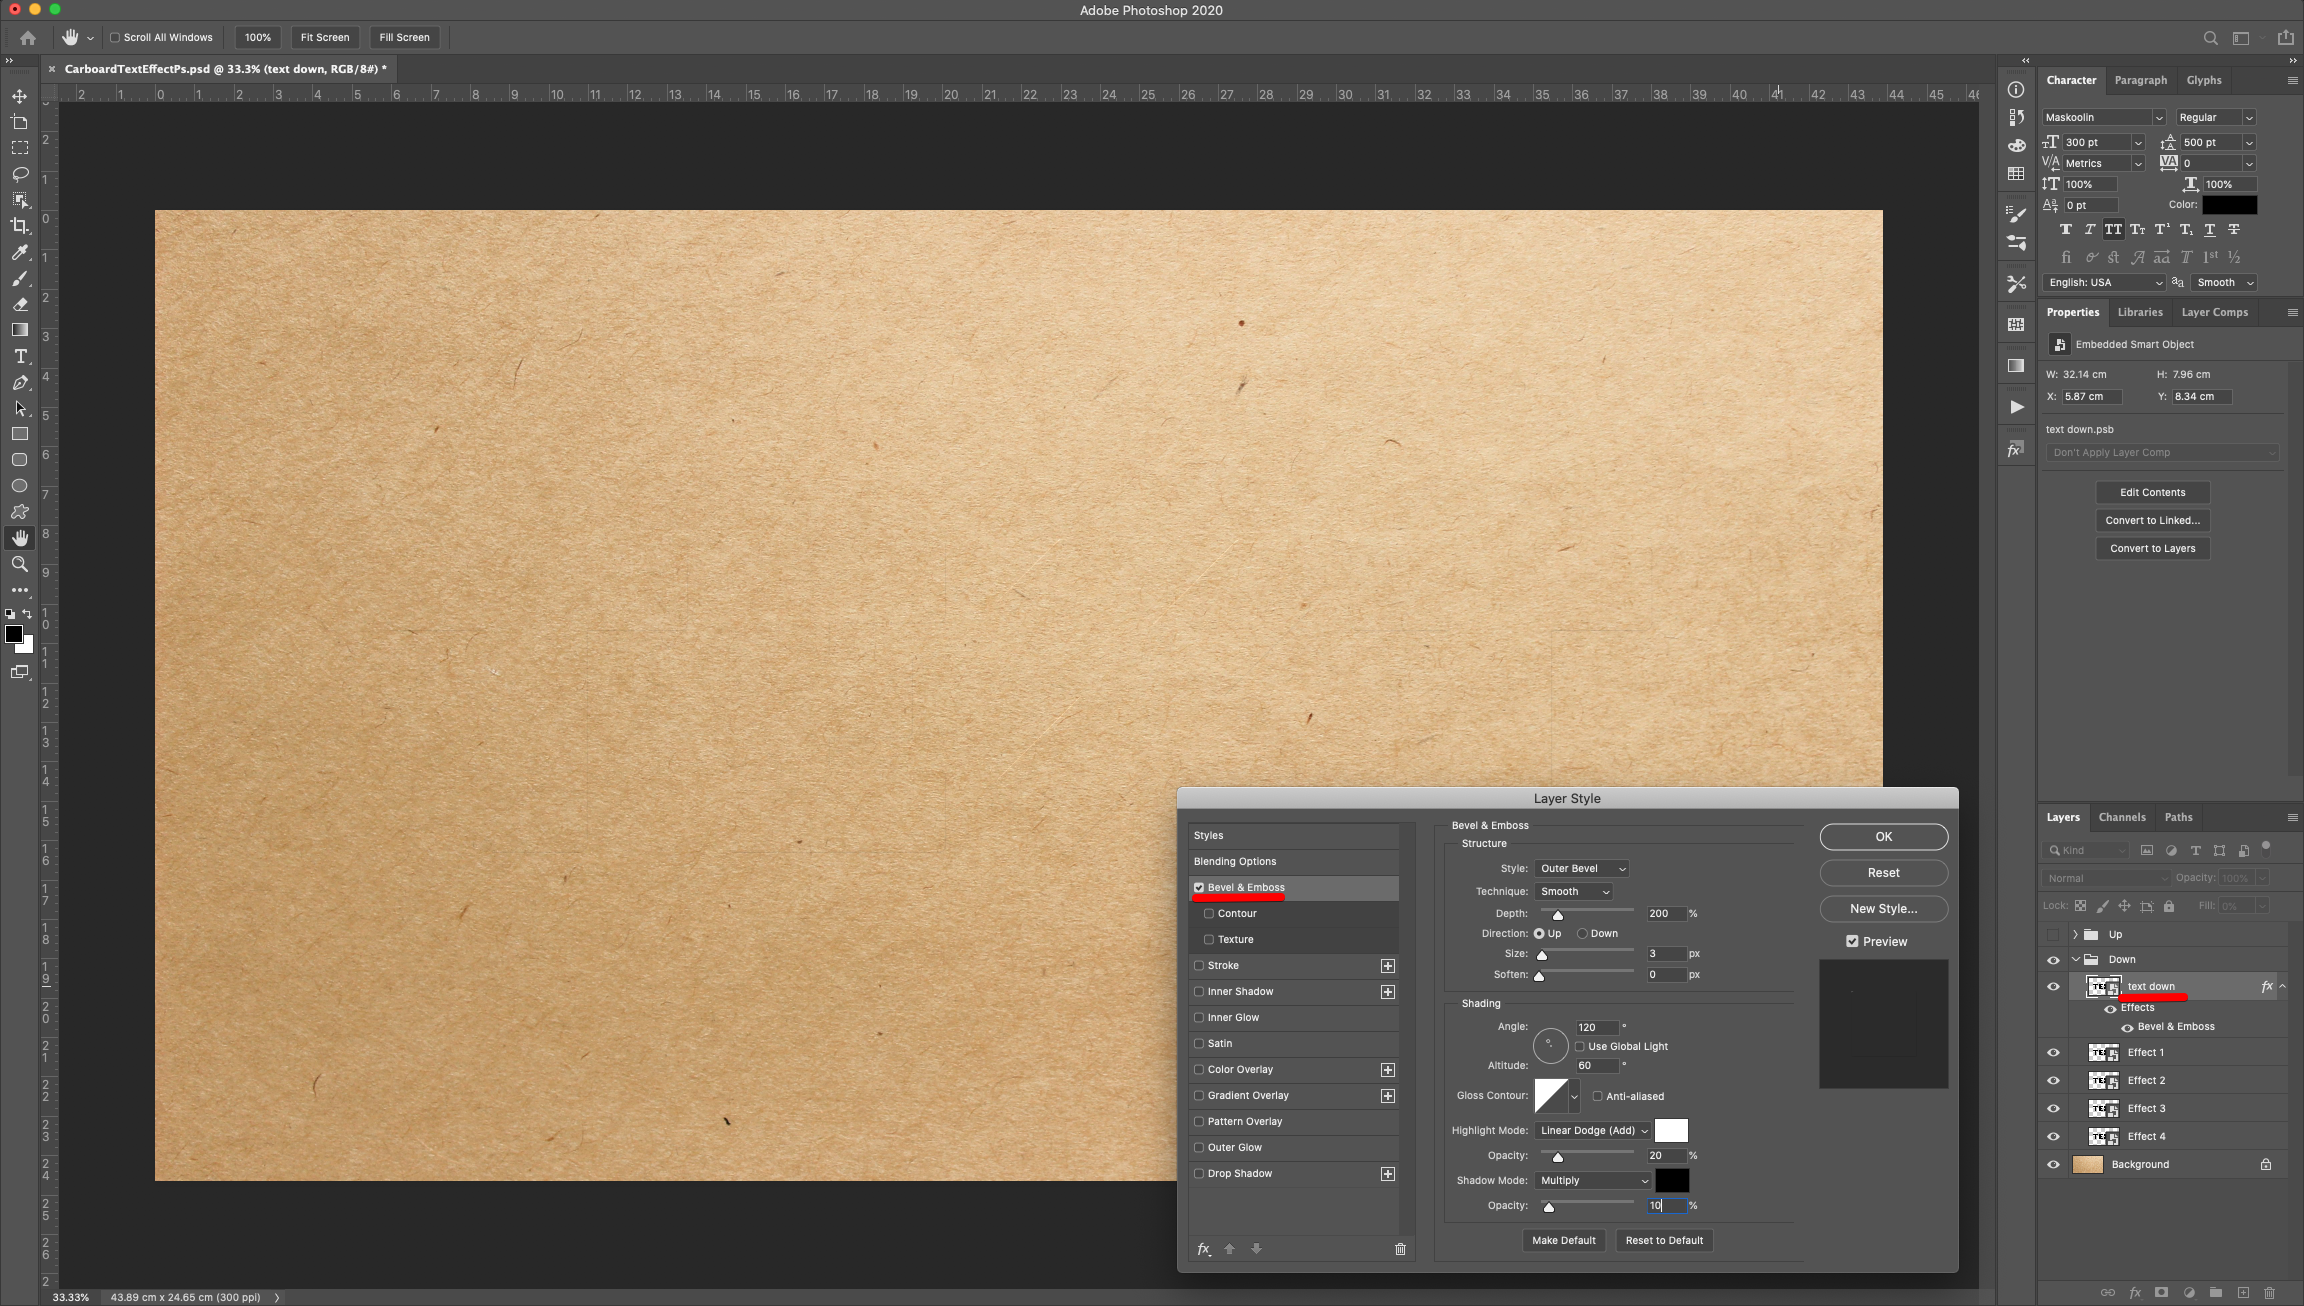
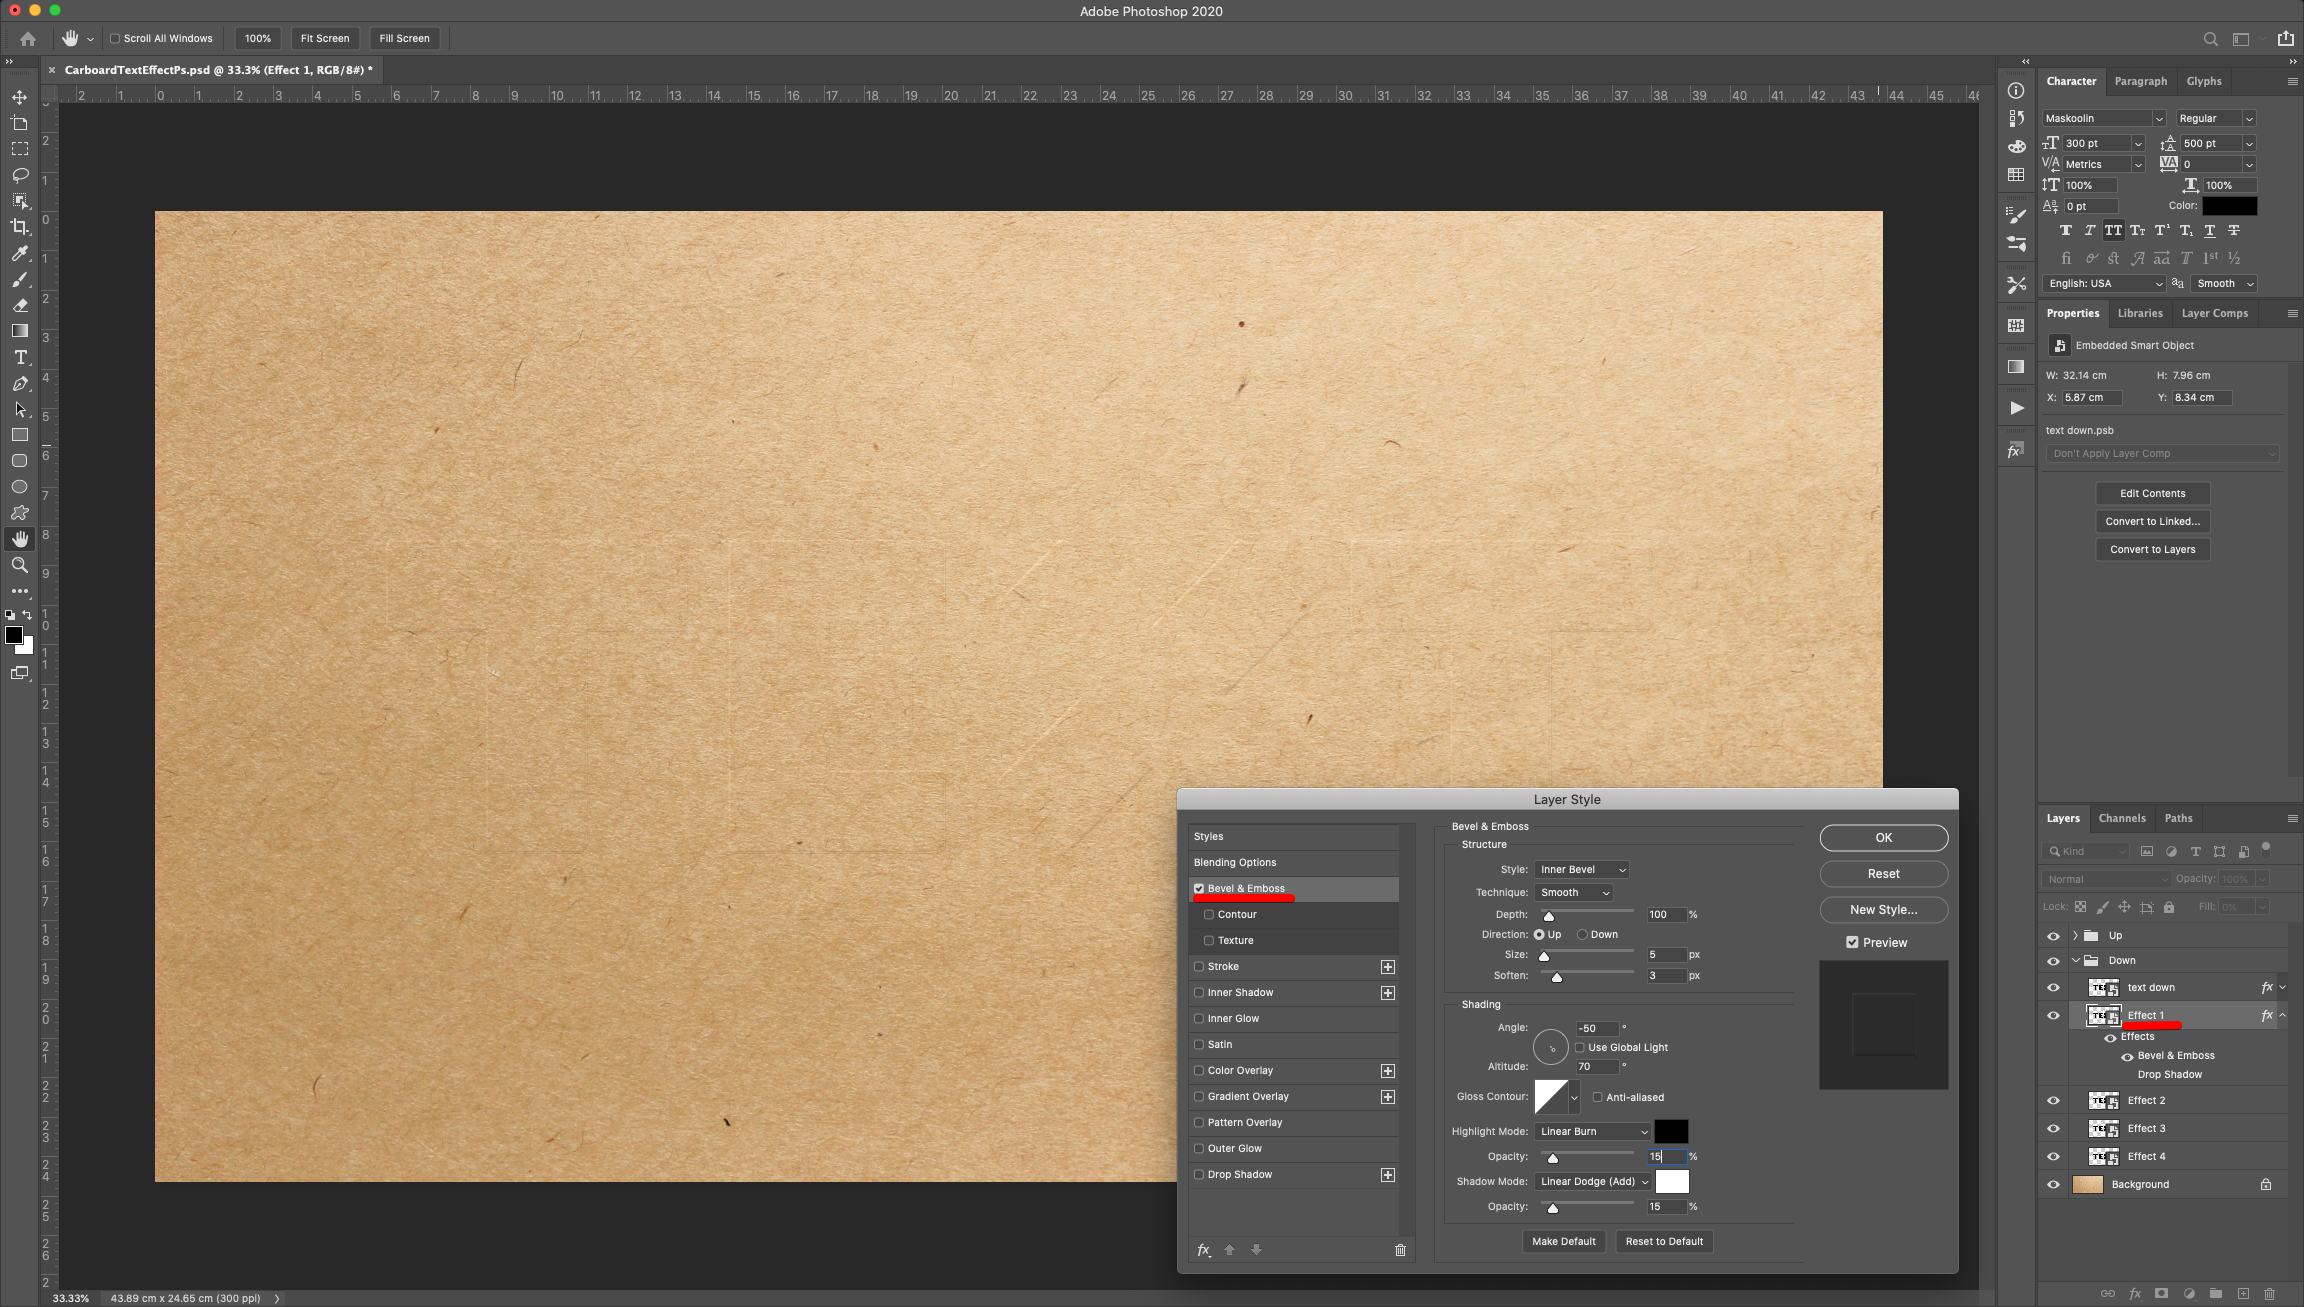
17 - Double-click on top of the “Effect 1” layer Thumbnail (in the “Down” group) and apply the following “Layer Styles”:
Bevel & Emboss:
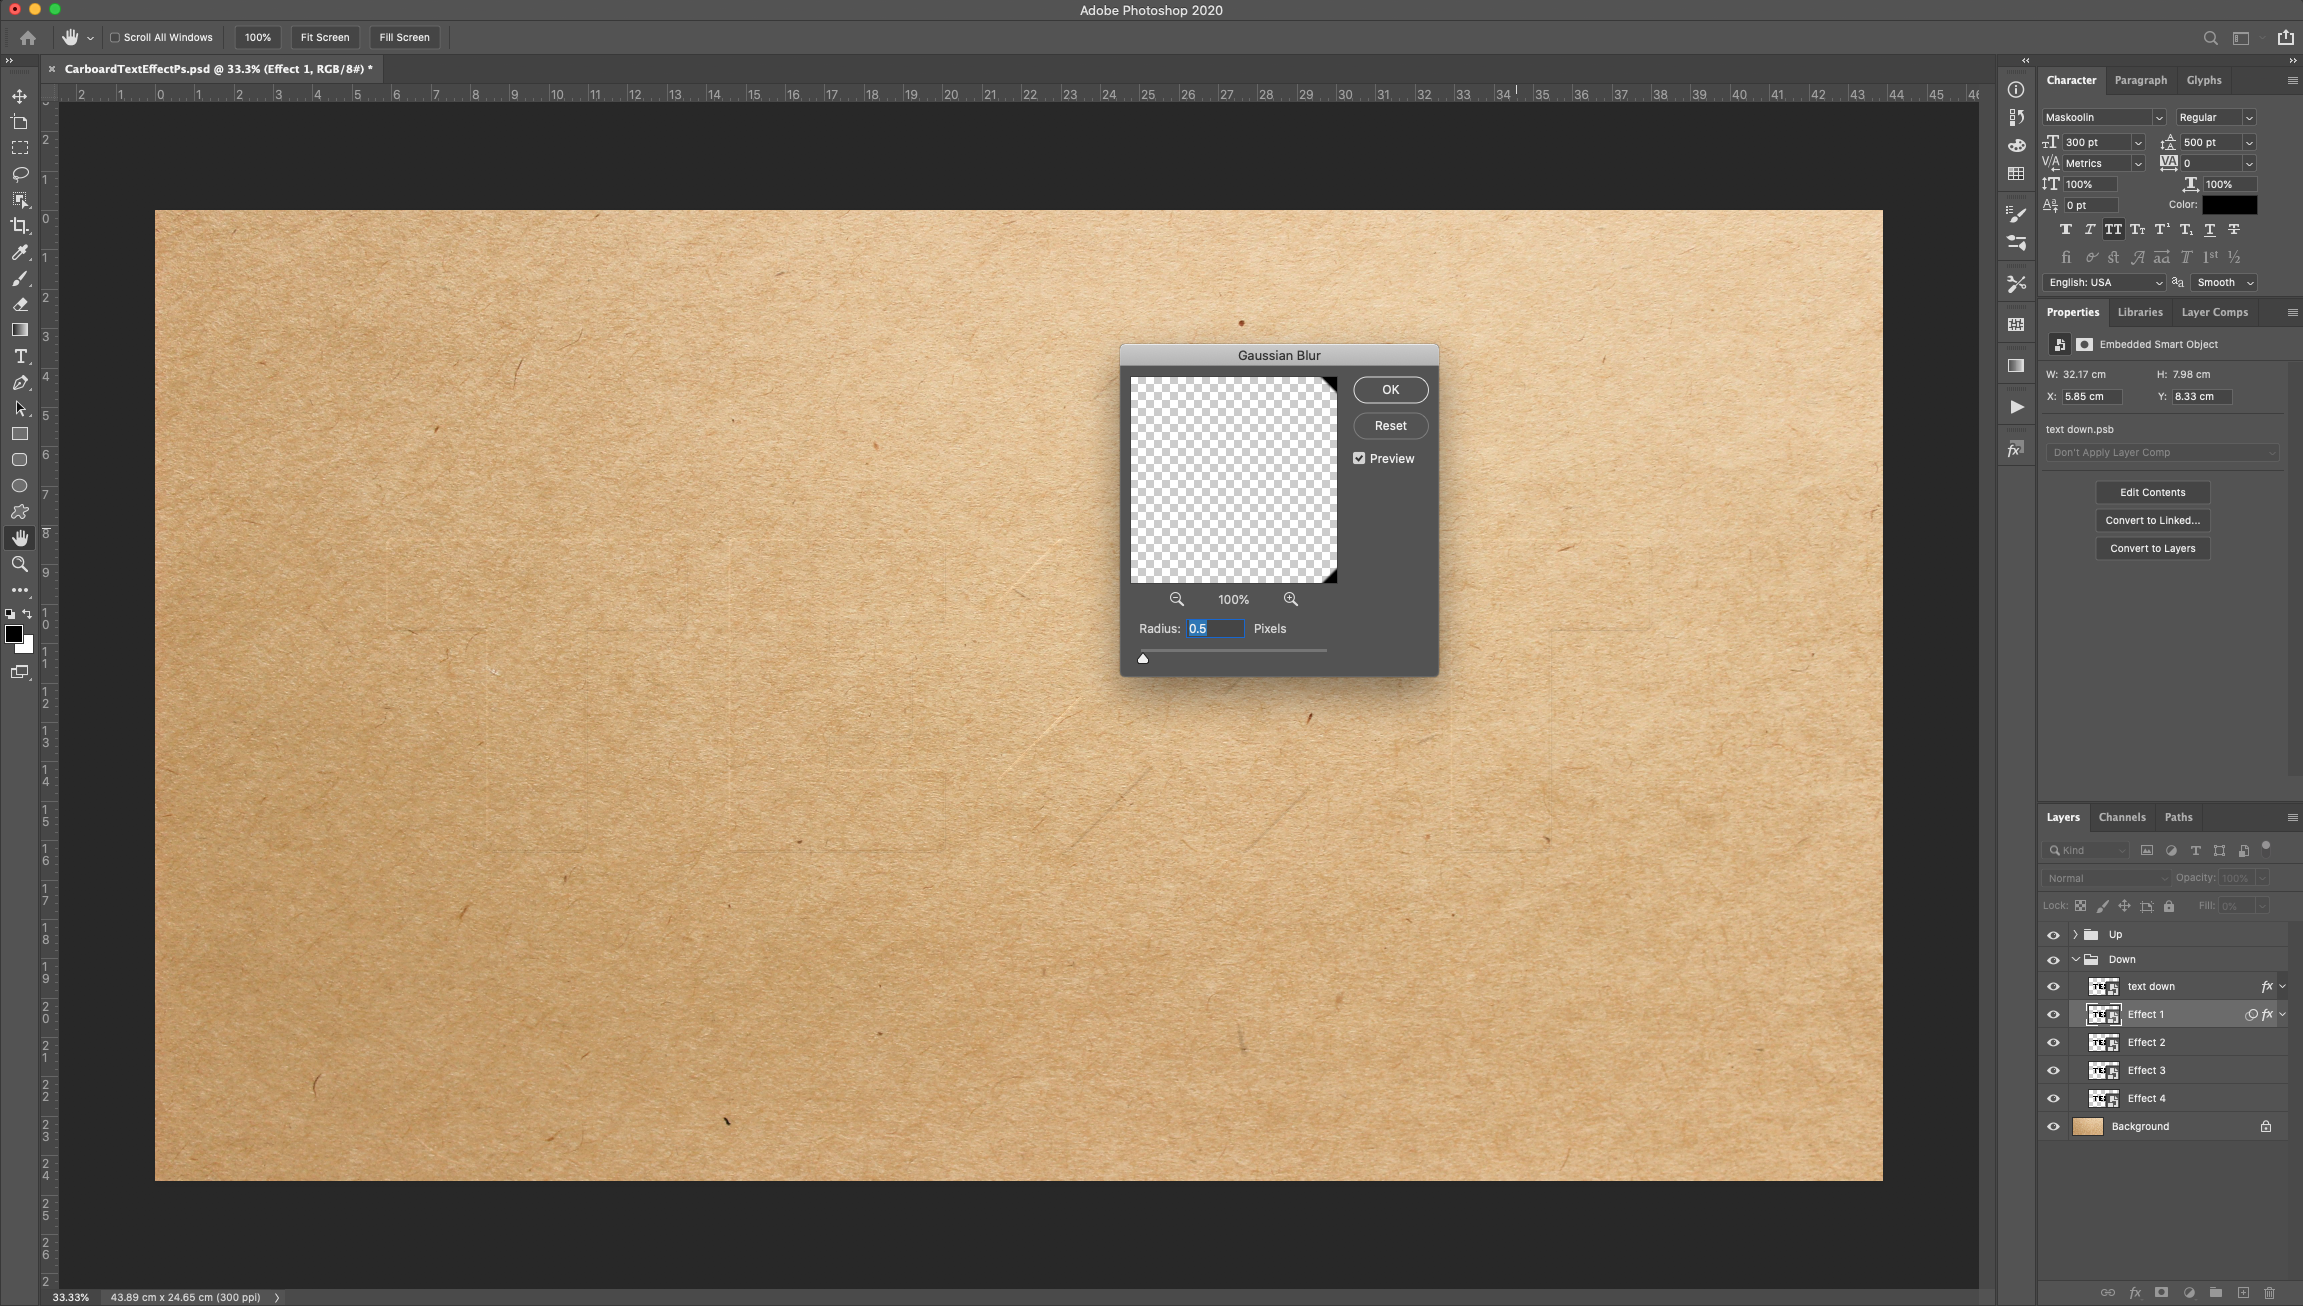
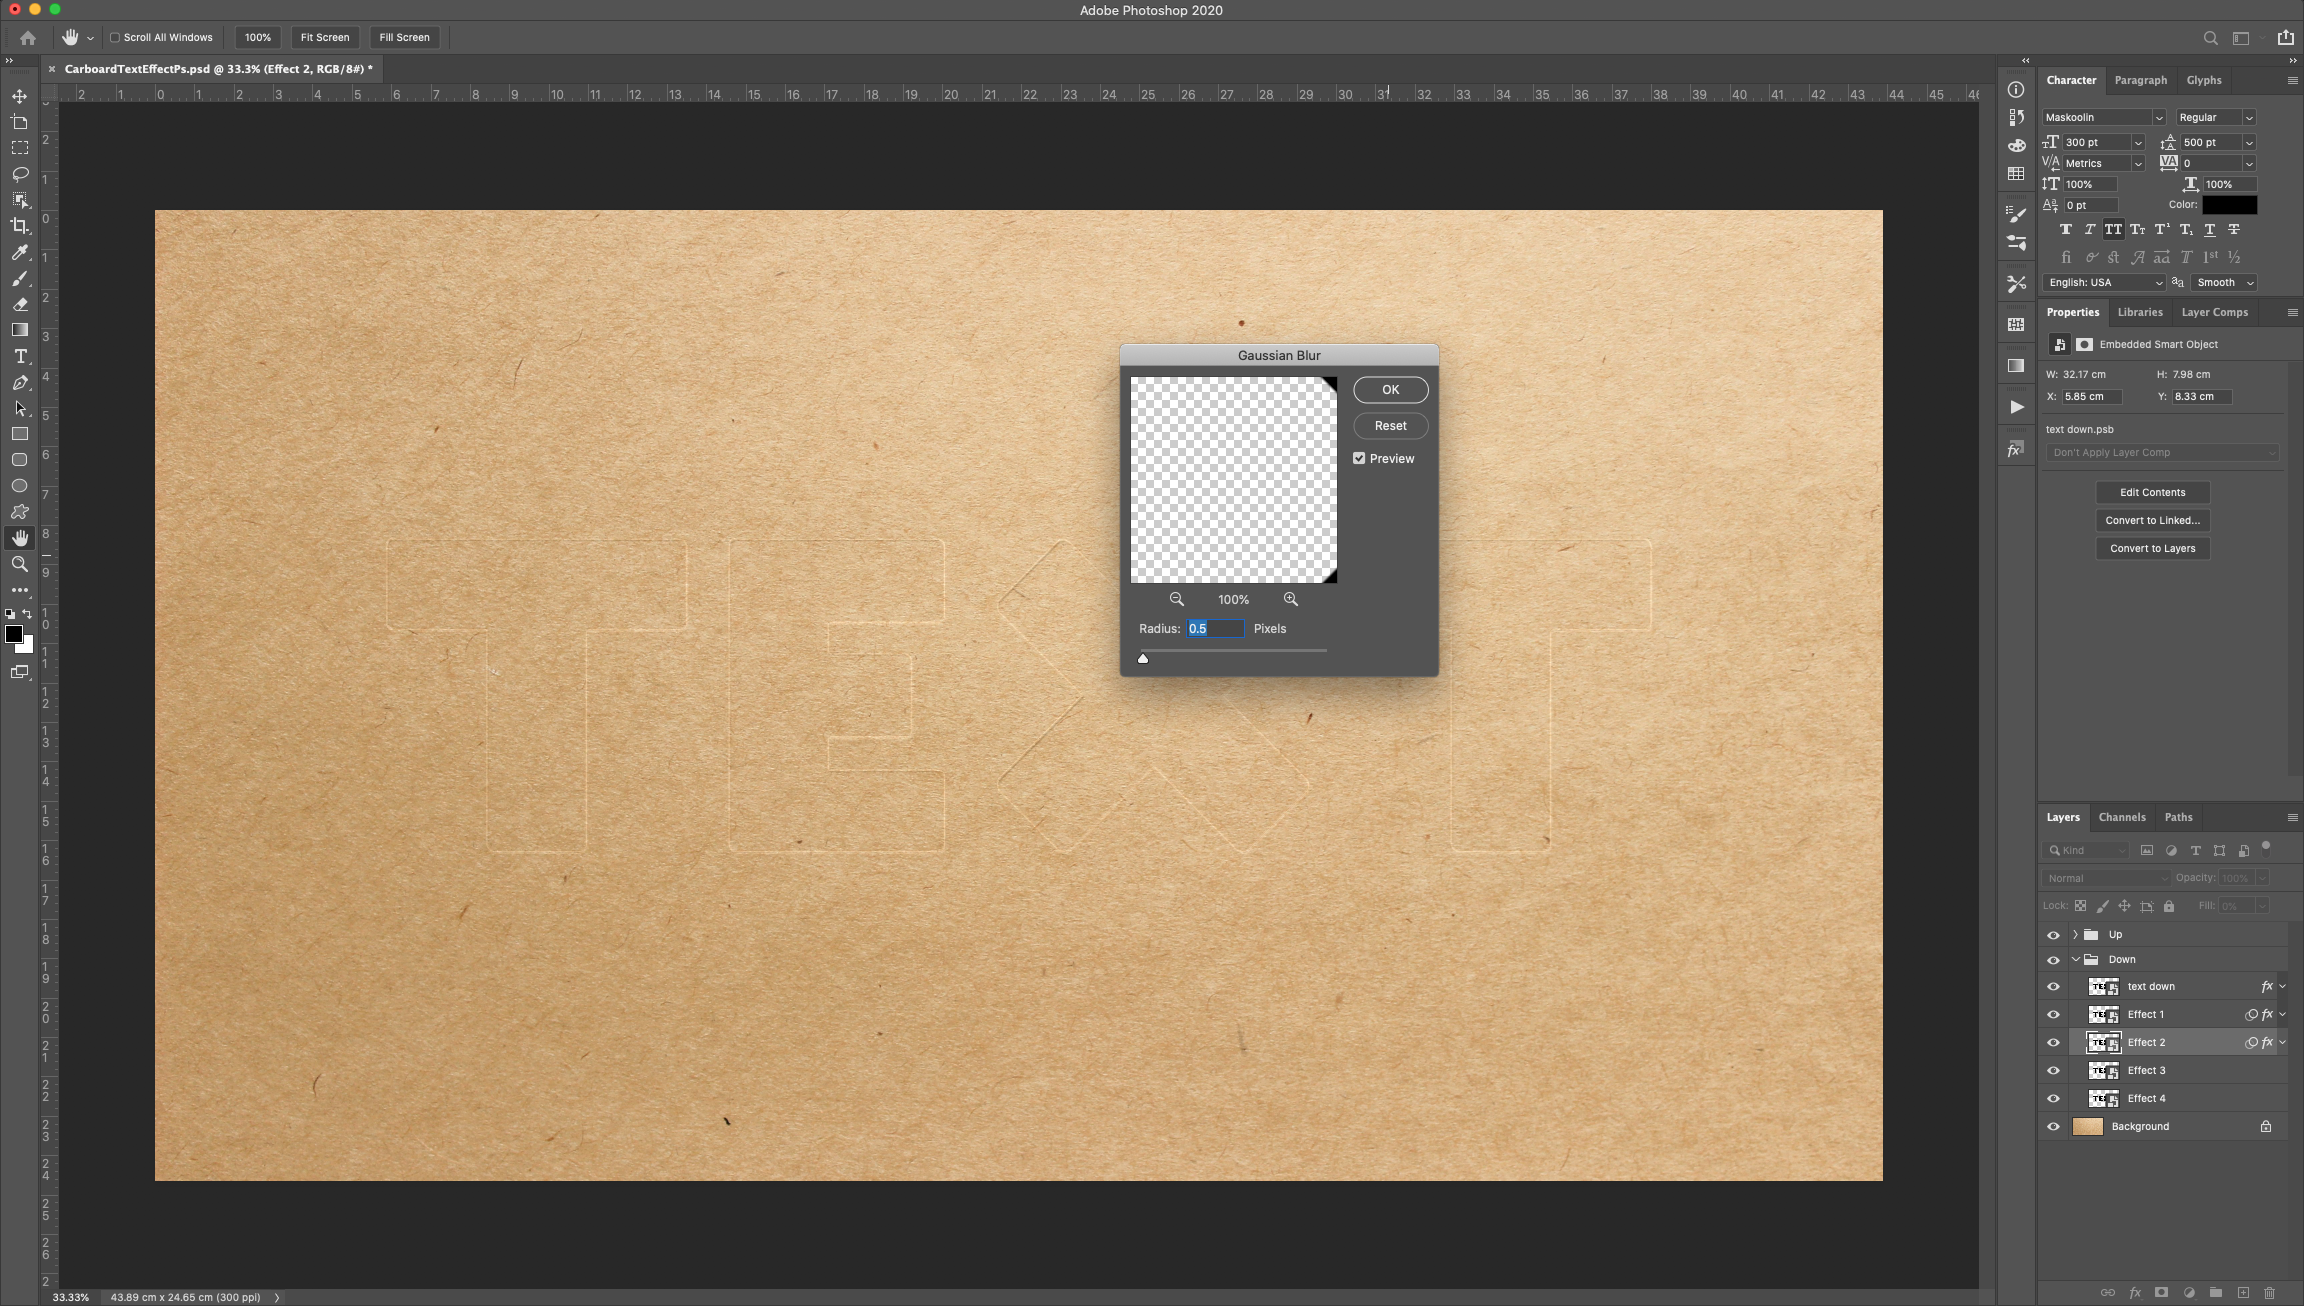
Go to Filter > Blur > Gaussian Blur and use a “Radius” of 5 Pixels.
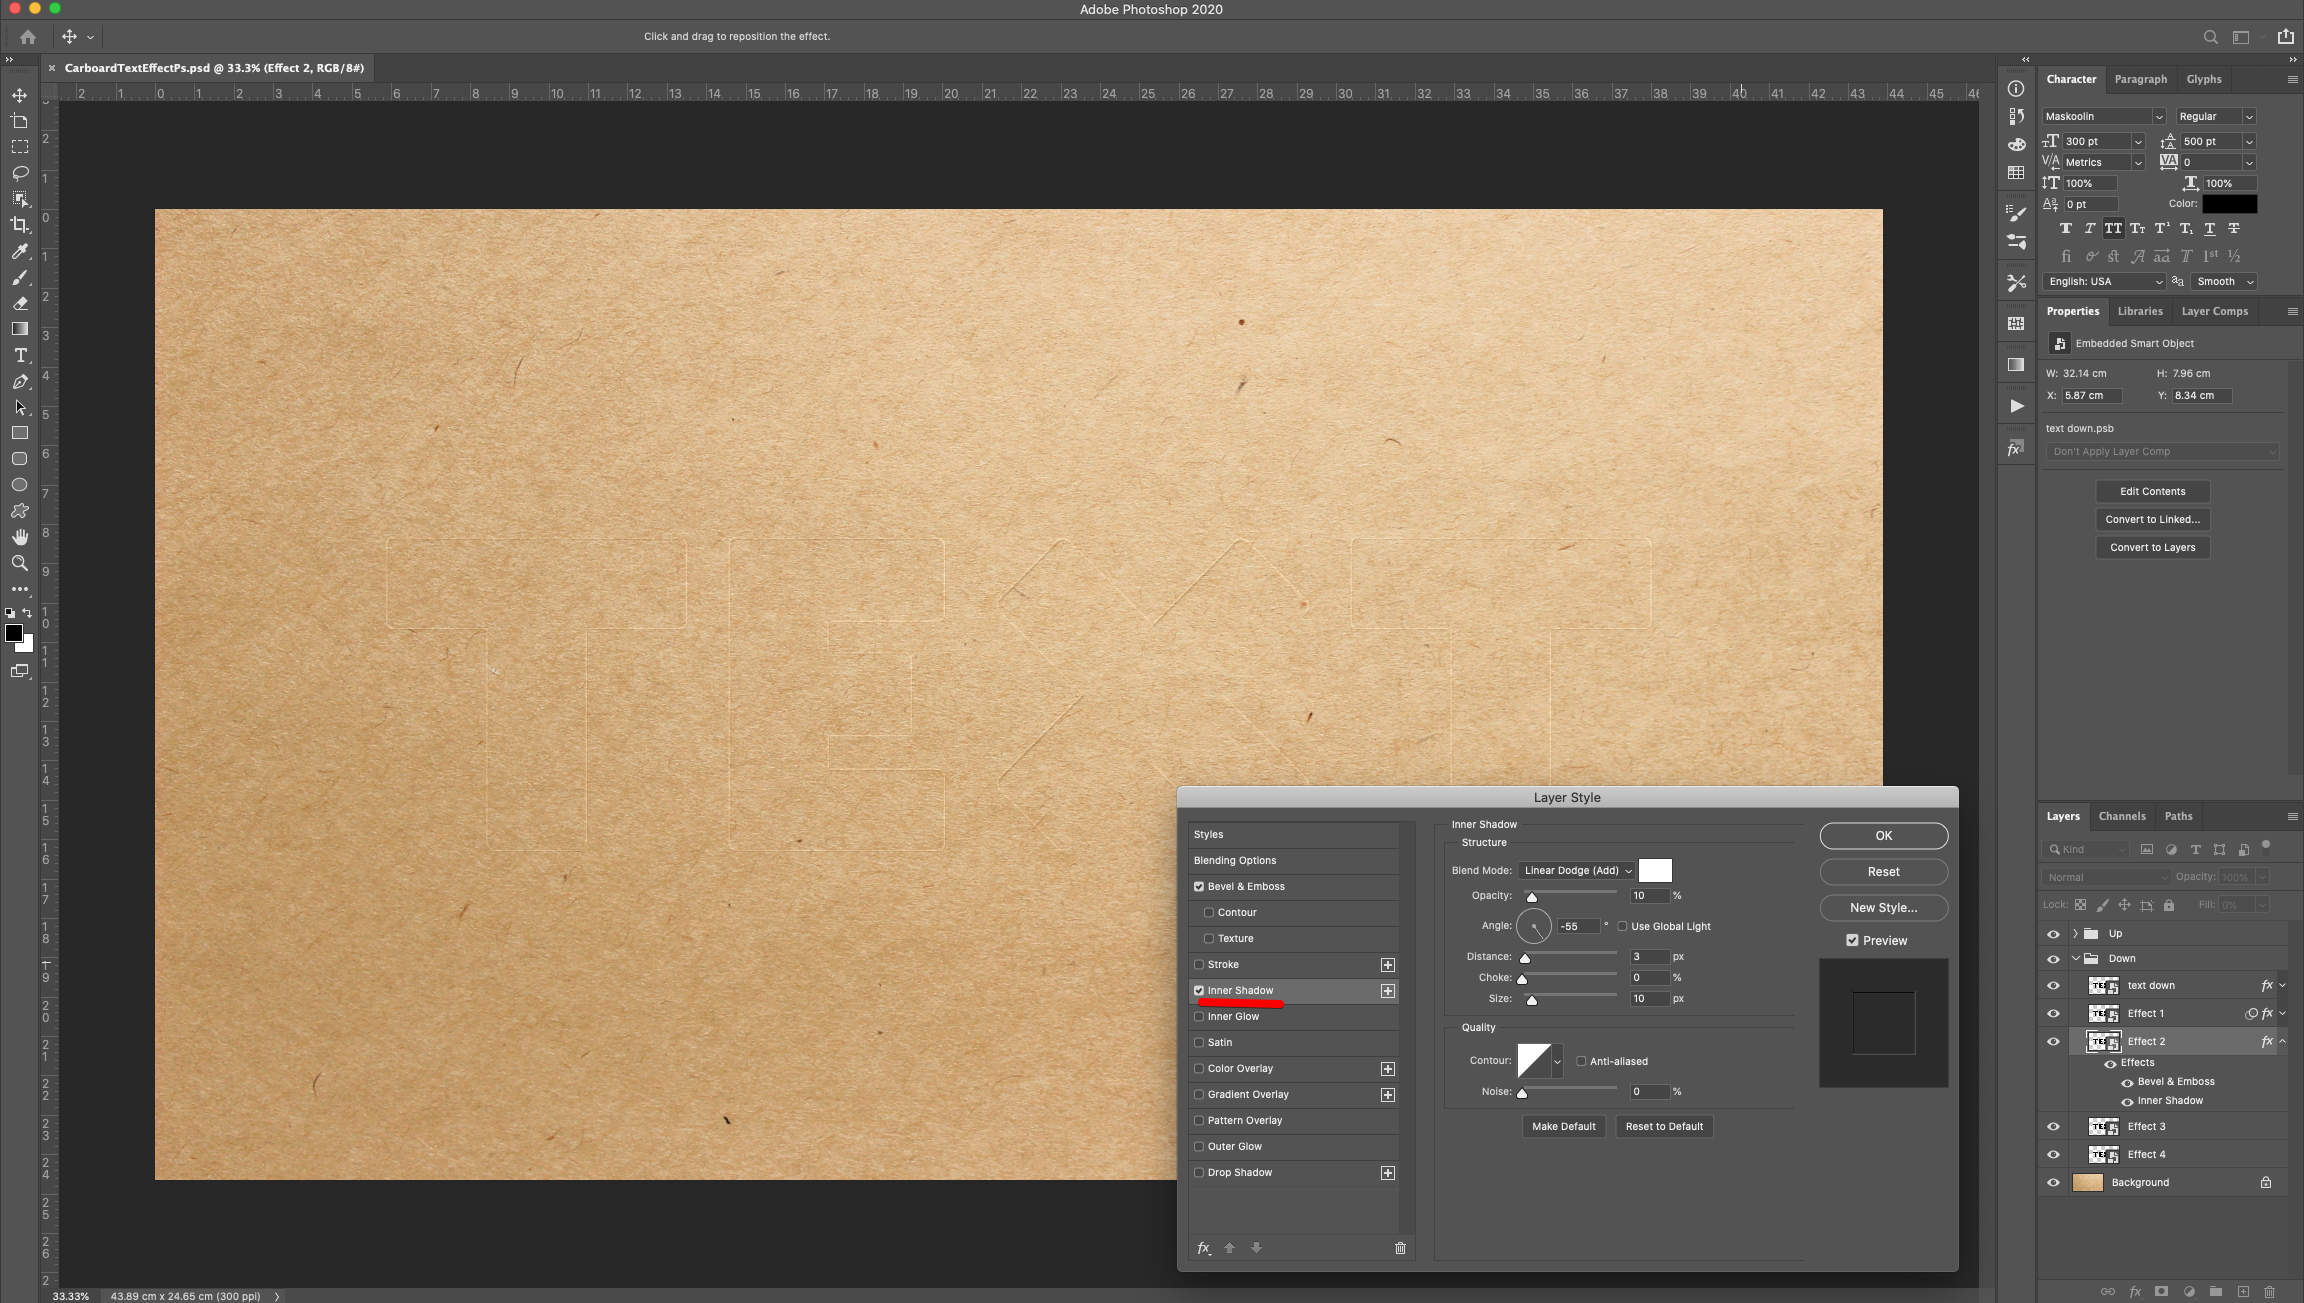
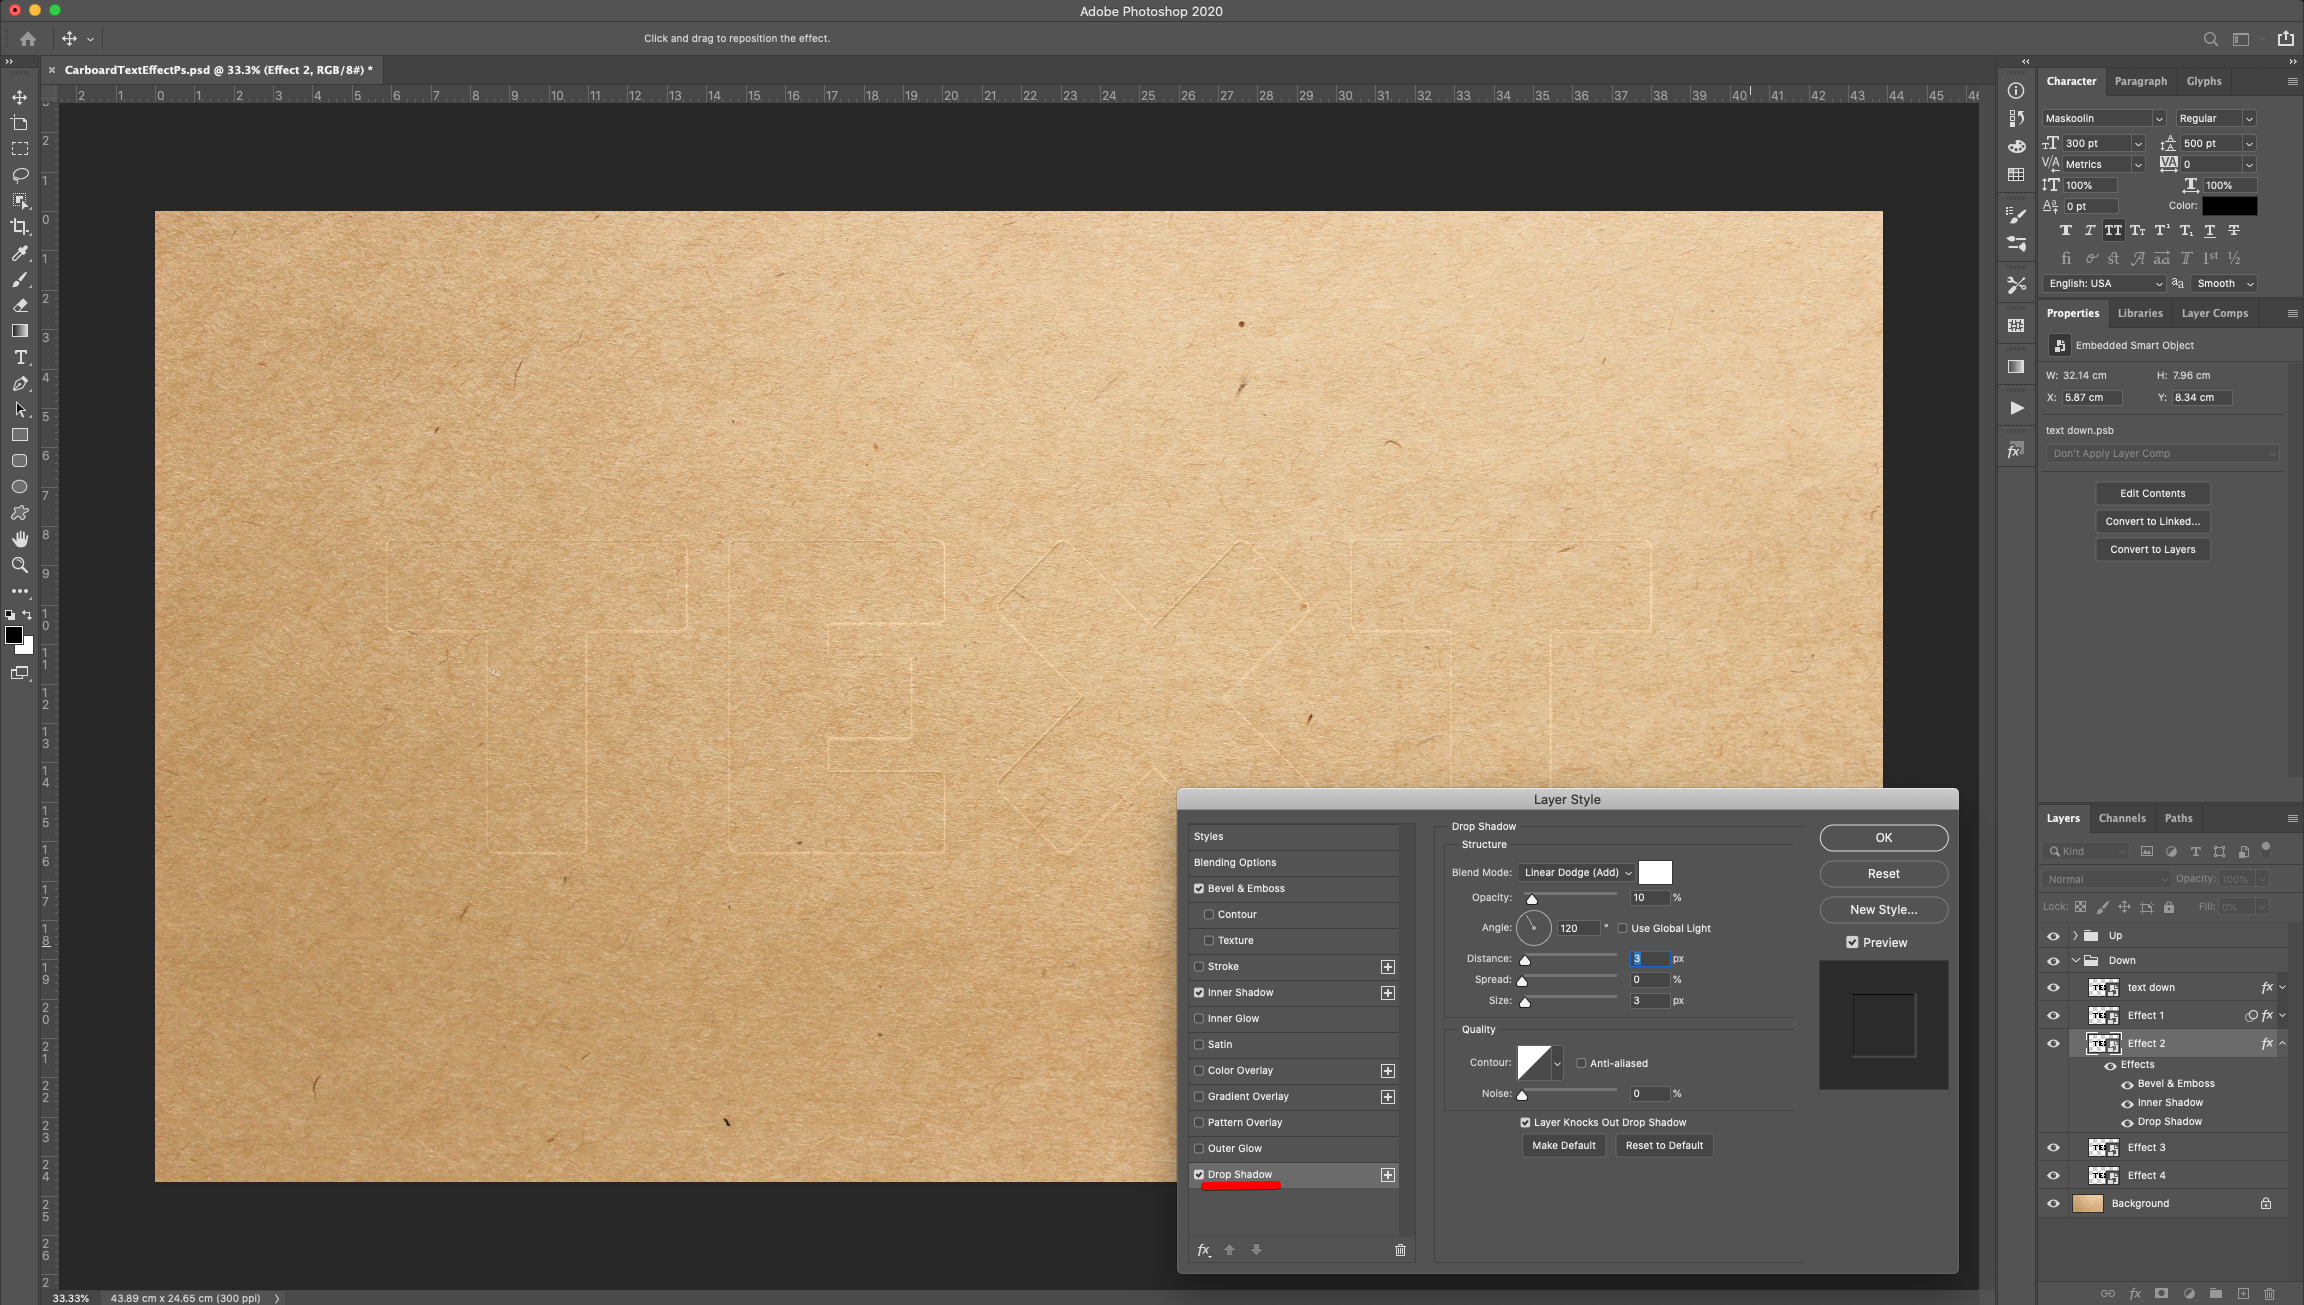
18 - Double-click on top of the “Effect 2” layer Thumbnail (in the “Down” group) and apply the following “Layer Styles”:
Bevel & Emboss:
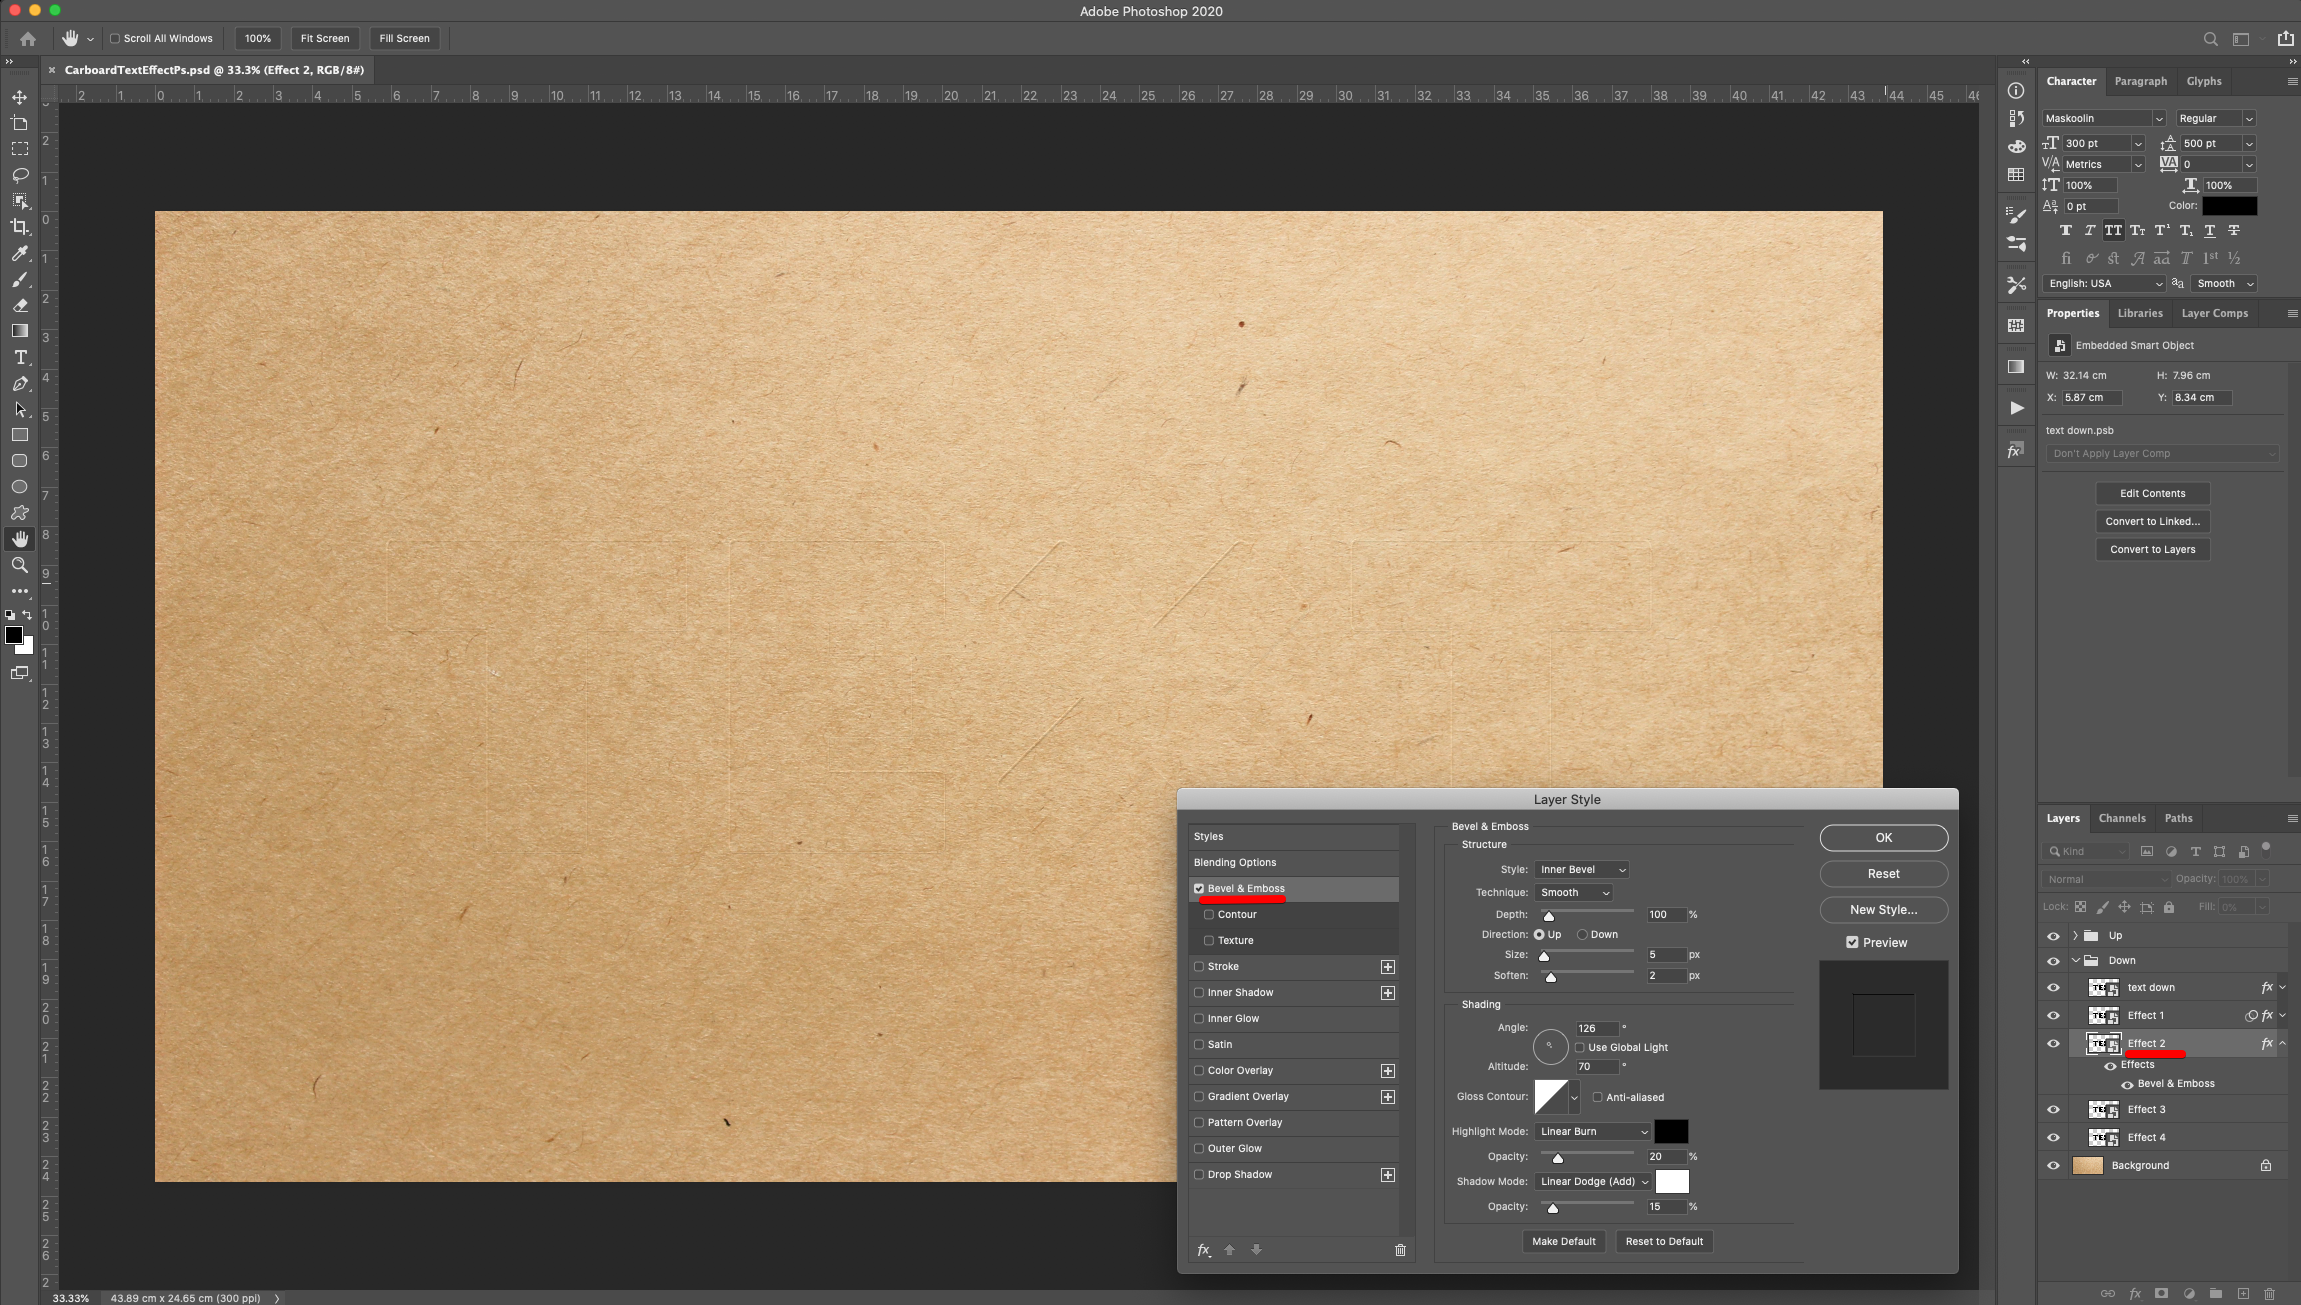
Inner Shadow:
Drop Shadow:
Go to Filter > Blur > Gaussian Blur and use a “Radius” of 0.5 Pixels.
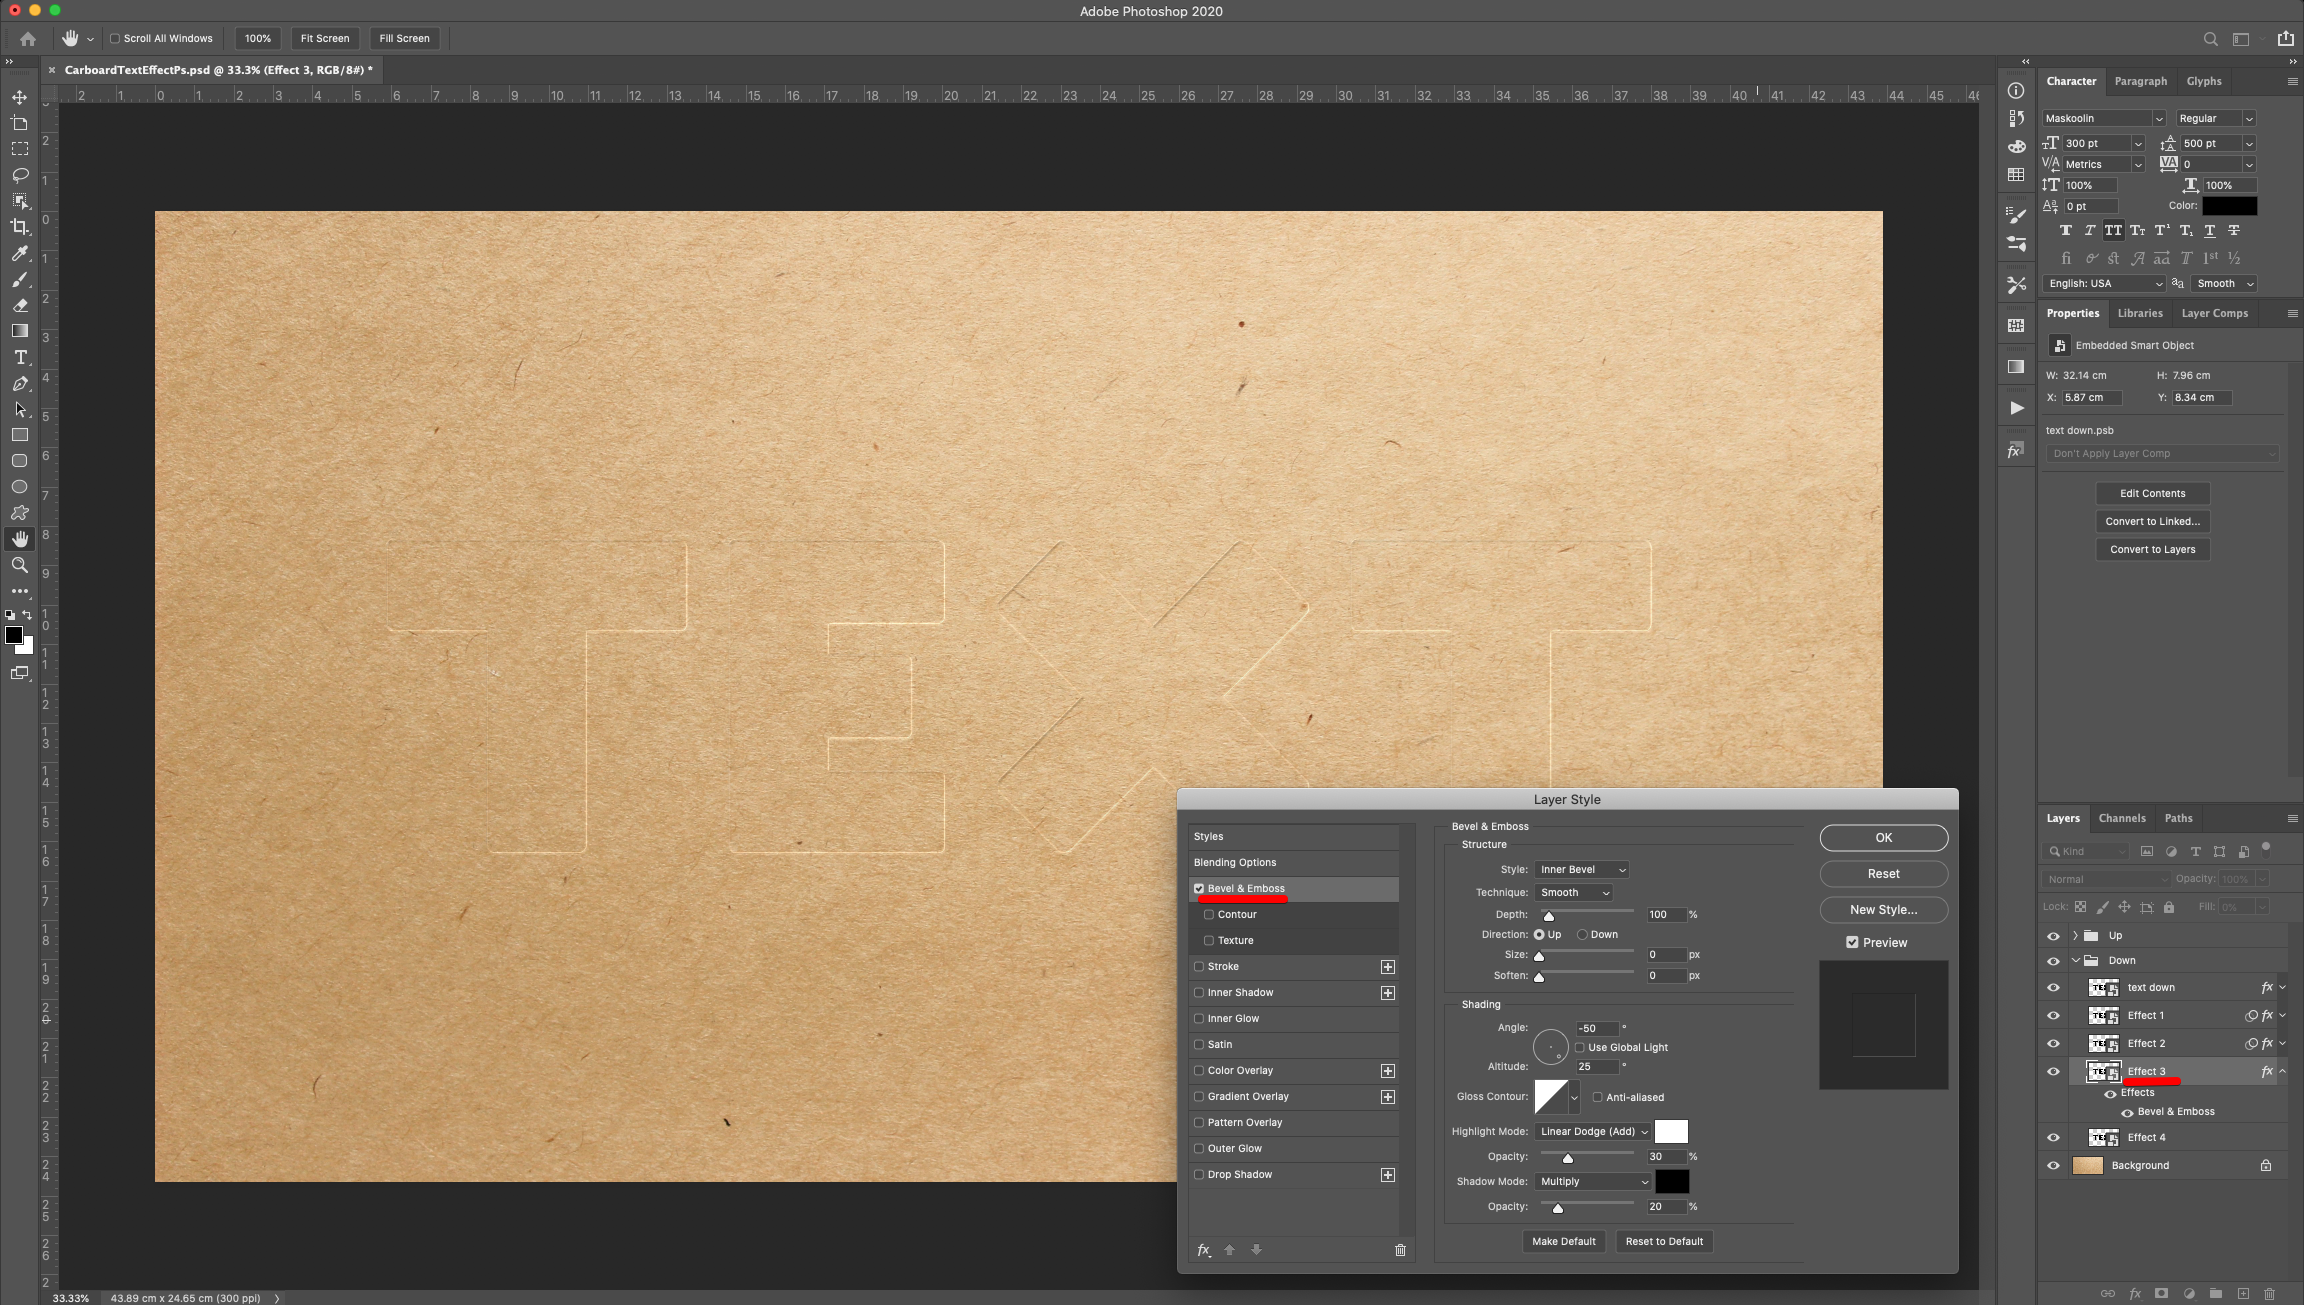
19 - Double-click on top of the “Effect 3” layer Thumbnail (in the “Down” group) and apply the following “Layer Styles”:
Bevel & Emboss:
Texture: (Grey Granite)
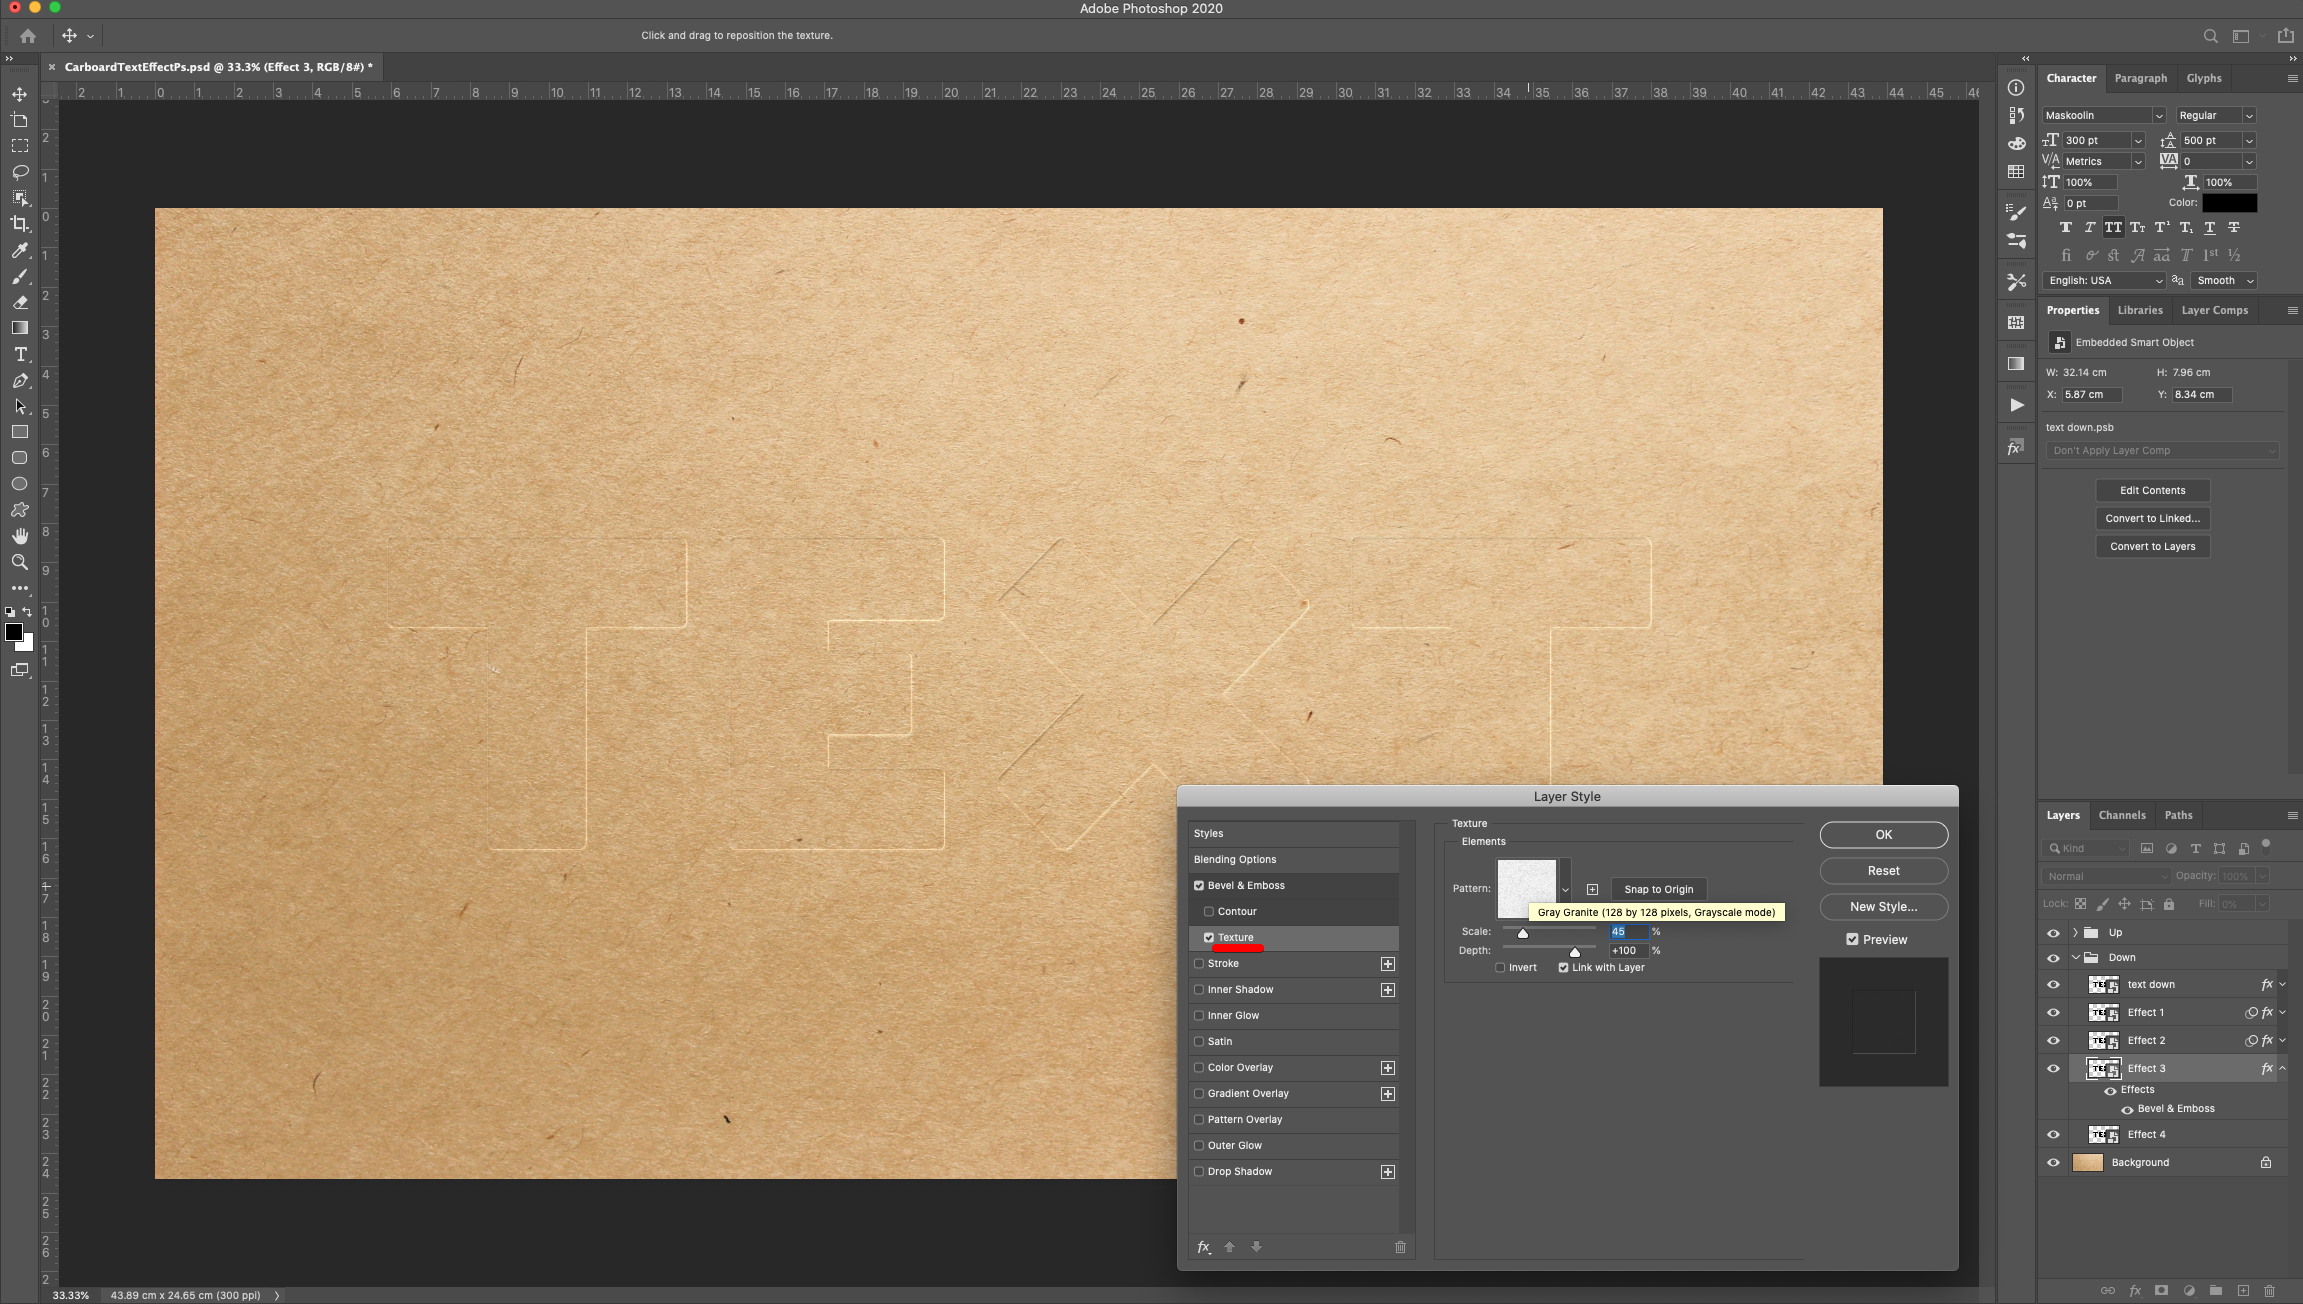
Inner Shadow:
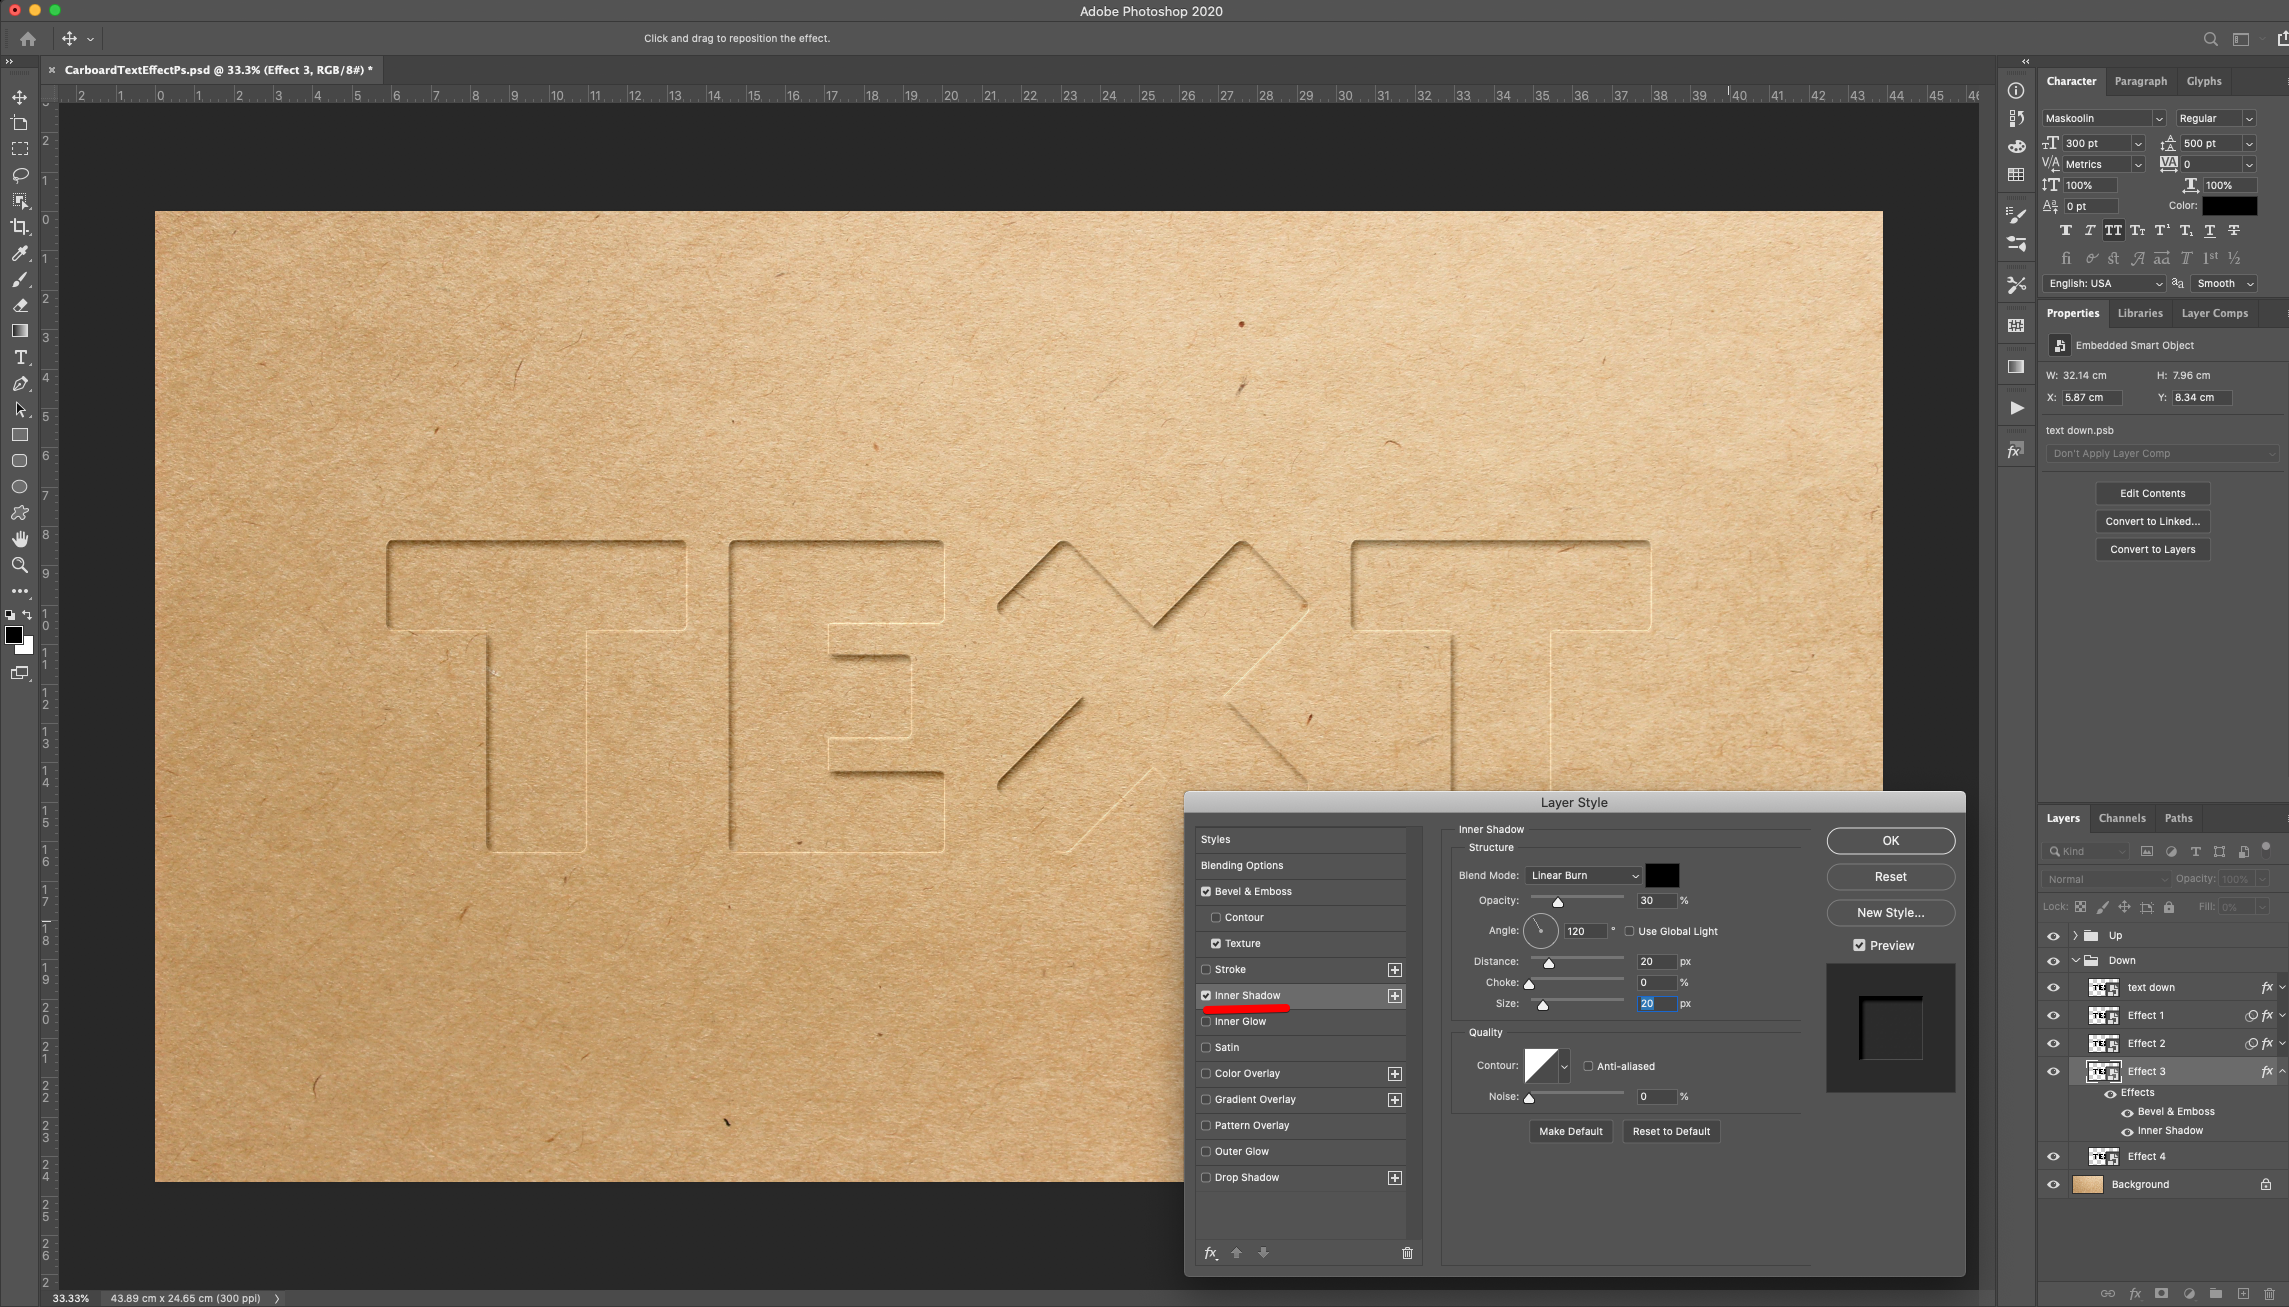
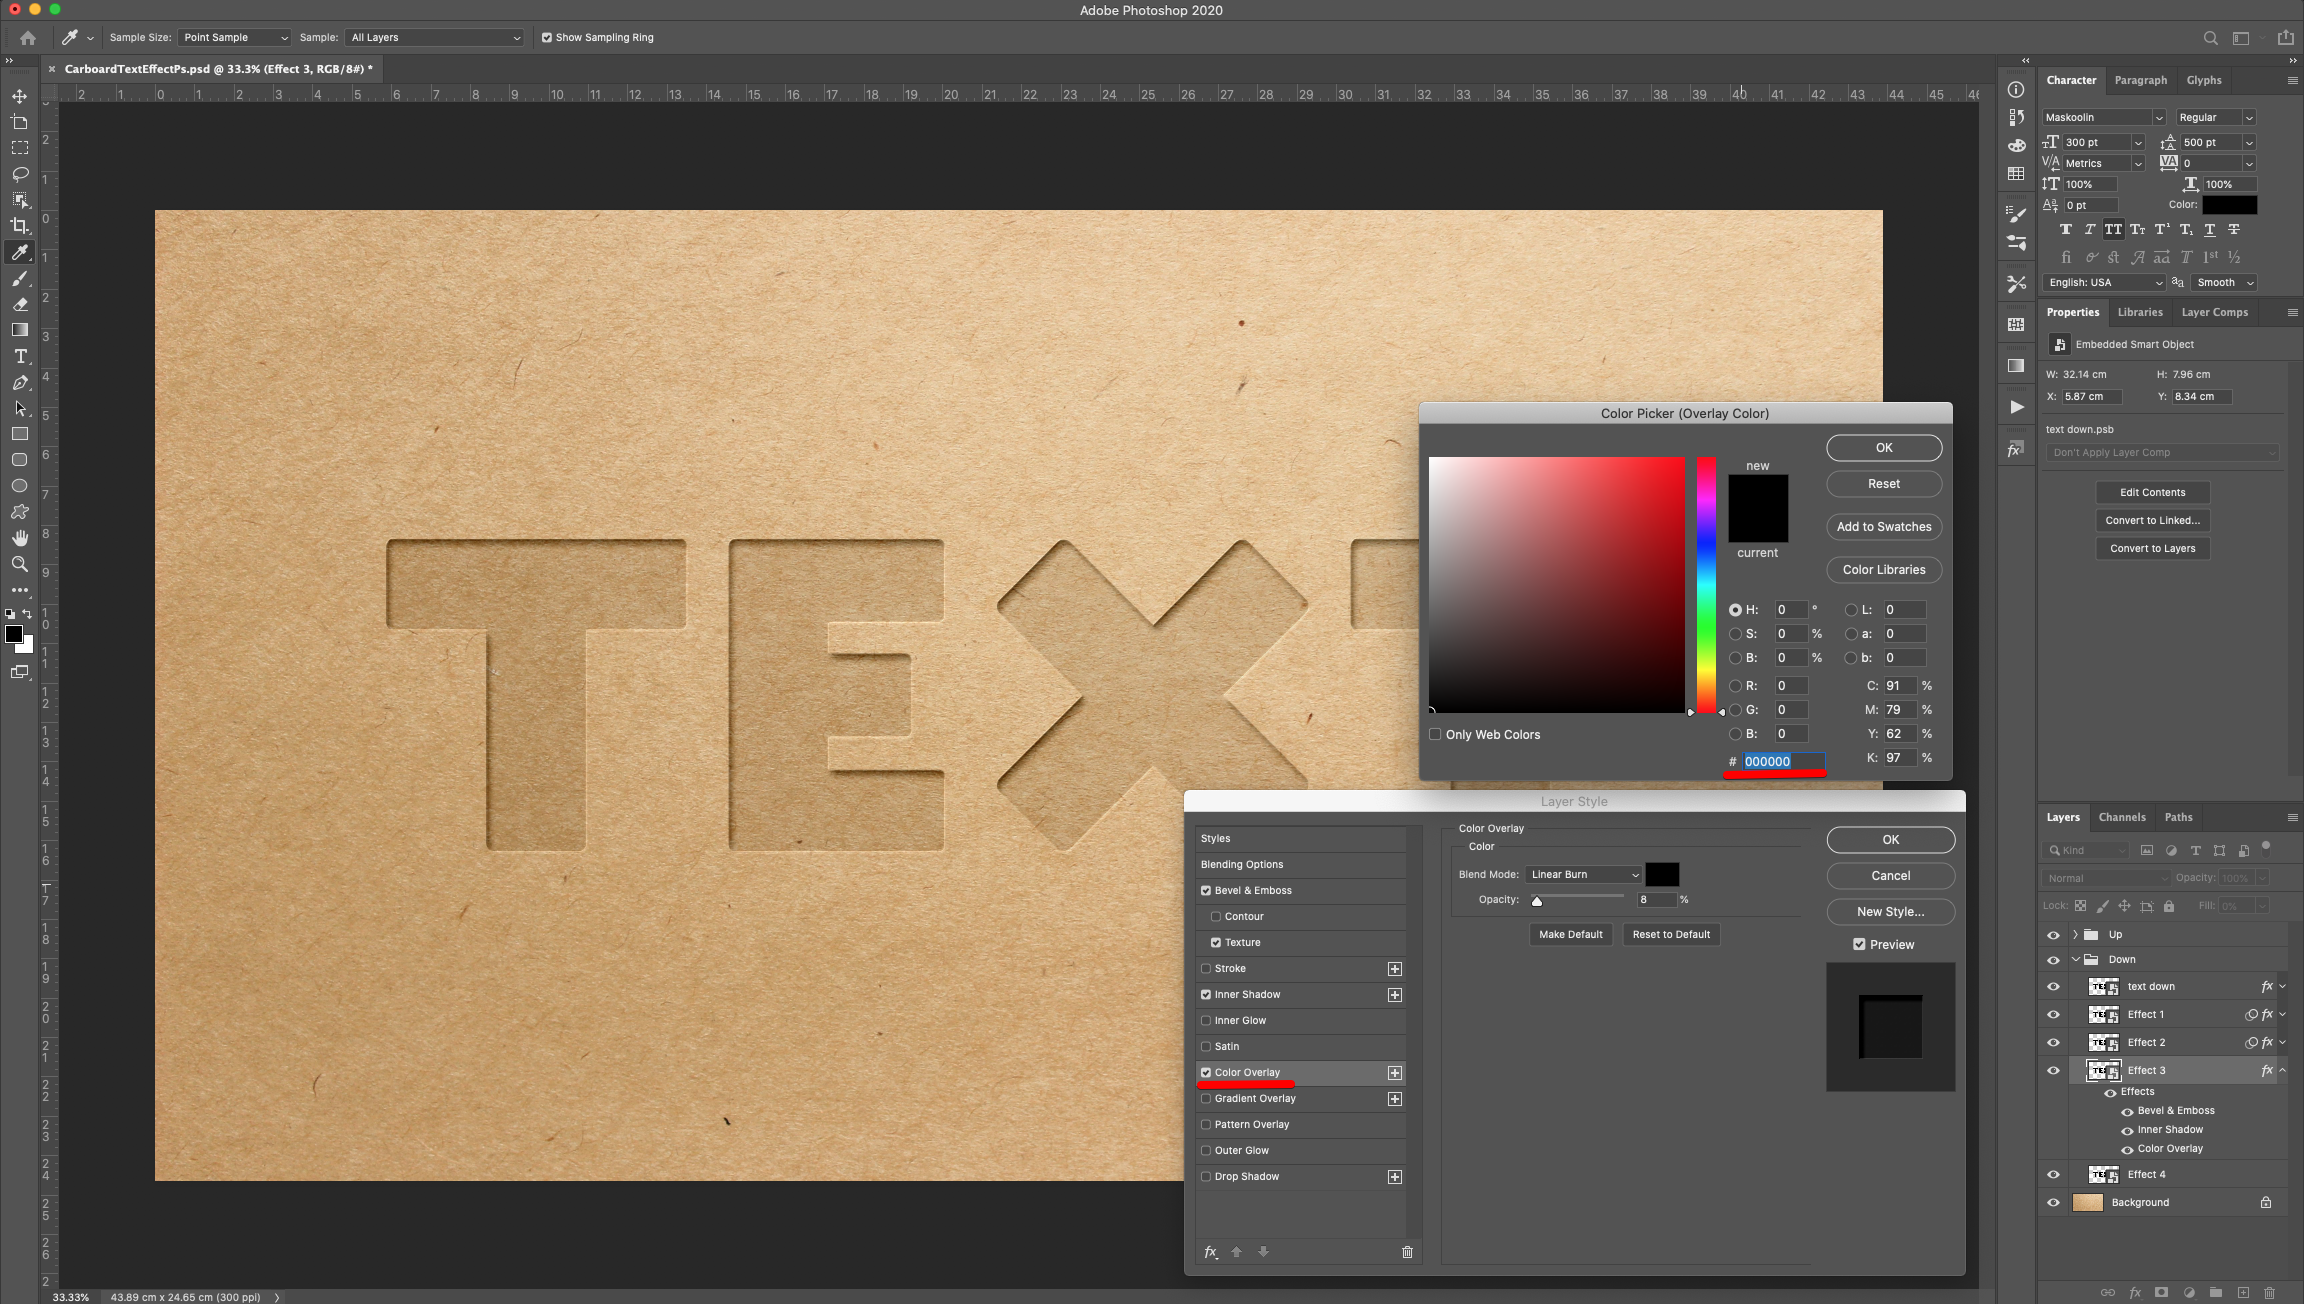
Color Overlay: (#000000)
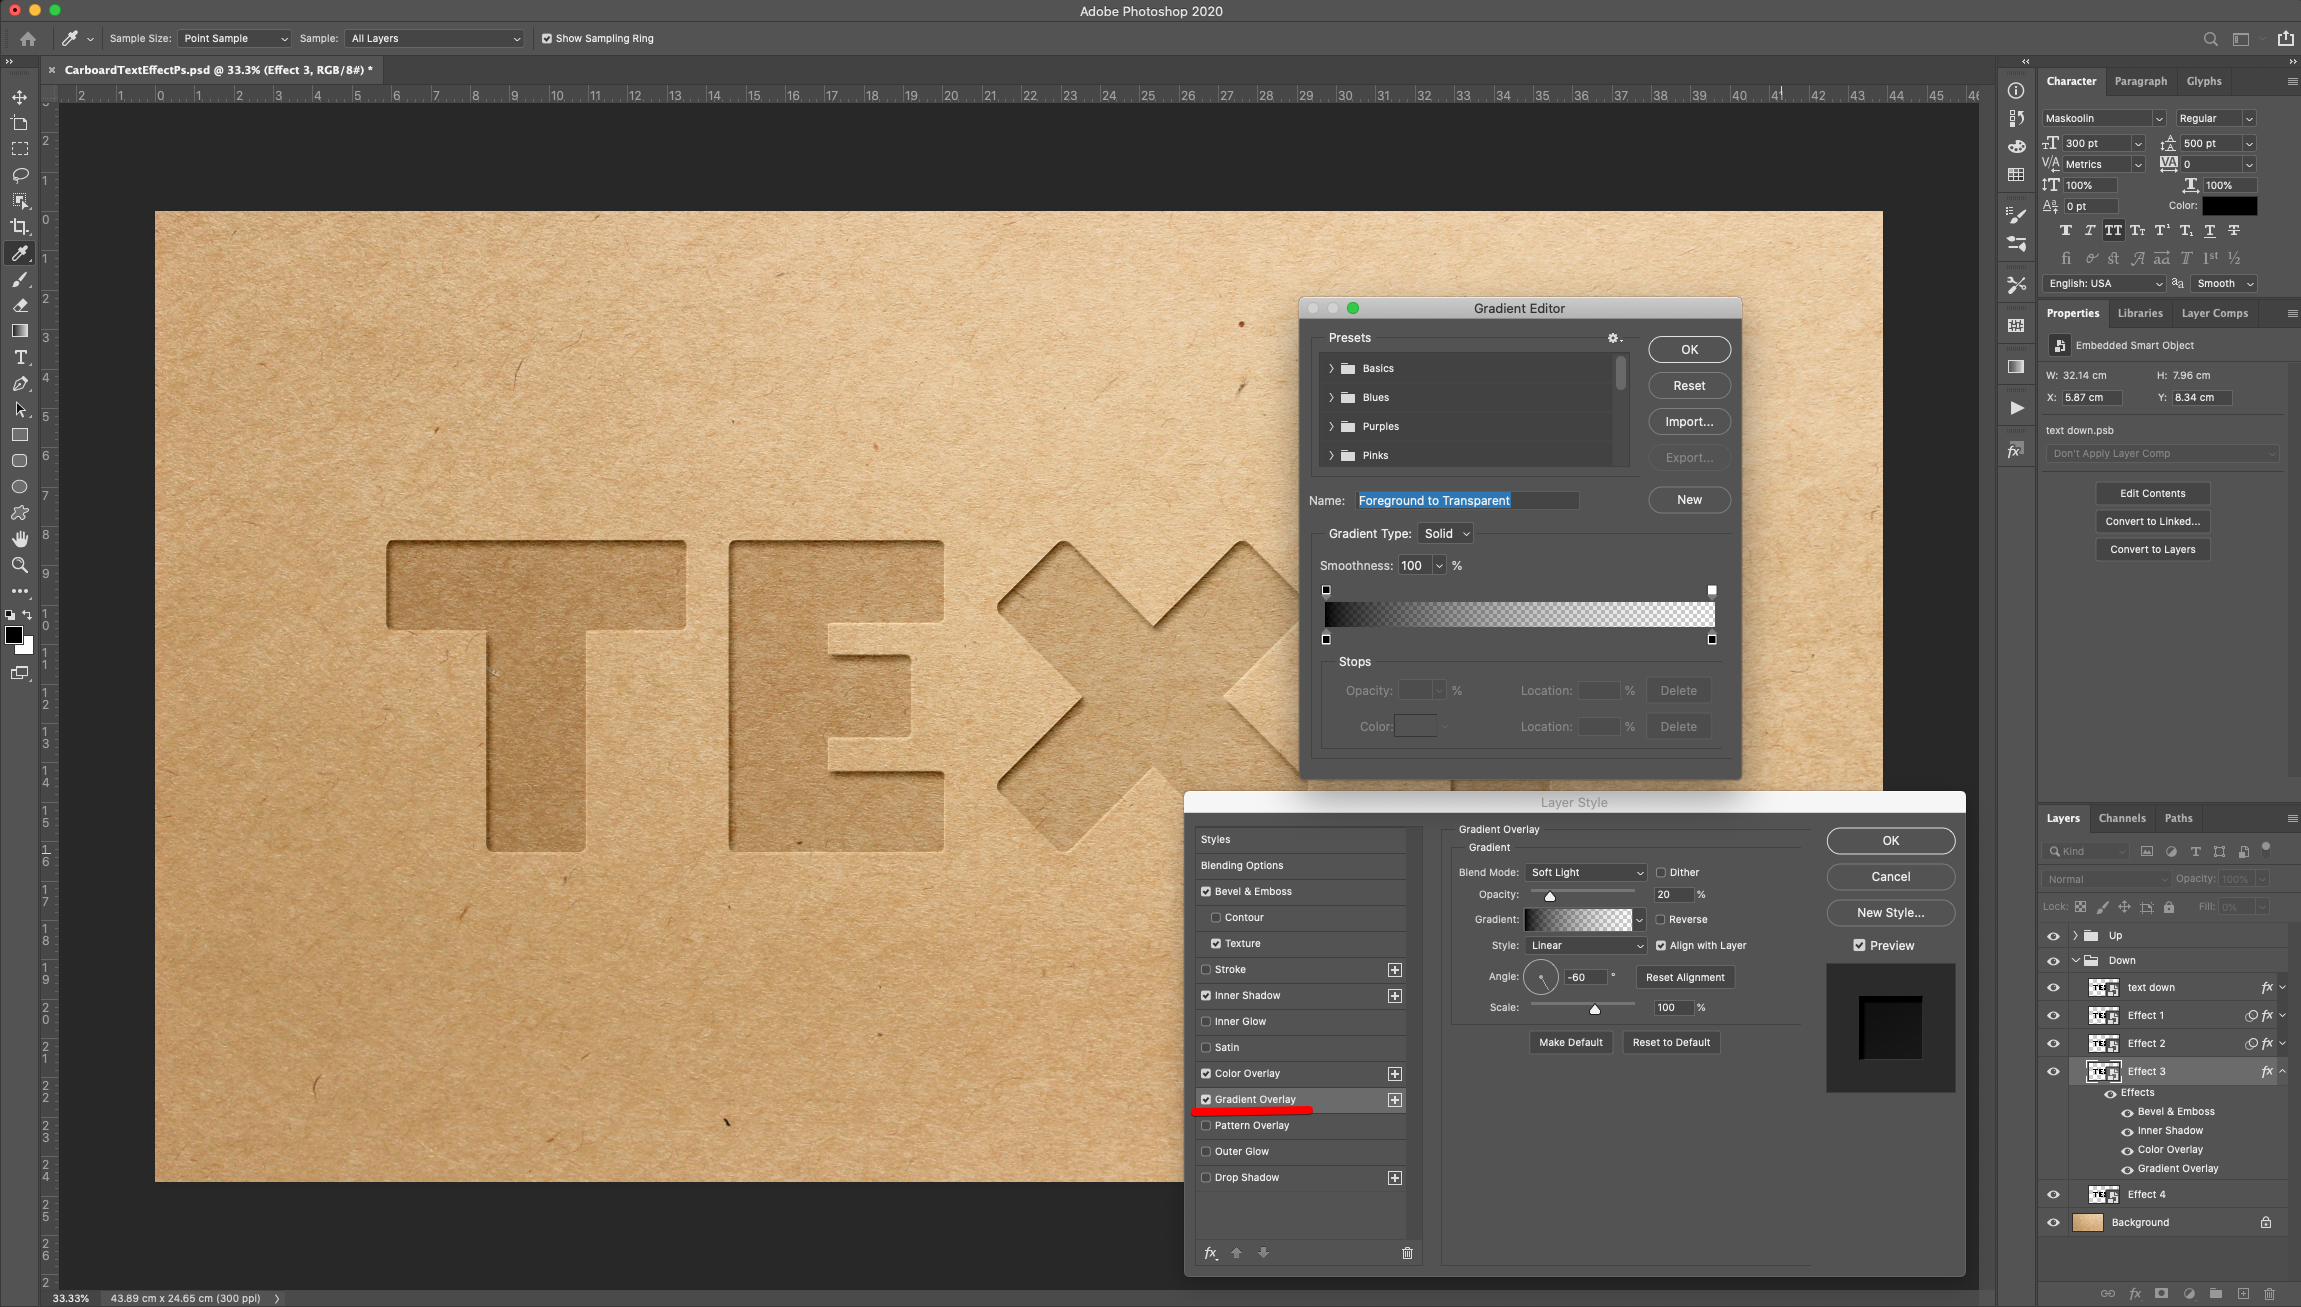
Gradient Overlay: (Foreground to Transparent)
Drop Shadow:
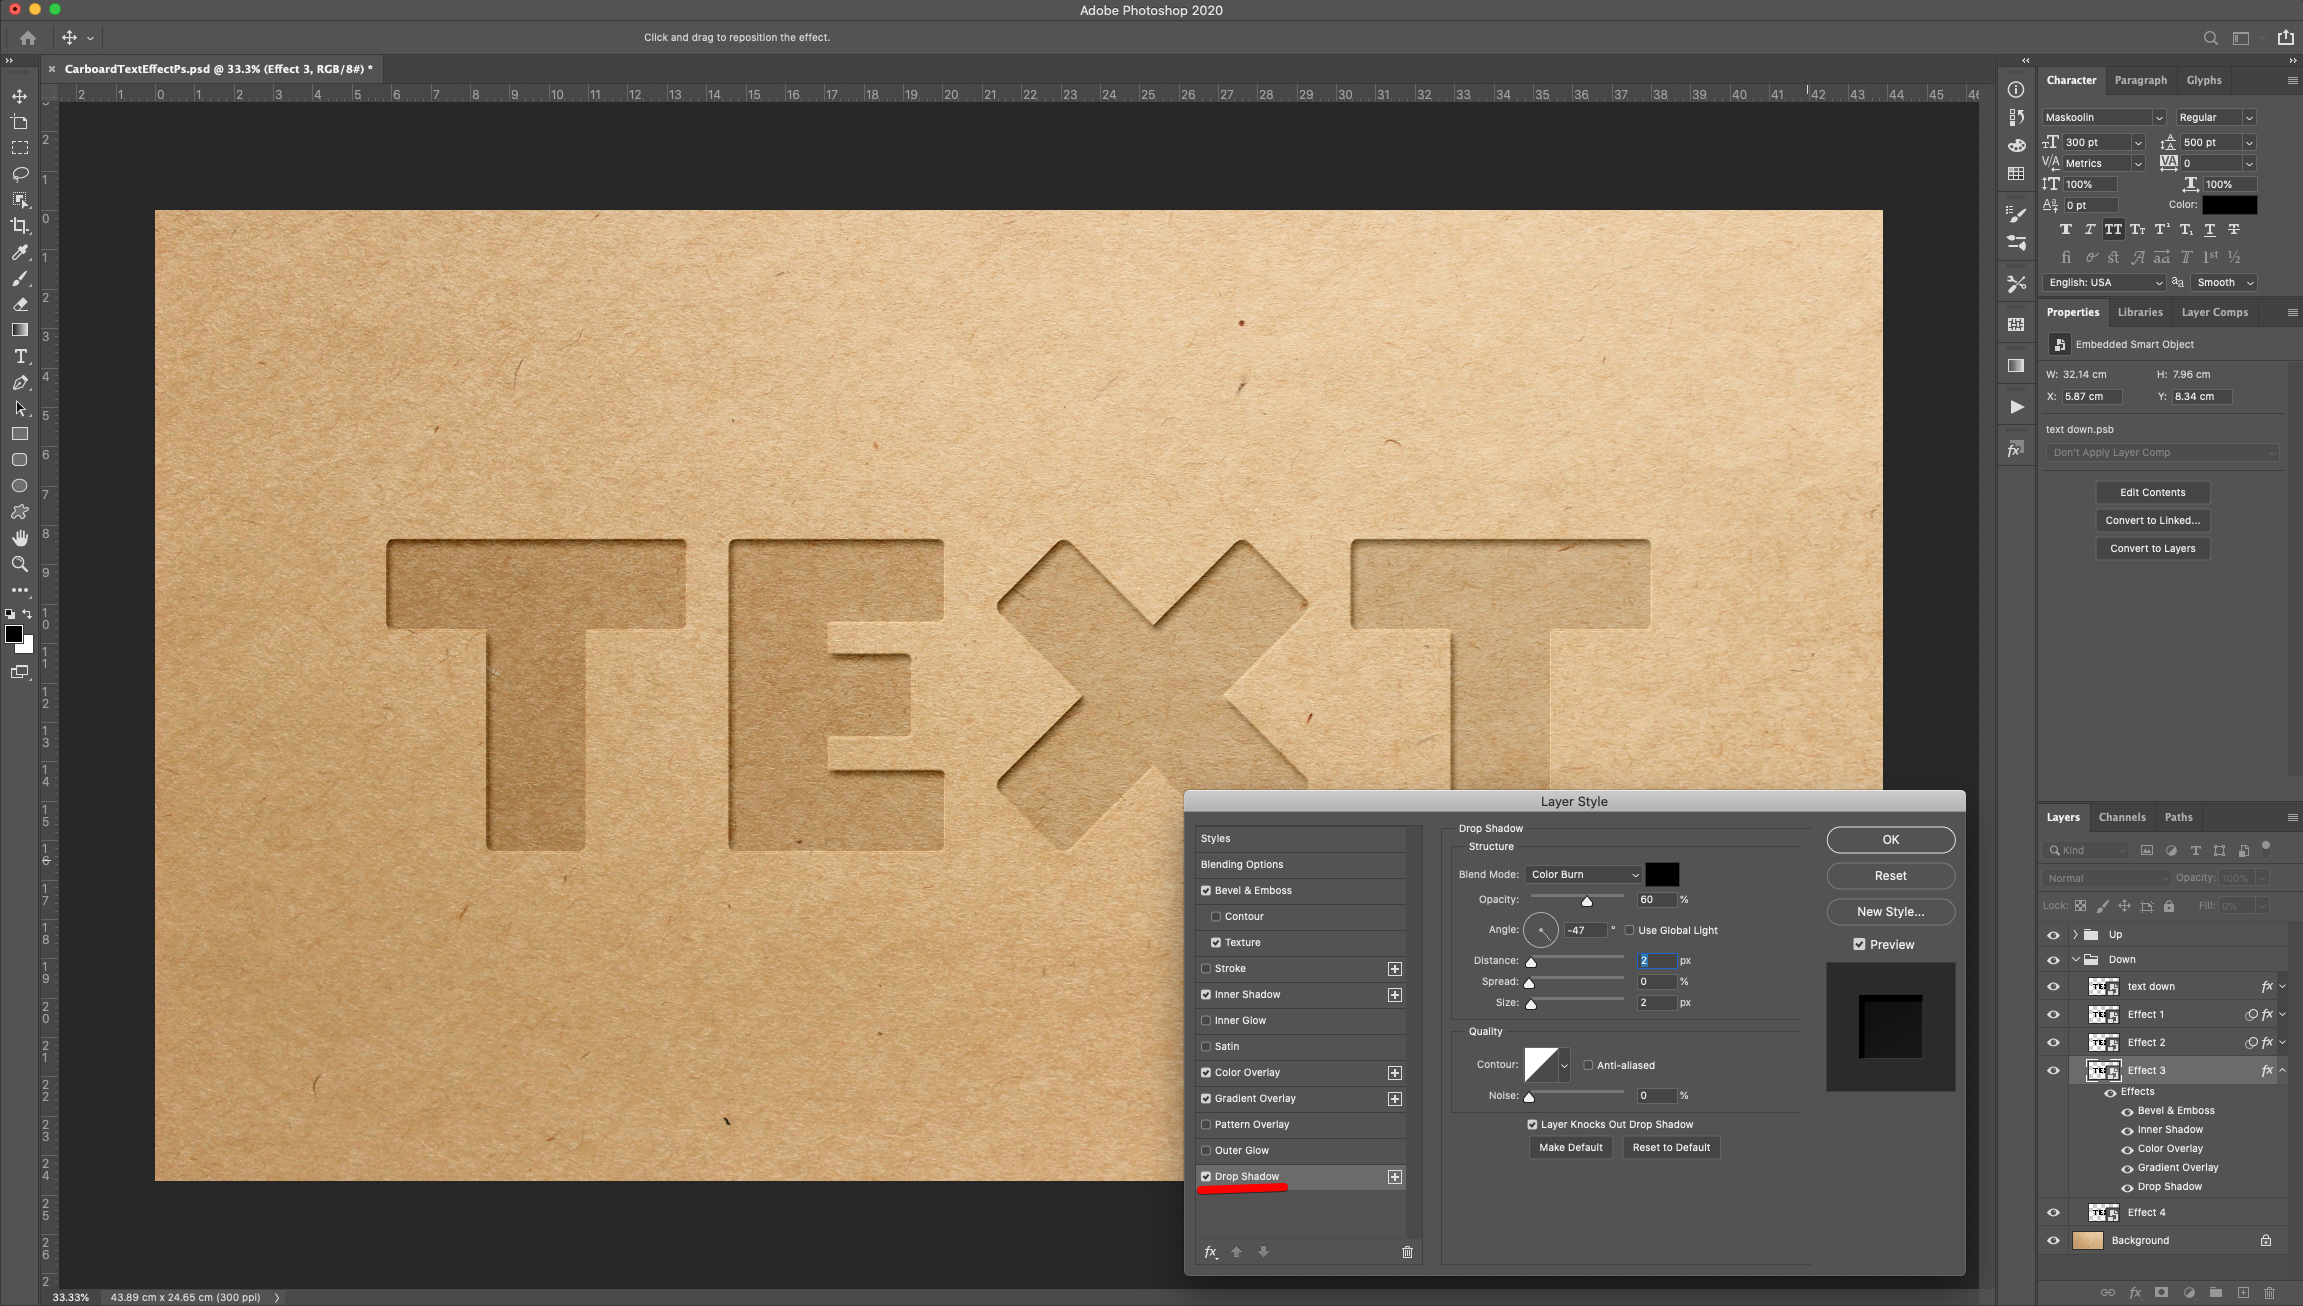
Go to Filter > Blur > Gaussian Blur and use a “Radius” of 0.5 Pixels.
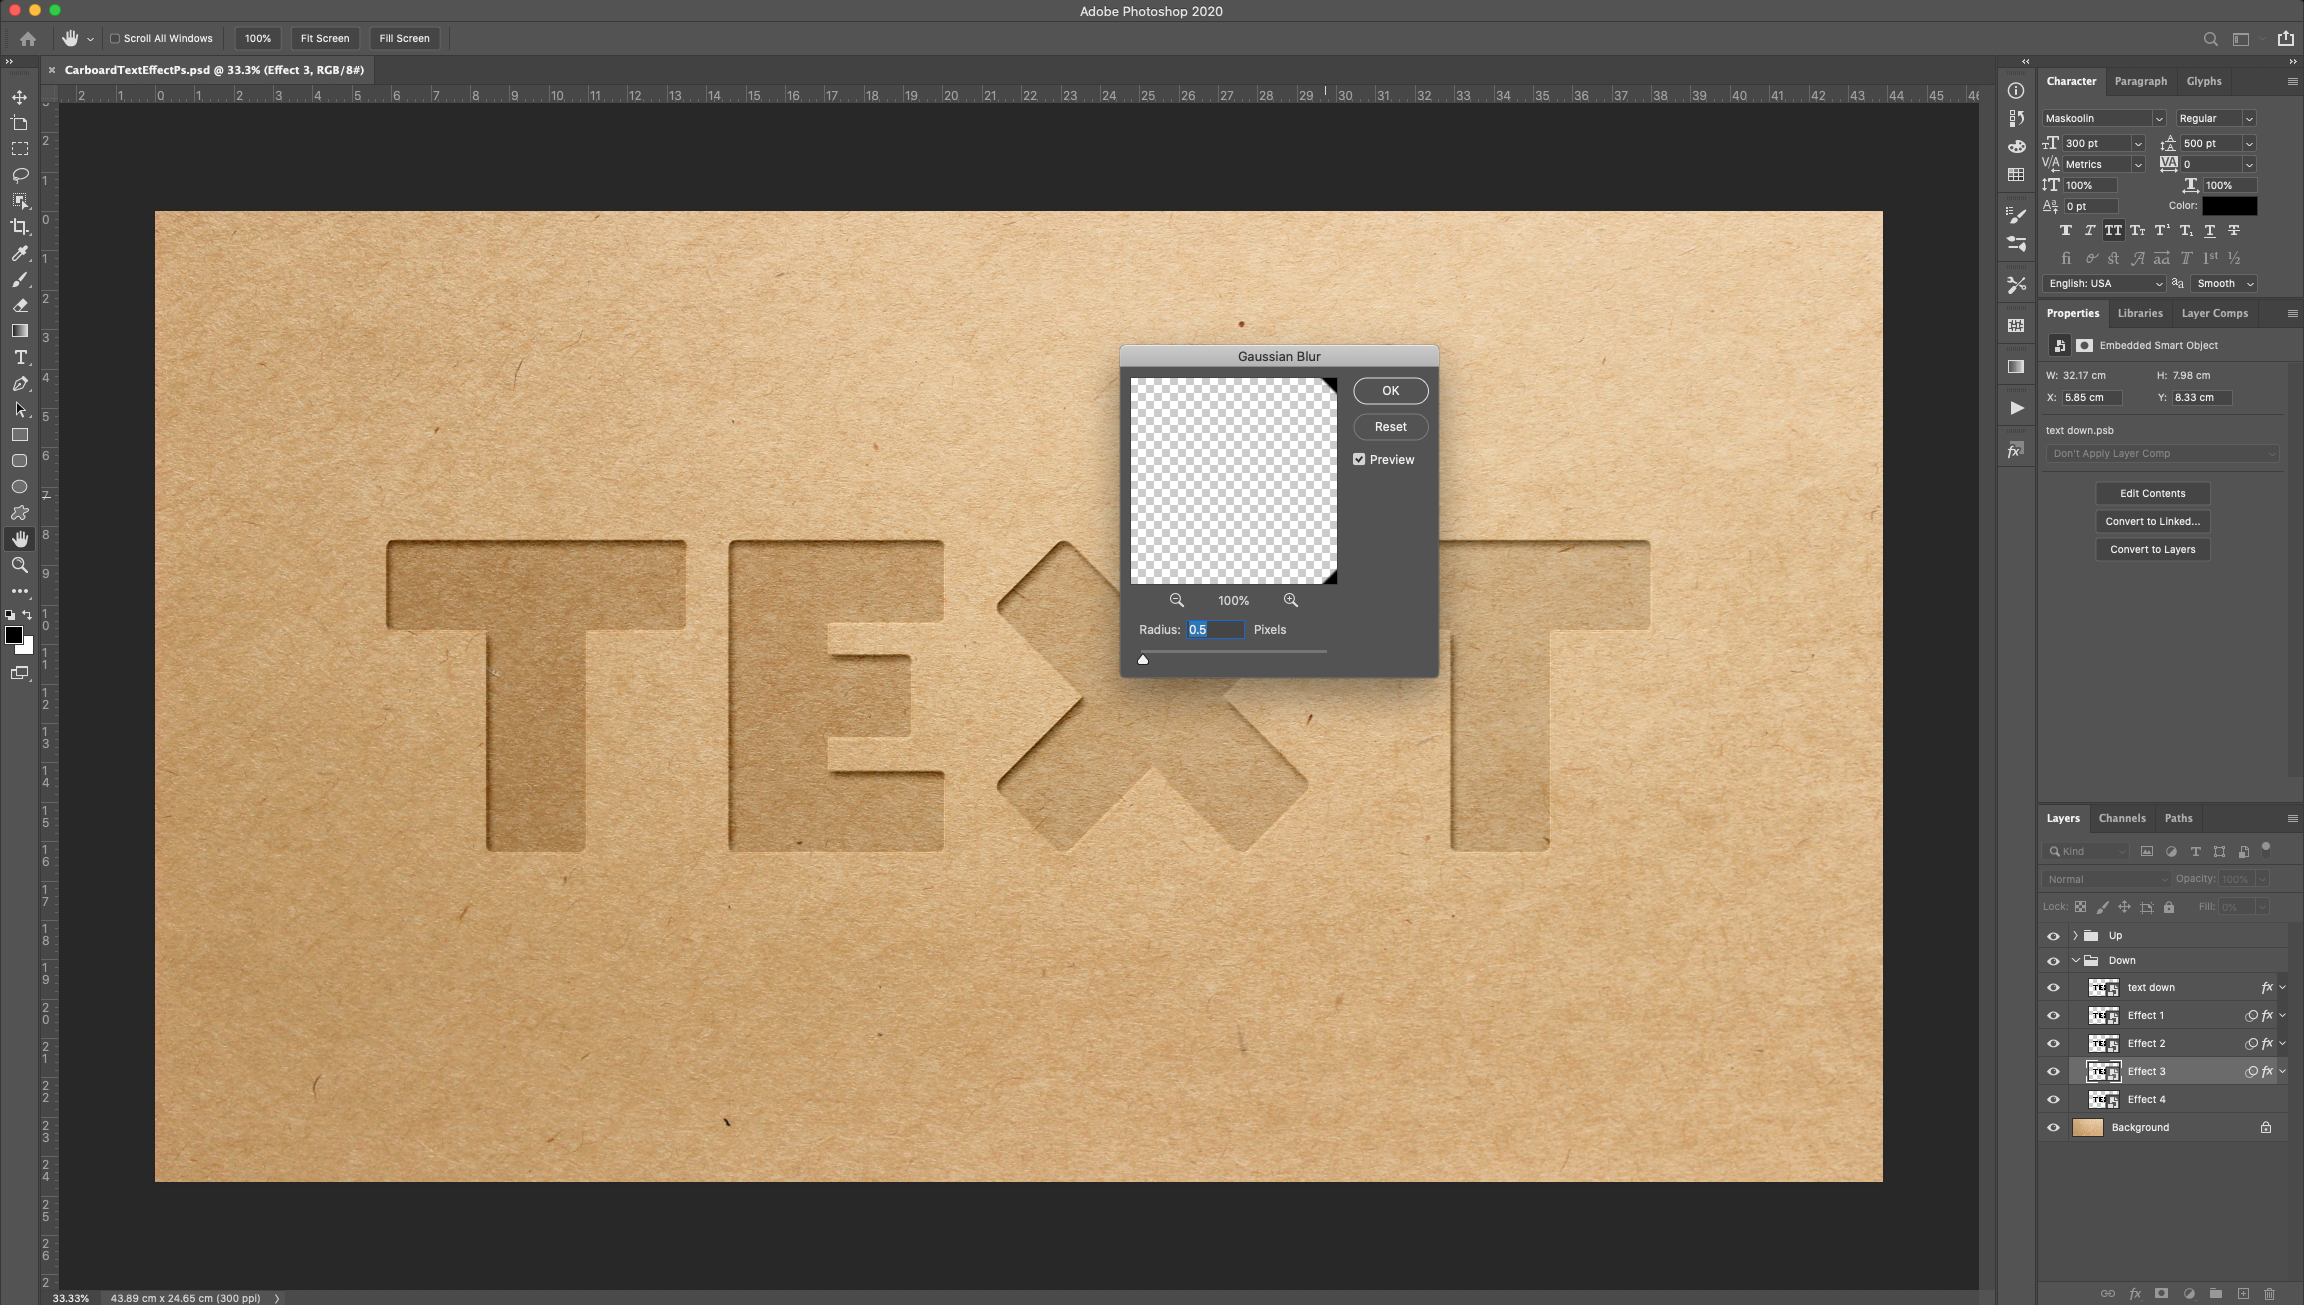
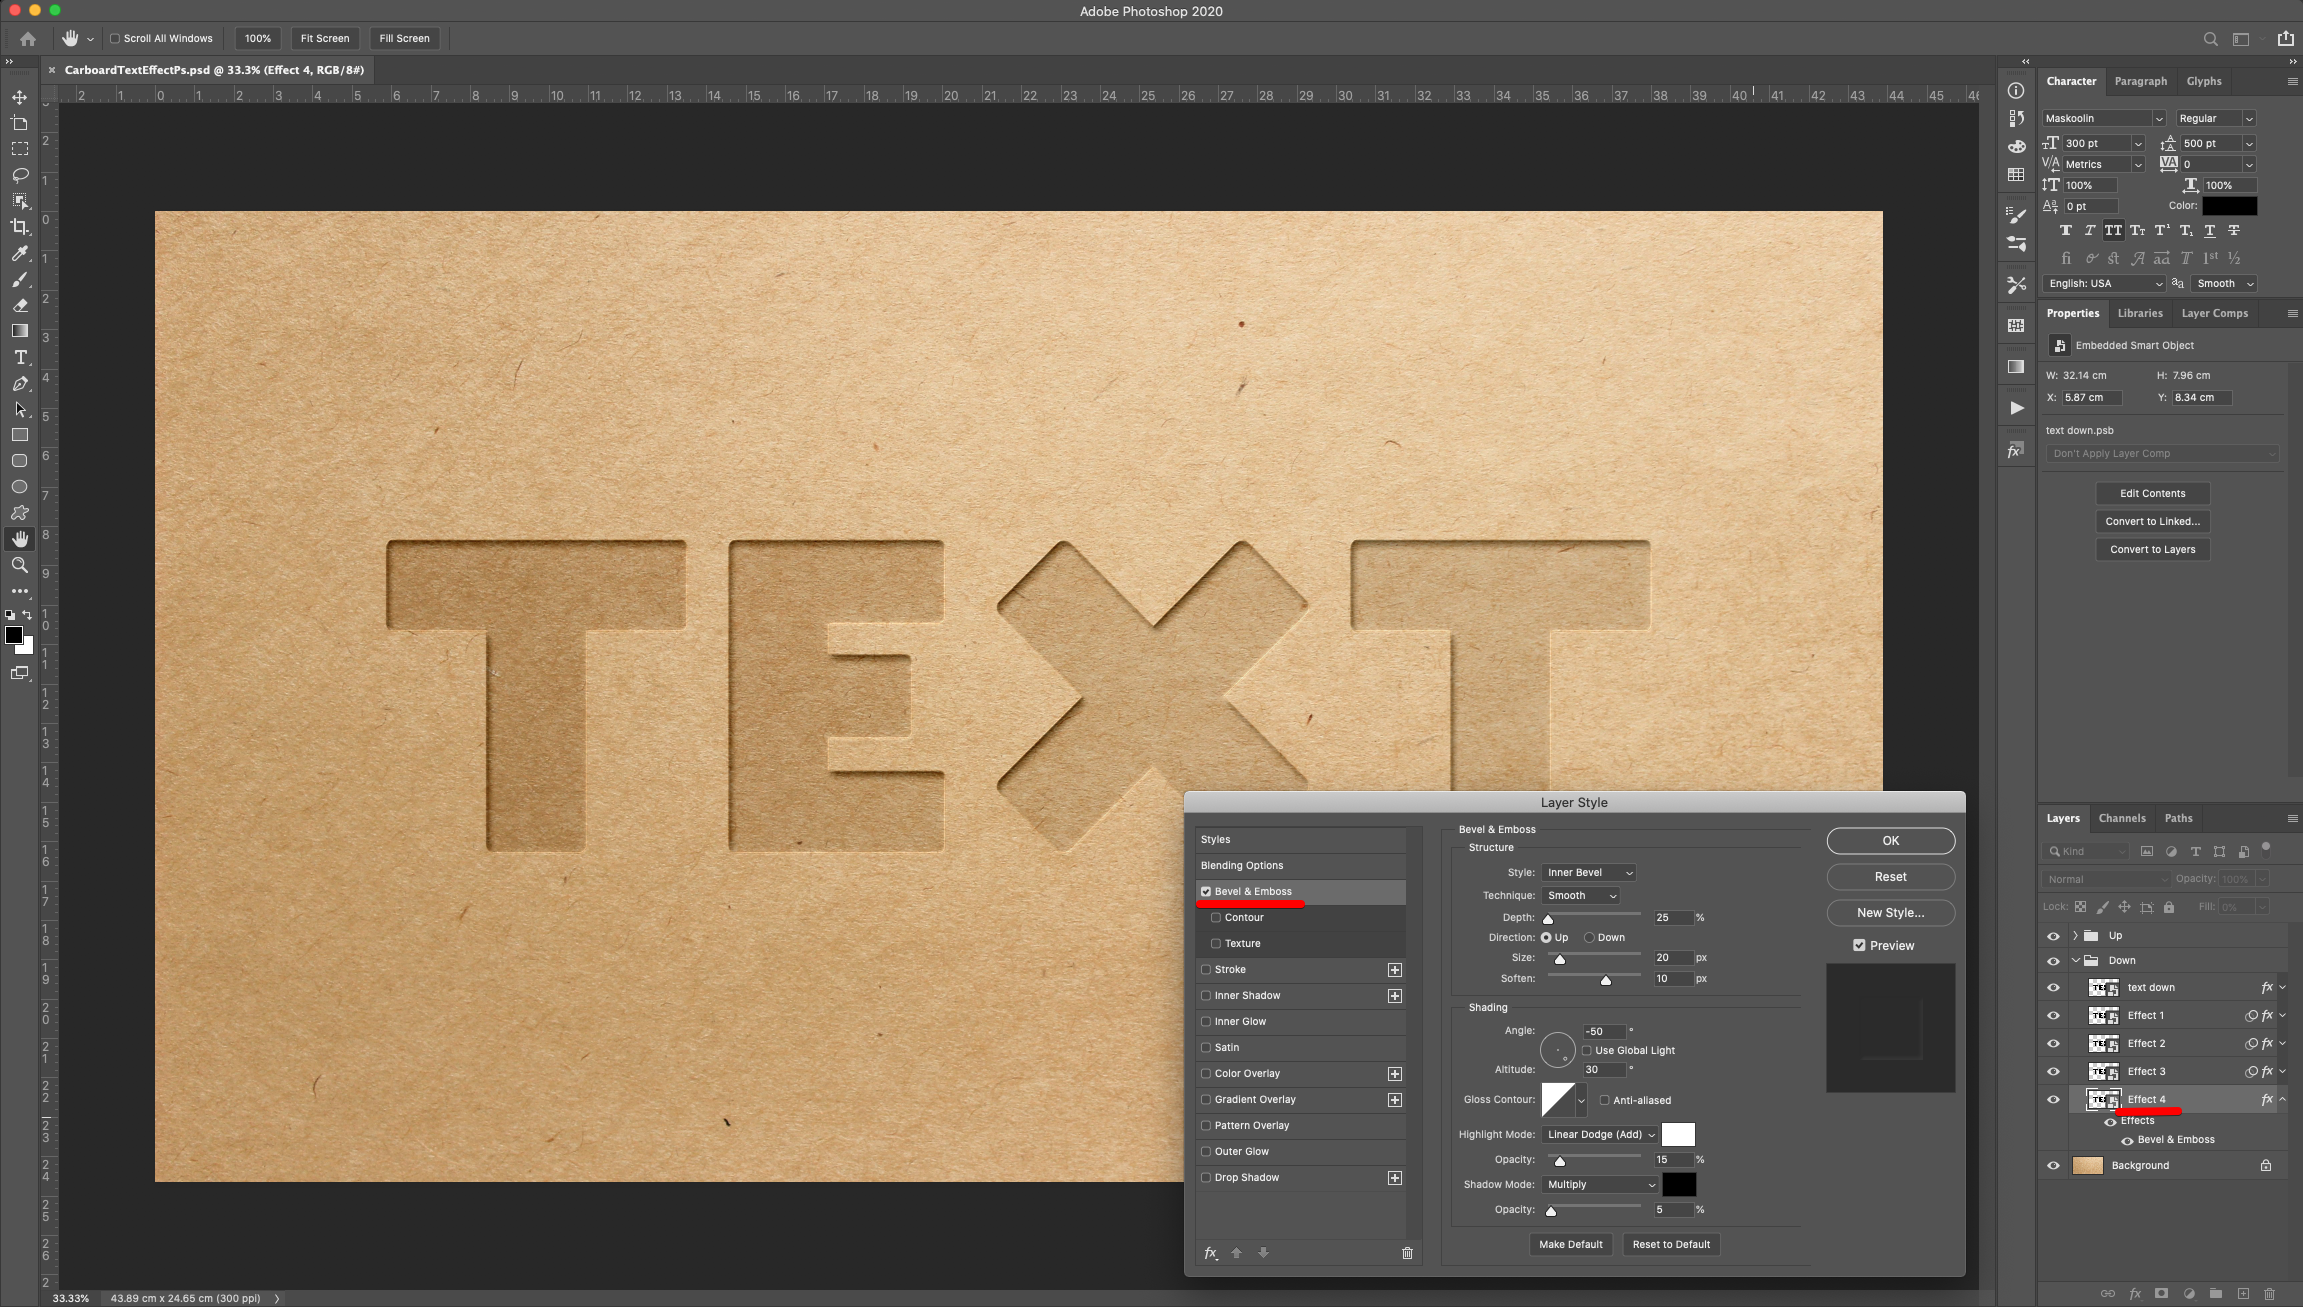
20 - Double-click on top of the “Effect 4” layer Thumbnail (in the “Down” group) and apply the following “Layer Styles”:
Bevel & Emboss:
Inner Shadow:
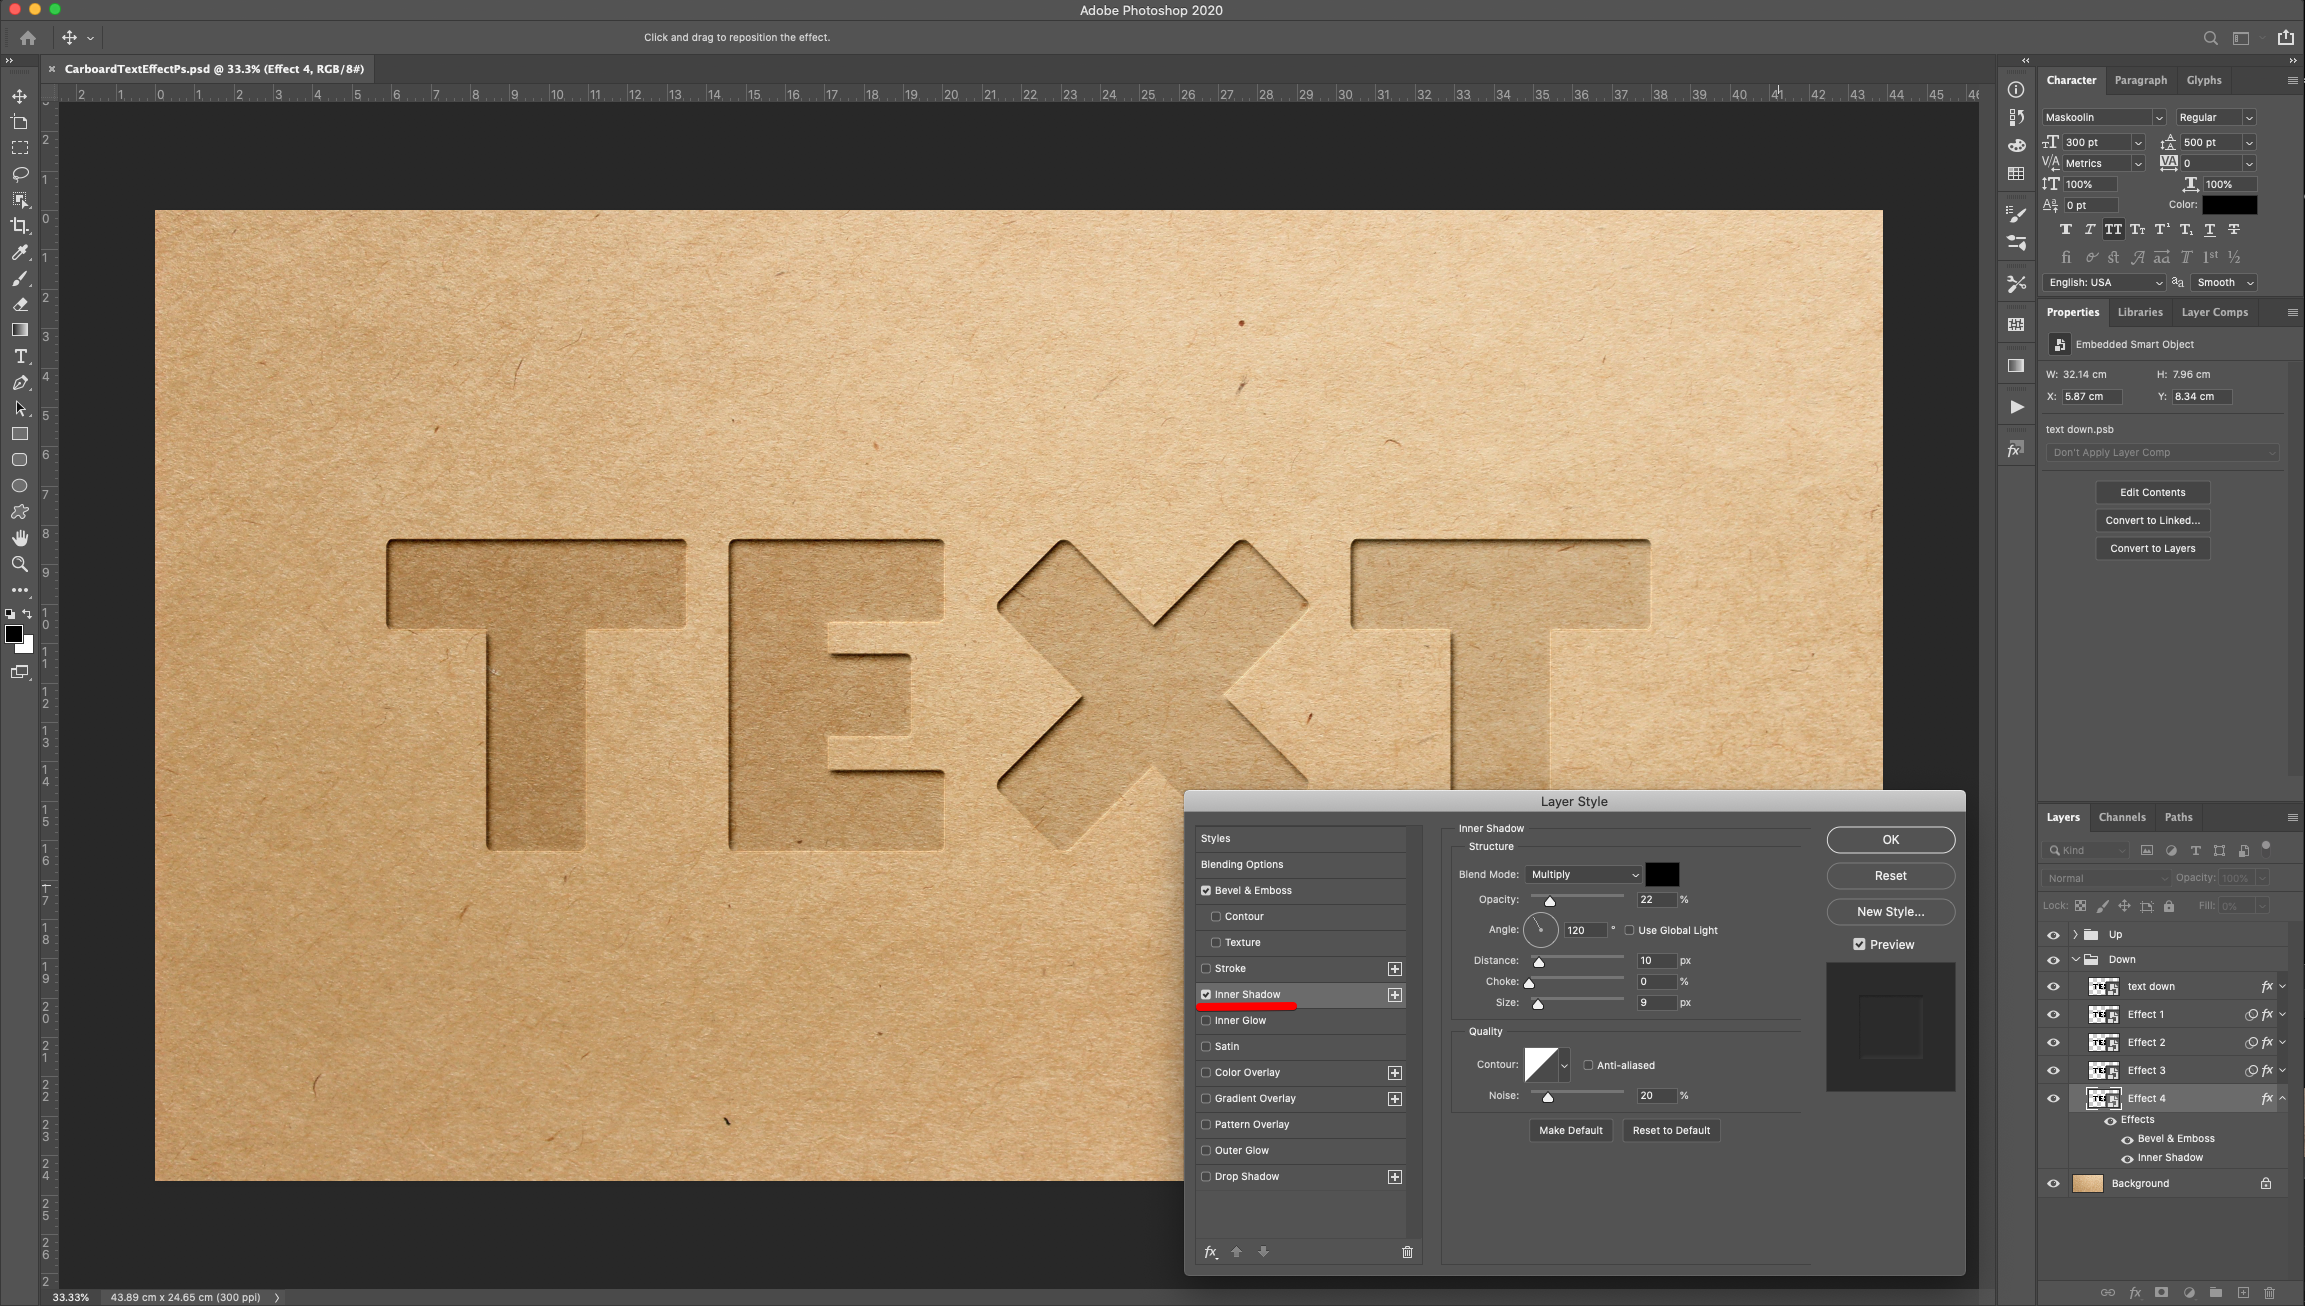
Drop Shadow:
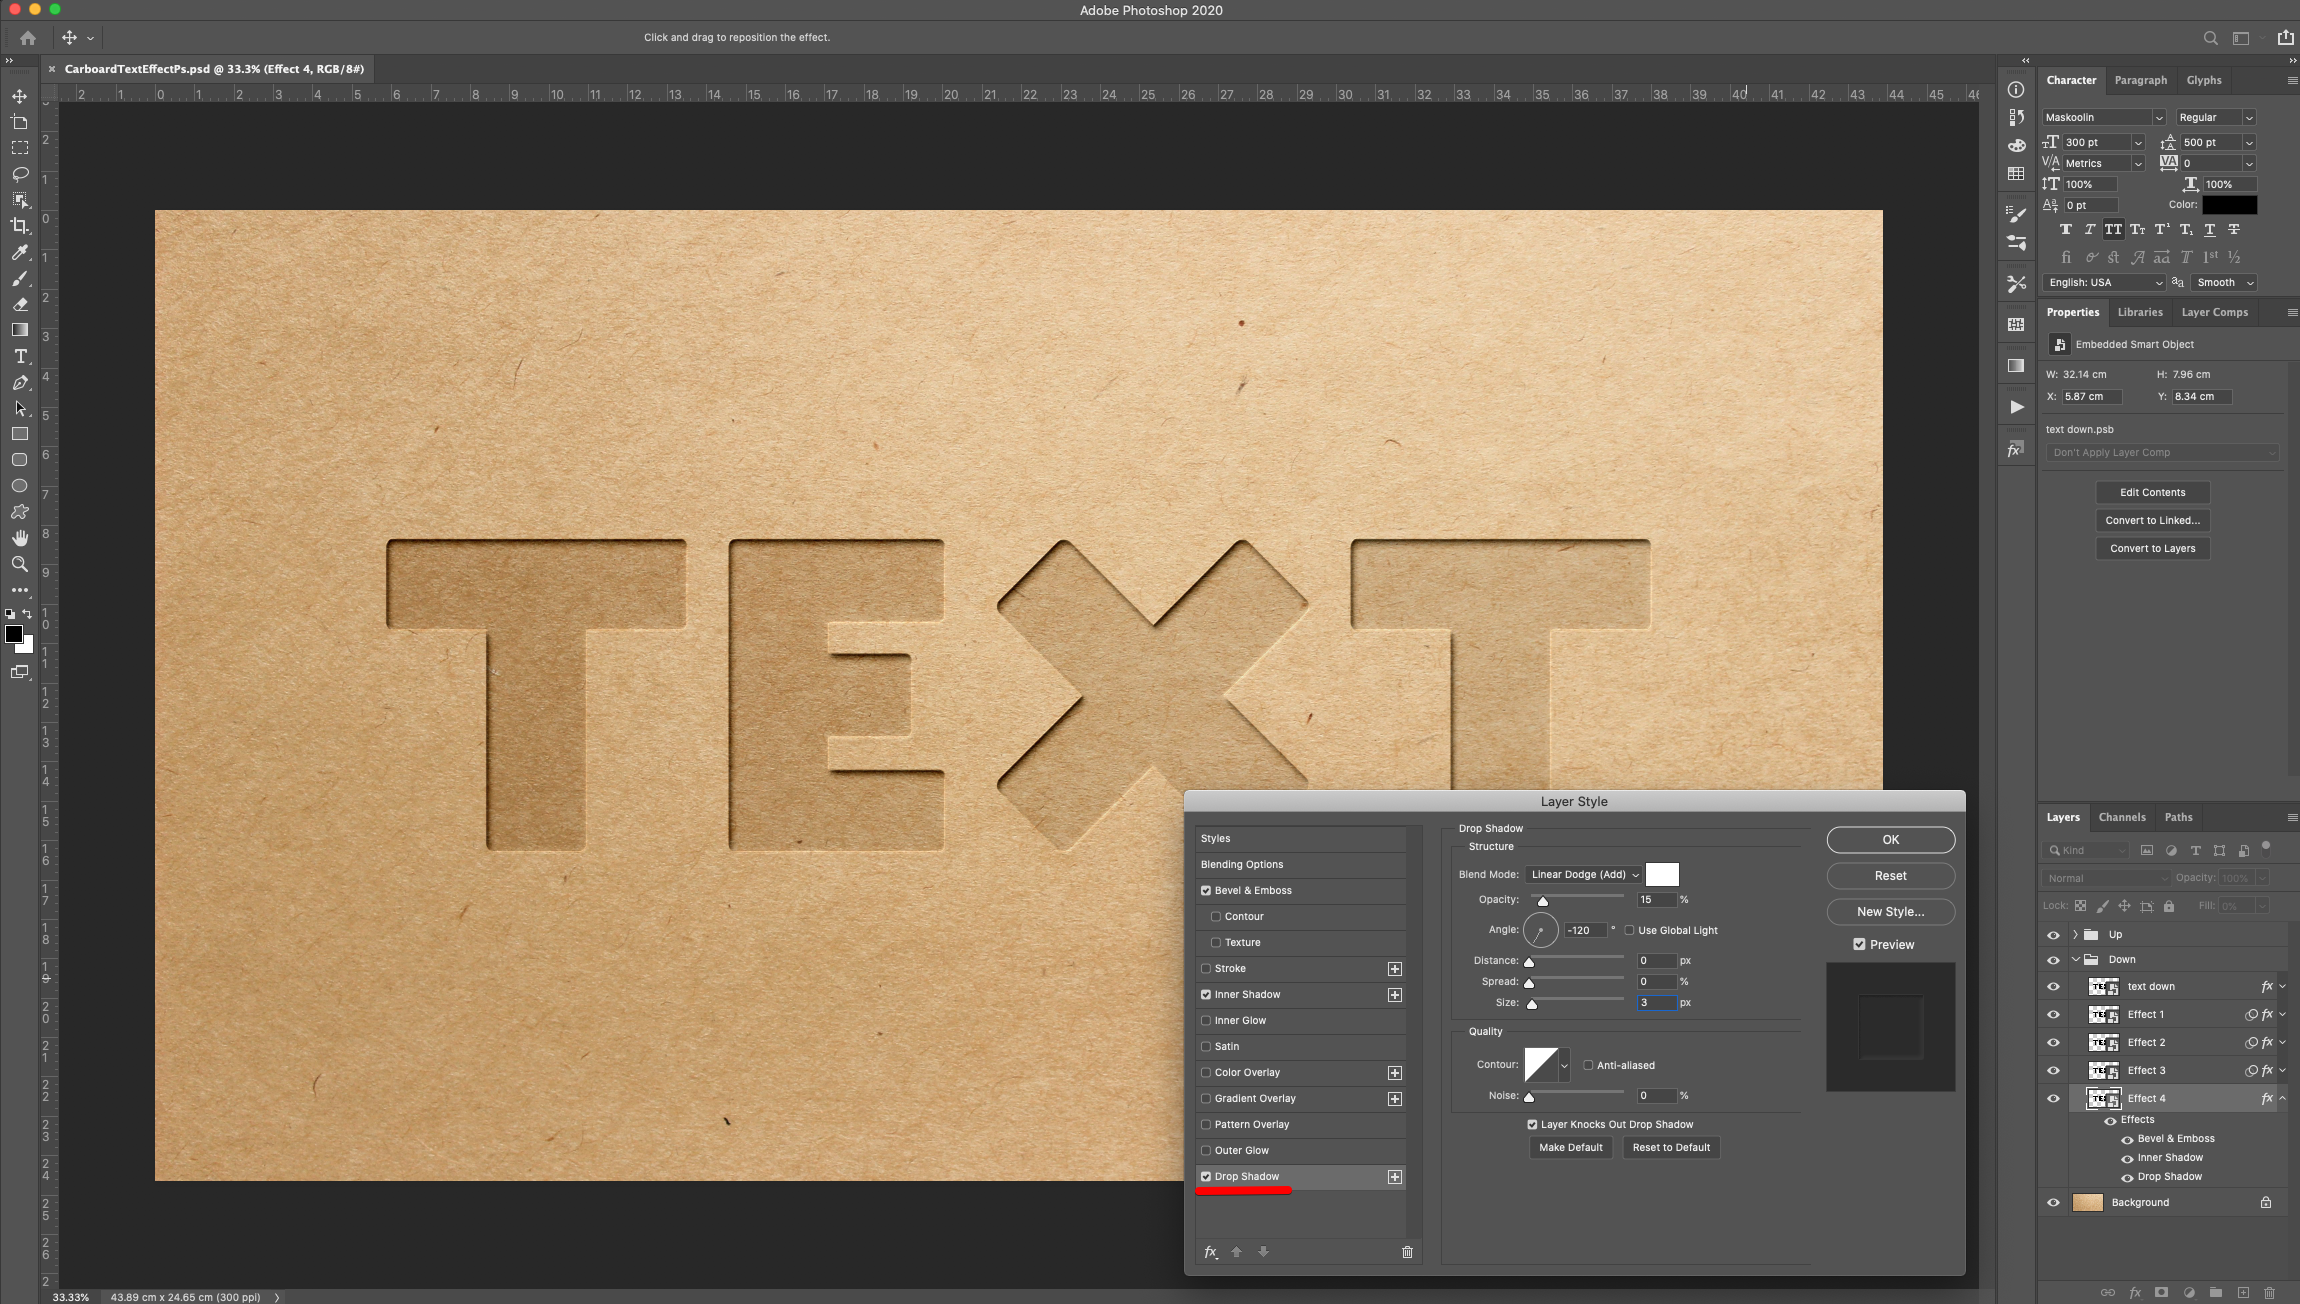
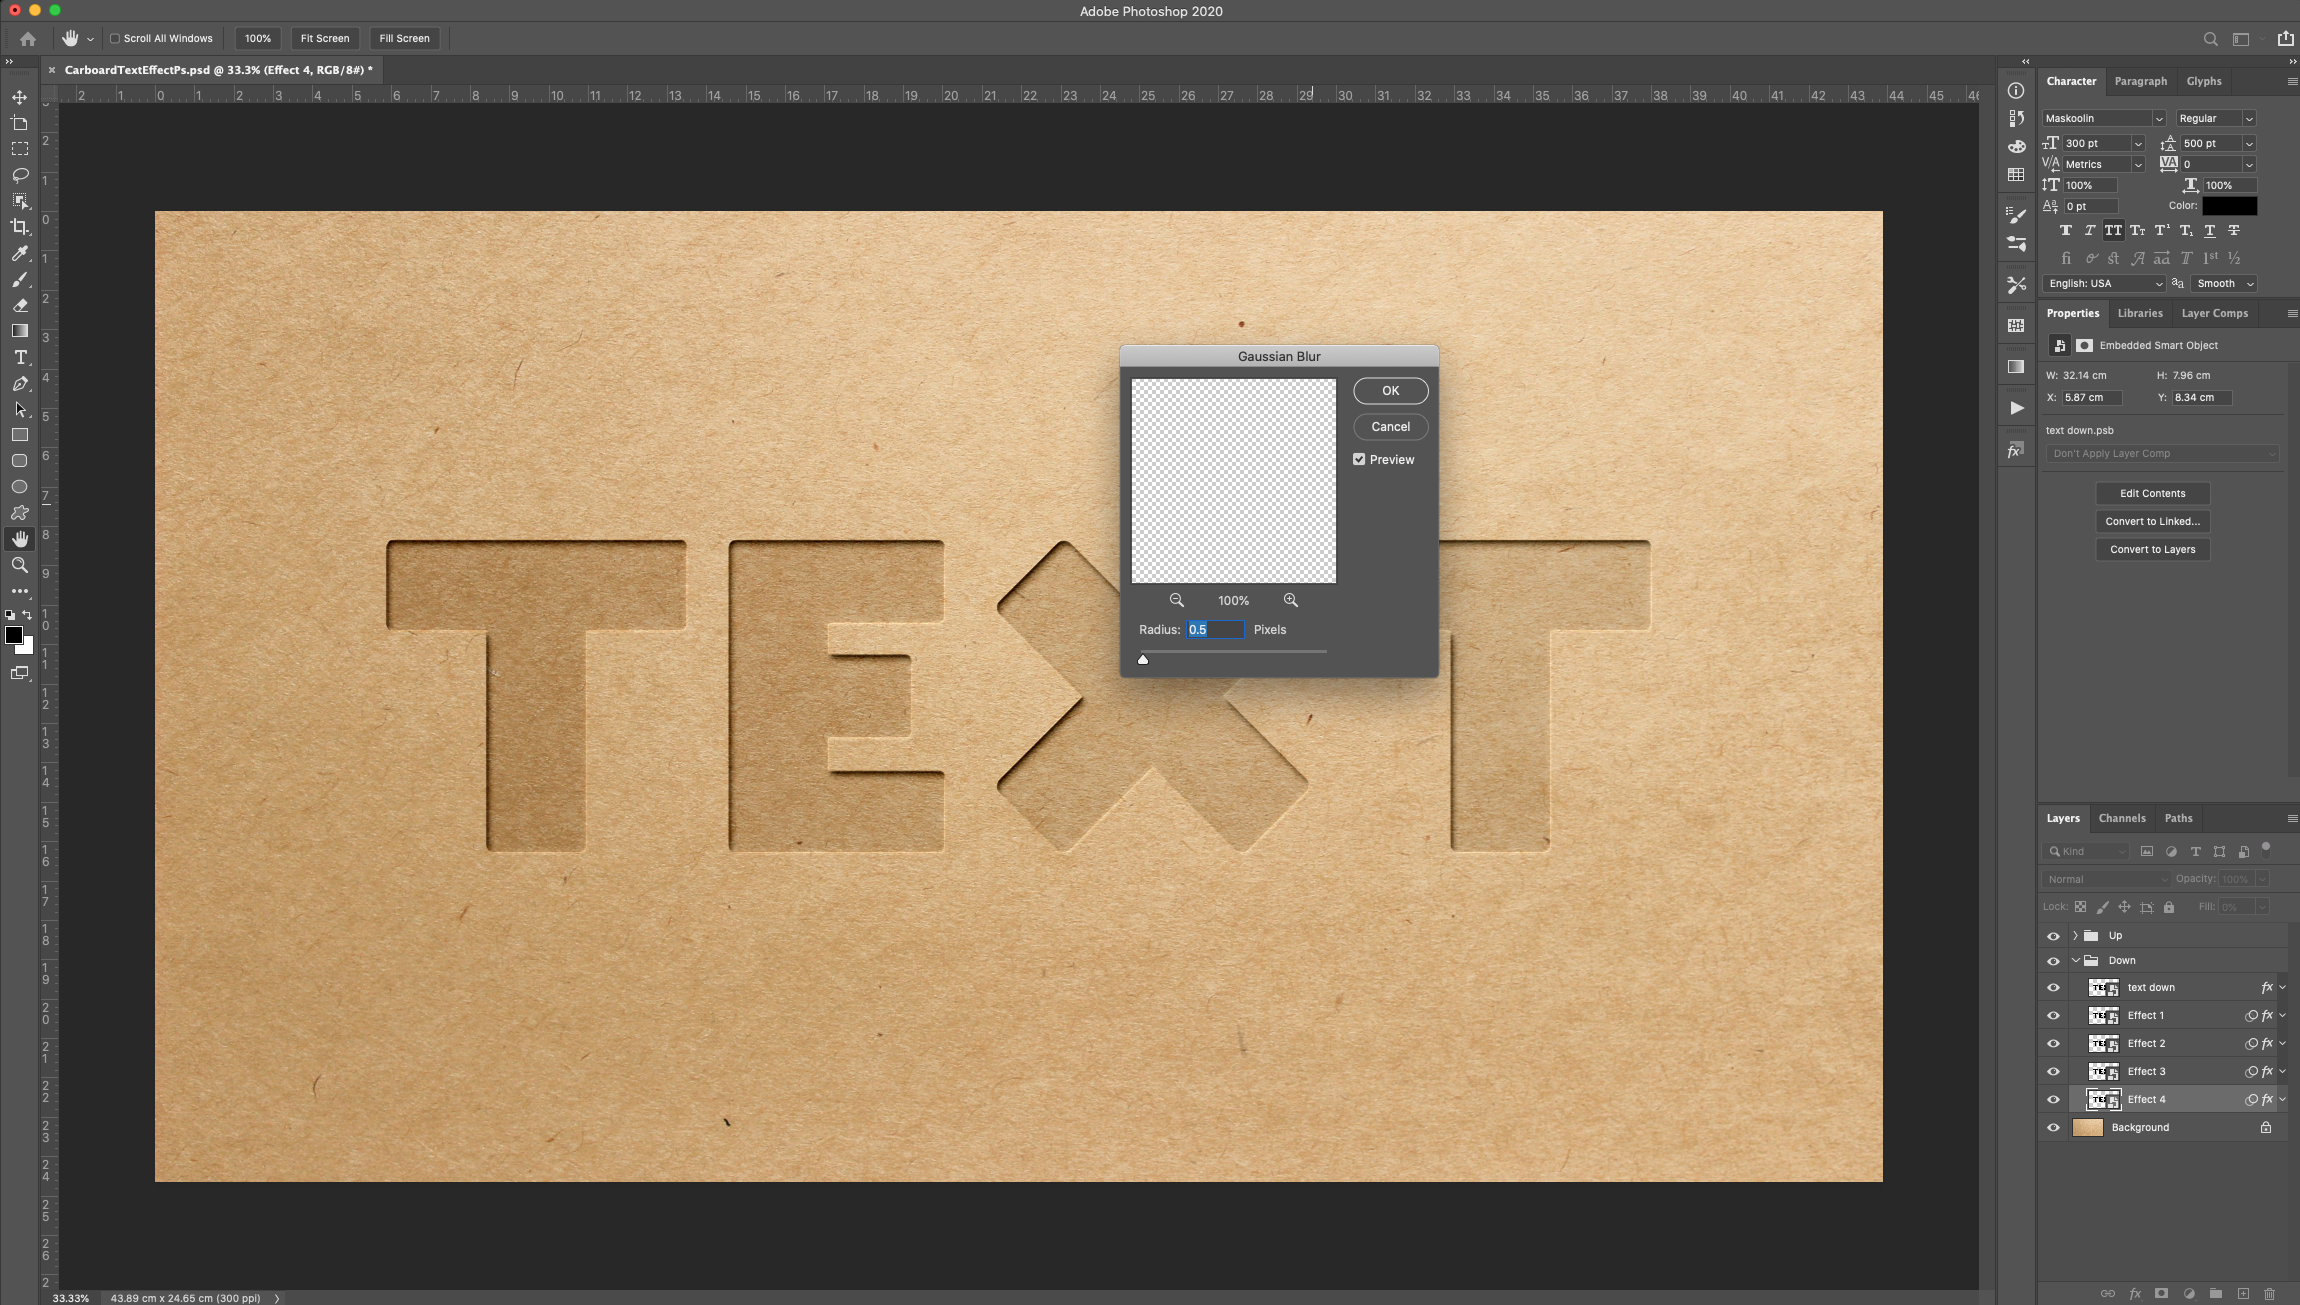
Go to Filter > Blur > Gaussian Blur and use a “Radius” of 0.5 Pixels.
21 - Check out your work! You can use one or both effects together to achieve different results.
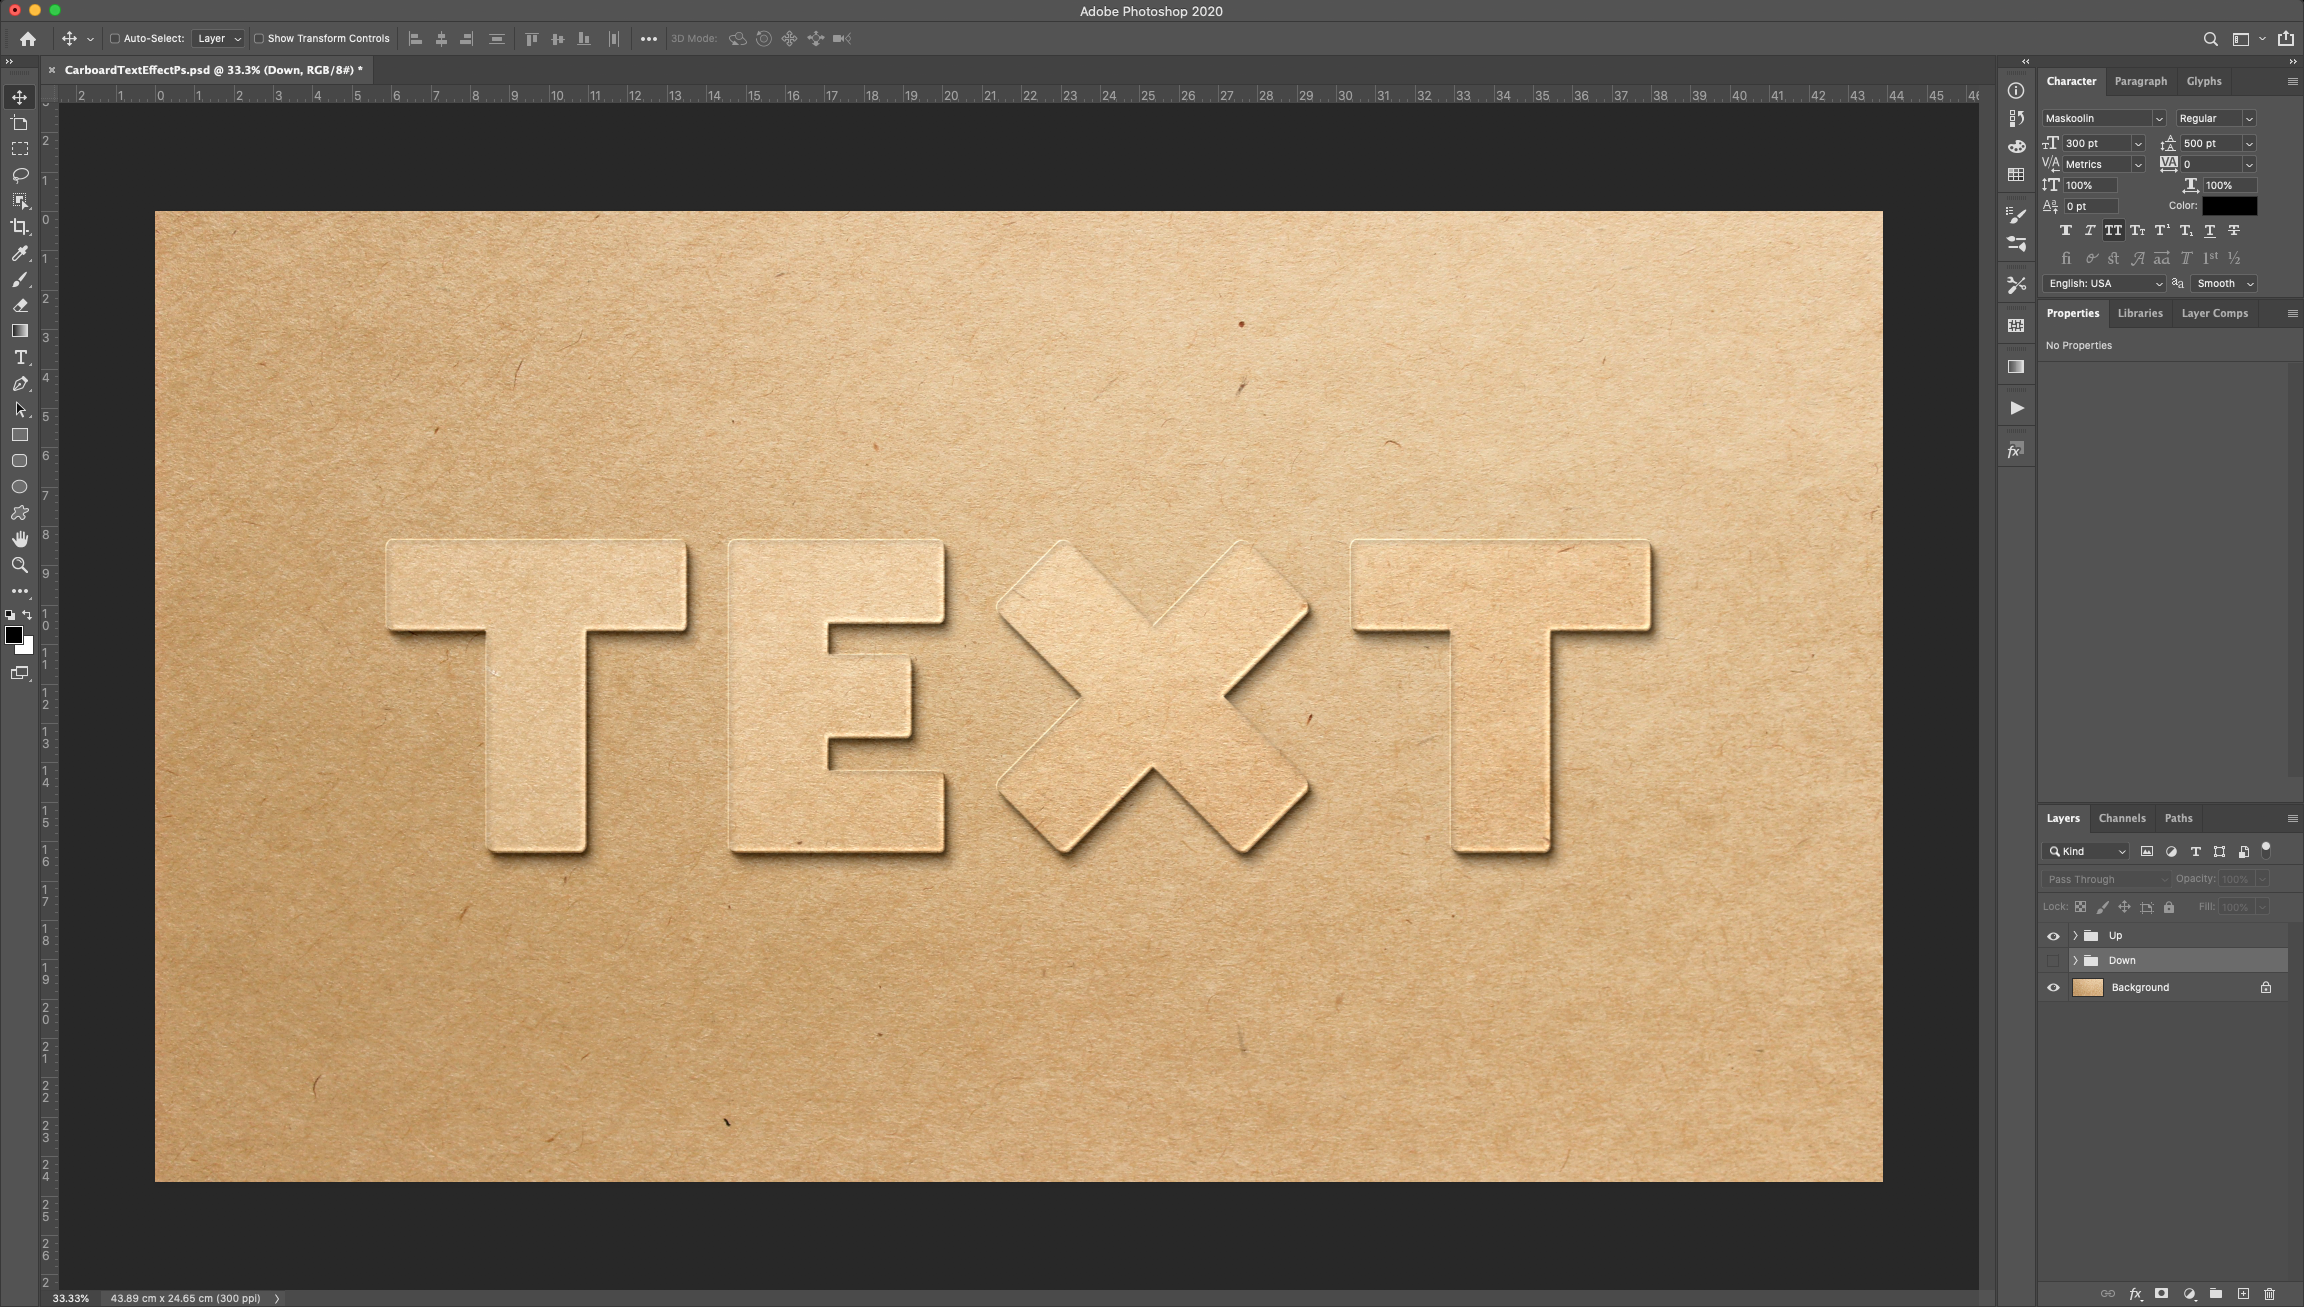
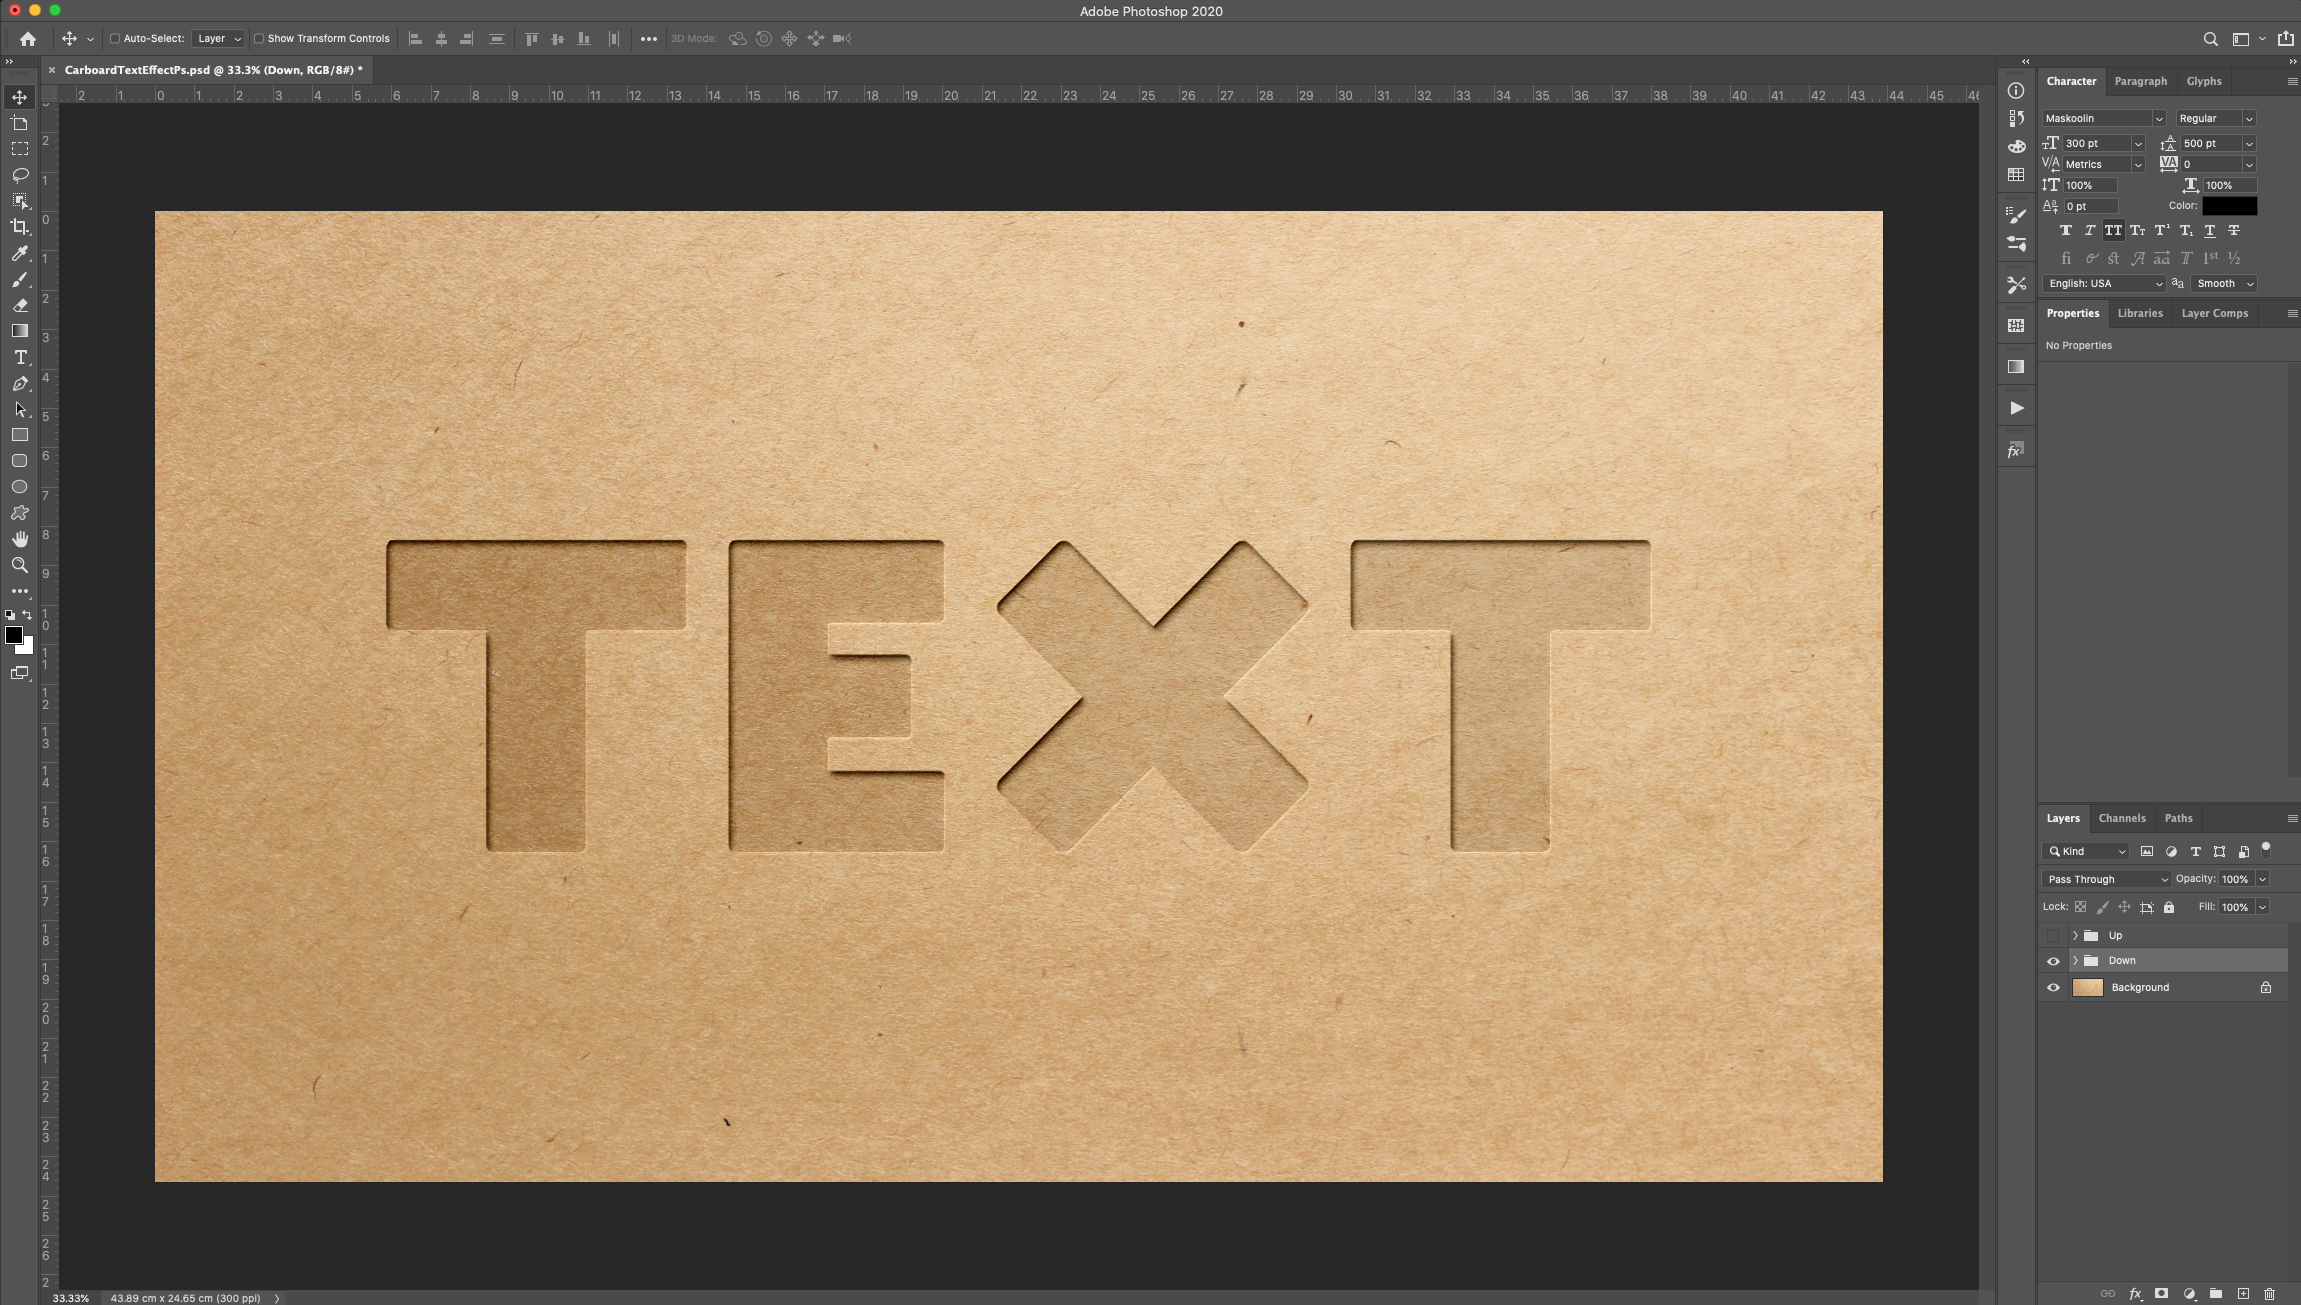
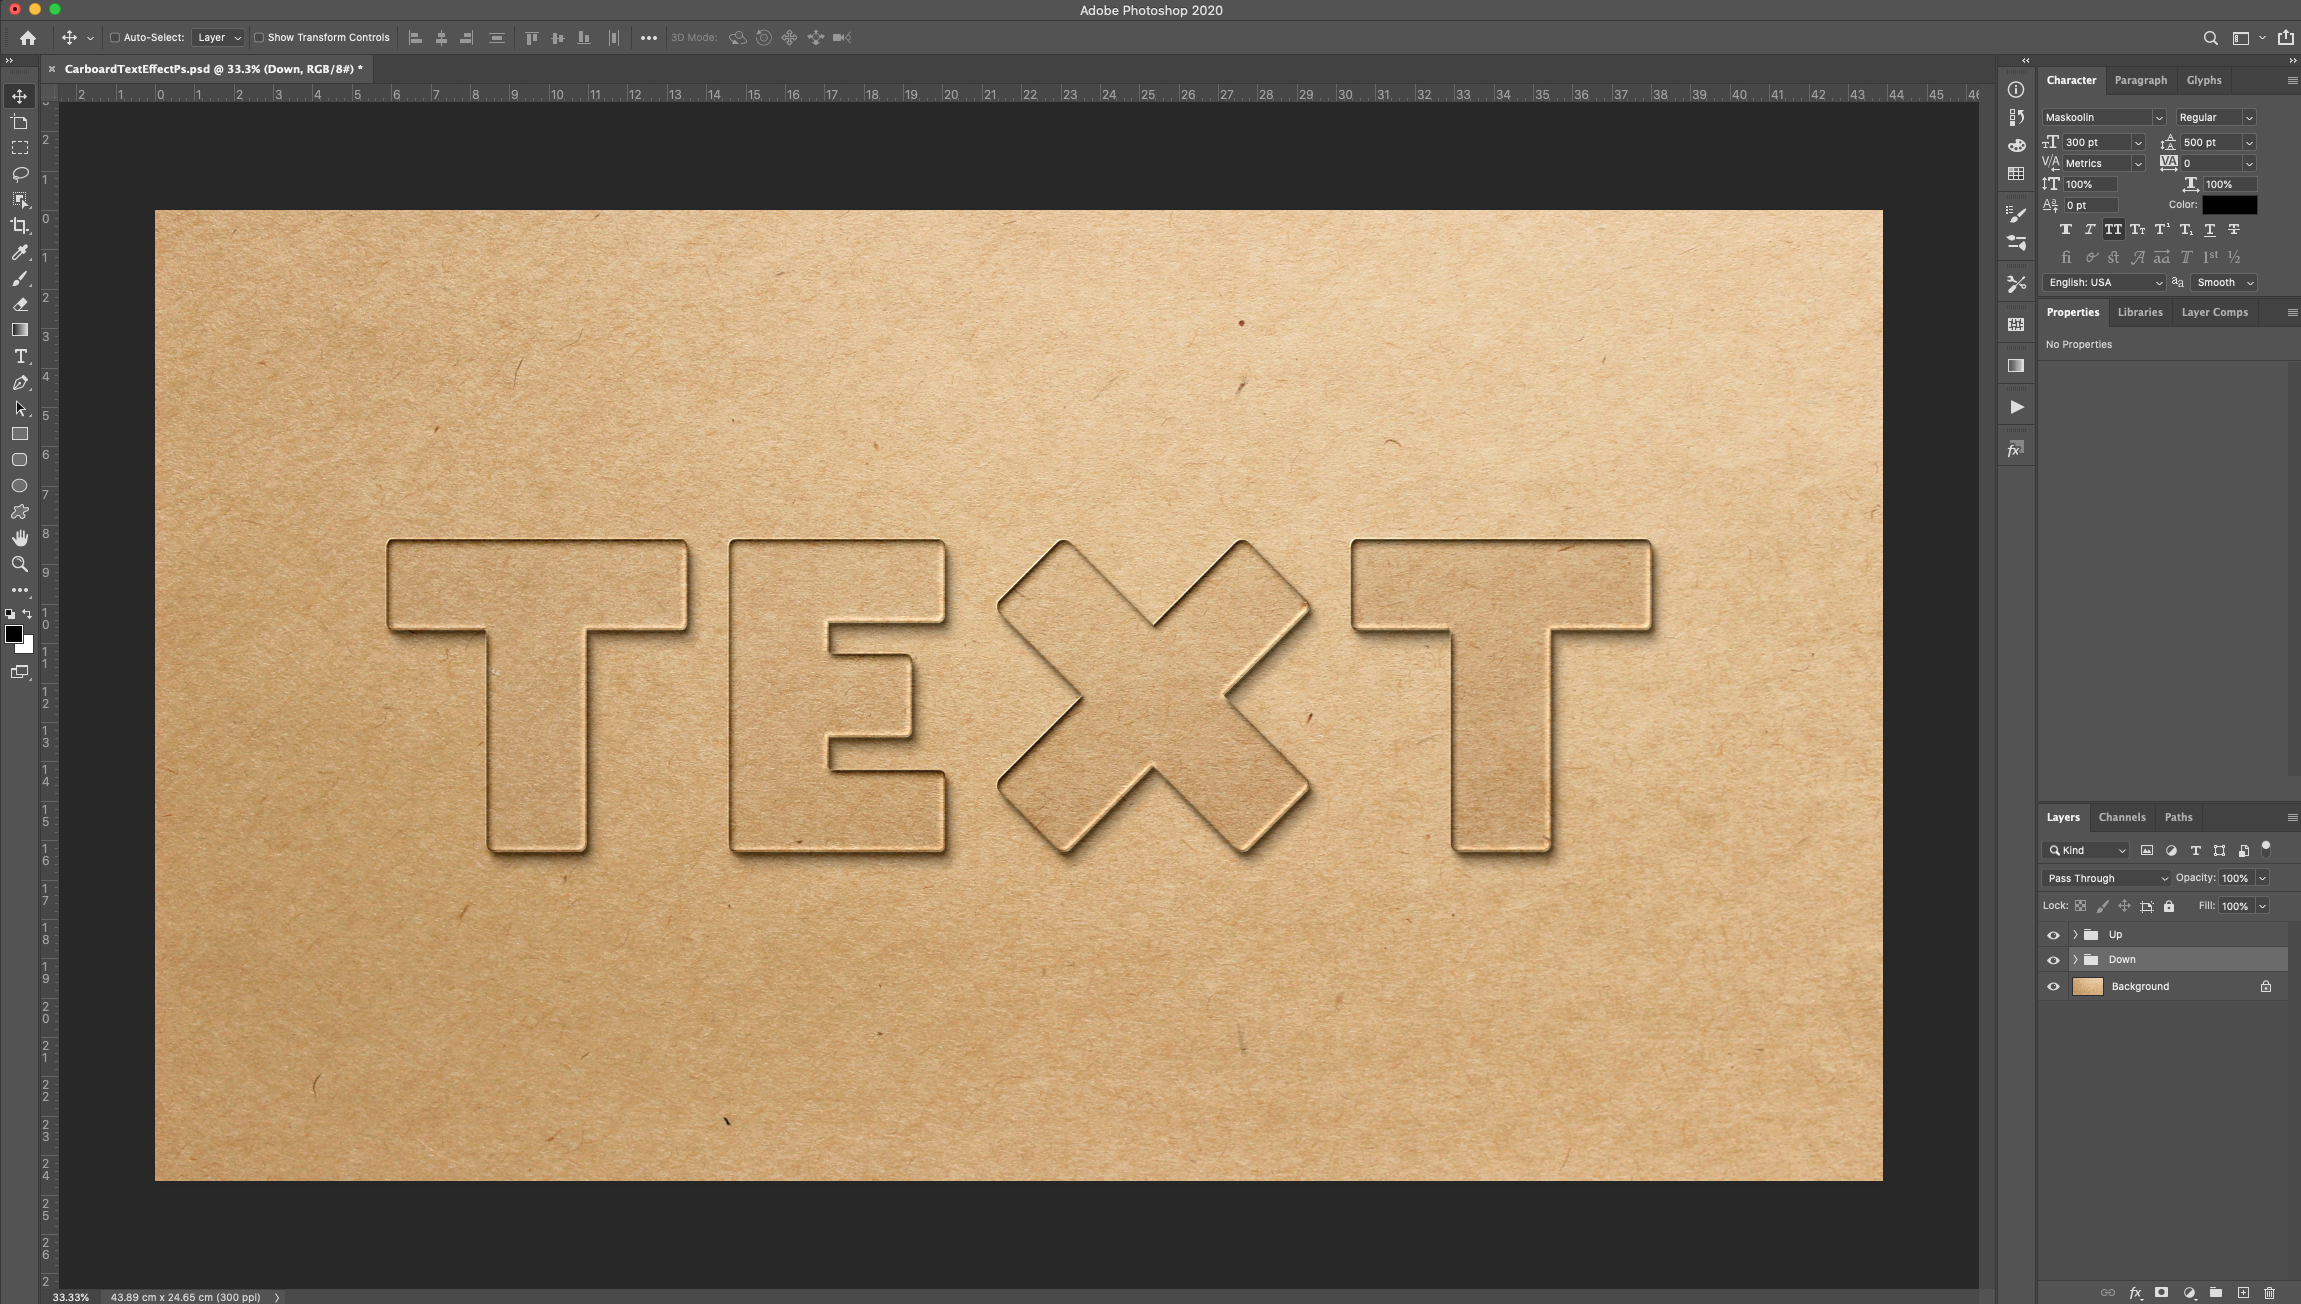
* To modify your text, just double-click on the “Text” Layer or “Text Down” (it will open it in another “Document”) change the text and “Save”. You should see the changes on your original file.
by @lornacane
6 Related Photoshop Tutorials
In today's tutorial we will show you how to create a see-through cut out text in Photoshop. This is a great way to impact in your projects including logos, social media and websites.You will need an image to use as “Background”. You are welcome to browse through the Commercial ...
*CM900 used.1- Open canvas workspace. Click on the text icon.2- Type your text.3- Change your font. I am using Garlic butter font from Font Bundles.4- If any letters are overlapping, click on the weld tool. Once all welded, click on offset.5- In the offset window, ...
For this tutorial we are using a canvas or paper background and Titin Script from Font Bundles.1 – Create a new “Gradient Layer” under your “Texture” layer. Use a “Transparent to Fill Color” gradient with #d3d1d1 and #918f8f as colors, the Style as Radial and a 250% Scale. Hit ...
For this tutorial, we are using “Bukhari Script” from Fontbundles.net (https://fontbundles.net/mikrojihad/33277-bukhari-script), some cake textures (there are some web pages that have free images that you can useas textures) and a plate and table background images.We are going to divide this tutorial in two sections. ...
*CM900 used.1- Open scan and cut canvas workspace. Click on the text icon.2- Type your text and change the font. I am using Bobbie script font from fontbundles.net3- Weld your text.4- Export your FCM foil via the internet.*If you do not have a wi ...
1- Open scan and cut canvas. Click on the shape icon.2- Pick the shape you would like to use for your pop up. You can use a shape or a welded word.3- Next select a square.4- Place the square over the shape. You need the left and ...

 All your Font Needs


