Using Icons in Cricut Design Space
1- Open Cricut Design Space. Select upload file.
2- Select upload image.
3- Select browse. Then select the icon PNG file.
4- Your image will will appear in the browse window. On the right you have 3 trace options to pick. If the images are detailed in any way select the complex option.
5- As this is a PNG image the outline trace should be straight forward. If there is a background colour you will need to use the erase tool to remove any of the background. Always select the preview option to ensure that the trace is clean.
7- You can see here that the trace here is clean. Select Continue.
8- At this point you have 2 options. you can create a Print and Cut file or a straight cut file which will only cut the outlines.
If you do choose the print and cut option and need just the cut file at a later time you can still cut the outline only (this will be shown in step 12)
9- Select the Print and cut option. name your file and if you like add tags to reference to in the future. Click save.
10- You will now automatically be brought back to the original upload screen. Select the file you have just created from the bottom icons and select Insert Images.
11- Your Icons will now appear on the design space. You can adjust the size of the images. for your print and cut.
13- If you are selecting print and cut leave as per step 11 and then select Cricut go button. Follow the prompts to print and cut.
Icons are from designbundles.net and the file is called Customizable Outline Icon set

2- Select upload image.

3- Select browse. Then select the icon PNG file.

4- Your image will will appear in the browse window. On the right you have 3 trace options to pick. If the images are detailed in any way select the complex option.

5- As this is a PNG image the outline trace should be straight forward. If there is a background colour you will need to use the erase tool to remove any of the background. Always select the preview option to ensure that the trace is clean.

7- You can see here that the trace here is clean. Select Continue.

8- At this point you have 2 options. you can create a Print and Cut file or a straight cut file which will only cut the outlines.
If you do choose the print and cut option and need just the cut file at a later time you can still cut the outline only (this will be shown in step 12)

9- Select the Print and cut option. name your file and if you like add tags to reference to in the future. Click save.

10- You will now automatically be brought back to the original upload screen. Select the file you have just created from the bottom icons and select Insert Images.
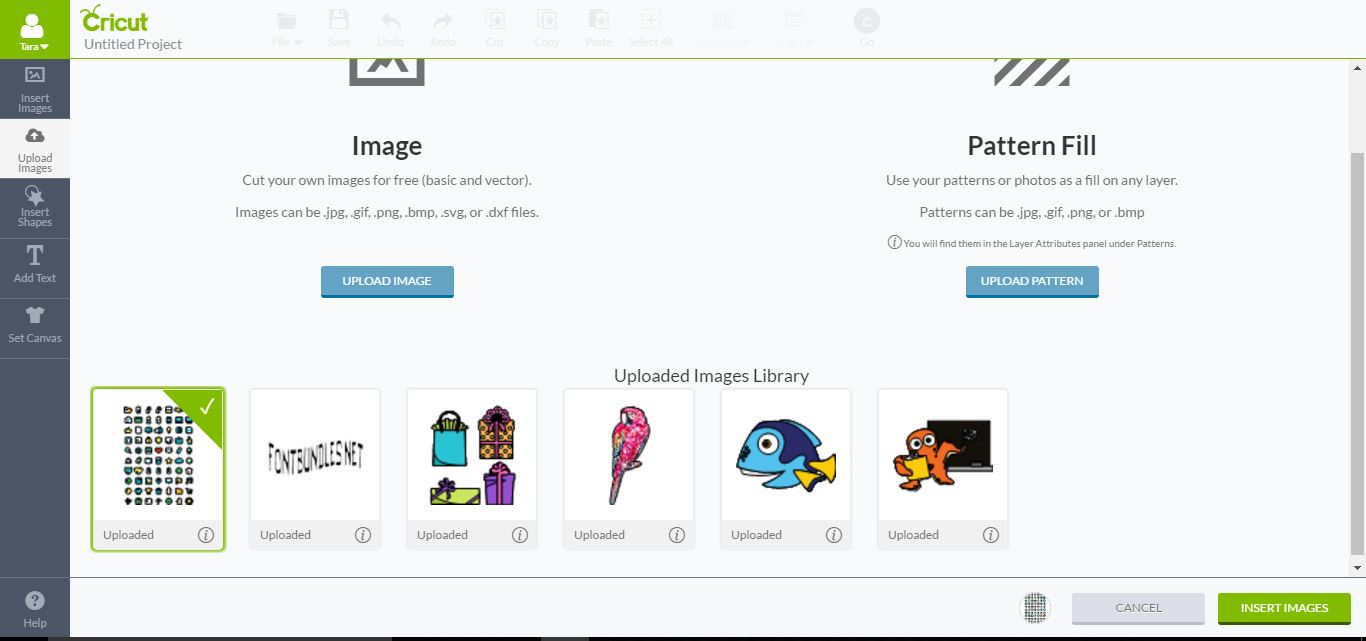
11- Your Icons will now appear on the design space. You can adjust the size of the images. for your print and cut.

12- If for any reason you do not want to print and cut, and only cut the icon shapes you can do this by selecting the image in the layers tab, bring up the layer alterations and select the cut option. You will see the images go away and only the silhouettes will be on screen. You can now select the cricut Go button and cut the outline.

13- If you are selecting print and cut leave as per step 11 and then select Cricut go button. Follow the prompts to print and cut.

Icons are from designbundles.net and the file is called Customizable Outline Icon set


