
Writing on a rainy window in Photoshop
For this tutorial, we are using the image of a window with rain. And the font Sekut fromFont Bundles.
1 - In Photoshop, open the image you chose as background.

2 - Select your “Type Tool” (T), choose your font (we used Sekut) and type your text. Make it about 350 pixels in size (this will depend on the font you choose), and fill it with black.


3 - Reposition your text using your “Move Tool” (V) and if to want to rotate it a bit use your “Transform Tool” (Command/Control + T) and place your cursor on a corner to use the curved double arrow to do it.


4 - Right-click on your text layer and choose “Convert to Smart Object” from the menu.

5 - Go to Filter > Liquify (Shift + Command/Control + X) and apply some distortion to make it look realistic (you can use a picture from the internet as reference). We used the “Twirl Clockwise Tool” (C), Size 100, Density 50, Pressure 100, Rate 80, Pin Edges unchecked. and the “Forward Warp Tool” (W), Size 60, Density 50, Pressure 100, Pin Edges unchecked.


6 - Change the “Bend Mode” of your text layer to “Overlay” and lower the “Opacity” to 50%. Duplicate your layer (Command/Control + J) and turn the “Opacity” of the duplicate back to 100%.


7 - Create a “Layer Mask” by clicking on the “Add Vector Mask” button at the bottom of the “Layers” menu and select the mask thumbnail, then click Command/Control + I to invert the mask color.

8 - Select the “Brush Tool” (B), make sure your “Foreground” color is white and choose a large brush with a “Hardness” of 0% and an “Opacity” of 30%. Making sure you are working on the mask thumbnail and “draw” a bit on the top part of the letters to add some contrast.

9 - Create a “New Layer” (Shift + Command/Control + N) and place it on top of your “Background” layer. Call it “Fog”.

10 - Select the “Brush Tool” (B) and choose “Wet Media Brushes” from the menu on the top right of the “Brush Presets” window, select the “Heavy Steeple” brush and change the size to 200 pixels and change the “Mode” to “Dissolve”. Use a light color present in your background as “Fill” color (we used # ccf1ff) and paint some fog on your window.


11 - Change the “Blending Mode” to “Screen” and lower the “Opacity” to 20% and “Fill” 60%.

12 - Duplicate the text layer again, double-click on it to apply the following “Layer Styles”:

Bevel & Emboss:

Inner Shadow: Blend Mode color #324b44

Satin:

Drop Shadow: Blend Mode color #13473e

(The choice of colors depends mostly of the ones present in your “Background”)
13 - Reduce the “Opacity” of your original text layer to 30%. Create a “New Layer” and position it on top of your second text duplicate, name it “Drops”. Select one of your text layers and click on top of its thumbnail while holding Command/Control to make a selection. Ten go back to your “Drops” Layer.


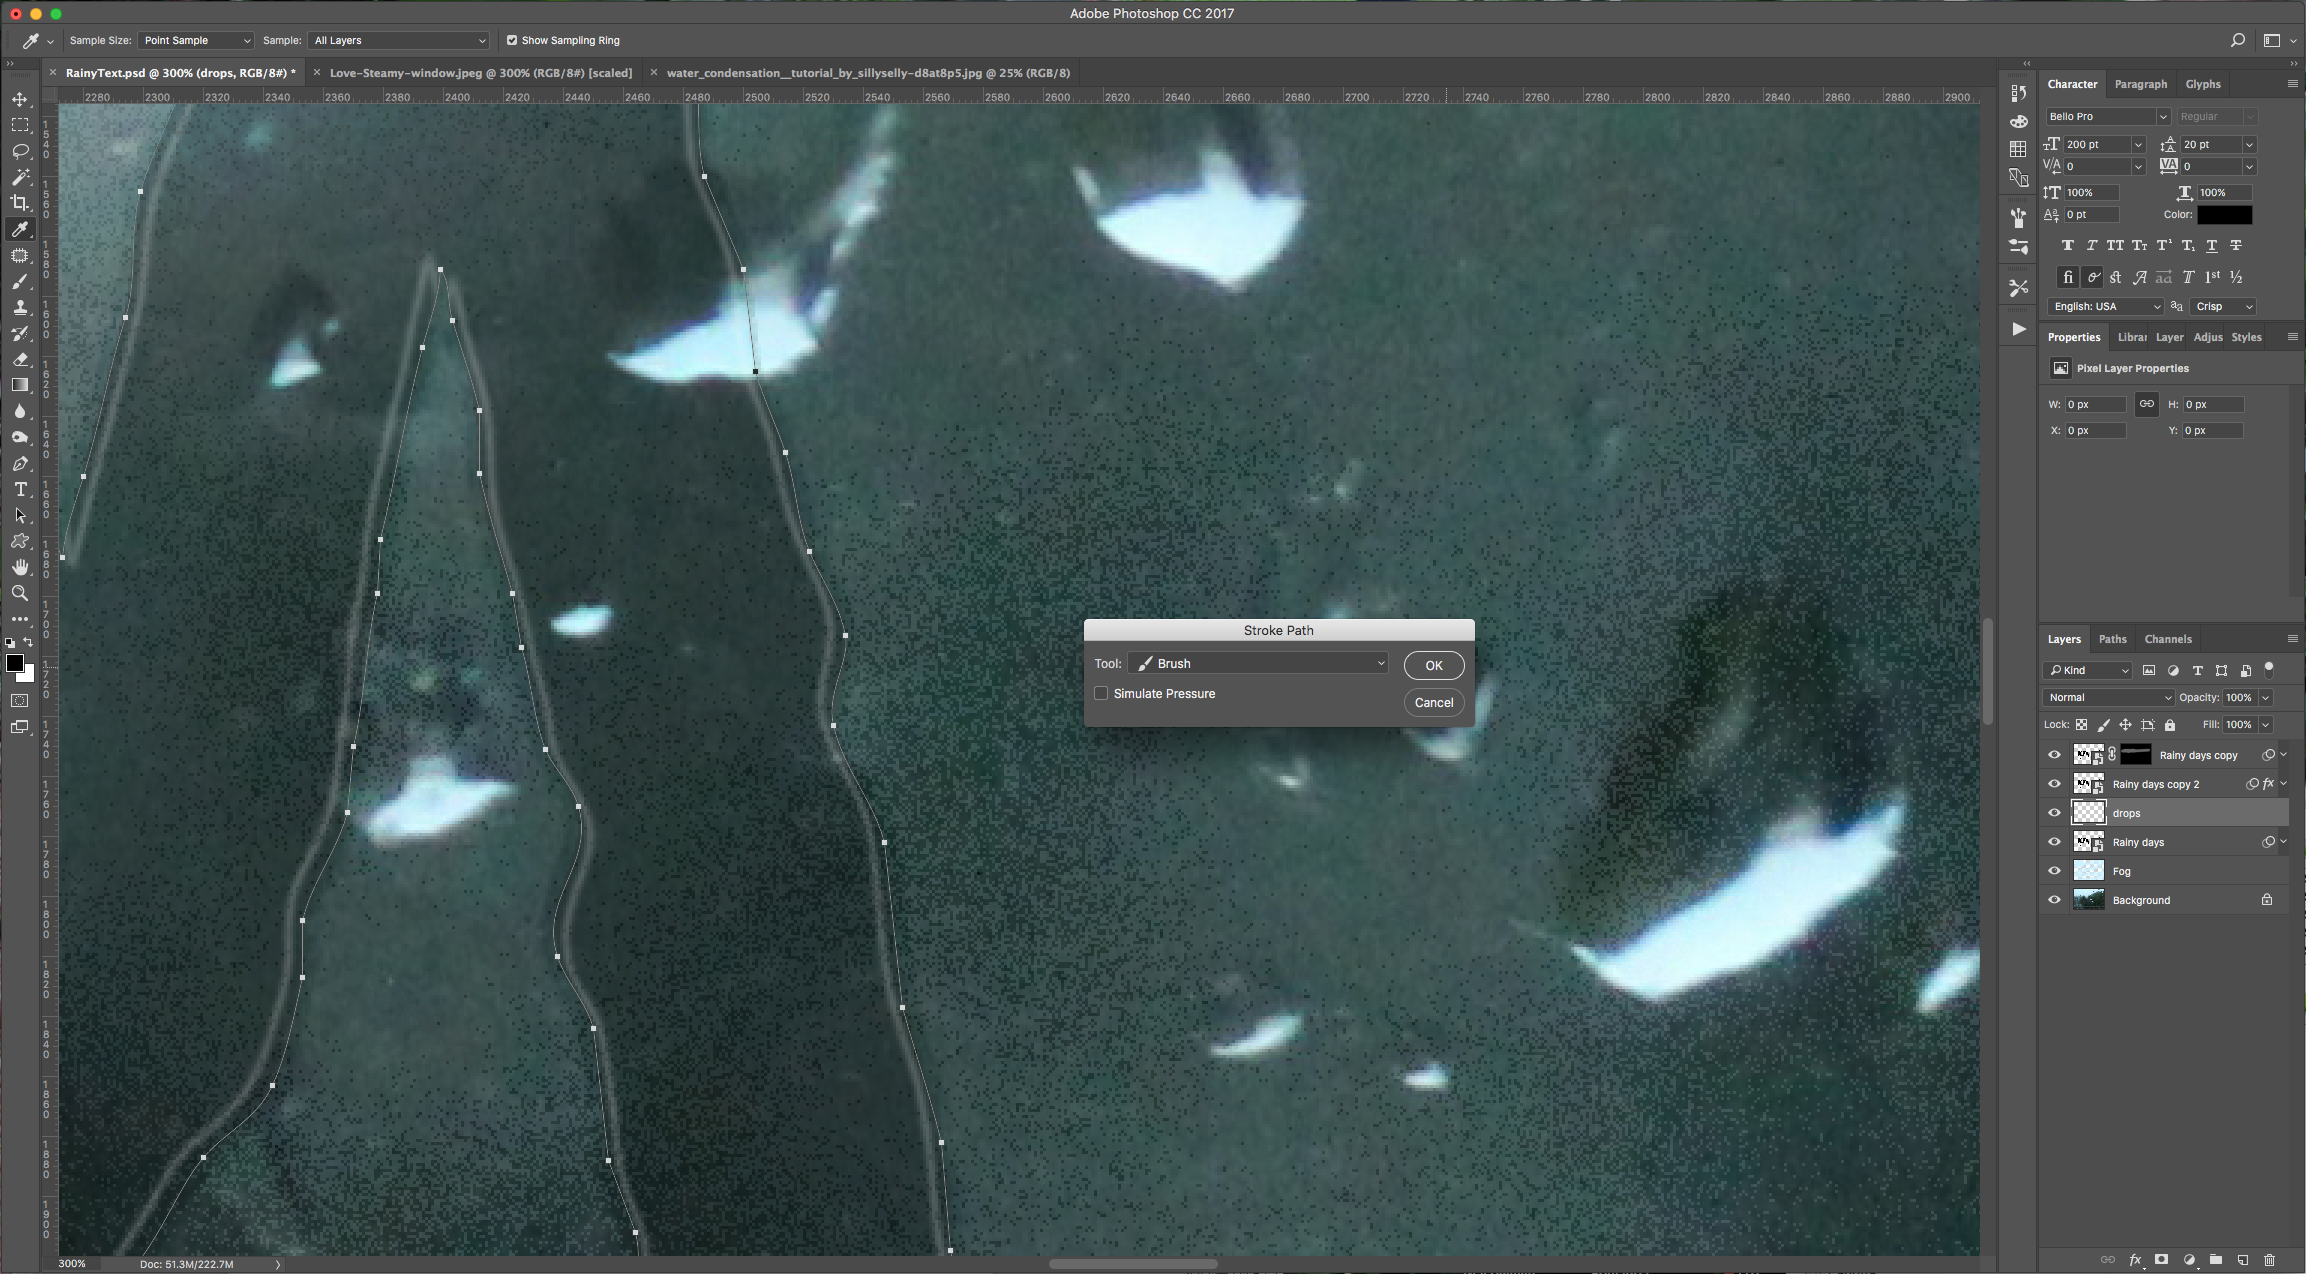
14 - Go to the “Paths” menu and click on the “Make work path from selection” button at the bottom, then go back to your “Drops” layer. Select the “Drippy Water” brush from the “Brush Presets” window, keep the default size and “Dissolve” as “Mode”. With your “Path Selection Tool” select the path. Then right-click on the path and choose “Stroke Path” from the pop up menu. Then choose “Brush” as the “Tool”.


15 - Double-click on the “Drops” layer and apply the following “Layer Styles”:

Satin:

Drop Shadow: Blend Mode color #13473e

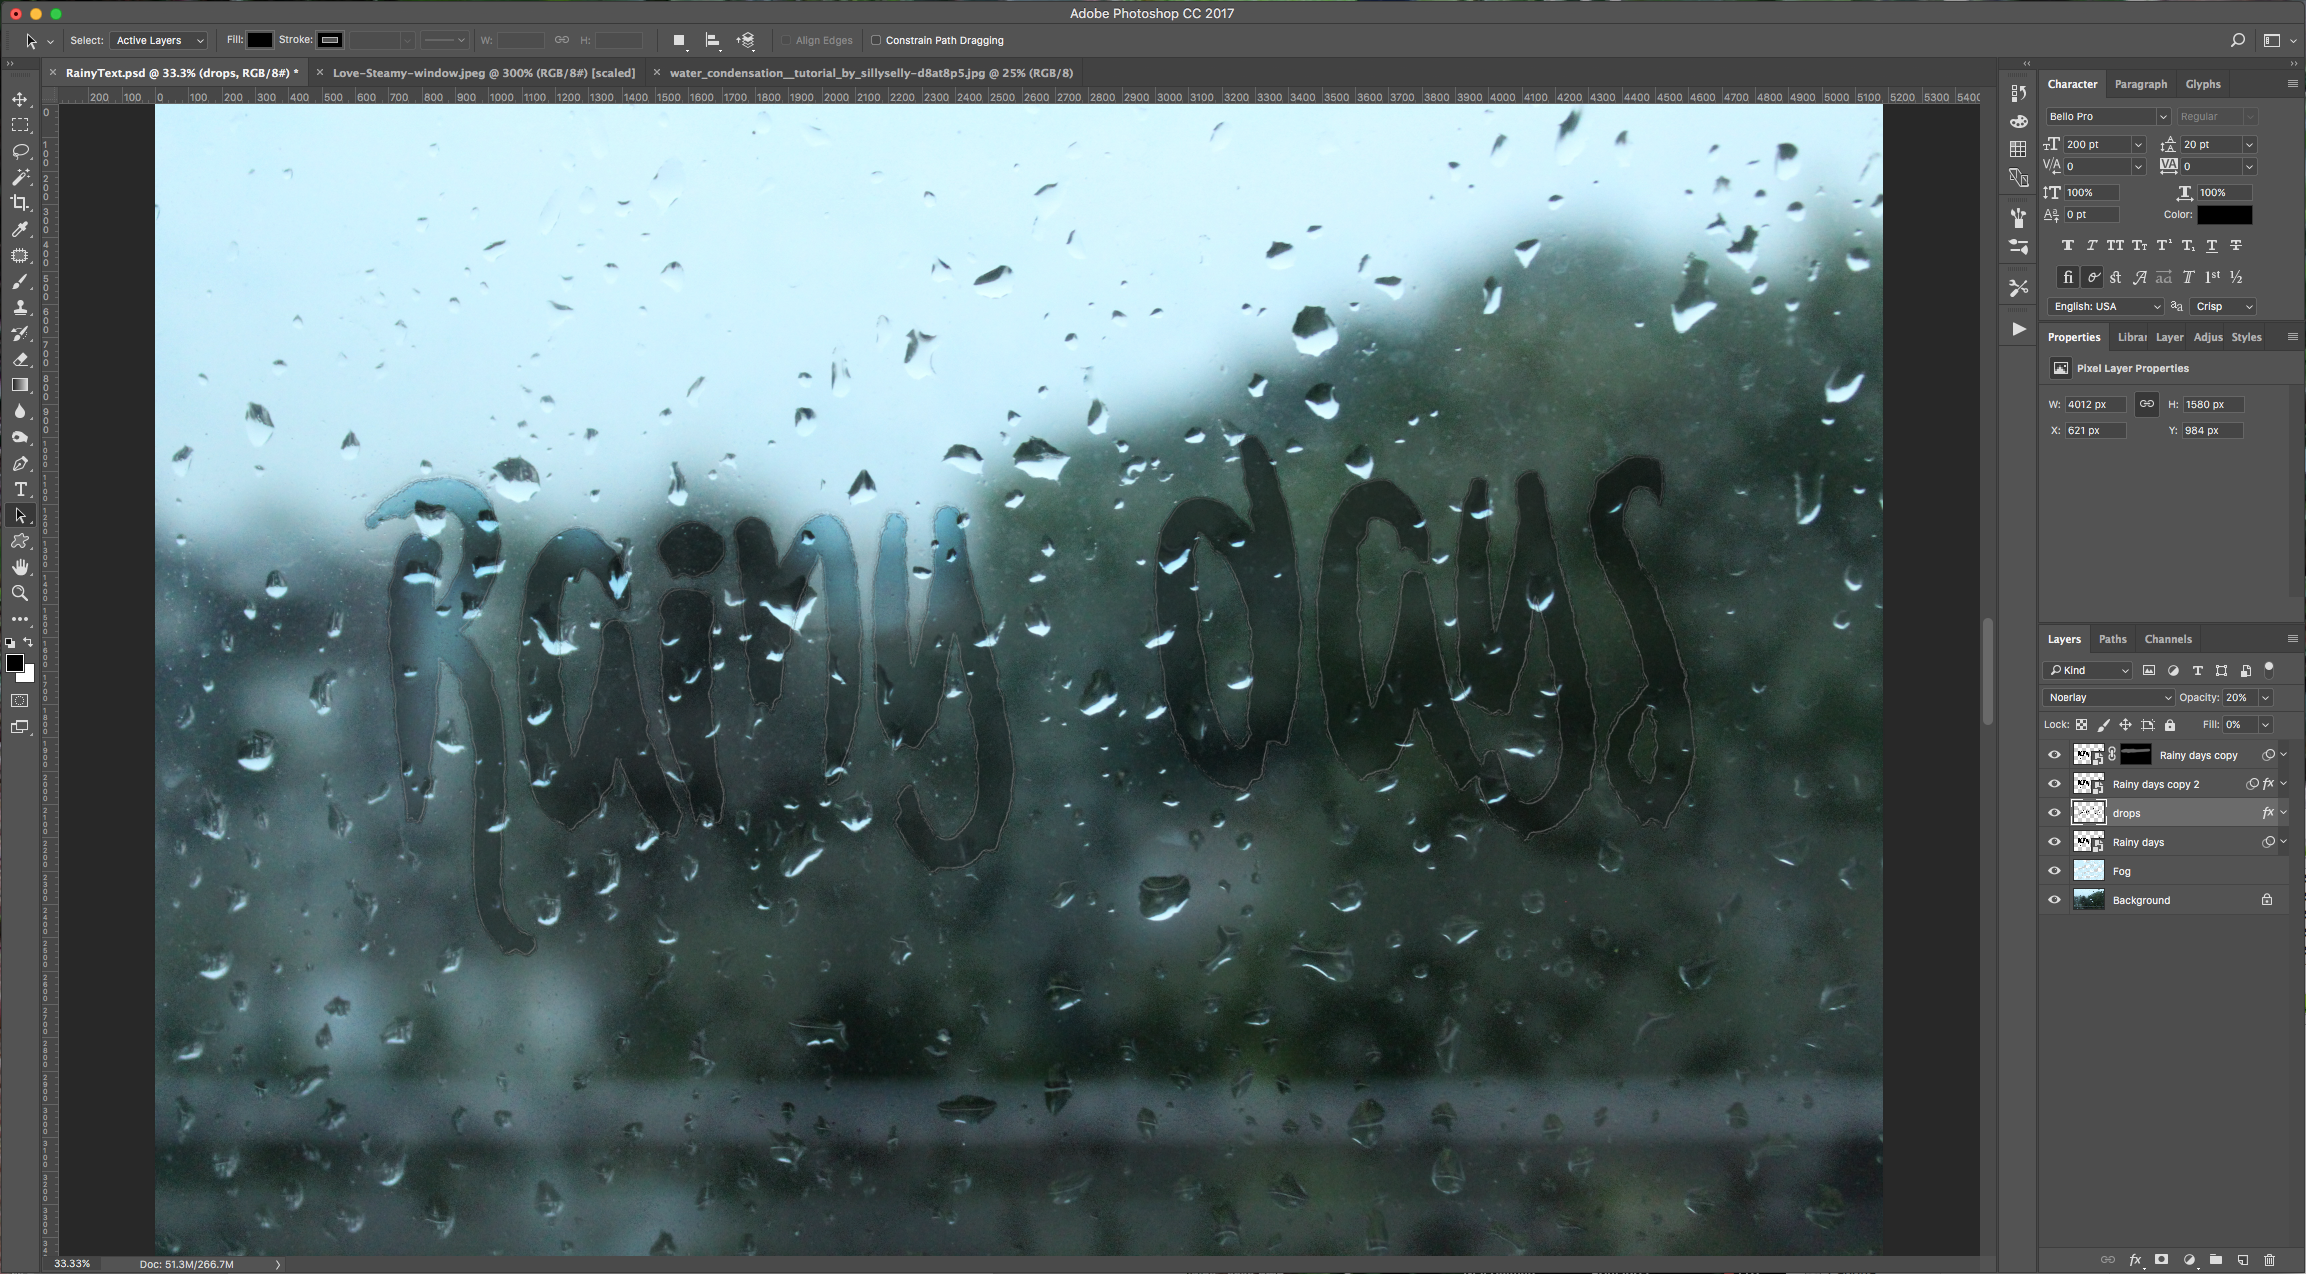
16 - Check your text:
by @lornacane


