


By Design Bundles
How to Access Extra Glyphs and Swashes in Photoshop
Accessing Glyphs and Swashes is easy in Photoshop on PC or Mac, as the software is specifically designed to be fully compatible with Glyphs.
For the tutorial today we'll be using Lovely Melissa, a gorgeous font which comes with a huge array of 900 glyphs.
The Difference between design where glyphs are used is huge as you can see in the below example:
Lovely Melissa Comparison between Glyphs disabled and enabled:

To access the Lovely Melissa additional Glyphs in Photoshop CC 2015 on Mac or PC, follow the following steps:
1. Install the .OTF version of the font as normal.
2. Launch Photoshop CC.
3. Select Lovely Melissa Font and create your text design.

4. Go to Window at the top and select 'Glyphs'.

5. The glyphs panel should appear with all of the font's glyphs visible. Move this somewhere nice in your interface so you can see the font design as well.
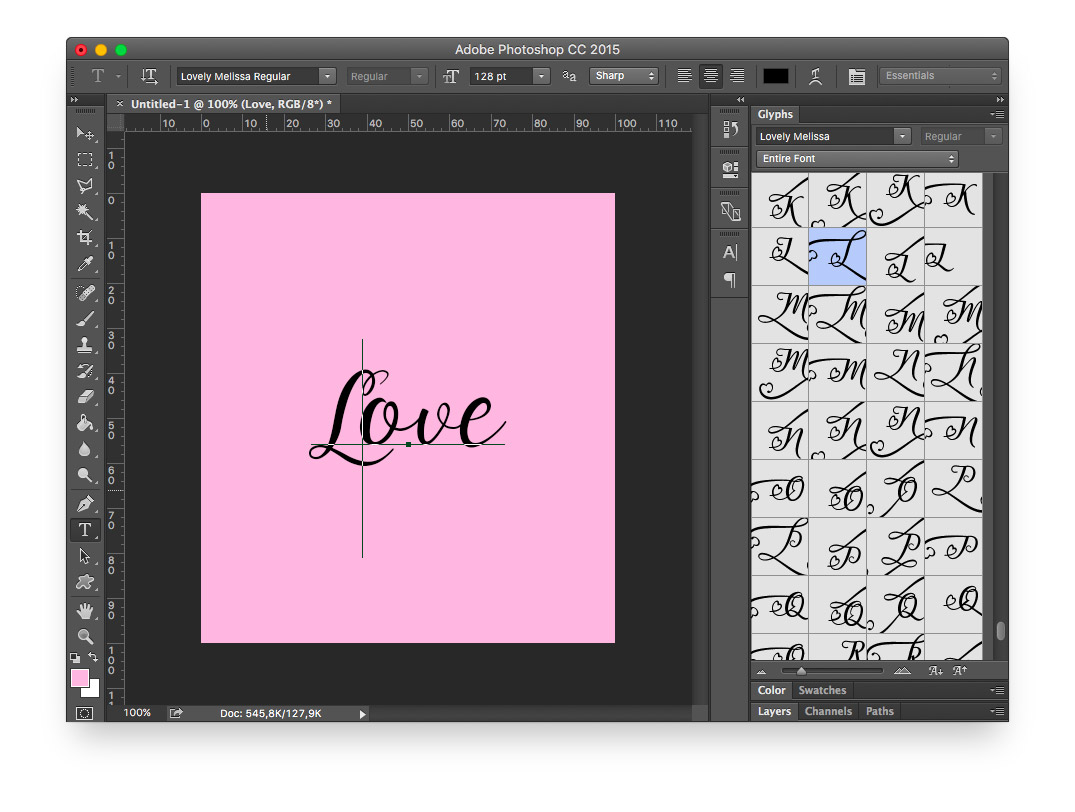
6. Select the character you want to replace with an advanced glyph.

7. Double click the glyph you would like to use in the glyphs panel.

8. The Glyph will now be replaced with your advanced, swirly amazing design.

You can now add styles to additional characters and complete your design in Photoshop CC on Mac or PC.


