Camouflage Pattern in Photoshop / Illustrator
For this tutorial you may want to get a Color Palette as reference.
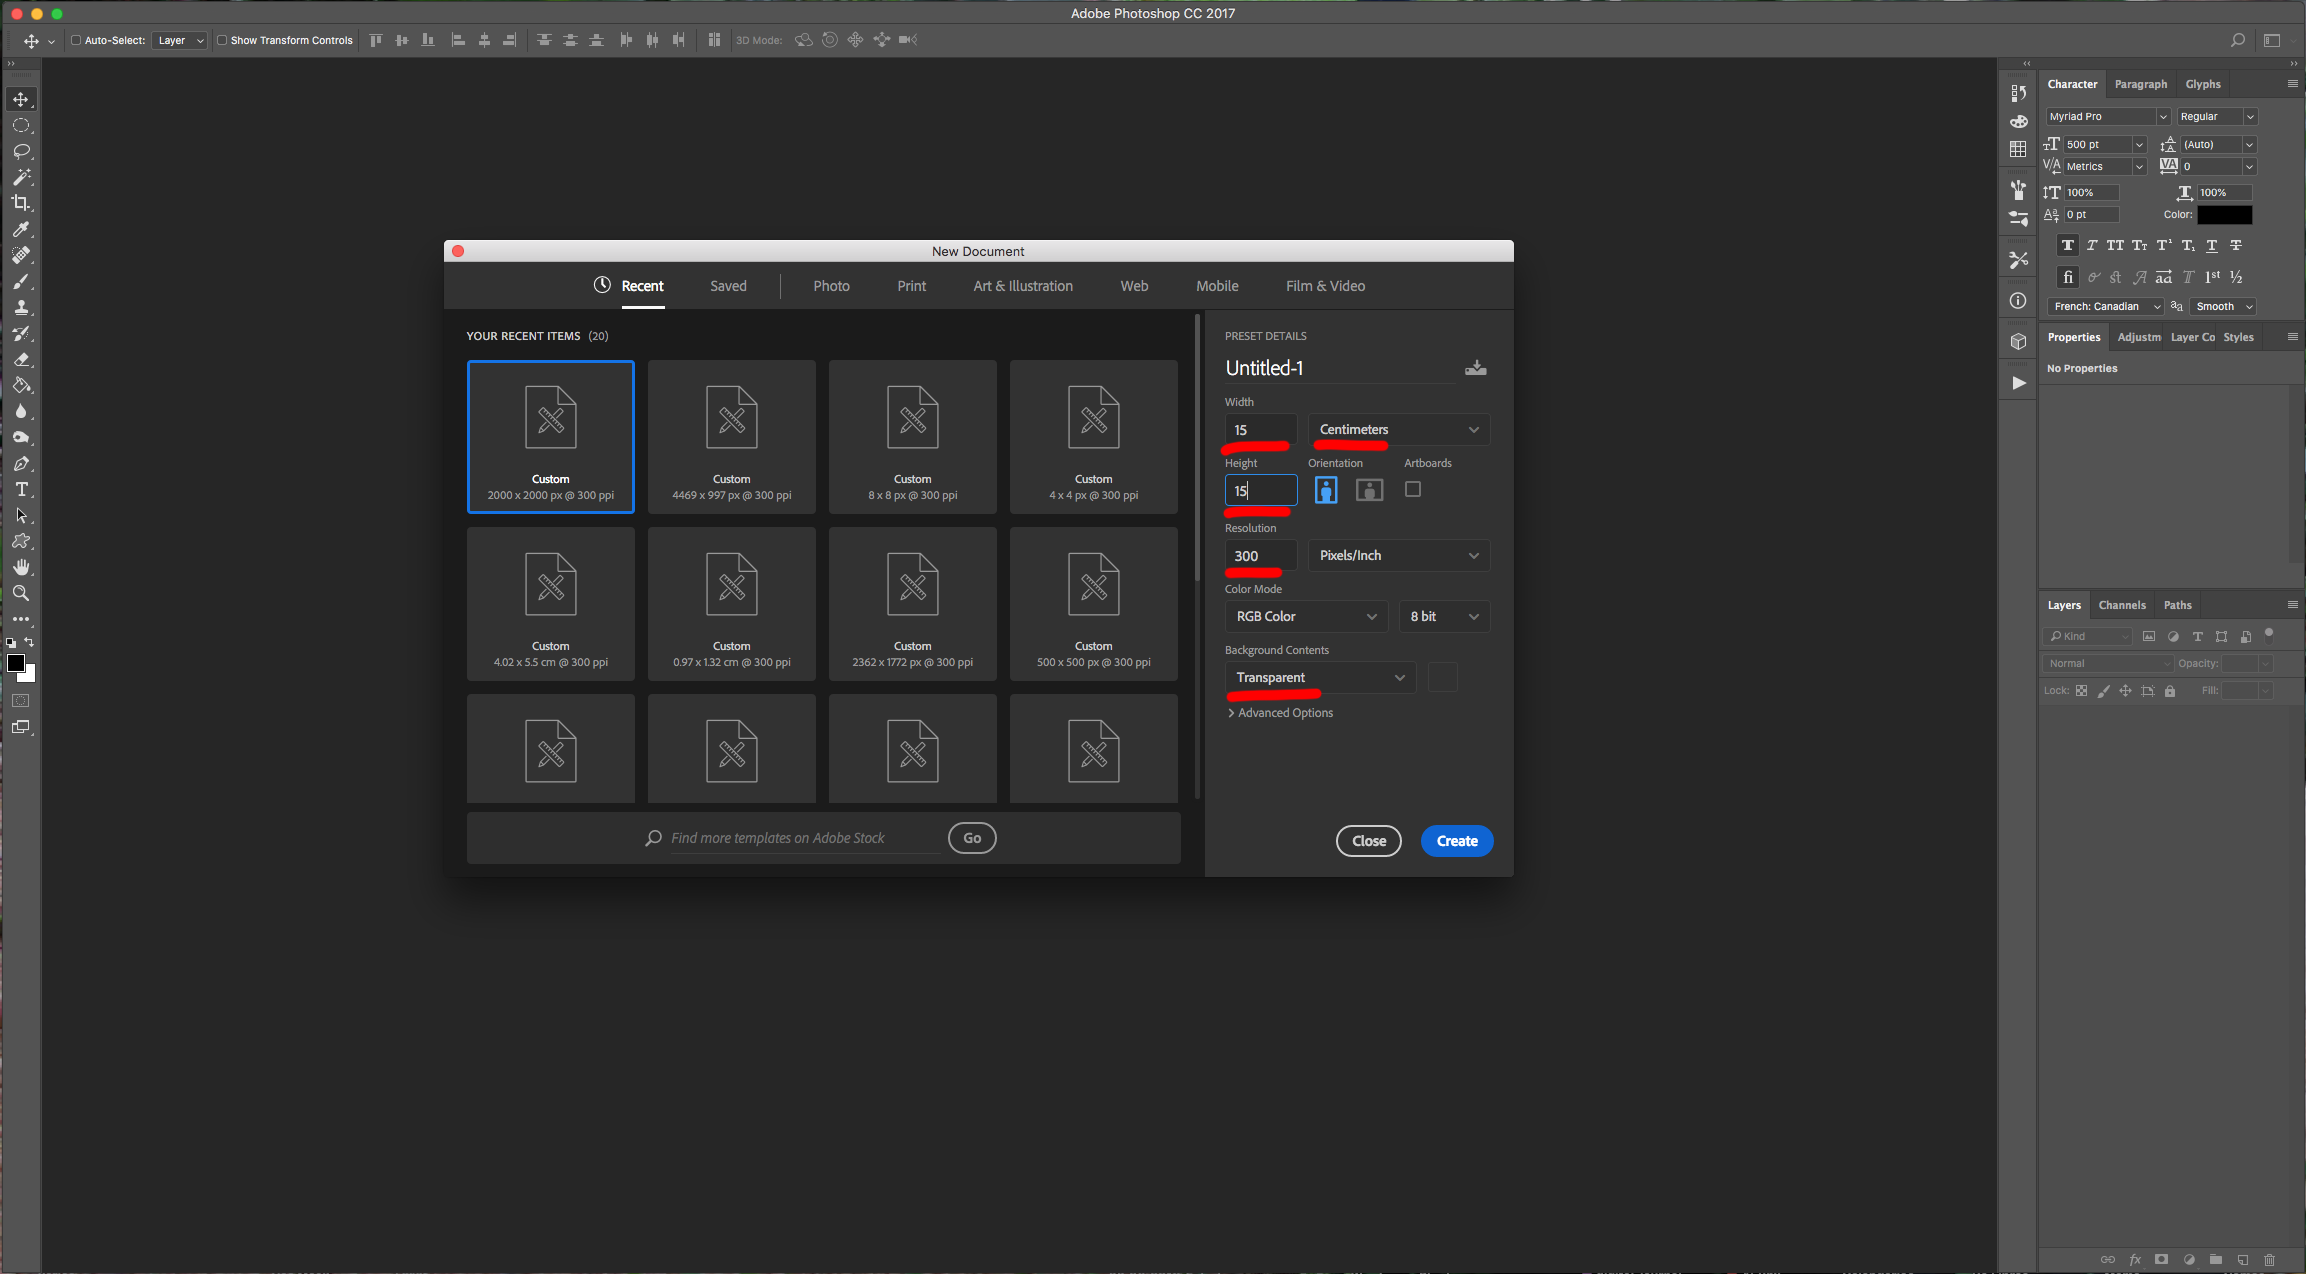
1 - In Photoshop create a “New Document”, make it 15 Centimeters in “Width” and “Height” @300 Pixels/Inch and with a “Transparent” Background.
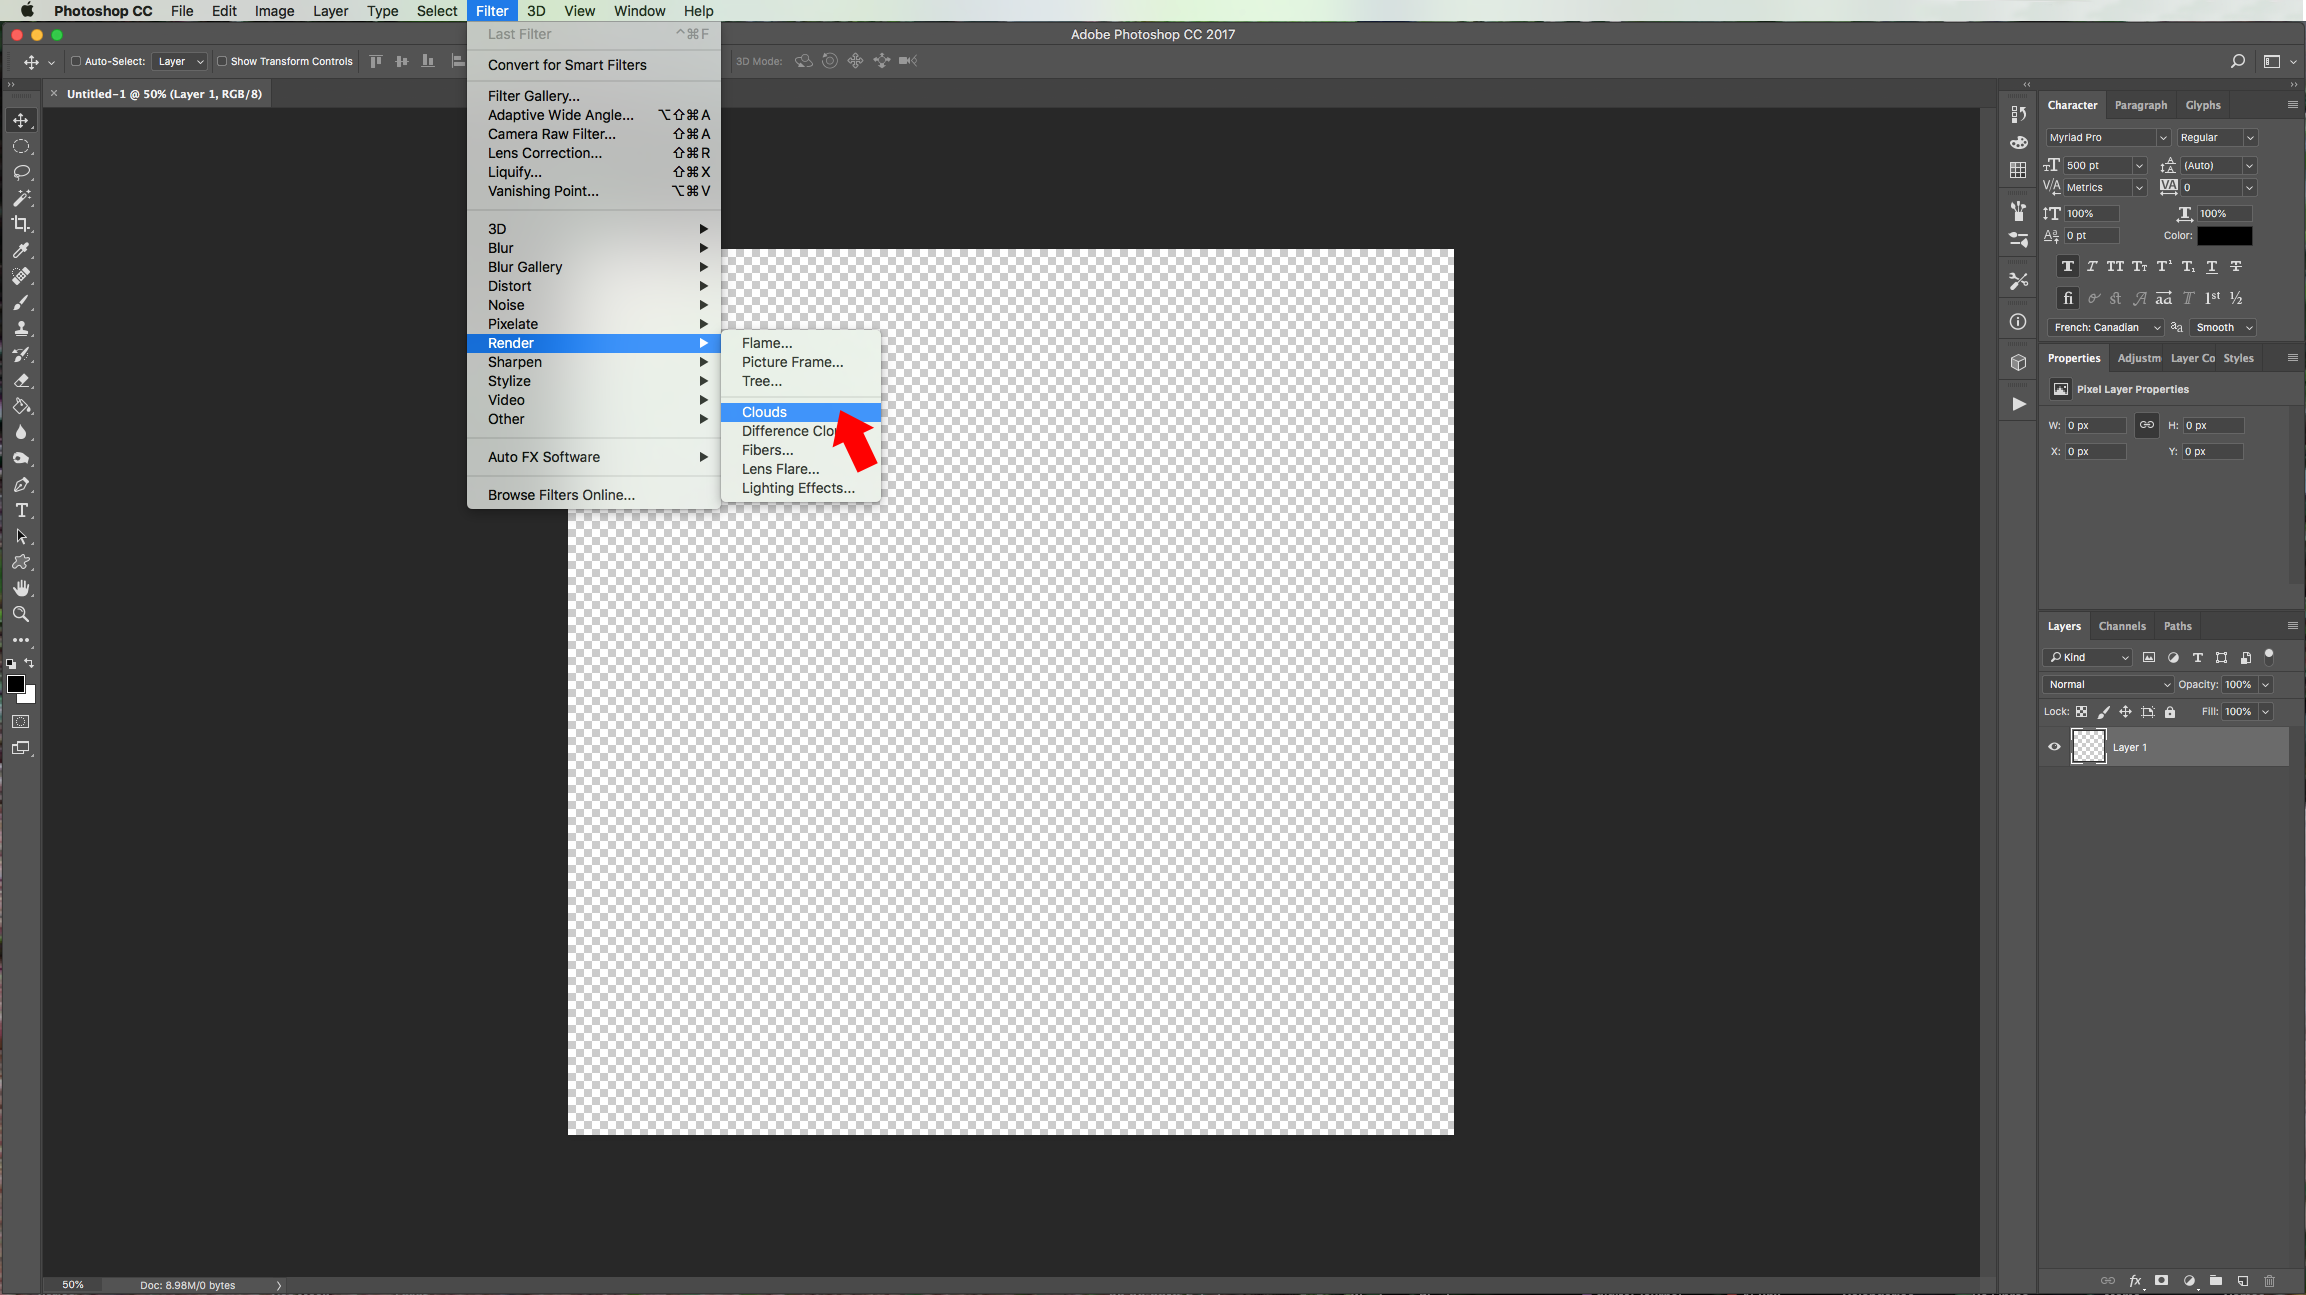
2 - Go to Filter > Render > Clouds...
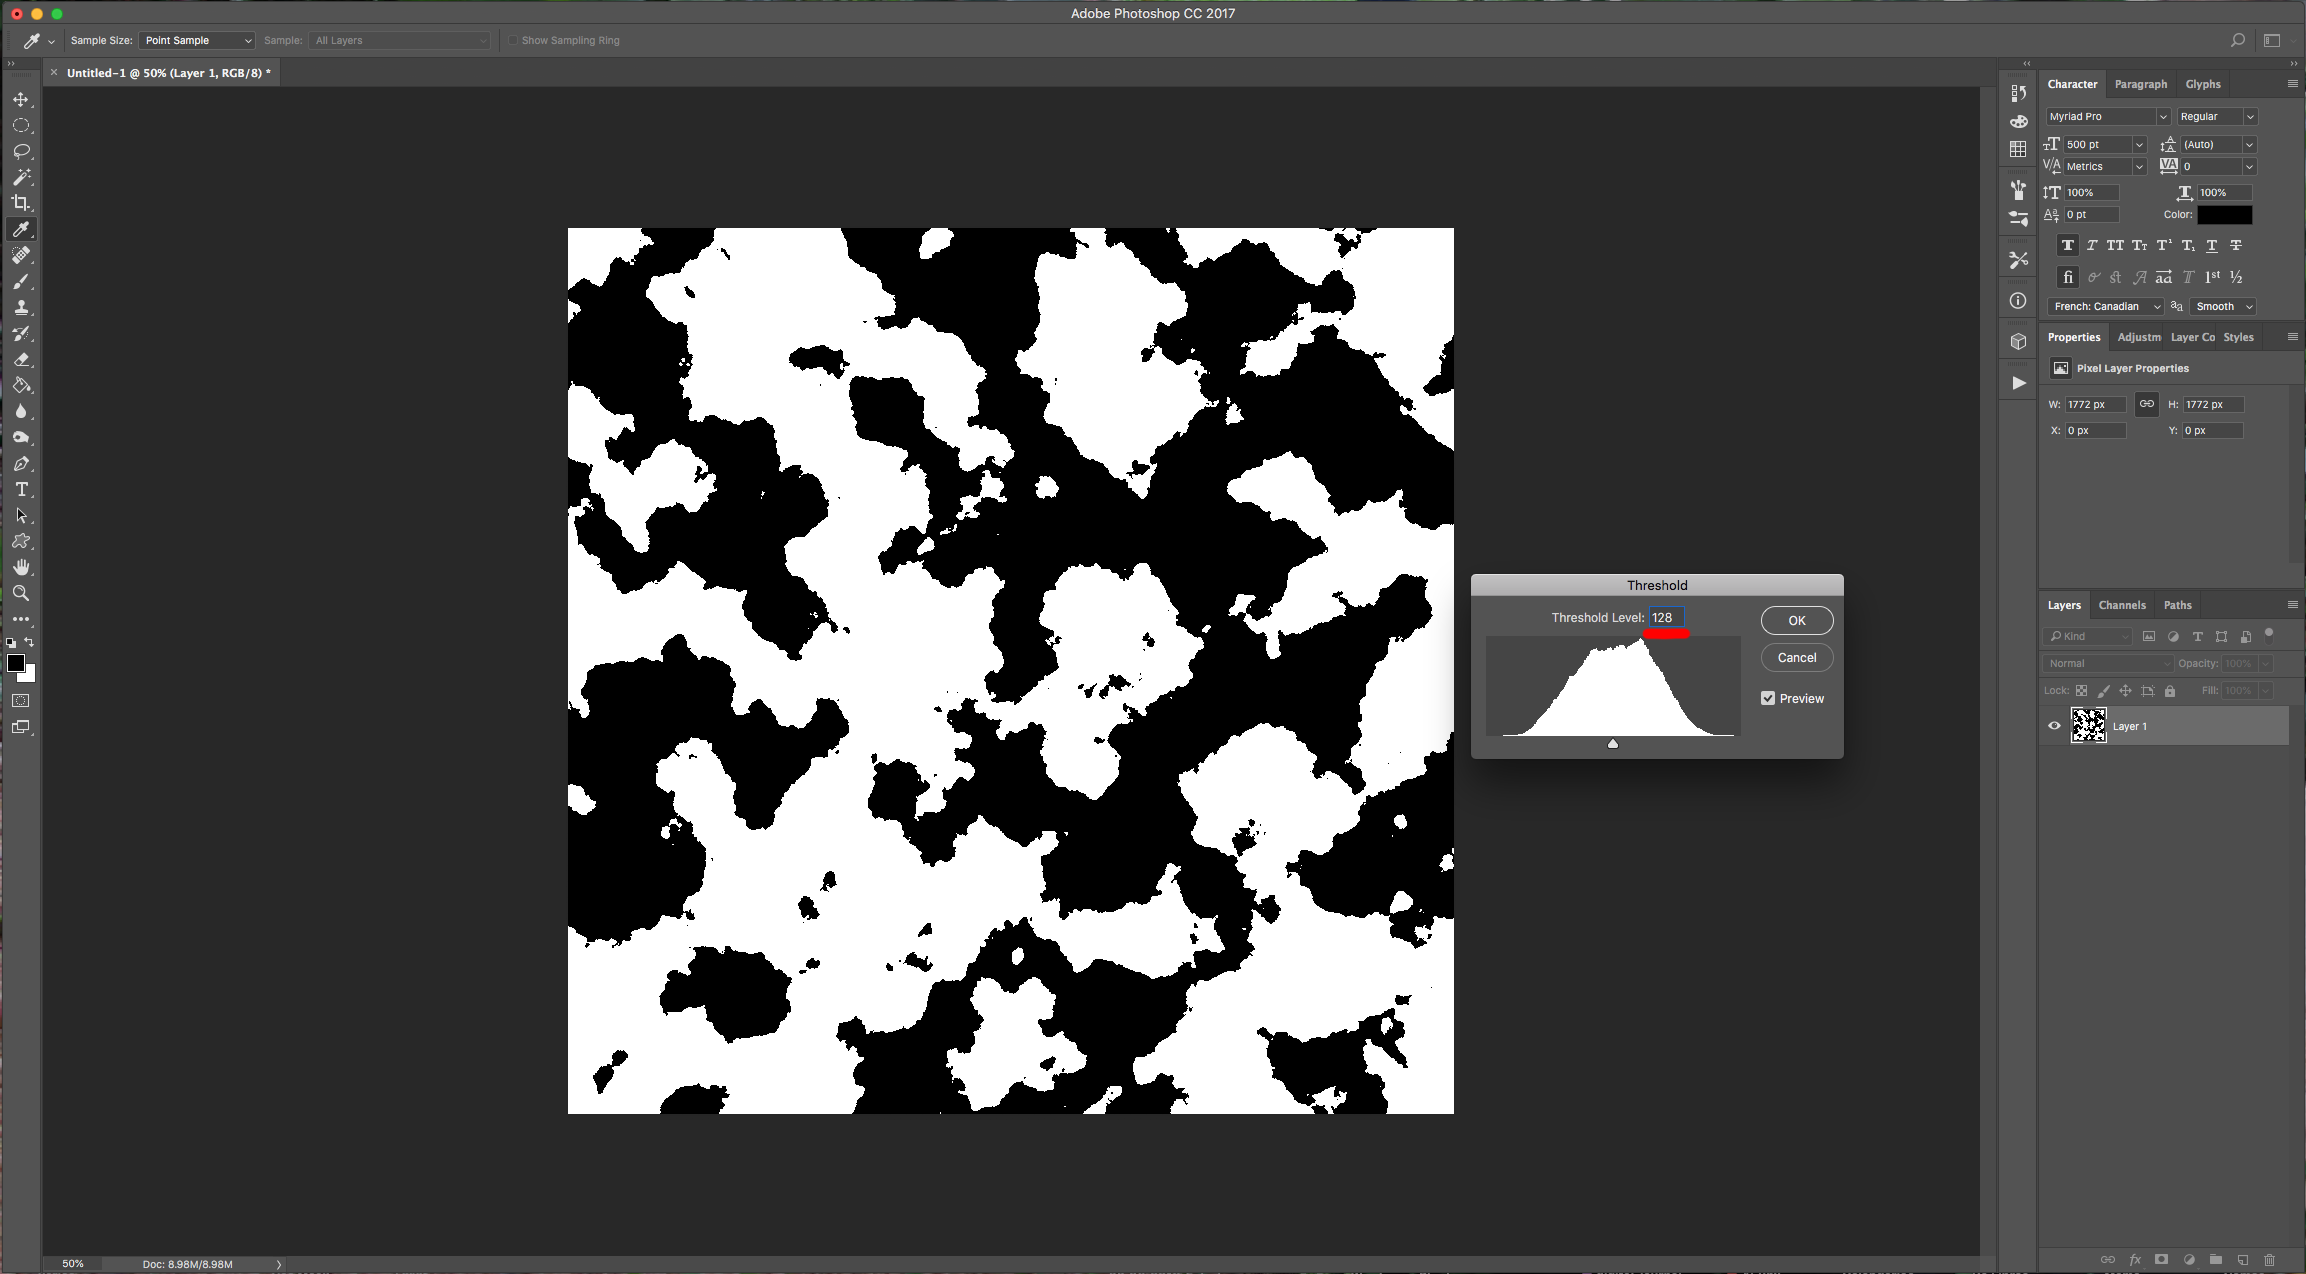
3 - Then, go to Adjustments > Threshold… and use a ·Threshold Level” of 128.

4 - “Select All” (Command/Control + A) and make a “Copy” (Command/Control + C). You can “Save” the file or close it.
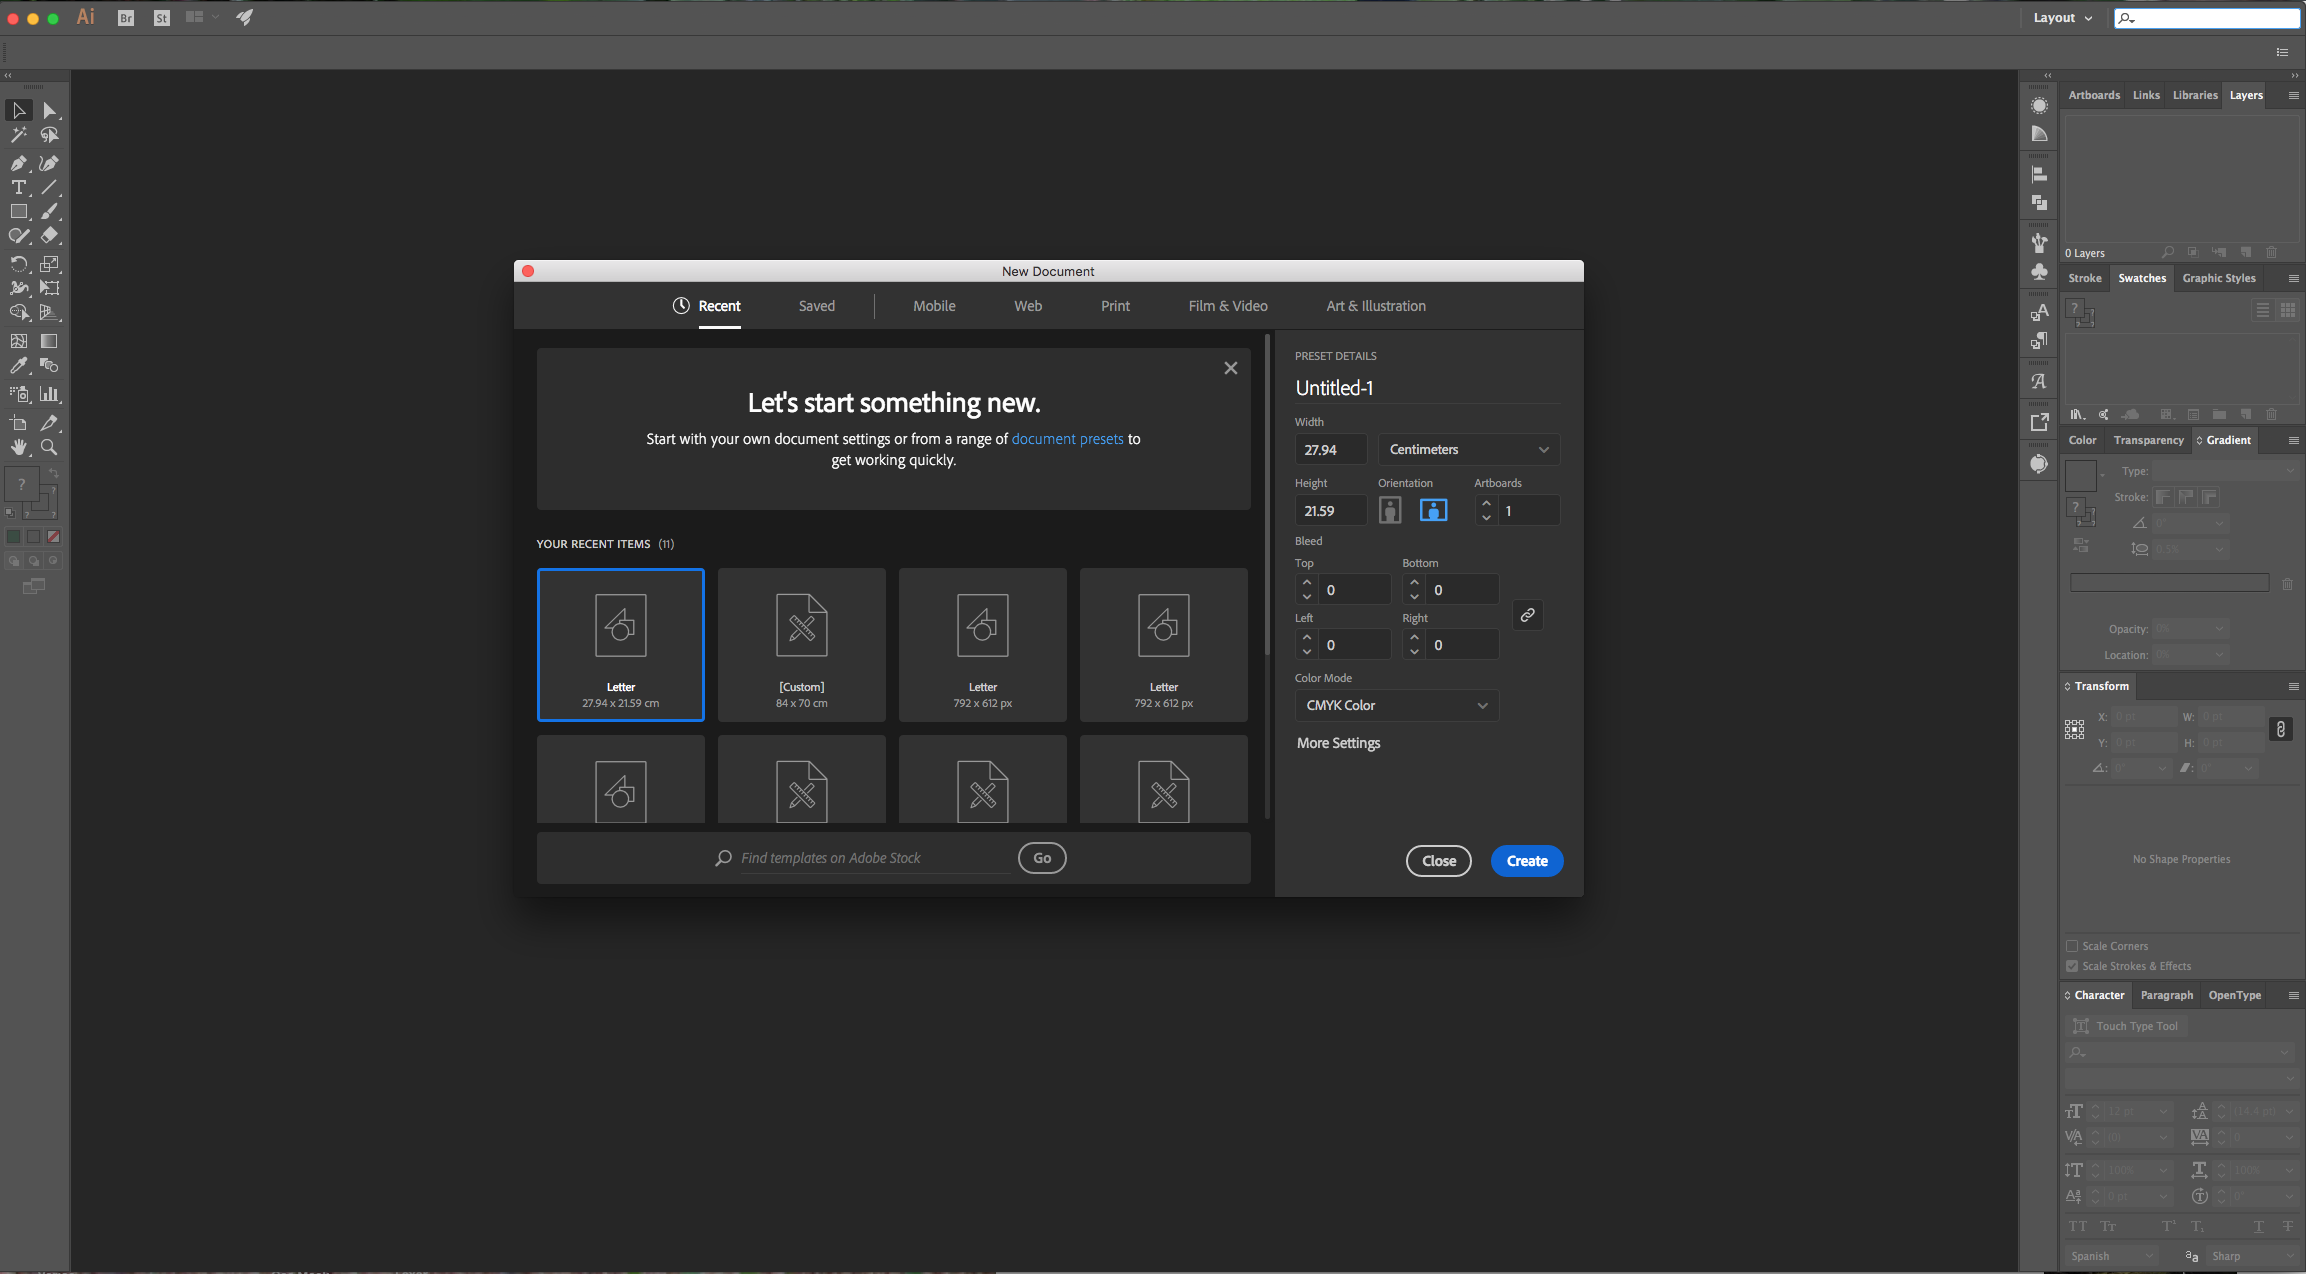
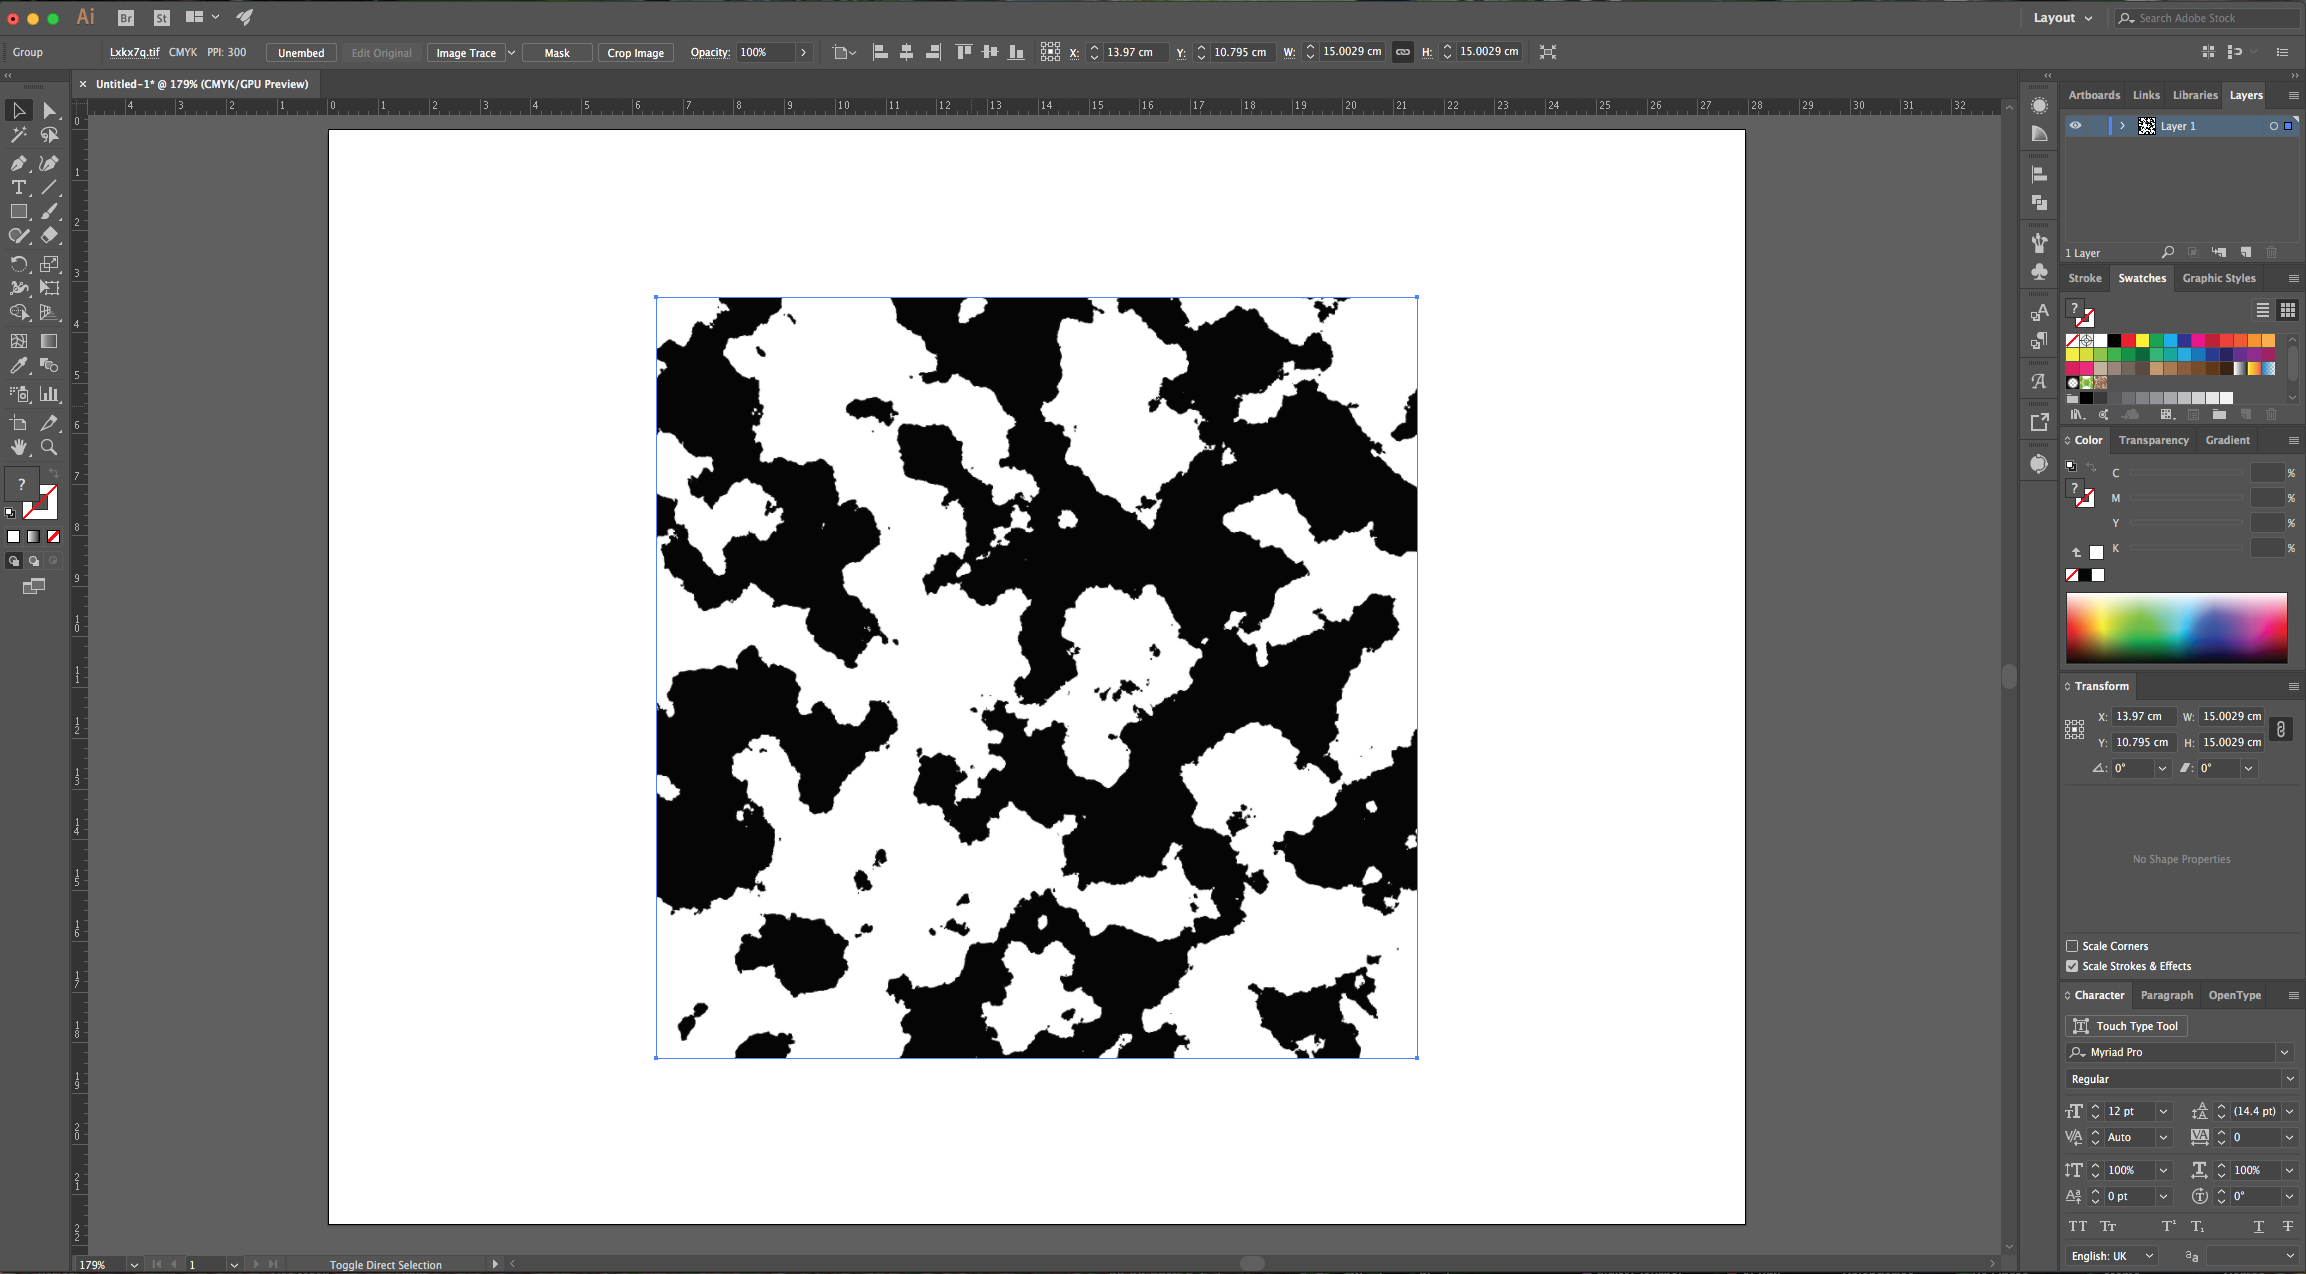
5 - In Illustrator, create a “New Document”. “Paste” your selection from “Photoshop” (Command/Control + V). It should be centered in your document by default.
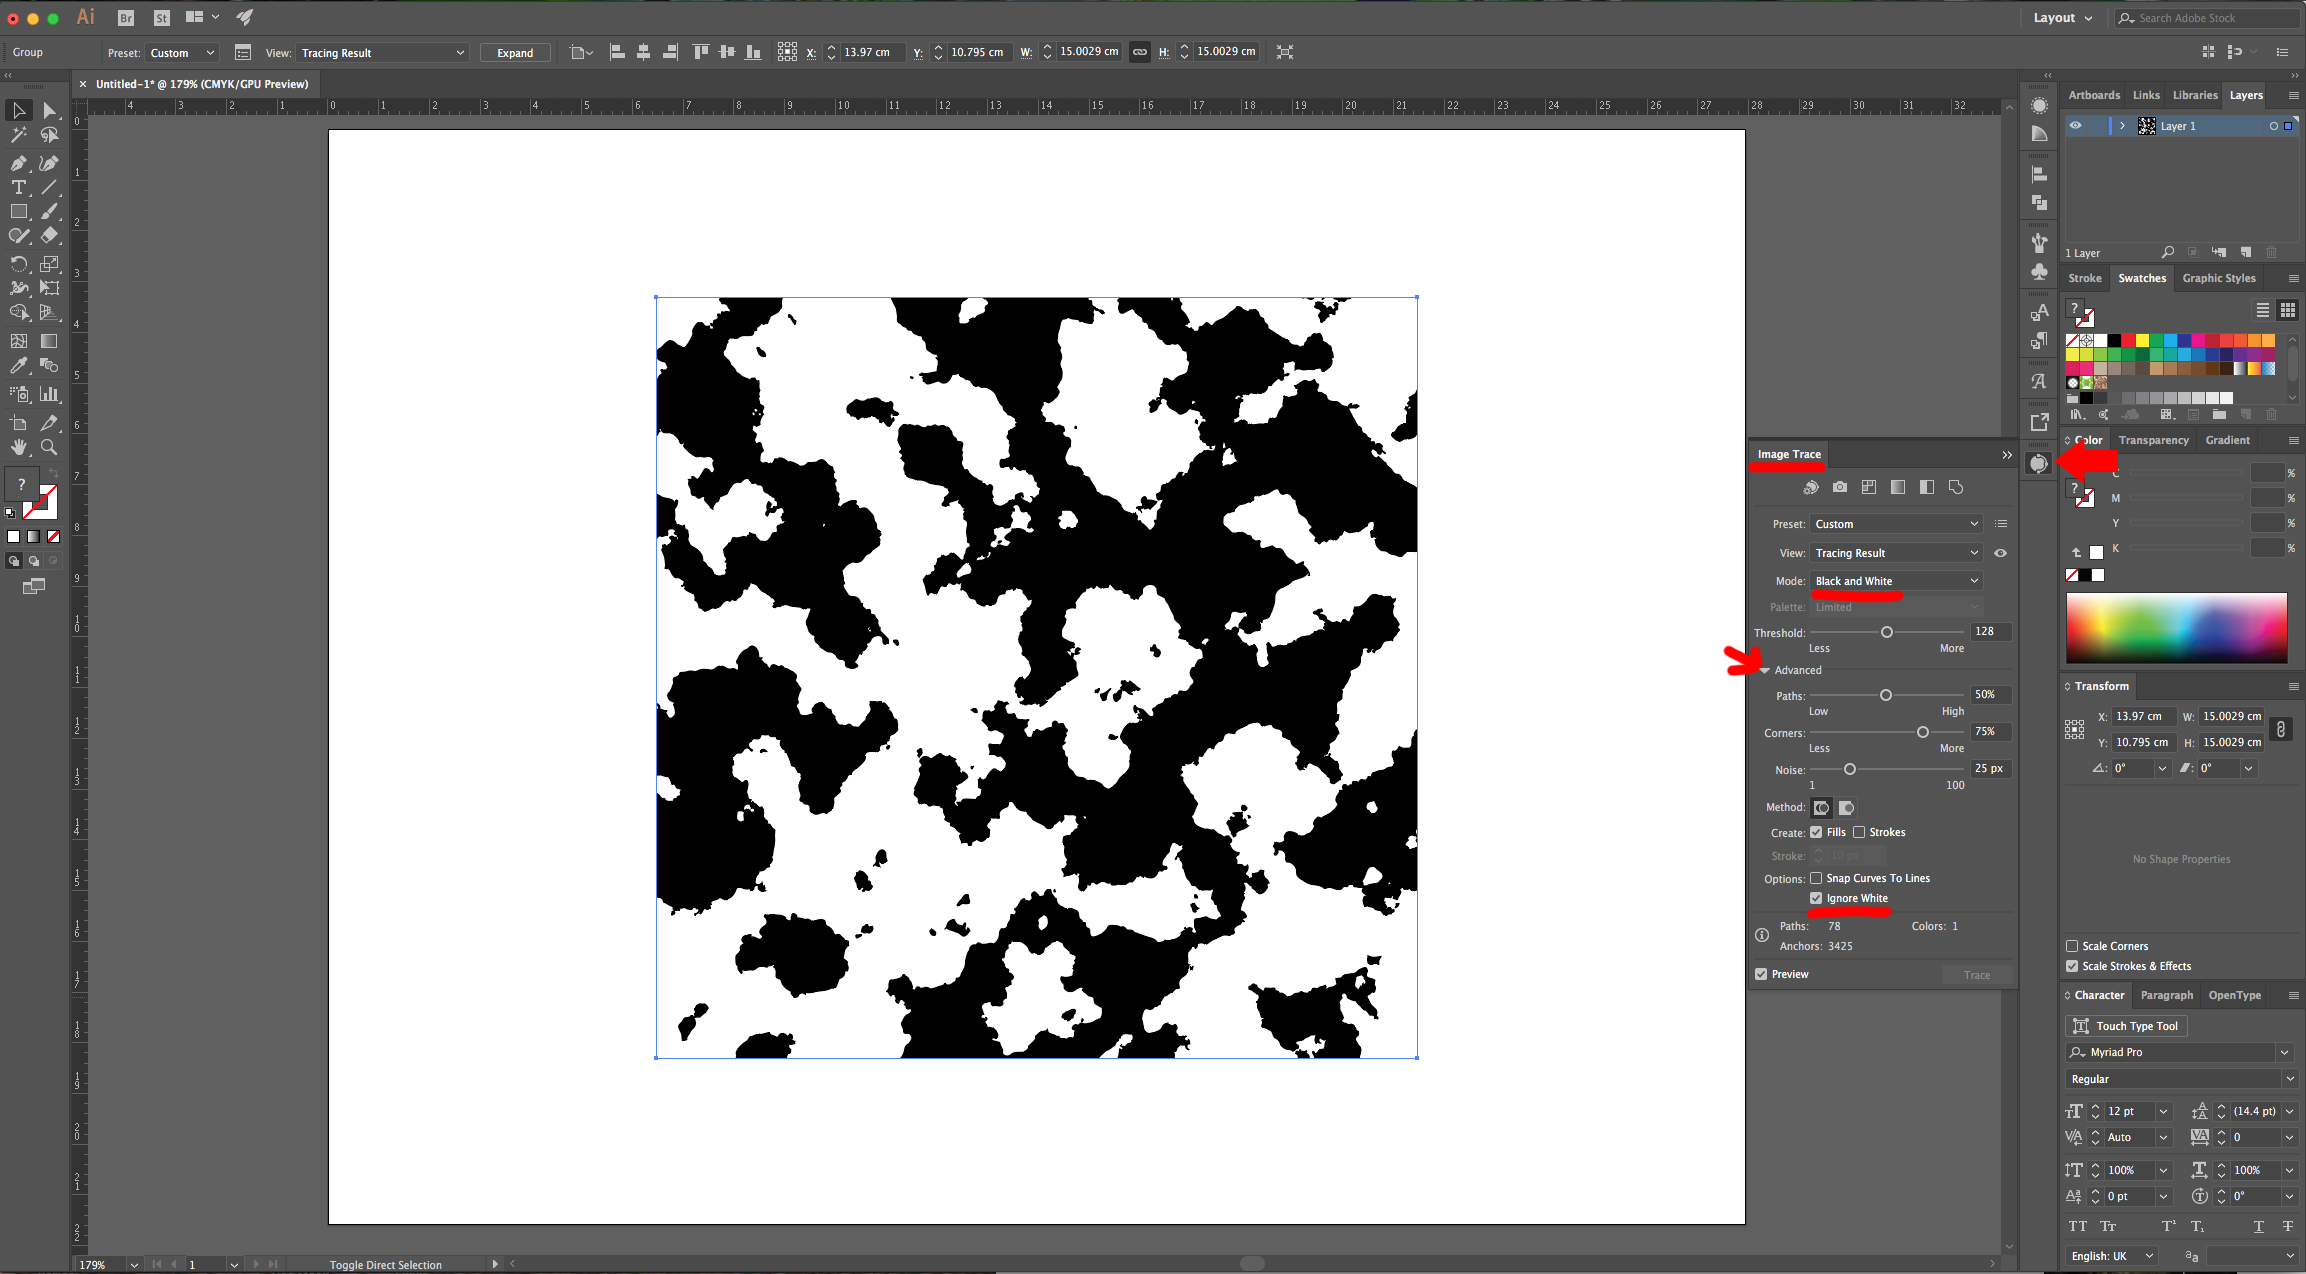
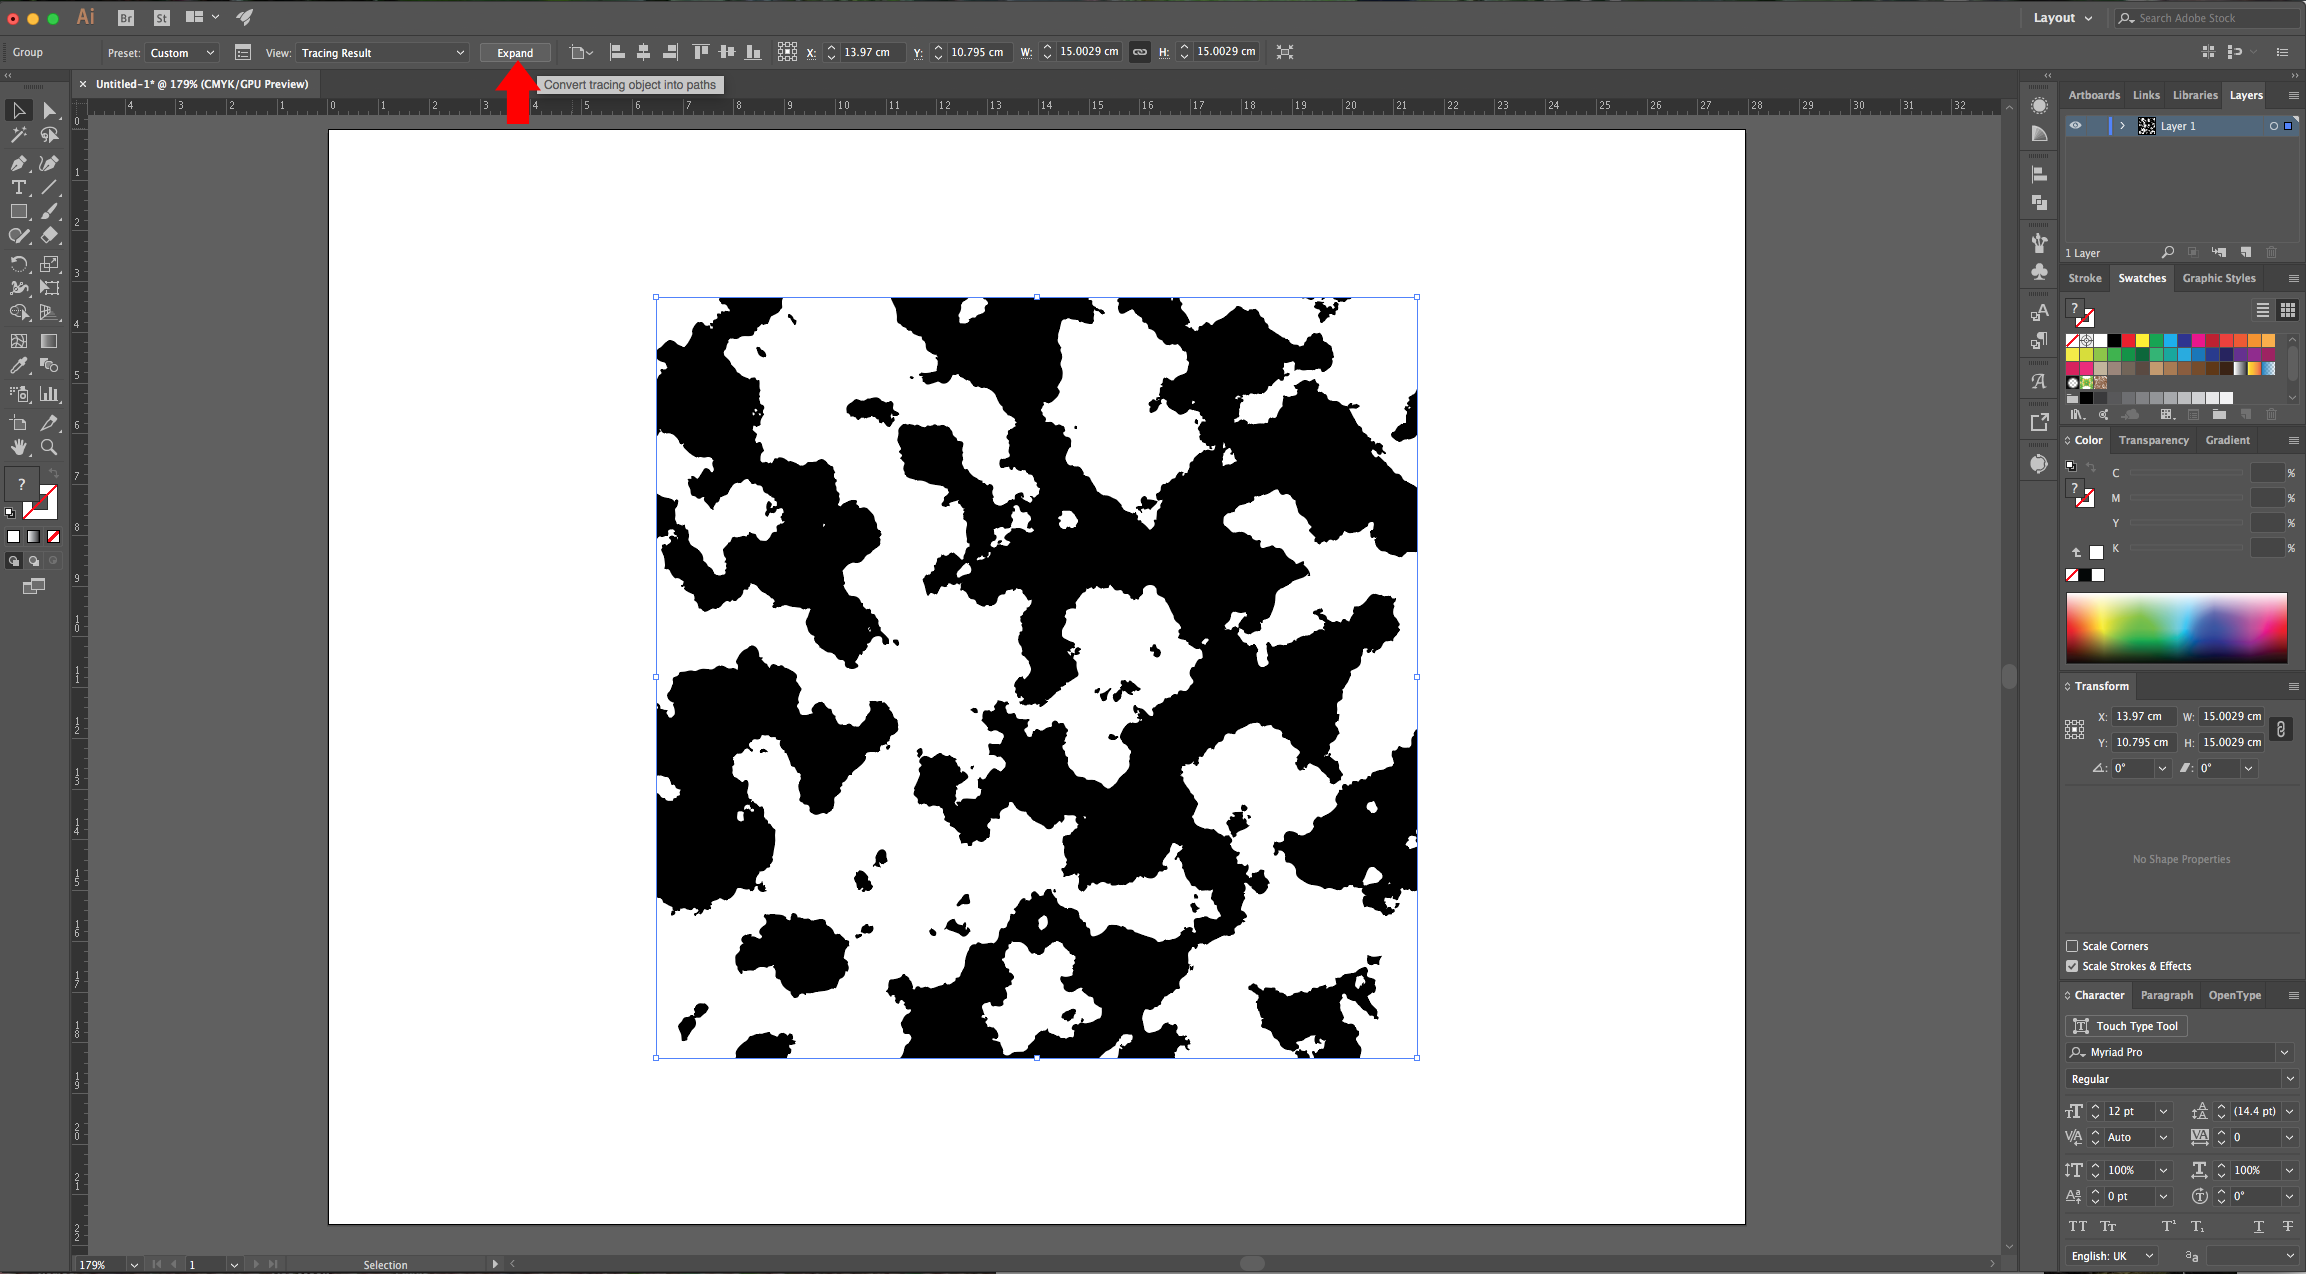
6 - Go to the “Image Trace Panel” or click the “Trace” button in the Top Menu. Make sure “Black and White” is selected as “Mode”, click on the small arrow to the left of the “Advanced” tab to open the “Advanced Options” and check the “Ignore White” box. Once you are done, click the “Expand” button on the Top Menu.
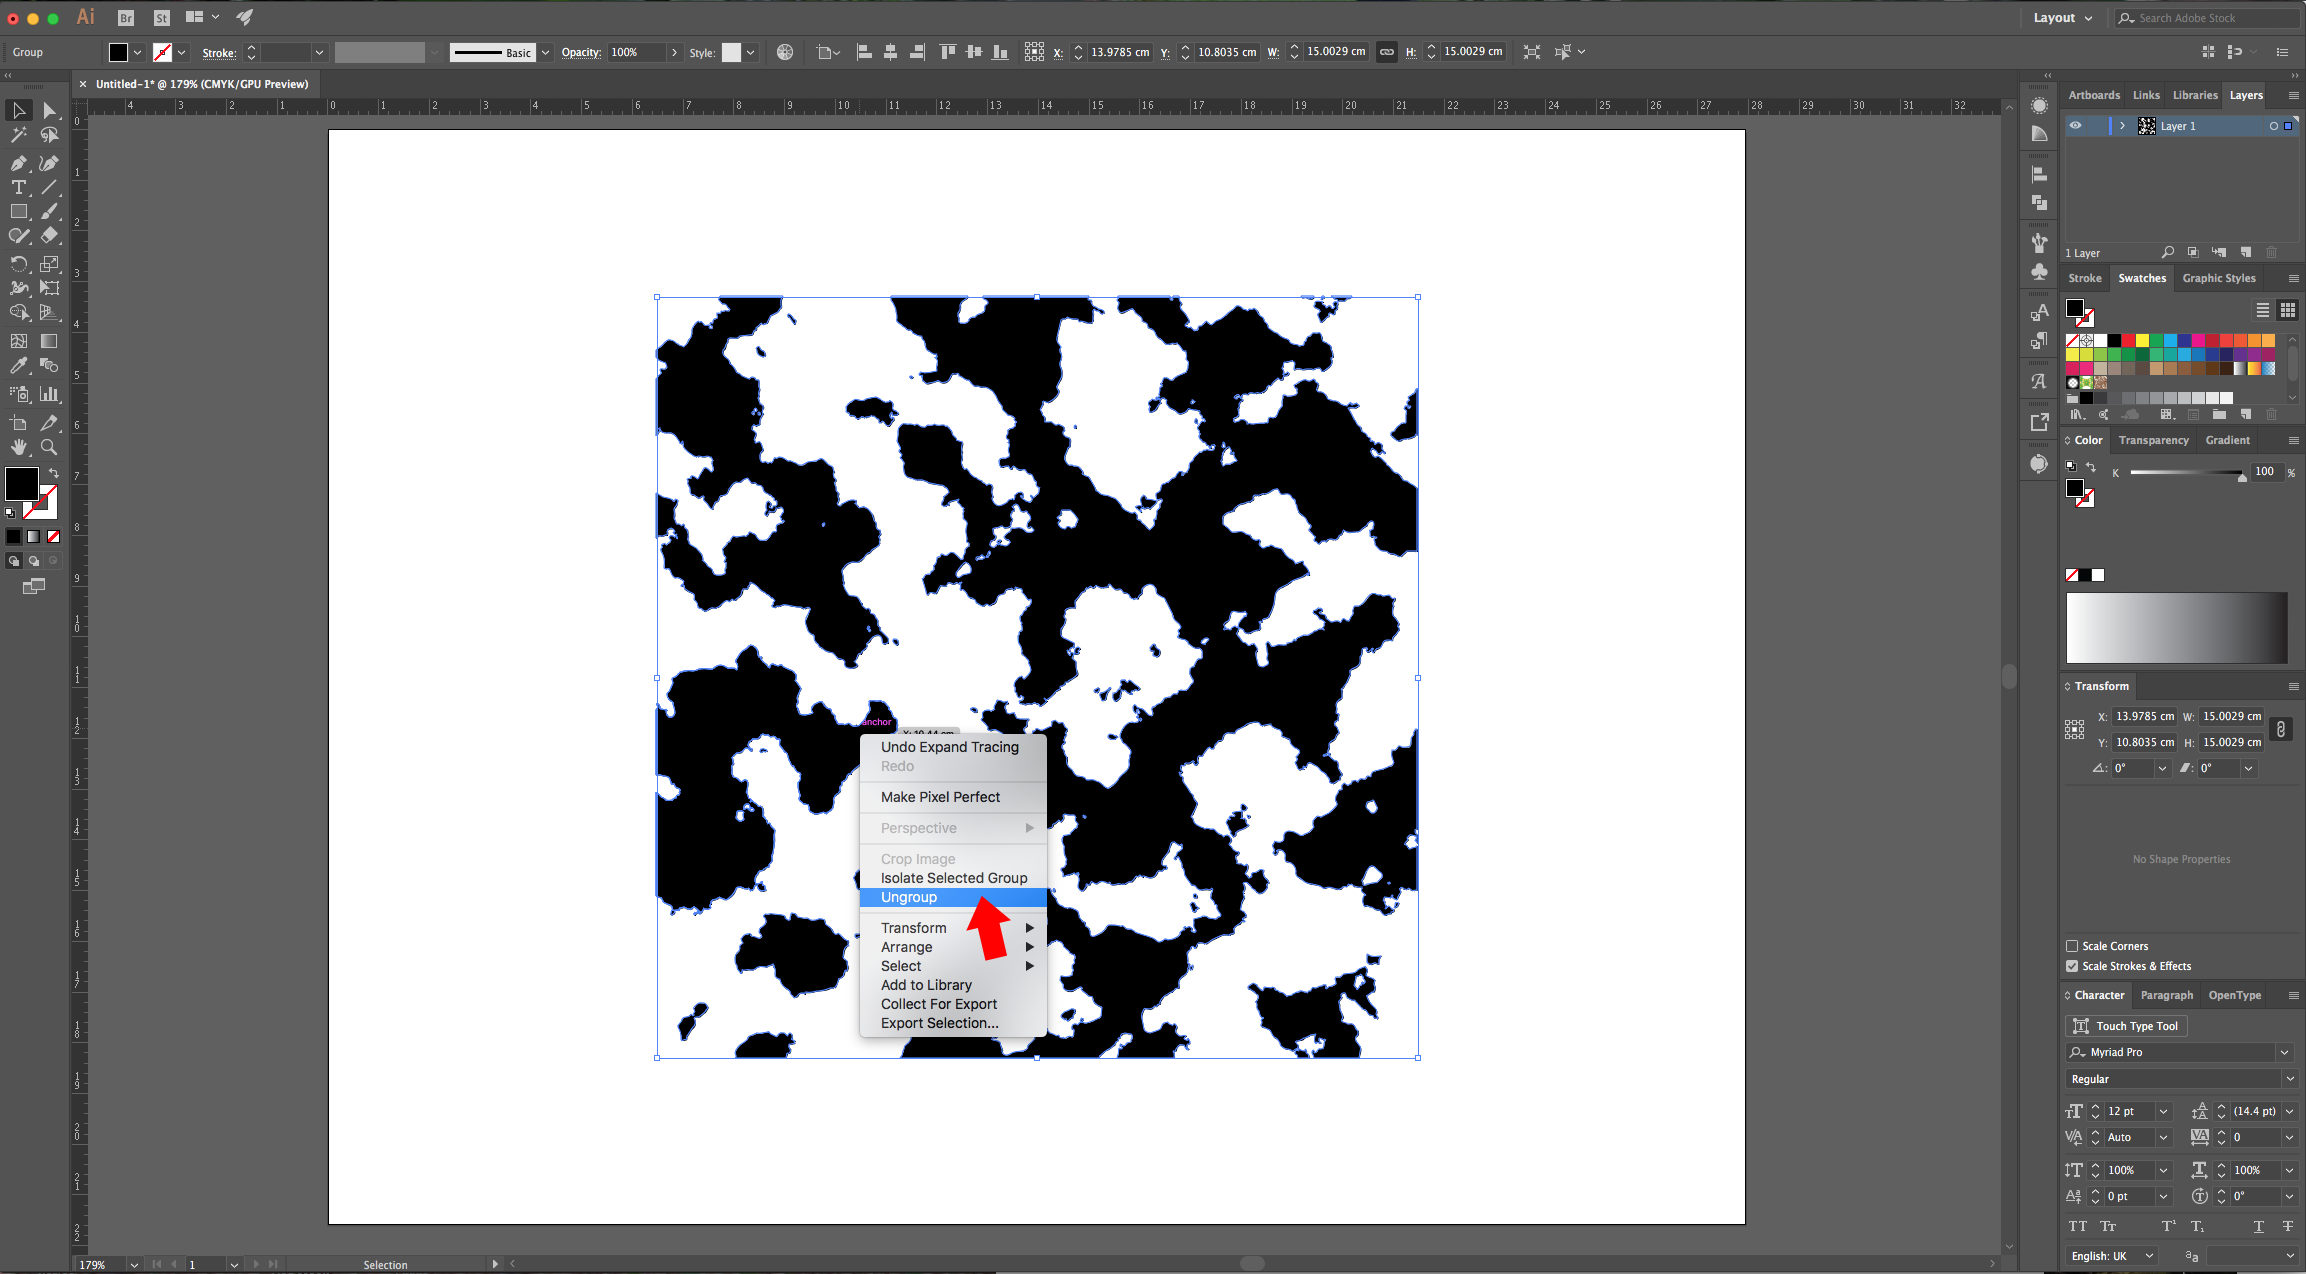
7 - Right-click on top of your vectors and choose “Ungroup” twice.

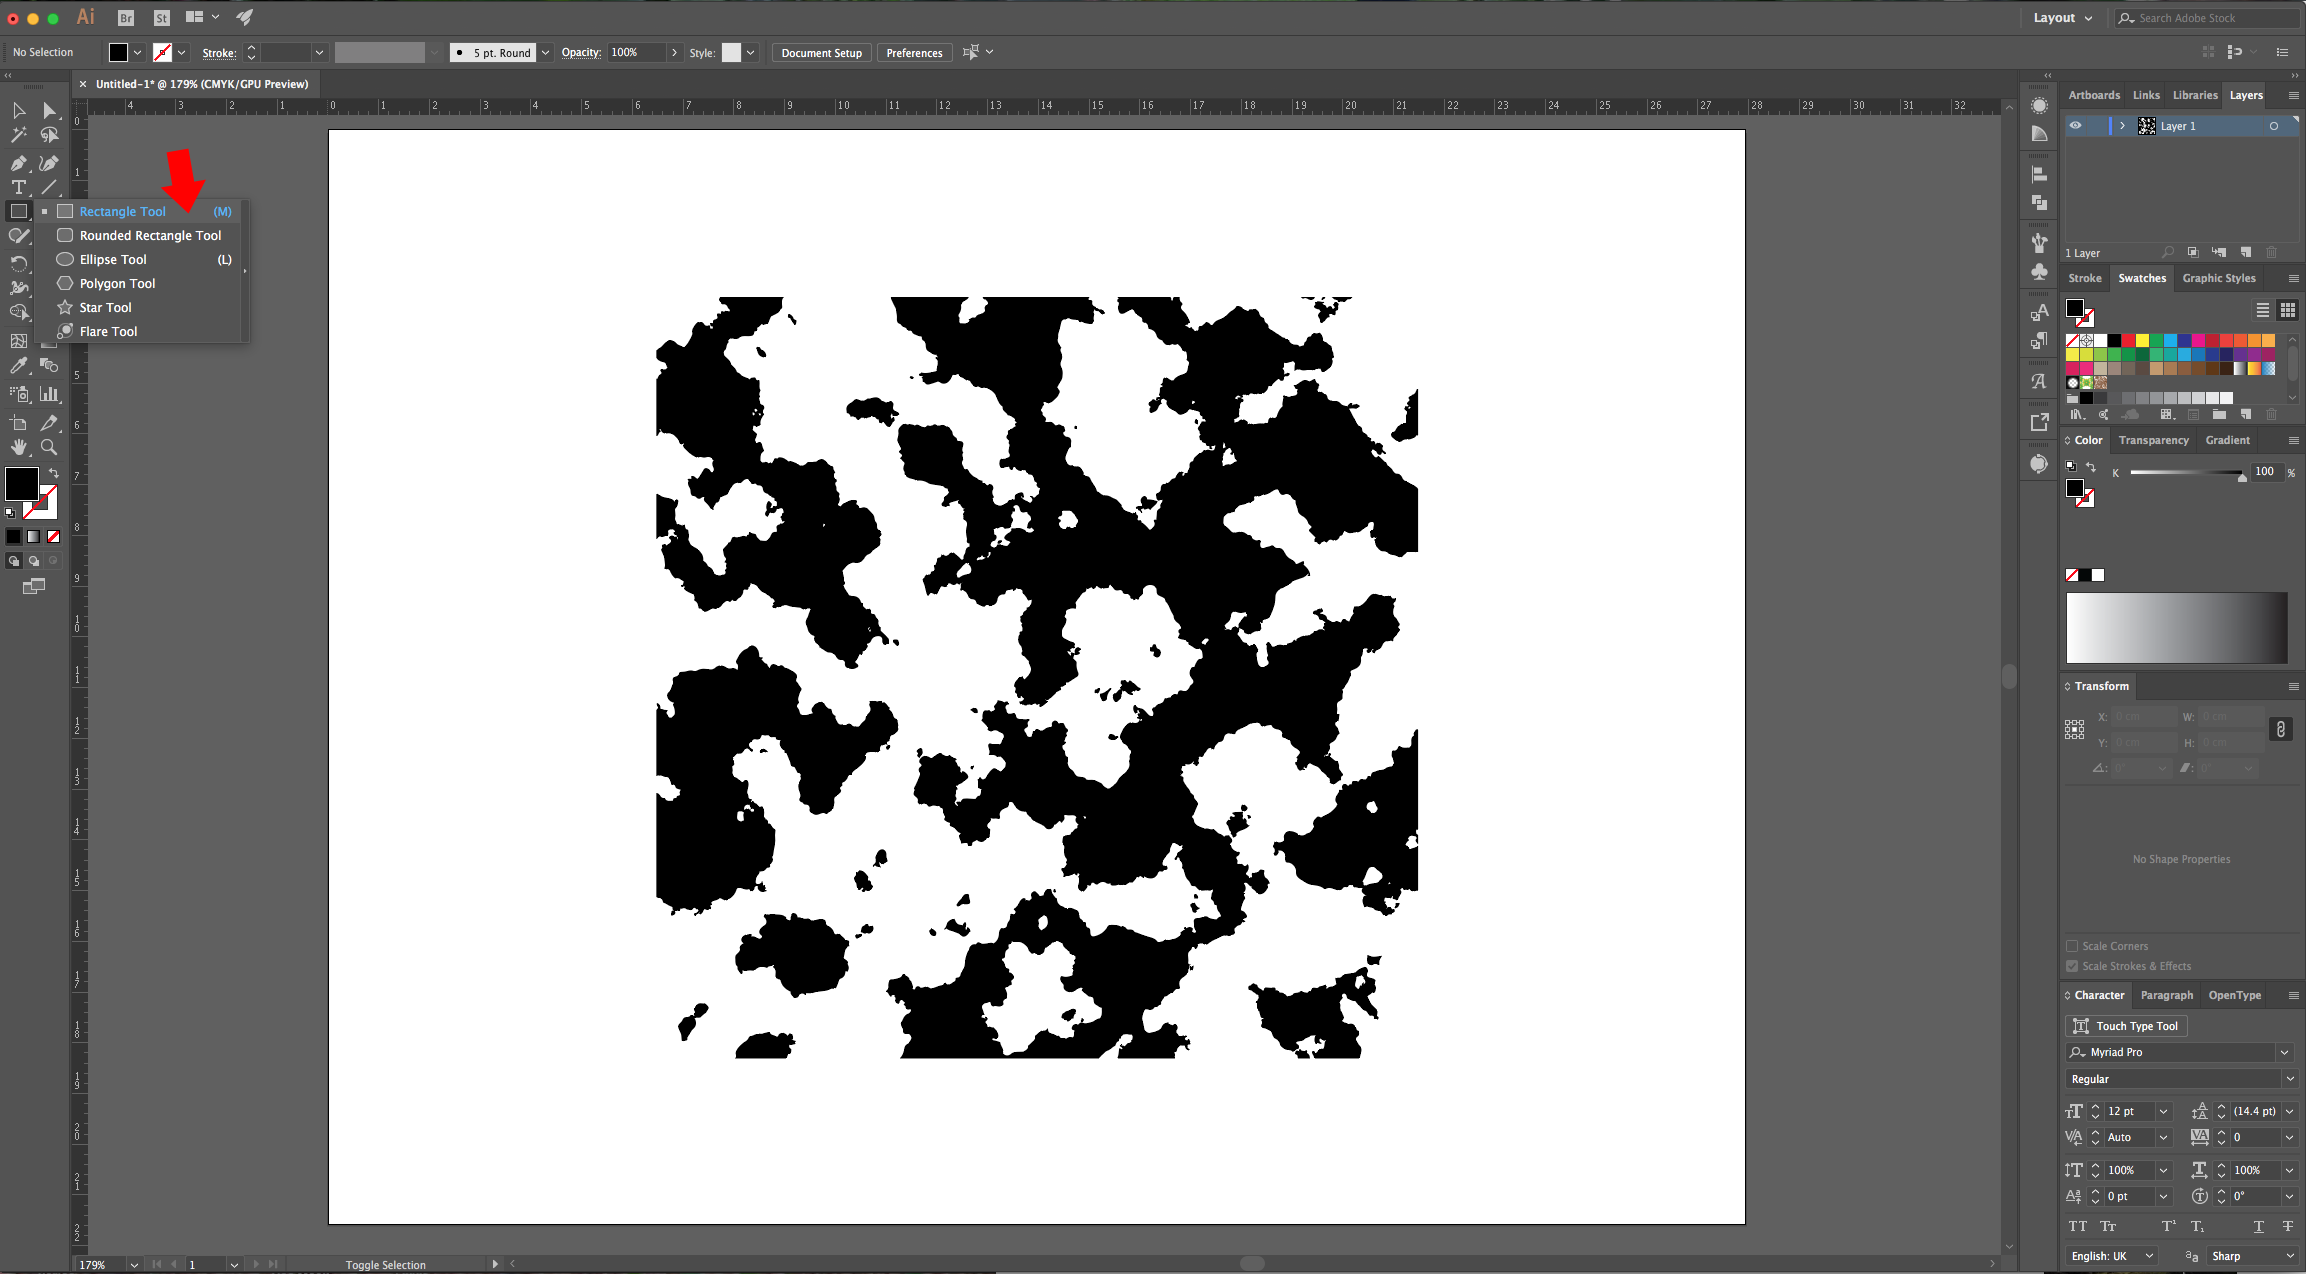
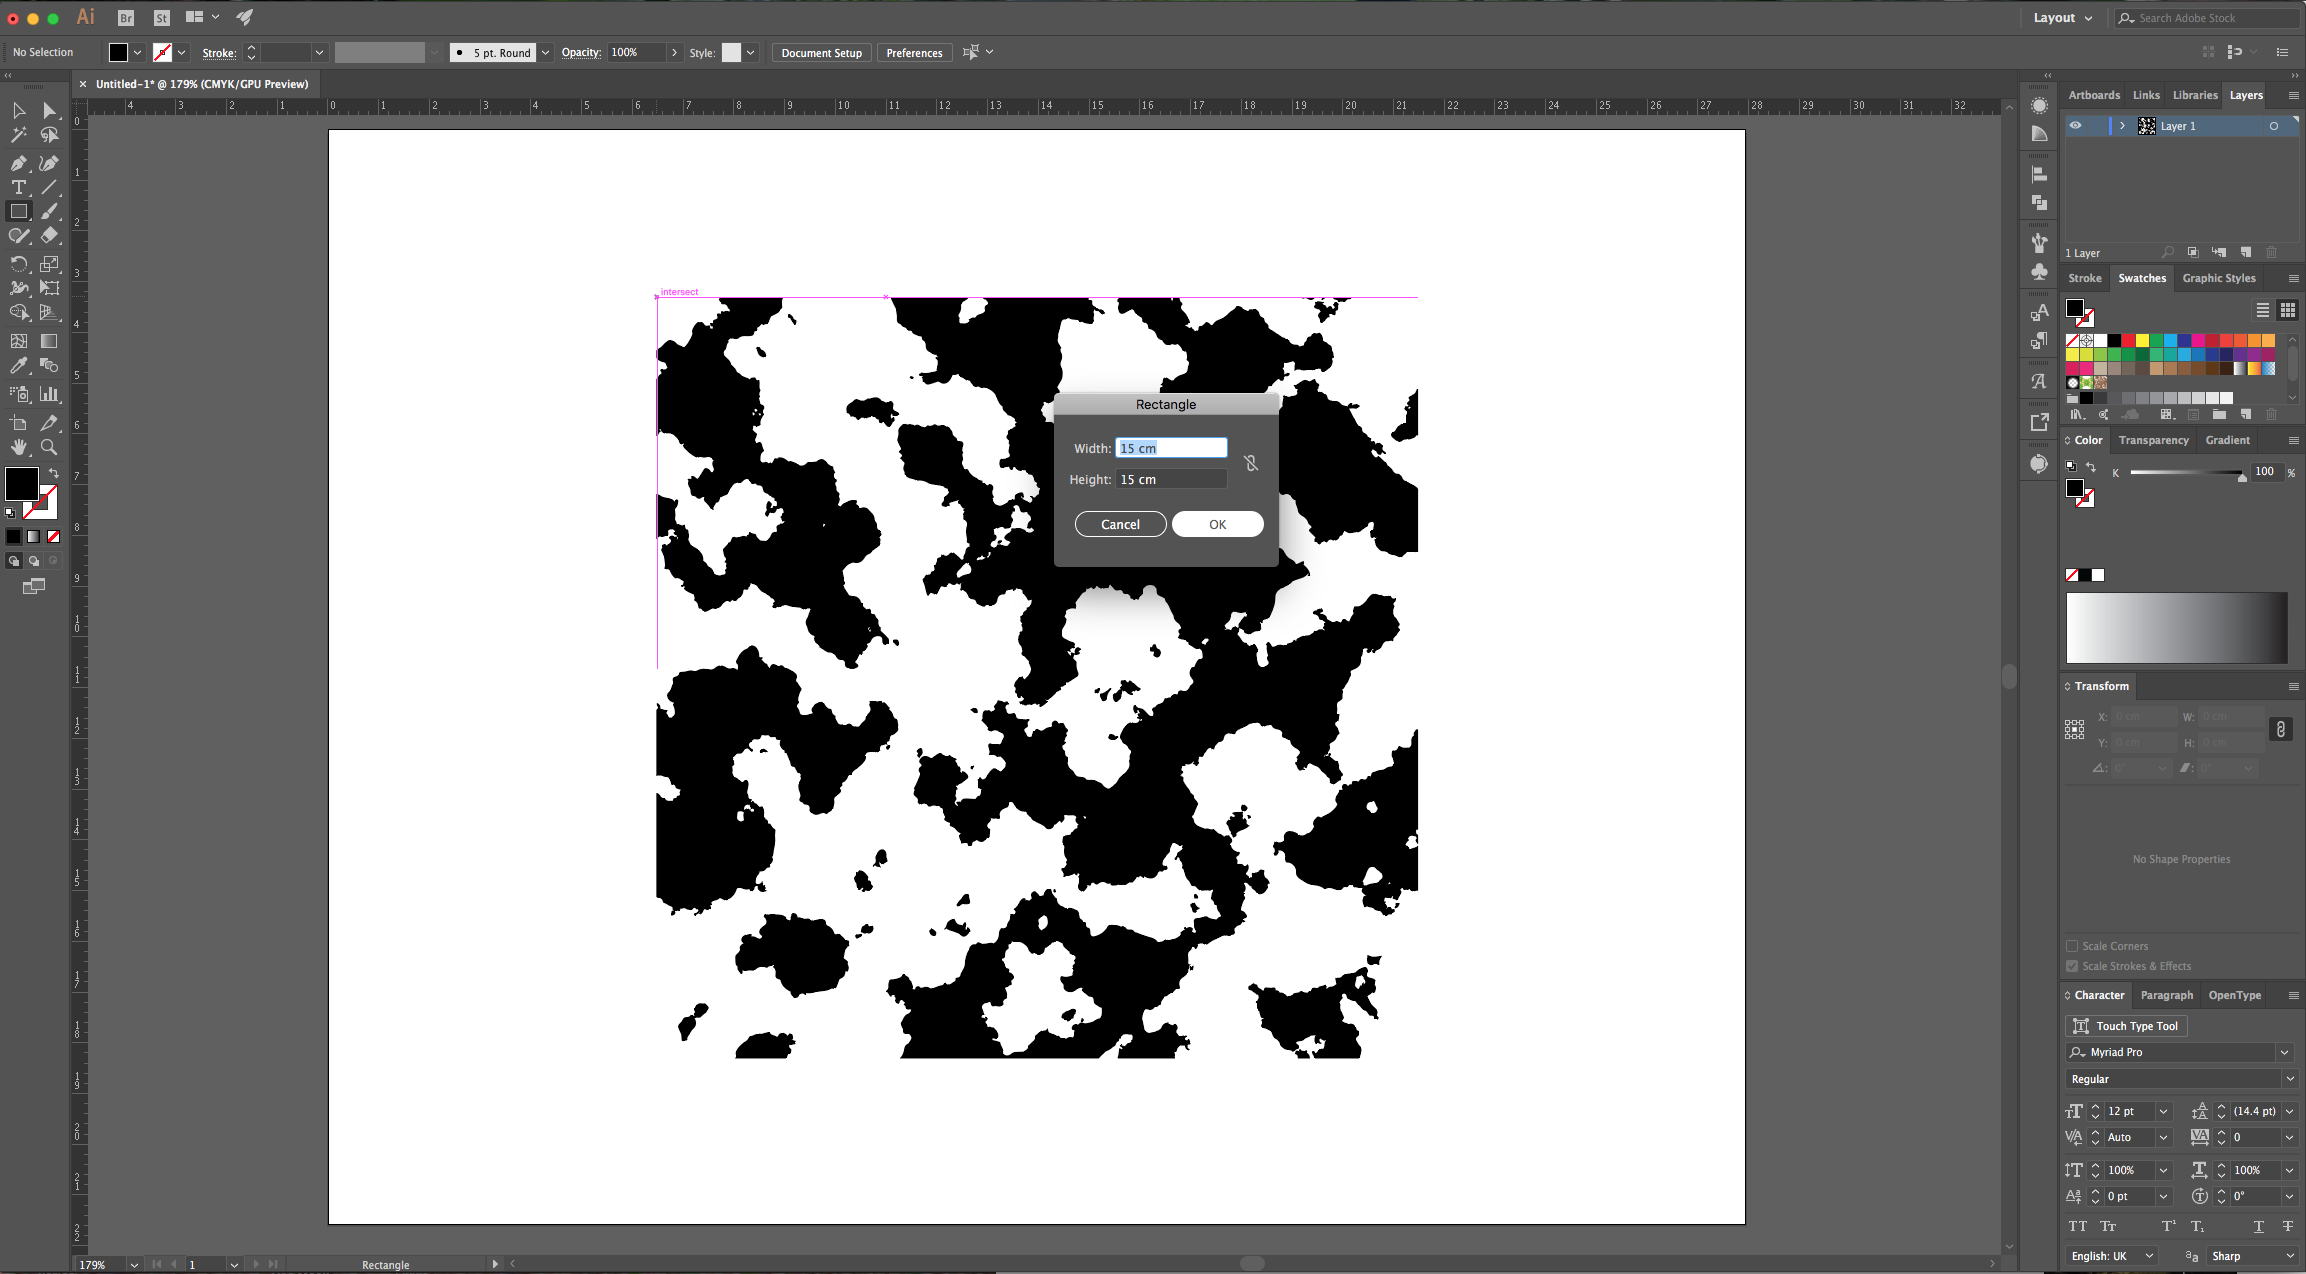
8 - Select the “Rectangle Tool” (M), click in the Top-Left corner of your Vector and create a 15 x 15 cm Square.
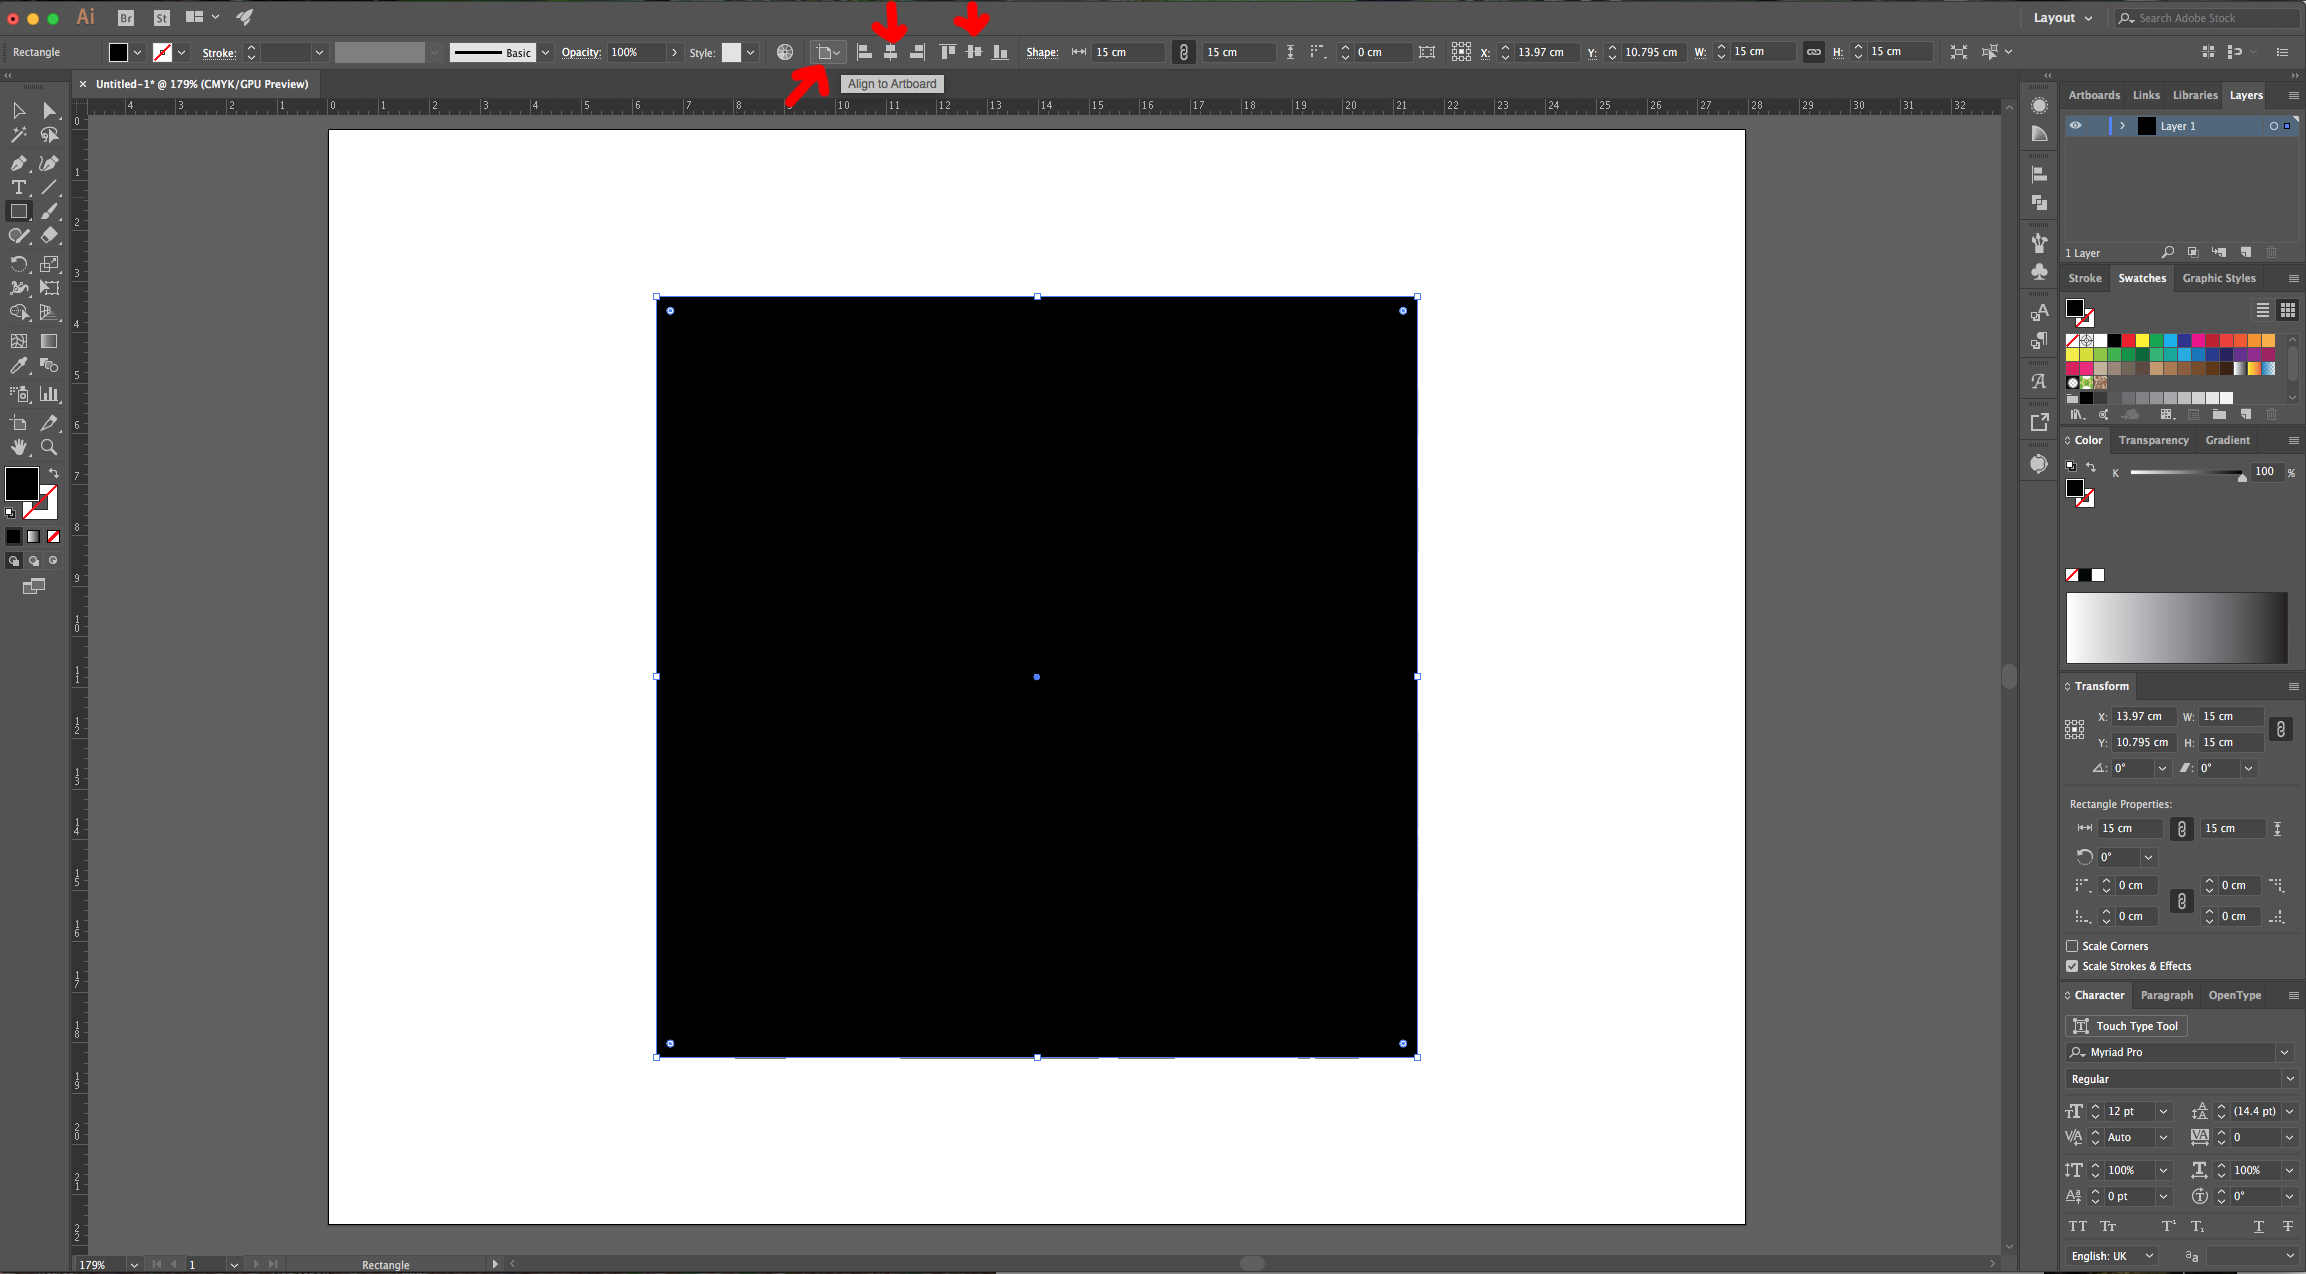
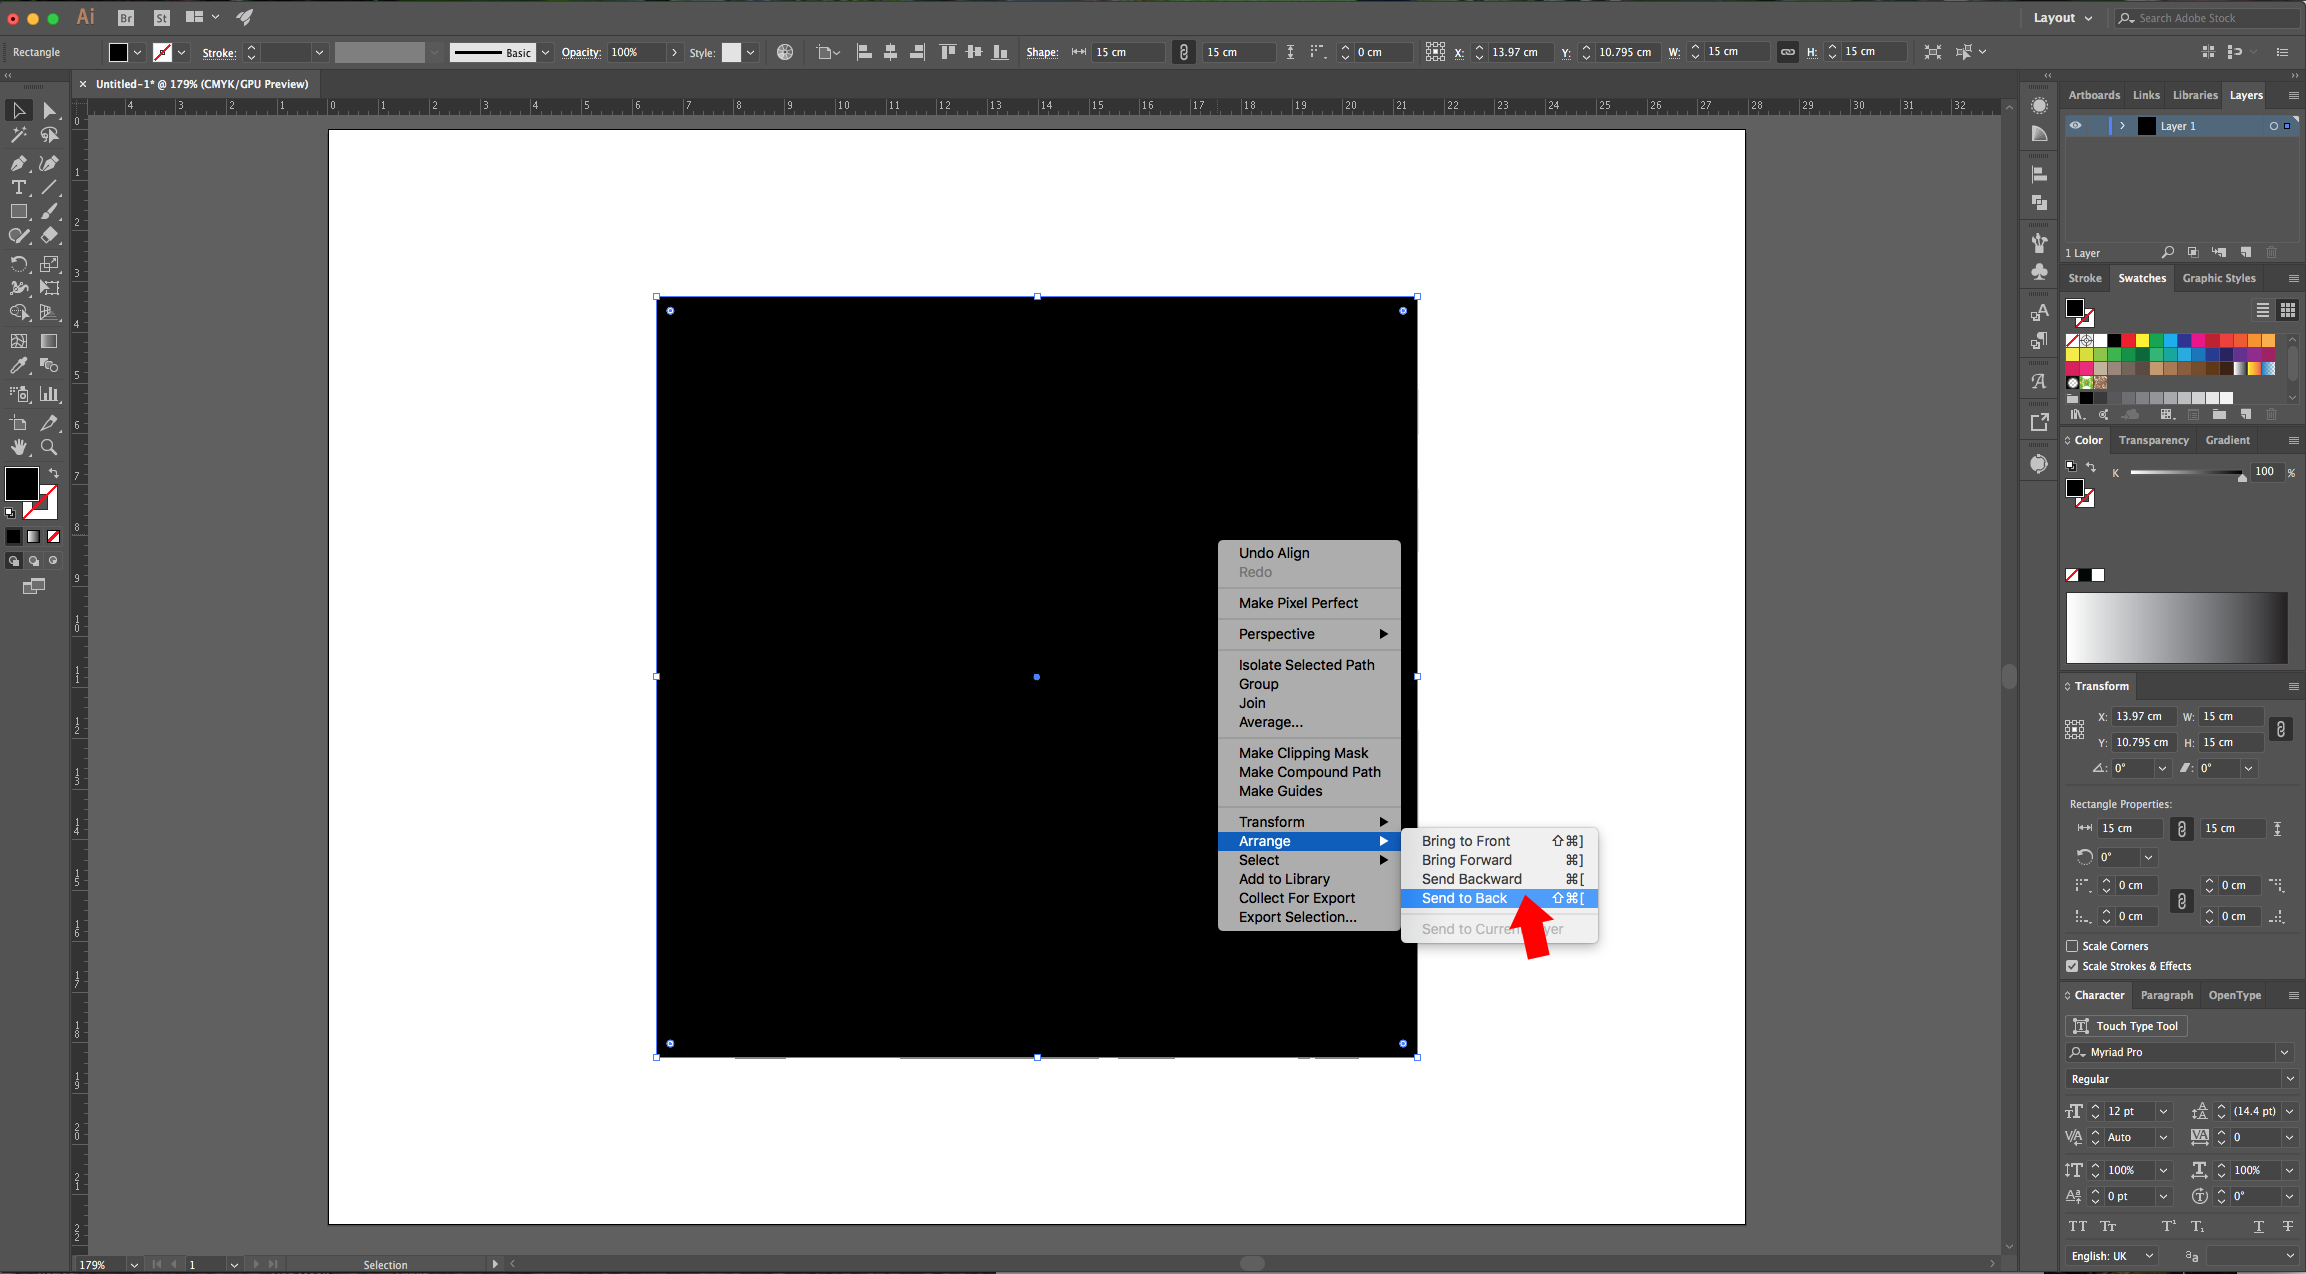
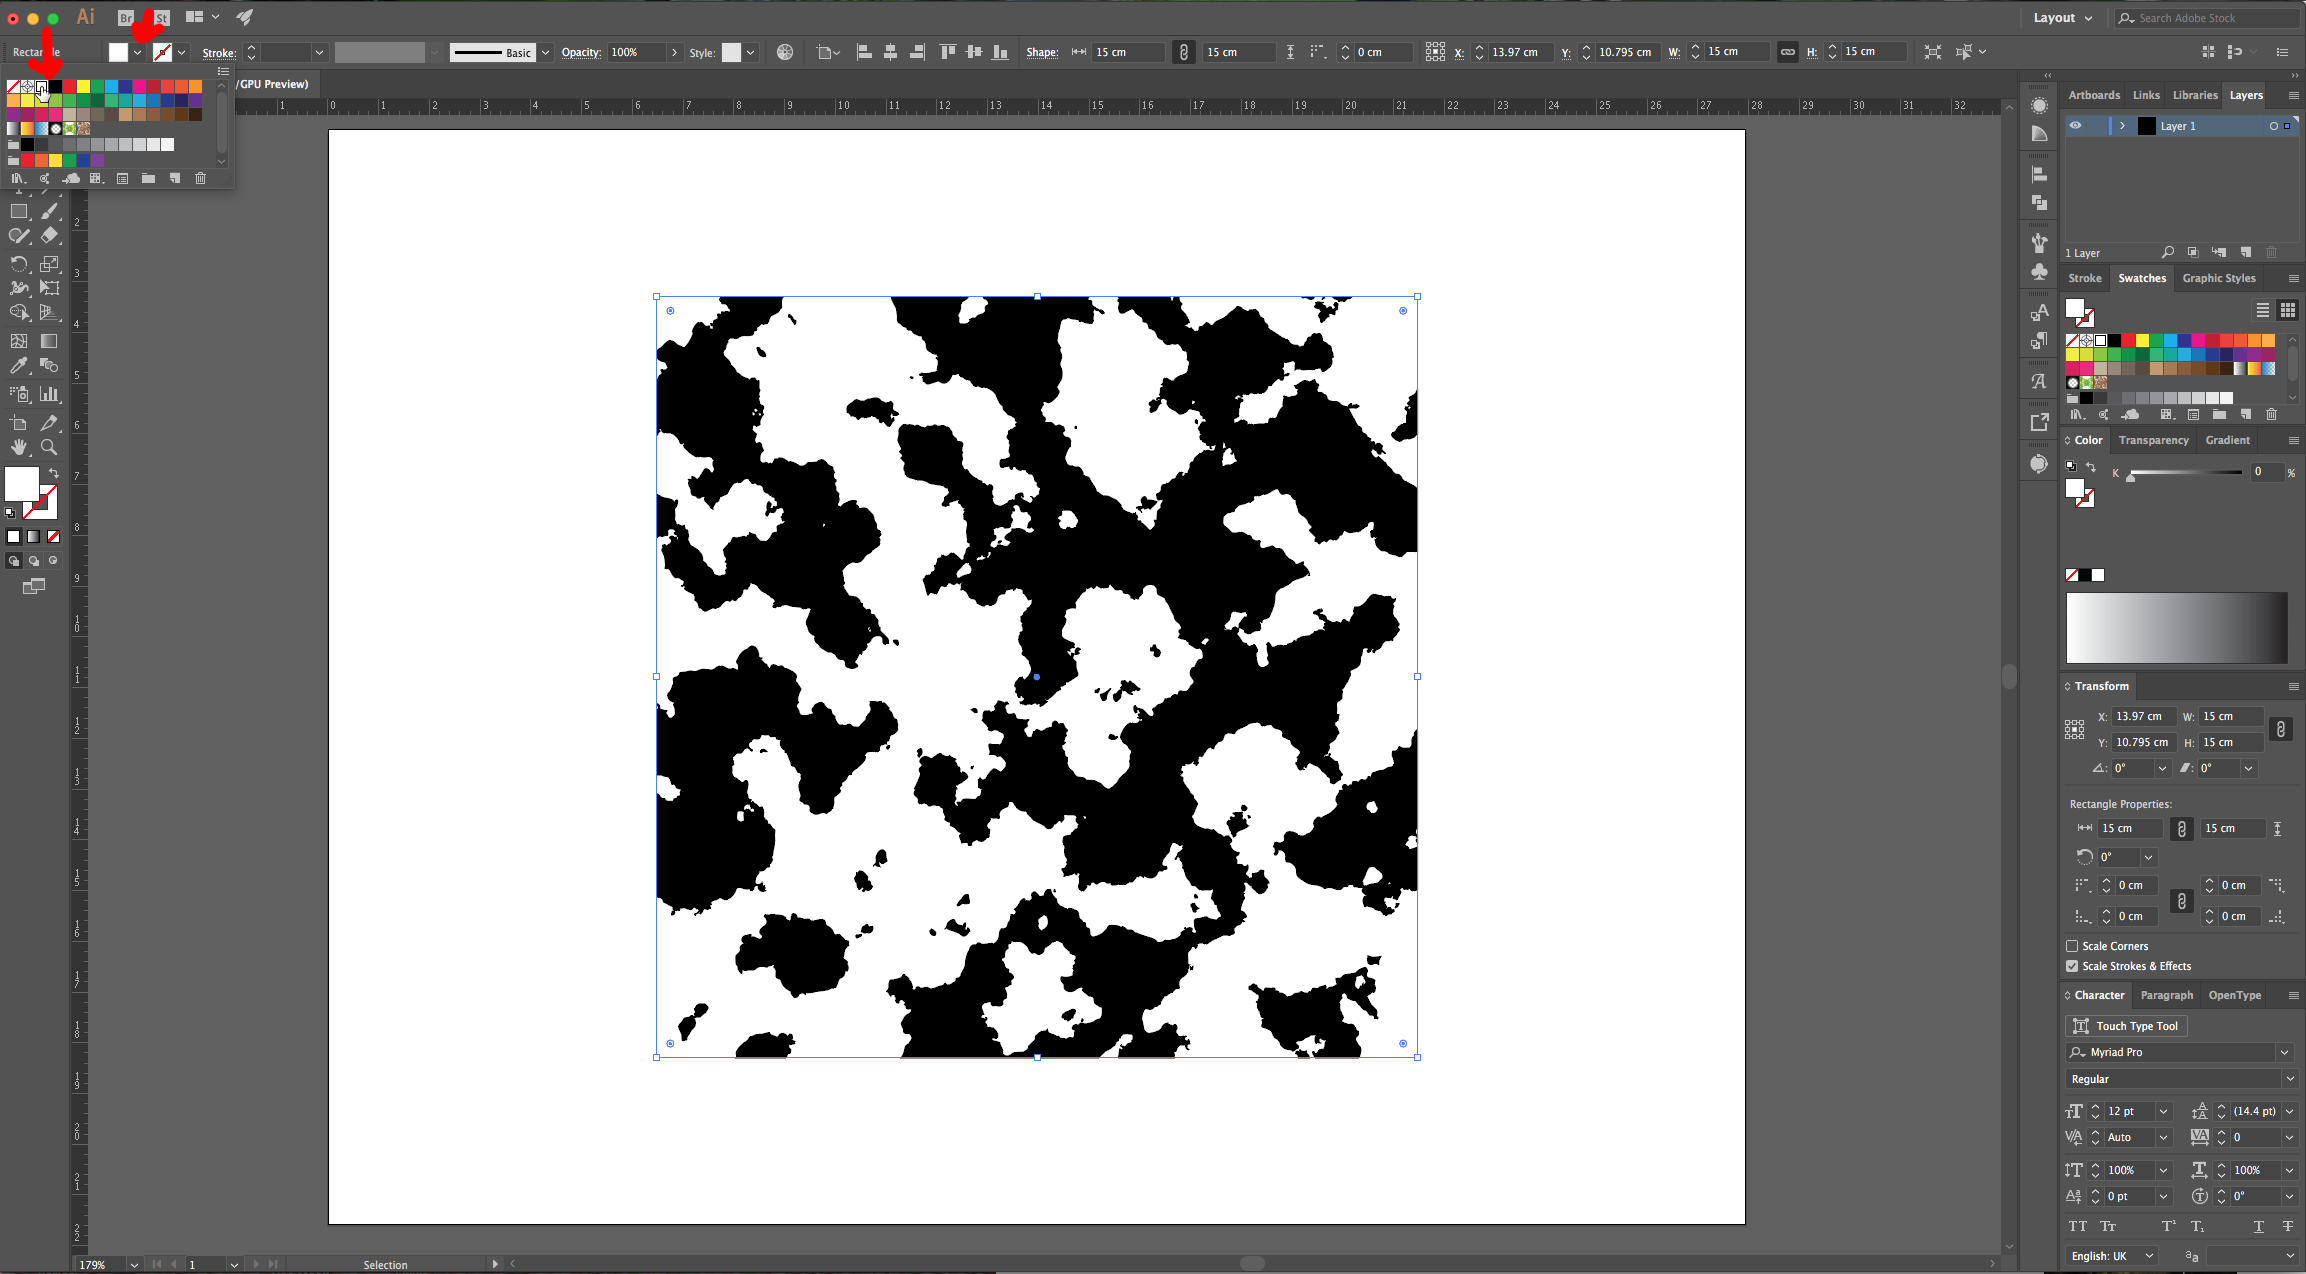
9 - Center it using the “Horizontal and Vertical Align Center” options on your Top Menu and make sure that “Align to Artboard” is selected. Or use the same options in the “Align Panel”. Then, right-click on top of it, choose Arrange > Send to Back and fill it with White.
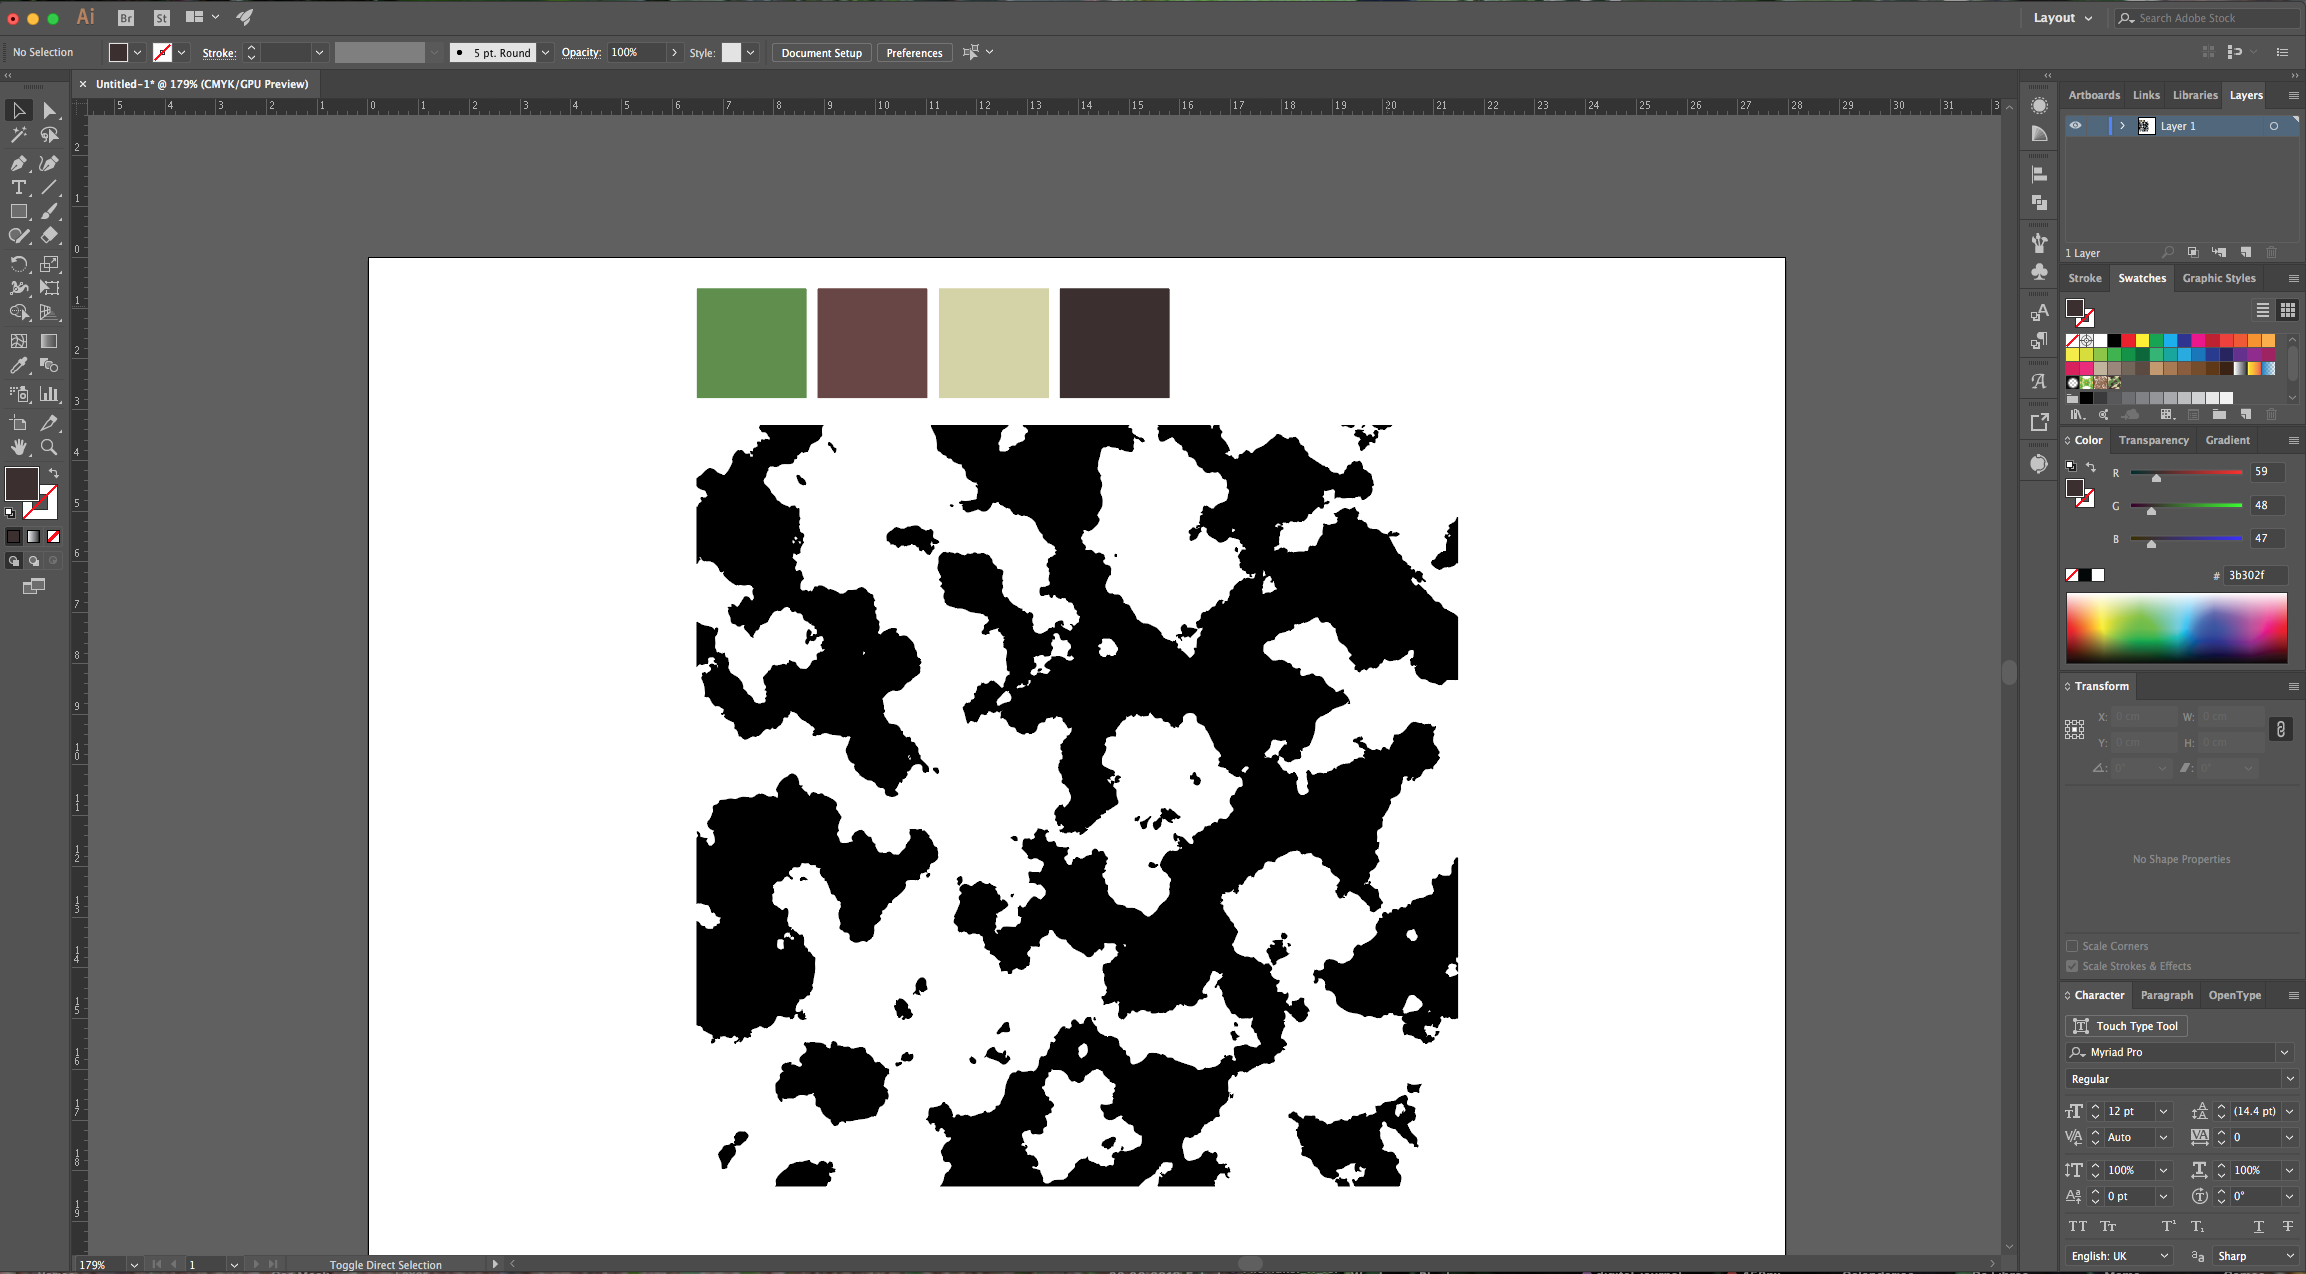
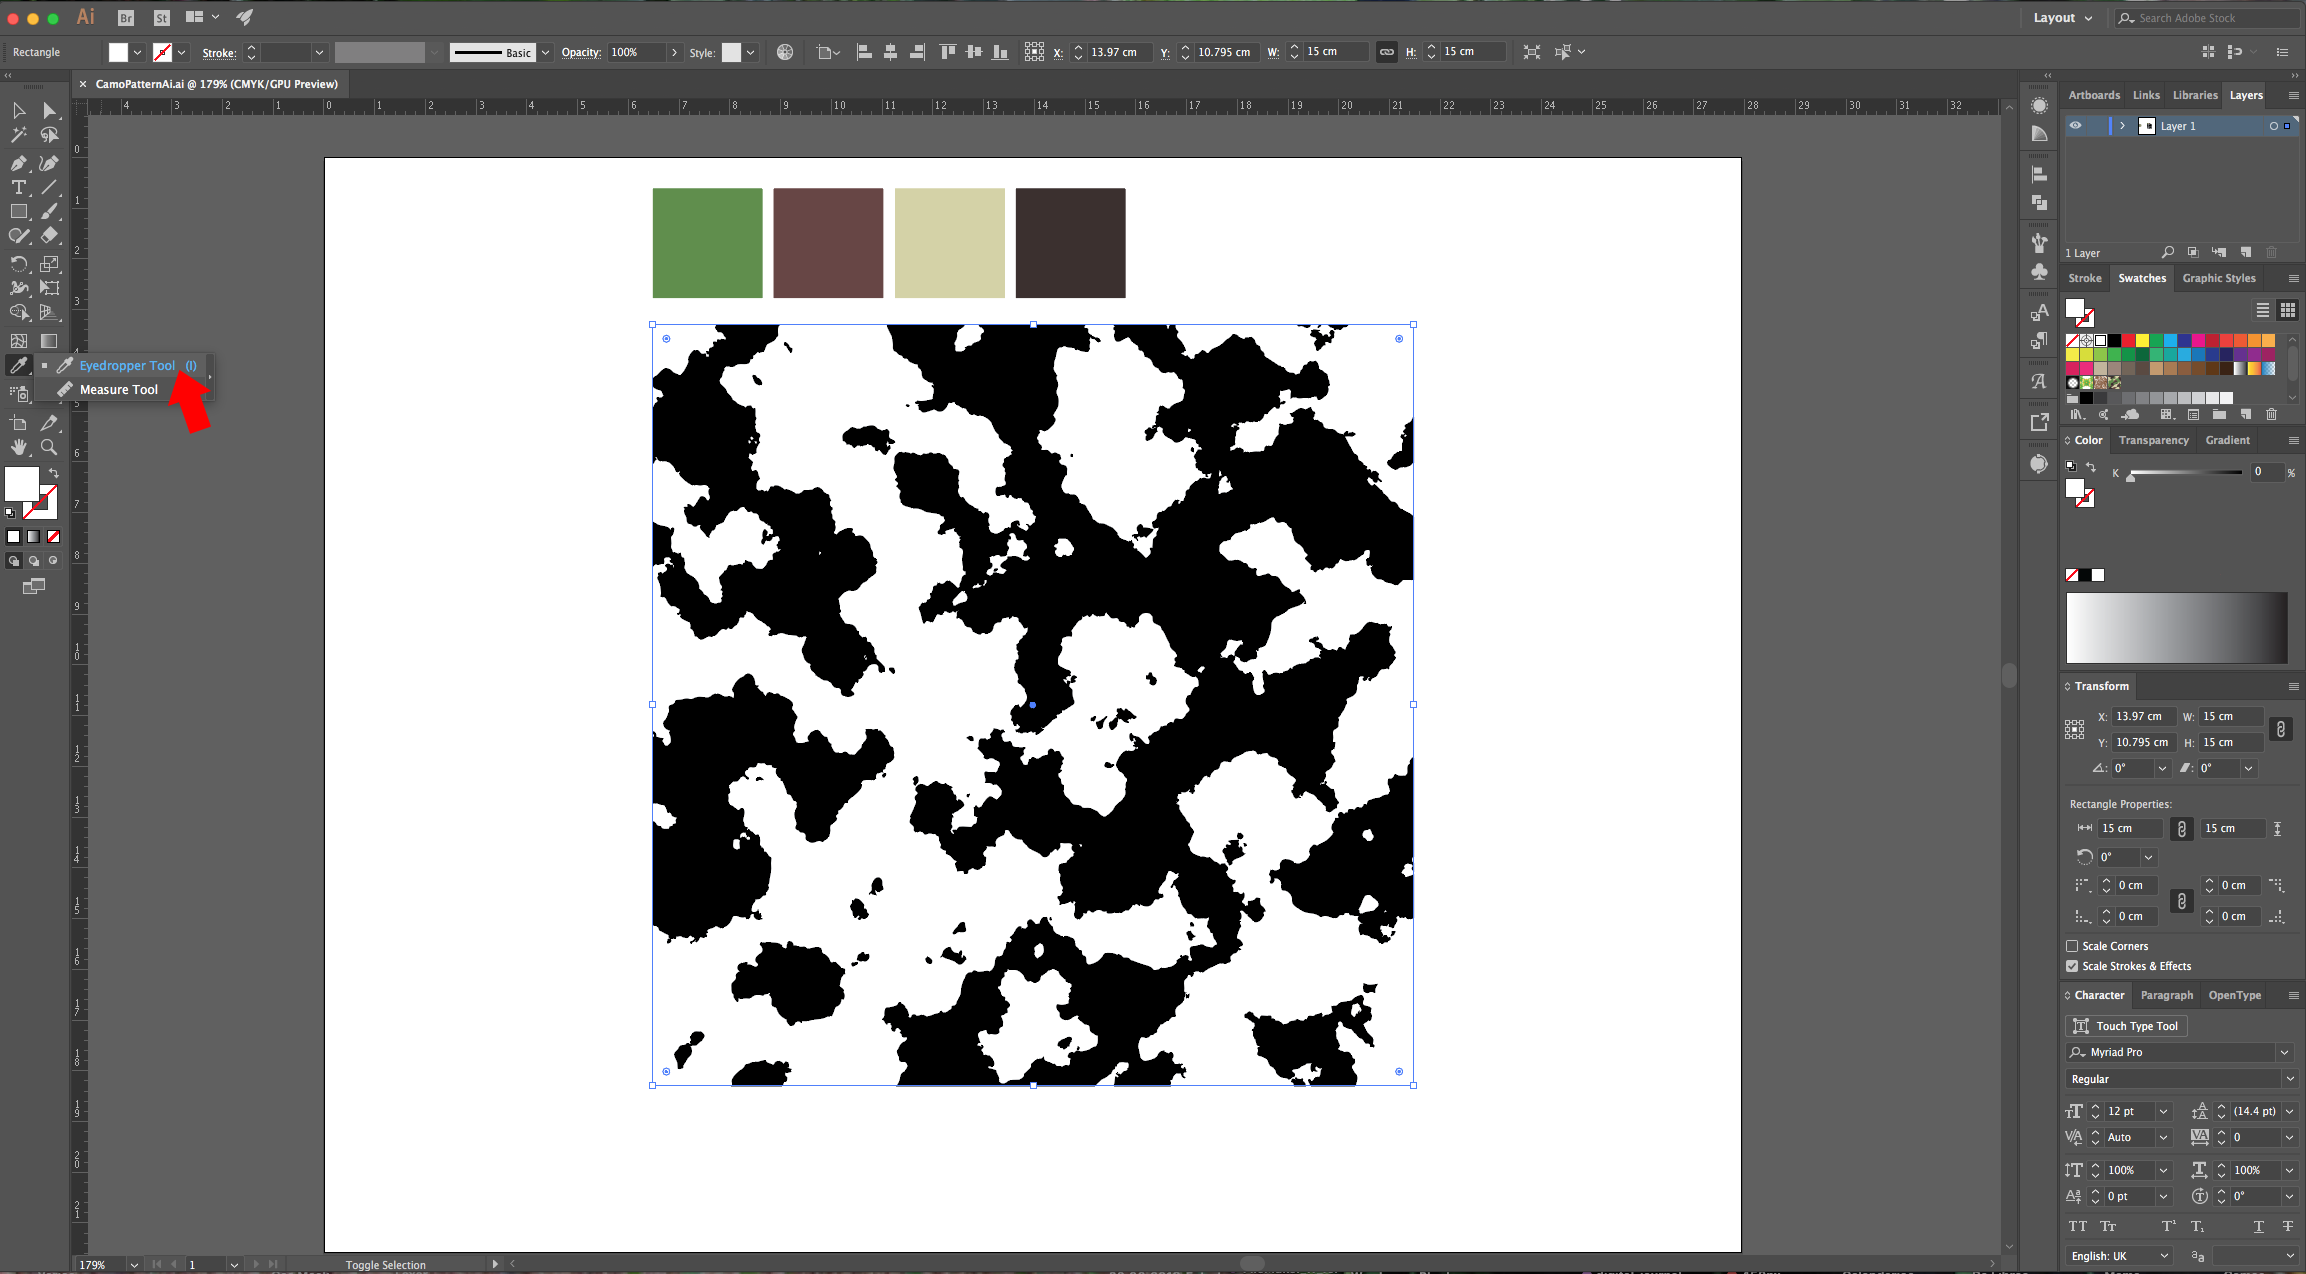
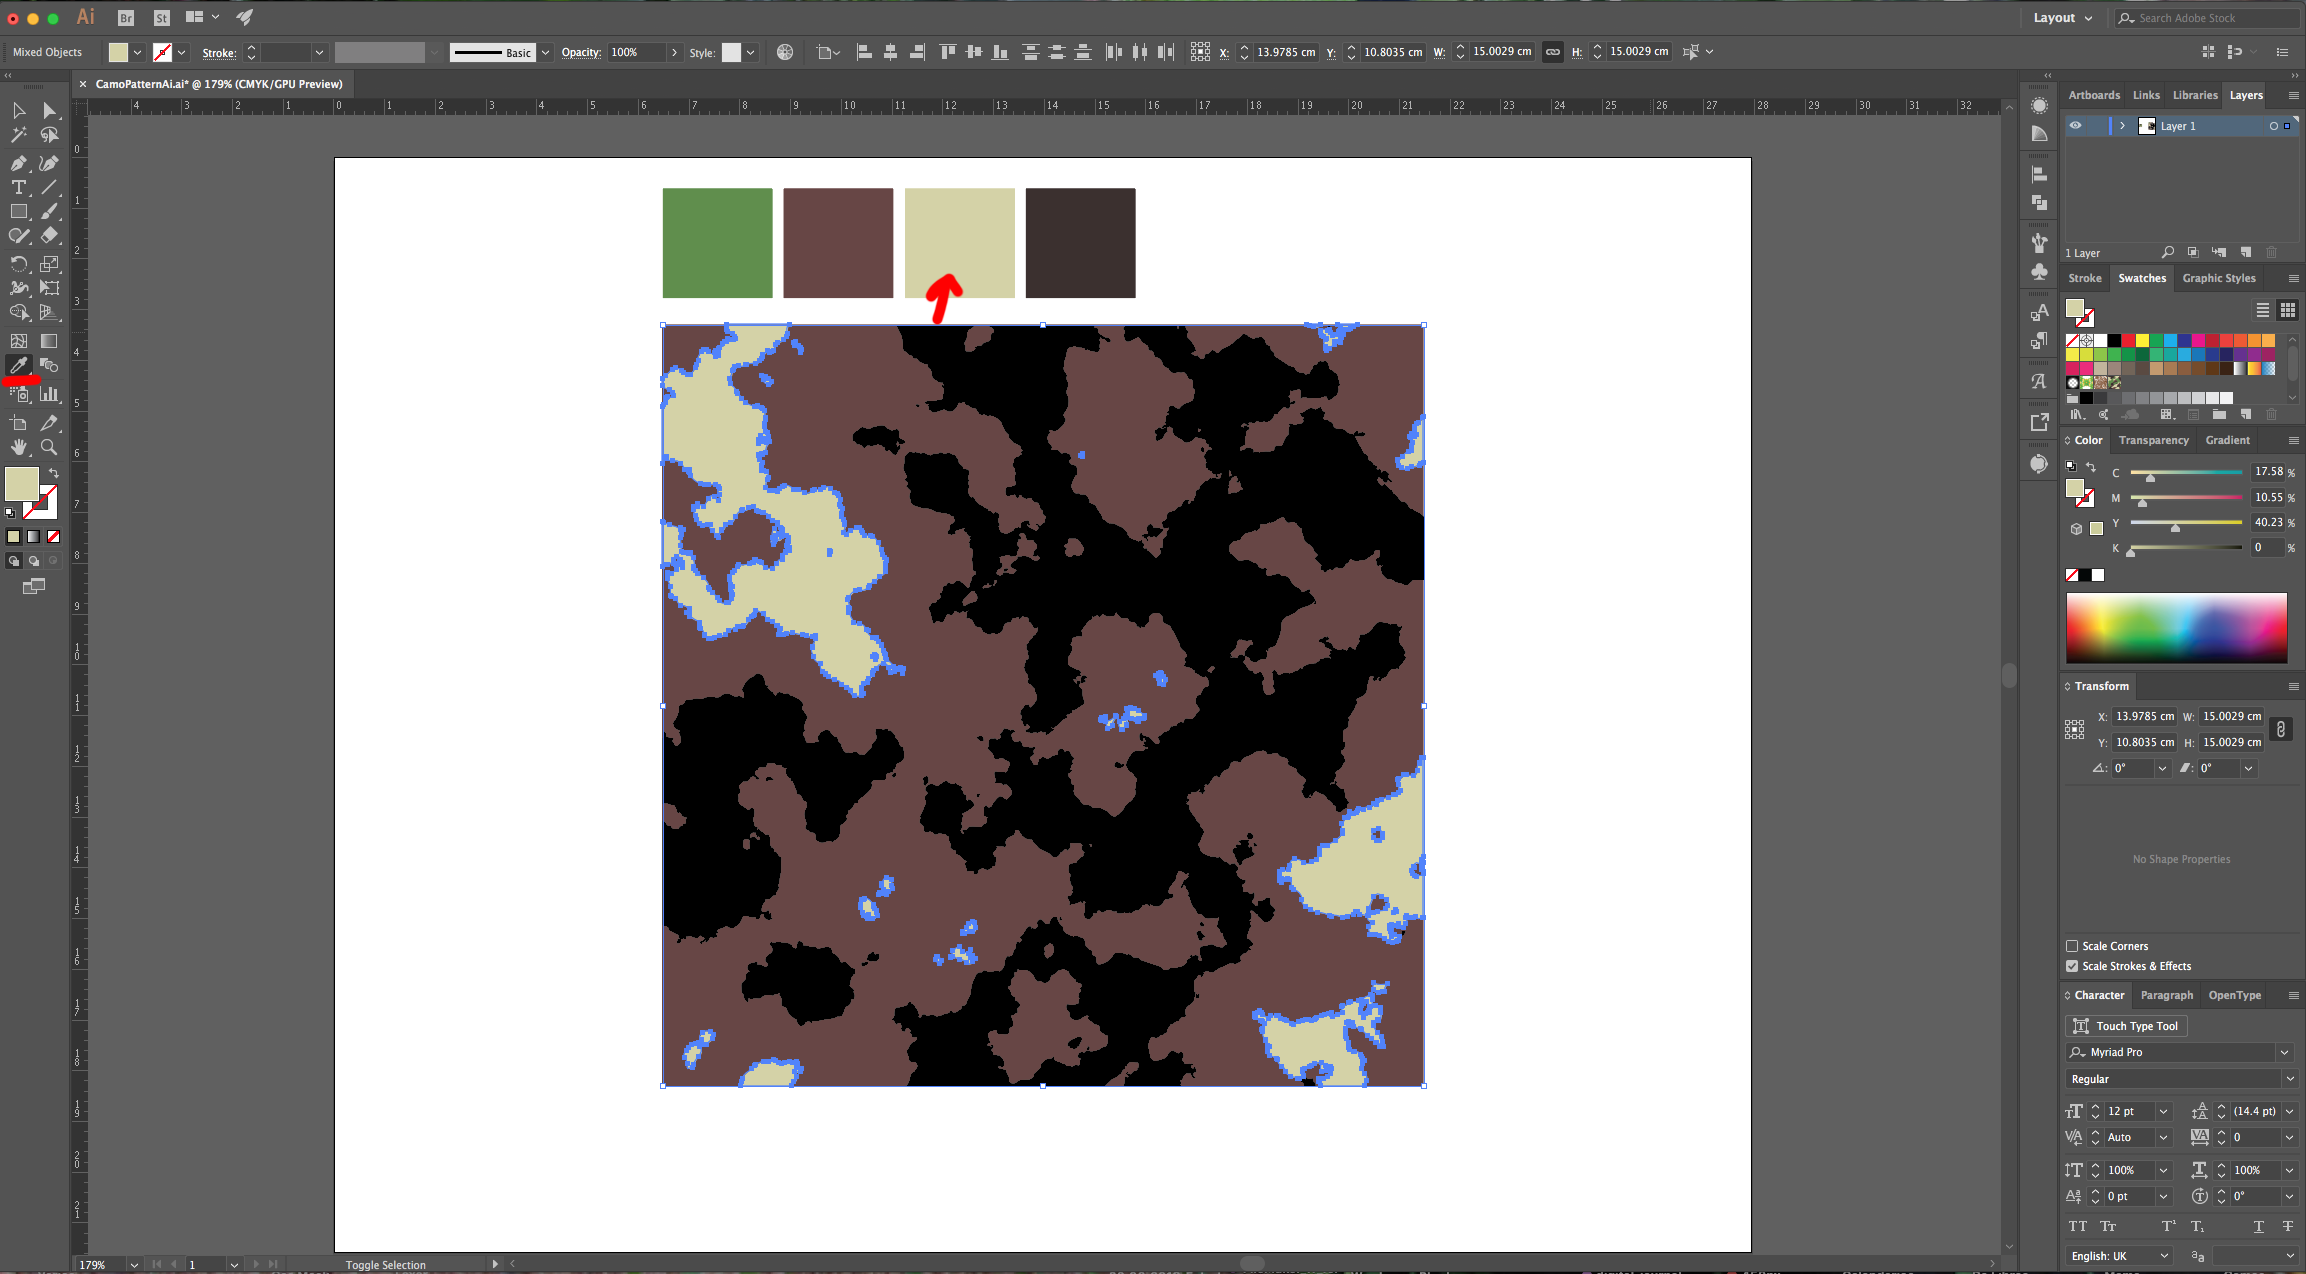
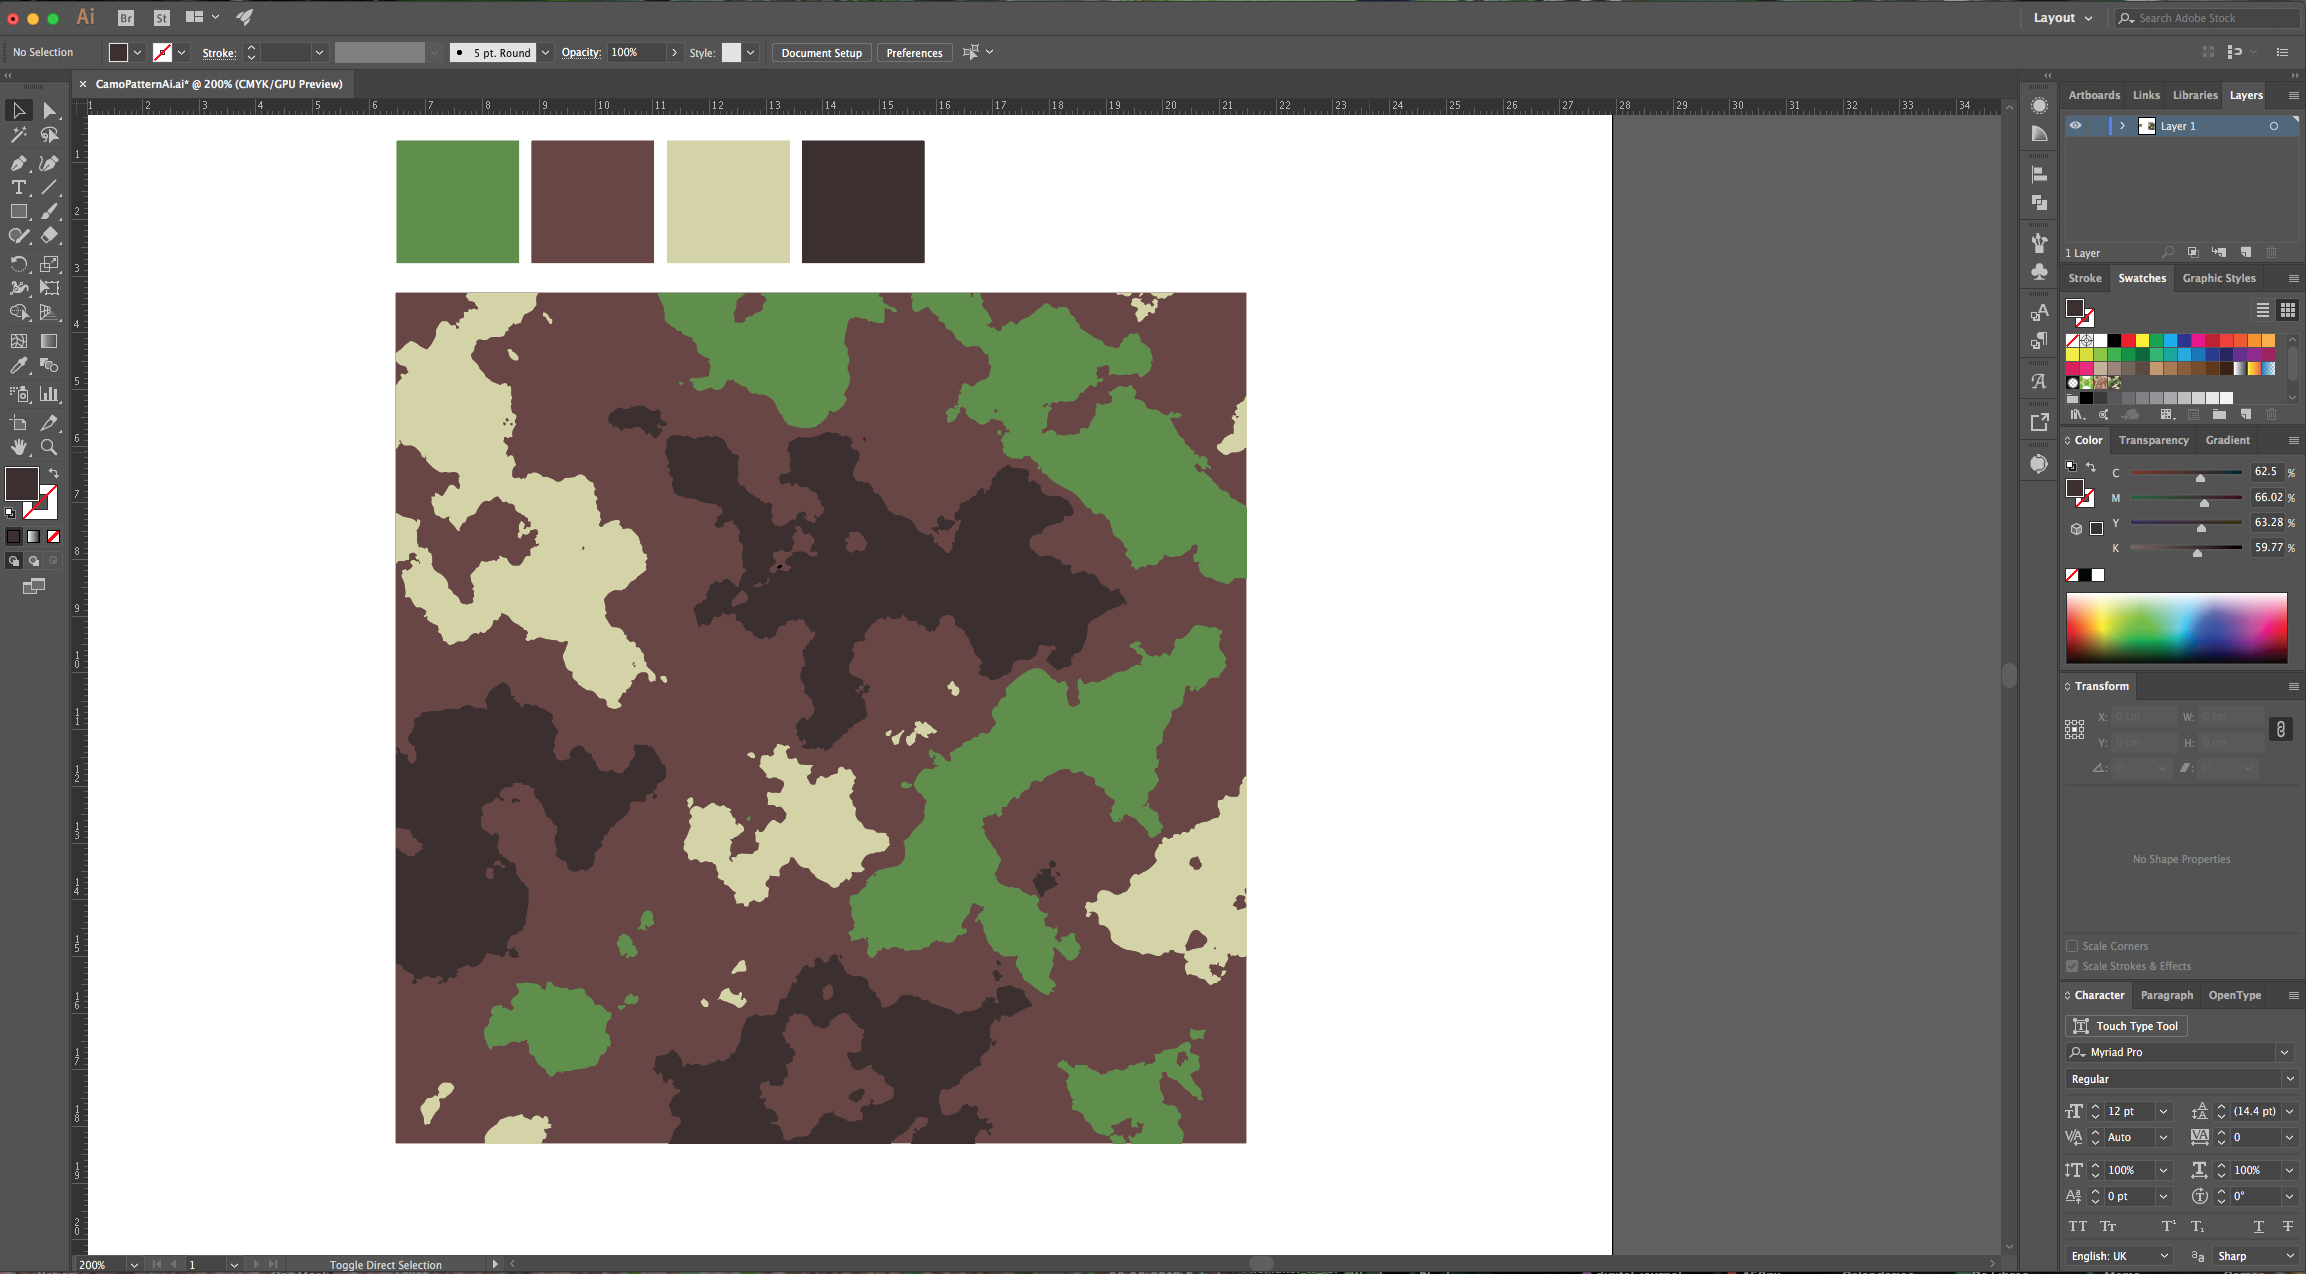
10 - Add some squares filled with the colors present in the “Color Palette” you chose as reference on the top part of your Canvas. If your reference is a flat image, you can “Place” it into your “Document” and use the “Eyedropper Tool” (I) to sample the colors.
11 - Select the White Square at the bottom and use the “Eyedropper Tool” (I) to change the fill color to one present in your “Palette” by clicking on top of the reference square filled with it.

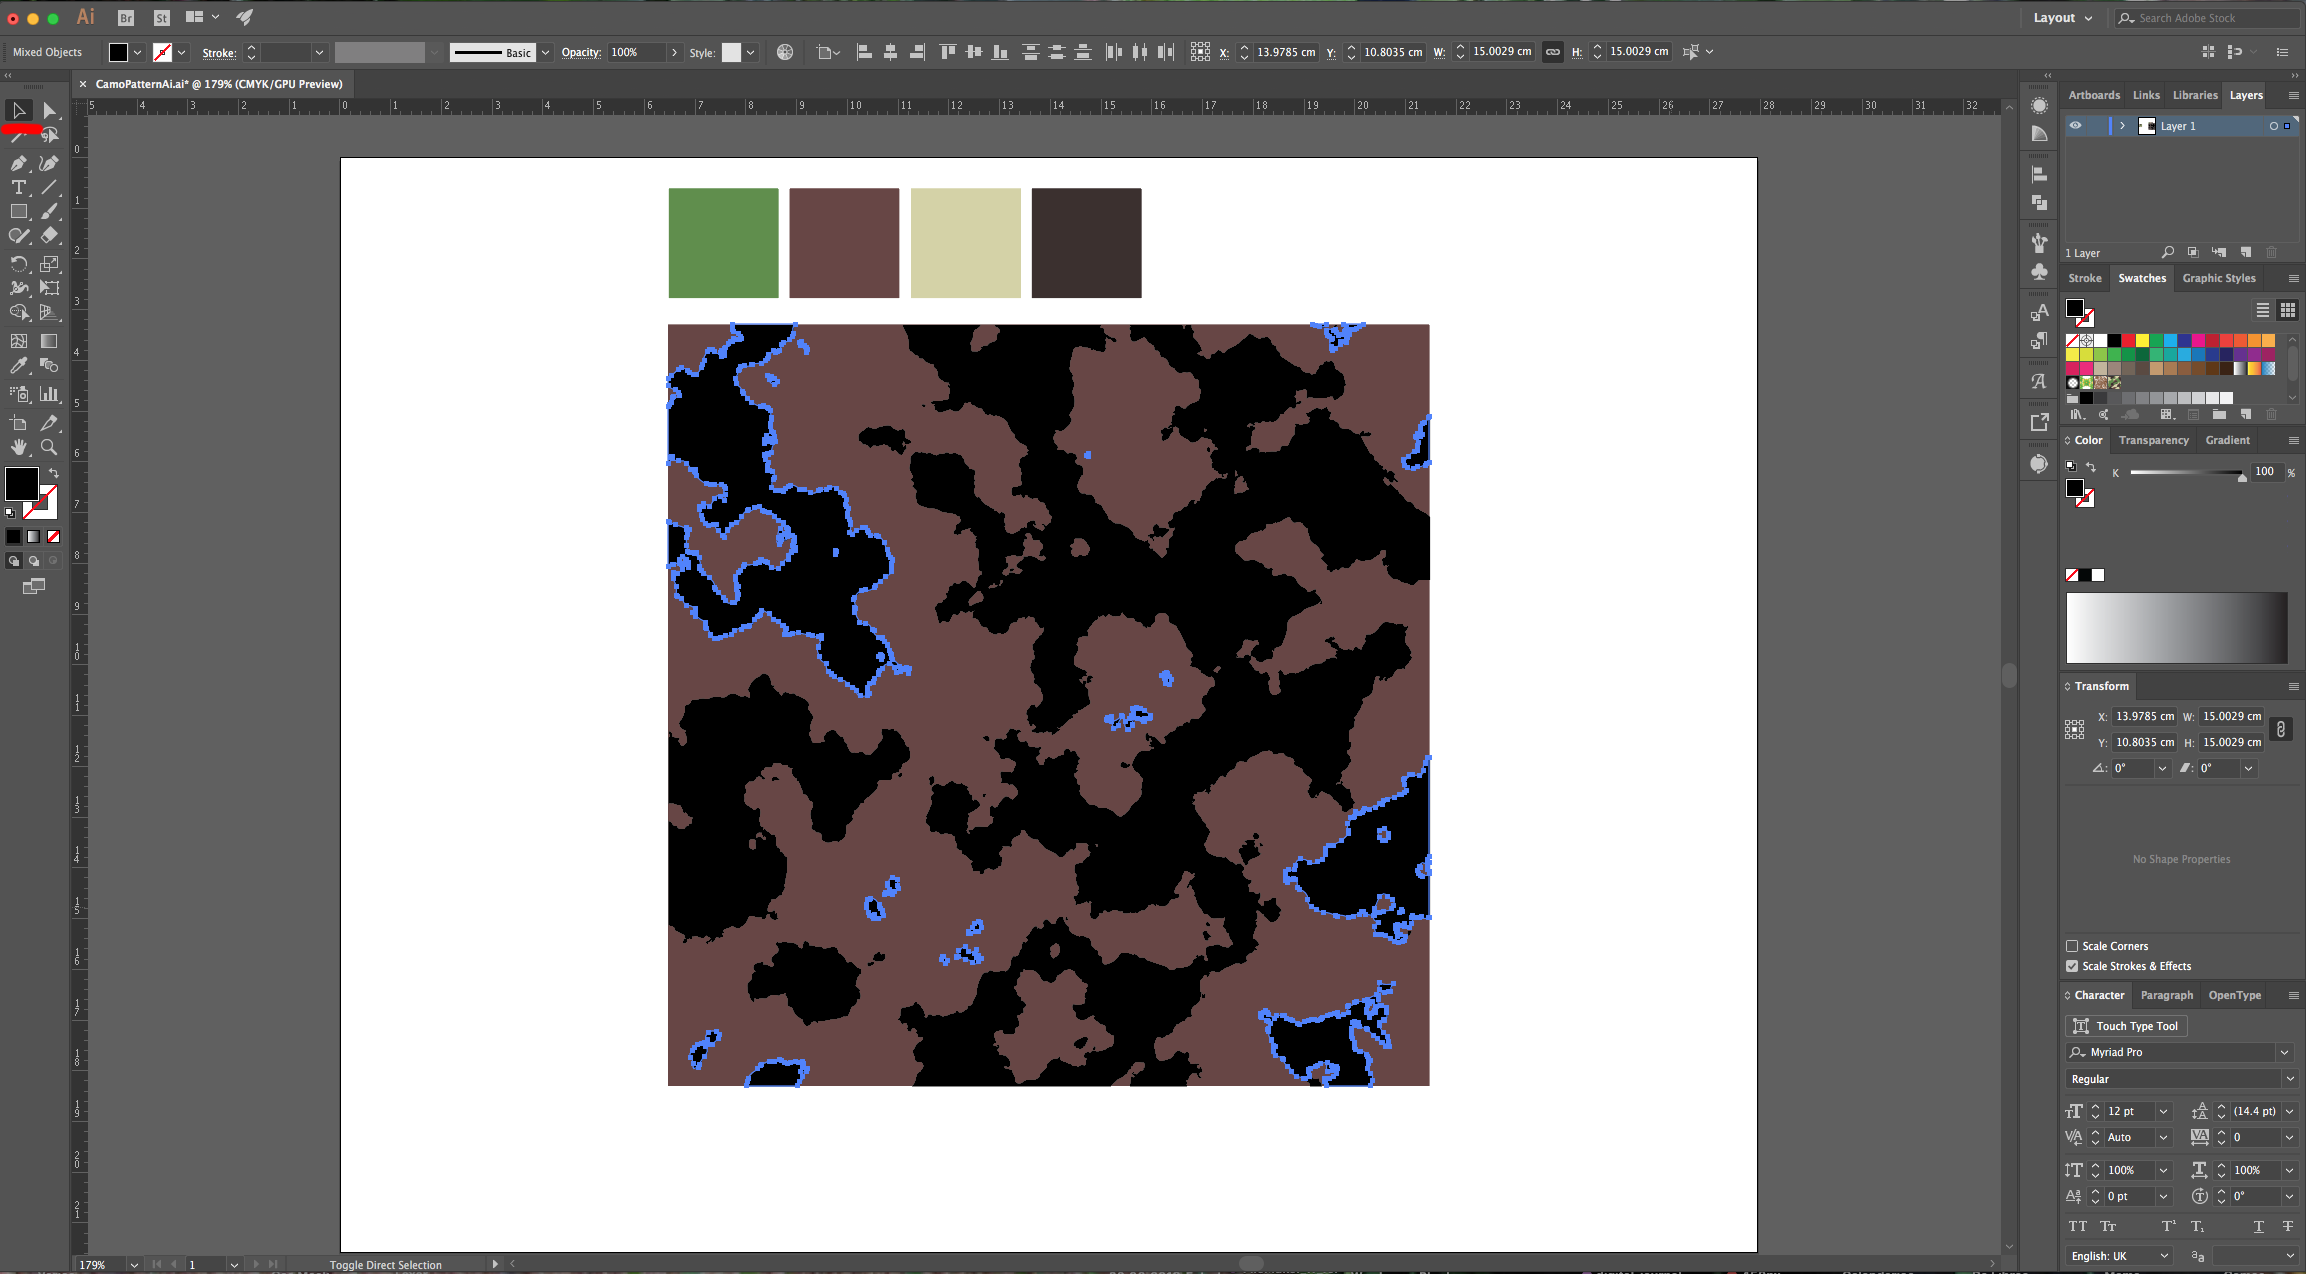
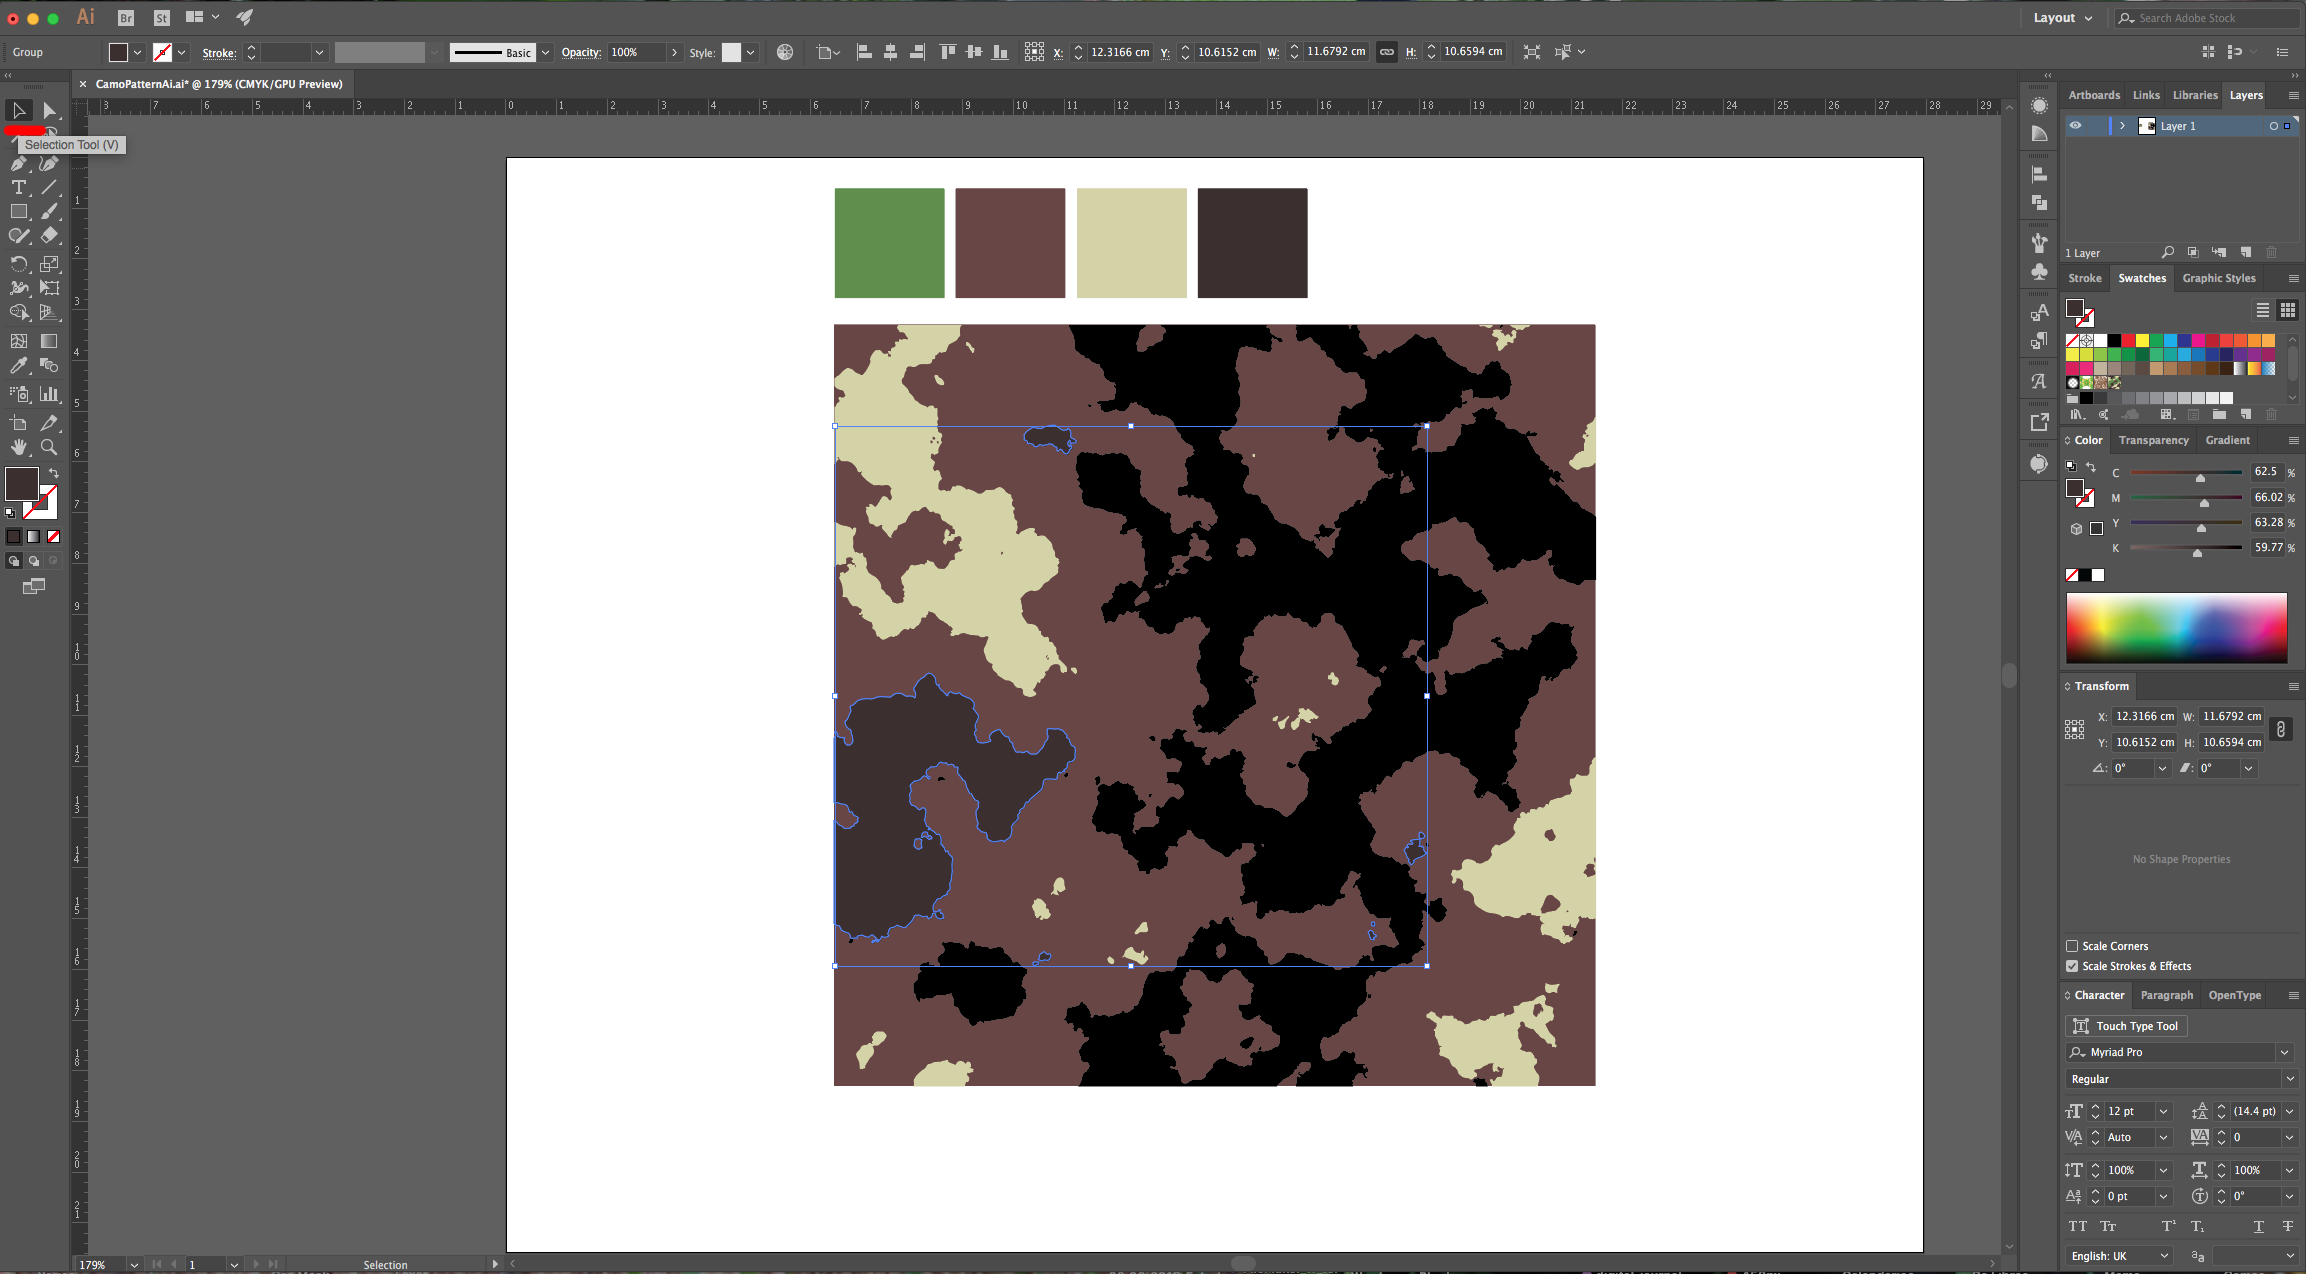
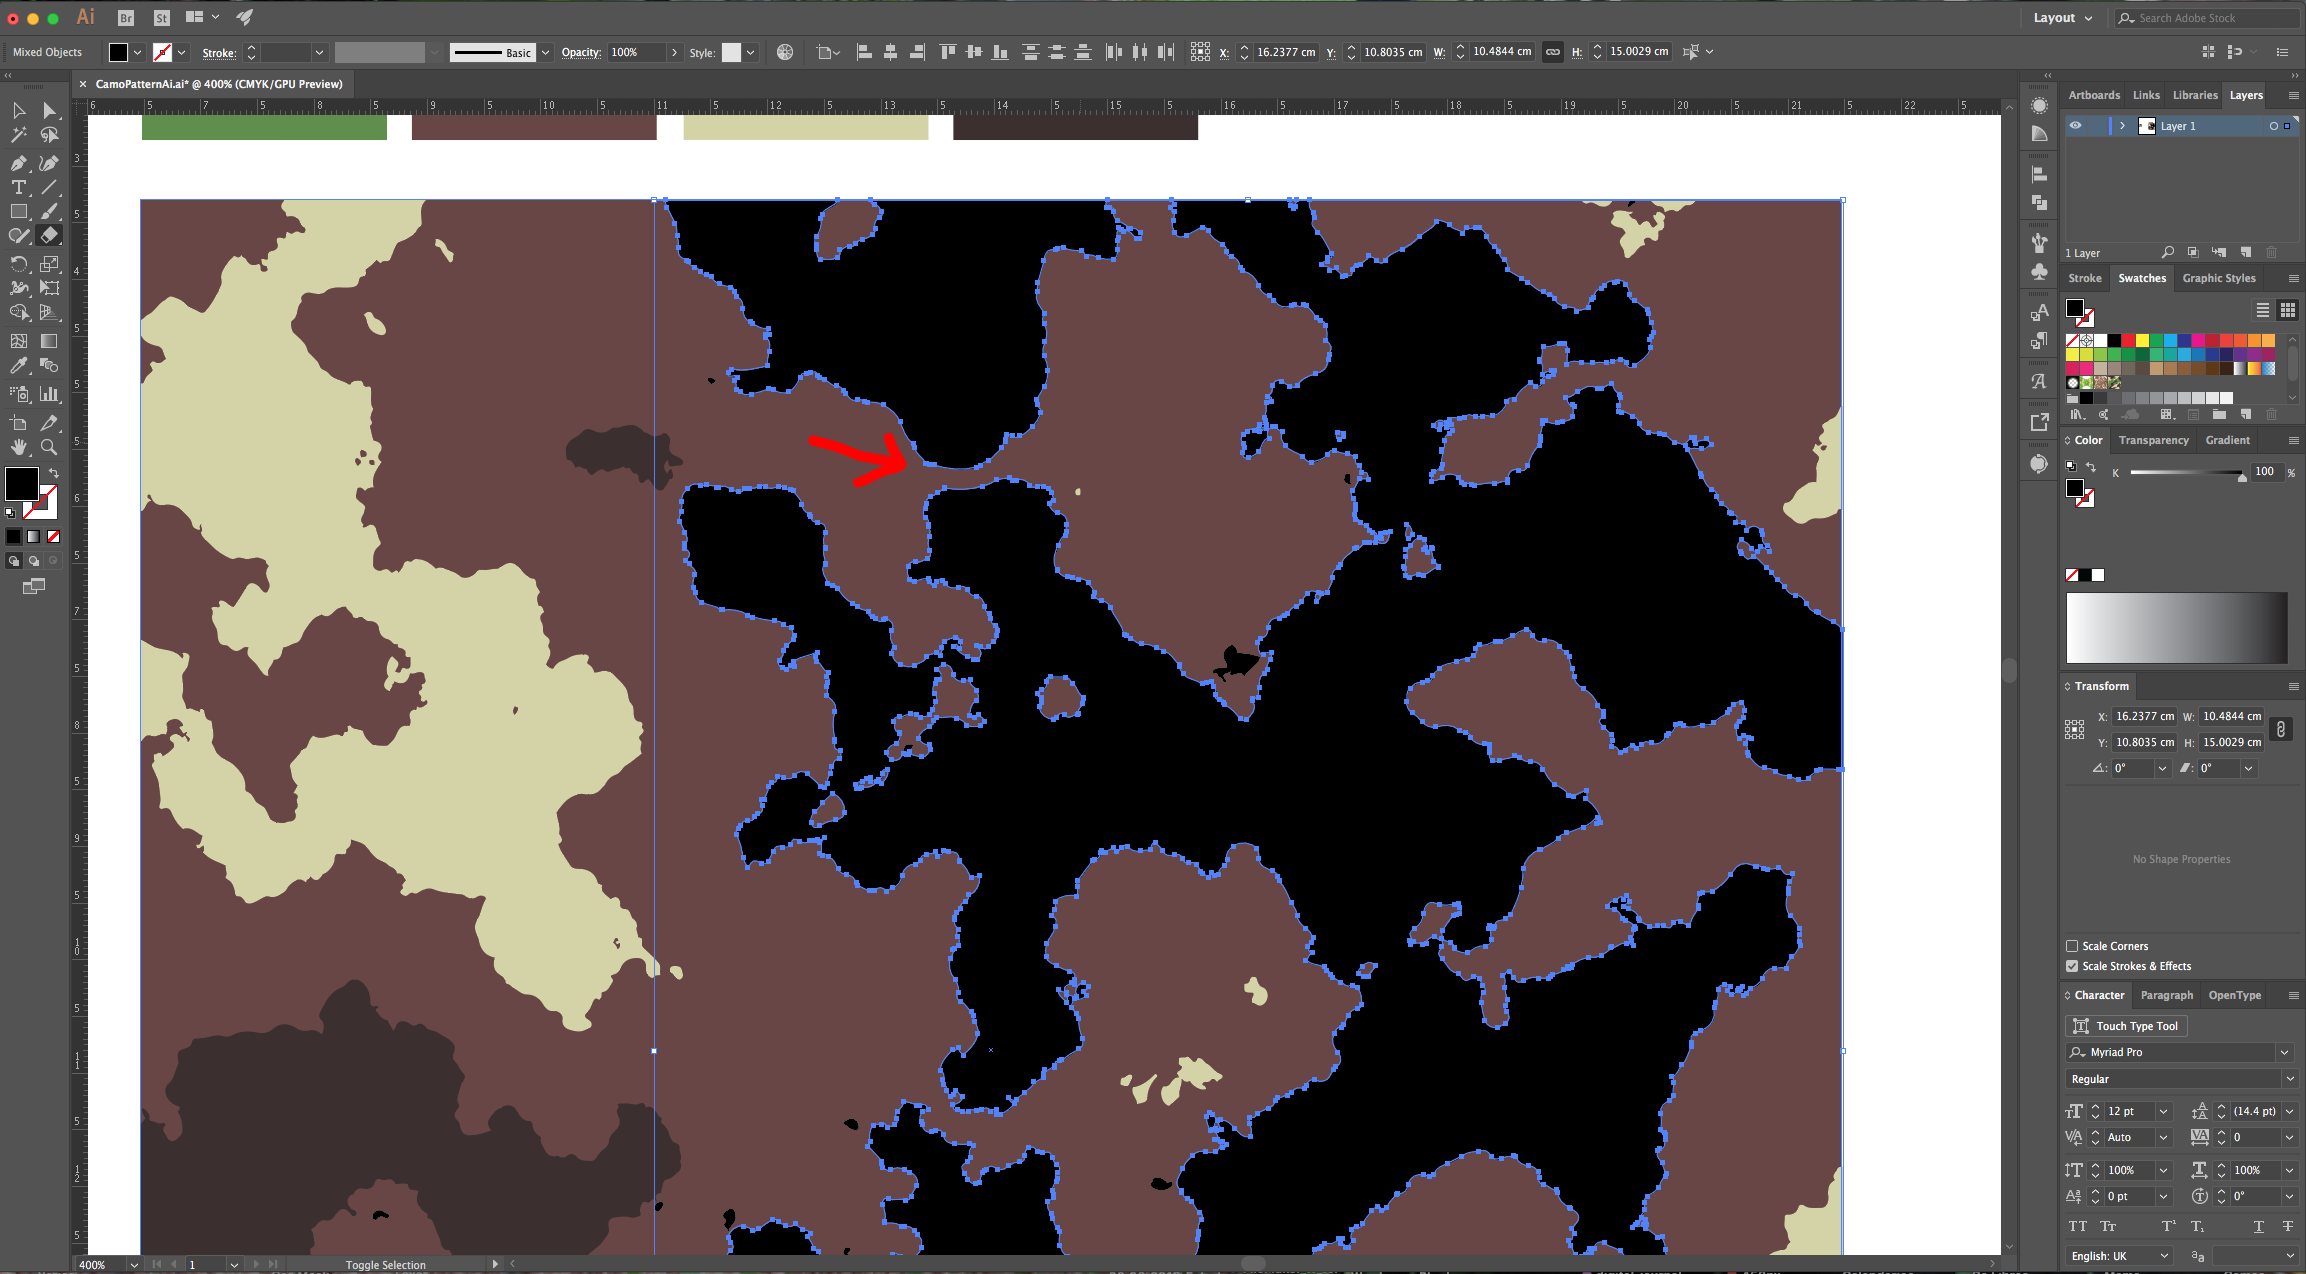
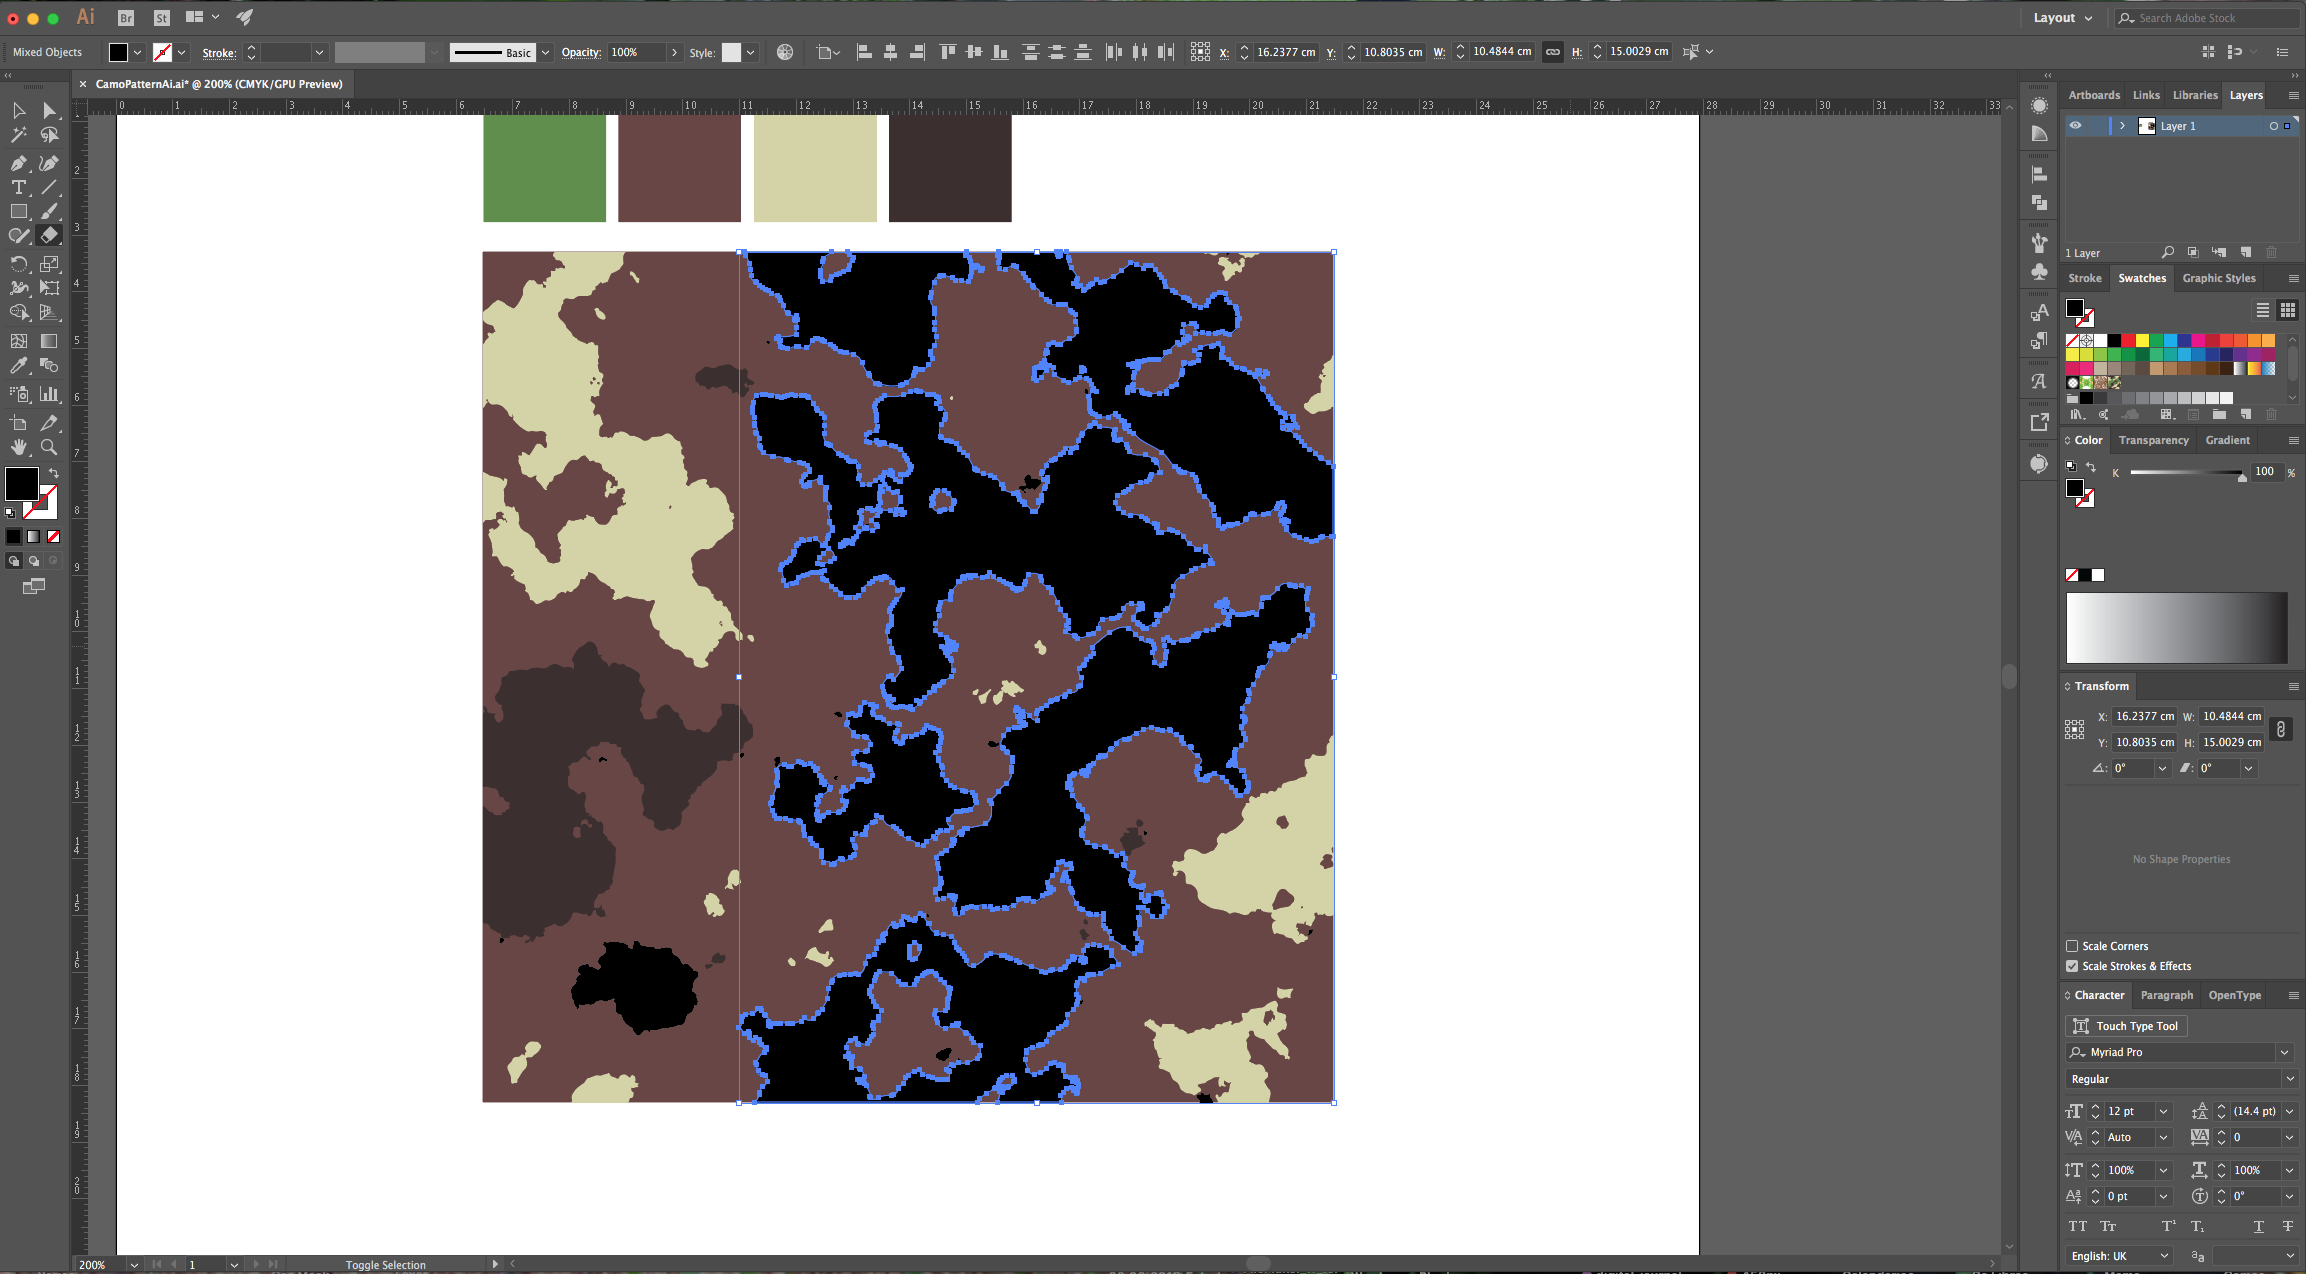
12 - Use the “Selection Tool” (V) to select some of the portions of the Pattern that you would like to be filled with the same color (“Shift” key) then use the “Eyedropper Tool” (I) to sample the color. Repeat for other colors.
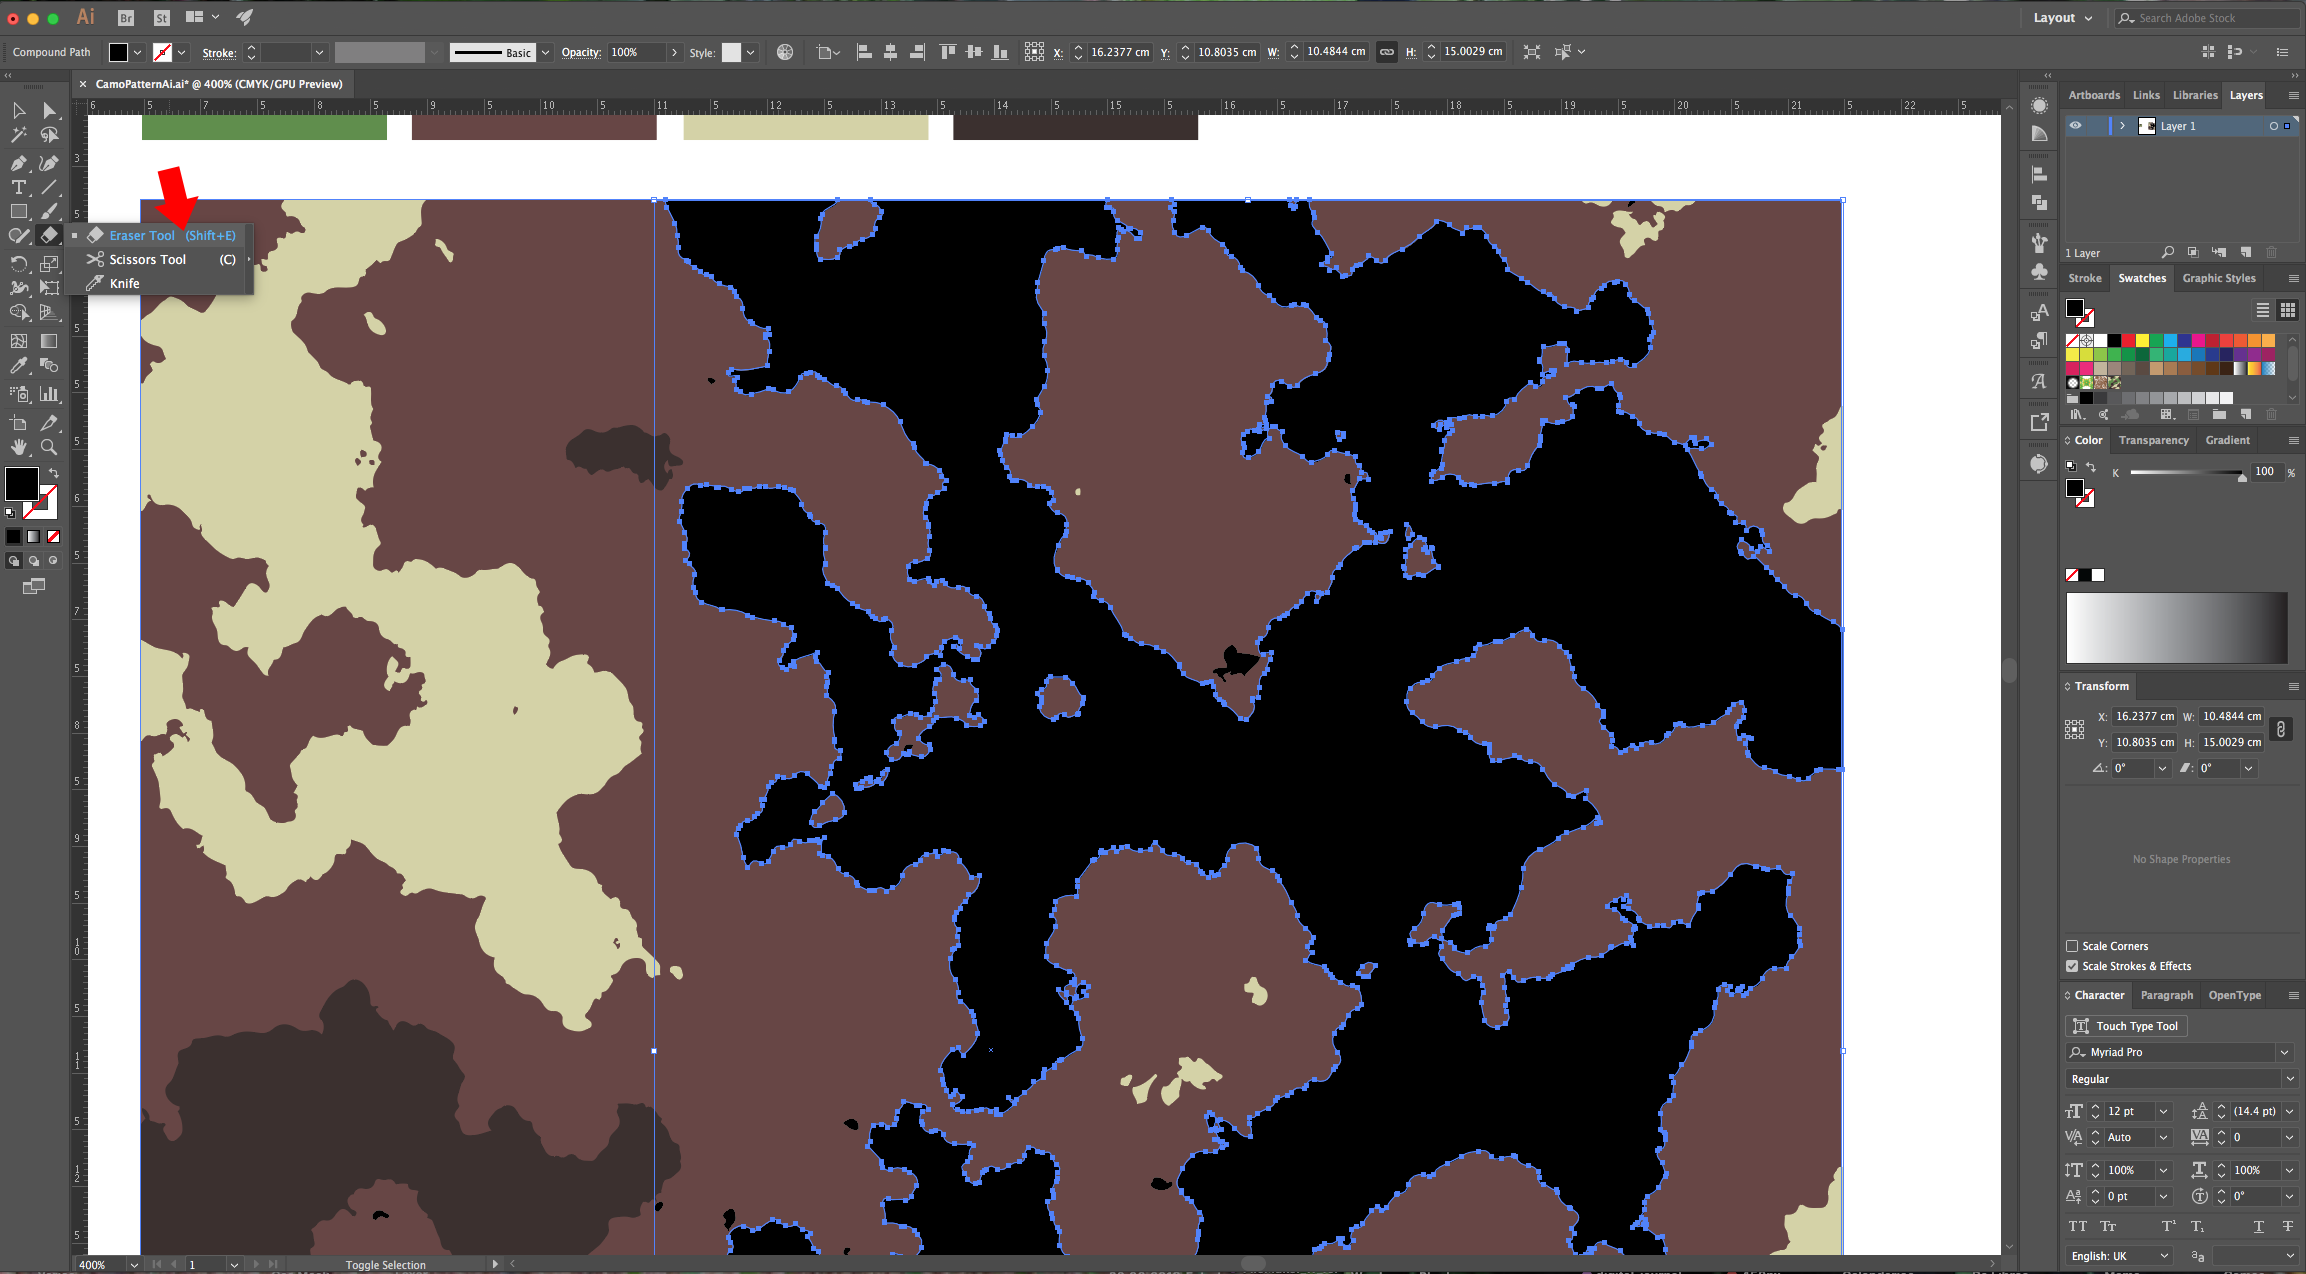
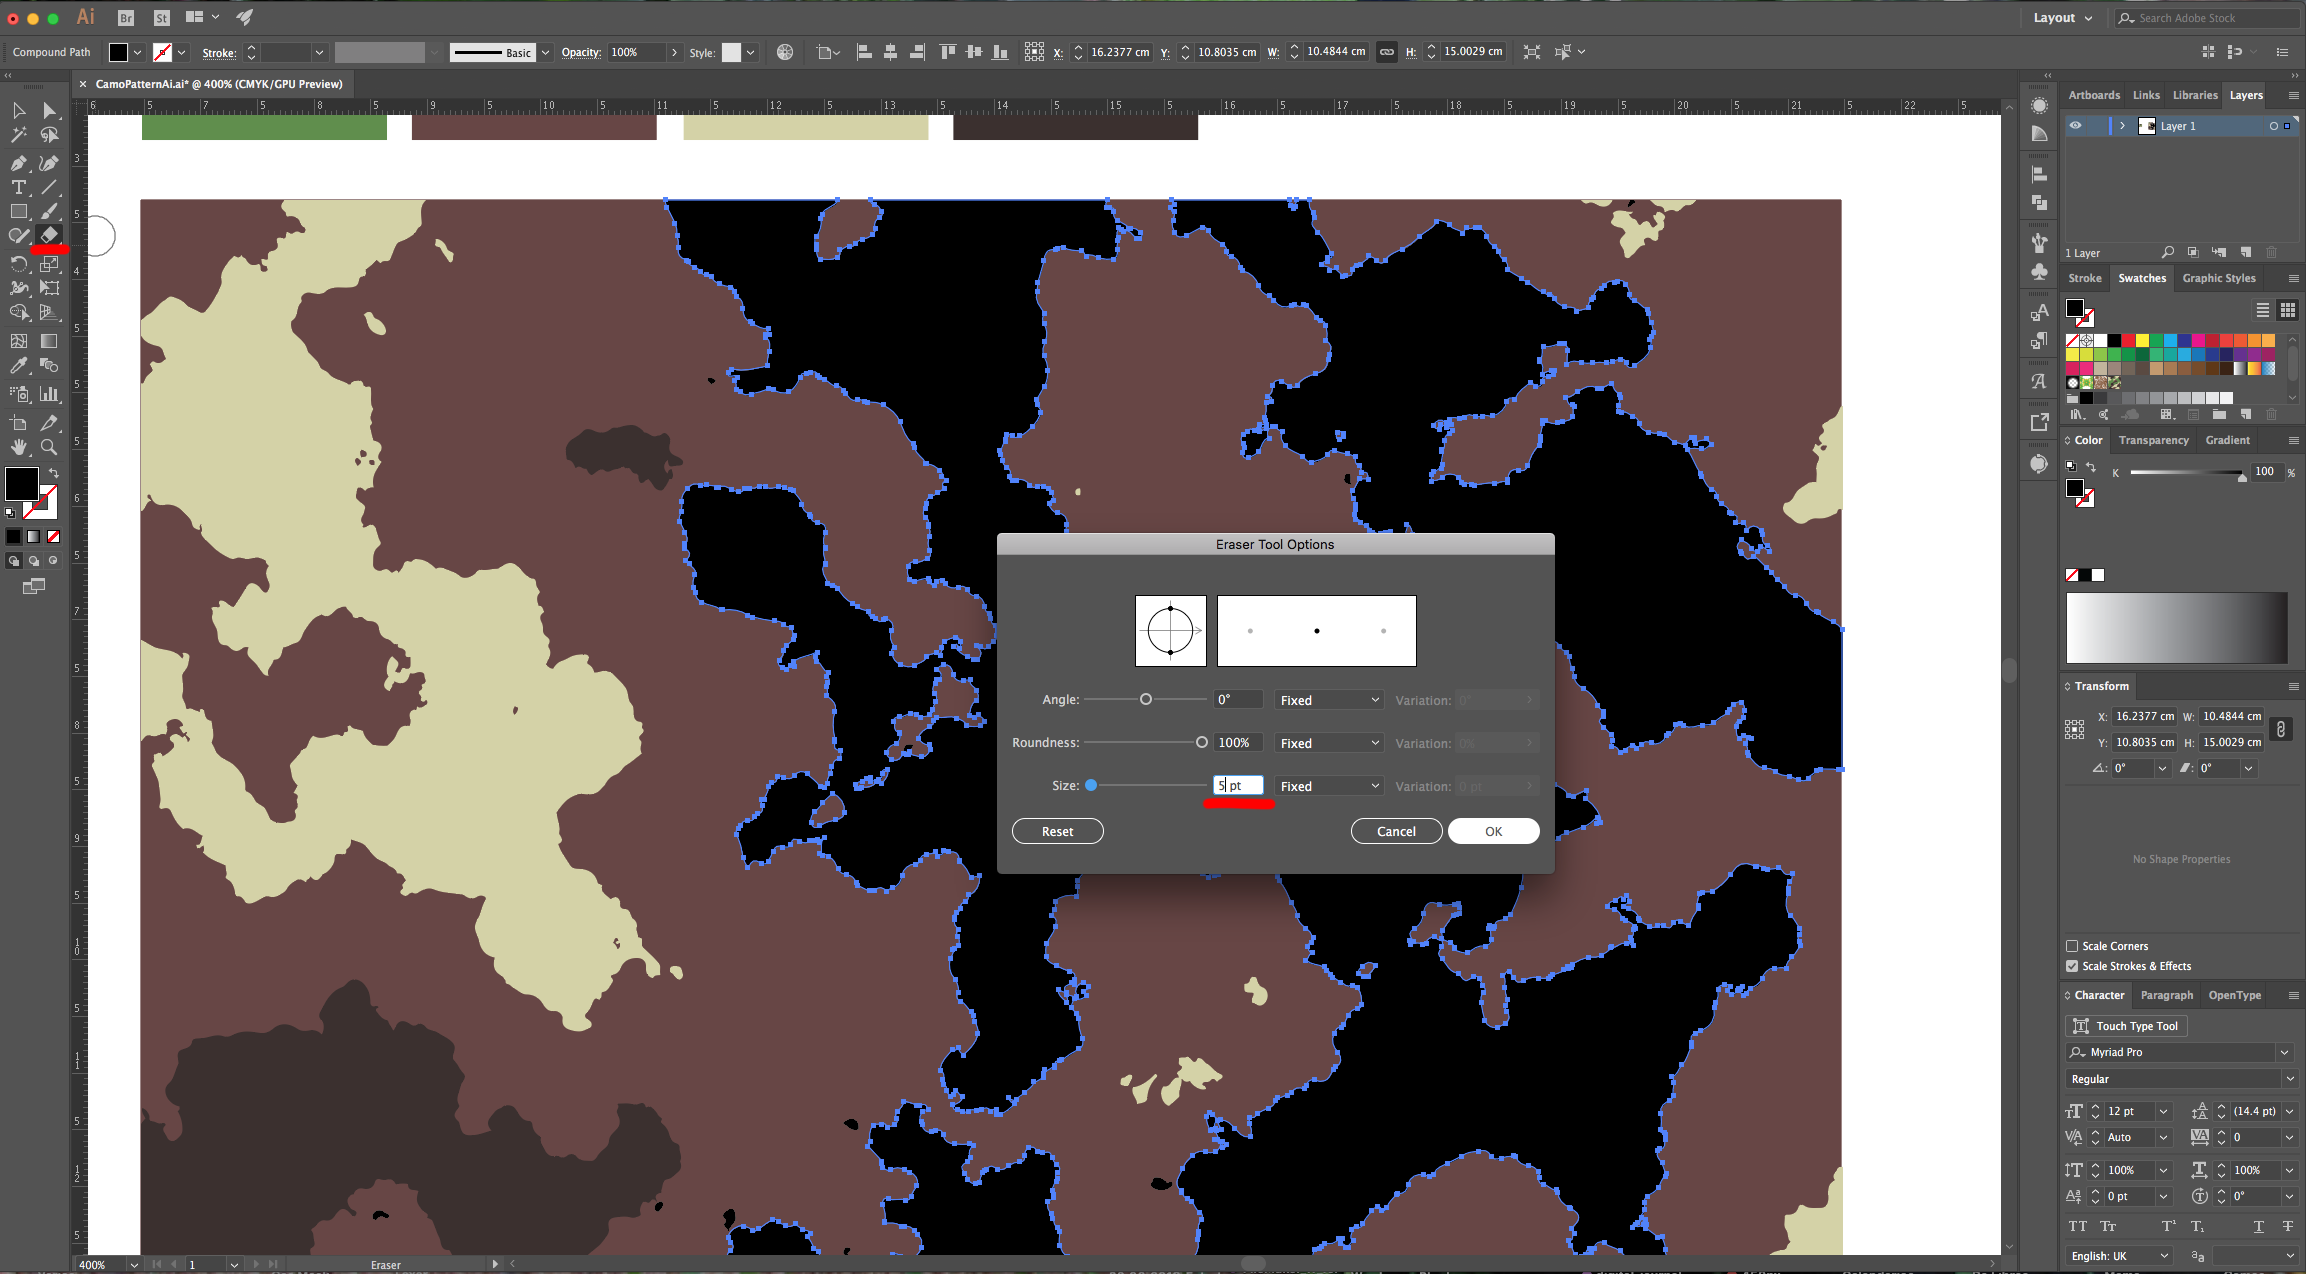
13 - If you have a large piece that you want to divide, choose the “Eraser Tool” (Shift + E), double-click on top of its Thumbnail to open the “Options Panel” and change the “Size” to 5 pt. Use it to erase portions of the vector to create separate pieces.
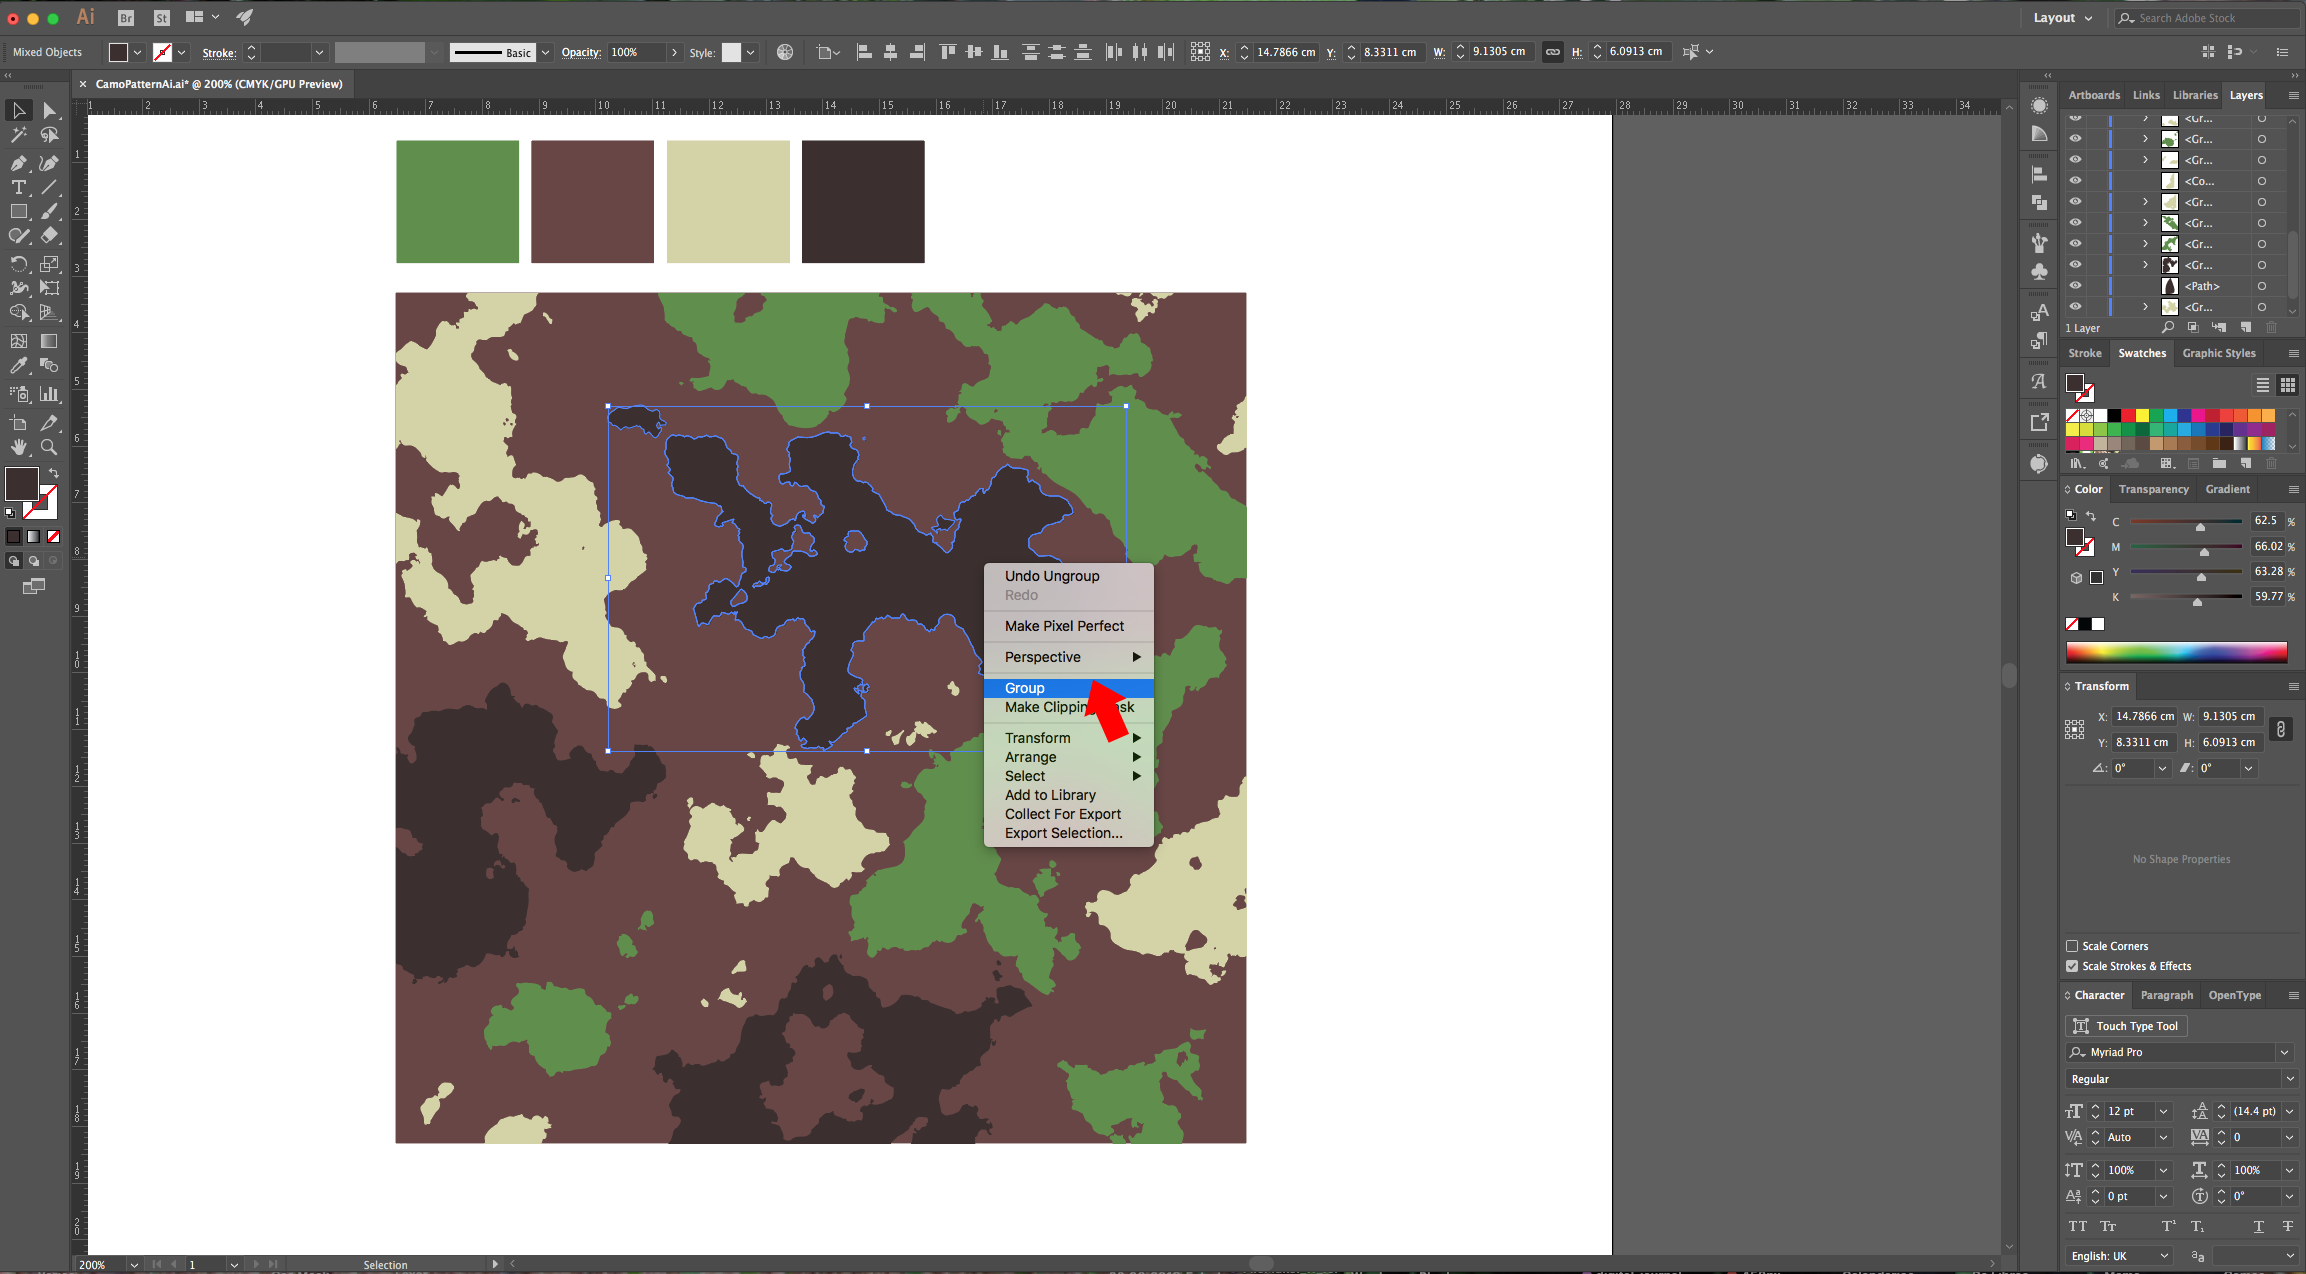
14 - Fill all your vector shapes with different colors. When you are done, select the pieces that should be together (“Shift” key), right-click on top of them and choose “Group”.
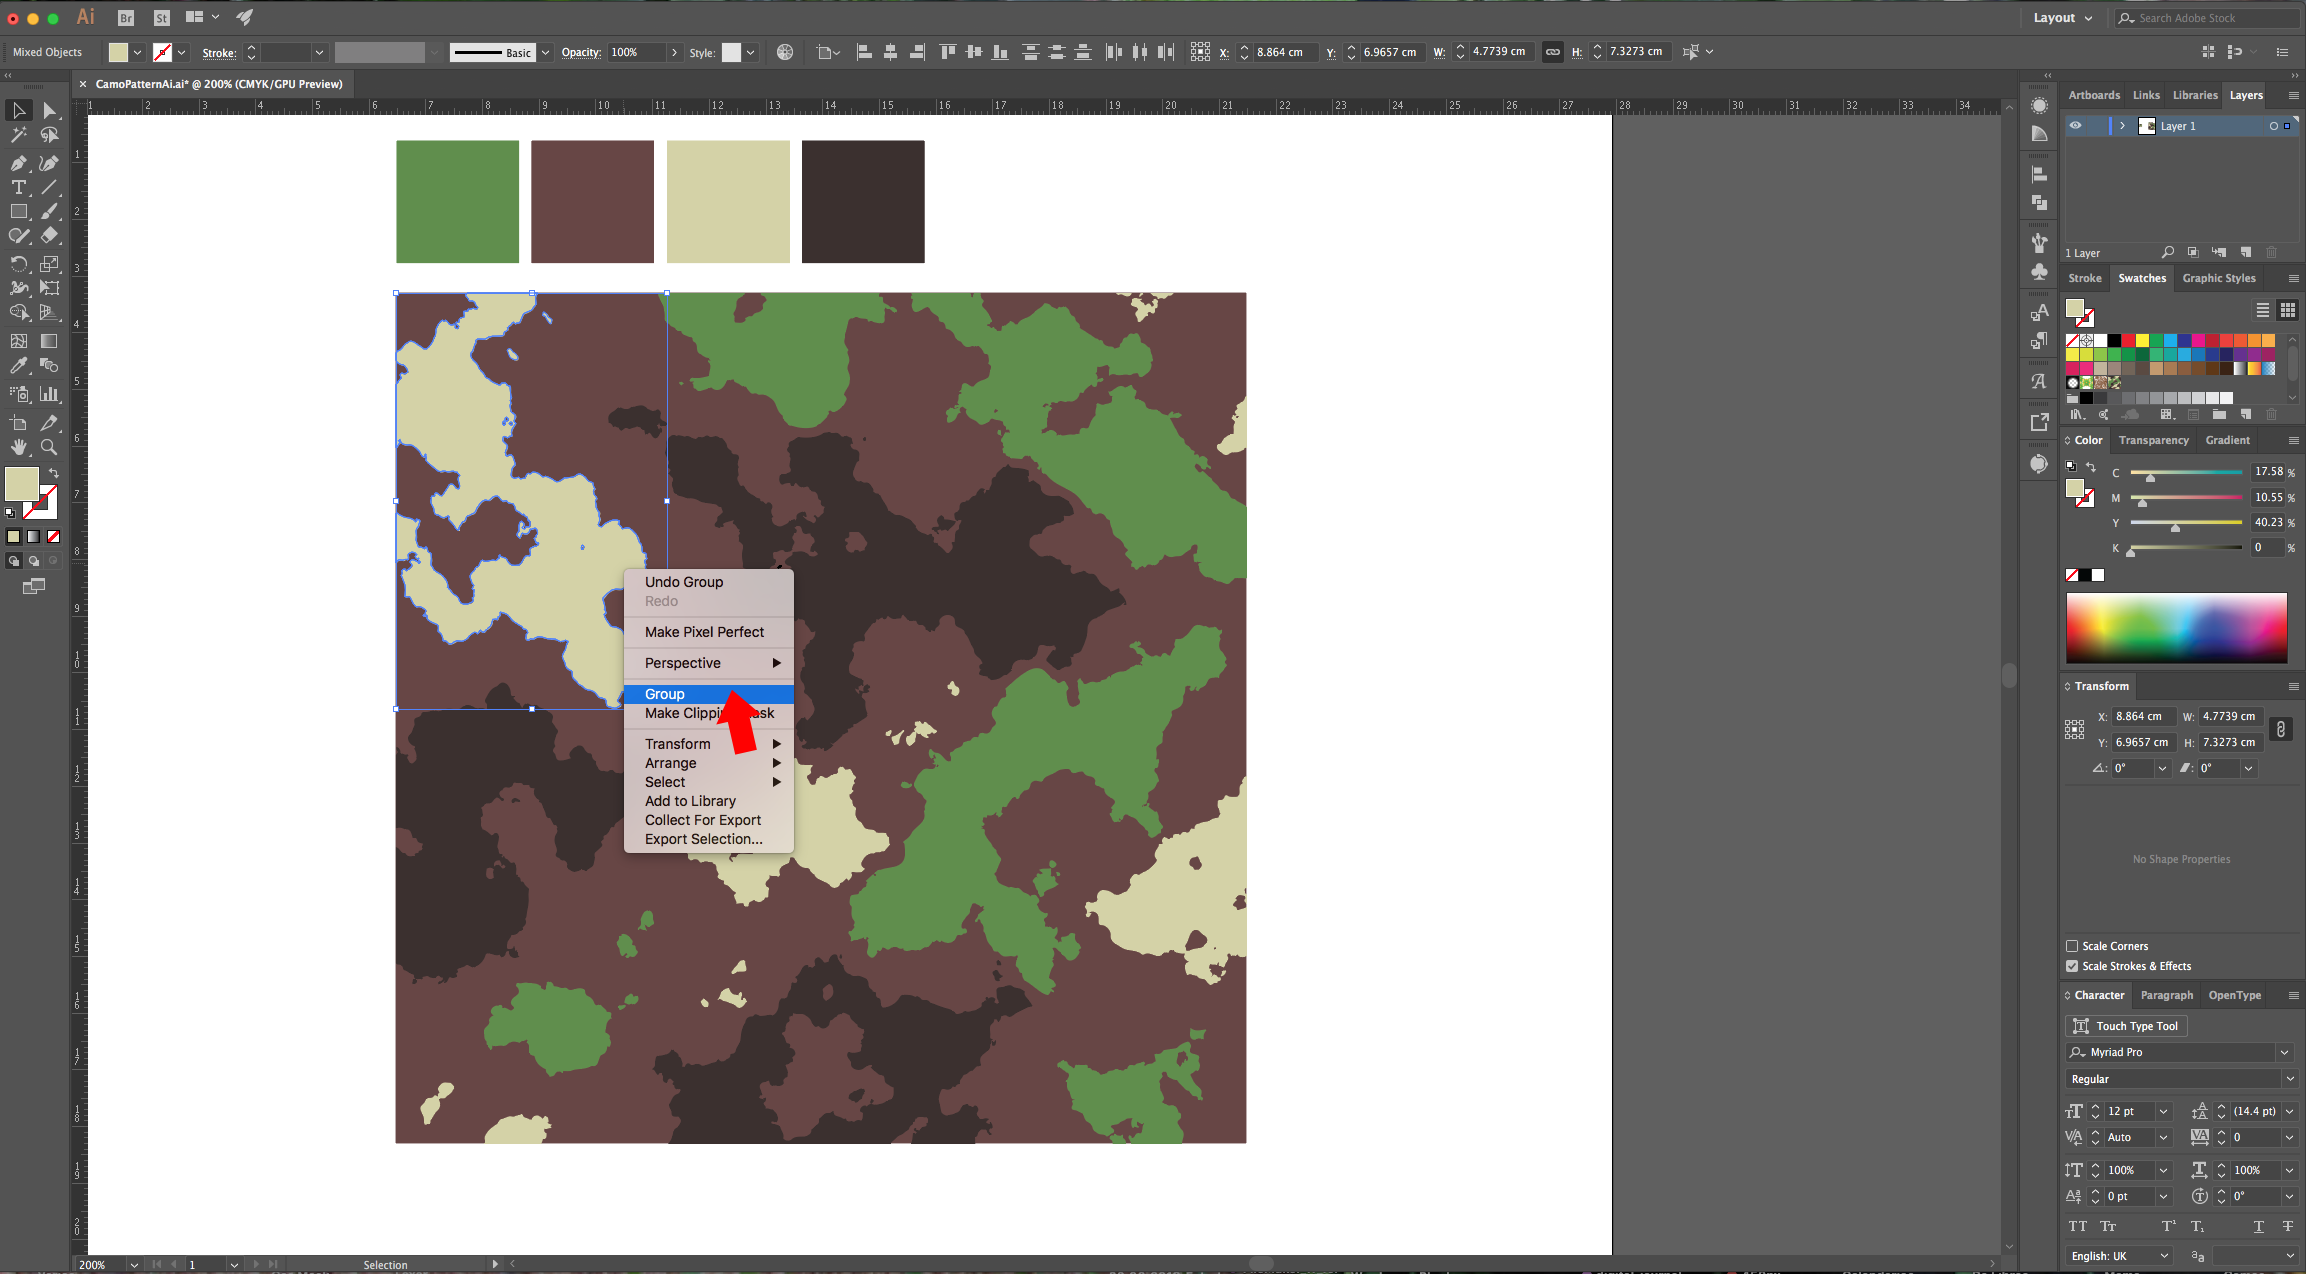
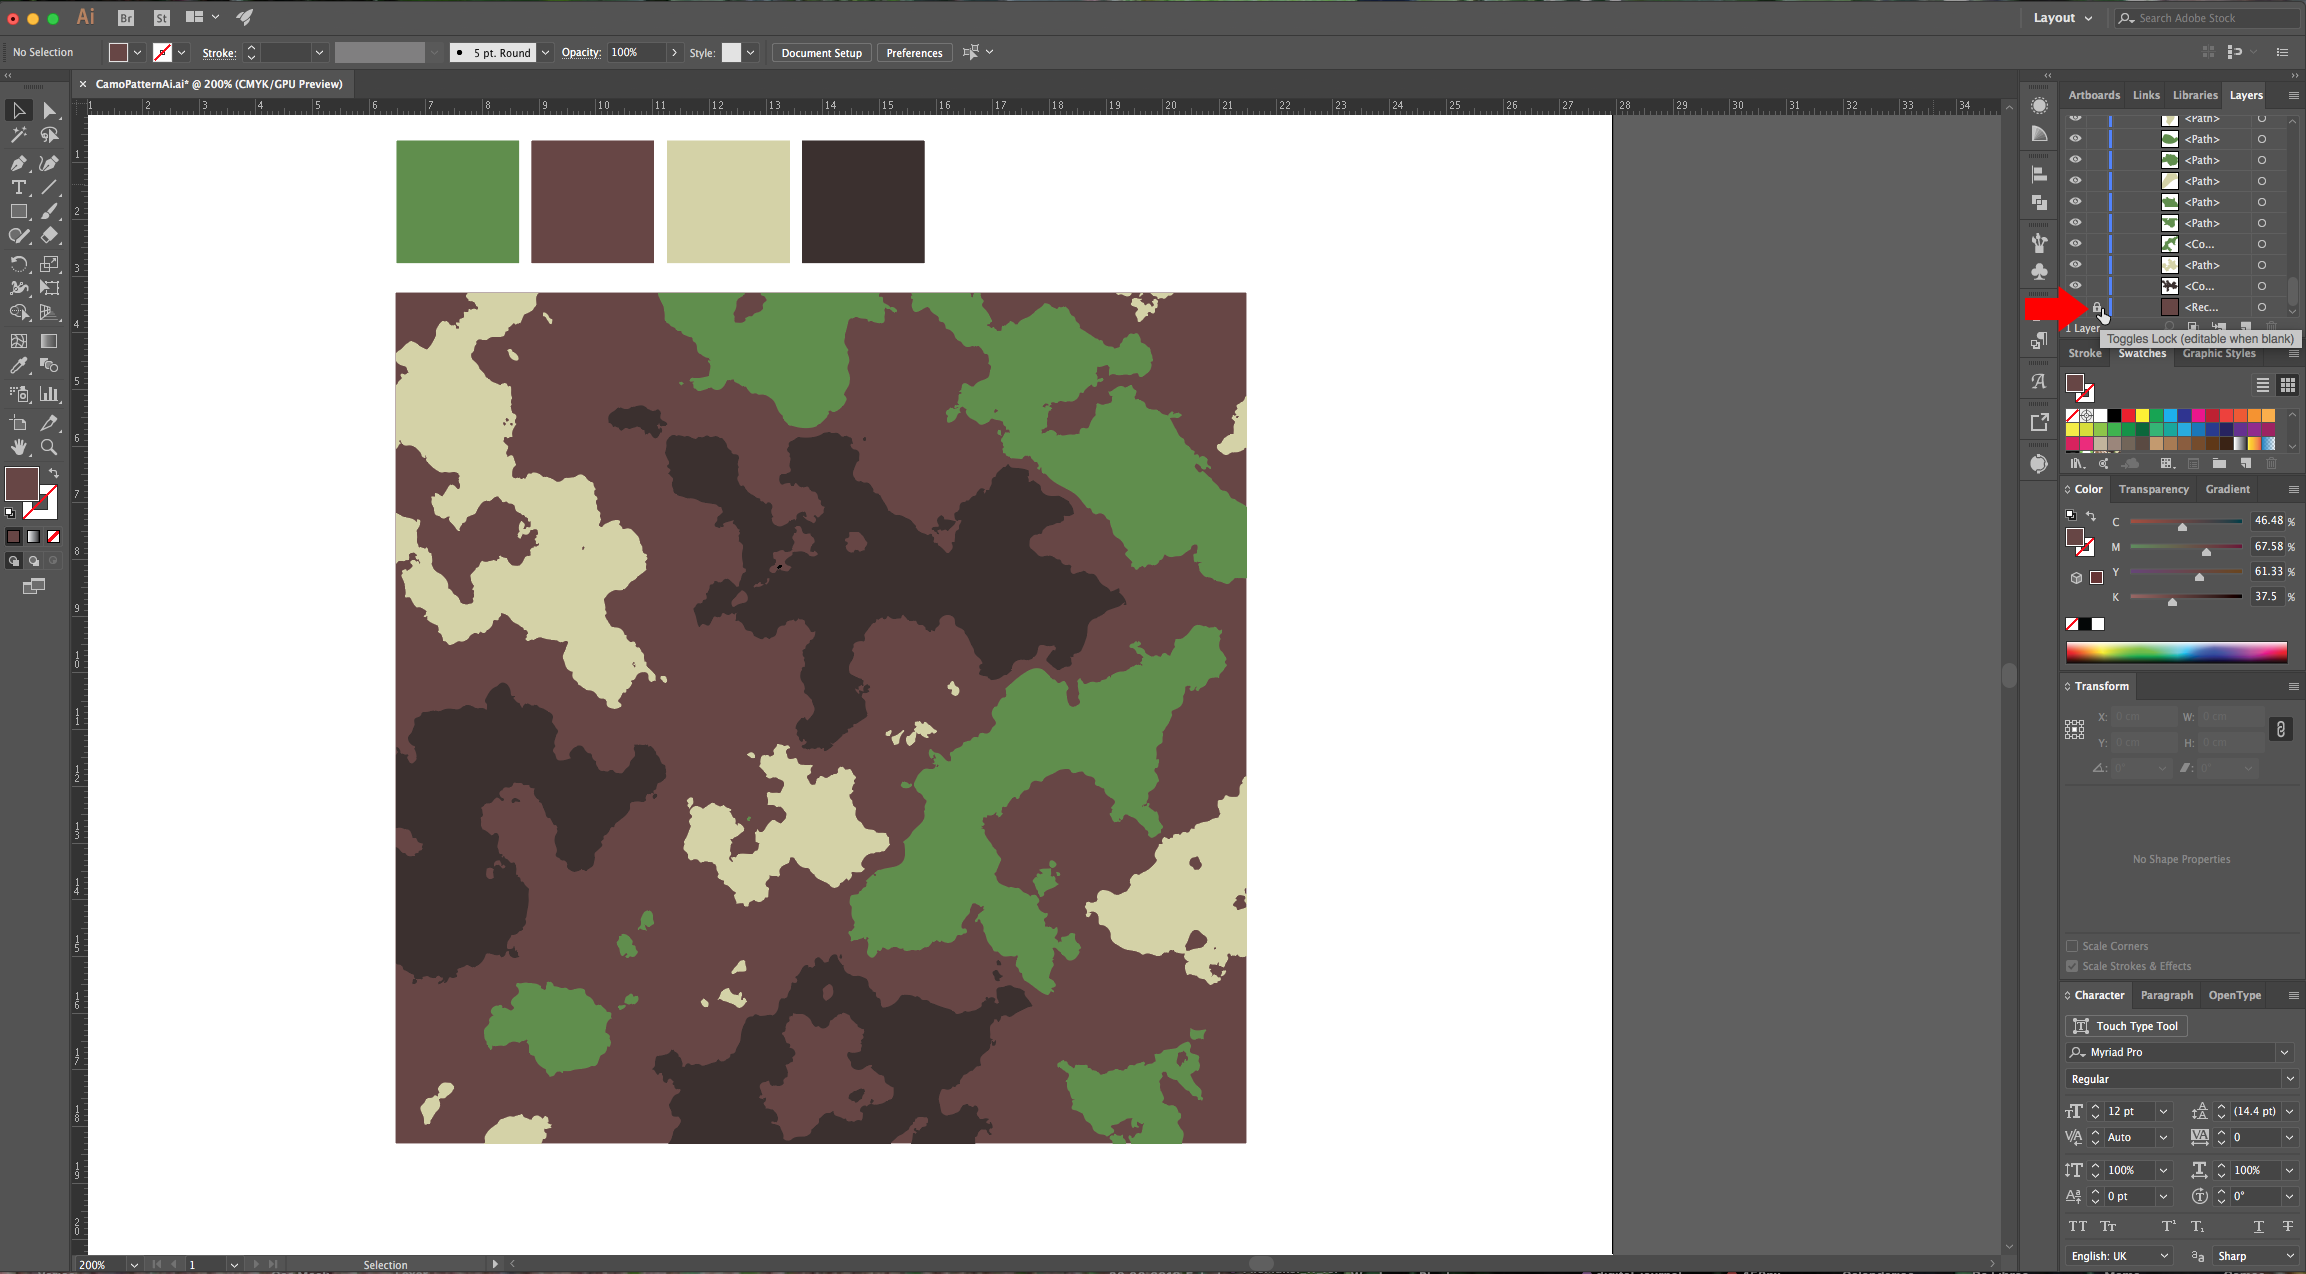
15 - To make this easier, go to the “Layers Panel”, click on the small arrow on the left side of your Layer to show its contents, scroll down and lock the big Square Shape by clicking on the small padlock to its left. Then, keep selecting and grouping together portions of your vector.
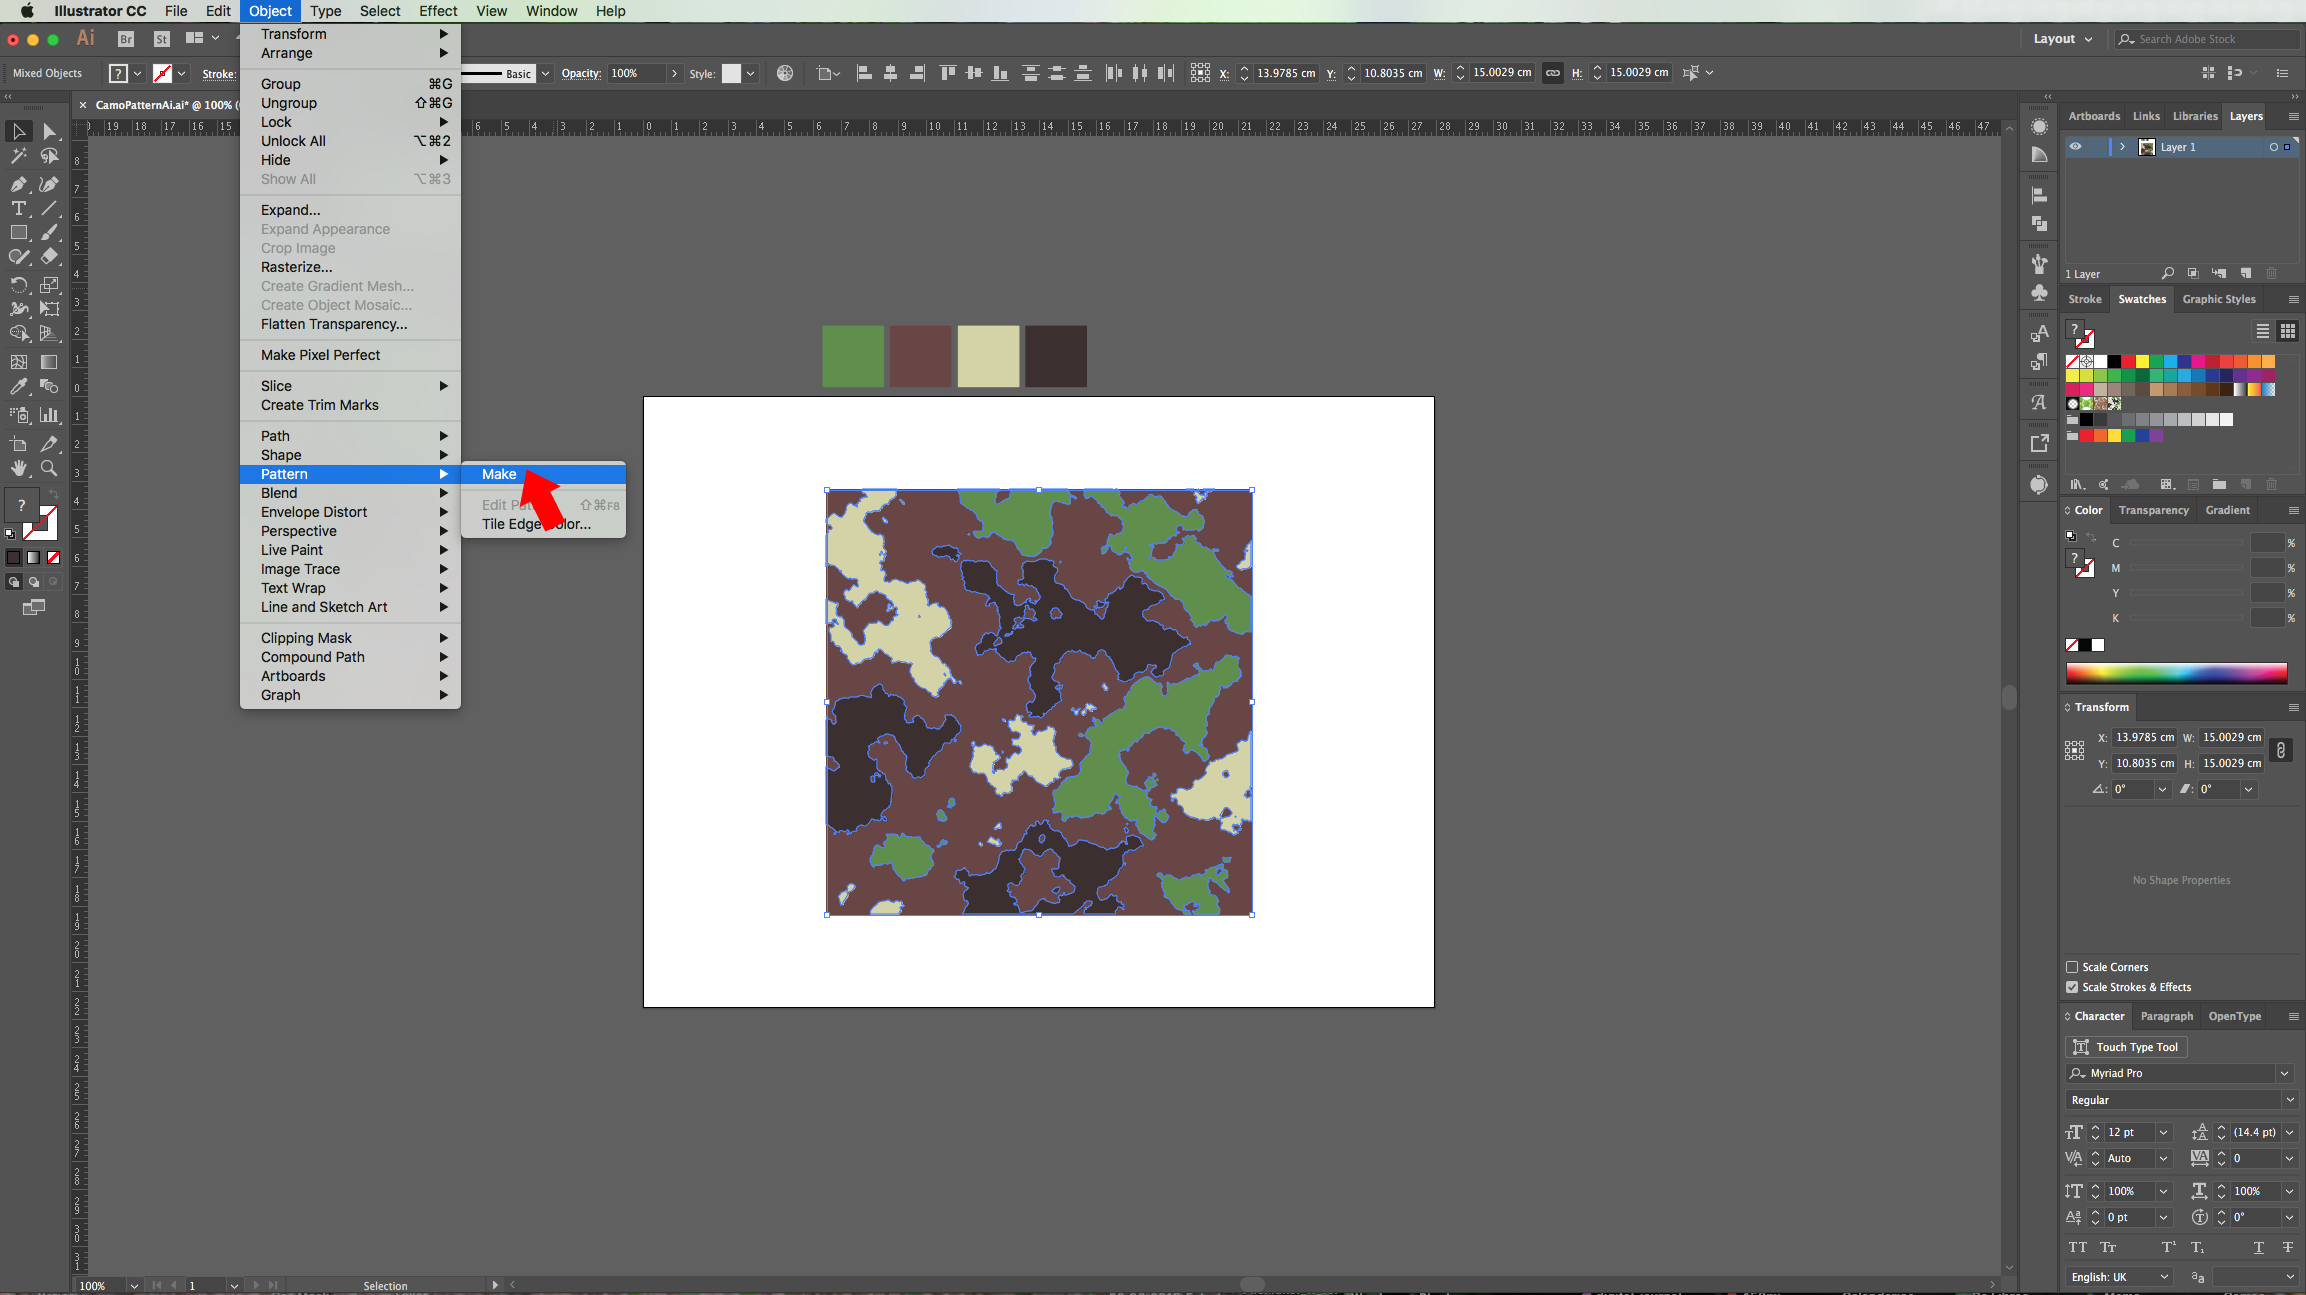
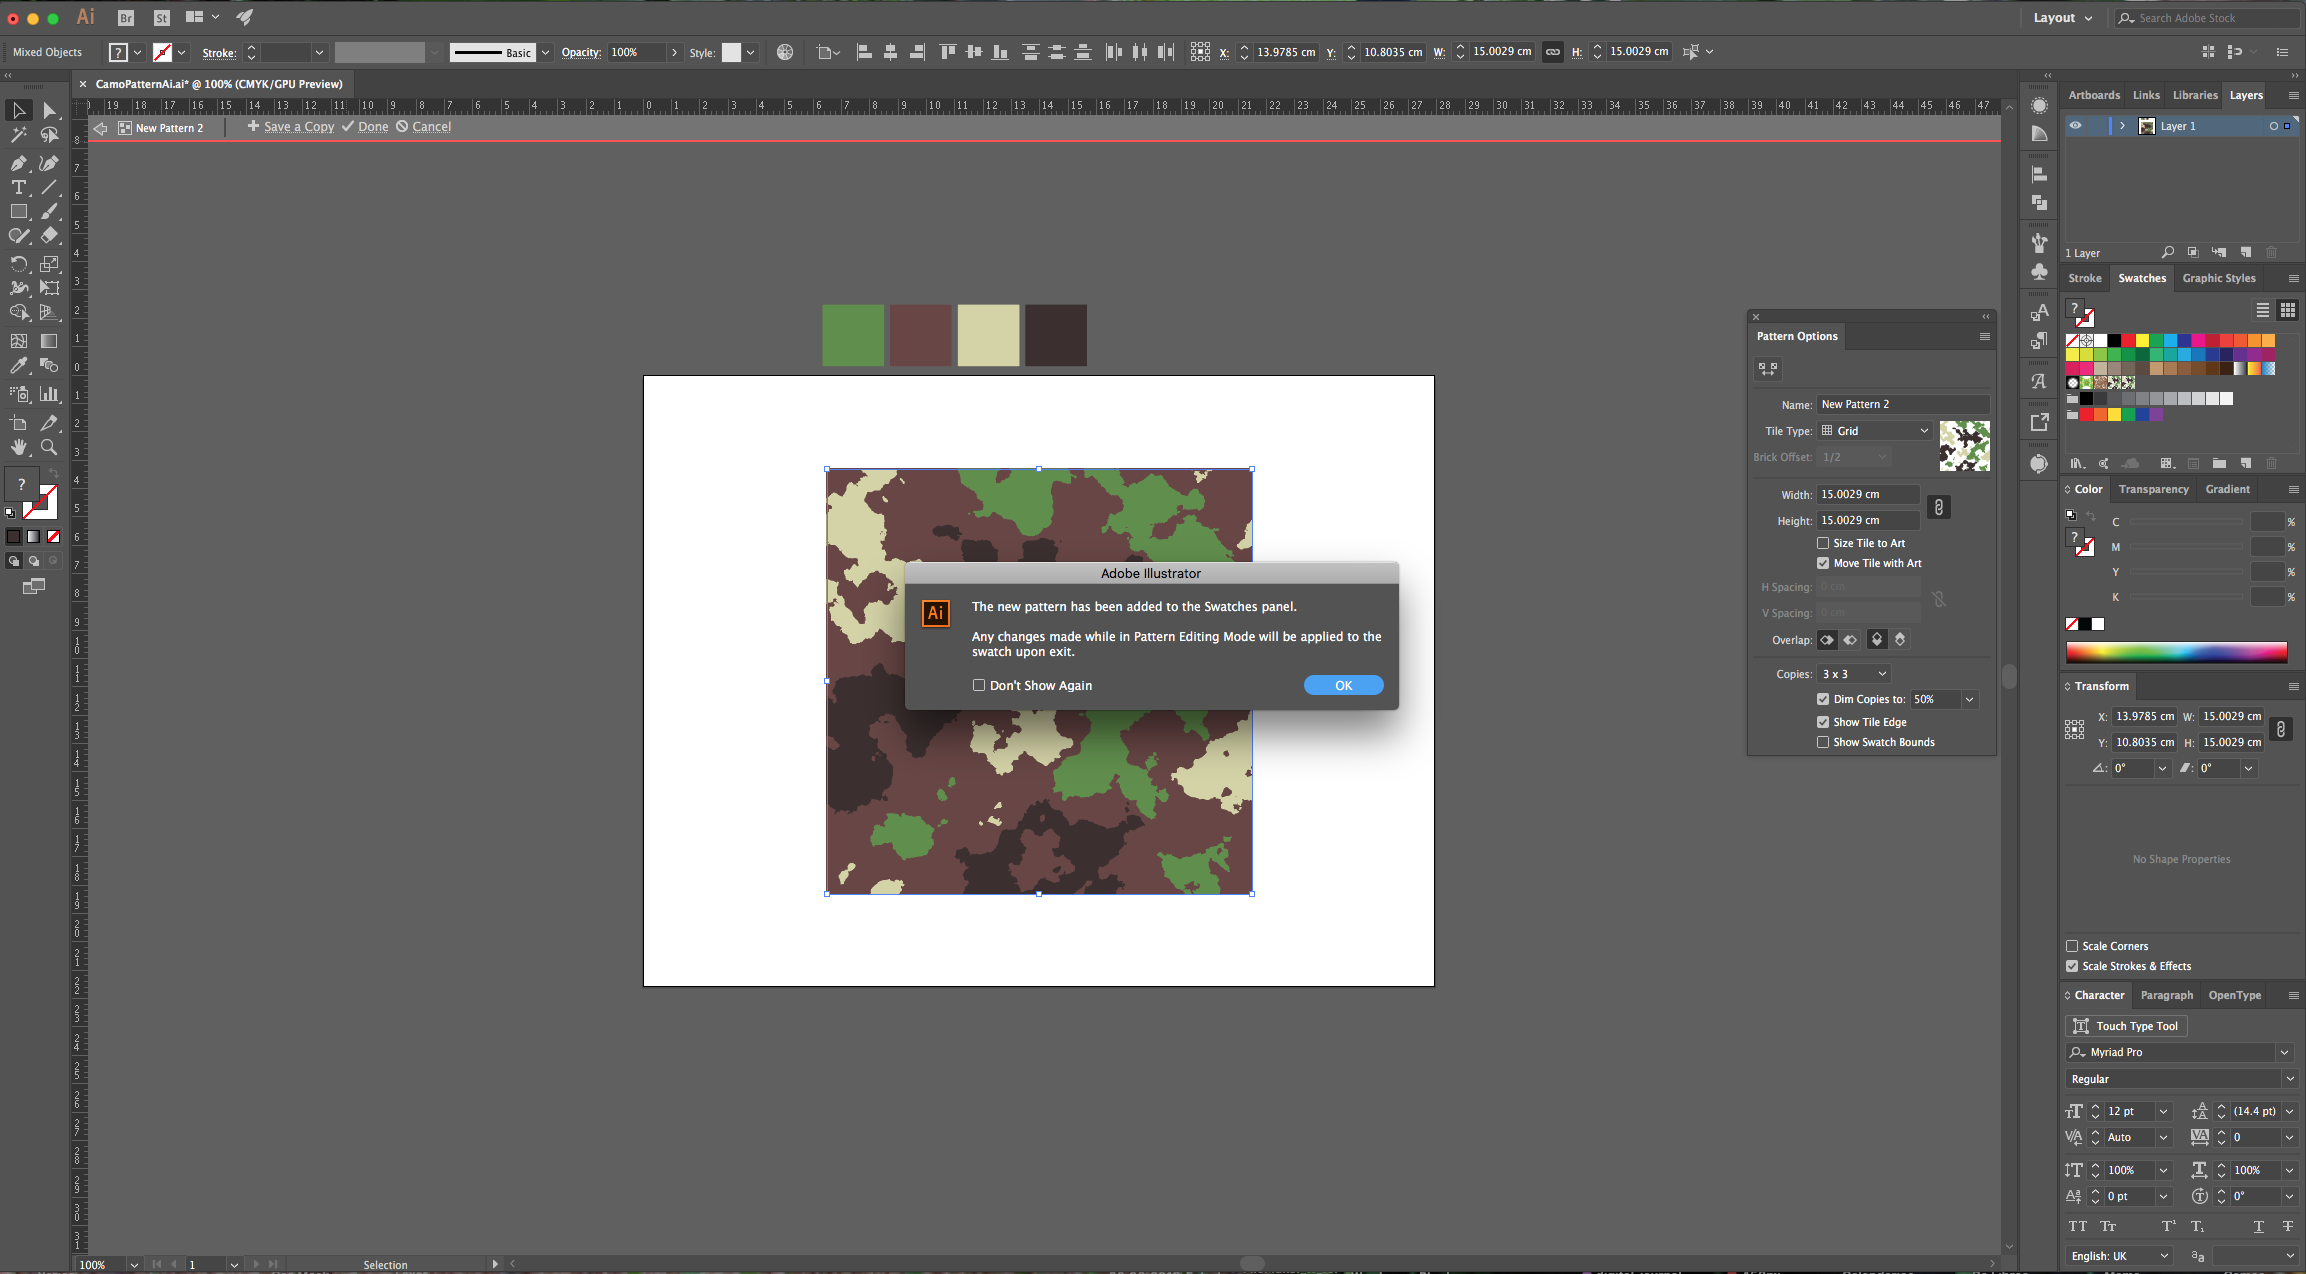
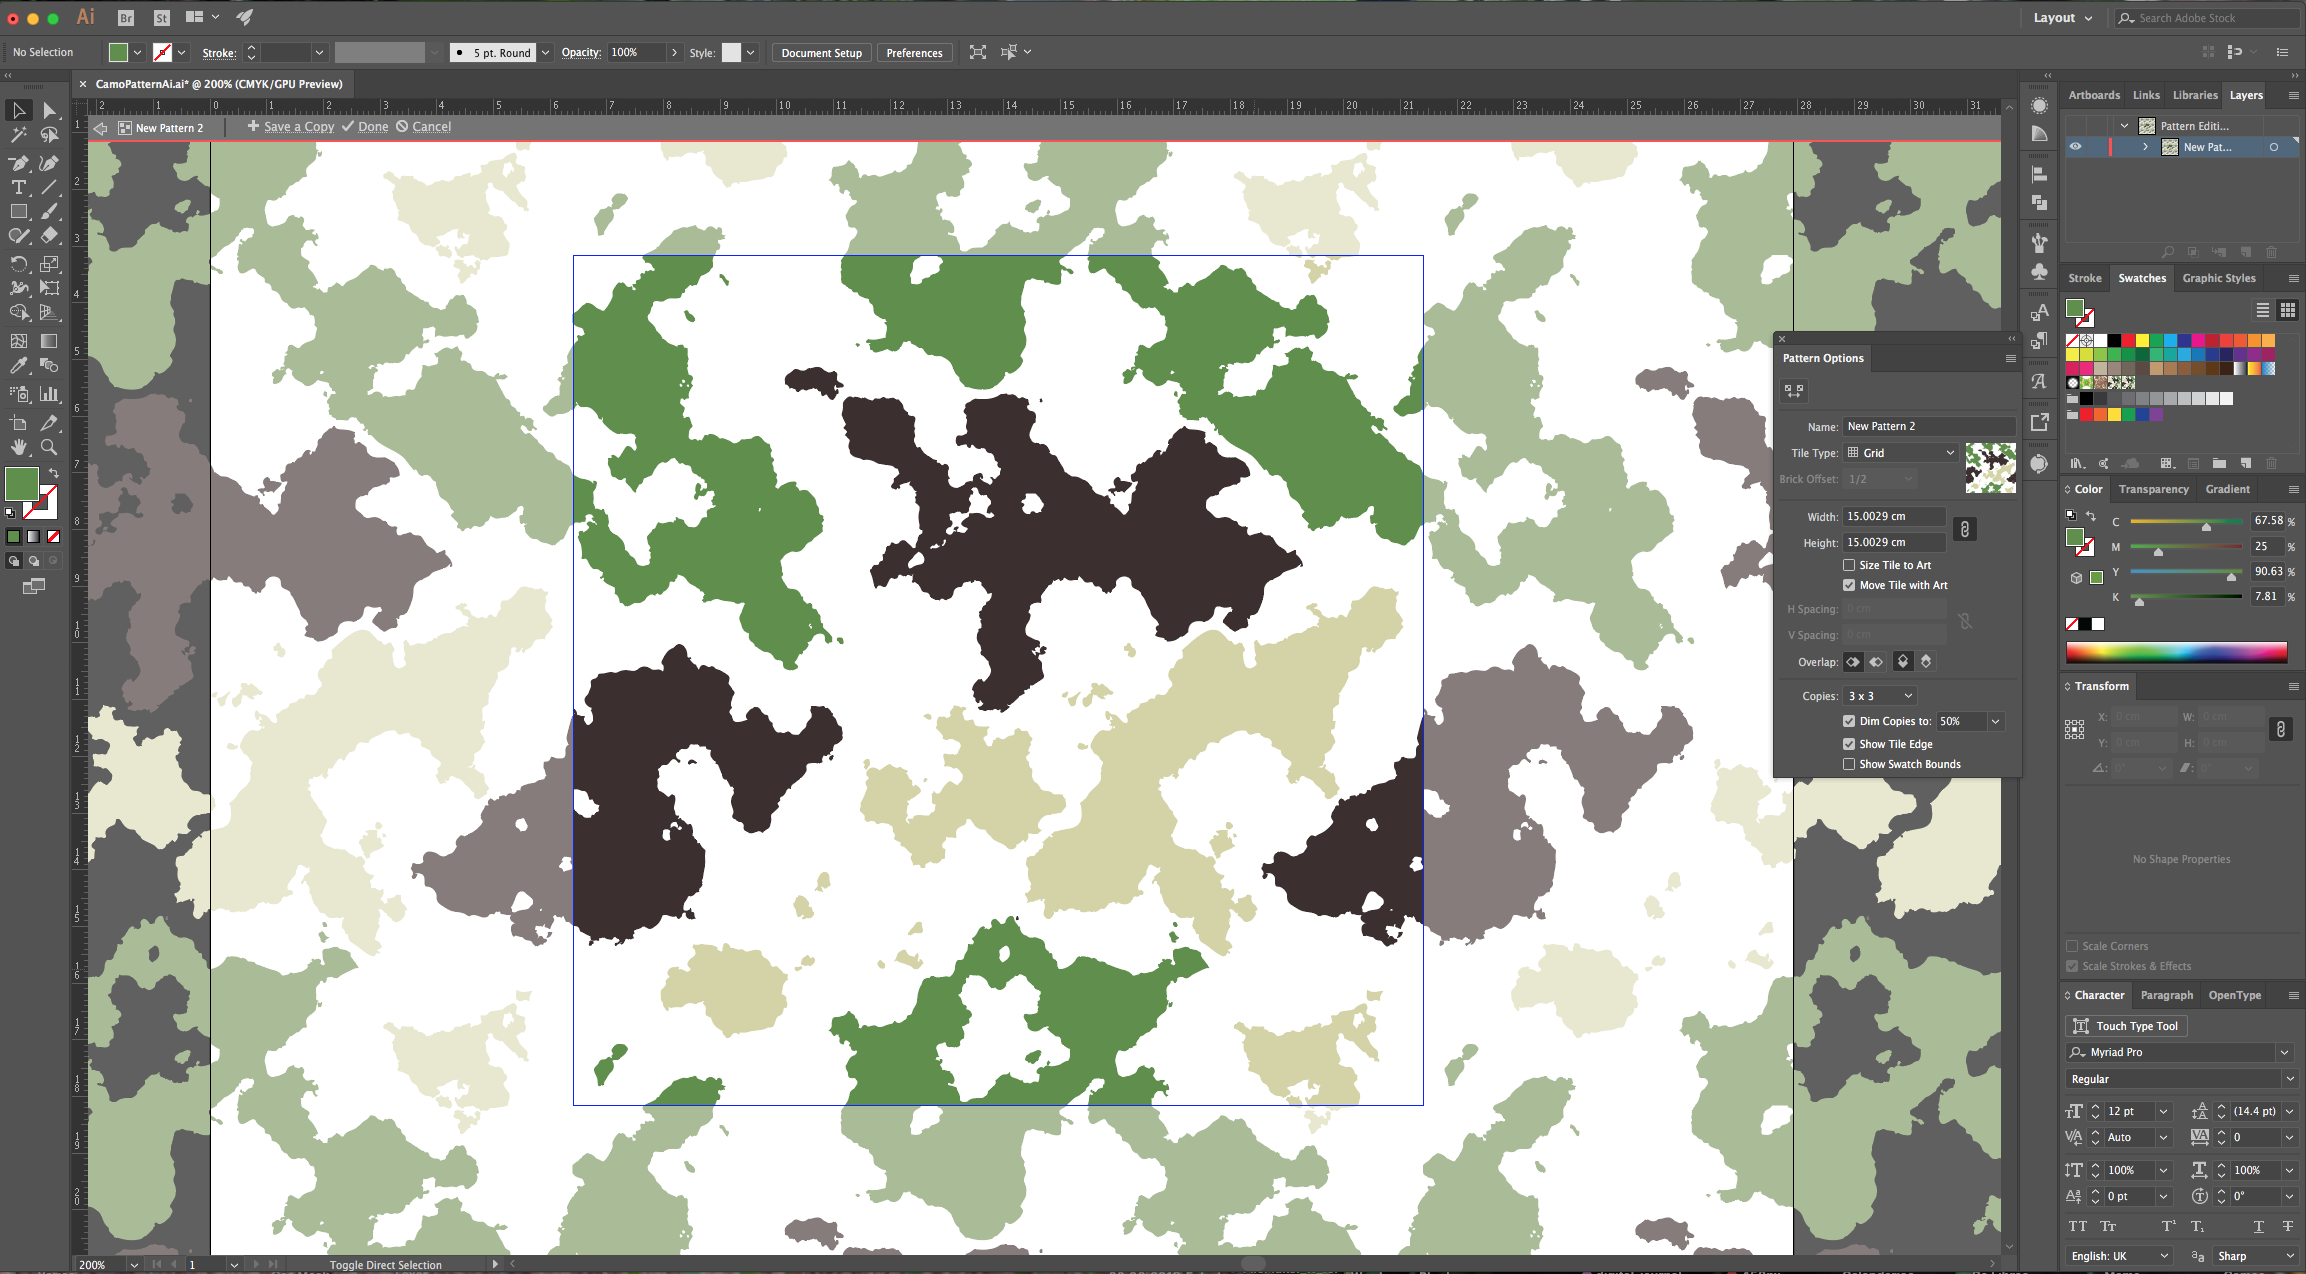
16 - Select everything and go to Object > Pattern > Make… Click “OK” on the Pop-Up Window.
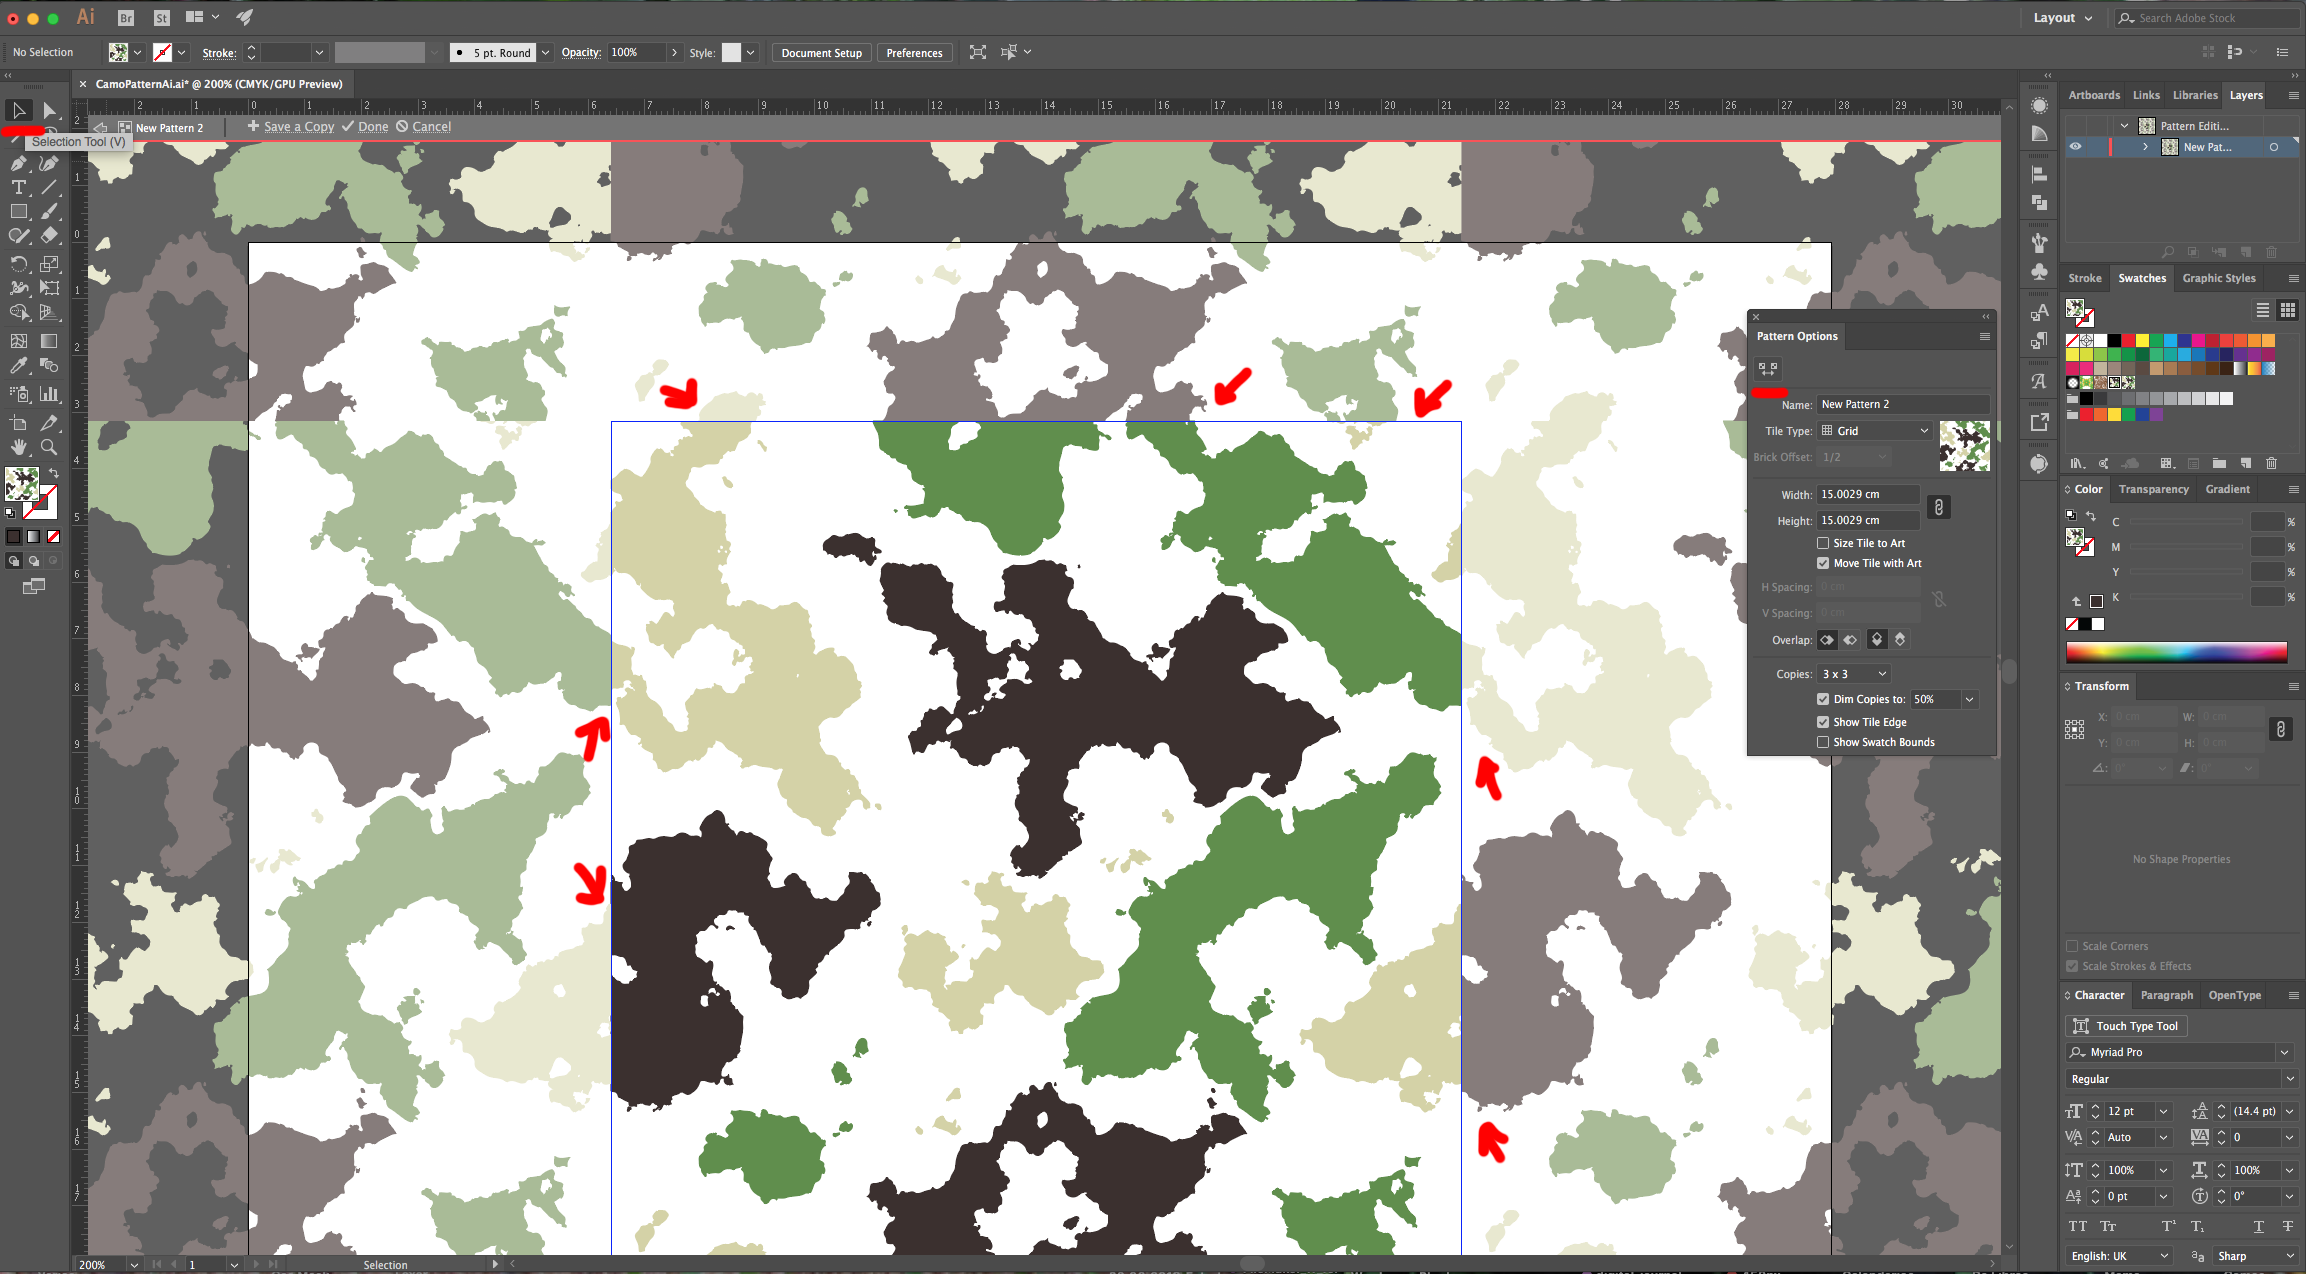
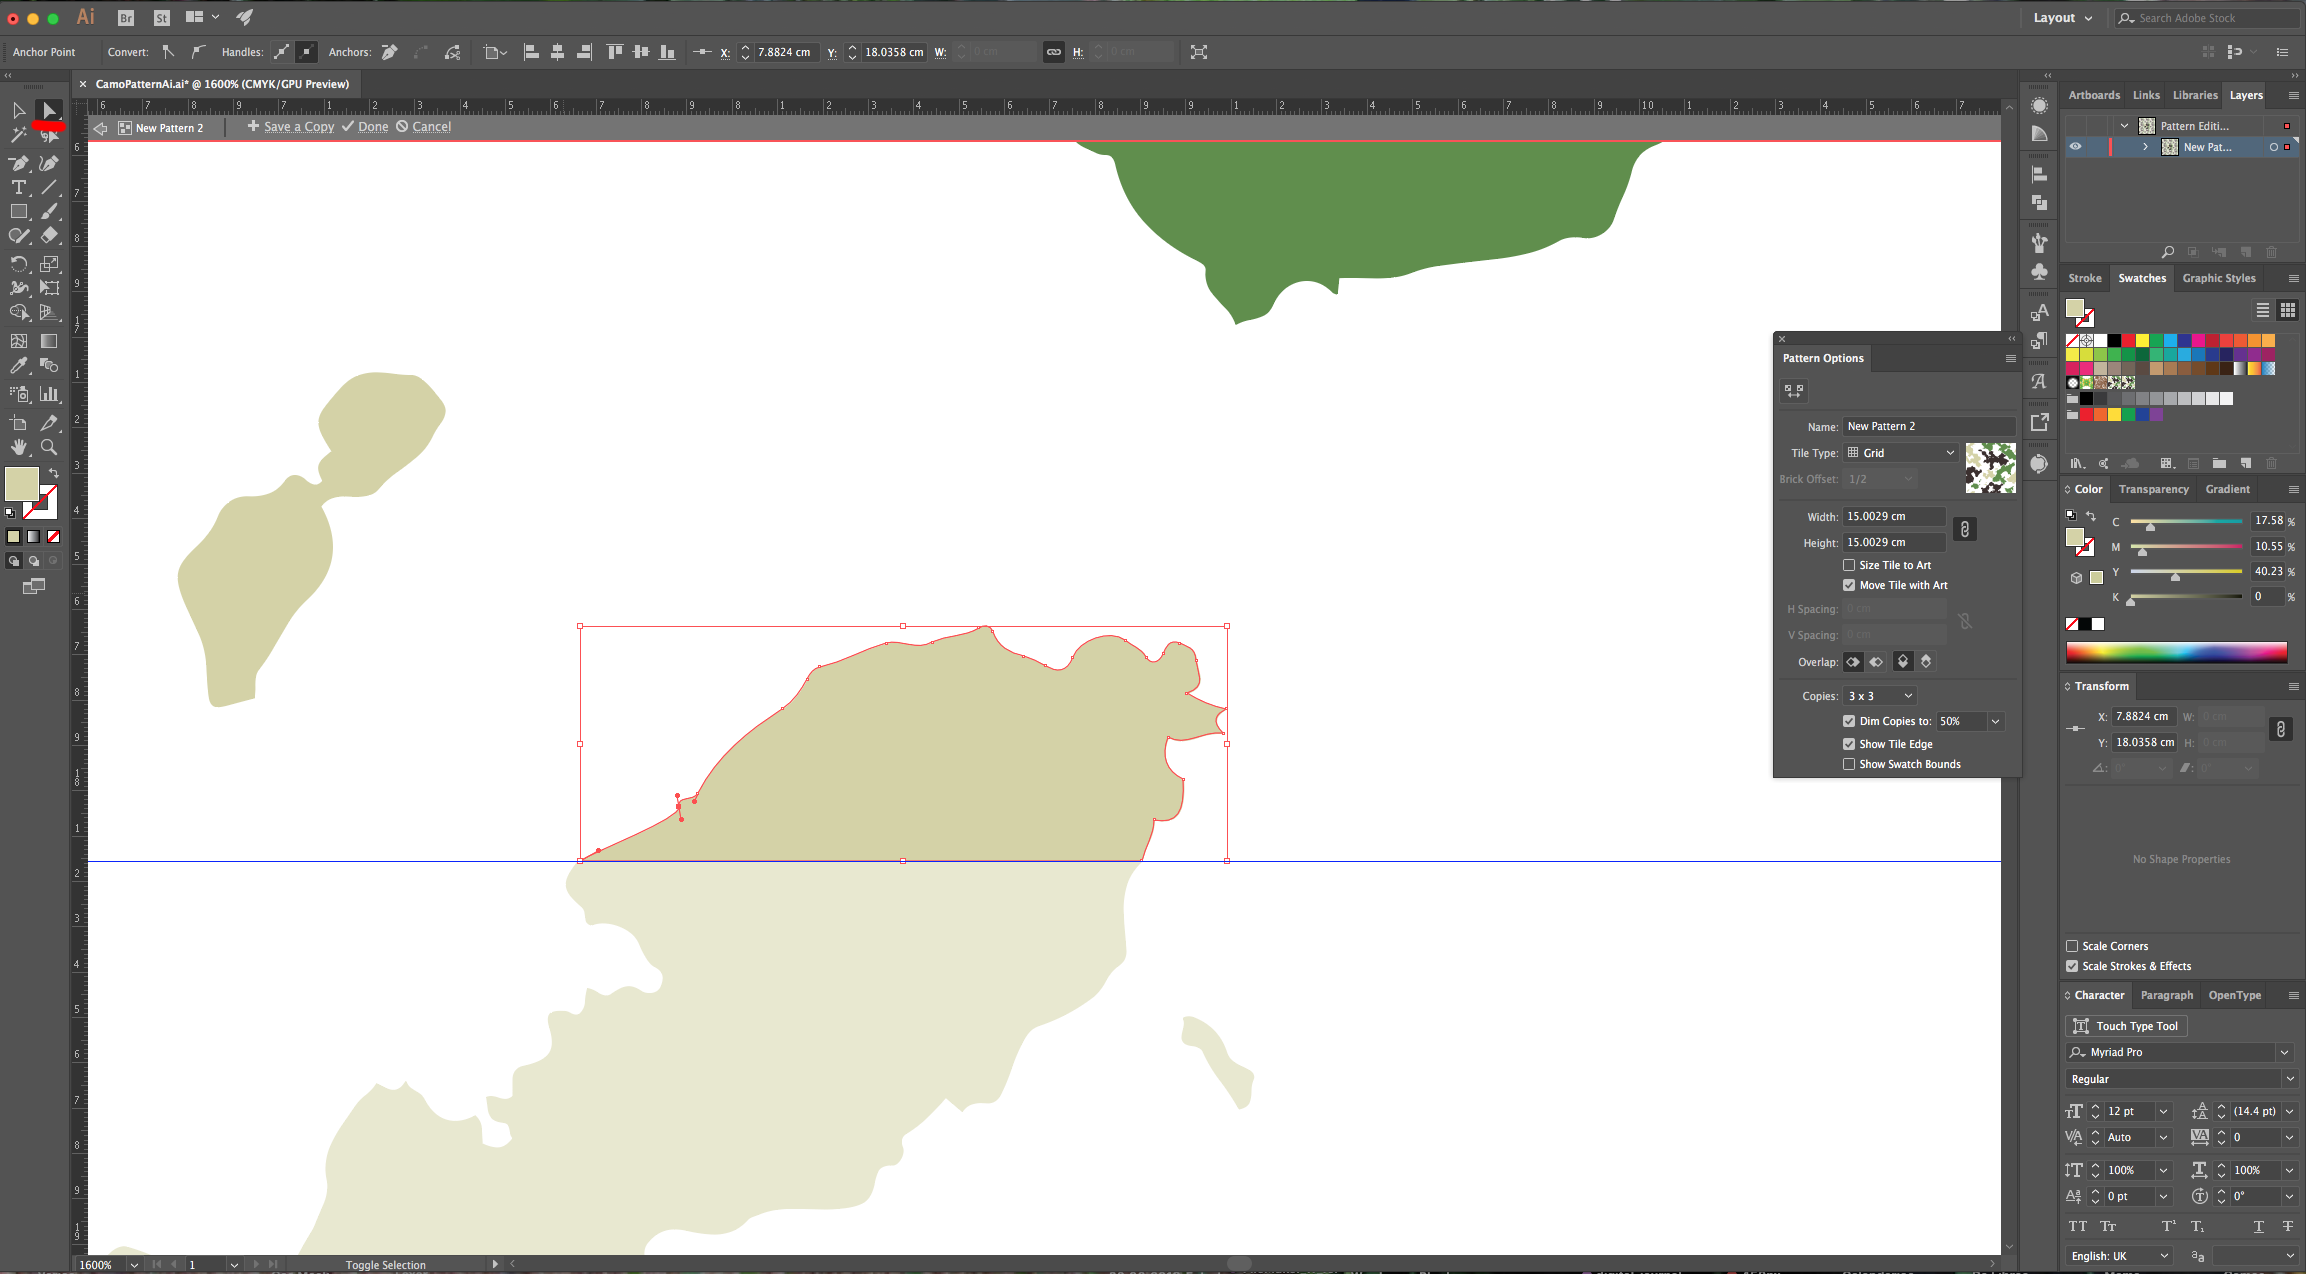
17 - Check the Tiling of your Pattern, if you notice that the shapes and/or colors where the edges meet are off, use the “Selection Tool” (V) to select and move some vectors. You can also delete some “Anchor Points” using the “Delete Anchor Point Tool” (-) and you can select and modify or move individual “Anchor Points” using the “Direct Selection Tool” (A).

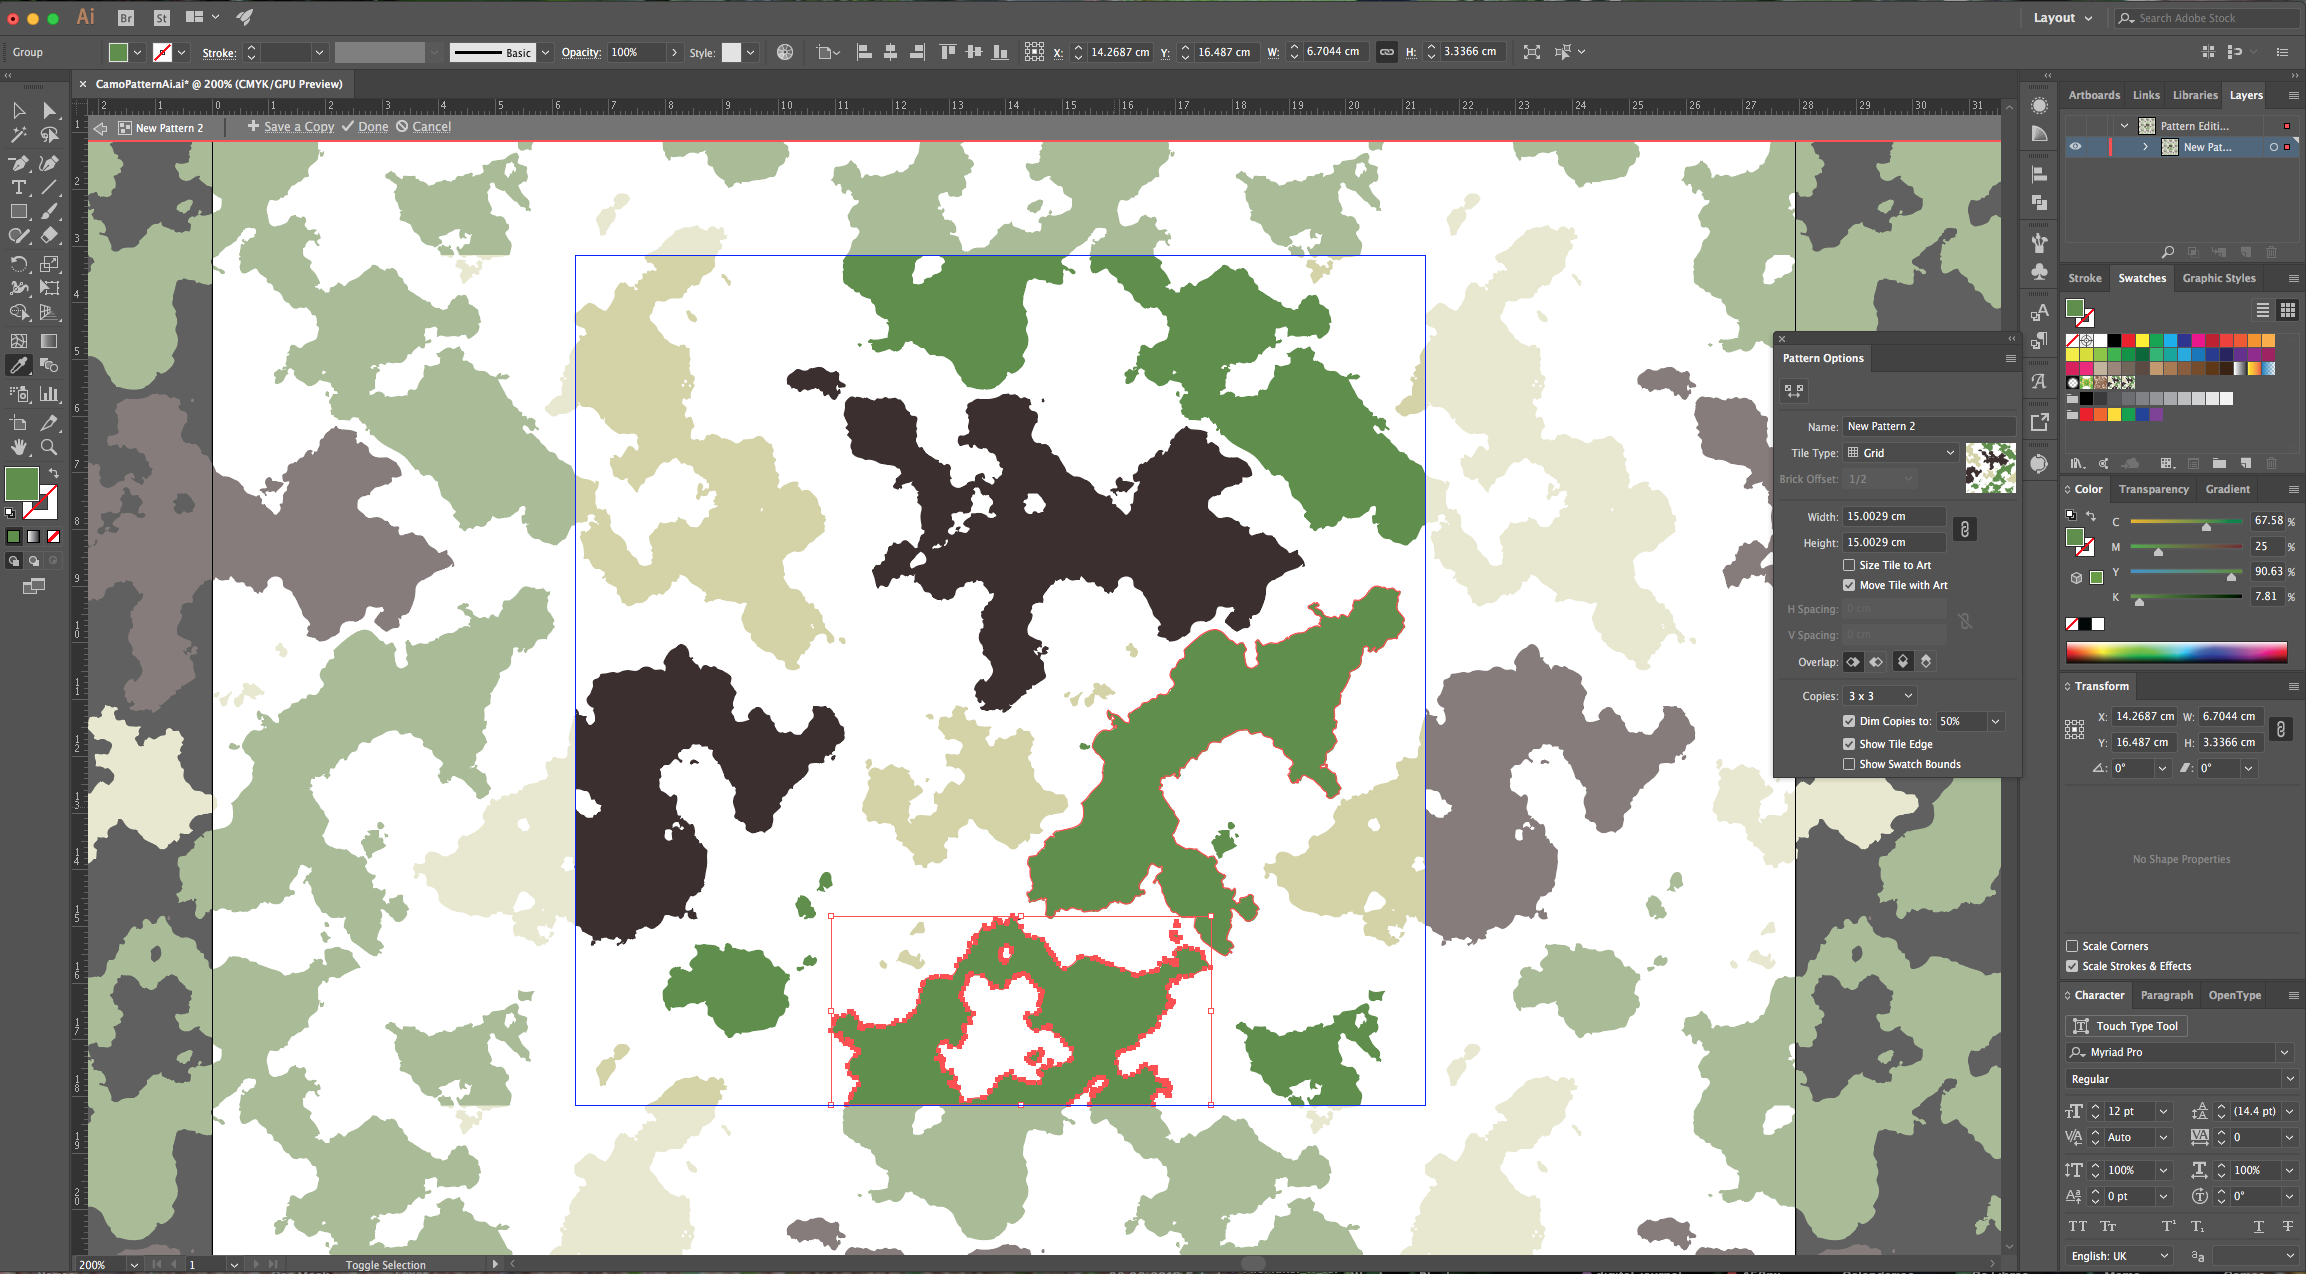
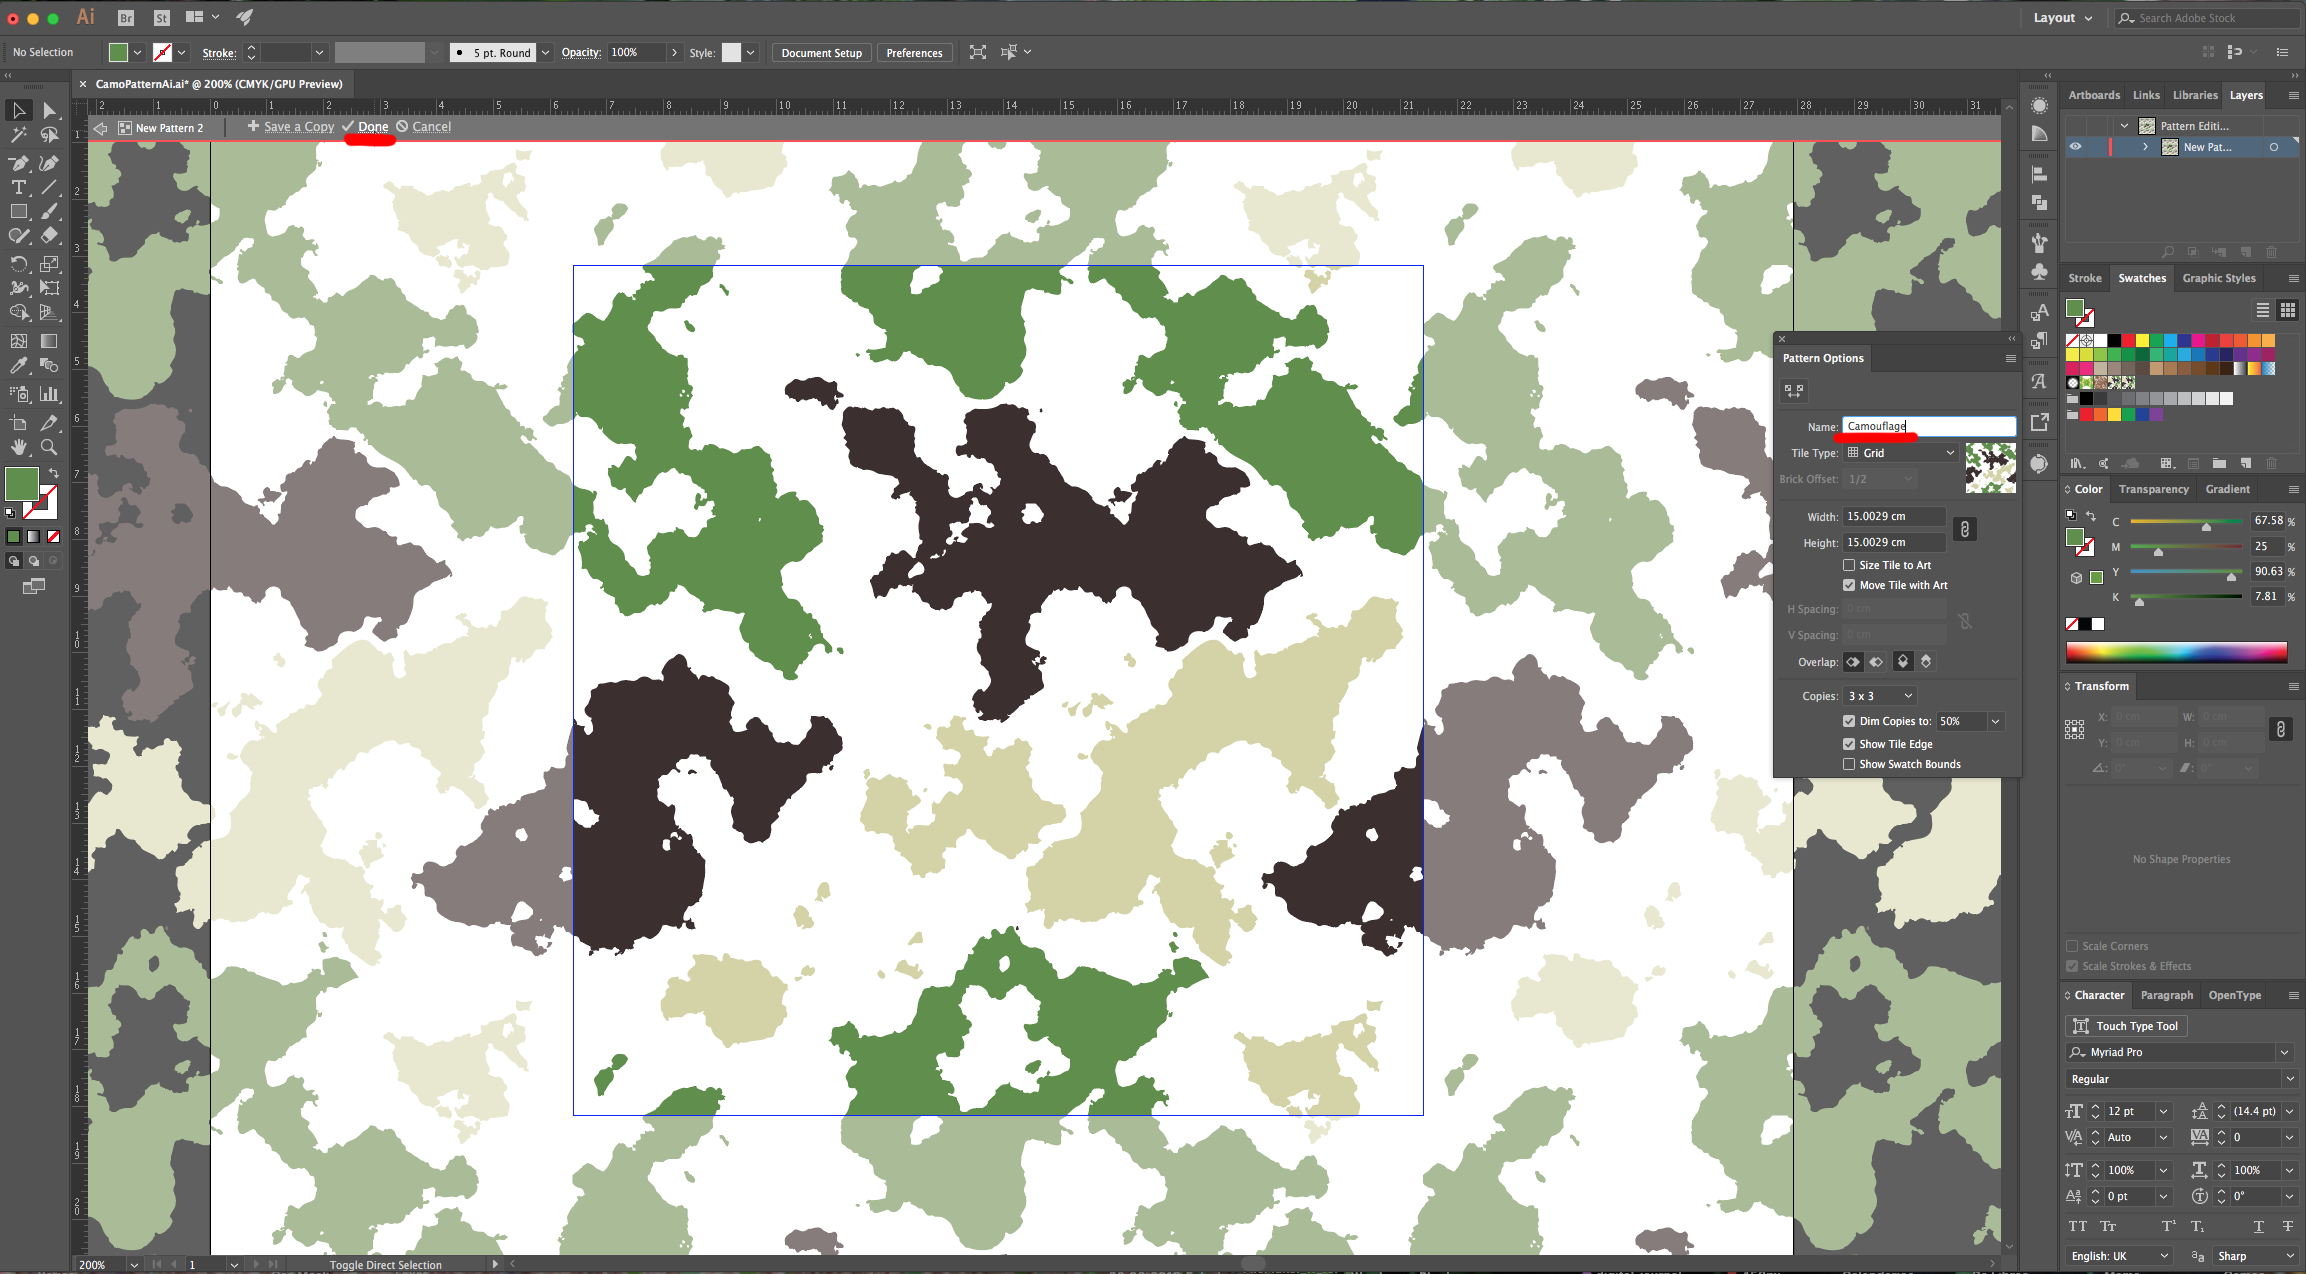
18 - Finally, you may need to change the “Fill” color of some pieces to make them match. Once you are happy with the results, give your “Pattern” a name (we used “Camouflage”) and click on the “Done” button on the Top Menu. A Swatch of your new pattern should be added to the “Swatches Panel”.
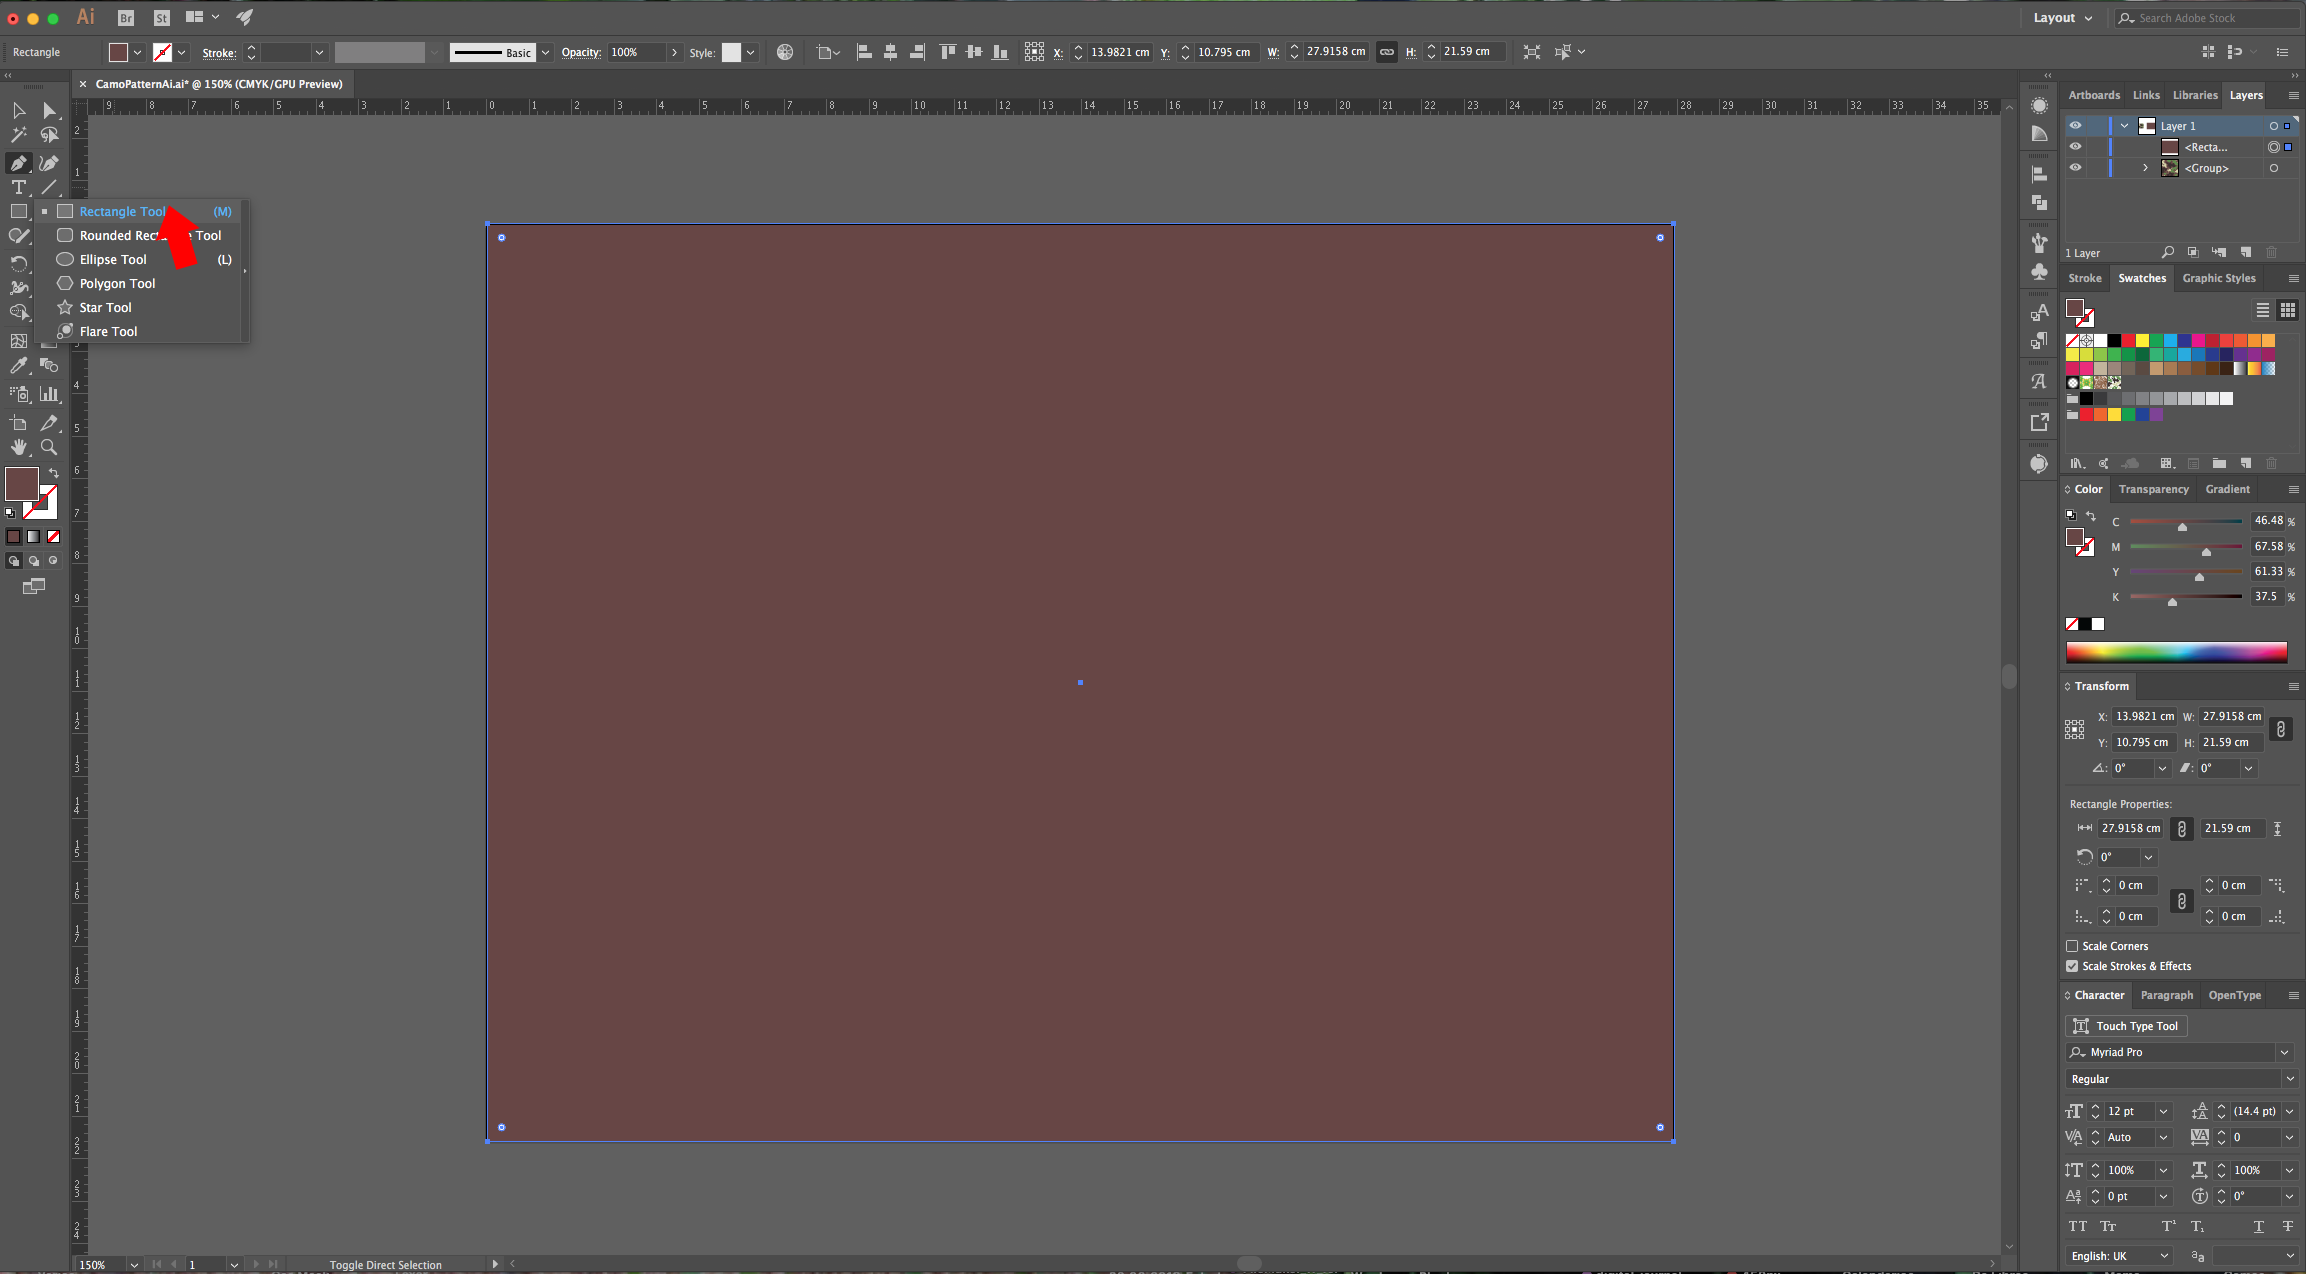
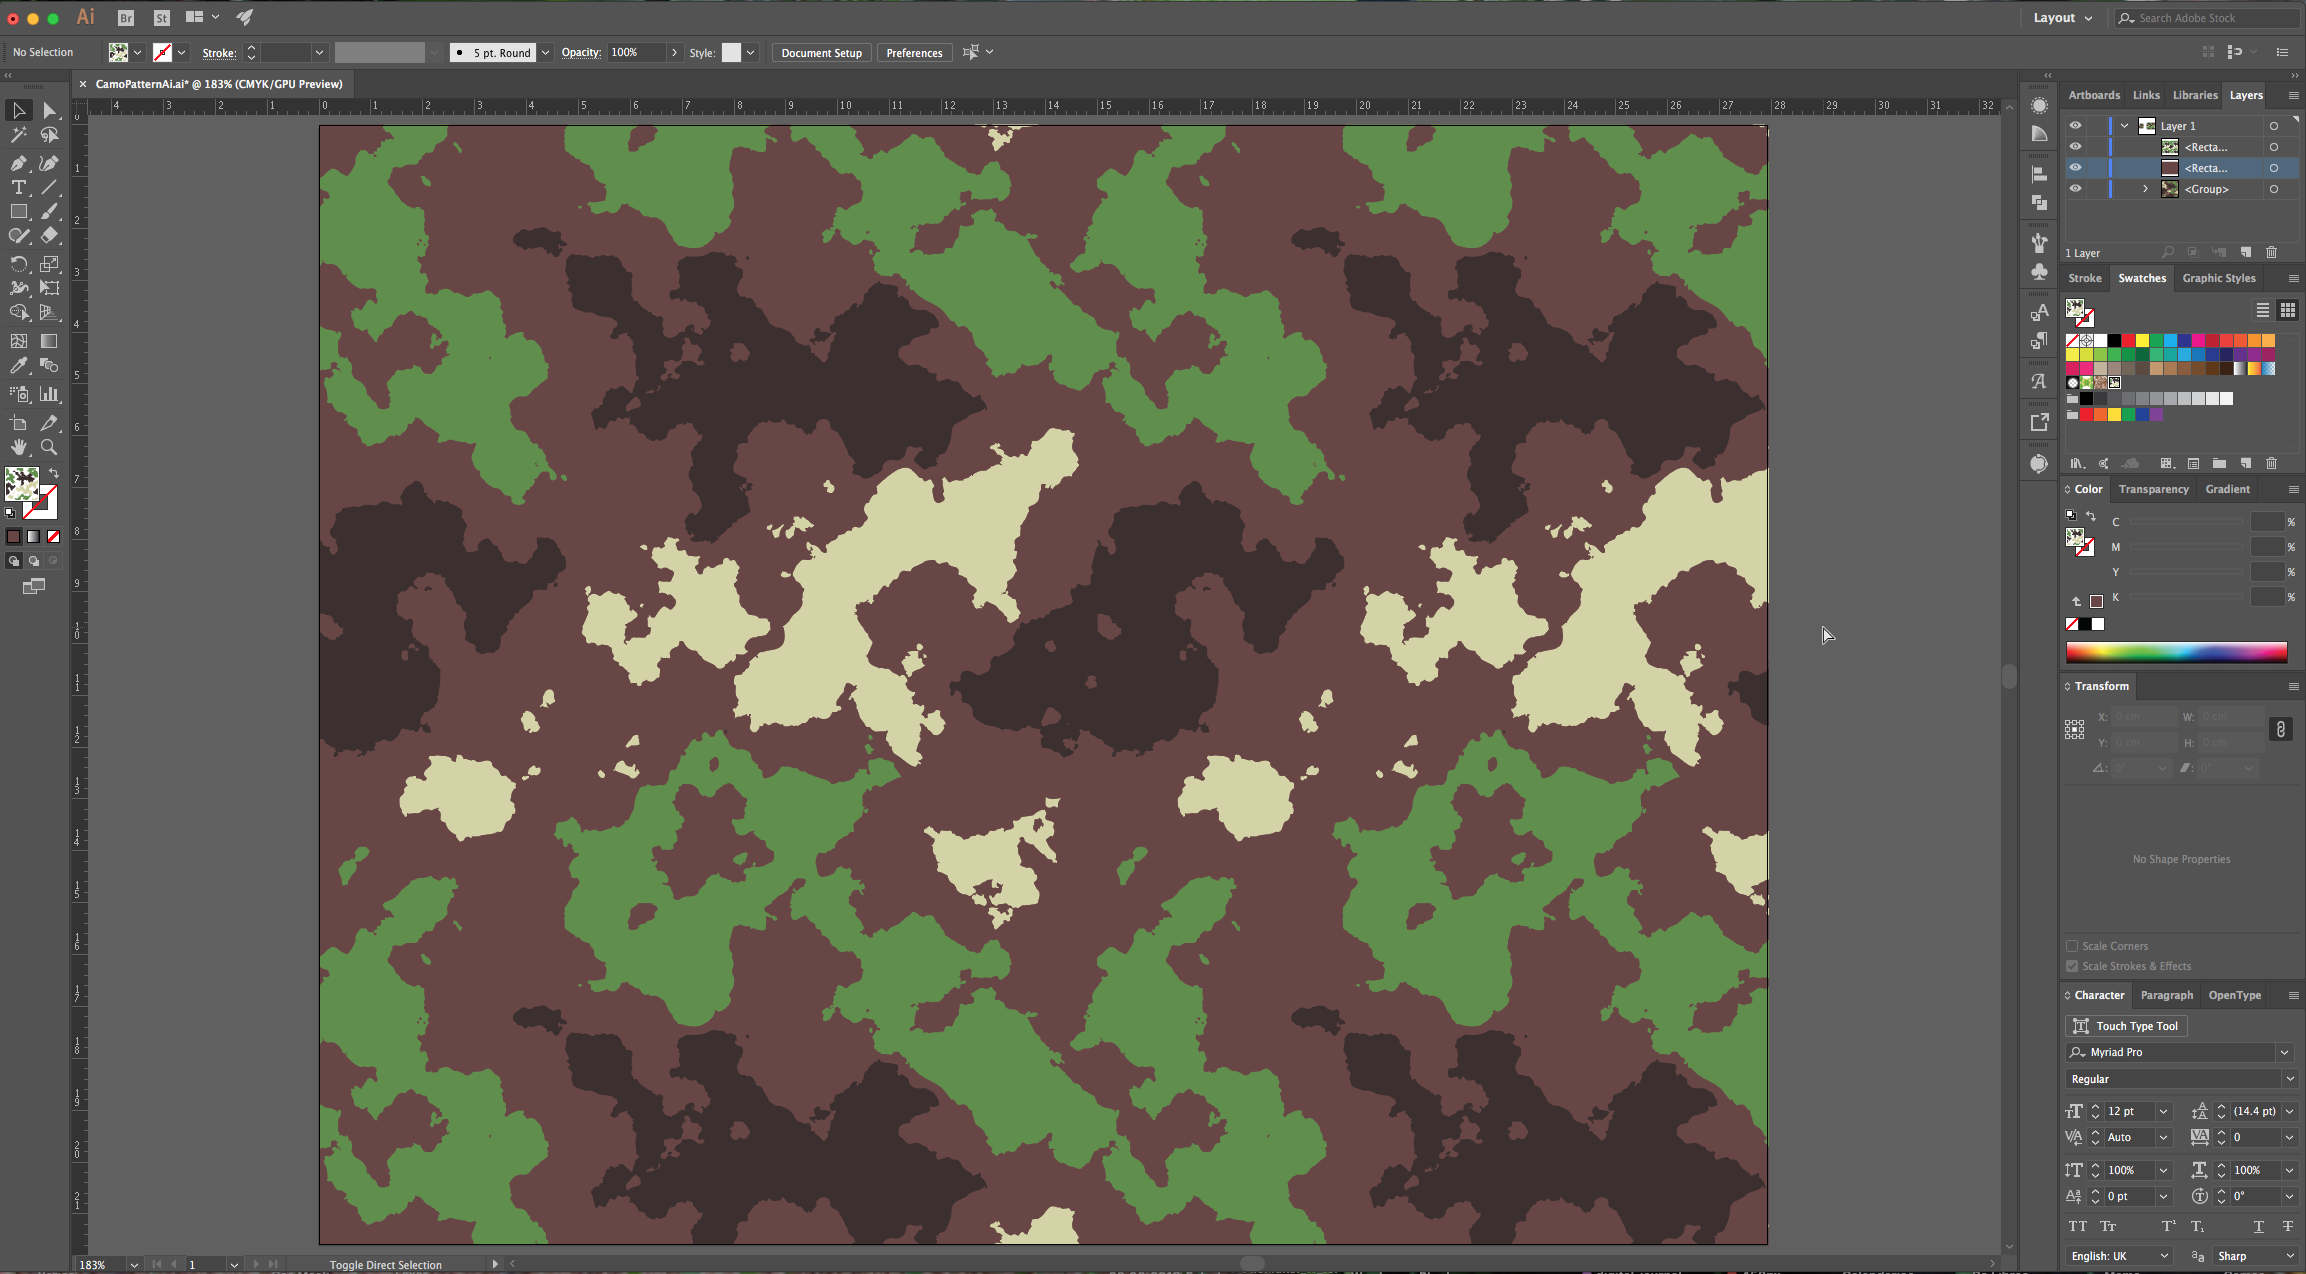
19 - Unlock the bottom Square Shape and modify it so it fits your entire Canvas, create another Rectangle and use your “Camouflage” Pattern as fill.
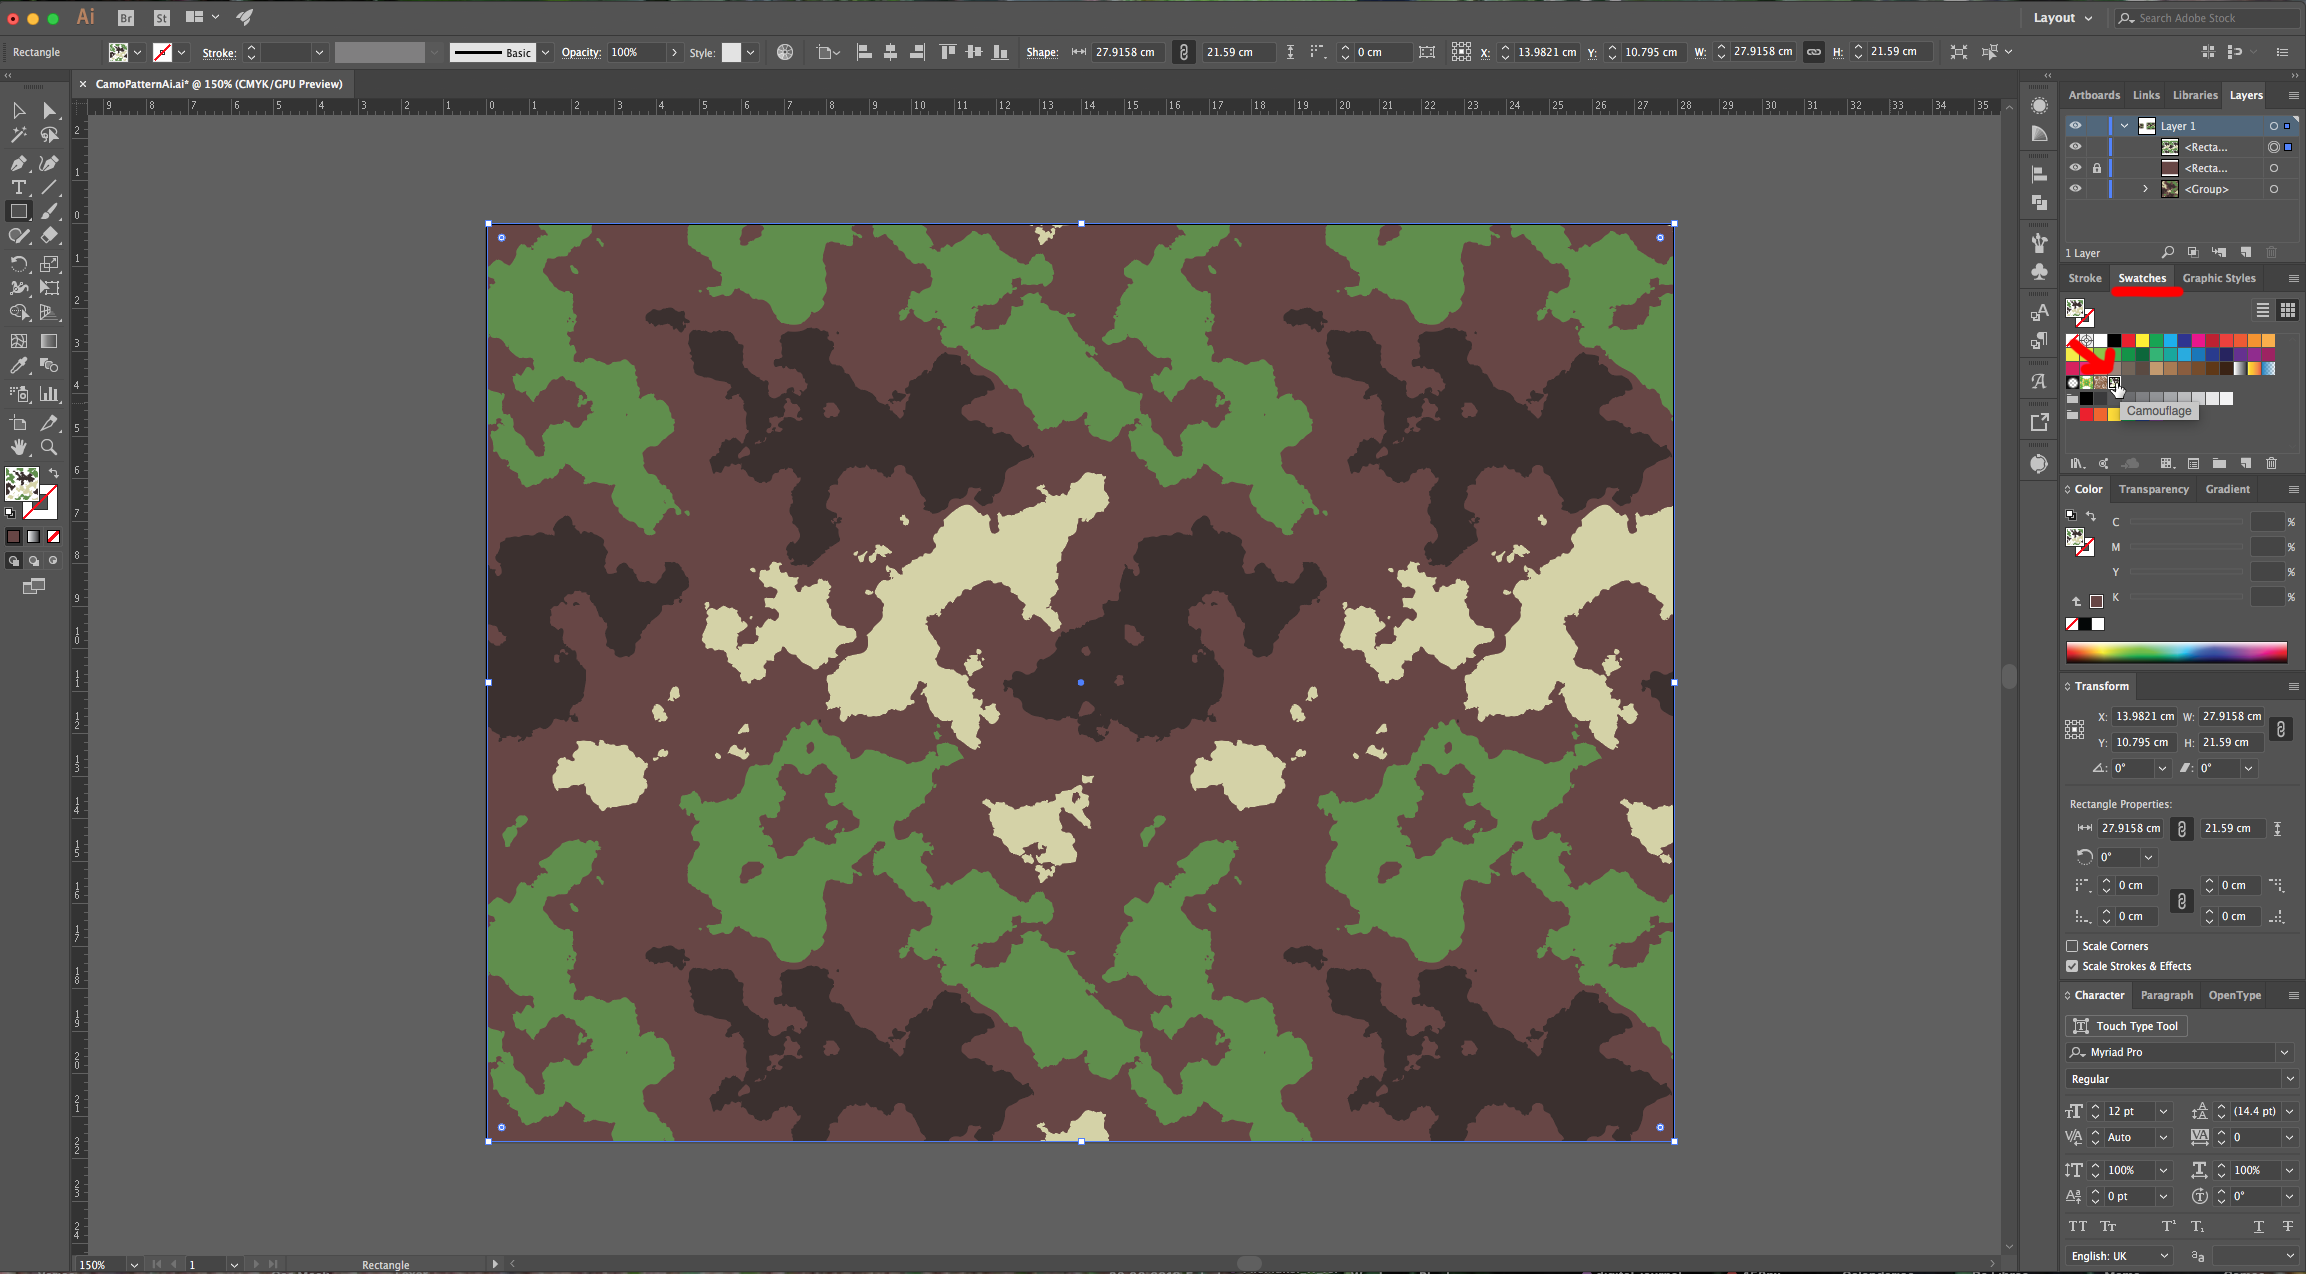
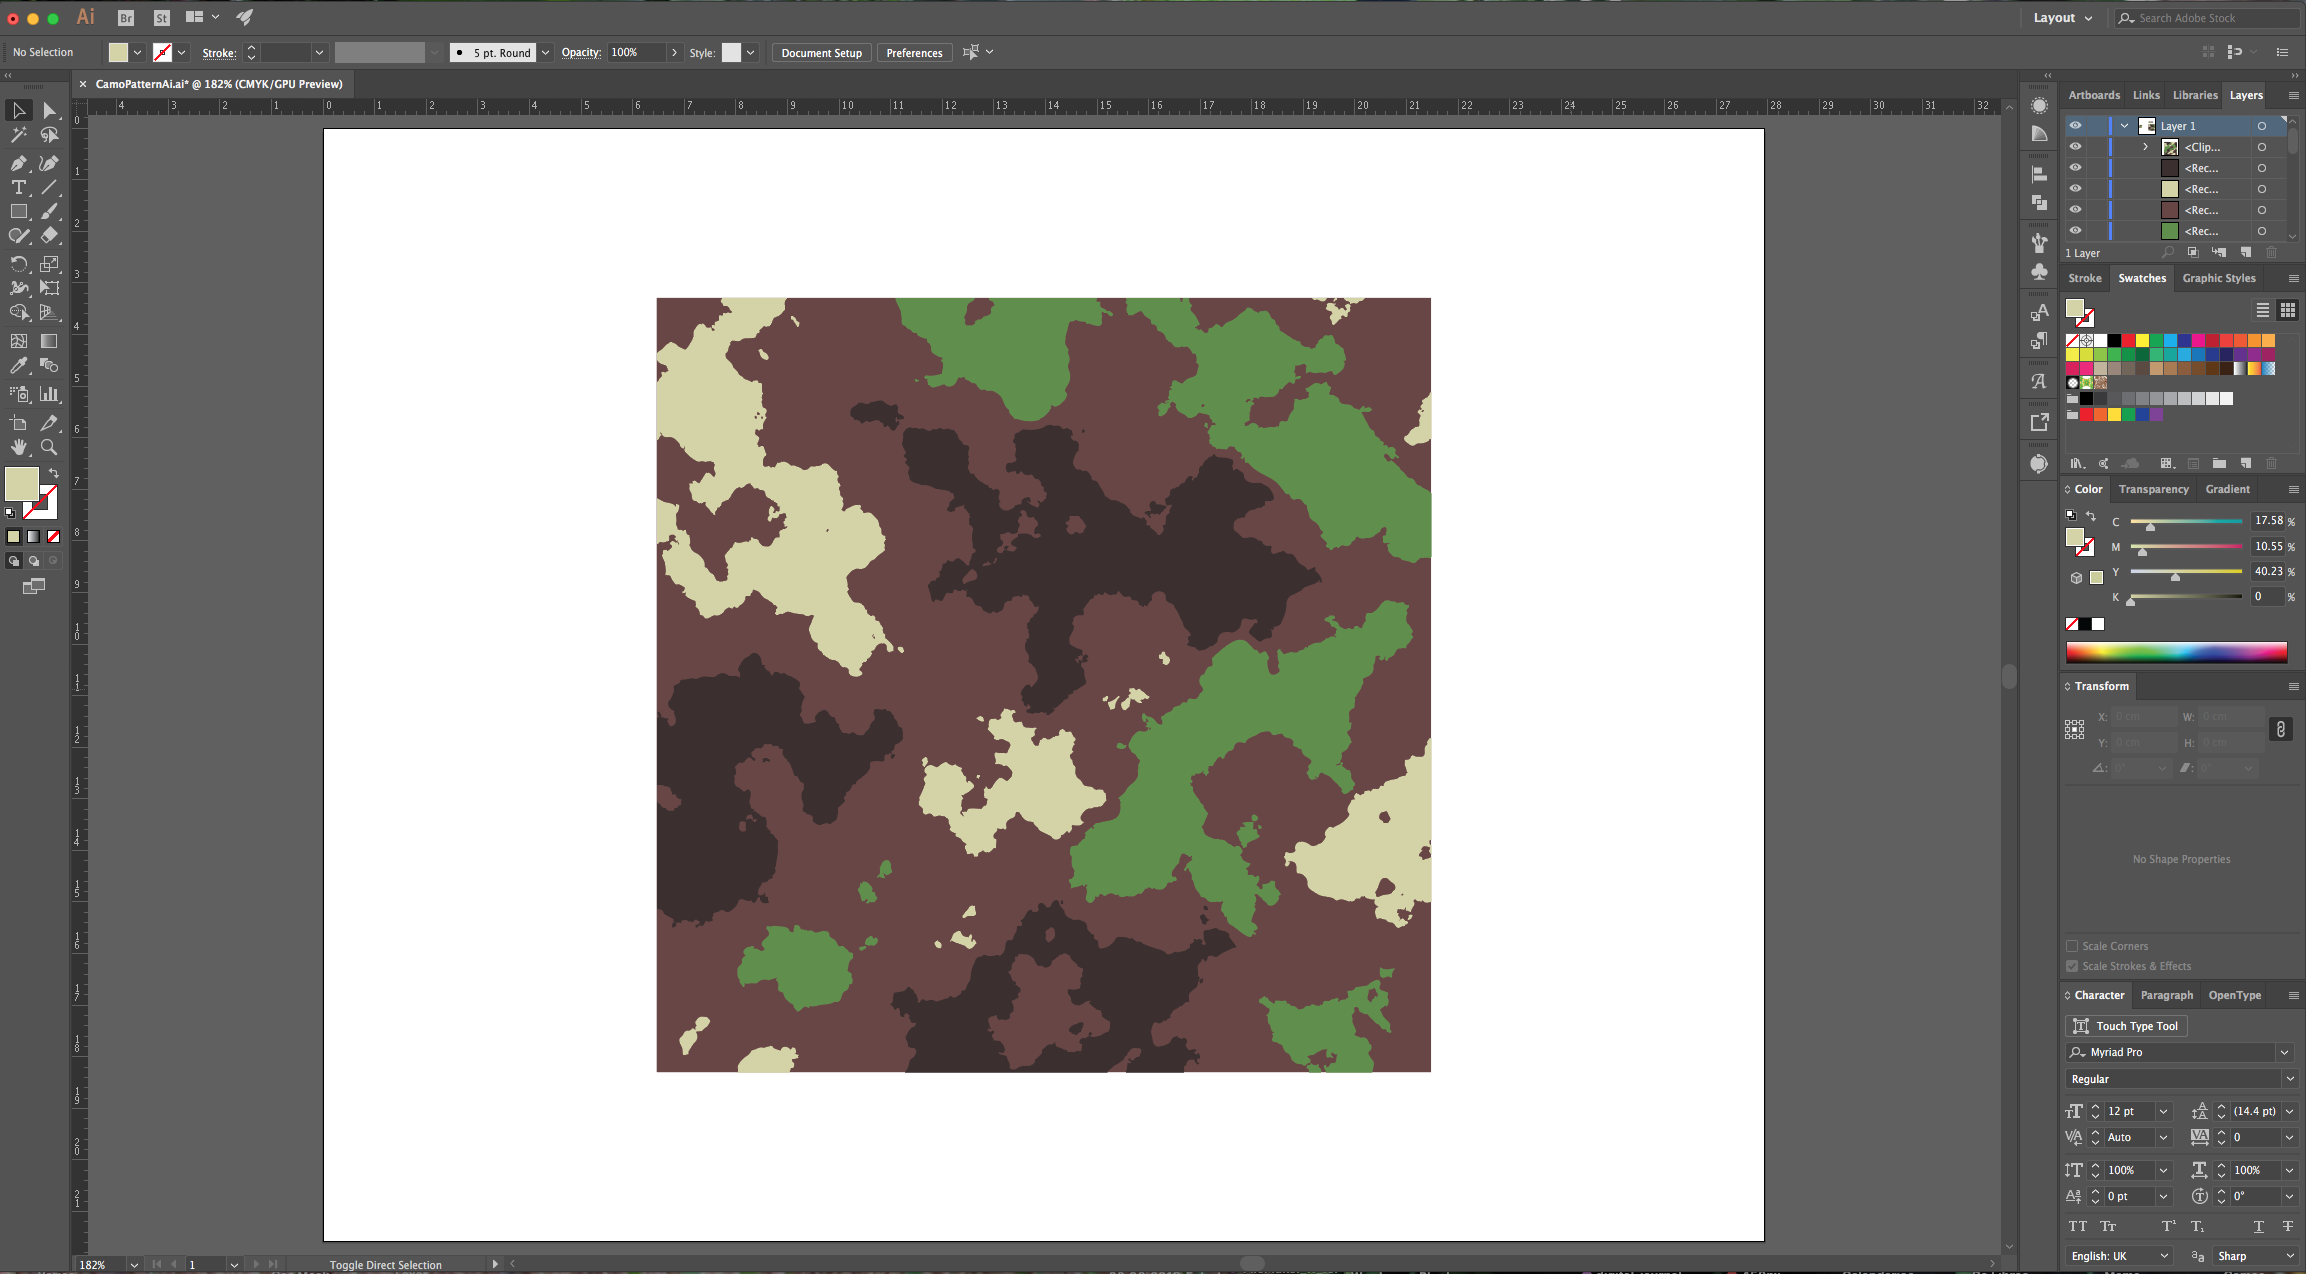
20 - Your “Pattern” should look similar to this.
1 - In Photoshop create a “New Document”, make it 15 Centimeters in “Width” and “Height” @300 Pixels/Inch and with a “Transparent” Background.
2 - Go to Filter > Render > Clouds...
3 - Then, go to Adjustments > Threshold… and use a ·Threshold Level” of 128.
4 - “Select All” (Command/Control + A) and make a “Copy” (Command/Control + C). You can “Save” the file or close it.
5 - In Illustrator, create a “New Document”. “Paste” your selection from “Photoshop” (Command/Control + V). It should be centered in your document by default.
6 - Go to the “Image Trace Panel” or click the “Trace” button in the Top Menu. Make sure “Black and White” is selected as “Mode”, click on the small arrow to the left of the “Advanced” tab to open the “Advanced Options” and check the “Ignore White” box. Once you are done, click the “Expand” button on the Top Menu.
7 - Right-click on top of your vectors and choose “Ungroup” twice.
8 - Select the “Rectangle Tool” (M), click in the Top-Left corner of your Vector and create a 15 x 15 cm Square.
9 - Center it using the “Horizontal and Vertical Align Center” options on your Top Menu and make sure that “Align to Artboard” is selected. Or use the same options in the “Align Panel”. Then, right-click on top of it, choose Arrange > Send to Back and fill it with White.
10 - Add some squares filled with the colors present in the “Color Palette” you chose as reference on the top part of your Canvas. If your reference is a flat image, you can “Place” it into your “Document” and use the “Eyedropper Tool” (I) to sample the colors.
11 - Select the White Square at the bottom and use the “Eyedropper Tool” (I) to change the fill color to one present in your “Palette” by clicking on top of the reference square filled with it.
12 - Use the “Selection Tool” (V) to select some of the portions of the Pattern that you would like to be filled with the same color (“Shift” key) then use the “Eyedropper Tool” (I) to sample the color. Repeat for other colors.
13 - If you have a large piece that you want to divide, choose the “Eraser Tool” (Shift + E), double-click on top of its Thumbnail to open the “Options Panel” and change the “Size” to 5 pt. Use it to erase portions of the vector to create separate pieces.
14 - Fill all your vector shapes with different colors. When you are done, select the pieces that should be together (“Shift” key), right-click on top of them and choose “Group”.
15 - To make this easier, go to the “Layers Panel”, click on the small arrow on the left side of your Layer to show its contents, scroll down and lock the big Square Shape by clicking on the small padlock to its left. Then, keep selecting and grouping together portions of your vector.
16 - Select everything and go to Object > Pattern > Make… Click “OK” on the Pop-Up Window.
17 - Check the Tiling of your Pattern, if you notice that the shapes and/or colors where the edges meet are off, use the “Selection Tool” (V) to select and move some vectors. You can also delete some “Anchor Points” using the “Delete Anchor Point Tool” (-) and you can select and modify or move individual “Anchor Points” using the “Direct Selection Tool” (A).
18 - Finally, you may need to change the “Fill” color of some pieces to make them match. Once you are happy with the results, give your “Pattern” a name (we used “Camouflage”) and click on the “Done” button on the Top Menu. A Swatch of your new pattern should be added to the “Swatches Panel”.
19 - Unlock the bottom Square Shape and modify it so it fits your entire Canvas, create another Rectangle and use your “Camouflage” Pattern as fill.
20 - Your “Pattern” should look similar to this.
by @lornacane


