
Triangular Pattern Artwork in Illustrator
For this tutorial, you will need a Color Palette to use with the Pattern and some Vectors of a subject you like to apply the “Pattern” to.
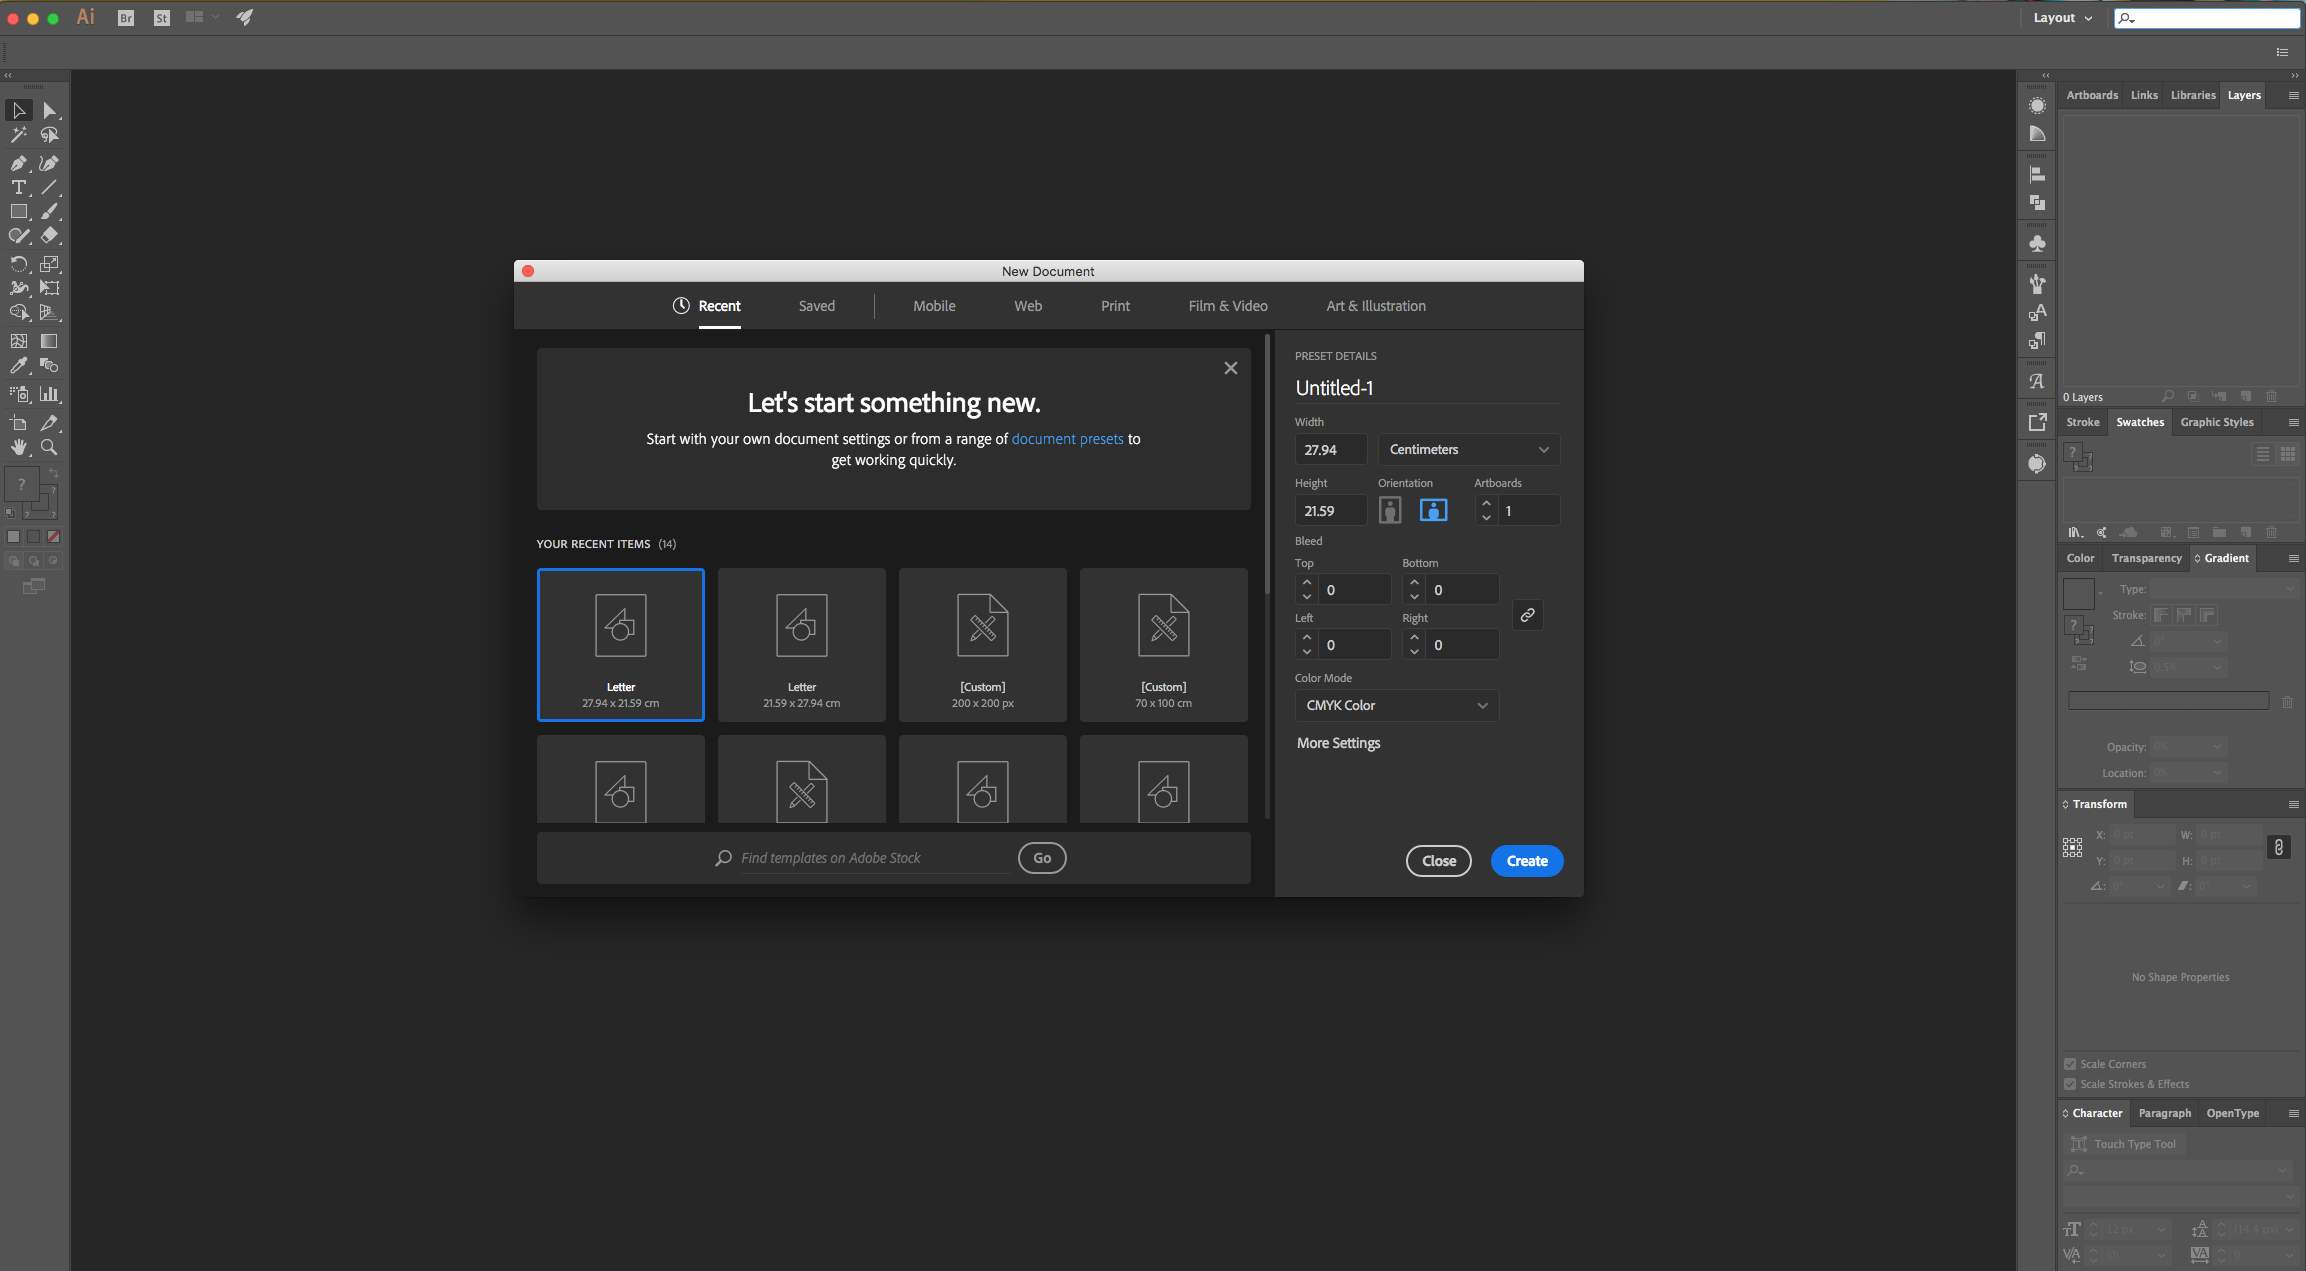
1 - In Illustrator, create a “New Document”.
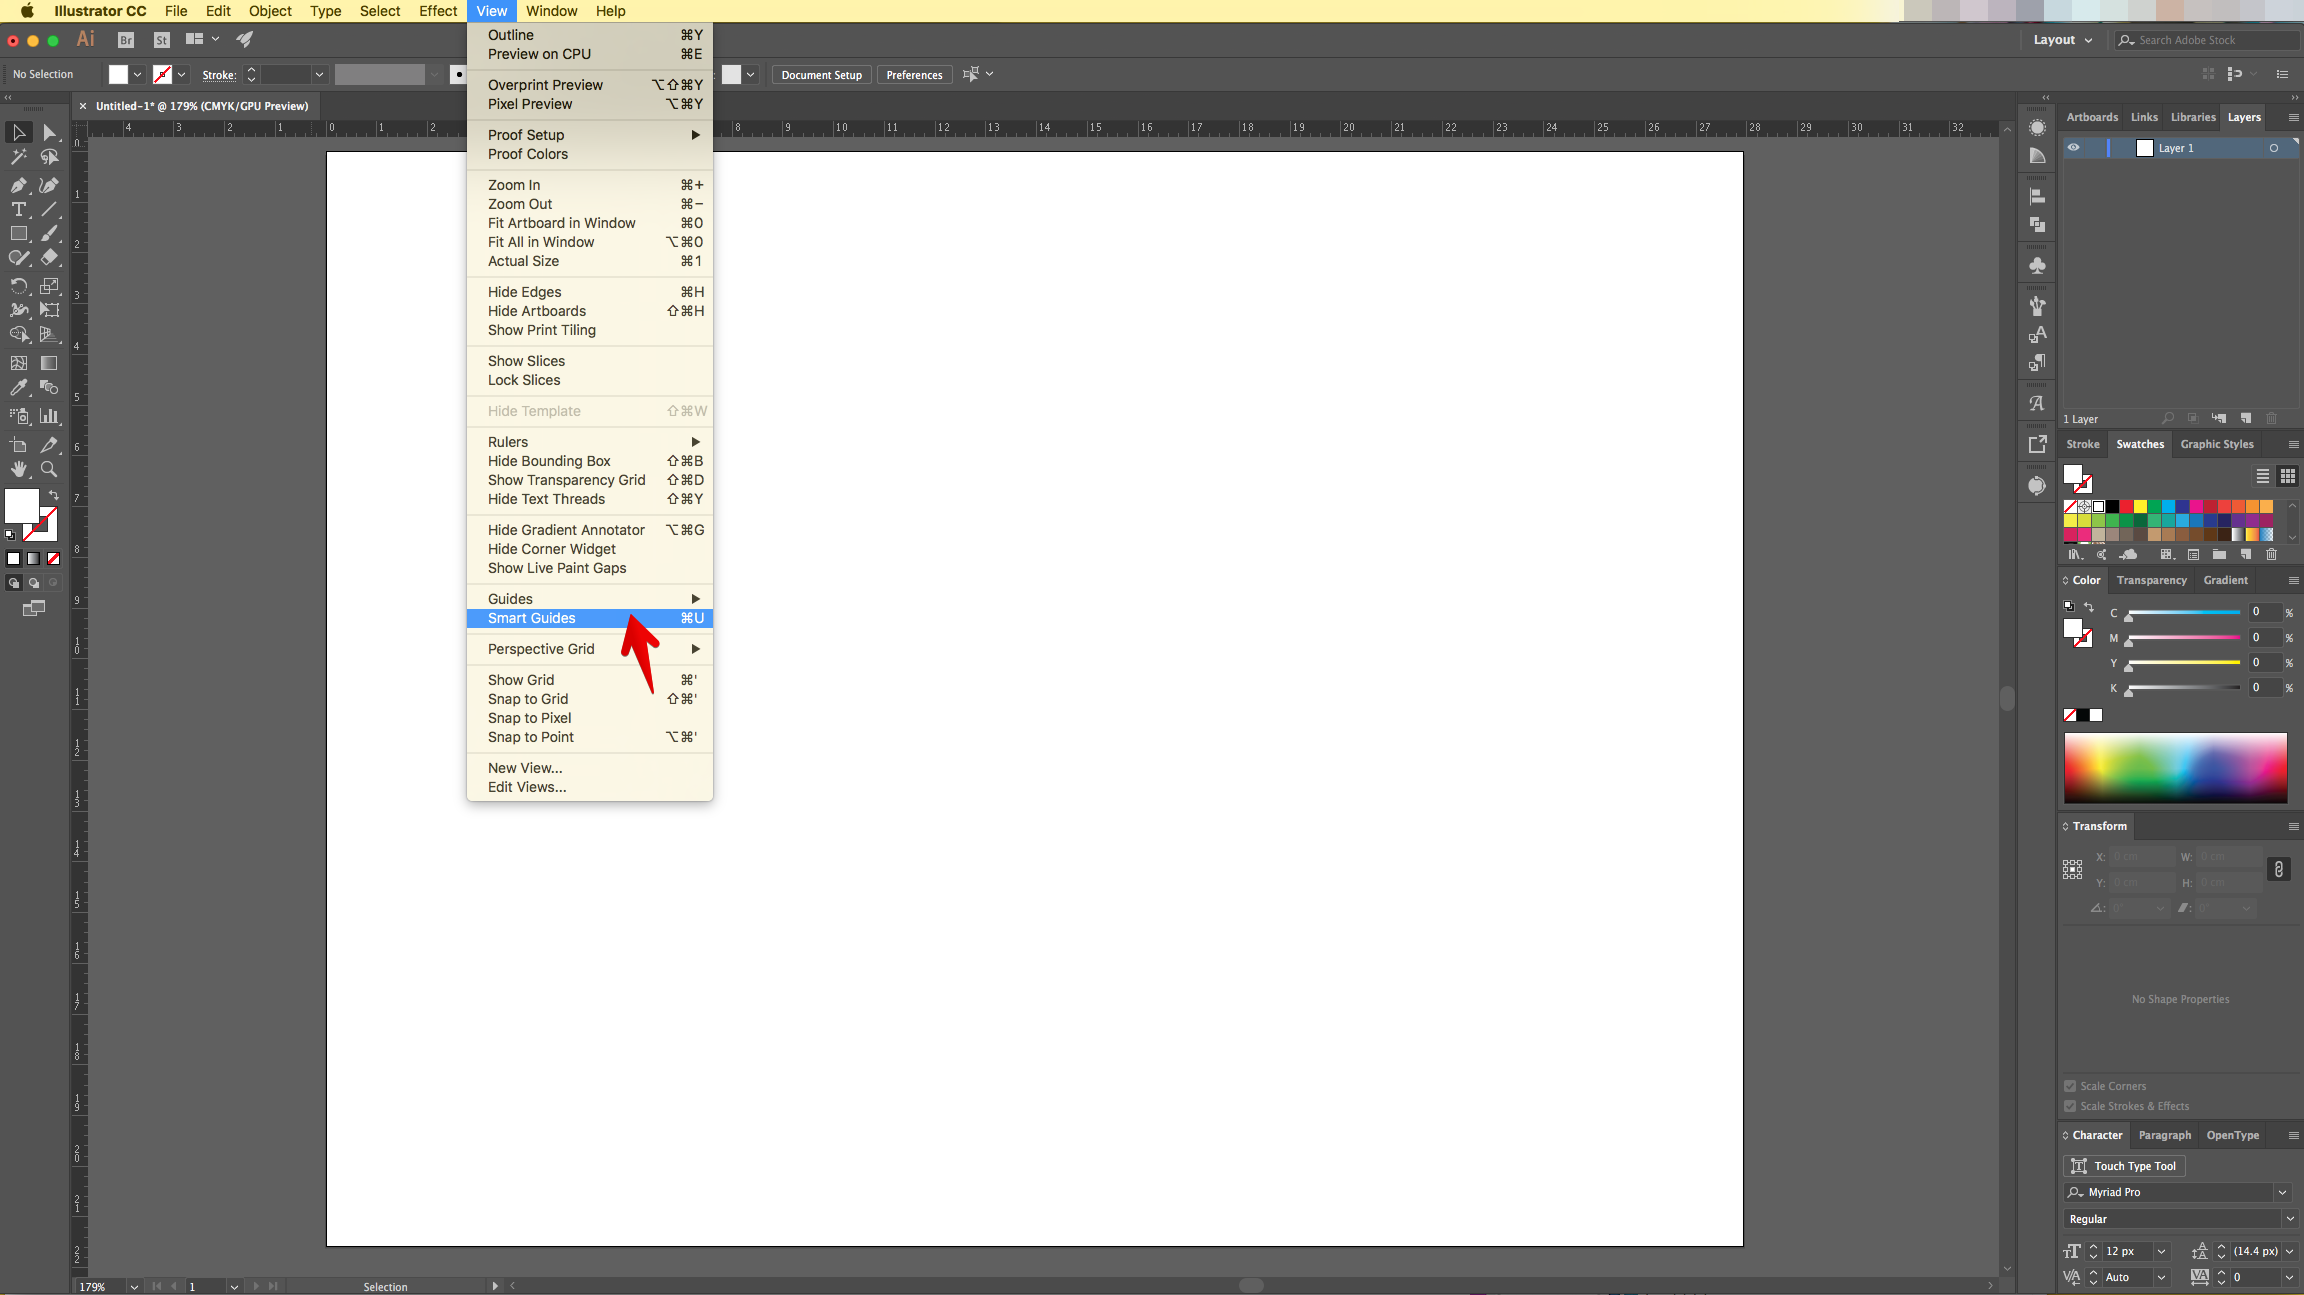
2 - If your “Page Rulers” are not active, go to View > Rulers > Show Rulers (Command/Control + R) to bring them out. Go to View > Smart Guides (Command/Control + U) to activate them.
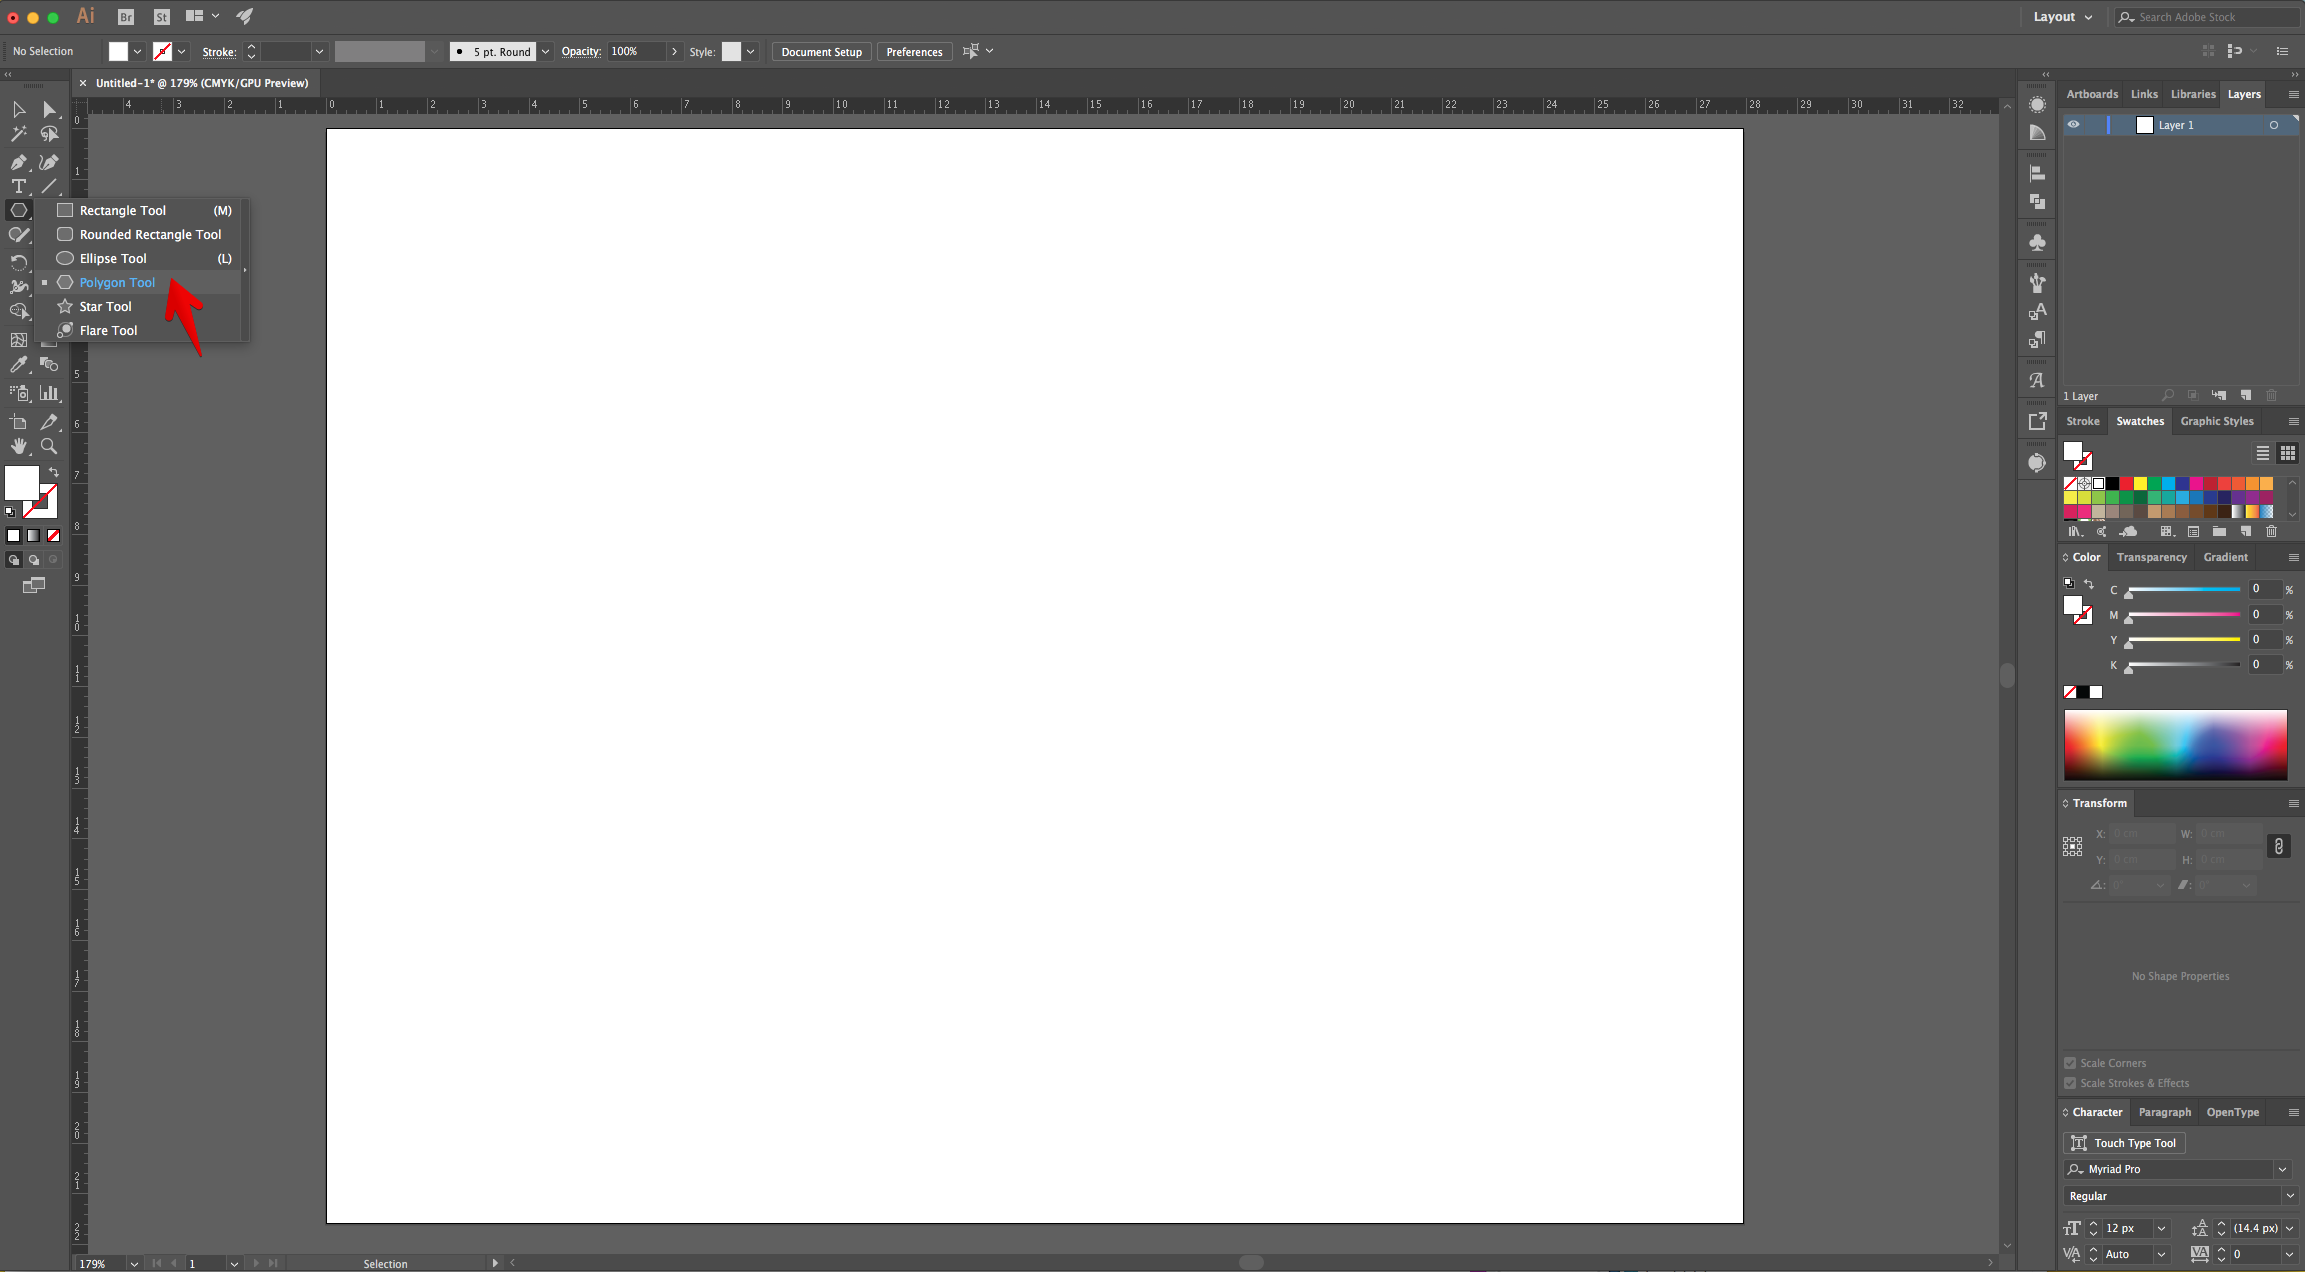
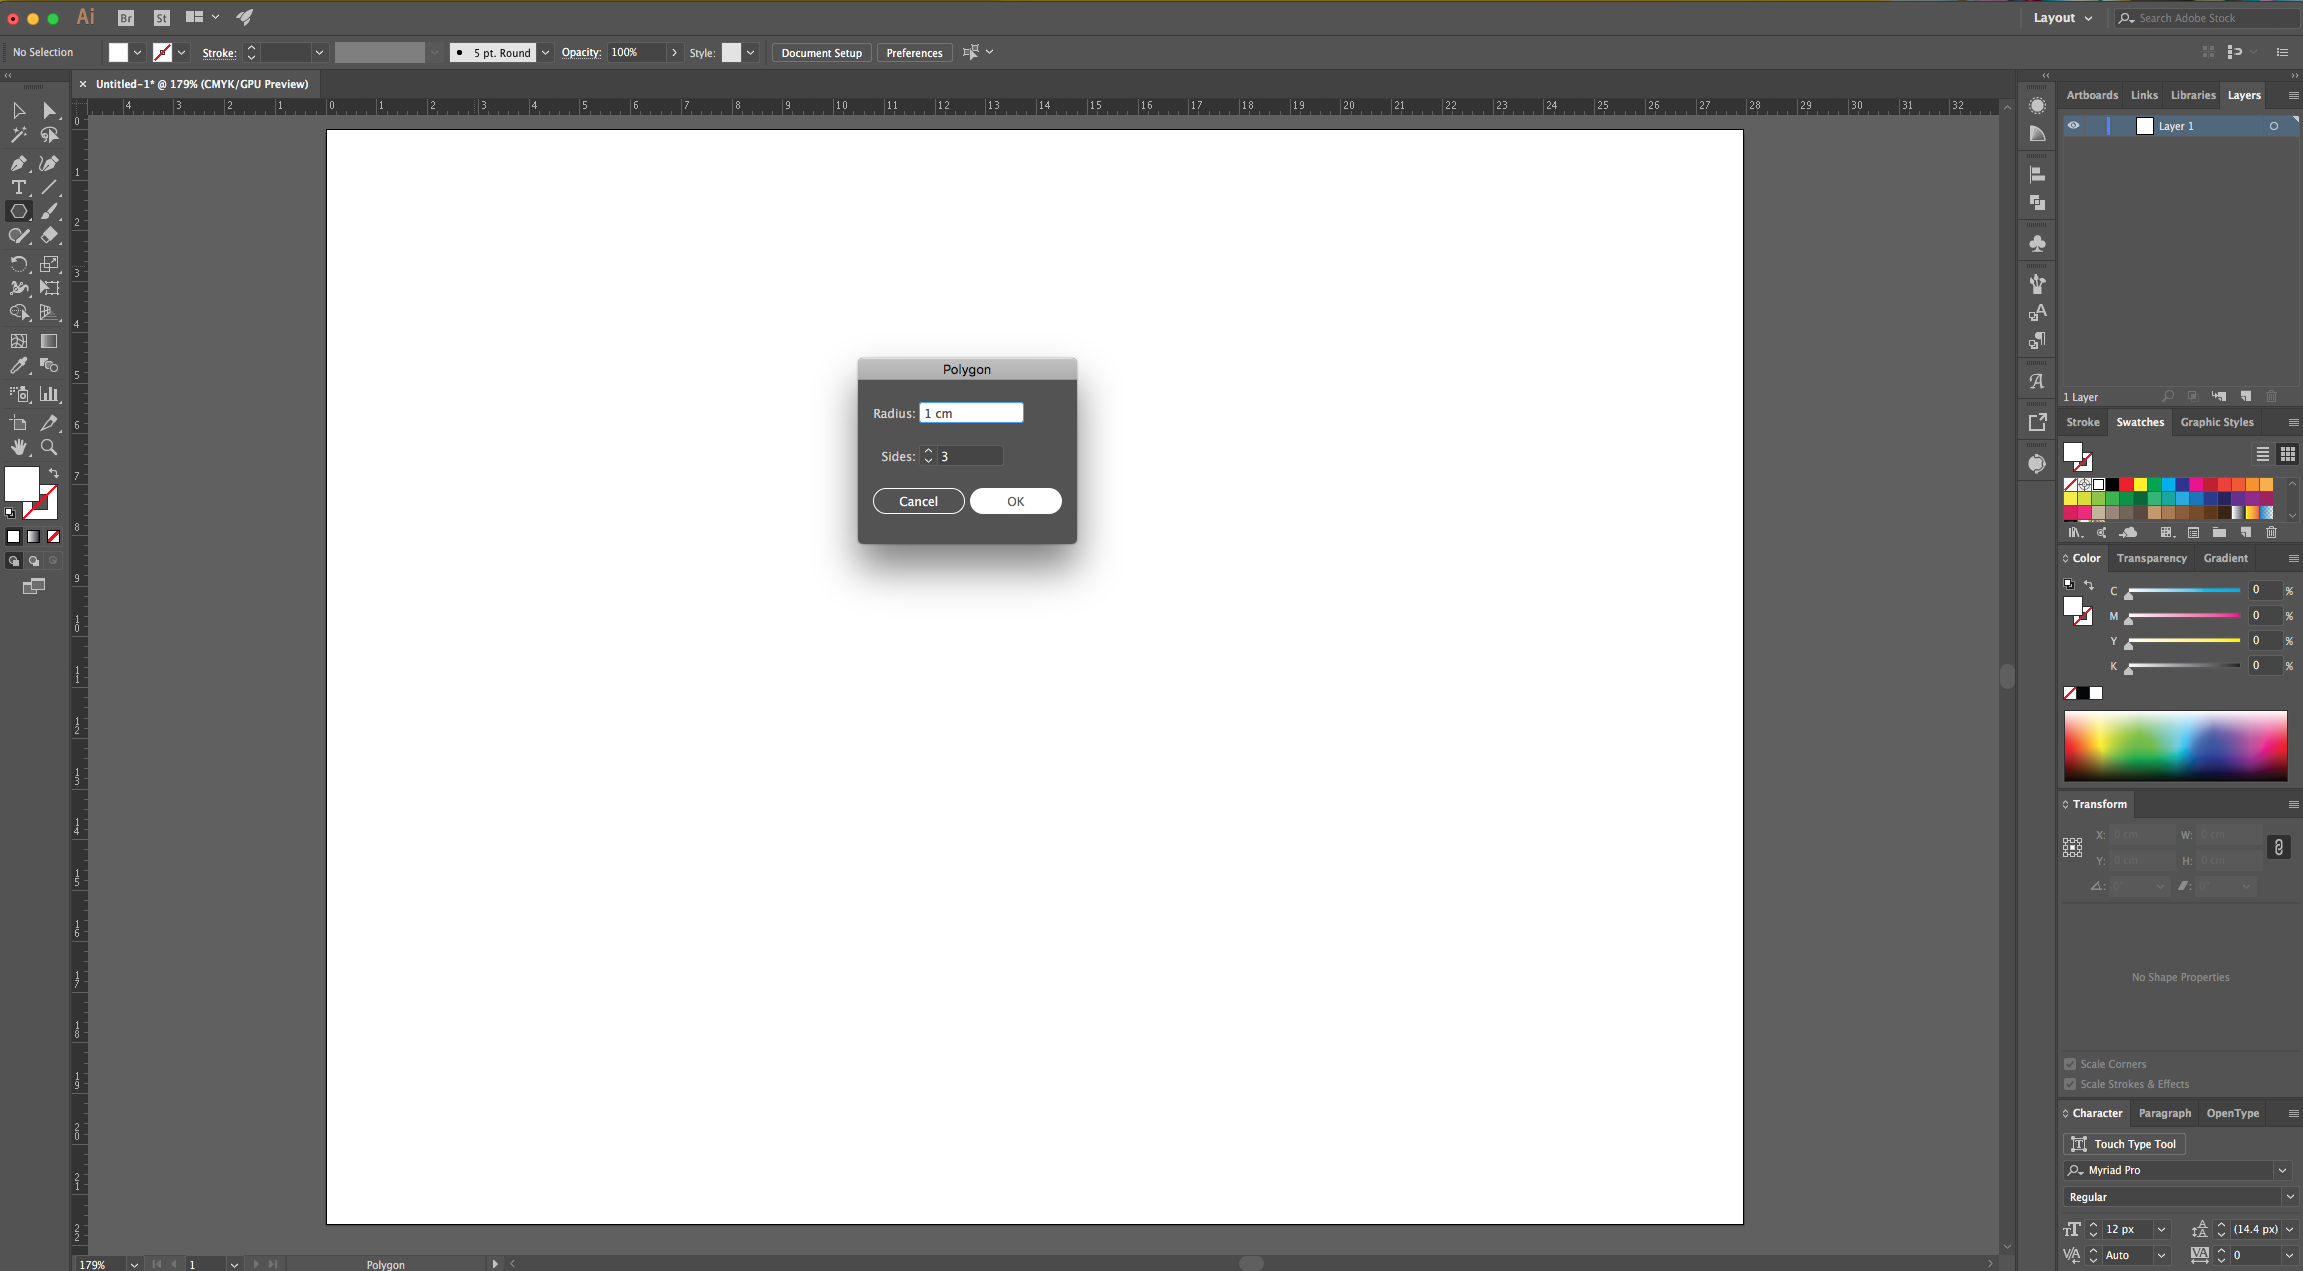
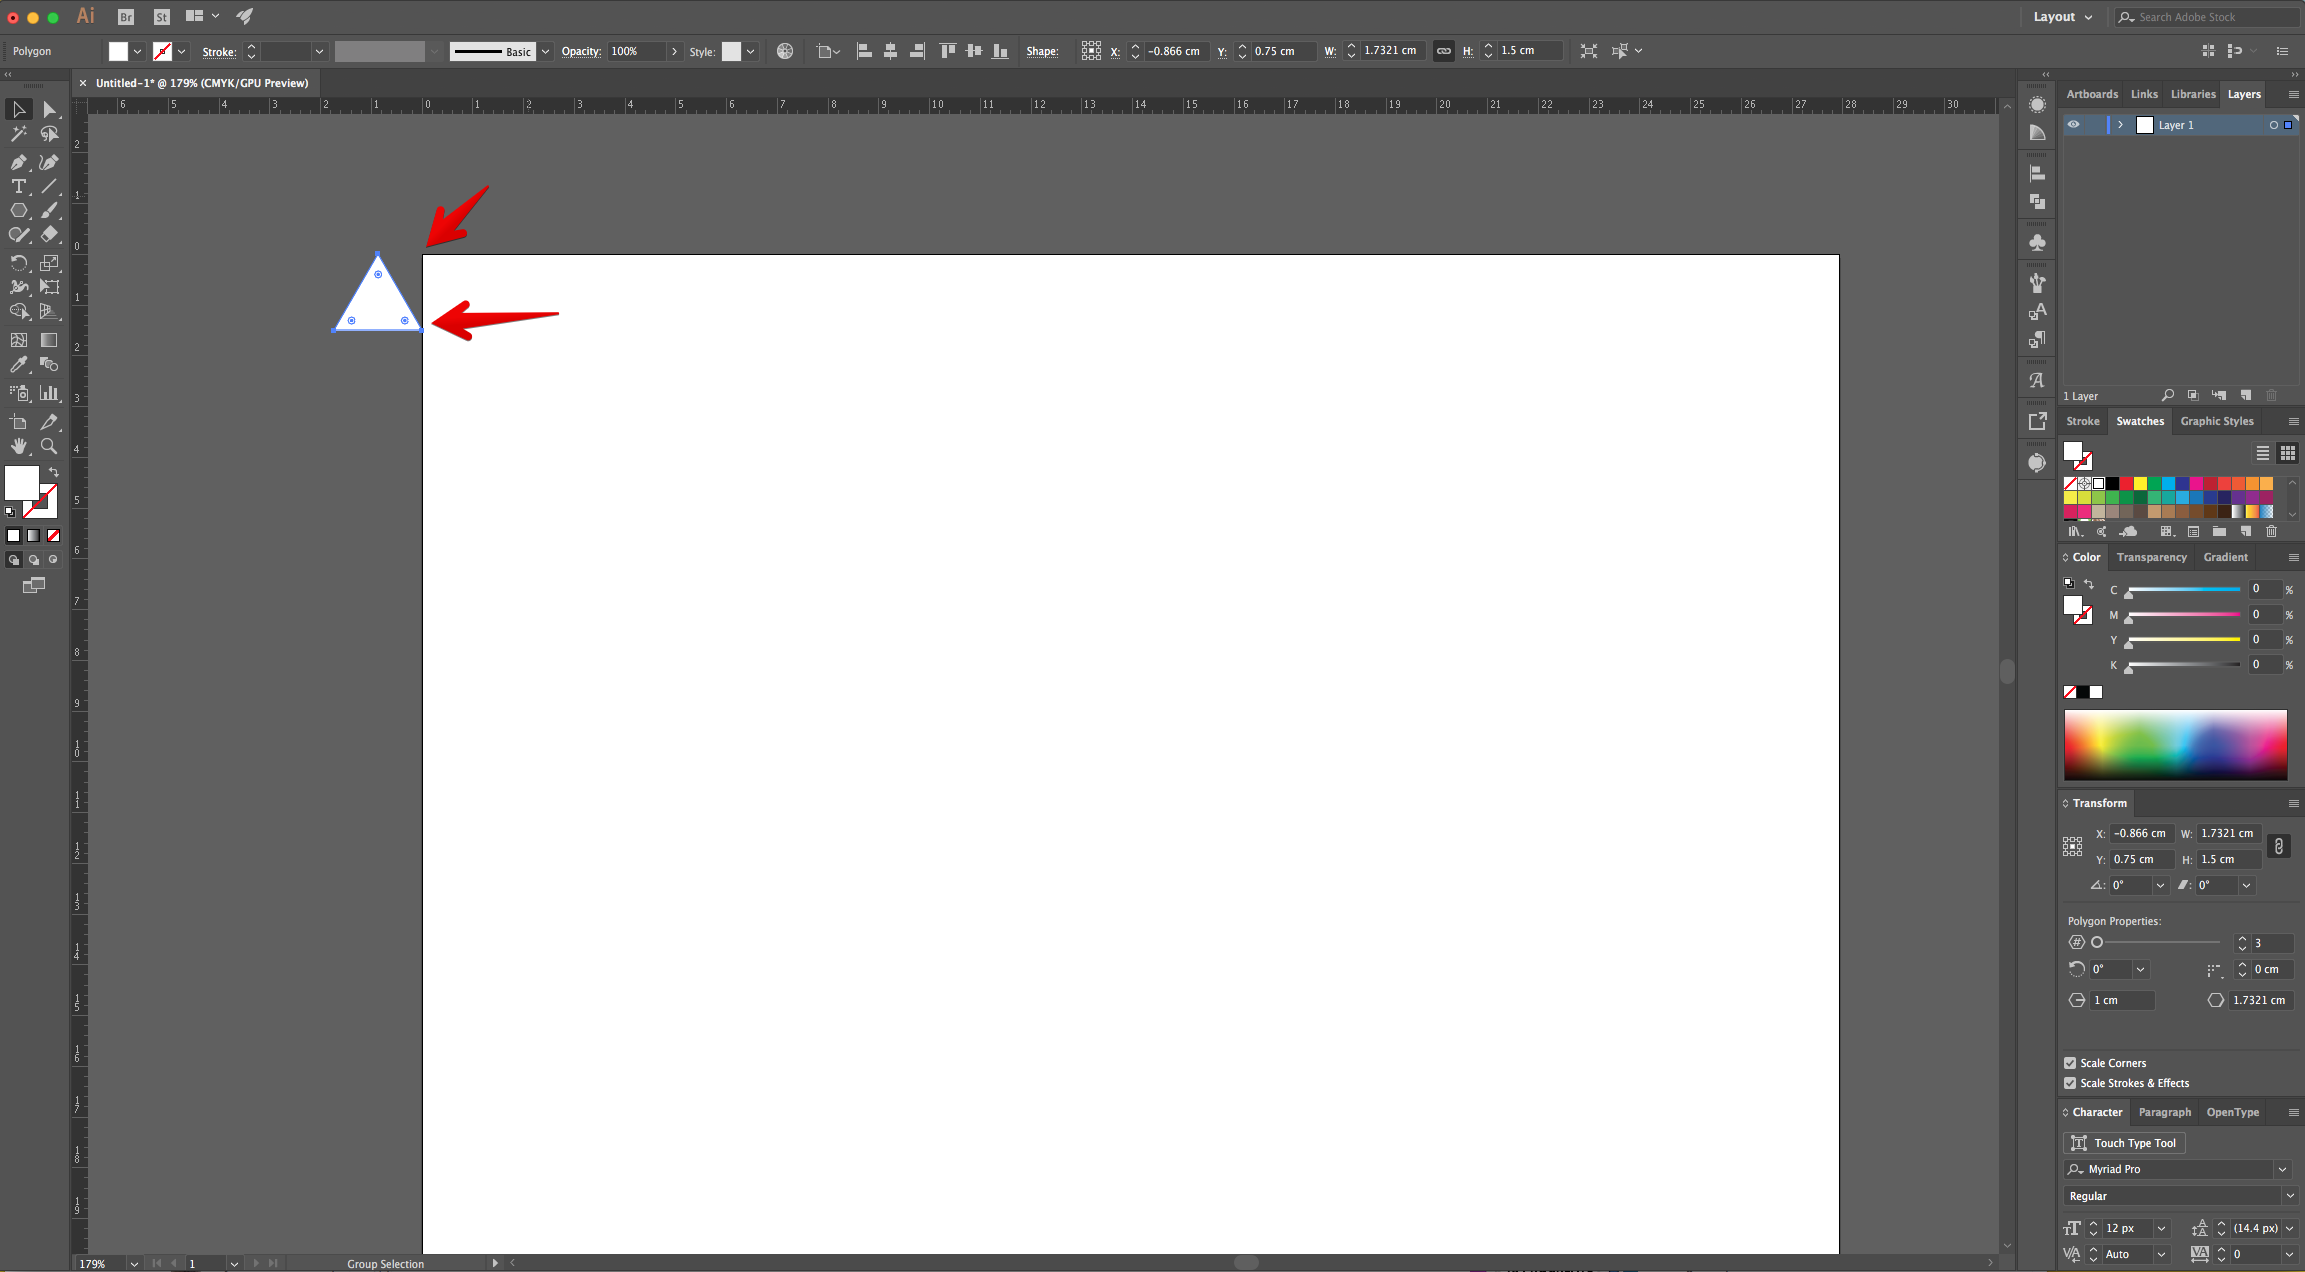
3 - Use the “Polygon Tool”, click inside the “Canvas” and use a 1 cm “Radius” value and 3 “Sides”.
4 - Move the “Triangle” to the Top-Left outside part of the “Document”. The “Smart Guides” should help you to position it accurately.
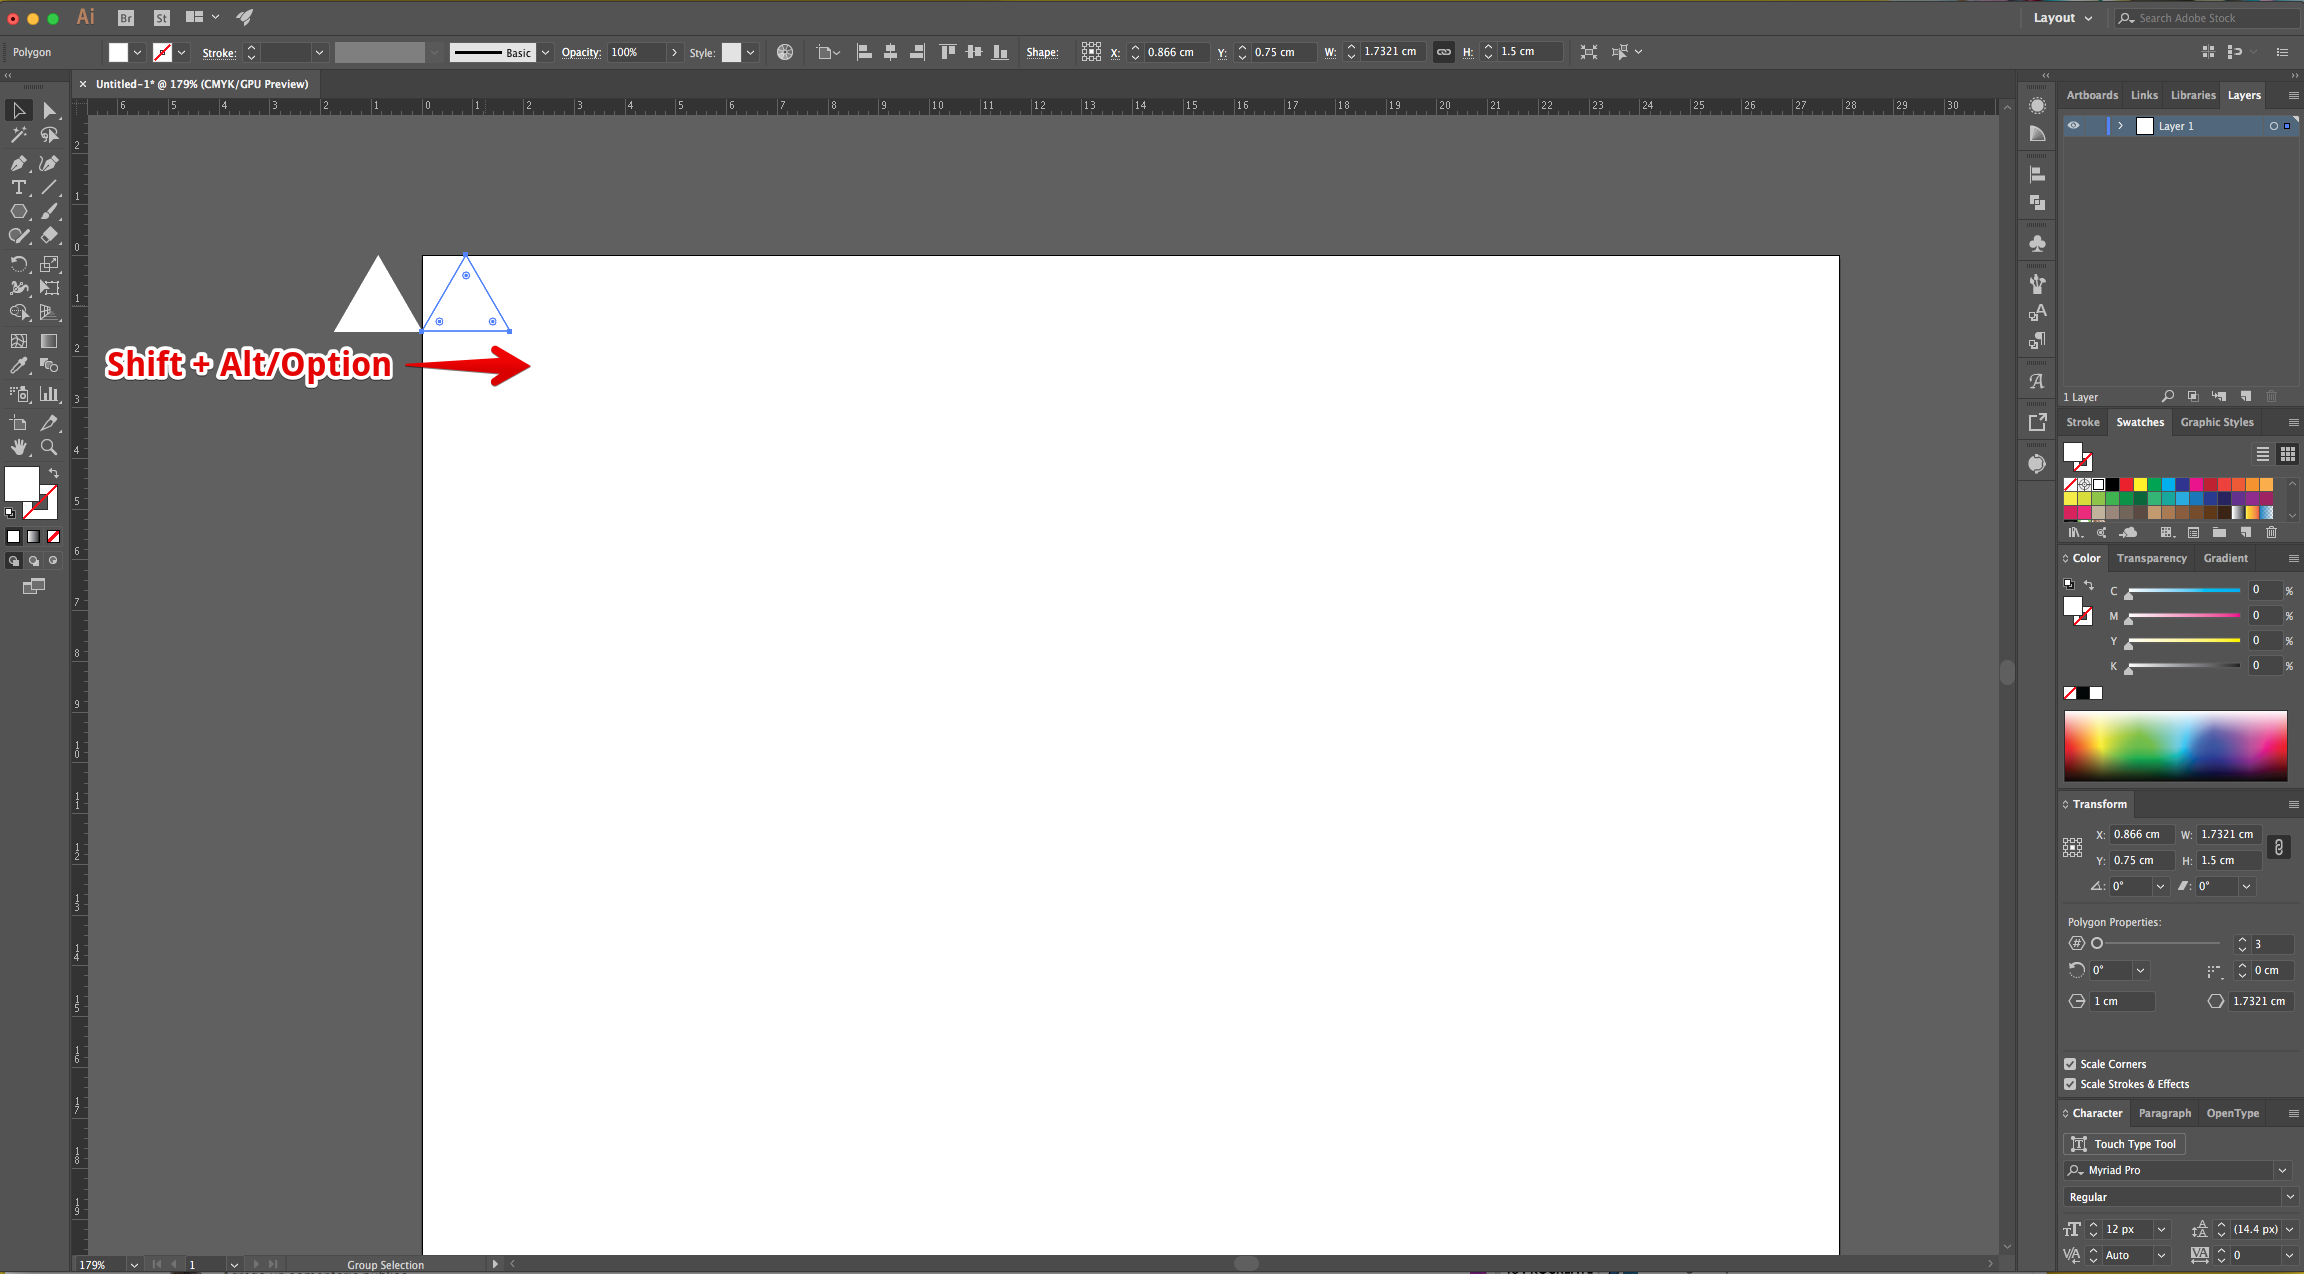
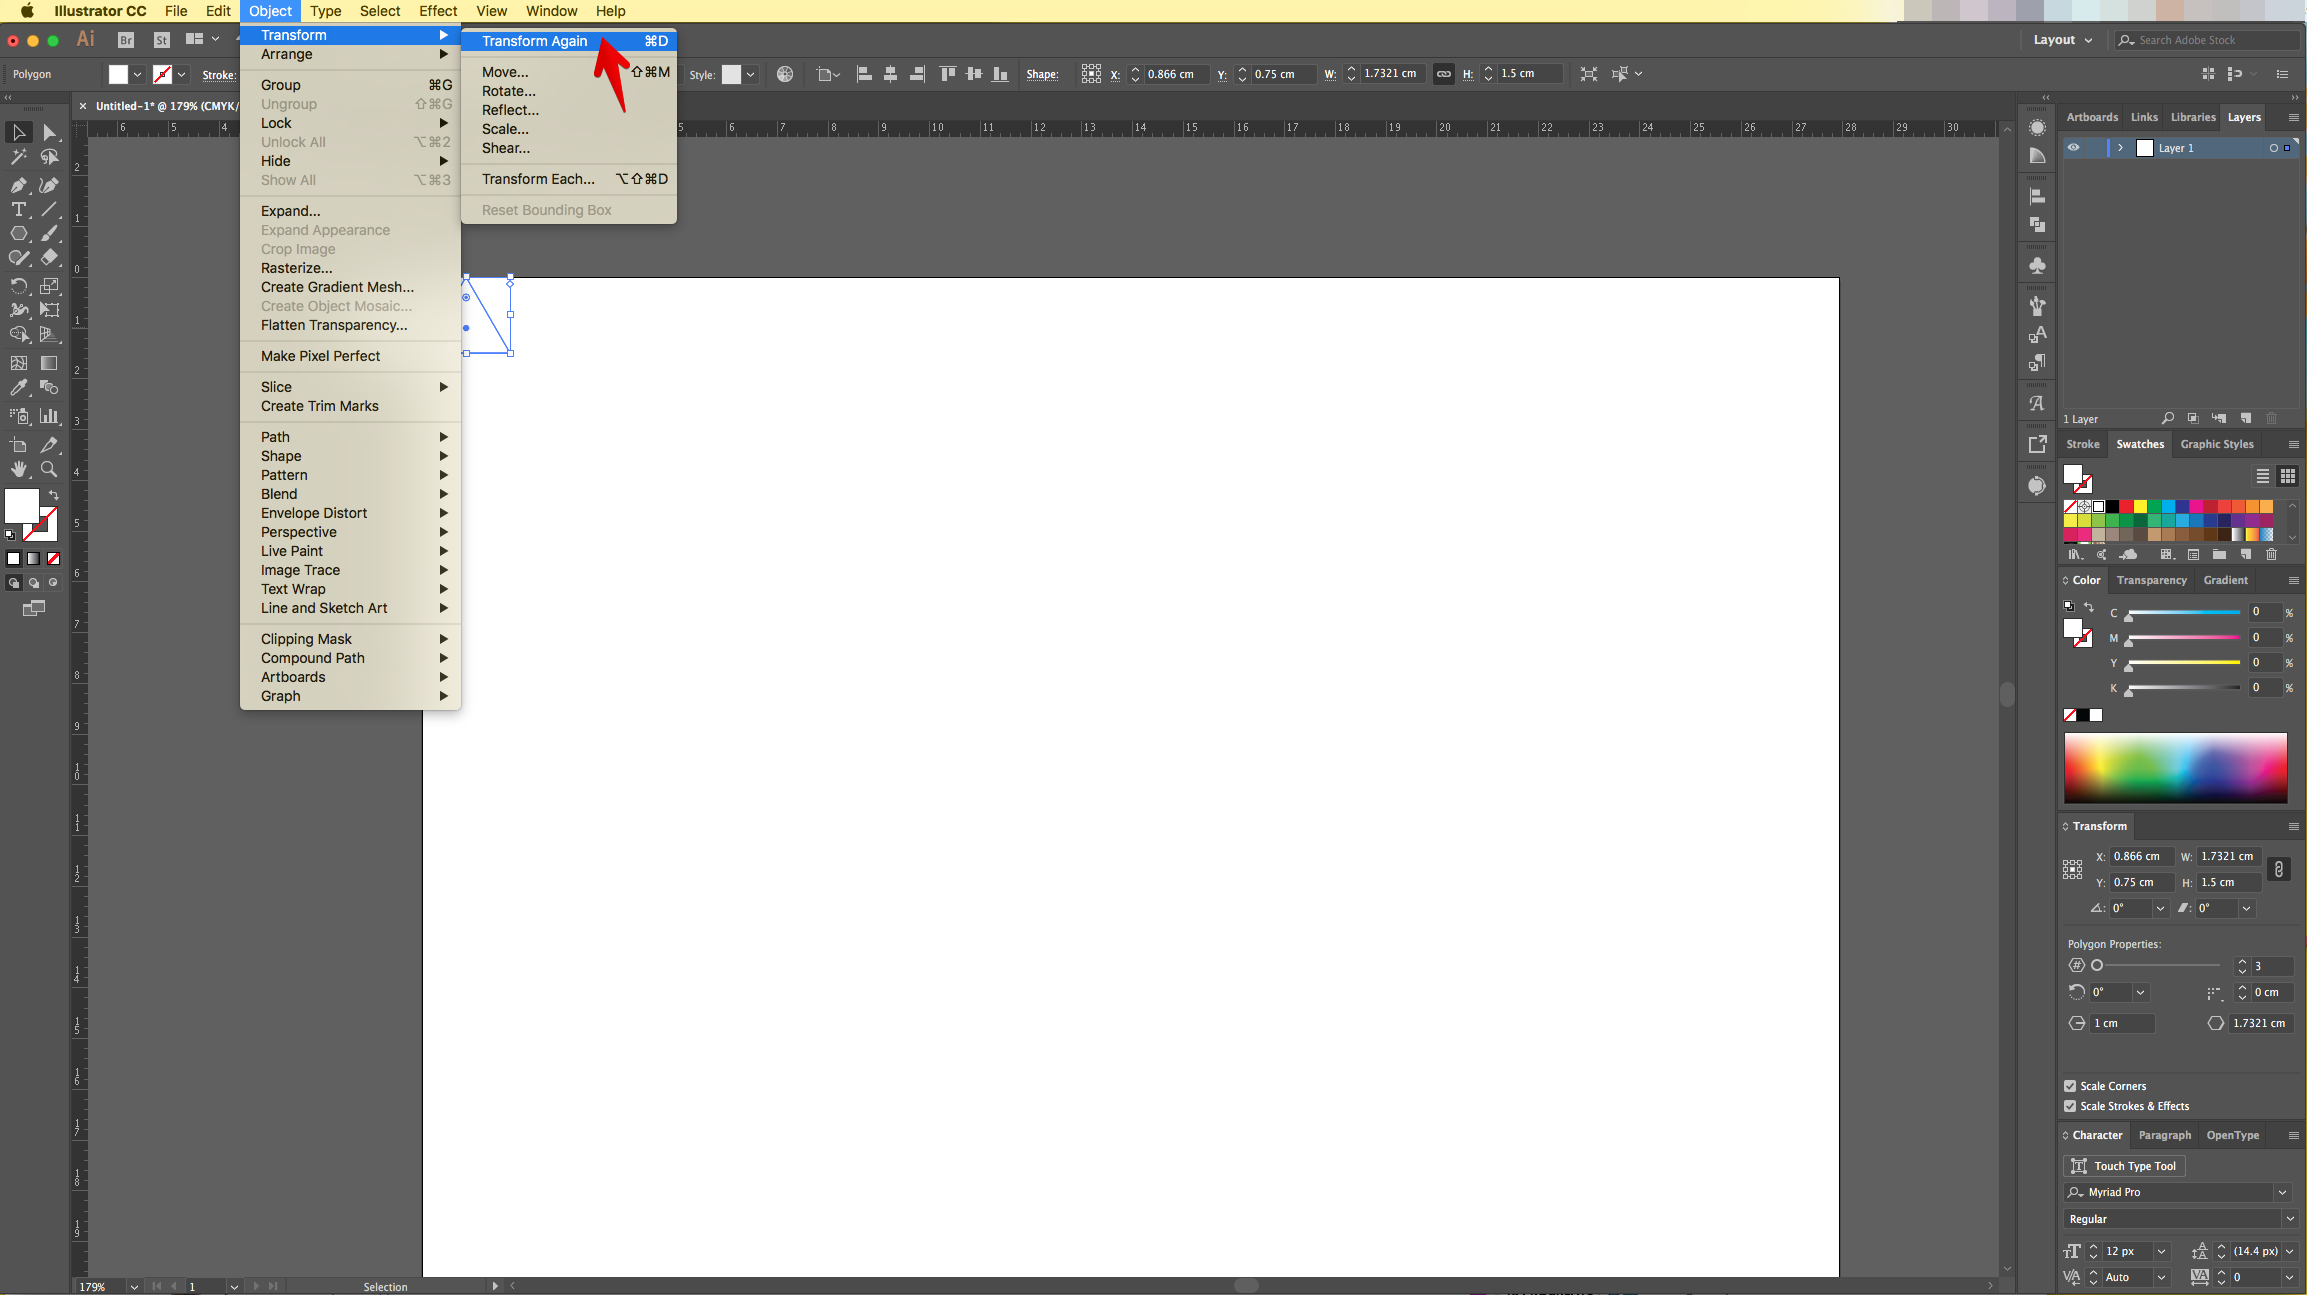
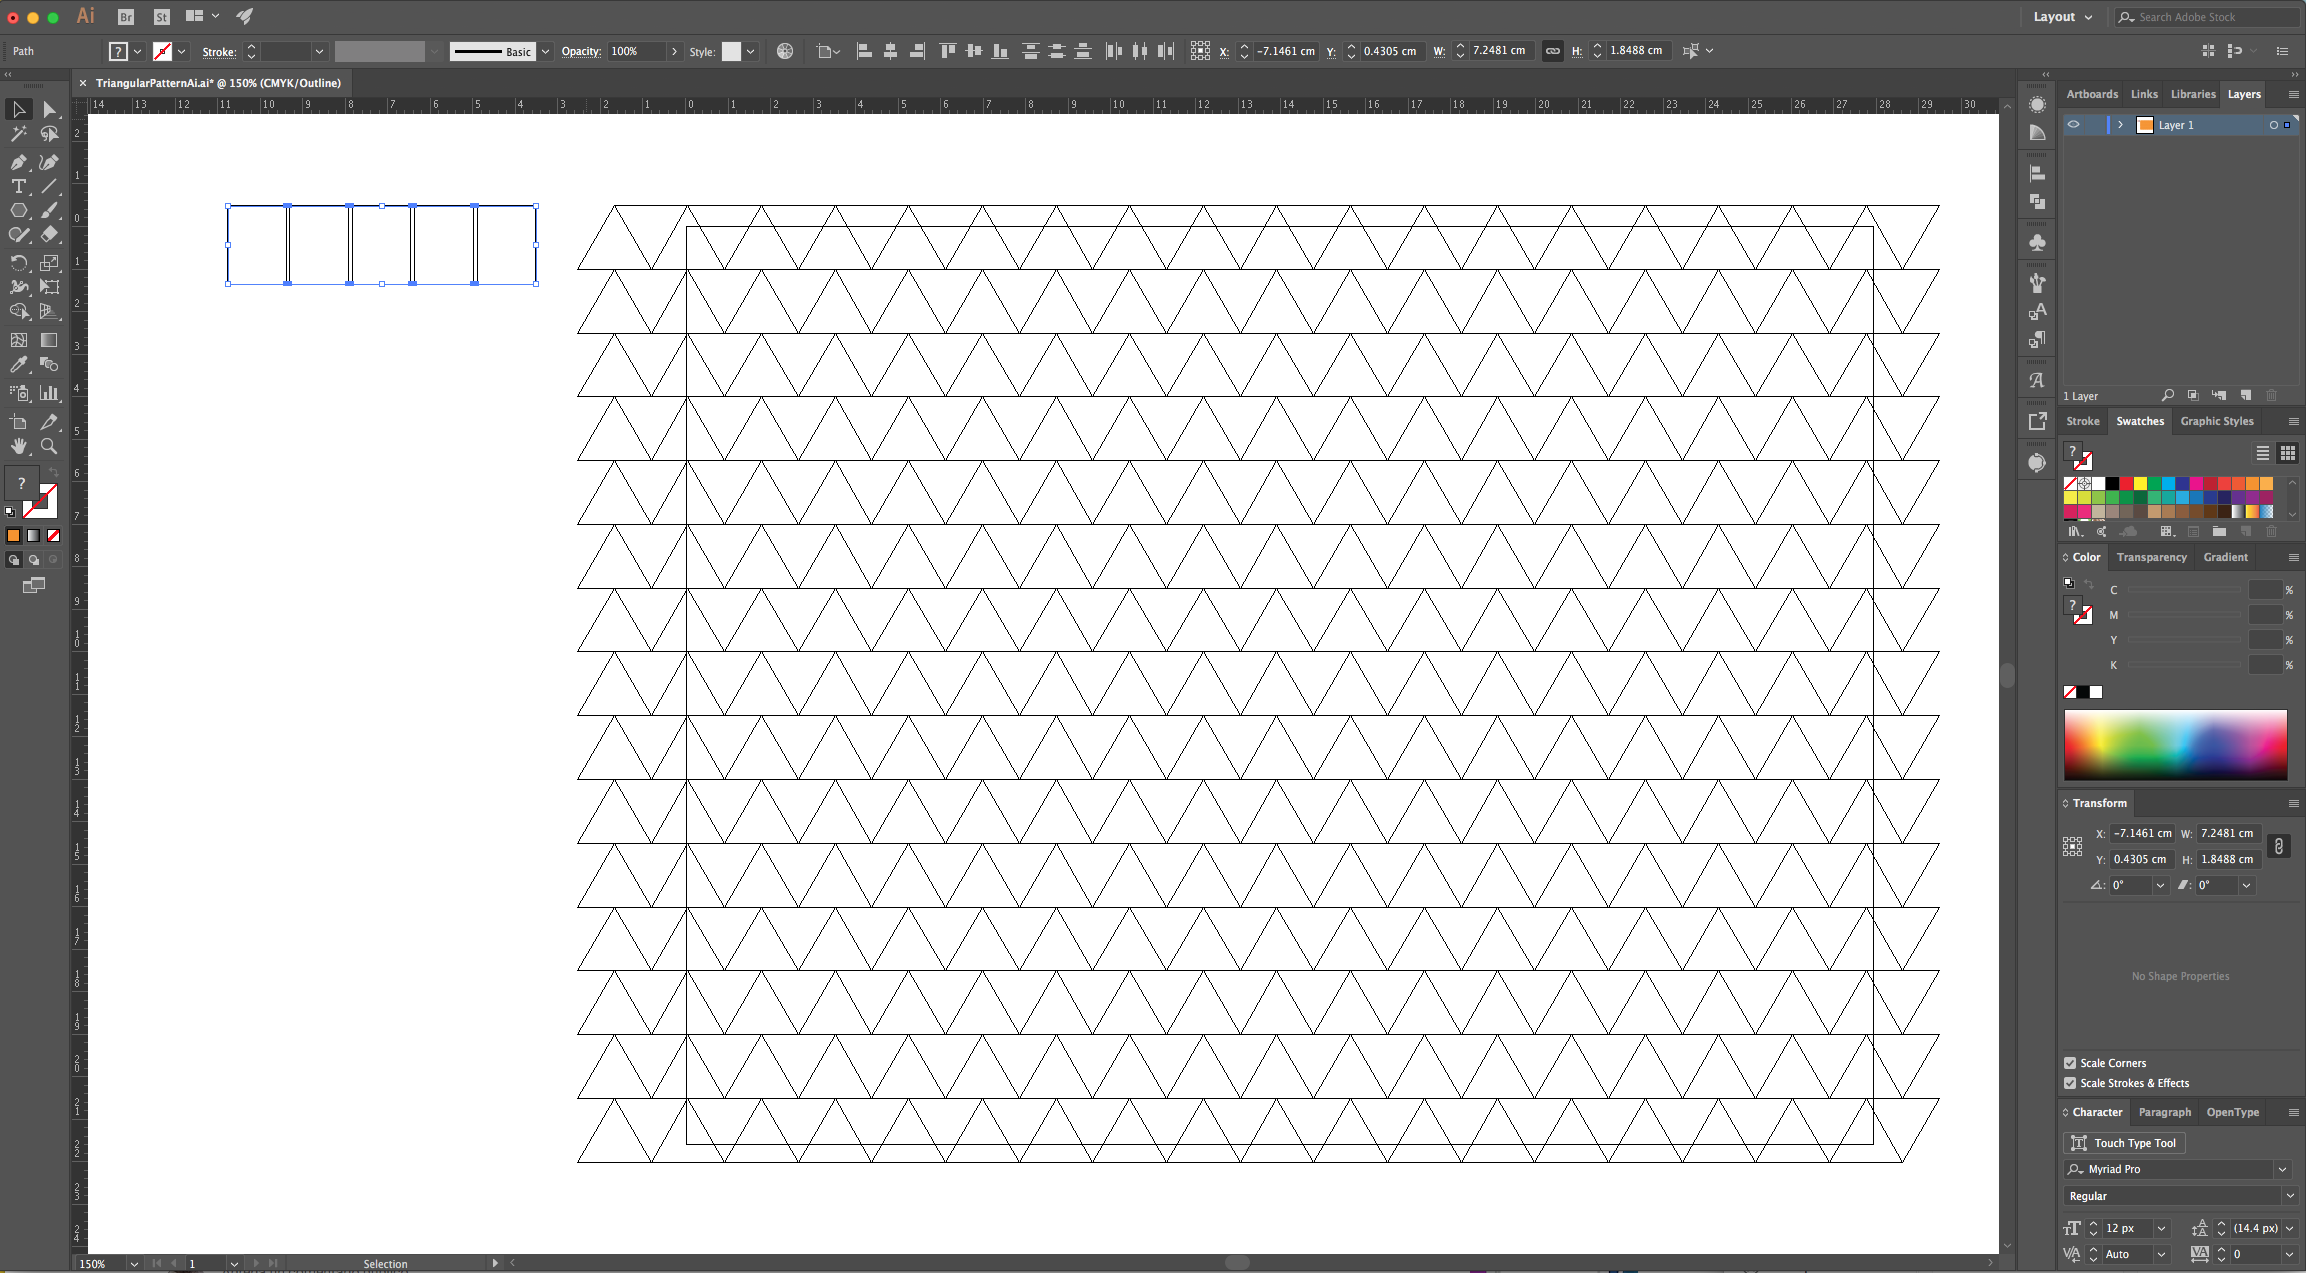
5 - Create a “Duplicate” by holding the “Shift” and “Option/Alt” keys while dragging it to the “Right”. The bottom “Points” of each triangle should be touching. Then, repeat this using “Transform Again” (Command/Control + D) until you fill the entire “Canvas” and place another “Triangle” outside the right side of it.

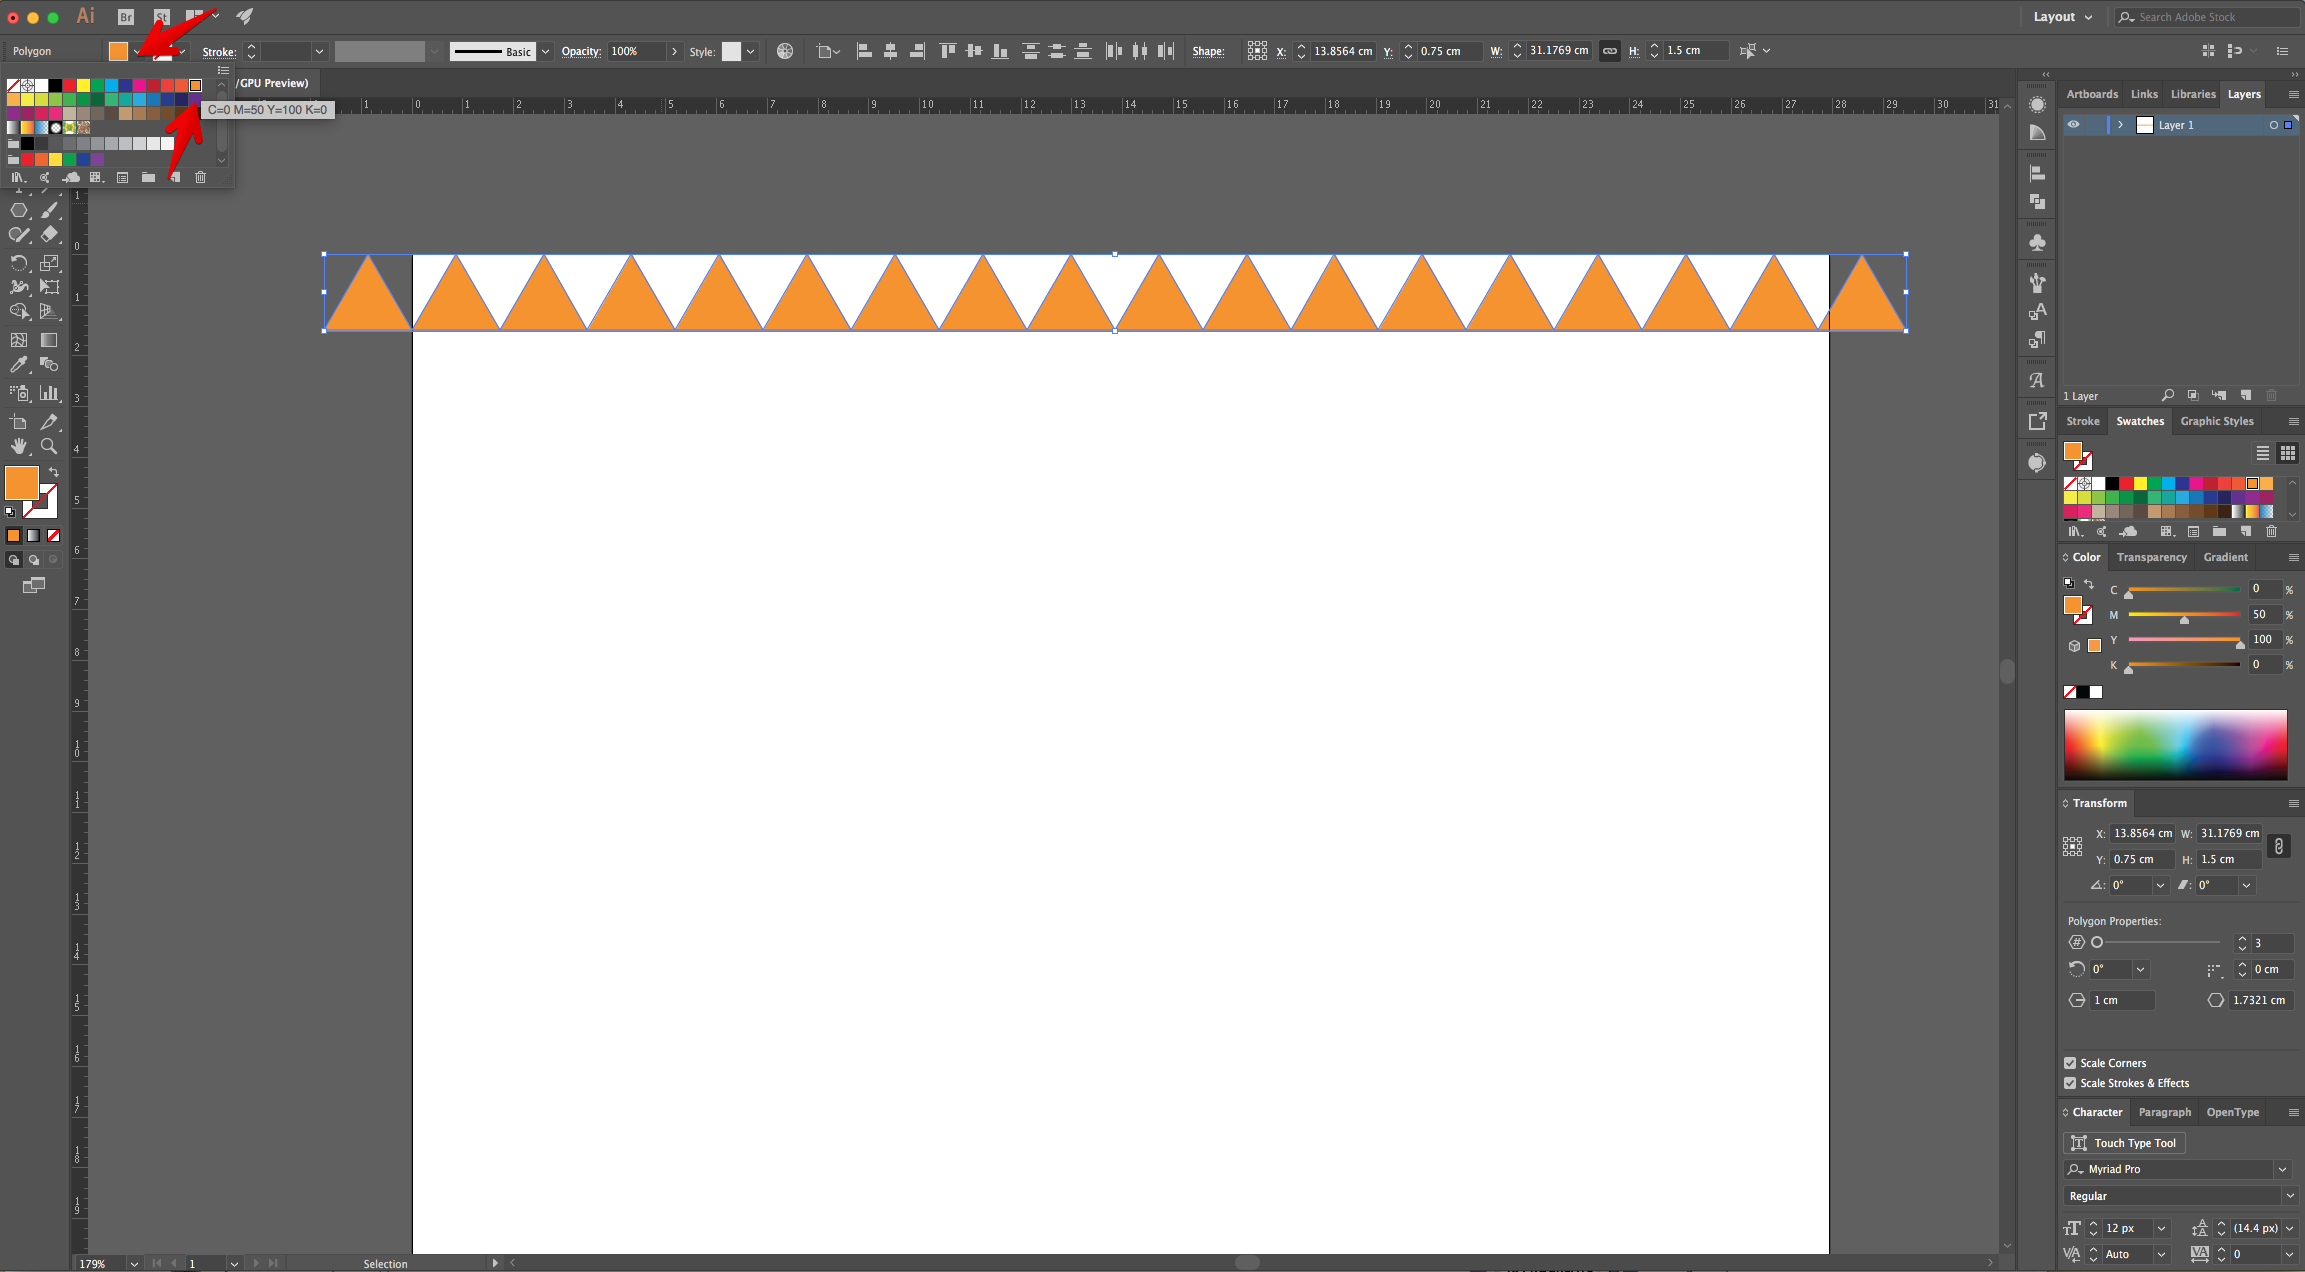
6 - Change the “Fill” to the color of your choice (we used an “Orange” shade from the “Swatches Panel”.
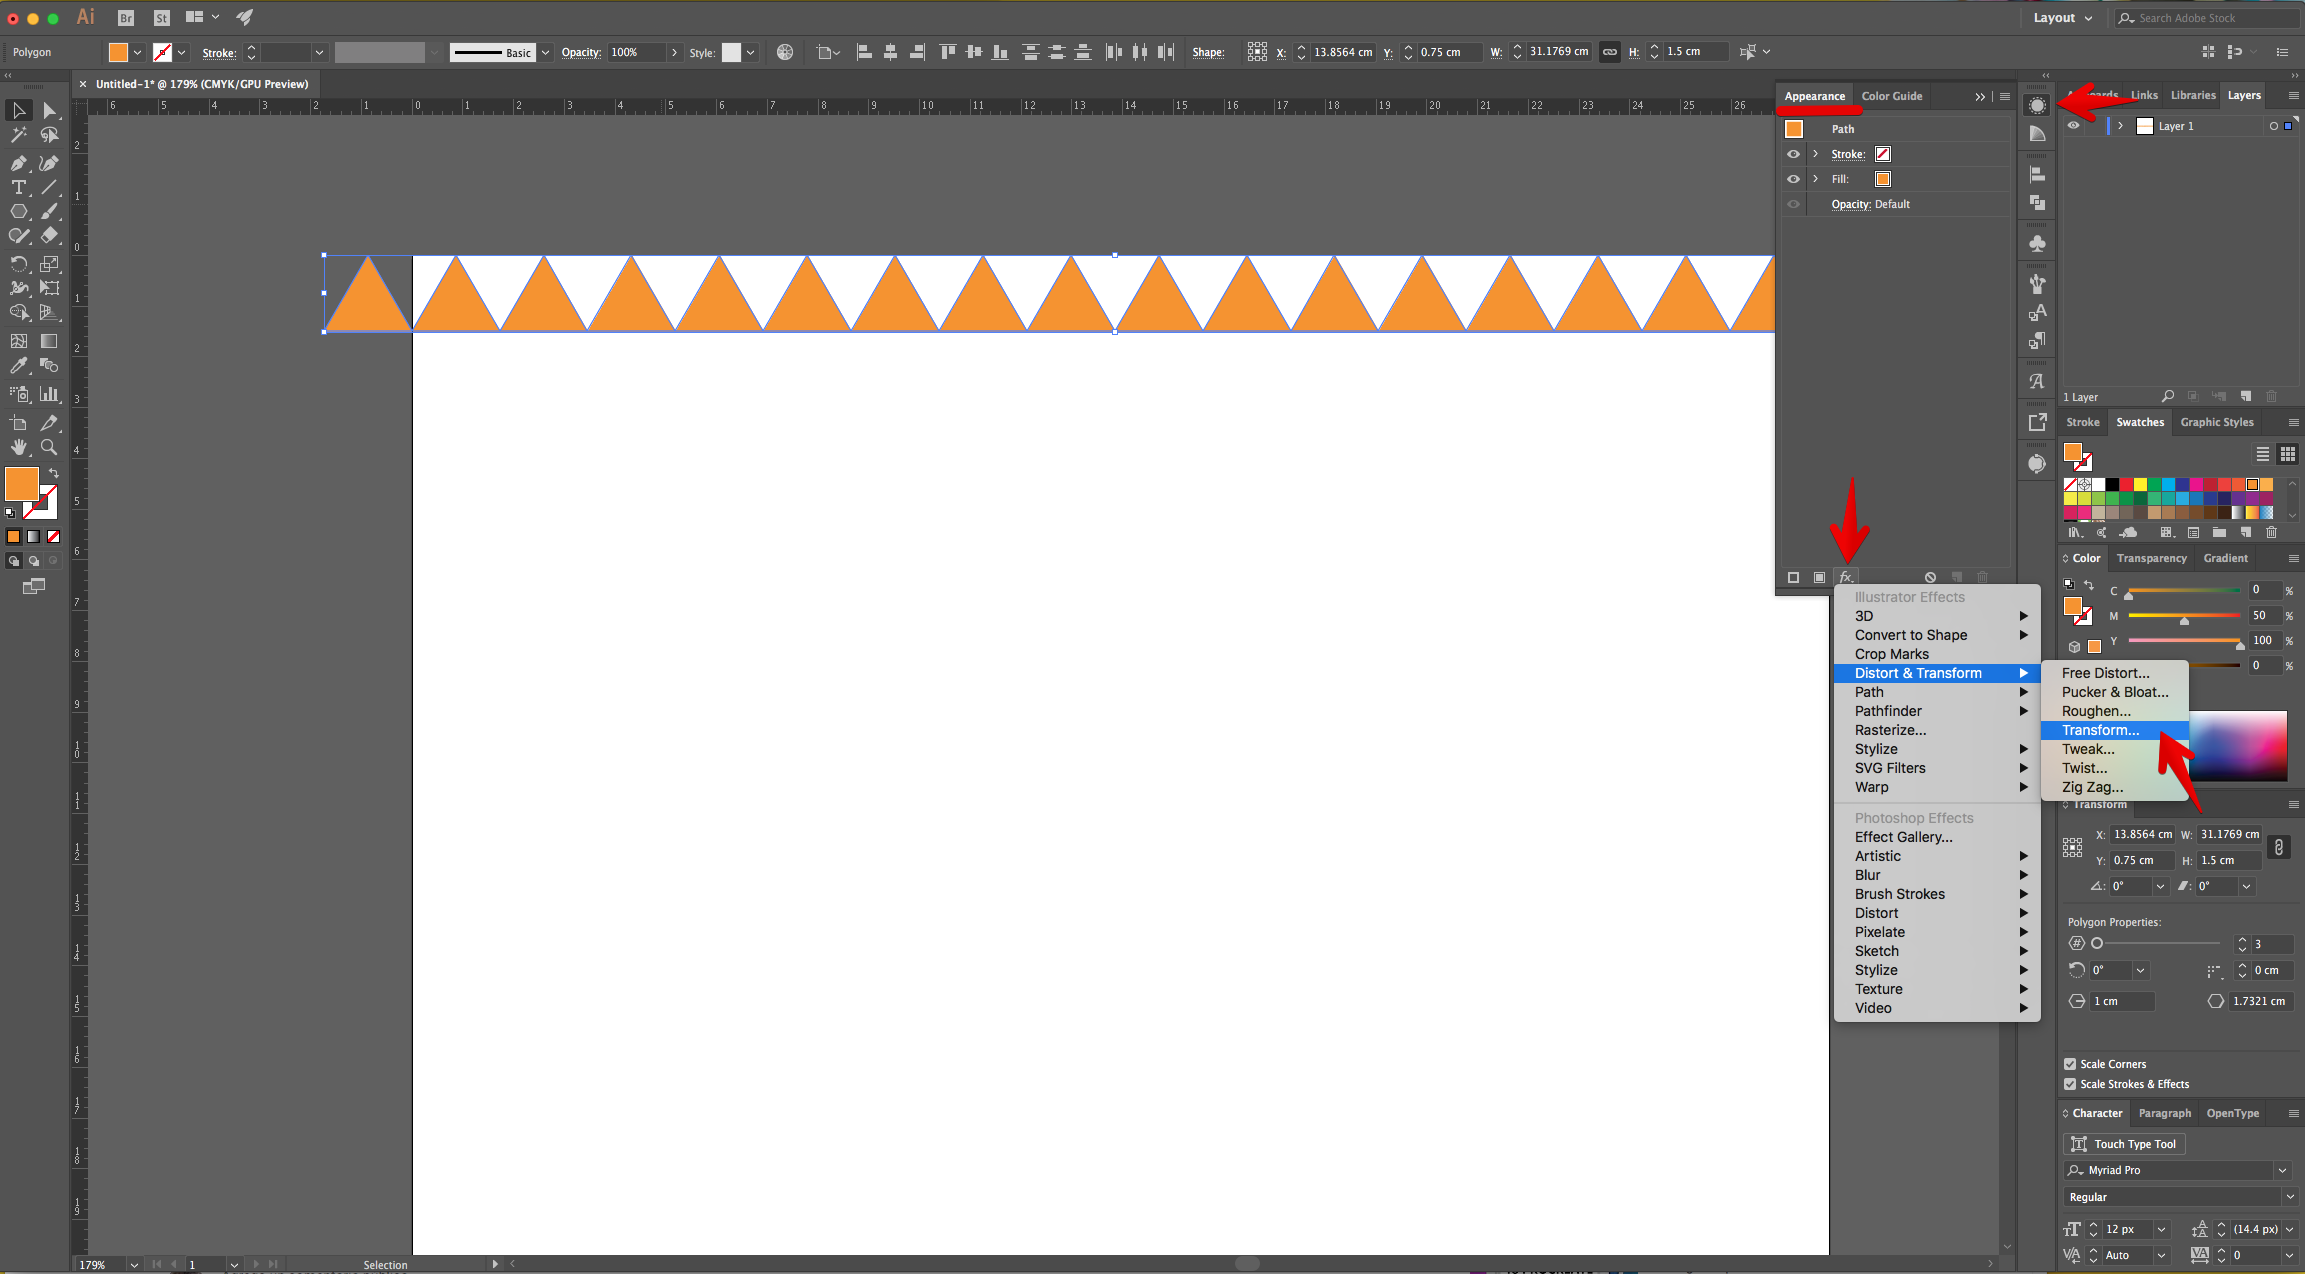
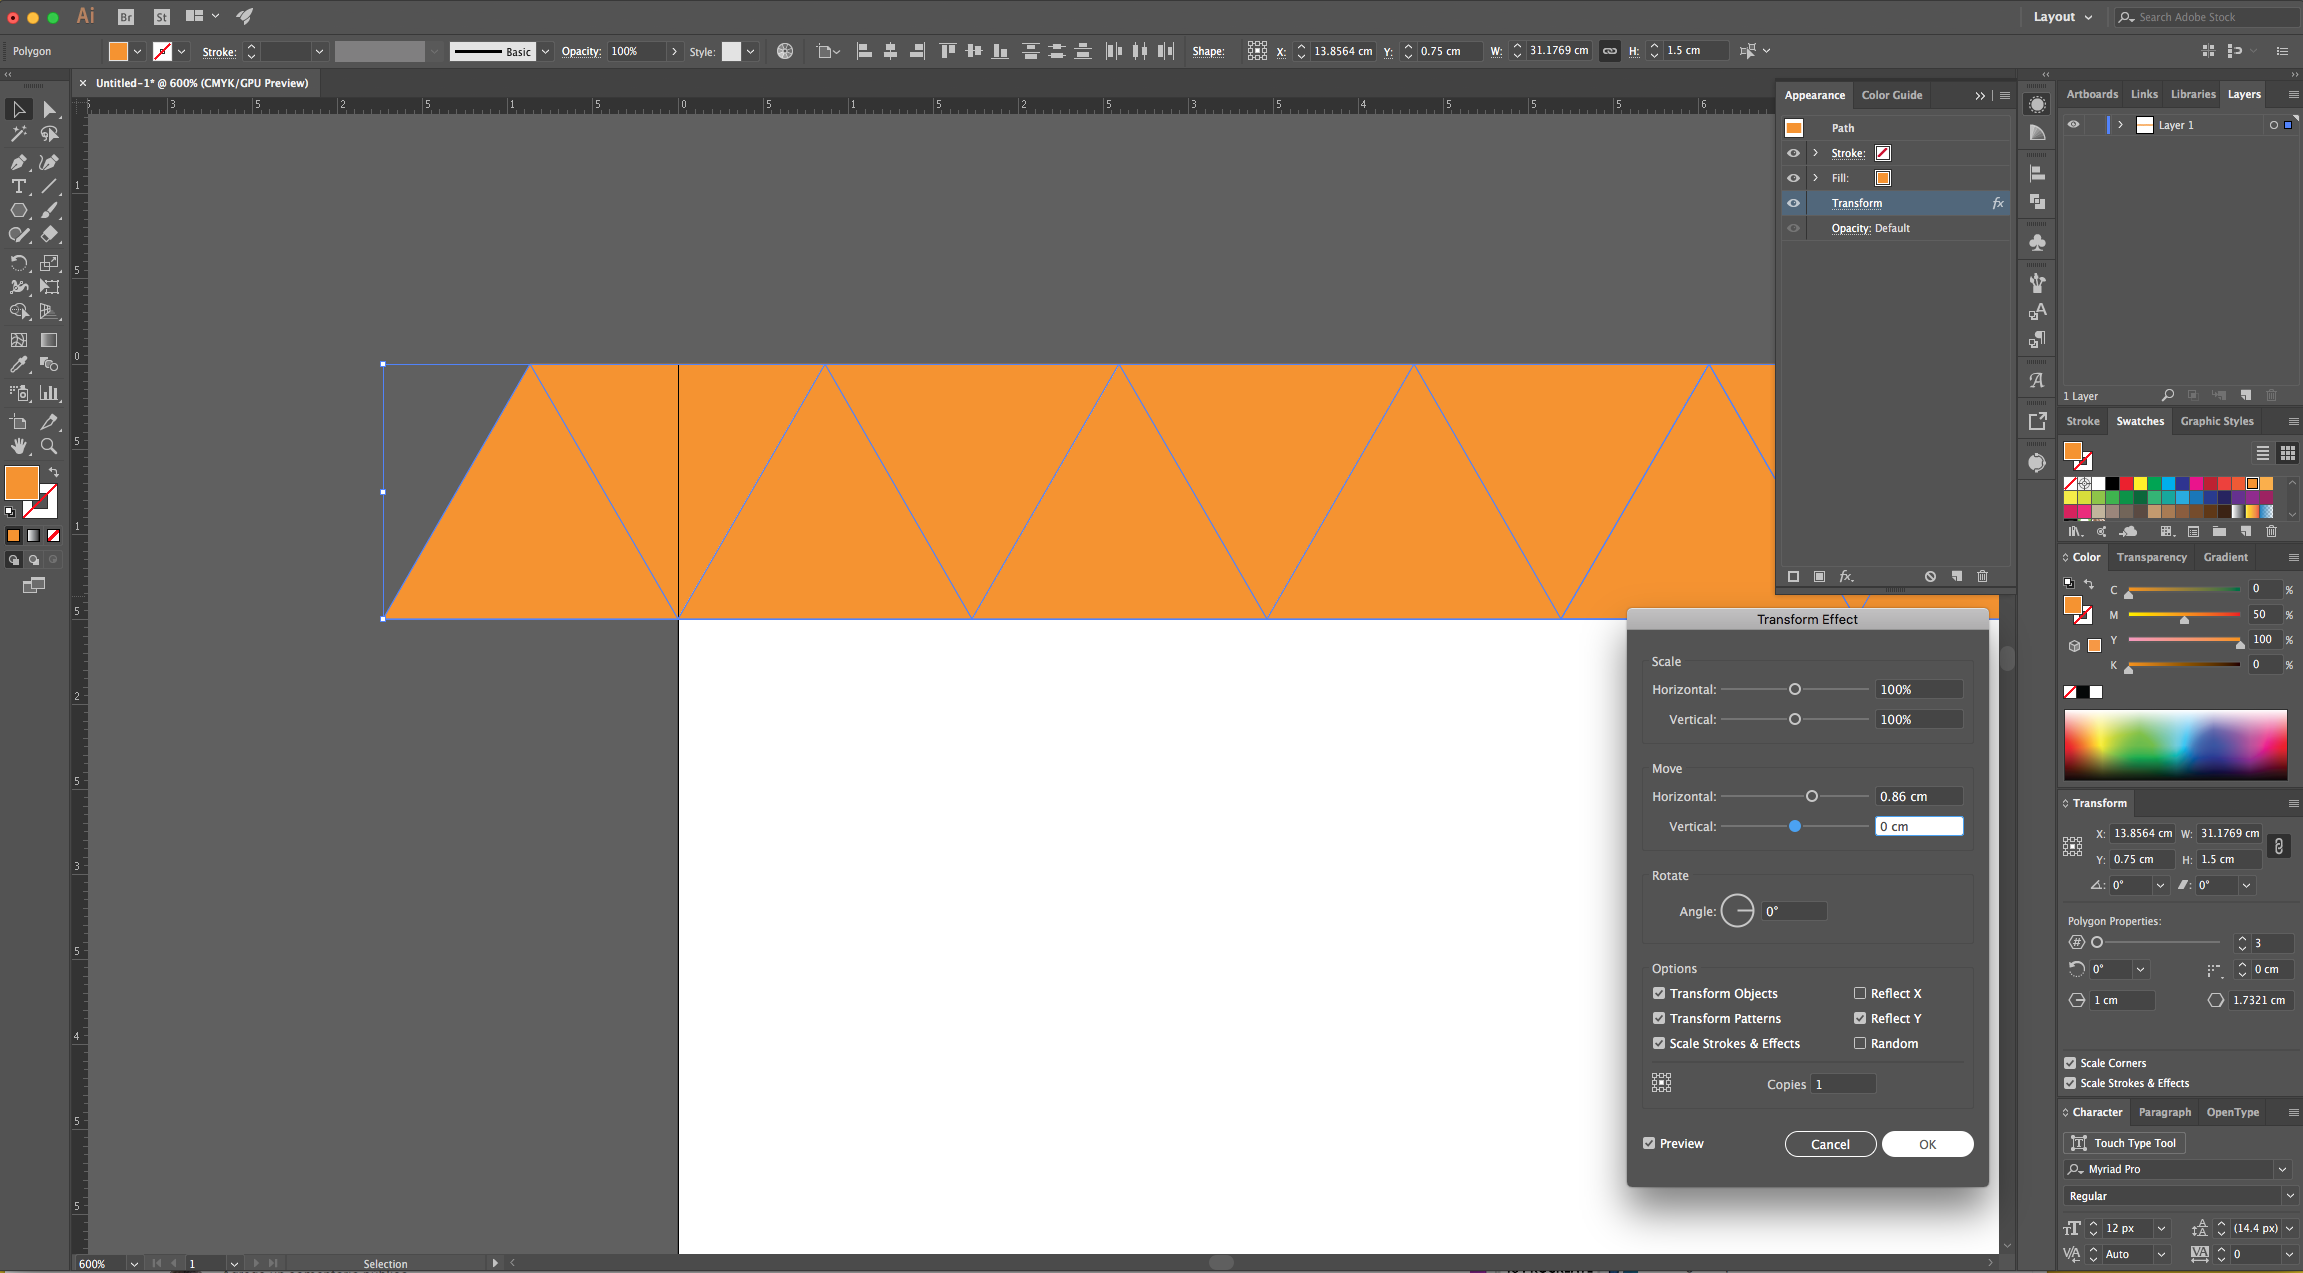
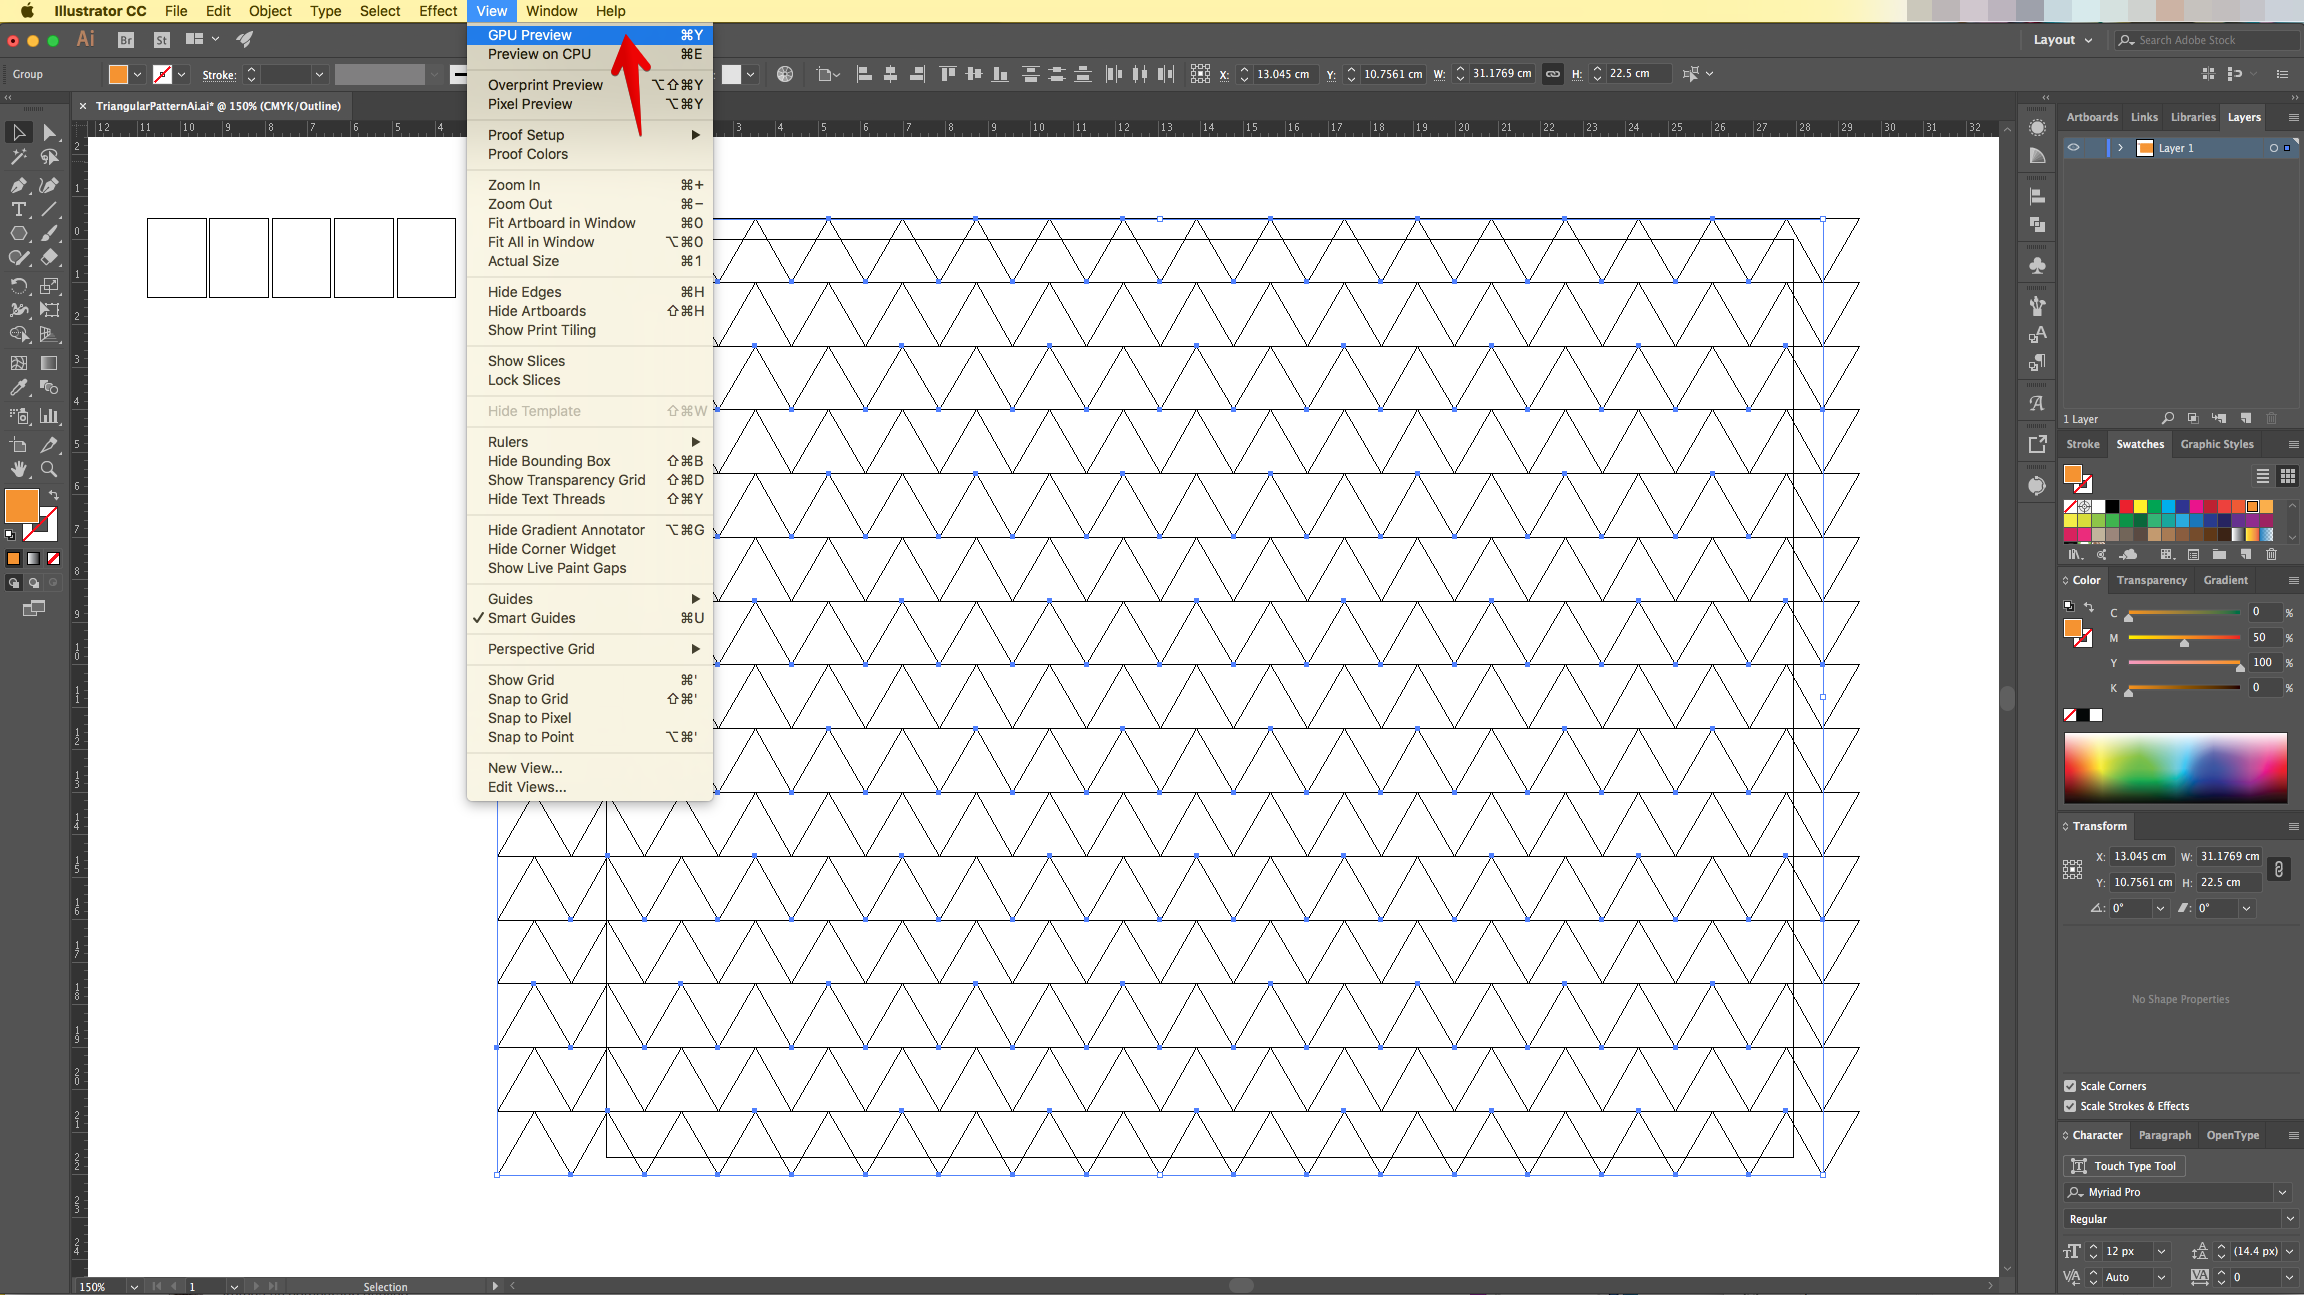
7 - With the “Triangles” still, head to the “Appearance Panel”, click on the “Effects” Menu at the bottom and navigate to Distort & Transform > Transform. Change the “Horizontal Move” value so the resulting “Row” fits perfectly between the space left by the original one. Check the “Reflect Y” box and make 1 ·Copy”.
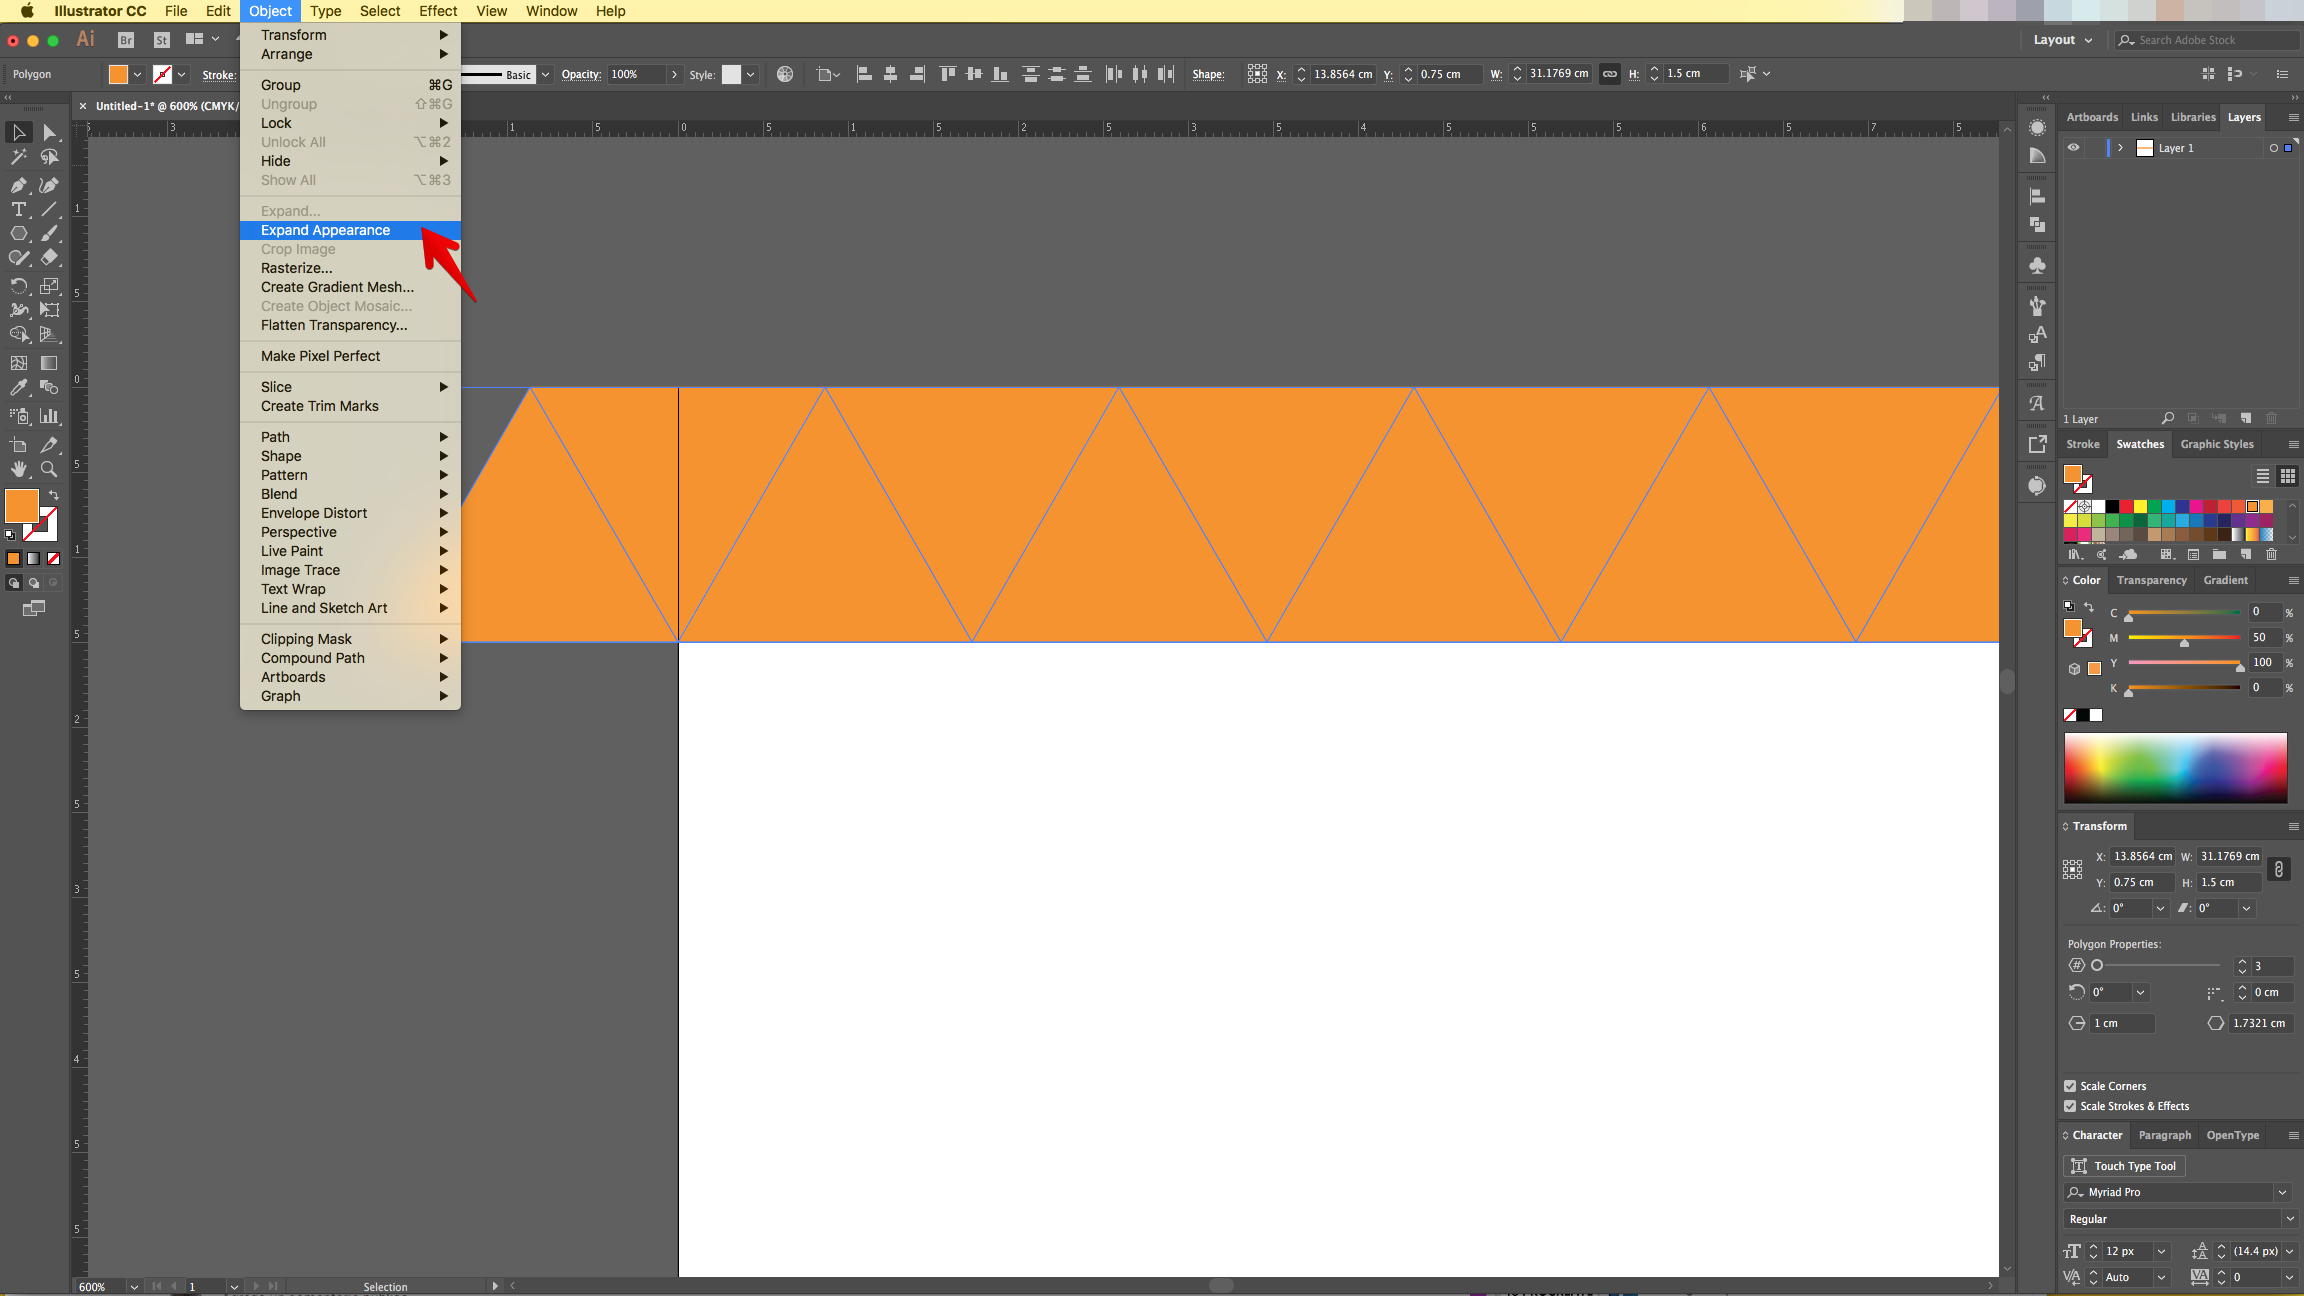
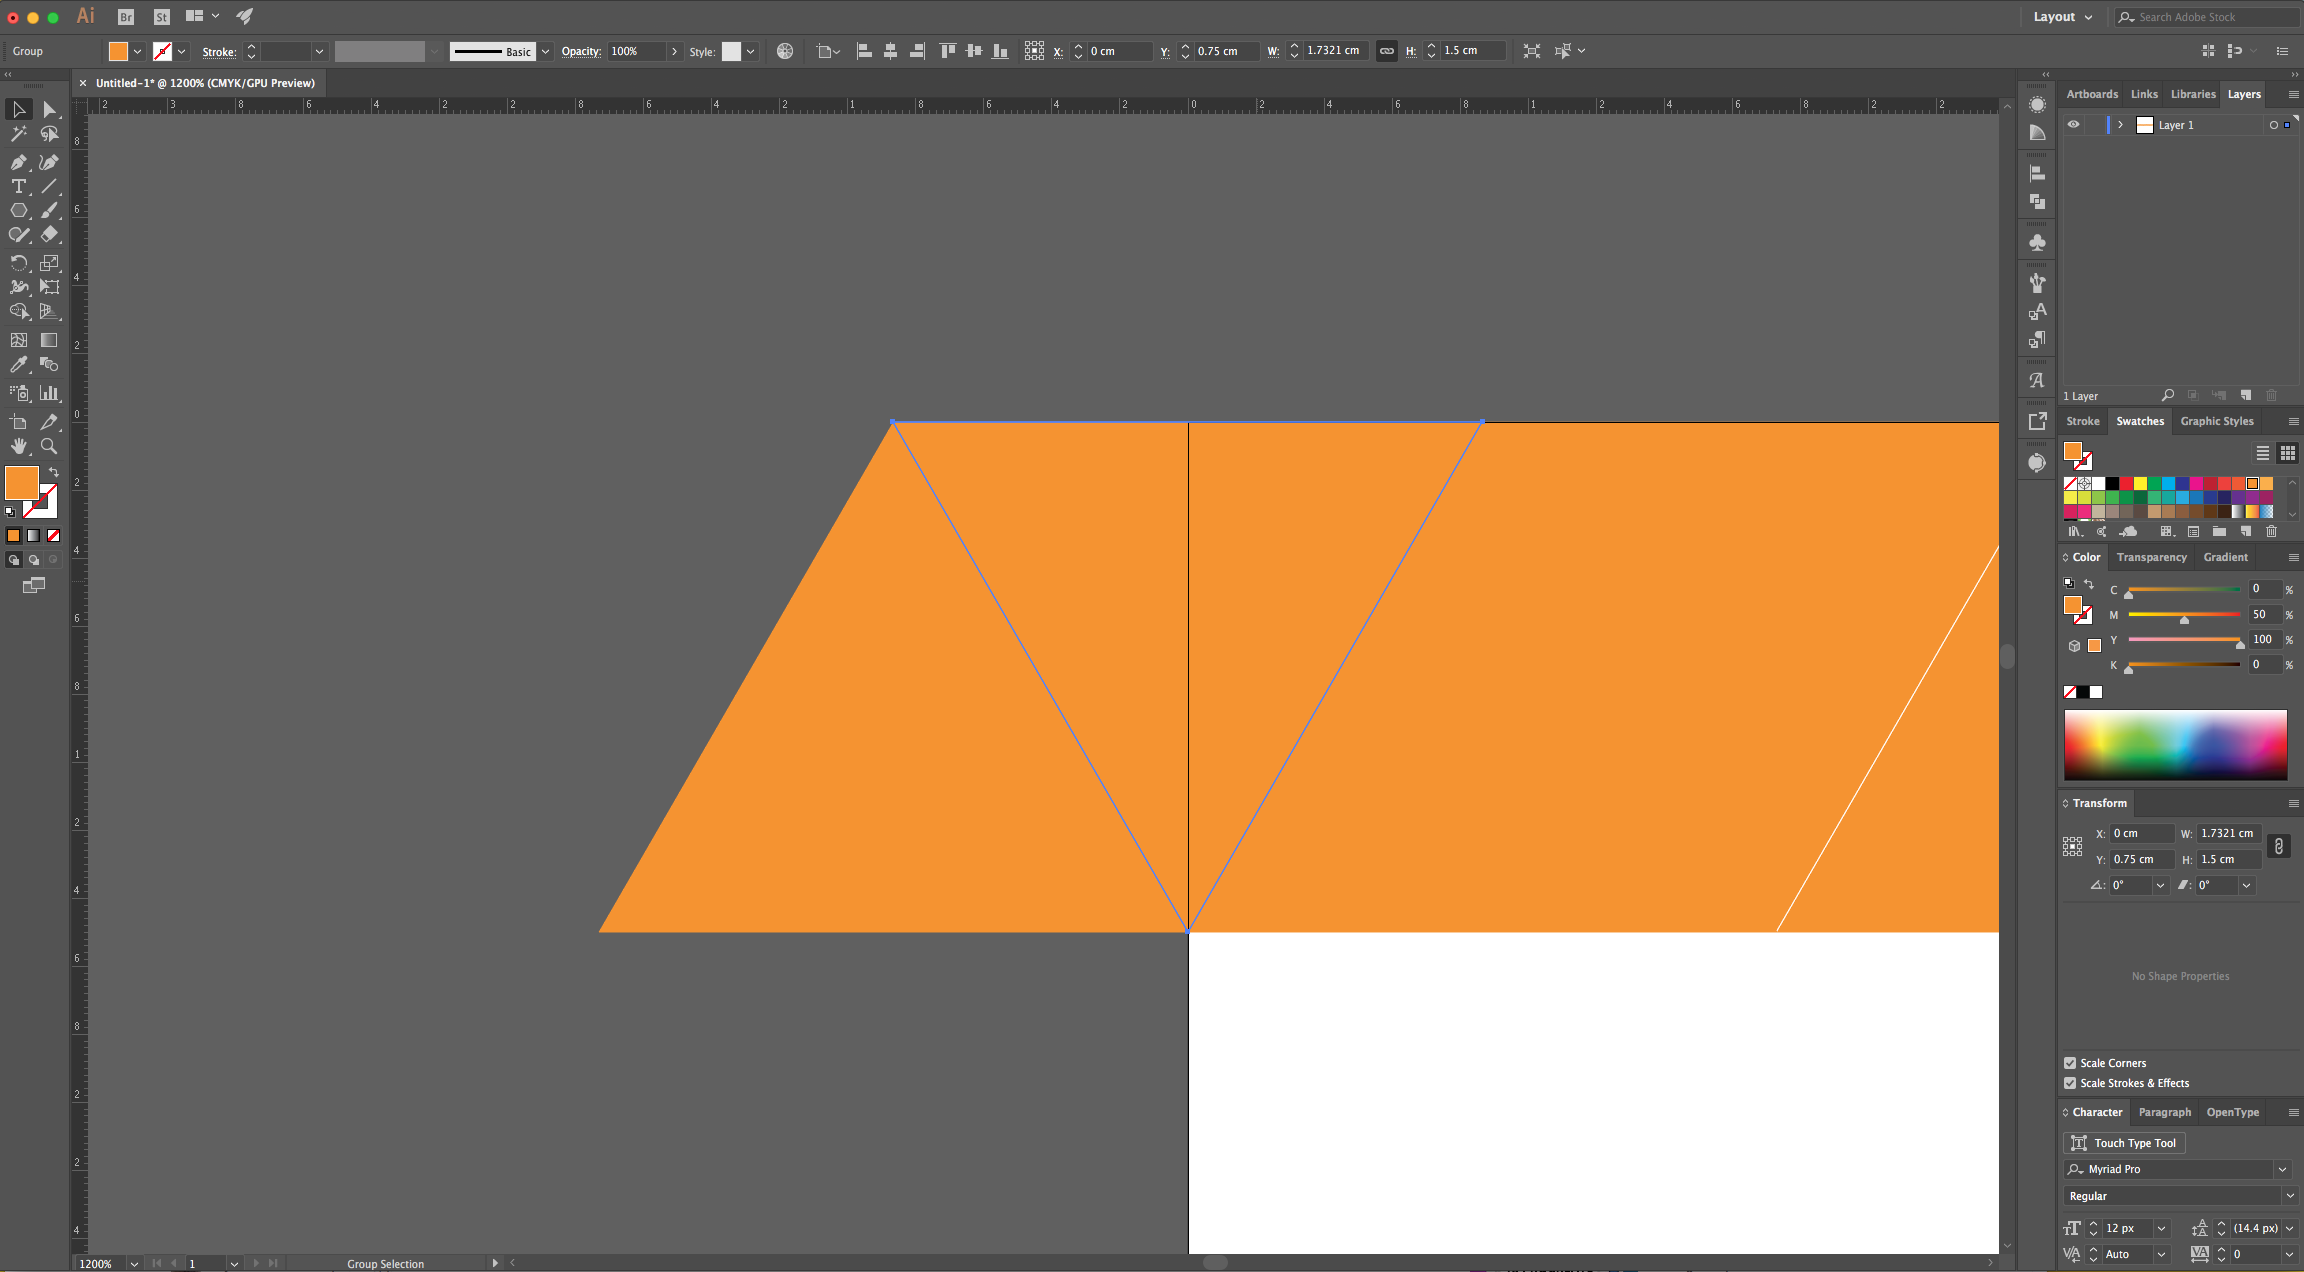
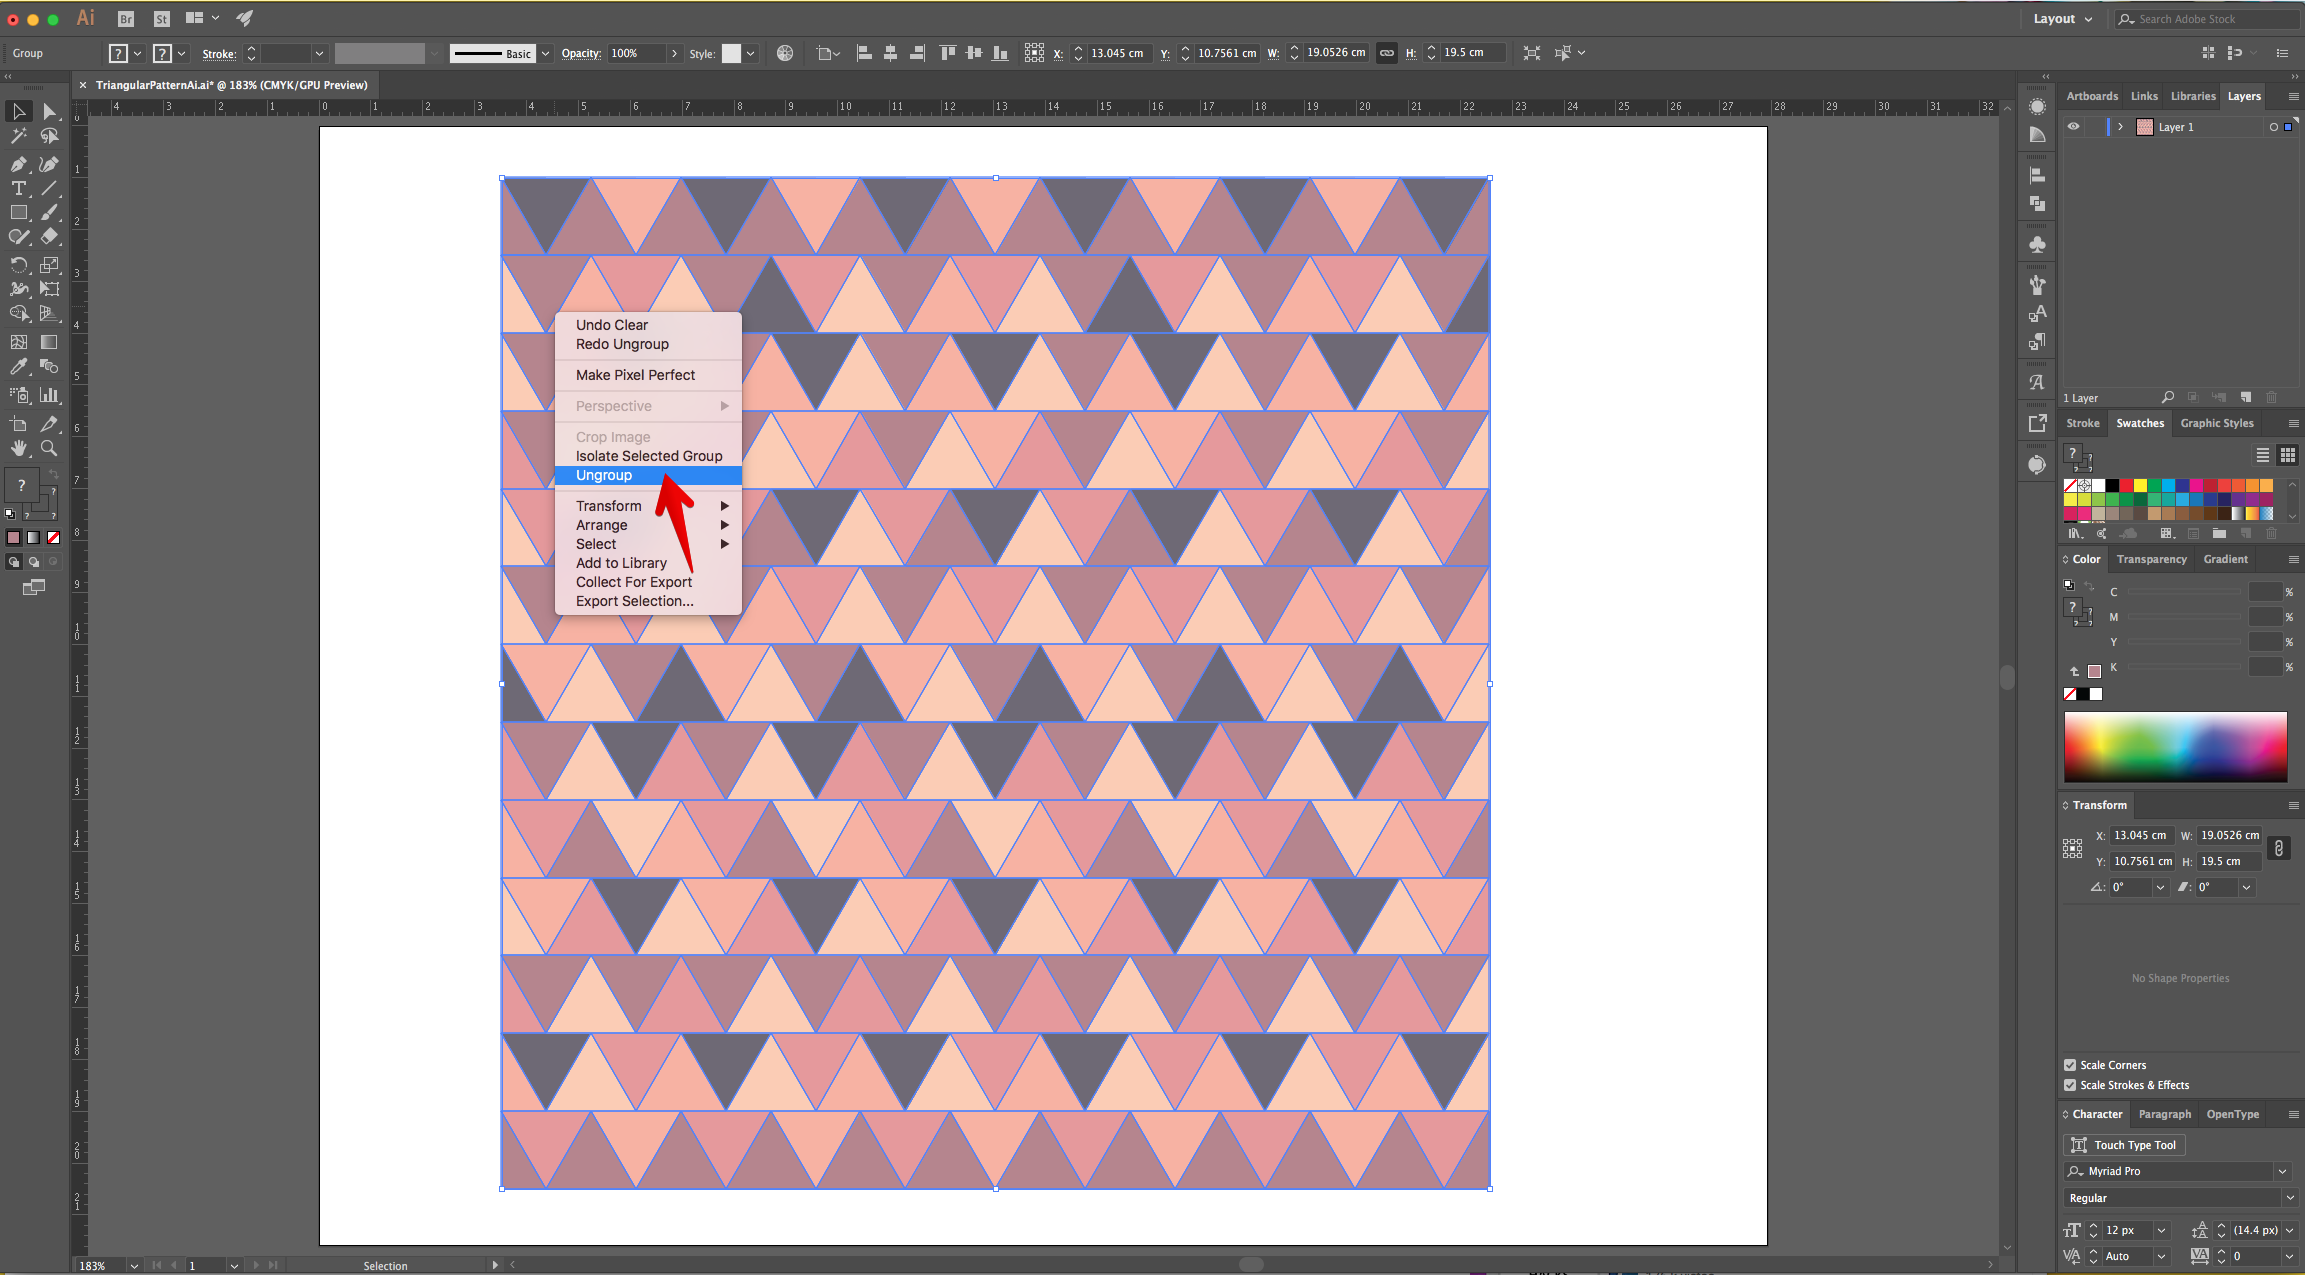
8 - Go to Object > Expand Appearance to release the “Shapes”, then right-click on top and choose “Ungroup”.

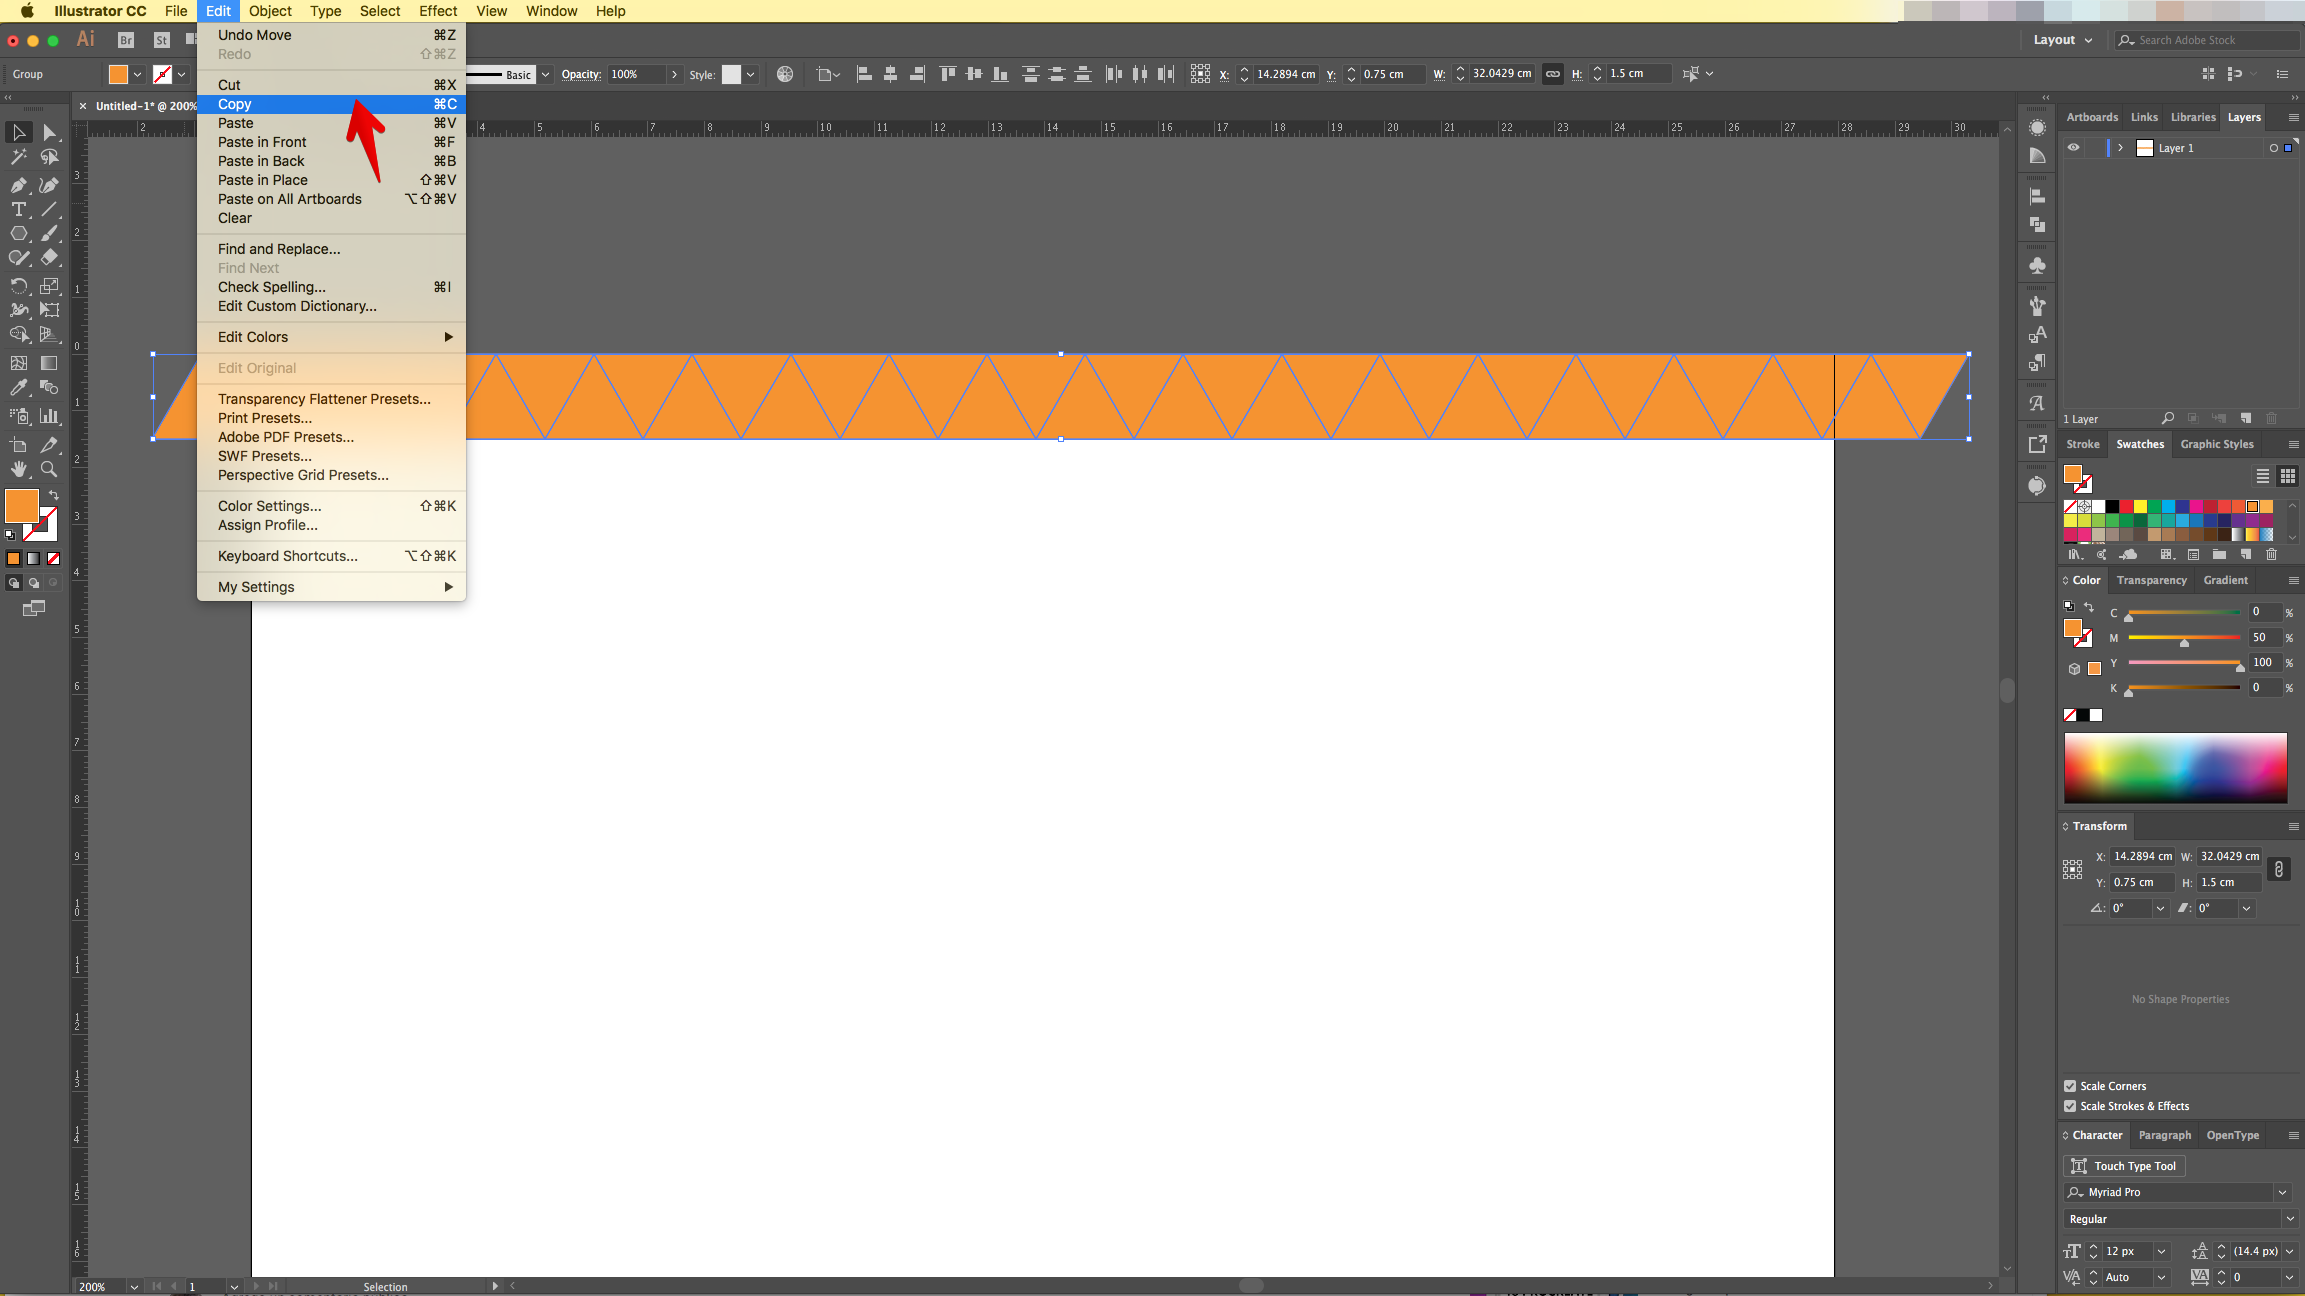
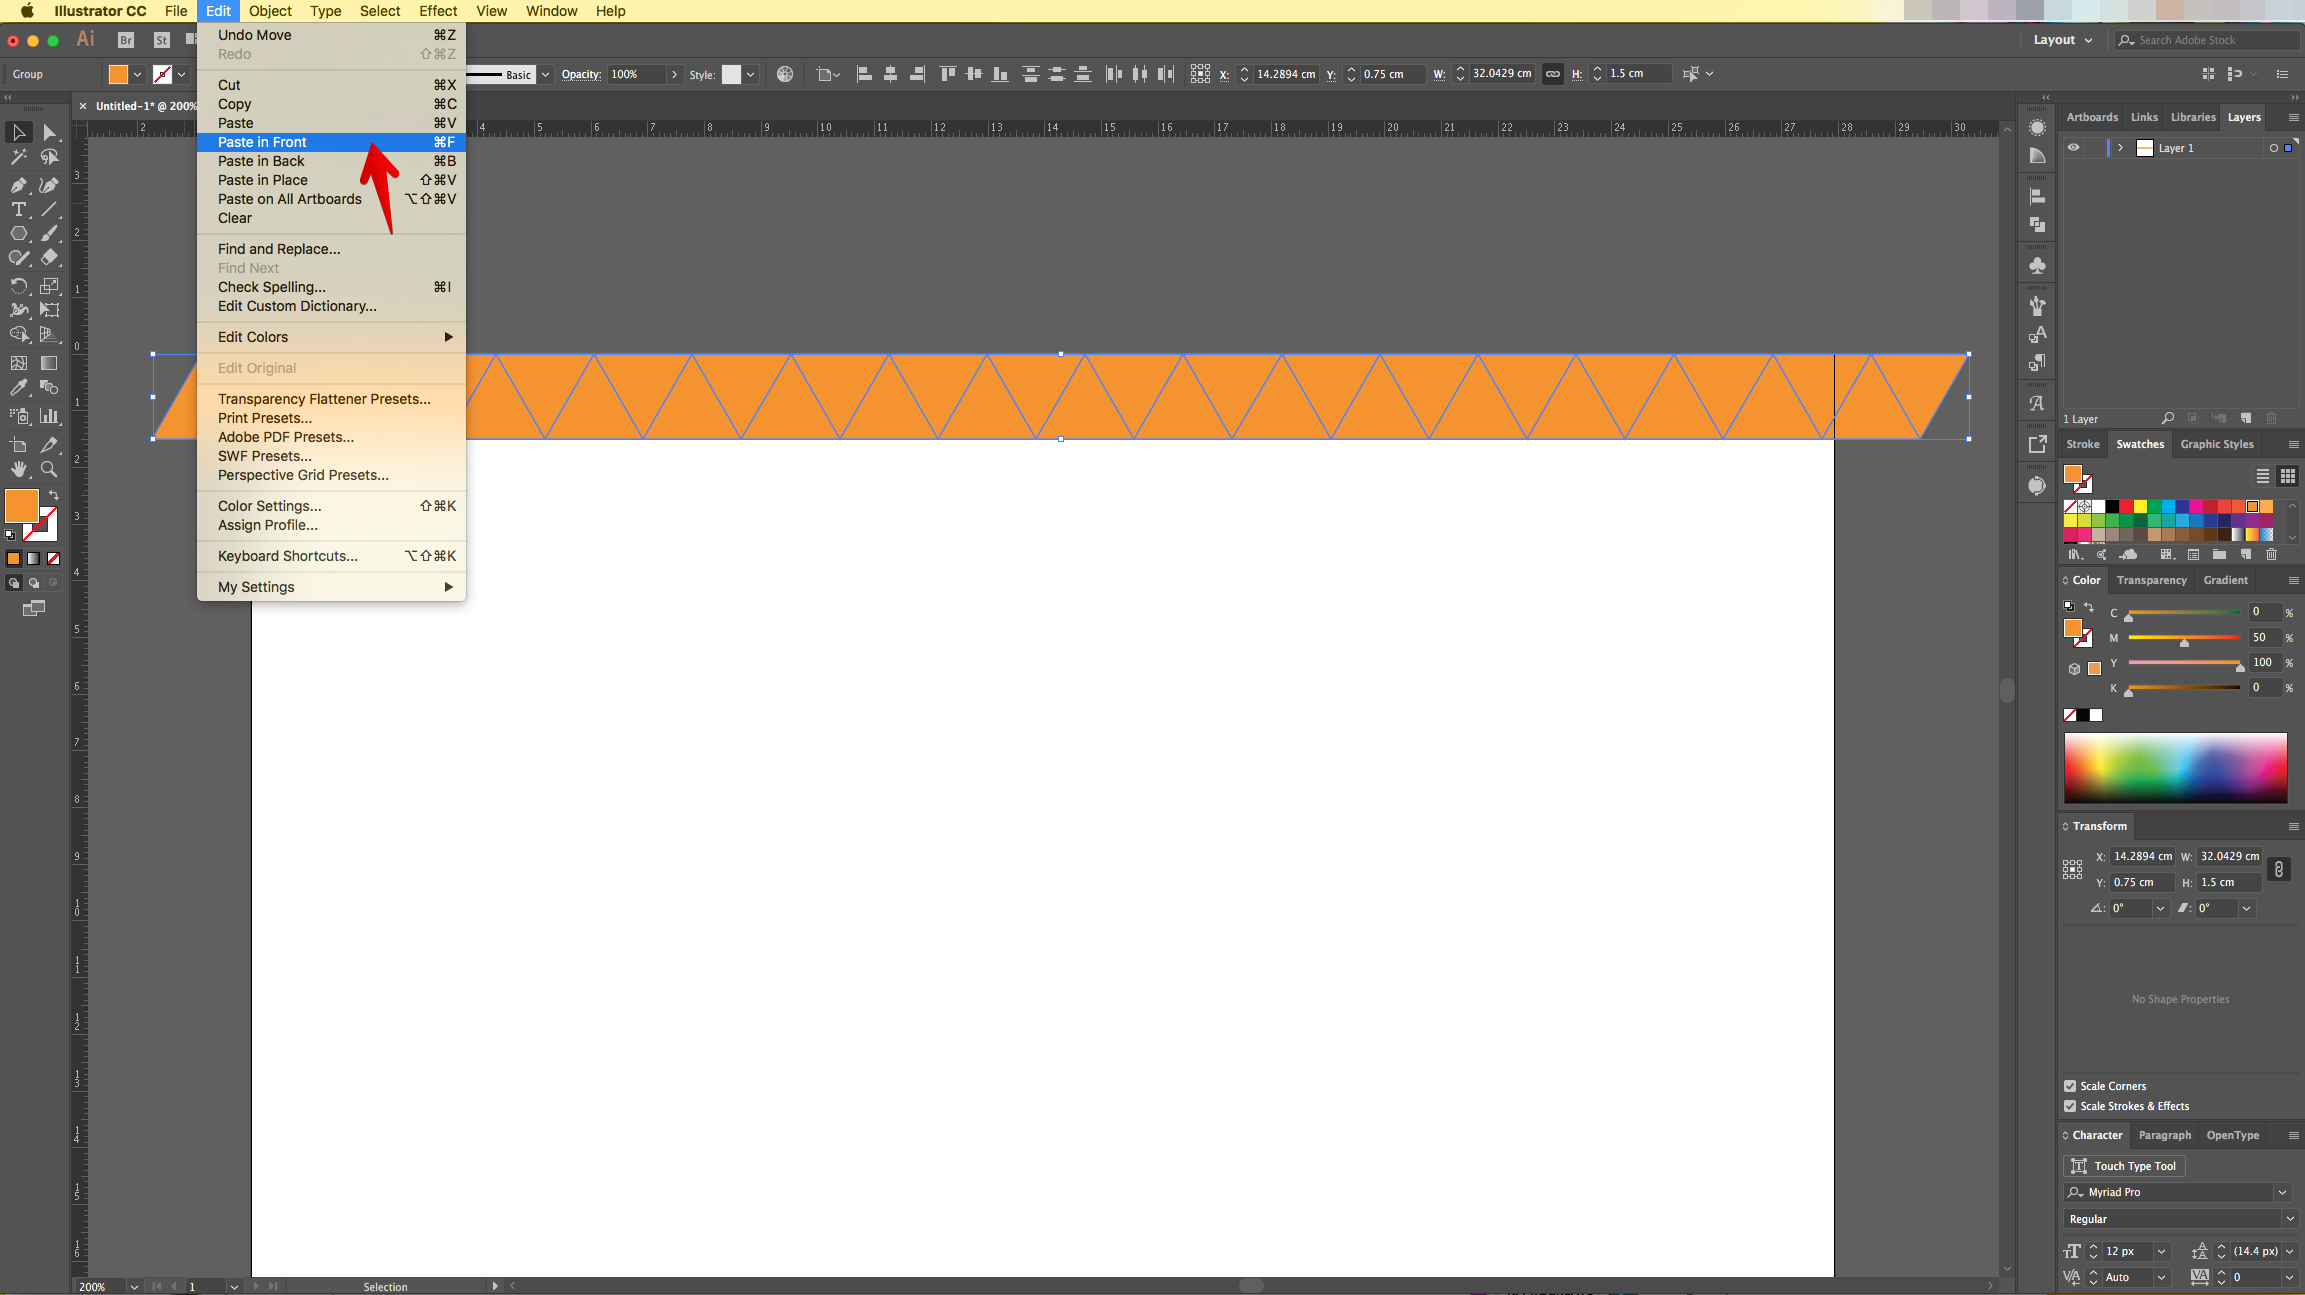
9 - Select everything, “Copy” it (Command/Control + C) and “Paste in “Front” (Command/Control + F).
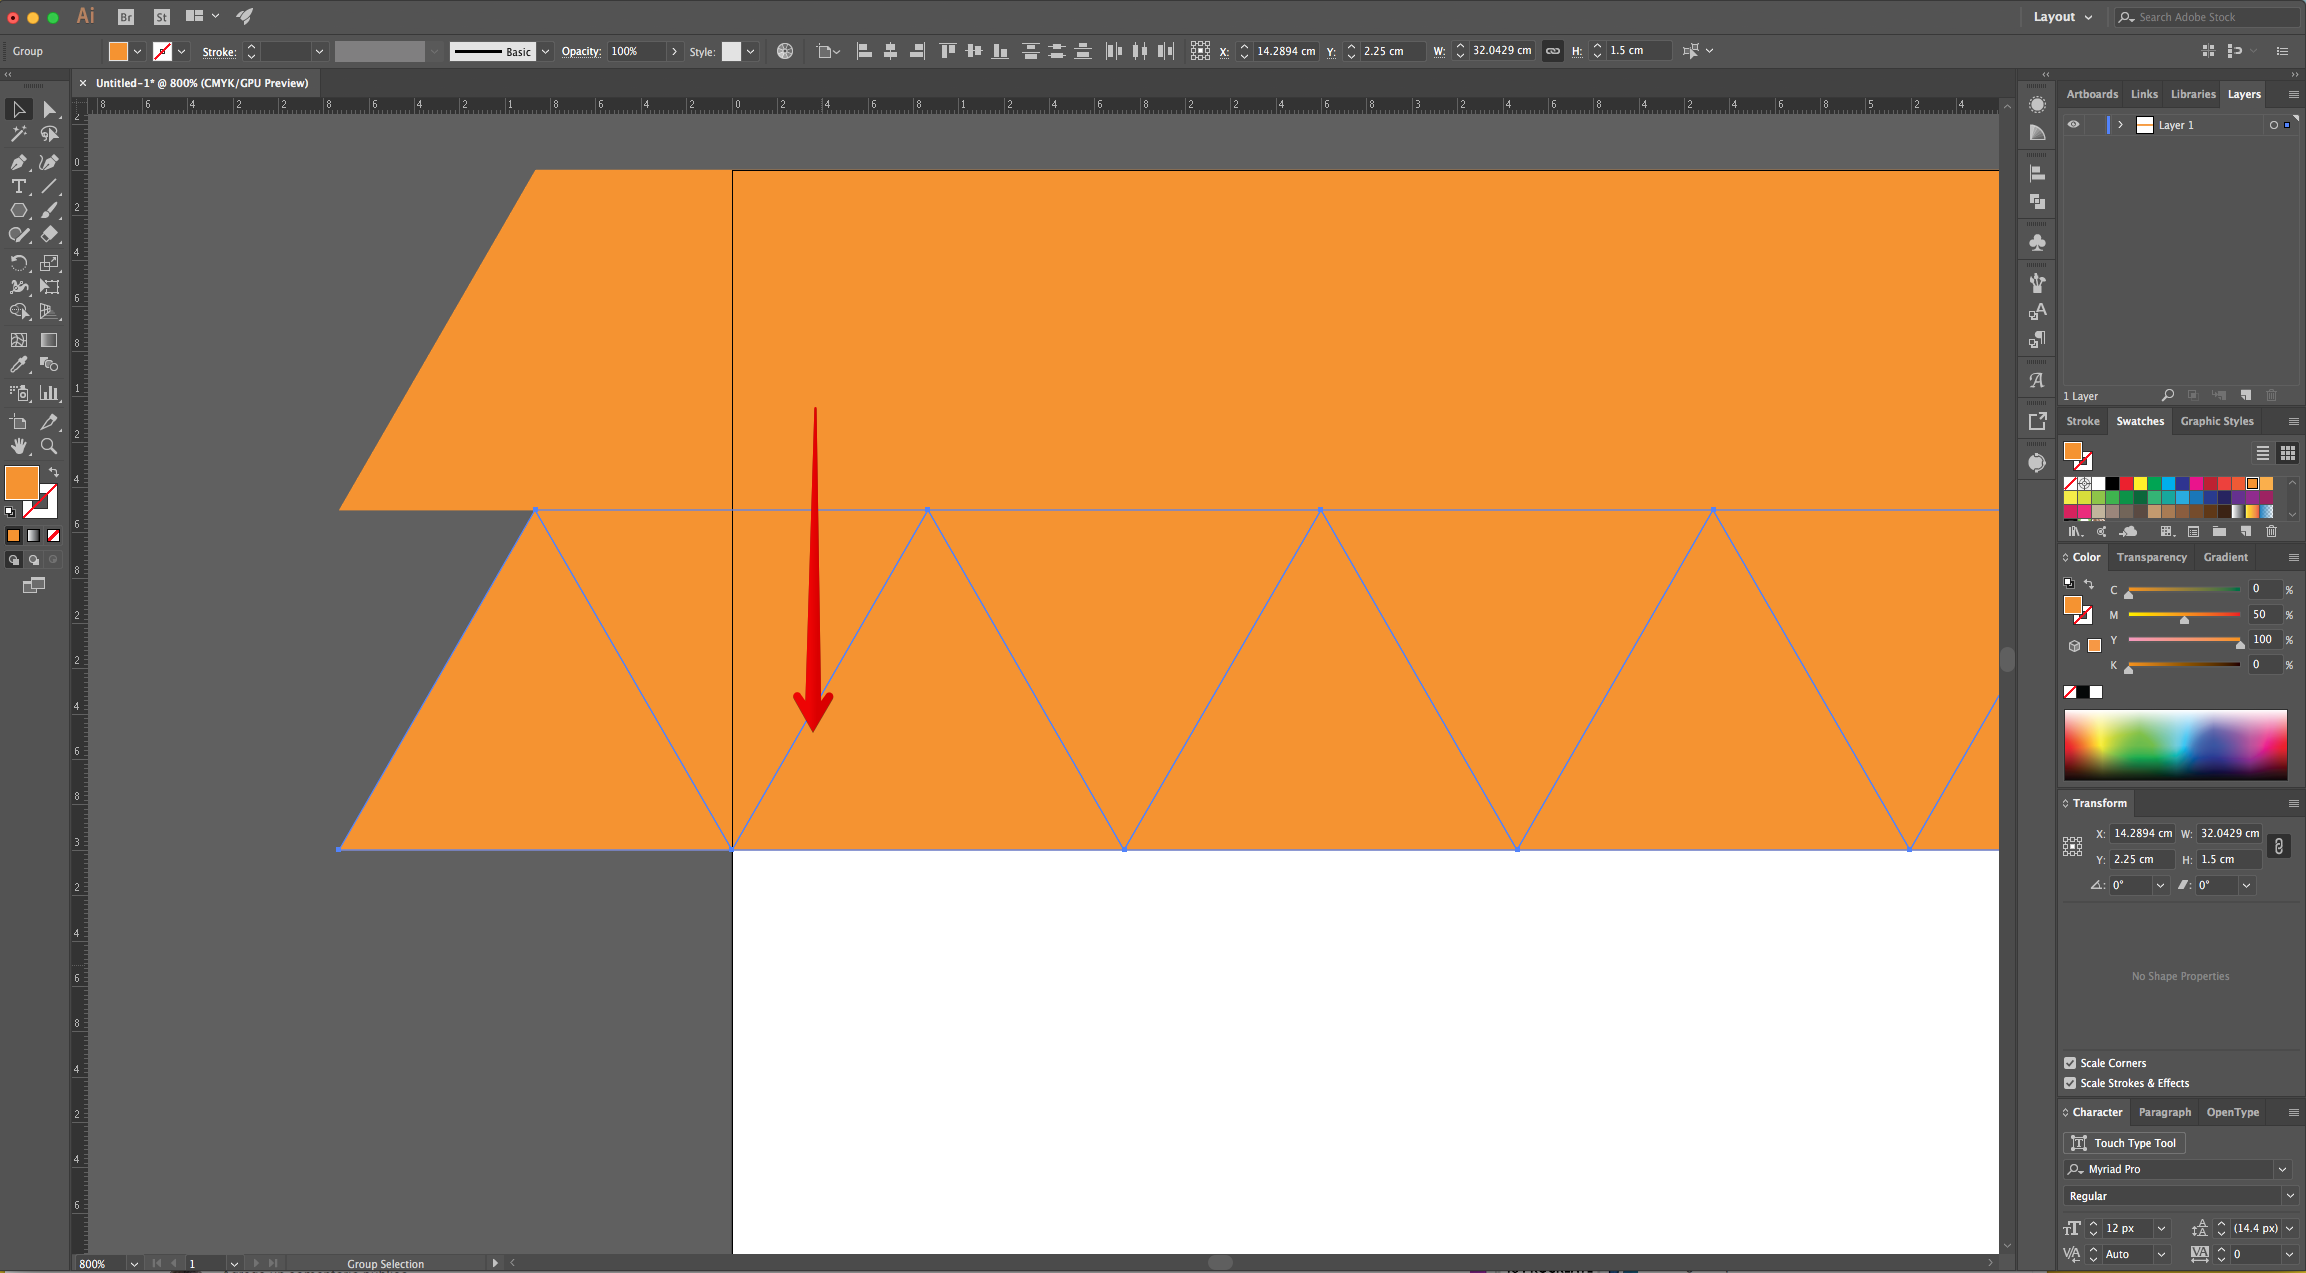
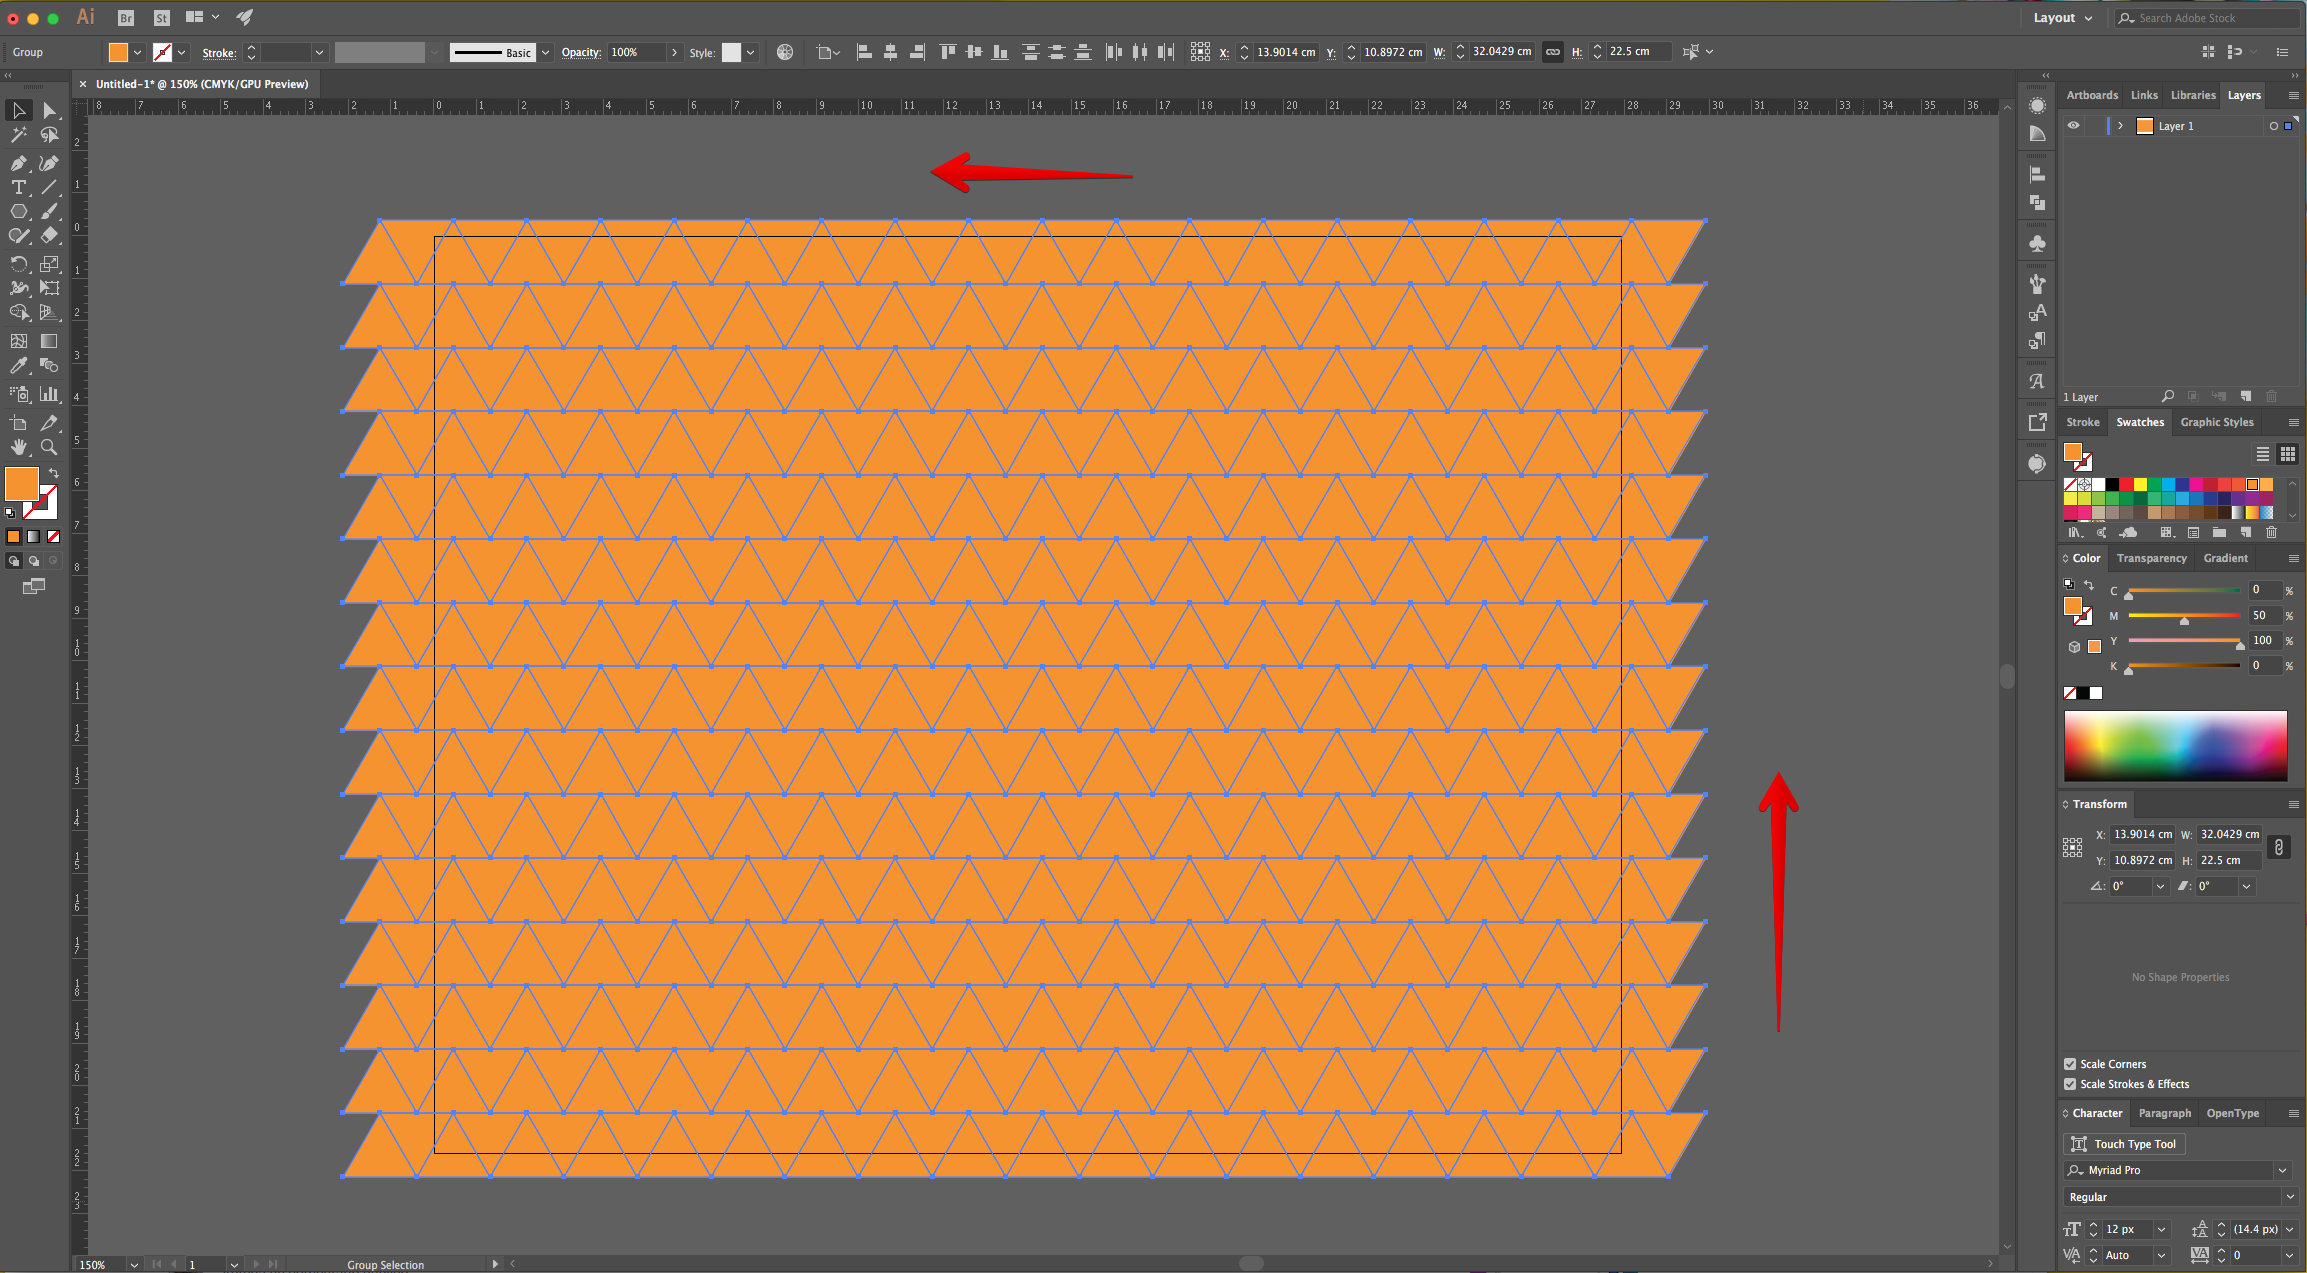
10 - Then, move the “Copy” down while holding the “Shift” key and place it exactly under the original shapes. Repeat until you get to the bottom.
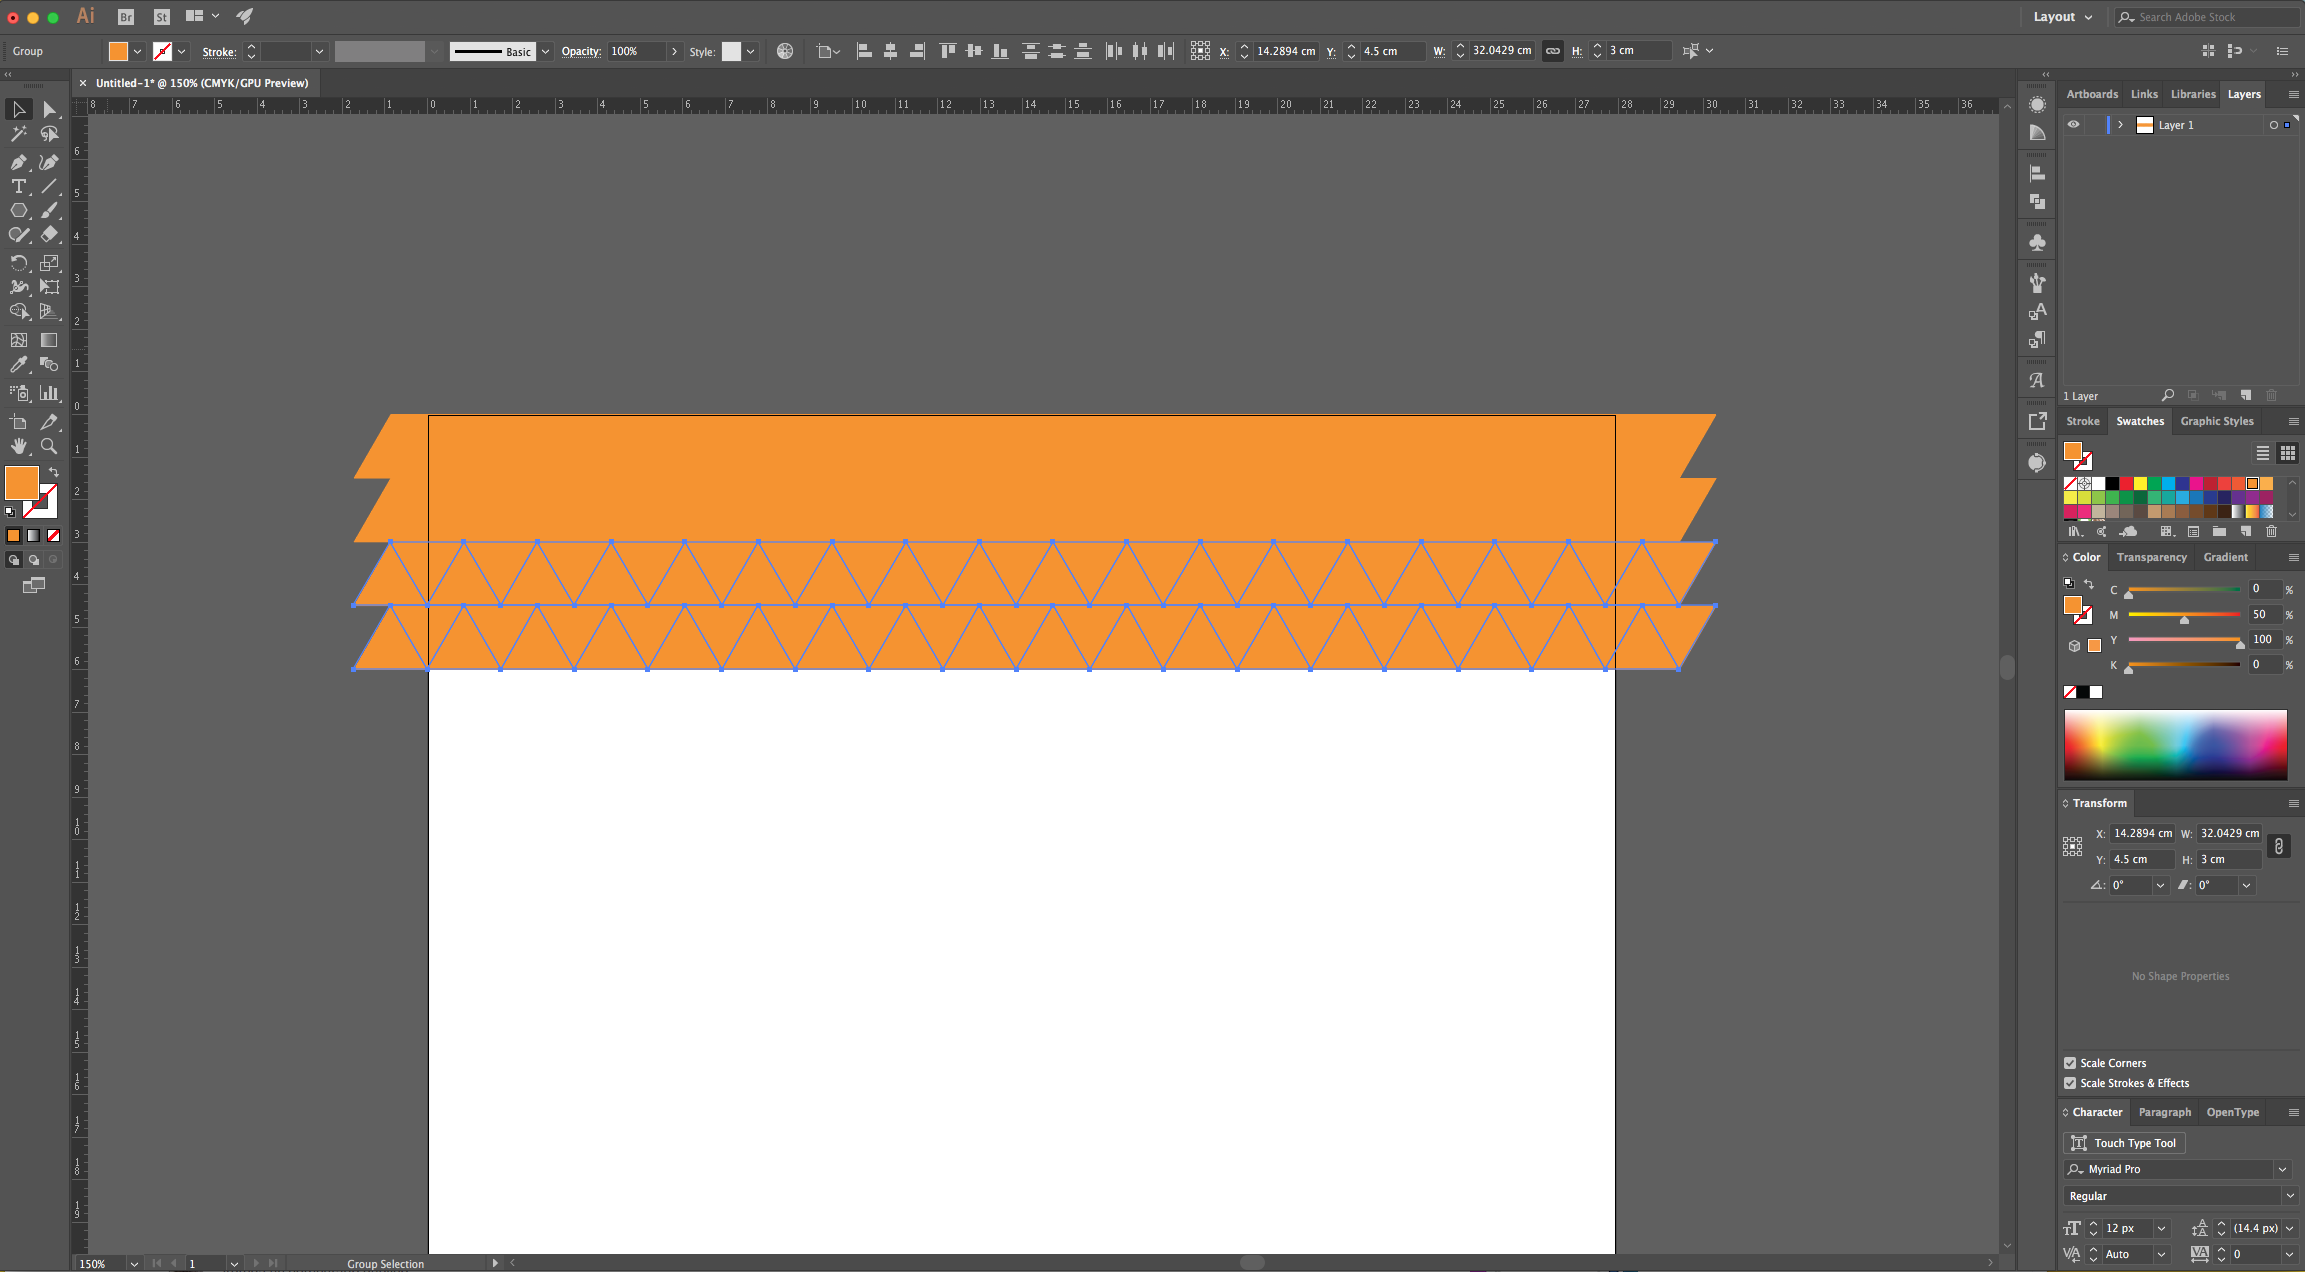

11 - Move the “Triangles” so they cover the entire “Canvas” evenly.
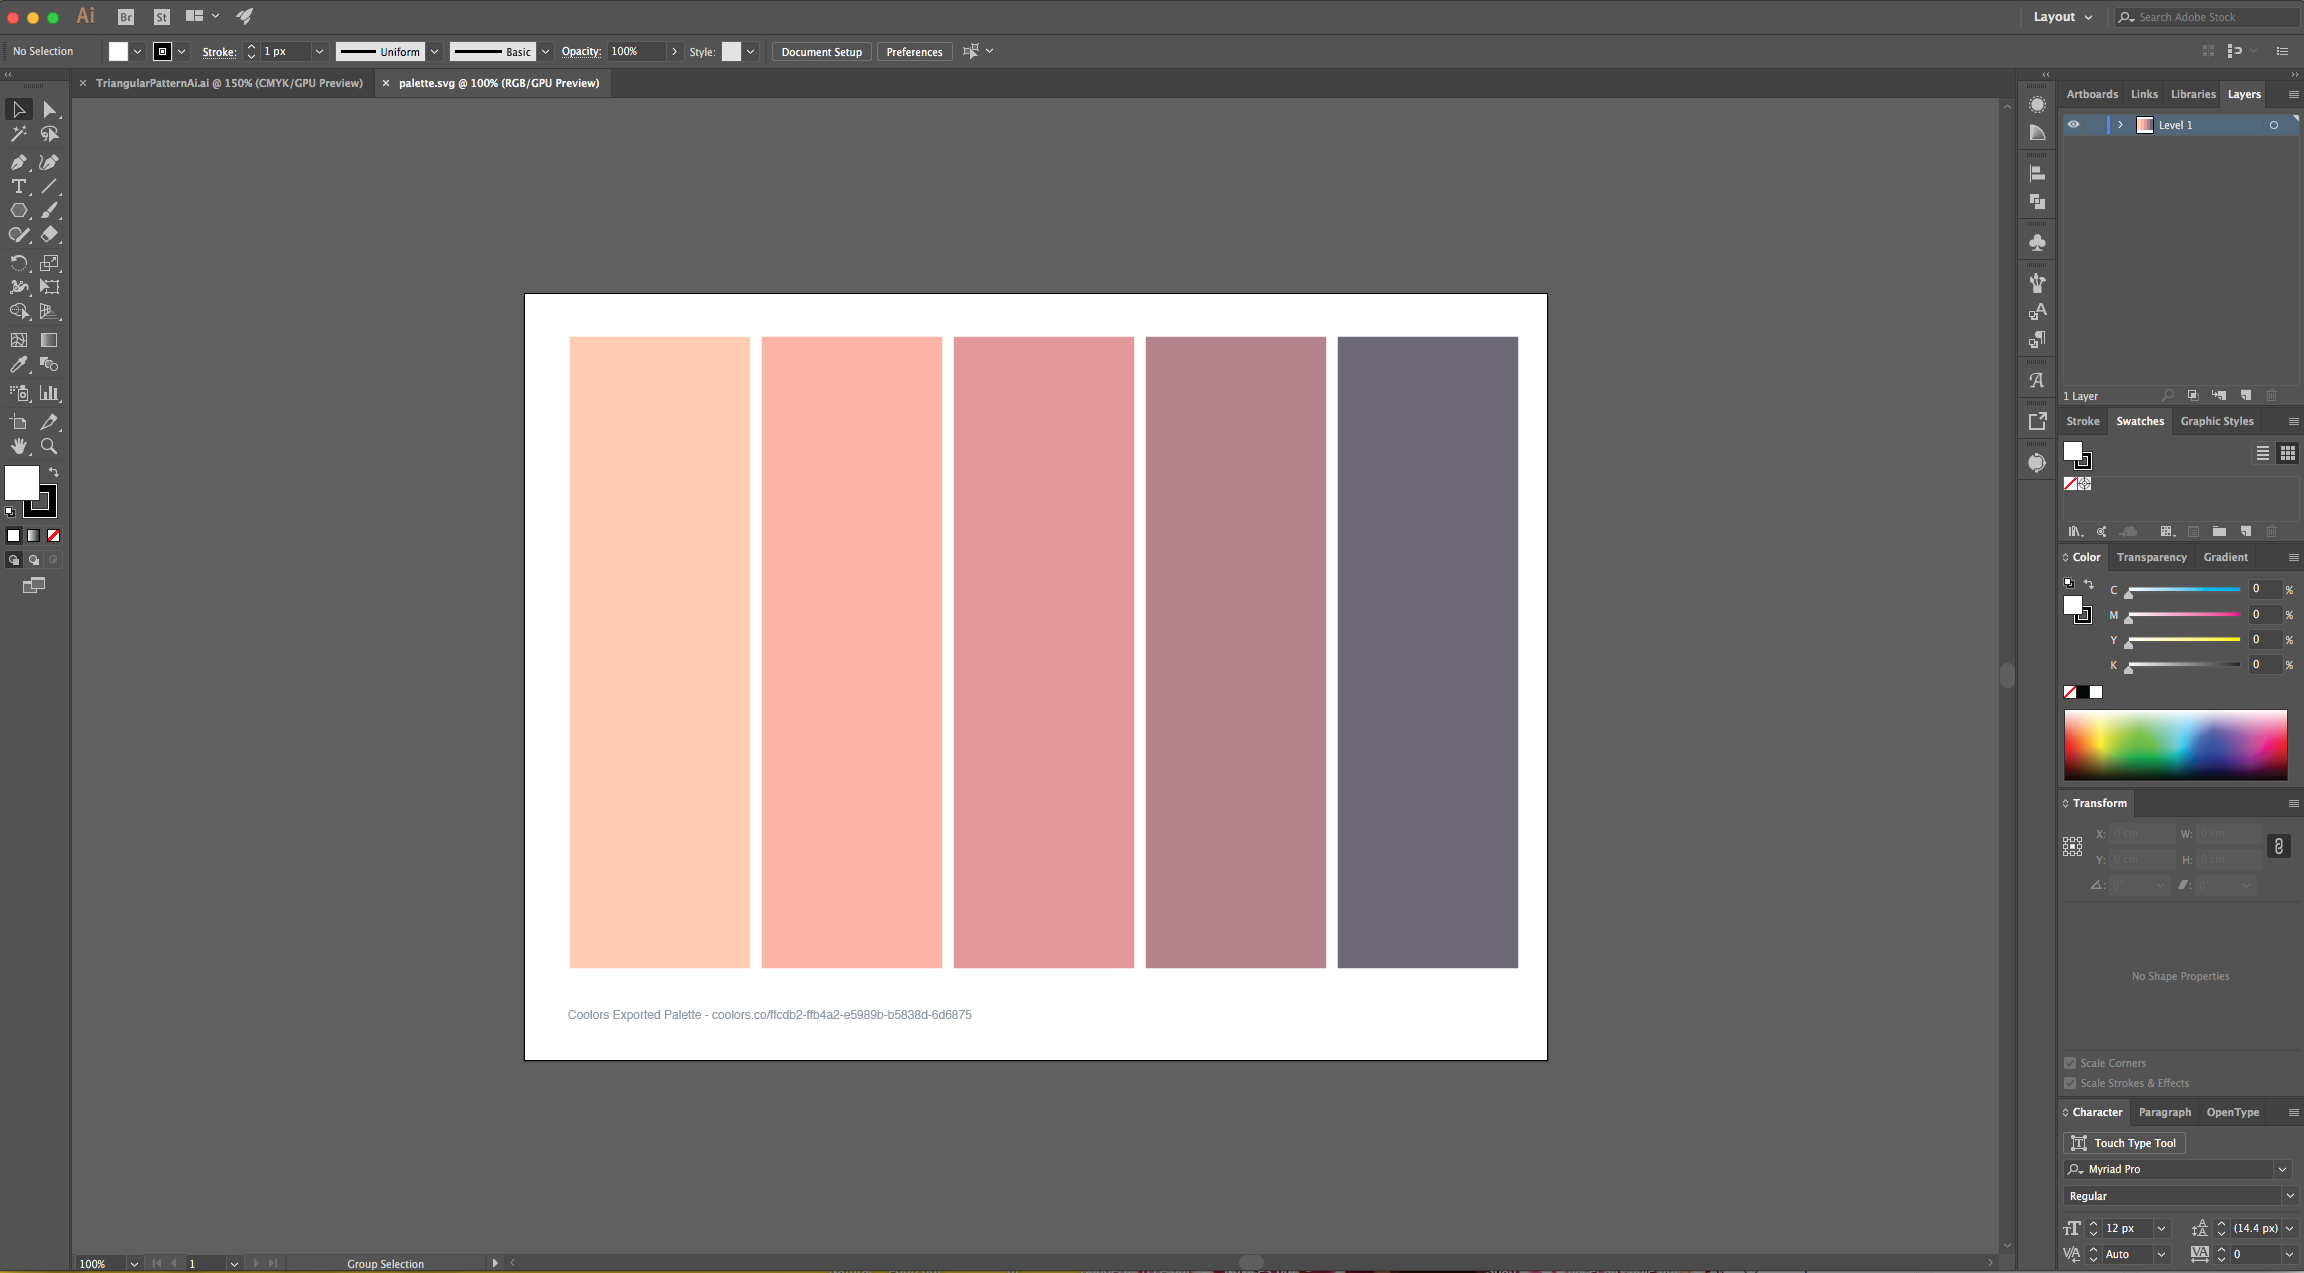
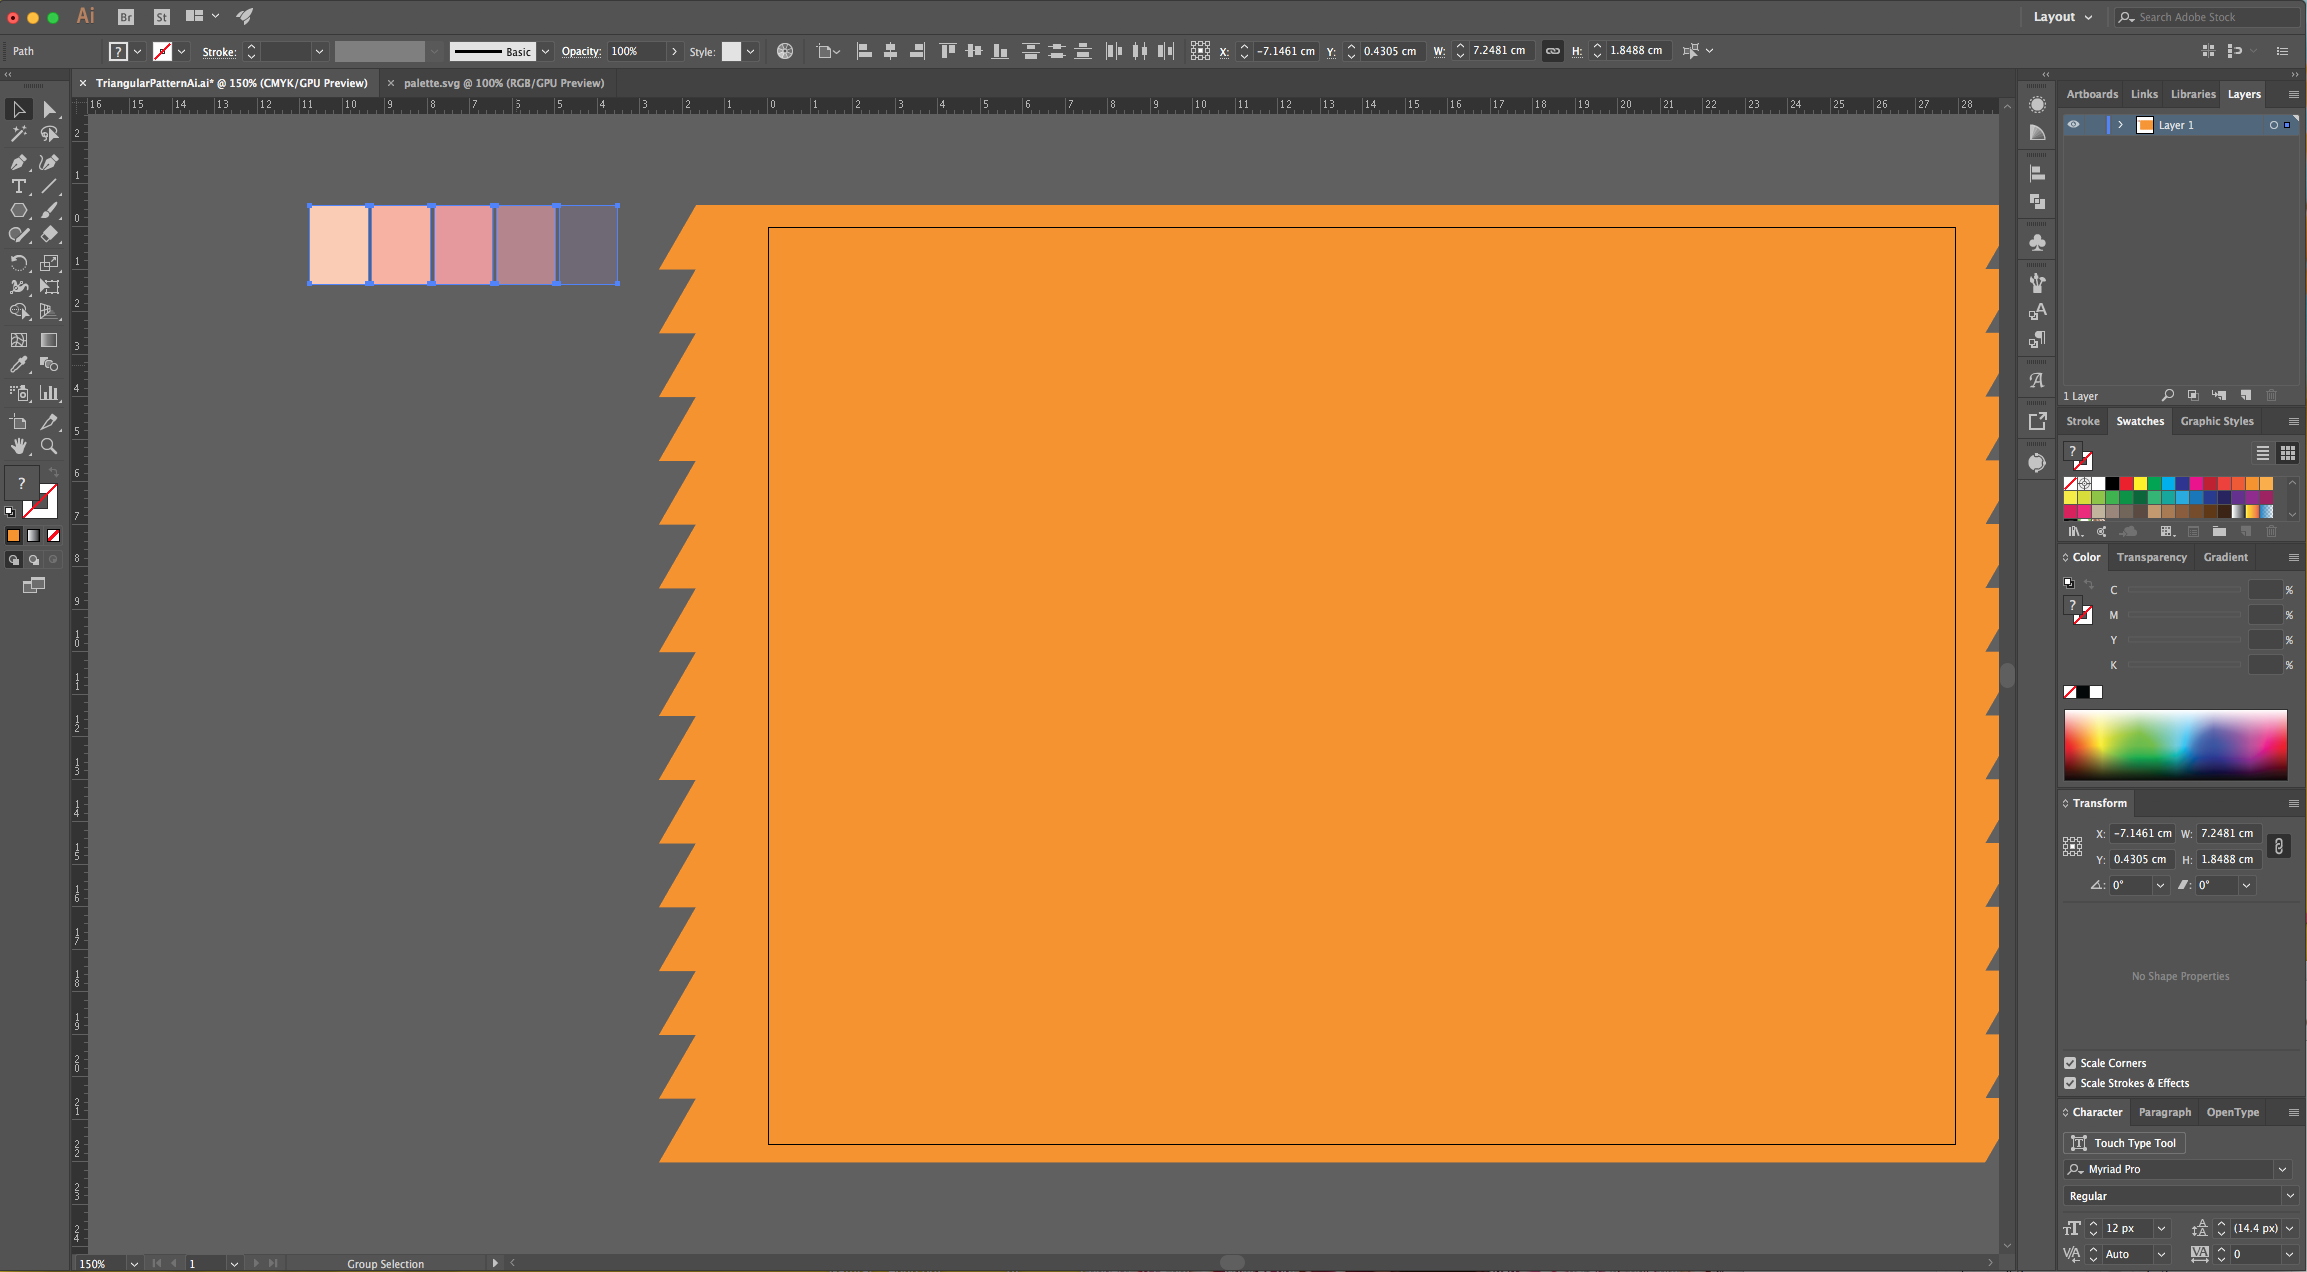
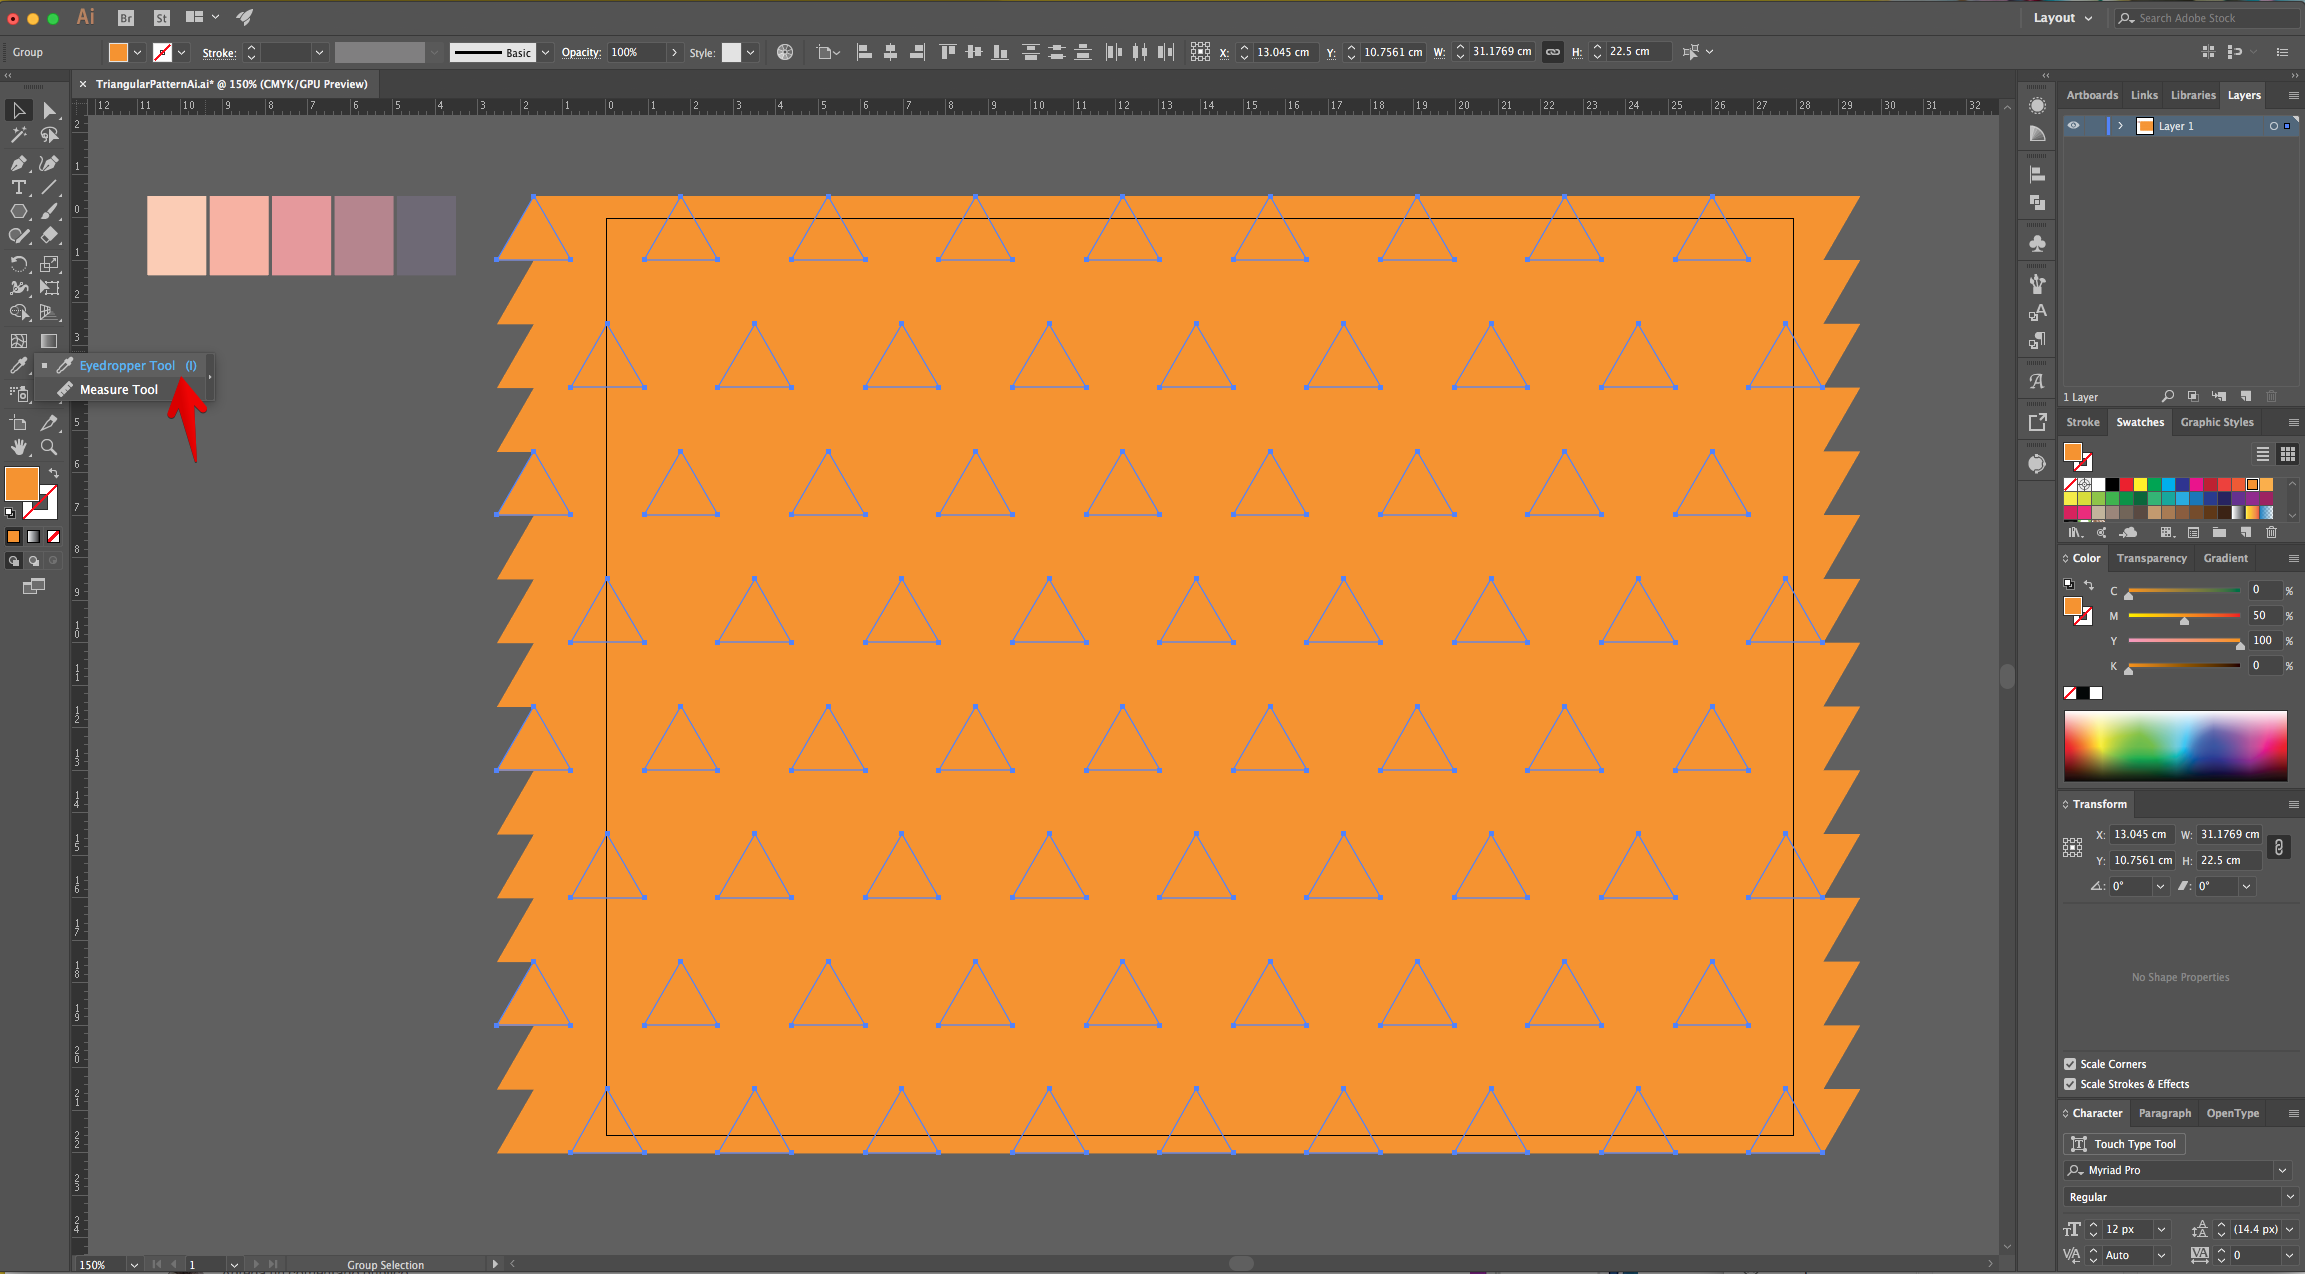
12 - Open the “Color Palette” file and import it or paste it into the “Document”. Create some squares filled with the colors and place them outside the “Canvas”.
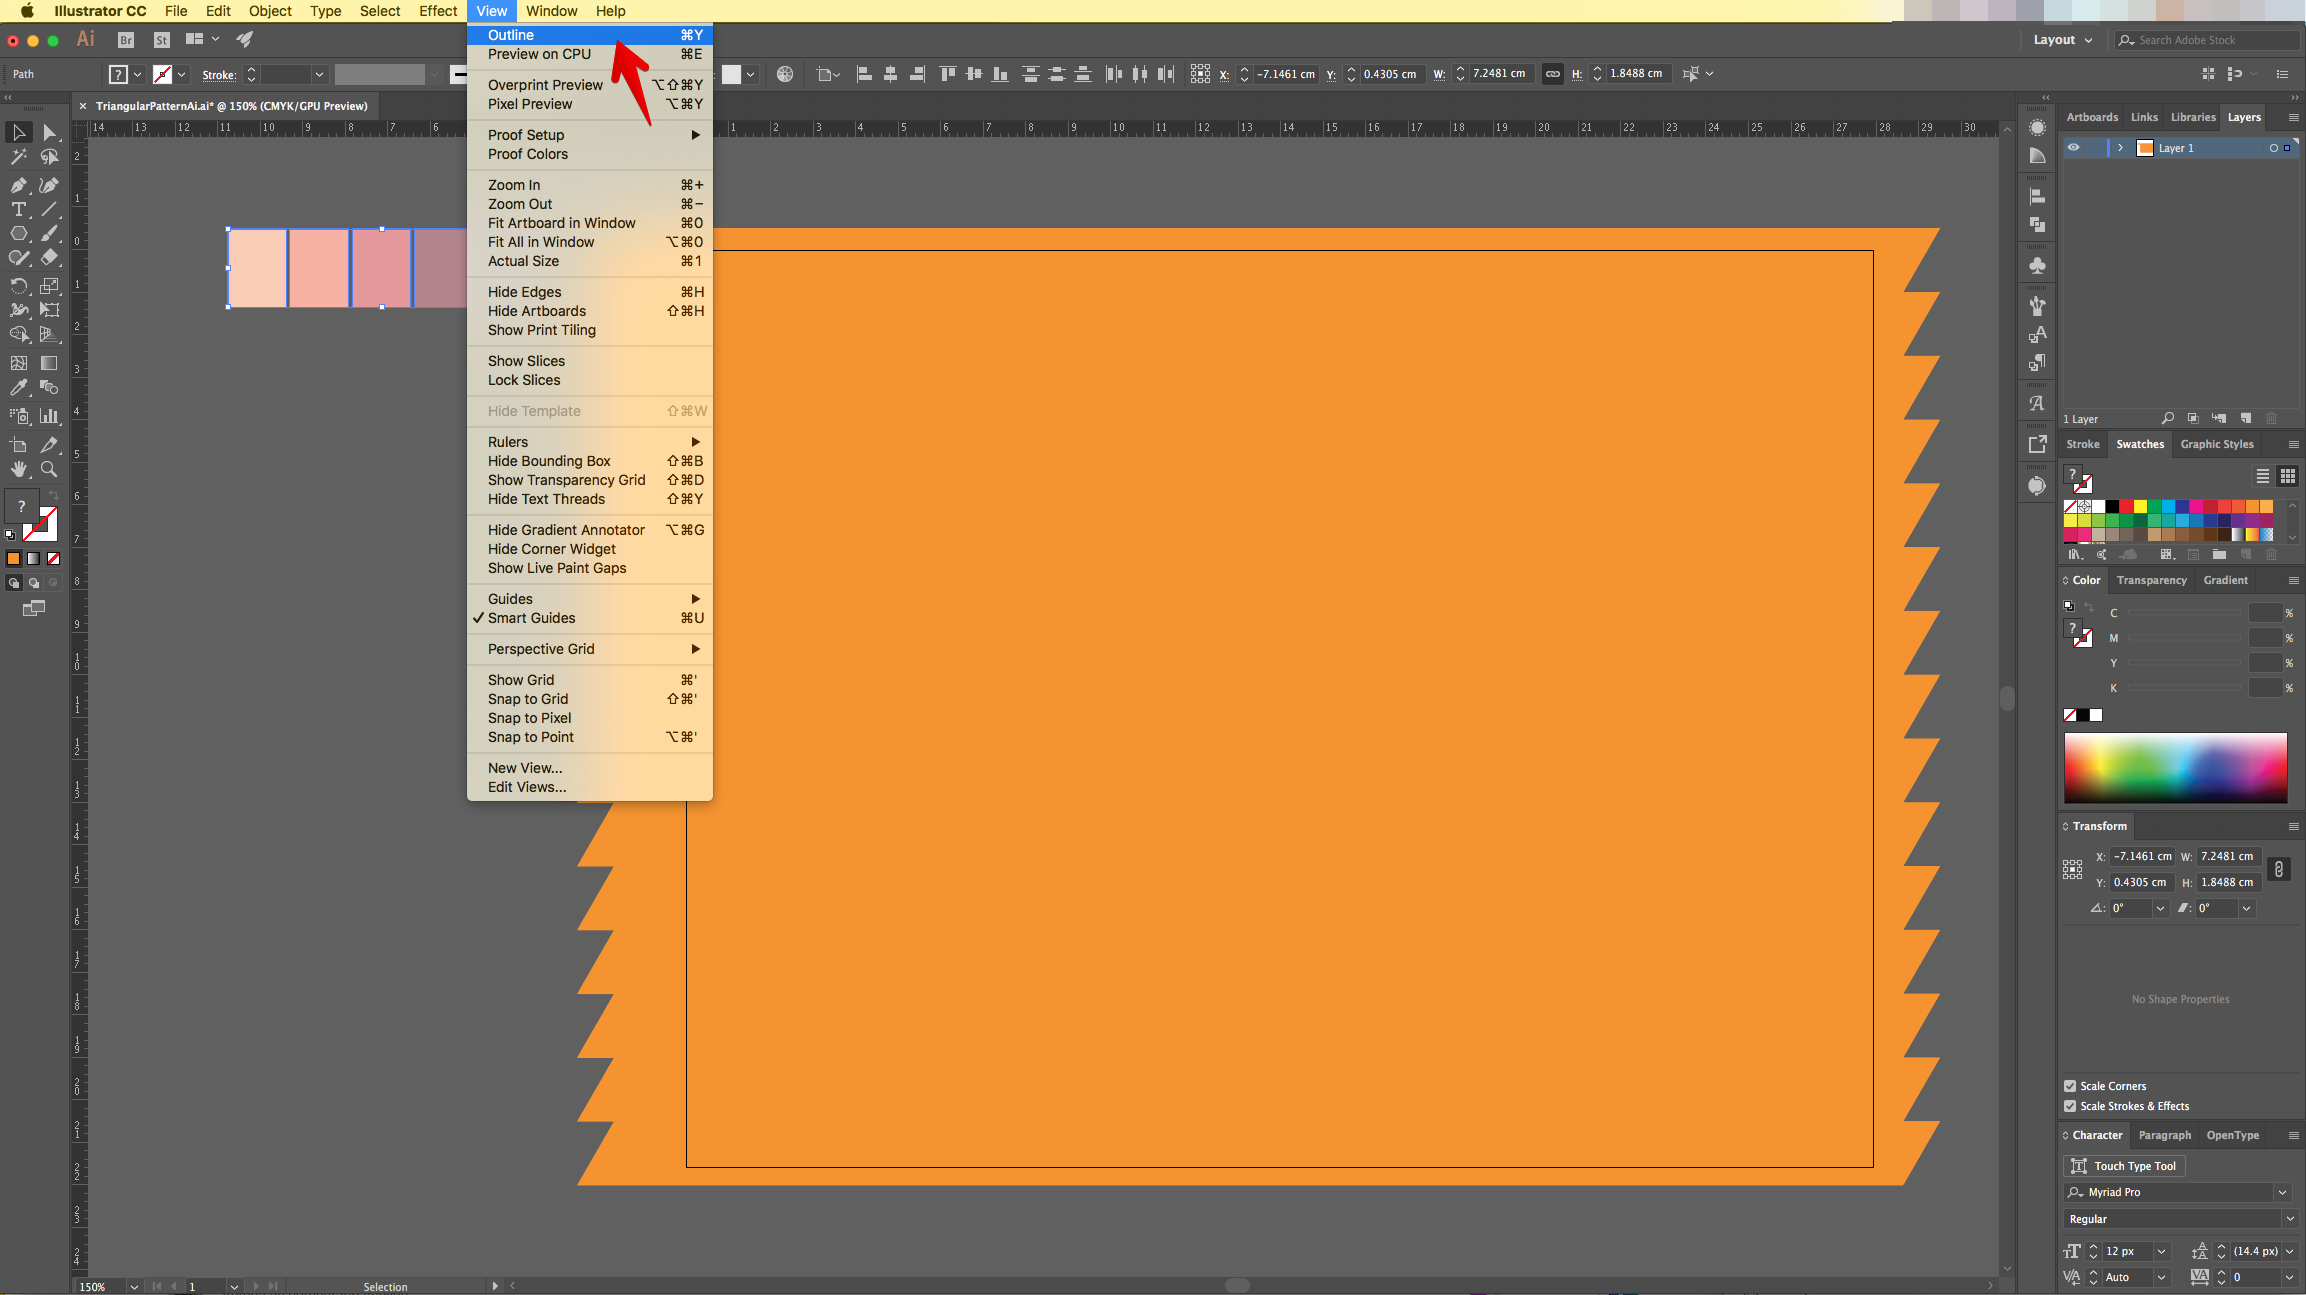
13 - You may need to enter “Outline Mode” (Command/Control + Y) to make it easier to select individual “Triangles”. If you want to go back, just hit Command/Control + Y again.
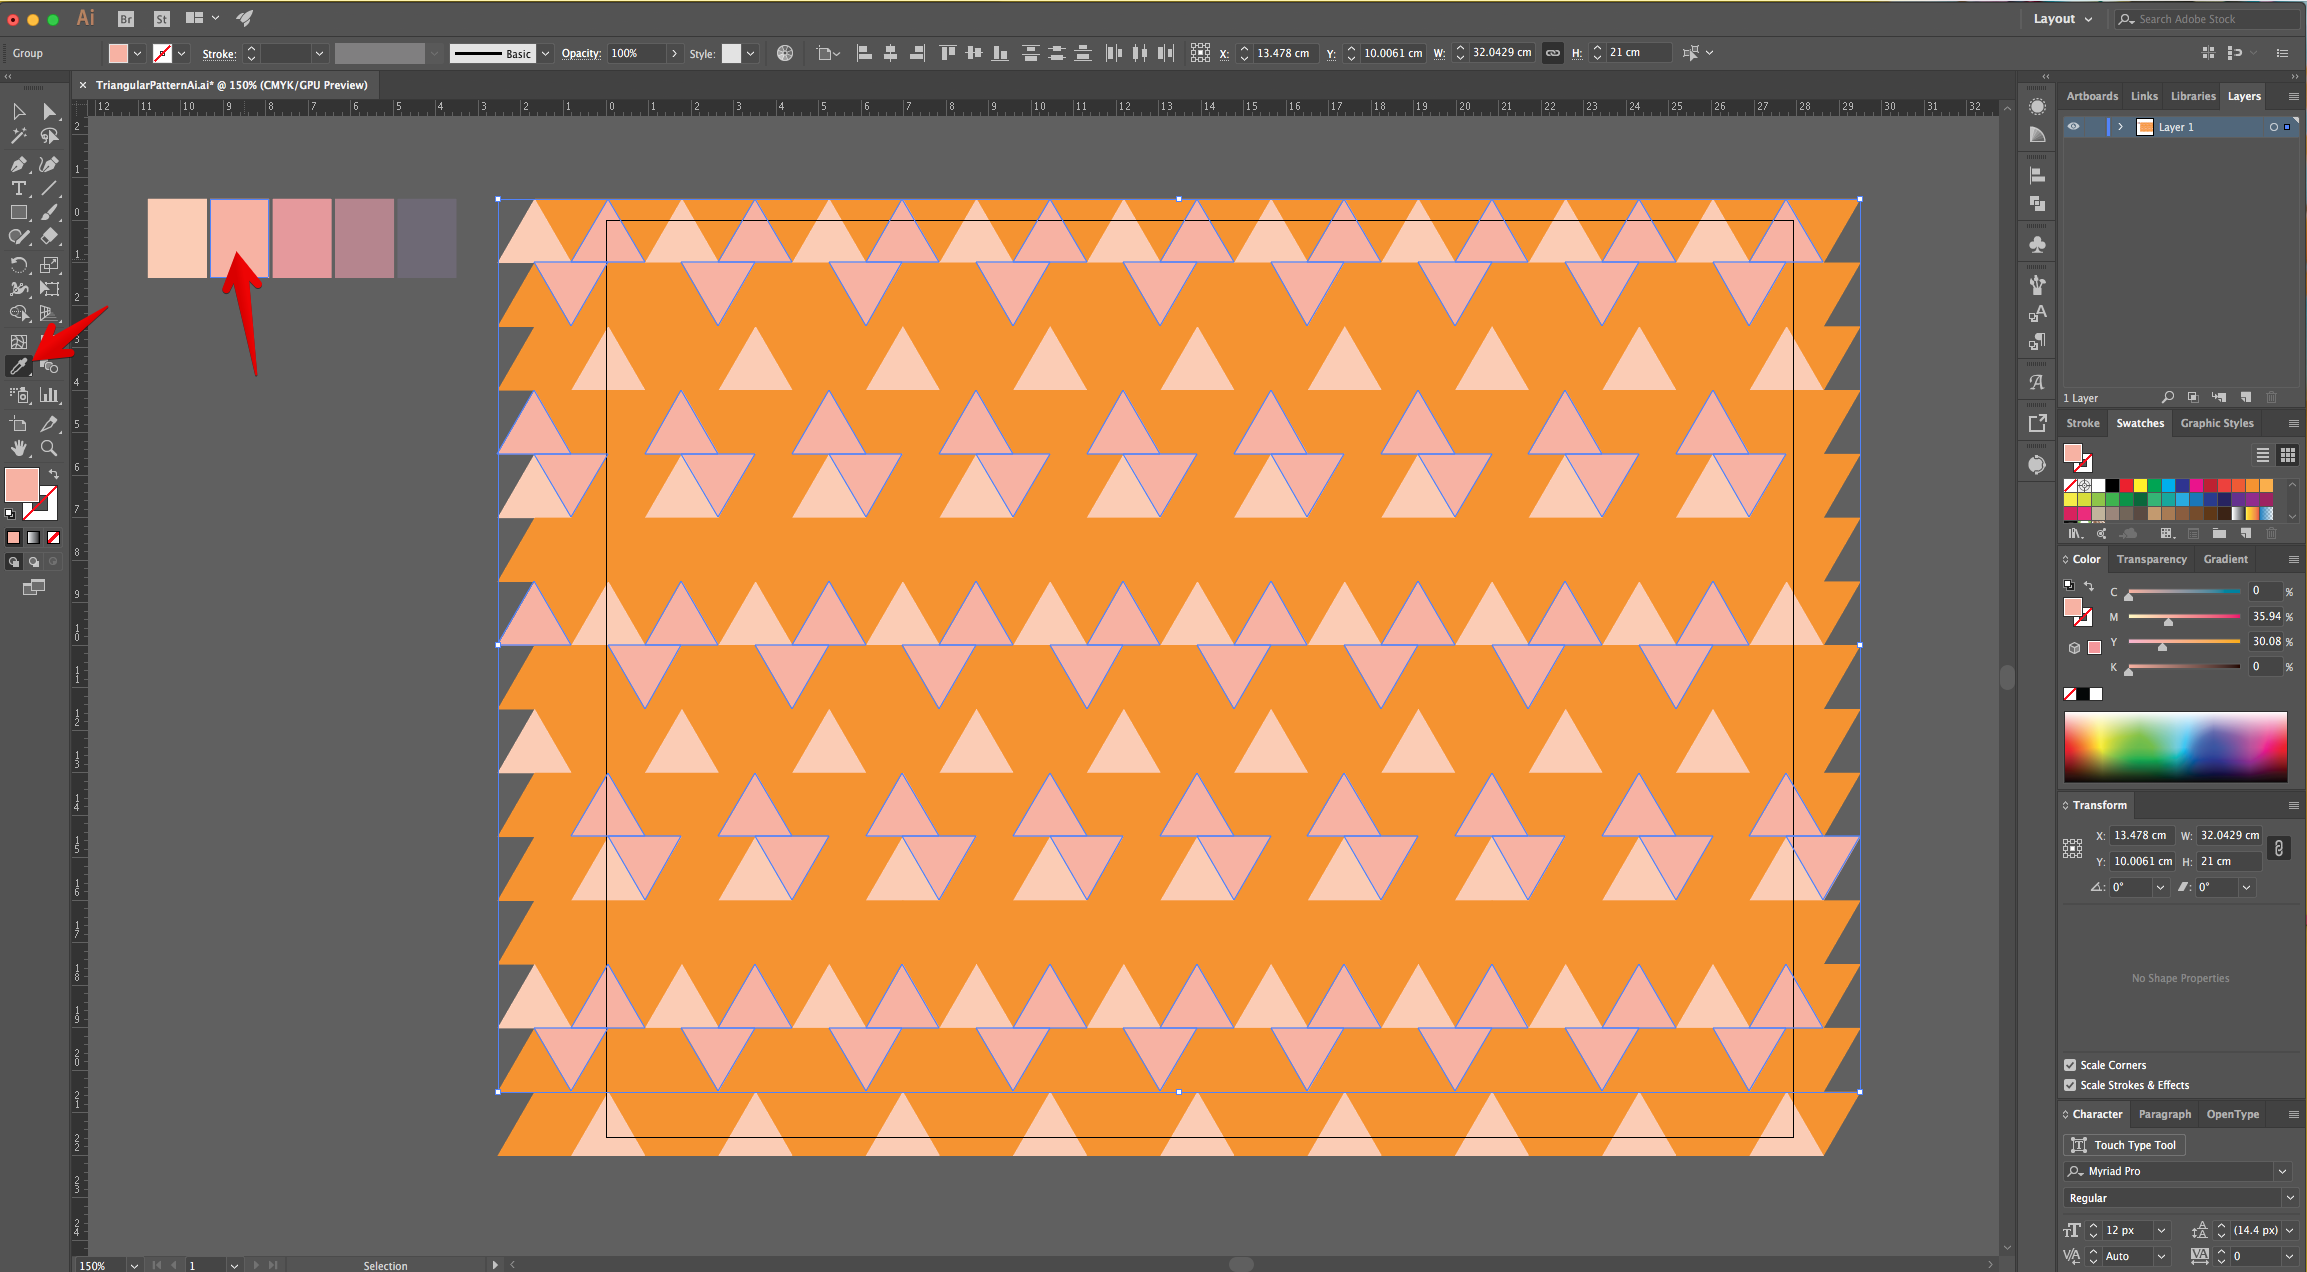
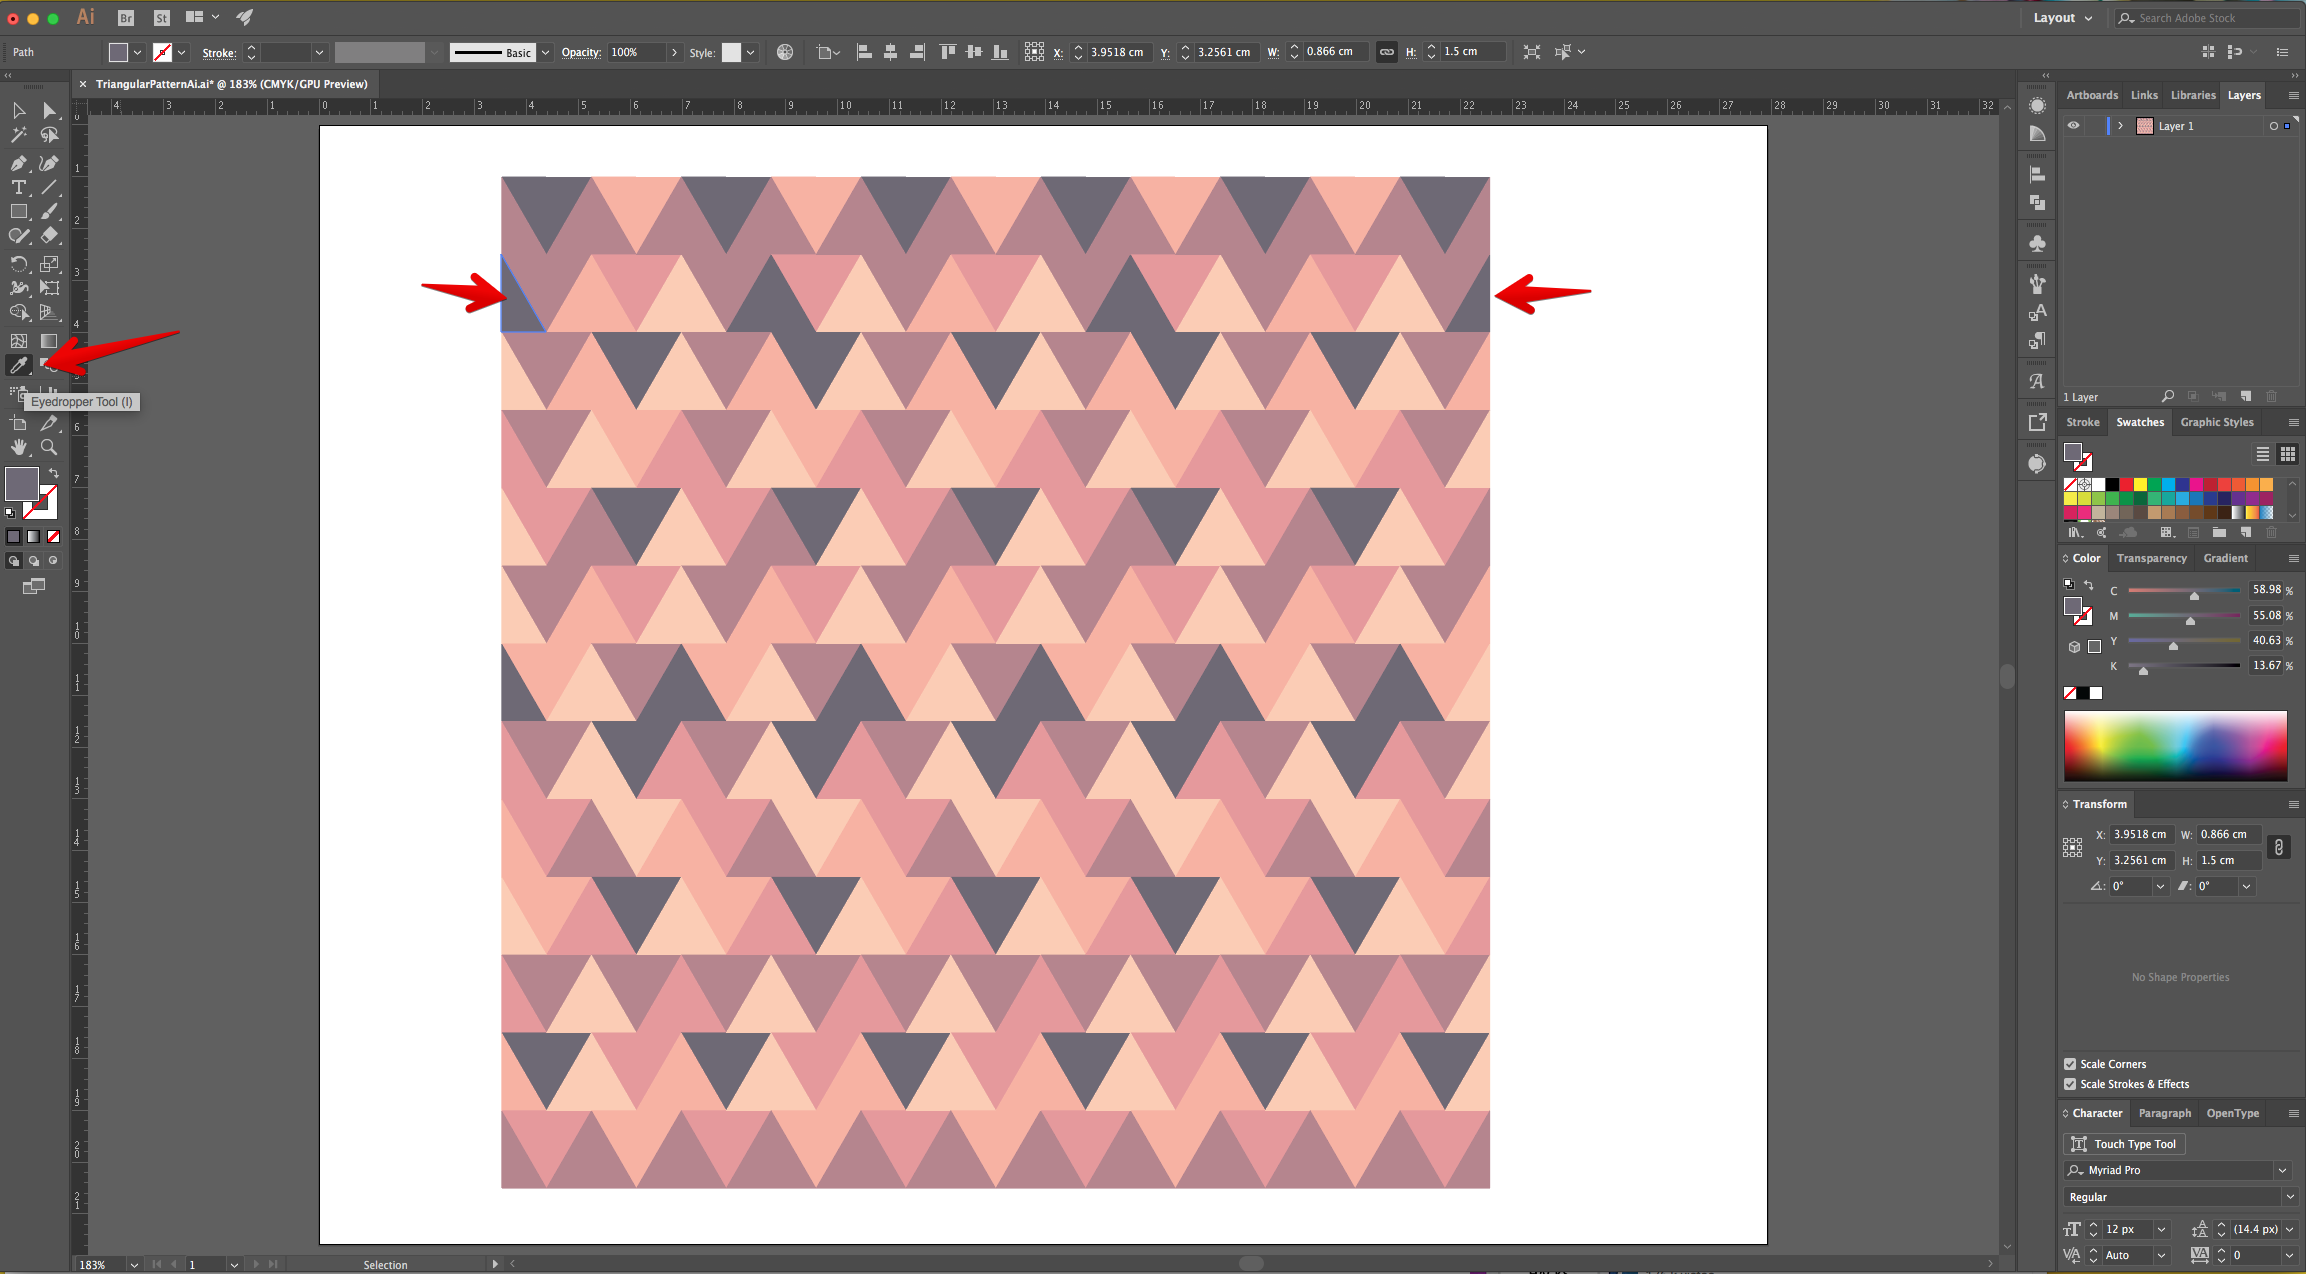
14 - Select some of the “Triangles” throughout the “Canvas” and then use the “Eyedropper Tool” (I) to click on the color square that has the color of your choice to apply it to your selection.
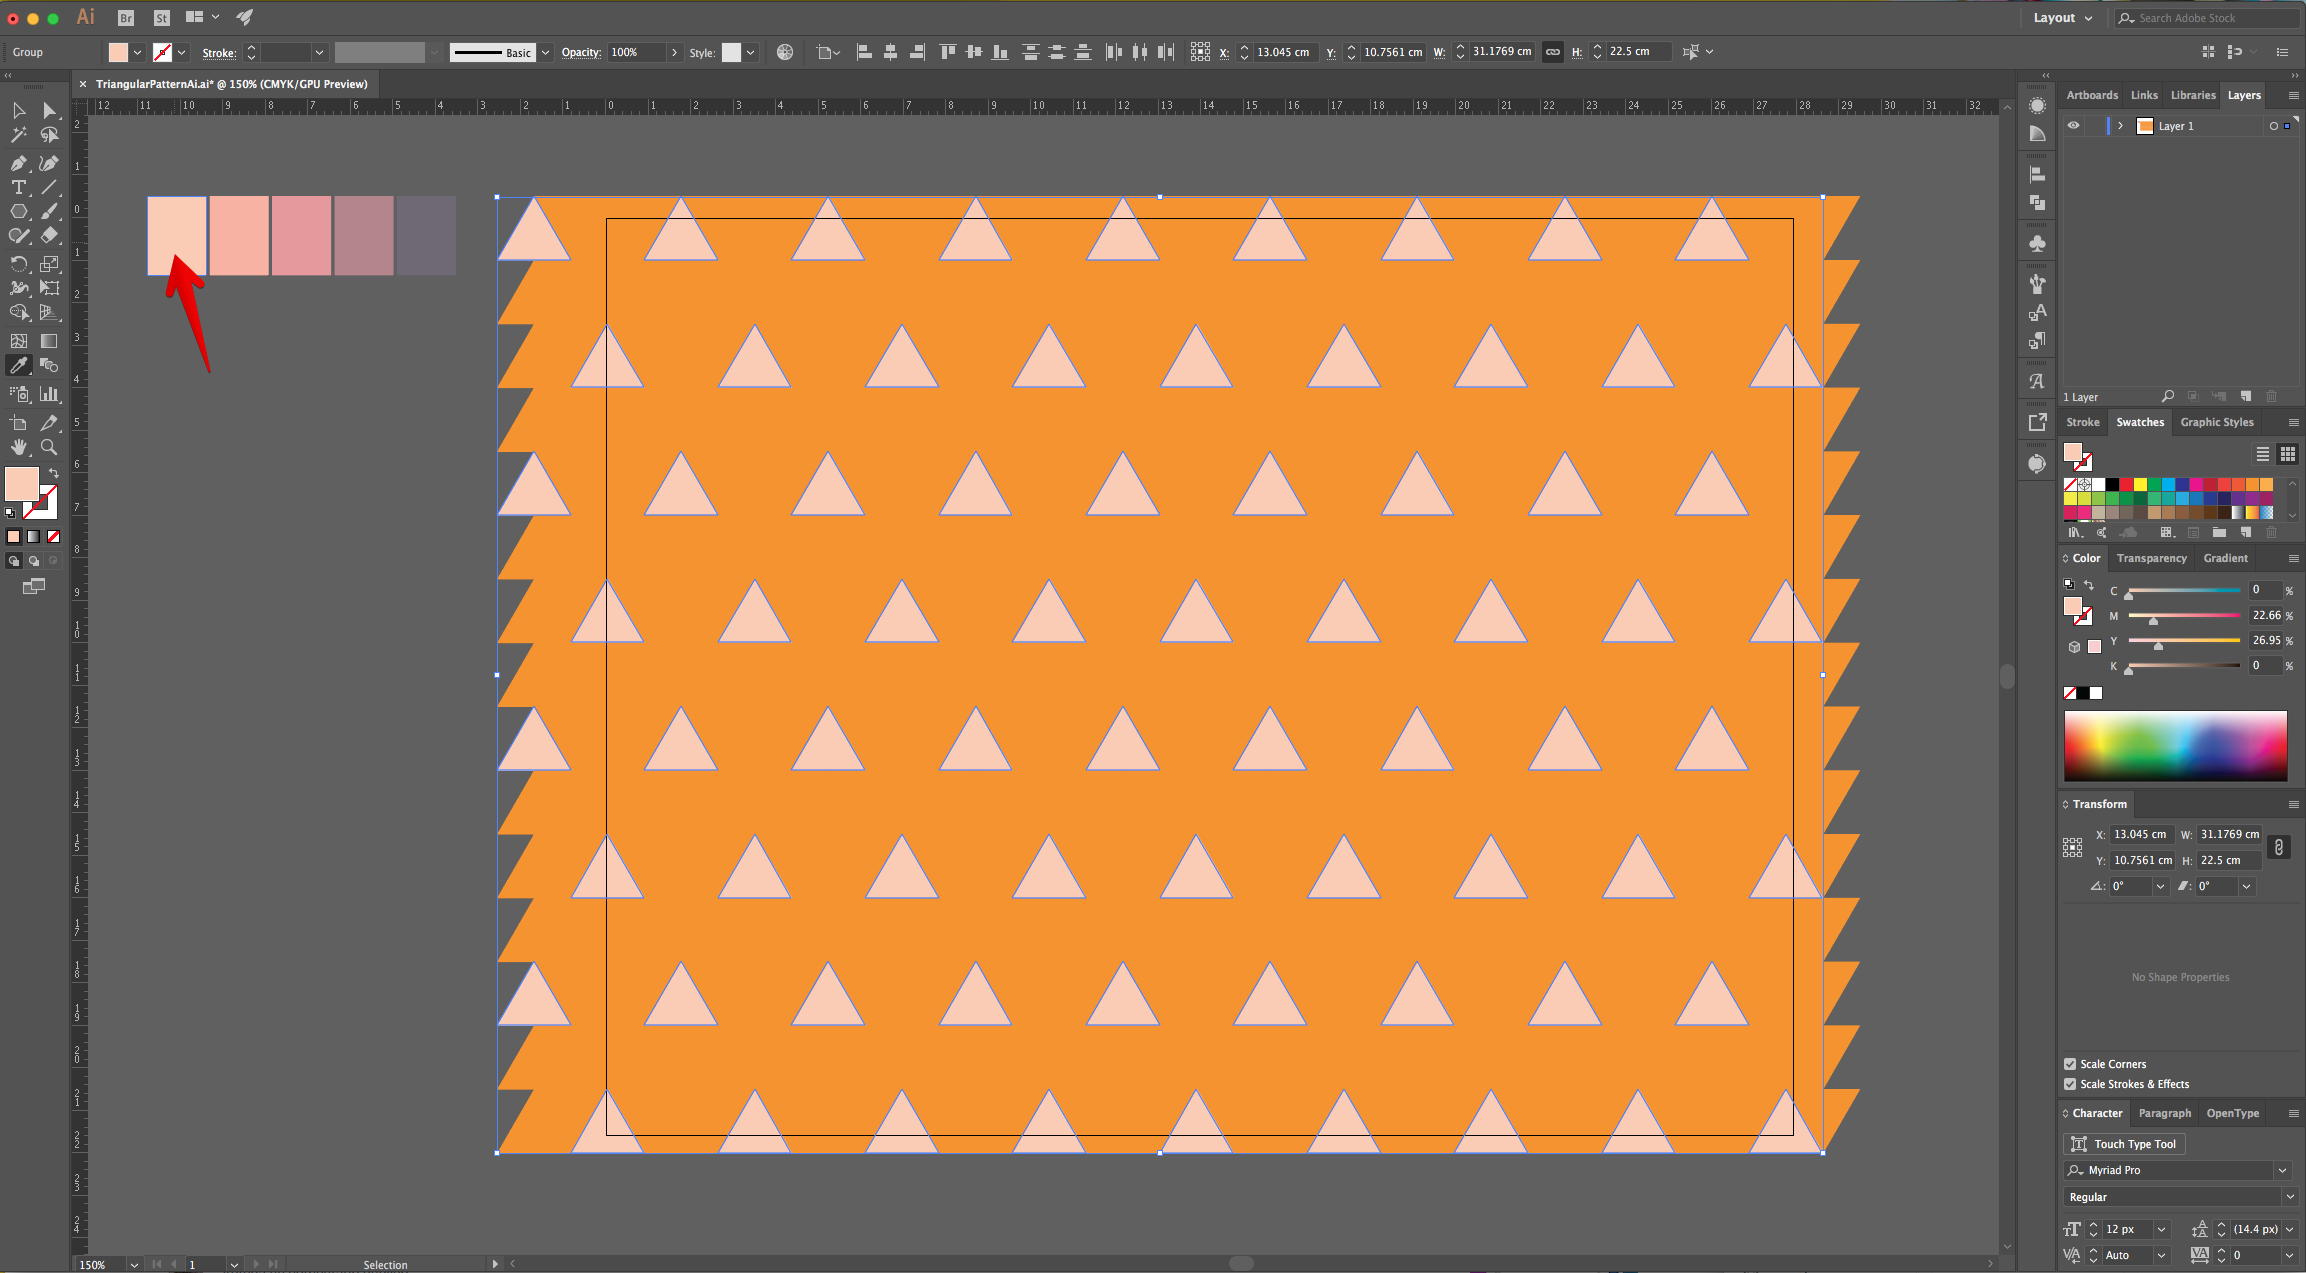
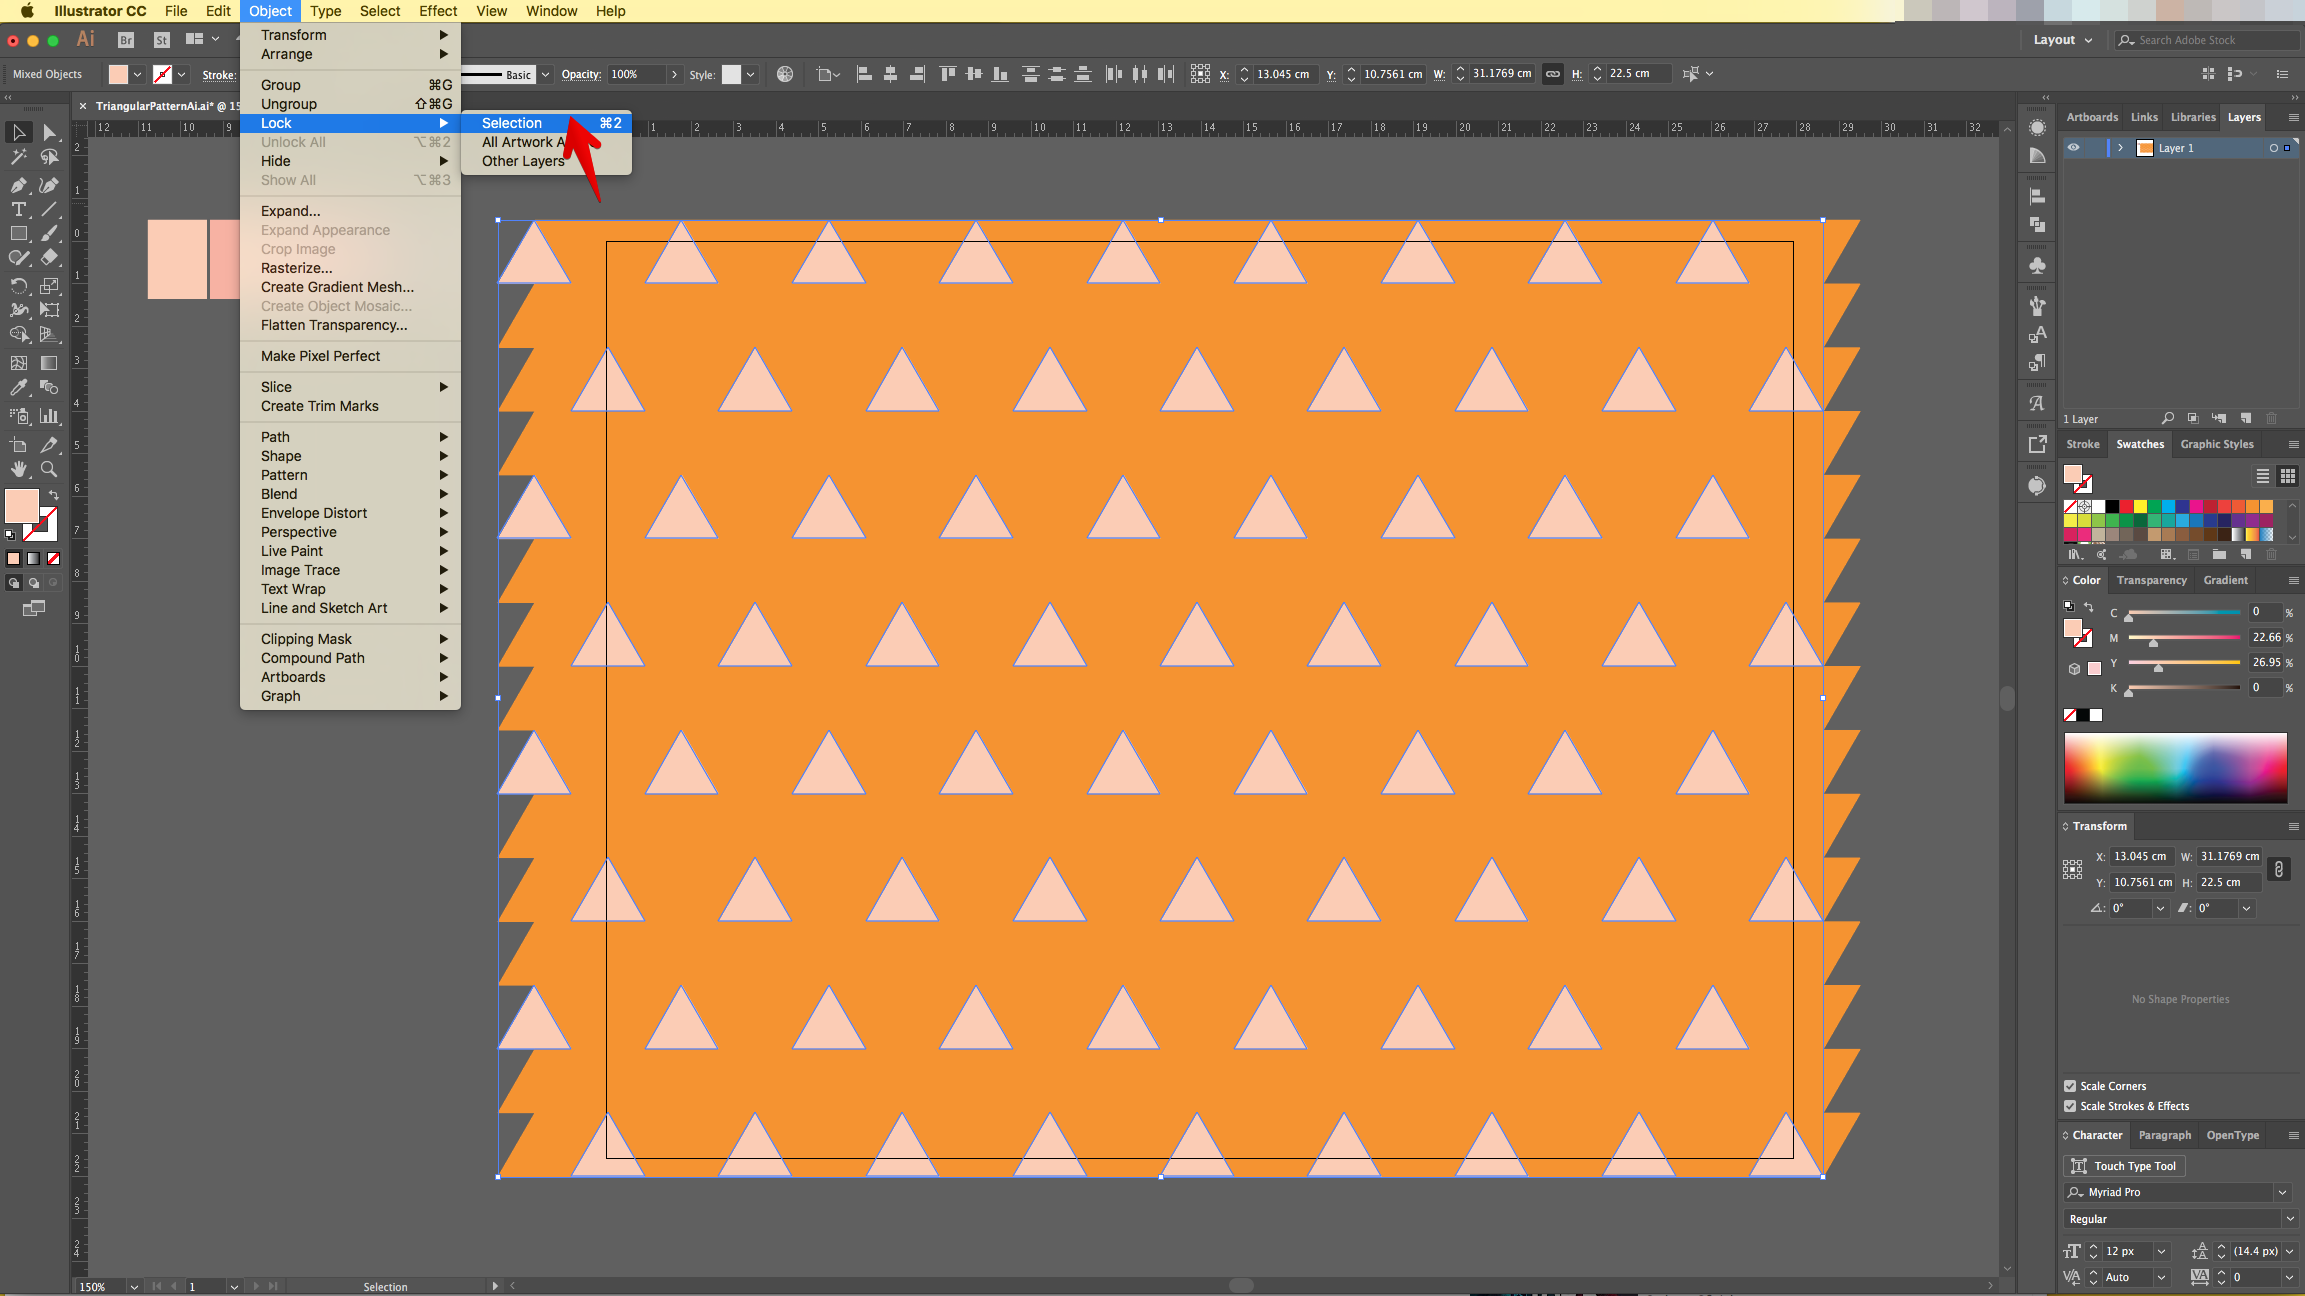
15 - Go to Object > Lock Selection (Command/Control + 2) to lock the triangles that you just modified.
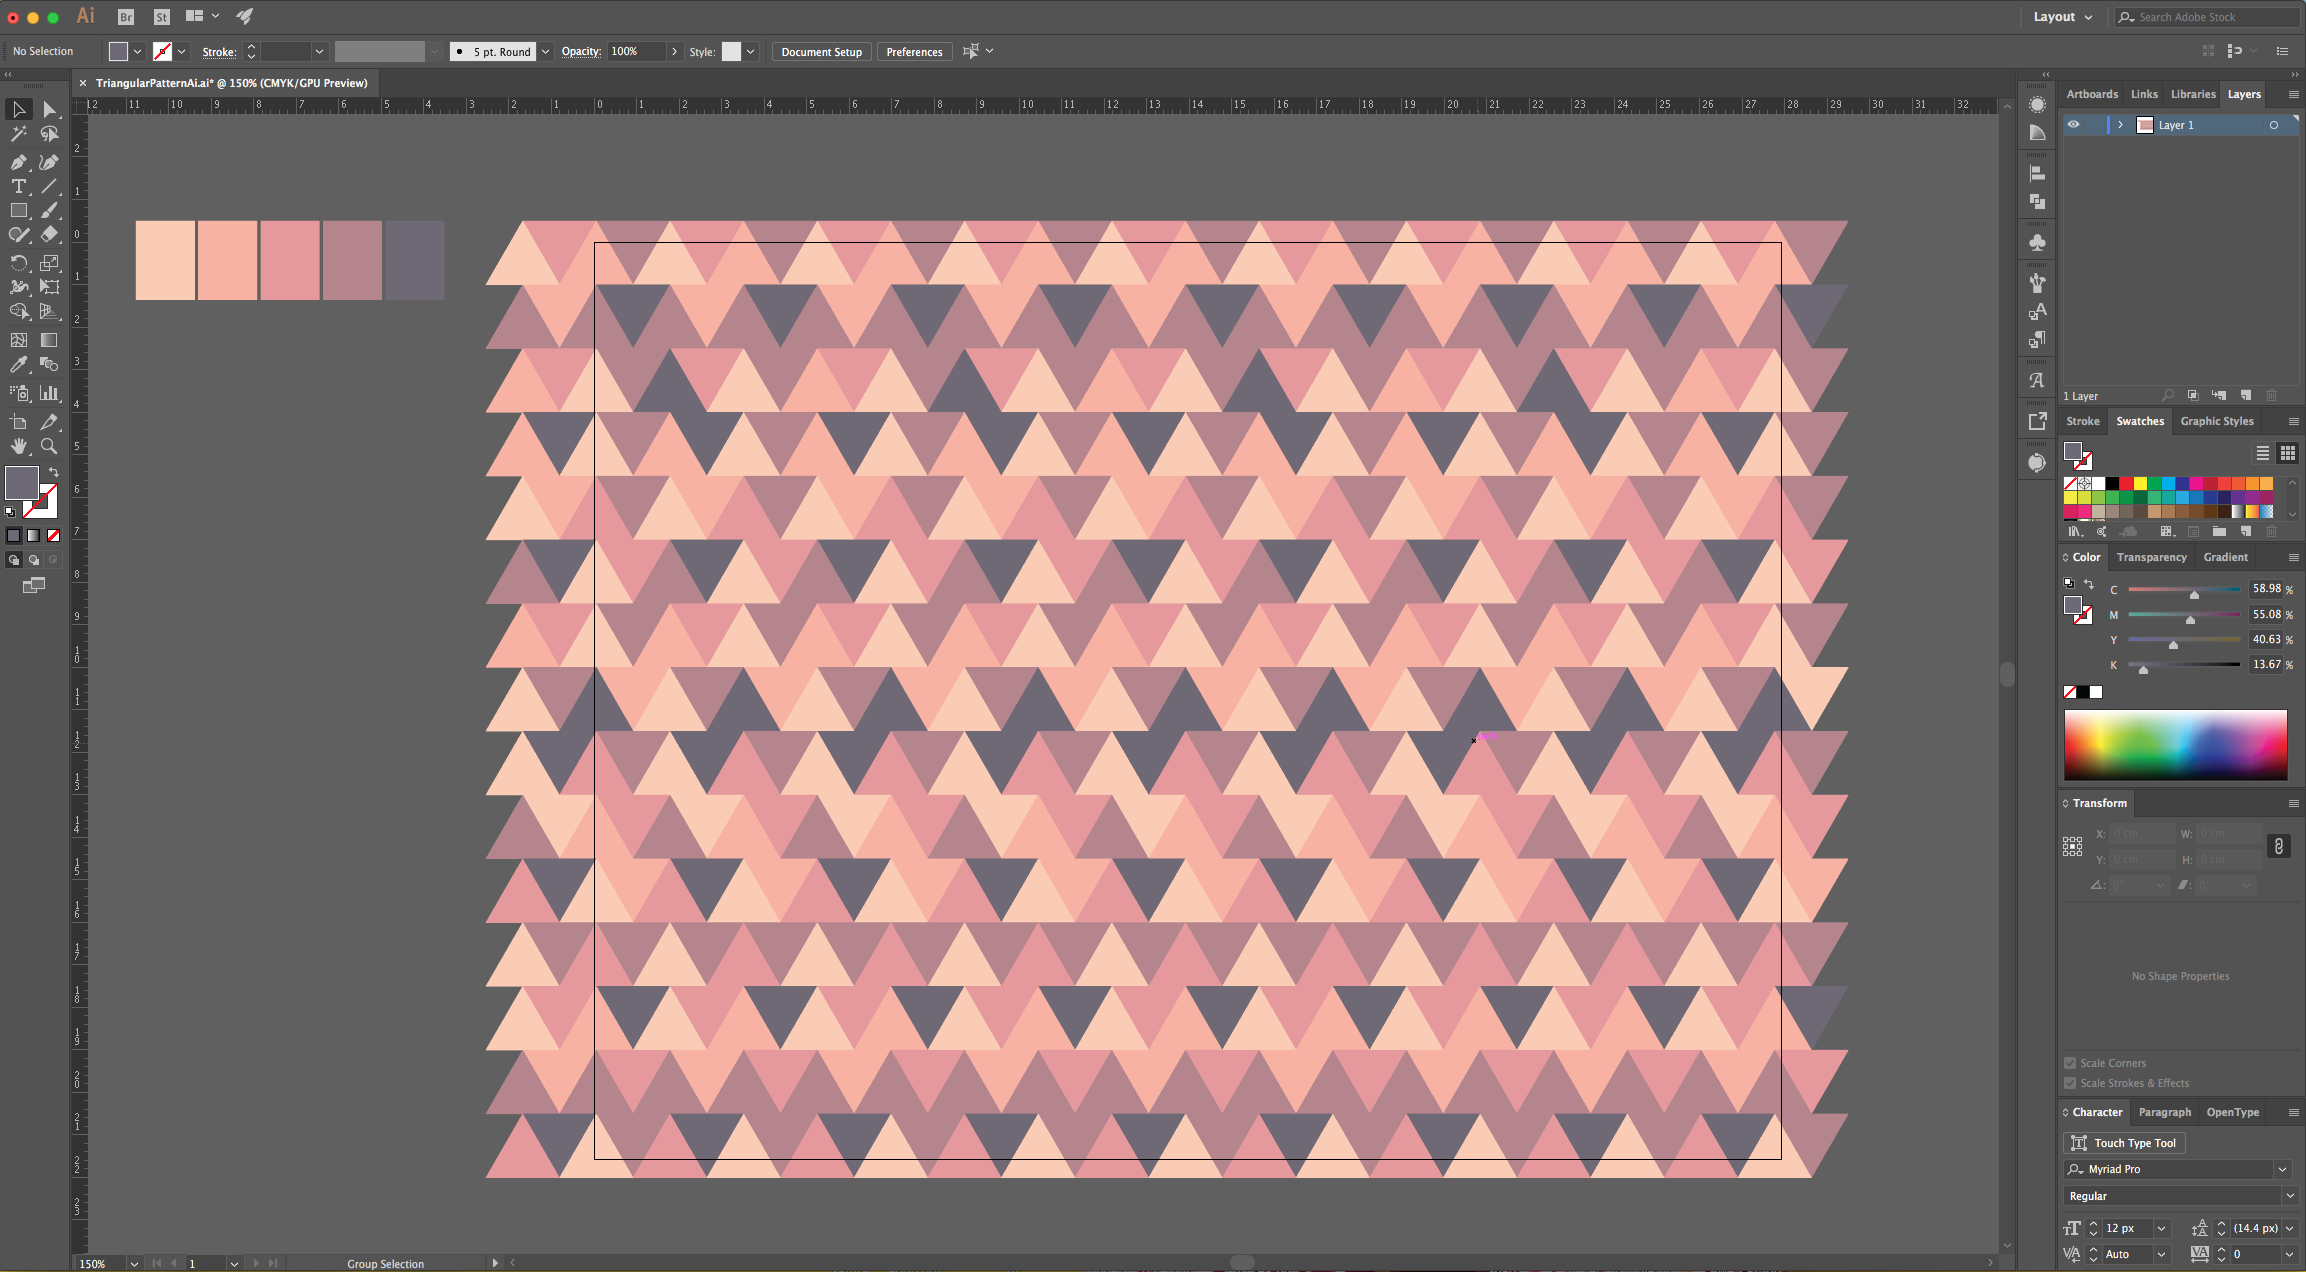
16 - Then repeat Steps 14 and 15 alternating colors until you change the color fill of the entire “Document”.
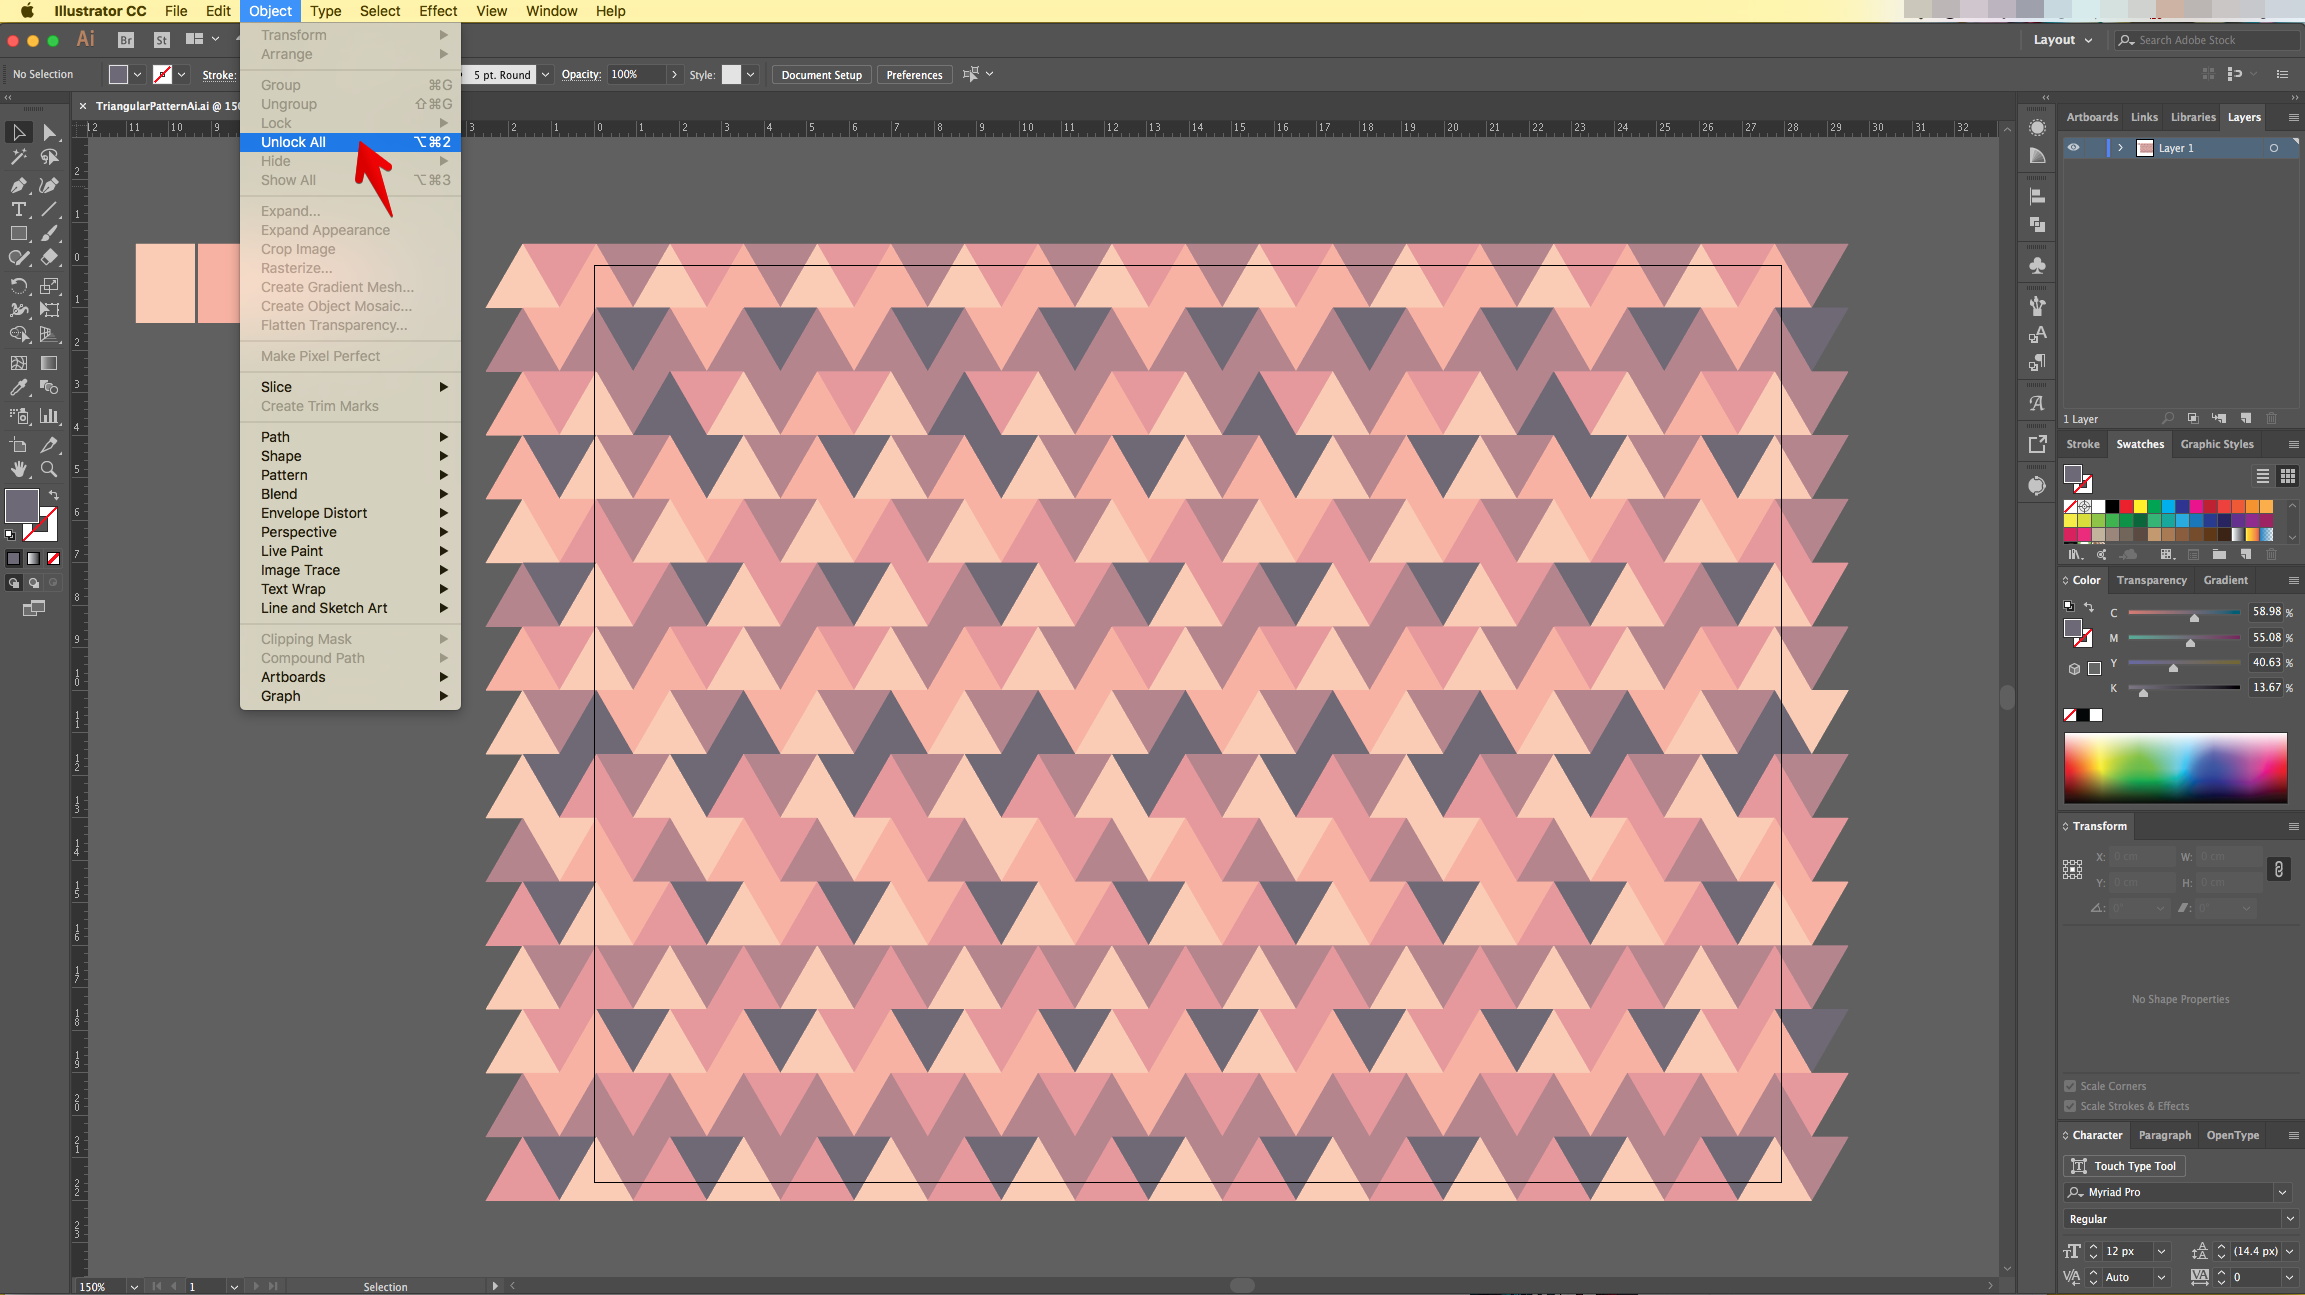
17 - Go to Object > Unlock All (Shift + Command/Control + 2) to unlock the triangles that you modified.
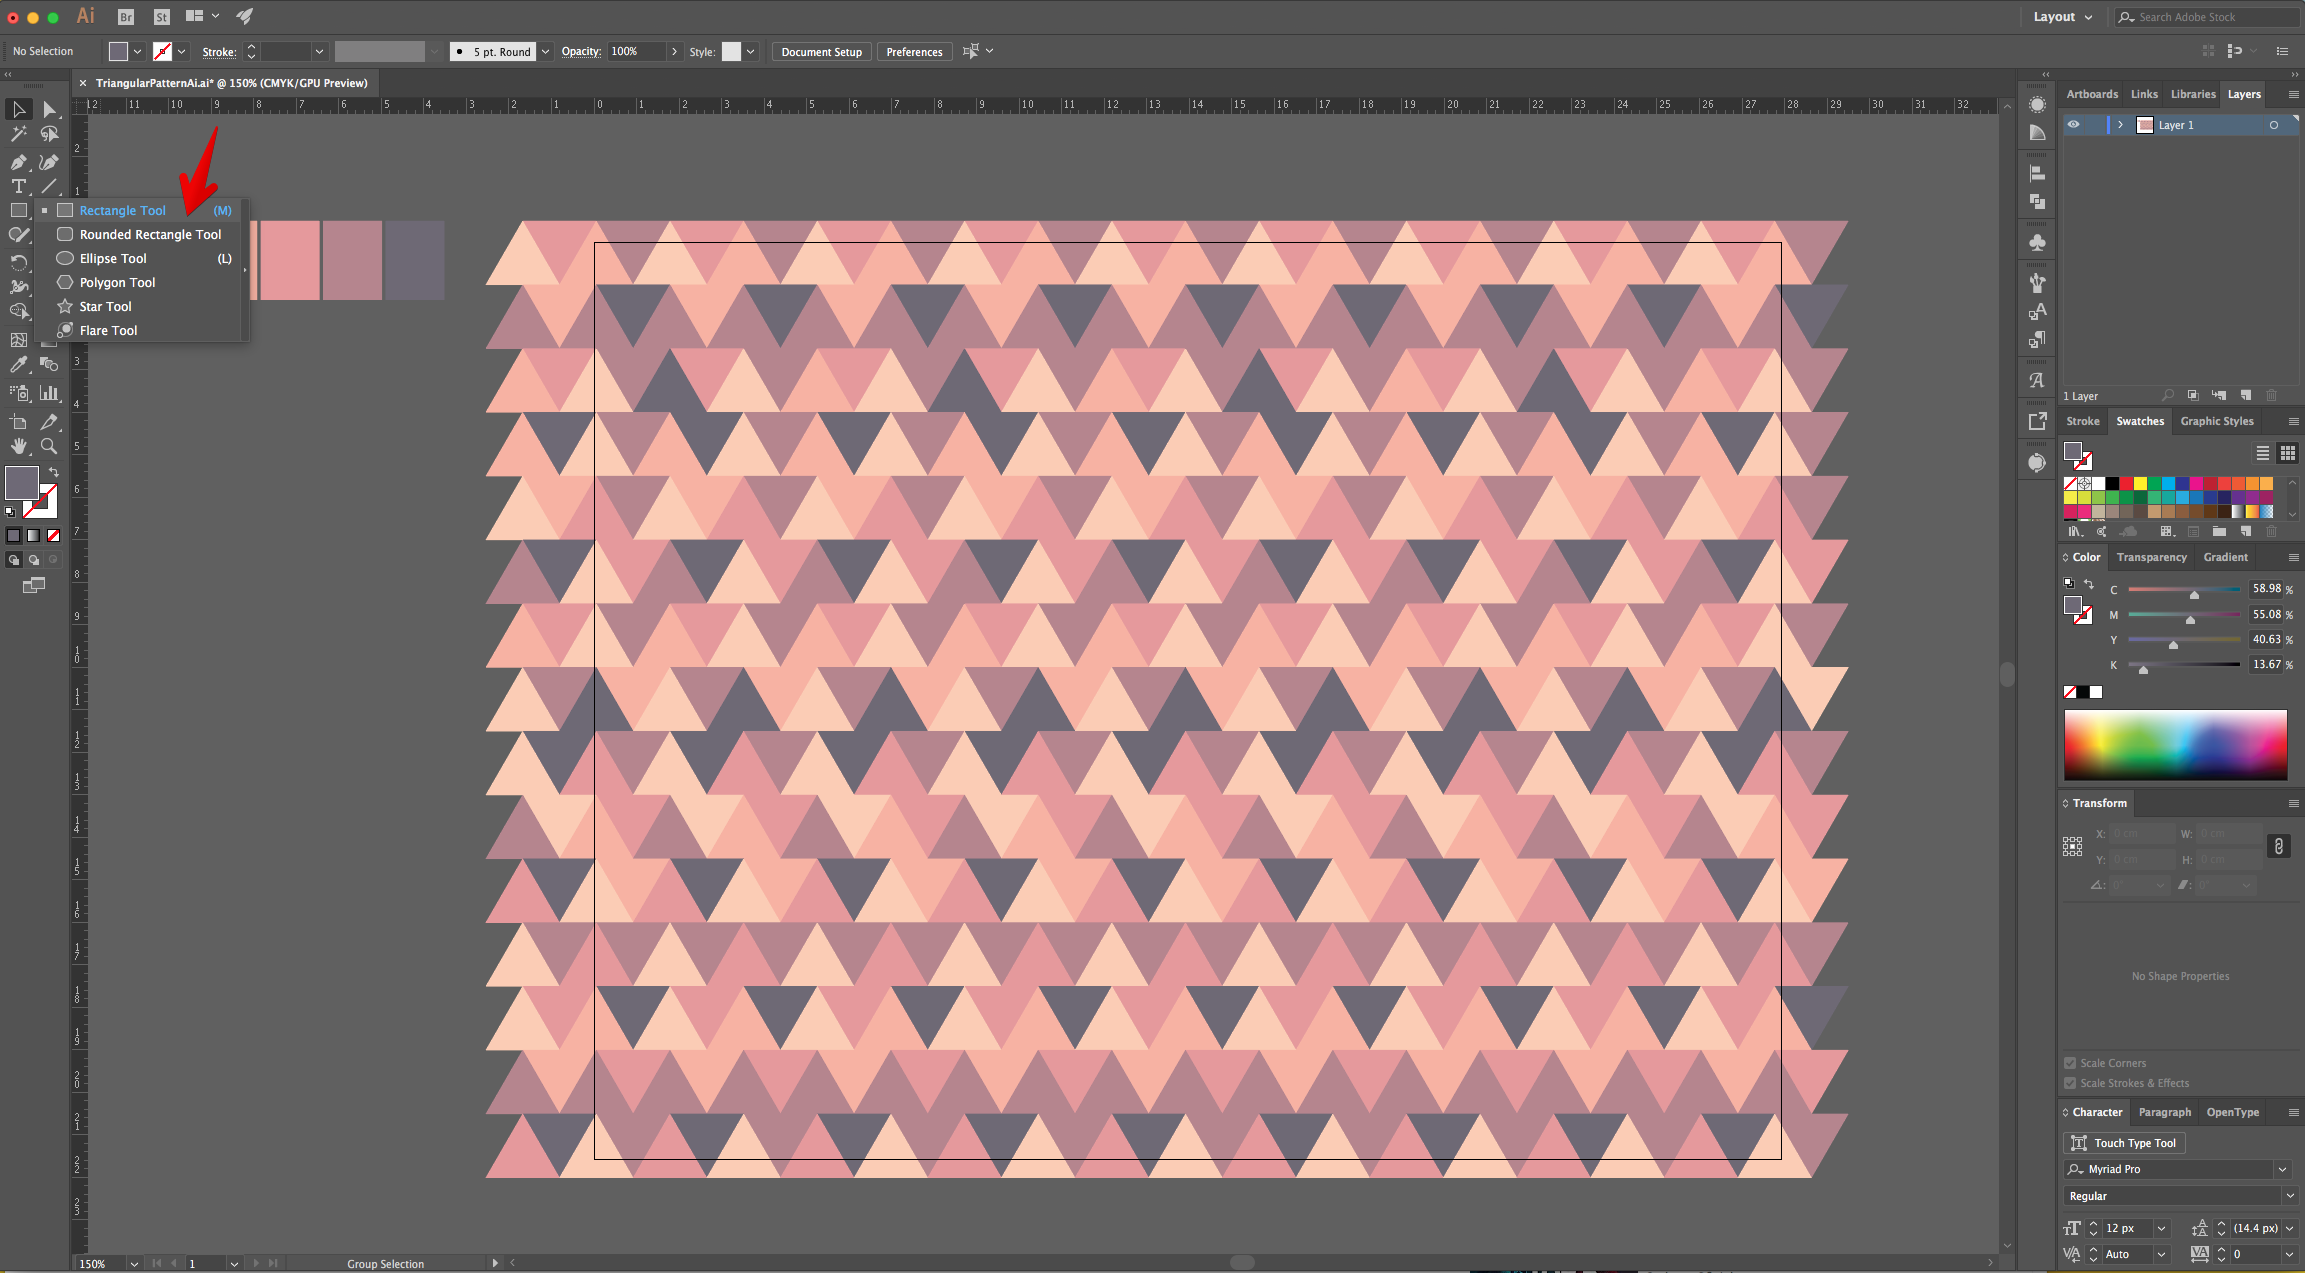
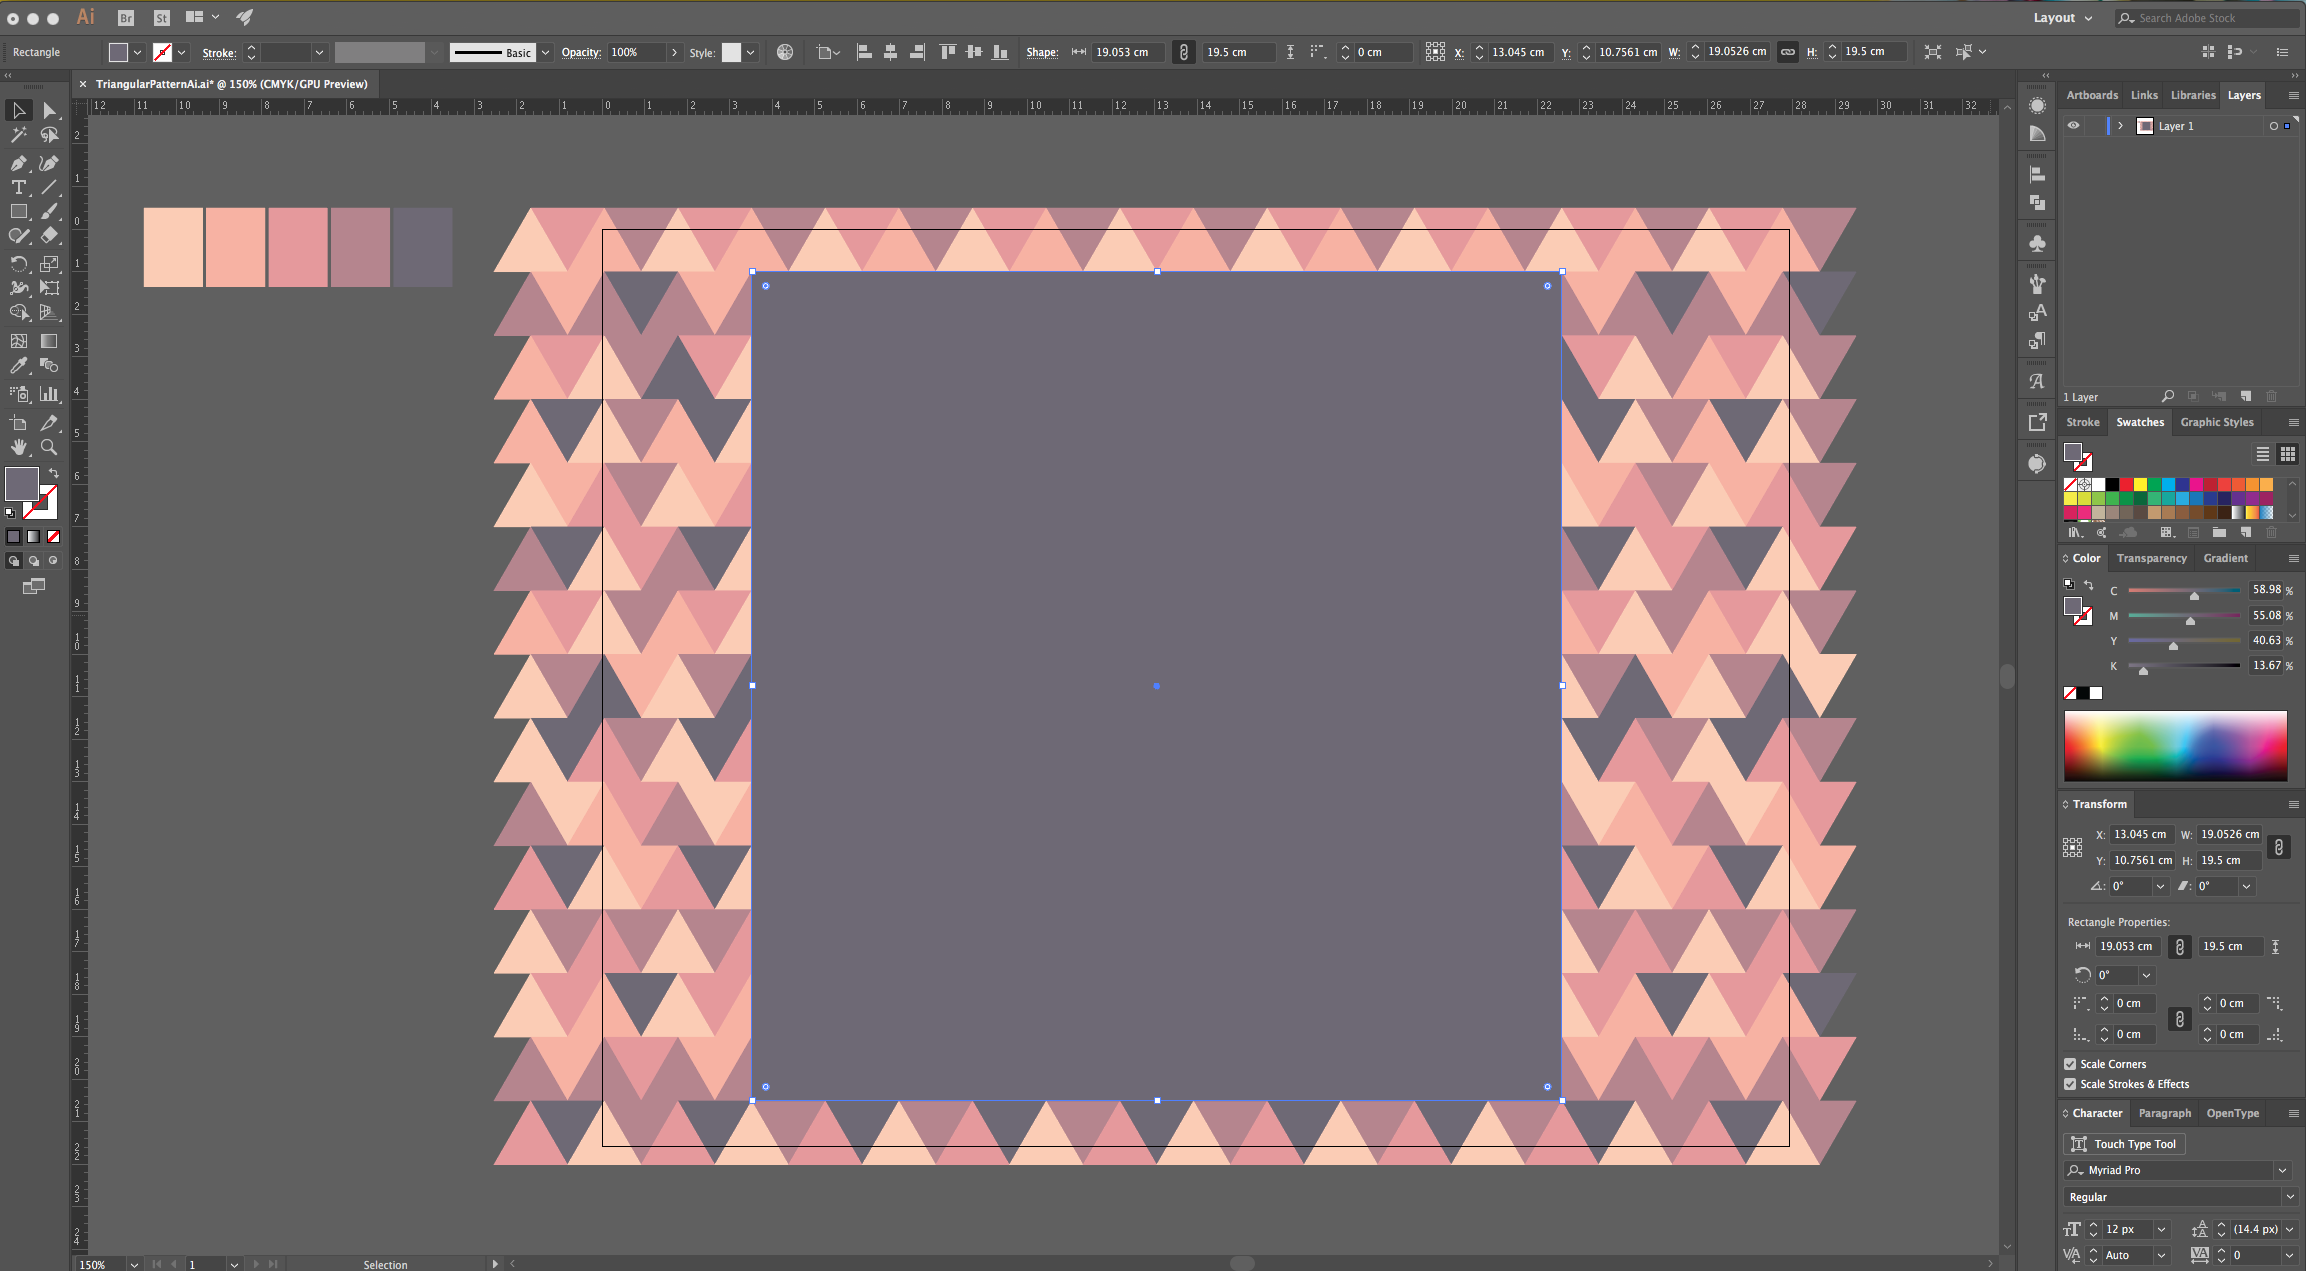
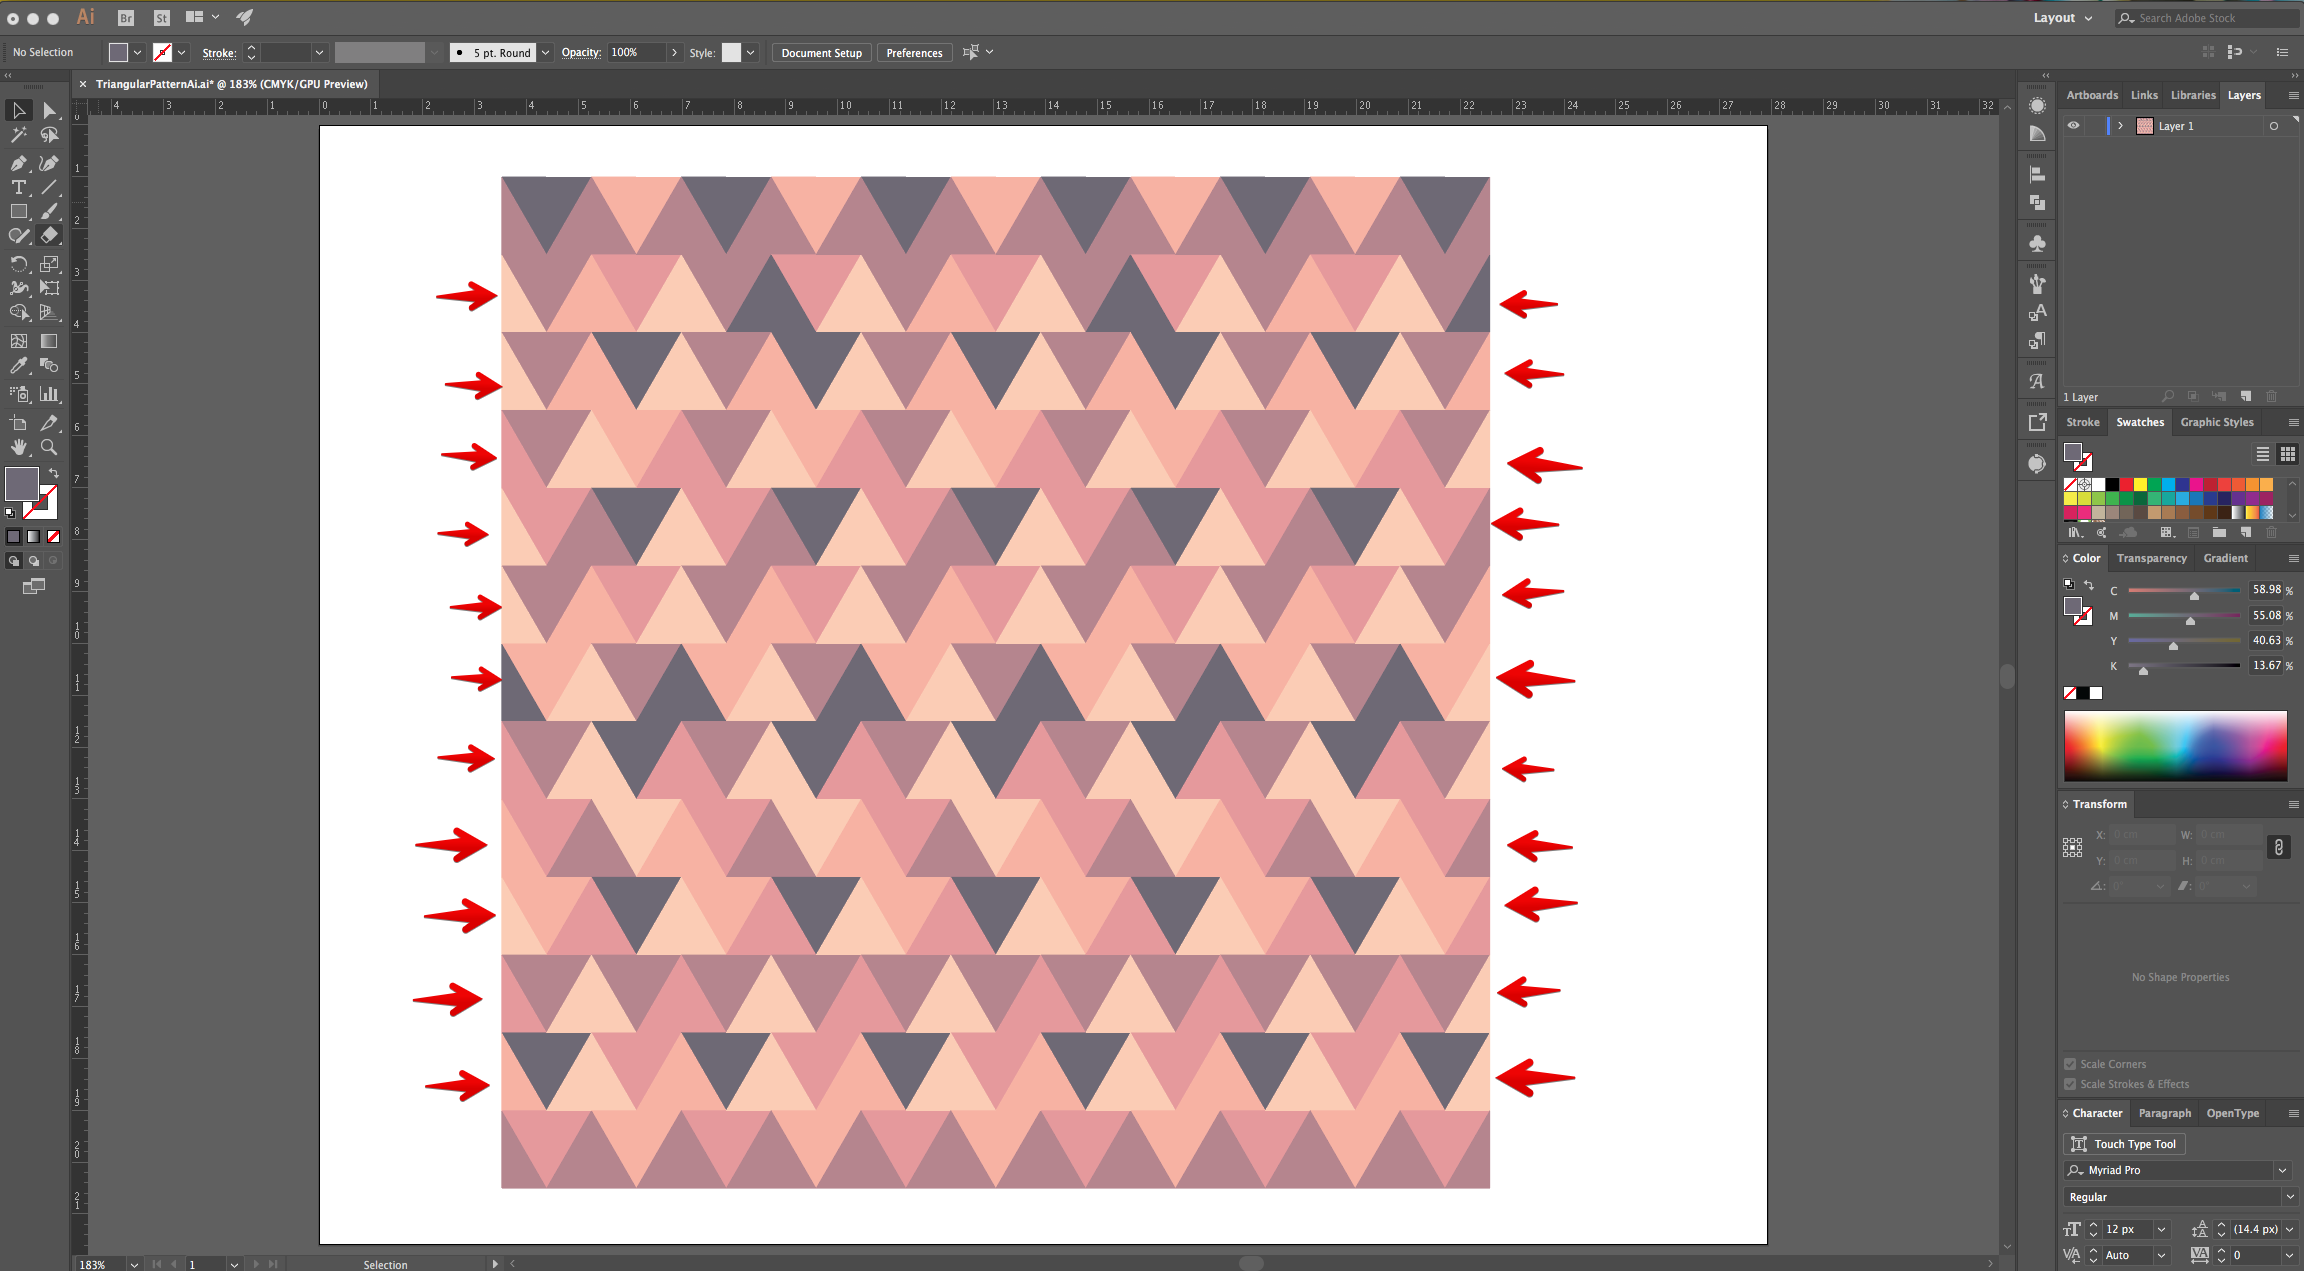
18 - Select the “Rectangle Tool” (R) and create a shape that covers a big portion of the triangles. Make sure that the portions of the “Triangles” covered by the edges of the “Square” are equal to the ones left outside.
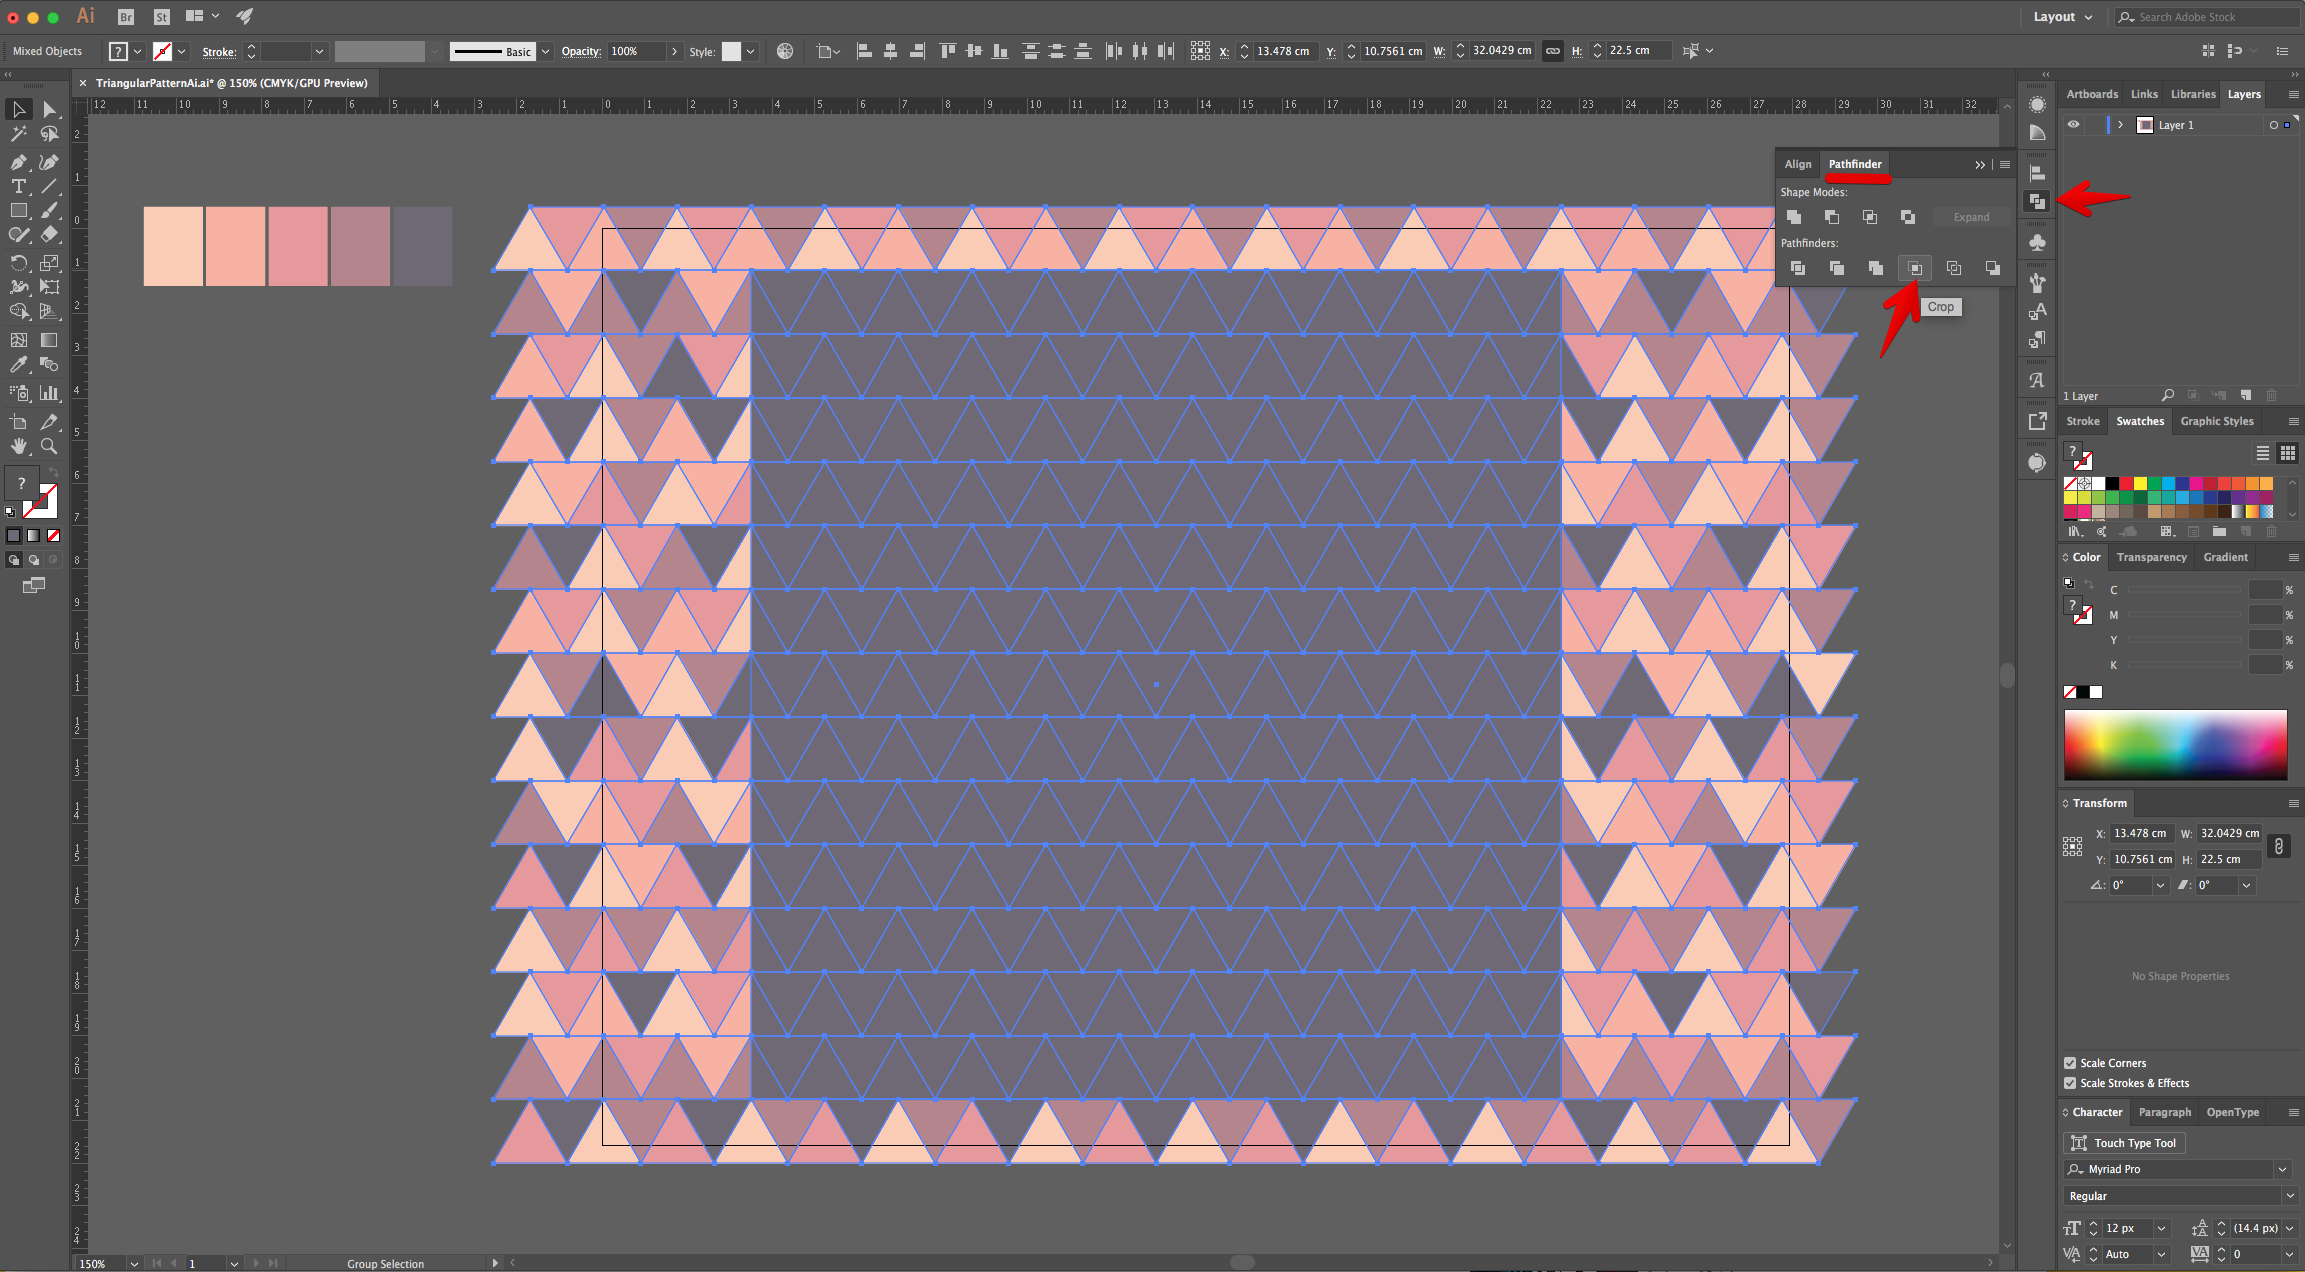
19 - Make sure that everything is selected, head to the “Pathfinder Panel” and choose “Crop” to leave only a squared shape but filled with the “Pattern”.
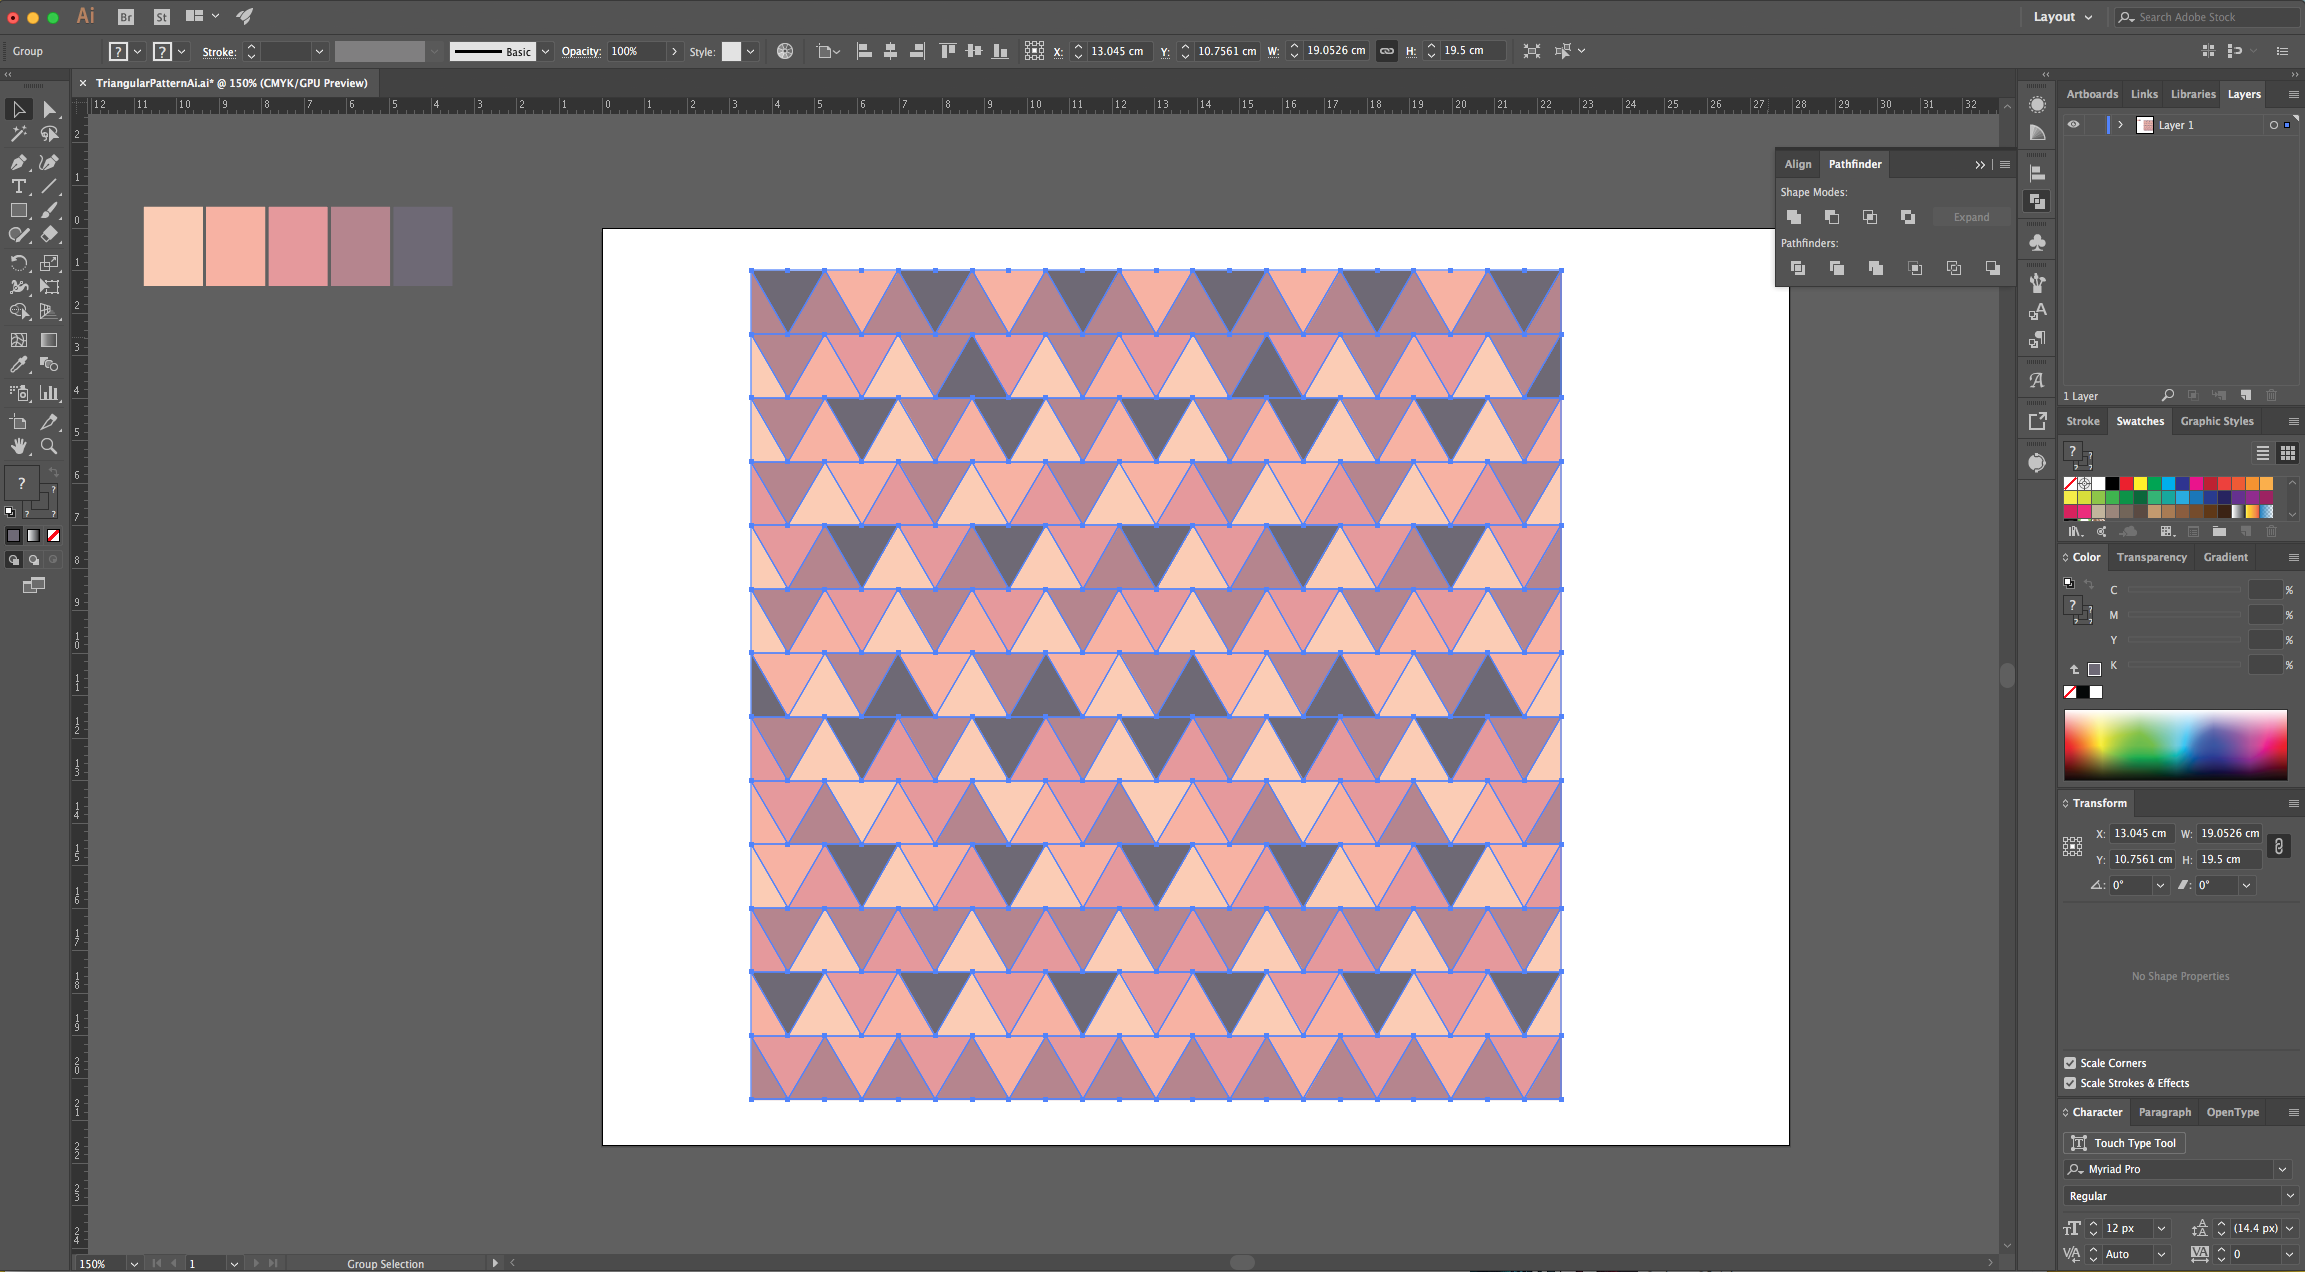
20 - Check the color of the Triangle portions on the sides of the Square to see if the “Fill” color match. Right-click on top and choose “Ungroup”.
21 - Fix them using the “Eyedropper Tool” (I) to make both the same color. Do this on every path that needs it so the resulting “Triangles” formed by a “Pattern” would be the same color.

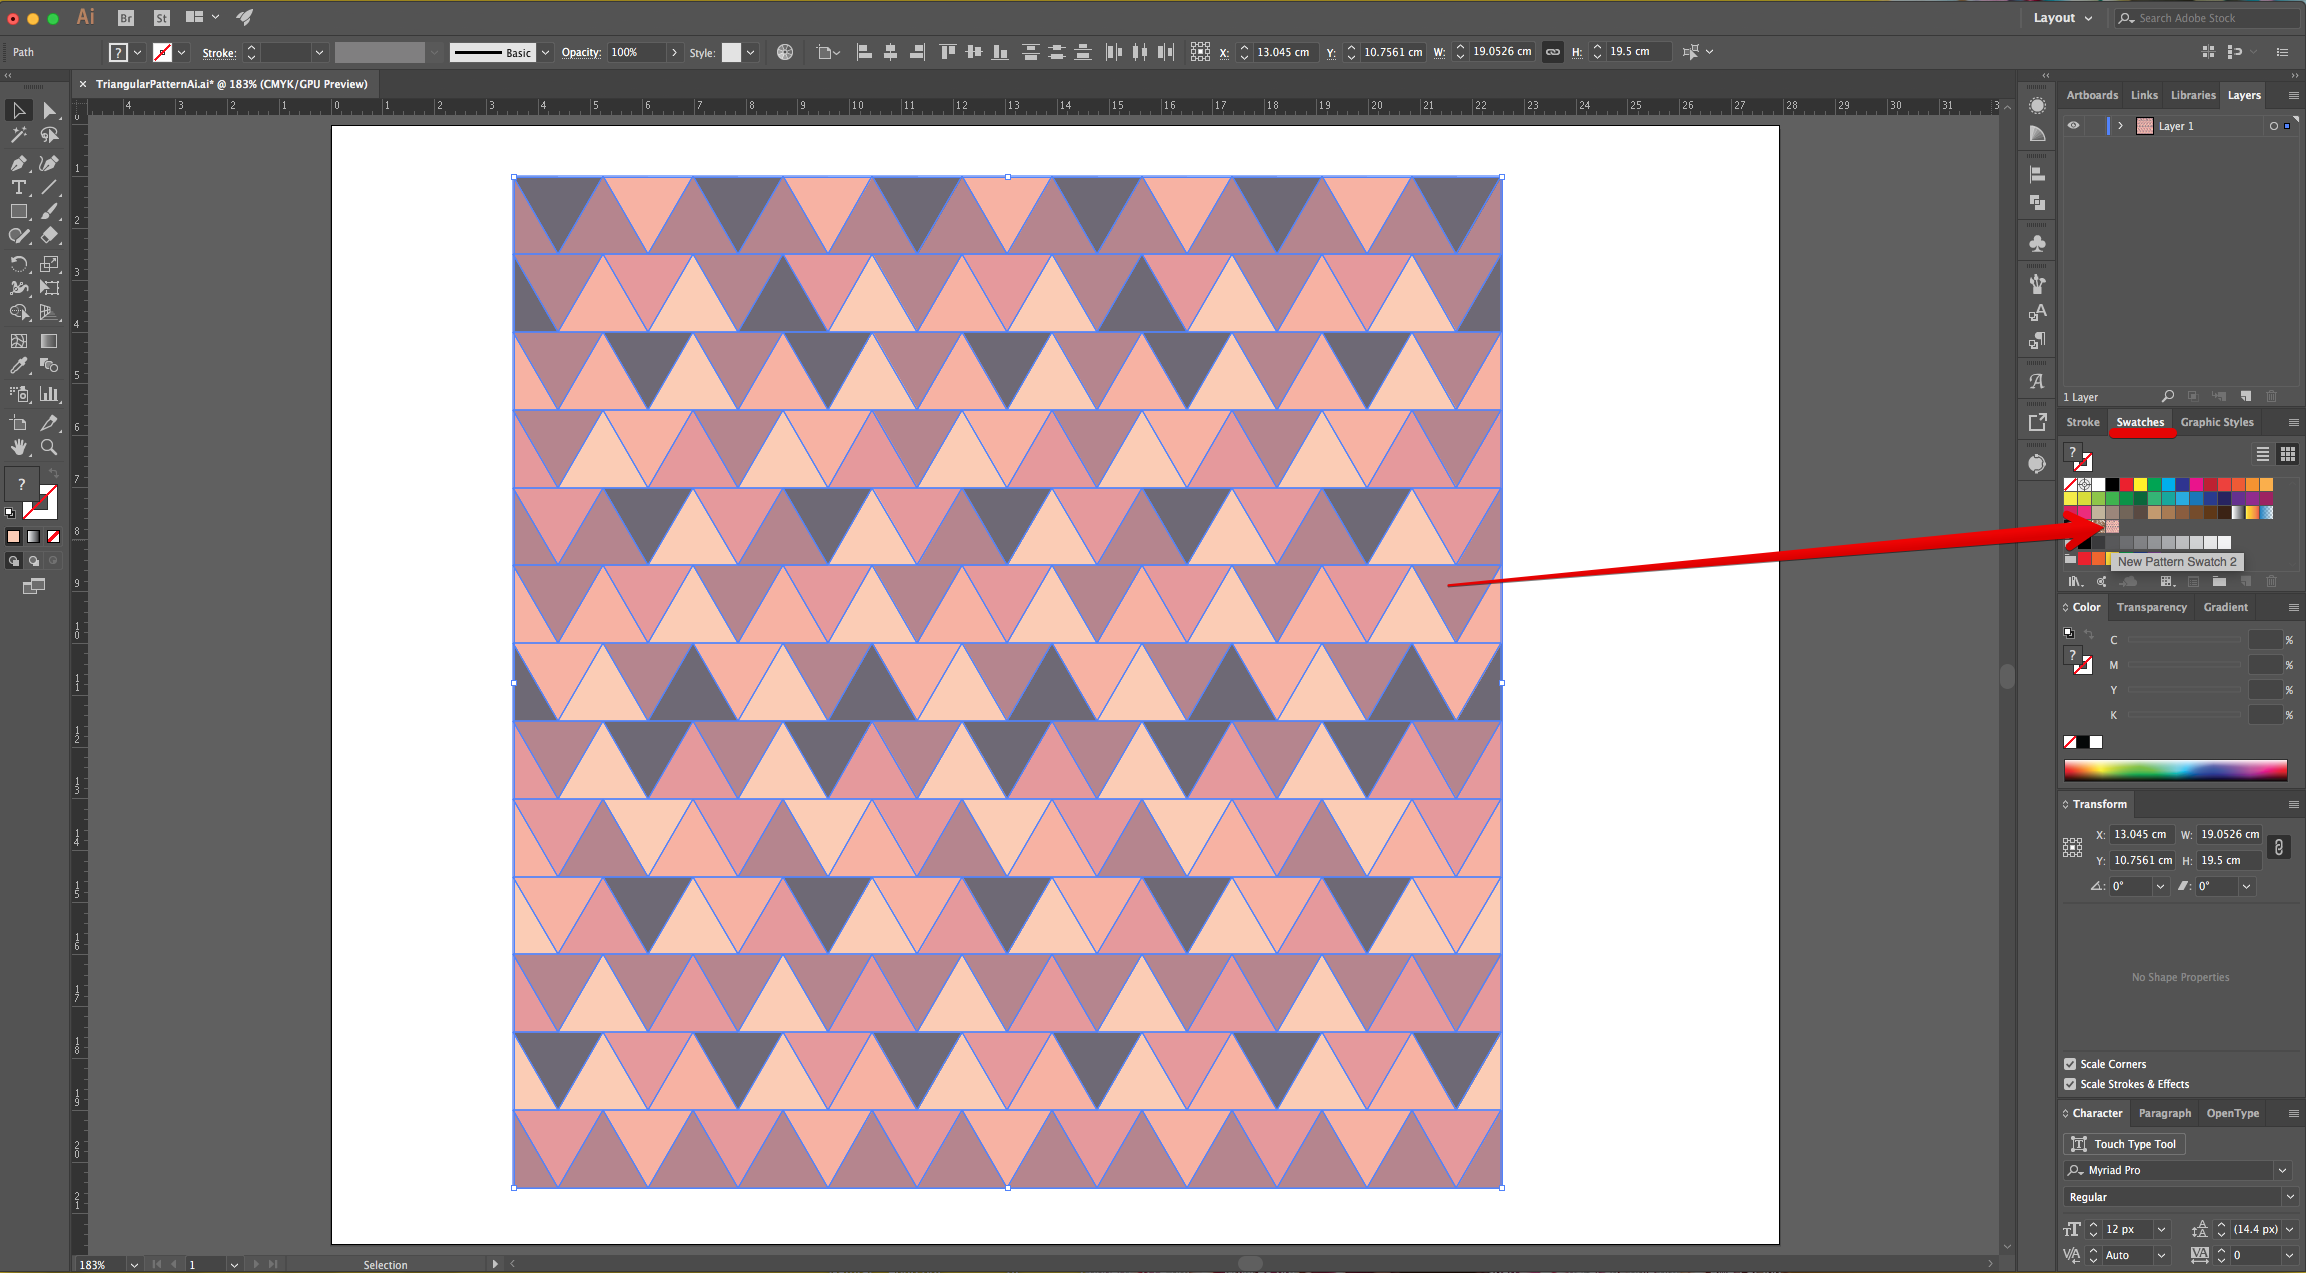
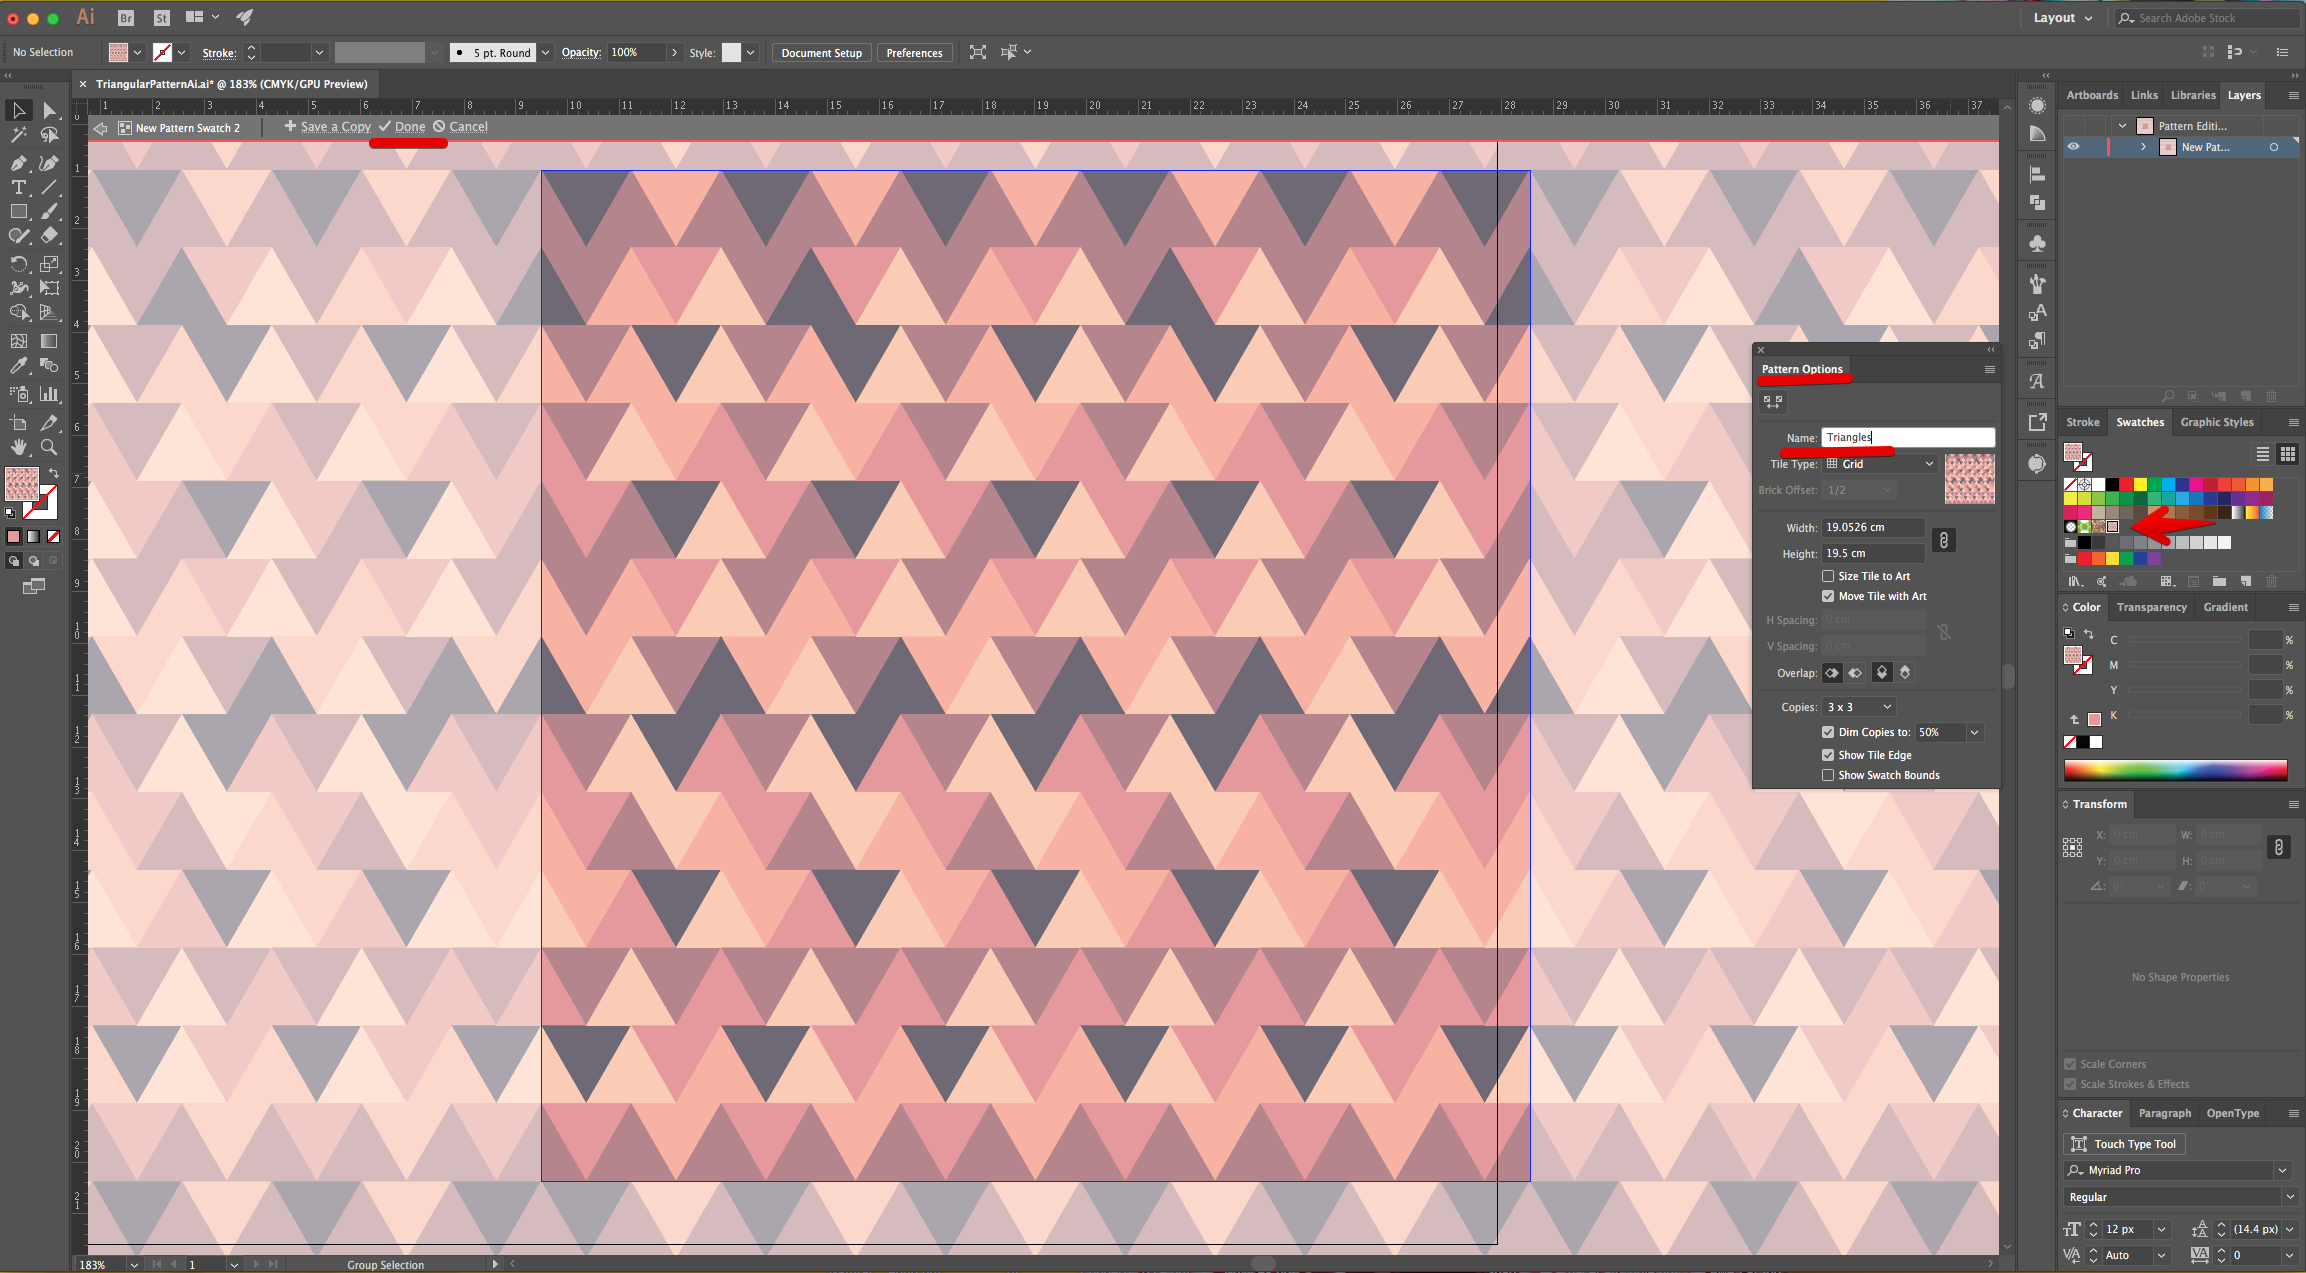
22 - Select everything and drag it to the “Swatches Panel” to create a “New Pattern Swatch”. Double-click on top of its Thumbnail, give it a name and click “Done” on the Top Menu.
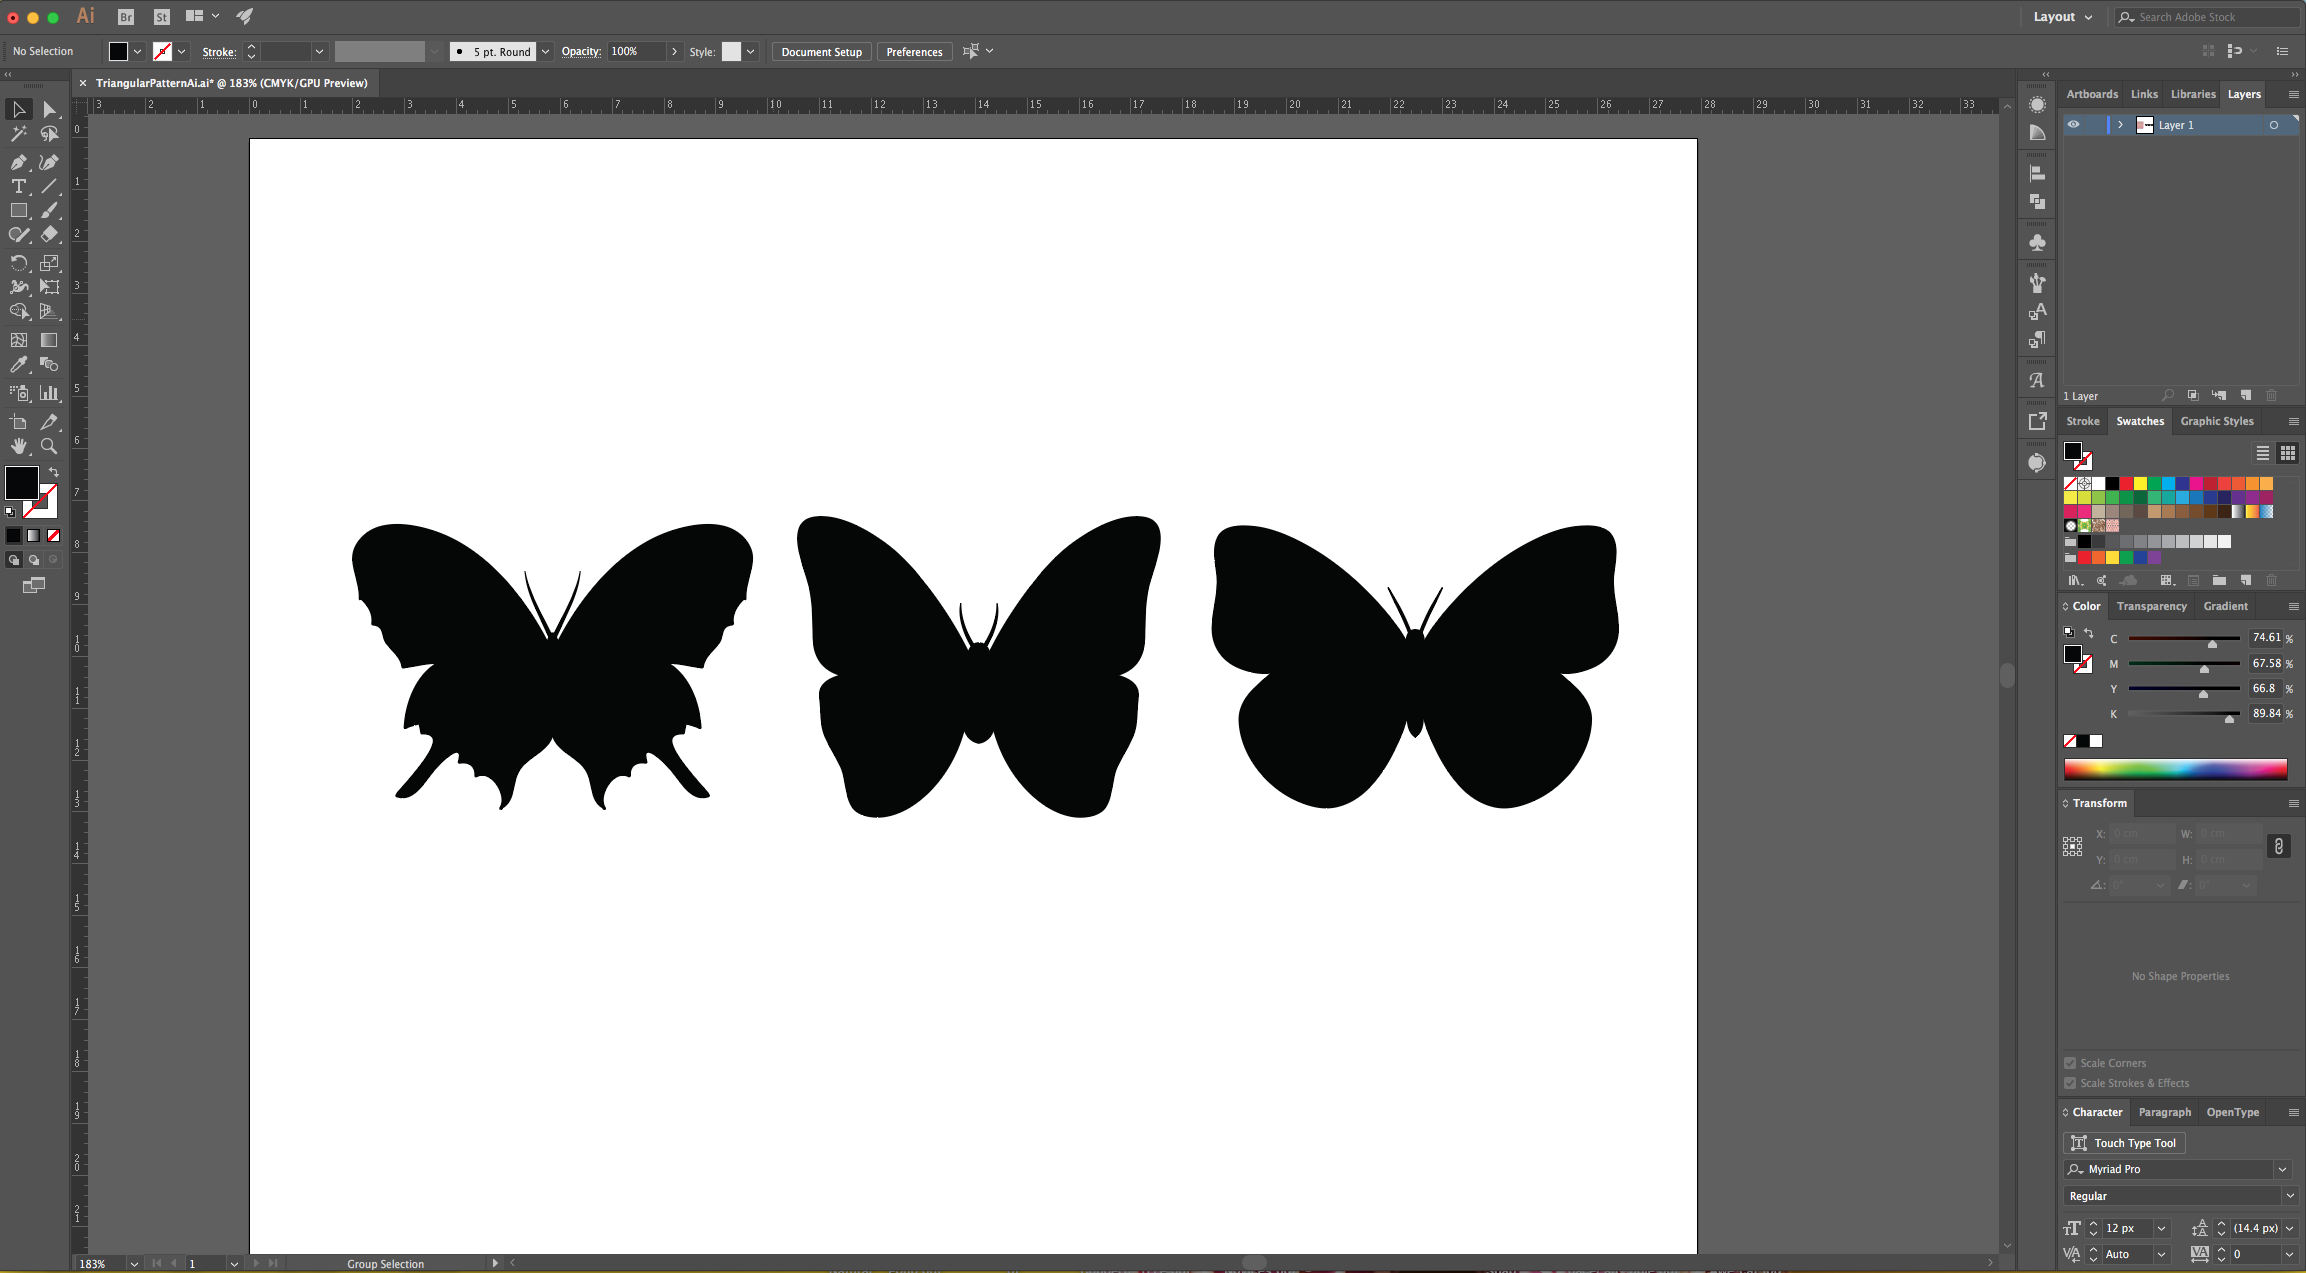
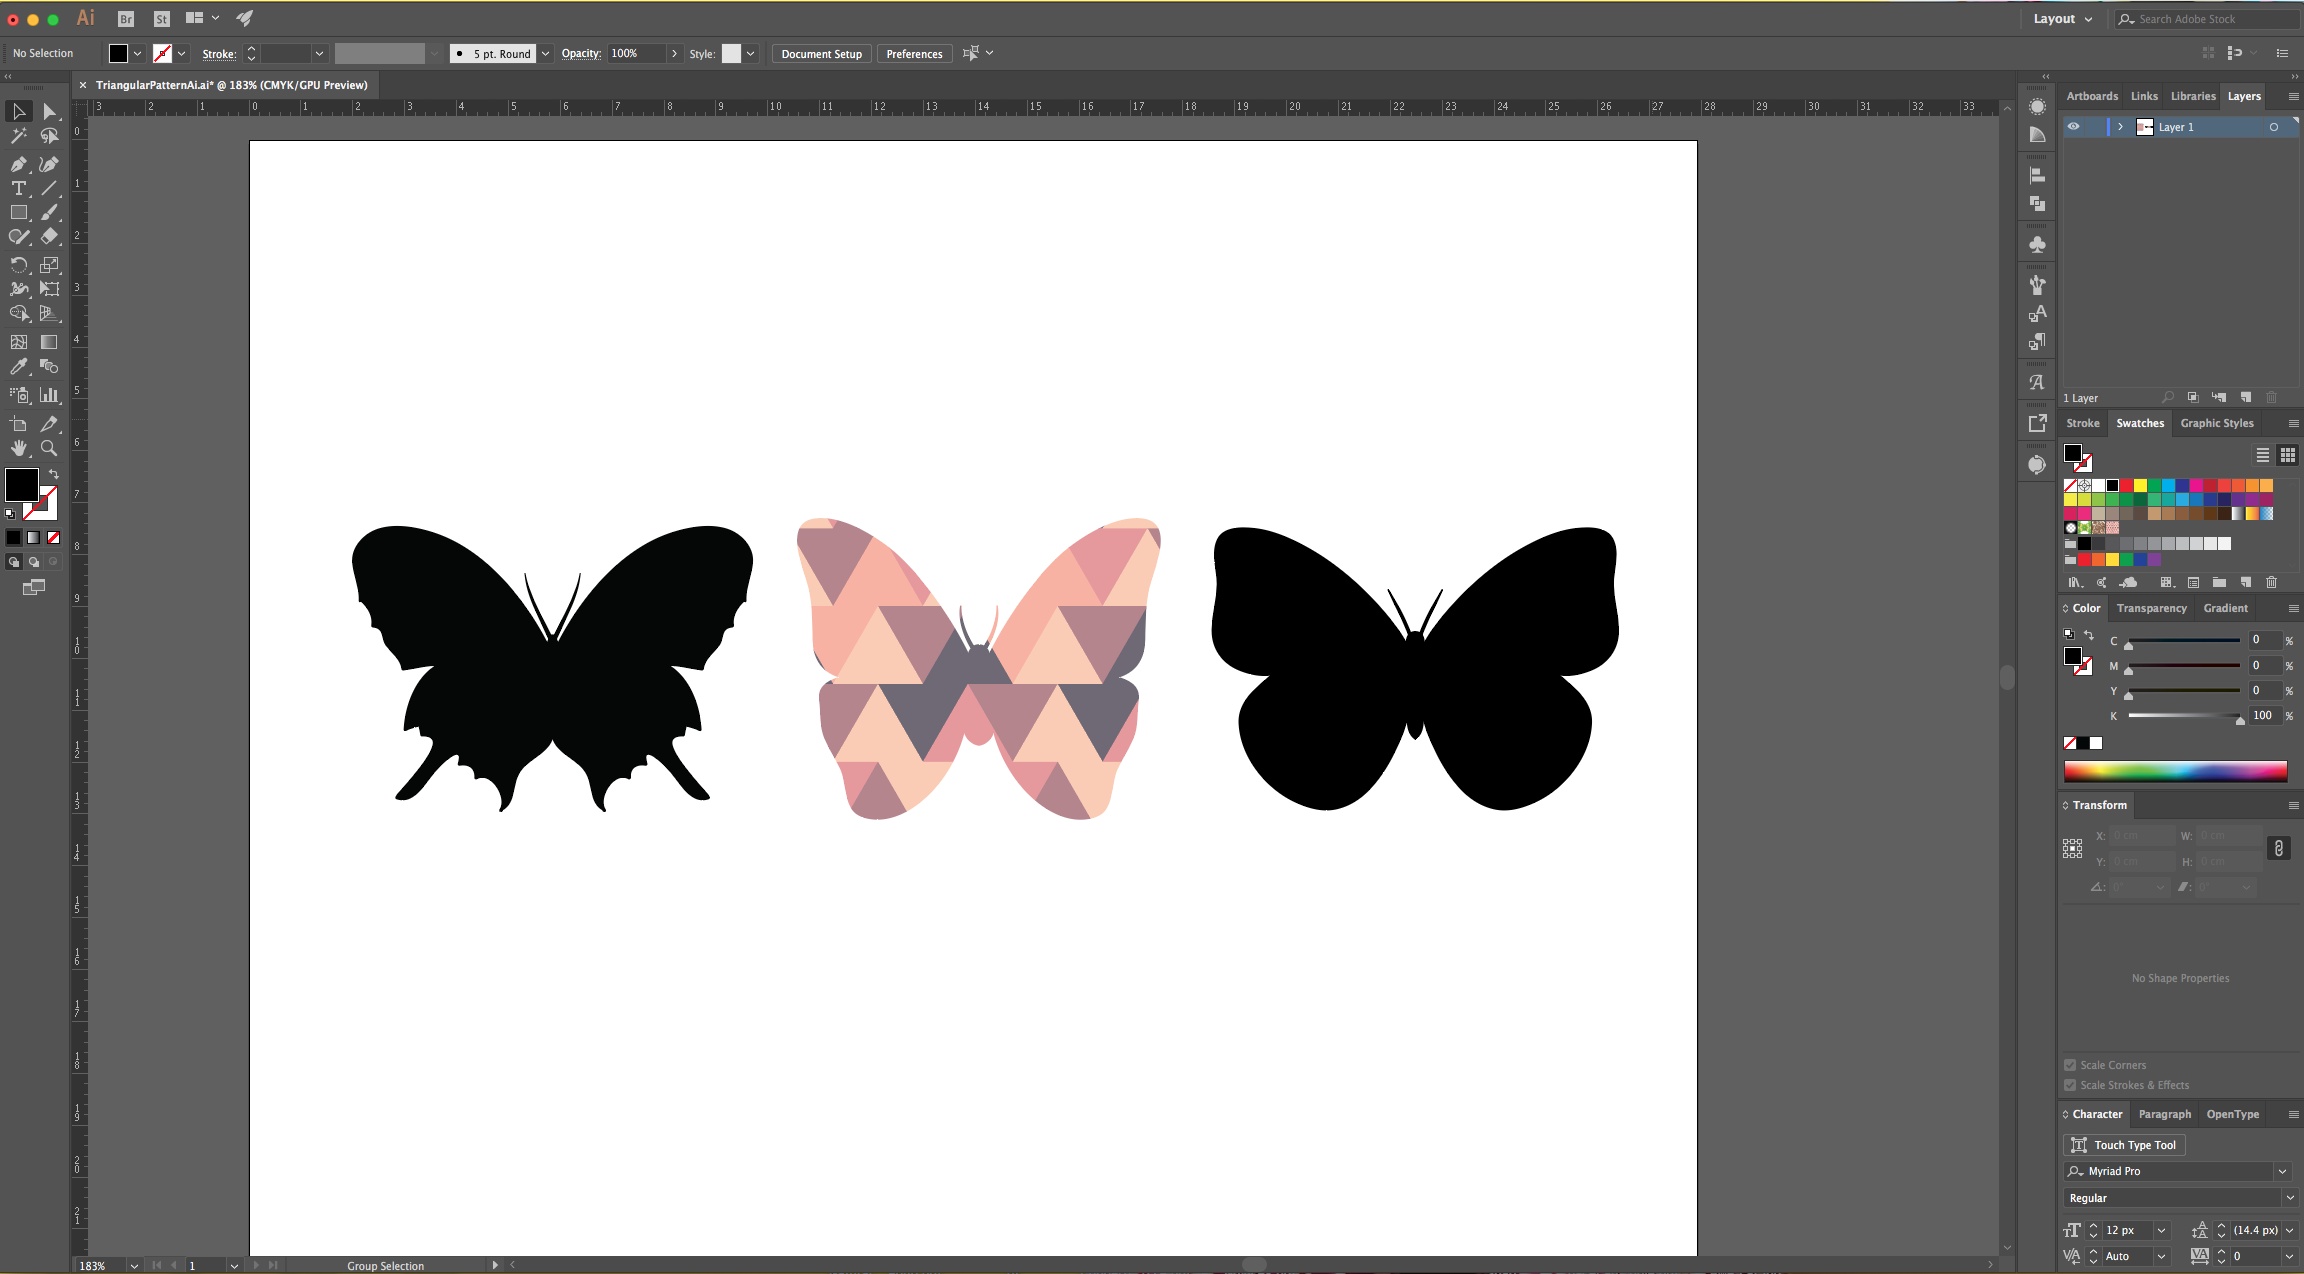
23 - Open the “Vectors” you want to use the “Pattern” with, select one and click on the “Triangles” Swatch to change the “Fill”.
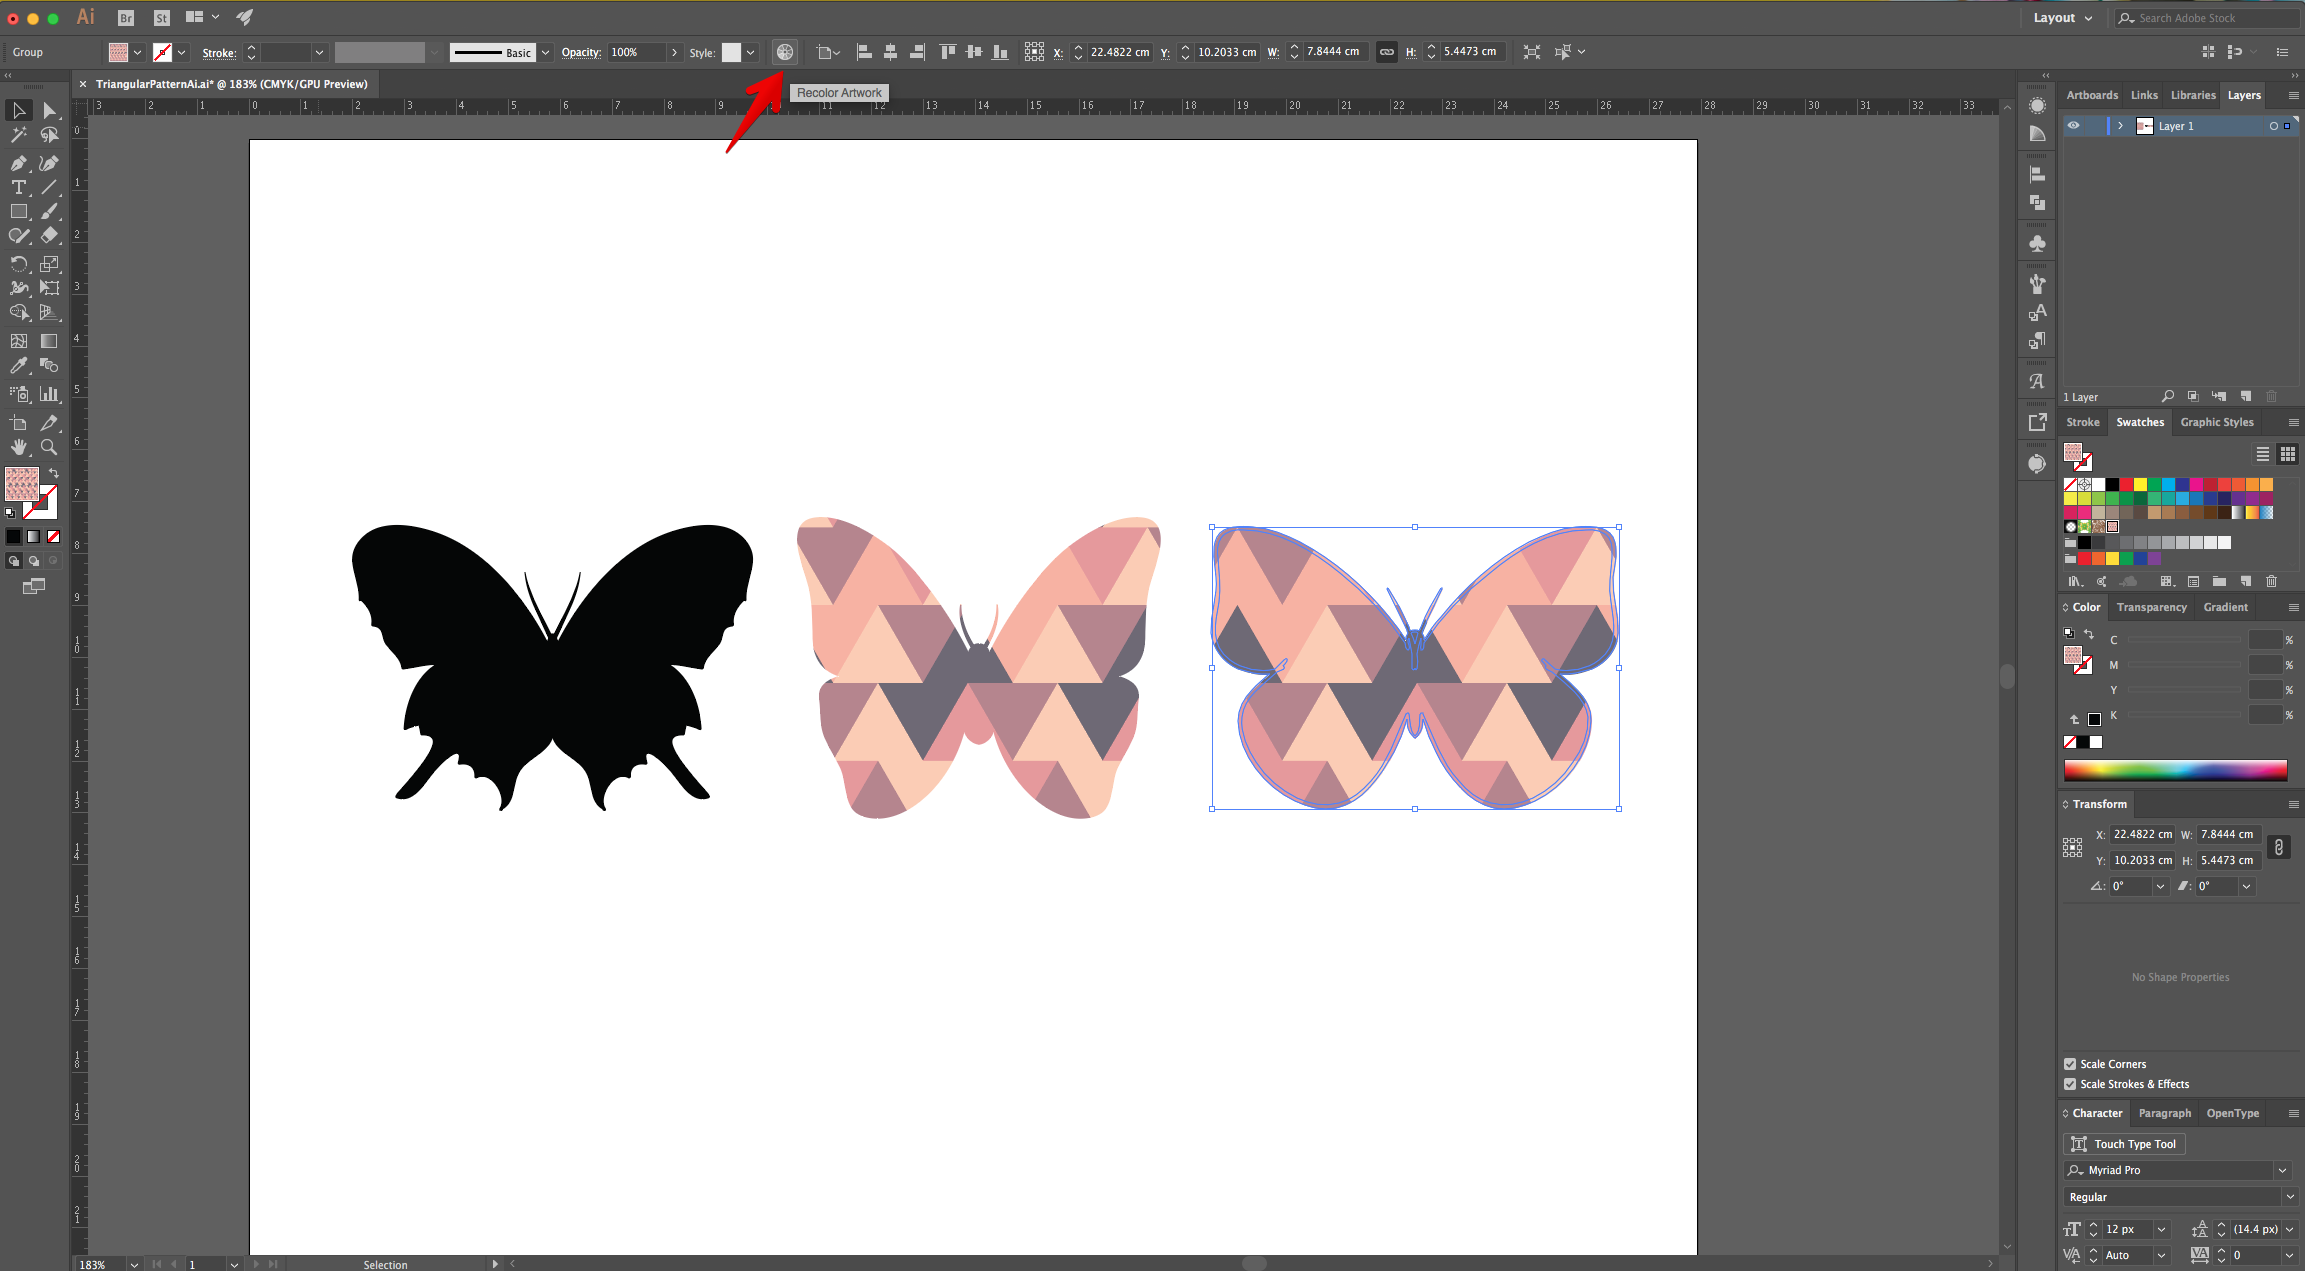
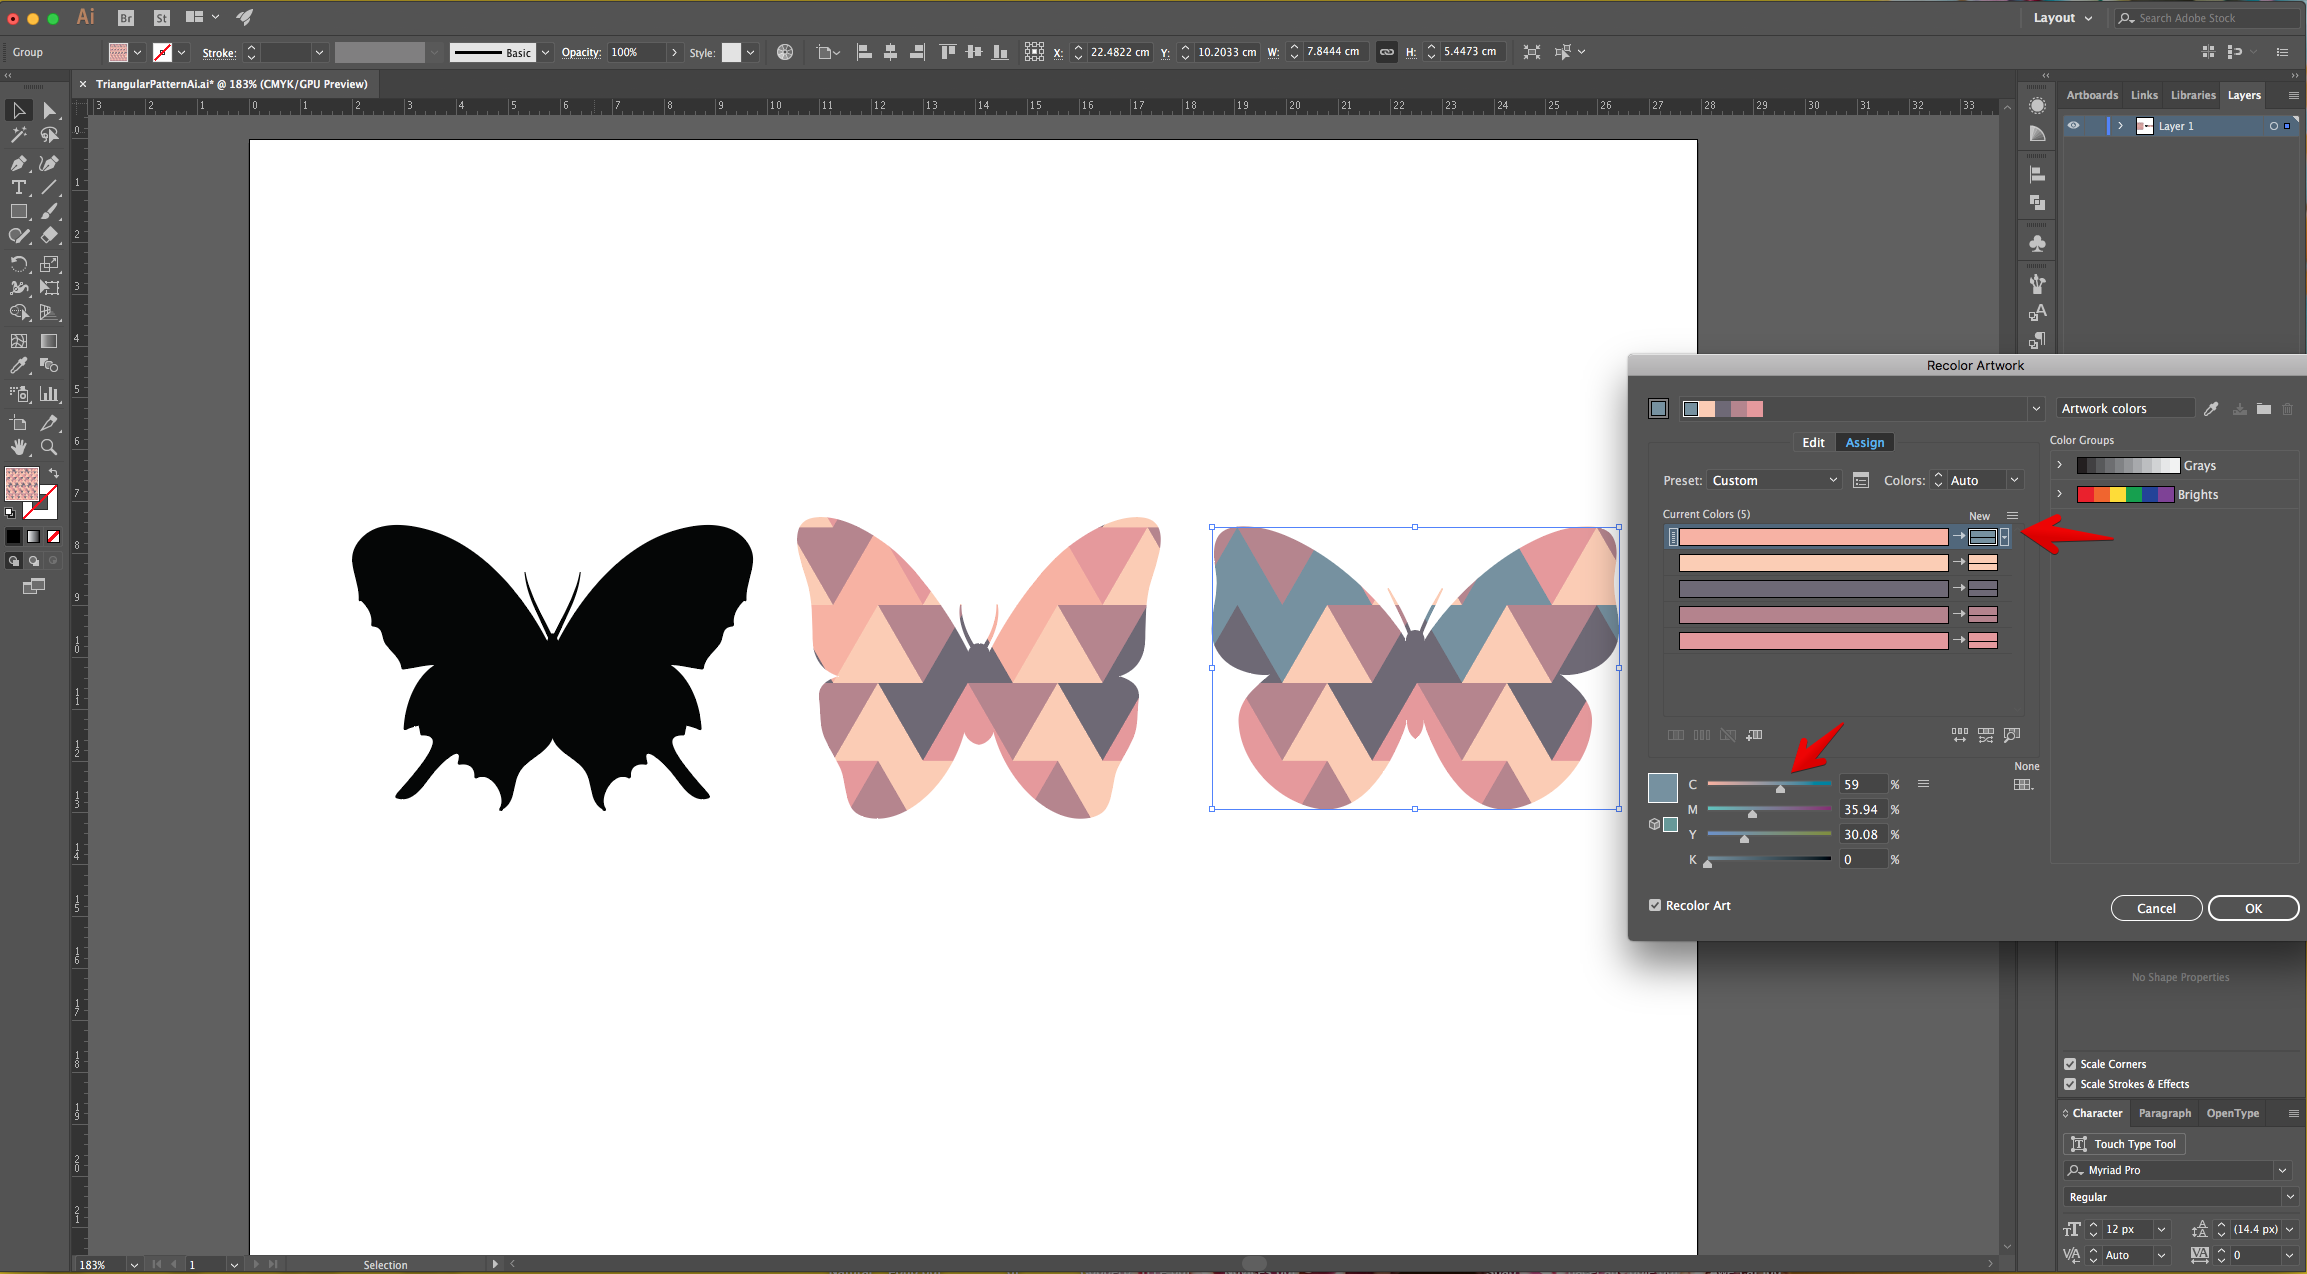
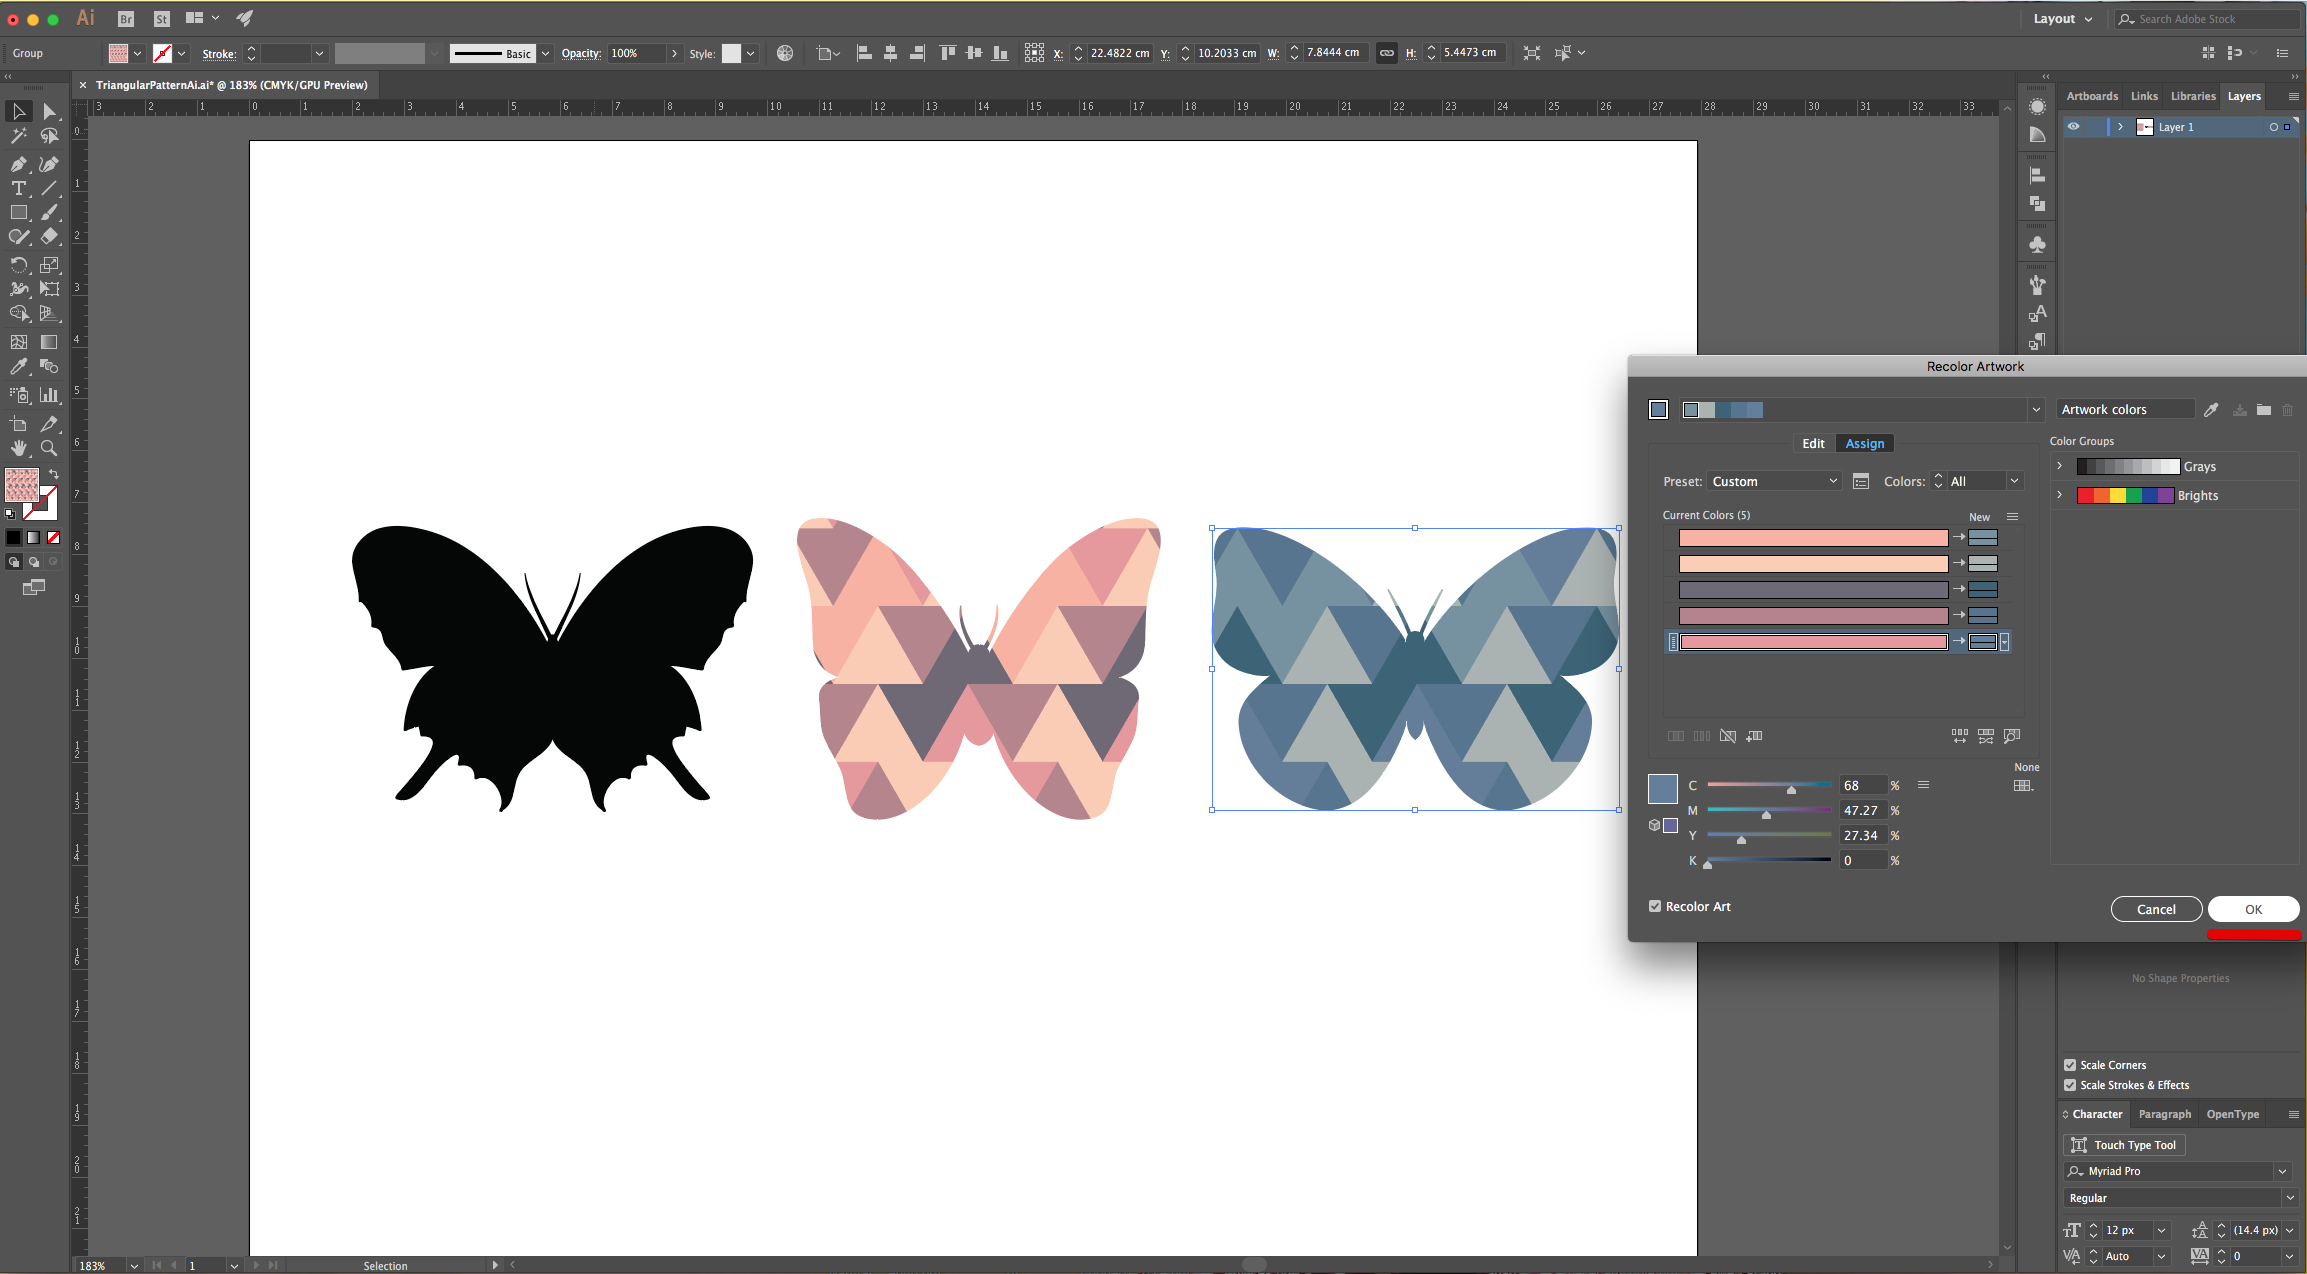
24 - To modify the colors of the “Pattern” click “Recolor Artwork” on the Top Menu and modify the “Current Colors” values. Once you are satisfied with the results, click “OK”. Repeat as many times as needed.
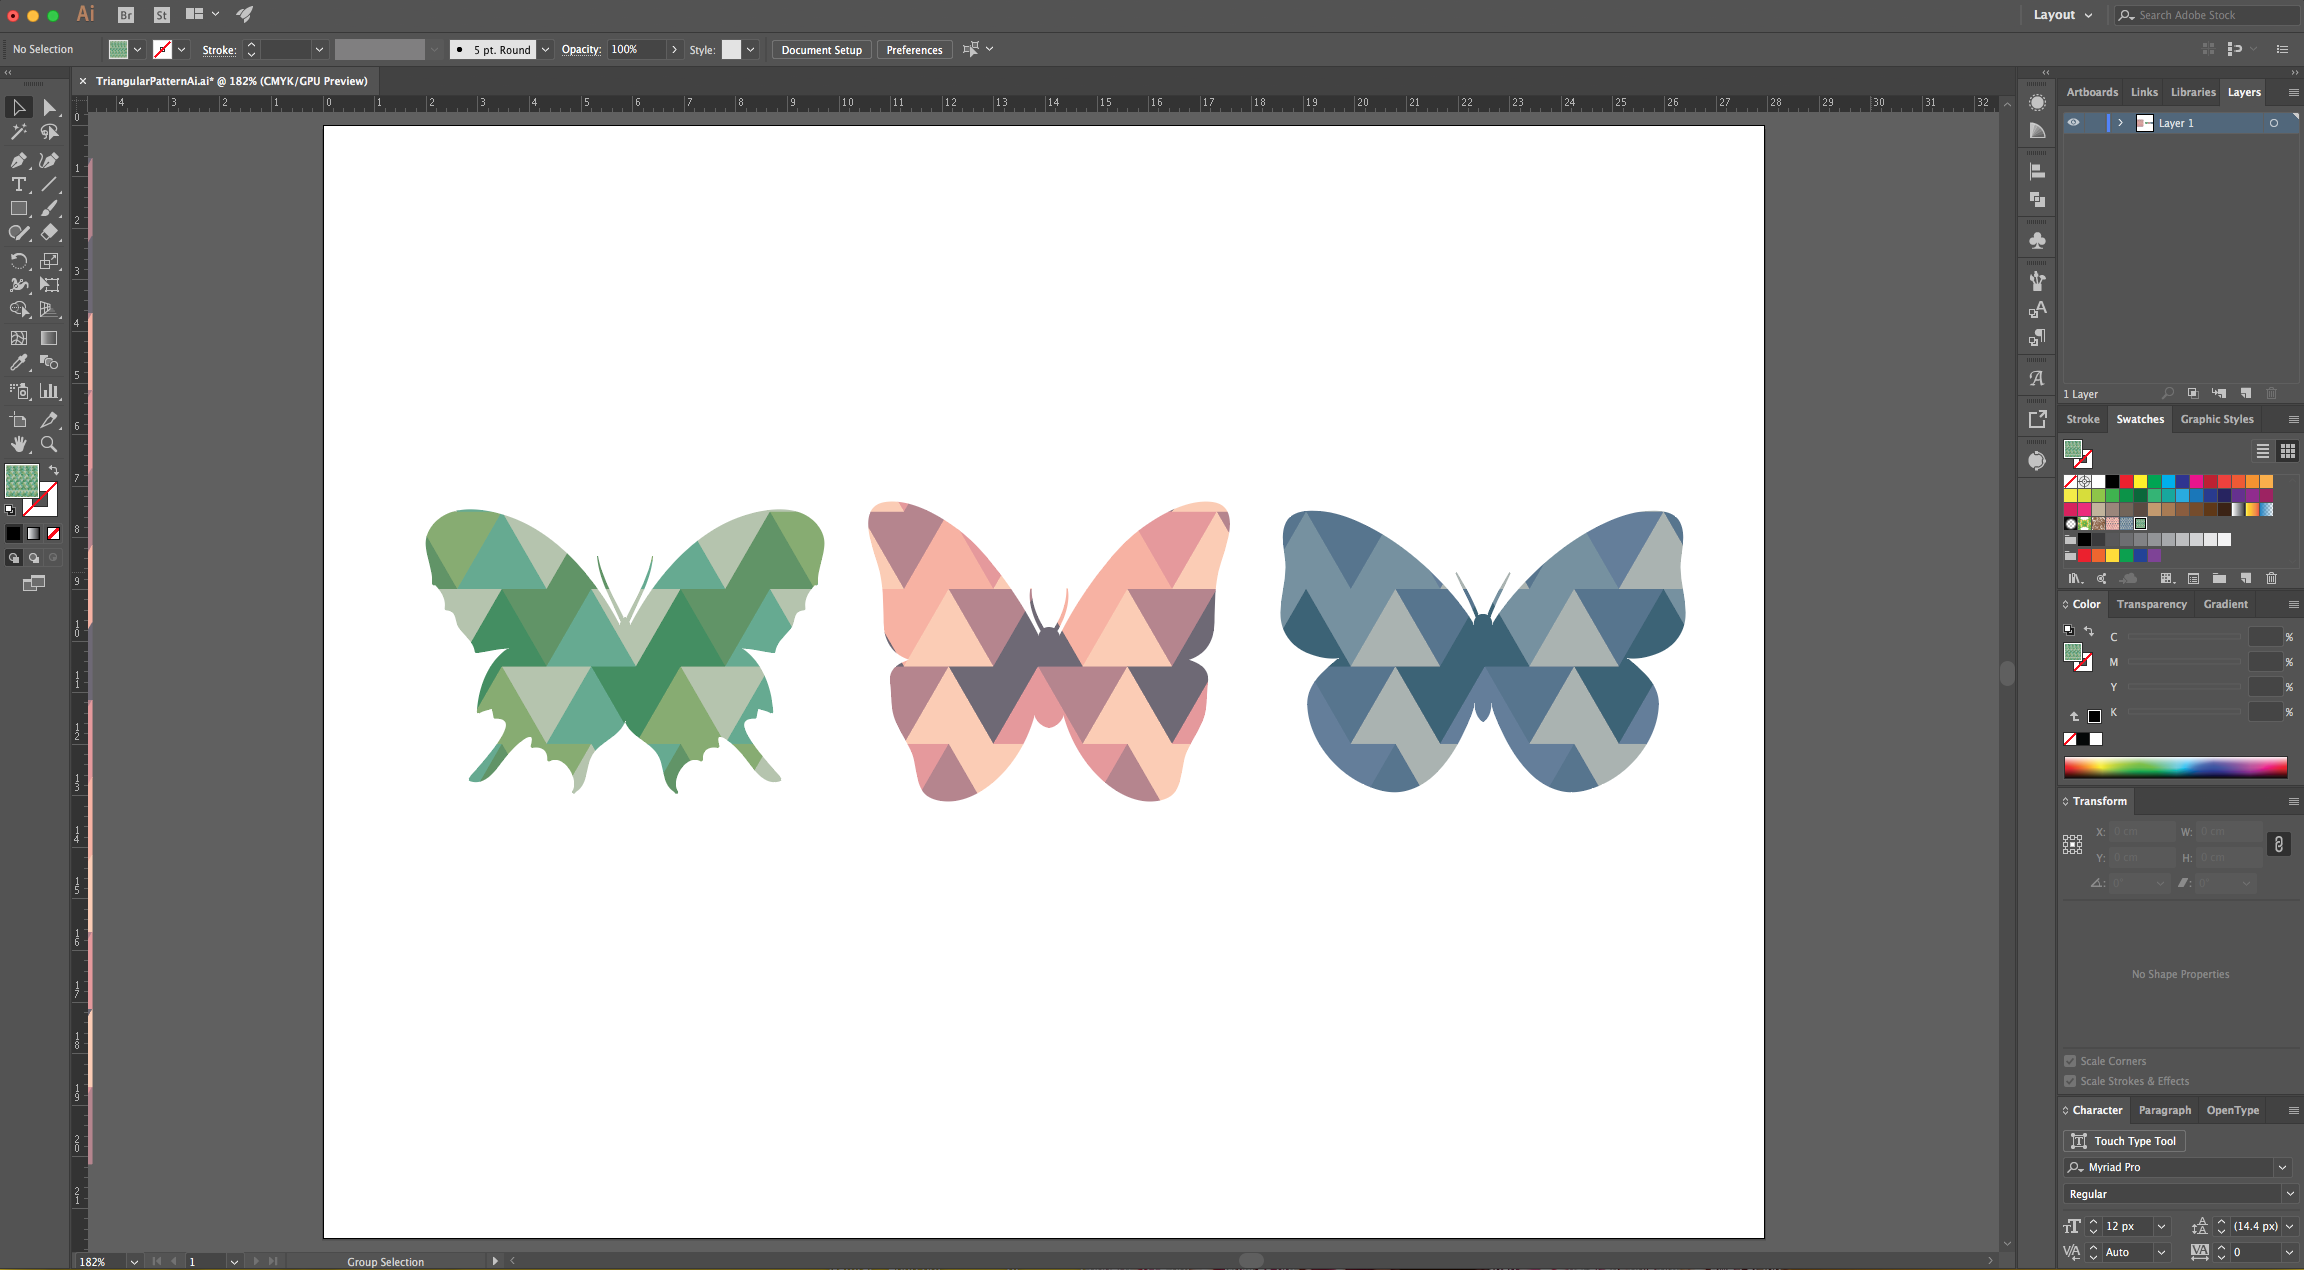
25 - Check out your Artwork!
1 - In Illustrator, create a “New Document”.
2 - If your “Page Rulers” are not active, go to View > Rulers > Show Rulers (Command/Control + R) to bring them out. Go to View > Smart Guides (Command/Control + U) to activate them.
3 - Use the “Polygon Tool”, click inside the “Canvas” and use a 1 cm “Radius” value and 3 “Sides”.
4 - Move the “Triangle” to the Top-Left outside part of the “Document”. The “Smart Guides” should help you to position it accurately.
5 - Create a “Duplicate” by holding the “Shift” and “Option/Alt” keys while dragging it to the “Right”. The bottom “Points” of each triangle should be touching. Then, repeat this using “Transform Again” (Command/Control + D) until you fill the entire “Canvas” and place another “Triangle” outside the right side of it.
6 - Change the “Fill” to the color of your choice (we used an “Orange” shade from the “Swatches Panel”.
7 - With the “Triangles” still, head to the “Appearance Panel”, click on the “Effects” Menu at the bottom and navigate to Distort & Transform > Transform. Change the “Horizontal Move” value so the resulting “Row” fits perfectly between the space left by the original one. Check the “Reflect Y” box and make 1 ·Copy”.
8 - Go to Object > Expand Appearance to release the “Shapes”, then right-click on top and choose “Ungroup”.
9 - Select everything, “Copy” it (Command/Control + C) and “Paste in “Front” (Command/Control + F).
10 - Then, move the “Copy” down while holding the “Shift” key and place it exactly under the original shapes. Repeat until you get to the bottom.
11 - Move the “Triangles” so they cover the entire “Canvas” evenly.
12 - Open the “Color Palette” file and import it or paste it into the “Document”. Create some squares filled with the colors and place them outside the “Canvas”.
13 - You may need to enter “Outline Mode” (Command/Control + Y) to make it easier to select individual “Triangles”. If you want to go back, just hit Command/Control + Y again.
14 - Select some of the “Triangles” throughout the “Canvas” and then use the “Eyedropper Tool” (I) to click on the color square that has the color of your choice to apply it to your selection.
15 - Go to Object > Lock Selection (Command/Control + 2) to lock the triangles that you just modified.
16 - Then repeat Steps 14 and 15 alternating colors until you change the color fill of the entire “Document”.
17 - Go to Object > Unlock All (Shift + Command/Control + 2) to unlock the triangles that you modified.
18 - Select the “Rectangle Tool” (R) and create a shape that covers a big portion of the triangles. Make sure that the portions of the “Triangles” covered by the edges of the “Square” are equal to the ones left outside.
19 - Make sure that everything is selected, head to the “Pathfinder Panel” and choose “Crop” to leave only a squared shape but filled with the “Pattern”.
20 - Check the color of the Triangle portions on the sides of the Square to see if the “Fill” color match. Right-click on top and choose “Ungroup”.
21 - Fix them using the “Eyedropper Tool” (I) to make both the same color. Do this on every path that needs it so the resulting “Triangles” formed by a “Pattern” would be the same color.
22 - Select everything and drag it to the “Swatches Panel” to create a “New Pattern Swatch”. Double-click on top of its Thumbnail, give it a name and click “Done” on the Top Menu.
23 - Open the “Vectors” you want to use the “Pattern” with, select one and click on the “Triangles” Swatch to change the “Fill”.
24 - To modify the colors of the “Pattern” click “Recolor Artwork” on the Top Menu and modify the “Current Colors” values. Once you are satisfied with the results, click “OK”. Repeat as many times as needed.
25 - Check out your Artwork!
by @lornacane


