
Chalk Text Effect in Photoshop
In this tutorial, learn how to turn any font into chalk text in Photoshop with the Brush tool.
Today we will learn a quick way to emulate the look of chalk in Photoshop. With this technique, you can give your text a realistic chalkboard look. We will do this using some brushes, layers styles, and adjustment layers to change the color. You can also use it on shapes if you want to. With it, you can create some cool-looking mockups, invites, and many other designs.
We will be using a classroom flat lay for the background, and Letter Forever font to create our design.
Start by opening the image you chose as the background. Then, select the Type Tool (T), and choose your font.
Type your text and adjust the size, alignment, and spacing, etc. that fit your needs. Use white as the Fill color.
Next, we are going to create a brush that mimics the look of chalk writing.
Select the Brush tool (B), go to the Brush Settings panel, then choose the Chalk 44 pixels brush. It should be part of the default brushes. Then apply the following values:
In the Brush Tip Shape tab, input a Size of 66 px and a 35% Spacing. Make sure that the Smoothing box is checked.
In the Shape Dynamics tab give Size Jitter a value of 100% and leave the rest as it is.
In the Dual Brush tab, choose the Spatter 39 pixels brush. Adjust with a 15 px Size, a 5% Spacing, a 150% Scatter and a Count of 1.

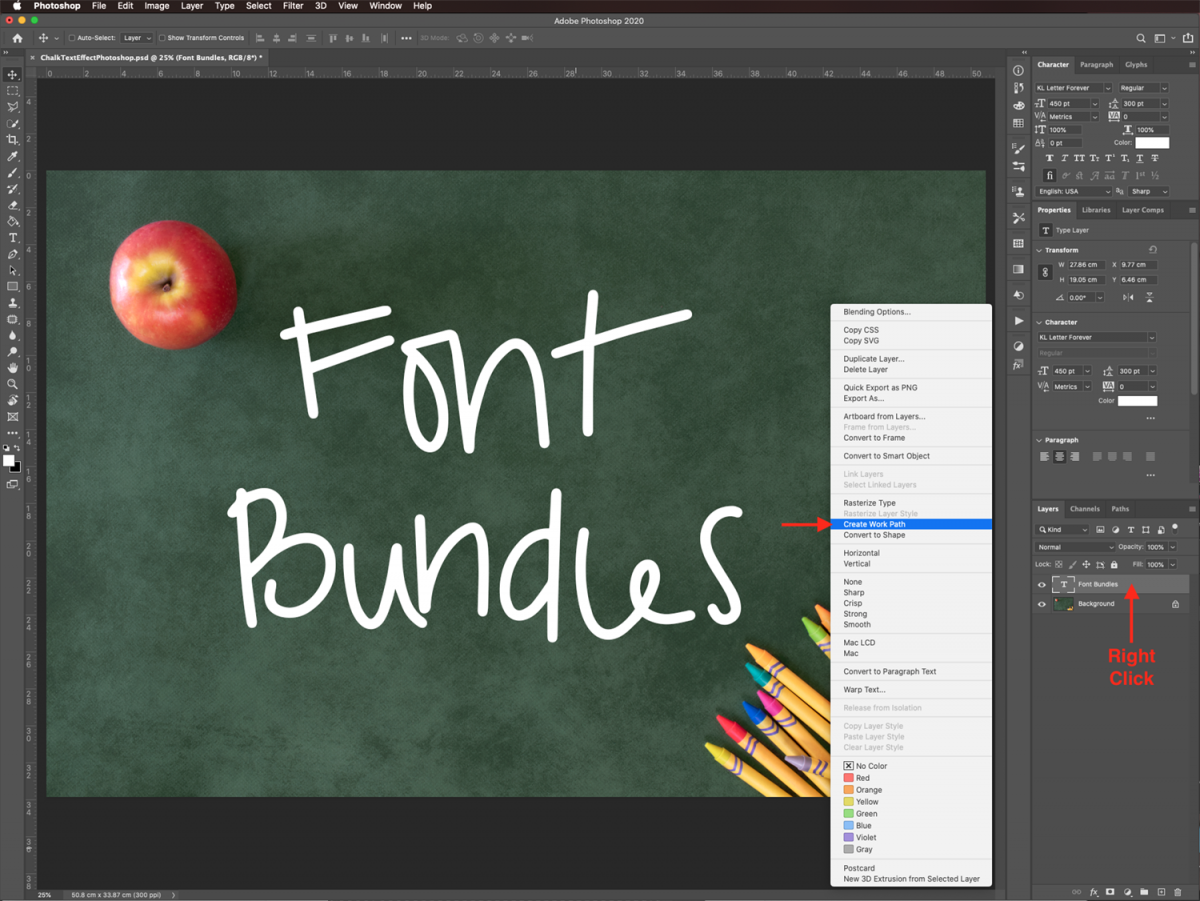
Now, we need to transform our text into a path so that we can apply the chalk brush to it. Right-click on top of the text layer thumbnail and choose Create Work Path.
You may get a pop-up window telling you that your request cannot be completed. It means that you need to convert the text to rasters.
Right-click on its thumbnail and choose Rasterize Type. Then try to create the work path again.
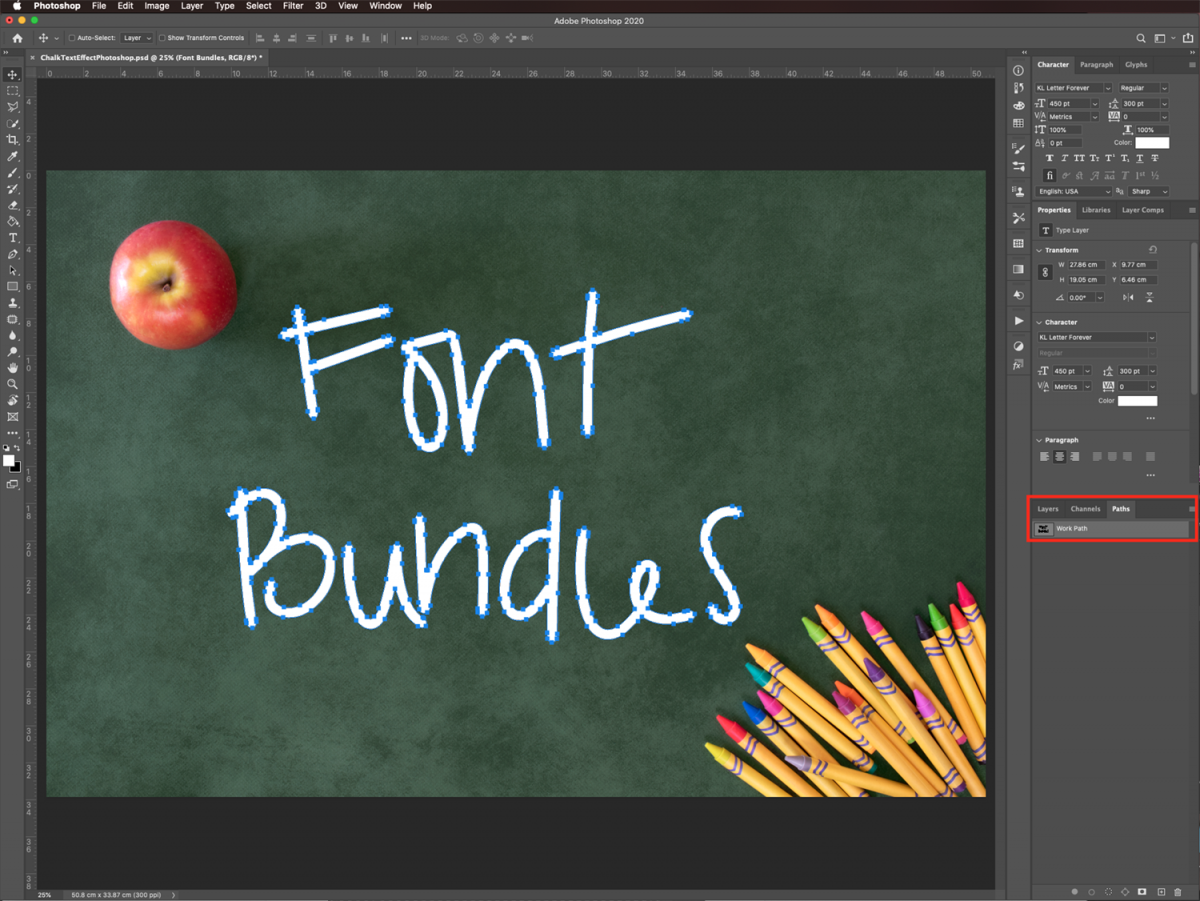
Your newly created work path should now show as a layer on the Paths panel.
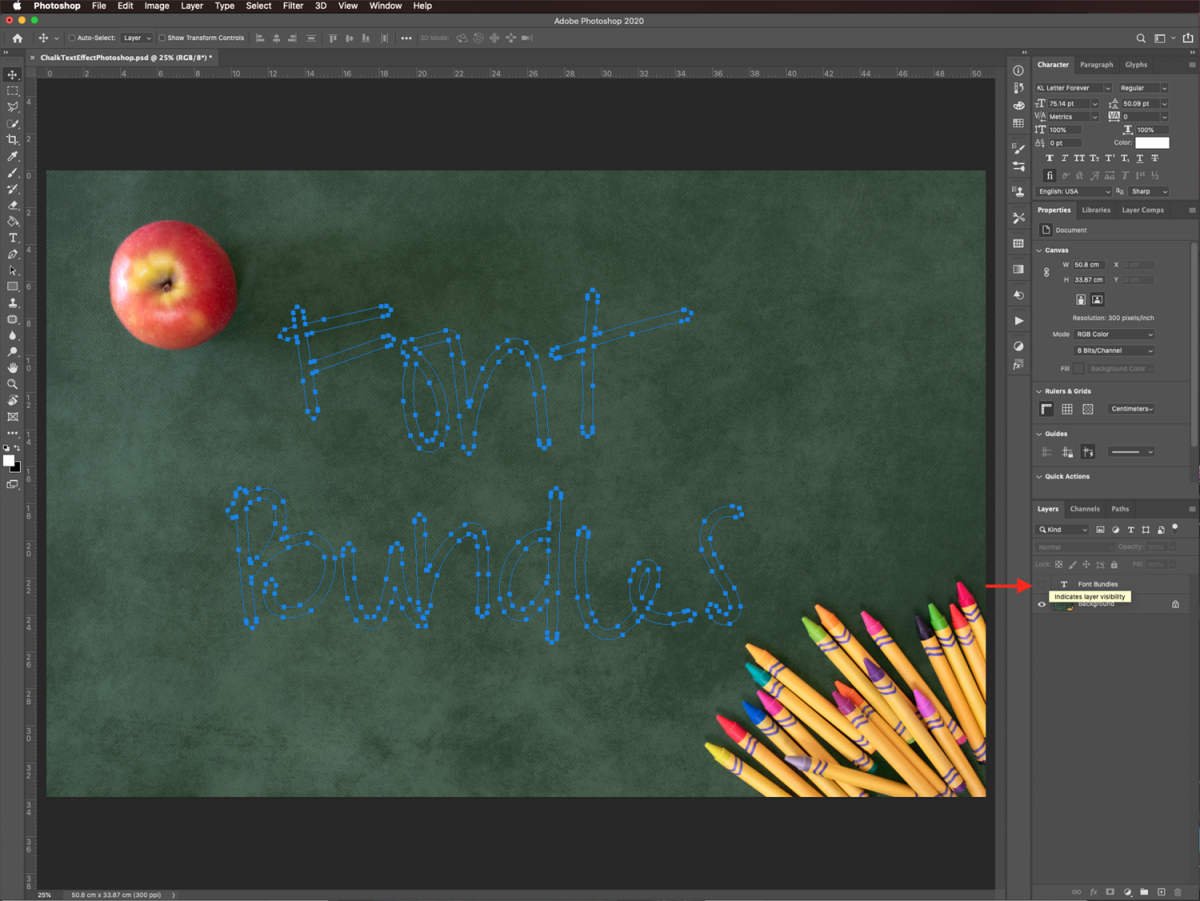
Head back to the Layers panel. Now hide the text layer by clicking on the small eye icon on the left side of its thumbnail.
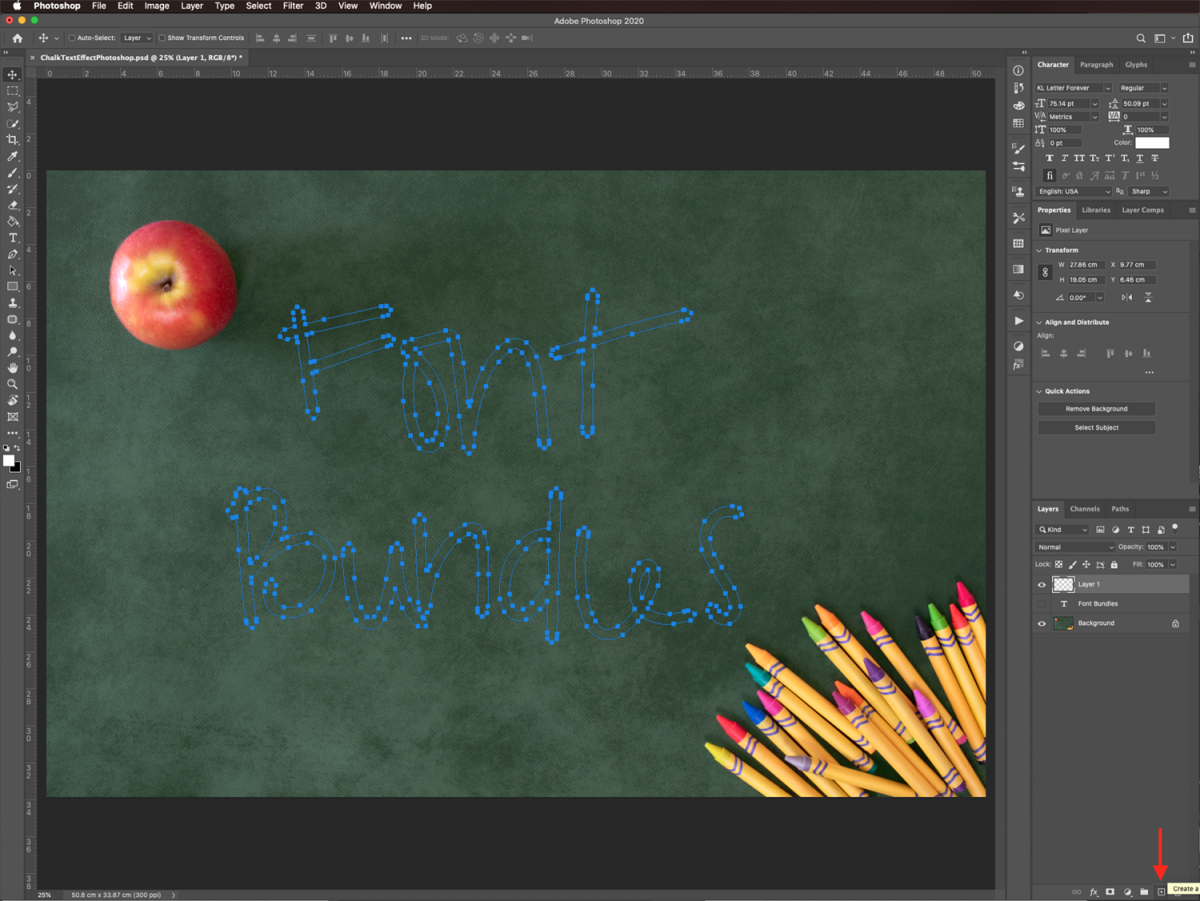
Then, create a new layer by clicking on the small button at the bottom of the Layers panel.
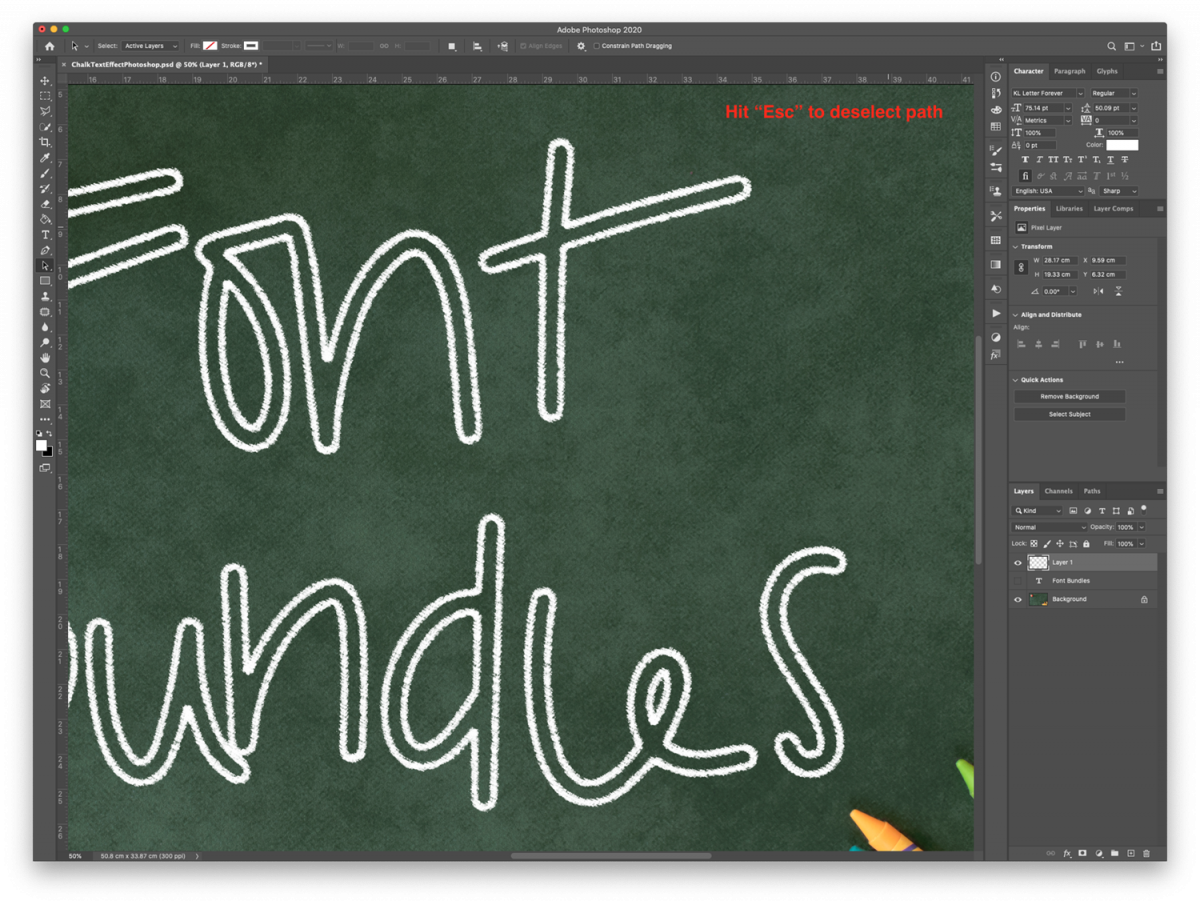
To add the chalk effect to the path, first, make sure white is set as your Foreground color. With the Path Selection tool (A) selected, right-click on top of your path and choose Stroke Path.

Next, select Brush as the tool on the popup window. Make sure that the Simulate Pressure box is unchecked and click Ok. Do this a couple of times if you want a thicker line.

To deselect your path, hit the Esc key a couple of times.
First, turn the visibility of the first text layer back on. Double-click on top of its thumbnail to apply the following Layer Styles:
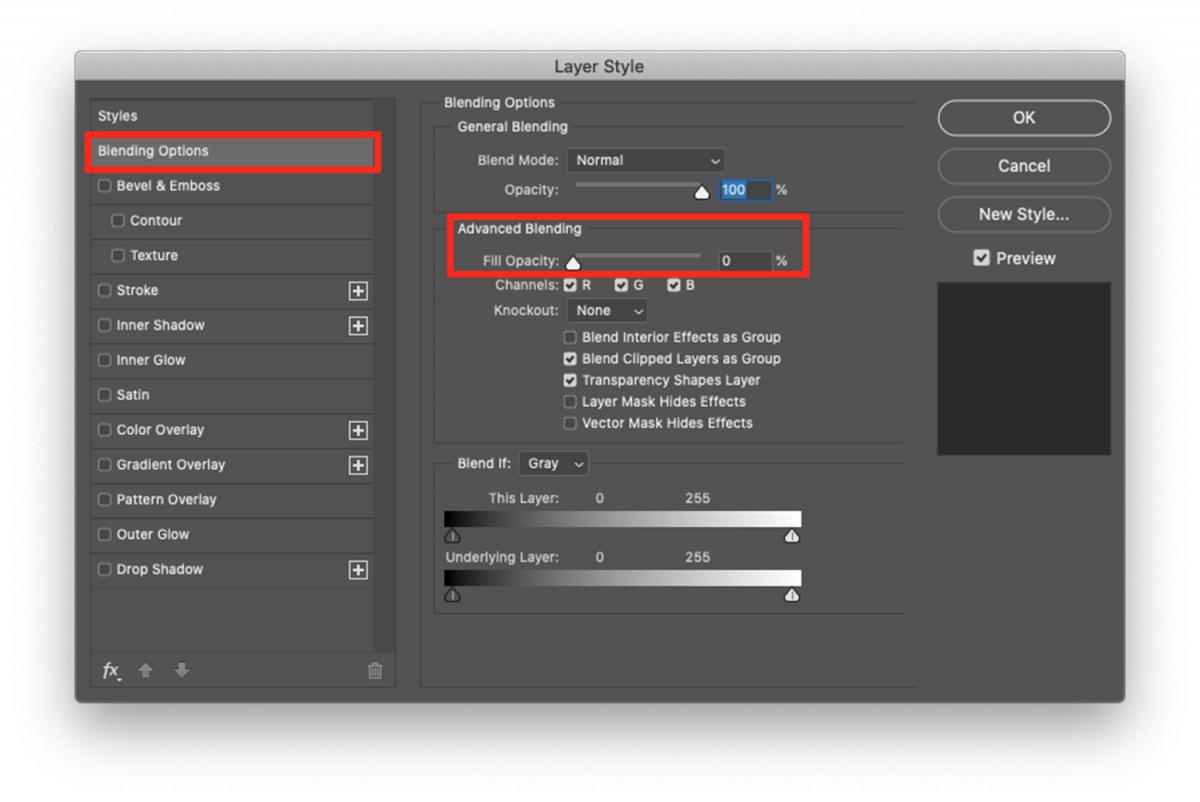
In the Blending Options tab reduce the Fill Opacity to 0%.
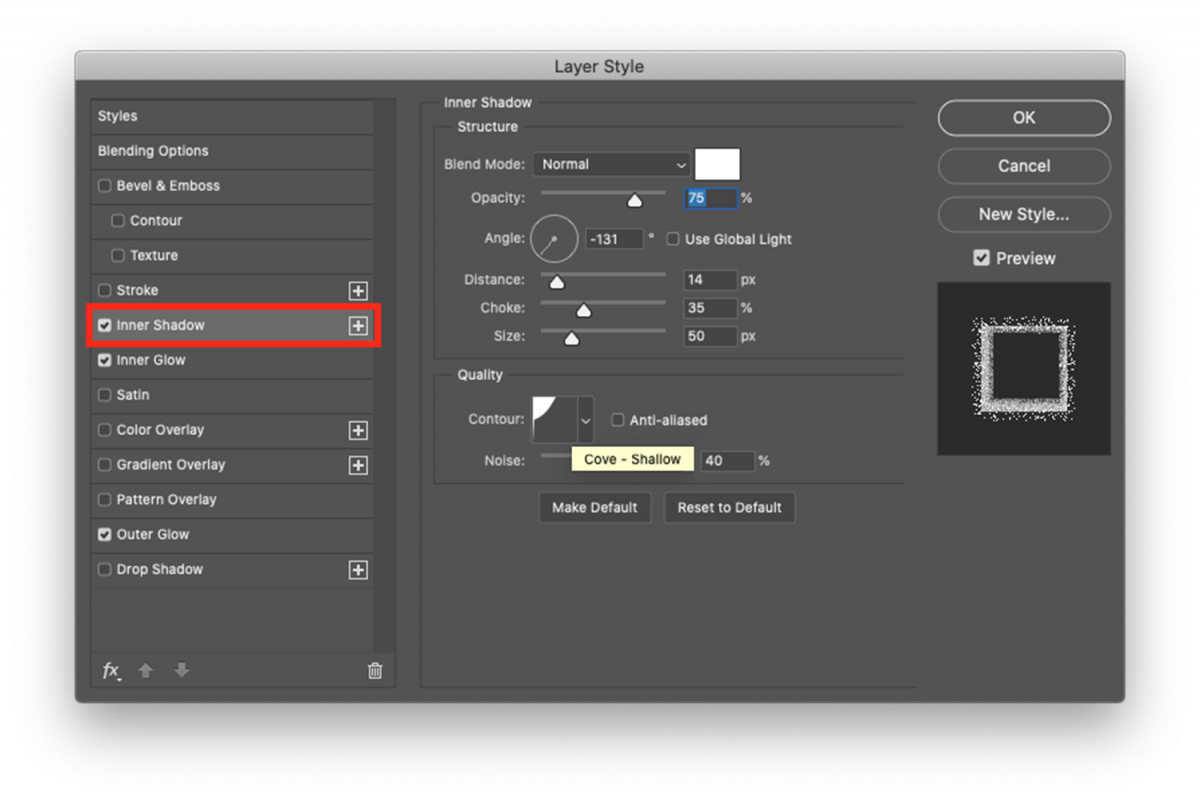
In the Inner Shadow tab use the following values:
In the Inner Glow tab:

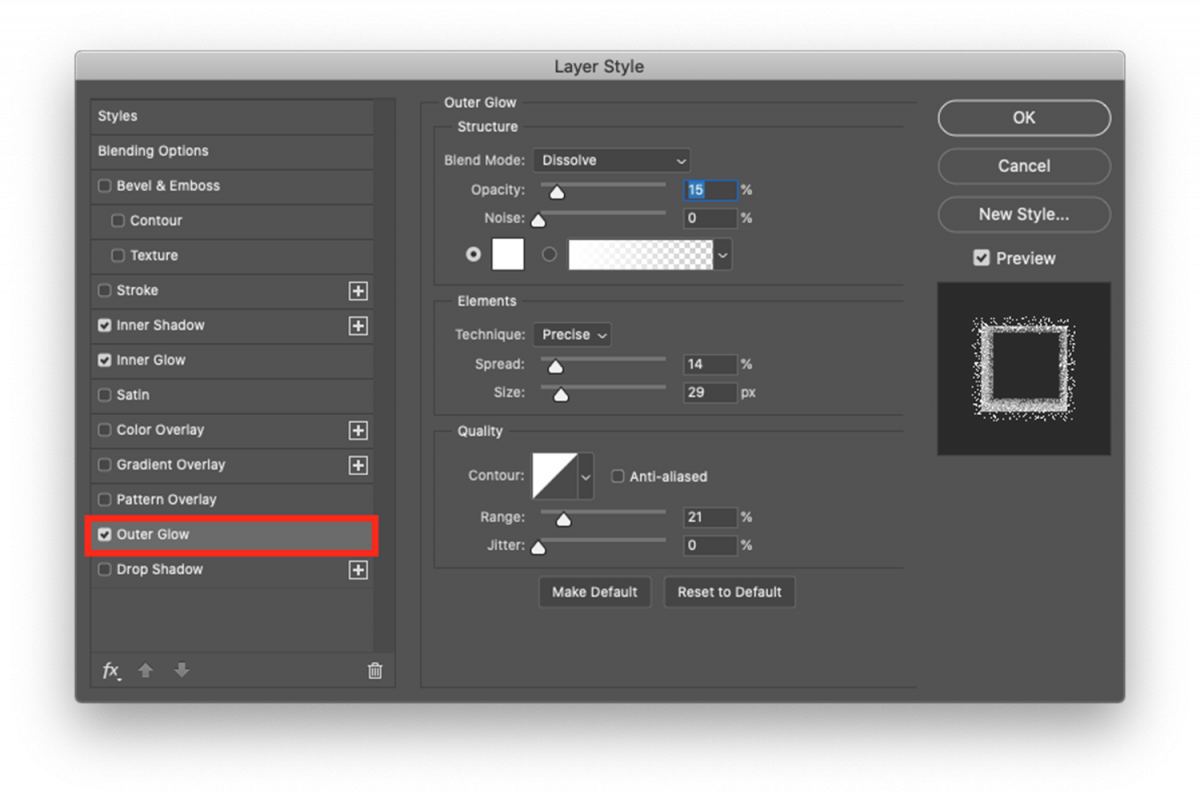
And in the Outer Glow tab use:
Your text should look similar to the one in the following image.

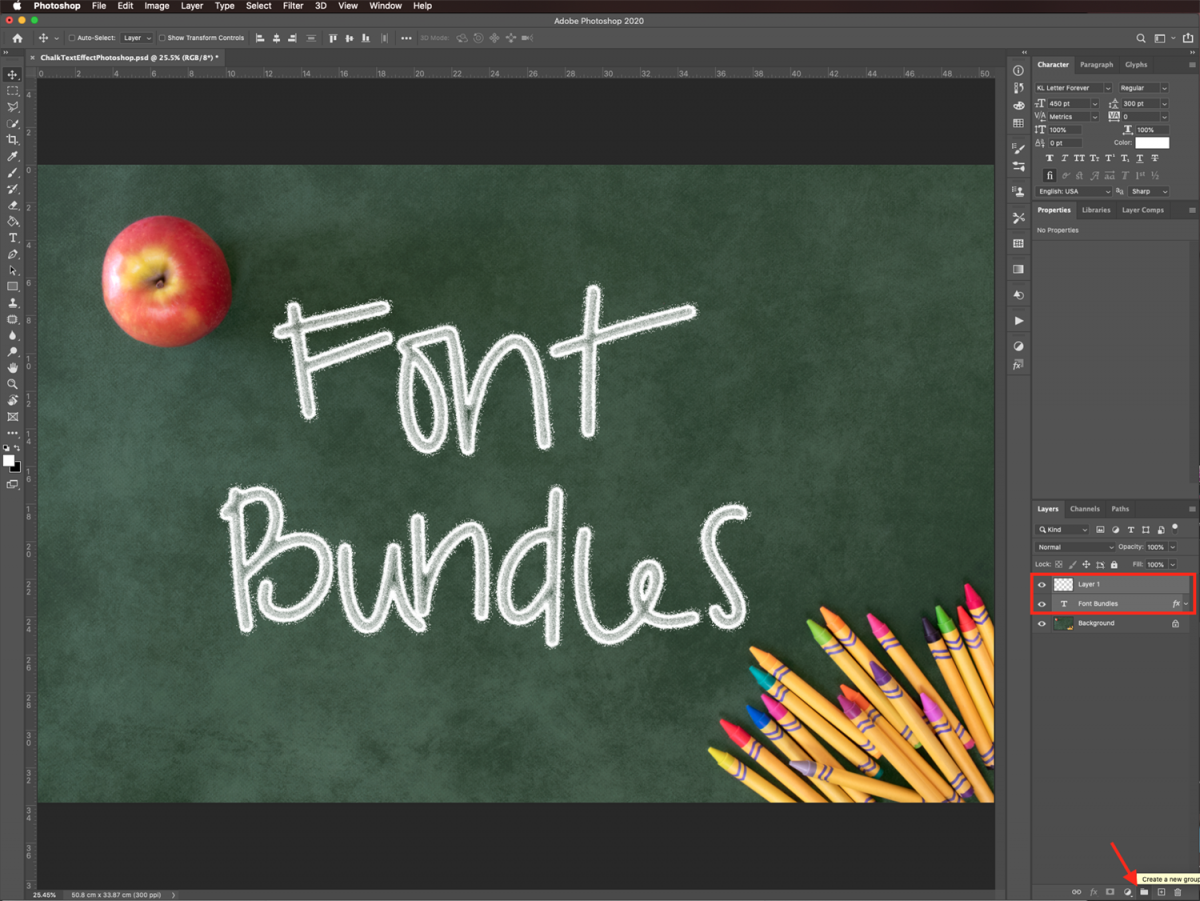
To keep all the text layers together, we need to group them. Select both, then group together by clicking the small folder icon at the bottom of the Layers panel.
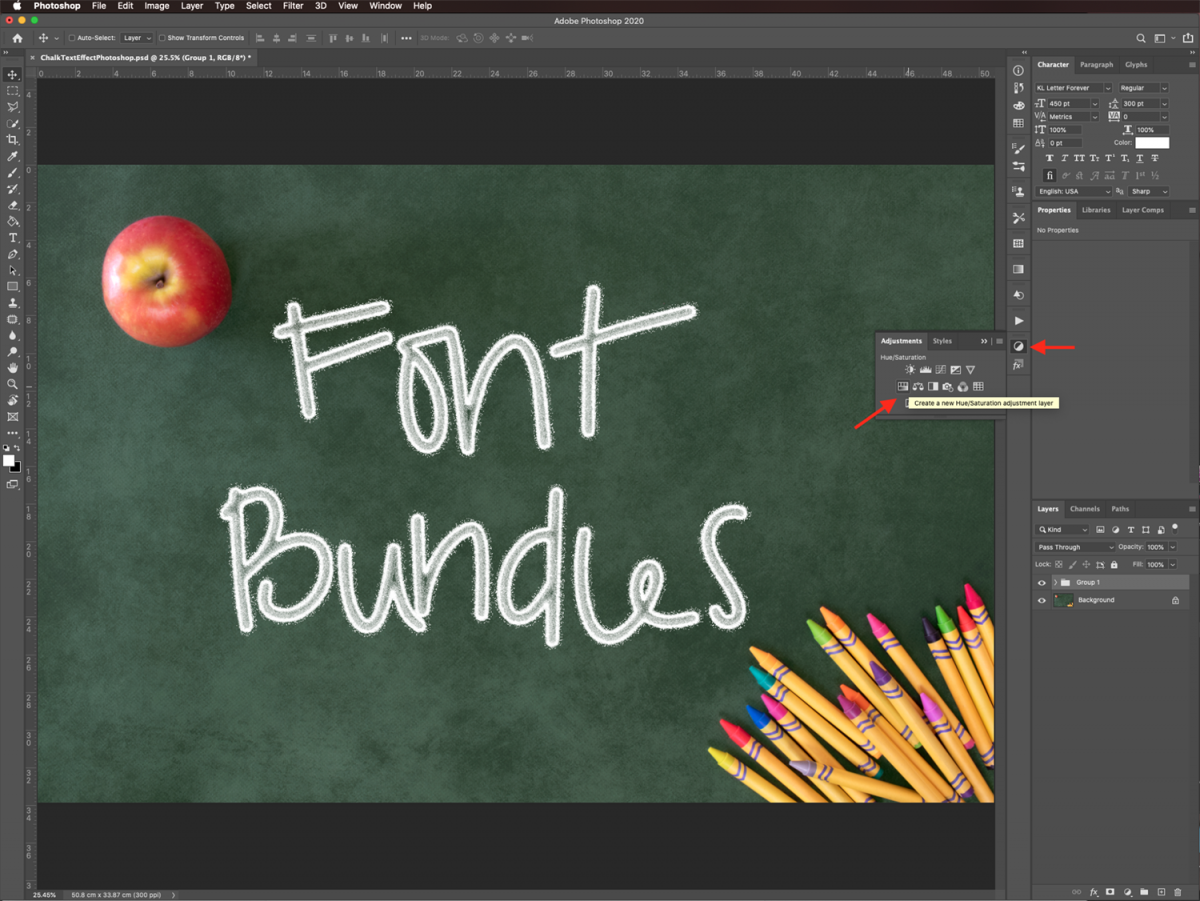
You may want to change the color of your text. Go to the Adjustments panel and create a new Hue/Saturation adjustment layer on top of your group.
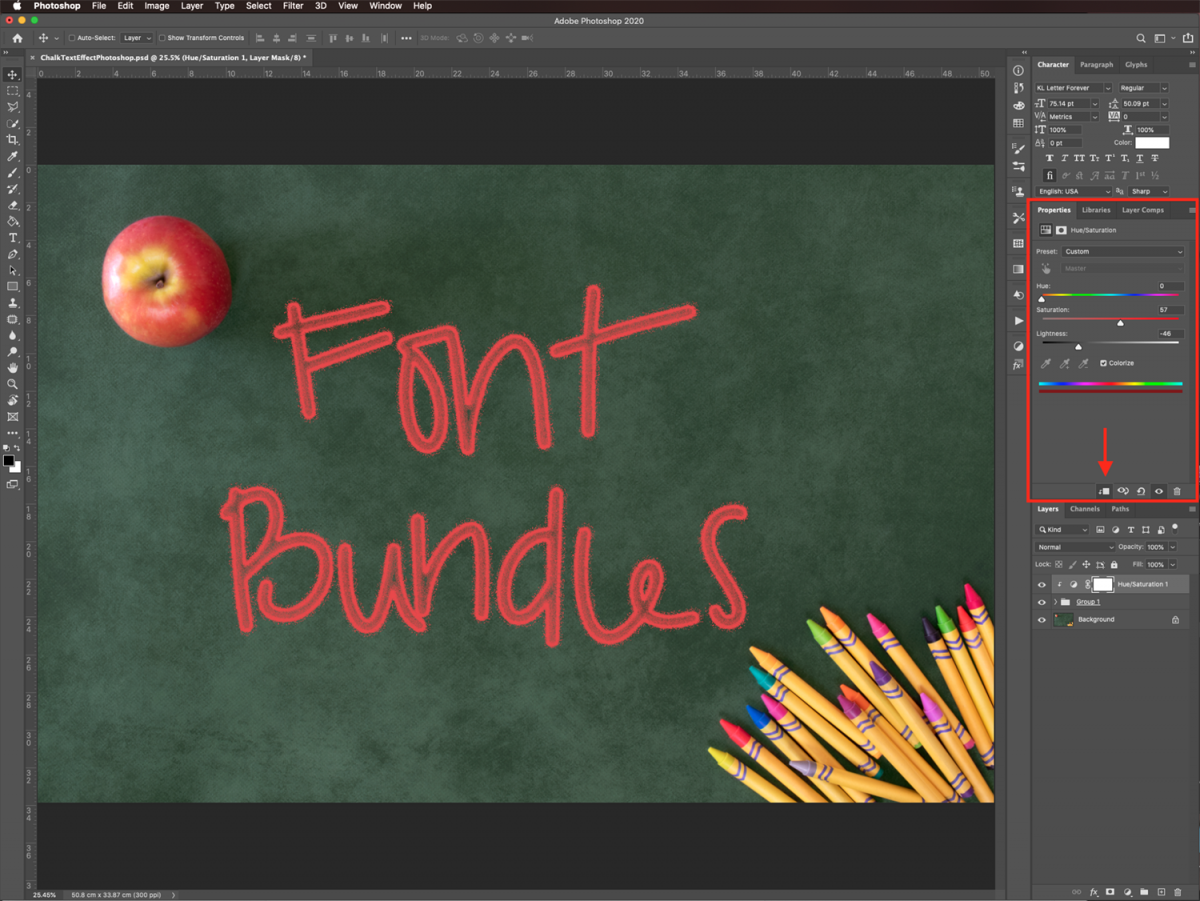
Clip it to the folder by clicking on the small icon at the bottom of the Properties panel. When doing this only the layer beneath it is affected. Then, check the Colorize box. Change the color of the text by moving the lever and experimenting with different values.
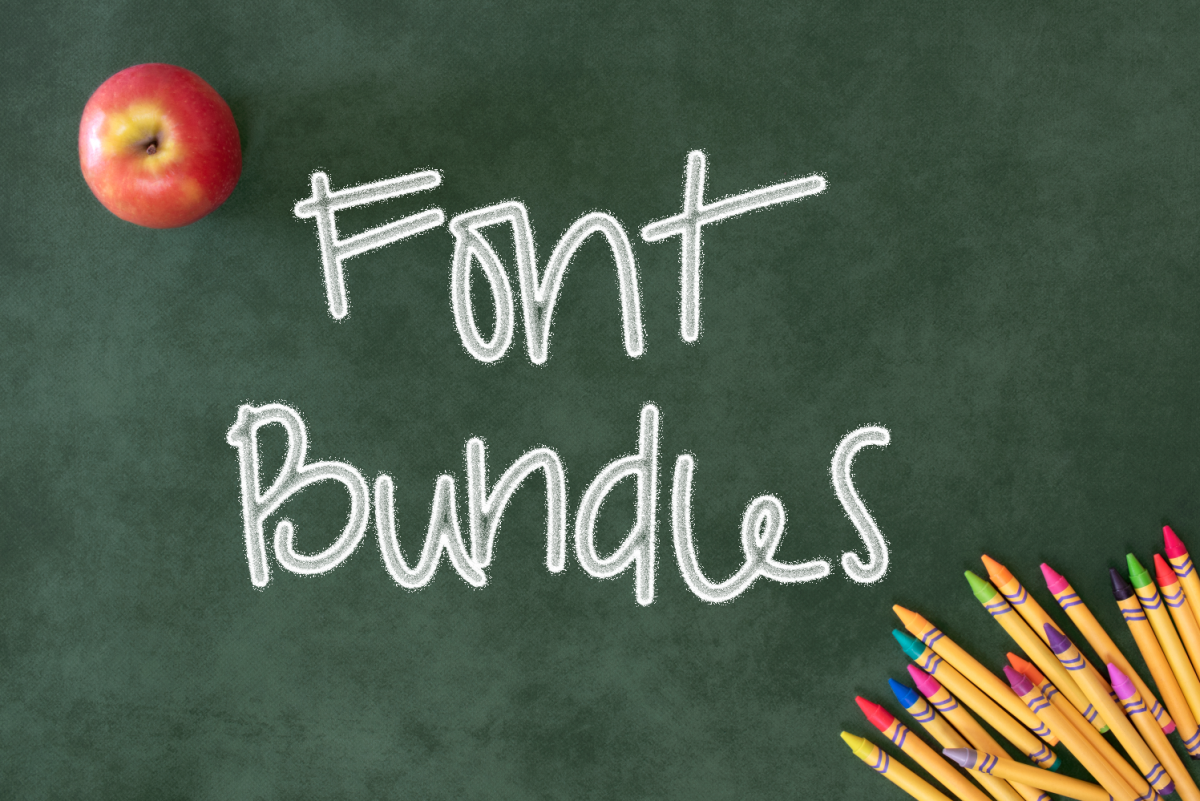
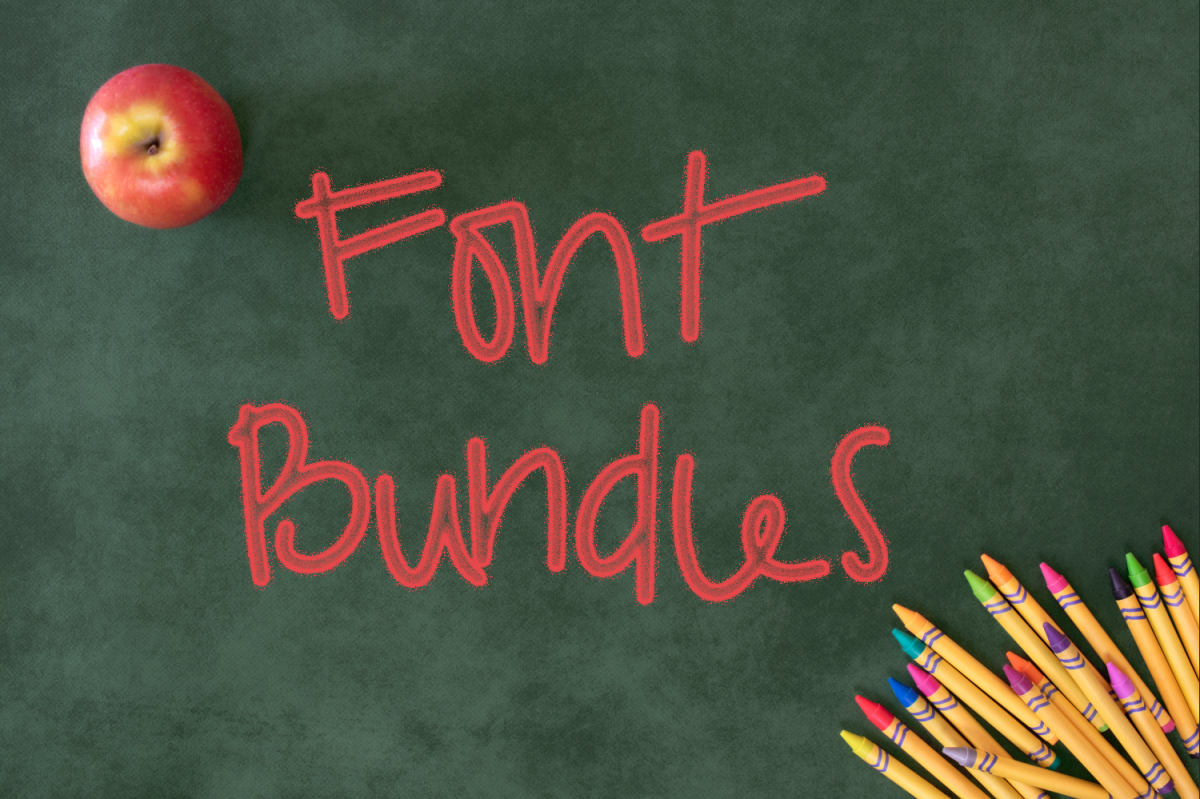
The image below is what our final result looks like.

Remember to try different brush settings, layer style combinations, and even methods to add color to achieve more cool results. Explore with your imagination!
If you liked this tutorial, check out some of our other text effect tutorials like creating a glitter glue text effect and creating a neon text effect in Adobe Photoshop.
We will be using a classroom flat lay for the background, and Letter Forever font to create our design.
Step 1 - Add Text to the Background Image
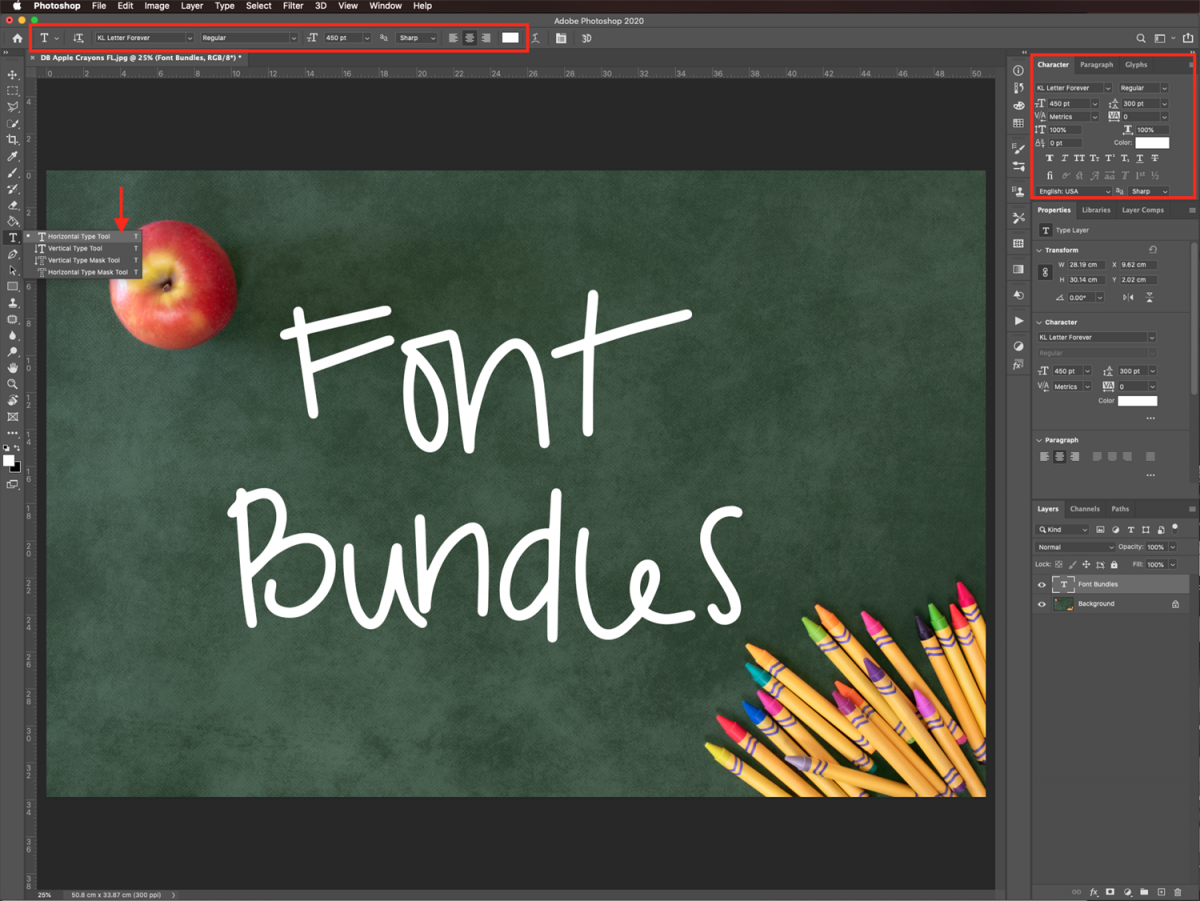
Start by opening the image you chose as the background. Then, select the Type Tool (T), and choose your font.
Type your text and adjust the size, alignment, and spacing, etc. that fit your needs. Use white as the Fill color.
Step 2 - Create a Chalk Brush
Next, we are going to create a brush that mimics the look of chalk writing.
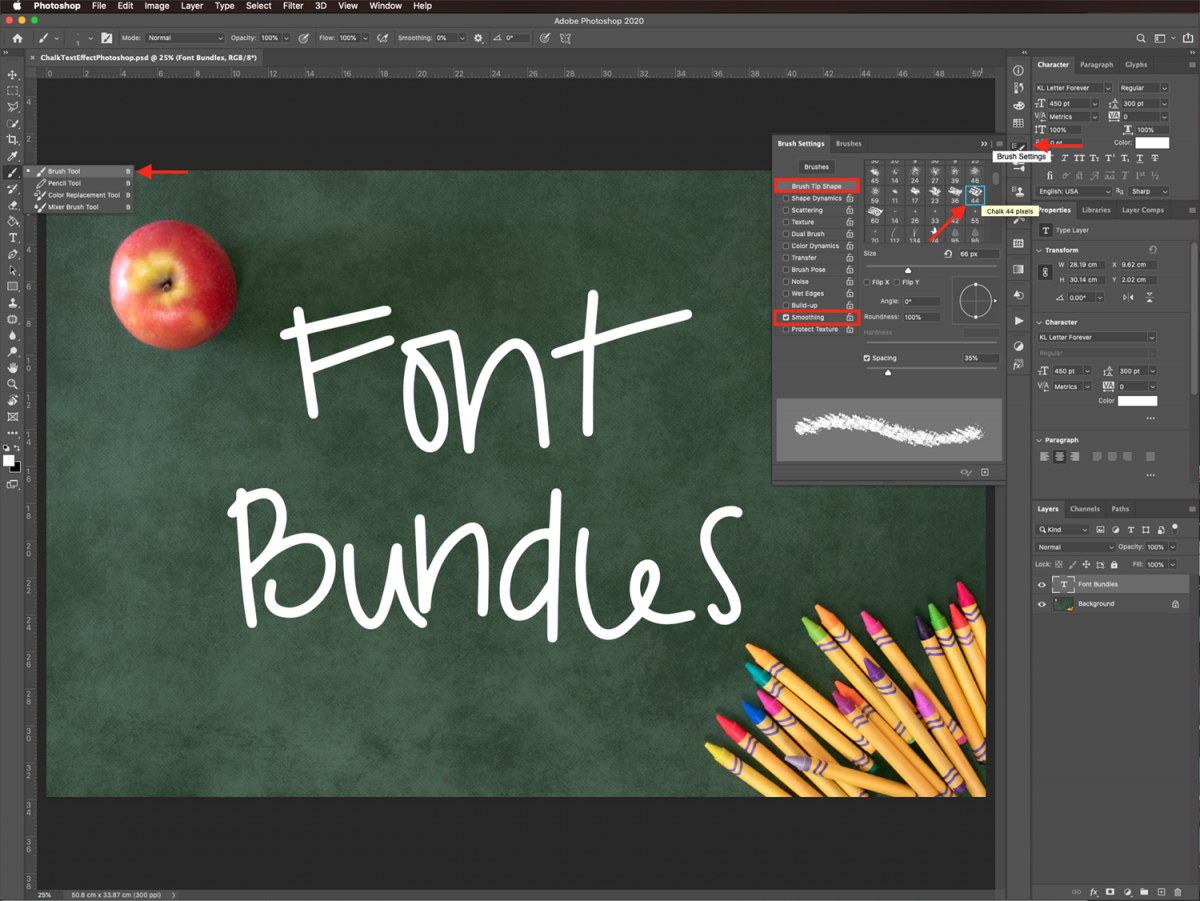
Select the Brush tool (B), go to the Brush Settings panel, then choose the Chalk 44 pixels brush. It should be part of the default brushes. Then apply the following values:
In the Brush Tip Shape tab, input a Size of 66 px and a 35% Spacing. Make sure that the Smoothing box is checked.
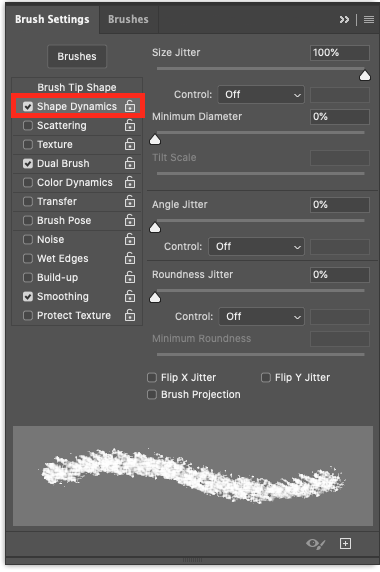
In the Shape Dynamics tab give Size Jitter a value of 100% and leave the rest as it is.
In the Dual Brush tab, choose the Spatter 39 pixels brush. Adjust with a 15 px Size, a 5% Spacing, a 150% Scatter and a Count of 1.
Step 3 - Turn your Text into a Path
Now, we need to transform our text into a path so that we can apply the chalk brush to it. Right-click on top of the text layer thumbnail and choose Create Work Path.
You may get a pop-up window telling you that your request cannot be completed. It means that you need to convert the text to rasters.
Right-click on its thumbnail and choose Rasterize Type. Then try to create the work path again.
Your newly created work path should now show as a layer on the Paths panel.
Head back to the Layers panel. Now hide the text layer by clicking on the small eye icon on the left side of its thumbnail.
Then, create a new layer by clicking on the small button at the bottom of the Layers panel.
Step 4 - Apply the Chalk Brush to the Path
To add the chalk effect to the path, first, make sure white is set as your Foreground color. With the Path Selection tool (A) selected, right-click on top of your path and choose Stroke Path.
Next, select Brush as the tool on the popup window. Make sure that the Simulate Pressure box is unchecked and click Ok. Do this a couple of times if you want a thicker line.
To deselect your path, hit the Esc key a couple of times.
Step 5 - Add Some Depth to the Text with Layer Styles
First, turn the visibility of the first text layer back on. Double-click on top of its thumbnail to apply the following Layer Styles:
In the Blending Options tab reduce the Fill Opacity to 0%.
In the Inner Shadow tab use the following values:
- Color #ffffff
- Blend Mode Normal
- Opacity 75%
- Angle -131º
- Use Global Light box unchecked
- Distance 14 px
- Choke 35 px
- Size 50 px
- Contour Cove Shallow
- Noise 40%
In the Inner Glow tab:
- Blend Mode Dissolve
- Opacity 19%
- Noise 80%
- Color #ffffff
- Technique Precise
- Source Edge
- Choke 7 px
- Size 27 px
- Contour Normal
- Range 60%
- Jitter 50%
And in the Outer Glow tab use:
- Blend Mode Dissolve
- Opacity 15%
- Noise 0%
- Color #ffffff
- Technique Precise
- Spread 14%
- Size 29 px
- Contour Normal
- Range 21%
- Jitter 0%
Your text should look similar to the one in the following image.
Step 6 - Group your Text Layers
To keep all the text layers together, we need to group them. Select both, then group together by clicking the small folder icon at the bottom of the Layers panel.
Step 7 - Change the Text Color with an Adjustment Layer
You may want to change the color of your text. Go to the Adjustments panel and create a new Hue/Saturation adjustment layer on top of your group.
Clip it to the folder by clicking on the small icon at the bottom of the Properties panel. When doing this only the layer beneath it is affected. Then, check the Colorize box. Change the color of the text by moving the lever and experimenting with different values.
The image below is what our final result looks like.
Remember to try different brush settings, layer style combinations, and even methods to add color to achieve more cool results. Explore with your imagination!
If you liked this tutorial, check out some of our other text effect tutorials like creating a glitter glue text effect and creating a neon text effect in Adobe Photoshop.


